
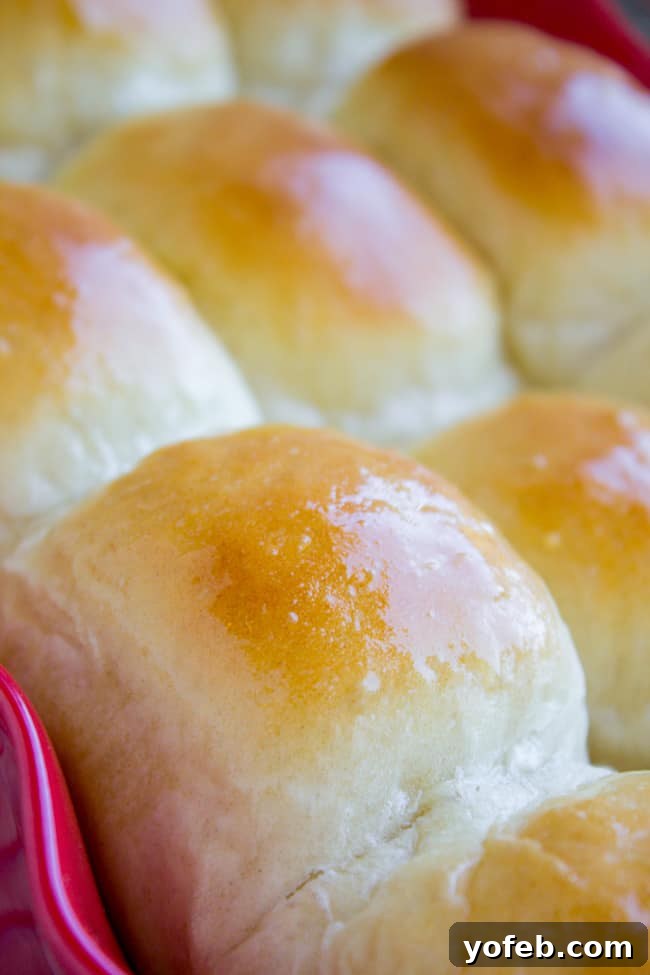
Welcome to the ultimate guide for creating the most heavenly, melt-in-your-mouth Homemade Dinner Rolls. These aren’t just any rolls; they are so light, incredibly fluffy, and infused with an abundance of buttery goodness that will make them the star of any meal. Seriously, once you try these, you might just skip the main course and go straight for a second (or third!) roll. This beloved recipe comes from my Aunt Shirley, a true baking maestro whose secret touch transforms simple ingredients into pure magic. Originally shared on June 14, 2016, this recipe has been perfected over the years to ensure every batch is nothing short of perfection.
Table of Contents
- The Secret to the Best Homemade Dinner Rolls
- Essential Ingredients for Fluffy Dinner Rolls
- Step-by-Step Guide: How to Make Dinner Rolls
- Serving Suggestions for Your Perfect Dinner Rolls
- Storing and Reheating Homemade Dinner Rolls
- Dinner Rolls Recipe FAQs
- Homemade Dinner Rolls Recipe
There’s nothing quite like the aroma of freshly baked bread filling your home, and these dinner rolls are no exception. They bring a comforting warmth and a promise of deliciousness that few other recipes can match. Forget about store-bought; once you master this recipe, you’ll be baking these delightful buns every chance you get. The secret truly lies in the balance of ingredients and a little bit of patience, resulting in a tender crumb and a rich, buttery crust that will have everyone reaching for more.

While life brings many exciting changes, some things, like the joy of baking and sharing a fantastic recipe, remain constant. It’s been a journey, balancing everyday life with new adventures, but the kitchen always calls me back. And what better way to celebrate than with a recipe that brings so much comfort and happiness?
There are periods in life when even the thought of food can be a challenge. I remember living on a limited diet for several months, mostly just milk and cereal. During those times, simple, comforting foods like these dinner rolls became an absolute lifesaver. It’s fascinating how our appreciation for certain dishes can deepen under different circumstances. My work largely revolves around food, so stepping back was a necessity. Now, back in full swing, I’m thrilled to share recipes that truly bring joy, like these incredible dinner rolls.
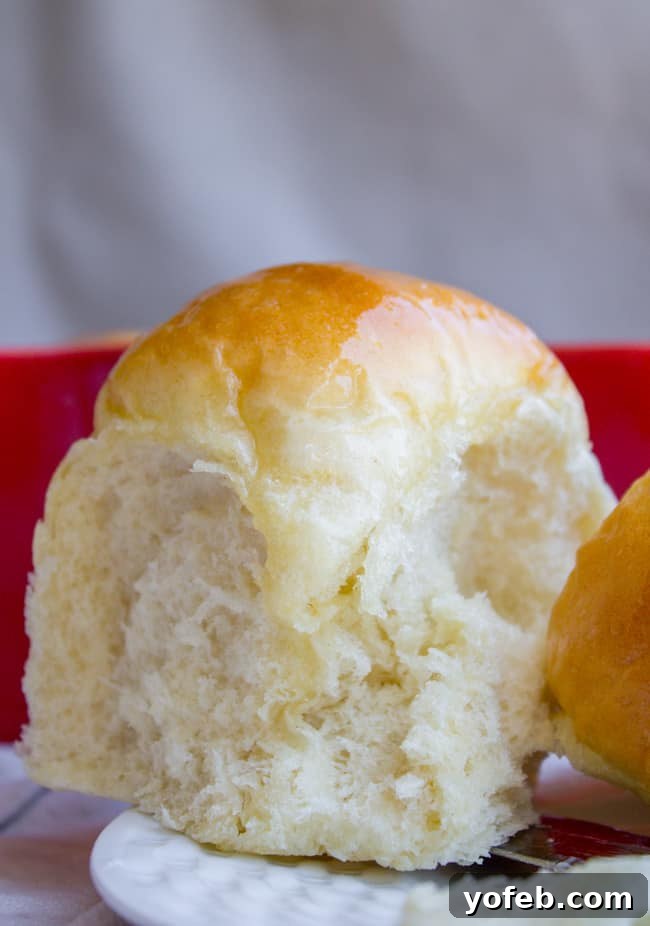
After a much-needed break, finding my way back to the kitchen and creating delicious dishes feels like a true blessing. It’s a wonderful feeling to be able to enjoy and share food once again, particularly timeless recipes that become family favorites. These dinner rolls are a testament to that joy, and I’m so excited for you to experience them.
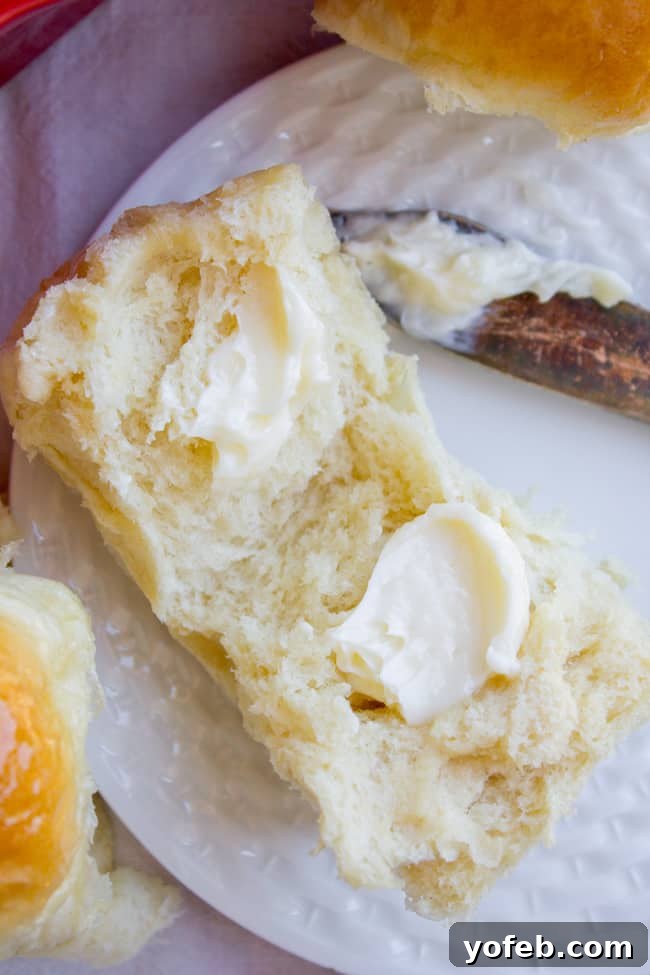
The Secret to the Best Homemade Dinner Rolls
What truly makes these dinner rolls stand out from the rest? It’s a combination of factors that result in an unparalleled texture and flavor. I first discovered the magic of these rolls at an Easter gathering, courtesy of my cousin Amber, who brought her mom’s (my Aunt Shirley’s) famous recipe. While other delicious dishes like ham, asparagus, and Jell-O salad graced the table, I found myself drawn exclusively to these rolls. That’s how impactful they are – even when battling morning sickness, these rolls were the only thing that appealed to me, allowing me to enjoy a meal focused solely on their comforting goodness.
Upon tasting them, I immediately understood why. These rolls boast an exceptional lightness and fluffiness, a direct result of using a generous two full tablespoons of active dry yeast. This ample amount of yeast contributes to their incredible rise and airy texture. But it’s not just the yeast; the overall composition creates a bread that is tender, slightly sweet, and unbelievably rich in flavor. Aunt Shirley’s original recipe calls for Crisco, which is a fantastic ingredient for achieving an incredibly soft crumb. However, if you prefer, good quality butter works wonderfully too, offering a slightly different but equally delicious richness. I personally love using butter-flavored Crisco for that extra layer of buttery taste without compromising on the signature softness. The combination of these elements makes for a truly irresistible dinner roll that will become a staple in your home.
Essential Ingredients for Fluffy Dinner Rolls
Gathering your ingredients is the first step to baking these fantastic dinner rolls. This recipe uses common pantry staples, ensuring accessibility and ease. Here’s a detailed shopping list to help you prepare. For the precise measurements and complete instructions, refer to the full recipe card below.
- Active dry yeast: Essential for that incredible rise and fluffy texture. Ensure it’s fresh for best results.
- White sugar: Feeds the yeast and adds a subtle sweetness to the rolls.
- Milk: Enriches the dough, contributing to its tender crumb and soft texture.
- Kosher salt: Balances the sweetness and enhances the overall flavor of the bread.
- Butter-flavored shortening (or butter): A key ingredient for ultimate softness. Shortening makes them incredibly tender, but real butter provides a rich flavor.
- Egg: Adds richness, helps with structure, and gives the rolls a beautiful golden hue.
- All-purpose flour: The foundation of our dough. The amount can vary slightly depending on humidity, so add gradually.
- Melted butter (for brushing): The finishing touch that adds shine, moisture, and even more buttery flavor after baking.
Each ingredient plays a crucial role in achieving the perfect dinner roll. The active dry yeast, when properly proofed, is what gives these rolls their remarkable volume and airy interior. The combination of milk, sugar, and shortening creates an enriched dough, meaning it’s richer in fats and sugars than a lean bread dough. This enrichment is precisely why these rolls are so soft, tender, and melt-in-your-mouth delicious. Don’t skimp on the final brush of melted butter; it’s a simple step that adds a luxurious sheen and an extra boost of flavor that truly elevates these rolls from good to extraordinary.
Step-by-Step Guide: How to Make Dinner Rolls
Baking these dinner rolls is a rewarding process, and I’ve broken down each step to ensure your success. Follow these instructions carefully for light, fluffy, and utterly delicious results!
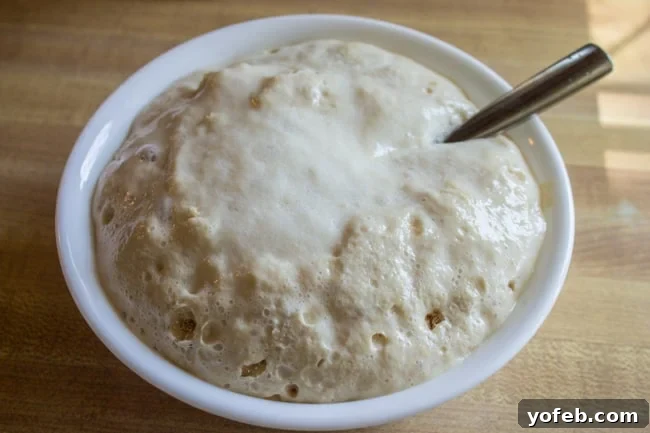
- **Proof Your Yeast:** This is a crucial first step. Combine lukewarm water (around 100-110°F or 38-43°C – warm to the touch but not hot) with your active dry yeast and a small amount of sugar. Let it sit for about 5 minutes. You should see a foamy, bubbly mixture forming on top. This indicates your yeast is active and ready to work its magic. If it doesn’t foam, your water might have been too hot or too cold, or your yeast is old. It’s better to start over than risk flat rolls! With two tablespoons of yeast in this recipe, it will be very active, so keep an eye on it to prevent overflow.
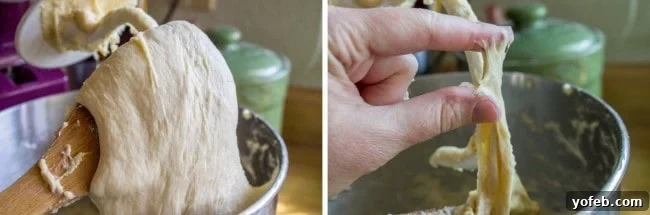
- **Achieve the Right Dough Consistency:** After incorporating the flour and kneading, your dough should be smooth, elastic, but still quite sticky. It should pull away from the sides of the bowl (if using a stand mixer) but feel soft and slightly tacky to the touch. The temptation is to add more flour to make it less sticky, but resist! Over-flouring can lead to dense, dry rolls. Aim for a dough that is just workable – sticky enough to promise tenderness but firm enough to handle for shaping.
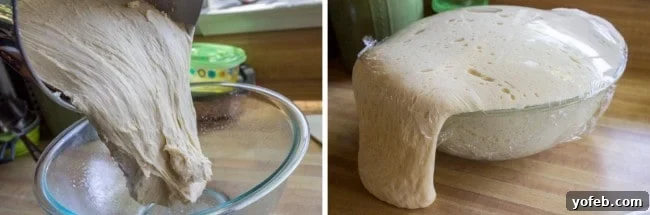
- **Mind Your Rise Time:** The first rise for this dough is approximately one hour, or until it has doubled in size. This dough is very active, so it tends to rise quickly and enthusiastically! Ensure you’re around to keep an eye on it, as it can easily overflow its bowl if left unattended for too long. A warm, draft-free spot is ideal for rising.
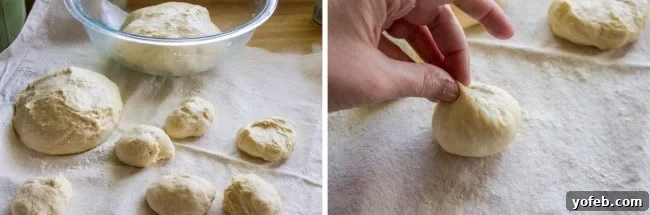
- **Shaping the Rolls:** After the first rise, gently punch down the dough to release the air. Divide it into 24 equal pieces. For consistent results, you can use a kitchen scale to ensure each piece weighs about 2 ounces. To shape each roll, gather the edges of a dough portion and pinch them together at the bottom, creating a smooth, round top. This technique helps create a taut surface and a beautiful finished roll.
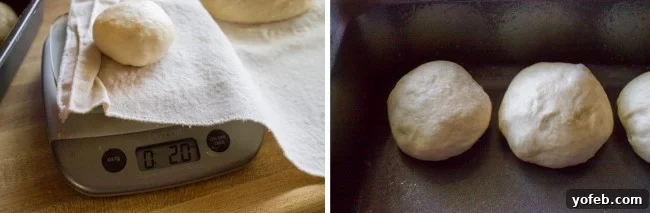
As mentioned, I like to be precise with my baking, so using a kitchen scale for portioning ensures uniform rolls that bake evenly. Each roll should weigh approximately 2 ounces. The image above wonderfully illustrates just how quickly this dough rises – even within minutes, you can see a noticeable puff, indicating the yeast’s incredible activity. This rapid rise is a hallmark of this recipe and contributes significantly to the rolls’ ultimate fluffiness.
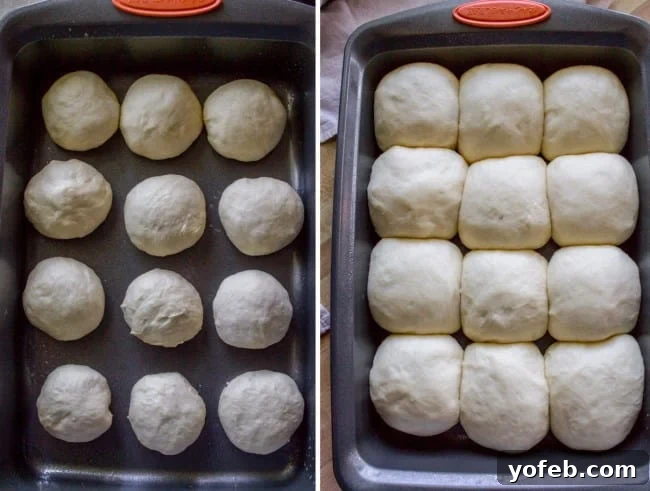
- **Arranging for the Second Rise:** Once shaped, arrange your rolls in well-greased baking pans. A 9×13 inch pan is perfect for one dozen rolls, allowing them enough space to expand but also encouraging them to cozy up and create those soft, pull-apart sides. Alternatively, a 2-quart casserole dish also works beautifully, resulting in slightly more “squished” but equally delicious rolls.
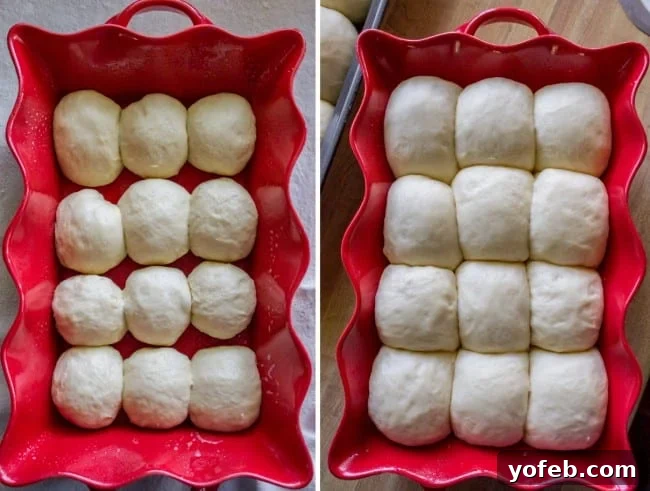
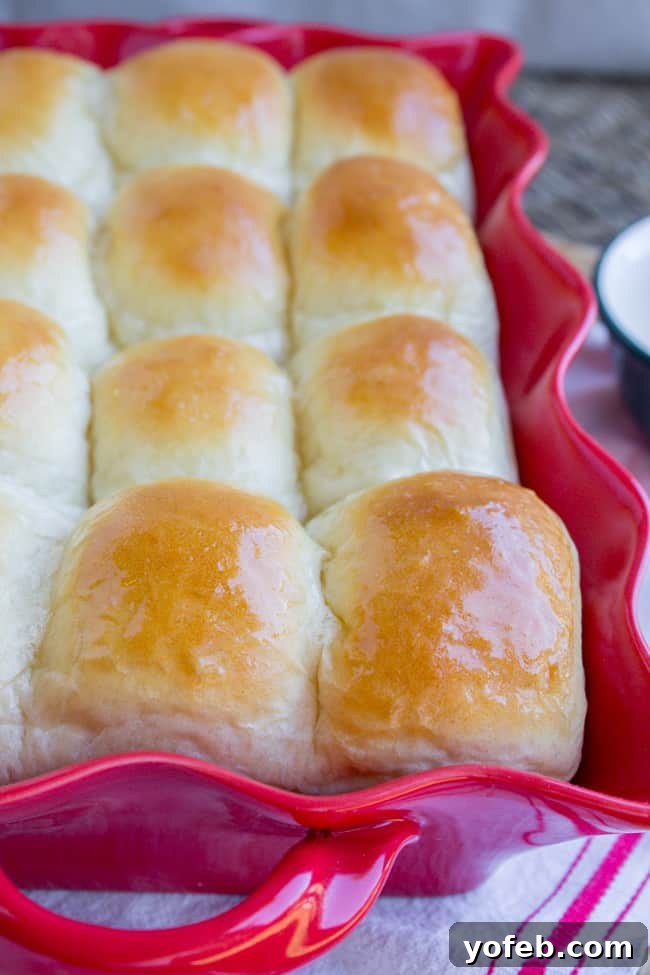
As you can see, whether in a standard baking pan or a casserole dish, the rolls will rise beautifully, nearly doubling in size and filling the pan. This second rise is crucial for achieving that airy texture, so be patient and let them take their time in a warm spot.
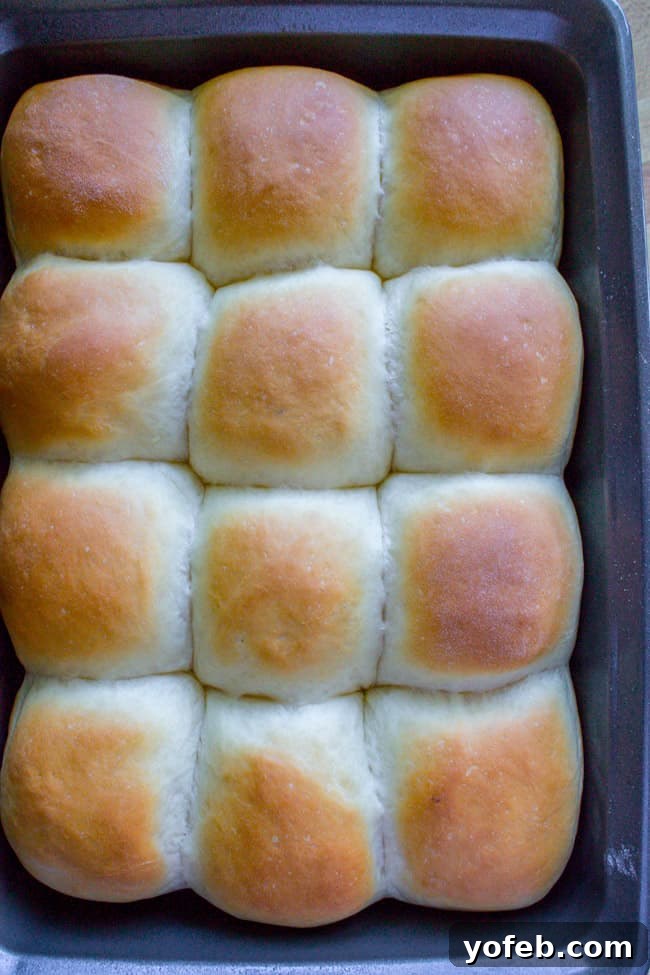
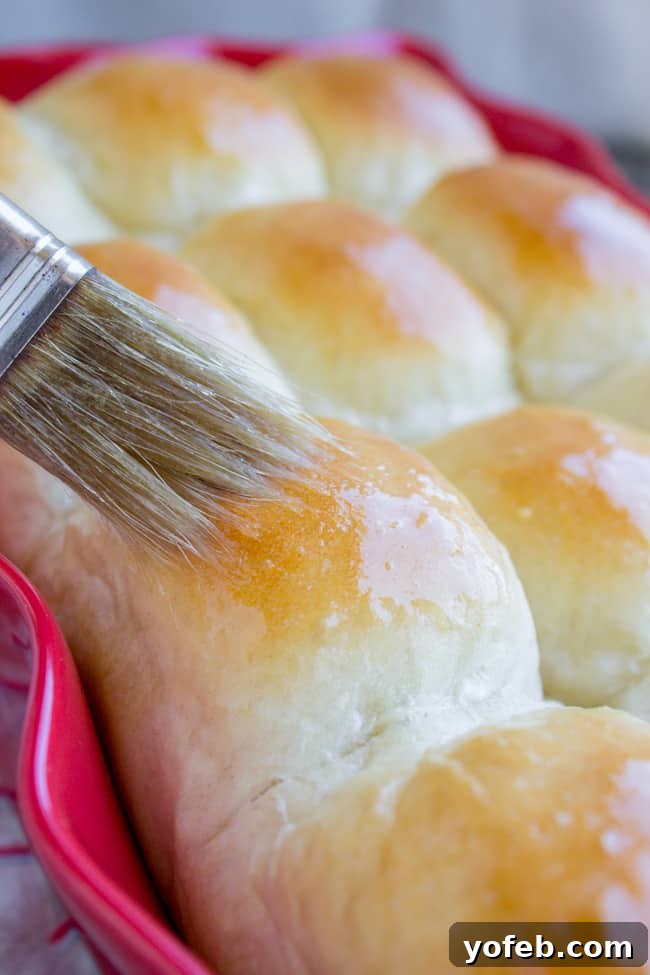
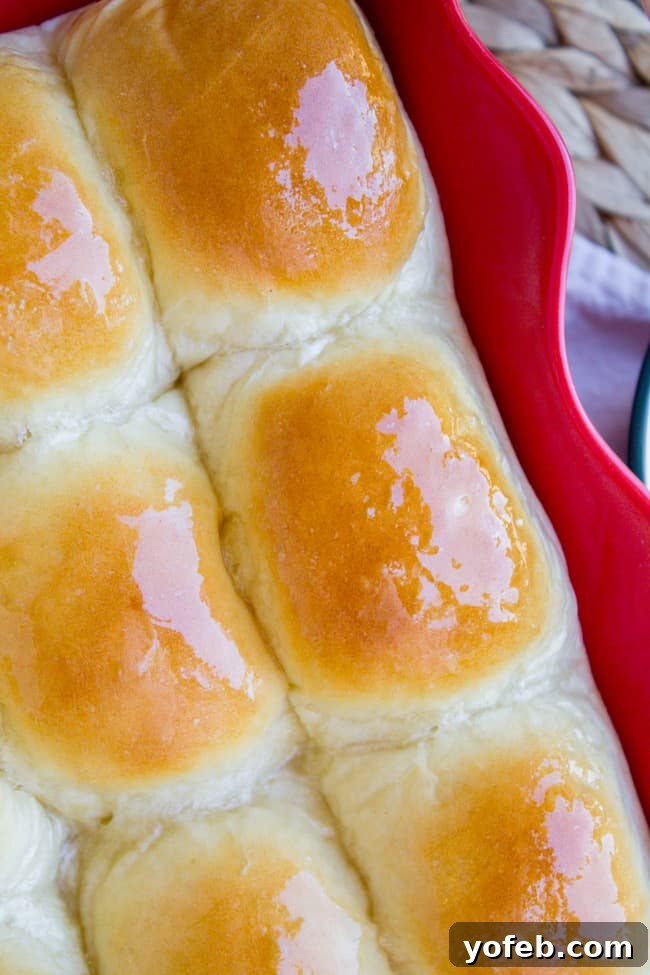
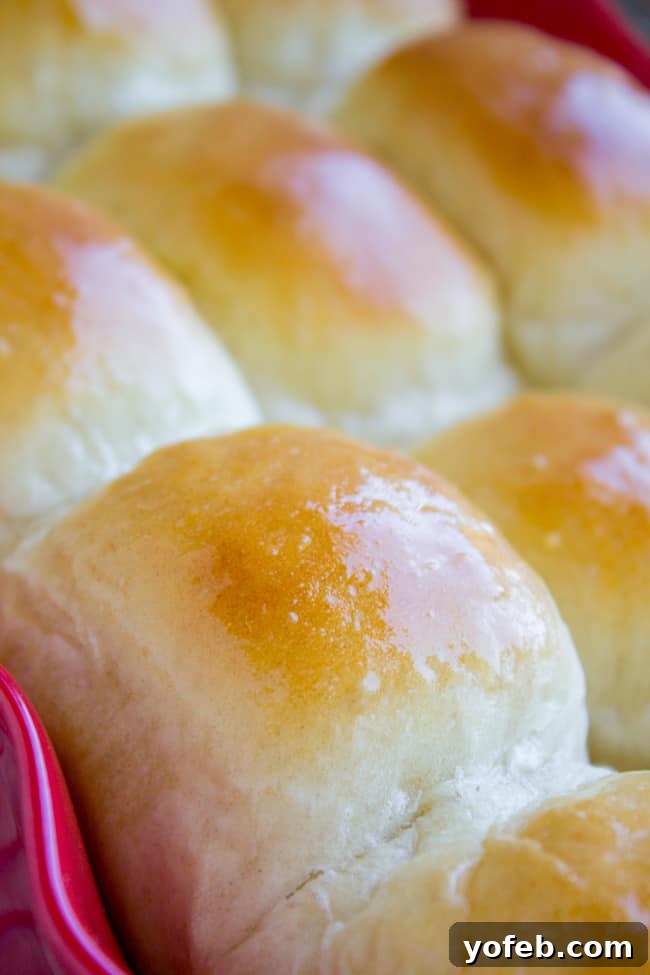
- **Bake to Golden Perfection:** Preheat your oven to 375°F (190°C). Bake the rolls for 12-15 minutes, or until they turn a beautiful golden brown across the top. Once removed from the oven, immediately brush them generously with melted butter. This final step not only adds a lovely sheen but also infuses them with even more delicious buttery flavor and keeps them wonderfully soft. Don’t forget to share your creations! Tag #TheFoodCharlatan on Instagram – I’d love to see your perfect dinner rolls!
Serving Suggestions for Your Perfect Dinner Rolls
These dinner rolls are best served warm, with a generous slathering of butter – perhaps even a homemade Cinnamon Honey Butter for an extra special treat! They are the quintessential accompaniment to nearly any meal, transforming a simple dinner into a comforting feast. Their versatile nature makes them suitable for everything from holiday extravaganzas to casual weeknight dinners. Here are some of my favorite main dishes that pair absolutely perfectly with a basket full of warm, buttery rolls:
- **Prime Rib Recipe To Impress Your Guests**: A luxurious holiday centerpiece that demands an equally impressive side. These rolls are a match made in heaven, perfect for soaking up rich au jus.
- **Shepherd’s Pie Recipe with Cheese Topping**: This hearty, gravy-soaked beef dish practically begs for a fluffy dinner roll to mop up every last bit of delicious sauce.
- **Easy Salisbury Steak Recipe (30 Minutes)**: Another comforting classic with a rich, savory sauce that is just waiting to be absorbed by a tender dinner roll. It’s homey food at its best!
- **Pork Chops in Creamy Mushroom Sauce**: There’s something undeniably “Sunday dinner” about perfectly cooked pork chops, especially when paired with a creamy, umami-rich mushroom sauce and these delightful rolls.
- **1770 House Meatloaf (Ina Garten)**: If you think you don’t like meatloaf, this recipe will change your mind. And a buttery roll alongside? Pure comfort.
- **Old Fashioned Beef Stroganoff**: An absolute crowd-pleaser that’s surprisingly easy to make. The creamy sauce and tender beef are beautifully complemented by these soft yeast rolls.
Storing and Reheating Homemade Dinner Rolls
To keep your homemade dinner rolls as fresh and soft as possible, proper storage is key. Once they have cooled completely, ensure they are stored in an airtight container or a sealed Ziploc bag. This prevents them from drying out and helps maintain their tender texture. At room temperature, these rolls are best enjoyed within 2-3 days. Thanks to their enriched dough, they tend to stay softer longer than lean bread, but freshness is always best.
If you find yourself with extra rolls (a rare occurrence!), they freeze exceptionally well. Simply let them cool entirely after baking, then transfer them to a freezer-safe container or bag. They can be stored in the freezer for up to 2-3 months without losing their quality. When you’re ready to enjoy them, simply pull out the desired number of rolls and let them thaw at room temperature on the counter. For a warm, “freshly baked” experience, a quick 15-30 second zap in the microwave will bring back their softness and warmth, making them ready to serve with your next meal or simply as a comforting snack.
Dinner Rolls Recipe FAQs
Dinner rolls are distinct from other breads primarily due to their size, ingredients, and intended use. They are typically small, individual servings designed to be placed directly on a plate alongside a main meal. A key characteristic is their enriched dough, meaning they are made with ingredients like milk, butter, and sugar, in addition to flour, yeast, and salt. This enrichment results in a soft, tender, and slightly sweet crumb with a delicate texture. They are often buttery on their own, requiring minimal or no additional butter. In contrast, many crusty breads (like a baguette or sourdough) are made with a leaner dough (flour, water, yeast, salt), resulting in a chewier texture and a crisp crust. While both are delicious, dinner rolls offer a comforting, easy-to-tear, and satisfying accompaniment that complements a wide range of dishes, especially hearty meals.
To maintain the softness of dinner rolls overnight and beyond, proper storage is essential. Once the rolls have completely cooled after baking, transfer them to an airtight container, such as a large Tupperware, or a well-sealed Ziploc bag. The goal is to prevent air exposure, which causes them to dry out. Because these rolls are made with an enriched yeast dough containing dairy and fat, they naturally stay softer for longer than leaner breads. They will remain wonderfully soft for 2-3 days at room temperature when stored correctly. For longer preservation, consider freezing them as soon as they are cool. Simply place them in a freezer-safe bag or container, and they will keep well for 2-3 months. Thaw at room temperature or warm briefly in the microwave for enjoyment.
There are several common reasons why dinner rolls might not turn out as light and fluffy as desired. Here are the most frequent culprits and how to avoid them in the future:
Too much flour: Over-flouring is a common mistake that leads to dense rolls. Always use the “fluff and scoop” method: use a spoon to gently fluff the flour in its container, then spoon it into your measuring cup, leveling off the top without packing it down. Add flour gradually to your dough until it’s just workable, remaining slightly sticky but not overly stiff. The less flour you use while still achieving a workable dough, the more tender your rolls will be.
Dead yeast: Yeast is a living organism and sensitive to temperature. If your water is too hot (above 115°F/46°C), it will kill the yeast, preventing it from activating and rising. Lukewarm water (100-110°F/38-43°C) is ideal. Use a thermometer if unsure. If your yeast mixture doesn’t become foamy after 5-10 minutes, your yeast is likely dead, and you should start over with fresh yeast and proper water temperature.
Old yeast: Even if handled correctly, yeast can expire. Always check the expiration date. Storing active dry yeast in the freezer can extend its shelf life significantly. If kept in the refrigerator after opening, it’s typically only good for about four months. Label your yeast jar with the opening date to keep track.
Insufficient rising environment: Yeast needs warmth to thrive and rise effectively. If your house is cold, your rolls might struggle to proof. Create a warm environment by preheating your oven to its lowest setting (or 350°F for just a minute or two), then turning it off. Place your covered dough inside the turned-off, warm oven to proof. This homemade “proofing box” will help your rolls double in size beautifully.
Absolutely! These dinner rolls are excellent for making ahead, which is a huge convenience, especially during busy holidays or for meal prep. You have a few options:
Refrigerate the dough: After the first rise and punching down, you can shape the rolls and place them in your greased baking pans. Cover them tightly with plastic wrap and refriger refrigerate for up to 1-2 days. When ready to bake, pull them out of the fridge and let them come to room temperature and complete their second rise (which might take longer than usual) in a warm spot before baking.
Freeze baked rolls: As mentioned in the storage section, fully baked and cooled rolls freeze beautifully for up to 2-3 months. Thaw and reheat as needed.
Freeze unbaked rolls: You can also freeze shaped but unbaked rolls. After shaping, arrange them on a baking sheet and freeze until solid. Then, transfer the frozen rolls to a freezer-safe bag. When ready to bake, place them in greased pans and let them thaw and rise in a warm place until doubled in size (this will take several hours), then bake as directed. This method offers the freshest possible taste, straight from your oven!
If your dough is excessively sticky and difficult to manage, first remember that a slightly sticky dough is desirable for soft rolls. However, if it’s unmanageable, you can gradually add a little more flour, one tablespoon at a time, mixing after each addition until the dough is just manageable. Be cautious not to add too much, as this will lead to tough rolls. You can also lightly oil your hands or the work surface to prevent sticking during kneading and shaping. A bench scraper can be a valuable tool for handling sticky dough, helping you to gather and turn it without constantly adding more flour.
More delicious yeasty delights:
Imagine eating these rolls with a little pot of this Cinnamon Honey Butter. Pure HEAVEN!
- Easy Fluffy One Hour Dinner Rolls << For those moments when you need warm rolls FAST!
- Buttery Sweet Potato Rolls << A delicious variation offering a slightly different, earthy flavor.
- Big Fat Crescent Rolls << Don’t let the picture fool you; these are incredibly amazing rolls!
Facebook | Pinterest | Instagram

Homemade Dinner Rolls Recipe
Rate this Recipe
Print Recipe
Ingredients
- 1/2 cup water
- 2 tablespoons active dry yeast
- 2 teaspoons white sugar
- 2 cups milk
- 1/3 cup white sugar
- 2 & 1/2 teaspoons kosher salt
- 1/4 cup butter-flavored shortening , OR real butter
- 1 egg
- 5-6 cups all purpose flour, spooned and leveled**
- 4 tablespoons melted butter, for brushing
Instructions
-
In a small bowl or coffee mug, microwave the 1/2 cup water for 20-30 seconds, until it is lukewarm but not hot (about 100-110°F or 38-43°C).
-
Add the yeast and 2 teaspoons sugar to the warm water and stir gently. Let this mixture sit for 5 minutes until it becomes foamy and bubbly. This indicates the yeast is active. If it doesn’t foam, your yeast may be inactive or the water temperature was incorrect – it’s best to start over.
-
In a separate glass measuring cup, microwave 2 cups milk for 1-2 minutes until it is warm but not hot (about 100-110°F or 38-43°C).
-
In a large mixing bowl or the bowl of a stand mixer, combine 1/3 cup sugar, kosher salt, shortening (or butter), and 2 cups of the flour. Stir these ingredients together with a wooden spoon until just combined.
-
Add the warm milk, the activated yeast mixture, and 1 egg to the bowl. Mix everything together thoroughly until well combined, then let the mixture rest for 5 minutes. If using a stand mixer, attach the dough hook at this stage.
-
Gradually add the remaining 4 cups of flour, one cup at a time, mixing well after each addition. Continue adding flour until the dough is smooth and begins to pull away from the sides of the bowl. The total amount of flour needed can range from 5 to 6 cups, or sometimes even slightly more, depending on various factors like humidity. The dough should remain soft and somewhat sticky, but still pliable enough to work with. Avoid adding too much flour, as this will result in dense, dry rolls. The less flour used, the more tender your rolls will be.
-
Once all the flour is incorporated and the dough has reached the right consistency, knead it for 5-6 minutes using your hands or a stand mixer with a dough hook. This develops the gluten, essential for a light and chewy texture.
-
Lightly grease a large bowl with oil or softened butter. Scrape all the dough into the greased bowl, shaping it into a ball. Turn the dough over once to ensure the top surface is also lightly greased, preventing it from drying out.
-
Cover the bowl loosely with a clean tea towel or plastic wrap. Place it in a warm, draft-free spot and let the dough rise until it has doubled in size, which typically takes about 1 hour.
-
Gently punch down the risen dough to release the air. Divide the dough into 24 equal pieces. To shape each piece into a ball, gather the edges and pinch them together at the bottom, creating a smooth top surface for the roll.
-
Place the shaped rolls into two well-greased baking pans. A 9×13 inch pan can hold one dozen rolls comfortably, and a 2-quart casserole dish works well for the second batch. Arrange them so they have a little room to expand.
-
Cover the pans with tea towels and let the rolls rise in a warm spot for another 30-45 minutes, or until they have visibly doubled in size. While they are completing their second rise, preheat your oven to 375 degrees F (190°C).
-
Bake the rolls in the preheated oven for 12-15 minutes, or until their tops are a beautiful golden brown.
-
Immediately upon removing them from the oven, generously brush the hot rolls with melted butter. This adds flavor and a lovely sheen.
-
Serve the rolls hot and enjoy their irresistible warmth and tenderness!
Notes
**The amount of all-purpose flour needed for this recipe can vary due to factors like humidity and how precisely the flour is measured. While the original recipe suggested 4-5 cups, through consistent baking, I’ve found that 5 to 6 cups, and sometimes even 6.5 cups, often yields the best result. It’s important to use your best judgment here: the goal is a dough that is still very soft and somewhat sticky, but cohesive enough to be workable and pull away from the sides of the bowl. Avoid adding so much flour that the dough becomes stiff; the less flour you can use while still forming a manageable dough, the more tender and light your finished rolls will be.