
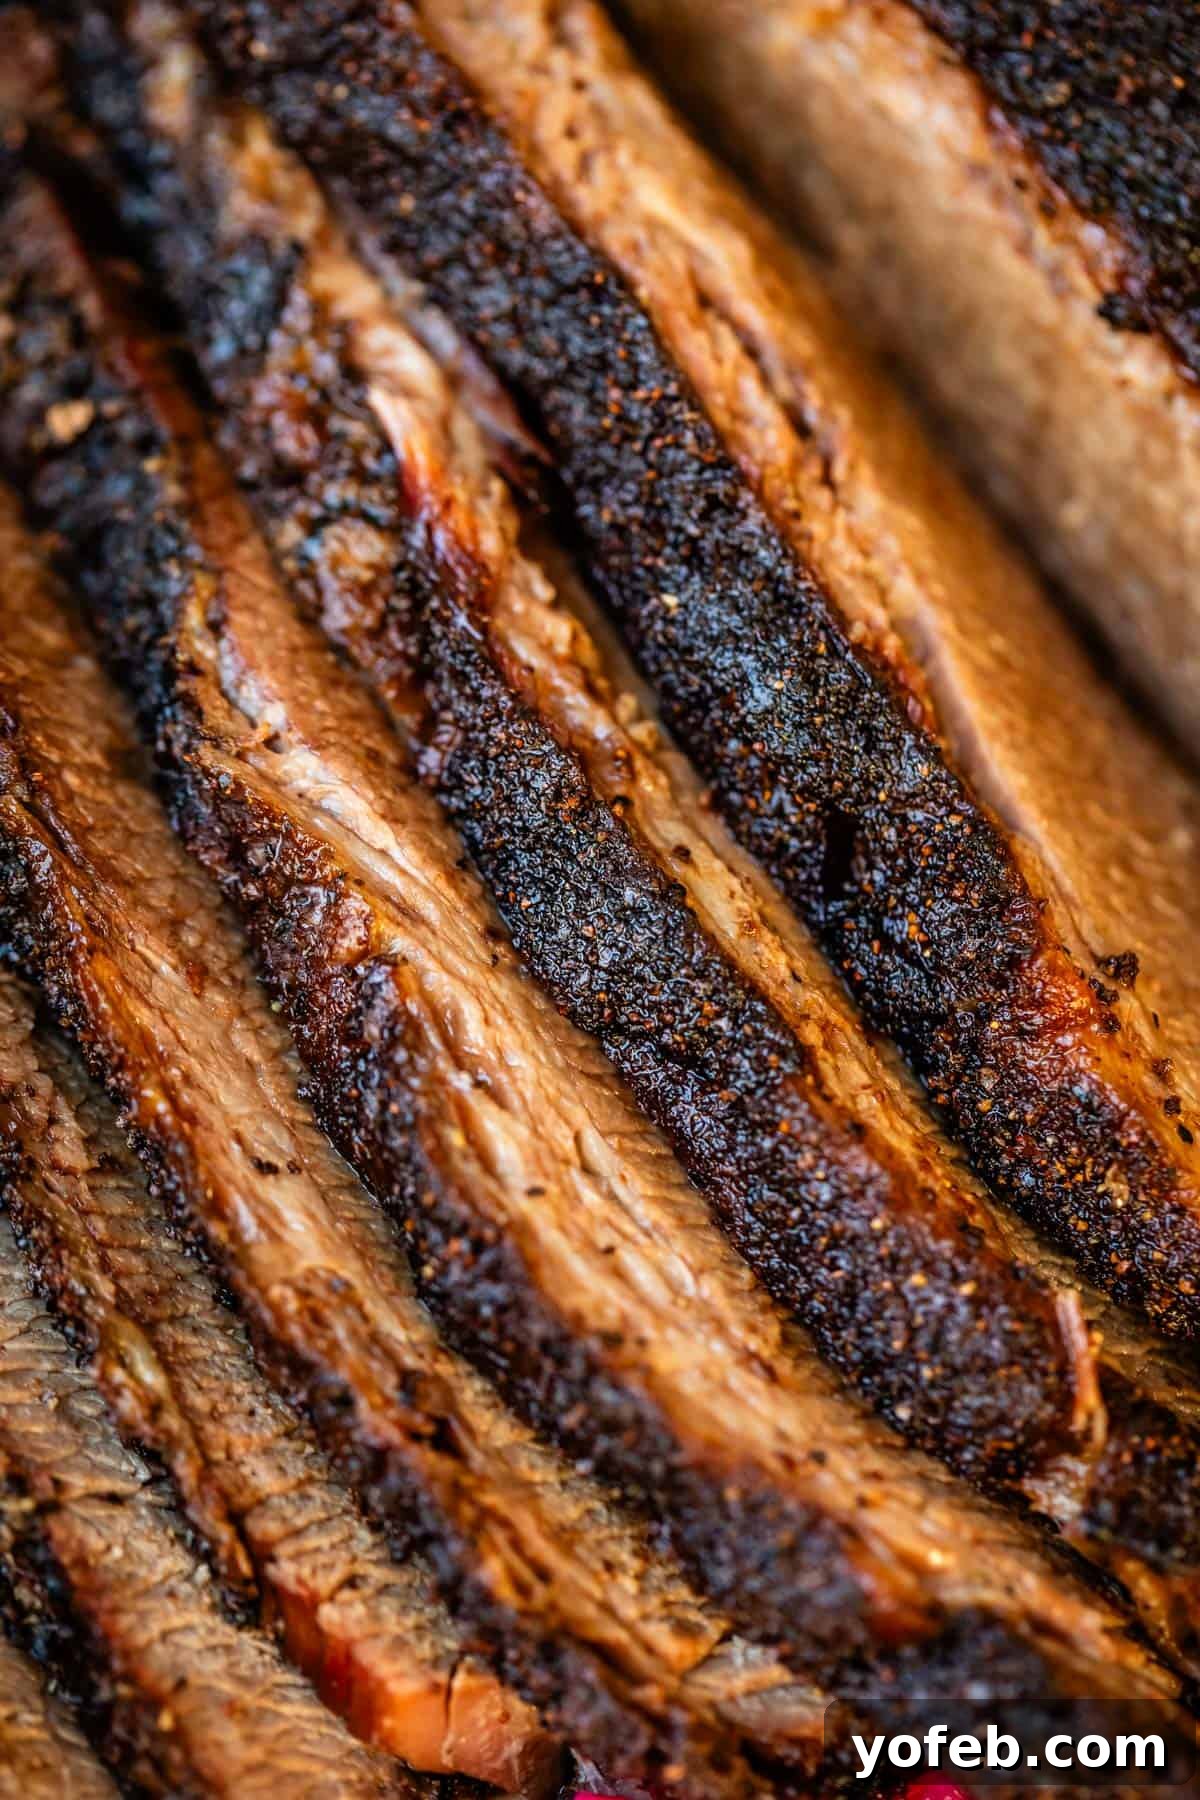
Hallelujah! Prepare to master the art of crafting KILLER Texas-style smoked beef brisket right in your own backyard, even without a dedicated smoker. Yes, you read that correctly! This revolutionary recipe unlocks the secret to achieving that coveted smoky flavor and melt-in-your-mouth tenderness using a simple gas grill and your oven. Get ready for a brisket so incredibly juicy, so perfectly charred, and so packed with authentic Texas BBQ essence, it will bring tears of joy to your eyes. I’ve meticulously documented every step with detailed instructions and plenty of pictures to guide you through this magical process. Whether it’s for a casual cookout, a festive holiday gathering, or any meal where you aim to impress, this smoked brisket recipe is guaranteed to be a showstopper.
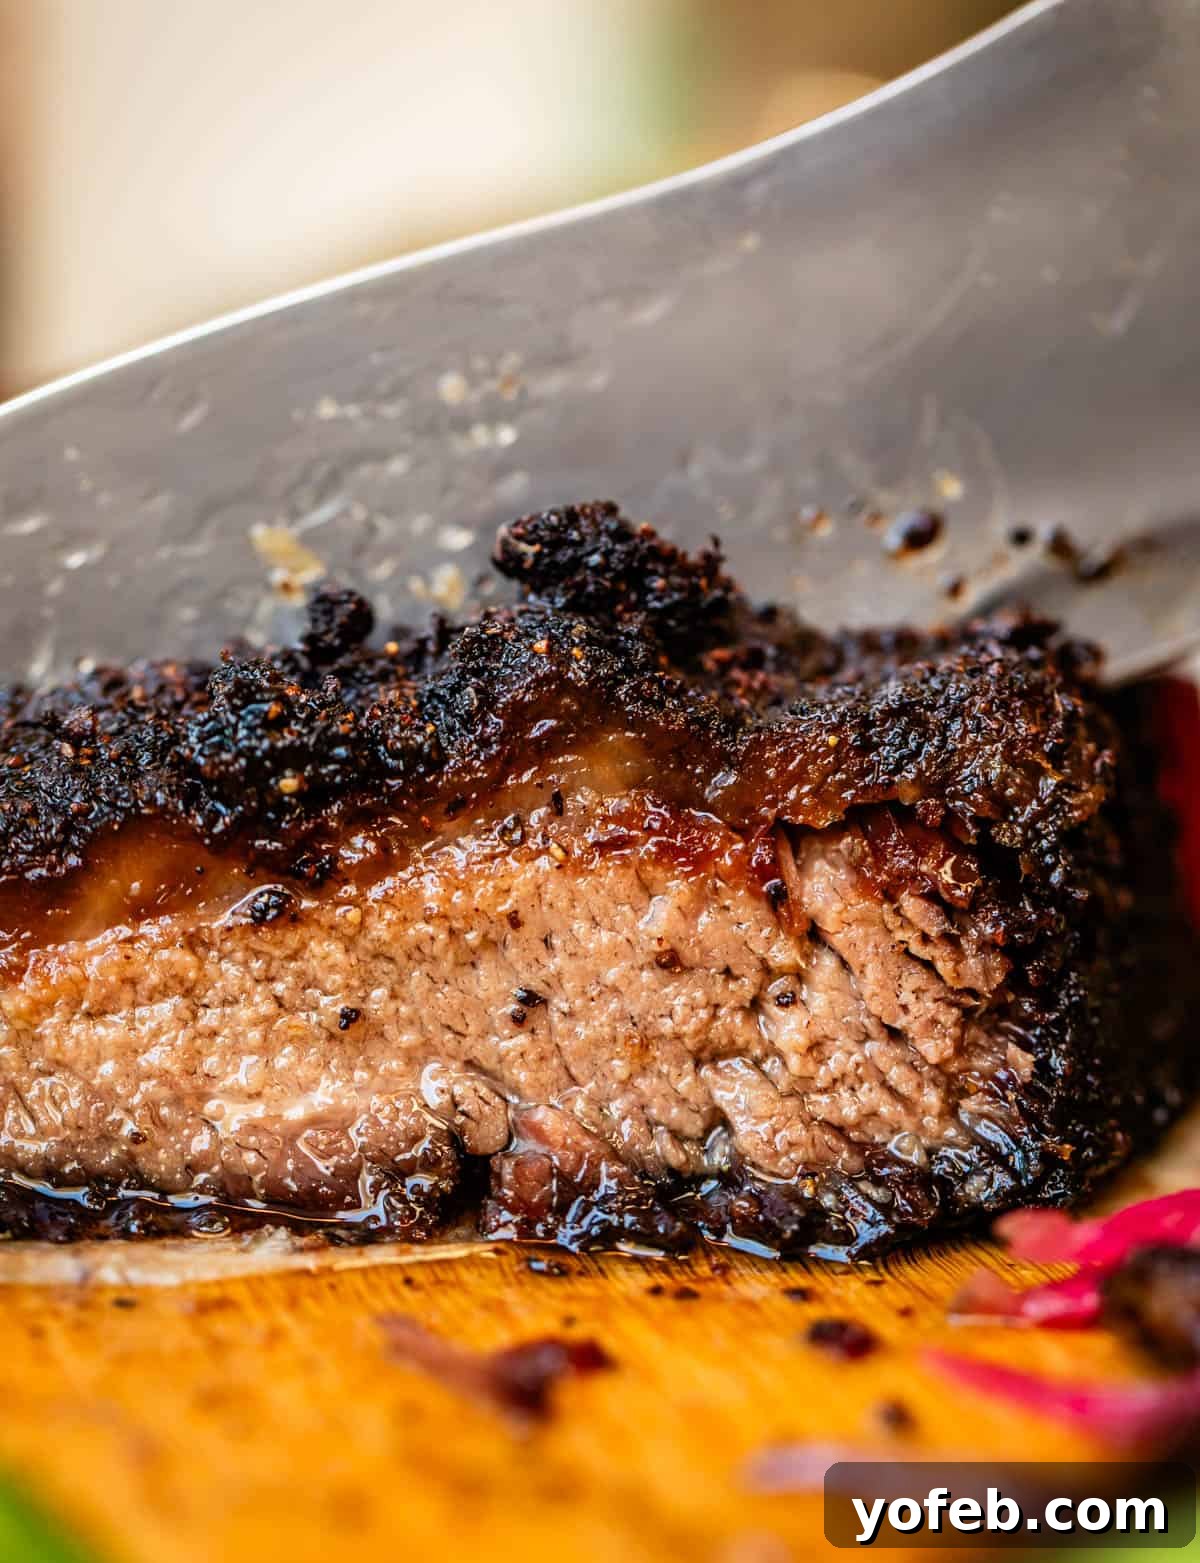
Table of Contents
- No Smoker? No Problem.
- How to Smoke Brisket Without a Smoker: A Simple Overview
- Achieving the BEST Brisket: Essential Tips
- Understanding Brisket: What is this Cut of Meat?
- Selecting the Perfect Brisket for Smoking
- Preserve the Fat Cap: Why It’s Crucial for Juicy Brisket
- The Science of Slow Cooking: Why Brisket Needs Time
- Brisket is Done When It’s Done: Trust Your Thermometer, Not the Clock
- The Ultimate Brisket Rub: Simple, Yet Powerful
- The Magic of Dry Brining for Tender Brisket
- Infusing Authentic Flavor: The Importance of Real Smoke
- BBQ Sauce Etiquette: To Sauce or Not to Sauce?
- Essential Beef Brisket Recipe Ingredients & Equipment
- Step-by-Step Guide: How to Cook Smoked Beef Brisket in the Oven
- Mastering the Slice: How to Carve Your Brisket
- Perfect Pairings: What to Serve with Smoked Beef Brisket
- Storing Leftover Brisket: Keeping It Fresh
- Freezing Smoked Brisket: A Meal Prep Game-Changer
- Smoked Beef Brisket in the Oven: Frequently Asked Questions
- More Amazing Barbecue and Grilled Meats
- Easy Smoked Beef Brisket in the Oven Recipe Card
As a born and raised California girl, my roots aren’t exactly steeped in the rich traditions of Texas barbecue. I’ve always appreciated good barbecue, but it wasn’t ingrained in my culinary DNA the way it is for true Texans. I vividly remember my friend Lawrence, a proud Texan, recounting his first “barbecue” invitation in Utah during college. He arrived, eager for a feast of slow-smoked meats, only to find a spread of hamburgers and hot dogs. His bewilderment was palpable – where was the actual barbecue?
This anecdote highlights a crucial point: authentic Texas barbecue is a serious affair, and it’s not something I’d attempt without a reliable source. Fortunately, my sister Laura, who has resided in Dallas for the past 15 years, has gradually become a connoisseur of all things Texan, especially when it comes to the grill. She’s learned invaluable techniques from her mother-in-law, Chris, a true Texan whose brisket recipes are legendary. Chris’s expertise has also blessed us with other incredible dishes like her Tejano Pinto Beans and Tejano Carne Guisada – recipes so authentic they can draw Texans out of the woodwork just by their aroma!
And now, after extensive testing and early morning dedication (my 5-year-old son, Edison, will attest to the dark circles under my eyes!), I’m thrilled to share a brisket recipe that delivers that genuine Texas flavor right to your plate, no smoker required. This method, inspired by Chris’s genius, will have your neighbors wondering if a professional pitmaster moved into town. Get ready to not only cook an incredible brisket but also to become the talk of the neighborhood!
No Smoker? No Problem. Achieve Authentic Texas Brisket
True aficionados know that perfectly smoked brisket is an experience unto itself, a culinary transcendence. For years, I believed that this incredible dish was exclusive to those with expensive smokers or a pilgrimage to the heart of Texas. However, I’m here to tell you that’s simply not the case! Laura’s mother-in-law, Chris (not to be confused with my mother-in-law, Kris!), has perfected a brilliant technique over the years to achieve that authentic smoky flavor without the need for a costly, dedicated smoker. Her ingenious method is strikingly similar to my approach for making Smoked Pulled Pork without a smoker, proving that incredible barbecue is accessible to everyone. Here’s a concise overview of the steps that make this smoked beef brisket in the oven taste genuinely smoked and utterly delicious:
How to Smoke Brisket Without a Smoker: A Simple Overview
- Craft the Easiest Dry Rub: Begin with a straightforward, yet incredibly effective, three-ingredient dry rub consisting of kosher salt, coarse black pepper, and garlic granules. This minimalist approach allows the natural beef flavor to shine.
- Embrace the Dry Brine: Allow your brisket to marinate with this dry rub for a minimum of 6 hours, or ideally, overnight. This crucial step enables the salt to deeply penetrate the meat, seasoning it to the core and tenderizing it before cooking even begins.
- Initiate the Smoke on Your Gas Grill: This is the secret weapon! Create homemade wood chip packets and use your gas grill to impart that unmistakable smoky flavor for a couple of hours. This ingenious step is what truly elevates this homemade brisket recipe, delivering a depth of flavor that can’t be replicated by other means.
- Transition to the Oven for Low & Slow Perfection: After its initial smoke bath, move the brisket to your oven for a long, slow cook until it reaches an internal temperature of 203 degrees Fahrenheit. This can even be done overnight, making it a surprisingly hands-off process for such a magnificent dish.
- Crucial Resting Period: Once cooked, allow the brisket to rest for 30-60 minutes before slicing. This essential step ensures that all those flavorful juices reabsorb back into the meat, resulting in an exceptionally juicy brisket. Do not skip it!
- Serve BBQ Sauce on the Side: To truly honor the Texas tradition and avoid any culinary controversy, always offer your favorite BBQ sauce on the side. This allows purists to enjoy the unadulterated flavor of the smoked brisket, while others can add a touch of tang or sweetness as desired.
It might sound daunting, but I assure you, the process is incredibly straightforward and surprisingly hands-off once you get the hang of it. The result? A tender, smoky brisket that tastes like it came straight from a Texas pit.
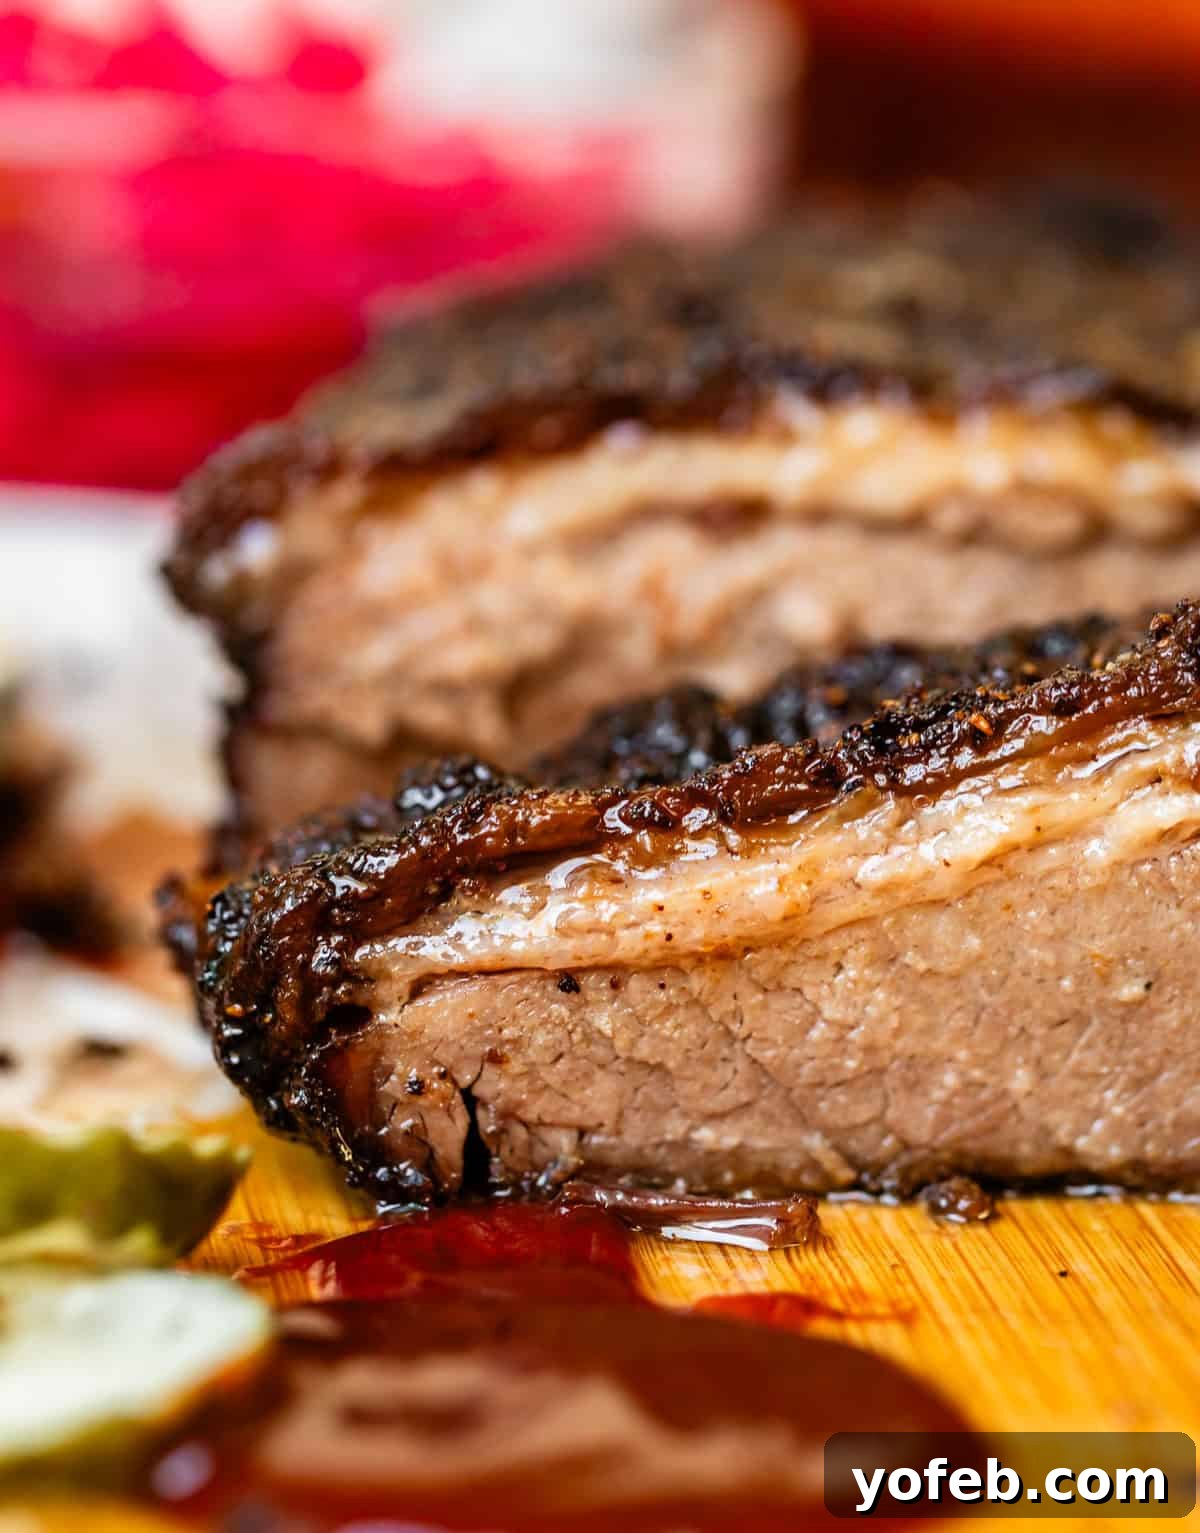
Achieving the BEST Brisket: Essential Tips
To ensure your homemade brisket is nothing short of spectacular, adhere to these golden rules:
- Source the Finest Brisket: The quality of your meat is paramount. Invest in the best cut of brisket you can find – a “Choice” grade with a substantial fat cap is ideal. A lean, low-quality brisket, even with perfect cooking, will result in dry, disappointing results.
- Master the Dry Brine: This step is non-negotiable. Dry brine your brisket and allow it to rest in the refrigerator overnight. This deep seasoning and tenderization process is fundamental for flavor and texture.
- Embrace the Fat Cap: Do not trim the fat cap! This layer of fat is the primary source of moisture and flavor for a flat cut brisket. It will render down, self-basting the meat throughout the long cooking process, and create a delicious, crispy “bark.”
- Select the Right Wood Chips: For that authentic smoky flavor, Hickory wood chips are highly recommended. They impart a classic, robust smoke that pairs perfectly with beef brisket.
- Commit to Low and Slow: This is the mantra of great barbecue. Cook your brisket at a consistently low temperature for an extended period. Patience is key to breaking down tough fibers and achieving that signature tender texture.
- Utilize a Leave-In Probe Meat Thermometer: A reliable meat thermometer is your best friend. It is the ONLY way to accurately determine when your brisket has reached its optimal internal temperature of 203°F. Guessing will lead to suboptimal results.
- Verify Oven Temperature Accuracy: Some ovens can be inconsistent at low temperatures. Use an oven thermometer to ensure your oven maintains a steady 250°F. Inaccurate temperatures can lead to tough, undercooked brisket or an unnecessarily long cooking time.
Understanding Brisket: What is this Cut of Meat?
Let’s demystify brisket. This cut of beef originates from the lower chest or breast of the cow, an area that gets a lot of work, making it inherently tough but also incredibly flavorful when cooked correctly. Brisket is typically comprised of two distinct muscles:
- The “Flat” Cut (First Cut): This is the leaner, flatter portion, known for its uniform shape and ease of slicing. It’s what most grocery stores outside of barbecue-centric regions typically carry. We will be focusing on cooking this cut today.
- The “Point” Cut (Second Cut): This section is considerably fattier and more marbled, with a slightly irregular shape. It’s the muscle that sits on top of the flat.
- The “Full Packer” Brisket: When both the flat and point cuts are sold together, untrimmed and unseparated, it’s known as a full packer. These can be quite large, often weighing between 12 to 20 pounds.
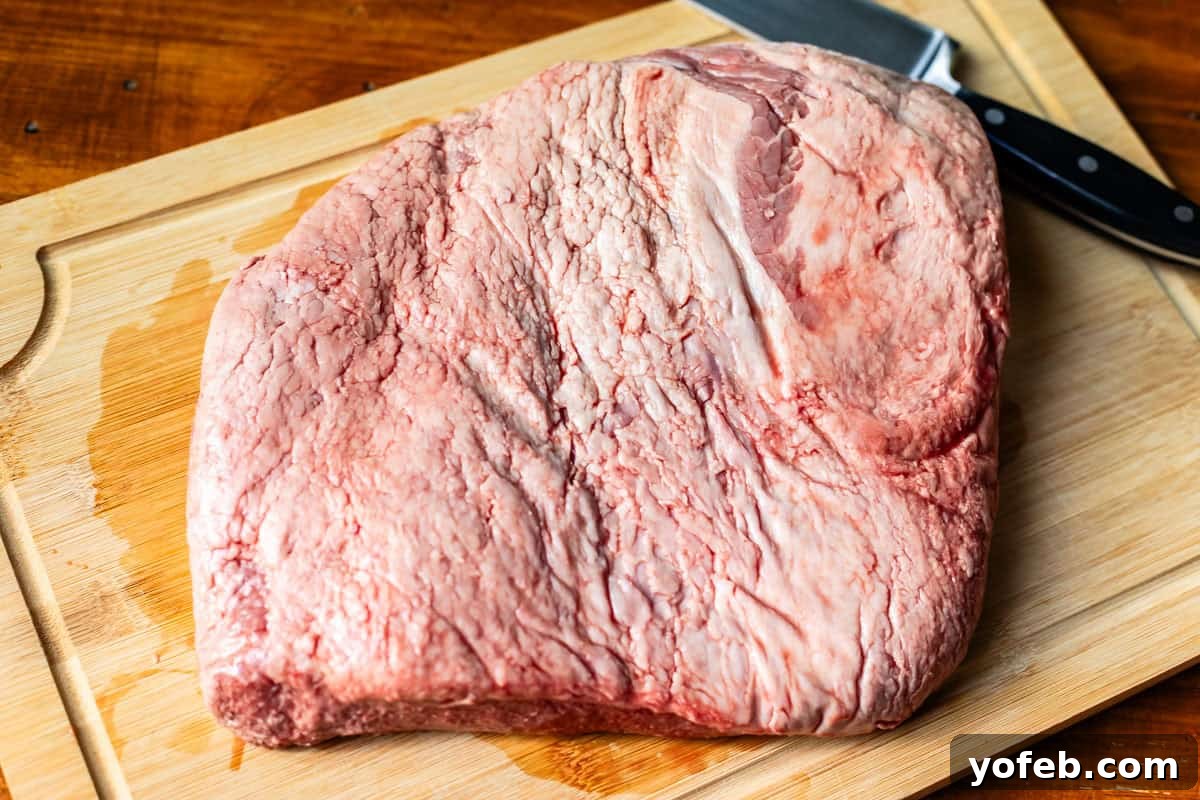
The image above showcases a flat cut brisket, devoid of the fatty point cut. While the point cut is prized for making rich, flavorful burnt ends (cubes of smoked brisket point, often smoked a second time for ultimate deliciousness), it’s generally too fatty for clean slices. Our focus today is on the 6-10 pound flat cut, ensuring it comes out incredibly moist and tender despite its leaner nature. Understanding these differences is your first step to a truly tender brisket.
Selecting the Perfect Brisket for Smoking
Given the investment of time and money, choosing the right brisket is crucial. Always aim for a “Choice” grade cut, at minimum. Here’s why and what to look for:
- Prime Grade: These cuts represent the top 3% of cattle and boast exceptional marbling. While superior, sometimes a Prime grade brisket can even be *too* fatty for some preferences.
- Choice Grade: This category encompasses the next 50-97% of cows. Within “Choice,” there’s a significant range, so careful selection is important. Look for a Choice grade brisket that has visible marbling (streaks of fat within the lean muscle) and, most importantly, the largest, most intact fat cap you can find. This fat is your friend for a moist and flavorful result.
Beyond grade, inspect the meat itself. If possible, and if it’s not vacuum-sealed, gently bend the brisket in half. A properly aged and tender brisket will bend with relative ease. The muscle should display a healthy reddish-pink hue, and the all-important fat cap should be a pristine white, not yellow, indicating freshness.
Preserve the Fat Cap: Why It’s Crucial for Juicy Brisket
Let me reiterate: I said what I said. Do NOT trim the fat cap off your brisket, especially if you’re working with a flat cut. Here’s why this often-overlooked detail is vital for achieving a truly juicy brisket:
On a flat cut of brisket, there is only one significant layer of fat, and it’s concentrated in this outer fat cap. Unlike the point cut, which has fat marbled throughout the muscle, the flat relies almost entirely on this external fat for moisture and flavor. Many recipes mistakenly instruct you to trim the fat cap to about 1/4 inch thick. I followed this advice on my first attempt and deeply regretted it. Removing this precious fat significantly compromises the brisket’s ability to stay moist during the long cooking process.
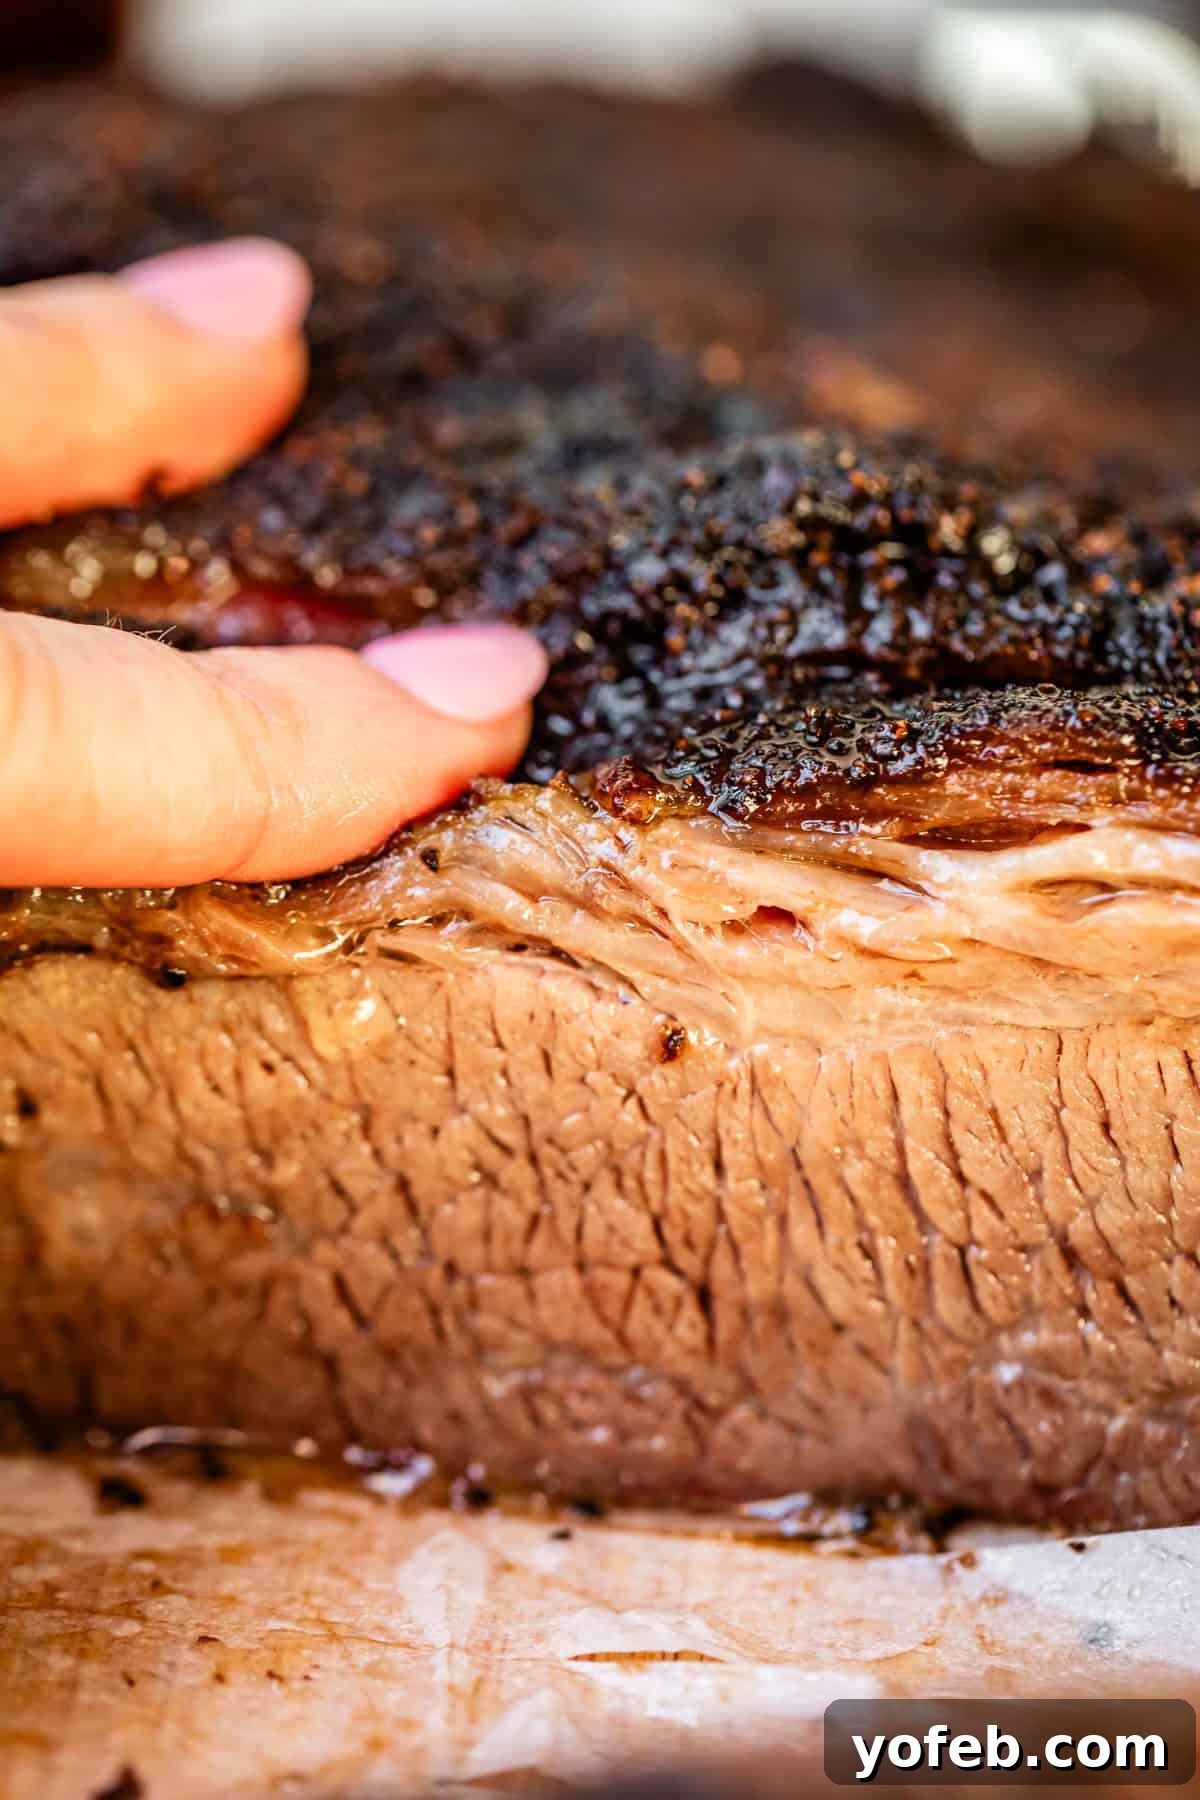
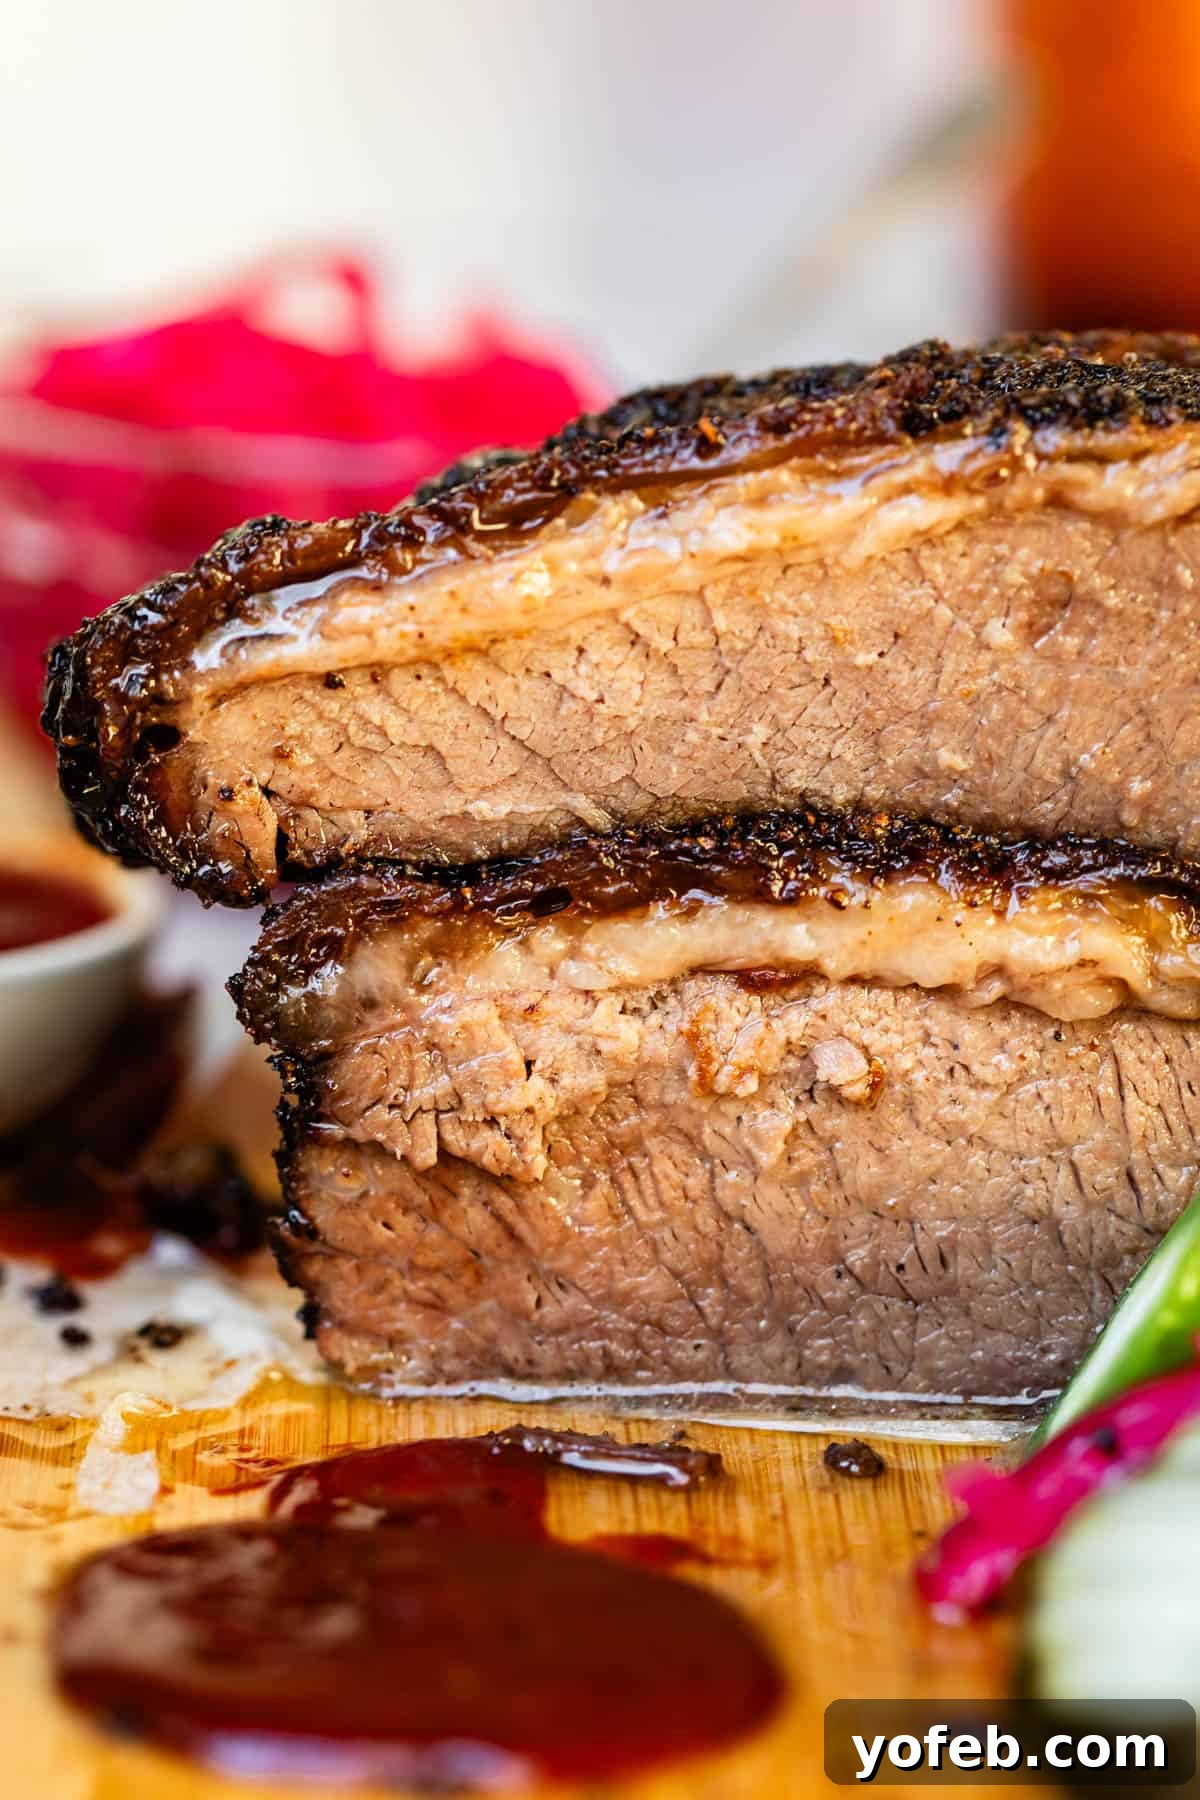
As the brisket cooks, this robust fat cap slowly renders, basting the meat below it, infusing it with flavor, and keeping it incredibly tender. Furthermore, this fat layer develops a magnificent, crispy “bark” on the exterior – a hallmark of well-cooked brisket. While I typically avoid fatty meat in other dishes, the brisket’s fat cap is an exception. The contrast between the smoky, salty bark and the rendered, rich fat is utterly divine, providing a texture akin to crispy pork belly. Trust me on this: let that fat cap do its job!
The Science of Slow Cooking: Why Brisket Needs Time
Brisket is a unique cut of meat that absolutely demands a “low and slow” cooking approach. The flat cut, in particular, is lean and tough, characterized by an abundance of collagen – a connective tissue that provides structural strength to the muscle. Attempting to cook brisket quickly will only result in a dry, unpleasantly chewy outcome, as the collagen won’t have sufficient time to break down.
The magic of a slow cooking process lies in giving this collagen ample time to melt and transform into tender, succulent gelatin. This transformation is what yields the incredibly tender bite that makes Texas-style smoked beef brisket so revered. For a cut this tough, your primary options are braising or smoking. While braising in an oven or slow cooker can tenderize it, the flavor profile will resemble a pot roast – a very expensive pot roast, given brisket prices. Smoking, as we’re doing here, is truly the superior method for unlocking brisket’s full potential, imparting that irreplaceable smoky depth that defines true barbecue.
Brisket is Done When It’s Done: Trust Your Thermometer, Not the Clock
Just as you can’t rush true love, you cannot rush a brisket. This is a fundamental truth in the world of barbecue. Cooking brisket is more an art than a precise science when it comes to timing. There are no exact cooking durations for this recipe because every brisket is different, and every grill and oven performs uniquely. Your sole guide to knowing when your brisket is perfectly cooked is a reliable meat thermometer.
Our target internal temperature is a consistent 203°F. Factoring in the smoking time on the grill, the extended low-and-slow cook in the oven, and the crucial resting period, the entire process can span anywhere from 8 to 15 hours. My sister Chris and Laura often start their briskets overnight, allowing it to slowly cook in the oven while they sleep. This way, the brisket is ready in the morning and can rest until dinner, avoiding the anxious wait for the thermometer to hit 203°F while hungry guests watch. Plan accordingly, and remember: a smaller brisket may cook faster, so adjust your overnight plans if your cut is on the leaner side. Patience and a thermometer are your greatest allies.
The Ultimate Brisket Rub: Simple, Yet Powerful
While you might encounter countless brisket rub recipes, each more complex than the last, the truth is, a truly exceptional brisket rub requires only three fundamental ingredients: kosher salt, coarse black pepper, and garlic granules. However, there are some essential rules to follow to ensure perfection.
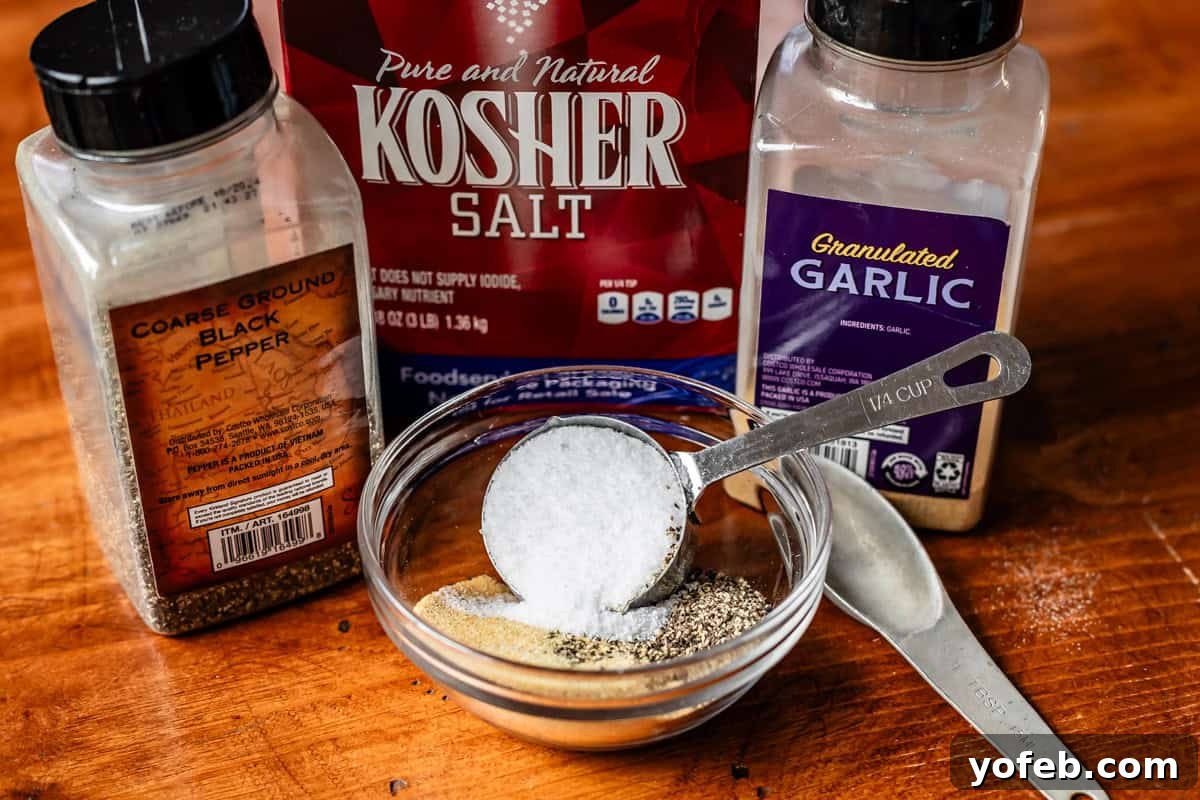
Firstly, the salt. This is where precision matters. I am unwavering in my recommendation for Diamond Crystal Kosher Salt. It has a larger crystal structure than table salt, making it less “salty” by volume and allowing for a more even application without over-salting. If you’re investing in a premium cut of brisket, please do not compromise by using regular table salt. It simply won’t yield the same nuanced flavor, and you risk an overwhelmingly salty taste. If kosher salt is truly unavailable, use approximately half the amount of table salt, but I strongly advise against it for optimal results. The combination of these three ingredients forms a crust that’s key to the brisket’s flavor profile.
The Magic of Dry Brining for Tender Brisket
Our purpose in liberally salting the brisket is far more than just adding flavor. We’re engaging in a technique known as dry brining, and applying the salt well in advance allows it to work its tenderizing magic long before any heat is introduced. This step is absolutely critical and not optional for achieving the best possible texture and taste.
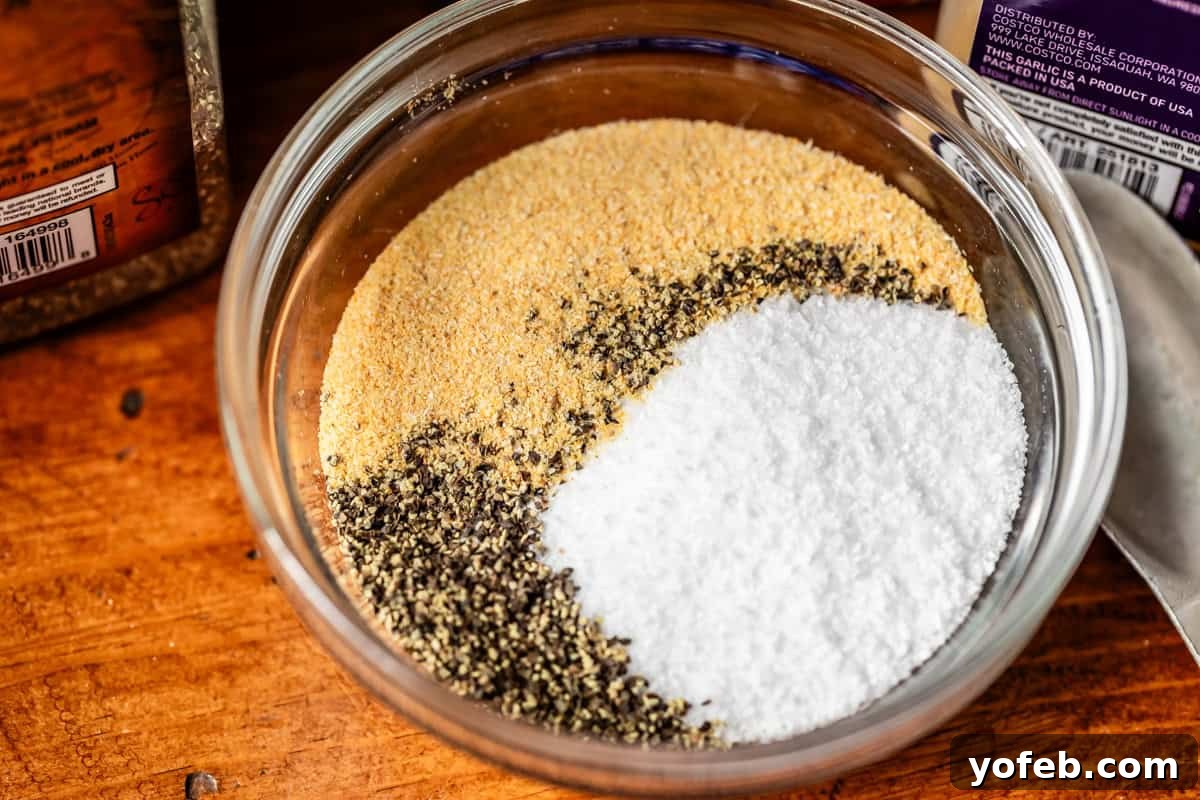
The science behind dry brining is simple yet profound: the salt initially draws moisture out of the meat. Then, through the process of osmosis, this moisture, now combined with the dissolved salt, is reabsorbed back into the muscle fibers – all the way to the center of the meat. This slow, internal seasoning is the most effective way to flavor a thick cut like brisket from within. I employ this same proven method for my Ribeye Steak and Prime Rib with consistently fantastic results.
After rubbing the brisket, we place it on a rack in the refrigerator, completely UNCOVERED. This exposure to the cold, circulating air facilitates a crucial drying process on the surface of the meat. This surface drying is what helps develop that highly sought-after, fantastic “bark” or crust during cooking. Rest assured, this method does NOT dry out the meat; instead, it contributes to an incredibly juicy and tender brisket with a perfect crust, a technique thoroughly tried and tested.
Infusing Authentic Flavor: The Importance of Real Smoke
The distinctive, deep flavor of Texas brisket is fundamentally defined by SMOKE. There’s simply no substitute for it, and synthetic alternatives like liquid smoke will not replicate the genuine article. Skipping the smoking step altogether will result in your brisket tasting much like a pot roast. While I appreciate a good Pot Roast, it’s not what you’re aiming for when you’ve invested in a brisket, especially considering its current price point.
Historically, brisket was considered a cheap cut, an economical way to feed a large crowd. However, its immense popularity has transformed it into one of the most expensive cuts available today. It’s a culinary paradox! Given this investment, it’s essential to honor the cut by employing the proper techniques. If you’re not planning to smoke it, you’d be better off purchasing a chuck roast, which offers similar pot roast-style results at a fraction of the cost. The smoke is non-negotiable for an authentic smoked brisket in the oven experience.
BBQ Sauce Etiquette: To Sauce or Not to Sauce?
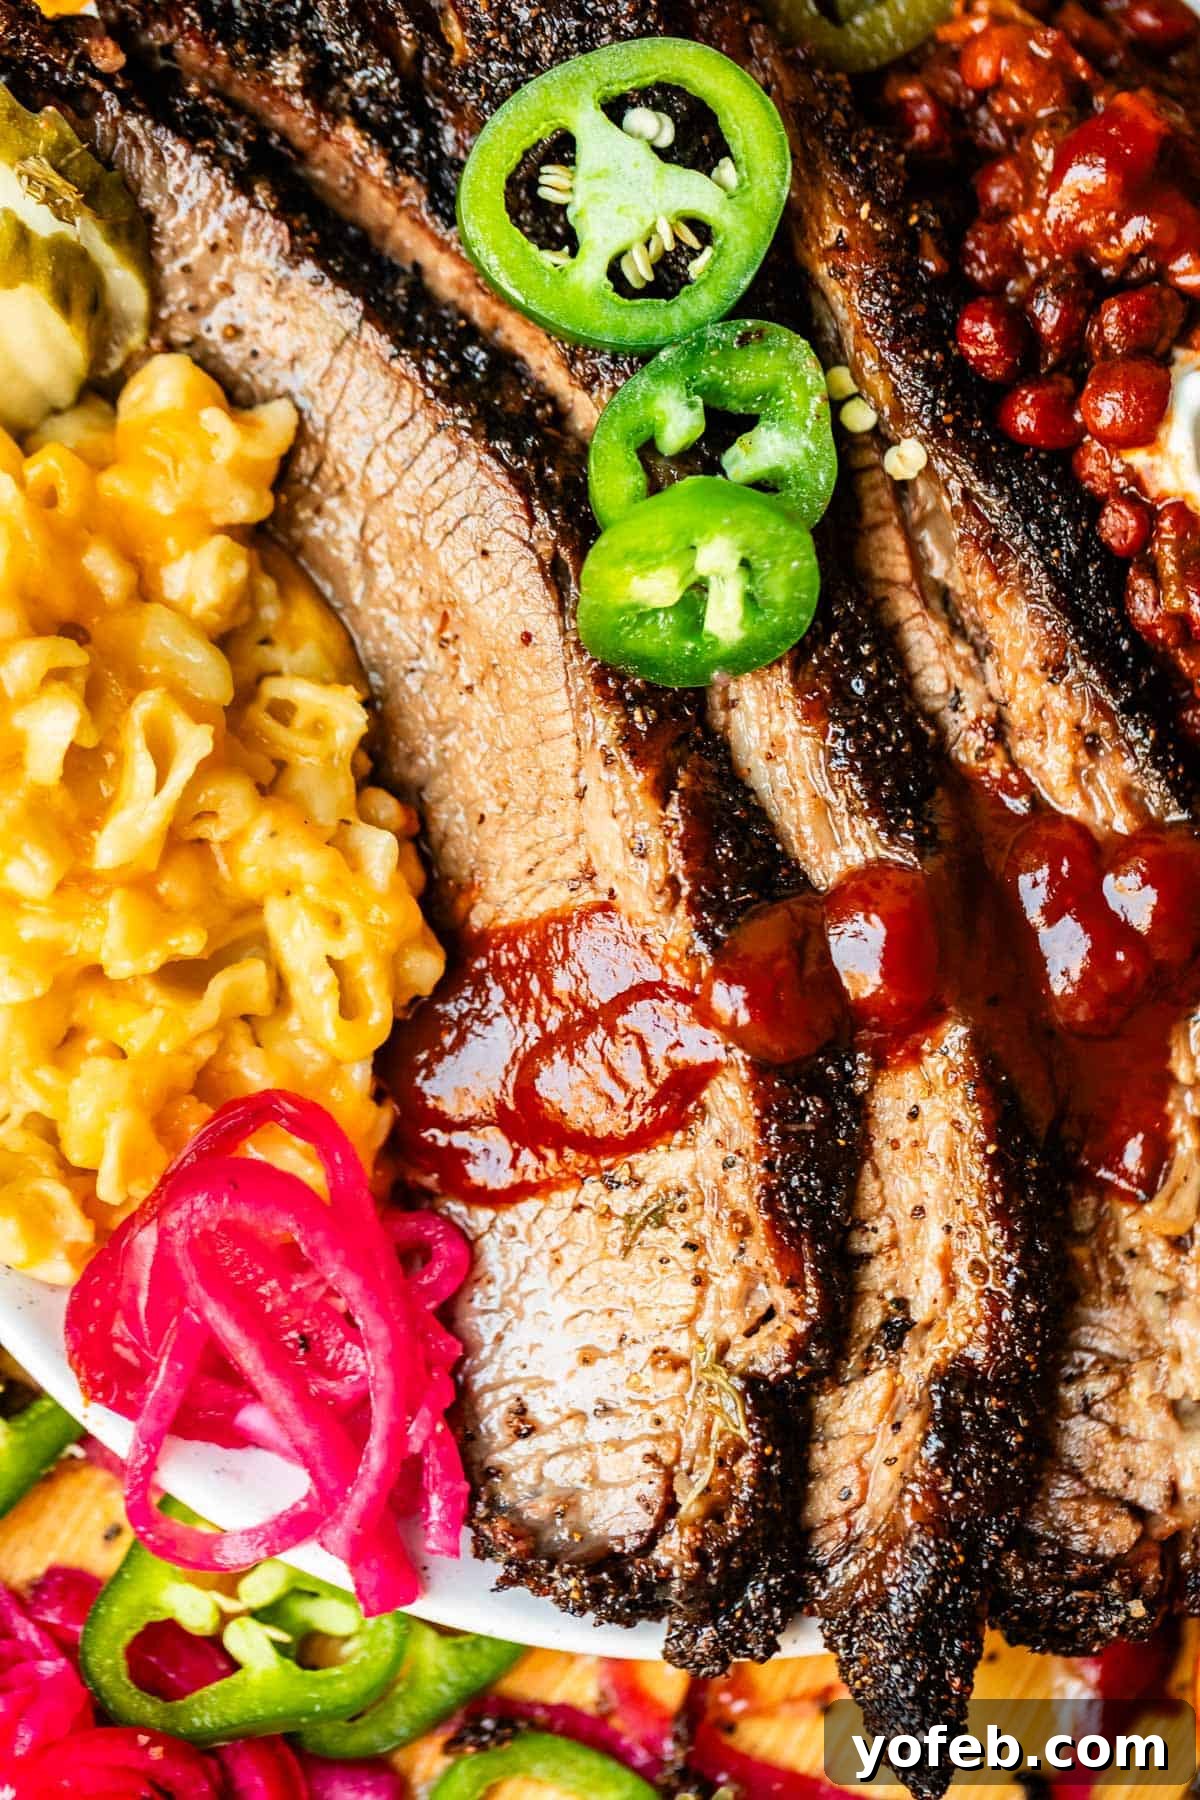
The question of barbecue sauce with brisket can ignite fierce debates, akin to a culinary Capulet and Montague feud. A truly perfectly smoked brisket, with its savory, smoky, and tender qualities, arguably needs no adornment. Adding sauce can sometimes mask the exquisite, natural flavor of the meat itself.
However, as an admitted “heathen,” I often find myself craving a touch of sauce halfway through a plate. The consensus among Texans, and the general rule of thumb, is that barbecue sauce should ALWAYS be served *on the side* of smoked brisket. Heaven forbid you invite a Central Texan to your barbecue and force them to endure your sauced brisket! It would be almost as egregious as my sister Laura’s attempt to enter white chicken chili into a neighborhood cook-off in Dallas (it was promptly disqualified).
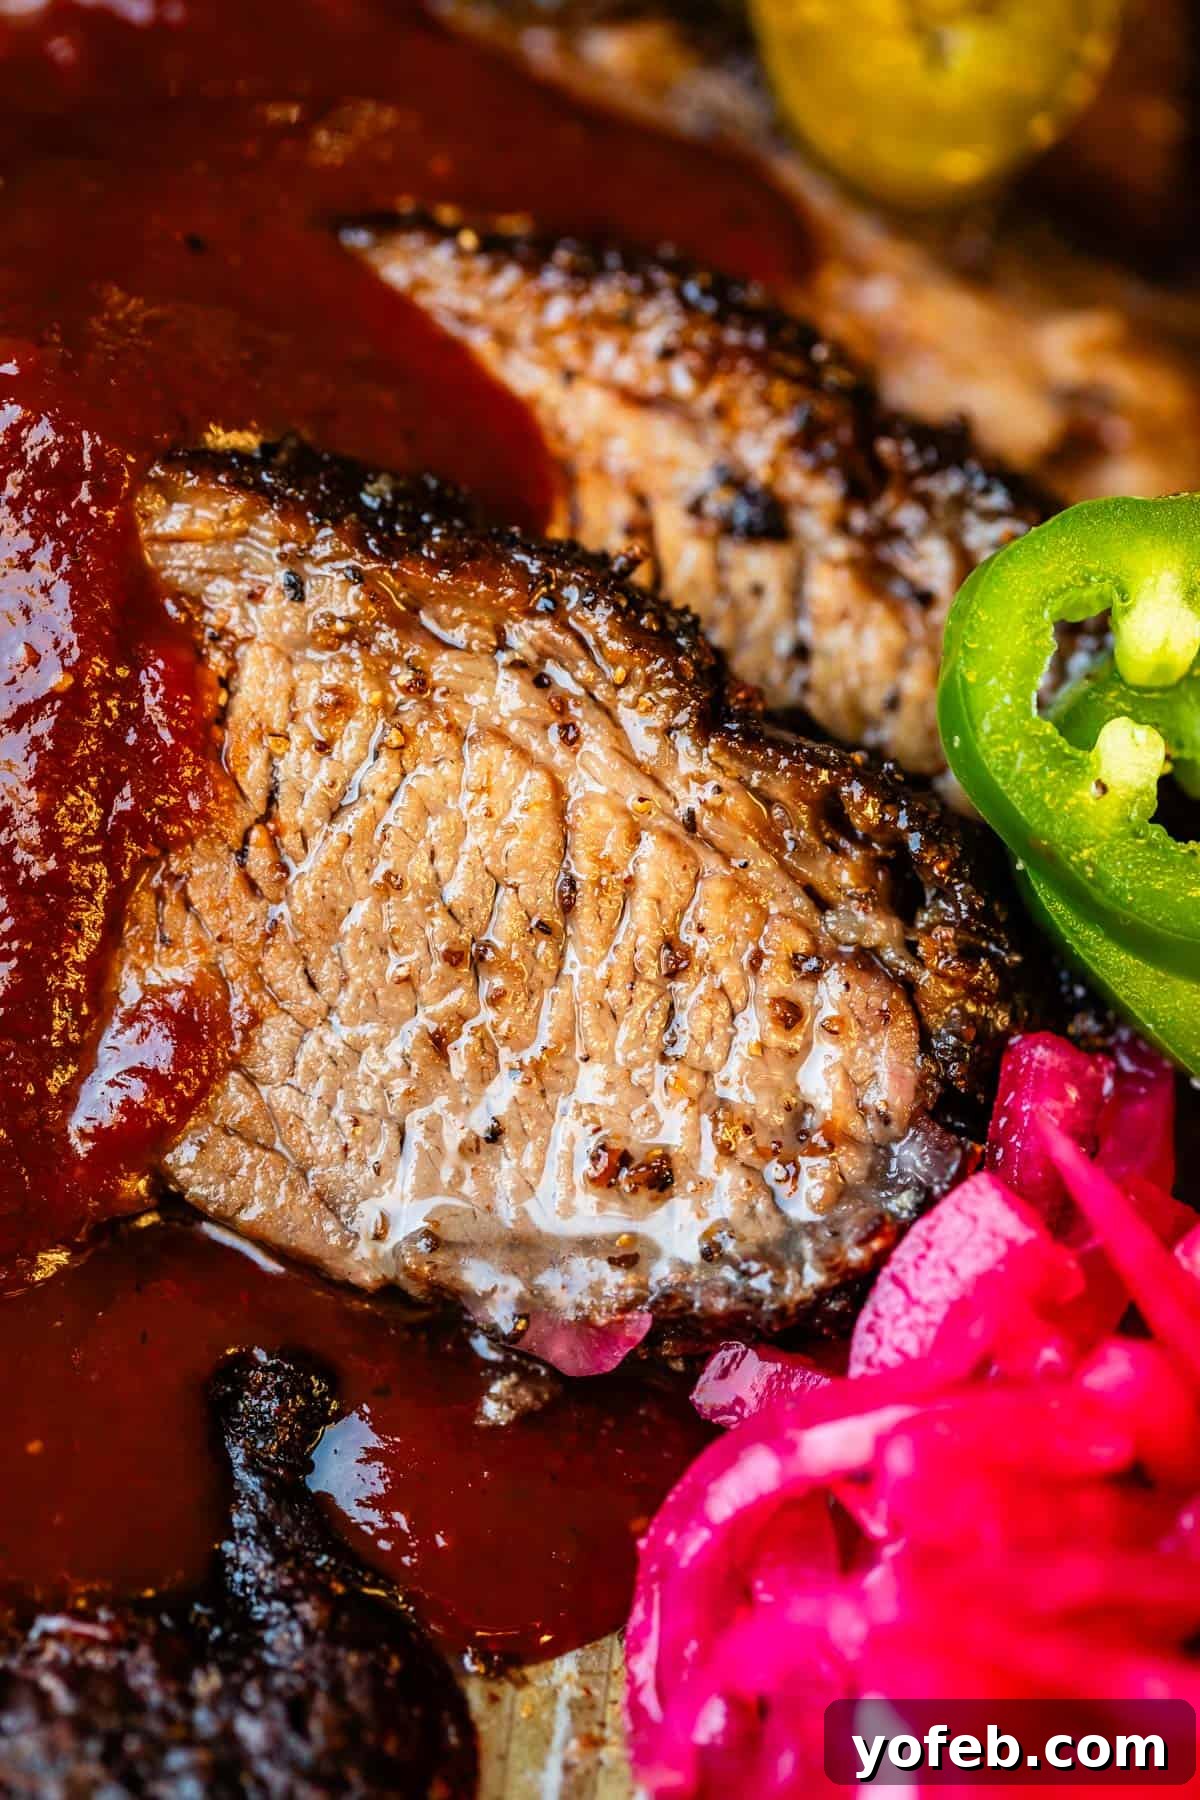
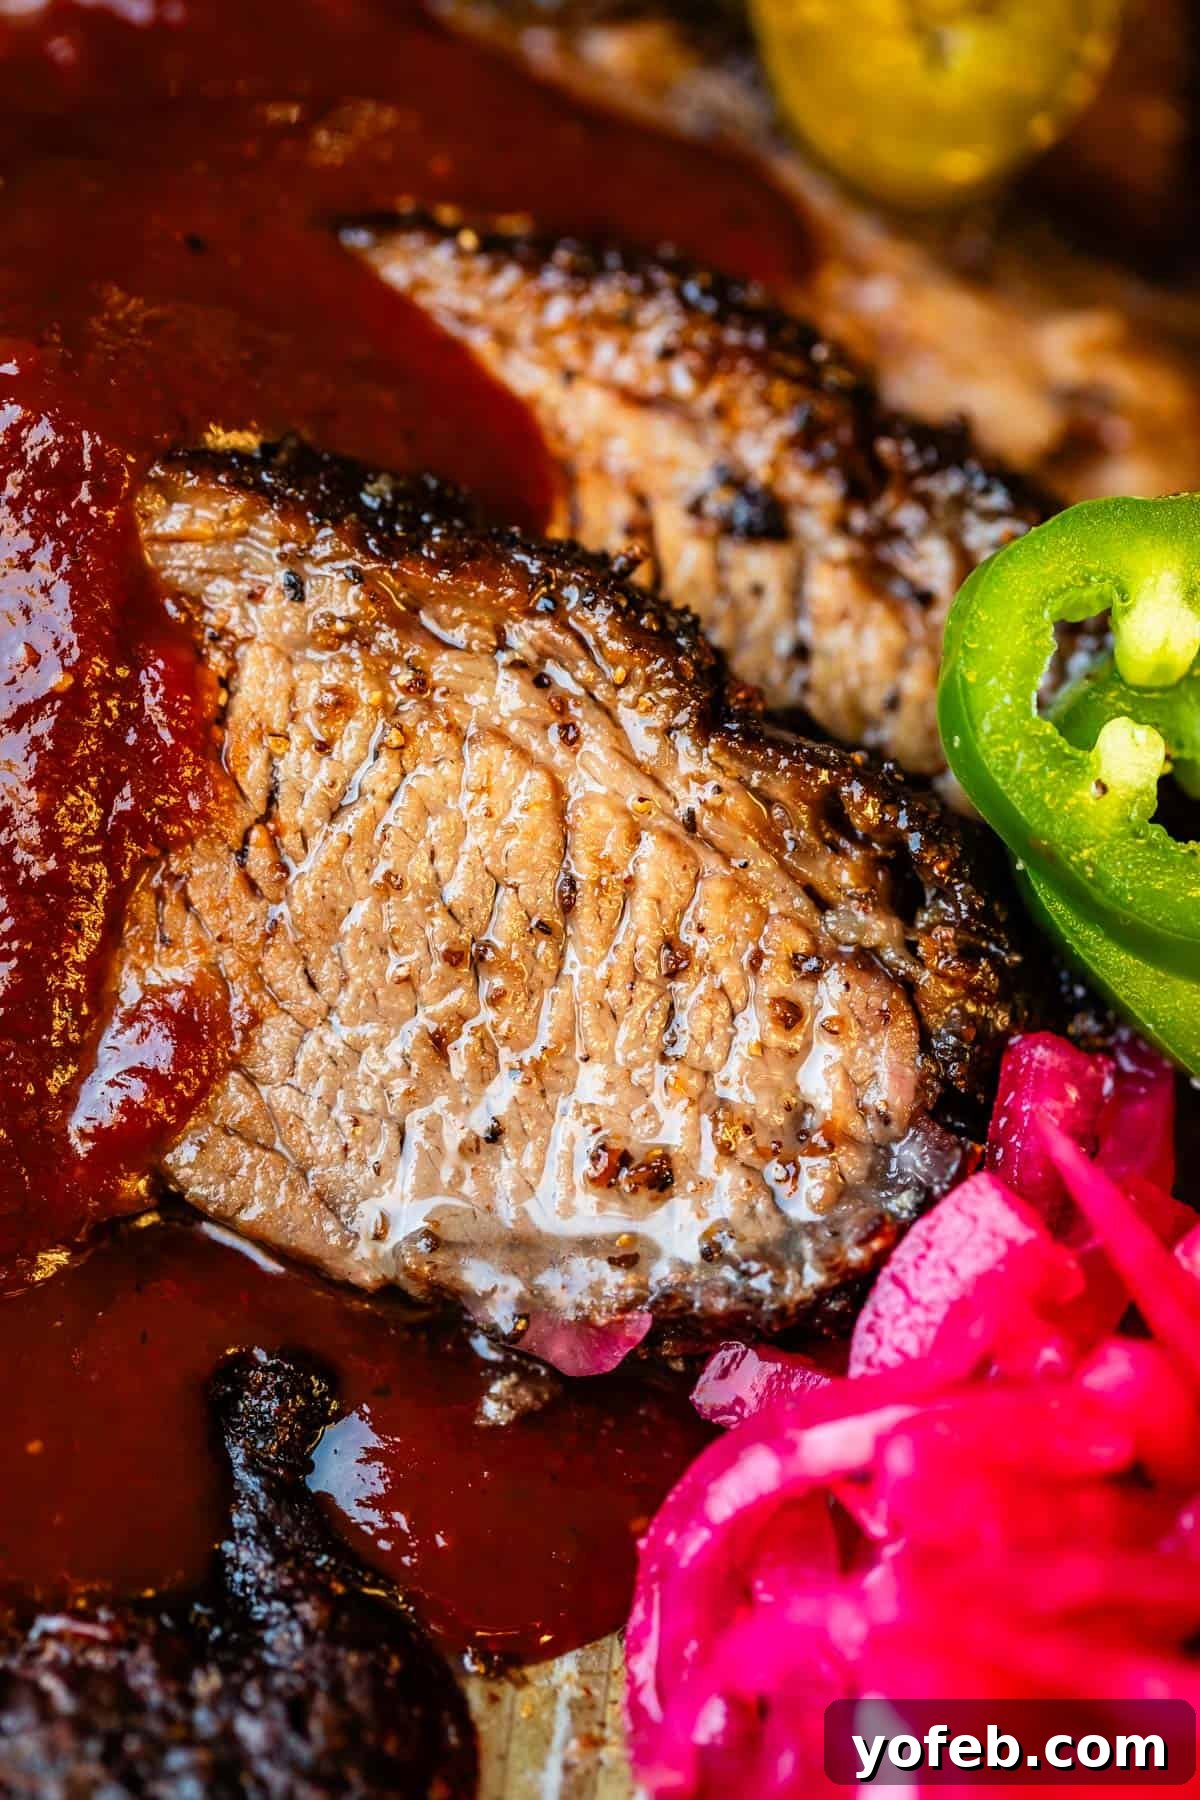
Chris, Laura’s mother-in-law, typically serves a semi-homemade sauce that blends Sweet Baby Ray’s, Claude’s Fajita Marinade, and yellow mustard. Since Claude’s is a regional brand unavailable in my area, I’ve found my own homemade BBQ Sauce to be an absolutely amazing accompaniment. You can even drizzle it over your brisket if you’re not expecting any staunch Texans like Lawrence for dinner!
For those striving for ultimate authenticity, traditional Texas BBQ sauces tend to be more tangy than sweet, often featuring a hint of chili powder or other spices for a subtle kick. If you’re purchasing a sauce, look for brands like Stubbs or Jack Daniels, or opt for one labeled “hickory” or “vinegar.” If your chosen sauce isn’t quite tangy enough, Laura suggests adding a splash of vinegar or a spoonful of mustard to achieve your desired flavor profile. This allows everyone to customize their brisket experience to their personal preference.
Essential Beef Brisket Recipe Ingredients & Equipment
While the beauty of this brisket recipe lies in its relatively few ingredients, some specialized items are crucial for success. Be sure to review this list carefully. The complete recipe, with precise measurements, is provided in the recipe card at the bottom of this post.
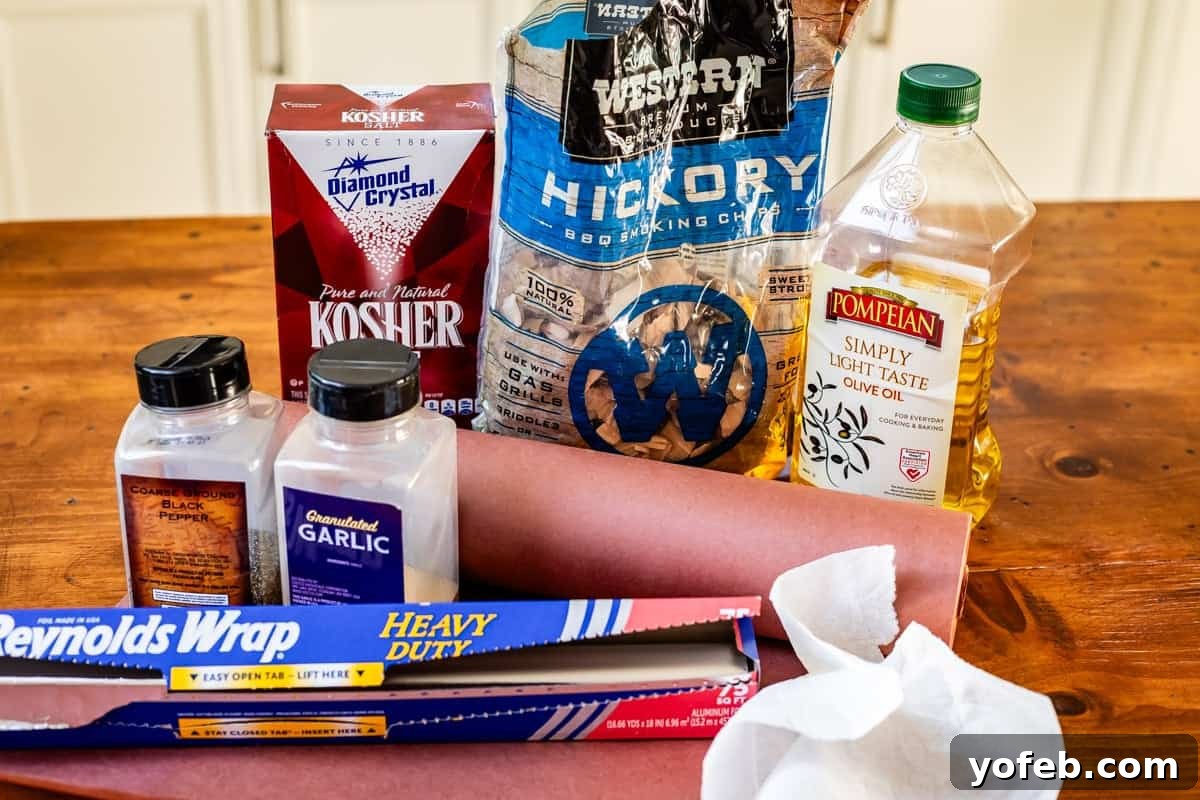
- Kosher salt (Diamond Crystal recommended)
- Coarse ground black pepper
- Garlic granules (not powder, for better texture and flavor)
- Brisket (either a 4-8 lb flat cut or a 12-18 lb full packer)
- Hickory wood chips (essential for smoke flavor)
- Leave-in probe or instant-read thermometer (a must-have for accuracy)
- Pink butcher paper (optional, but highly recommended; heavy-duty foil can be used as an alternative)
- Your favorite Barbecue Sauce (consider homemade or a tangy Texas-style sauce)
Step-by-Step Guide: How to Cook Smoked Beef Brisket in the Oven
The journey to a perfect smoked beef brisket in the oven begins long before you even turn on the grill. Follow these detailed steps for an unforgettable barbecue experience.
1. Choosing Your Brisket Wisely:
This is arguably the most critical initial step, and I cannot stress its importance enough. Given the expense and time commitment, selecting a superior cut of meat is paramount. Head to a reputable butcher shop or a high-end grocery store with a knowledgeable butcher counter. Inquire about their available brisket cuts, specifically asking for a “Choice” grade flat cut brisket. If you’re feeling ambitious and can source one, a “full packer” brisket is also an option, but be prepared for a larger cut (12-18 lbs) and slightly longer cooking times. The absolute key is to find a brisket with the most significant fat cap possible. This fat is your insurance policy for a moist and tender final product.
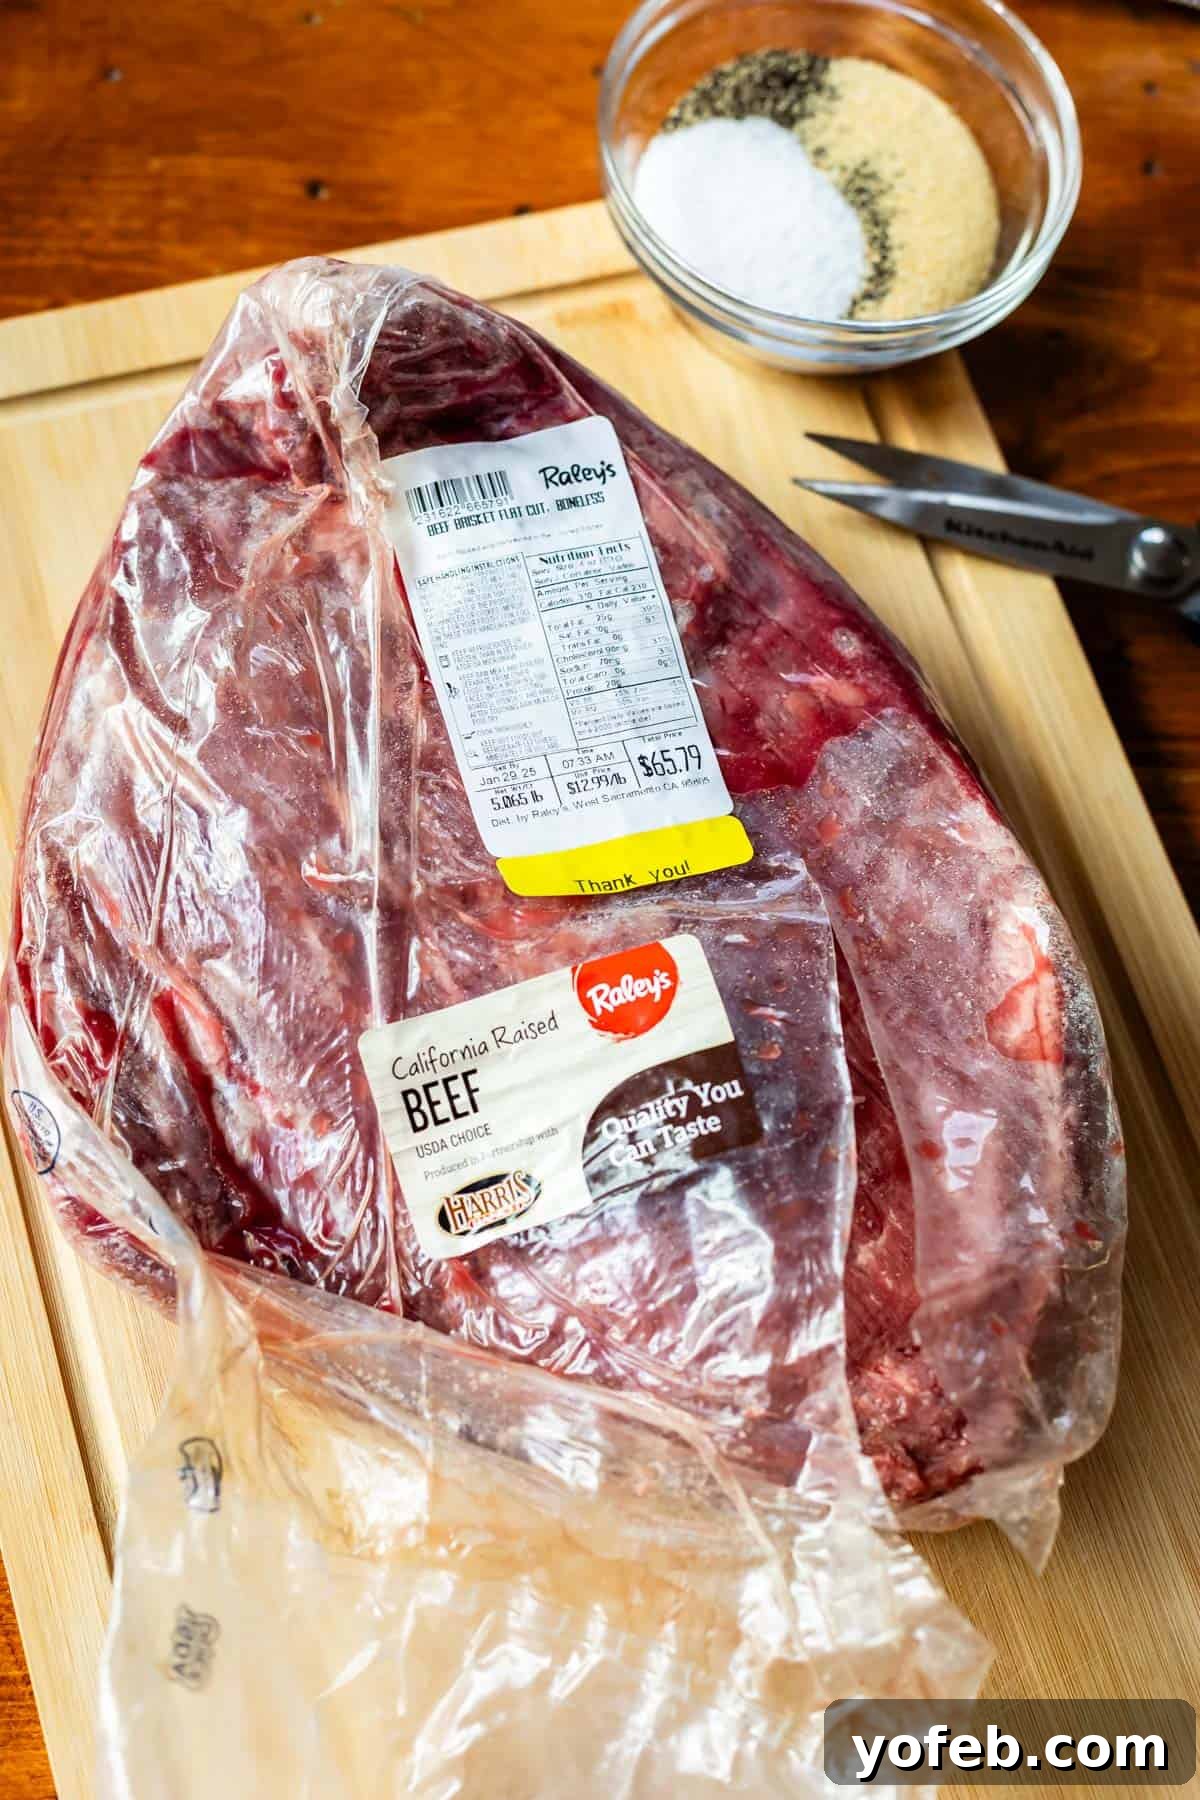
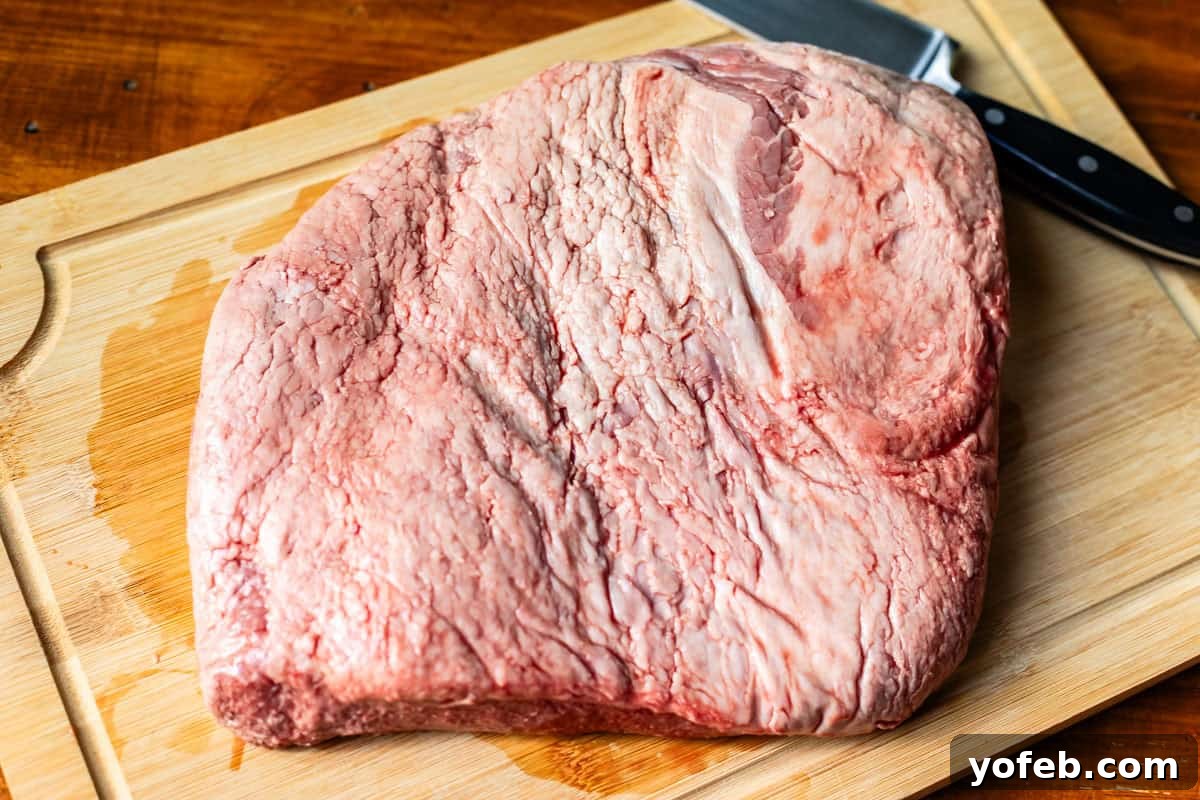
Brisket Inspection: Examine the fat cap – it should be thick and uniformly white, not yellow, which indicates freshness. If the brisket isn’t vacuum-sealed, a good indicator of proper aging and tenderness is its flexibility; it should bend easily in half. The muscle itself should have a vibrant reddish-pink color. *Note: The brisket pictured here was an early trial with a thinner fat cap. Aim for one significantly thicker than this!*
2. The Dry Brine Process:
Once you’ve brought your carefully selected brisket home, it’s time for the dry brine. Unpack the brisket and pat it thoroughly dry with paper towels. Place it on a cooling rack set inside a rimmed half baking sheet. This setup prevents the meat from sitting in its own juices and promotes even air circulation. Now, generously apply your simple yet powerful rub: a mixture of kosher salt, coarse black pepper, and garlic granules. Ensure every surface – top, bottom, and sides – is completely covered. Don’t be shy; the salt is crucial for both flavor and tenderization.
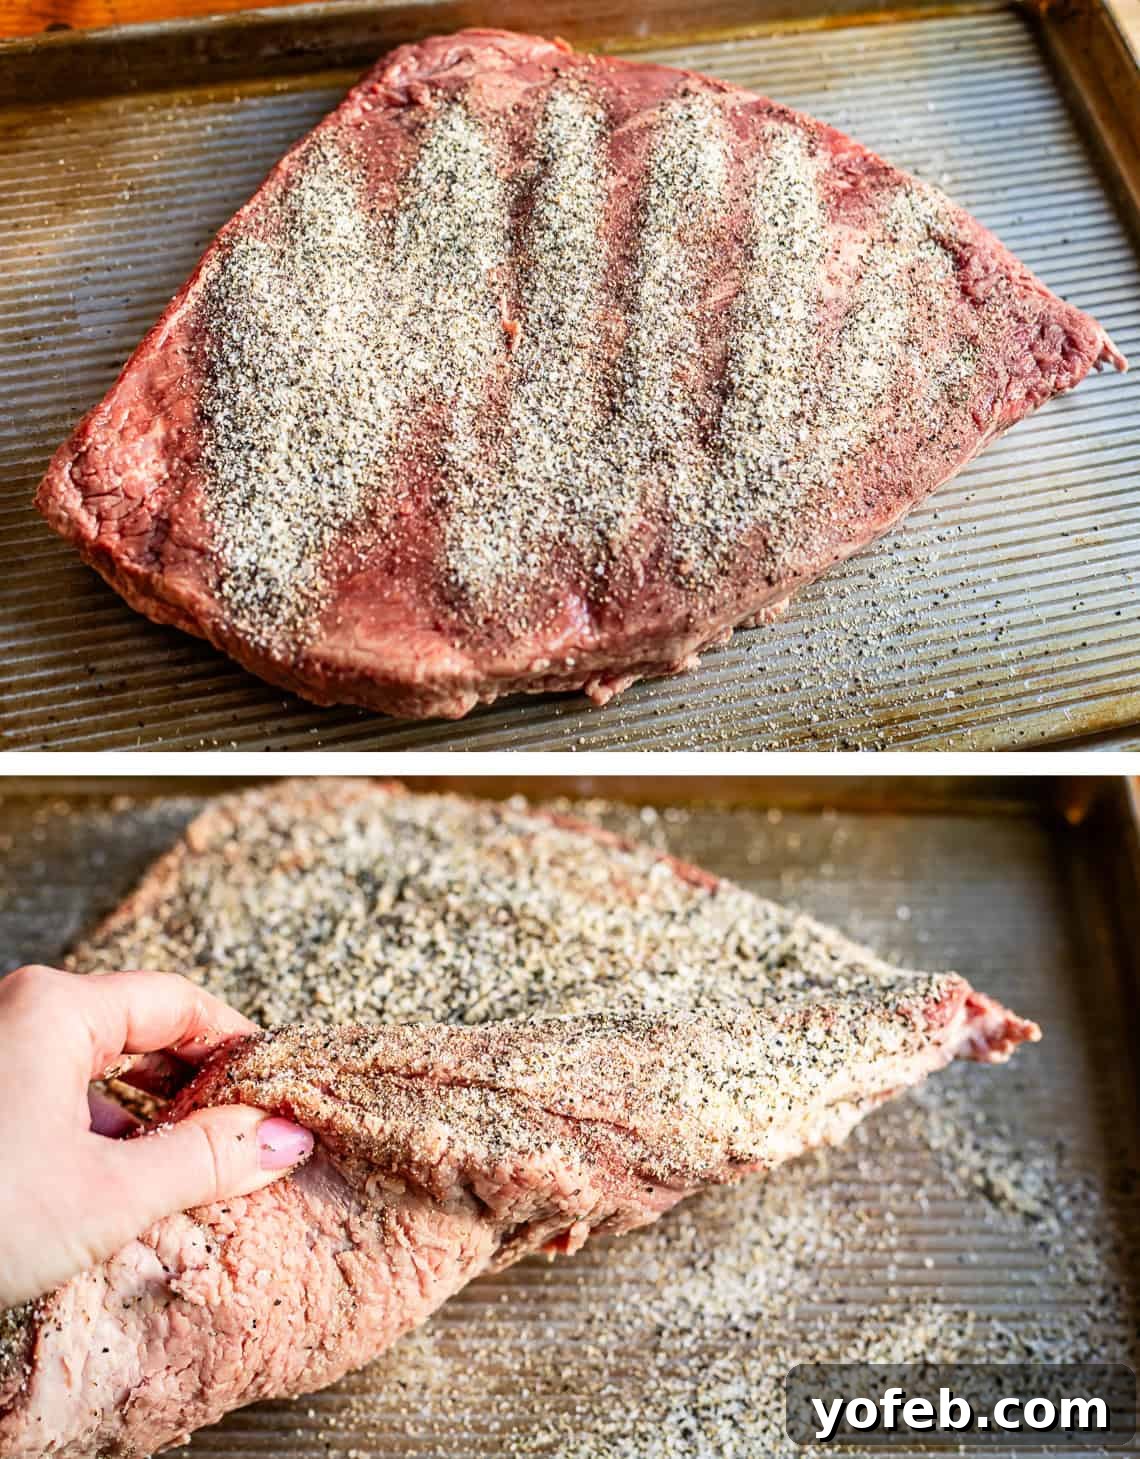
3. Refrigeration for Optimal Flavor and Bark:
After applying the dry brine, place the brisket (still on its rack and baking sheet) into the refrigerator, completely UNCOVERED. This allows the exterior of the meat to dry out slightly, which is essential for developing that desirable, crispy “bark” during cooking. Rest assured, this process does not dry out the interior of the meat; instead, it contributes to an incredibly moist and flavorful brisket, especially if your cut has a good fat cap. Allow it to chill for at least 6 hours, but ideally overnight, or even up to 48 hours for maximum benefit.
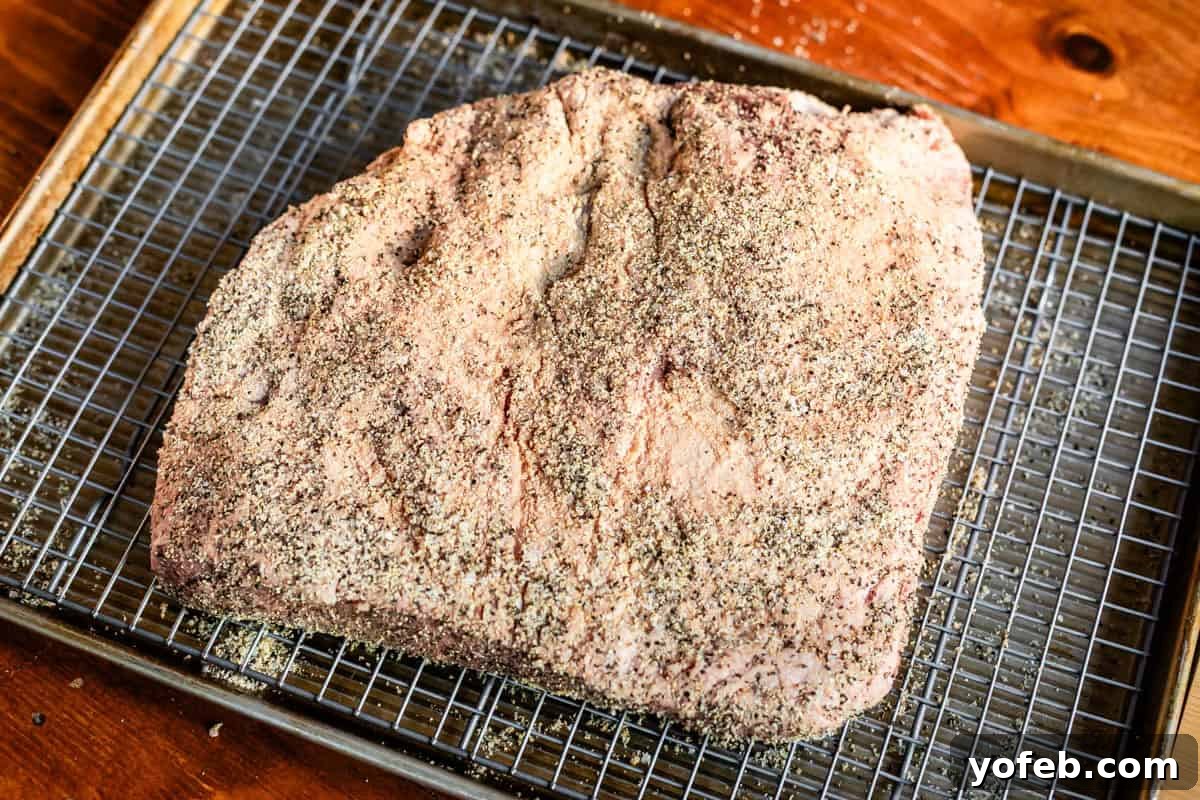
4. Prepare Your Wood Chip Packets for Smoking:
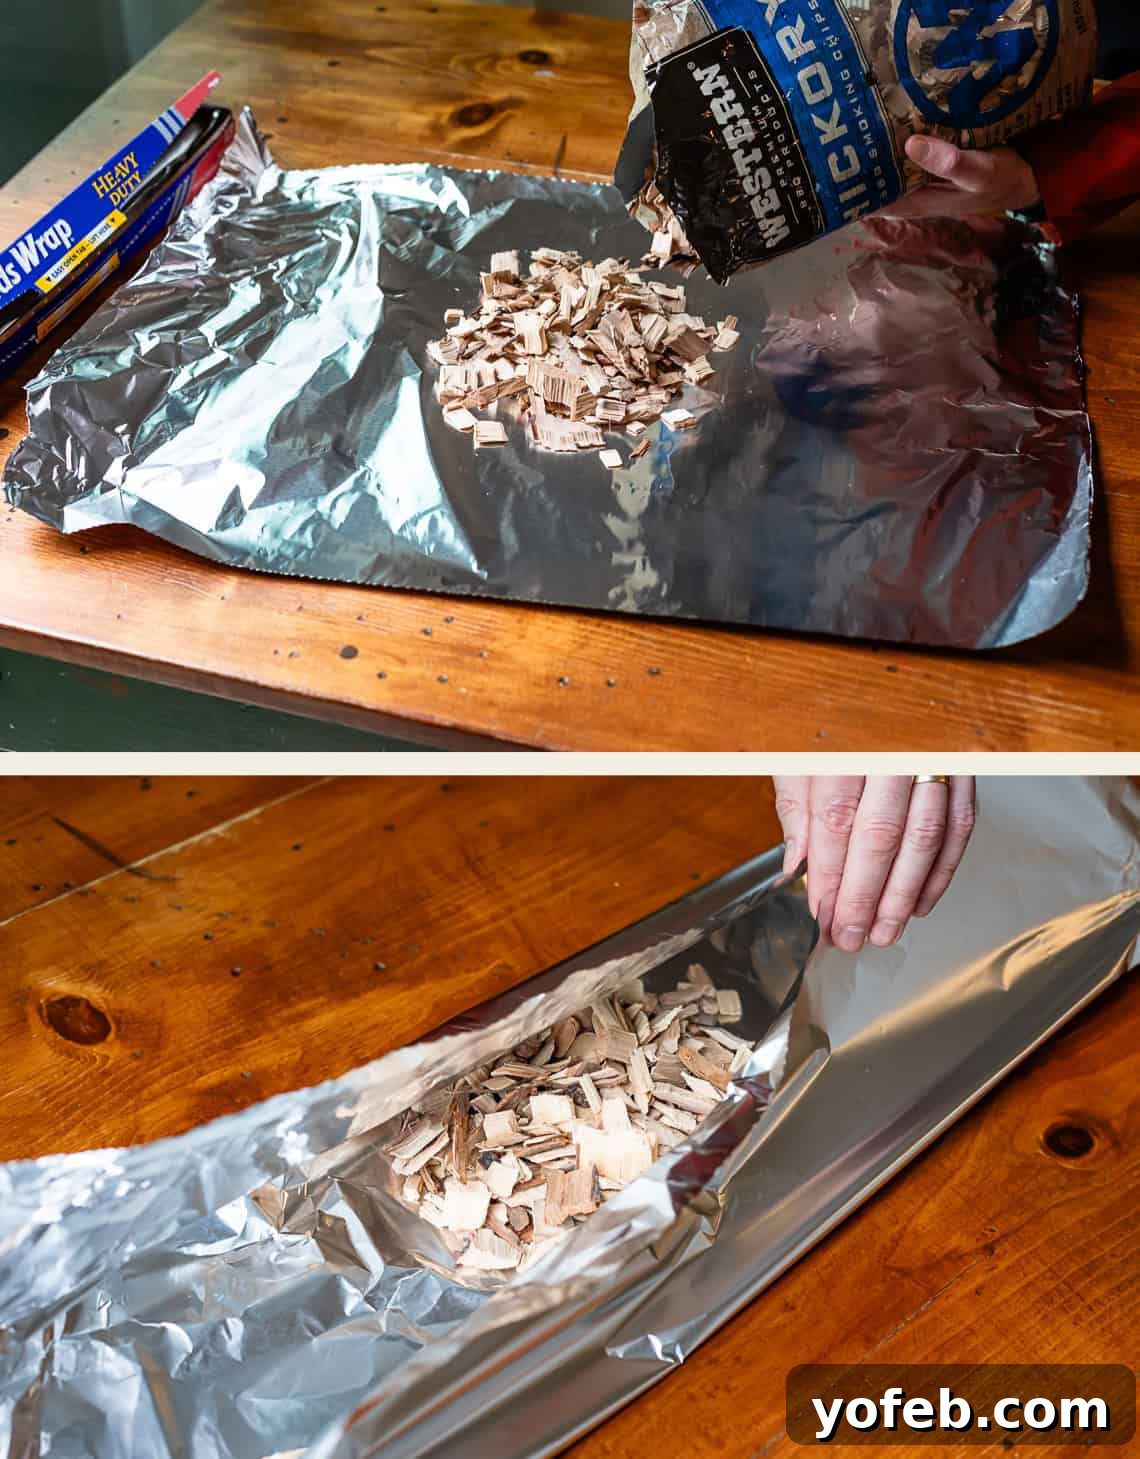
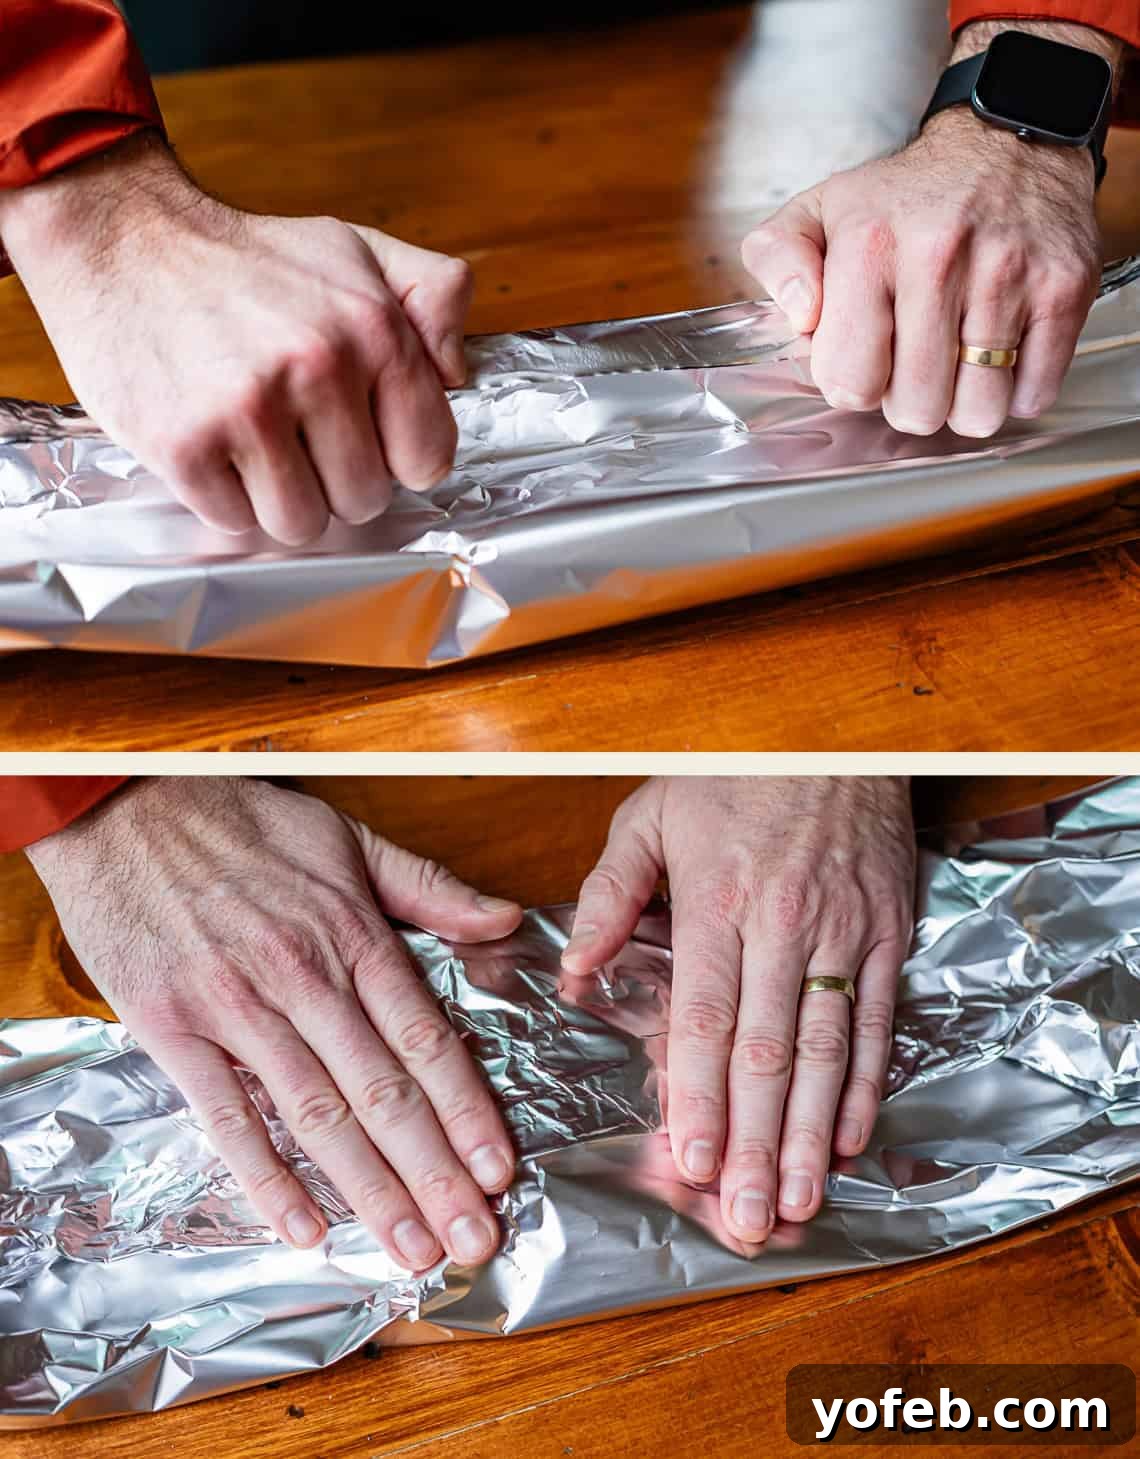
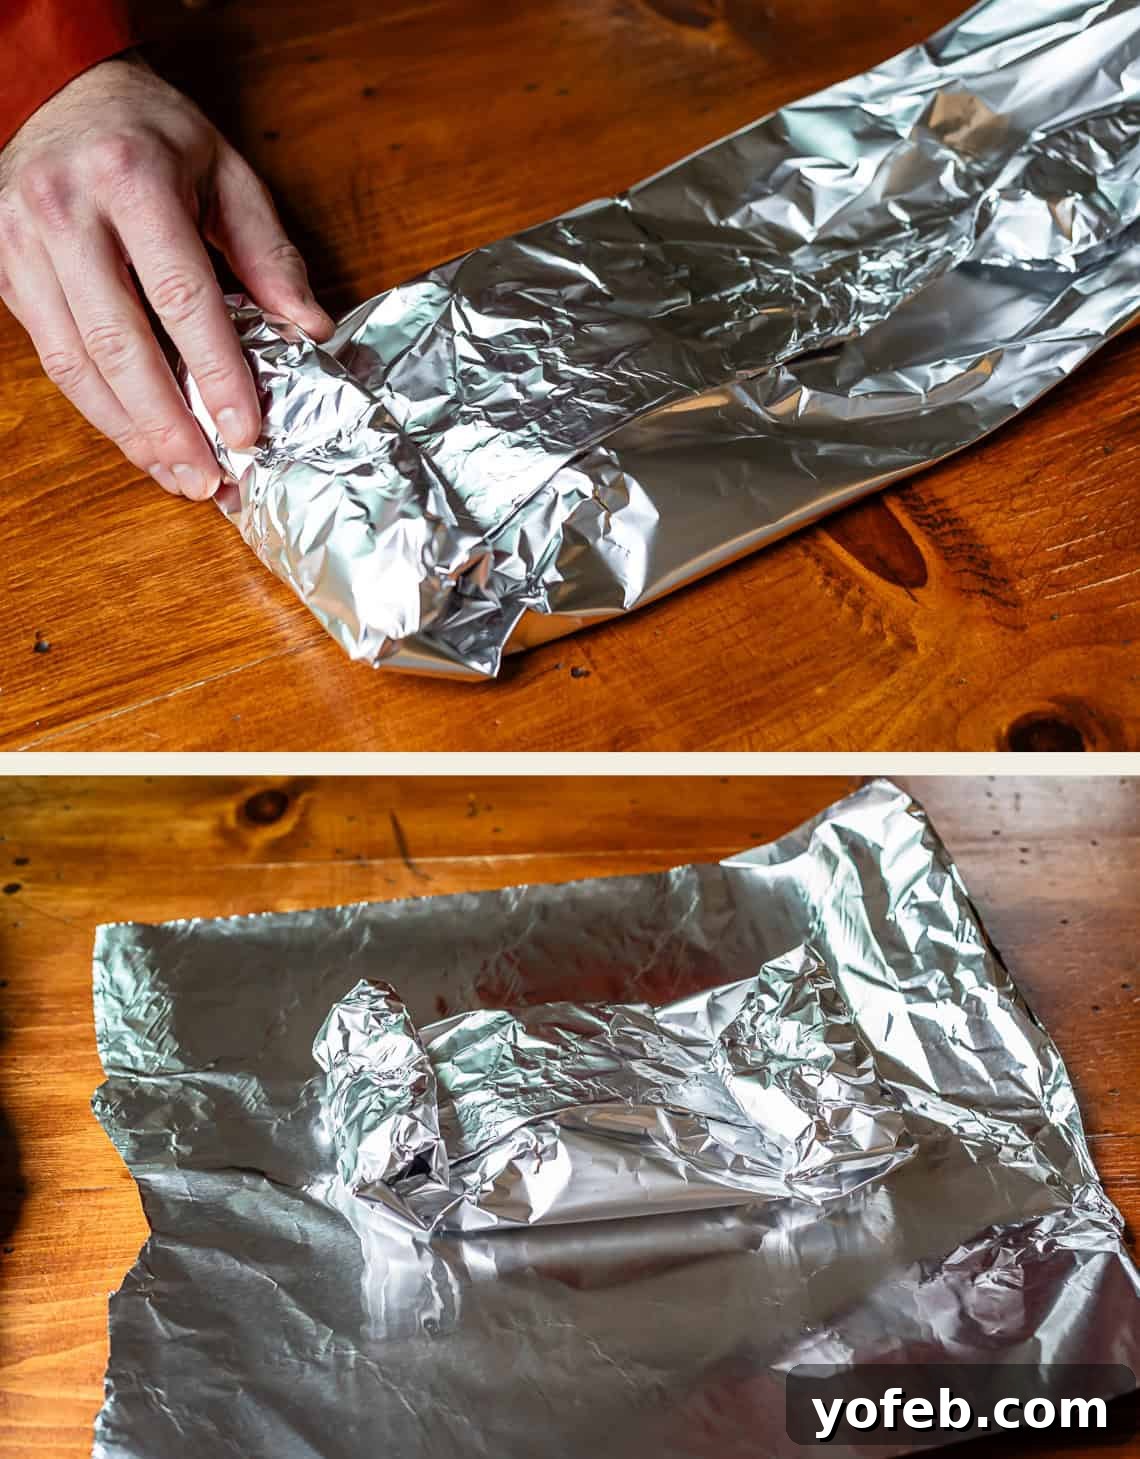
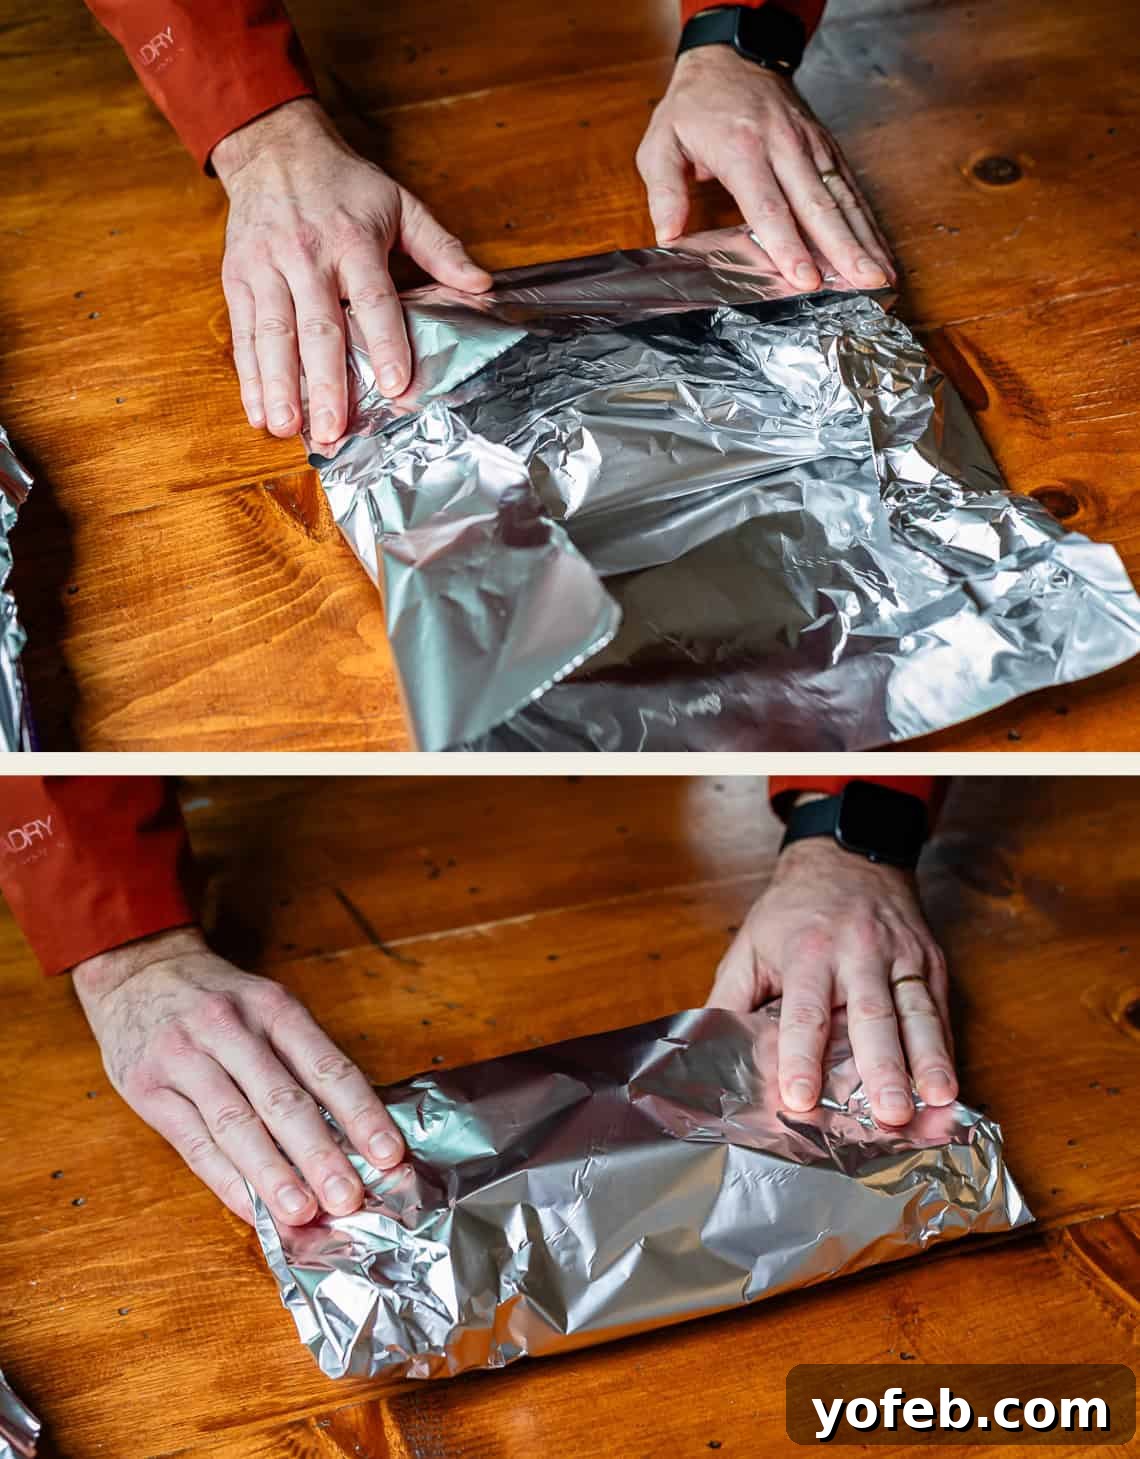
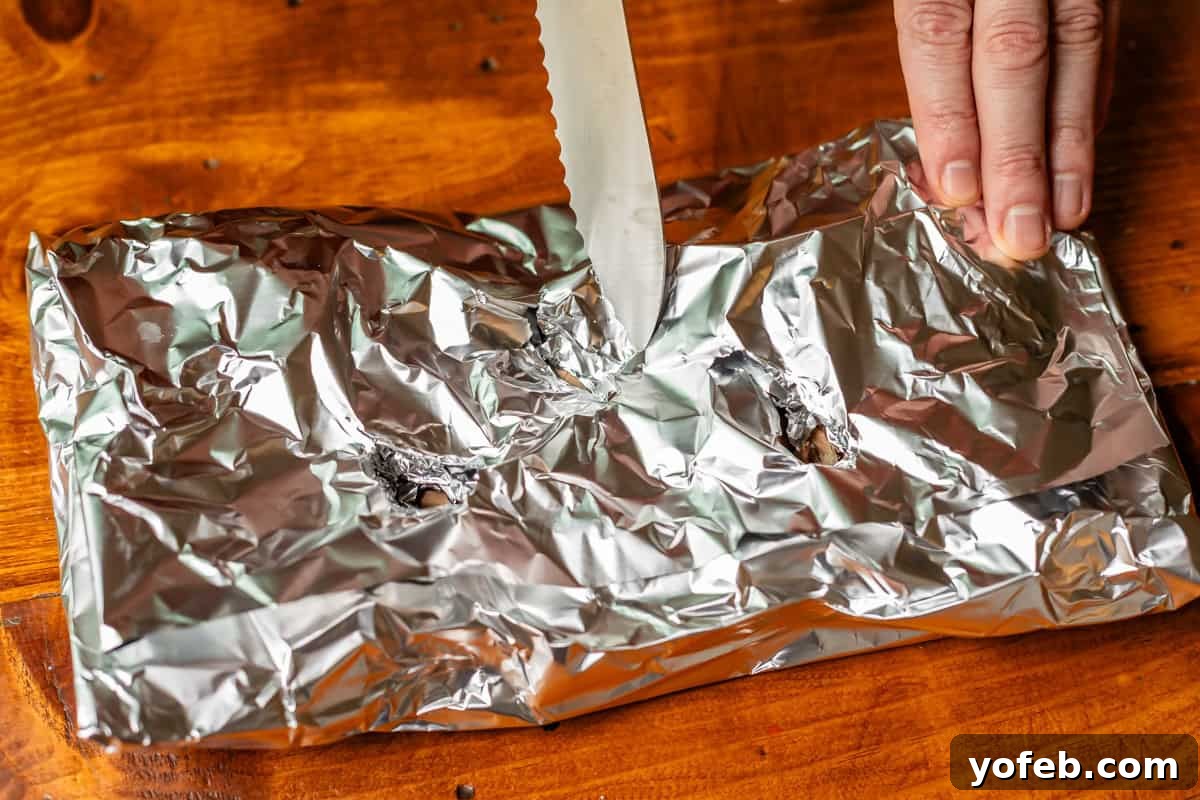
About 30 minutes before you plan to start smoking, take the brisket out of the fridge to allow it to come slightly closer to room temperature. This is also the time to prepare your smoke packets. Take large sheets of heavy-duty aluminum foil and place about 2 cups of Hickory wood chips on each. Fold the two long edges of the foil together multiple times to create a tight seal, then fold in the ends like wrapping a present. Ensure the packets are well-sealed to prevent the chips from escaping or puncturing the foil. Create 2-3 (1-inch) slits on the top of each packet with a sharp knife; these are your smoke vents. You will need a total of four such packets, as we’ll use two at a time.
5. Gas Grill Setup for Smoking:
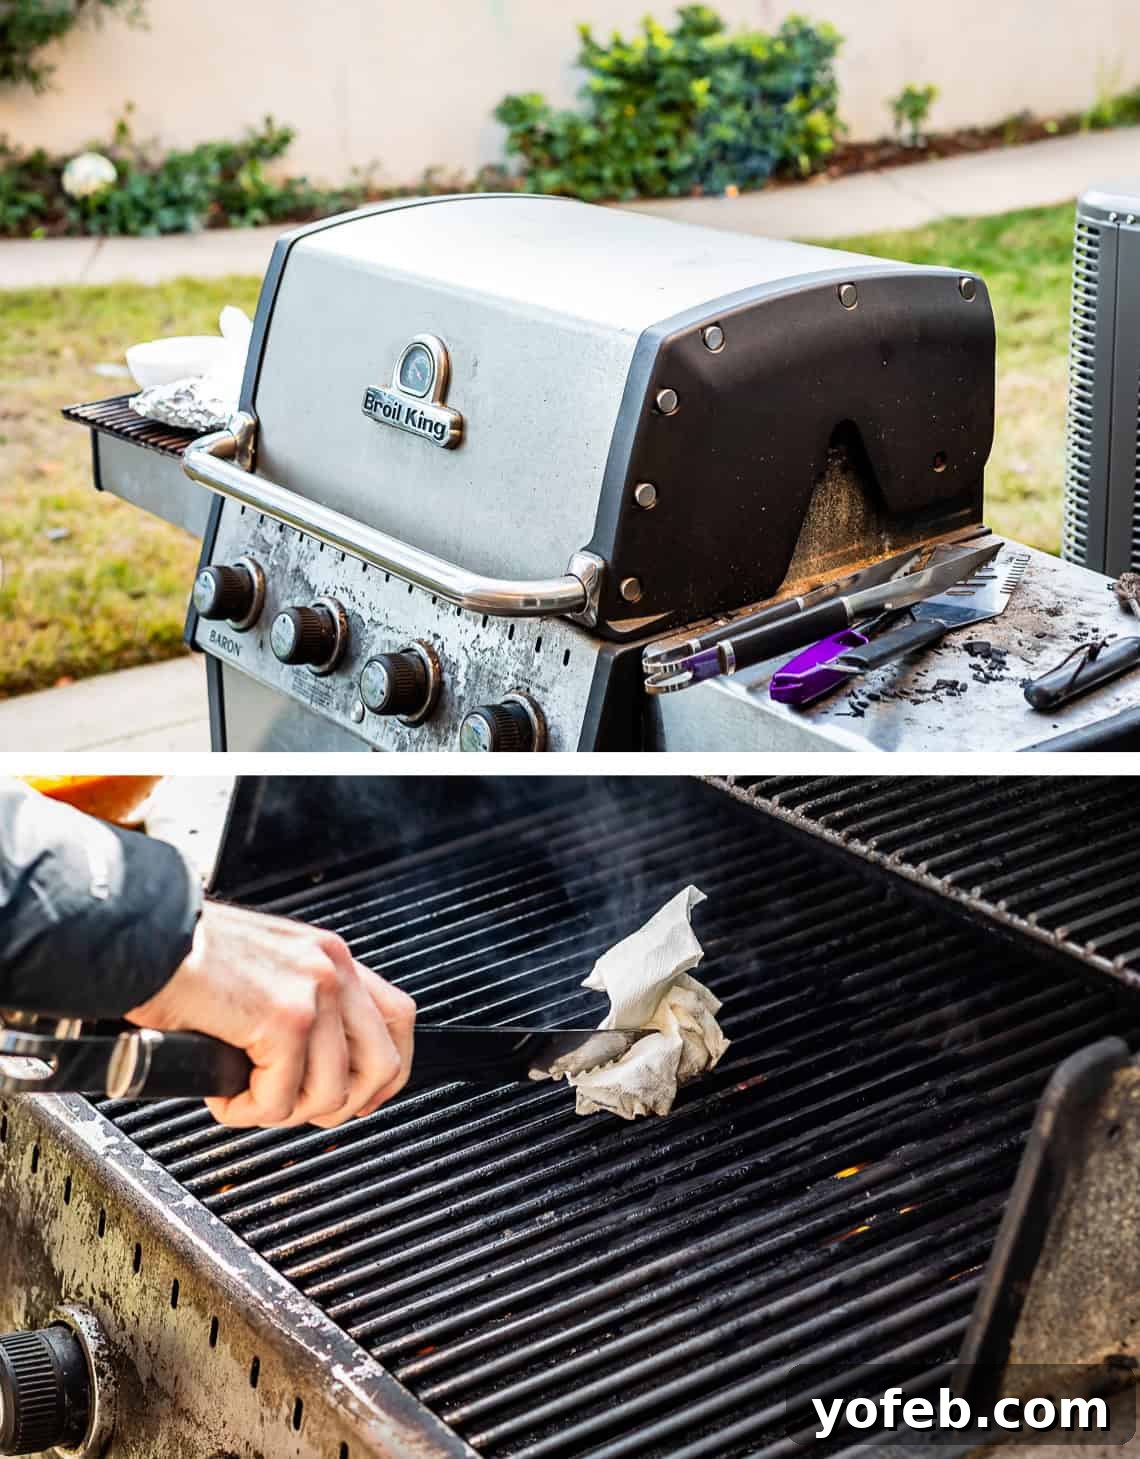
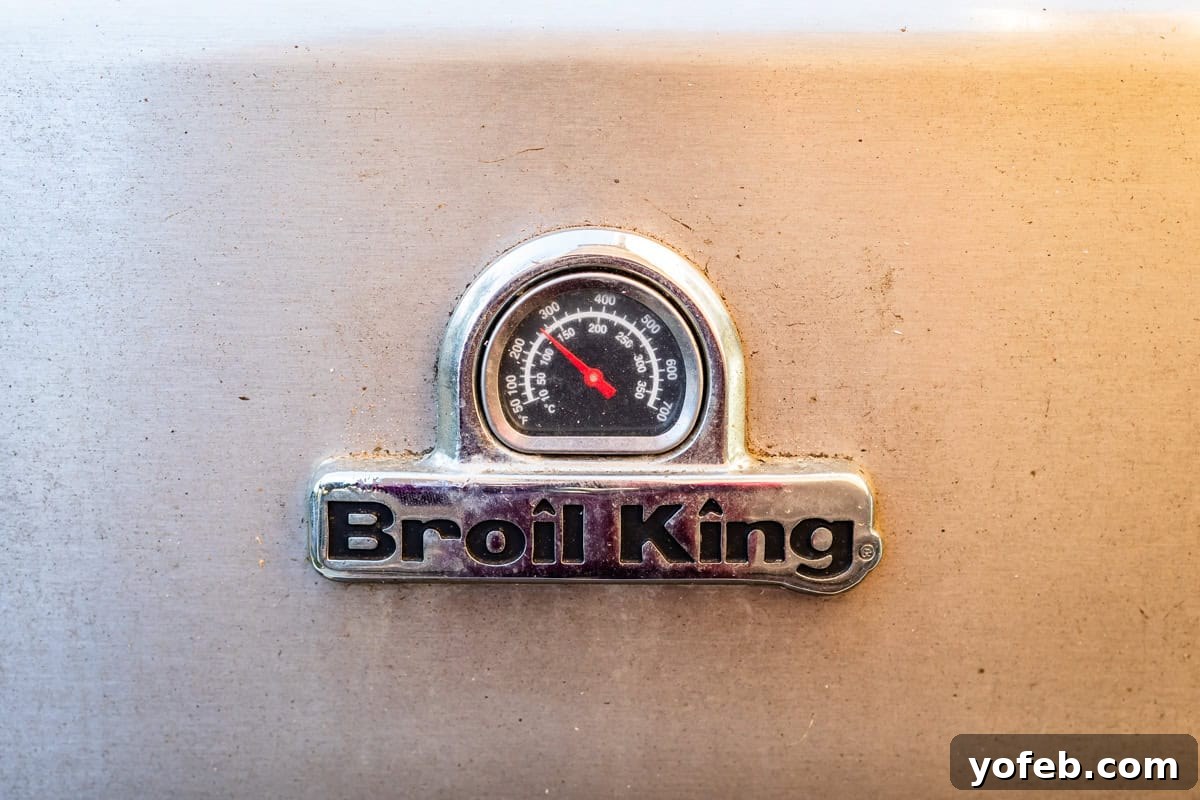
Preheat your gas grill to a steady 250°F. Clean your grill grates thoroughly. On one side of your grill, remove the grill grates and heat plates directly above the primary burner. Place two of your prepared wood chip packets directly on the heat source. On the opposite side of the grill, where your brisket will sit, ensure the burners are turned OFF. If your grill has a top rack, you can place the wood chip packets there once they start smoking to prevent them from igniting. It’s crucial to maintain a consistent temperature of 250°F. Use an oven thermometer if your grill doesn’t have an accurate built-in gauge. Once the grill is at temperature, lightly oil the clean grates on the “off” side with a paper towel dipped in vegetable oil to prevent sticking.
6. The Smoking Phase:
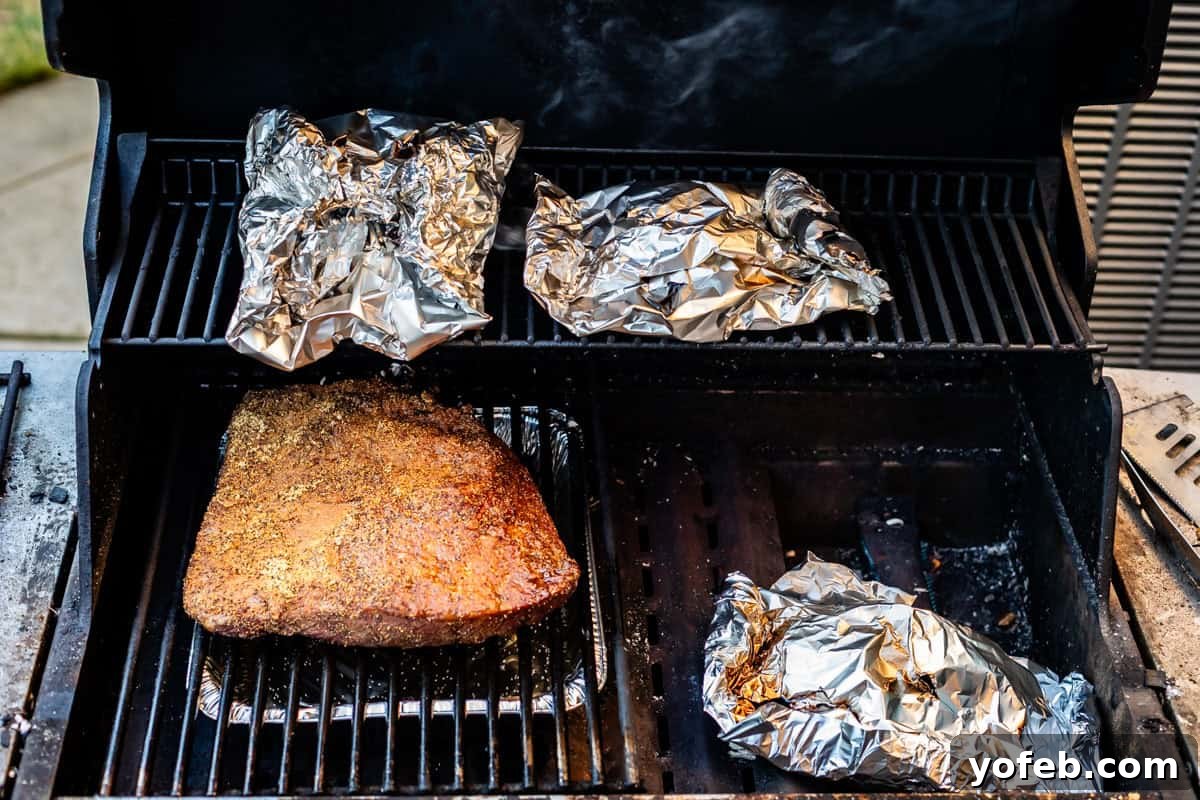
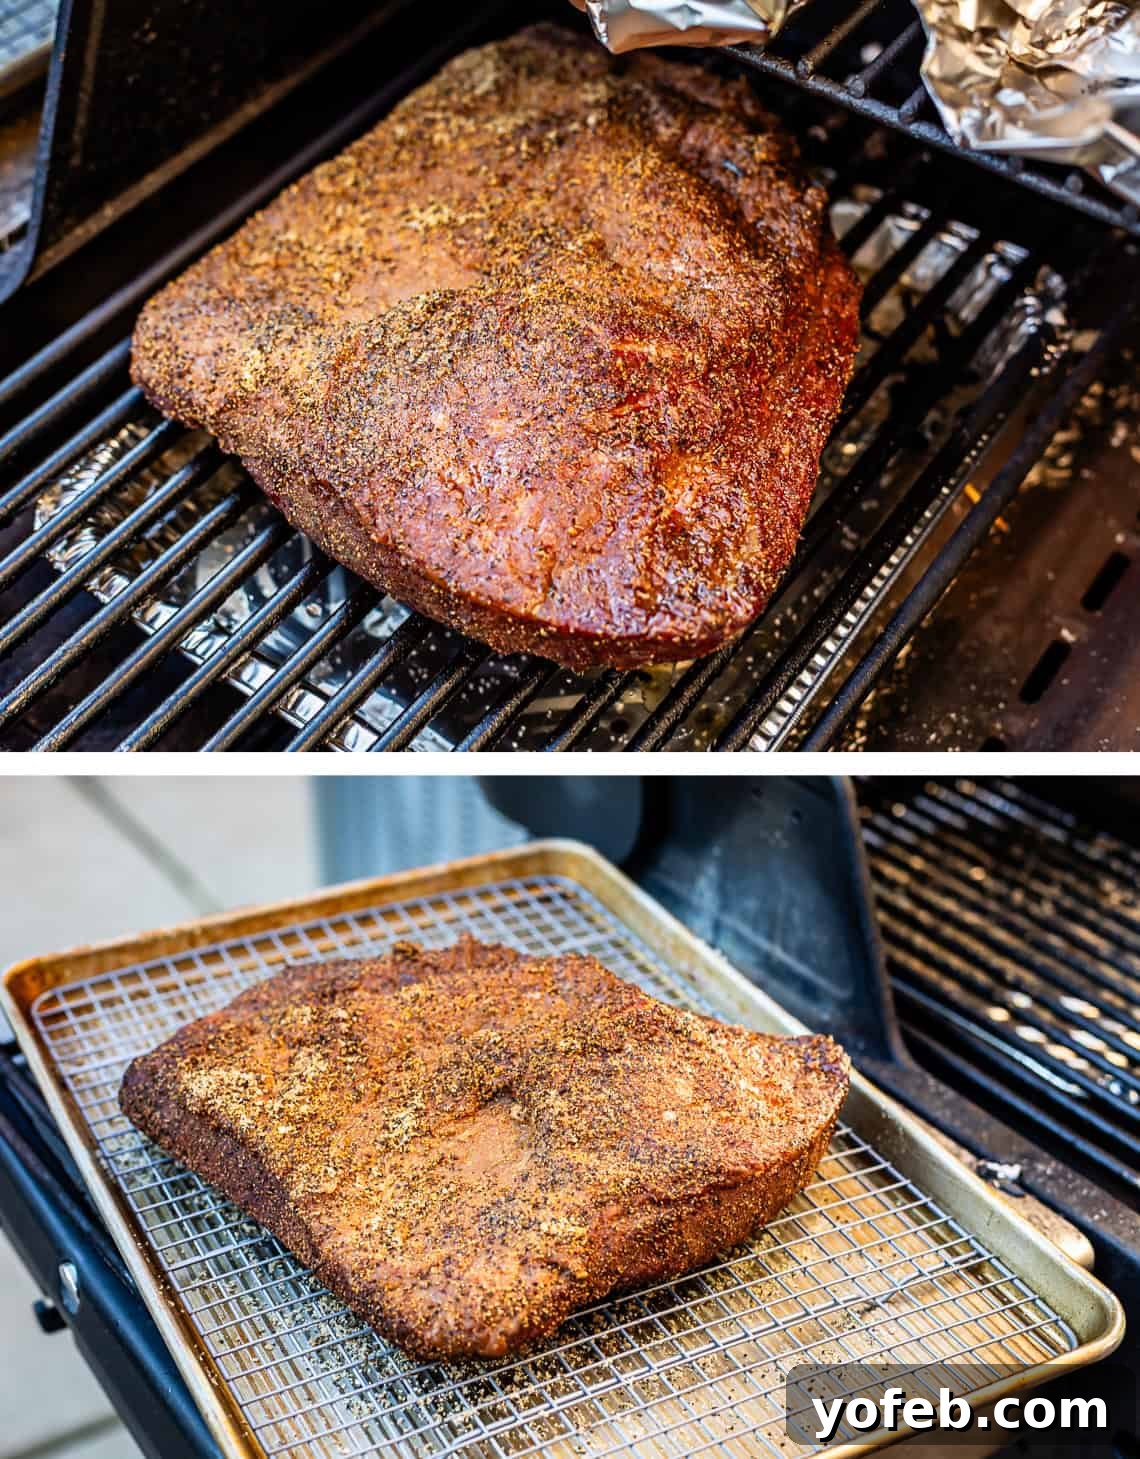
Place your brisket, fat-side up, directly onto the oiled grates on the side of the grill with the burners turned OFF. Close the lid immediately. This initial phase is the most hands-on. Keep a watchful eye on your grill’s temperature, aiming to maintain it as close to 250°F as possible. Avoid opening the lid unnecessarily, as this causes heat and smoke to escape. You may need to subtly adjust the active burners to keep the temperature steady. Each set of two smoke packets typically burns out in 45-60 minutes. Once the first set stops smoking, carefully replace them with the remaining two fresh packets. Continue smoking for a total of approximately 2 hours, using both sets of smoke packets. This will infuse your brisket with that glorious smoky flavor.
7. Transition to the Oven and Wrap:
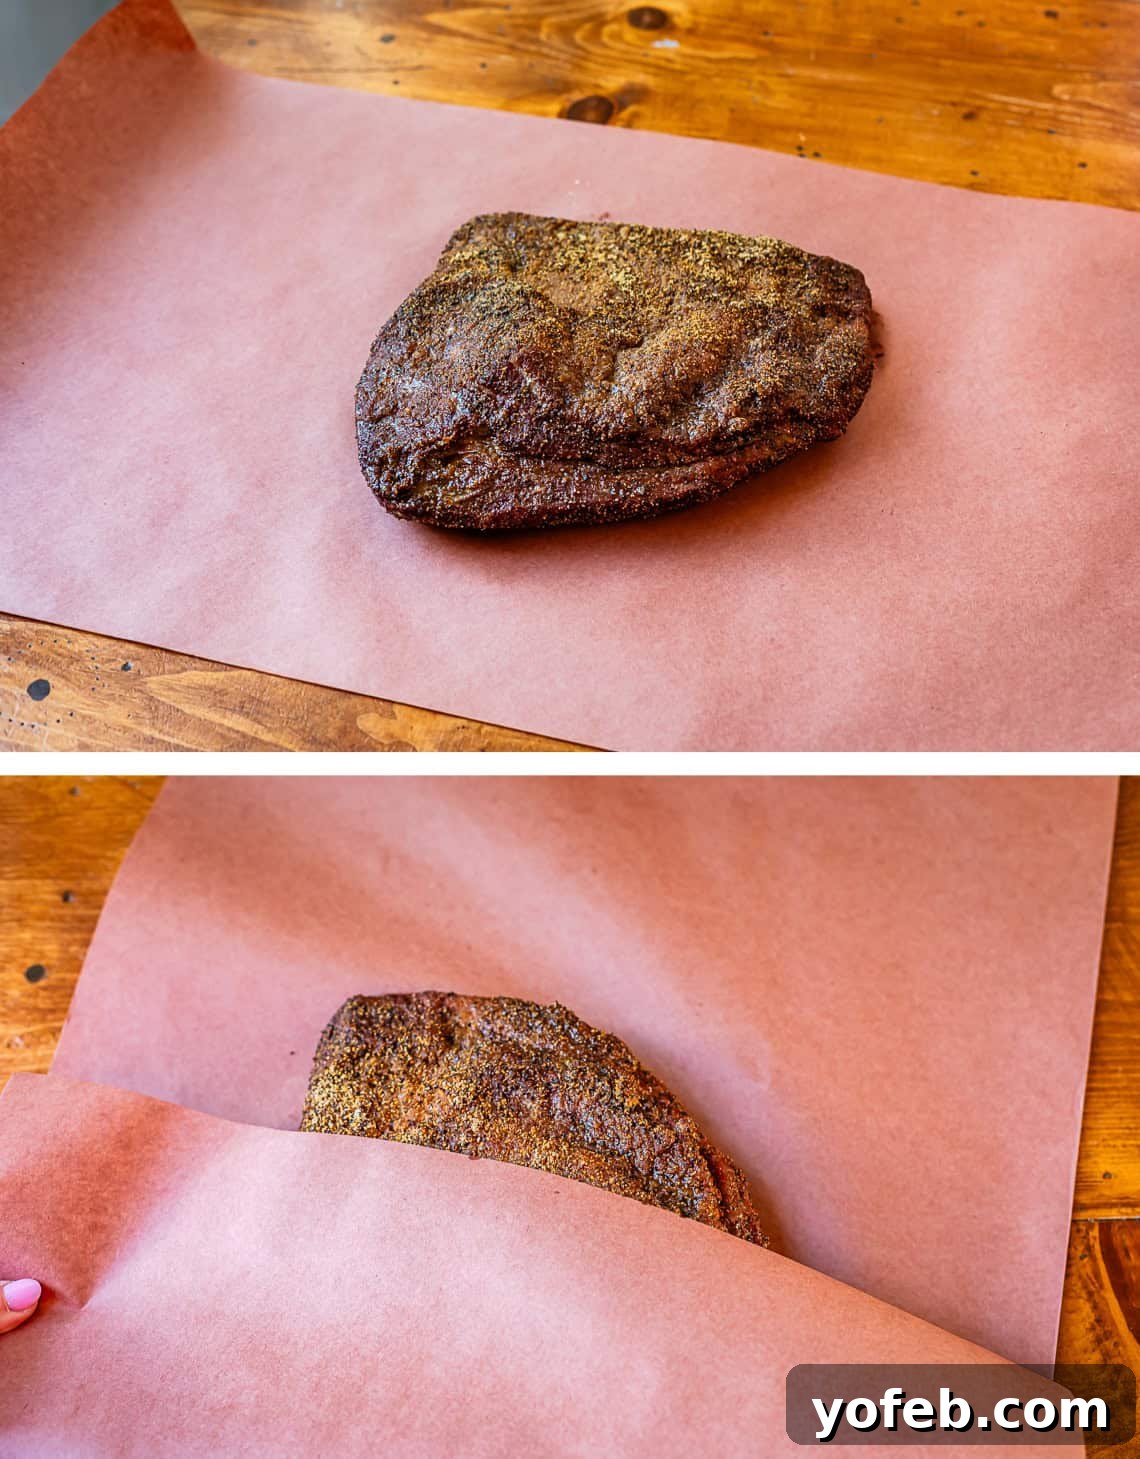
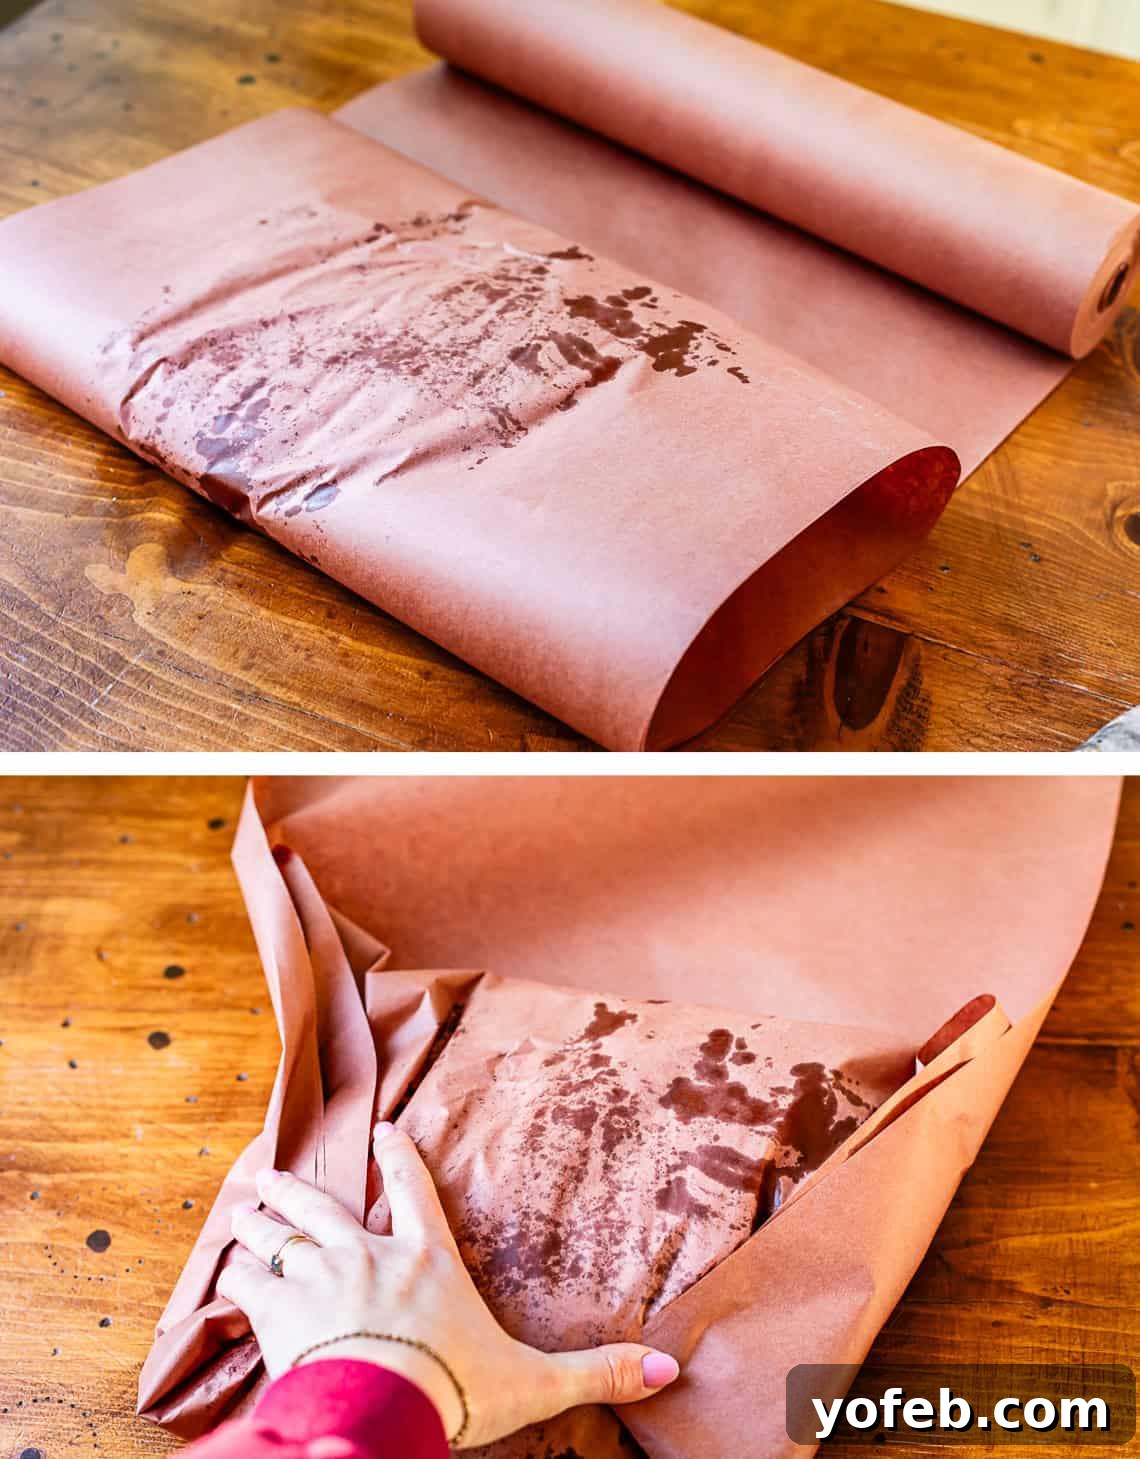
Once the smoking phase is complete and the last set of wood chips has burned out, turn off your grill. Carefully transfer the smoked brisket, fat-side up, back onto the cooling rack set on a rimmed baking sheet. Now, prepare a large sheet of pink butcher paper (or heavy-duty foil). Place the brisket fat-side up onto the paper. Begin wrapping by folding one side of the paper over the brisket, then tucking and folding the ends inwards, much like wrapping a present. Continue rolling or folding until the brisket is fully encased. It’s crucial that the brisket goes into the oven fat-side up, so ensure this orientation as you wrap.
8. The Long, Slow Oven Cook:
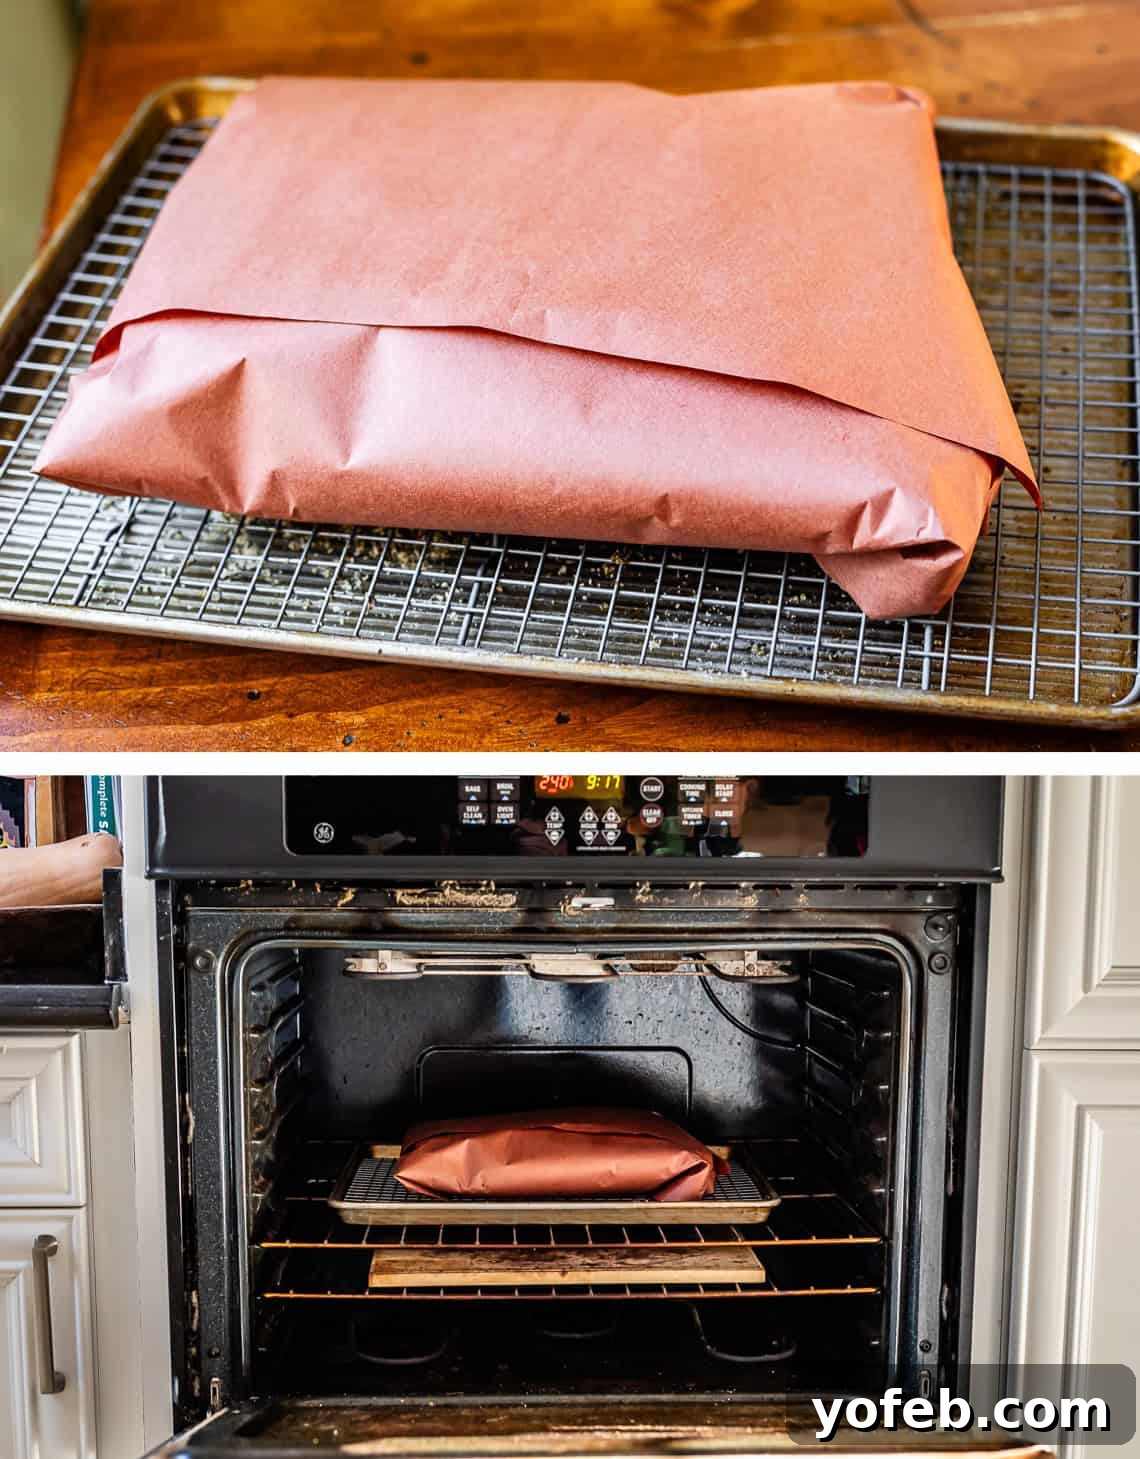
Preheat your oven to 250°F. Place the wrapped brisket (fat-side up) back onto the cooling rack and baking sheet. Insert the probe of a leave-in meat thermometer into the thickest part of the brisket, ensuring it doesn’t touch the fat cap or bone. Set the alarm for 203°F. Place the entire setup into the preheated oven. Now, settle in for the true “low and slow” cooking phase. This could take anywhere from 4 to 10 hours, depending on the size and characteristics of your brisket. Resist the urge to open the oven door; trust your thermometer. This long, gentle cook breaks down the tough connective tissues, yielding that incredibly tender brisket.
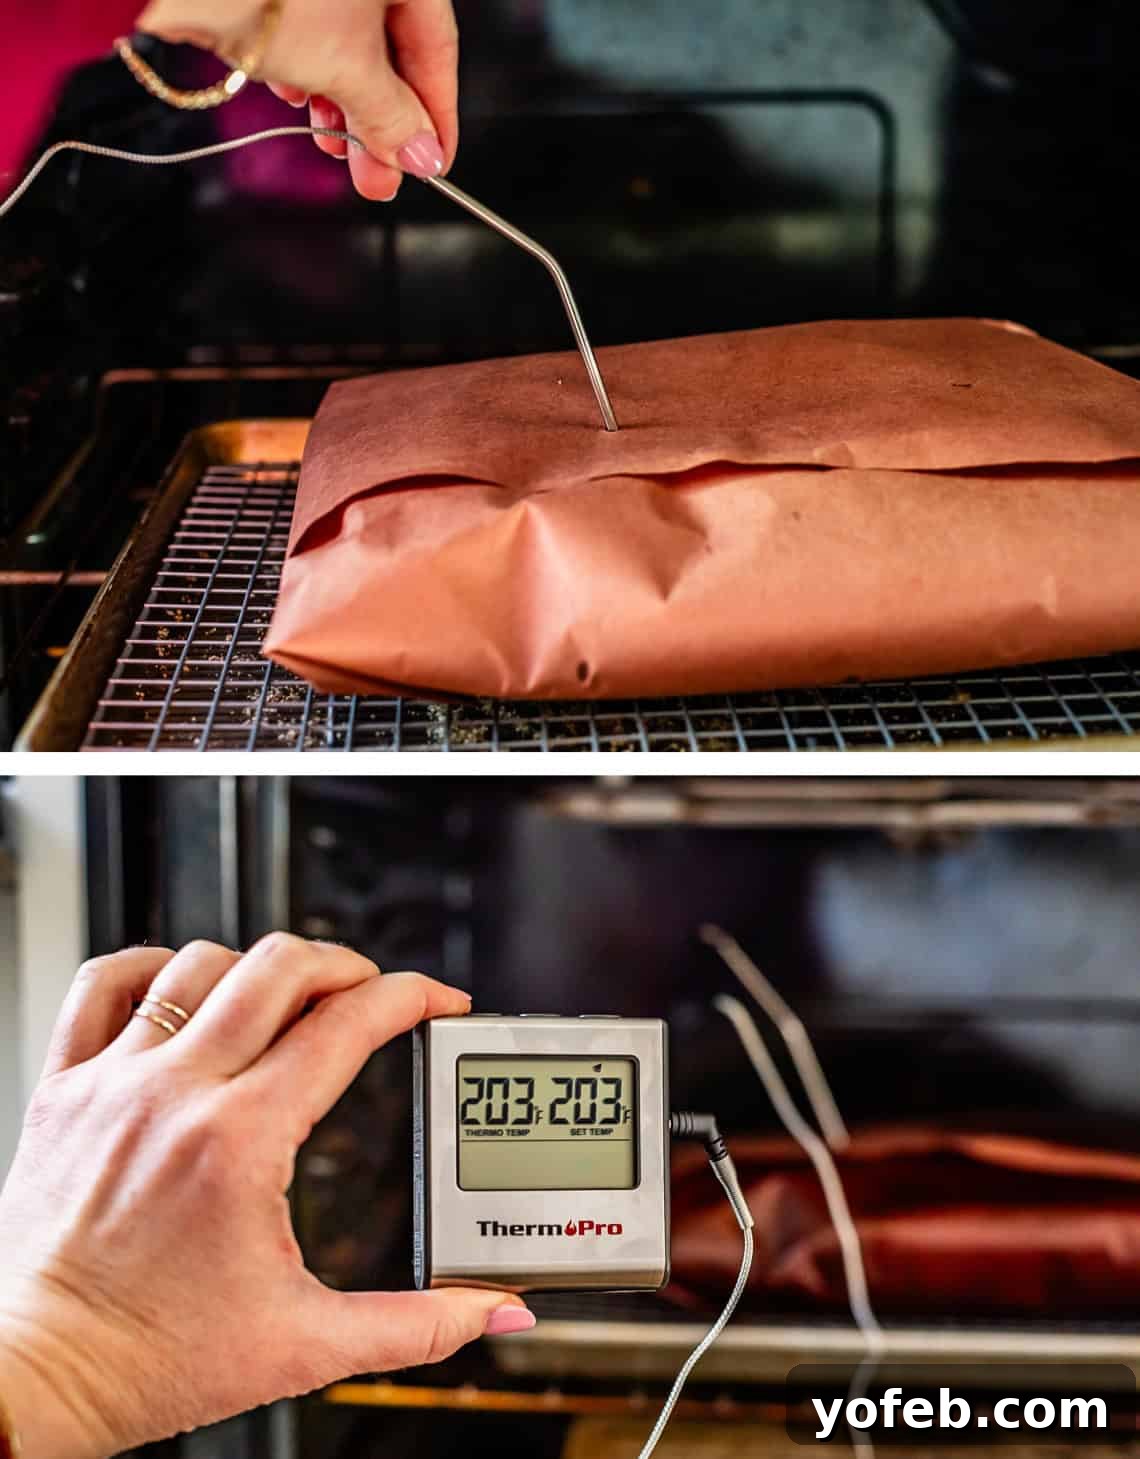
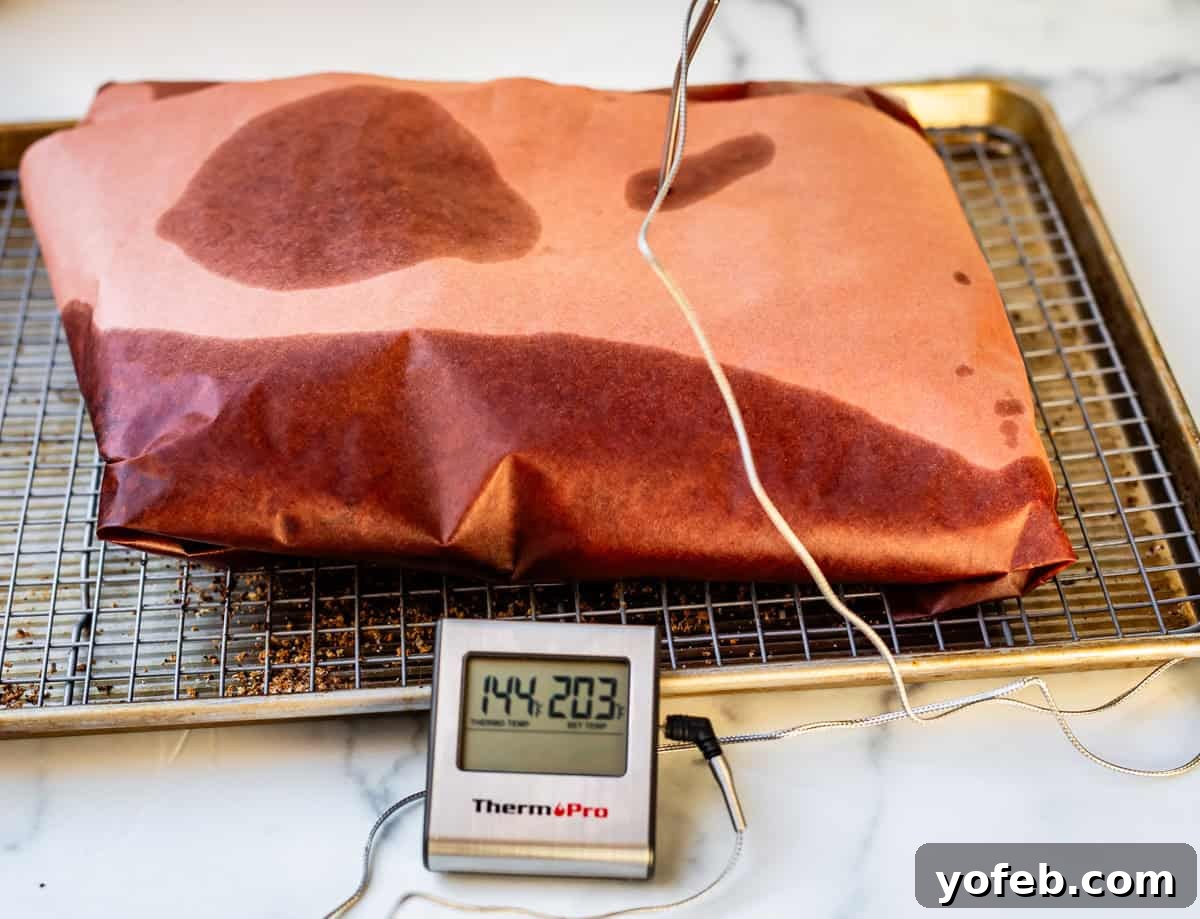
9. The Essential Resting Period:
Once your thermometer signals 203°F, carefully remove the brisket from the oven (beware of hot juices and melted fat). This next step is as vital as the cooking itself: the resting period. DO NOT unwrap your brisket immediately. Let it rest, still wrapped, at room temperature for a minimum of 30-60 minutes. This allows the internal juices to redistribute evenly throughout the meat, preventing them from gushing out when sliced and ensuring every bite is incredibly moist. The internal temperature will drop to around 140-150°F during this time.
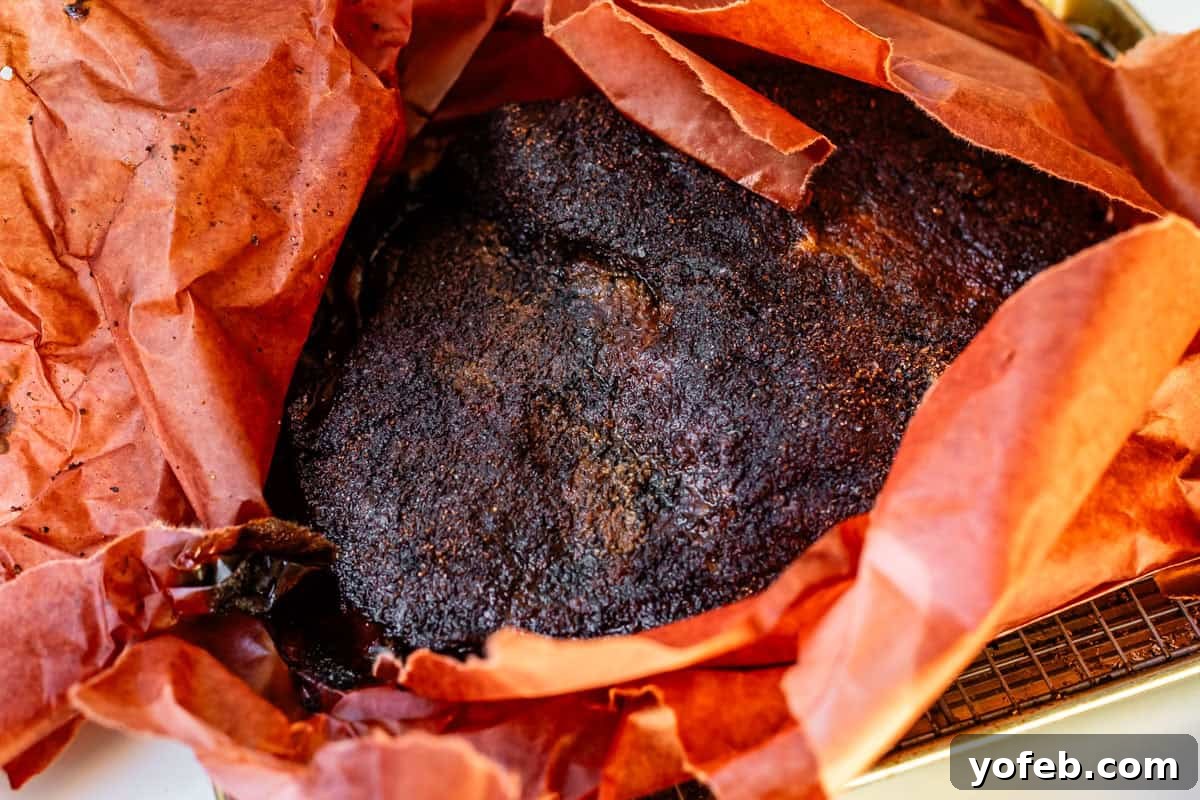
Mastering the Slice: How to Carve Your Brisket
After the patient wait, it’s finally time to unleash your masterpiece. Unwrapping your smoked beef brisket is a moment of pure anticipation. Carefully catch all the savory juices in the rimmed baking sheet; these are liquid gold for reheating or adding to sauce. Transfer the brisket to a large cutting board with a juice groove.
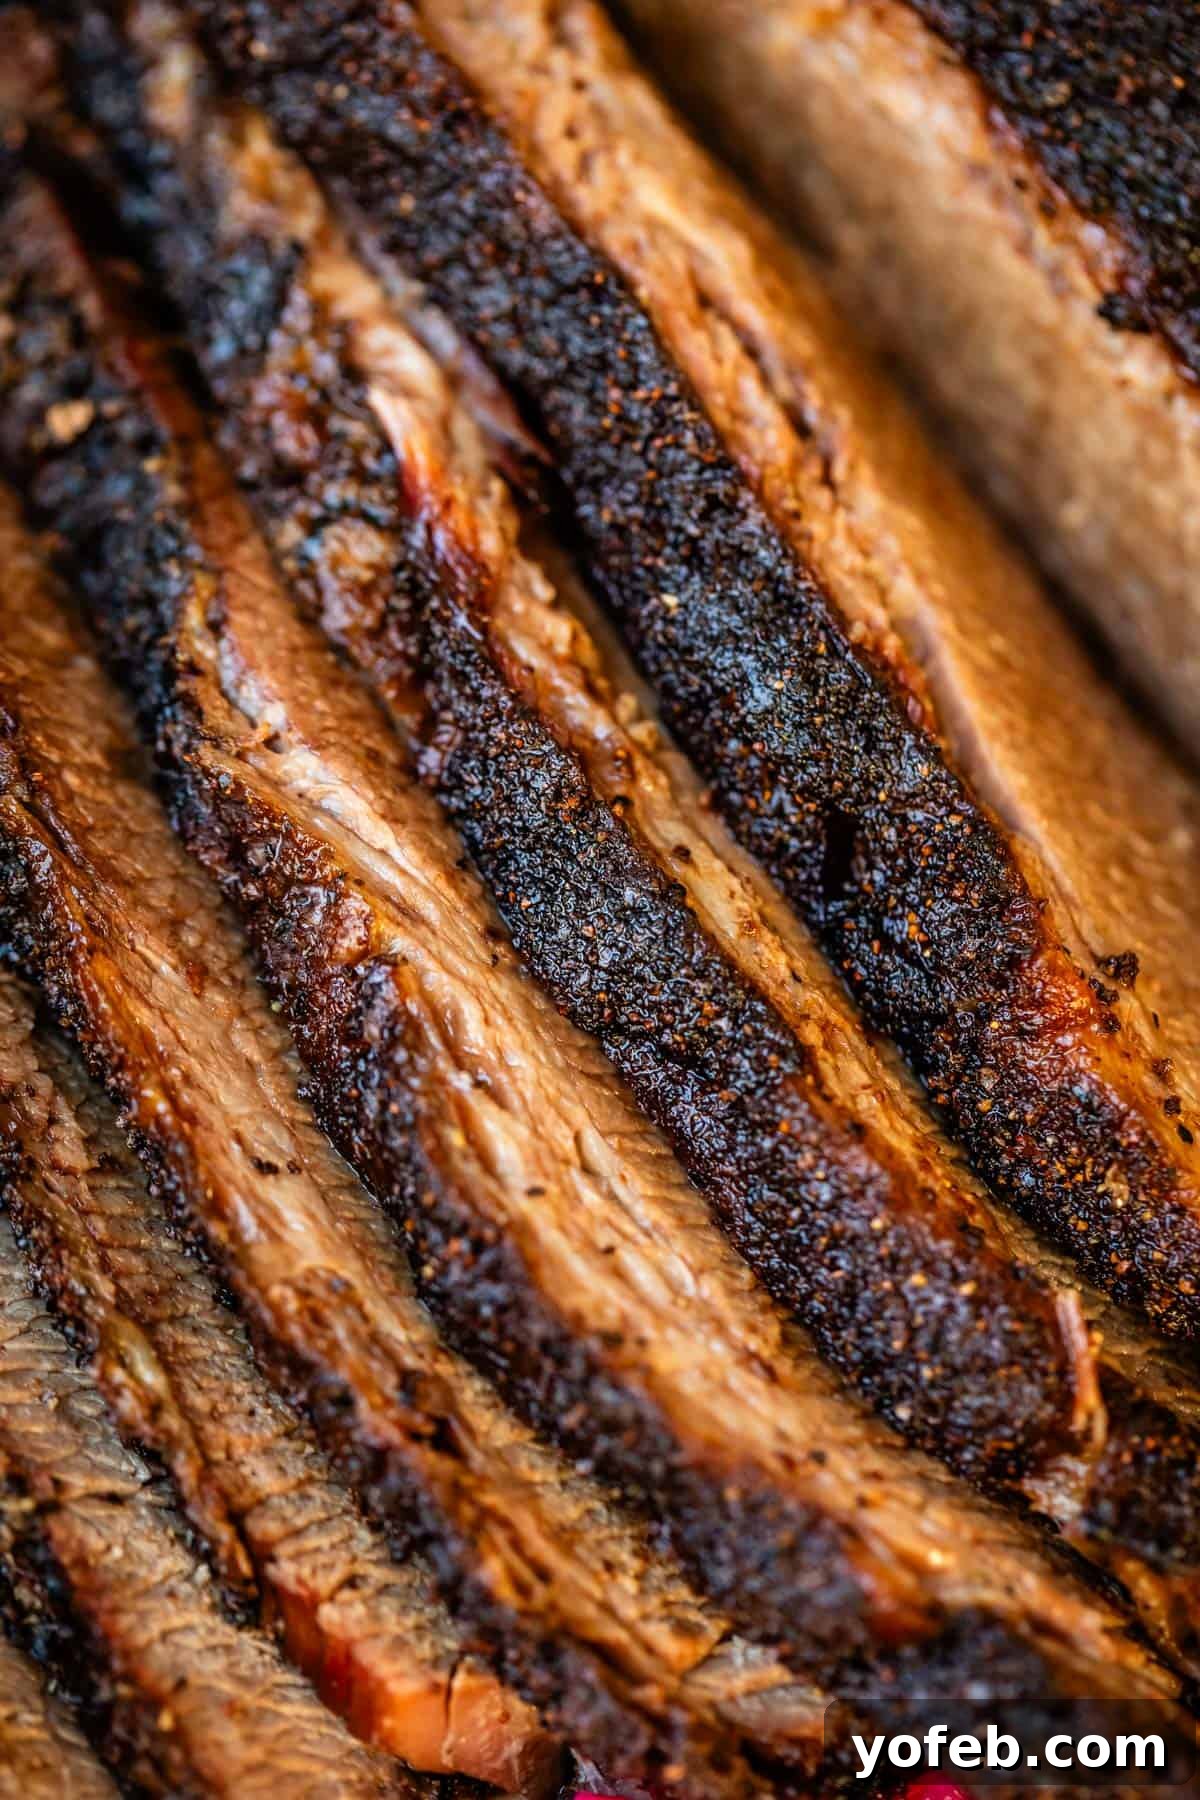
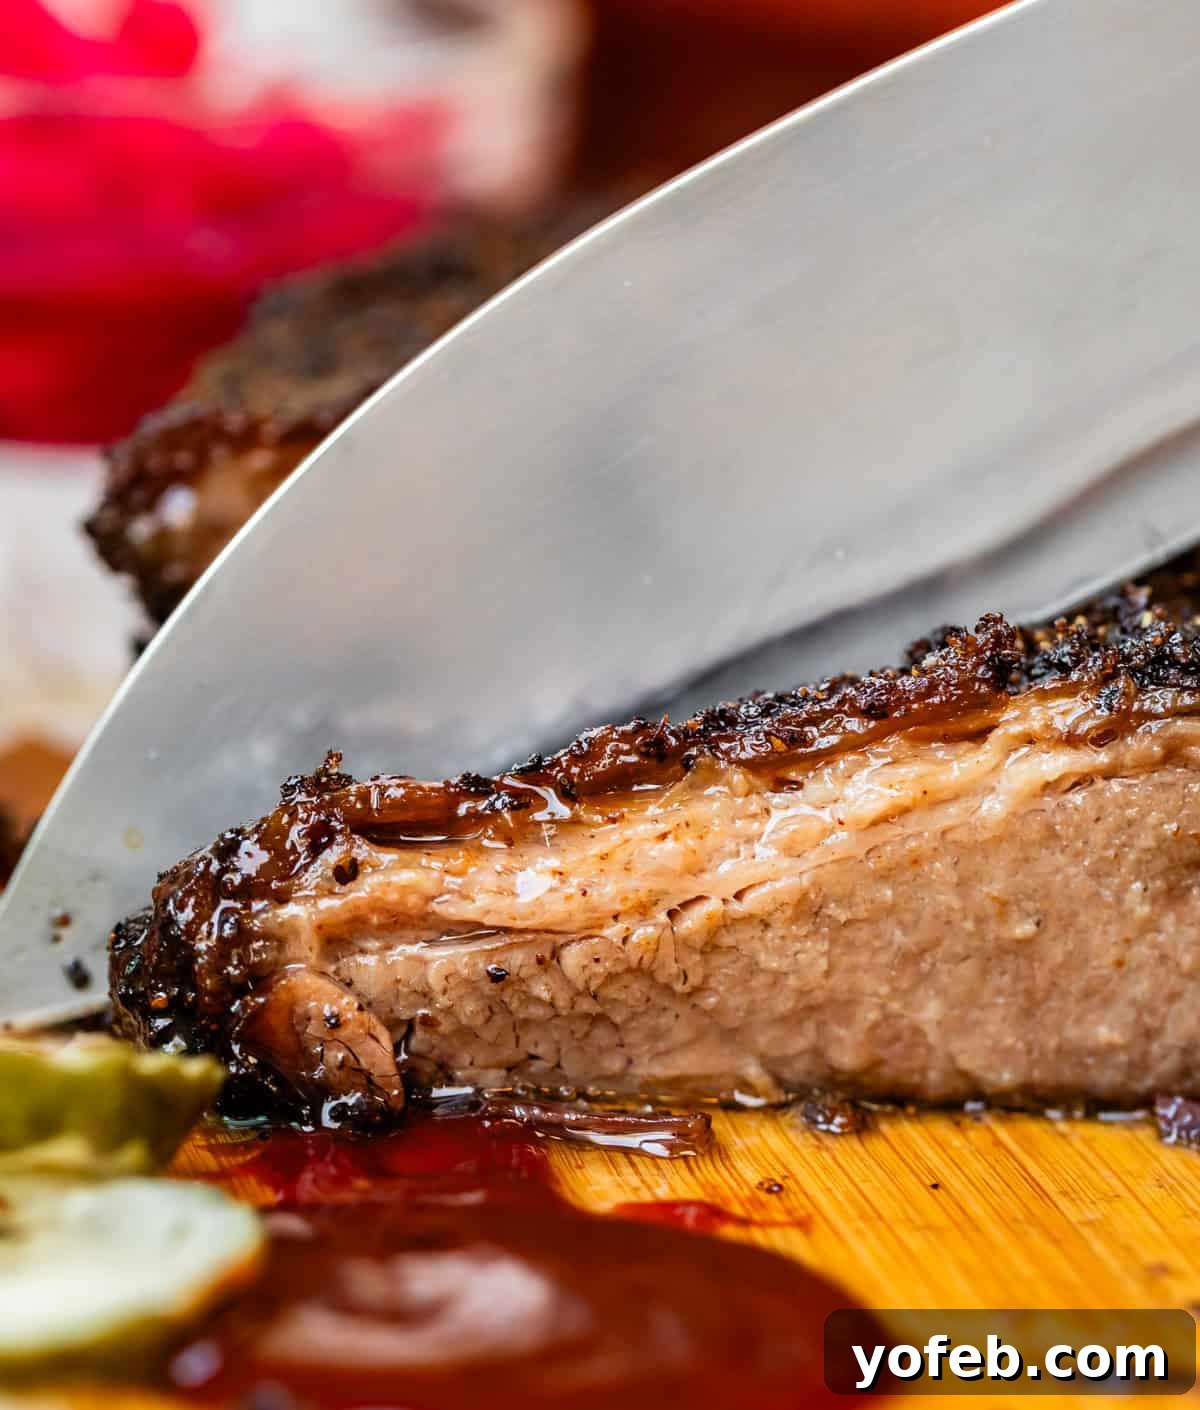
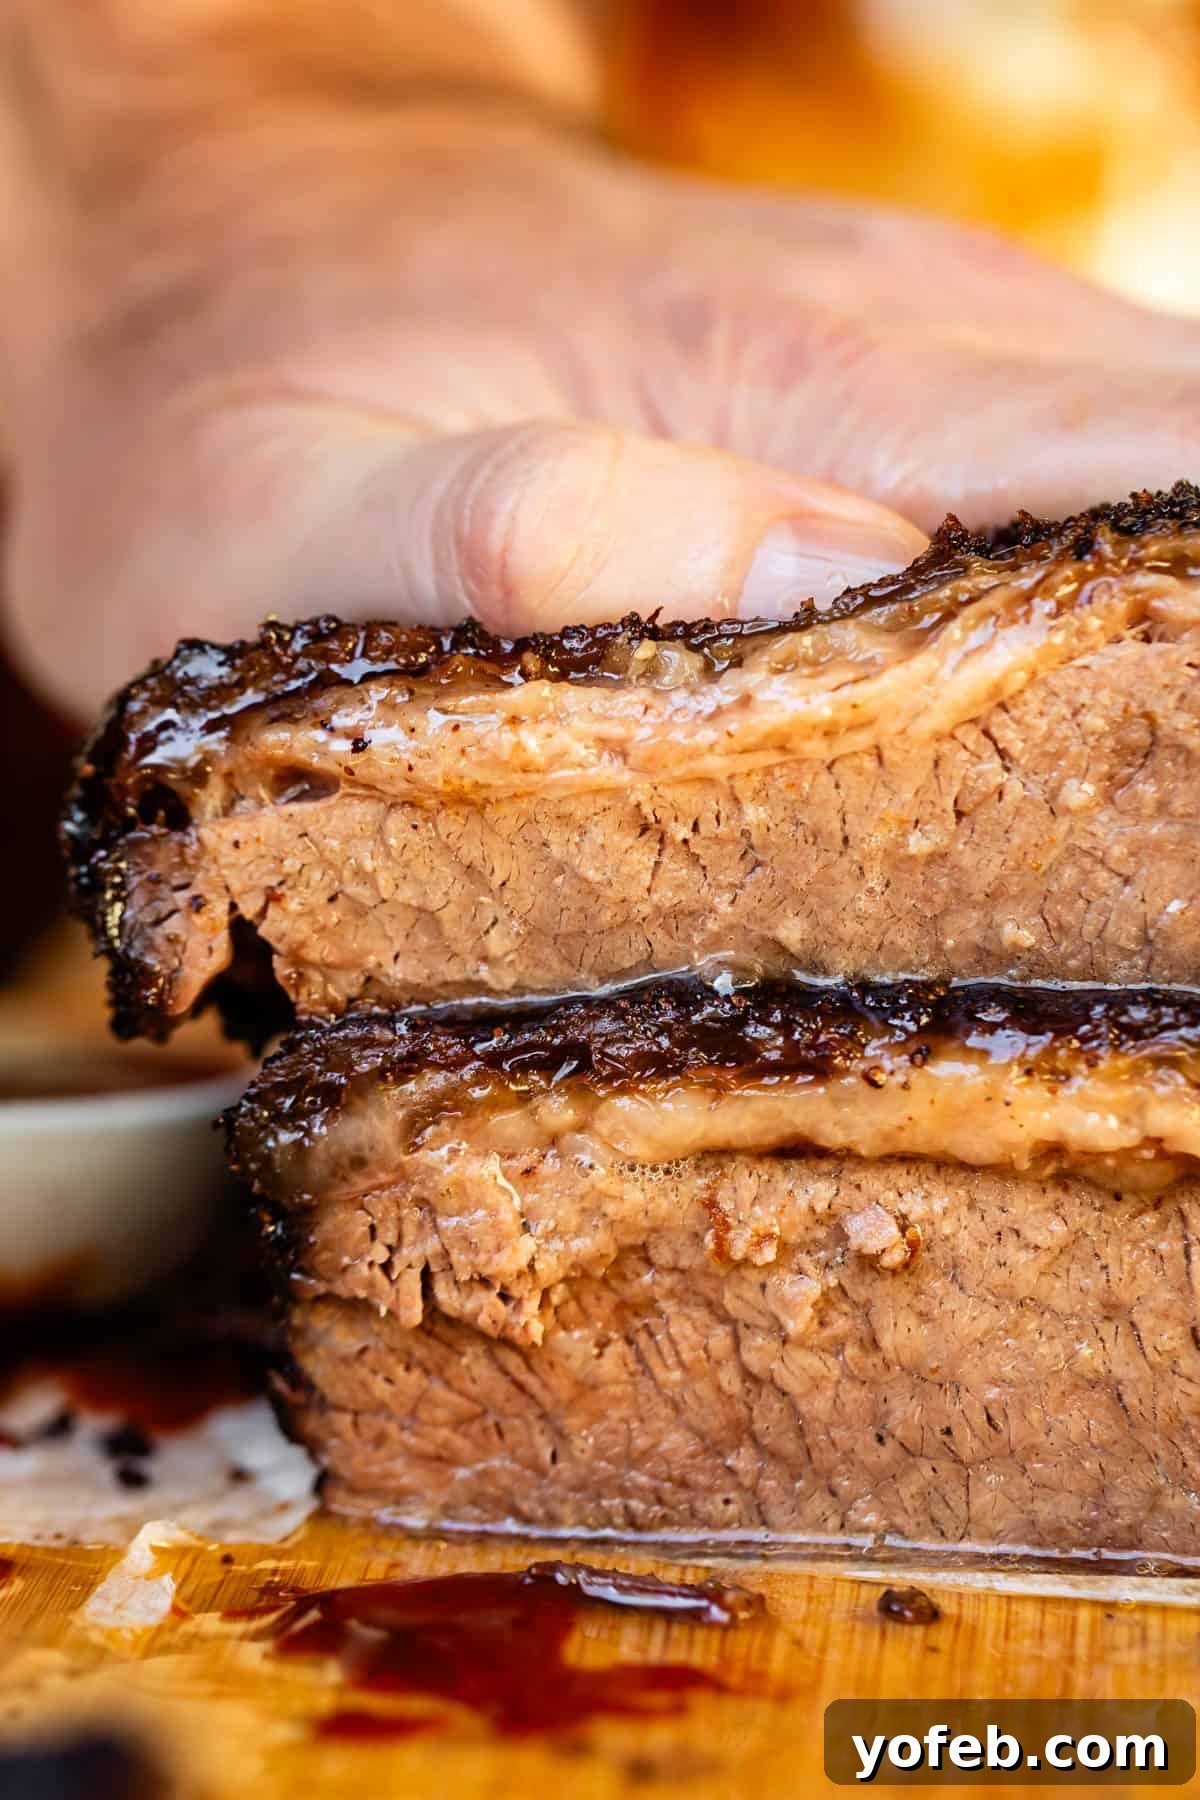
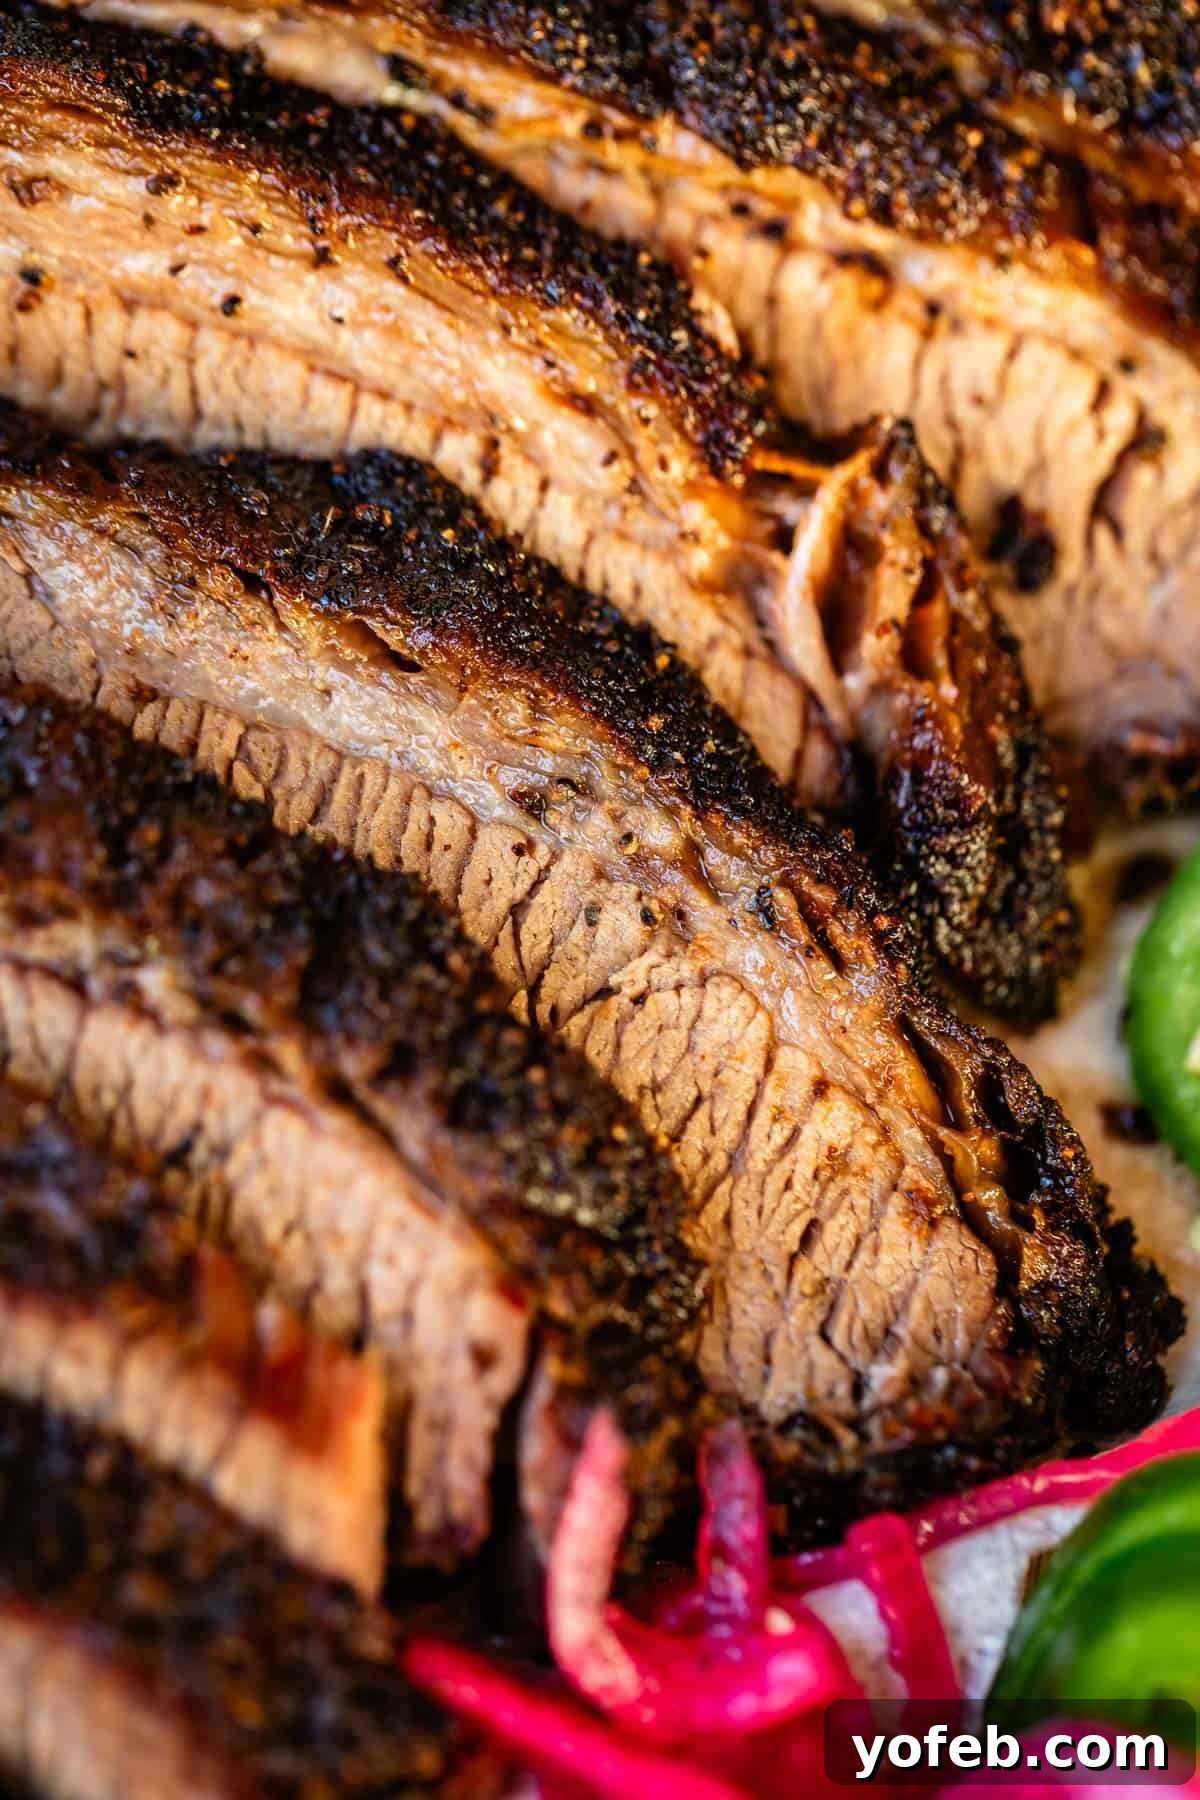
The key to serving tender brisket is to slice it correctly: against the grain. On a flat cut brisket, the grain (the direction of the muscle fibers) is usually quite visible and runs in a consistent direction. Using a sharp chef’s knife, make slices perpendicular to these lines. Each slice should reveal small, distinct squares or rectangles of meat, rather than long, stringy fibers that would be tough to chew. If you were carving a full packer brisket, the grain would change direction between the flat and point, requiring an adjustment in your slicing angle. Always ensure your knife is cutting across the fibers for optimal tenderness.
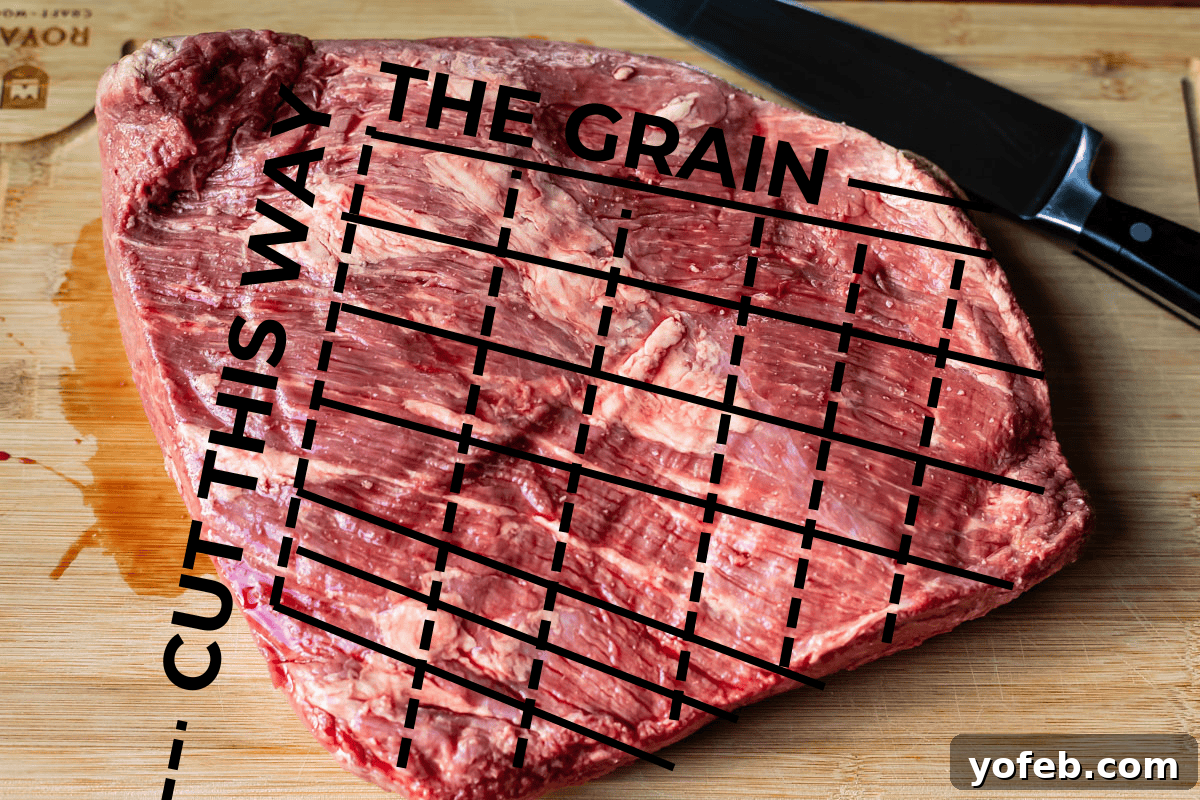
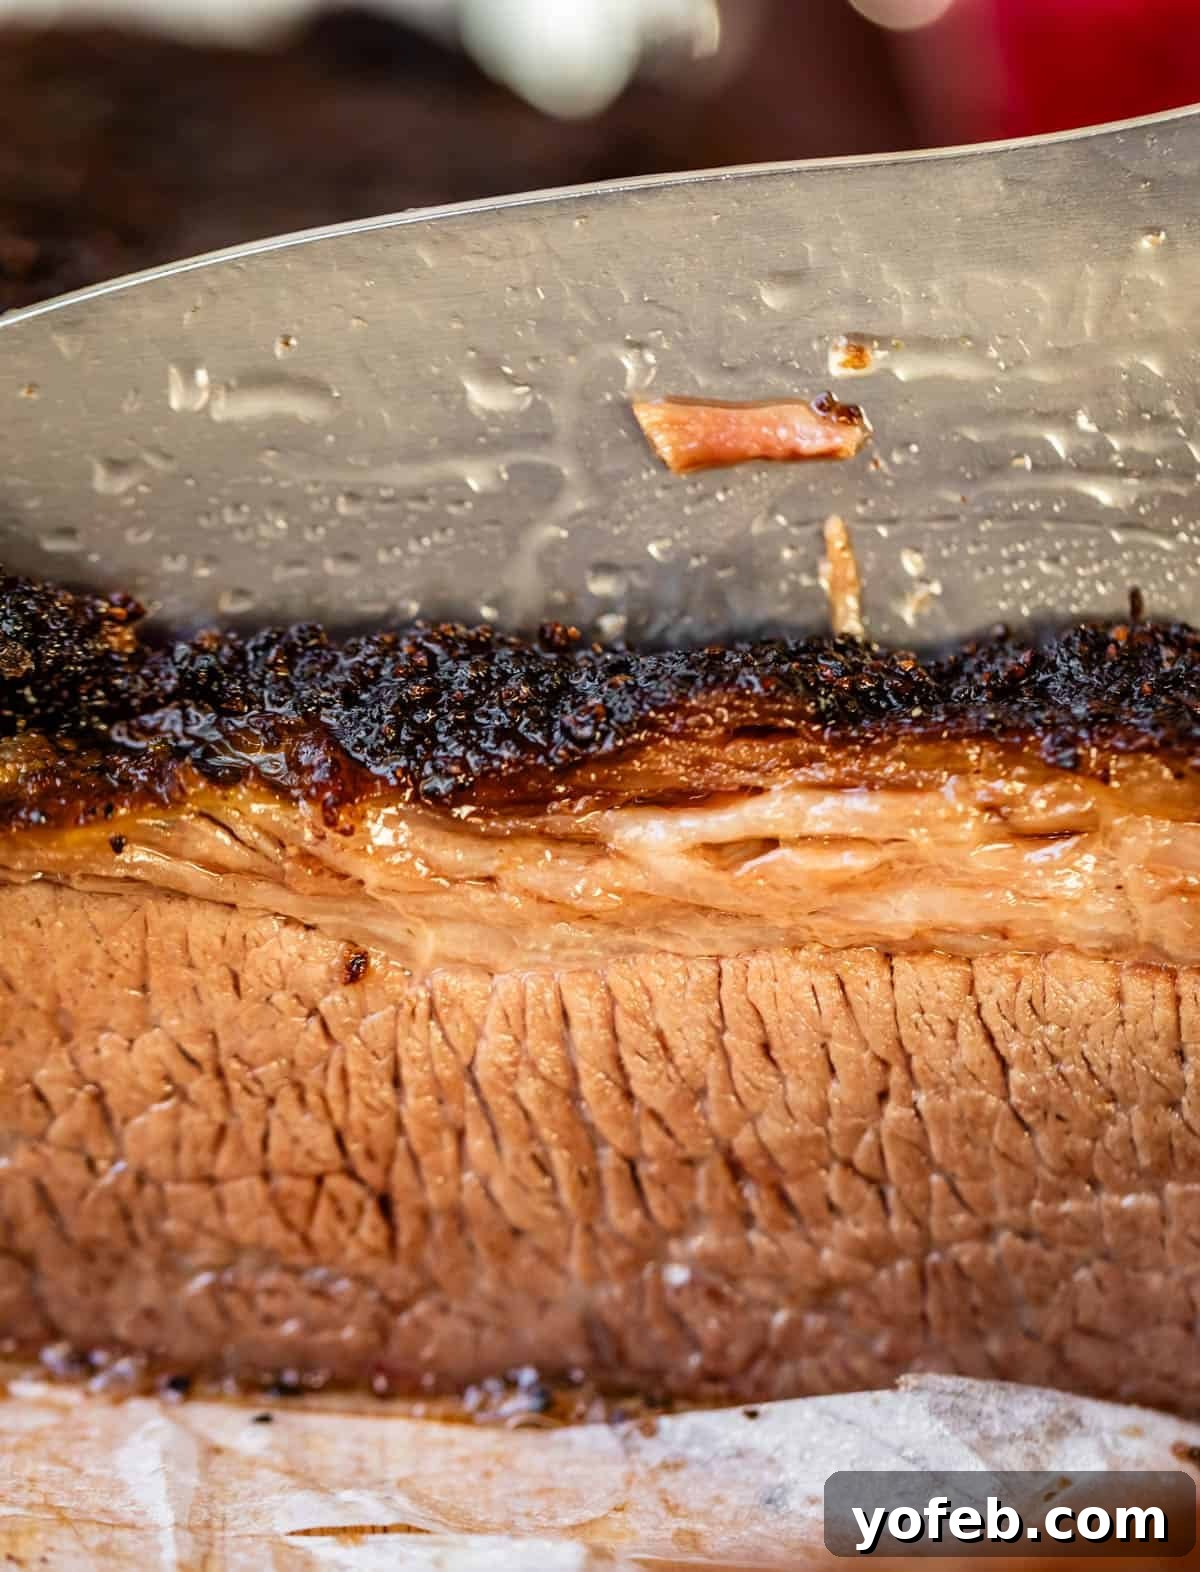
Do you see the small rectangles and triangles in the cross-section? That’s what you’re aiming for – a texture that pulls apart easily, rather than long, unbroken strips. And now, for the best part: time to taste! You won’t be able to resist “snagging” a few bites. Serve with my favorite BBQ Sauce on the side, of course! Lots more side dish suggestions below! ↓
Perfect Pairings: What to Serve with Smoked Beef Brisket
When there’s fresh, hot smoked beef brisket around, it’s hard to focus on anything else! But to complete your Texas BBQ experience, a selection of classic side dishes is essential. Here are some ideas, starting with those typically found at authentic Texas BBQ joints:
- White Bread: An absolute staple at every Texas BBQ restaurant, served simply straight from the bag. Theories abound as to why (it’s cheap, soaks up juices, acts as an edible napkin), but its presence is undeniable.
- French Fries: A universally loved side that pairs well with rich brisket.
- Fried Okra: A Southern classic offering a crispy, savory contrast.
- Creamed Corn: Sweet, creamy, and a comforting accompaniment.
- Loaded Baked Potato: Often served plain or “stuffed” with brisket, cheese, and other toppings for a hearty meal.
- Bacon Wrapped Jalapeño Poppers: For an extra Texan touch, hollow out jalapeños, stuff them with a cream cheese mixture (and maybe some chopped brisket!), wrap in bacon, and grill or bake until crispy.
- Beans: A must-have. Each establishment has its own signature recipe, but generally, expect a variation of pinto beans.
- Traditional Tejano Pinto Beans (Slow Cooker Mexican Beans): My go-to for an authentic Texas BBQ bean experience.
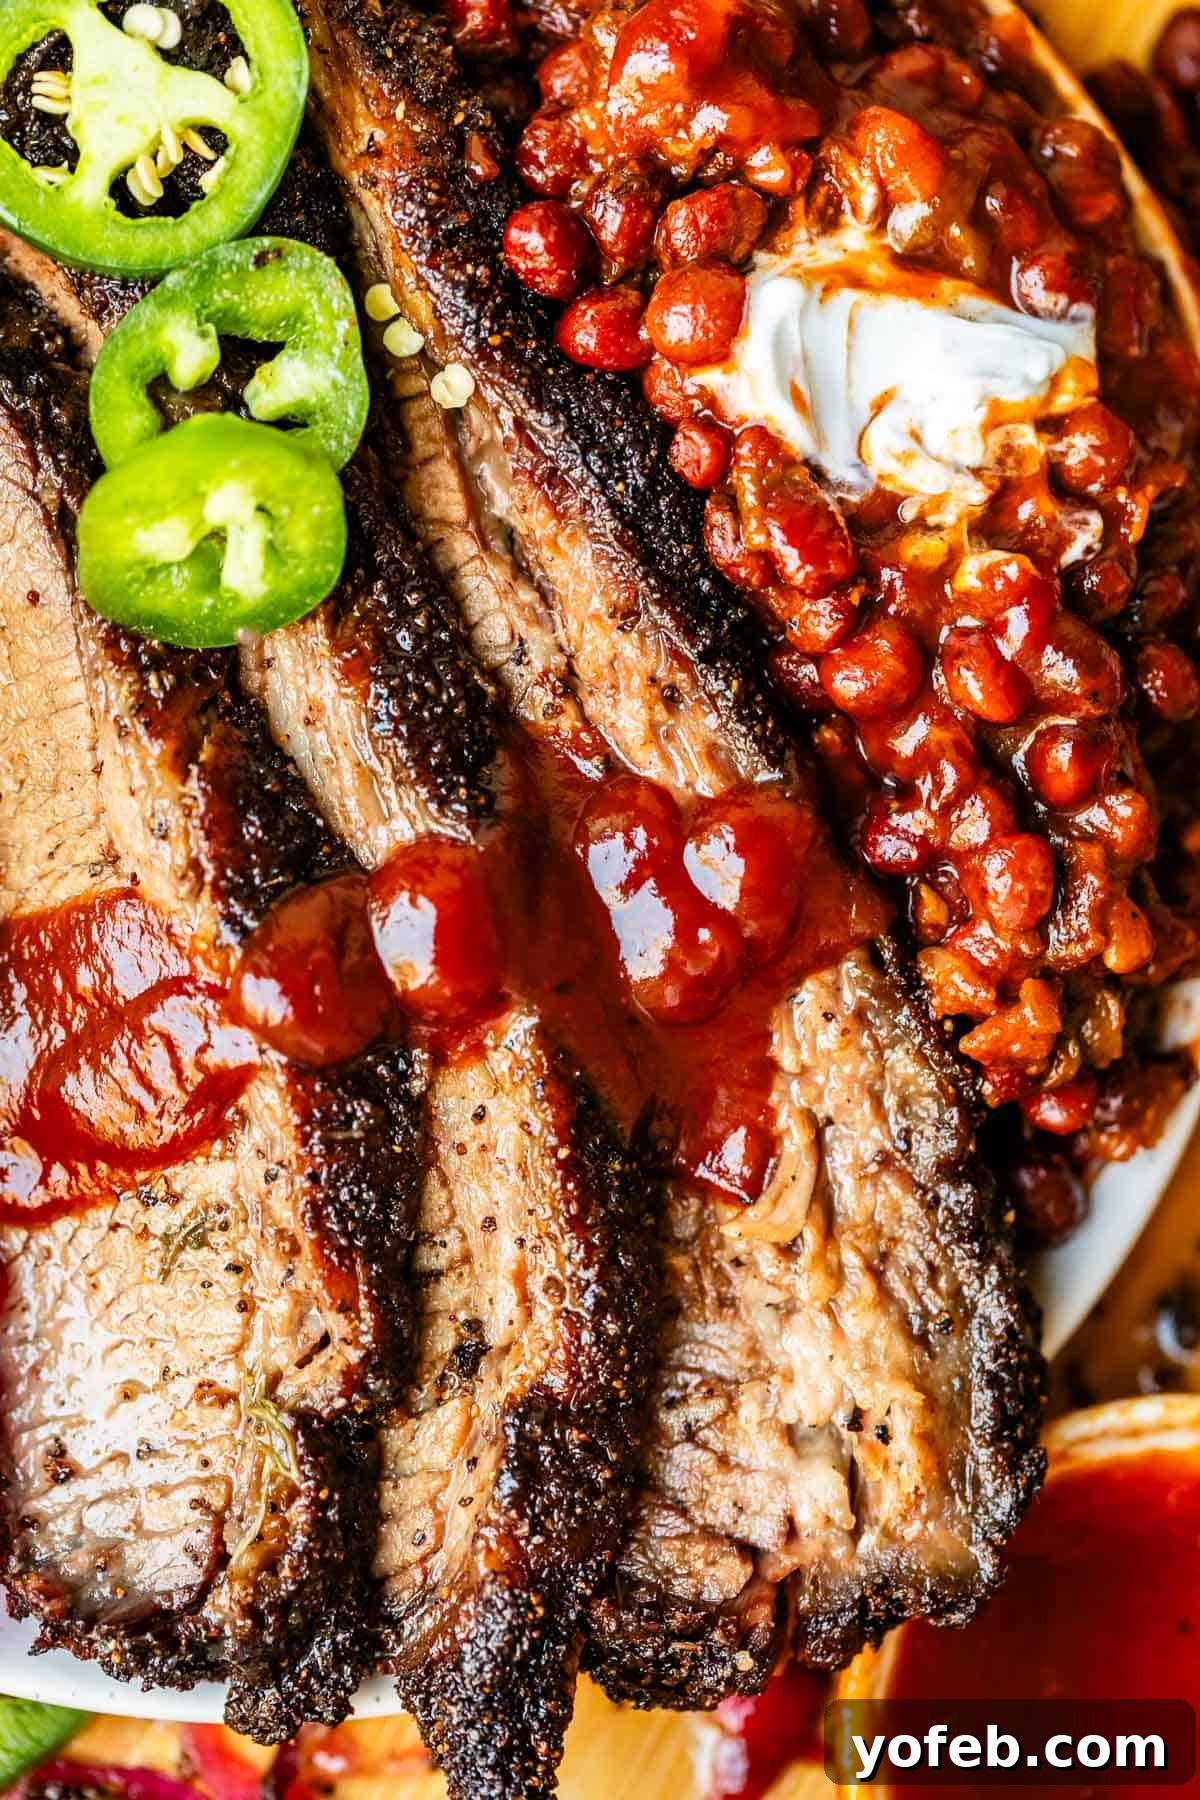
- Santa Maria Beans: A smoky and sweet summer side, perfect for balancing the rich brisket flavor. These are featured in the plated photos of the brisket in this post.
- Bacon Baked Beans: A timeless crowd-pleaser and classic American barbecue side.
- Best EVER Potato Salad: A creamy, tangy staple for any cookout.
- Easy Broccoli Bacon Salad Recipe: Loaded with crunchy veggies, crispy bacon, and a delicious dressing – always a hit.
- Fresh Coleslaw (with Lemon and Herbs!): Light, bright, and refreshing, offering a crisp counterpoint to the rich meat.
- Southern Green Beans from Small Town Woman: Tender and flavorful, a classic comfort side.
- Cornbread Casserole Recipe: A creamy, sweet, and custardy take on cornbread. This is the mac and cheese you see in the plated photos on this post.
- The BEST Mac N Cheese: Indulgently creamy and cheesy, the ultimate comfort food pairing.
- The BEST Banana Cream Pie Recipe: While banana pudding is traditional, this pie offers a luxurious, grand slam version.
- Homemade Peach Cobbler: A warm, fruity dessert that’s heavenly with a scoop of ice cream.
For those cooler months or holiday gatherings, here are a few more hearty and comforting side dish options:
- Sweet and Moist Cornbread Recipe: Forget dry cornbread; this recipe delivers supremely moist and tender results.
- Aunt Shirley’s Mashed Potatoes Recipe with Cream Cheese: These are, without a doubt, the rich and creamy mashed potatoes you’re craving.
- Roasted Red Potatoes in Oven: Simple, flavorful, and a welcome easy side after the effort of brisket.
- Best Roasted Brussel Sprouts and Roasted Sweet Potatoes Recipe: A personal favorite, especially for holiday meals.
- Lemon Almond Green Beans: An easy yet elegant side bursting with fresh flavor.
- Gooey Chocolate Chip Cookie Pie: Tastes like a warm, giant chocolate chip cookie baked into a flaky pie crust.
- Apple Crisp with Oatmeal (and a ridiculous amount of streusel!): A perfect fall or holiday dessert, much simpler than pie but equally satisfying.
Storing Leftover Brisket: Keeping It Fresh
Properly storing leftover smoked brisket is essential to preserve its tenderness and flavor. Brisket will remain fresh and delicious in an airtight container in the refrigerator for 4-5 days. To maximize moisture retention, I recommend rewrapping any larger, uncut portions in butcher paper before placing them in an airtight container or bag. For optimal reheating results, it’s best to slice only the amount you intend to serve initially, leaving the rest of the brisket intact.
Make-Ahead & Reheating Instructions:
Brisket is an excellent make-ahead dish due to its lengthy cooking process. If you plan to serve it at a later time, allow the cooked brisket to cool to almost room temperature. Keep it tightly wrapped in its butcher paper, then cover the entire tray securely with plastic wrap before refrigerating. To reheat a large portion or a whole leftover brisket, remove it from the refrigerator about 30 minutes prior to reheating to let it temper slightly. Discard any plastic wrap, then cover the wrapped brisket (or transfer to a Dutch oven with a lid) with 1-2 layers of heavy-duty foil. Add any accumulated juices and fat to the pan. Reheat in a 250°F oven until the internal temperature reaches 140-160°F. The reheating time will vary based on the size of the brisket; a good estimate is about 8 minutes per pound.
For reheating smaller portions or individual slices, the oven remains the superior method. Place the brisket in an oven-safe dish, spritz with a little water or drizzle with some reserved meat juices, cover tightly with foil, and warm in a 250°F oven until heated through. While convenient, the microwave tends to dry out brisket and make it tough. If you must use it, place the slice on a plate, cover it with a damp paper towel, and use a splatter cover. Microwave at 50% power in 30-second increments until just warm, aiming for the shortest possible reheating time to maintain tenderness.
Freezing Smoked Brisket: A Meal Prep Game-Changer
Freezing smoked brisket is an absolutely brilliant idea, especially if you anticipate leftovers or want to prepare meals in advance. I always have a stash in my freezer from my various testing rounds. Having a significant portion of brisket in the freezer means a delicious, effortless meal awaits you, allowing your future self to thank your past, amazing self!
Freezing Instructions:
For freezing, it’s best to keep the brisket unsliced. Wrap the portion you intend to freeze tightly in its original butcher paper (if still usable) or fresh butcher paper. Crucially, include as much of the rendered juices and fat as possible within the wrapping; this will be vital for maintaining moisture during reheating. After the butcher paper, wrap the brisket again in two layers of plastic wrap. If it fits, place the entire package into a gallon-sized (or even 2-gallon) freezer-safe ziplock bag and seal it tightly, removing as much air as possible. If the brisket is too large for a bag, wrap it once more in two layers of heavy-duty aluminum foil. When stored in a freezer bag, brisket will keep well for 2-3 months. If wrapped only in foil, aim to use it within 1-2 months to prevent freezer burn and excessive drying. If you possess a vacuum sealer, this is the ideal method, extending shelf life to 4-6 months.
Reheating Frozen Brisket:
To reheat cooked, frozen brisket, first transfer it from the freezer to the refrigerator and allow it to thaw completely. This can take 1-2 days, depending on the size of the portion. Once thawed, remove all plastic wrap. If necessary, rewrap it snugly in butcher paper and place it on a rimmed baking sheet or in a Dutch oven. Be sure to add all the reserved juices and fat on top of the brisket. If you feel there isn’t enough moisture, add a few pats of butter.
Cover the Dutch oven with its lid, or securely cover the baking sheet with 2 layers of heavy-duty foil. Place it in a 250°F oven and reheat until the internal temperature reaches 140-160°F. Again, reheating time varies by size, but a general guideline is about 8 minutes per pound.
For advanced techniques and visual aids, including videos on slicing brisket, the experts at Franklin BBQ offer excellent tutorials that you might find helpful!
Smoked Beef Brisket in the Oven: Frequently Asked Questions
Honestly, the absolute pinnacle of flavor for brisket is achieved in a dedicated smoker. However, for most home cooks who don’t own one (like me!), the method outlined in this recipe is truly the next best thing. A relatively short smoking period on your gas grill, followed by a long, slow cook in the oven, yields a delectably tender, smoky, and juicy brisket that is remarkably close to the real deal from a traditional pitmaster. This combination provides the best of both worlds: genuine smoke flavor and consistent, low-temperature cooking.
The 3-2-1 rule is a popular guideline for smoking brisket, designed to produce very tender results, and it shares some conceptual similarities with our method. The formula dictates: 3 hours of smoking or baking at 225°F, followed by wrapping the brisket in foil or butcher paper and cooking for another 2 hours, then unwrapping and cooking for a final 1 hour. While it offers a starting point, I find this method often overlooks critical factors such as the exact size of your brisket, the unpredictable duration of the “stall” (a phase where the brisket’s temperature plateaus), and the ultimate internal temperature required for doneness. Brisket can be quite finicky, and relying solely on a fixed time risks either an undercooked, tough brisket or an overcooked, dry one. The most reliable method for perfectly cooked brisket is to consistently monitor its internal temperature with an instant-read thermometer, aiming for 200-203°F, where it reaches peak tenderness. My recipes often extend to 7-8 hours of cooking time to ensure this ideal temperature is achieved.
The “better” method depends entirely on the outcome you desire! For the Texas-style, smoky BBQ brisket we’re aiming for in this recipe, the oven (after an initial smoke on the gas grill) is definitively superior. The oven provides the necessary consistent, low, and relatively dry heat that mimics a smoker environment, allowing for the formation of a delicious bark and proper rendering of fat. A slow cooker, while certainly capable of producing tender brisket, will result in a more braised-style meat, akin to a pot roast. This is still delicious, and there’s absolutely a place for slow cooker brisket in the culinary world. However, it won’t give you the distinct texture and flavor profile characteristic of a classic BBQ brisket, which is our objective here.
The foremost secret to a consistently moist and tender brisket is the “low and slow” cooking philosophy. Cooking at a low temperature for an extended period allows the tough collagen in the meat to gradually break down into gelatin, resulting in that desirable tender texture. Other crucial elements include: executing a thorough dry brine to season the meat from within and aid in tenderization; ensuring the brisket is tightly wrapped (in butcher paper or foil) during its oven phase to retain moisture; allowing a generous resting period post-cooking for juices to reabsorb; and starting with a quality cut of meat with an adequate fat cap. For all the intricate details and best practices, be sure to read through the comprehensive “How-to” section of this article!
More Amazing Barbecue and Grilled Meats
There’s an undeniable magic in pulling perfectly cooked meat off the grill – that signature smoky flavor combined with a tender, juicy bite is simply unbeatable. If you’ve enjoyed mastering this brisket recipe, you might be ready to explore more delicious barbecue and grilled meat options for your next cookout or family meal:
- Best Smoked Pulled Pork Recipe: This recipe uses a very similar gas grill smoking method as our brisket, delivering incredibly flavorful pulled pork without a dedicated smoker. For an even simpler option, try this slow cooker version!
- Tri Tip Steak (Grilled or Oven-Roasted): A personal childhood favorite, this versatile cut is always a hit.
- Ribeye Steak Recipe (Grilled or Pan-Seared): Achieve steakhouse-quality results at home – tender, juicy, and surprisingly easy.
- How to Make Carne Asada: Learn the secrets to making carne asada that rivals your favorite Mexican restaurant.
- Grilled Chicken Marinade Recipe: For those times you want easy, yet incredibly flavorful grilled chicken.
- How to Cook Flank Steak (Grilled or Oven Broiled): Discover the techniques for a fabulous and tender flank steak.
- Slow Grilled Mustard Chicken: Experience how low and slow grilling can transform chicken thighs into incredibly tender bites.
- Homemade Smash Burgers (Cast Iron Burgers): My absolute favorite way to make juicy, flavorful hamburgers.
- Grilled Pork Chops from Dinner at the Zoo: Perfect for a quick and satisfying meal from the grill.
- Grilled Meatloaf from Butter Your Biscuit: A unique and smoky take on a classic comfort food.
Facebook | Pinterest | Instagram

Easy Smoked Beef Brisket in the Oven
Equipment
-
half baking sheet
-
cooling rack
-
heavy duty aluminum foil or a smoker box
-
pink butcher paper optional; you can use foil in a pinch
-
leave-in probe thermometer
-
large cutting board with juice groove
Ingredients
- 5-6 pound brisket flat, OR whole full-packer brisket (12-18 lbs)***
- 1/4 cup kosher salt
- 2 tablespoons coarse ground black pepper*
- 2 tablespoons garlic granules, this is a step up from garlic powder
- 8 cups hickory smoke chips
- 1 batch Homemade BBQ Sauce**, or your favorite sauce
Instructions
-
Read carefully. There are some special items needed for this recipe. In addition to the brisket and spice rub, make sure you read over the equipment list above: you need heavy duty foil, butcher paper, and a leave-in probe thermometer.
-
Choose your brisket: Go to a quality butcher or a high-end grocery store. Ask the butcher for a choice grade flat cut brisket (or a full-packer, if you are all in). If they only have prepackaged cuts, make sure it is Choice grade. Find the one with the biggest fat cap you can find. Bend the brisket to see if it folds in half easily (if it’s vacuum sealed, skip this, bending won’t tell you much.) The fat cap should be white, not yellow.
-
Assemble the spice rub. In a small bowl, add 1/4 cup Diamond Crystal kosher salt. DO NOT USE TABLE SALT. (If that’s all you have, use half the amount.) Add 2 tablespoons coarse black pepper and 2 tablespoons garlic granules.
-
Prepare the brisket. Set out a rimmed half baking sheet and a cooling rack. Cut open the packaging and pat the brisket with paper towels to dry it off. Place it on the baking sheet, fat-side up.
-
Dry brine. Rub about one third of the seasoning over the fat cap and edges, carefully patting it onto the meat. Flip the brisket over and sprinkle the remaining dry rub all over the sides and top of the brisket. If the spices fall onto the baking sheet, scoop it up and rub it in.
-
Make sure every part of the meat is seasoned, top, bottom, and sides. Make additional rub if you haven’t covered every part of the brisket. The ratio is 2 parts kosher salt to 1 part pepper, to 1 part garlic.
Lift the brisket and slide the cooling rack underneath the meat, so that the brisket is sitting on the cooling rack, which is nestled in the baking sheet.
-
Refrigerate. Transfer the brisket to the refrigerator to chill, UNCOVERED. This helps dry out the edges so you get an amazing crispy “bark.” It does not make your brisket dried out, I promise it will still be moist (if it has enough fat). Chill overnight or for at least 4-6 hours.
-
Let the brisket rest out of the fridge. Take the meat out of the fridge and let it sit on the counter for about 30 minutes while you prepare to smoke.
-
Instructions for wood chip smoker foil packets. Use large sheets of heavy duty foil to make four 4 packets, each filled with about 2 cups dry wood chips. See photos. Seal the foil at the top by folding it over, then fold up the ends. Your packets should be about 8×5 inches. Make sure that they are well sealed, and that the chips do not puncture the foil on the bottom or edges. Use a sharp knife to poke a 2-inch slit on either side of the top of the packets. This will allow smoke to escape, and oxygen in to feed our chips. Make 4 packets total, we will be using 2 at a time on the grill.
-
Smoker box instructions: (I have a smoker box and still prefer to use foil smoke packets – save your money unless you already have one.) Add 4 cups dry hickory wood chips to your smoker box, or however much will fit with the lid closed.
-
Prepare the grill. Clean off your grill grates of any debris from the last time you grilled. Remove the grill grates on the side that has the primary burner. Place 2 foil packets over the primary burner, either on the heat plates, or directly on the burner.
(If you have a smoker box, remove the grates from your grill and place the smoker box directly on the primary burner. You may need to remove the heat plate entirely from your grill.)
-
Turn on the grill. Turn all the burners on the grill to high heat if you are using a smoker box, or to medium heat if you are using foil packets. Let it preheat for 10 minutes.
-
After 10 minutes, turn off the burners on the empty side of the grill, the side with the grill grates still on. This is where our brisket will sit. Turn the other burners down to LOW.
You need to bring the grill temperature all the way back down to 250 degrees and make sure it stays at 250 degrees. You can open the lid for a minute or two to let some heat escape if it’s too hot. Do NOT put the brisket into the grill if it’s too hot! It will not cook the proper way and you’ll end up with dry meat.
-
Oil the grate. Use tongs to dip a crumpled paper towel into a bit of oil, then rub on the grill grate.
-
Smoke. Place the brisket fat side UP on the oiled grate over the burners that are TURNED OFF. Save the cookie sheet and cooling rack for later.
Close the lid and smoke the brisket for about an hour, maintaining a grill temperature of about 250 degrees. Come back and adjust it as necessary. Use an oven thermometer set inside your grill to gauge the temperature if your grill doesn’t have a built in thermometer. Check to make sure your wood chips are still smoking (turn heat up a bit momentarily to get them to smoke again if necessary, returning the heat back down to maintain 250 degrees F.)
-
Smoke again. After an hour, remove the spent foil packets if they are no longer smoking, or move them to the back if they still have smoke coming out. Add the remaining two foil pouches to the side with the flame.
Or, if you have a smoker box, carefully dump out the spent chips and add 3 more cups of hickory chips to the smoker box.
Close the lid and smoke the brisket for another 60-70 minutes, maintaining a grill temperature of 250 degrees. Come back and adjust it as necessary.
-
Preheat the oven to 250 degrees, about 10 minutes before your brisket is done smoking.
-
Remove from grill. Once the smoke packets are spent, turn the grill off, and use grill gloves or a large metal spatula to move the brisket back over to the cooling rack on top of the cookie sheet. VERY carefully, take it inside.
-
Wrap the brisket. Making sure you have a wide space, pull out a large section of butcher paper but don’t cut it yet. Set the brisket fat side UP on the paper, then fold the paper up over the brisket. Flip the brisket over in the paper, then wrap up the ends like a birthday present. See photos. Flip the brisket again and MAKE SURE the fat side is up. (Unwrap it if you’re not sure!!) Tuck and wrap the paper as necessary to make sure the paper doesn’t come undone in the oven.
-
Transfer to the oven. Place the wrapped brisket back onto the cooling rack on the baking sheet, fat side up. If you have one, insert the probe of a leave-in meat thermometer into the thickest part of the brisket, and set the alarm to ring when the internal temperature reaches 203 degrees F.
Double check that your oven is set to 250 degrees, and place the wrapped brisket in the oven. Settle in for the long haul! Do not open the oven door until your brisket reaches that 203 mark. If you don’t have a leave-in thermometer, start checking the temperature with an instant read thermometer after about 3-4 hours, depending on how big your brisket is. Keep checking until it reaches 203. It could take twice as long! Plan to make this a day ahead of your event if you are not sure!
-
Rest. Once it’s reached temperature, as carefully as possible remove the baking sheet (there will be melted fat and juices so don’t burn yourself!). You will be tempted but DON’T UNWRAP it! Let it sit at room temperature for 30-60 minutes to let it rest and reabsorb all the fat. Check the temperature and make sure the meat is 140-150 degrees before unwrapping.
-
Unwrap. Unwrap the brisket, carefully catching all the juices in the rimmed baking sheet. Place the brisket on a cutting board with a juice groove.
-
Slice. Look for the grain in the brisket, and then slice against (perpendicular to) the grain with a sharp chef’s knife (see photos). Snag a bite. Die and go to heaven.
-
Serve with Homemade BBQ Sauce. On the side! I like to serve brisket with Mac and Cheese, or Santa Maria Pinquito Beans!
-
Storage. Store covered in the fridge for 4-5 days. Brisket freezes very well! See post for details, as well as reheating instructions.
Notes
- *The amount of pepper you add is up to you. Some people in Texas like a super peppery crust and add as much as a whole cup of pepper to a full packer brisket! The most common is a 1:1 salt to pepper ratio, but I like things a little milder, so I went with half as much pepper as salt. Follow your heart to decide how much you want!
**THE SAUCE: I love my Homemade BBQ Sauce with this brisket, but someday I want to try Chris’ recipe:
- 1/2 cup Claude’s Fajita Marinade
- 1 cup Hickory and Brown Sugar BBQ Sauce
- 2 tablespoons mustard
Mix well, taste, and adjust to your liking.
***FULL PACKER BRISKET INTRUCTIONS: If you are like my sister and live in Texas or another similarly blessed area that love brisket, you may not be able to get just a brisket flat. Where she lives they only sell the full packer! Luckily, the steps to make a whole brisket aren’t much different than cooking just the flat. Here are some tips if you’d like to make a whole 12-20 lb brisket:
- For a flat we don’t remove any of the fat cap. For a full brisket, you’ll definitely want to trim the fat cap to about 1/4″ thick, especially on the fatty point.
- Double the amount of marinade you use. 1/2 cup salt, 1/4 cup of coarse pepper, and 1/4 cup garlic granules should be enough to cover a whole brisket.
- Follow the same smoking, wrapping, and oven cooking steps. The main difference will be cook time – it may need to cook a bit longer (which is why Laura and her mother in law often smoke in the evening and cook all night). Just BE AWARE that it may seems like it would take twice as long since it’s twice as big, but it’s just not true. In testing, a full brisket only took an hour or two longer than a flat! Timing is still finicky so you still need to very much depend on your thermometer!!
- Letting the brisket rest will take slightly longer as well, but again, not twice as long. Just keep an eye on things.
- Slicing the brisket: Use the image in the post for slicing the flat. Once you start to get to the point, you should notice that the grain switches directions due to the way the muscle works. Switch angles and cut against the new grain! Because it’s thicker and more fatty, many people cut the point into cubes rather than slices. You could also try to resmoke the cubes to make burnt ends!
- As with most foods, the more often you make it, the better you will understand what works for you in your kitchen, with your tools. There’s a lot of room for variation in this recipe due to your specific brisket, your grill and oven, your thermometer, etc. If it isn’t perfect the first time, take note of what could improve and try again! If you have any questions as you think through the process, let us know in the comments and we’ll do our best to get the answer to you!!