
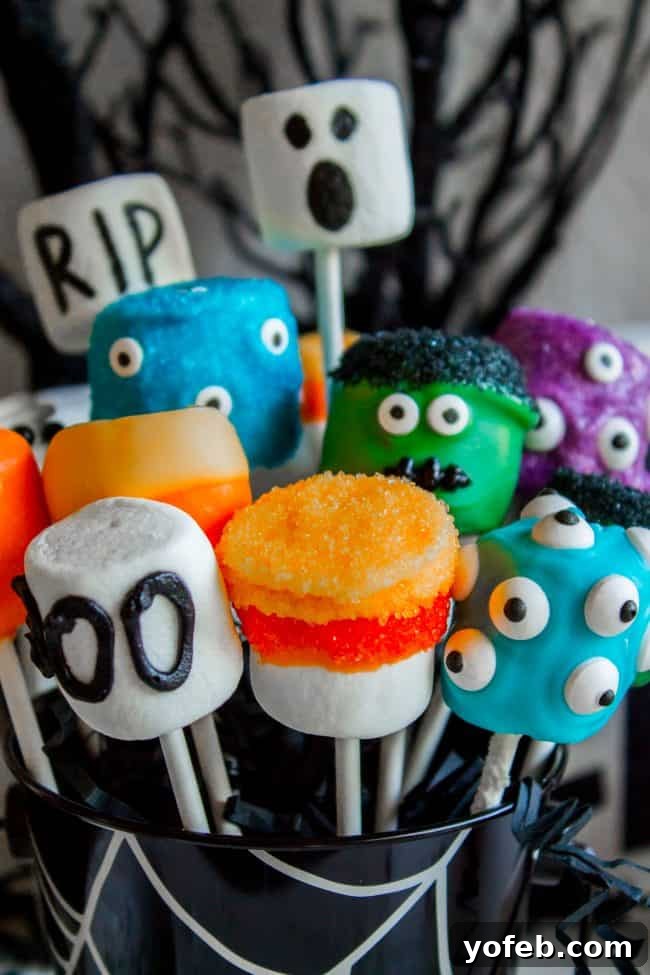
Get ready for a hauntingly good time in the kitchen! These festive Halloween Marshmallow Pops are incredibly easy to create, making them the perfect no-bake treat for parties and a delightful project for kids of all ages. Forget the complexities of traditional cake pops that demand baking and intricate shaping; with these marshmallow creations, you’ll jump straight to the most enjoyable part: dipping, decorating, and bringing spooky characters to life. Imagine an army of adorable Frankensteins, ethereal ghosts, and charming mummies all lined up, ready to delight your little monsters and guests. Your family will absolutely love this simple yet spectacular Halloween dessert idea that promises maximum fun with minimal effort!
As the crisp autumn air heralds the arrival of Halloween, our household bursts with excitement, particularly my 7-year-old daughter, Charlotte. This year, her chosen costume is none other than Marie Antoinette. I confess, I’m still puzzled as to how a second-grader developed such an appreciation for 18th-century French royalty. My delicate attempts to explain the queen’s rather unfortunate “cut short” ending and the historical context of the guillotine have not swayed her royal aspirations. Charlotte, with the stubborn determination only a seven-year-old can possess, insists on being a queen. Perhaps her unwavering resolve is a tiny glimpse into why Marie Antoinette remains an iconic figure, captivating imaginations even centuries later.
We’ve managed to secure a lovely wig and a princess-style gown – because, as it turns out, authentic, reasonably priced Rococo Victorian dresses aren’t readily available in children’s sizes! I’m planning to powder her face a dramatic white to complete the look, but I still wonder if people will truly recognize her. Perhaps she should carry a tiny cake and declare, “Let them eat cake!” Or, more fittingly for the season, “Let them eat marshmallow pops!”
Indeed, “Let them eat marshmallow pops!” resonates perfectly with the spirit of Halloween. This enchanting season is a celebration of all things sweet and spooky, providing the perfect excuse for an abundance of sugary delights, complementing the piles of candy your kids will collect. And while I absolutely adore baking more involved treats, such as my decadent Reese’s Stuffed Brown Butter Brownies, sometimes the moment calls for something quick, effortless, and endlessly customizable. These delightful Halloween marshmallow pops fit that bill perfectly. They are genuinely one of the easiest and most charming Halloween projects you can undertake with your children, offering a fantastic opportunity for creative expression without the stress and mess of traditional baking.
Why Halloween Marshmallow Pops Are Your Go-To Spooky Treat
Embrace the seasonal joy with these delightful Halloween Marshmallow Pops. They are not just delicious treats; they are edible crafts that bring smiles and creative satisfaction to everyone involved. Here are just a few compelling reasons why you should absolutely add them to your Halloween to-do list:
- Effortless Preparation, No Baking Required: The biggest draw of marshmallow pops is their incredible simplicity. Unlike intricate cake pops that demand baking a cake, crumbling it, and then mixing it with frosting – a delicious but time-consuming process (even if it leads to a decadent strawberry truffle cake!) – marshmallow pops skip directly to the fun part. No oven, no complex mixing, no waiting for cakes to cool. Just pure dipping joy, saving you valuable time during the busy Halloween season.
- Unbeatable Kid-Friendly Fun: Children universally adore food on a stick! Presenting them with these adorable, customizable marshmallow pops will make you an instant hero. The dipping and decorating process is straightforward enough for even little hands to participate in safely, fostering creativity, fine motor skills, and a sense of accomplishment. It’s a fantastic activity for a gloomy afternoon or a pre-party craft session.
- Surprisingly Delicious and Appealing: Beyond their charming and festive appearance, candy-dipped marshmallows are genuinely tasty. The crisp, sweet candy coating provides a delightful contrast to the soft, chewy interior of the marshmallow. This combination creates a satisfying texture and flavor experience that appeals to almost everyone, making them a guaranteed crowd-pleaser at any Halloween gathering.
- Endless Adorability and Creative Potential: Whether you’re crafting googly-eyed monsters, classic spooky ghosts, or intricately wrapped mummies, the results are undeniably cute and Instagram-worthy. These little characters aren’t just snacks; they’re conversation starters, festive decorations, and expressions of individual creativity all rolled into one. Each pop can be a unique masterpiece, reflecting the personality of its creator. Who can resist a table full of grinning Frankensteins and wide-eyed mummies?
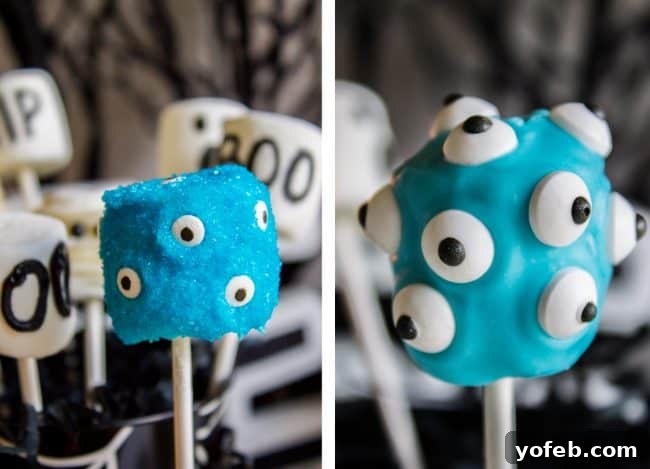
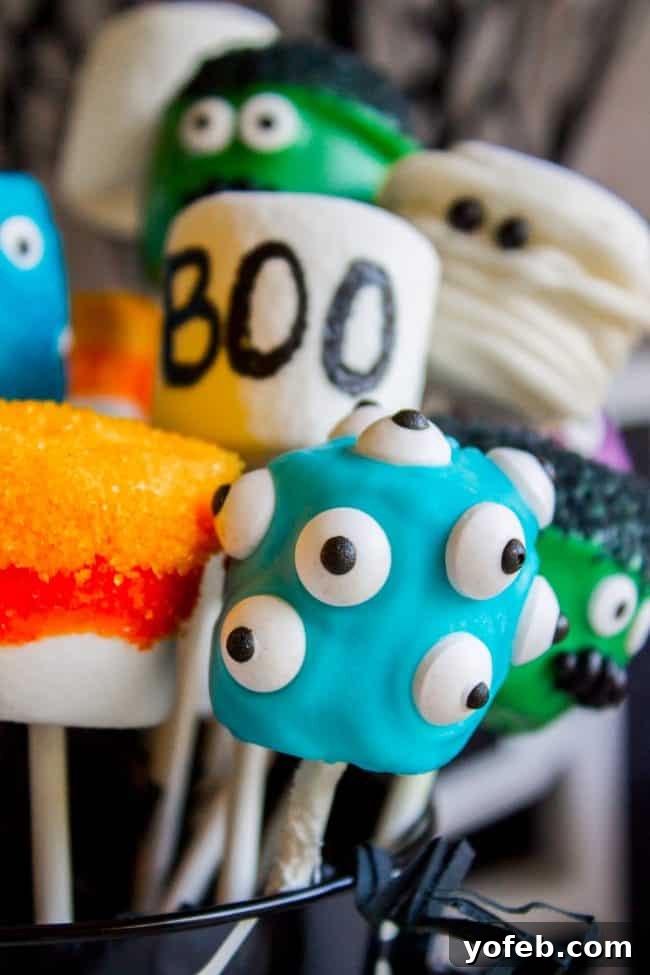
How to Make Halloween Marshmallow Pops: Your Easy DIY Guide
Don’t let the seemingly intricate designs in the pictures fool you; these Halloween marshmallow pops are surprisingly easy to create! As someone who doesn’t possess that magical “everything-I-touch-looks-pretty” gene, I can confidently tell you that if I can make these look decent, absolutely anyone can. This is a truly approachable project, perfect for beginners and seasoned DIY enthusiasts alike. The key is to embrace the fun, not stress over perfection, and remember that Halloween treats are all about charmingly spooky imperfections!
Gathering Your Halloween Marshmallow Pop Supplies
Before you dive into the delightful world of dipping and decorating, ensure you have all your essential supplies gathered. A quick trip to a craft store like Michaels or Hobby Lobby, or even a well-stocked grocery store like Walmart, should cover most of your needs. Here’s a comprehensive list of what you’ll generally want on hand to create a variety of festive characters:
- Lollipop Sticks: Opt for sturdy paper or plastic sticks, about 6 inches long, which are crucial for holding your pops securely.
- Large Marshmallows: The bigger the marshmallows, the easier they are to dip and decorate. Extra-large varieties are ideal for creating bold characters.
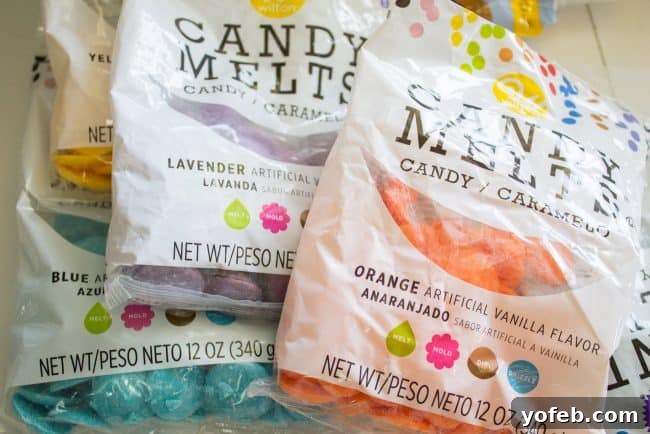
- Candy Melts: These specialized melting wafers come in a fantastic array of colors. You’ll want green for Frankenstein, orange for pumpkins and candy corn, yellow for candy corn, white for mummies and ghosts, and blue/purple for fun monsters.
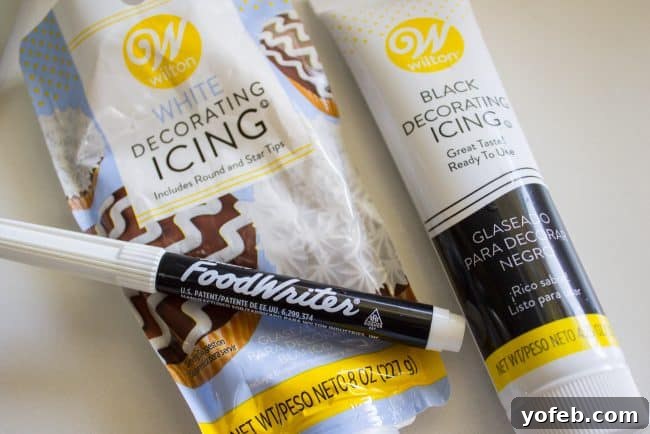
- Decorating Icing: Tubes of black and white decorating icing with small tips are incredibly useful for adding fine details like Frankenstein’s mouth, mummy eyes, or gravestone lettering.
- Edible Markers: A black edible food marker is perfect for drawing simple ghost faces or writing “BOO” and “RIP” on marshmallows without dipping.
- Candy Eyes: These are absolutely essential for bringing your monsters and Frankensteins to life with a quirky, googly-eyed charm!
- Sanding Sugars and Nonpareils: Black sanding sugar for Frankenstein’s hair, blue/purple for monsters, and yellow/orange for candy corn pops add texture, sparkle, and definition. Black nonpareils make excellent tiny mummy eyes.
- Mugs or Deep Bowls: These are your secret weapon for melting candy melts. Their depth allows you to fully submerge a marshmallow in one smooth dip, ensuring an even and complete coating. Wider, shallow bowls will also work, but you might need to spoon candy over the marshmallow to achieve full coverage.
- Styrofoam Block: A true lifesaver for holding your finished or drying marshmallow pops upright. This prevents them from touching surfaces and smudging their perfect coating.
- Parchment or Wax Paper: Line your workspace with this for easy cleanup and a non-stick surface to place any temporary resting pops.
Melting and Dipping Techniques for Perfect Marshmallow Pops
Achieving that smooth, professional-looking candy coating is easier than you think. The key is in the melting and dipping technique. I highly recommend melting your candy in mugs; their depth allows you to fully submerge the marshmallow in one smooth motion, eliminating the need to roll it around and ensuring an even coat. If you only have bowls, simply ensure they are deep enough to at least partially submerge the marshmallow, and be prepared to spoon extra candy over it to ensure full coverage.
For best results, melt your candy melts in the microwave in short bursts, typically 30 seconds at a time. Stir thoroughly after each interval, even if the candy doesn’t appear fully melted. Continue microwaving and stirring until the candy is smooth, fluid, and completely melted. Be cautious not to overheat the candy, as this can cause it to seize and become thick or lumpy, making it difficult to work with. If your candy does become a bit too thick, you can thin it out with a tiny amount of shortening (like Crisco) or a specialized candy thinning oil, stirring it in until you reach the desired consistency.
Decorating Your Halloween Marshmallow Pop Creations
After dipping each marshmallow, gently tap the stick against the edge of your mug or bowl to allow any excess candy coating to drip off. This step is crucial for achieving a clean, smooth finish and preventing pooling at the base. For designs that require multiple layers of candy or delicate details, always ensure each layer is completely dry and set before proceeding. A quick chill in the refrigerator (just 5-10 minutes!) can dramatically speed up the drying process, making your project much faster and less messy.
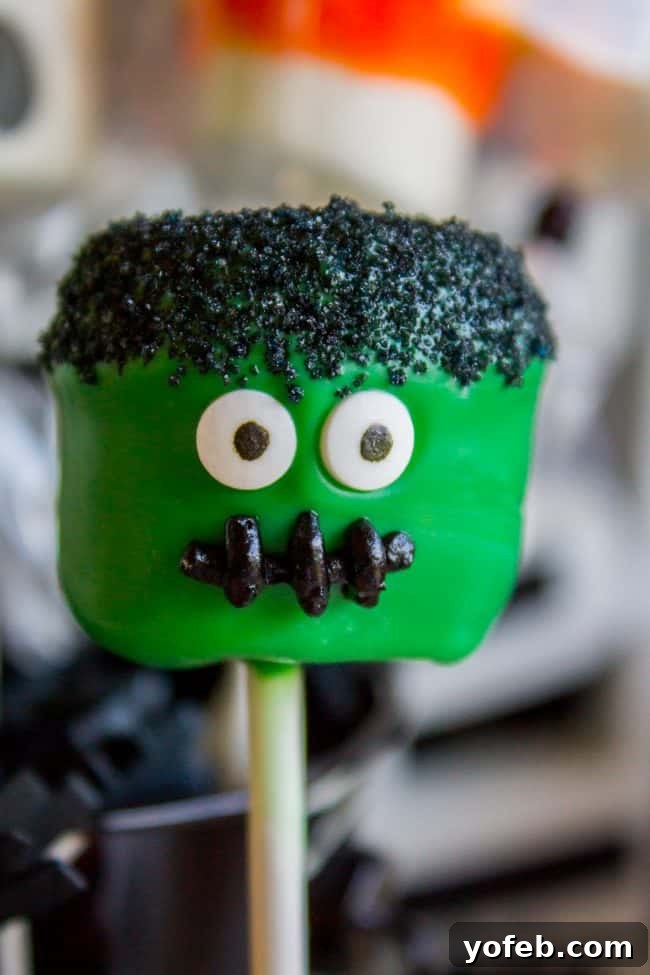
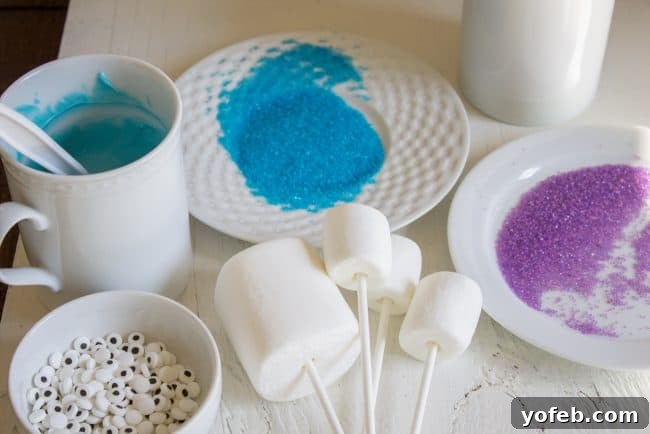
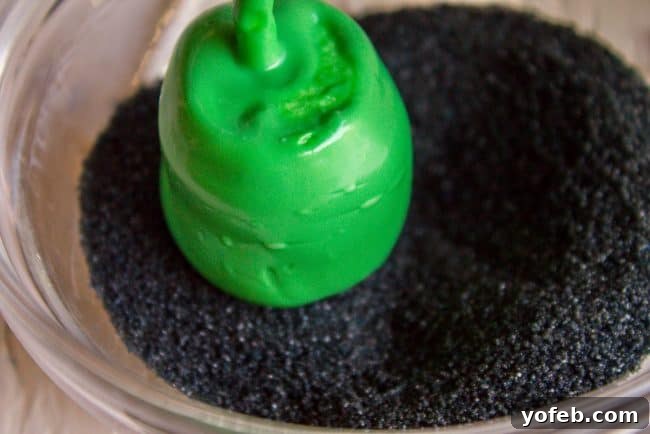
Here’s our Frankenstein getting his signature spiky hair from the black sanding sugar, and his iconic candy eyes pressed firmly into place. Remember, for any elements like sprinkles or candy eyes that need to adhere to the candy coating, you must apply them while the candy is still wet. This ensures they stick securely. For finer details, such as drawing mouths, scars, or tiny stitches, a fine-tipped decorating icing or an edible marker is your best tool. Just a little patience, a steady hand, and a willingness to embrace the delightfully macabre will yield fantastic and memorable results for your Halloween marshmallow pops.
How Long Do Halloween Marshmallow Pops Last? Storage Tips
One of the many fantastic advantages of making treats like these Halloween marshmallow pops is their versatility and make-ahead potential. They can be prepared well in advance, making them an excellent choice for class celebrations, birthday parties, or any festive gathering without last-minute stress. Ideally, I recommend making these delicious pops about 24 hours before you plan to serve them. This allows the candy coating to fully set and harden, ensuring the decorations are firm and they look their absolute best when presented.
If you’re particularly pressed for time or simply want to get a significant head start on your Halloween preparations, you can comfortably prepare these marshmallow pops up to 2 days (48 hours) in advance. Beyond this timeframe, while still edible, the marshmallows themselves may begin to lose some of their signature soft, chewy texture and start to get a bit stale. To maximize their freshness and ensure they remain delightful, always store them in an airtight container at room temperature. Avoid refrigerating them unless absolutely necessary for setting very delicate icing details, as the humidity inside a refrigerator can sometimes cause the candy coating to become slightly sticky or “sweaty.” If you do refrigerate them, ensure they are in a tightly sealed container and allow them to come back to room temperature before serving for the best experience.
Creative Presentation Ideas for Your Halloween Marshmallow Pops
These charming Halloween marshmallow pops are more than just delicious treats; they are incredibly versatile for presentation, making them a fantastic addition to any spooky celebration. Here are a couple of creative ways to showcase your edible masterpieces:
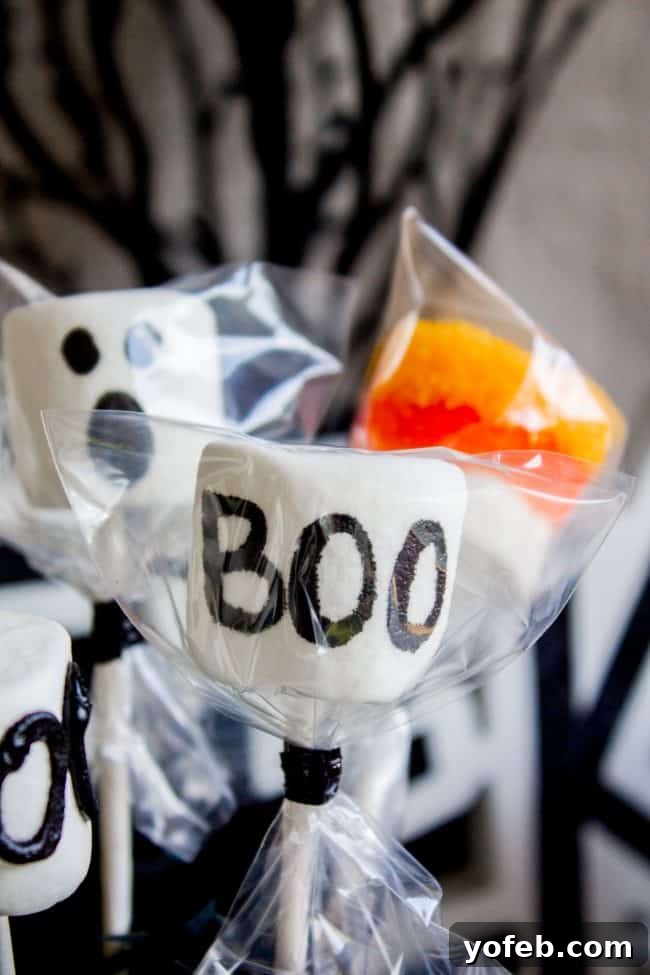
Frightfully Fun Party Favors: Imagine sending your guests home with a delightful, handmade treat! These marshmallow pops make for adorable and memorable Halloween party favors. You can easily find small plastic cellophane bags and decorative twist ties or ribbons at any craft store like Michaels or Hobby Lobby. Simply wrap each pop individually once it’s completely dry, and you have a thoughtful, edible takeaway that guests of all ages will appreciate. Kids especially love receiving their own special monster or ghost pop to enjoy later, extending the party fun.
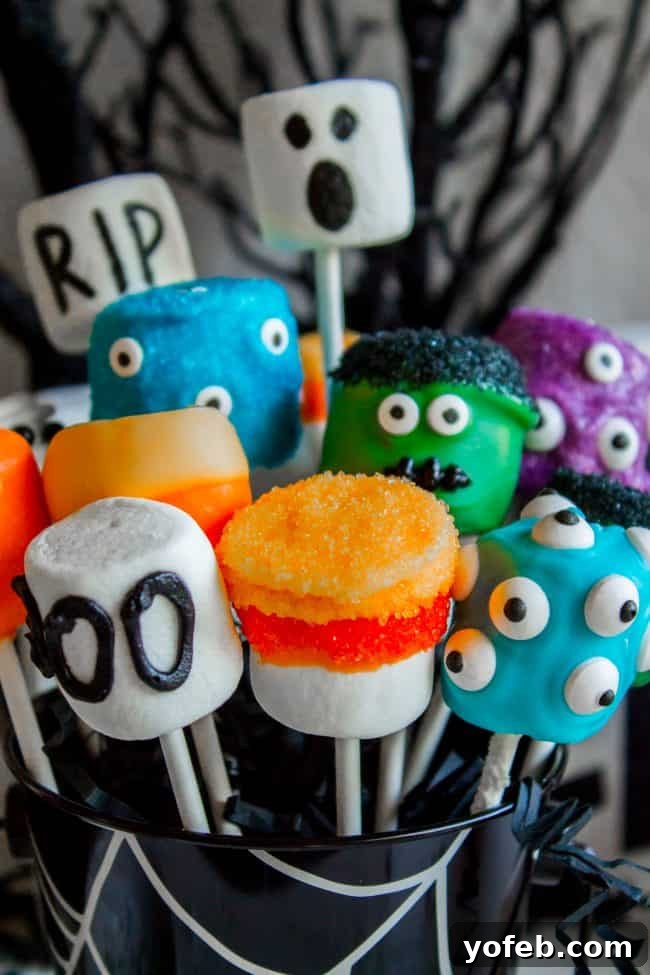
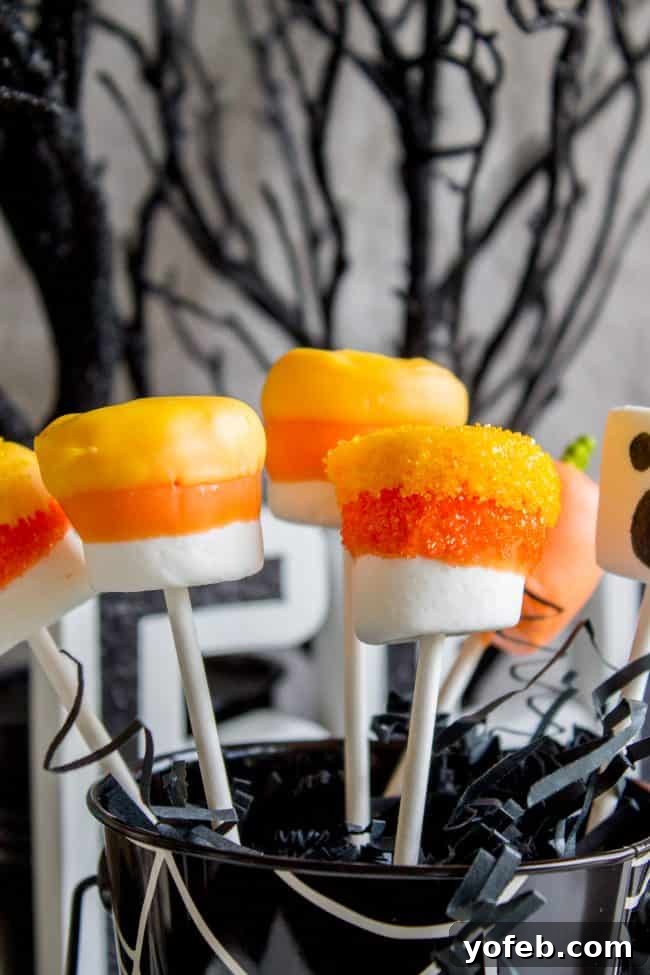
Spooktacular Table Centerpiece: Beyond individual favors, these pops can transform into an eye-catching and festive table centerpiece. To create a striking display, arrange them upright in a decorative container. A spooky cauldron, a rustic basket, or even a brightly colored plastic jack-o-lantern can serve as the perfect base. To hold the pops securely, place a block of styrofoam in the bottom of your chosen container. Cover the styrofoam with black paper shred, crinkled tissue paper, or even some decorative moss for a polished and eerie look. The different colors, shapes, and characters of your marshmallow pops will create a dynamic display that adds instant Halloween ambiance to your party table. Get creative with your arrangement – you could design a miniature graveyard scene with “RIP” pops, a monster mash collection, or a friendly ghost gathering. The possibilities for a personalized and festive centerpiece are endless!
Happy Halloween! More Spooky Treat Ideas!
Wishing everyone a fantastic and frightfully fun Halloween season! If you’re looking for even more inspiration to fill your Halloween party menu or just to enjoy some seasonal baking, here are some other delicious and easy treat ideas to consider:
- Halloween Cheesecake Parfaits – These layered delights are unbelievably good and SUPER easy to assemble. They offer a slightly more elegant (but still incredibly festive) dessert option that can be customized with various spooky toppings.
- Dracula’s Dentures – A truly playful and deliciously spooky snack that’s guaranteed to get some laughs from your guests. This recipe holds a special place in my heart as one of the first posts on my blog! I still vividly remember taking that picture on our old coffee table in one of our first apartments. Can you spot a glimpse of my old couch in the background? Ah, those were the early blogging days!
- Butterscotch Popcorn Balls – Am I the only one who feels like popcorn balls are an absolute, quintessential Halloween classic? They’re wonderfully chewy, sweet, and perfectly sticky, making them a superb, shareable treat for a class party, a neighborhood gathering, or simply a cozy autumn evening in.
More Fun Pop Ideas from Other Bloggers!
Looking to expand your repertoire of treats on a stick? Check out these creative ideas from fellow food bloggers:
- Halloween Candy Corn Cake Pops from Love from the Oven
- Muppets Cookie Pops from Living Locurto
- White Chocolate Dipped Cheesecake Pops from That Skinny Chick Can Bake
Connect with us for more delicious recipes and kitchen adventures!
Facebook |
Pinterest |
Instagram
Halloween Marshmallow Pops Recipe Card
Rating: 5 from 2 votes
Prep Time: 30 minutes
Total Time: 30 minutes
Yields: 24 pops
These Halloween Marshmallow Pops are about 10 times easier and faster to make than traditional cake pops, offering a delightful no-bake, fun, and creative project for kids and adults alike. Dive into the world of Frankenstein, ghosts, and mummies without the baking hassle, and create memorable spooky treats!
Ingredients
For All Halloween Marshmallow Pops (Base Supplies)
- Lollipop sticks (approximately 6 inches long)
- 24 large or extra-large marshmallows
- Small bucket, basket, or decorative container (for display)
- Block of styrofoam (optional, but highly recommended for holding pops upright)
- Black paper shred or crinkled tissue paper (to cover styrofoam, optional)
- Small plastic cellophane bags and ribbons/twist ties (optional, for individual party favors)
For Frankenstein Marshmallow Pops
- Green candy melts (about 1 cup per 6 pops)
- Black sanding sugar
- Candy eyes (2 per Frankenstein pop)
- Black decorating icing (in a tube with a small tip, e.g., #2, #3, or #4)
For Mummy Marshmallow Pops
- White decorating icing (in a tube)
- Black nonpareils (small sprinkles for eyes)
For Monster Marshmallow Pops (e.g., Purple, Blue)
- Blue and/or purple candy melts (about 1 cup per 6 pops)
- Blue and/or purple sanding sugar (optional)
- Candy eyes (various sizes, 1-3 per monster pop)
For Candy Corn Marshmallow Pops
- Orange candy melts
- Yellow candy melts
- Yellow sanding sugar (optional)
- Orange sanding sugar (optional)
For Pumpkin Marshmallow Pops
- Orange candy melts (about 1 cup per 6 pops)
- Small green leaf candy, or other green candies like M&M’s or Mike and Ike’s (cut in half if large)
For Ghost Marshmallow Pops
- Black edible marker
For BOO/RIP Gravestone Marshmallow Pops
- Black edible marker or black decorating icing with a very small tip
Instructions
- Prepare Your Marshmallows: Gently push a lollipop stick into the center of each marshmallow, ensuring it’s secure but doesn’t go all the way through the top.
- Melt Candy Melts: Melt your chosen color of candy melts in a deep mug or microwave-safe bowl in 30-second intervals, stirring well after each, until smooth and fluid. Be careful not to overheat.
- To Make Frankenstein Pops: Dip the entire marshmallow into the melted green candy, covering it completely. Gently tap off any excess. While the candy is still wet, immediately dip the top section of the marshmallow into black sanding sugar to create “hair.” Press two candy eyes onto the front. Place the pop into a styrofoam block to dry completely (a few minutes in the fridge works wonders). Once dry, use black decorating icing with a small tip to draw a zig-zag mouth and any desired “stitches” or scars.
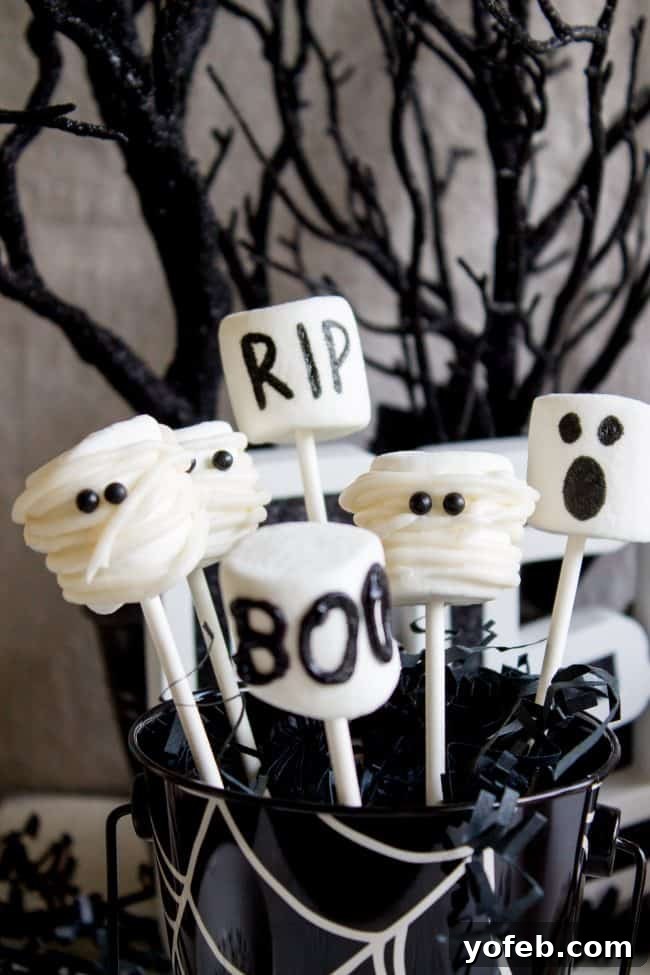
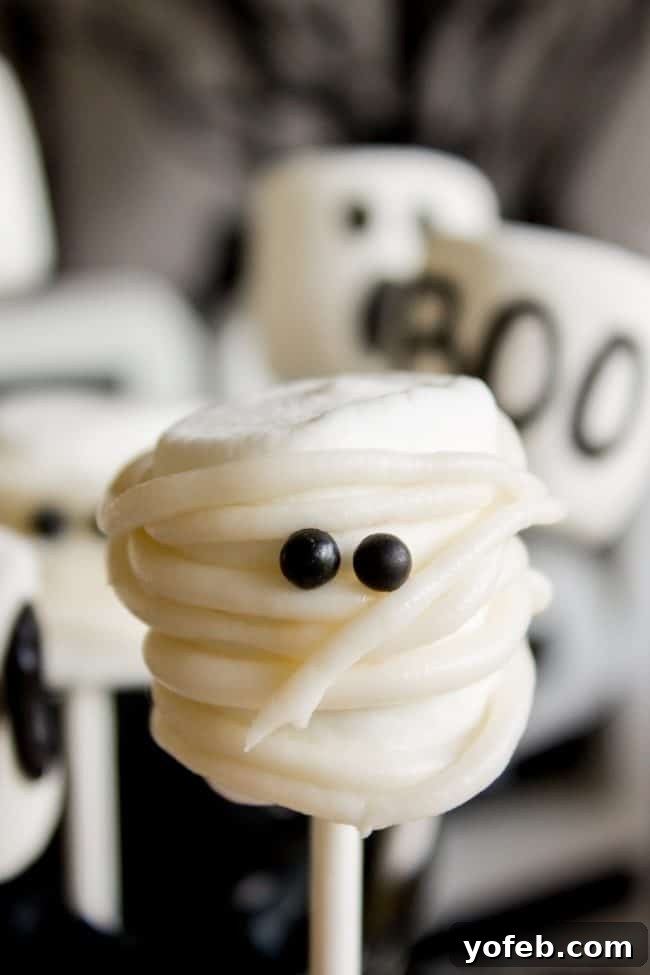
- To Make Mummy Pops: Secure a marshmallow onto a lollipop stick. Using white decorating icing, pipe thin lines while spinning the marshmallow to create a “bandaged” effect, covering it entirely. It’s okay if the lines aren’t perfect – mummies are supposed to look a little tattered! Add two small black nonpareils for eyes. Allow the frosting to set in the fridge. Note: Mummy icing can be fragile, so these are best for immediate serving or very gentle handling if wrapped.
- To Make Monster Pops: Dip a marshmallow on a stick into your melted blue or purple candy melts, covering it completely. Tap off excess. If using colored sanding sugar, gently press the top and sides of the pop into the corresponding sugar while the candy is still wet. Immediately press candy eyes (use one, two, or even three for a whimsical monster effect!). Let dry completely in styrofoam.
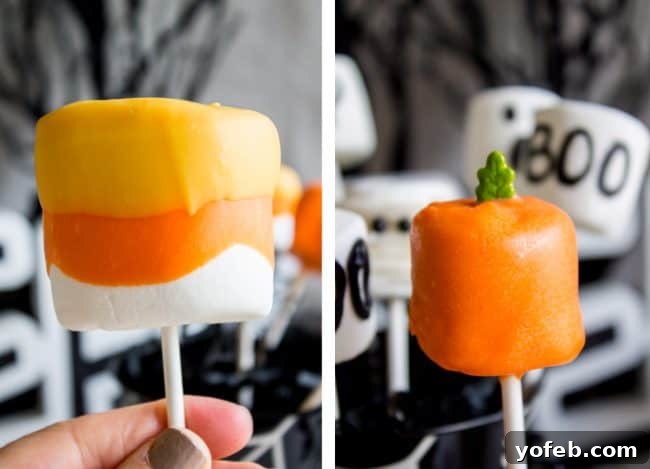
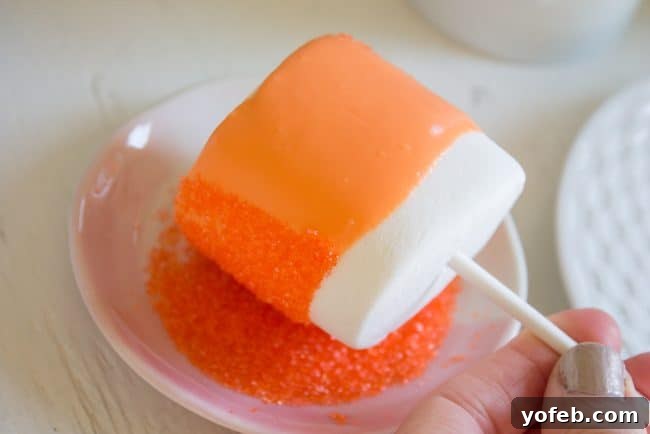
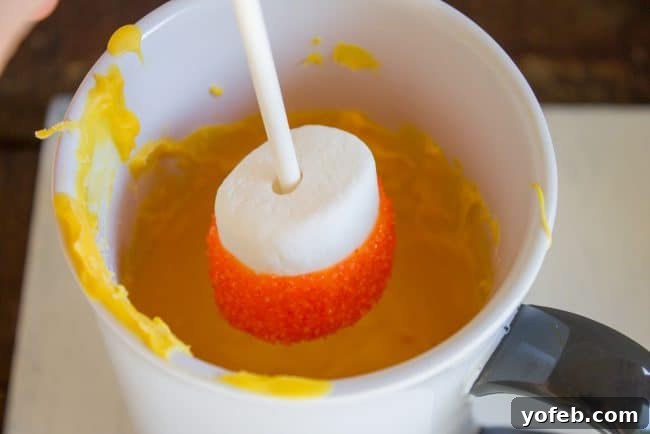
- To Make Candy Corn Pops: Press a stick into a marshmallow. Dip the marshmallow about two-thirds of the way into melted orange candy melts. Allow this orange layer to dry completely. Next, dip the top one-quarter of the marshmallow into melted yellow candy melts. If desired, gently press the orange-dipped section into orange sanding sugar and the yellow-dipped top into yellow sanding sugar while wet. Let dry completely.
- To Make Pumpkin Pops: Dip a marshmallow on a stick into melted orange candy melts, covering it fully. Tap off excess. While the orange candy is still wet, gently press a small green leaf-shaped candy (or a small piece of another green candy) onto the very top to create a pumpkin stem. Let dry completely.
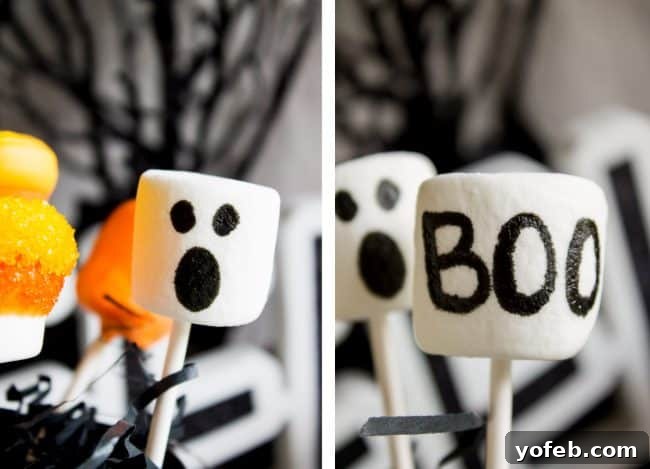
- To Make Ghost Pops: For these simplest ghosts, no dipping is required! Secure a marshmallow onto a stick. Use a black edible marker to draw two oval eyes and a larger oval mouth on the front of the marshmallow.
- To Make BOO/RIP Gravestone Pops: Secure a marshmallow onto a stick. You can leave it white, or dip it in a very light grey candy melt for a stone effect. Once dry, use a black edible marker or black decorating icing with a very fine tip to carefully write “BOO” or “RIP” on the front of the marshmallow.
- To Assemble a Centerpiece: Place a block of styrofoam in the bottom of your chosen decorative bucket, basket, or container. Cover the styrofoam with black paper shred or crinkled tissue paper. Insert each finished marshmallow pop securely into the styrofoam, arranging them to create a charming and spooky display.
- To Assemble as Party Favors: Once the marshmallow pops are completely dry and set, carefully slide each one into a small plastic treat bag. Tie the bag securely at the base of the marshmallow with a twist tie, a festive ribbon, or natural twine.
Notes
- Stick Alternatives: For a more eco-friendly option, consider using sturdy paper straws instead of plastic lollipop sticks.
- Candy Melt Consistency: If your candy melts become too thick while working, microwave them for another 10-15 seconds and stir, or add a very small amount of vegetable shortening (like Crisco) to thin the consistency.
- Kid Involvement: While adults should handle the hot melted candy, kids can enthusiastically help with pressing on candy eyes, sprinkling sanding sugar, and drawing faces with edible markers. Supervise closely for safety.
- Cooling Time: Placing dipped pops in the refrigerator for 5-10 minutes can significantly speed up the drying time of the candy coating.
Nutrition Information (Approximate per serving)
Serving Size: 1 pop | Calories: 111kcal | Carbohydrates: 17g | Protein: 1g | Fat: 5g | Saturated Fat: 4g | Polyunsaturated Fat: 1g | Monounsaturated Fat: 1g | Potassium: 1mg | Fiber: 1g | Sugar: 15g | Calcium: 1mg | Iron: 1mg
Course: Snack, Dessert
Cuisine: American
Keywords: Halloween, marshmallow, pops, easy, no-bake, kids, party, Frankenstein, ghost, mummy, pumpkin, candy corn, DIY, spooky, treat, dessert
Did you make this? I’d love to see it!
Mention @thefoodcharlatan or tag #thefoodcharlatan!