
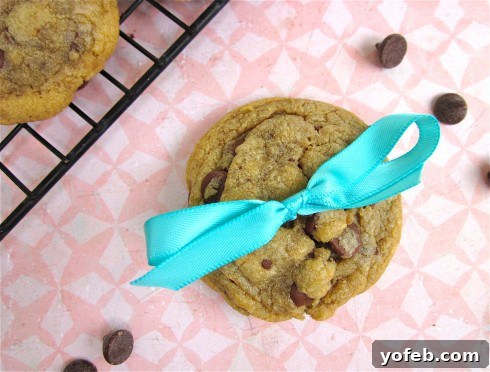
The Ultimate Guide to My Favorite Classic Chocolate Chip Cookies
Ah, the humble chocolate chip cookie. Is there anything more universally loved? It’s a treat that transcends generations, cultures, and dietary trends. Everyone seems to have a cherished memory associated with these golden-brown discs of joy, and often, a fiercely guarded “favorite” recipe. While the culinary world constantly churns out new twists – dark chocolate, sea salt, cornstarch, pudding mix, elaborate chilling times – sometimes, the heart simply craves the comforting embrace of a true classic. And that, my friends, is precisely what you’ll find here. This isn’t just *a* chocolate chip cookie recipe; it’s *the* recipe that has captured my heart, a timeless rendition that proves simplicity, when executed perfectly, is truly unbeatable.
In a landscape saturated with innovative baking techniques and exotic ingredients, this recipe stands as a testament to tradition. It requires no obscure pantry items, no elaborate steps that test the patience of a saint. Instead, it relies on quality basic ingredients and a straightforward process to deliver a cookie that is perfectly chewy in the center, subtly crisp at the edges, and bursting with that unmistakable, deeply satisfying chocolate chip flavor. If you’ve been on a lifelong quest for the ultimate classic chocolate chip cookie – the kind that tastes like childhood memories and warm hugs – your search ends now. Prepare to rediscover the pure, unadulterated pleasure of a truly classic treat.
Baking Memories: A Childhood Flour Fiasco
My love affair with chocolate chip cookies began early, a passion ignited in my childhood kitchen. Back then, I was a self-proclaimed cookie-making prodigy, convinced I had my mom’s recipe memorized down to the last gram (a delusion I, to this day, haven’t quite shaken). It was an era before stand mixers graced our countertops, a time when elbow grease and sheer determination were the primary tools of any aspiring young baker. The kitchen was a place of endless possibilities, sweet aromas, and occasional, memorable mishaps.
One particular afternoon, a friend and I decided to embark on a grand cookie-baking adventure. I confidently declared that my mom always “doubled the recipe” – a fact I vaguely remembered. What I evidently *didn’t* recall was the actual quantity of flour. With the unshakeable conviction of a child, I proceeded to double what I *thought* was the correct amount. The result? A staggering 12 cups of flour dumped into the mixing bowl. We plunged our hands into the growing mountain of stiff dough, valiantly attempting to stir it by hand. It was less like baking and more like an intense, dough-based wrestling match, our small arms aching from the effort to incorporate what felt like an endless supply of white powder. The kitchen, once a realm of sweet anticipation, had quickly transformed into a scene of flour-dusted chaos and youthful exasperation.
Just as despair began to set in, my dad, ever the pragmatic hero, stepped into the flour-filled battlefield. He took one look at our colossal, unyielding dough blob and instantly grasped the magnitude of our youthful error. Instead of chastising us or simply tossing the botched batch, he saw an opportunity for legendary culinary creativity. With a twinkle in his eye, he declared we would simply add *more* of the other ingredients to salvage our creation, aiming for nothing less than the largest batch of cookies ever attempted outside of a professional bakery. The only catch? We didn’t have nearly enough chocolate chips to go around for this behemoth. Undeterred, Dad rummaged through the cupboards, his improvisational spirit taking hold. What we lacked in classic chocolate, we made up for in whimsy: dozens upon dozens of cookies emerged, each studded with colorful, sugary Lucky Charms marshmallows.
I can still picture my siblings’ faces, a mixture of bewilderment and perhaps a hint of indignation. The one time our mom splurged on that coveted sugary cereal, and it ended up baked into our cookies! It was a chaotic, sugar-fueled afternoon that lives on as a cherished family legend, a testament to the joy of baking, the occasional comical disaster, and the magic of a dad who knew how to turn a culinary catastrophe into a sweet, unforgettable memory. These are the kinds of stories that remind us why baking, especially something as simple and comforting as chocolate chip cookies, is so much more than just following a recipe; it’s about creating moments.
Why This Classic Chocolate Chip Cookie Recipe Reigns Supreme
So, what makes this particular chocolate chip cookie recipe my absolute favorite, the one I return to again and again? It’s a culmination of perfect texture, balanced sweetness, and an authentic, comforting flavor that defines what a truly great chocolate chip cookie should be. Forget the fads; this recipe celebrates the pure essence of what makes this treat so universally adored.
The Perfect Balance of Texture and Flavor
- Chewy Center, Crisp Edges: This recipe delivers the holy grail of cookie textures. Each bite starts with a delicate crispness on the outside, giving way to a wonderfully soft and chewy interior. It’s not too cakey, not too thin, but just right.
- Rich, Balanced Sweetness: The combination of white sugar and dark brown sugar is key. White sugar contributes to the crispness and spread, while dark brown sugar brings moisture, depth of flavor (thanks to its molasses content), and that coveted chewiness.
- Uncomplicated Deliciousness: There are no surprises here – no dark chocolate for bitterness, no sea salt for contrast, no cornstarch for puff, and certainly no pudding mix for artificial softness. This is a recipe that trusts the foundational ingredients to shine, resulting in an honest, unpretentious, and deeply satisfying chocolate chip cookie.
- The Power of Butter and Shortening: The unique blend of butter and butter-flavored shortening is a secret weapon. Butter provides incredible flavor, while shortening contributes to a softer texture and helps prevent excessive spreading, giving the cookies a lovely, slightly thicker profile. This combination ensures a cookie that holds its shape beautifully while maintaining a tender crumb.
Essential Tips for Baking Your Best Batch of Chocolate Chip Cookies
Achieving cookie perfection is within your grasp! While this recipe is incredibly forgiving, a few key techniques and considerations can elevate your homemade chocolate chip cookies from great to truly exceptional. Follow these expert tips to ensure every batch is a resounding success.
Ingredient Essentials: Quality Matters
- Room Temperature Ingredients: Ensure your butter, shortening, and eggs are at true room temperature. This allows them to cream together properly, creating an emulsified mixture that traps air, resulting in a lighter, more evenly textured cookie. Cold ingredients will lead to a lumpy batter and a denser cookie.
- Use Fresh Ingredients: Fresh eggs and good quality vanilla extract make a noticeable difference. While semi-sweet chocolate chips are classic, using a brand you love will directly impact the final flavor.
- The Right Shortening: The recipe calls for butter-flavored shortening, which provides a fantastic balance of texture without sacrificing that delicious buttery taste. If you’re particular about fat ratios, remember that the total fat amount (butter + shortening) should always equal 1 1/2 cups. Feel free to experiment with your preferred blend, but a mix is often ideal for both flavor and structure.
Mastering the Mixing Process
- Creaming is Key: Don’t rush the creaming of the sugars, butter, and shortening. This step is crucial for incorporating air, which contributes to the cookies’ lift and tender texture. Cream until light and fluffy, typically 2-3 minutes.
- Don’t Overmix the Flour: Once you add the dry ingredients to the wet, mix *just until* everything is combined. Overmixing develops the gluten in the flour, which can lead to tough, dense cookies. The moment you see no streaks of flour, stop mixing.
- Chocolate Chips Last: Add your chocolate chips towards the end of the mixing process. This ensures they are evenly distributed without being broken down too much by the mixer.
The Magic of Chilling the Dough
- Why Chill? Refrigerating the dough for at least an hour (or even overnight!) is a game-changer. Chilling allows the flour to fully hydrate, deepening the flavor of the cookies. It also solidifies the fats, which prevents the cookies from spreading too much in the oven, leading to a thicker, chewier cookie with those lovely slightly crisp edges.
- Quick Chill Hack: If time is of the essence, use a cookie scoop to form individual balls of dough and place them directly into a ziplock bag. Freeze them for a quick half-hour. This speeds up the chilling process significantly.
Baking for Perfection
- Preheat Accurately: Ensure your oven is fully preheated to 350°F (175°C) before placing your cookies inside. An accurately heated oven is critical for even baking.
- Uniform Cookie Size: Use a cookie scoop to ensure all your cookies are roughly the same size. This guarantees they bake evenly, preventing some from being underdone while others are overbaked. Aim for golf ball-sized portions.
- Proper Spacing: Place your cookie dough balls about an inch and a half apart on a baking sheet lined with parchment paper or a silicone baking mat (Silpat). This prevents them from merging into one giant cookie blob as they spread.
- Watch for Doneness: Bake for 12-15 minutes. Cookies are done when the edges are golden brown, but the centers still look slightly soft. They will continue to set as they cool.
- Cooling Process: Let the cookies cool on the baking sheet for about 5 minutes after removing them from the oven. This allows them to firm up slightly before you transfer them to a wire rack to cool completely. Moving them too soon can cause them to break apart.
By following these tips, you’re not just baking cookies; you’re crafting an experience. Each step is designed to contribute to the ultimate classic chocolate chip cookie, a testament to timeless taste and simple pleasures.
Now, let’s get to the recipe that started it all!

My Favorite Chocolate Chip Cookies

Ingredients
- 1 cup white sugar
- 1 & 1/2 cups dark brown sugar
- 1 cup butter, softened (2 sticks)
- 1/2 cup butter flavored shortening
- 3 large eggs
- 1 tablespoon pure vanilla extract
- 4 & 3/4 cups all purpose flour
- 2 teaspoons baking soda
- 1 & 1/2 teaspoons salt
- 12 ounces semi-sweet chocolate chips
Instructions
-
In a large bowl, cream together the white sugar, dark brown sugar, softened butter, and butter-flavored shortening until light and fluffy. Beat in the vanilla extract and eggs one at a time, ensuring each is fully incorporated before adding the next. In a separate medium bowl, whisk together the all-purpose flour, baking soda, and salt. Gradually add the dry ingredients to the creamed mixture. Just before the flour is fully incorporated, add the semi-sweet chocolate chips and mix briefly, only until everything is combined and no dry streaks of flour remain. Be careful not to overmix.
-
Cover the dough and refrigerate for at least one hour. For best results and richer flavor, chill for 2-4 hours, or even overnight. If you’re short on time, use a cookie scoop to form individual dough balls, place them directly into a ziplock bag, and freeze for 30 minutes.
-
Preheat your oven to 350°F (175°C). Line a baking sheet with parchment paper or a silicone baking mat. If you refrigerated the dough in the bowl, use a cookie scoop to form uniform balls of dough, roughly the size of golf balls. Place each dough ball about 1.5 inches apart on the prepared baking sheet to allow for spreading.
-
Bake for 12-15 minutes, or until the edges are golden brown and the centers are still slightly soft. Do not overbake. Let the cookies cool on the baking sheet for 5 minutes before carefully transferring them to a wire rack to cool completely. Once cooled (or still warm!), enjoy your freshly baked, delicious classic chocolate chip cookies!
Notes
Source: Adapted from my sister-in-law Clairice
Nutrition