
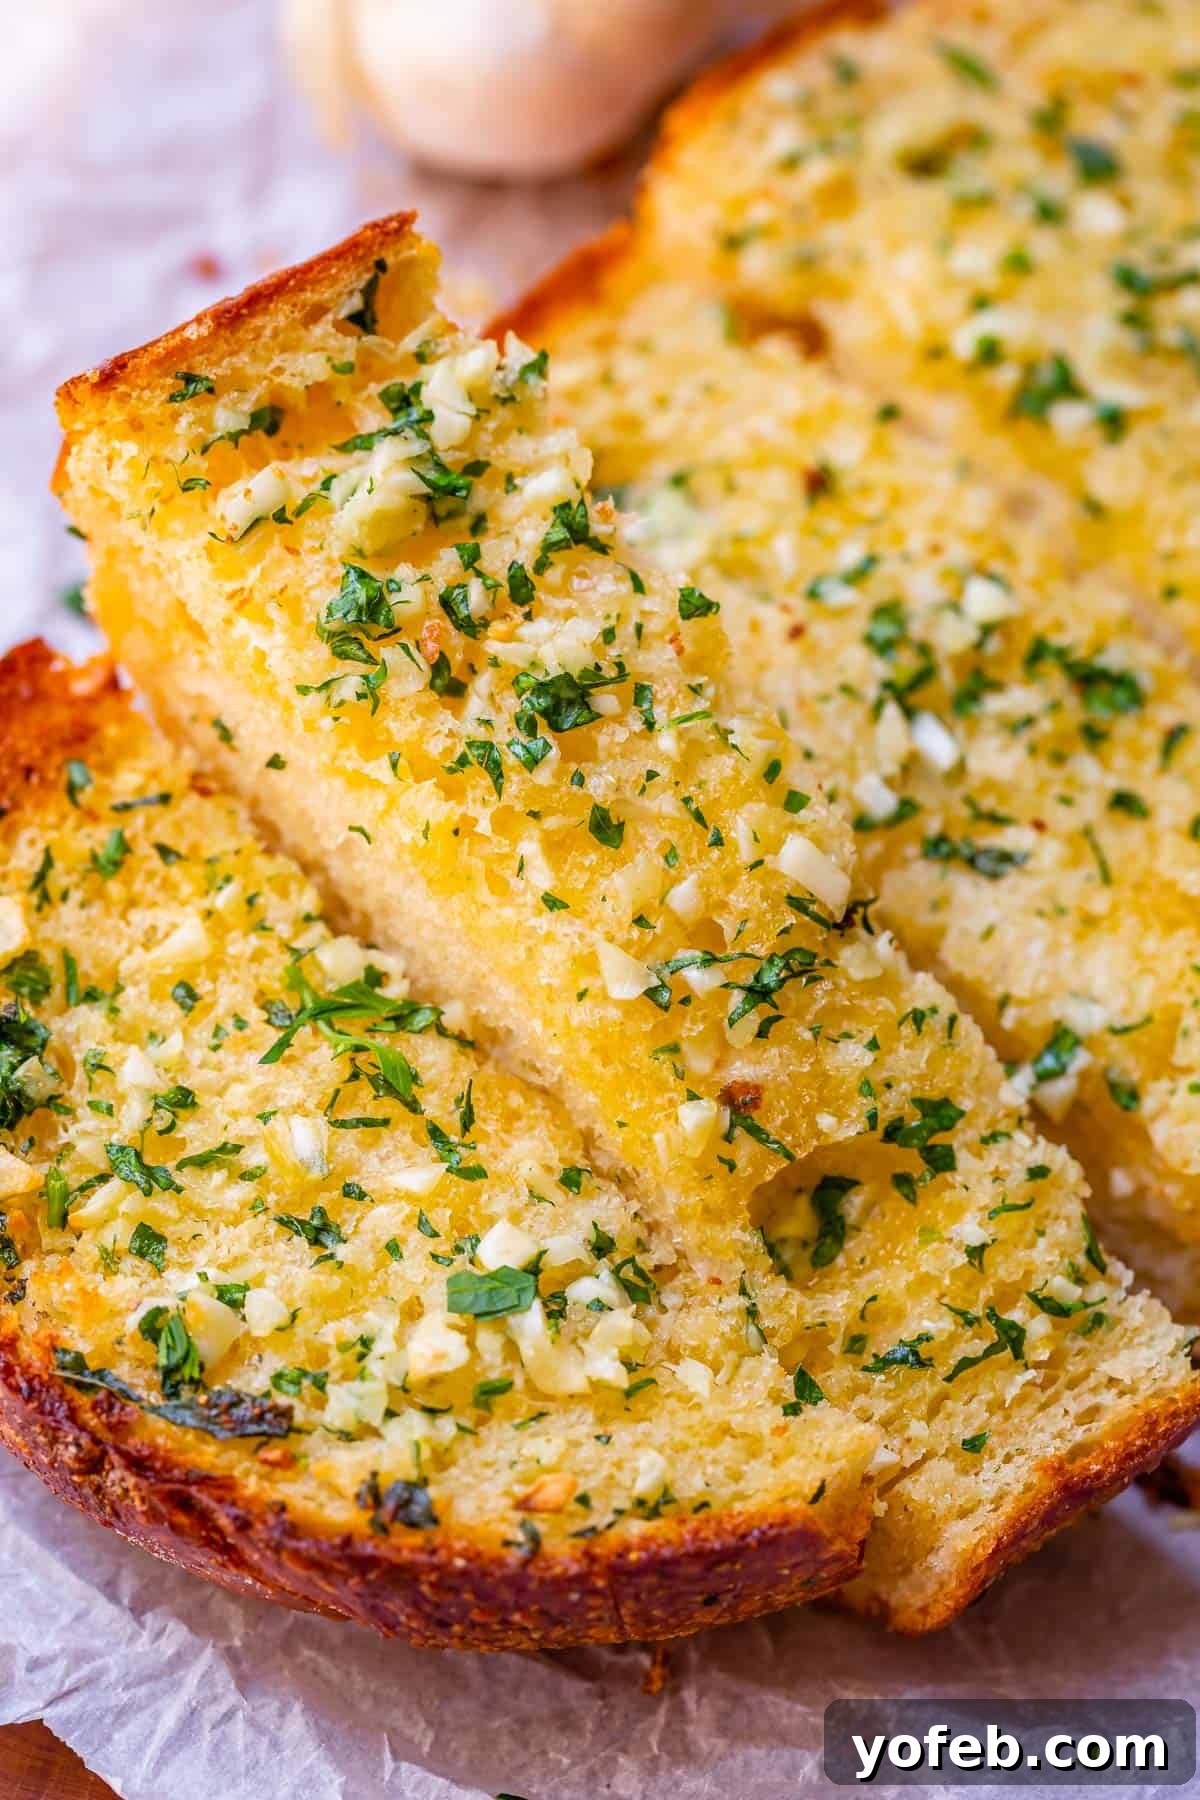
Prepare yourself for the ultimate garlic bread experience! This isn’t just a recipe; it’s a guide to crafting the most irresistible homemade garlic bread you’ve ever tasted. Imagine perfectly crispy edges giving way to a wonderfully chewy, soft interior, each bite infused with the rich flavor of softened, salted butter and fragrant garlic. We’re about to unlock three fundamental tips that will elevate your garlic bread to professional levels, along with three distinct methods to suit every preference. Get ready to transform simple ingredients into a side dish that steals the show! Originally published May 19, 2023.
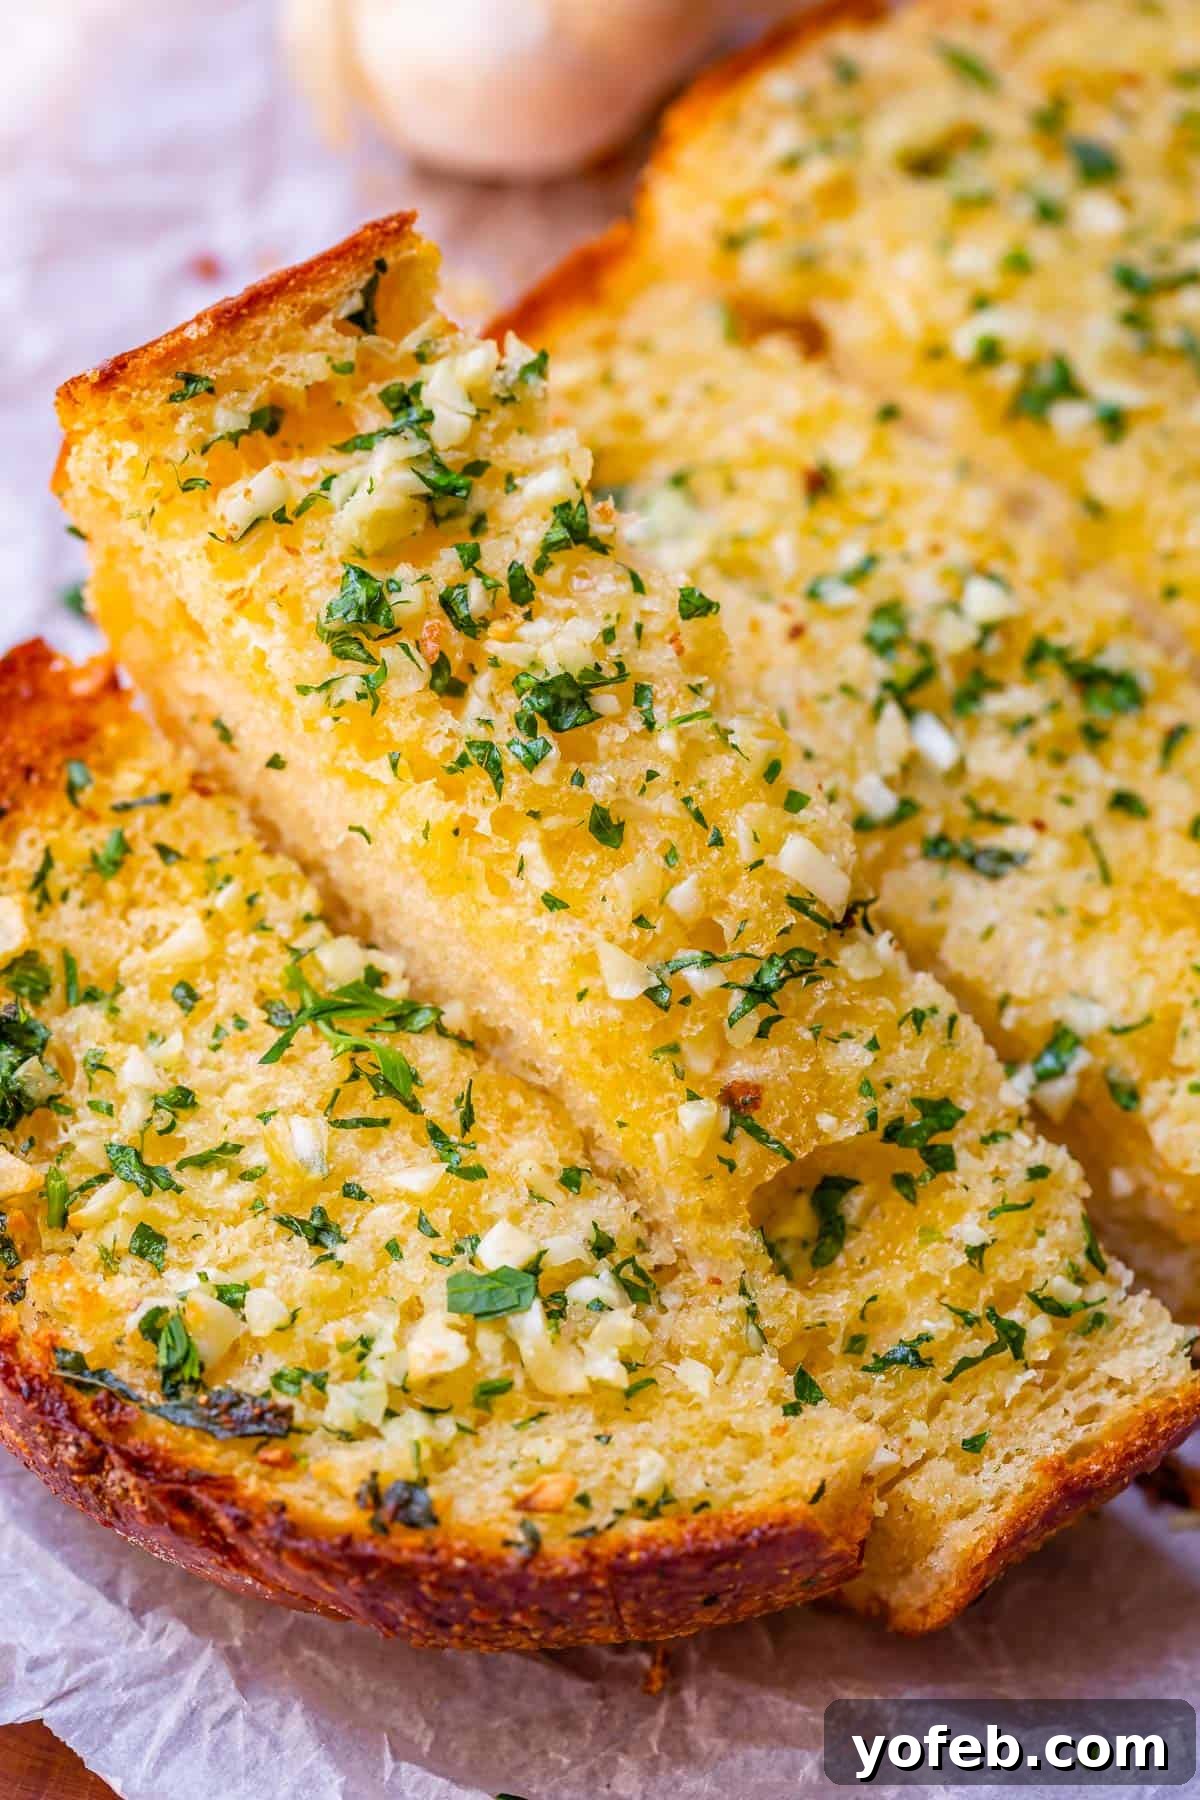
Table of Contents
- The Irresistible Allure of Garlic Bread
- Why This Is The BEST Garlic Bread Recipe You’ll Ever Make
- Essential Ingredients for Homemade Garlic Bread
- Crafting the Perfect Garlic Butter
- Mastering Garlic Bread in the Oven: 3 Methods
- Elevate Your Garlic Bread with Cheese
- Top 3 Tips for Unforgettable Homemade Garlic Bread
- What to Serve Alongside Your Garlic Bread
- Storage and Reheating Garlic Butter Bread
- Frequently Asked Questions About Garlic Bread
- More Delightful Bread Recipes
- Homemade Garlic Bread Recipe
Life, much like baking, often presents unexpected twists and turns. Just the other day, my adventurous three-year-old, Edison, decided our living room was an excellent venue for an indoor bouncy ball competition. The ball ricocheted off every surface imaginable, possibly even making a brief, albeit soft, stop on Grandma’s head. I, attempting to channel my most authoritative mom voice, sternly warned him, “If I see that ball thrown one more time, it’s gone.”
Minutes later, the tell-tale thumps resumed. Rushing into the living room, I exclaimed, “Edison! You can’t throw the bouncy ball!” He calmly looked at me, as if explaining a simple concept to a rather slow student, and replied, “But you didn’t *see* me.” A classic move, indeed! A rookie parenting mistake, and a testament to the fact that even in the chaos of daily life, some things, like the joy of perfectly executed garlic bread, are simply undeniable.
The Irresistible Allure of Garlic Bread
Imagine this: you’re settling in for a perfectly balanced meal, a plate filled with wholesome proteins and vibrant vegetables. Then, a glistening, golden loaf of garlic bread emerges, and suddenly, all dietary discipline goes out the window. Your focus shifts entirely to that aromatic, buttery goodness. It’s a primal, undeniable craving that transforms you into a singular mission: acquire and devour garlic bread. Some might even say your pupils take on the shape of tiny, heart-shaped garlic bulbs in anticipation.
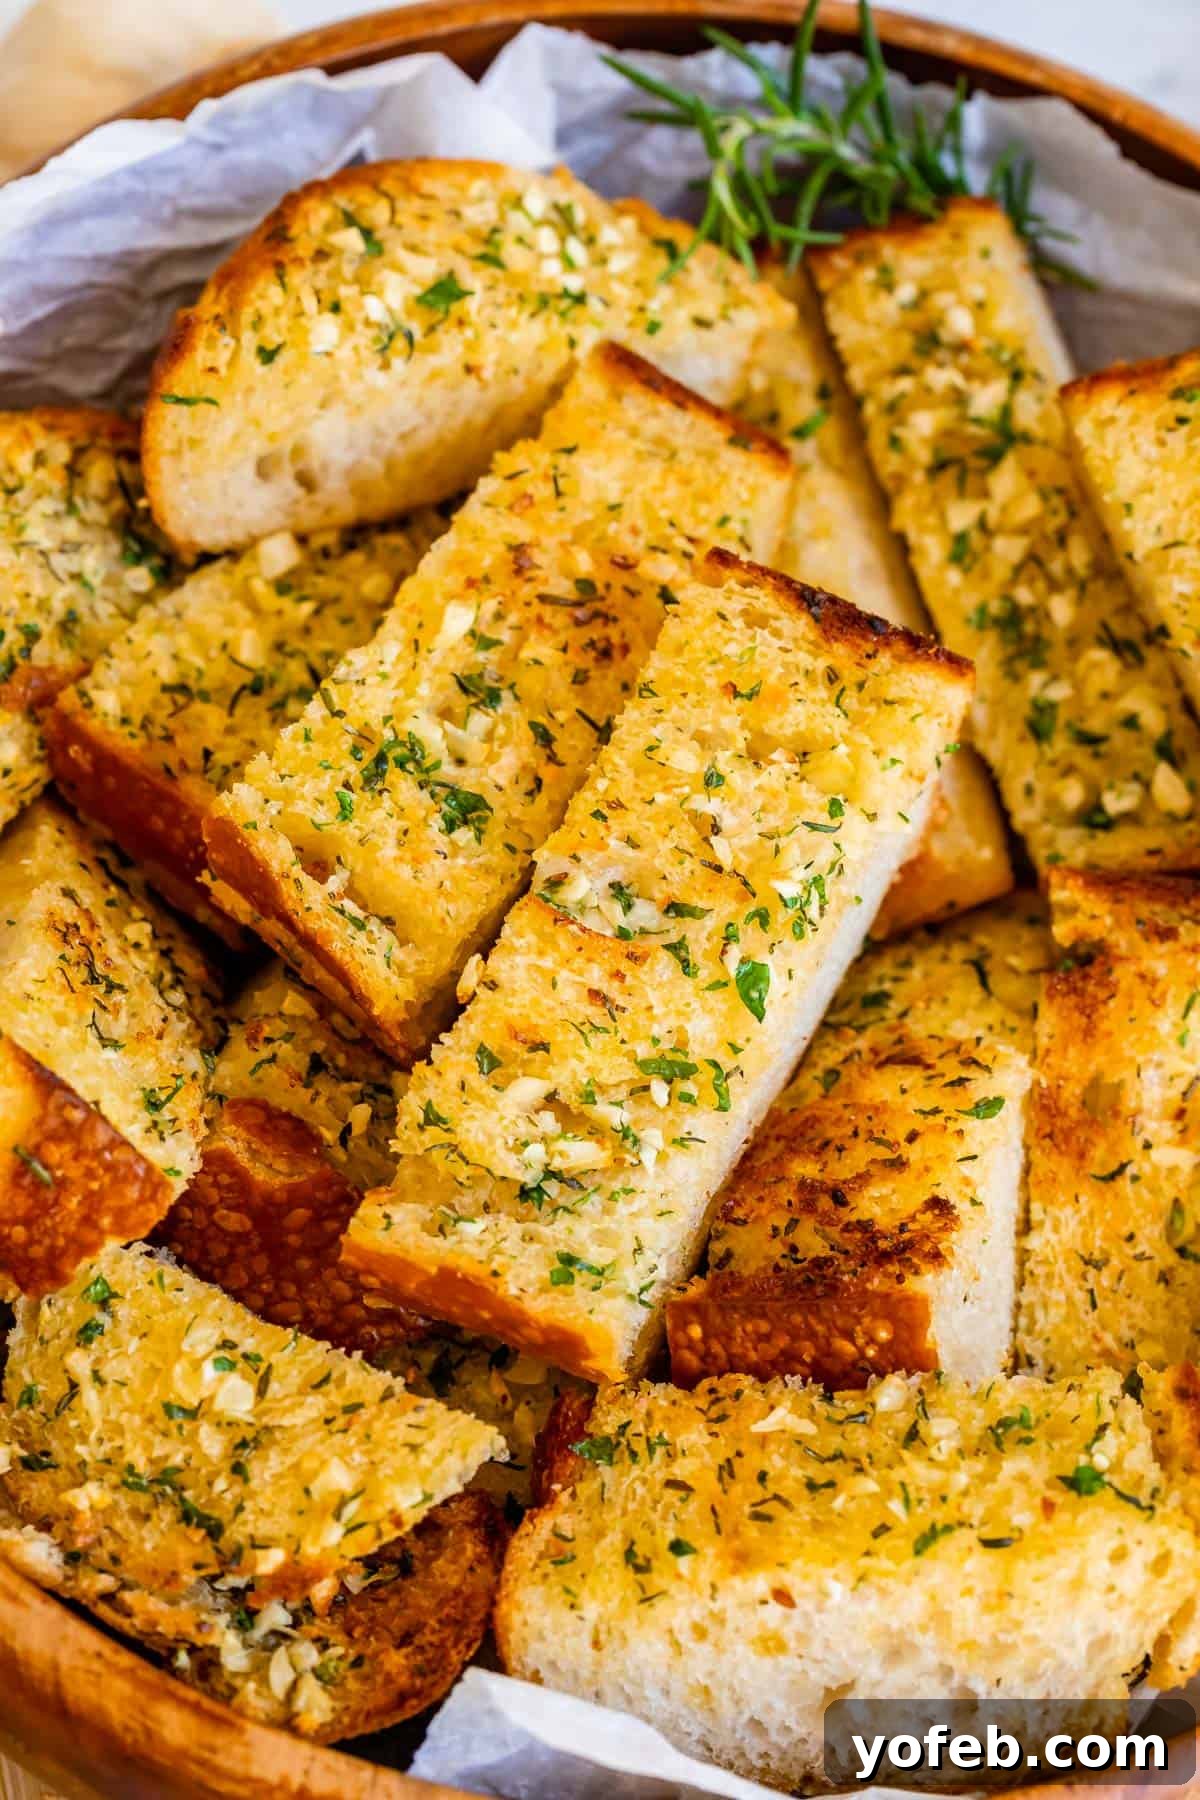
This exact scenario plays out every time I step into an Italian restaurant. I carefully peruse the menu, agonizing over the perfect pasta or entrée. But the moment those menus are whisked away and a basket of warm, crusty bread arrives, often still steaming and fragrant, my carefully laid plans crumble. The “garlic-mania” sets in. That meticulously chosen meal? It’s now designated for tomorrow’s lunch. All that matters in that instant is the hot, toasty, garlicky, buttery bread right in front of me. And I want it *now*. (To be clear, I’d likely fail the marshmallow test spectacularly in the presence of fresh garlic bread.)
There truly is nothing quite like freshly baked garlic bread. It’s a culinary masterpiece that transcends mere sustenance. Many believe it’s the ultimate comfort food, a simple pleasure that brings joy to any meal. Indeed, it’s so fundamental to a satisfying dining experience that one might even suggest it’s the very “staff of life” itself, meant to be savored and enjoyed without reservation.
Why This Is The BEST Garlic Bread Recipe You’ll Ever Make
I must confess, I once considered myself a complete failure at making garlic bread. How could something so seemingly straightforward be so difficult? Yet, my attempts often resulted in burnt crusts, insufficient butter, or an overwhelming amount of salt. It was a disheartening cycle of culinary missteps.
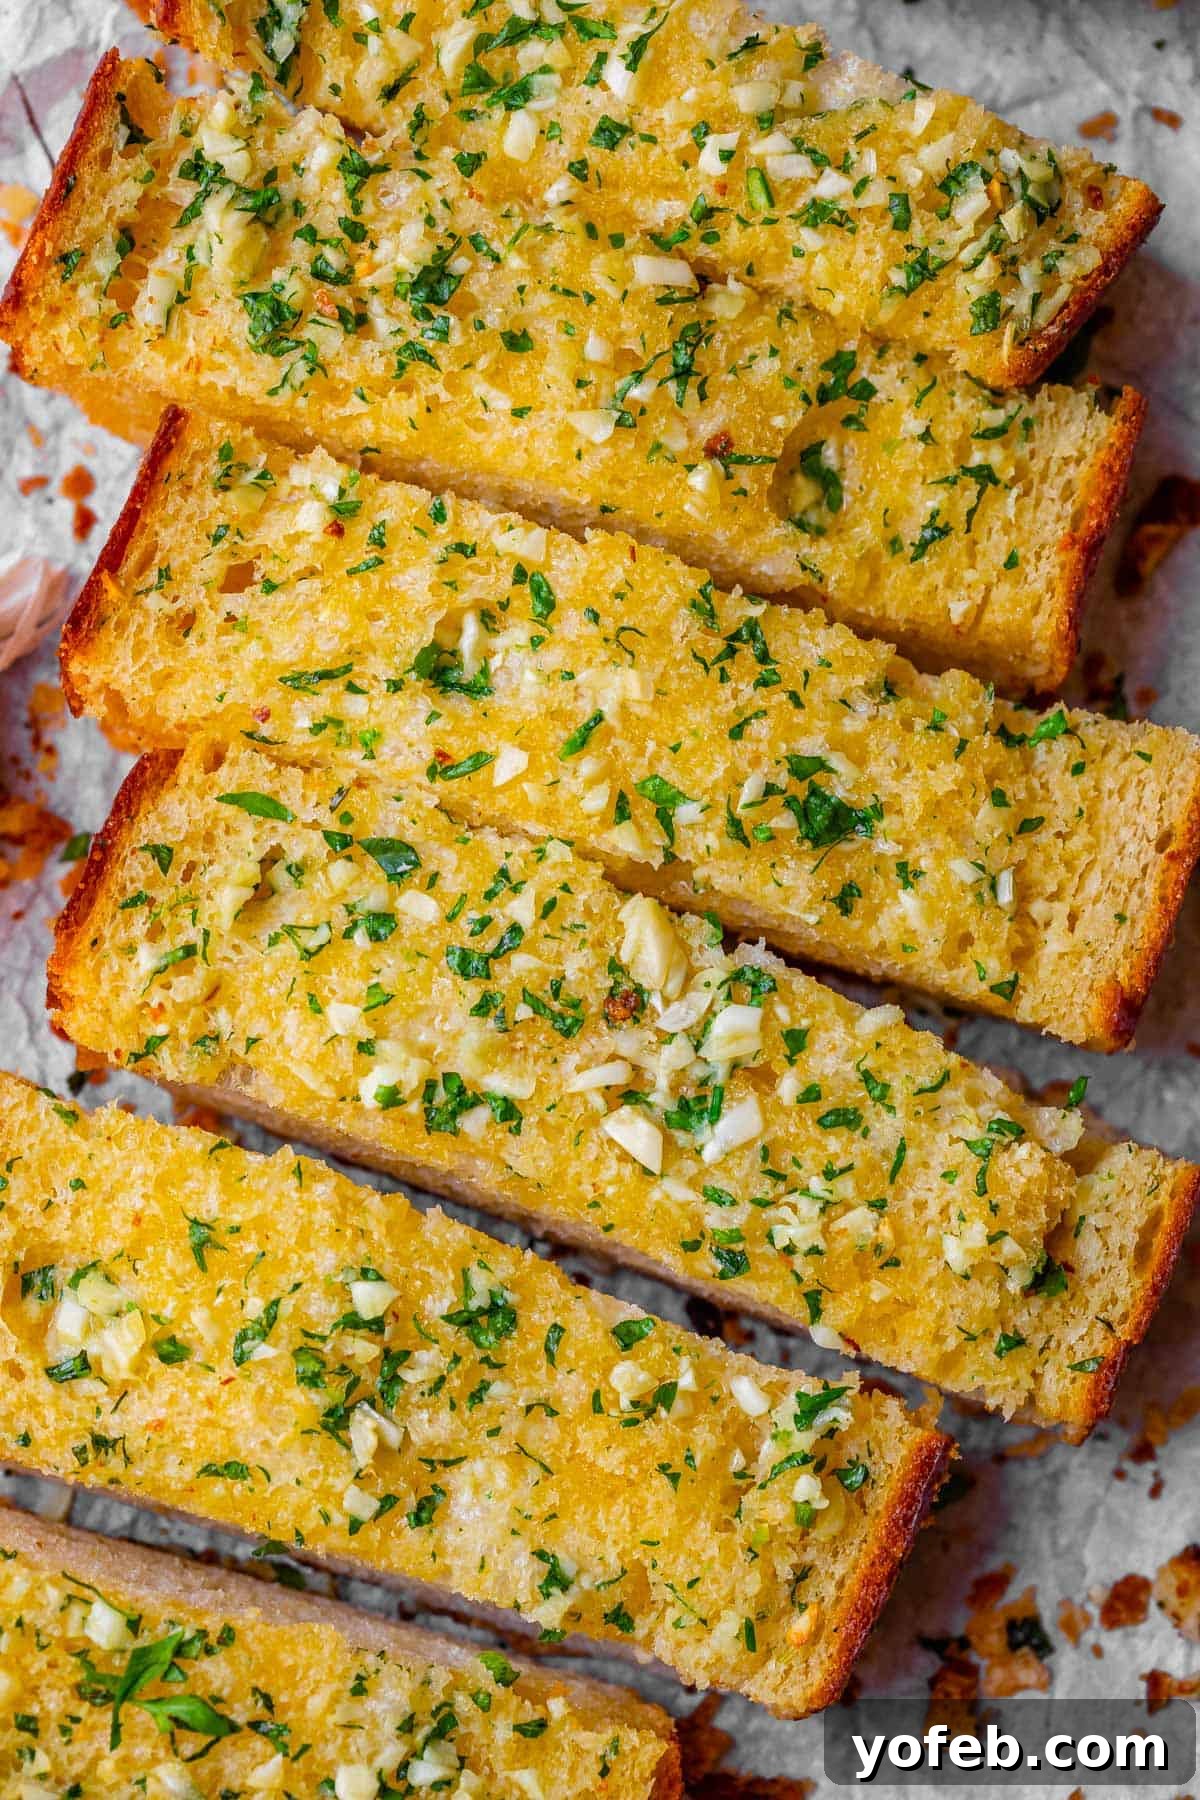
My quest for perfection led me through countless loaves, easily 15 batches, leaving my freezer overflowing with less-than-ideal test subjects. My son, Edison, proved to be an exceptionally harsh critic. When presented with an overly crusty piece, he’d meticulously extract the soft, buttery center, then, with mischievous glee, systematically crush the hardened edges into a fine powder to sprinkle beneath his chair. The indignant parental shrieks that followed each meal were, no doubt, a treasured reward for his efforts.
But fear not, for I have endured the trials and tribulations of garlic bread experimentation so you don’t have to! This guide is designed to guarantee your success, delivering garlic bread that boasts a delightfully soft and chewy center, harmoniously contrasted with shatteringly crispy edges (if that’s your preference – instructions for perfectly soft garlic bread are also included!). Every single bite will be infused with rich, savory butter, and I’ll reveal the secrets to preventing it from ever drying out. Get ready to impress yourself and everyone at your table!
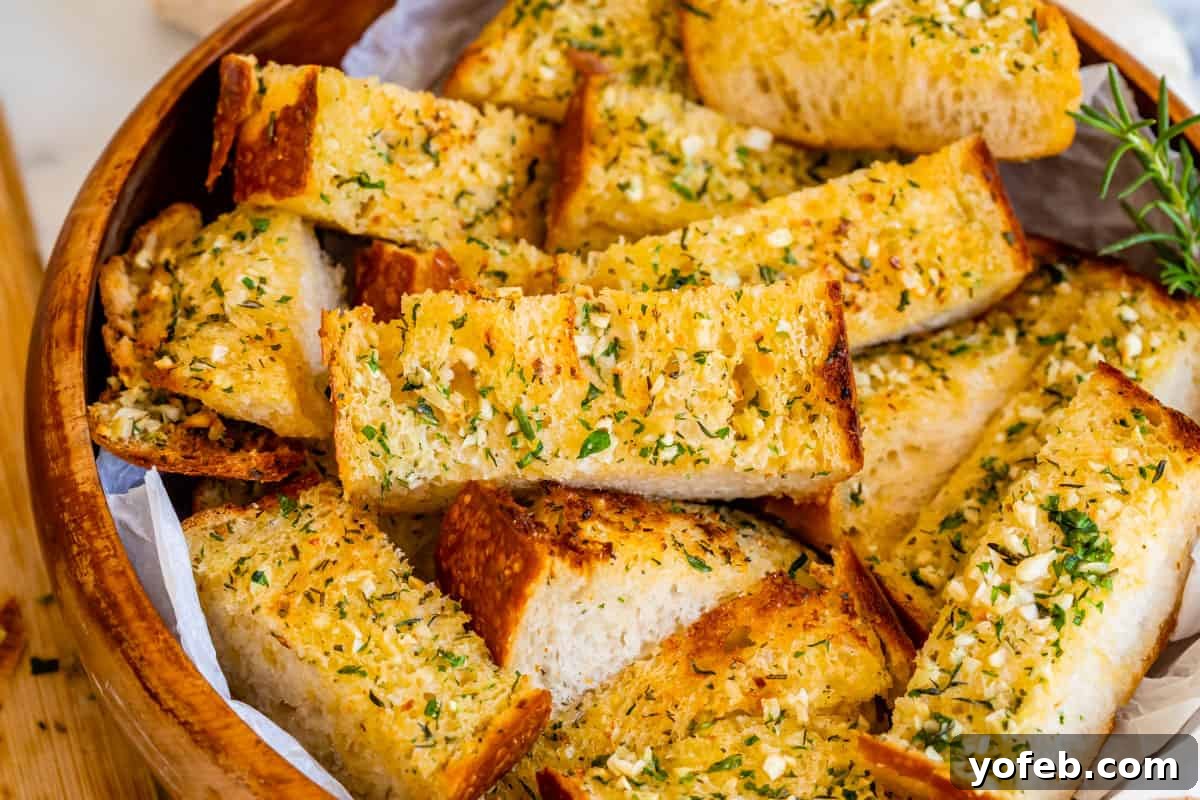
Essential Ingredients for Homemade Garlic Bread
Making truly exceptional garlic bread is surprisingly simple, relying on just a handful of core ingredients. We’re talking only four absolute essentials, with a few optional additions to elevate your creation if you’re feeling fancy. The full, precise recipe can be found at the conclusion of this article!
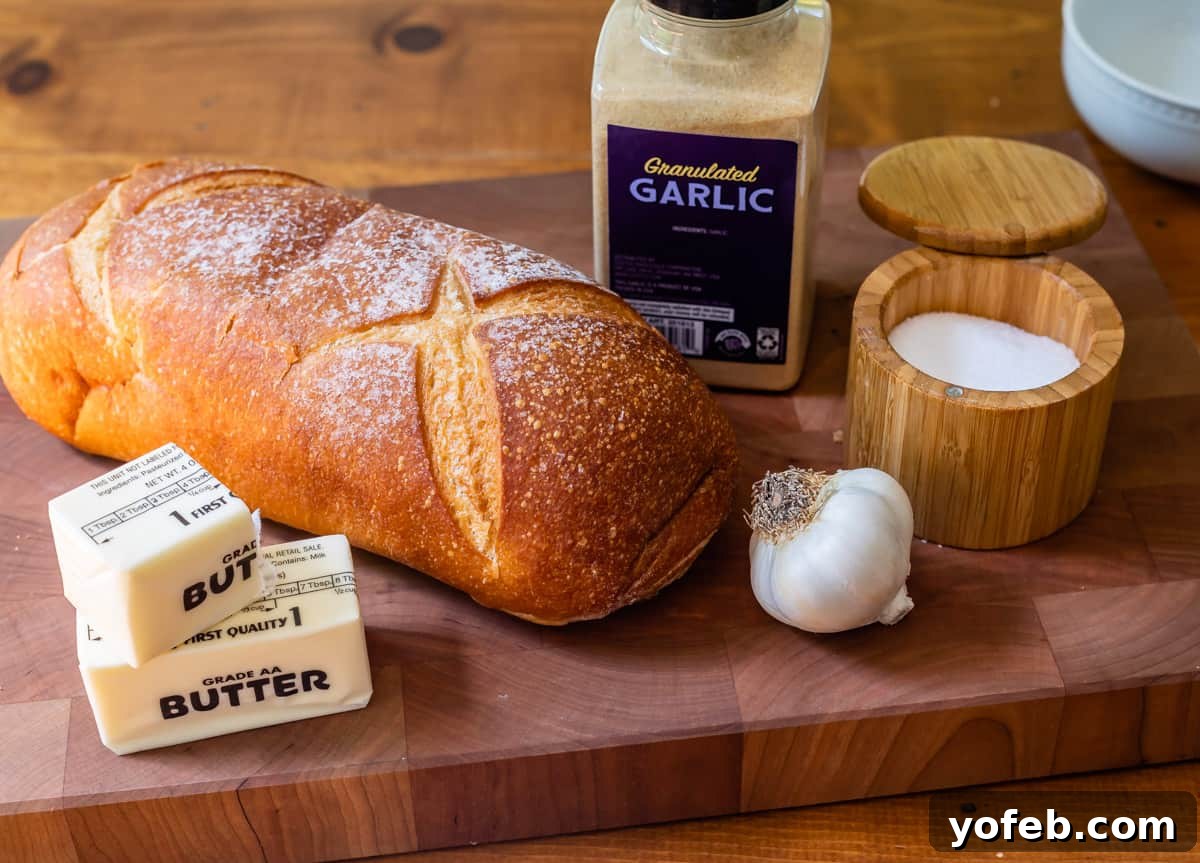
- A high-quality loaf of bread – more details on selection below.
- Generous amounts of luscious butter – trust me, you’ll need more than you think!
- Fine-grained kosher salt for perfect seasoning.
- Absolutely indispensable: high-quality garlic powder.
- Fresh garlic (optional, but highly recommended for an extra punch, as we’ll discuss).
- Optional flavor boosters: finely chopped fresh rosemary, thyme, and parsley.
- For an irresistible cheesy version: shredded mozzarella and/or grated Parmesan cheese.
What is the Best Bread for Garlic Bread?
Given the simplicity of this recipe, the quality of your ingredients genuinely makes a difference. (Though, in a pinch, I’m convinced I could make cardboard edible with enough butter and garlic!) Choosing the right bread is the first step towards garlic bread perfection.
French bread remains the most classic and popular choice. I personally swear by the “Country French Bread” from Costco; it’s consistently fantastic and what you see beautifully showcased in these photos. A standard French loaf from your local grocery store will also work wonderfully! However, don’t limit your creativity. You can transform almost any good quality bread into spectacular garlic bread (excluding, of course, cardboard – I was only joking!):
- Homemade French Bread (surprisingly quick to make, taking only about an hour!)
- Artisan Sourdough bread, offering a delightful tang
- Chewy Ciabatta loaves, perfect for soaking up butter
- Flavorful Focaccia, with its dimpled surface
- A hearty Sesame Seed loaf for added texture
- Thick-sliced Texas Toast for a robust base
These are merely suggestions to spark your imagination. Feel free to use any bread you love! Just remember, the better the quality of your starting bread, the more exceptional your finished garlic bread will be. Seek out fresh, crusty loaves that promise a good balance of exterior crispness and interior softness.
Crafting the Perfect Garlic Butter
Let’s dive into the heart of this recipe: creating the luscious garlic butter that transforms ordinary bread into an extraordinary culinary delight. You’ll find the complete, step-by-step instructions at the bottom of this page, but here’s a detailed overview to guide you.
For one standard loaf of bread, we’re going to use a generous 3/4 cup of butter – that’s equivalent to 1 and 1/2 sticks. If this sounds like a lot, you’re not alone! Most recipes suggest only one stick, but to achieve truly *the best* garlic bread, more butter is indeed the secret ingredient. Embrace it – you only live once, so why not make it delicious?
The magic behind using this much butter lies in how it bakes. As the bread toasts, the butter doesn’t just sit on the surface; it slowly seeps down, permeating every fiber of the loaf. This ensures you’re not merely getting a buttery top layer, but rich, garlic-infused butter from crust to center in every single slice.
Begin with 3/4 cup of high-quality butter in a mixing bowl. I highly recommend a premium brand like Kerry Gold for its superior flavor and texture. Allow it to soften thoroughly to room temperature. If you’re short on time, you can gently soften it in the microwave using a very low power setting. I find power level 2 for about a minute works perfectly, yielding a soft, spreadable consistency without fully melting it.
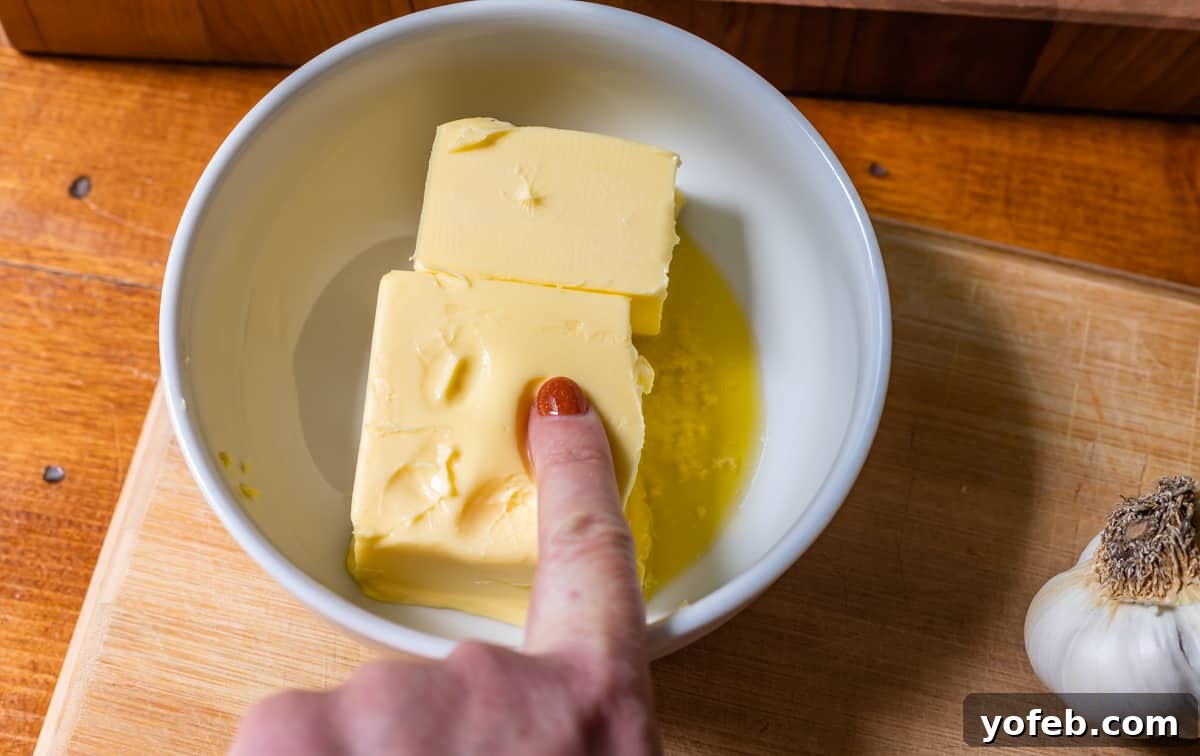
It’s crucial to use *softened*, not melted, butter. Melted butter is difficult to spread evenly and tends to run off the bread onto your baking sheet in the oven. Softened butter, on the other hand, slowly melts *into* the bread as it bakes, creating that deeply infused, succulent texture we’re aiming for.
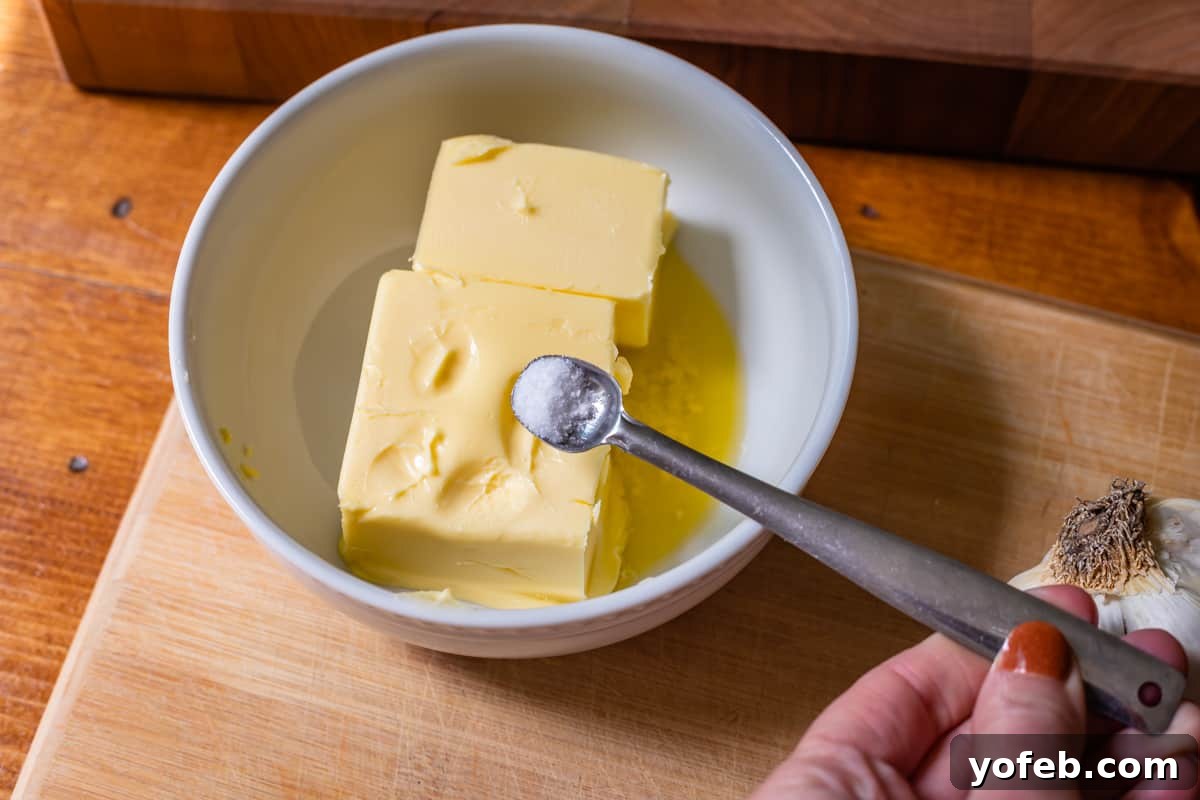
Next, add a touch of kosher salt to your butter. If you’re using salted butter, about 1/8 teaspoon should suffice. For unsalted butter, you’ll want to increase this to about 1/2 teaspoon or slightly more, adjusting to your taste. (Remember to use less if you only have standard table salt, as it’s finer and more potent).
Now, here’s a key tip for maximum flavor: incorporate 1/4 teaspoon of high-quality garlic powder. Even if you plan to use fresh garlic, the powder provides a foundational, aromatic depth that beautifully complements the fresh cloves, ensuring every part of the butter mixture is intensely garlicky.
It’s time to prepare our fresh garlic. Quality fresh garlic adds an unmatched pungency and texture that enhances the overall experience.
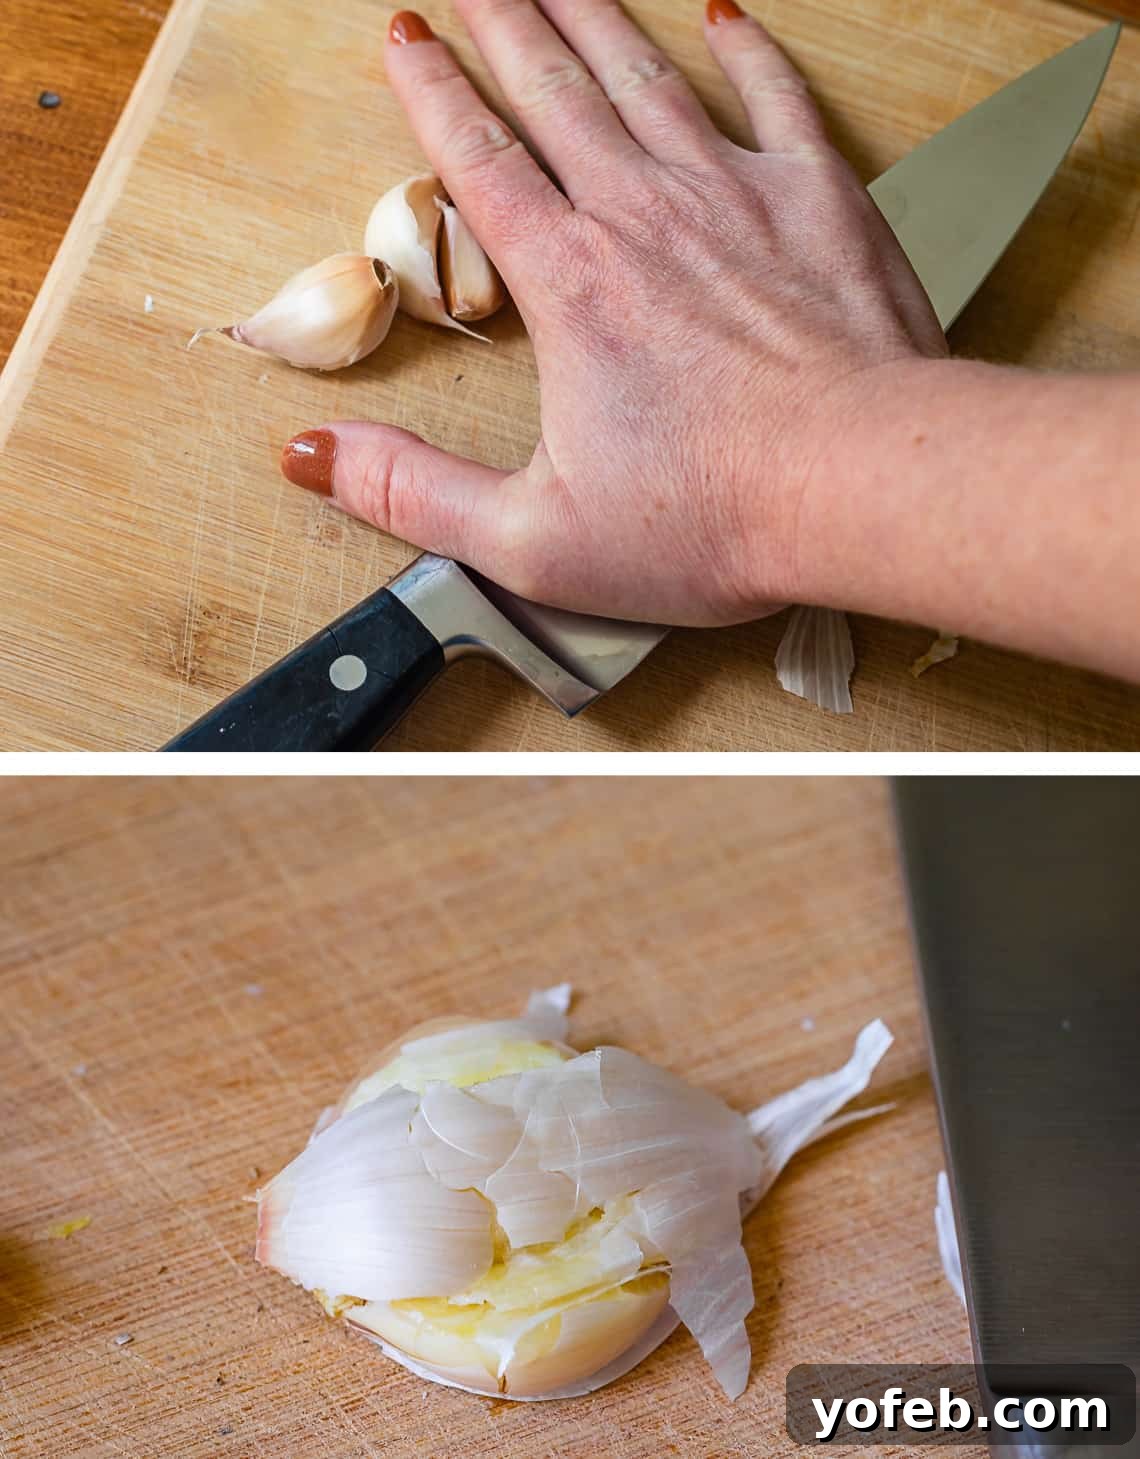
For mincing garlic, a chef’s knife is your best tool. I’ve experimented with countless methods – garlic presses, grater plates, shaking cloves in jars to remove peels – but nothing beats the efficiency and control of a good knife. With a firm smash using the side of your blade, the peels will come right off, making the mincing process much easier.
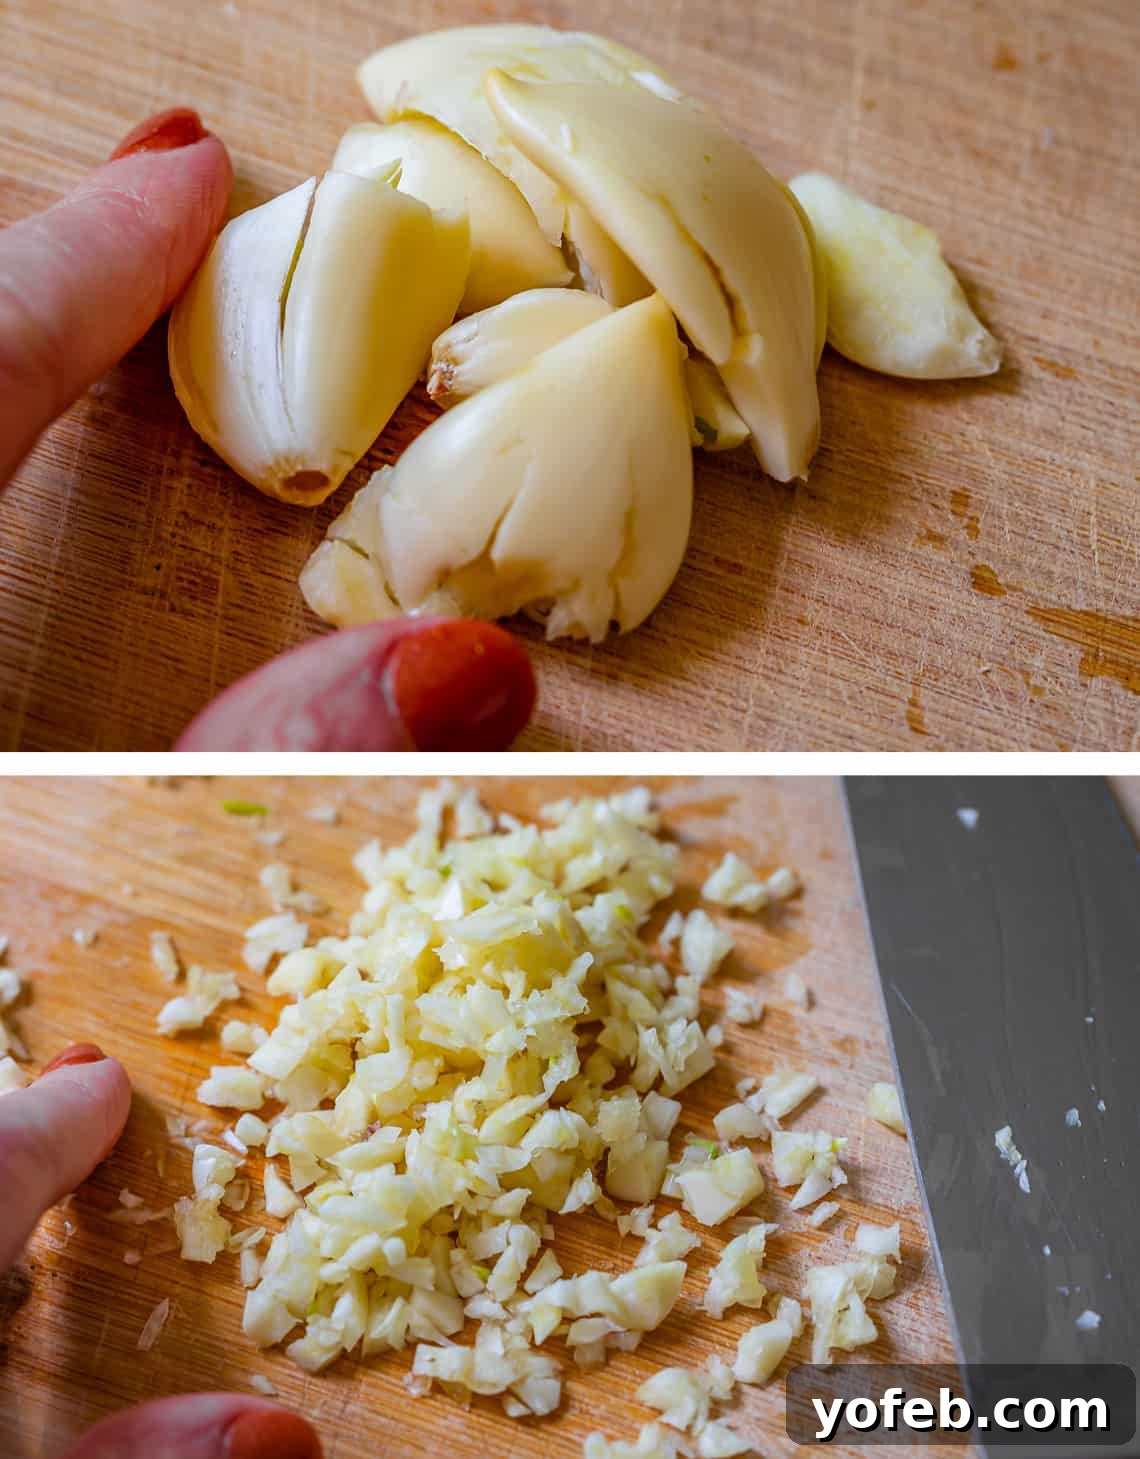
Mince your fresh garlic quite finely. I prefer to use about 5-6 cloves per loaf, which yields roughly 3 tablespoons of minced garlic – I am, after all, a confessed garlic enthusiast! However, feel free to adjust this quantity to your personal preference. When it comes to garlic, my philosophy is “go big or go home.”
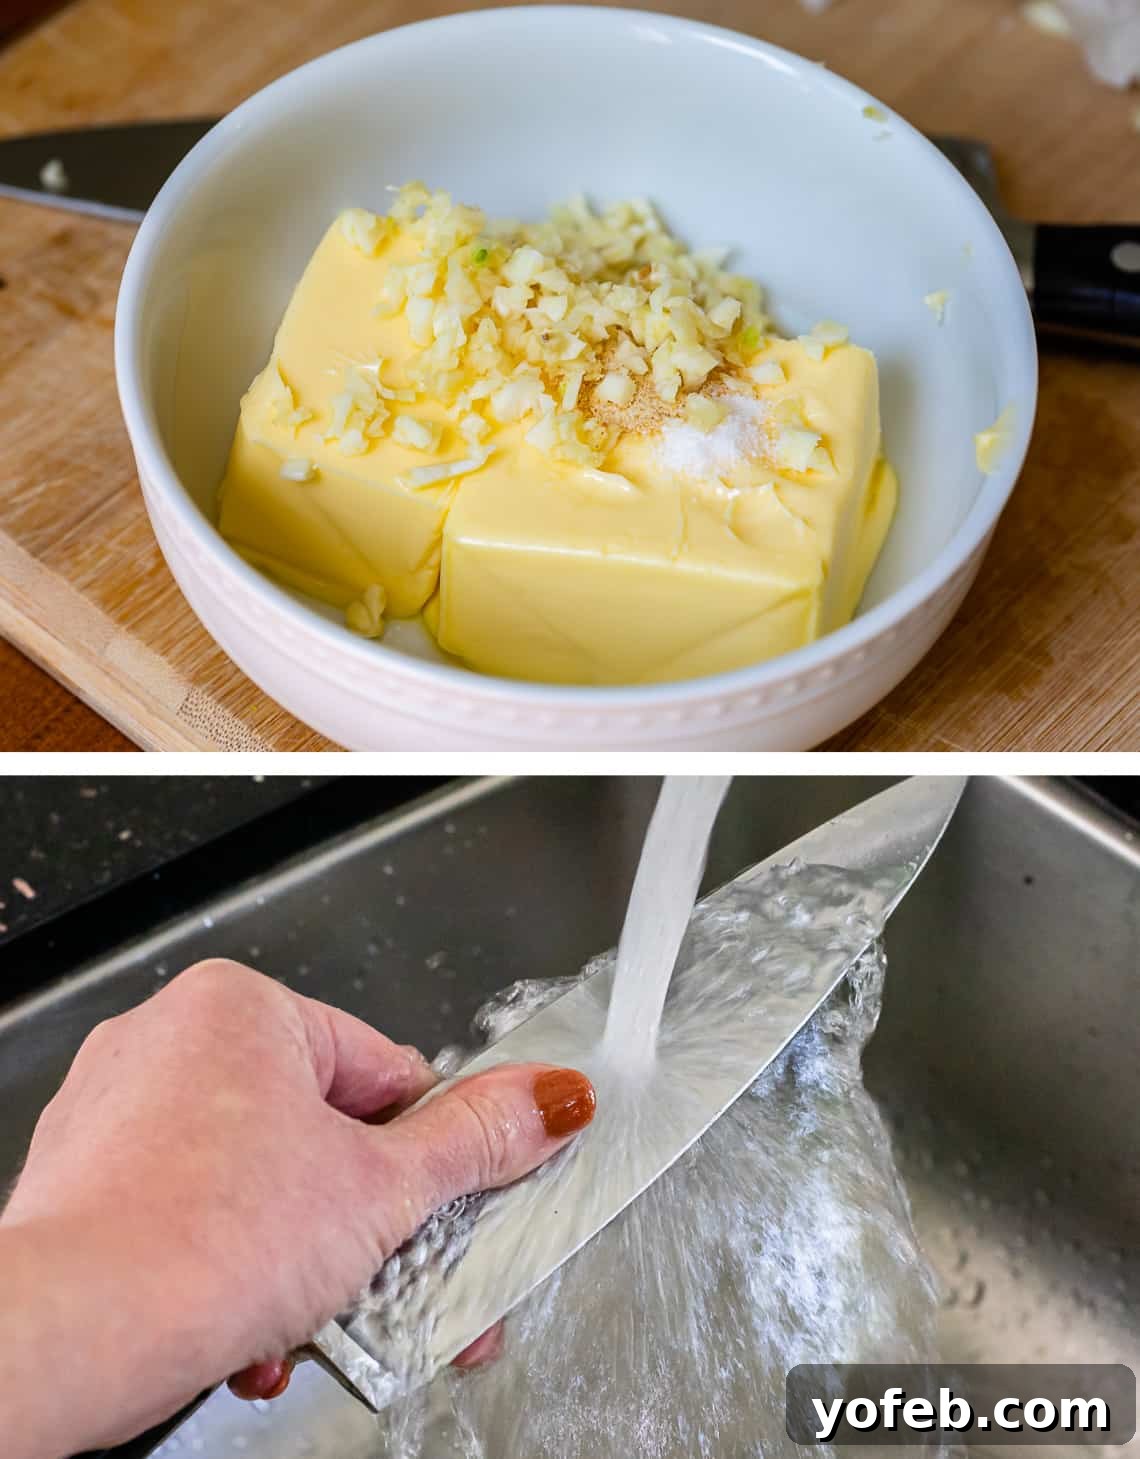
Here’s a little trick for after you’re done mincing: rub your fingers on the side of your knife under running water to neutralize that stubborn garlic smell. It works wonders and saves your hands from lingering aroma!
Now for the optional, yet highly recommended, step that truly takes your garlic butter to the next level:
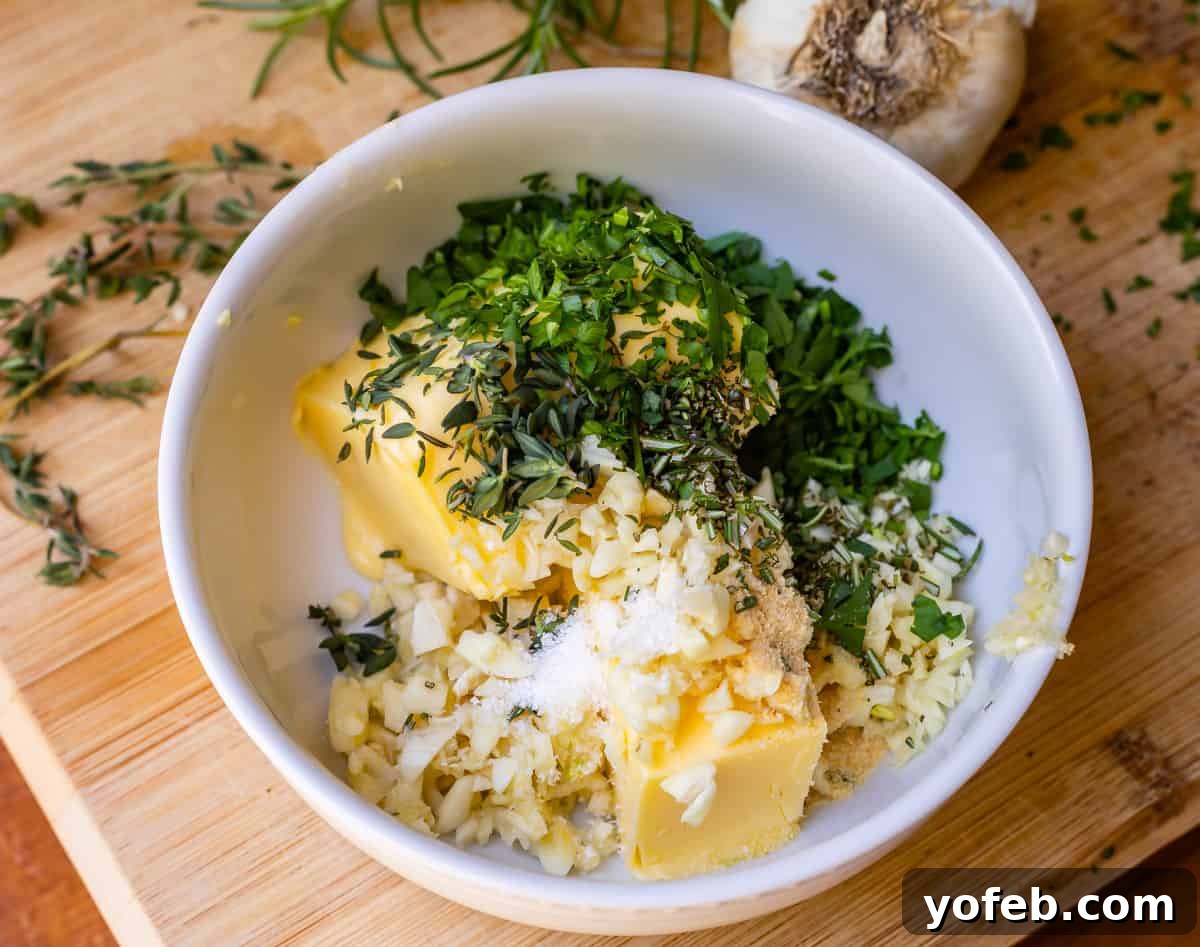
I adore incorporating fresh herbs into my garlic bread. My absolute favorite combination includes a touch of rosemary, a hint of thyme, and a generous amount of fresh parsley. You can choose to use all three, or just one – whatever speaks to your palate. These herbs add a beautiful layer of freshness and complexity that truly elevates the overall flavor profile.
Finally, thoroughly mix all these delightful ingredients together with a spatula until well combined. Don’t forget to give it a quick taste test to ensure it’s seasoned perfectly to your liking before spreading it generously on your bread!
Mastering Garlic Bread in the Oven: 3 Methods
Once your exquisite garlic butter is prepared, the next step is to choose your desired garlic bread style. I’ve developed three distinct methods, each yielding a unique texture and experience, ensuring there’s a perfect technique for every occasion:
- Crispy-Edge, Pillow-y Center Garlic Bread: For those who love a satisfying crunch with a tender interior.
- Soft and Tender Edge Garlic Bread: Ideal for a uniformly soft, melt-in-your-mouth texture.
- Fast and Easy Garlic Bread: Perfect for last-minute cravings when time is of the essence.
Garlic bread mastery truly comes down to the right technique. Select the method that best suits your craving and let’s get baking! Visual aids are provided here, and the full, detailed recipe instructions are conveniently located further down the page.
How to Make Homemade Garlic Bread with Crispy Edges
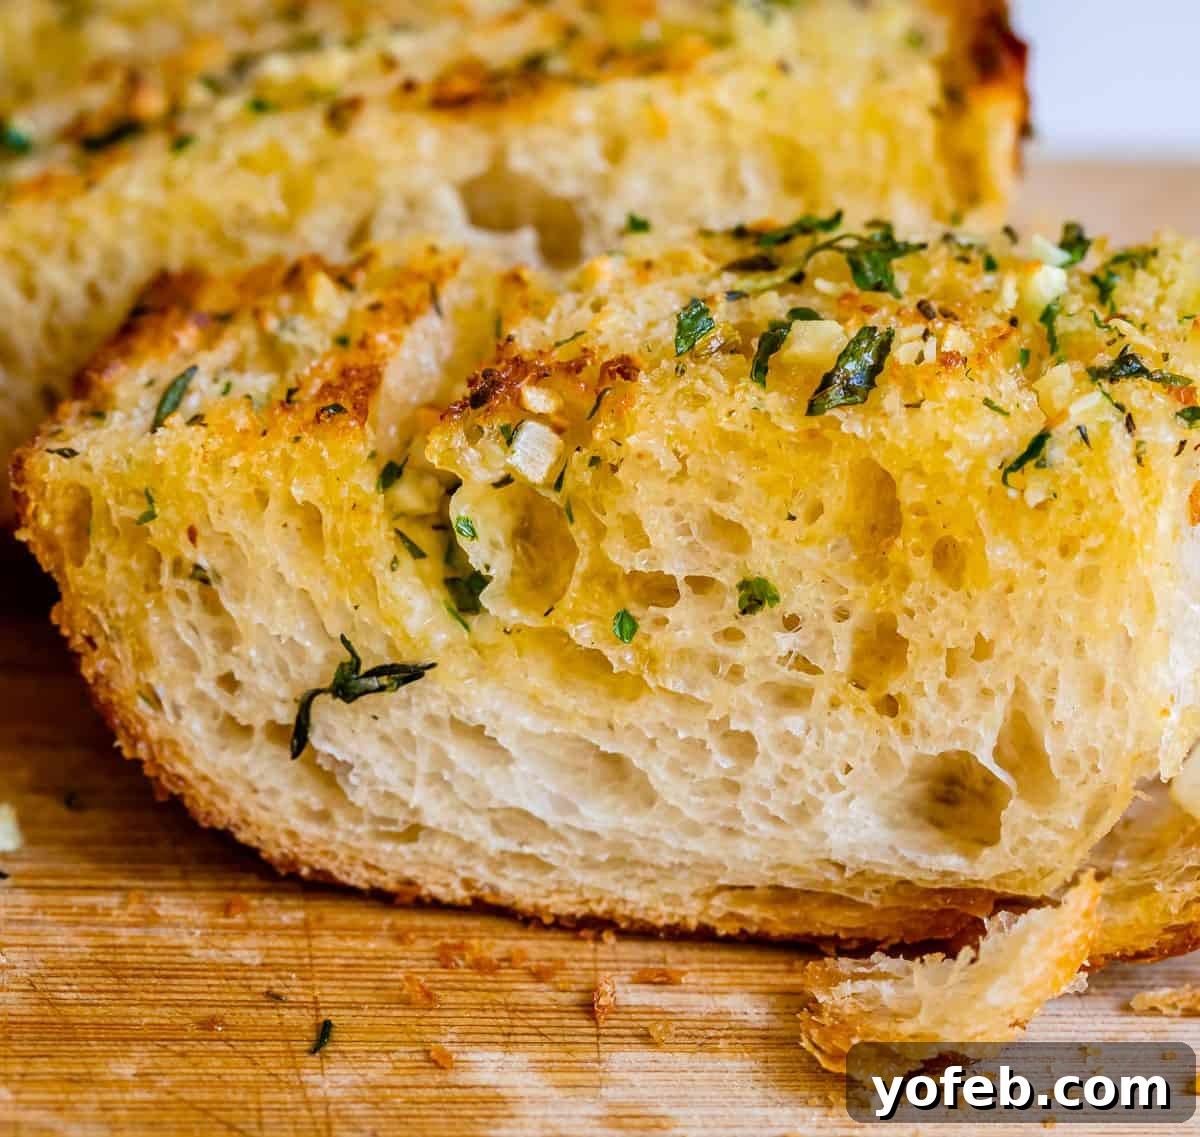
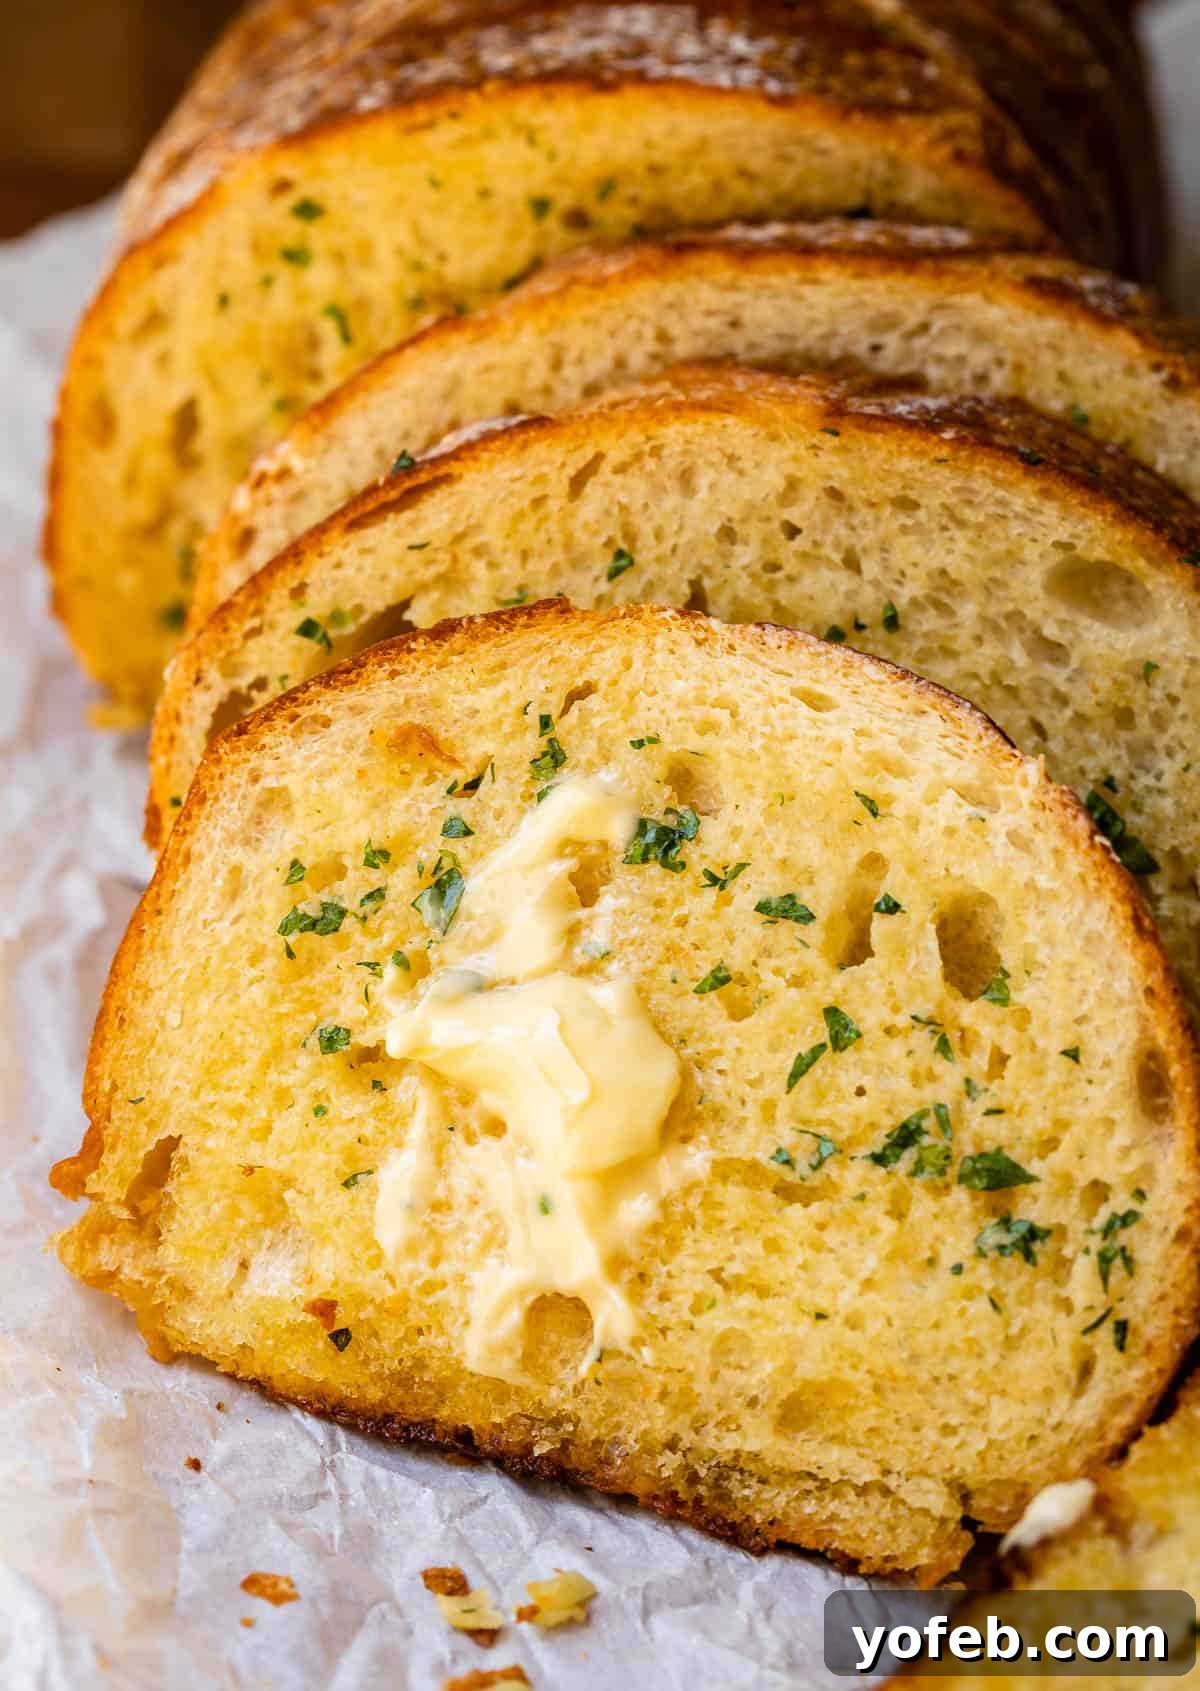
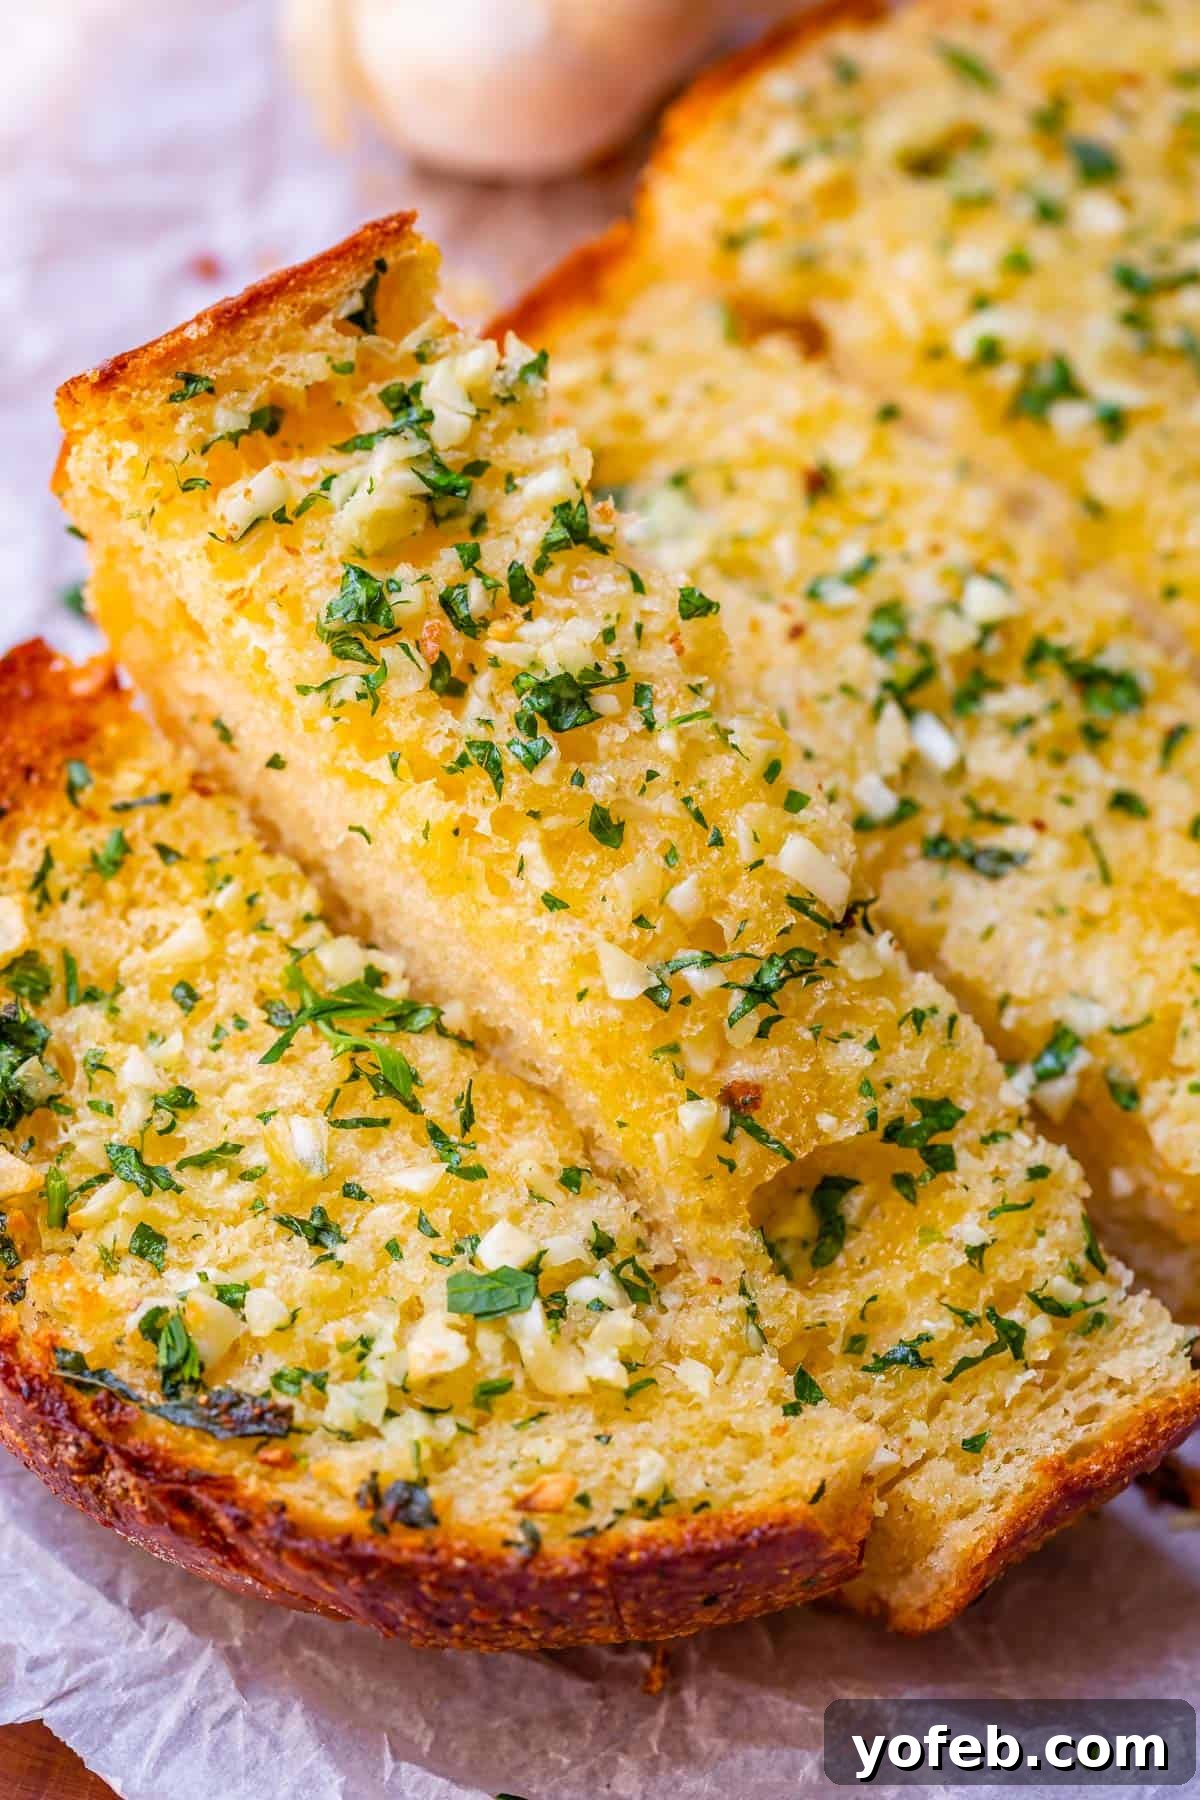
This method is my absolute favorite, consistently delivering garlic bread with beautifully crispy, buttery layers that shatter with each bite, while maintaining a wonderfully soft and tender center.
First, prepare your bread by cutting the loaf horizontally:
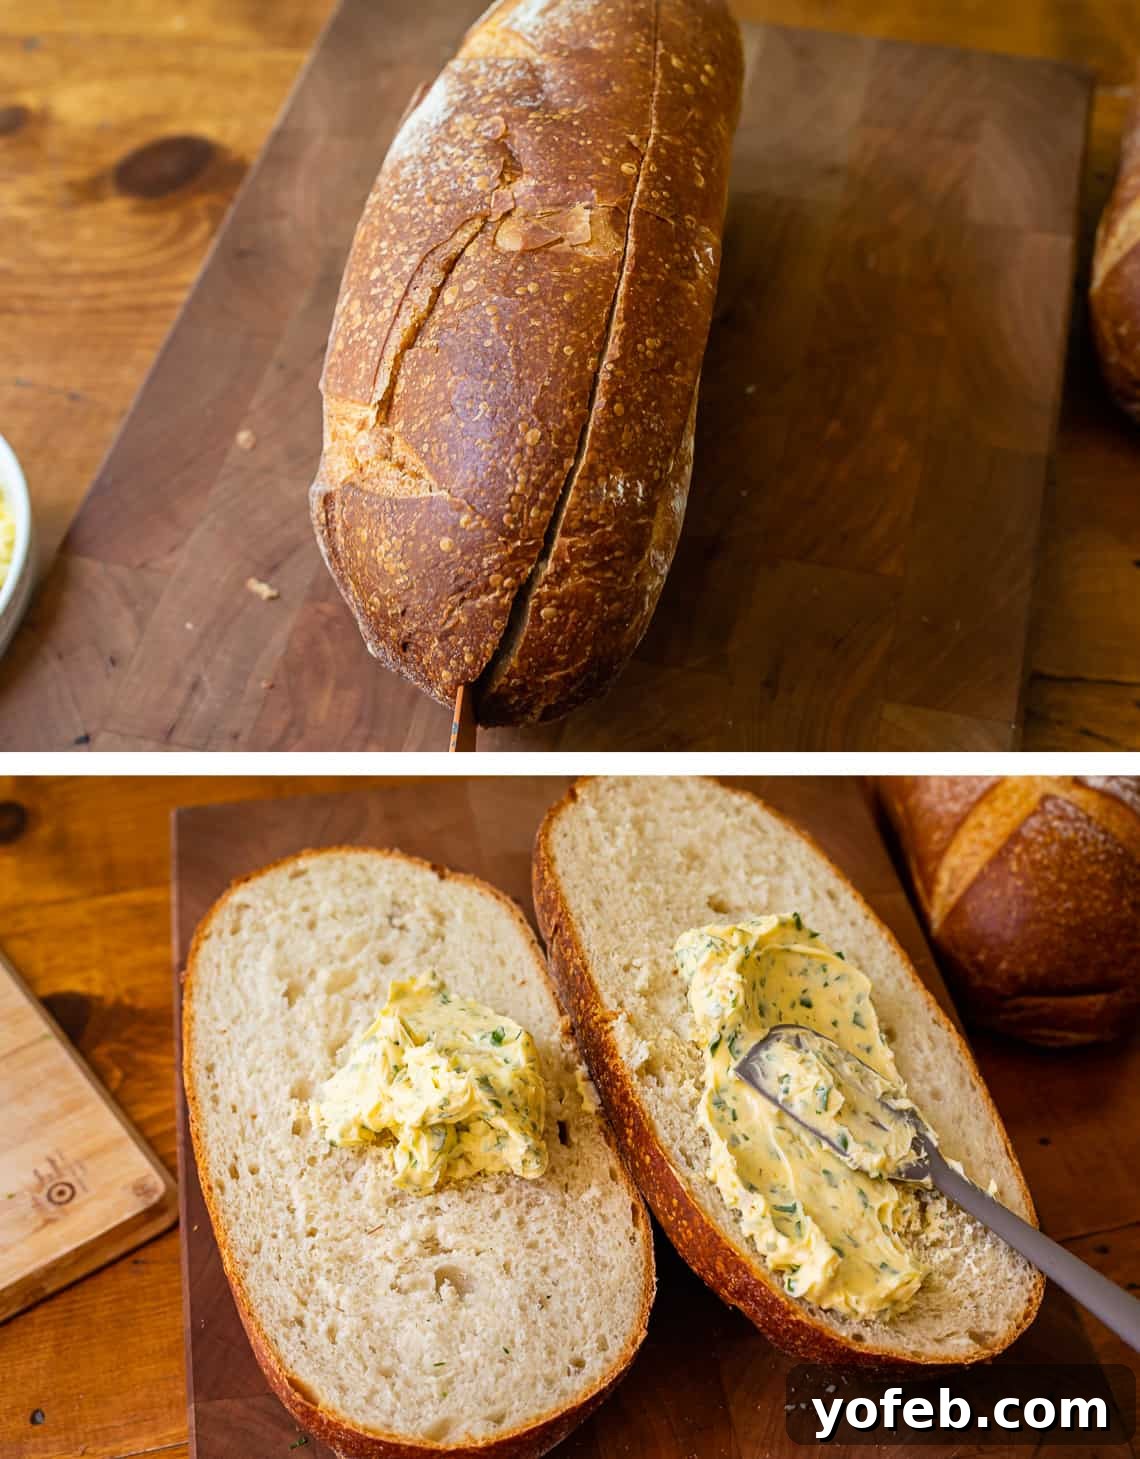
Now, generously apply that incredible garlic butter all over the cut surfaces of the bread.
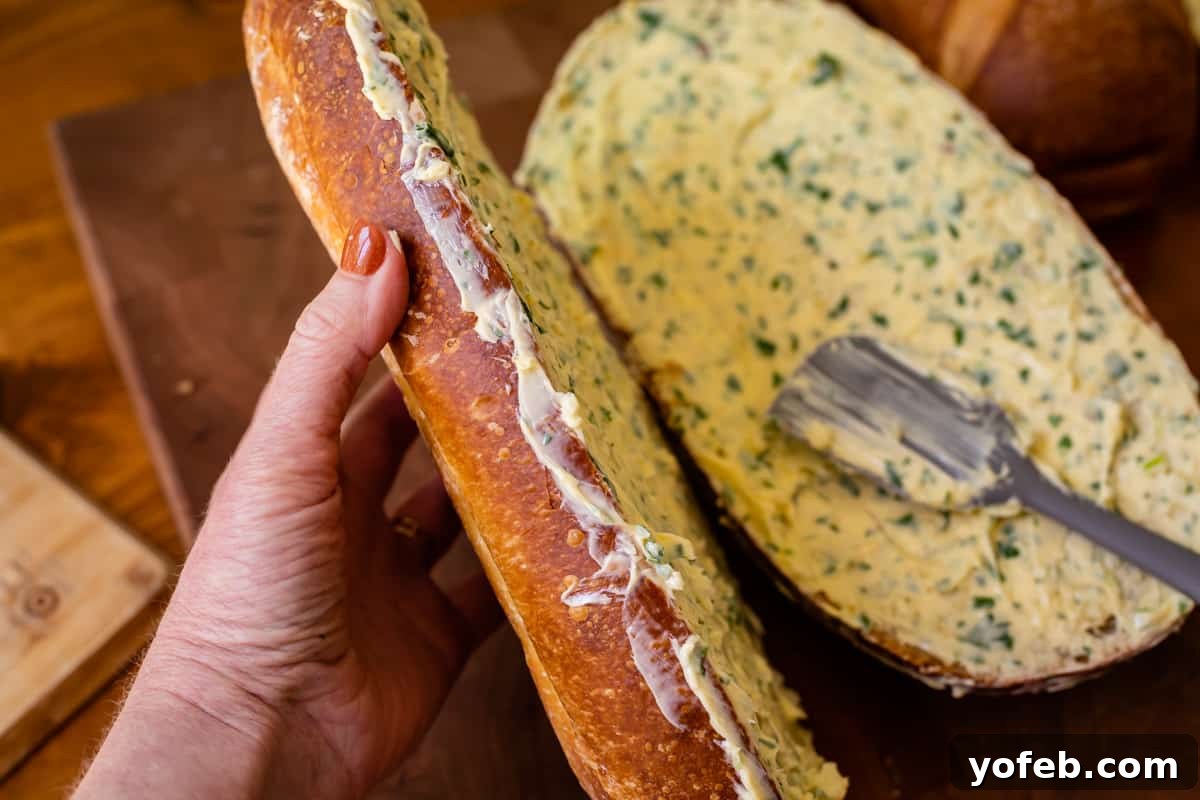
Don’t stop at just the top surface! Oh no, this is where many go wrong. Take your generous portion of butter and ensure you thoroughly coat the edges of the bread as well, just like this example demonstrates.
This technique is what I affectionately call “No Corner Left Behind”:
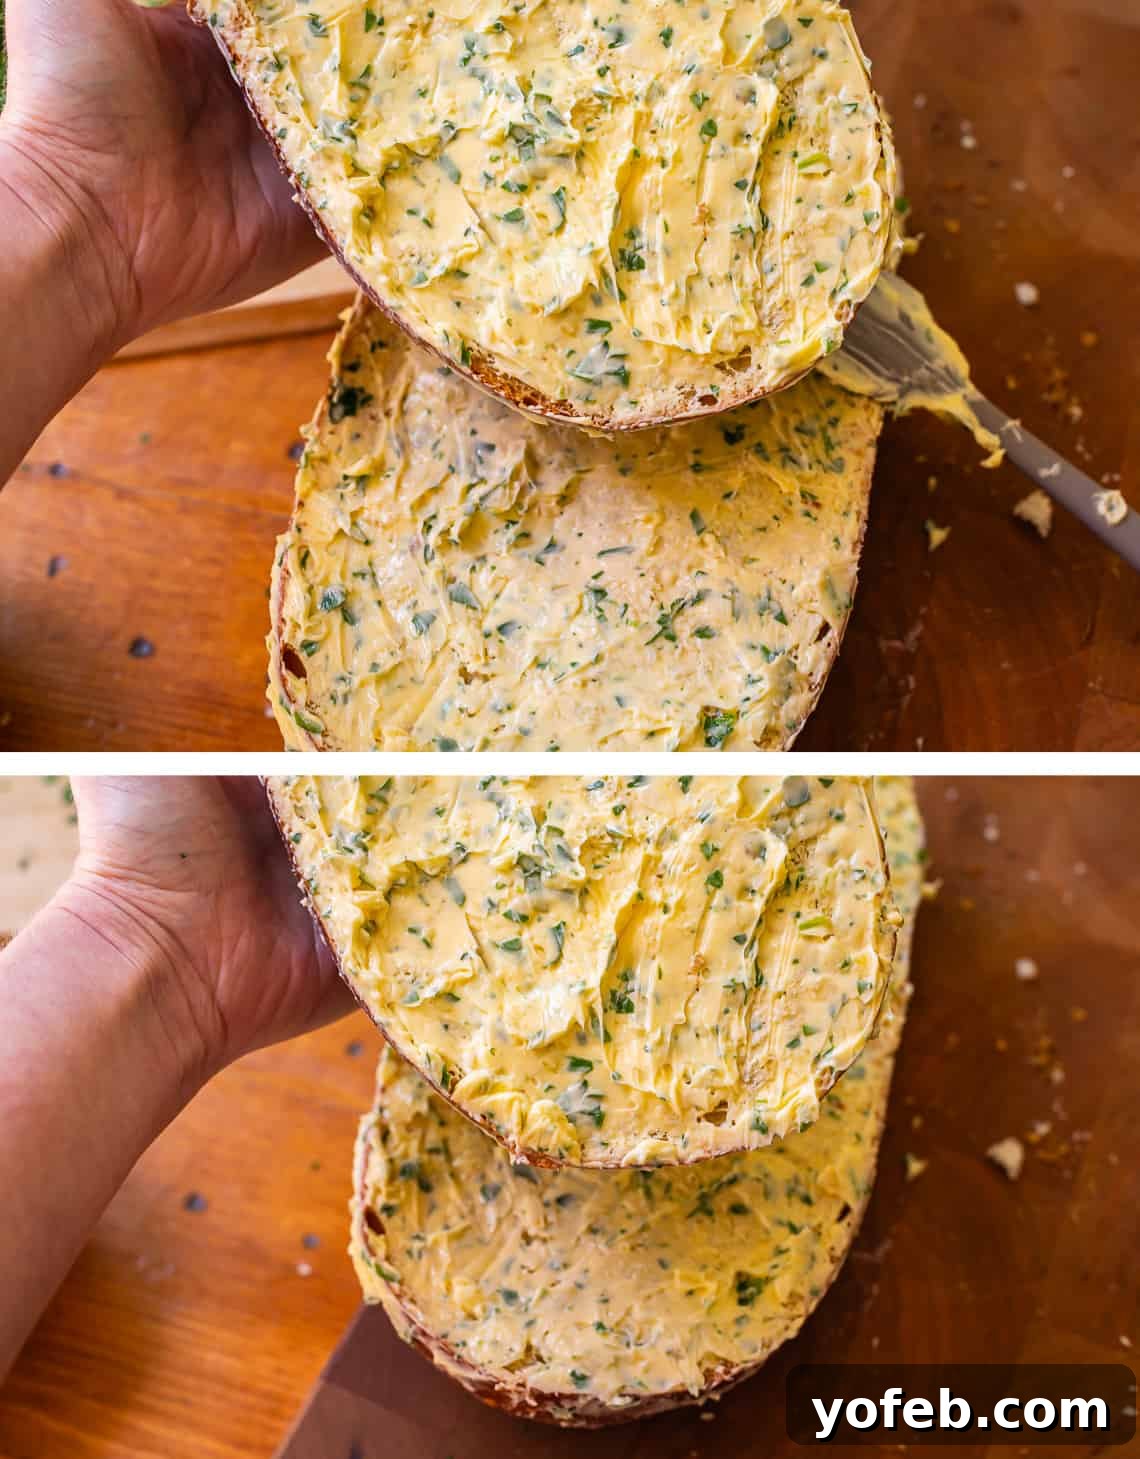
Do you ever spot those sad, dry, unbuttered spots on garlic bread? We absolutely want to avoid that! Shower every single nook and cranny of this bread with butter. Abundant butter is precisely how we achieve those super crunchy, crispy, and delightfully craggy edges that define truly exceptional garlic bread.
This reminds me of a childhood conversation with my brother and our cousin, Tony. Tony, with the unwavering conviction only a young child possesses, declared that no one, except him, knew how to properly make a peanut butter and jelly sandwich. “People always just slap the peanut butter in the middle,” he’d lament. “You have to carefully spread it to the very edge. My mom never gets it right.” While Tony’s declaration was perhaps a tad disrespectful to his lovely mother, his core principle holds true: SPREAD TO THE VERY EDGE, EVERYONE! It truly makes all the difference.
(A quick aside: Tony’s mom is none other than Aunt Shirley, the same blessed Shirley who gifted us these incredible Creamy Mashed Potatoes and the legendary Famous Dinner Rolls. So, we can certainly forgive her for not dedicating more than a few seconds to each sandwich while juggling six children!)
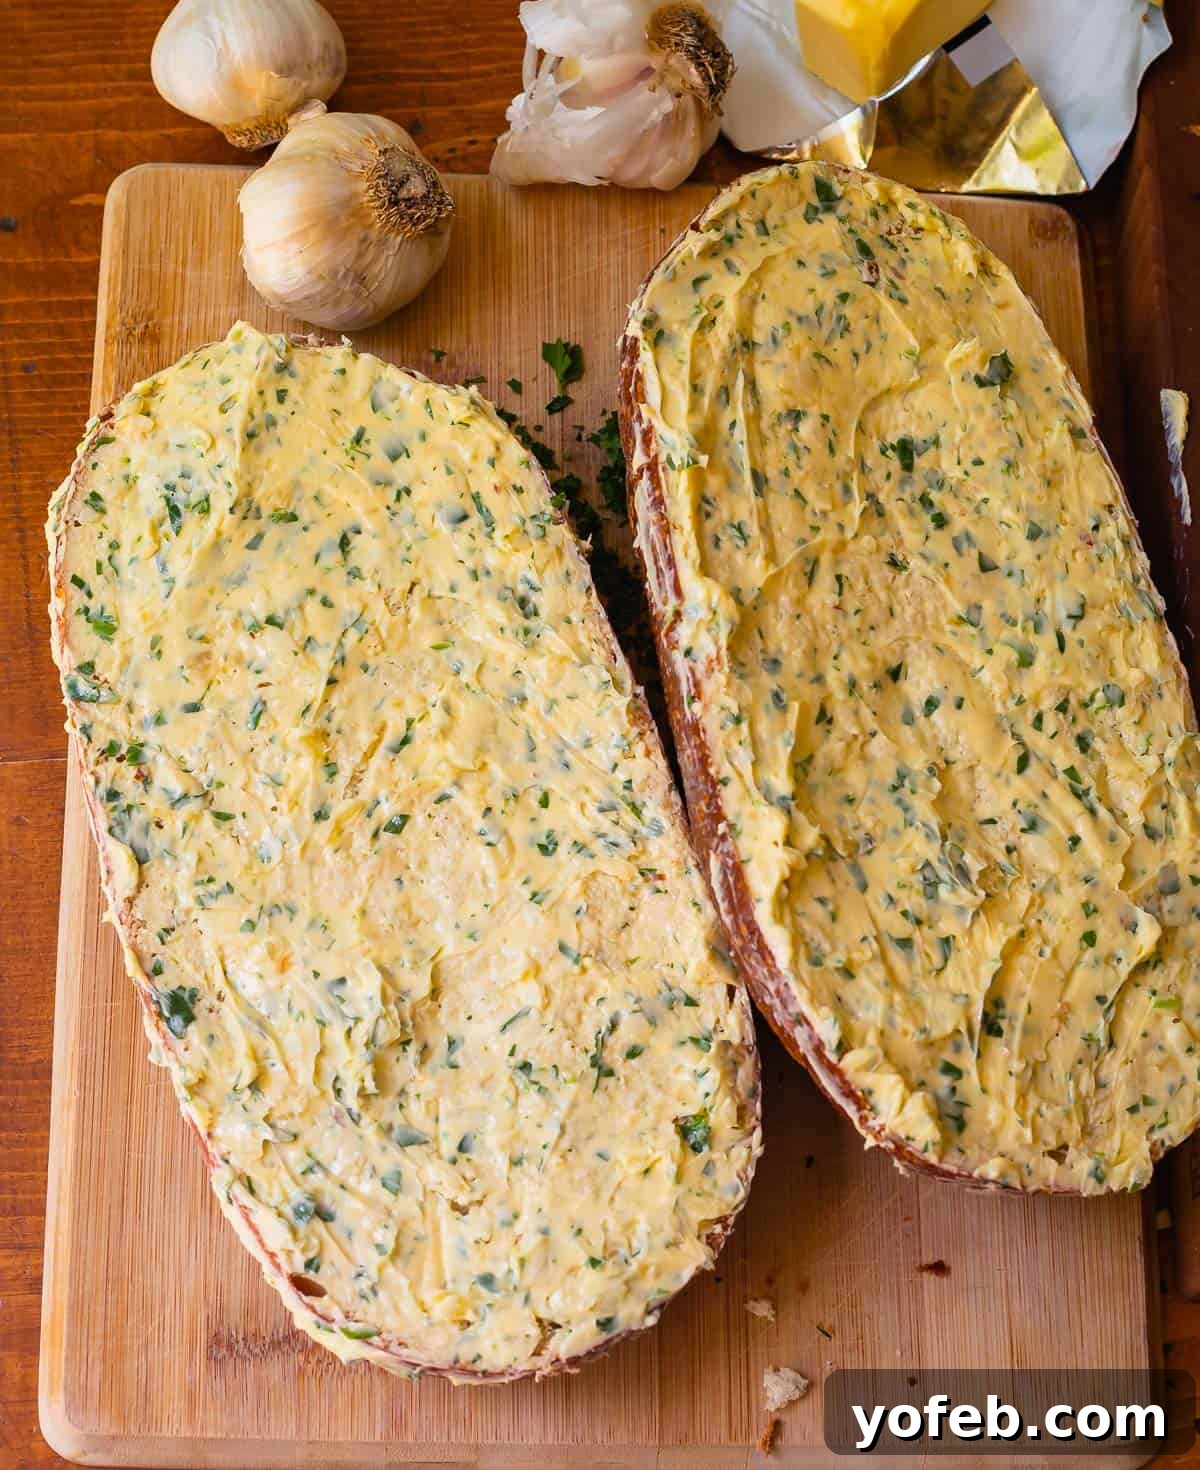
With every surface lavishly coated, your garlic bread is now perfectly prepared for the oven, promising maximum flavor and texture.
Bake the buttered halves directly on a sturdy baking sheet (no foil needed for this step) at 350°F (175°C) for approximately 10 minutes. This crucial initial phase allows the butter to slowly melt and deeply infuse into the bread. After 10 minutes, elevate the oven rack to the highest position and switch to the broiler setting. Broil for a mere 1-2 minutes – and whatever you do, *do not* walk away! Keep a close eye on it until the top reaches your desired level of golden crispness. This rapid burst of high heat creates those coveted shattering edges.
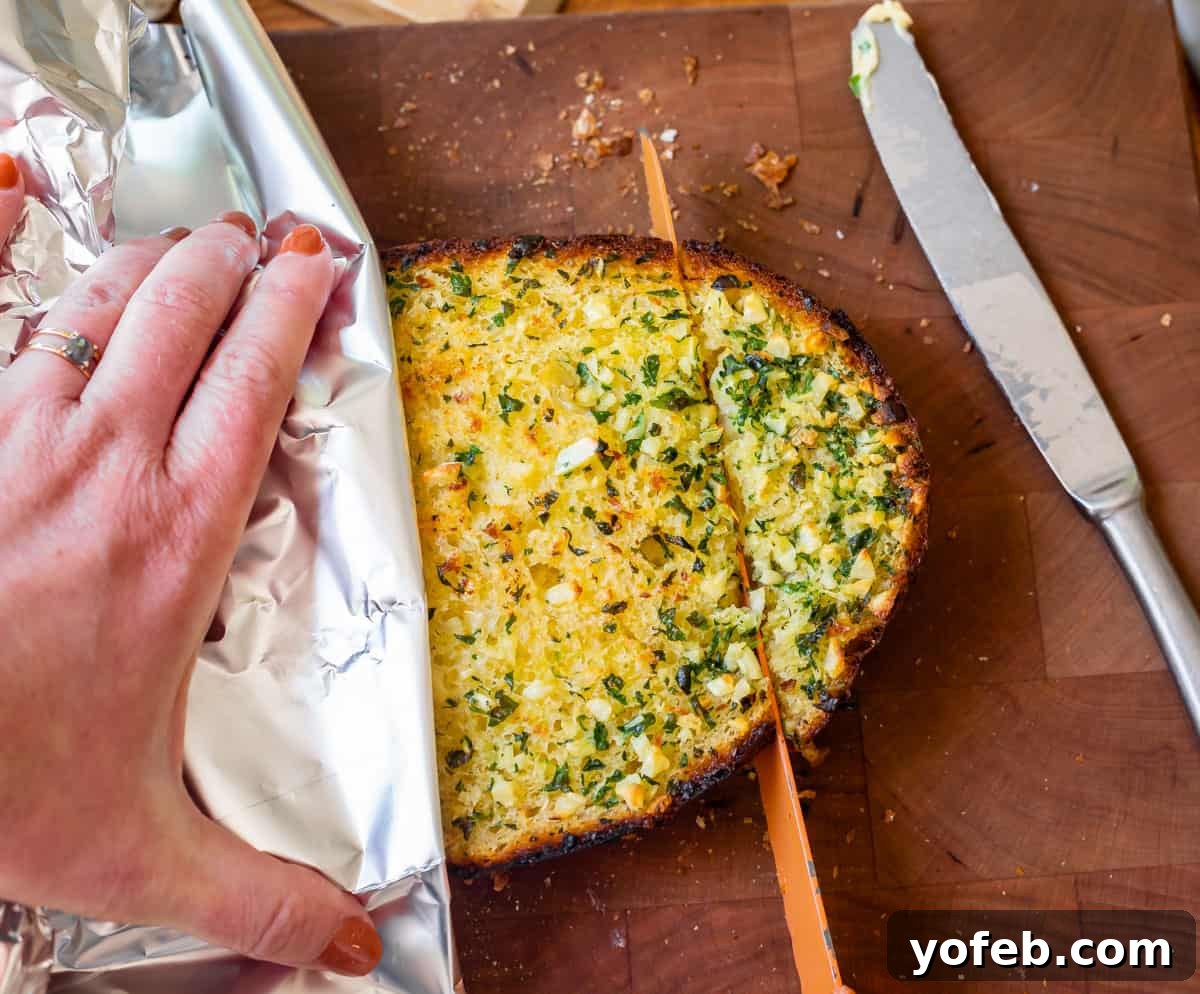
Once baked, immediately transfer the hot bread to a cutting board. For easier handling while slicing with a serrated knife, I find it helpful to use a piece of foil to brace the hot loaf. Yes, it will be piping hot, but the reward is incredibly fresh, hot garlic bread – exactly what we all crave! Serve it without delay. If your main course isn’t quite ready, you can loosely tent the bread with foil and keep it warm in the oven on a “Keep Warm” setting.
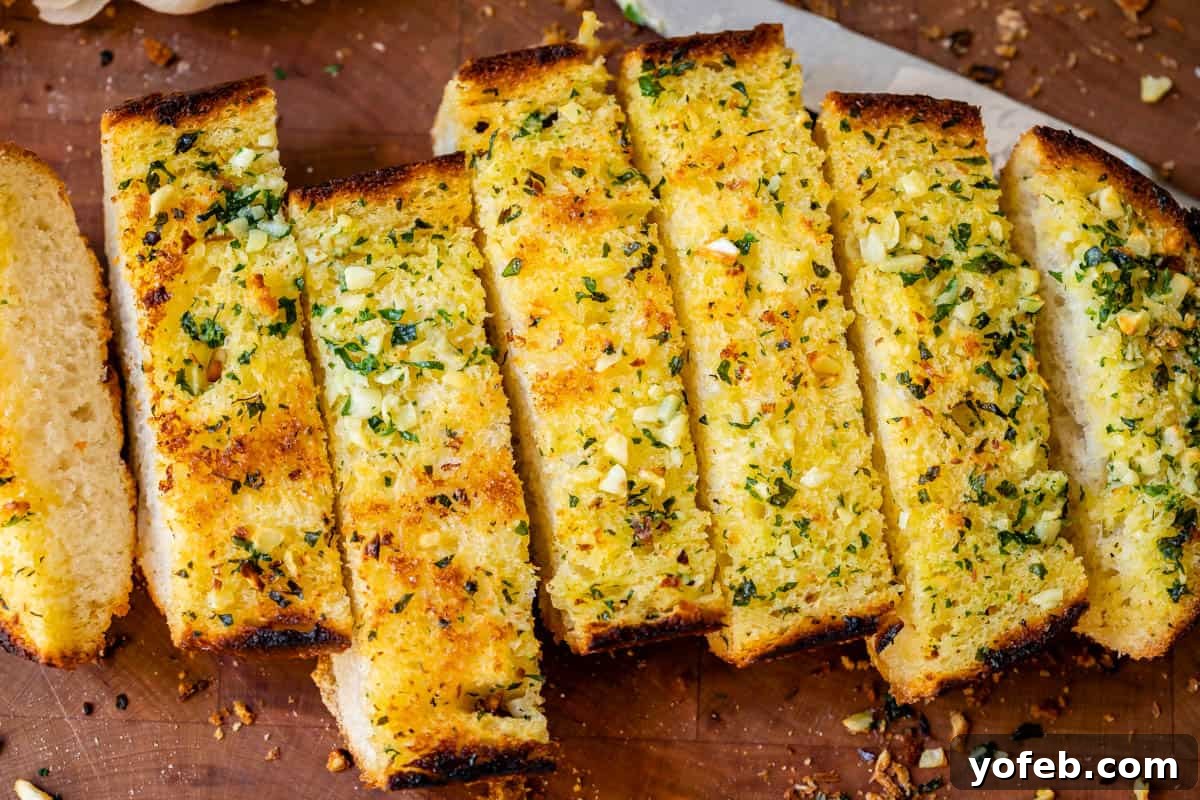
How to Make Soft and Tender Garlic Butter Bread
For those who prefer an all-over soft, pillowy garlic bread with tender edges, this method is for you. Begin by using a serrated knife to slice your loaf of bread into approximately 1-inch thick pieces, cutting all the way through the bottom. Keep the slices aligned, as we will reassemble the loaf later.
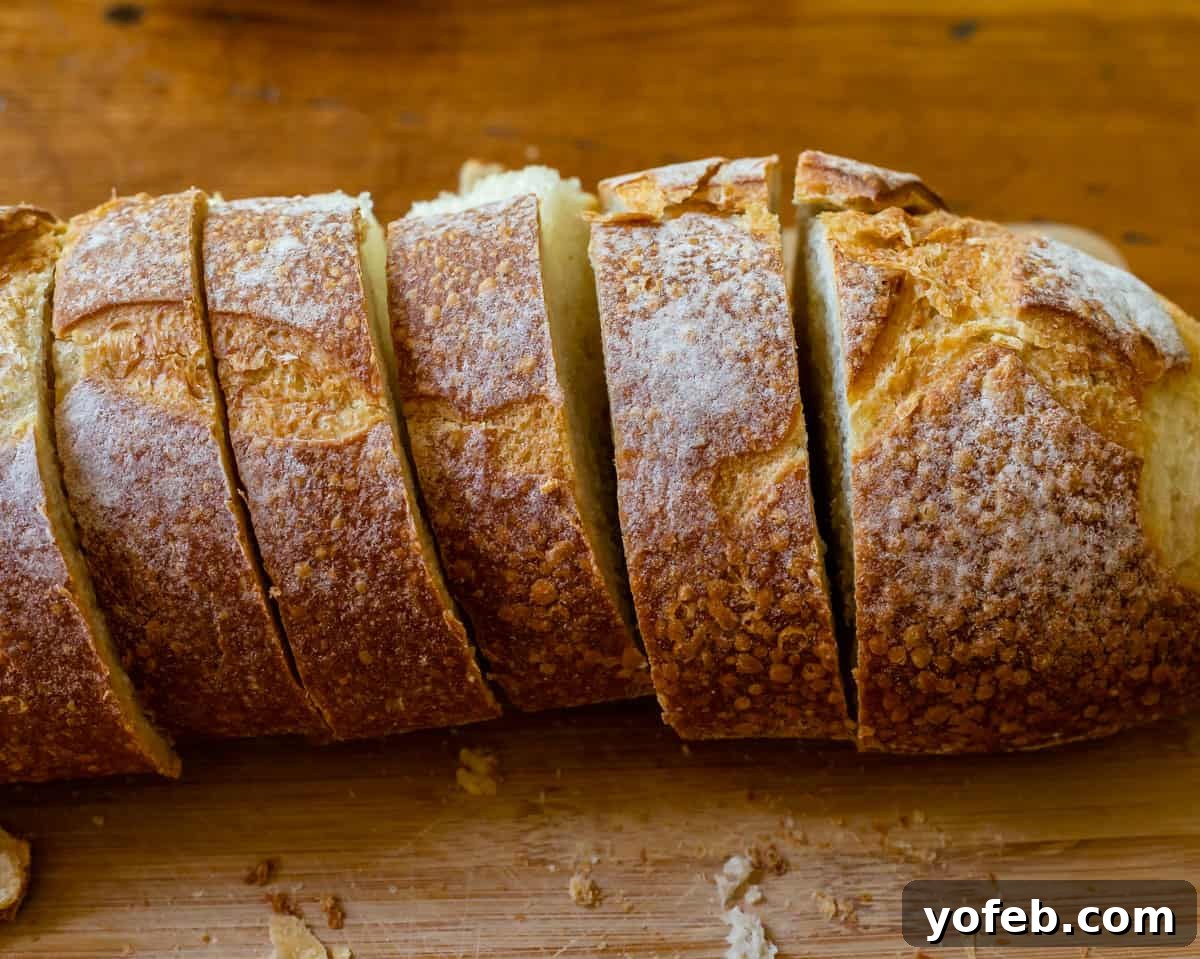
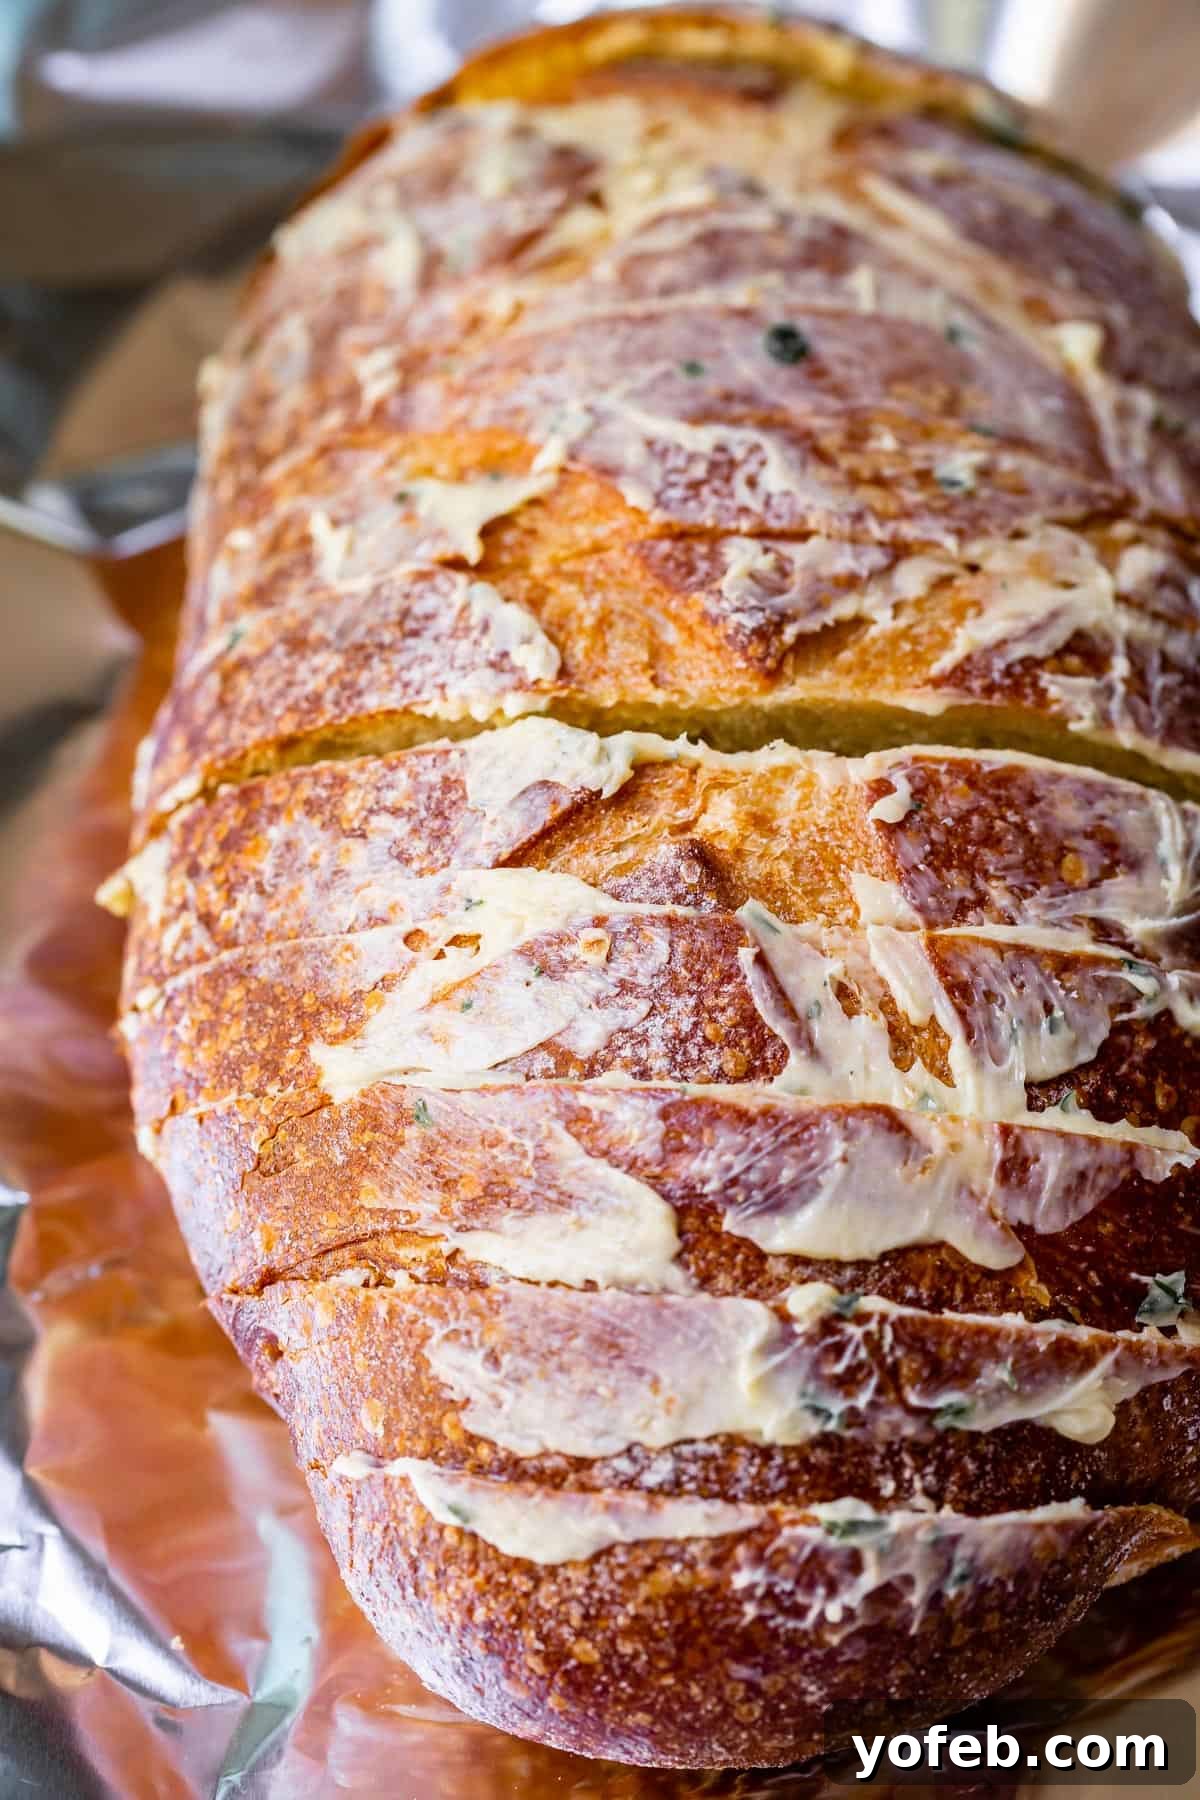
Next, generously spread the prepared garlic butter onto one side of each bread slice. I initially tried buttering both sides, but found it to be a bit excessive – which is saying something, coming from someone who typically believes “more is more” when it comes to butter! One side is perfectly sufficient for this method.
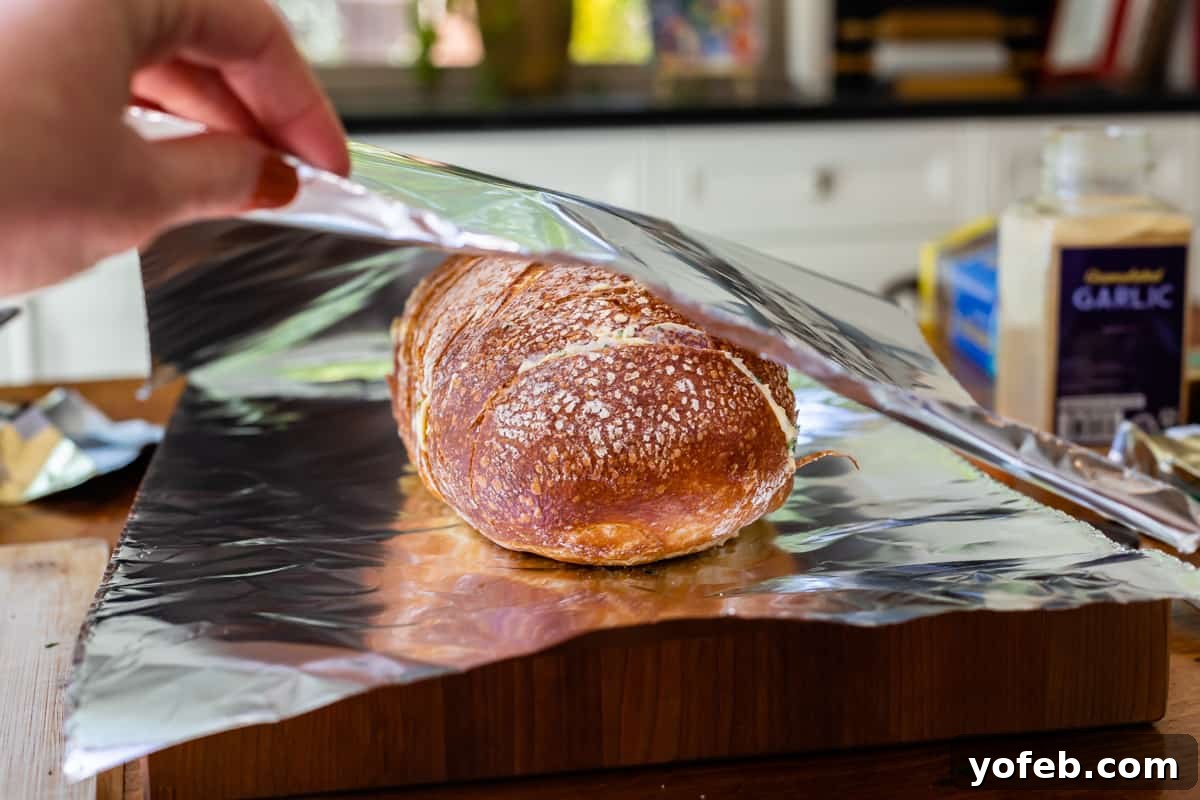
Lay out a large sheet of aluminum foil. Carefully arrange your buttered bread slices back into their original loaf shape on the foil, ensuring each slice stands upright. If you have any remaining garlic butter, spread it directly over the top crust of the reassembled loaf. This will contribute to a wonderfully tender and flavorful top.
Place another sheet of foil over the top of the bread, creating a protective enclosure.
Carefully press the foil sheets together, folding and sealing the edges to create a tight, sealed packet, as shown here:
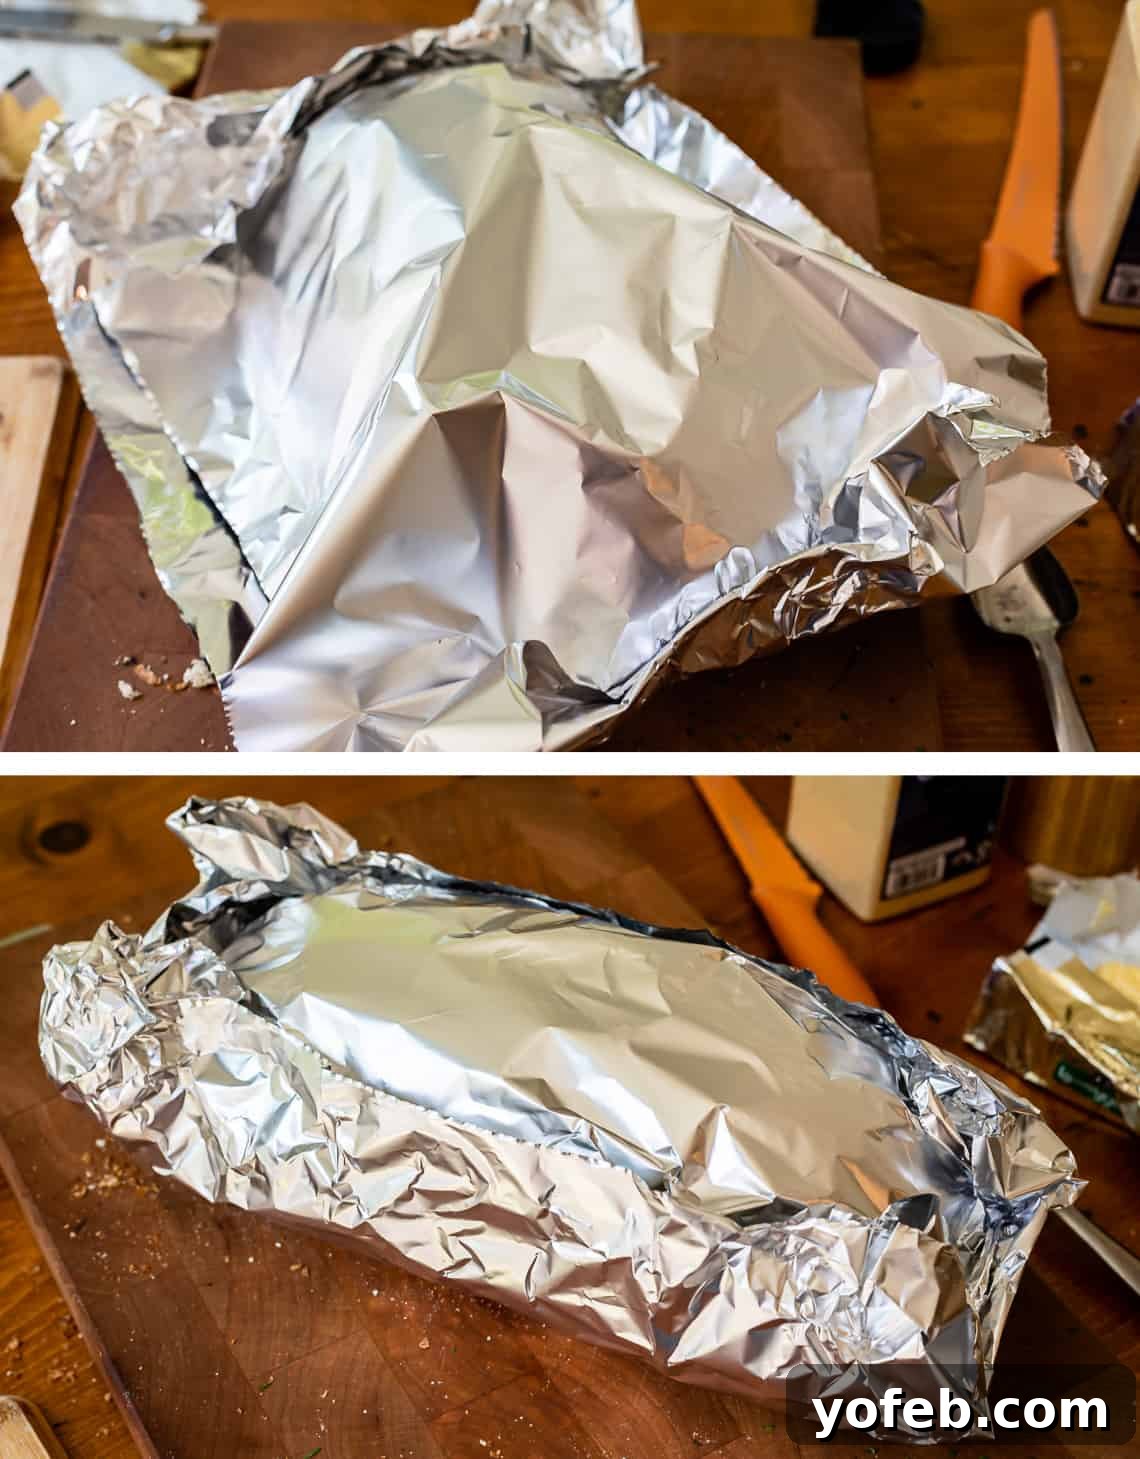
Bake the foil-wrapped loaf on a sturdy sheet pan at 350°F (175°C) for approximately 15 minutes, or until all the butter has melted and thoroughly permeated the bread. This steaming process ensures a beautifully soft and tender result.
This method yields wonderfully soft and buttery bread. If you desire a very slight crispness on the exterior, simply unwrap the top layer of foil during the last few minutes of baking. Serve immediately, while still warm and fragrant!
How to Make Homemade Garlic Bread Last Minute
Sometimes, the craving for garlic bread strikes at the eleventh hour, a mere four minutes before dinner is on the table. For those spontaneous moments, this fast and easy method is an absolute lifesaver, delivering delicious results in record time.
Start by cutting your bread into 1-inch thick slices, cutting on a slight bias for an appealing presentation. Arrange these slices in a single layer across one or two sturdy baking sheets, ensuring they don’t overlap. Generously spread the softened garlic butter mixture over the top surface of each individual slice. By exposing more surface area, we accelerate the toasting process.
Bake the slices at a higher temperature, 475°F (245°C). This intense heat will quickly melt the butter, infusing it into the bread, and rapidly toast the surfaces to a beautiful golden crisp. The cooking time will be significantly shorter than other methods, making it perfect for those urgent cravings.
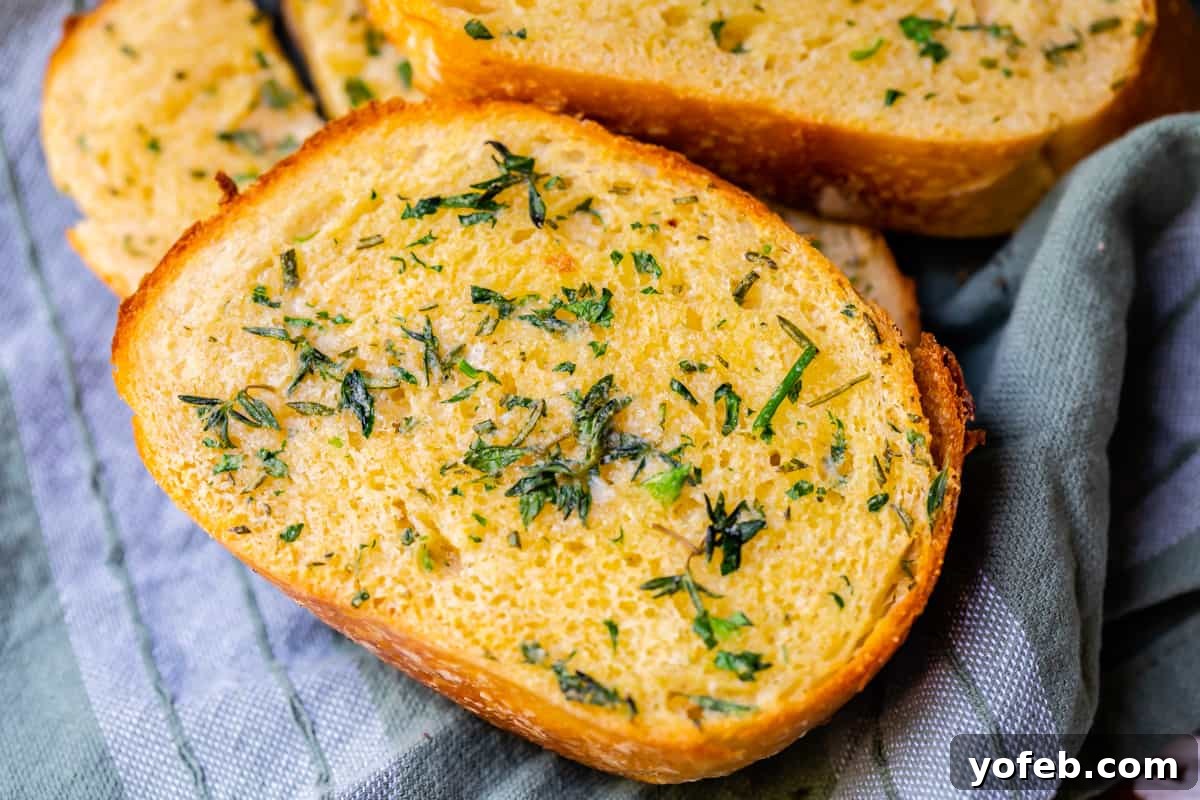
That’s it! This straightforward technique gets the job done quickly and deliciously, proving that you don’t always need a lot of time to enjoy fantastic homemade garlic bread.
Elevate Your Garlic Bread with Cheese
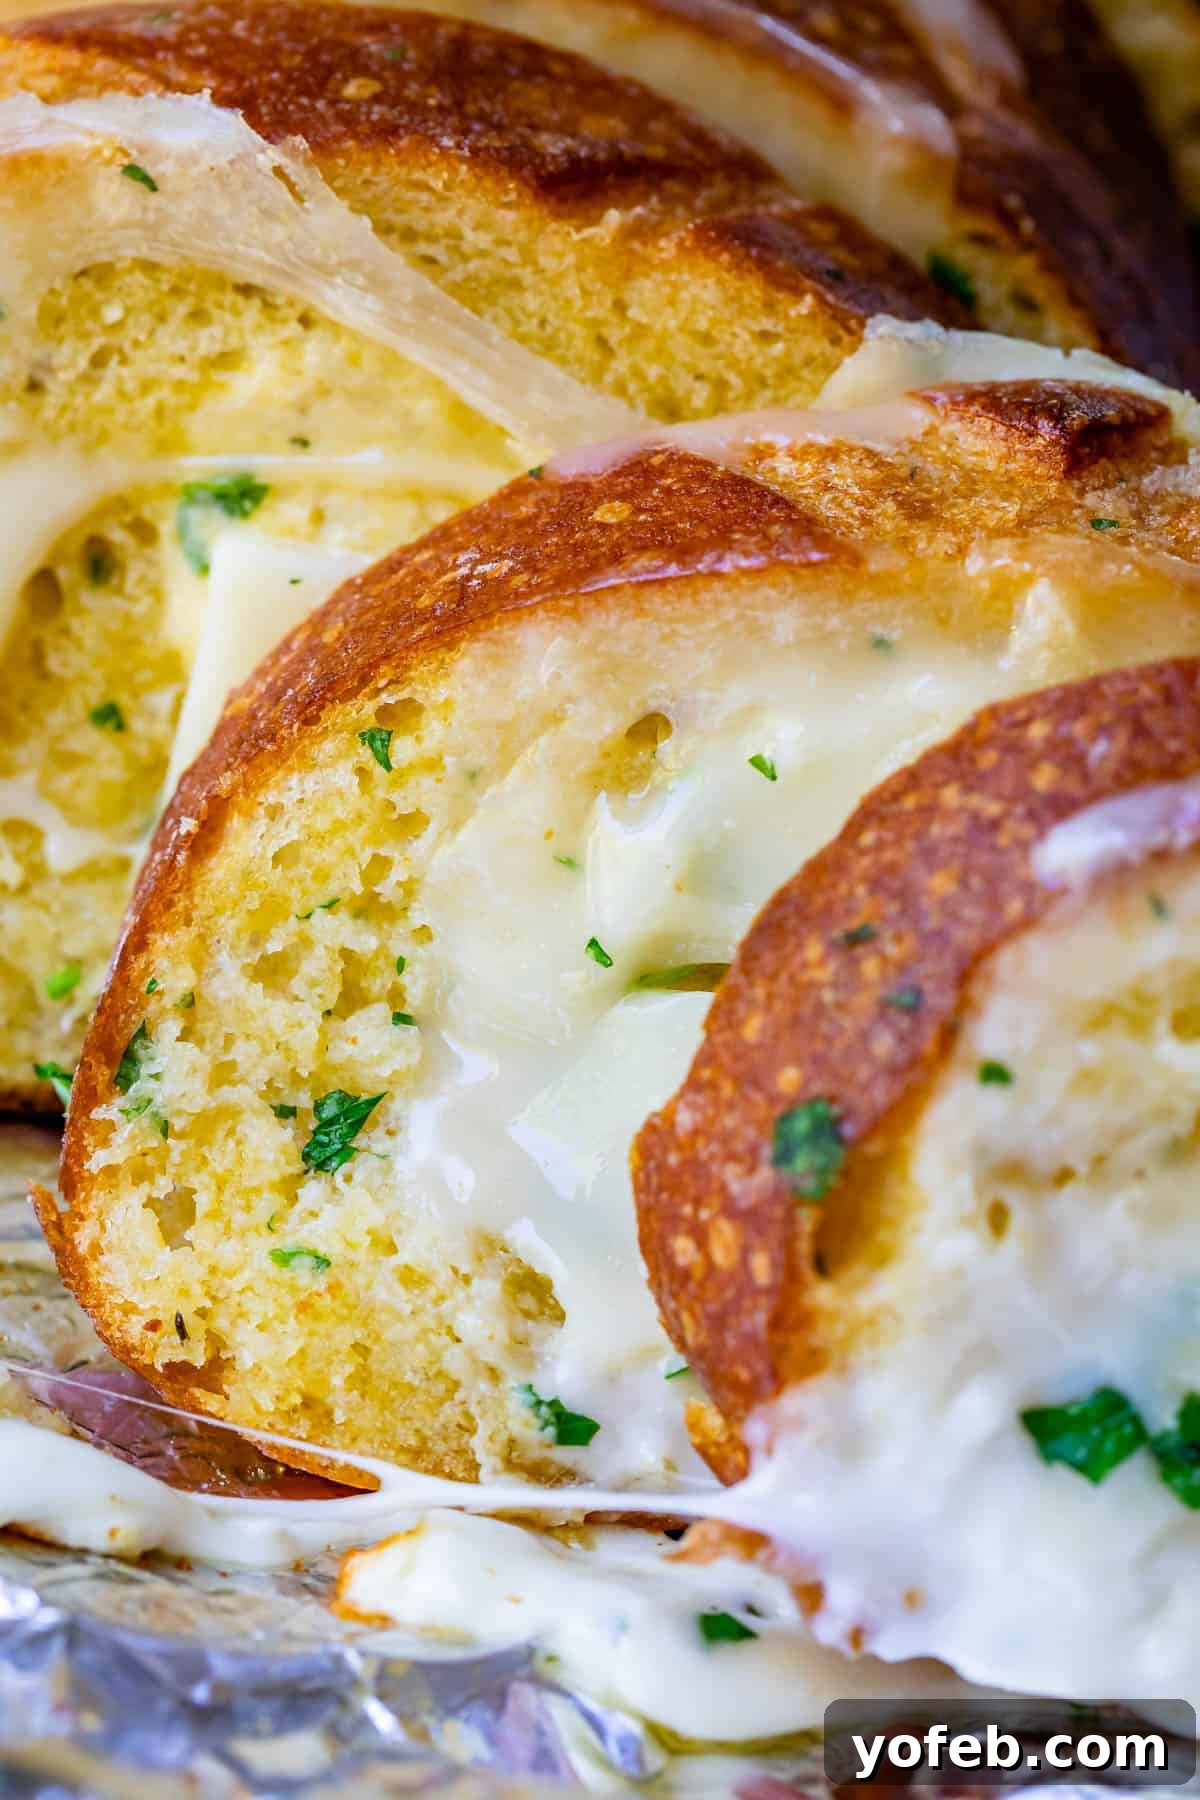
Just when you thought garlic bread couldn’t possibly get any better, we introduce the magic of cheese. Cheesy garlic bread is, without a doubt, the pinnacle of this beloved side dish, taking its deliciousness to an entirely new dimension.
I find the flavor of Parmesan cheese utterly irresistible, but it doesn’t always melt into that smooth, gooey consistency we crave. My trick? Layer it beneath a blanket of mozzarella! This way, you get the rich, nutty notes of Parmesan without its sometimes-crackly melt. Of course, if you prefer, you can skip the Parmesan altogether and use only mozzarella – the choice is yours for a truly customized cheesy experience.
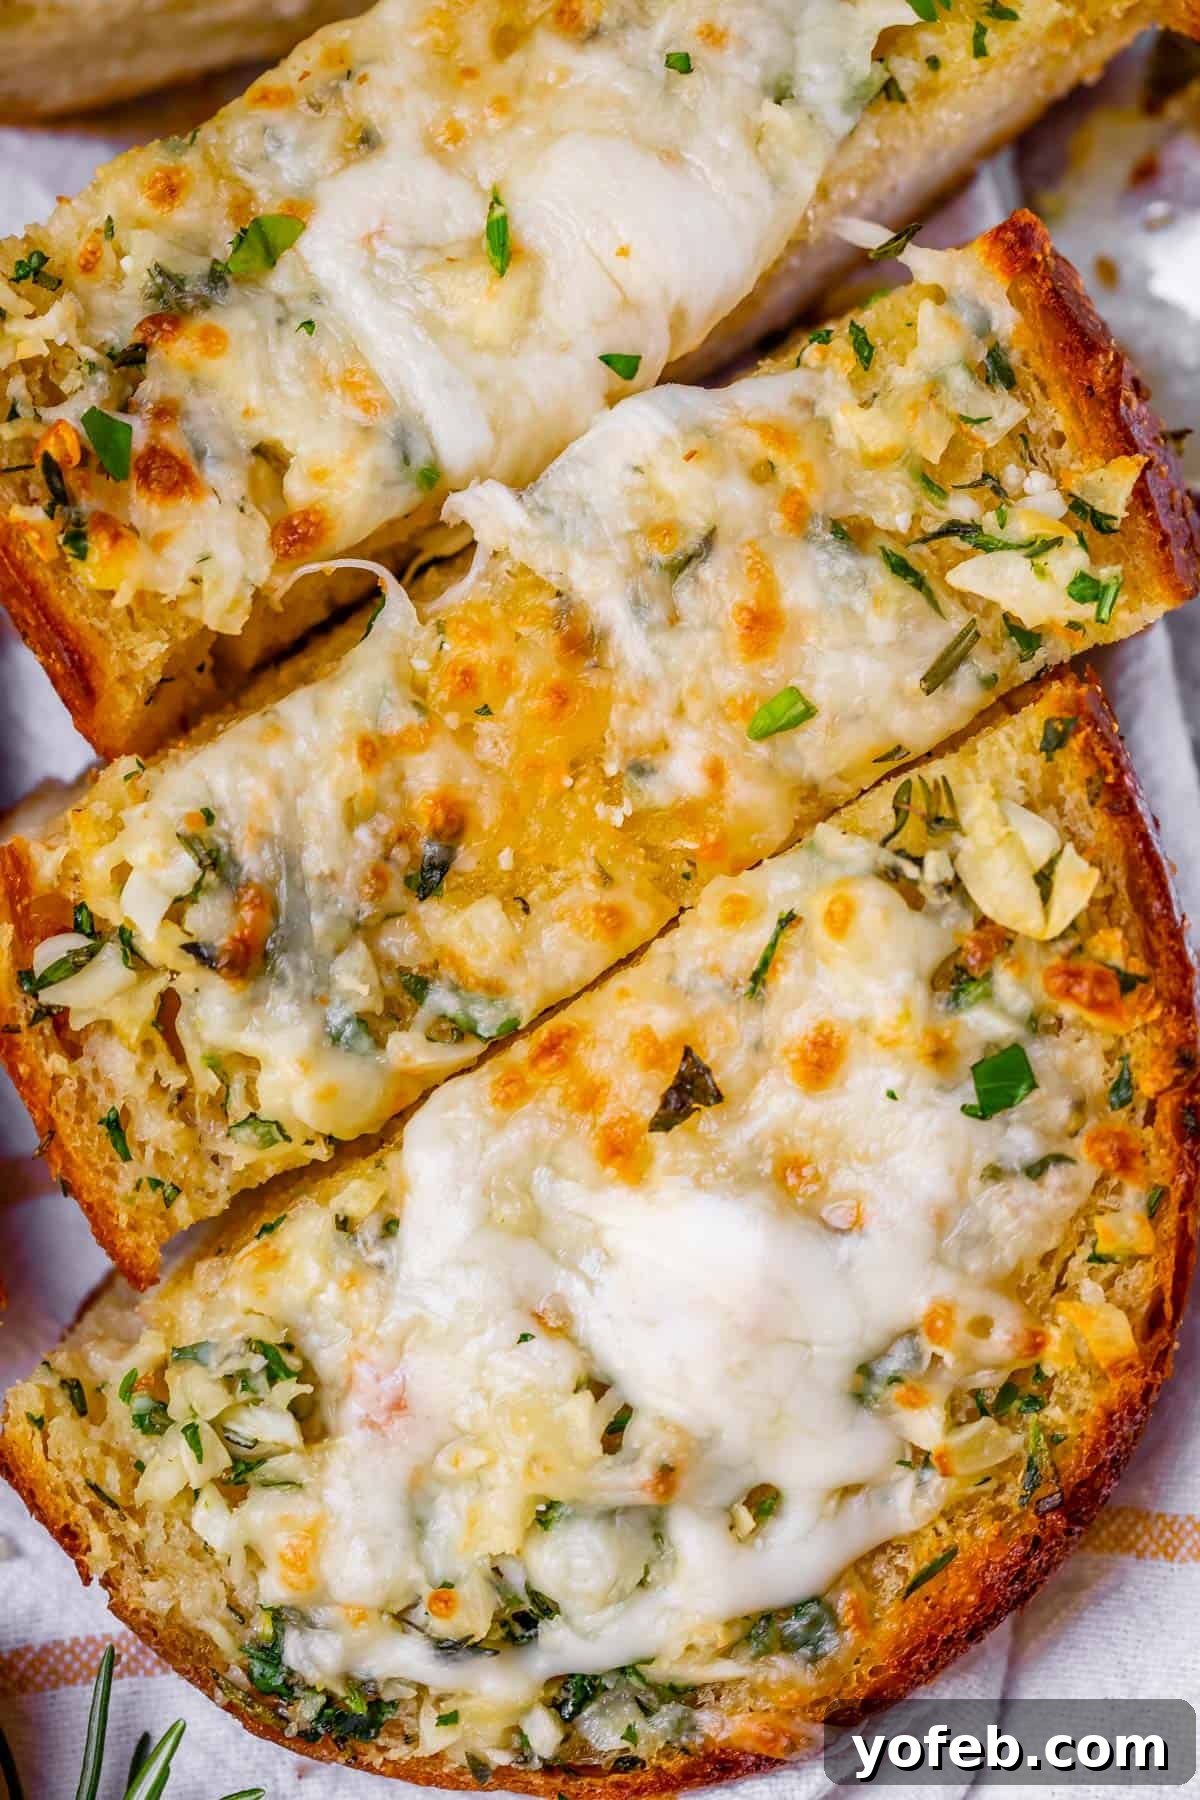
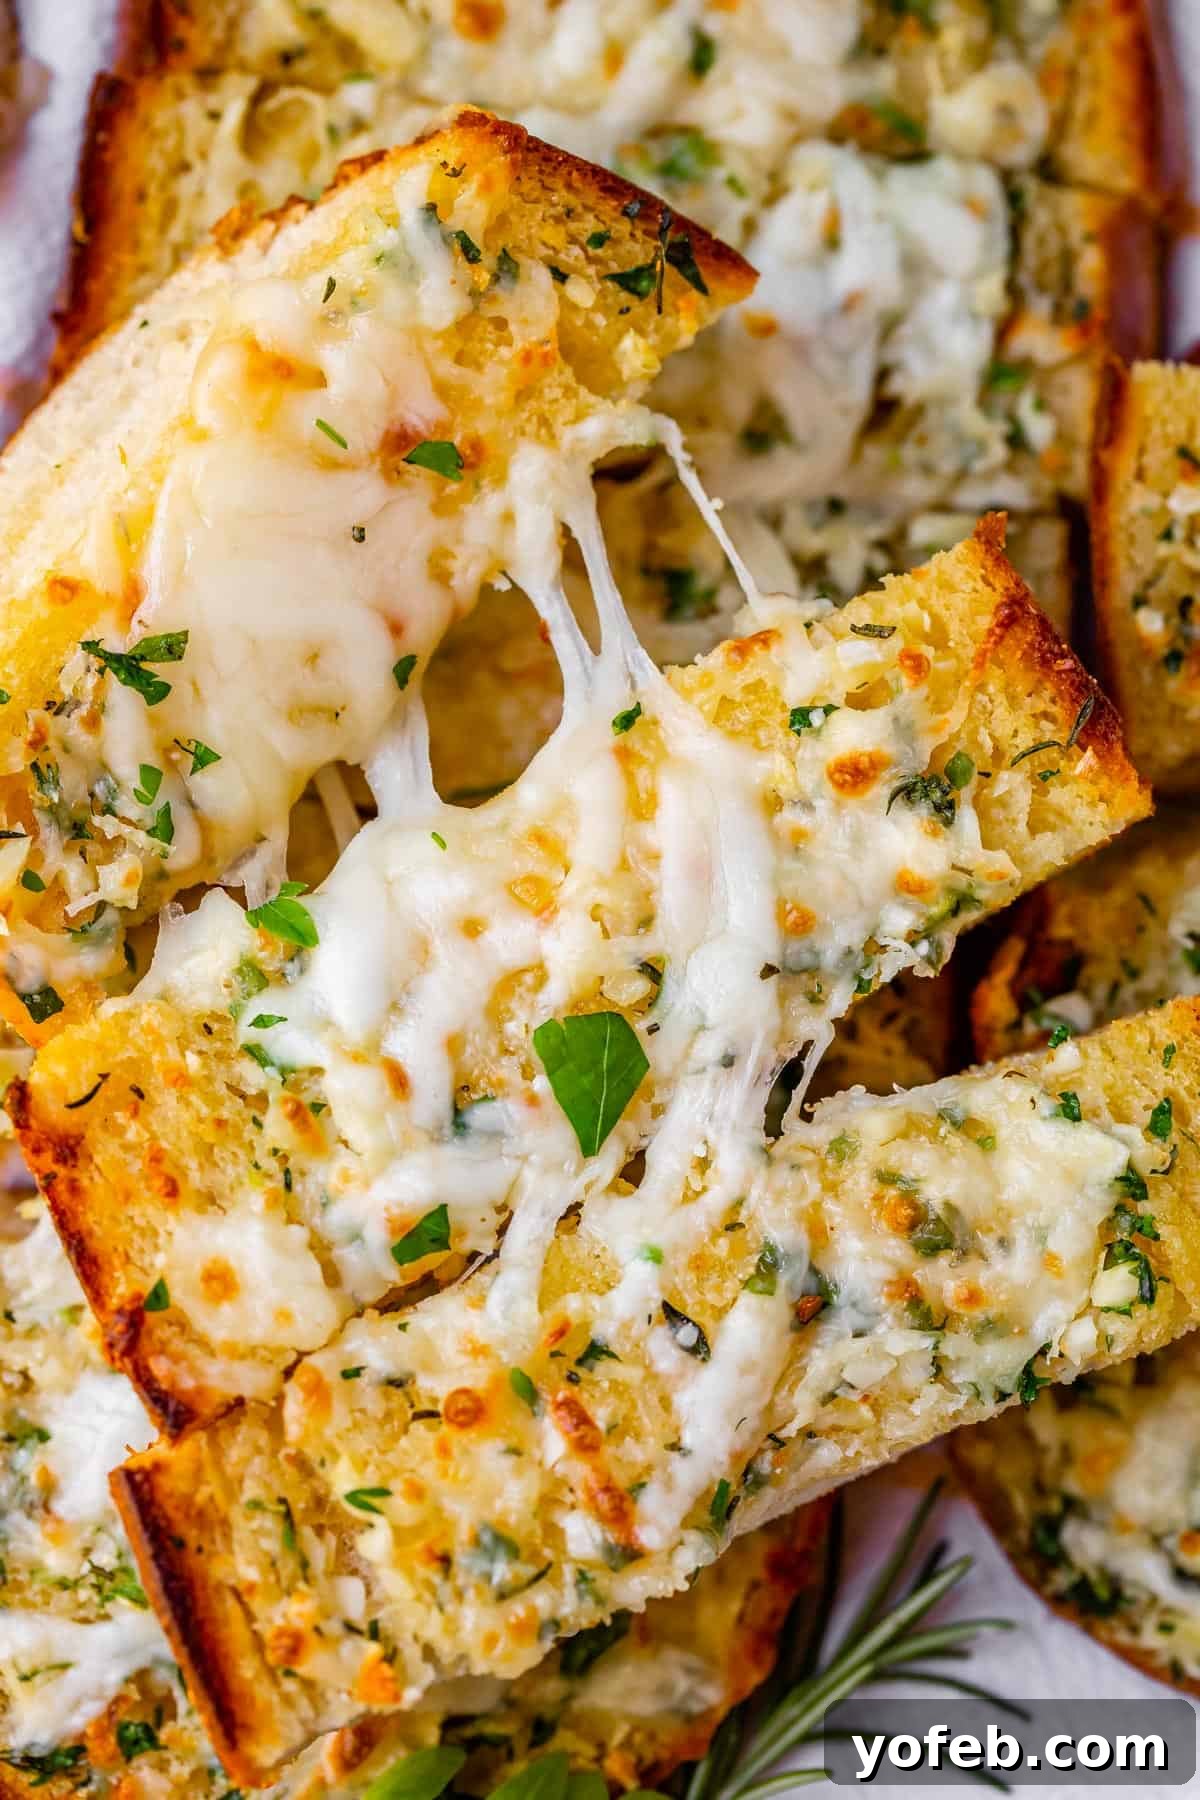
For our Crispy-Edge Garlic Bread method, add your chosen cheese (Parmesan and/or mozzarella) right before the broiling step. Broil for 1-3 minutes, watching closely, until the cheese is beautifully melted, bubbly, and begins to develop golden-brown, irresistible spots. It should look something like this:
For a truly indulgent Soft Garlic Bread, you can mix grated Parmesan cheese directly into your garlic butter before spreading it onto the bread. For the ultimate cheesy experience, take it a step further: place a slice of mozzarella cheese in between each individual slice of bread before reassembling the loaf and wrapping it in foil. Bake as directed, adjusting the temperature slightly lower (around 325°F / 160°C) and increasing the baking time to about 20 minutes to ensure the cheese melts perfectly without over-browning.
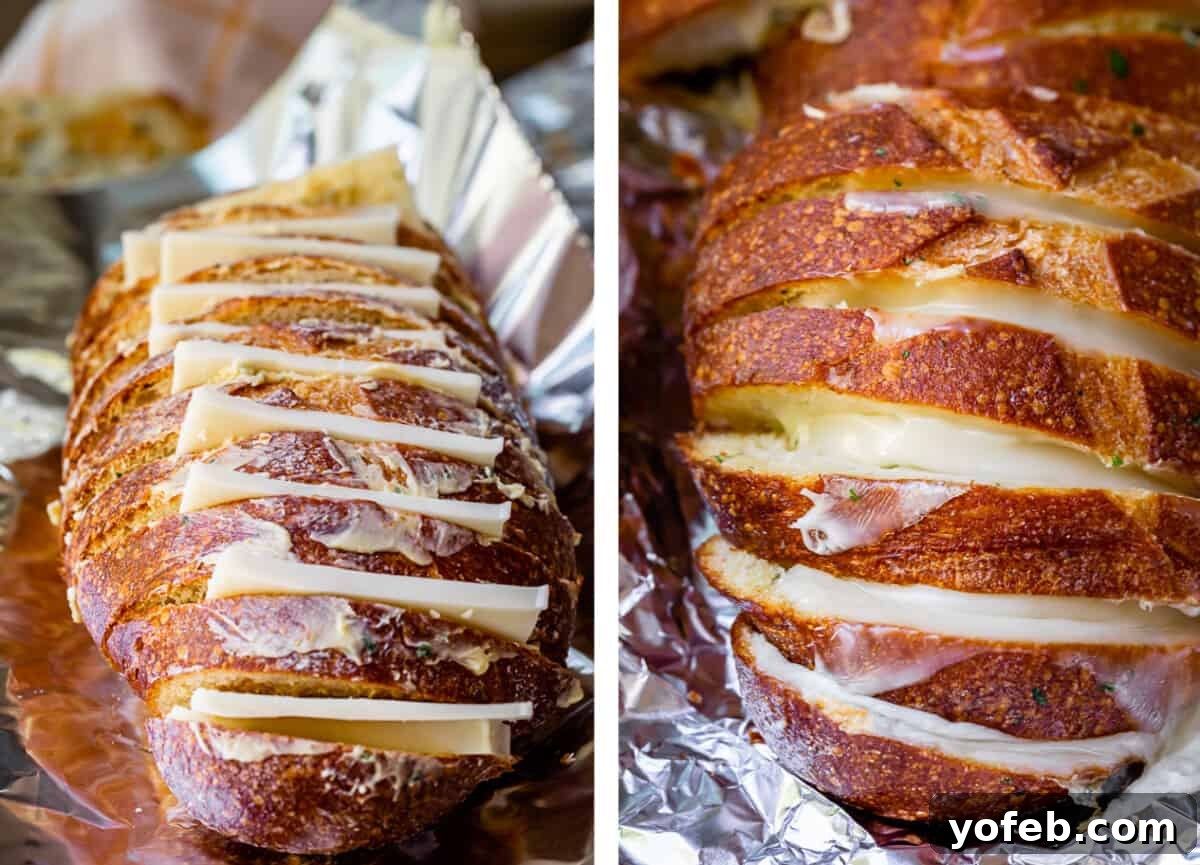
This method results in an incredibly, almost unbelievably, cheesy bread. Prepare yourself for an ooey-gooey, utterly satisfying experience!
And for our Fast Garlic Bread, simply sprinkle the cheese (Parmesan and/or mozzarella) over each buttered slice before baking them at 475°F (245°C). The cheese will melt quickly as the bread toasts, giving you cheesy goodness in minutes.
How Long to Bake Garlic Bread in Oven
The baking time for your garlic bread largely depends on the method you choose to achieve your desired texture:
- For crispy-edge garlic bread: You’ll need approximately 10 minutes at 350°F (175°C) to heat through and infuse the butter, followed by a quick 1-2 minutes under the broiler for that signature crispness.
- For soft and tender garlic bread: Wrapped tightly in foil, it will require about 15 minutes at 350°F (175°C) to ensure the butter is fully melted and absorbed, creating a steamed, soft interior. If adding cheese between slices, increase baking time to 20 minutes at 325°F (160°C).
- For lightning-fast garlic bread: Slice the bread first, spread the garlic butter on individual slices, arrange them in a single layer on a baking sheet, and bake at a higher temperature of 425°F (220°C) for a mere 3-7 minutes, until beautifully toasted.
Always keep a close eye on your bread, especially during the broiling phase, to prevent burning and ensure perfect results!
Top 3 Tips for Unforgettable Homemade Garlic Bread
Achieving truly exceptional garlic bread boils down to a few key principles. Here are my top three tips that will guarantee a delicious outcome every single time, whether you’re a seasoned baker or a novice:
- Be Generous with Butter, and Keep It Soft: Always use more butter than you think is necessary – it’s the secret to deep flavor and perfect texture. And critically, ensure your butter is softened to room temperature, not melted. Softened butter melts slowly into the bread, infusing it completely, while melted butter tends to run off, leaving you with dry patches.
- Master the Bake for Your Desired Texture: Avoid over-baking, which leads to dry, tough bread. Pay close attention to the instructions regarding when and how to use foil. This simple technique is the key to achieving either the most shatteringly crispy edges or a wonderfully soft and tender loaf, depending on your preference.
- Always Include High-Quality Garlic Powder: Even if you’re using fresh garlic, a good quality garlic powder is non-negotiable. It provides a foundational, consistent garlic flavor throughout the butter mixture that fresh garlic alone cannot fully achieve.
Regarding fresh garlic, I want to be clear: while I adore the pungent kick of real garlic, I don’t insist on it for every batch of garlic bread. On a busy weeknight, the thought of smashing, peeling, and mincing five cloves of garlic can feel like an insurmountable task. In such instances, a high-quality garlic powder is an absolute rockstar and delivers a knock-out flavor.
You can identify good quality garlic powder by its appearance. Look for one labeled “granulated garlic” if possible, which will have visible small granules and a golden-yellow hue. Steer clear of any brand that looks like fine, white chalk dust – that’s a clear indicator of lower quality and won’t give you the rich flavor you desire.
What to Serve Alongside Your Garlic Bread
Honestly, what *can’t* you serve with garlic bread? It’s the ultimate versatile companion! However, it truly shines when paired with dishes that have a delicious sauce begging to be mopped up. Here are some of my top recommendations:
- Easy Spaghetti Sauce Recipe (30 minutes): A timeless classic! Easy spaghetti, this garlic bread, and a Caesar salad make for a perfect, comforting weeknight dinner.
- This Bolognese Sauce will Knock Your Socks Off: A heartier, more complex version of spaghetti sauce, absolutely worth the effort for an unforgettable meal.
- Killer Homemade Lasagna Recipe: Use your garlic bread to savor every last drop of that rich, savory sauce. Pure heaven!
- Best Chicken Alfredo Recipe: Garlic bread and Chicken Alfredo are a match made in culinary heaven, like peanut butter and jelly, but even better.
- Laura’s Tomato Bisque Soup: The queen of all tomato soups, practically begging for a piece of buttery, garlicky goodness to dunk into its creamy depths.
- Minestrone with Sausage and Pesto (Stovetop or Slow Cooker): A hearty and flavorful soup that pairs beautifully with the simple elegance of garlic bread.
- Pan Seared Sea Scallops with Sauce: Tender, buttery scallops in a creamy wine sauce would be exquisitely complemented by warm garlic bread.
- The Best Baked Ziti: This cheesy, comforting dish feeds a crowd and is perfectly enhanced by the addition of garlic bread.
- Easy Slow Cooker Chicken Stroganoff: Creamy noodles and chicken find their perfect partner in garlicky bread.
- French Onion Soup: (From Flavors of the Kitchen) The rich broth and cheesy topping of this classic soup are a natural fit for garlic bread.
Storage and Reheating Garlic Butter Bread
Proper storage is key to enjoying your garlic bread leftovers. The best way to keep your garlic bread fresh is to store it in a sealed container or a reliable ziplock bag. Avoid refrigerating it unless you enjoy dry, stale bread – a texture no one truly desires! Stored correctly at room temperature, it will remain delicious for about 3-4 days. In our household, however, it rarely lasts that long; garlic bread has a way of disappearing as if by magic.
To reheat garlic bread, especially an entire loaf or a significant portion of one, wrap it loosely in aluminum foil. Bake it in an oven preheated to 350°F (175°C) for approximately 15 minutes, or until it’s thoroughly warmed through. If you prefer extra crunchy edges, simply remove the foil for the last few minutes of reheating. For individual slices, a large air fryer works wonderfully (just reduce the time by a few minutes) or you can toast them for a crispier result.
While the microwave is an option in a true pinch, be warned: it can make your bread unpleasantly tough very quickly. If you must use it, heat for no longer than 8-10 seconds per slice to minimize the adverse effects.
Can You Freeze Garlic Butter Bread?
Absolutely, freezing garlic bread is a fantastic way to enjoy it whenever the craving strikes! My freezer is often stocked with an impressive array of garlic bread loaves. You can freeze either a fully prepared but unbaked loaf, or a loaf that has already been baked and cooled.
Regardless of whether it’s baked or unbaked, ensure the bread is completely cool before freezing. Place it securely in a large freezer-safe ziplock bag – I highly recommend these 2-gallon ziplocks for their ample size. Press out as much air as possible before sealing to prevent freezer burn. Alternatively, if you don’t have a large enough freezer bag, you can double-wrap the loaf tightly with aluminum foil, followed by a layer of plastic wrap.
When you’re ready to indulge, you can bake the garlic bread straight from frozen! Simply preheat your oven to 350°F (175°C) and bake for approximately 15-25 minutes. Remember to remove any plastic wrap before baking, leaving only the foil if you used it, or placing it directly on a baking sheet if it was only in a bag. This makes for a quick and convenient side dish anytime!
Frequently Asked Questions About Garlic Bread
For the best garlic bread, French bread is my top recommendation. I often use the Country French bread from Costco for its consistent quality. You can also try making your own Homemade French Bread, which is surprisingly quick to prepare! Beyond French bread, any good quality, crusty loaf will work beautifully, such as sourdough, ciabatta, or even thick-cut Texas toast.
Baking time varies based on your chosen method and desired texture. Generally, plan for 10-15 minutes at 350°F (175°C). For a crispy loaf, it’s about 10 minutes at 350°F followed by 1-2 minutes under the broiler. For a soft, foil-wrapped loaf, expect around 15 minutes at 350°F. A quick weeknight version, with pre-sliced bread, bakes in just 3-7 minutes at 425°F (220°C). If you add cheese, you might need a few extra minutes for melting and browning, especially for the soft loaf method where a slightly lower temperature (325°F / 160°C) for 20 minutes is recommended.
To reheat, wrap your leftover garlic bread in foil and bake it in an oven preheated to 350°F (175°C) for about 15 minutes, or until warmed through. For a crunchier exterior, remove the foil for the last few minutes. A large air fryer also works well, but reduce the time by a few minutes. You can also toast individual pieces for a crispier result. As a last resort, a microwave can be used for 8-10 seconds, but be aware it tends to make the bread tough.
Healthy for your soul? Absolutely! For your body, it’s a dish best enjoyed in moderation. Garlic bread is essentially bread generously slathered with butter, garlic, and other seasonings. If you are mindful of your carbohydrate, fat, or overall calorie intake, you’ll need to assess how much fits into your dietary plan. It’s a delightful treat to savor, not necessarily a health food staple.
Surprisingly, the garlic bread we commonly enjoy today is largely an American innovation! While bruschetta is a distant Italian relative, the buttery, cheesy, crusty loaf is a delicious tradition credited to early Italian-American immigrants. These immigrants were sometimes referred to as “garlic eaters” or said to wear “Italian perfume” due to the prevalent and pungent use of garlic in Southern Italian cooking. It seems Italians embraced the attempted insult as a challenge, enthusiastically adding garlic even to their bread. Take that, critics! Garlic for life!
For the best flavor, I recommend using both high-quality garlic powder and fresh minced garlic. Garlic powder offers a concentrated, baseline garlic flavor that permeates the butter, while fresh garlic provides an undeniable intensity and textural element. You should use kosher salt separately to control the overall saltiness. Please refer to the full recipe card for the specific amounts of each ingredient.
More Delightful Bread Recipes
If you’ve fallen in love with homemade garlic bread, you’ll surely enjoy these other fantastic bread recipes:
- Quick and Easy French Bread Recipe: Incredibly fast to make and an excellent foundation if you desire a fully homemade garlic bread experience!
- Garlic Knots Recipe: All the glorious garlicky goodness, but ingeniously shaped into adorable, pull-apart knots.
- Garlic and Rosemary Skillet Bread: A unique take that’s almost like a pan pizza version of garlic bread – utterly amazing!
- Olive Garden Breadsticks: Recreate the beloved restaurant classic at home. I’m convinced I could eat my weight in these!
- Big Fat Crescent Rolls: These are indeed big, delightfully fat, and arguably the best crescent rolls you’ll ever bake.
- Cheddar Biscuits: Taste just like the famous ones from Red Lobster, perhaps even better!
- Flaky Buttermilk Biscuits From Scratch: It’s hard to beat the tender, melt-in-your-mouth layers of a perfectly made buttermilk biscuit.
- Samoan Coconut Rolls (Pani Popo): An adventurous and incredibly delicious choice, with dinner rolls baked in a rich coconut milk bath.
- Texas Toast: (From Farmgirl’s Dabbles) A thick, satisfying toast that makes a great base for many meals.
- Focaccia: (From Once Upon a Chef) A light and airy Italian bread, often infused with herbs and olive oil.
Facebook | Pinterest | Instagram

Homemade Garlic Bread Recipe
5 minutes
10 minutes
15 minutes
8
Ingredients
- 1 (16-oz) loaf of French bread
- 3/4 cup salted butter, (1 & 1/2 sticks), softened
- 1/8 teaspoon kosher salt
- 1/4 teaspoon garlic powder*, high quality, see notes
- 5-6 cloves fresh garlic*, about 3 tablespoons, see notes
- 1 teaspoon fresh rosemary, minced, optional
- 1 teaspoon fresh thyme, optional
- 2 tablespoons fresh parsley, chopped fine, optional
For cheesy garlic bread (optional)
- 1/2 cup shredded parmesan cheese
- 1 cup shredded mozzarella cheese, or 8 ounces sliced mozzarella
Instructions
Make the garlic butter
-
Add 3/4 cup butter to a small bowl. Let soften to room temperature. To speed it up, you can microwave it in 30-second increments at a low power level (e.g., power level 2). The goal is softened, not fully melted butter, though a little melting is fine.
-
Add 1/8 teaspoon kosher salt and 1/4 teaspoon high-quality garlic powder* to the bowl. If using unsalted butter, triple the salt to 1/2 teaspoon. (Adjust if using table salt, as it’s saltier).
-
Mince the garlic.* Use the side of your chef’s knife to smash 5-6 cloves of garlic. Peel off the papery skins, then mince the garlic finely. Add it to the bowl with the softened butter.
-
Optional: Add fresh herbs. Finely mince about 1 teaspoon fresh rosemary, 1 teaspoon fresh thyme, and 2 tablespoons fresh parsley. Adjust these amounts to your personal preference; this combination is my favorite for an extra layer of flavor!
-
Use a spatula to thoroughly mix the butter, garlic, salt, garlic powder, and any chosen herbs until well combined. Taste and adjust seasoning if needed. Once your garlic butter is ready, choose one of the following methods to prepare your garlic bread:
Crispy-Edge Garlic Bread (My Favorite)
-
Preheat your oven to 350 degrees F (175°C).
-
Using a serrated knife, carefully cut your loaf of bread in half lengthwise.
-
Generously spread all the prepared garlic butter evenly over the cut surfaces of both loaf halves. Don’t be shy; ensure you coat every edge, including the top edges of the cut sides, for maximum crispness.
-
Place each buttered loaf half, cut-side up, directly onto a sturdy baking sheet that can withstand high temperatures.
-
Bake for 10 minutes at 350°F (175°C), allowing the bread to heat through and the butter to melt and infuse into the loaf.
-
Carefully remove the bread from the oven and move your oven rack to the highest position. Turn your broiler on to high heat. Return the baking sheet to the oven. Set a timer for 1 minute and watch continuously – do not walk away! Broil until the top surface is toasted to your desired crispness. Avoid burning, especially the garlic bits, which can become bitter.
-
Cheese option: For cheesy garlic bread, sprinkle 1/2 cup Parmesan and 1 cup shredded mozzarella over the top of the loaves just before broiling. Broil for 1-3 minutes until the cheese is melted, bubbly, and golden brown. Again, watch closely to prevent burning!
-
Allow the bread to cool for a minute or two before slicing and serving. Use a piece of foil to hold the hot bread while slicing with a serrated knife to protect your hands. Serve the slices immediately in a bread basket or bowl, ideally lined with a tea towel to keep them warm.
Soft Garlic Bread
-
Preheat your oven to 350 degrees F (175°C).
-
Slice your loaf of bread into approximately 1-inch thick pieces, cutting all the way through the bottom.** Spread the prepared garlic butter generously on one side of each slice, using all of the mixture.
-
Lay out a large piece of aluminum foil. Carefully reassemble the buttered bread slices back into their original loaf shape on the foil (each slice should be standing on its cut edge). Place another piece of foil over the top of the loaf. Press the foil sheets together and fold up the edges to create a tightly sealed packet. Refer to the photos for visual guidance.
-
Place the foil-wrapped loaf on a sturdy baking sheet and bake at 350°F (175°C) for about 15 minutes, or until all the butter is completely melted and absorbed. Serve hot and enjoy the tender, buttery goodness!
-
Cheese option: Stir 1/4 to 1/2 cup shredded Parmesan cheese directly into your garlic butter mixture before spreading it on the bread. For extra cheesy bread, slice about 8 ounces of mozzarella cheese and layer it in between each bread slice. Lightly spray your foil with nonstick spray to prevent sticking. Wrap as directed and bake for about 20 minutes at a slightly lower temperature of 325°F (160°C) to ensure the cheese melts perfectly without over-browning.
Fast Garlic Bread
-
Preheat your oven to 425 degrees F (220°C).
-
Slice your loaf of bread into 1-inch thick pieces, cutting on a bias. Arrange the slices in a single layer on one or two sturdy baking sheets, ensuring they are not overlapping. Generously spread each slice with the softened garlic butter mixture.
-
Bake at 425°F (220°C) for approximately 3-7 minutes. The exact time will depend on your oven and how crispy you prefer your garlic bread. Keep a close eye on it to prevent burning.
-
Cheese option: Once the butter has melted and the bread begins to toast (after about 3-4 minutes), remove the bread from the oven. Sprinkle 1/2 cup Parmesan and 1 cup mozzarella over all the slices. Turn the oven broiler to high heat and return the baking sheet to the oven for 1-2 minutes until the cheese is beautifully melted and bubbly. As always, set a timer and do not step away from the oven when the broiler is on!
Notes
** Many recipes suggest “hasselbacking” the bread (slicing it partially, leaving the bottom intact) to prevent butter from seeping out. This often leads to needing to slice the bread twice and struggling to tear it apart at the dinner table. My advice: cut it all the way through! Using foil effectively contains all the butter, and softened butter (rather than melted) also helps prevent it from running off.
Storage Instructions: Store leftover garlic bread in a sealed container or ziplock bag at room temperature for 3-4 days. To reheat, wrap in foil and bake at 350°F (175°C) for about 5 minutes, or until warmed through. For crunchy edges, remove the foil for the last few minutes.
For an air fryer, reduce the reheating time by a few minutes. You can toast one or two pieces at a time for crunchy bread. Microwaving bread is generally not ideal as it can make it tough; if necessary, heat for no longer than 8-10 seconds.
Freezing instructions: Once cooled, place the garlic bread (baked or unbaked) in a freezer-safe ziplock bag, removing as much air as possible, and seal tightly. Alternatively, double wrap it with foil and then plastic wrap. To bake from frozen, remove any plastic (keep the foil on if used), and bake at 350°F (175°C) for 10-25 minutes, depending on the size and whether it was previously baked.
Nutrition
Serving:
1
serving
|
Calories:
225
kcal
|
Carbohydrates:
2
g
|
Protein:
5
g
|
Fat:
22
g
|
Saturated Fat:
14
g
|
Polyunsaturated Fat:
1
g
|
Monounsaturated Fat:
6
g
|
Trans Fat:
1
g
|
Cholesterol:
62
mg
|
Potassium:
43
mg
|
Fiber:
0.1
g
|
Sugar:
0.2
g
|
Vitamin A:
777
IU
|
Vitamin C:
2
mg
|
Calcium:
137
mg
|
Iron:
0.2
mg
Bread
American
225
bread, Garlic Bread
Did you make this? I’d love to see it!
Mention @thefoodcharlatan or tag #thefoodcharlatan!