
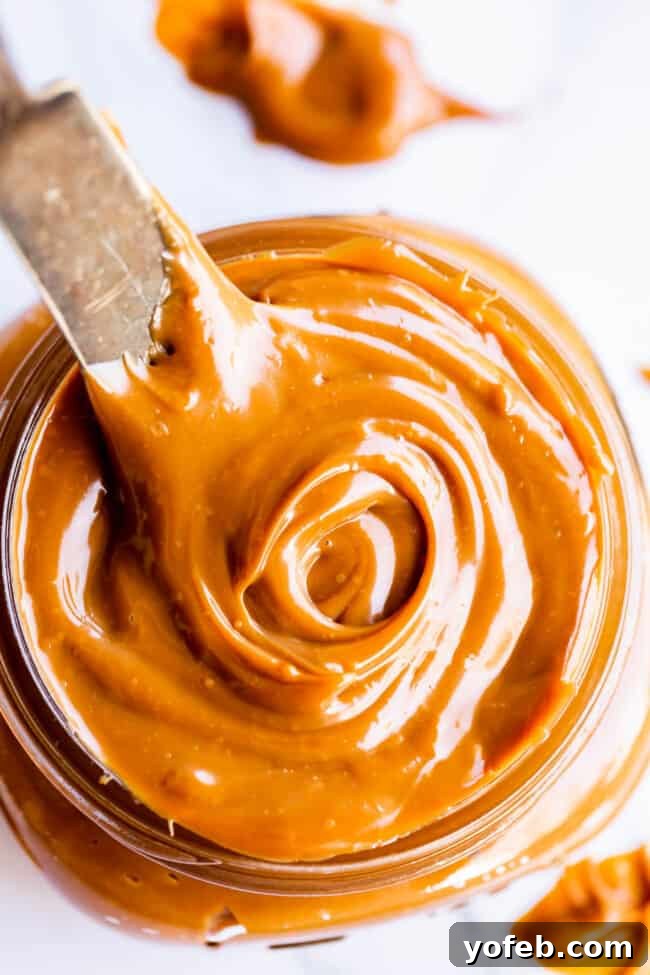
Welcome to the ultimate guide for making luscious Dulce de Leche! This sweet, caramel-butterscotch-like sauce is a true culinary delight, perfect for topping desserts, enriching baked goods, or simply enjoying by the spoonful. While traditional methods involve patiently cooking milk and sugar, the easiest and most foolproof way to achieve this golden perfection is from an unopened can of sweetened condensed milk. In this comprehensive guide, you’ll discover how to effortlessly transform condensed milk into rich dulce de leche using your slow cooker, Instant Pot, or stovetop. Plus, we’ll share a plethora of irresistible ideas for how to use your homemade creation, far beyond just savoring it straight from the jar. Originally published November 5, 2019, this updated article brings you the best tips and tricks for a truly delightful experience.
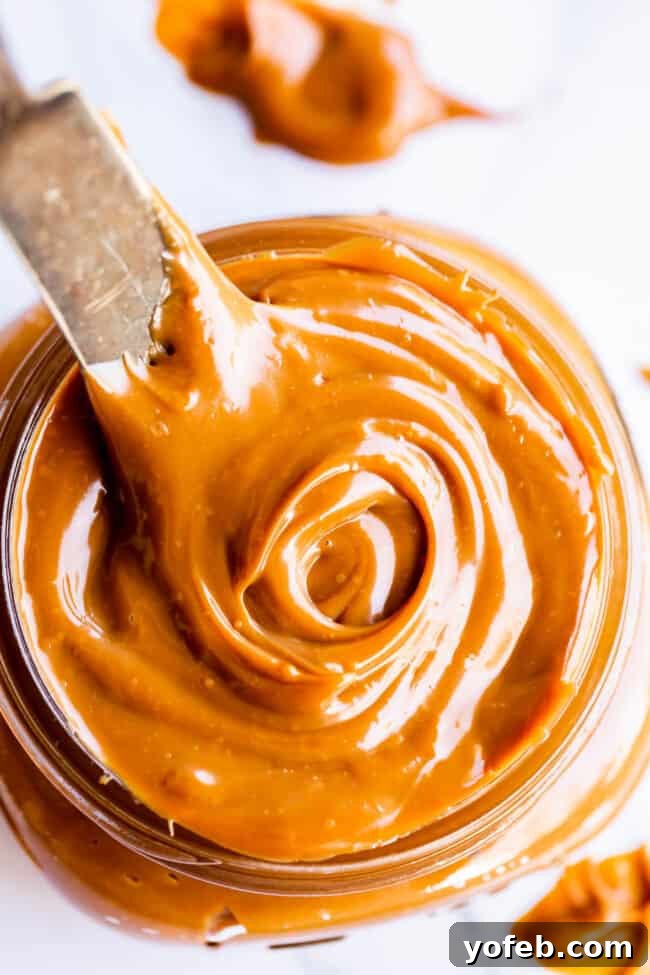
Table of Contents
- What is Dulce de Leche?
- The Single Ingredient: Homemade Dulce De Leche
- Effortless Ways to Make Dulce de Leche
- Slow Cooker Dulce de Leche: The Set-and-Forget Method
- Instant Pot Dulce de Leche: Speed and Efficiency
- Stovetop Dulce de Leche: Classic and Reliable
- Creative Ways to Enjoy Homemade Dulce de Leche
- How to Store Your Delicious Dulce de Leche
- More Irresistible Ideas for Dulce de Leche
- Why Homemade is Always Better: Other Kitchen Staples to Master
- How to Make Dulce De Leche with Condensed Milk Recipe Card
As the holiday season draws near, my mind often drifts to sweet treats and festive baking. This year, with our little one due on December 21st, there’s an extra layer of anticipation. My husband, Eric, a huge Star Wars enthusiast, recently reminded me he’d bought tickets for the new movie on December 19th. It’s a running joke that events like these somehow guarantee an early arrival!
Amidst the excitement and mild trepidation of a Christmas baby, I’m grateful for Eric’s quiet wisdom. He knows better than to add another ‘Christmas baby dilemma’ to my plate, given my good-natured grumbling about sharing a birthday with Christmas itself. (Because honestly, who wants to compete with Jesus’s birthday? Sorry, kid, but you don’t have an entire genre of music dedicated to your birth!) So, props to Eric for his understated genius.
With just a few weeks left until our due date, time feels like it’s simultaneously crawling and flying. The third trimester has a way of stretching out endlessly, yet suddenly the holidays are upon us! This makes it the perfect time to arm yourself with simple, impressive recipes. And trust me, mastering homemade dulce de leche from sweetened condensed milk is one of the best kitchen tricks you can have up your sleeve, especially during this busy season.
What is Dulce de Leche?
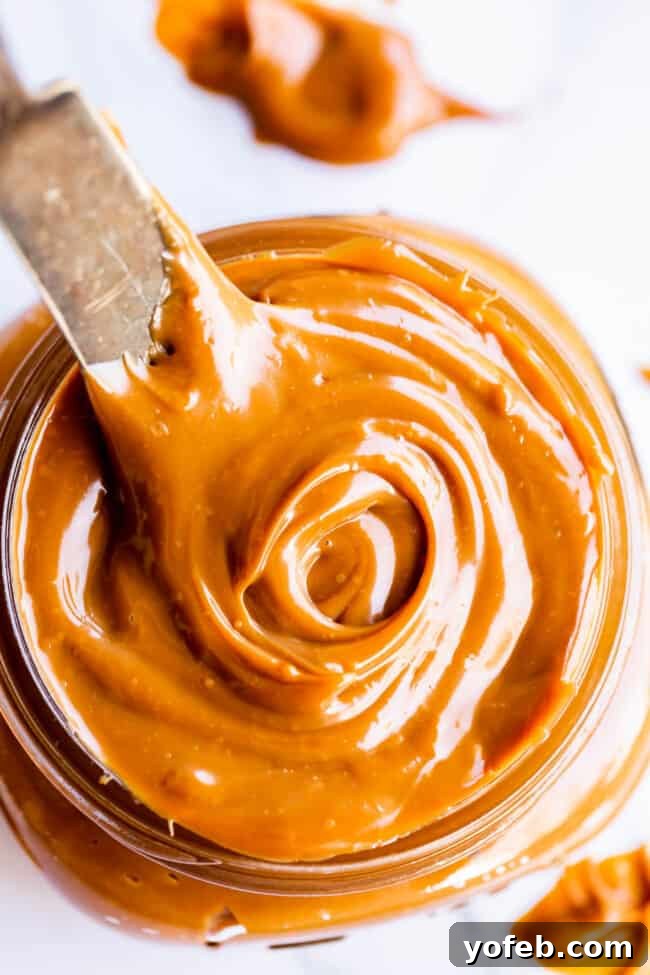
Often described as a sweet nectar from the gods, Dulce de Leche is, more accurately, a thick, rich, and intensely creamy caramel-like sauce. Its name, meaning “sweet of milk” in Spanish, perfectly encapsulates its essence. While some mistakenly refer to it as Mexican Caramel, its true origins lie in South America, with Argentina being the most commonly cited birthplace. However, various South American countries, including Chile and Uruguay, proudly lay claim to its invention, each with their own beloved legends.
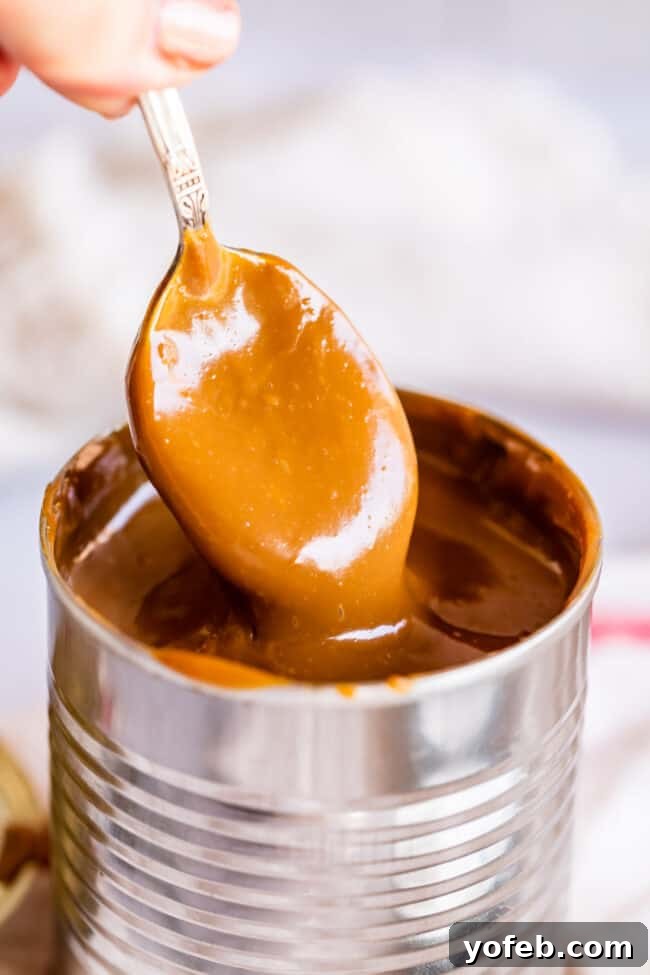
Folklore often tells of a happy accident: a cook, distracted or called away, left a pot of milk and sugar simmering on the stove for an extended period. Upon returning, they discovered not a burnt mess, but a beautiful, dark brown, thick, and utterly delicious caramel sauce. This serendipitous discovery led to one of the most cherished confections in Latin American cuisine, now enjoyed worldwide.
Dulce de Leche vs. Caramel: Understanding the Difference
While often used interchangeably, dulce de leche and traditional caramel are distinct. Classic caramel is typically made by heating granulated sugar until it melts and caramelizes, often with the addition of water, cream, or butter. This process primarily relies on the caramelization of sugar, resulting in a flavor profile that can range from intensely sweet to slightly bitter, depending on how dark it’s cooked.
Dulce de leche, on the other hand, is a milk-based caramel. It’s produced by slowly heating a combination of milk and sugar (or, in our easy method, sweetened condensed milk). The key to its unique flavor and color lies in the Maillard reaction – a chemical process between amino acids and reducing sugars. This reaction, responsible for the browning and complex flavors in many cooked foods, gives dulce de leche its signature deep brown hue and a distinctively mellow, rich taste. It lacks the slight bitterness sometimes found in traditional caramel, offering a more toffee-like or butterscotch flavor profile.
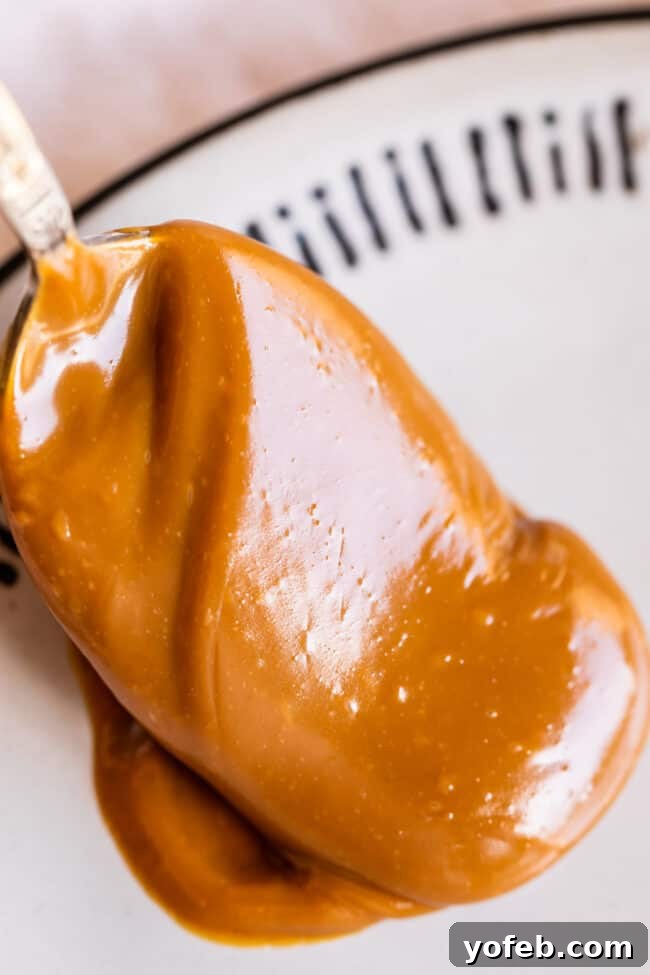
In terms of consistency, dulce de leche is also noticeably thicker than most caramel sauces. Once it cools to room temperature or is chilled, it develops a spoonable, pudding-like consistency, often compared to a softer peanut butter. This makes it incredibly versatile for spreading, filling, and topping a wide array of desserts, providing a luxurious mouthfeel that sets it apart.
The Single Ingredient: Homemade Dulce De Leche
Prepare yourselves, because this might just be the shortest ingredient list you’ve ever encountered for such an impressive homemade treat! When making dulce de leche the traditional way, you combine milk and sugar, then gently simmer them for hours until the mixture reduces, thickens, and caramelizes.
However, for the ultimate in convenience and consistent results, our method requires just one simple ingredient: **sweetened condensed milk**. These cans are readily available in most grocery stores. Look for a standard 14-ounce can, though if your store offers different sizes, adjust accordingly. This single ingredient contains all the milk and sugar necessary, pre-mixed in the perfect ratio, taking all the guesswork and constant stirring out of the equation. It’s truly a marvel of modern canning!
Effortless Ways to Make Dulce de Leche
While preparing dulce de leche from scratch with fresh milk and sugar can be a rewarding culinary endeavor, it demands significant time and attention. It typically involves slow heating on the stovetop or in the oven for several hours, requiring frequent stirring to prevent scorching and ensure even caramelization. For those seeking a simpler, more hands-off approach without sacrificing flavor or texture, boiling an unopened can of sweetened condensed milk is an absolute game-changer.
This ingenious method works because the can is sealed, creating a pressurized environment where the sweetened condensed milk slowly cooks and transforms. The sealed nature means no evaporation, eliminating the need for constant stirring or babysitting. The pressure also significantly speeds up the caramelization process compared to open-pot cooking. You can achieve perfect homemade dulce de leche using a variety of common kitchen appliances:
- **On the Stovetop:** A classic method using a large stockpot and boiling water.
- **In the Slow Cooker (Crock-Pot):** An incredibly hands-off, overnight solution.
- **In an Instant Pot (Electric Pressure Cooker):** The fastest method for busy cooks.
Regardless of your chosen method, the preparation of the can itself is crucial for a smooth cooking and cleanup experience.
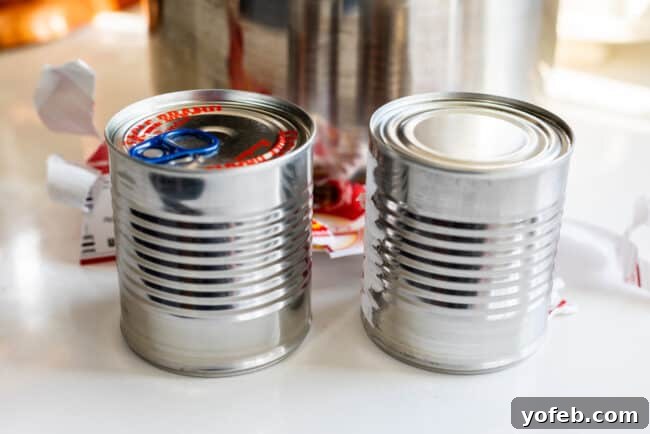
First, remove the paper label. While optional, I highly recommend this step. It’s far easier to peel dry paper from a can beforehand than to fish soggy, disintegrating paper bits out of hot water after cooking. This small effort saves a lot of hassle.
Next, clean any residual glue from the can. This step is also optional, but based on my experience, many brands of sweetened condensed milk use strong adhesives. After cooking, this glue can leave a sticky, grimy residue on the interior of your pot, whether it’s a stockpot, Instant Pot, or slow cooker. I find it much preferable to clean the glue off the can using a product like Goo Gone (it literally takes just a few seconds) than to scrub it off my cookware later. This ensures your pots remain sparkling clean and ready for their next culinary adventure.
Slow Cooker Dulce de Leche: The Set-and-Forget Method
For those who love a truly hands-off approach, making dulce de leche in a slow cooker is an excellent choice. This method requires minimal effort and supervision, allowing you to prepare it overnight or while you’re out and about. It yields consistently creamy and delicious results with almost no fuss.
To begin, place your prepared cans of sweetened condensed milk on their sides at the bottom of your slow cooker. Lying them sideways helps them remain stable and prevents them from bouncing around during the long cooking process. You can cook multiple cans at once, as many as can comfortably fit in a single layer at the bottom of your slow cooker.
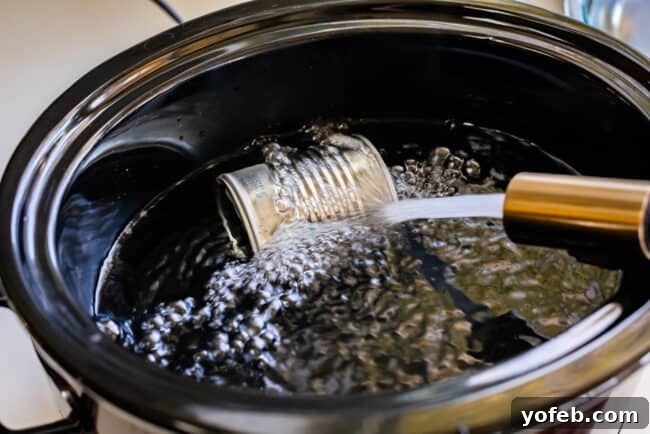
Next, fill the slow cooker with water, ensuring that the cans are completely submerged by at least one inch. This consistent water level is crucial for even heat distribution and preventing the cans from overheating. Once the water is added, cover your slow cooker and set it to the LOW heat setting. The cooking time for this method is typically between 8 to 10 hours. The longer you let it cook, the darker and more caramelized your dulce de leche will become, developing a richer flavor. After the cooking time, you’ll be rewarded with perfectly tender, rich dulce de leche, ready for cooling and enjoyment.
Instant Pot Dulce de Leche: Speed and Efficiency
For those times when you need homemade dulce de leche in a flash, the Instant Pot (or any electric pressure cooker) is your best friend. This method dramatically reduces the cooking time, delivering rich, creamy dulce de leche in under an hour, making it by far the fastest way to achieve this sweet treat.
Begin by placing your prepared cans of sweetened condensed milk on their sides within the Instant Pot. As with the slow cooker, arranging them sideways helps them stay put on the bottom of the pot during the pressure cooking cycle. You can fit multiple cans, usually up to three 14-ounce cans, as long as they rest in a single layer without stacking.
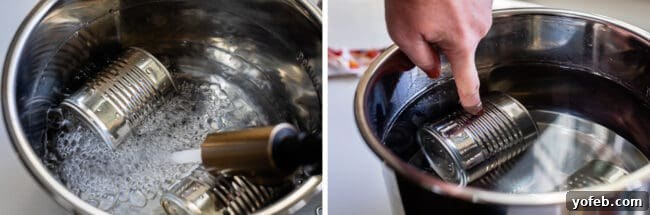

Pour enough water into the Instant Pot to cover the cans by at least one inch. A good visual cue is to fill the water up to your first knuckle when it’s resting on the can. Secure the lid on your Instant Pot and set the steam release handle to the “SEALING” position. Pressure cook on HIGH for 40 minutes. Once the cooking cycle is complete, you can either allow for a natural pressure release (NPR) or perform a quick release (QR) by carefully turning the steam release handle to “VENTING.” Always exercise caution when releasing steam to avoid burns.
In one of my attempts, I neglected to thoroughly clean the label glue off the can, and as you can see from the floating residue in the water, it required a thorough cleanup of my Instant Pot with Goo Gone afterward. A small pre-cook step saves significant post-cook cleaning!
Stovetop Dulce de Leche: Classic and Reliable
The stovetop method is a classic and reliable way to make dulce de leche from sweetened condensed milk. While it requires a bit more active monitoring than the slow cooker, it’s still largely hands-off and delivers excellent results. Expect the boiling process to take approximately 3 hours.
To begin, place your prepped cans of sweetened condensed milk on their sides in a large stockpot. Orienting them sideways ensures they remain stable at the bottom of the pot. You can cook as many cans as will fit comfortably in a single layer without stacking.
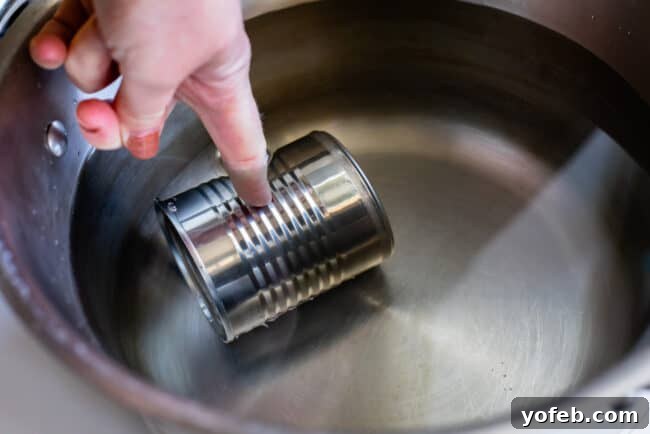
Fill the pot with water, making sure it covers the cans by at least two inches. A good rule of thumb is to fill the water up to your second knuckle when it’s resting on the can. Cover the pot with a lid and bring the water to a rolling boil over high heat. Once boiling, reduce the heat to a gentle simmer, just enough to maintain active, but not aggressive, bubbles. For my stove, this usually means setting my “power burner” to a low setting. The goal is a gentle, consistent simmer.
Continue simmering for 3 hours, keeping the lid on the pot. The crucial part of this method is to regularly check the water level, ideally every 30-60 minutes, to ensure the cans remain fully submerged. As water evaporates, add more hot water to keep the cans completely covered. This prevents the cans from overheating or cooking unevenly.
A Critical Safety Warning: Cooling Down Your Cans
Regardless of the cooking method you choose – slow cooker, Instant Pot, or stovetop – this step is paramount: NEVER attempt to open a can of dulce de leche while it is still hot and pressurized! The contents inside are molten hot, and opening it prematurely can cause a dangerous eruption of hot dulce de leche, leading to severe burns. Safety first!
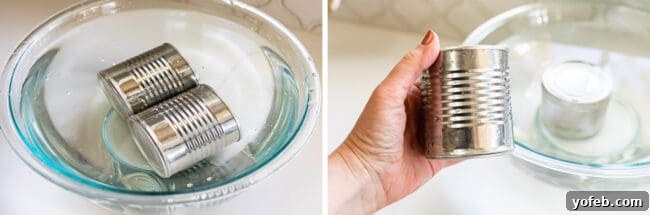
After cooking, carefully remove the hot cans from the water using tongs and oven mitts. Transfer them immediately to a bowl of cold water, or even an ice bath, to speed up the cooling process. Allow the cans to cool for at least 30 minutes, or until they are tepid enough to handle comfortably with your bare hands. This ensures the internal pressure has normalized and the contents have cooled sufficiently to be safe.
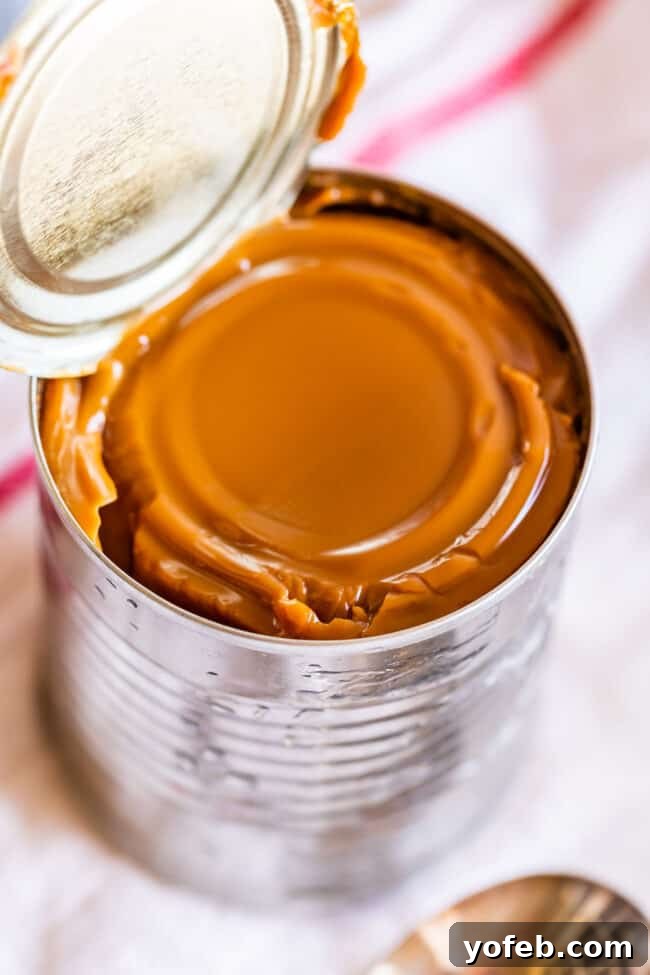
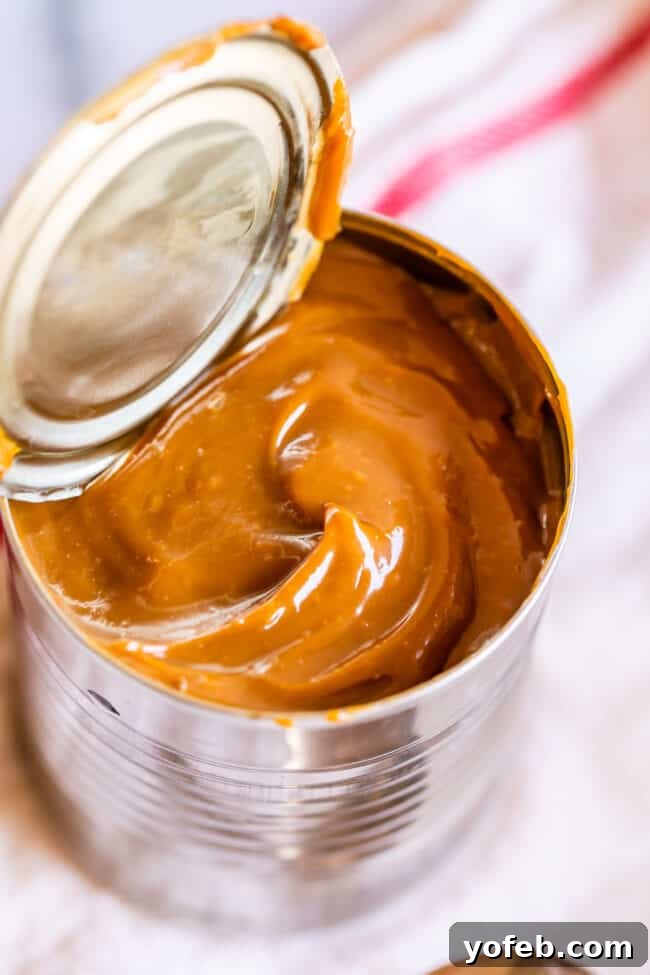
Once cooled and safe to handle, carefully open the can. You might find the dulce de leche appears somewhat firm or slightly lumpy initially. Don’t worry! Simply give it a good stir with a spoon or whisk until it becomes perfectly smooth, creamy, and wonderfully luxurious. It’s now ready to be enjoyed!
Creative Ways to Enjoy Homemade Dulce de Leche
The beauty of homemade dulce de leche isn’t just in its incredible flavor and creamy texture; it’s also in its immense versatility. Once you’ve made a batch, the culinary possibilities are endless! Beyond just spooning it straight into your mouth (which, let’s be honest, is a perfectly valid and delightful way to enjoy it), here are some of my absolute favorite ways to incorporate this sweet, caramel-butterscotch magic into your meals and desserts:
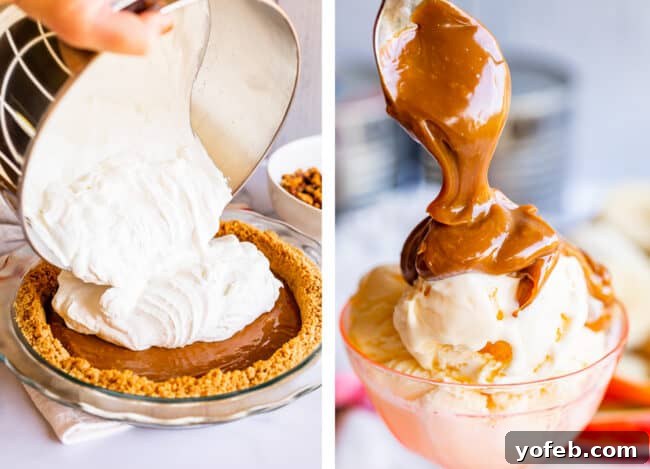
- Ice Cream Topping: Drizzle warm dulce de leche generously over a scoop (or three!) of vanilla bean ice cream for an instant upgrade. Add a sprinkle of sea salt for a salted caramel twist.
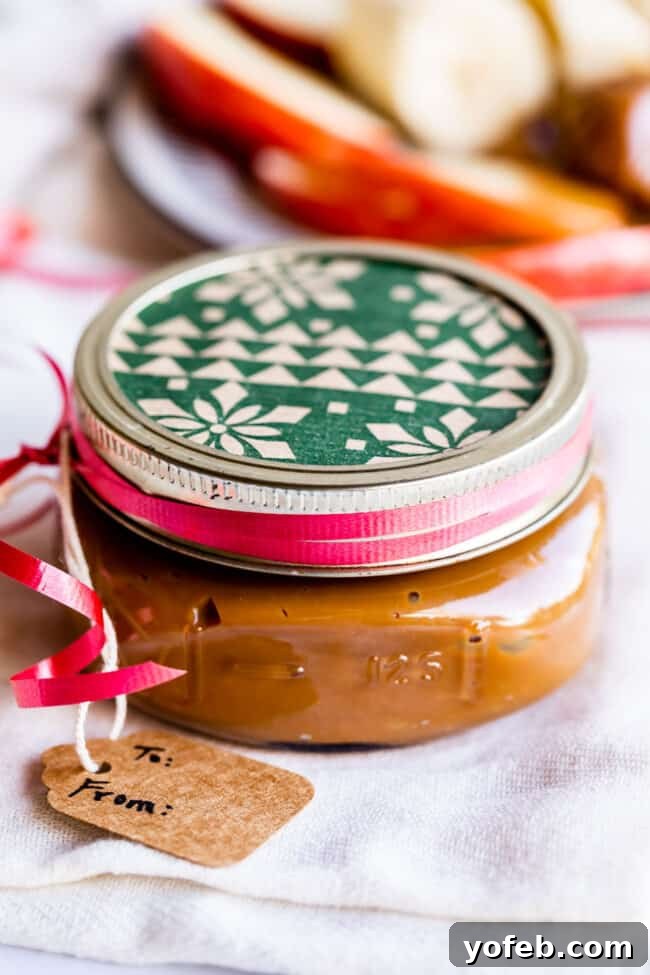
- Thoughtful Holiday Gift: Spoon your homemade dulce de leche into small mason jars, adorn with a pretty label and ribbon, and gift to neighbors, friends, or teachers. It’s a personal, delicious present that truly shows you care.
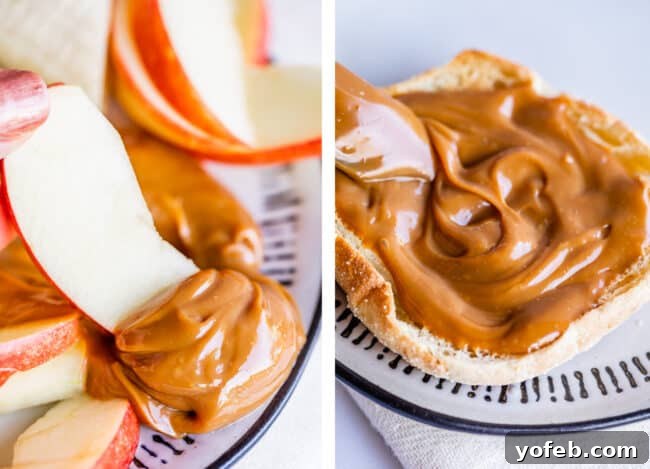
- Breakfast Bliss: Spread it thick on warm toast, bagels, or fluffy English muffins for an indulgent start to your day. It’s also phenomenal on croissants!
- Elegant Cake or Doughnut Filling: Replace traditional buttercream with dulce de leche as a filling for cakes, cupcakes (like these pumpkin cupcakes), or even homemade doughnuts. Its rich flavor pairs beautifully with almost any cake or pastry.
- Fruit Dip: Serve it alongside apple slices, banana chunks, pear wedges, or strawberries for a simple yet sophisticated party snack or a healthy-ish treat. It’s always a hit at gatherings and baby showers.
- Trifle Layer: Substitute pudding with dulce de leche in your next trifle recipe. Its dense creaminess adds a luxurious texture and deep flavor.
- Morning Oats Enhancer: Stir a spoonful into your overnight oats or hot oatmeal for a naturally sweet and comforting breakfast.
- Pancake & Waffle Perfection: Elevate your breakfast game by topping your favorite pancakes or waffles with warm dulce de leche. Seriously, you have to try this!
- Yogurt Mix-in: Fold it into plain Greek yogurt, then top with granola, fresh berries, or nuts for a healthier dessert or satisfying snack.
- Whipped Cream Fold: Gently fold dulce de leche into freshly whipped cream to create a caramel-infused topping for pies, cakes, or hot chocolate.
- Crepe Filling: Fill delicate crepes with a generous spread of dulce de leche, perhaps with some sliced bananas or berries, for a delightful dessert or brunch item.
- Brownie & Blondie Booster: Swirl it into the batter before baking, or dollop it on top of freshly baked brownies or blondies for an extra layer of sweetness and texture.
- Cheesecake Swirl: Swirl dulce de leche into your cheesecake batter before baking or use it as a decadent topping once chilled.
- Pie Upgrade: Pour it over your favorite pie (apple, pumpkin, pecan – the possibilities are endless!) or gently swirl it into the pie filling for a deeper, richer flavor.
- Stuffed Cookies: Use it as a sweet surprise filling for cookies, much like these Stuffed Gingerbread Cookies. Imagine a warm, gooey center!
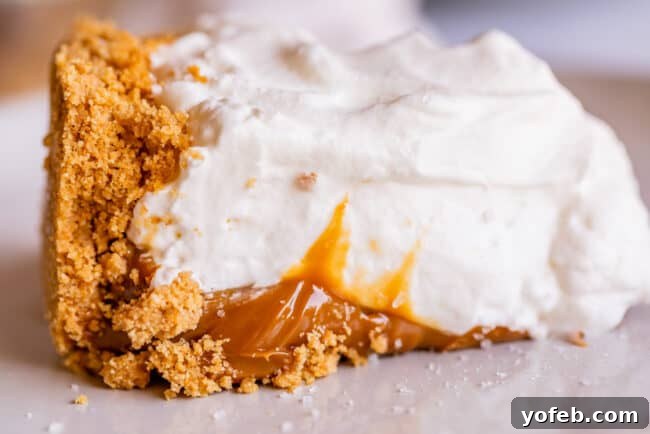
Speaking of pies, you absolutely must try making a Dulce de Leche pie! It was the whole reason I initially developed this ‘How to Make Dulce de Leche’ post, fueled by my ulterior motives to create more amazing recipes featuring this ingredient. (UPDATE! The recipe is now live: find it here!)
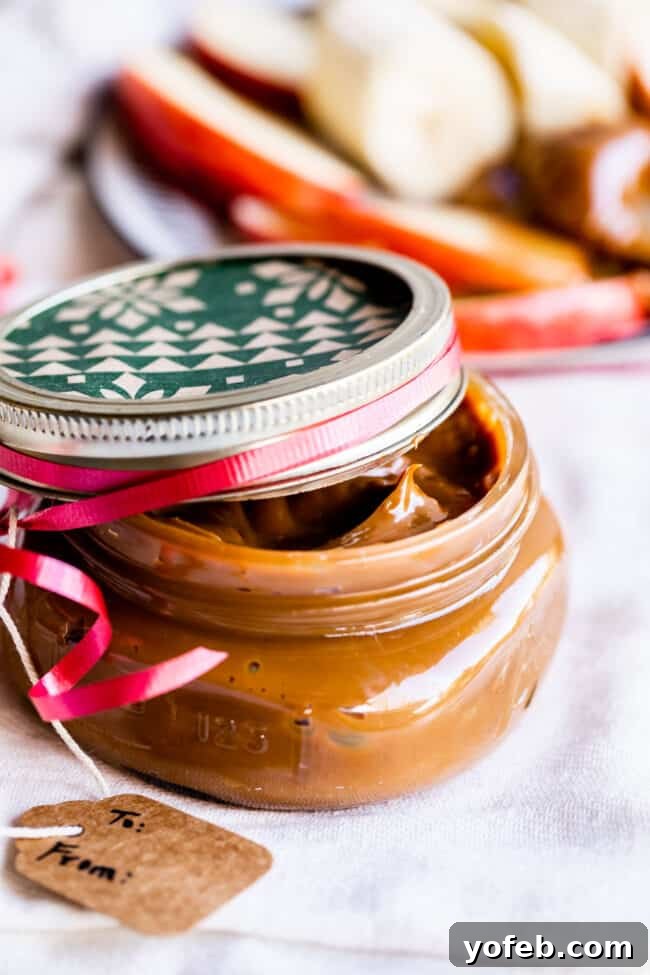
Imagine the smiles you’ll bring by gifting jars of this delectable homemade dulce de leche this Christmas. It’s a surprisingly easy yet incredibly thoughtful present for friends, neighbors, or anyone who appreciates a touch of sweetness. Pair it with a few fresh apples for dipping, and you’ve got a gift that’s both fun and utterly irresistible!
How to Store Your Delicious Dulce de Leche
Proper storage is key to enjoying your homemade dulce de leche for as long as possible. The method of storage depends on whether you’ve opened the can or not.
Unopened Cans: If you cooked multiple cans and haven’t opened them, they remain shelf-stable for up to 3 months when stored in your pantry. It’s a good idea to label them clearly (perhaps with a “Dulce de Leche” sticker or marker) to avoid mistaking them for regular condensed milk or other canned goods later on. This also applies if you used the recommended method of cooking the condensed milk directly in its original sealed can. However, if you chose the alternative method of cooking the milk in sealed mason jars, those jars are not considered shelf-stable and must be refrigerated immediately after cooling.
Opened Cans / Prepared Jars: Once you open a can of dulce de leche, or if you prepared it in a mason jar, it needs to be refrigerated. Transfer any leftovers to an airtight container, such as a mason jar with a tightly fitting lid or a sturdy tupperware. Stored in the refrigerator, your homemade dulce de leche will stay fresh and delicious for up to 3 weeks.
Consistency and Warming: After chilling, dulce de leche will naturally thicken to a pudding-like consistency, similar to soft peanut butter, and will not be easily pourable. If you prefer a smoother, more drizzly consistency for topping ice cream or pancakes, simply warm it gently. You can do this by microwaving it for a minute or two, stirring well until it reaches your desired texture. For an extra touch of richness and a truly silky pour, I love to stir in a tablespoon or two of heavy cream to the warm dulce de leche. Because, let’s be honest, calorie restraint isn’t always my forte when it comes to delicious homemade treats!
More Irresistible Ideas for Dulce de Leche
If you’re looking for even more ways to incorporate the sweet, creamy goodness of dulce de leche into your baking and everyday treats, these recipes offer fantastic inspiration. From elegant desserts to simple swaps, you’ll find plenty to satisfy your sweet tooth:
- No Bake Dulce de Leche Cheesecake with Caramelized Peaches: This light and creamy cheesecake is a dream. No peaches in season? Try it with caramelized bananas instead for a tropical twist!
- Cranberry Dulce de Leche Hand Pies: These adorable hand pies are a delightful surprise, especially perfect for holiday gatherings. The tart cranberries beautifully cut through the richness of the dulce de leche.
- 2 Ingredient Puff Pastry: While the original uses Nutella, imagine these flaky puffs filled with warm dulce de leche! A quick and utterly delicious dessert.
- Dulce de Leche Cheesecake Parfaits: These parfaits are incredibly easy to assemble and make for an elegant, customizable dessert bar at parties, brunches, or baby showers.
- Nutella and Banana Stuffed Crescent Rolls: Swap the Nutella for dulce de leche in this recipe for a heavenly combination of sweet caramel and soft banana wrapped in buttery crescent dough.
- Top these Dark Chocolate Waffles with a generous dollop of dulce de leche for an unbelievably decadent breakfast or dessert. Talk about starting your day with a bang!
Why Homemade is Always Better: Other Kitchen Staples to Master
Just like homemade dulce de leche elevates any dish, there are many other pantry staples and condiments that truly shine when made from scratch. Taking a few extra minutes to prepare these at home often results in superior flavor, fresher ingredients, and the satisfaction of knowing exactly what goes into your food. Here are some of my top recommendations for store-bought items you should definitely try making at home:
- Cinnamon Honey Butter: This magical spread is incredibly popular for a reason! Pinned over 500,000 times, it’s a verified winner that transforms any piece of toast or roll.
- My Favorite Caramel Sauce: While dulce de leche is distinct, a classic caramel sauce is another essential in your homemade repertoire. You can never go wrong with rich, buttery, homemade caramel.
- The Best Lemon Curd (Easy!): Bright, tangy, and utterly delicious, this reader-favorite lemon curd is incredibly easy to make and far surpasses any store-bought version.
- Homemade Chocolate Sauce: Forget the watery, artificial store-bought hot fudge. This homemade chocolate sauce is rich, decadent, and a game-changer for sundaes or milkshakes.
- Easy Homemade Maple Syrup: My husband is absolutely obsessed with this homemade maple syrup. It’s simple, pure, and perfect for pancakes and waffles.
- Coconut Syrup: A popular treat in Hawaii, this coconut syrup is fantastic on its own or especially on these Banana Macadamia Pancakes.
- Homemade Nutella from Crunchy Creamy Sweet: Experience the rich, nutty, chocolatey spread in its purest form.
- Peanut Butter Ice Cream Topping from Crazy for Crust: Elevate your ice cream sundaes with this smooth, flavorful topping.
- Homemade Magic Shell from Real Housemoms: Recreate this fun childhood favorite with just a couple of ingredients.
Facebook | Pinterest | Instagram

How to Make Dulce De Leche with Condensed Milk
2 mins
40 mins (Instant Pot)
42 mins
14 1-oz. servings
Print Recipe
Ingredients
- 1 (14-oz) can sweetened condensed milk
Instructions
Prepare your can:
-
Remove the label. This is optional, but I think it’s easier to peel dry paper off of a can than to fish wet particles of disintegrating paper out of hot water when you’re done.
-
Clean the glue off the can. This is also optional, but every brand of sweetened condensed milk that I tried had such a strong glue attaching the label to the can that afterward, the interiors of my pots (stock pot, Instant pot, and Crock pot) were covered in a grimy film from the glue. I’d rather clean the glue off the can than clean it off my pot. I used Goo Gone and it took about 2 seconds.
-
Place the can on its side (not upright) in your pot (Crock pot, Instant pot, or large stock pot). This is so that the can stays put on the bottom of the pot. It will bounce around if you stand it upright. You can make as many cans at a time as you like, usually up to 3 depending on the size of your pot. The cans need to be able to fit sideways on the bottom of the pot, do not stack them.
-
Alternatively
, you can scrape your sweetened condensed milk into a very clean mason jarand seal tightly with a clean ring and a clean lid. If you choose this method, place the jar in the pot upright, not on its side. If you are doing more than one can, make sure they are not touching each other. Leave a little space at the top of the jar so the milk has room to expand. 2 (14 ounce) cans of sweetened condensed milk will fit into 3 (8 ounce) mason jars. Mason jars are perfect if you are planning to gift these to neighbors or friends.
Stovetop Instructions:
-
Fill your large stock pot with water that reaches 2 inches above the cans (which are on their sides.)
-
Cover with a lid and set over high heat.
-
When the water is at a rolling boil, lower the heat to a simmer. For my stove on the “power burner” this was on low. There should still be active bubbles, just not so much that your water looks ragey and angry. It should be gently bubbly.
-
Simmer as is for 3 hours. Keep the lid on. Check the pot every 30-60 minutes to make sure that the water level is above the cans. The cans need to be completely submerged at all times. Add more hot water as necessary.
-
After 3 hours, either wait for the water to cool a bit, or carefully remove the can with tongs and oven mitts. DO NOT open the can right away! The can is pressurized and you will spurt yourself with molten hot dulce de leche, and it will hurt. You can place the can in a bowl of cold water to speed up the cooling if you like. When you can handle the can easily with your bare hands, it is ready to be opened. It doesn’t take more than a half hour if placed in cold water.
-
Open your can and voila! Delicious dulce de leche!
Instant Pot Instructions:
-
Fill your Instant pot (or any brand electric pressure cooker) with water that reaches 1 inch above the cans (which are on their sides.)
-
Place the lid on the Instant pot and turn the lever on top to “SEAL.”
-
Pressure cook on high (which is the default) for 40 minutes.
-
At this point you can either release the lid naturally or follow manual instructions to do a quick release. Be careful! You don’t want to get a steam burn.
-
DO NOT open the can right away! The can is pressurized and you will spurt yourself with molten hot dulce de leche, and it will hurt. You can place the can in a bowl of cold water to speed up the cooling if you like. When you can handle the can easily with your bare hands, it is ready to be opened. It doesn’t take more than a half hour if placed in cold water.
-
Open your can and voila! Delicious dulce de leche!
Slow Cooker Instructions:
-
Fill your slow cooker with water that reaches 1 inch above the cans (which are on their sides.)
-
Set the heat to LOW and cook for 8-10 hours. The longer you cook it, the darker your dulce de leche will be.
-
After 8-10 hours, either wait for the water to cool a bit, or carefully remove the can with tongs and oven mitts. DO NOT open the can right away! The can is pressurized and you will spurt yourself with molten hot dulce de leche, and it will hurt. You can place the can in a bowl of cold water to speed up the cooling if you like. When you can handle the can easily with your bare hands, it is ready to be opened. It doesn’t take more than a half hour if placed in cold water.
-
Open your can and voila! Delicious dulce de leche!
Storage:
-
If you do not open the cans, they are shelf-stable for 3 months. There is no need to refrigerate if you have not opened the cans. They are still sealed. If you cooked in mason jars, they are not shelf stable and you need to refrigerate.
-
Once the can is opened, transfer leftovers to a mason jar with a lid or a tupperware with a lid. Refrigerate for up to 3 weeks.
-
The consistency of dulce de leche after cooling is pudding-like. It is not thin or pourable. It is more like soft peanut butter. If you are storing in the fridge, you can warm it in the microwave for a minute or two to soften it. If you are pouring over ice cream, I like to stir in a bit of cream to the warm dulce de leche to make it even smoother. Because calorie restraint is not my forte 🙂
Nutrition
Serving: 1oz
|
Calories: 91kcal
|
Carbohydrates: 15g
|
Protein: 2g
|
Fat: 2g
|
Saturated Fat: 2g
|
Polyunsaturated Fat: 0.1g
|
Monounsaturated Fat: 1g
|
Cholesterol: 10mg
|
Potassium: 105mg
|
Sugar: 15g
|
Vitamin A: 76IU
|
Vitamin C: 1mg
|
Calcium: 80mg
|
Iron: 0.1mg
Did you make this? I’d love to see it!
Mention @thefoodcharlatan or tag #thefoodcharlatan!