

Oh, the glorious Brazilian churrascaria! A paradise for meat lovers, where succulent sirloin, tender prime rib, and delectable bacon-wrapped chicken are continuously carved right at your table. But amidst this carnival of grilled delights, there’s a humble, yet utterly irresistible, star that often steals the show: Brazilian Cheese Bread, affectionately known as Pão de Queijo. Many claim it’s the best part, and while that might be a slight exaggeration given the sheer culinary spectacle of a churrascaria, it’s certainly a contender for the top spot. These warm, chewy, cheesy bites are so incredibly good, they go head-to-head with the finest cuts of lamb and the sweet tang of grilled pineapple. If you’ve never experienced the magic of a Brazilian meat-fest at places like Tucanos, Rodizio, or Fogo de Chao, you’re truly missing out on a heavenly feast. And now, you can bring a piece of that heaven right into your own kitchen with this incredibly easy, gluten-free Pão de Queijo recipe.
These tiny, puffed appetizers, with their delightful crisp exterior and soft, airy, cheesy interior, offer a textural and flavor experience unlike any other bread. It’s a testament to their deliciousness that they can compete with gourmet prime rib. And the best part? They are surprisingly simple to make at home. Forget complicated doughs, lengthy rising times, or worrying about dry versus wet ingredients. With this recipe, you simply toss everything into a blender, give it a whirl, and bake. It’s a kitchen marvel that delivers maximum flavor with minimal effort, making it perfect for a quick snack, a party appetizer, or a delightful addition to any meal. Prepare to fall in love with the sheer simplicity and profound taste of homemade Brazilian Cheese Bread.
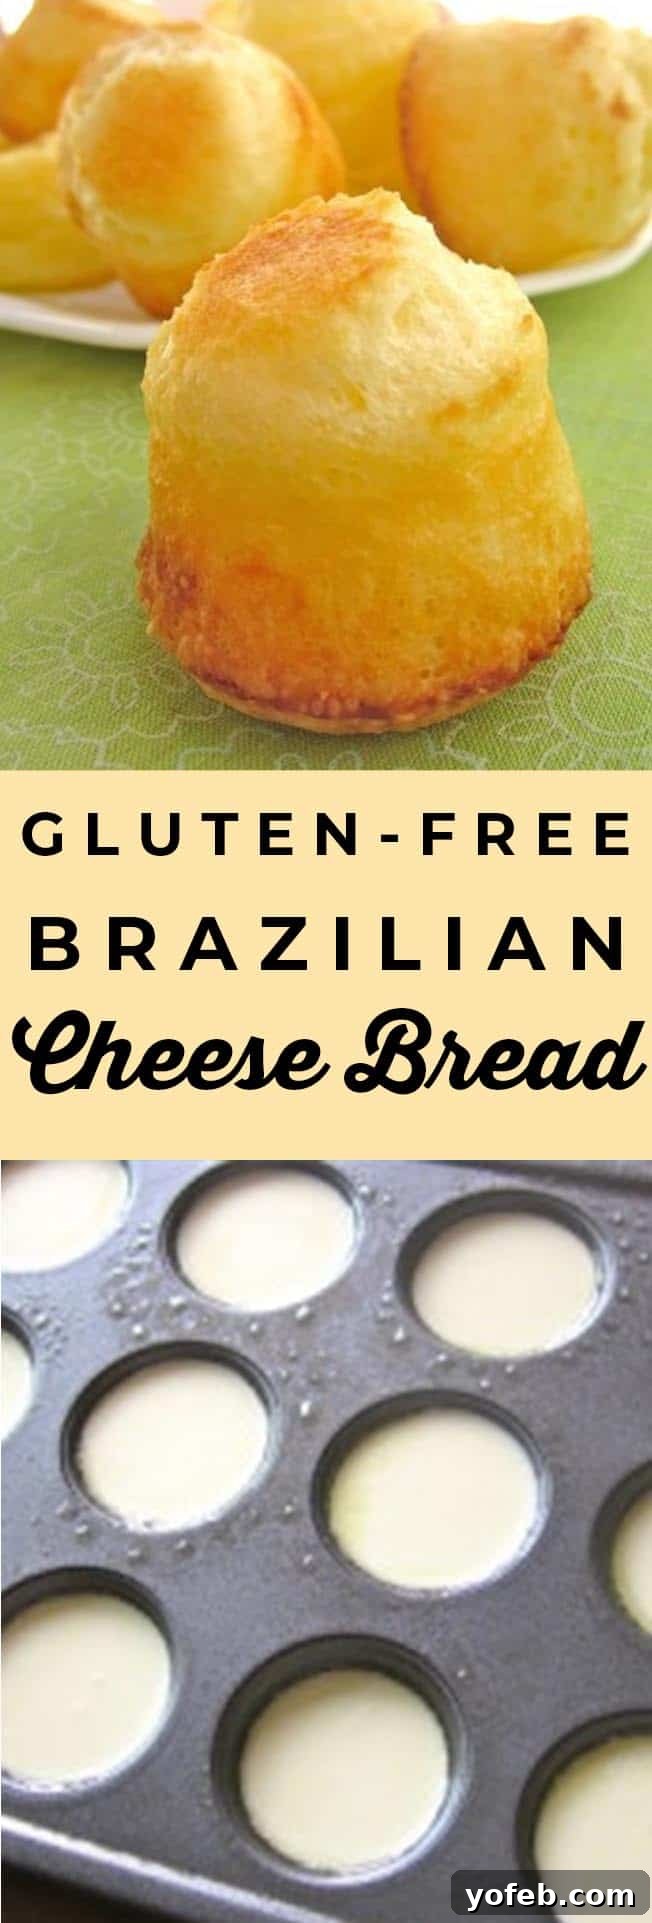

Authentic Brazilian Cheese Bread (Pão de Queijo): Your Easy, Gluten-Free Journey to Churrascaria Bliss
Pão de Queijo, pronounced “pown-deh-KAY-zho,” is far more than just a cheese roll; it’s a culinary icon of Brazil. Originating from the state of Minas Gerais, this popular snack is traditionally made with tapioca flour (polvilho), which gives it its characteristic chewy texture and makes it naturally gluten-free. Historically, Pão de Queijo was developed by African slaves in Brazil, who first used starch from cassava (manioc) to make bread. Over time, as dairy farming grew, cheese was added to the recipe, transforming it into the beloved treat we know today. It’s a staple in Brazilian households, served at breakfast, as a snack, or as an accompaniment to coffee. The unique combination of a crisp exterior and a soft, incredibly cheesy interior is what makes Pão de Queijo so addictive and utterly satisfying.
Why You’ll Fall in Love with This Pão de Queijo Recipe
Beyond its irresistible taste and delightful texture, this Pão de Queijo recipe stands out for its incredible simplicity and speed. Many traditional bread recipes involve kneading, proofing, and lengthy waiting times. Not this one! This Pão de Queijo recipe is designed for the modern home cook, requiring minimal effort and delivering delicious results in under 30 minutes. Here’s why it will become a regular in your rotation:
- Effortless Preparation: The magic happens in your blender. Simply combine all the ingredients, blend until smooth, and you’re ready to bake. No messy hands, no intricate steps.
- Naturally Gluten-Free: Made with tapioca flour, this recipe is perfect for those with gluten sensitivities or anyone looking for a wholesome alternative to wheat-based breads.
- Quick from Start to Finish: With just 5 minutes of prep and 15-20 minutes in the oven, you can have warm, fresh Pão de Queijo on your table in no time. Ideal for unexpected guests or a spontaneous craving.
- Irresistible Flavor and Texture: The combination of tangy cheese and the unique chewiness of tapioca flour creates a snack that is both comforting and exciting. Each bite offers a burst of cheesy goodness.
- Versatile: Perfect as an appetizer, a breakfast item, a side dish, or simply a delicious snack any time of day.
Key Ingredients and Their Roles
Making Pão de Queijo relies on a few key ingredients that contribute to its distinctive taste and texture. Understanding each component helps ensure your cheese bread turns out perfectly every time.
- Tapioca Flour (Polvilho): This is the star ingredient and the secret to the bread’s unique chewy, elastic texture and its gluten-free nature. Tapioca flour is a starch extracted from the cassava root. It’s crucial not to substitute it with other flours, as they will not yield the same consistency. You can usually find it in the gluten-free section of larger supermarkets or easily online.
- Queso Fresco: The original recipe calls for queso fresco, a mild, fresh cheese that melts beautifully and adds a subtle tang. If you can’t find queso fresco, you can experiment with other cheeses. A good blend of mozzarella and Parmesan (or Pecorino Romano for more sharpness) works wonderfully, offering a balance of meltiness and savory depth. Just be sure to use a firm, crumbly cheese for the best results, avoiding overly soft or watery varieties.
- Milk: Whole milk is preferred as it adds richness and moisture to the batter, contributing to the soft interior of the Pão de Queijo. You can use lower-fat milk, but the texture might be slightly less tender.
- Olive Oil: A good quality olive oil enhances the flavor and contributes to the bread’s smooth texture and slight crispness. Vegetable oil or another neutral oil can be used as a substitute if olive oil is not preferred.
- Egg: The egg acts as a binder, helping to hold the dough together and giving the cheese bread structure as it bakes. Using a room-temperature egg is always recommended for better incorporation into the batter.
- Salt: Essential for balancing the flavors and enhancing the cheesiness. You can adjust the amount to taste, especially depending on the saltiness of your chosen cheese.
Facebook | Pinterest | Instagram | Twitter

Brazilian Cheese Bread {Gluten Free!}
5 minutes
15 minutes
20 minutes
16 Servings

Ingredients
- 1 egg, room temperature
- 1/3 cup olive oil
- 2/3 cup milk
- 1 & 1/2 cups Tapioca Flour, 170 grams
- 1/2 cup queso fresco, packed (about 66 grams)
- 1 teaspoon salt, or more to taste
Instructions
-
Preheat oven to 400°F (200°C). Lightly grease a mini-muffin tin. Combine all the ingredients (egg, olive oil, milk, tapioca flour, queso fresco, and salt) into a blender. Blend until the mixture is completely smooth and uniform, scraping down the sides of the blender with a spatula as needed to ensure everything is incorporated. At this stage, the batter can be stored in an airtight container in the refrigerator for up to a week, making it perfect for fresh-baked Pão de Queijo any day.
-
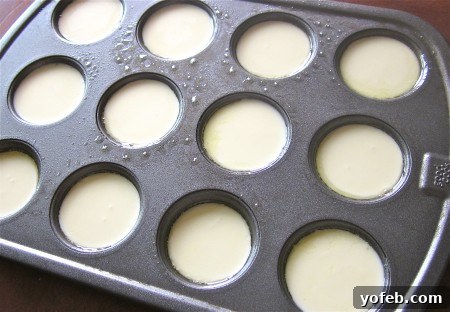
Pour the batter into the prepared mini-muffin tin, filling each cup about two-thirds full. Bake in the preheated oven for 15-20 minutes, or until the cheese breads are beautifully puffy, golden brown on the outside, and cooked through. The exact baking time may vary slightly depending on your oven and the size of your muffin tin.
-
Once baked, remove the Pão de Queijo from the oven and let them cool on a wire rack for a few minutes before serving. This recipe yields approximately 16 mini-muffin-sized cheese breads. For the best taste and texture, these are ideally enjoyed warm and on the same day they are made. If you have leftover batter, remember it stores well in the refrigerator, allowing you to bake fresh batches whenever you desire.
Notes
Source: Simply Recipes
Nutrition
Did you make this? I’d love to see it!
Mention @thefoodcharlatan or tag #thefoodcharlatan!
Tips for Perfect Pão de Queijo Every Time
Achieving that ideal Pão de Queijo texture and flavor is easy with a few simple tips. Follow these guidelines to ensure your cheese bread is consistently delicious:
- Room Temperature Ingredients: Ensure your egg and milk are at room temperature. This helps them combine more smoothly with the other ingredients in the blender, creating a more uniform batter and preventing curdling.
- Don’t Overbake: Pão de Queijo should be golden brown and slightly puffed, but not overly hard or dark. Overbaking can result in a dry texture instead of the desired chewy interior. Keep an eye on them, especially during the last few minutes.
- Grease Your Muffin Tin Well: Although the cheese bread often pulls away easily, a well-greased mini-muffin tin prevents sticking and ensures your Pão de Queijo pops out perfectly.
- Cheese Quality Matters: While queso fresco is traditional, using a good quality, flavorful cheese (or a mix) will significantly impact the final taste. Avoid pre-shredded cheeses that often contain anti-caking agents, as they can affect melting and texture. Grate your own for the best results.
- Scrape the Blender: During blending, stop once or twice to scrape down the sides of the blender. This ensures all ingredients are fully incorporated, especially the tapioca flour and cheese, leading to a consistent batter.
- Rest the Batter: While not strictly necessary for this recipe, allowing the batter to rest in the refrigerator for 30 minutes to an hour (or even overnight) can sometimes result in slightly more tender and flavorful Pão de Queijo, as it allows the tapioca flour to fully hydrate.
Serving Suggestions for Your Homemade Pão de Queijo
Pão de Queijo is incredibly versatile and can be enjoyed in numerous ways beyond just a churrascaria appetizer. Here are some ideas to savor your freshly baked Brazilian cheese bread:
- Breakfast Staple: Serve them warm with a cup of strong Brazilian coffee (or your favorite brew) for a delightful start to your day.
- Everyday Snack: They are perfect for an afternoon snack, satisfying that cheesy craving without being too heavy. Kids absolutely adore them!
- Party Appetizer: Arrange them on a platter for your next gathering. Their unique taste and gluten-free nature make them a crowd-pleaser for all dietary preferences.
- Side Dish: Pair Pão de Queijo with soups, stews, or any main meal where you’d typically serve bread. Their cheesy goodness complements a wide range of dishes.
- With Dips: Enjoy them plain, or try dipping them in a vibrant chimichurri sauce, a creamy herb dip, or even a spicy salsa for an extra kick.
Storage and Reheating
While Pão de Queijo is undoubtedly best enjoyed fresh from the oven, you can prepare parts of it in advance or store leftovers to enjoy later.
- Storing Batter: The prepared batter can be stored in an airtight container in the refrigerator for up to a week. This is a fantastic option for having fresh, warm Pão de Queijo whenever the craving strikes! Simply give the batter a quick whisk before pouring and baking.
- Storing Baked Pão de Queijo: Leftover baked cheese breads can be stored in an airtight container at room temperature for up to 2 days, or in the refrigerator for up to 4 days. They might lose some of their crispness, but the chewiness remains.
- Freezing: For longer storage, baked Pão de Queijo can be frozen in a freezer-safe bag for up to 1-2 months. You can also freeze the unbaked batter in muffin tins, then pop out the frozen balls and store them in a freezer bag, baking them from frozen when ready (this will require a few extra minutes of baking time).
- Reheating: To restore their delightful texture, reheat baked Pão de Queijo in a preheated oven at 350°F (175°C) for about 5-10 minutes, or until warmed through and slightly crispy again. A toaster oven works great for a few pieces.
Delicious Variations to Explore
Once you master the classic Pão de Queijo, feel free to get creative with variations. The beauty of this recipe lies in its adaptability:
- Cheese Blends: Experiment with different types of cheese. A combination of mozzarella, Parmesan, and a touch of provolone can create a richer, more complex flavor profile. For a sharper taste, add some aged cheddar or Pecorino Romano.
- Herb Infusion: Add finely chopped fresh herbs like parsley, chives, oregano, or a hint of rosemary to the batter for an aromatic twist.
- Spicy Kick: A pinch of red pepper flakes or a dash of hot sauce in the batter can give your Pão de Queijo a subtle spicy warmth.
- Garlic Goodness: Incorporate a clove of minced garlic into the batter for a savory, garlicky version that pairs exceptionally well with many meals.
- Sweet Touch: For a less traditional but intriguing variation, try adding a touch of sugar (1-2 teaspoons) to the batter and serving them with a fruit jam or guava paste.
Whether you’re reliving cherished churrascaria memories or simply discovering a new favorite gluten-free bread, this Brazilian Cheese Bread recipe is a delightful journey for your taste buds. Its ease of preparation and unforgettable flavor make it a true culinary gem. Don’t hesitate to whisk up a batch and experience the joy of warm, chewy, cheesy Pão de Queijo right at home!
If you are in love with churrascaria food, try this Chimichurri Sauce! It’s a great marinade and condiment for grilled meat.