
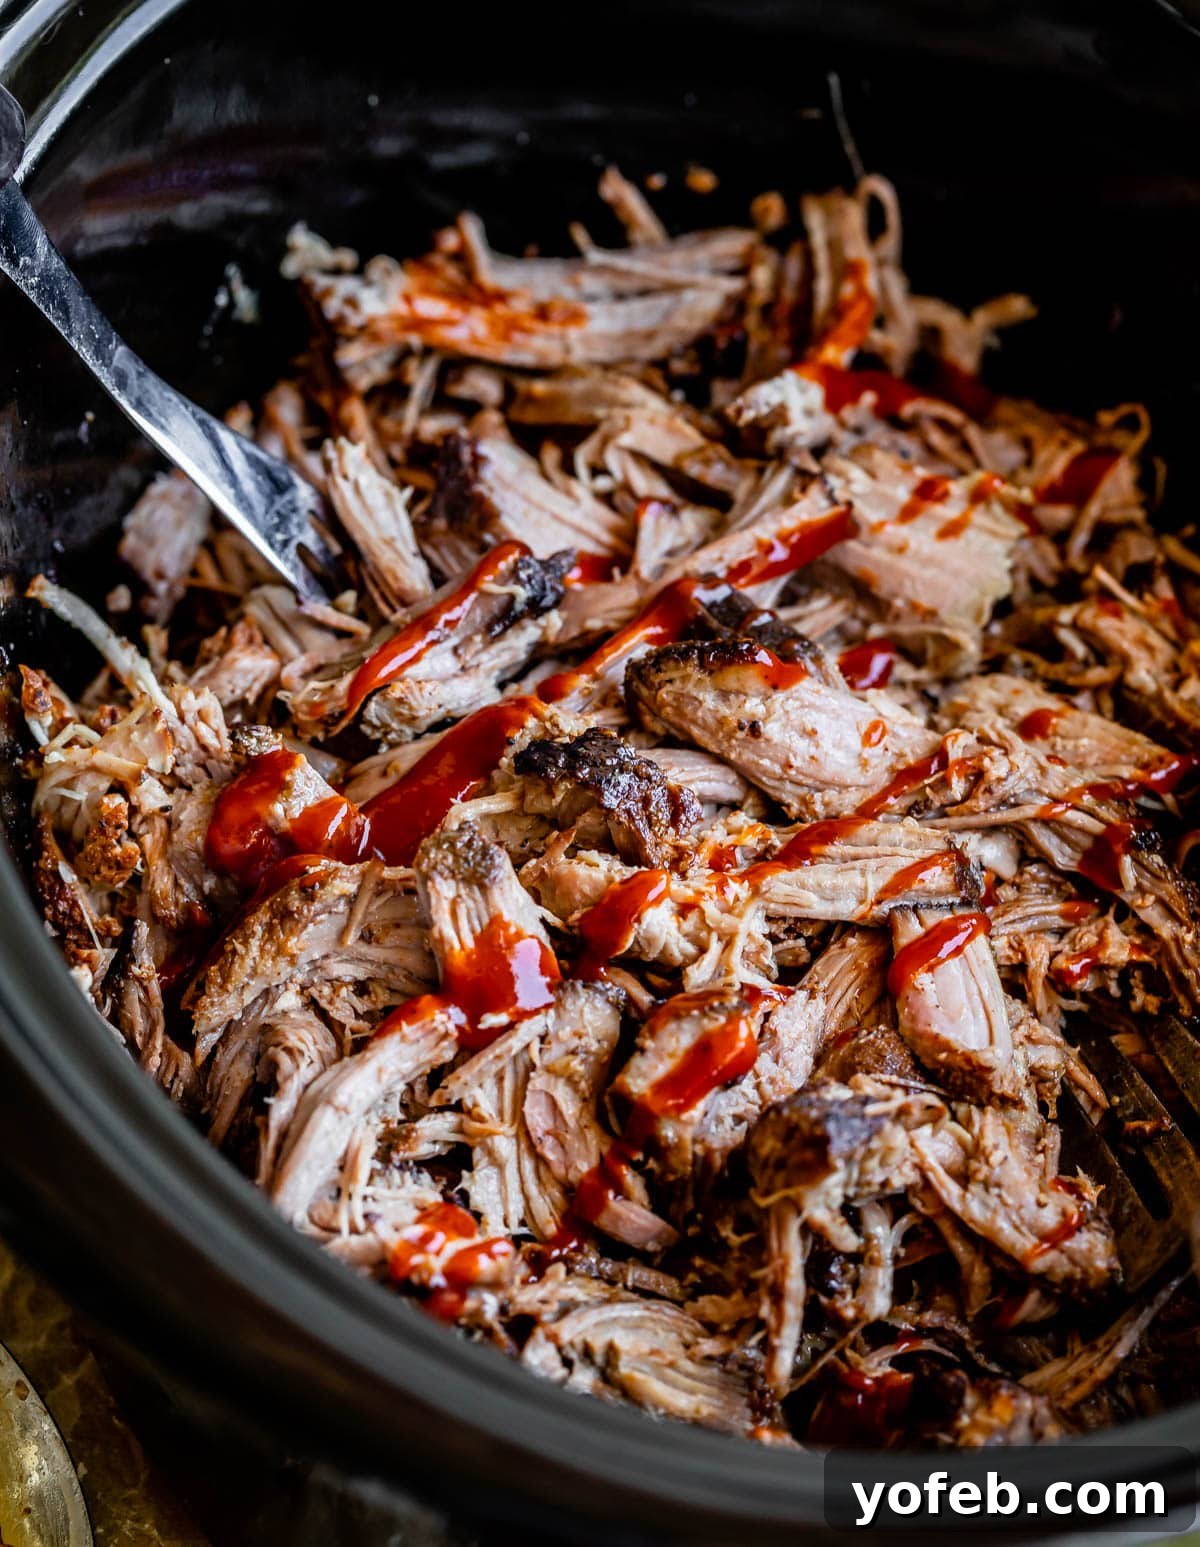
Welcome to the ultimate guide for crafting the most tender, melt-in-your-mouth pulled pork, effortlessly prepared in your slow cooker or roasted to perfection in the oven. This isn’t just an easy recipe; it’s a culinary revelation that yields amazing results, perfect for feeding a hungry crowd or simplifying your weekly meal prep. Get ready to impress with minimal effort, achieving that fall-apart texture and rich flavor everyone craves. We’re diving deep into two fantastic methods, plus tips for the best BBQ sauce and essential side dishes. For those who love a smoky twist, don’t miss our Smoked Pulled Pork recipe! And, of course, every great pulled pork needs a great BBQ Sauce to tie it all together. This comprehensive guide was originally published on July 15, 2022, and has been continuously refined for perfection.
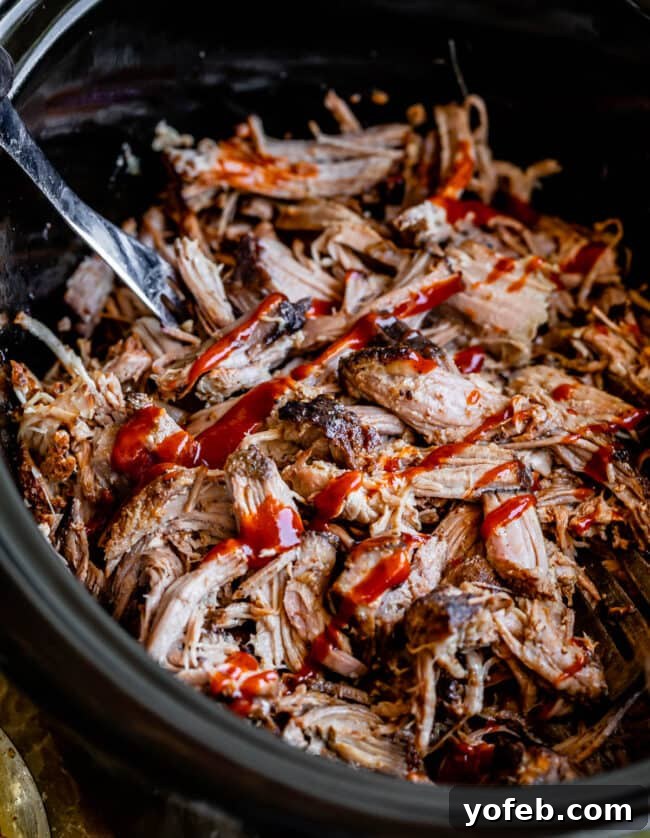
Table of Contents
- The Secret to Irresistibly Juicy Pulled Pork
- Choosing the Best Cut for Tender Pulled Pork
- Crafting the Perfect Pulled Pork Spice Rub
- Slow Cooker Pulled Pork: Effortless Perfection
- Why “Low and Slow” is Key for Tender Crock Pot Pulled Pork
- Achieving Crispy Bark with Oven Roasted Pulled Pork
- The Magic of “Bark” in Oven-Baked Pulled Pork
- Mastering the Art of Shredding Pulled Pork
- Serving Suggestions for Your Delicious Pulled Pork
- Essential Side Dishes to Complement Pulled Pork
- Frequently Asked Questions about Pulled Pork
- Storing Leftover Pulled Pork
- Freezing Pulled Pork for Future Meals
- Reheating Pulled Pork: Maintaining Tenderness
- The Secrets to Perfectly Tender Pulled Pork
- Pulled Pork vs. Shredded Pork: What’s the Difference?
- Optimal Internal Temperature for Pulled Pork
- Can You Overcook Pulled Pork? Understanding the Science
- How Much Pulled Pork to Make Per Person? Serving Size Guide
- Explore More Mouthwatering Slow Cooker Recipes
- Crock Pot Pulled Pork Recipe
Moving into a new home can be an adventure, filled with new routines and discoveries. From finding the perfect route to work to navigating unfamiliar grocery store aisles (seriously, where is the BBQ sauce in this place?), every change brings its own set of minor challenges. But amidst the chaos of settling in, one thing remains constant: the need for delicious, easy meals that bring comfort and joy. This is where a fantastic slow cooker pulled pork recipe truly shines, offering a stress-free path to an incredible dinner, even when life feels a little unsettled.

The Secret to Irresistibly Juicy Pulled Pork
Once you experience the magic of truly tender, juicy pulled pork, there’s no turning back. Its succulent texture and rich flavor make it an instant favorite, perfect for any occasion from casual family dinners to grand backyard barbecues. I’m thrilled to share how incredibly simple it is to transform a humble cut of pork into a glorious, crowd-pleasing dish that will have everyone asking for more.
This recipe builds upon the flavor foundations of our acclaimed BBQ Smoked Pulled Pork, but with a focus on indoor cooking methods. While the spice rub ingredients are largely similar, the cooking techniques diverge significantly. Our smoked pulled pork guides you through achieving authentic smoky flavor on a gas grill without a dedicated smoker. Today, however, we’re concentrating on how to achieve equally flavorful and tender pulled pork using either your oven or a slow cooker. These methods are designed for maximum convenience and incredible results, proving that you don’t need a smoker to enjoy top-tier pulled pork. Whether you choose the set-it-and-forget-it approach of a crock pot or the bark-building capabilities of the oven, prepare for a truly delicious experience.
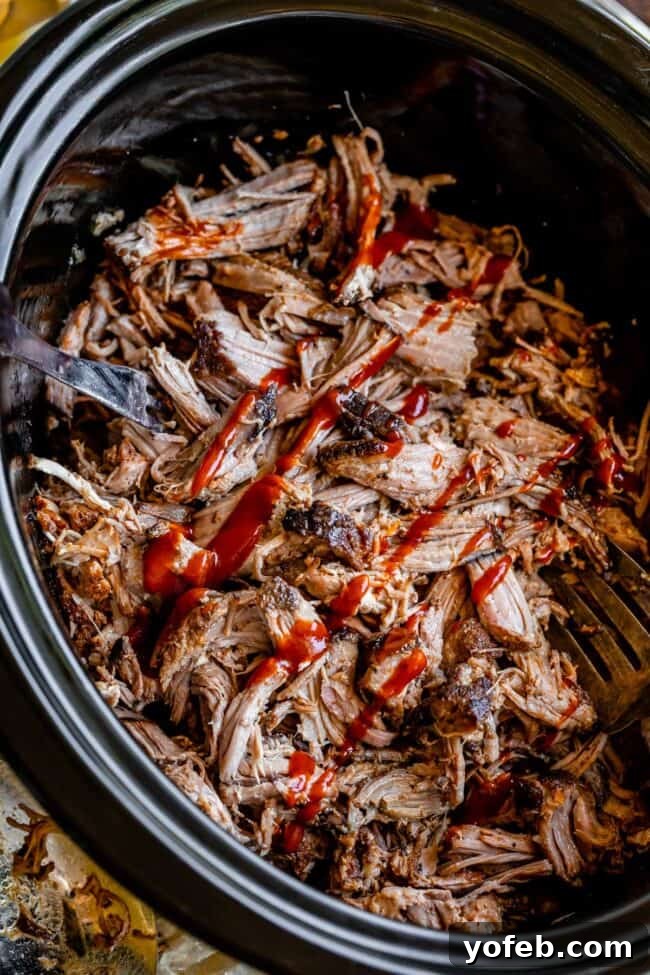
This article will first cover foundational information and the initial preparation steps common to both cooking methods. Then, we will delve into specific instructions for making pulled pork in your slow cooker, followed by details for oven roasting. Finally, a comprehensive FAQ section will address common questions to ensure your success. Full, detailed recipes for both methods are conveniently located at the bottom of this post in the recipe card. Let’s get started on your journey to the best homemade pulled pork!
Choosing the Best Cut for Tender Pulled Pork
The foundation of exceptional pulled pork lies in selecting the right cut of meat. For optimal tenderness and flavor, always opt for a front shoulder cut of pork. This cut, derived from the pig’s foreleg and shoulder area, is rich in fat marbling and connective tissues, which are essential for achieving that desirable fall-apart texture when cooked low and slow.
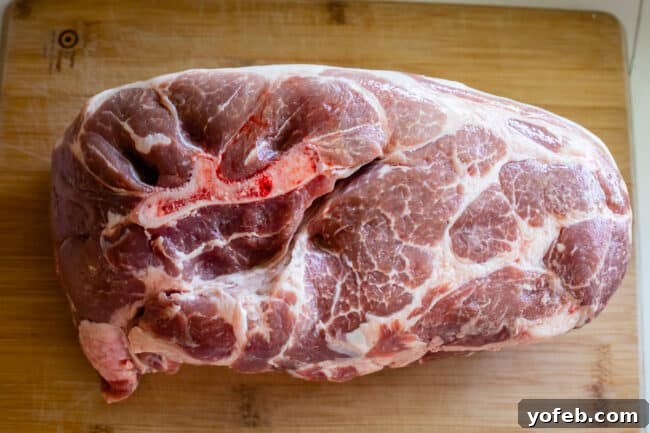
When you’re at the grocery store, look for “Pork Butt” or “Boston Butt.” Despite its name, pork butt comes from the upper part of the shoulder, not the rear end of the pig. It’s highly prized for pulled pork due to its generous fat content and ideal muscle structure. A close second is “Pork Shoulder” or “Picnic Roast,” which comes from the lower portion of the shoulder. While both are excellent choices, Pork Butt generally contains slightly more fat marbling, translating to even more flavor and moisture. These fat pockets and connective tissues slowly break down during extended cooking, basting the meat from within and contributing to its unparalleled tenderness. For a deep dive into the nuances of these cuts, Cook’s Illustrated offers an excellent explanation on the difference between pork butt and shoulder.
Crafting the Perfect Pulled Pork Spice Rub
A homemade spice rub is crucial for infusing your pulled pork with layers of complex flavor. It’s surprisingly easy to create your own signature blend, and the effort truly pays off in the final taste. Our preferred rub combines a thoughtful selection of spices that work in harmony to deliver a melt-in-your-mouth experience. Each ingredient plays a vital role:
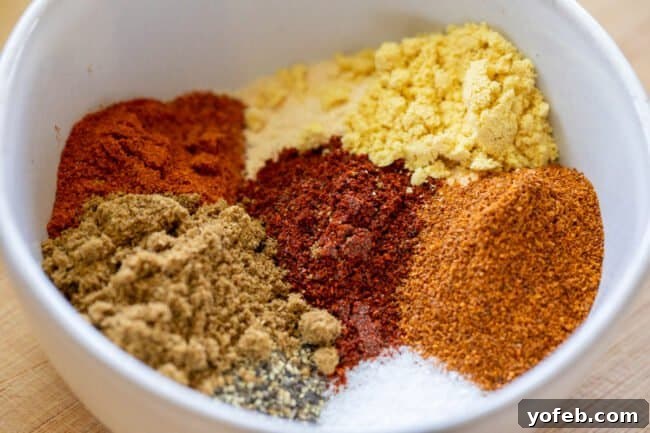
- Kosher Salt: Essential for seasoning and drawing out moisture, enhancing the pork’s natural flavors.
- Black Pepper: Adds a classic, pungent kick and aromatic depth.
- Paprika: Contributes a mild sweetness, vibrant color, and earthy undertones.
- Garlic Powder & Onion Powder: These provide a savory, aromatic base that penetrates the meat deeply.
- Chili Powder: Offers a smoky, slightly spicy element, building on the BBQ profile.
- Cayenne Pepper: For a touch of heat, which can be adjusted to your preference.
- Cumin: Earthy and warm, it’s a cornerstone of many robust spice blends.
- Dry Mustard Powder: Adds a subtle tang and helps to tenderize the meat.
- Brown Sugar: Crucial for balance, it caramelizes during searing, creating a delicious crust and a hint of sweetness that complements the savory spices.
The precise amounts for this irresistible rub are listed in the detailed recipe card at the end of this post.
Slow Cooker Pulled Pork: Effortless Perfection
Making tender pulled pork in a slow cooker is incredibly straightforward, perfect for busy days when you want a delicious meal without constant attention. The key is setting it up right and letting time do its magic. Here’s how to achieve crock pot pulled pork perfection:
- Prepare Your Pork: First, decide on your cooking timeline. If you keep the pork butt whole, it will generally take 8-10 hours to reach that desirable fall-apart tenderness.
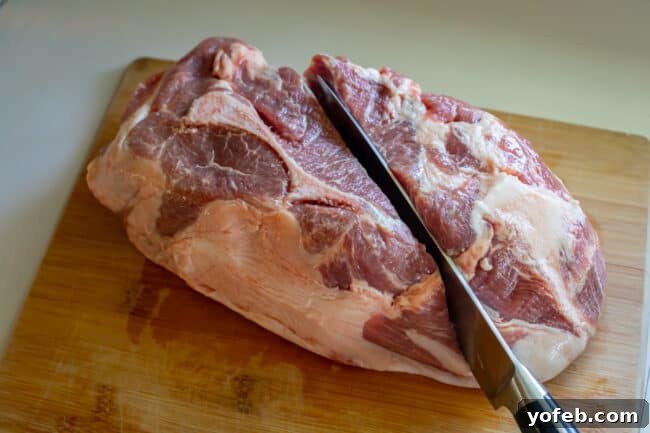
For a quicker cook, or to maximize the flavorful seared crust, slice your roast in half. Smaller pieces cook faster, reducing the total time to about 6-7 hours. Both methods yield fantastic results, but halving offers the benefit of more surface area for searing.
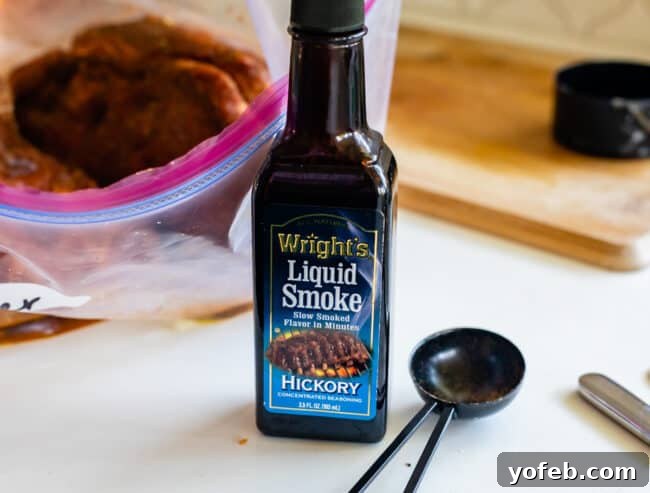
- Season and Marinate: Pat the pork thoroughly dry with paper towels. This helps the rub adhere and promotes a better sear. Rub the meat with a light coating of olive oil. If you want to introduce a subtle smoky flavor, which is typically lost when cooking indoors, drizzle and massage in about 1 teaspoon of liquid smoke. I recommend brands like Wright’s that use only water and smoke as ingredients. This step is optional but highly recommended for an authentic BBQ taste.
- Apply the Spice Rub: Reserve about 3 tablespoons of your prepared spice rub for later. Generously coat the entire surface of the pork with the remaining rub, ensuring every nook and cranny is covered. A helpful technique is to sprinkle the rub with one hand and rub it in with the other to avoid cross-contamination. Place the seasoned pork in a large sealable bag and marinate in the refrigerator for at least 6 hours, or ideally, up to 48 hours. This extended marination allows the flavors to deeply penetrate the meat. Just before cooking, apply the reserved 3 tablespoons of spice rub to refresh the seasoning.
- Sear for Flavor (Maillard Reaction): This step is critical for developing rich, savory flavor and a beautiful crust on your pork. Heat a large skillet over medium-high heat until hot. Add a couple of tablespoons of vegetable oil. Once shimmering, carefully place the pork in the skillet and sear each side for a few minutes until it forms a deep brown crust. This browning, known as the Maillard reaction, creates hundreds of new flavor compounds that will enhance your pulled pork.
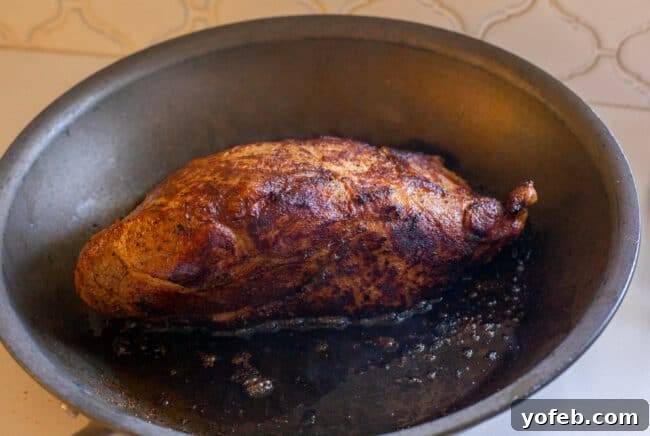
- Slow Cook to Perfection: Once seared, transfer the pork directly into your slow cooker. Cover it with the lid and set it to low heat. Resist the urge to use the “high” setting, as rapid cooking can result in dry, tough meat. The true secret to tender, juicy pulled pork is time. Cook for 6-8 hours if halved, or 8-10 hours if whole.
Why “Low and Slow” is Key for Tender Crock Pot Pulled Pork
The “low and slow” cooking method is paramount for pulled pork because it gives the meat’s collagen and connective tissues ample time to break down. These tough tissues, abundant in cuts like pork butt, melt into gelatin during long, gentle cooking. This process not only tenderizes the meat but also infuses it with moisture and richness, creating that incredibly succulent, melt-in-your-mouth texture that defines perfect pulled pork.
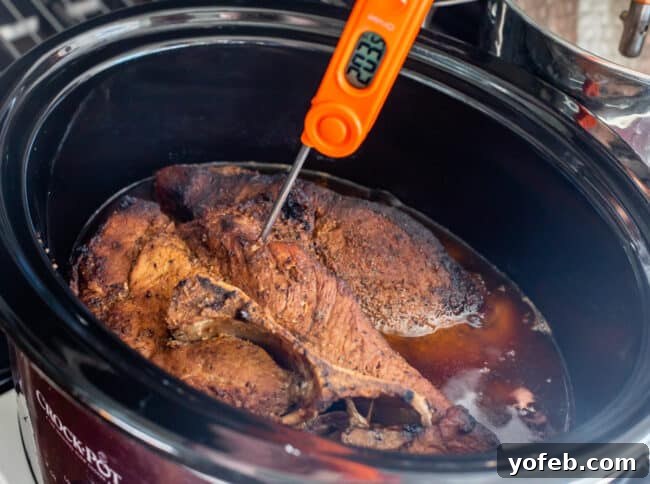
It’s crucial to monitor the internal temperature with a reliable meat thermometer towards the end of the cooking cycle. Aim for an internal temperature of 195-200 degrees F. Exceeding 200 degrees can cause the meat fibers to dry out and become stringy, compromising the texture. Once cooked, remove the pork from the slow cooker and let it rest for a few minutes before shredding.
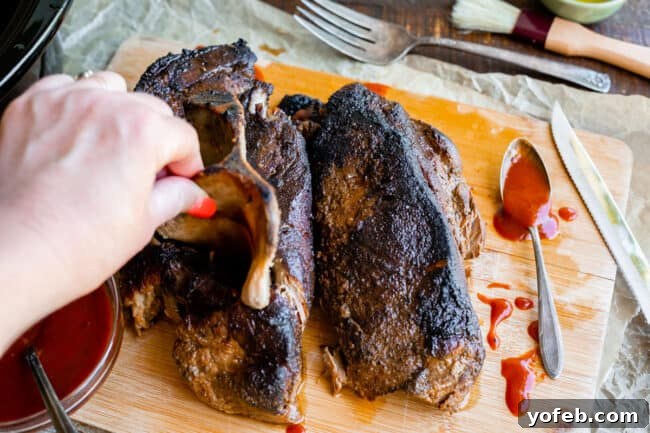
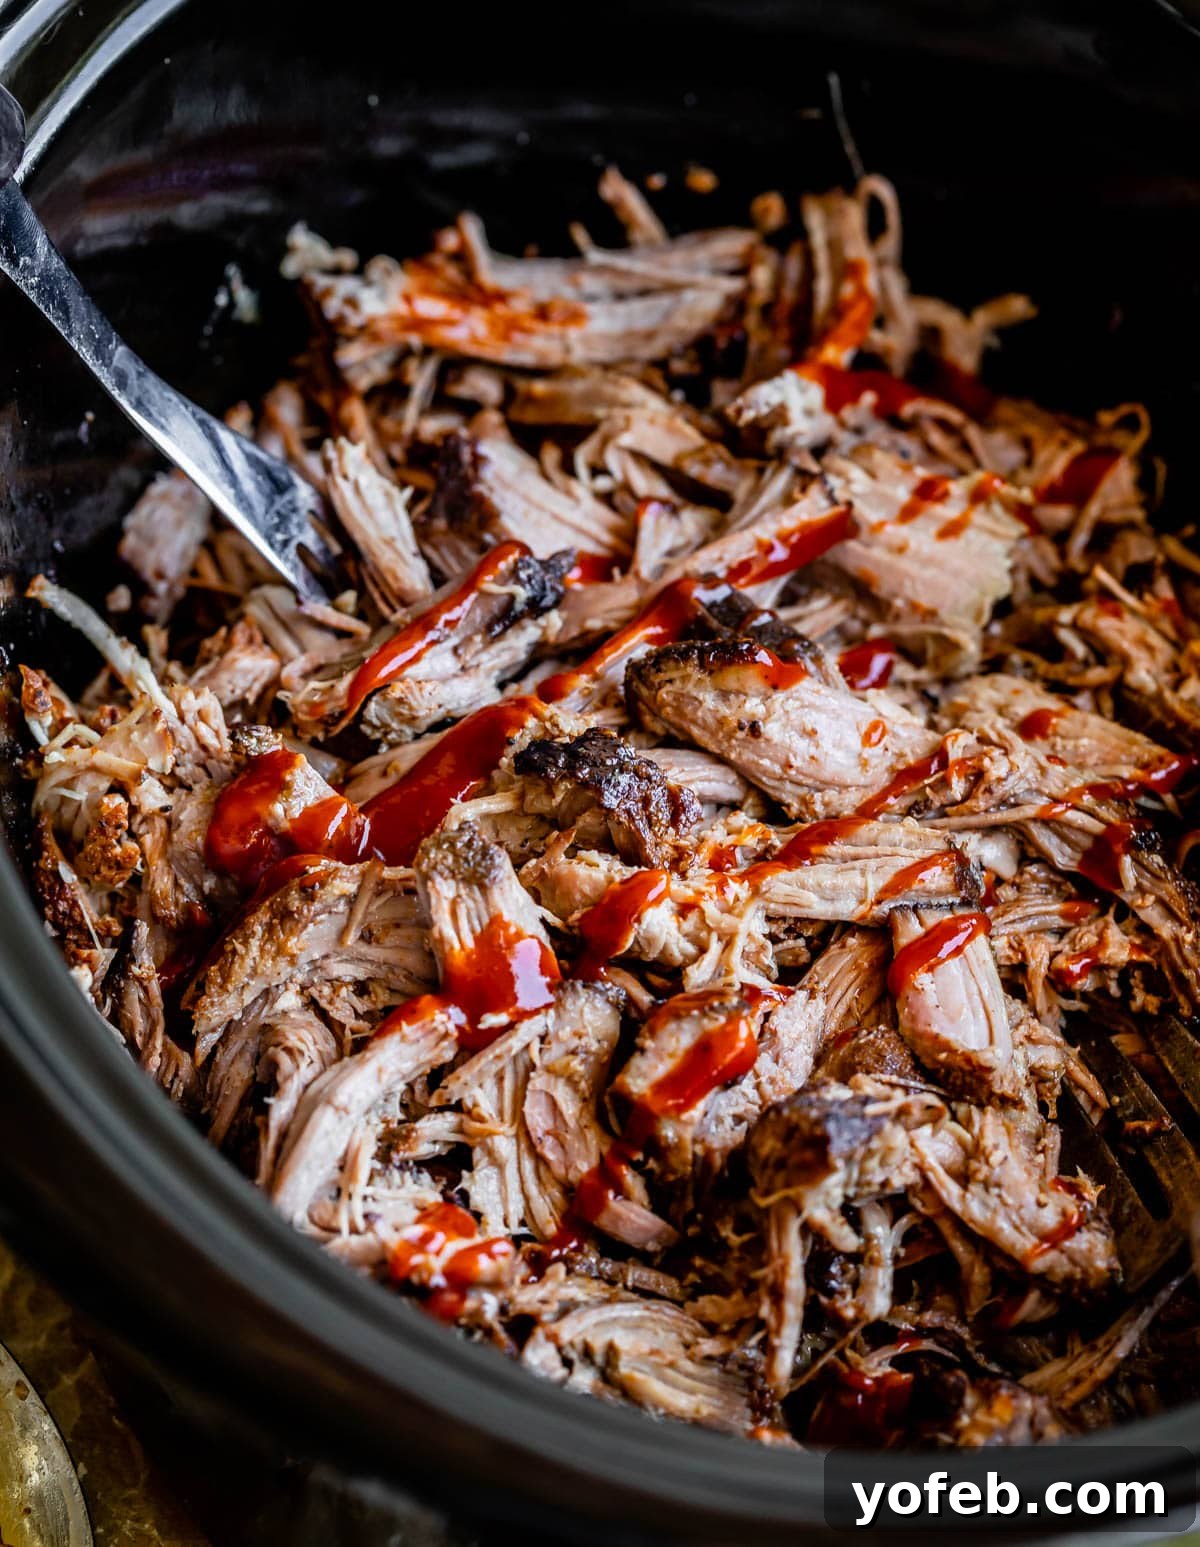
As you can see, when perfectly cooked, the pork is so tender that the bone lifts out effortlessly, and the meat simply falls apart. Return the shredded pork to the cooking juices in the crock pot to keep it moist and flavorful. With this, your delicious dinner is ready! Now, let’s explore how to achieve equally incredible results in your oven.
Achieving Crispy Bark with Oven Roasted Pulled Pork
While slow cooker pulled pork offers unbeatable convenience, oven roasting delivers a distinct advantage: the coveted “bark.” This crispy, blackened, incredibly flavorful outer crust is something a slow cooker simply can’t replicate. If you’re a fan of those caramelized, savory edges, oven roasting is your preferred method. Here’s how to master it:
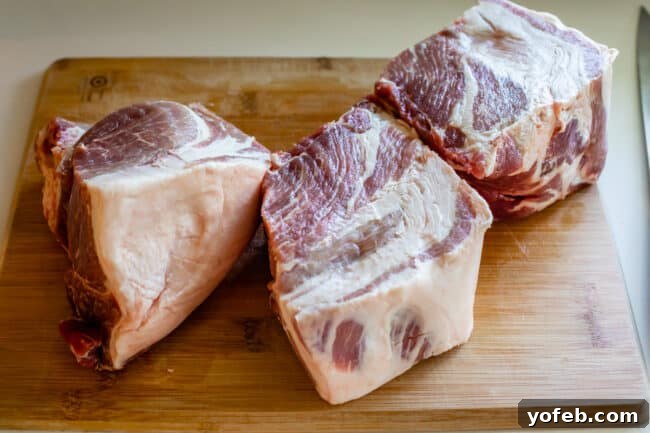
- Prepare the Pork for Bark: To maximize the crispy bark, start by cutting your pork butt into 2-3 equal pieces. This increases the surface area exposed to the oven’s direct heat, resulting in more delicious blackened edges. Smaller pieces also tend to cook a bit faster, offering a win-win situation.
- Season and Marinate: Follow the same initial preparation as the slow cooker method: pat the pork dry, rub with a little olive oil, and optionally, a teaspoon of liquid smoke for that BBQ aroma. Then, apply most (but not all) of your spice rub. Marinate the pork in a sealed bag in the refrigerator for 6 to 48 hours to allow the flavors to infuse deeply.
- Bring to Room Temperature: About an hour before you plan to roast, remove the pork from the fridge and let it sit at room temperature. This step is crucial for more even cooking, preventing the outer edges from drying out while the center cooks.
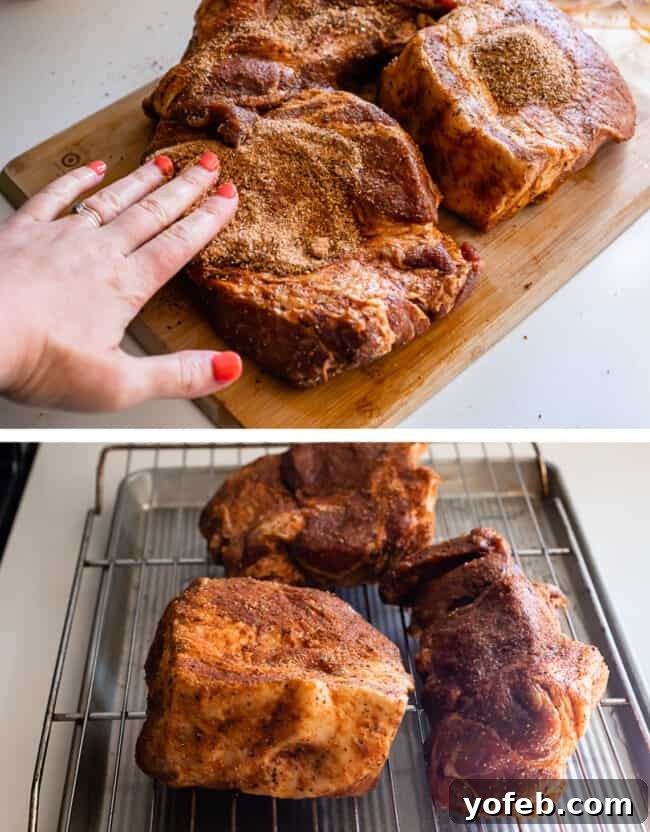
- Prepare for Roasting: Preheat your oven to a robust 425 degrees F, ensuring it’s fully heated for at least 20 minutes before placing the pork inside. Set an oven-safe wire cooling rack over a rimmed baking sheet and spray the rack with nonstick spray. Pour about 1.5 cups of water into the baking sheet; this creates a humid environment, helping to keep the pork moist while the bark forms. Rub the remaining 3 tablespoons of spice rub onto the pork pieces, then arrange them on the rack, ensuring they don’t touch. Position any fat caps facing up for better rendering and crisping.
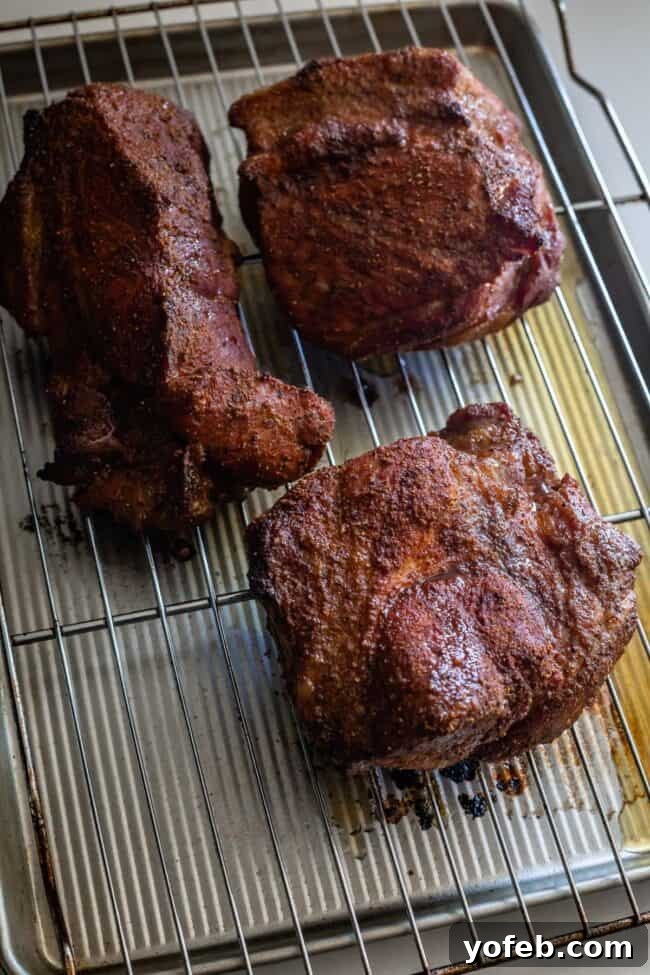
Here’s what the pork looks like after 30 minutes at 425 degrees F. Notice those beautiful brown edges already starting to form!
The Magic of “Bark” in Oven-Baked Pulled Pork
Now, for the extended low and slow cooking. Reduce the oven temperature to 300 degrees F. You might need to open the oven door for 30-60 seconds to help the temperature drop faster. Continue roasting the pork for another 3-5 hours, depending on the size of your pieces. Remember, the goal is to slowly break down the tough collagen and connective tissues, transforming them into succulent gelatin. This long, gentle heat is what makes the pork incredibly tender and juicy.
Do not rely solely on cooking times; always use a meat thermometer. The pork is fully cooked and ready to be pulled when its internal temperature reaches between 195 and 200 degrees F. Keep in mind that the internal temperature will continue to rise by a few degrees even after you remove it from the oven, so aiming for 195F initially is often ideal to prevent overcooking.
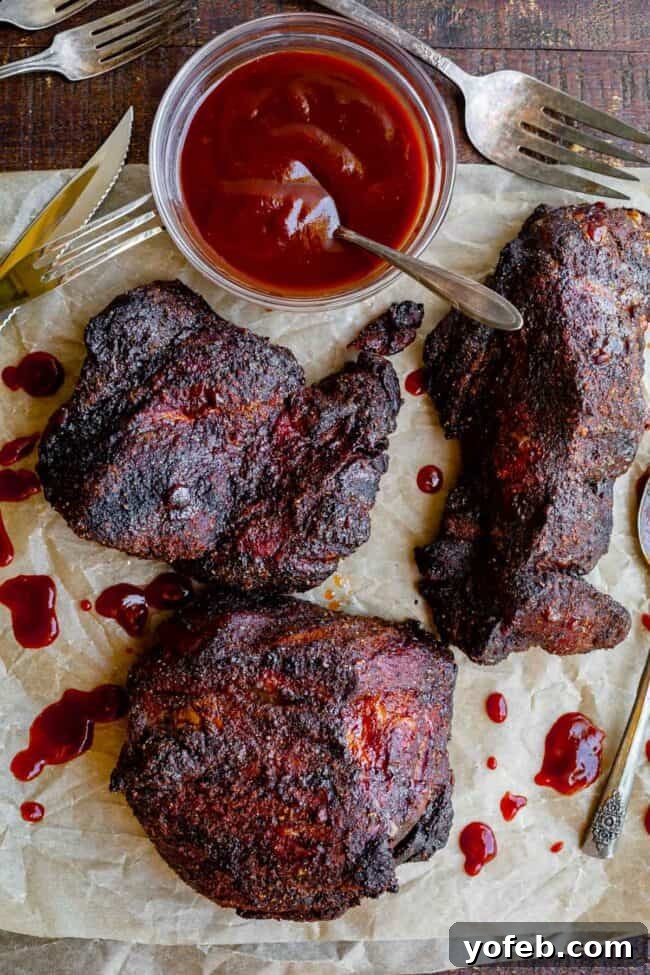
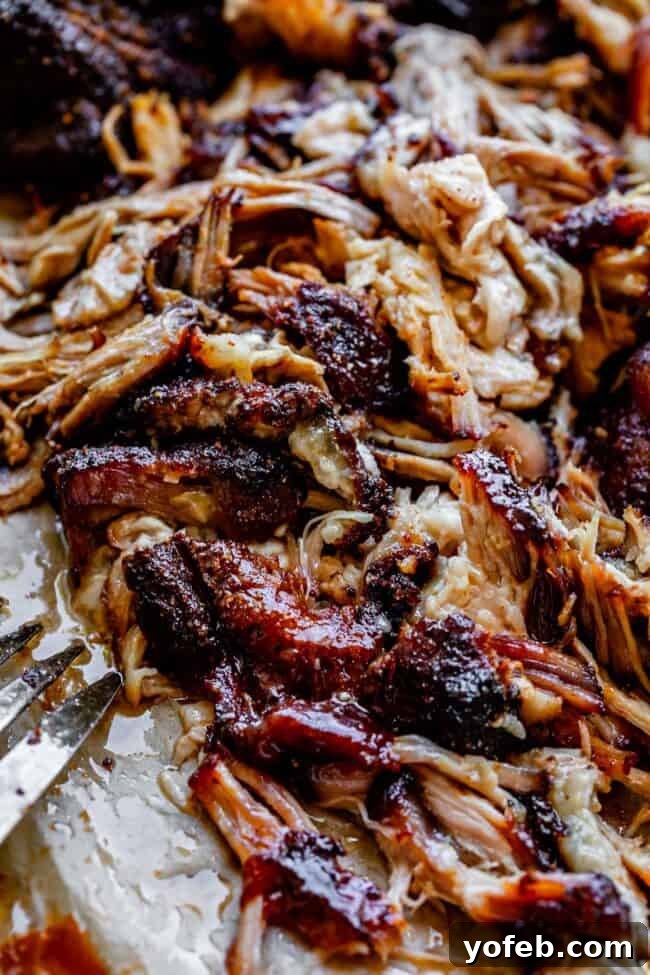
At first glance, this pork might appear overly browned. But rest assured, this is the magnificent, deeply flavored “bark”—those glorious, blackened, caramelized edges that are the hallmark of perfectly oven-roasted pulled pork. It’s truly divine! Now, let’s get ready to shred this masterpiece.
Mastering the Art of Shredding Pulled Pork
Once your pork is cooked to perfection, the final step before serving is to “pull” or shred it. This process is incredibly satisfying, especially when the meat has been cooked properly and simply falls apart at the slightest touch. Here’s how to do it right:
First, carefully transfer the cooked pork to a sturdy cutting board. Allow it to rest for about 10-20 minutes, loosely tented with foil. This resting period is crucial as it allows the juices within the meat to redistribute, resulting in a more moist and flavorful end product.
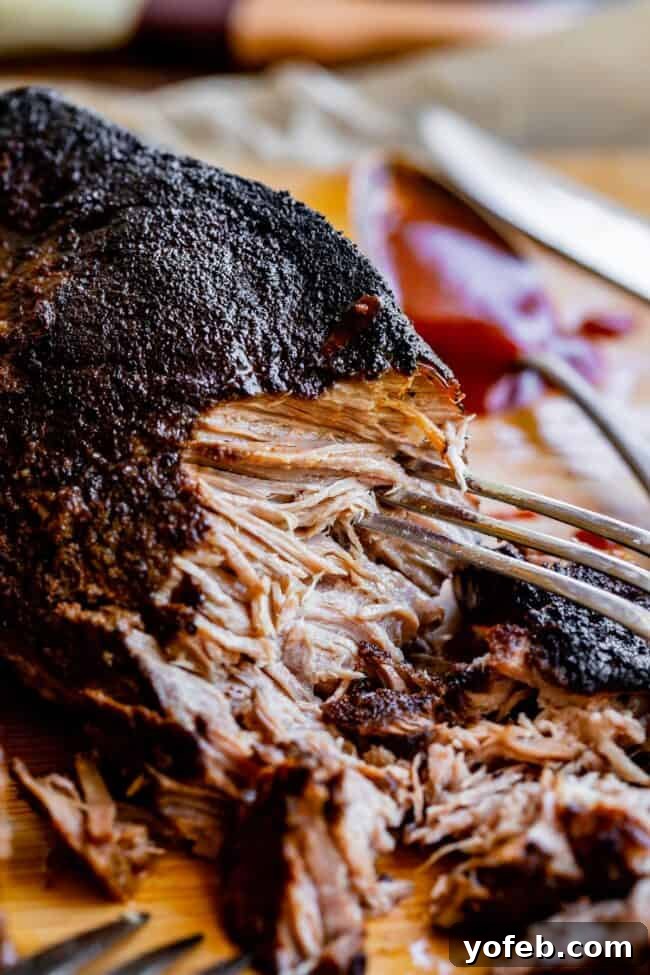
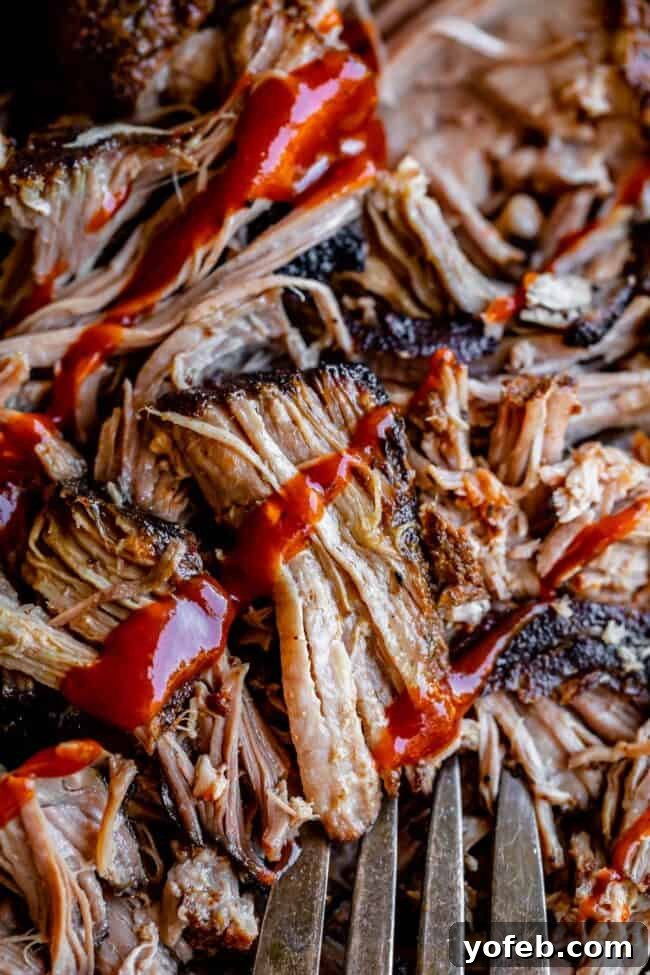
Now it’s time to pull! The easiest and most common method is to use two large forks. Insert one fork into the meat to hold it steady, and use the other to pull and tear the meat into strands. If you have meat claws, they can make this process even faster and more efficient. The goal is to break the pork into tender, succulent pieces. As you shred, you’ll naturally encounter any bones, which should slide out easily, and any tough gristle, which can be discarded.
A Crucial Tip: Do NOT Discard the Fat! This is where I get a little insistent. Many recipes suggest removing the “crusty fat cap” and discarding it. This is a common misconception that can rob your pulled pork of its incredible flavor. Fat is flavor! Think of bacon – you don’t throw away its delicious fat, do you?
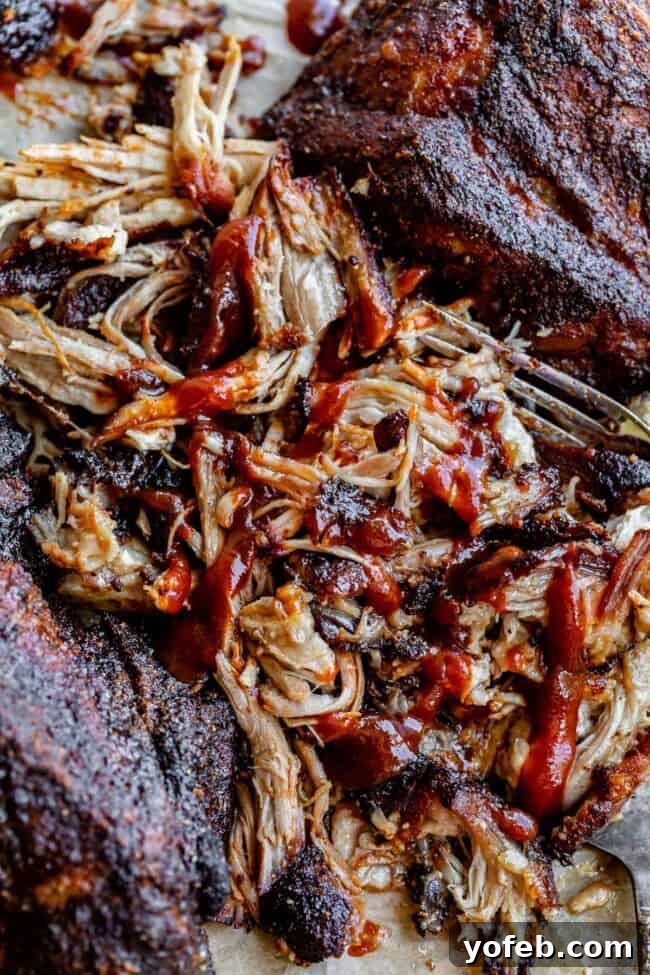
That slow-cooked, rendered fat, especially the crispy bark from oven roasting, is what gives pulled pork its signature moisture, tenderness, and depth of flavor. While you should certainly remove any unpalatable gristle or overly tough bits, please do not discard every bit of fat you find. Shred the tender fat right into the meat. You will not regret this advice; it’s a game-changer for truly flavorful pulled pork!
Serving Suggestions for Your Delicious Pulled Pork
Once your perfectly cooked and shredded pulled pork is ready, the possibilities for serving are endless! The most classic accompaniment, of course, is barbecue sauce. We have a fantastic recipe for Homemade BBQ Sauce that delivers incredible flavor. Until then, Stubb’s Original BBQ sauce is a favorite, with its classic black-pepper-molasses profile that inspired our own recipe. You can either stir about 1-2 cups of BBQ sauce directly into the shredded pork for an all-in-one flavor, or serve it on the side, allowing everyone to customize their plate.

Pulled Pork Sandwich
Creating the ultimate pulled pork sandwich is an art form. Start with a high-quality brioche hamburger bun—its soft texture and subtle sweetness are perfect. Generously slather the cut sides of the bun with softened butter. Heat a skillet over medium heat, add a dollop of butter, and toast the buns butter-side down for 2-4 minutes until they are lightly golden and perfectly toasted. This creates a wonderful barrier and adds extra flavor.

Pile a generous amount of your tender, juicy, hot pulled pork onto the toasted bun. Drizzle with more BBQ sauce if desired.

And for the ultimate sandwich experience, DO NOT skip the Favorite Coleslaw. Its cool, creamy crunch provides an essential contrast to the rich, warm pork, making it an indispensable component of the perfect pulled pork sandwich.
Beyond sandwiches, pulled pork is incredibly versatile. Use it to top nachos, fill tacos, create baked potato boats, or add a protein punch to salads. Whether slow cooked or oven-roasted, or even smoked on the grill, you’ve now unlocked the secrets to the best pulled pork of your life!
Essential Side Dishes to Complement Pulled Pork
What’s a delicious pulled pork meal without an array of flavorful side dishes? Alongside the indispensable BBQ Sauce, here are some of our top picks for sides that perfectly complement pulled pork, making any meal a true feast:
- My Favorite Coleslaw << A truly great coleslaw is non-negotiable for pulled pork, providing a crucial fresh and creamy counterpoint.
- Easy Broccoli Bacon Salad << A vibrant salad with the irresistible crunch and savory notes of bacon.
- The Only Macaroni Salad You Need << The secret to this beloved recipe lies in its perfectly small chop, ensuring every bite is balanced.
- Pineapple Spinach Salad << An easy, elegant, and refreshing salad that adds a touch of sweetness.
- Italian Tortellini and Pepperoni Pasta Salad << A hearty, flavorful pasta salad that’s always a crowd-pleaser.
- Bacon Baked Beans << Smokey, rich, and utterly comforting—a BBQ classic.
- Santa Maria Pinquito Beans << These unique beans boast a wonderfully smooth and distinct flavor profile.
- The Best Potato Salad Recipe << A perfectly balanced potato salad that truly lives up to its name.
- Literally the Best Mac & Cheese I’ve Ever Had << Pairing creamy mac & cheese with BBQ is always a winning combination.
For even more inspiring ideas, be sure to explore our BBQ holidays recipe section!
Frequently Asked Questions about Pulled Pork
Storing Leftover Pulled Pork
Pulled pork makes for incredibly convenient leftovers. To store, allow the meat to cool to room temperature. Transfer it to an airtight glass container with a well-sealing lid and refrigerate. While plastic containers can be used, be aware that the sauce may stain some plastics, especially if the meat is warmed in the same container. Properly stored, pulled pork will keep fresh in the refrigerator for 4-5 days.
Freezing Pulled Pork for Future Meals
Freezing pulled pork is an excellent way to prepare meals in advance. Simply ensure the pork has cooled to room temperature. Place it into a freezer-safe zip-top bag, removing as much air as possible before sealing. You can freeze it with or without BBQ sauce mixed in. The frozen pulled pork will maintain its quality for approximately 4-6 months. To reheat, thaw the bag overnight in the refrigerator on a plate to catch any condensation, then follow the reheating instructions below.
Reheating Pulled Pork: Maintaining Tenderness
Reheating pulled pork without drying it out is key to enjoying leftovers as much as the fresh batch. For a single serving, place some pork in a microwave-safe bowl, cover it, and microwave at 50% power for 1-2 minutes, or until warmed through. For larger quantities, you have a few options: you can extend the microwave time, place it in a lidded pan on the stovetop with 1-2 tablespoons of water (stirring occasionally) until warm, or return it to the slow cooker on the “warm” setting until heated through. Always add a sprinkle of water or broth to prevent it from drying out during reheating, ensuring it retains its juicy texture.
The Secrets to Perfectly Tender Pulled Pork
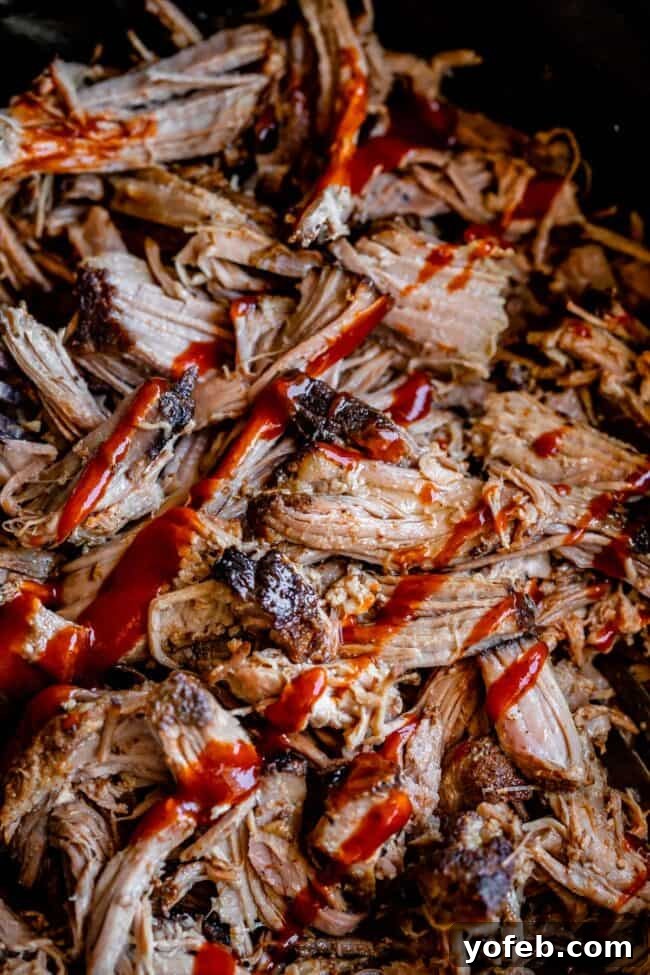
Achieving truly tender pulled pork relies on two fundamental secrets. Firstly, it begins with the right cut of meat: the Boston Butt (also known as pork butt) is superior, with pork shoulder as a close second. Despite its name, pork butt is a shoulder cut brimming with fat marbling and dense muscle fibers, making it perfectly suited for cooking down into succulent, fall-apart goodness.
Secondly, the cooking duration and method are paramount. These shoulder cuts are rich in collagen and connective tissues. If not cooked long enough, these tissues remain tough, resulting in chewy pork that requires significant effort to eat. The magic happens with “low and slow” heat, which gradually breaks down these tough connective tissues, converting them into rich gelatin. This process melts into the meat, tenderizing every fiber and infusing it with moisture and flavor. This patient cooking is what yields perfectly tender, effortlessly pullable pork.
Pulled Pork vs. Shredded Pork: What’s the Difference?
For most home cooks and diners, the terms “shredded pork” and “pulled pork” are used interchangeably to describe slow-cooked pork that has been broken into smaller pieces. Both refer to pork that has reached a point of tenderness where it can be easily separated. However, some barbecue aficionados draw a subtle distinction: “shredded pork” might imply meat that has been uniformly separated into fine, stringy strands, without any substantial clumps. “Pulled pork,” on the other hand, might include a mix of finer shreds along with some larger, juicy chunks of meat, offering a more varied texture. Ultimately, this is a minor difference in semantics. For the purpose of this recipe, feel free to pull or shred the meat to your preferred texture and consistency.
Optimal Internal Temperature for Pulled Pork
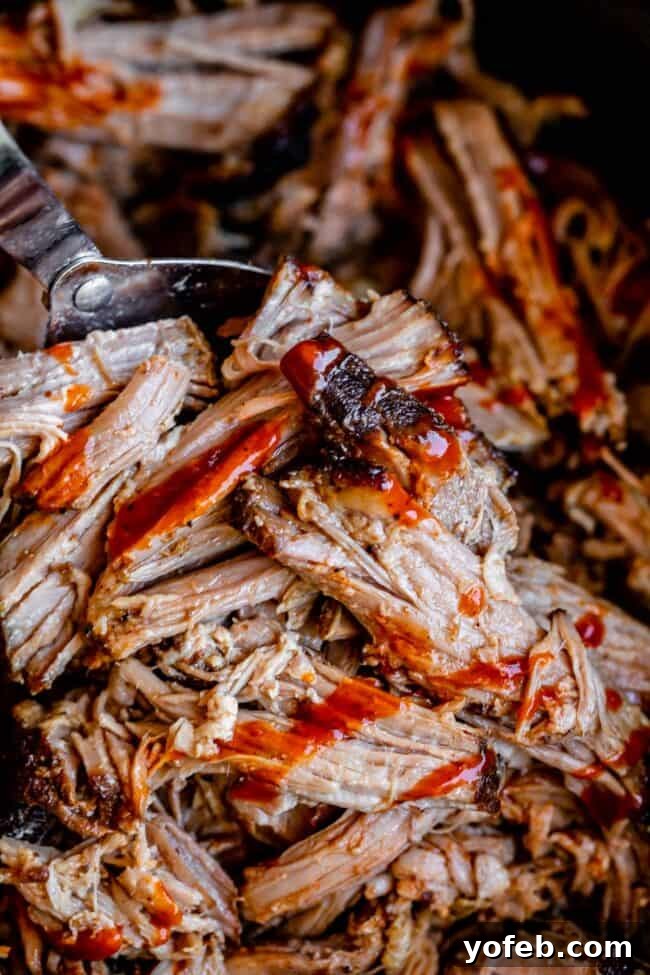
Regardless of whether you smoke, slow cook, or oven roast your pulled pork, the target internal temperature for perfect doneness is consistently around 200 degrees F. Once the meat reaches approximately 195 degrees F, you can remove it from the heat. This accounts for “carry-over cooking,” where the internal temperature continues to rise a few degrees after it’s removed from its heat source. Allowing the temperature to climb much higher than 203 degrees F, however, risks drying out the pork, leading to a less desirable texture.
A reliable meat thermometer is an absolute essential for making pulled pork. You simply cannot rely solely on cooking time, as variables like the exact size and shape of the meat, oven/slow cooker calibration, and starting temperature can significantly alter the cooking duration. Invest in a good thermometer, and once the internal temperature approaches 185 degrees F, begin checking it every 15-30 minutes. This precision ensures you achieve that ideal tender, juicy result every time.
Can You Overcook Pulled Pork? Understanding the Science
While the mantra for pulled pork is “low and slow,” it is indeed possible to overcook it! Let’s briefly delve into the science. As pork butt cooks, around 130 degrees F, the intramuscular fat begins to render, essentially basting the meat from the inside out. Then, typically between 160 and 190 degrees F, the collagen (tough connective tissue) starts to break down and convert into gelatin, which makes the meat incredibly tender and juicy. This is the sweet spot we aim for.
However, if the internal temperature continues to rise beyond approximately 210 degrees F, the muscle fibers themselves can begin to contract, toughen, and expel their moisture. This leads to dry, chalky, and unpleasantly chewy pork – a disappointing outcome after all that patience! This is precisely why a meat thermometer is invaluable. It helps you hit that optimal temperature range, ensuring your pulled pork remains perfectly tender and moist without venturing into the realm of overcooked dryness.

How Much Pulled Pork to Make Per Person? Serving Size Guide
When planning your meal, a good general guideline is to estimate about ⅓ pound of cooked pulled pork per person, especially if serving sandwiches. If your crowd includes many small children, or if you’re offering a wide variety of hearty side dishes, you can typically scale back to ¼ pound per person. Conversely, if you anticipate guests enjoying more than one sandwich or being particularly big eaters, it’s wise to increase the amount slightly. The beauty of pulled pork is that any leftovers freeze beautifully, allowing you to enjoy the delicious fruits of your labor (or meats, in this case!) at a later date. After rigorous testing of all these methods, I can confidently say I have a generous supply of fantastic pulled pork in my freezer right now—and absolutely no regrets!
And remember, if you have access to a gas grill and about 12 hours to spare, do yourself a favor and try our Smoked Pulled Pork Recipe for an authentic smoky flavor. It’s an experience not to be missed! Enjoy your BBQ, my friends!
Explore More Mouthwatering Slow Cooker Recipes
The slow cooker is a true kitchen hero, simplifying mealtime by allowing you to create a delicious main dish with minimal fuss, leaving you free to whip up complementary sides. If you love the convenience and flavor of slow-cooked meals, you’ll adore these other recipes:
- Slow Cooker Pork Tacos with Mexican Coleslaw << An easy and flavorful pantry-friendly meal perfect for taco night.
- Honey Balsamic Slow Cooker Pork Ribs << Prepare to make fall-off-the-bone ribs with incredible ease in your slow cooker.
- Bacon Blue Cheese Brisket << This unbelievably rich and savory brisket is guaranteed to win over any guest.
- Brown Sugar Balsamic Pork Tenderloin << Slow-cooked until incredibly tender, then finished in the oven for a perfect, caramelized glaze.
- Cafe Rio Sweet Shredded Pork for Burritos << Experience the irresistibly sweet and savory flavors inspired by the famous Cafe Rio.
Facebook | Pinterest | Instagram

Crock Pot Pulled Pork
Equipment
-
Large skillet I love this cast iron skillet!
-
Slow Cooker I use and recommend this slow cooker!
Ingredients
- 5-7 pound pork butt or pork shoulder, leave the fat cap on
- 3 tablespoons olive oil, for rubbing on meat
- 1 teaspoon liquid smoke*, optional, for rubbing on meat
- 2 tablespoons vegetable oil, for searing, more as necessary
For the rub/marinade
- 1 tablespoon kosher salt, use 2 and 1/2 teaspoons if using table salt
- 2 teaspoons black pepper
- 1 tablespoon paprika
- 2 teaspoons garlic powder
- 2 teaspoons onion powder
- 1 teaspoon chili powder
- 1 teaspoon cayenne pepper
- 2 teaspoons cumin
- 1 teaspoon dry mustard powder
- 1/3 cup brown sugar, packed
To serve
- barbecue sauce, homemade or store bought
- brioche hamburger buns, if you’re making sandwiches
- butter, softened
- Coleslaw, this is my favorite herby recipe!
Instructions
Slow Cooker Instructions
-
Choose your pork. A pork shoulder is great, but a pork butt (sometimes called Boston Butt) is better. They are similar cuts of meat and have all the fat and connective tissues we need to break down into a tender and juicy pulled pork (Butts have just a little more). Use a bone-in butt or shoulder if you can find it, but boneless if fine too. Choose one that is well marbled with white fat.
-
Marinate with spice rub. In a small bowl, combine 1 tablespoon kosher salt, 2 teaspoons black pepper, 1 tablespoon paprika, 2 teaspoons garlic powder, 2 teaspoons onion powder, 1 teaspoon chili powder, 1 teaspoon cayenne pepper, 2 teaspoon cumin, 1 teaspoon dry mustard powder, and 1/3 cup packed brown sugar. Measure out 3 tablespoons of this mixture and set aside in a small ziplock or covered bowl; you will need it later.
-
If you would like to speed up the cooking process, use a sharp knife to cut the pork in half. This will increase the surface area of meat that you are able to brown on the stove (increasing flavor) and shorten the crock pot time to about 6-7 hours. (It’s totally okay to leave the pork butt whole, it will cook in about 8-10 hours.)
-
Use paper towels to dry off the pork as best you can. Massage 3 tablespoons olive oil into the meat, making sure it’s well distributed. Drizzle 1 teaspoon liquid smoke over the pork and massage it in. This step is optional but I like the smoky flavor it adds, which helps make up for the fact that we aren’t cooking this pork in a smoker or on the grill.
-
Use your hands to rub the spices (all but 3 tablespoons) into the meat, getting every nook and cranny and under every flap. Place in a large ziplock bag and seal (I love these 2 gallon bags).
-
Marinate in the fridge for at least 6 hours, or up to 48 hours.
-
Remove the pork from the ziplock and pat dry if it is wet. Rub the remaining 3 tablespoons of the spice rub mixture into the pork.
-
Set a large dry skillet on your stove over medium high heat. Let the skillet preheat for at least 3 minutes on medium high. Add 2 tablespoons vegetable oil and swirl to coat the pan. The oil should shimmer immediately.
-
Add the pork and sear for about 2 minutes until well browned. Use tongs to flip the pork and sear the other side until browned. Flip again onto its side, until all the outside of the pork is seared. Add more oil as necessary. Repeat with the other piece, if you split it in half.
-
Place the seared pork into your dry crock pot. Cover with the lid and cook on low heat for 6-8 hours if you split it in half, and about 8-10 hours if you left it whole.
-
Do not overcook your pork. You only want the temperature of the meat to reach about 200 degrees, so start checking it with a meat thermometer at the lowest recommended cook time. It’s tempting to set it and forget it, but your pork will taste dried out and stringy if you leave it in too long. Rely on your meat thermometer. You can remove it from the slow cooker anywhere between 195 and 200 degrees F, since the meat will continue rising in temperature even after you take it out of the slow cooker.
-
Remove the pork from the slow cooker and let rest on a cutting board for about 5 minutes, tented with foil.
-
Shred the pork using two forks. It should be just completely falling apart. Remove any gristle, but do not discard all the fat! Shred it up and toss it in with the meat. Fat=flavor, and that slow cooked fat is part of what makes pulled pork so amazing. (You don’t throw out the strips of fat on bacon, do you? I think not. Show your pork some respect.)
-
Add the shredded pork back into the crock pot (or whatever you plan to serve in) and toss with the cooking liquid.
-
You can stir about 1 to 2 cups homemade or store bought BBQ sauce into the pulled pork, or serve it with BBQ sauce as an optional topping. Serve warm on sandwiches (more instructions on that below), top a salad, use for meal prep, whatever your little heart desires.
Oven Pulled Pork Instructions
-
Cut your pork butt or shoulder into 3 equal pieces. This is to speed up the cooking process and to increase the amount of edges that will get browned in the oven. Hello flavor!
-
Follow the same instructions above for preparing your pork: pat dry, rub with 3 tablespoons olive oil and 1 teaspoon liquid smoke (optional), then rub with all but 3 tablespoons of the spice rub. Place in a large ziplock and marinate for 6 to 48 hours.
-
Remove the pork from the fridge and let sit at room temperature for about an hour. This ensures more even cooking in the oven. Nobody wants a dry outer edge.
-
Preheat your oven to 425 degrees F. Let it heat up for at least 20 minutes.
-
Place an oven-safe wire cooling rack over a rimmed baking sheet. Spray with nonstick spray. Add 1 and 1/2 cups water to the bottom of the pan, to provide a humid environment while the pork is cooking.
-
Remove the pork from the ziplock and rub each piece with the remaining 3 tablespoons spice rub. Place the pork on the cooling rack, making sure the pieces are not touching each other. Fat caps should be on top, if you can.
-
Roast in the oven for 30 minutes at 425 degrees. This initial blast of heat is to help sear the edges of the pork. After 30 minutes, lower the oven temperature to 300 degrees. Open the oven door for 30-60 seconds to cool the oven down a bit. Close the door.
-
Roast at 300 degrees for another 3-5 hours, depending on how large the pieces are. Add more water to the bottom of the pan as necessary.
Rely on your meat thermometer to test for doneness. Take the pork out of the oven when a meat thermometer reads 195 to 200 degrees F. Do not let the meat go above 200 degrees, as the temperature will keep rising a few degrees after you take it out of the oven.
-
Remove the pork from the oven and let rest for about 15-20 minutes, tented with foil. Transfer the pork to a cutting board.
-
Shred the pork using two forks. It should be just completely falling apart. Remove any gristle, but do not discard all the fat! Shred it up and toss it in with the meat. Fat=flavor.
-
Make a sandwich: To make the best pulled pork sandwich of your life, butter both sides of a brioche bun. Heat another tablespoon of butter in a pan over medium heat on the stove. Toast the buns for 2-4 minutes, until lightly golden.
-
Add shredded pork to your bun. Top with more BBQ sauce, if desired. Top with an unreasonable amount of lemony herb coleslaw, if you’re like me. Smash with the top of your toasty brioche bun and devour messily.
-
Store leftovers in an airtight container in the fridge. It will keep for 4-5 days in the fridge.
-
Pulled pork freezes very well. Seal in a ziplock bag (with or without BBQ sauce mixed in). It will freeze for up to 4-6 months. Let thaw in the fridge overnight. Heat leftovers in the microwave, or place in a tin foil covered pan, sprinkle with water, and bake in an oven set to 300 for about 20-40 minutes, depending on how much there is.
Video
Notes
Don’t miss out on making this recipe on the grill at least once in your life: It’s so good. Smoked Pulled Pork on a Gas Grill.