
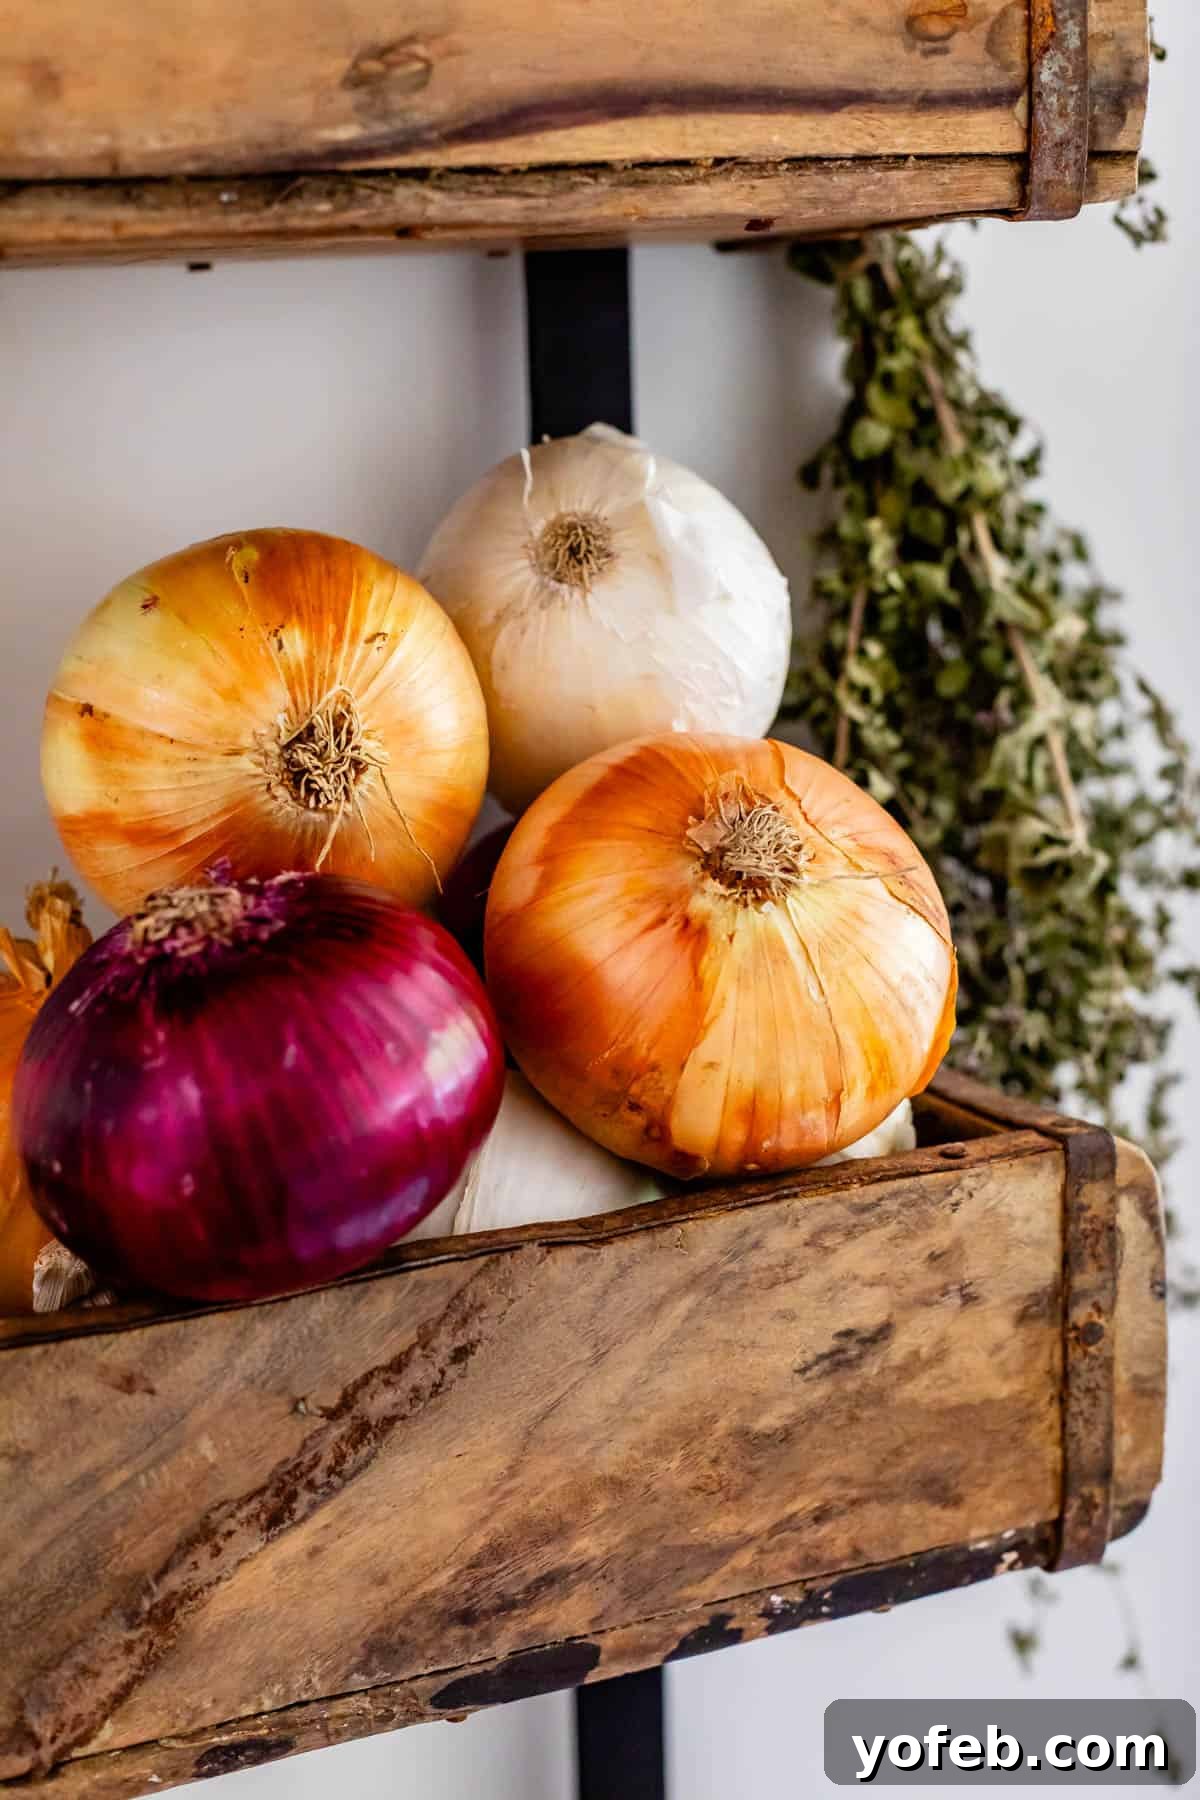
Ever found yourself in a battle with an onion, leaving you in tears and with uneven chops? You’re not alone! Many home cooks dread the process of cutting an onion, but it doesn’t have to be a tear-filled struggle. Mastering essential onion cutting techniques is a foundational skill that can transform your cooking experience, making meal prep faster, safer, and much more enjoyable. This comprehensive guide will equip you with all the tips, tricks, and methods—from simple dicing to elegant slicing—to handle any onion with confidence, just like a seasoned chef.
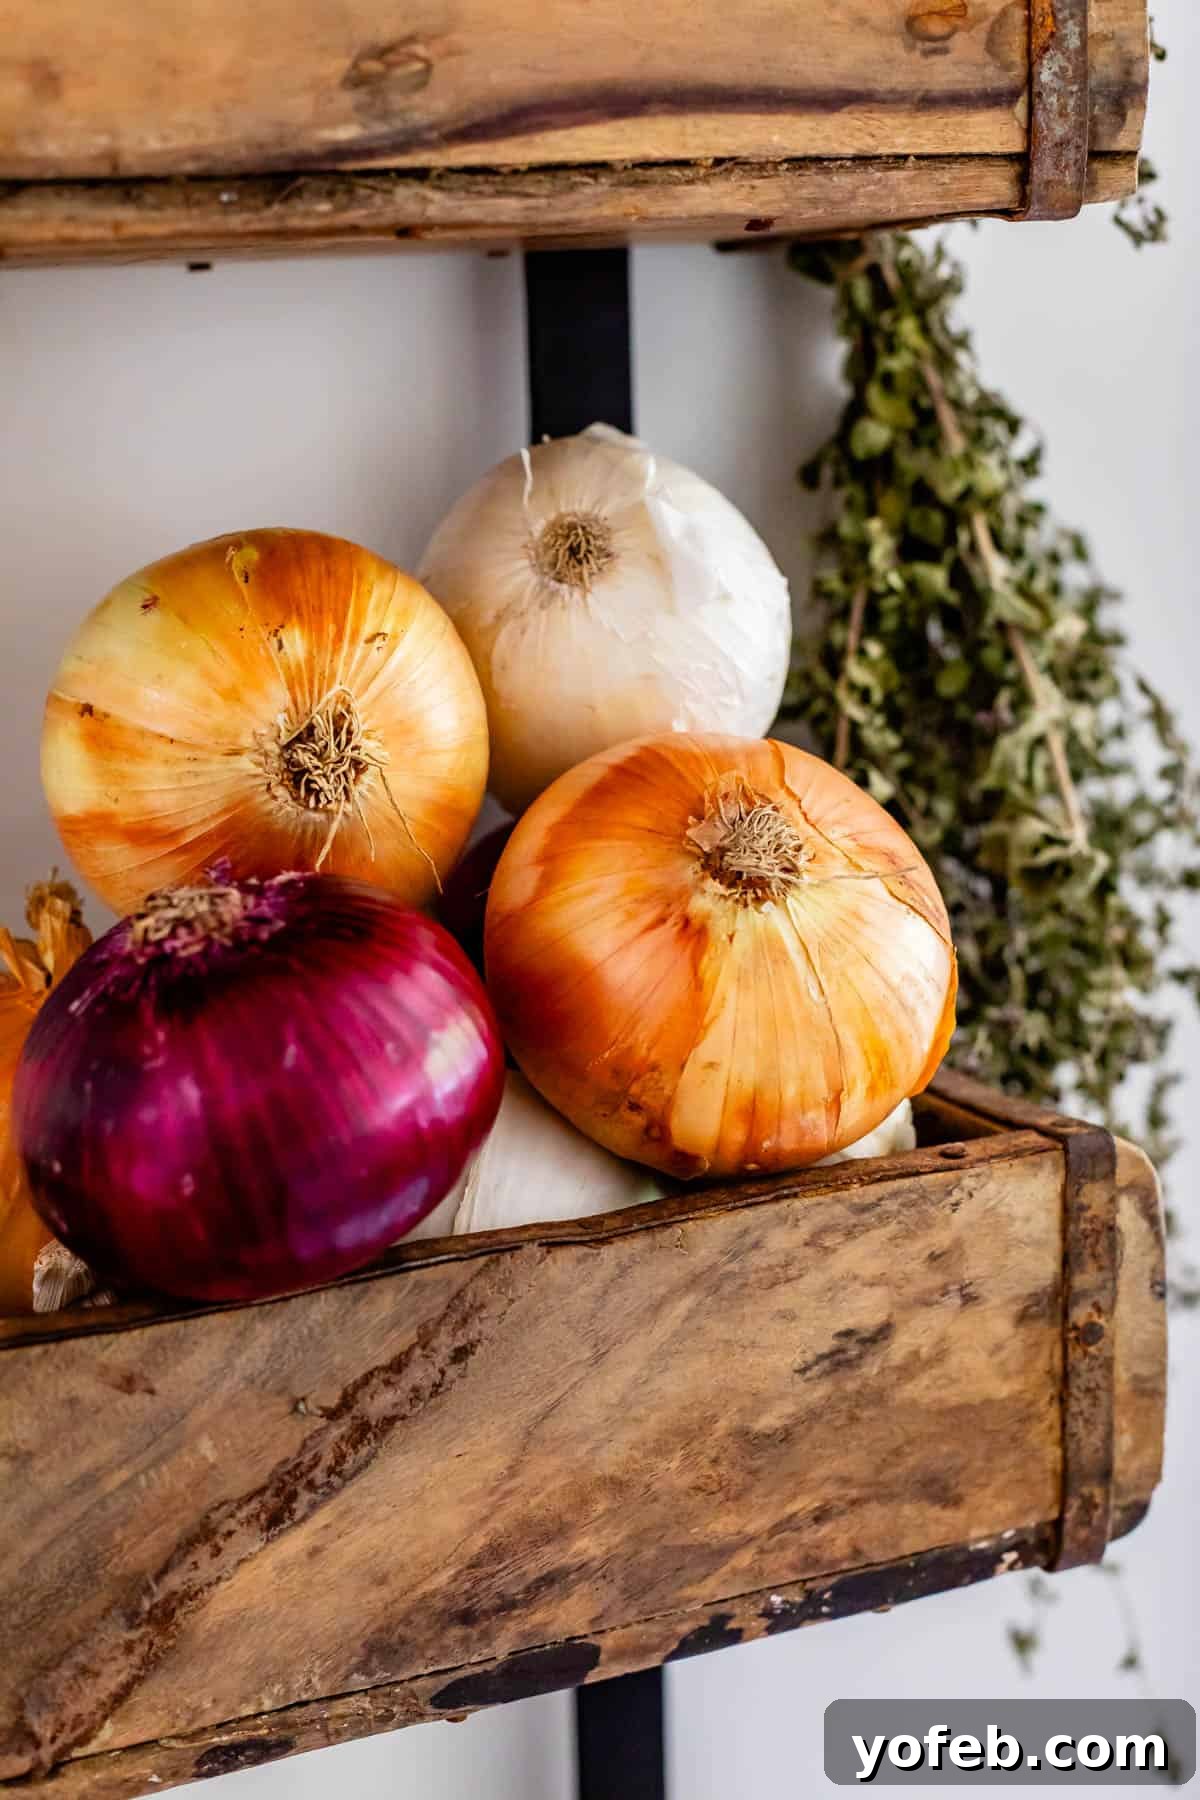
Table of Contents
- The Universal Challenge of Onion Chopping
- Why Do Onions Make Us Cry? The Science Behind the Tears
- Effective Strategies to Prevent Onion Tears
- The Non-Negotiable Tool: A Sharp Knife
- Understanding Onion Anatomy
- How to Dice an Onion: The Home Cook’s Method
- How to Dice an Onion: The Chef’s Method
- How to Slice an Onion for Rings and Sauteing
- Different Types of Onions and Their Uses
- Storing Onions Properly
- Frequently Asked Questions About Cutting Onions
- Delicious Recipes Starring Onions!
- How to Cut an Onion: Recipe Guide
The Universal Challenge of Onion Chopping
For many home cooks, the mere thought of dicing an onion can trigger a flood of emotions—mostly tears! While some might consider it a necessary evil, the truth is, onions are an indispensable ingredient in countless dishes across nearly every cuisine. From the savory base of a rich spaghetti sauce to the crisp freshness of pico de gallo, their unique flavor profile adds depth and complexity that simply cannot be replicated. Despite the tears, our dedication to delicious food keeps us coming back to the cutting board, onion in hand.
I understand the struggle firsthand. My eyes aren’t immune to the potent fumes; in fact, I’m often reduced to a full-on sobbing mess, needing more than just a tissue to recover. Yet, onions feature in my cooking several times a week. This persistence highlights a fundamental culinary truth: mastering onion preparation is not just a skill, it’s a necessity. If you’re tired of inefficient chopping or dreading the inevitable tear-fest, you’ve come to the right place. Let’s explore practical solutions and efficient techniques to make onion cutting a breeze.
Why Do Onions Make Us Cry? The Science Behind the Tears
The stinging sensation and tears we experience when cutting onions are a natural defense mechanism. When an onion’s cell walls are ruptured—whether by a knife or a hungry pest—a chemical reaction occurs. Amino acid sulfoxides in the onion are converted into sulfenic acids by enzymes called alliinases. These unstable sulfenic acids then rearrange into syn-propanethial S-oxide, a volatile sulfur compound. This compound quickly disperses into the air and, upon contact with the moisture in your eyes, forms a mild sulfuric acid, irritating the lachrymal glands and prompting tear production. It’s a clever trick by the onion to deter predators, but it can be quite a nuisance for us home cooks!
Understanding this chemical process is the first step toward combating the tears. By mitigating the airborne irritant, we can significantly reduce its effect on our eyes. This knowledge forms the basis for many popular tear-reduction strategies, some more effective than others.
Effective Strategies to Prevent Onion Tears
While no method is 100% foolproof for everyone, certain techniques can significantly reduce the tears when chopping onions. Here are the most effective and commonly suggested methods:
The Ultimate Tear Blocker: Swim Goggles

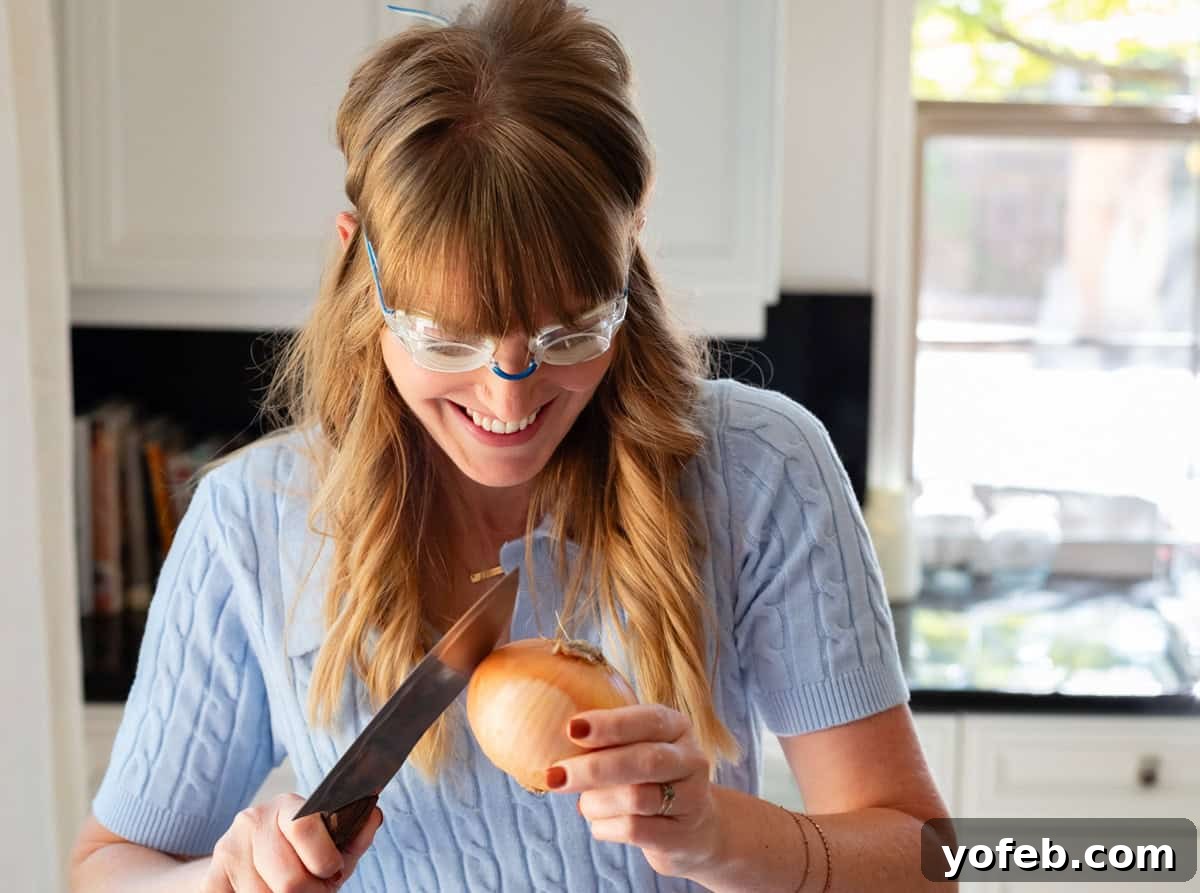
It’s onion time.
Yes, you might look a little silly, and yes, they might leave temporary “raccoon marks” around your eyes, but swim goggles are, by far, the most effective physical barrier against onion fumes. Unlike specially marketed “onion goggles” which often feature porous foam padding that allows irritants to seep through, swim goggles create a tight seal around your eyes. This hermetic barrier literally prevents the sulfuric acid vapor from reaching your delicate eye membranes, making them a superior choice for tear prevention. For me, they are an absolute game-changer, ensuring I can chop away without any risk of accidental knife-related mishaps due to impaired vision.
Other Handy Tear-Reduction Tricks:
- Run Your Wrists Under Cold Water: This old-fashioned trick, passed down by my mother, works surprisingly well. The theory is that cooling down a pulse point can distract your body from the irritation in your eyes. While it doesn’t solve the core problem, it provides quick, temporary relief from the stinging sensation.
- Wear Contact Lenses: If you’re a contact lens wearer, you’re in luck! Your lenses act as a thin protective barrier over your corneas, effectively blocking a significant amount of the irritating fumes. This is a passive benefit for those with poor vision, turning a necessity into a culinary advantage.
- Chill Your Onions: Placing onions in the refrigerator for a couple of hours before cutting can reduce the emission of sulfuric compounds. Colder temperatures slow down the chemical reaction. However, avoid long-term refrigeration for whole onions, as the humid environment can make them soft and mushy. A cool, dark, dry pantry is ideal for whole onion storage.
- Improve Ventilation: Turning on an exhaust fan, opening a window, or even placing a small fan near your cutting board can help dissipate the irritating compounds away from your face. Increased air circulation prevents the vapors from concentrating around your eyes.
- Soak in Ice Water: Halved onions can be soaked in a bowl of ice water for a few minutes. This allows some of the irritating compounds to dissolve into the water, reducing their airborne presence when you cut. This method also works well if you plan to use raw onion slices in salads, as it can temper some of their harsh bite.
While these alternative methods offer some relief, for truly tear-free onion preparation, my top recommendation remains the trusty swim goggles. They are a small investment for a significant return in comfort and safety.
One final note on tear prevention: always use fresh onions. Older onions tend to produce stronger acidic compounds, leading to more intense eye irritation. When selecting onions at the grocery store, look for firm bulbs with dry, papery, and smooth skin. Avoid any that show signs of sprouting, as these are past their prime and will be harder to cut and more pungent.
The Non-Negotiable Tool: A Sharp Knife
Beyond tear prevention, the single most impactful factor in safe and efficient onion cutting is a sharp chef’s knife. A dull knife forces you to apply more pressure, increasing the risk of the knife slipping and causing injury. It also crushes the onion cells rather than cleanly slicing them, releasing even more of those tear-inducing compounds. A sharp blade, on the other hand, glides through the onion with minimal effort, making precise cuts and reducing both the physical strain and the chemical irritation.
If you don’t already own a good knife sharpener—whether it’s an electric model, a honing steel, or sharpening stones—it’s an essential kitchen investment. A properly sharpened knife not only makes cooking more efficient but also significantly safer. Once you experience the effortless precision of a truly sharp knife, you’ll wonder how you ever managed without one. It’s a game-changer for all your prep work, not just onions.
Understanding Onion Anatomy
Before diving into cutting techniques, it’s helpful to understand the basic anatomy of an onion. An onion has two distinct ends: the stem end (where the green shoot emerges) and the root end (the fuzzy, fibrous part that held the onion to the ground). The root end is particularly important because it holds the onion’s layers together. When dicing, some techniques leverage this integrity to keep the onion stable and facilitate even cuts.
The outer layers of an onion are typically papery and tough, unsuitable for eating. These need to be peeled away. Beneath these, you’ll find the edible layers, which vary in thickness and juiciness. Understanding these parts will help you apply the following cutting methods more effectively and efficiently.
How to Dice an Onion: The Home Cook’s Method
This method, which I affectionately call my “AOL version,” is intuitive and effective, especially if you’re not aiming for perfectly uniform chef-level cuts. It works well for any type of onion and provides a stable base for chopping.
-
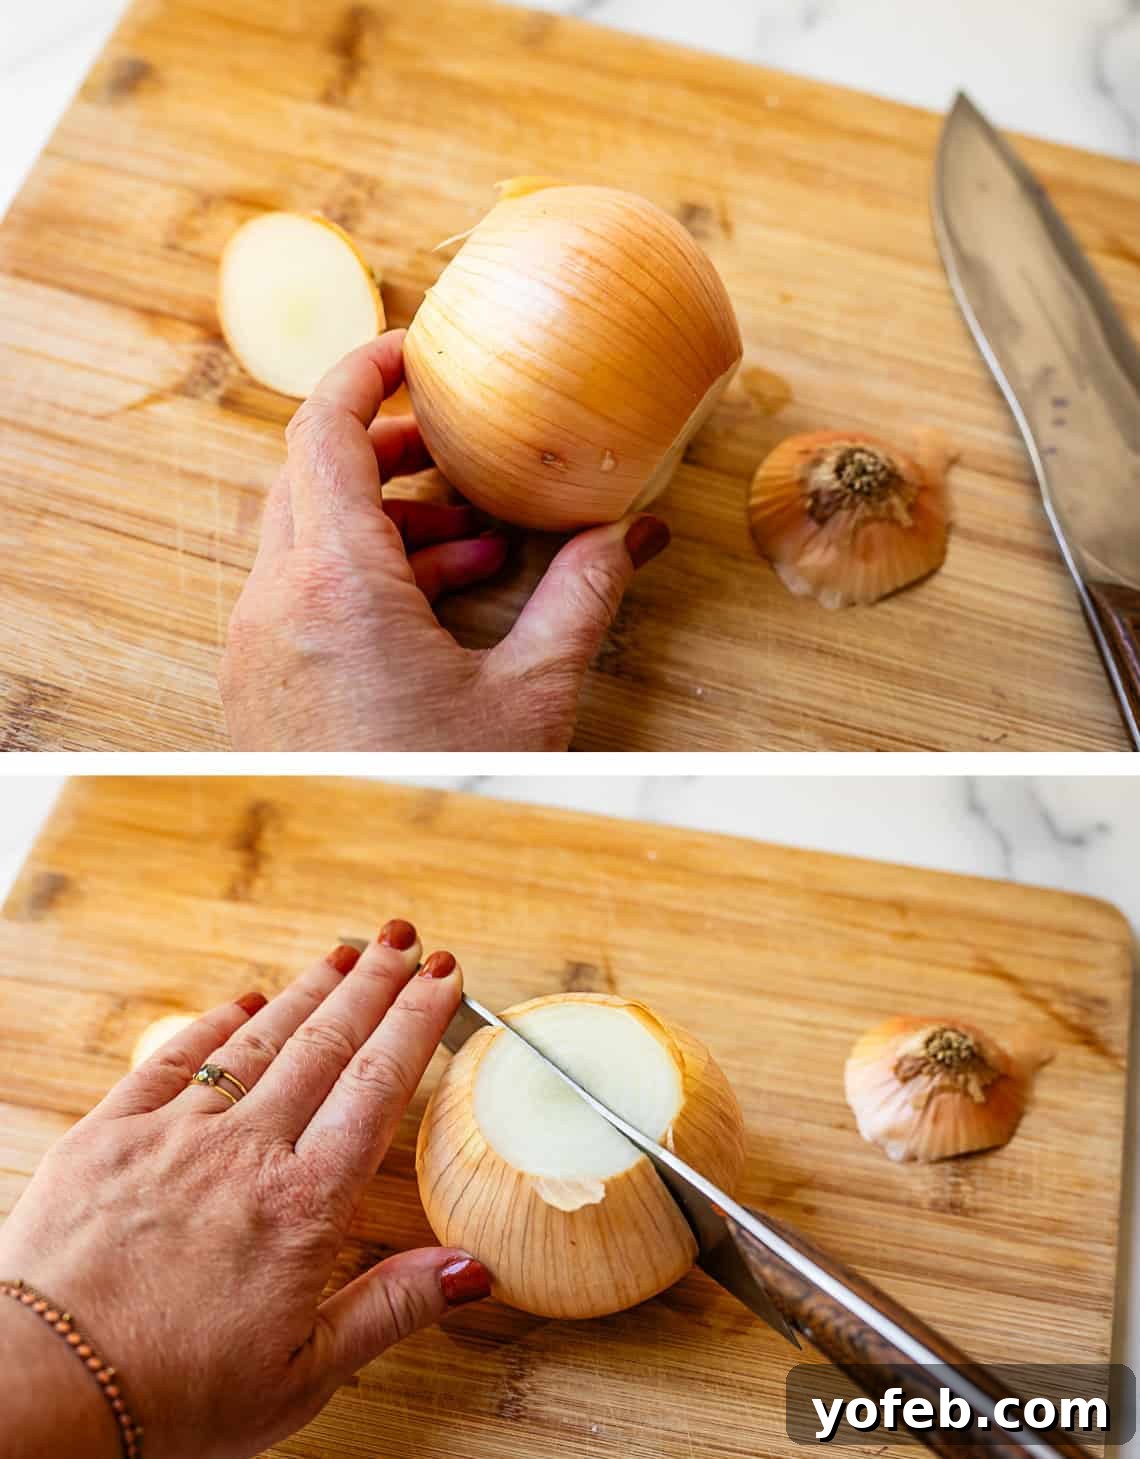
Prepare the Onion: Begin by placing the onion on your cutting board. Carefully chop off both the stem and root ends. This creates two flat surfaces, making the onion more stable.

-
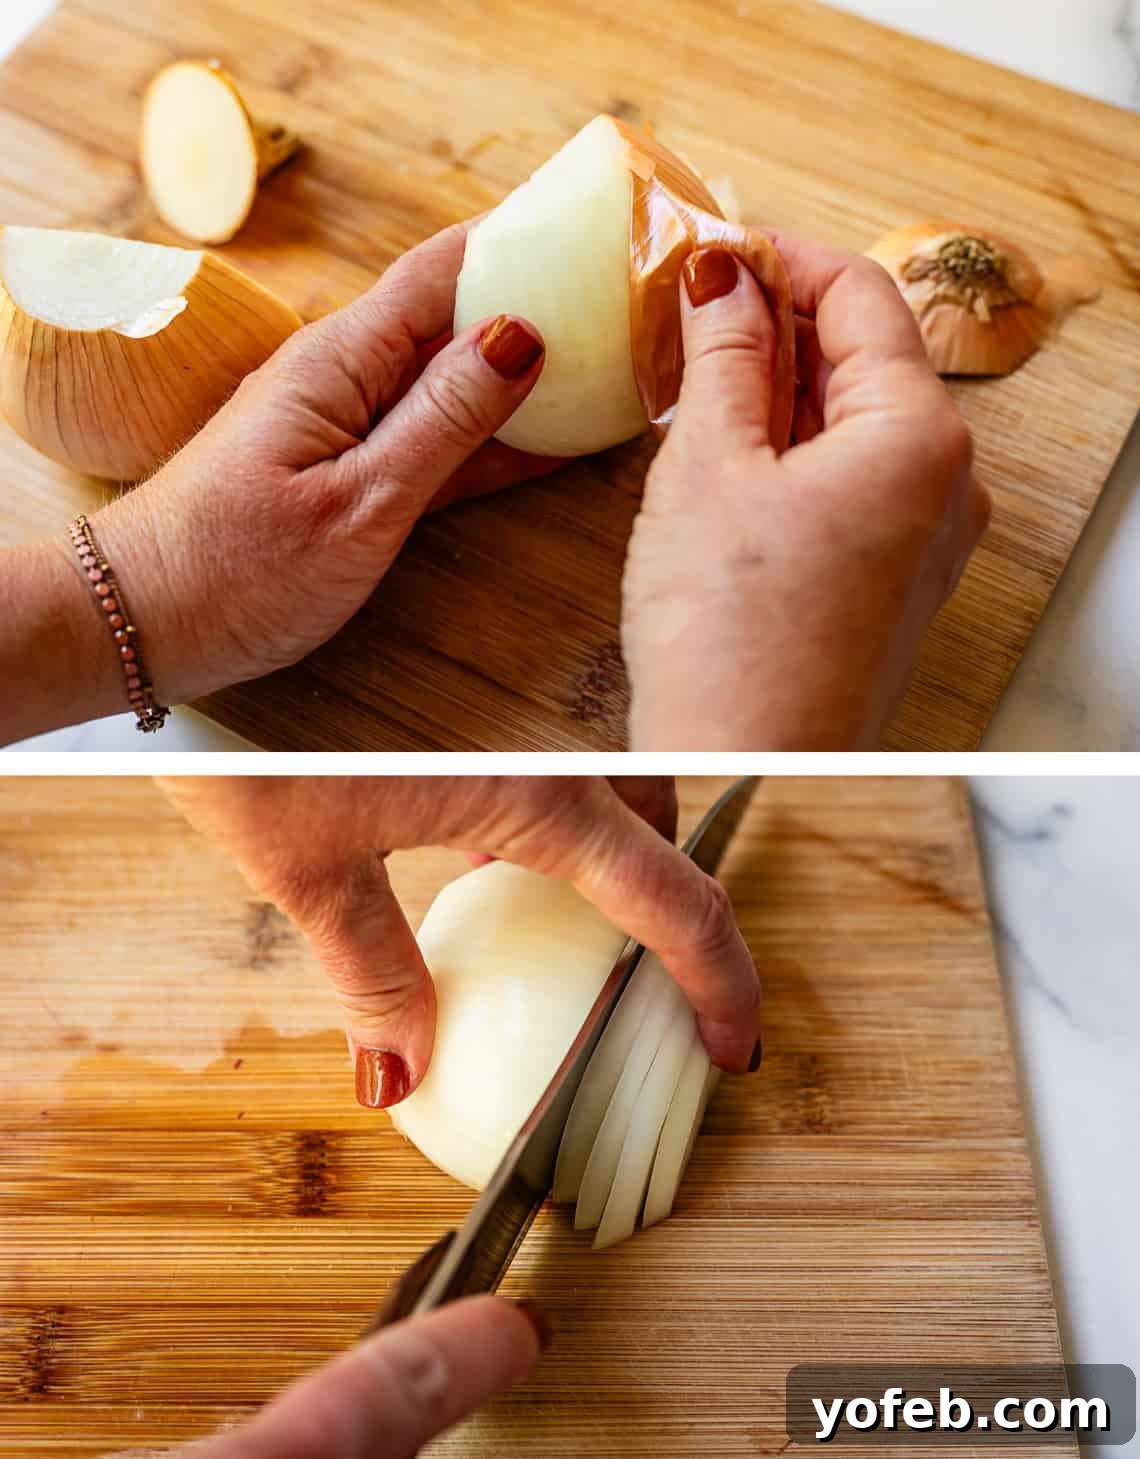
Halve and Peel: Stand the onion on one of its flat ends and cut it in half lengthwise, from top to bottom. Once halved, carefully peel off the papery outer layers. Sometimes an inner, slightly papery layer might stick; decide if its texture is acceptable. If it’s too tough or difficult to peel, I usually sacrifice the next perfectly good layer of onion to save time. Ain’t nobody got time for stubborn onion skins!
-
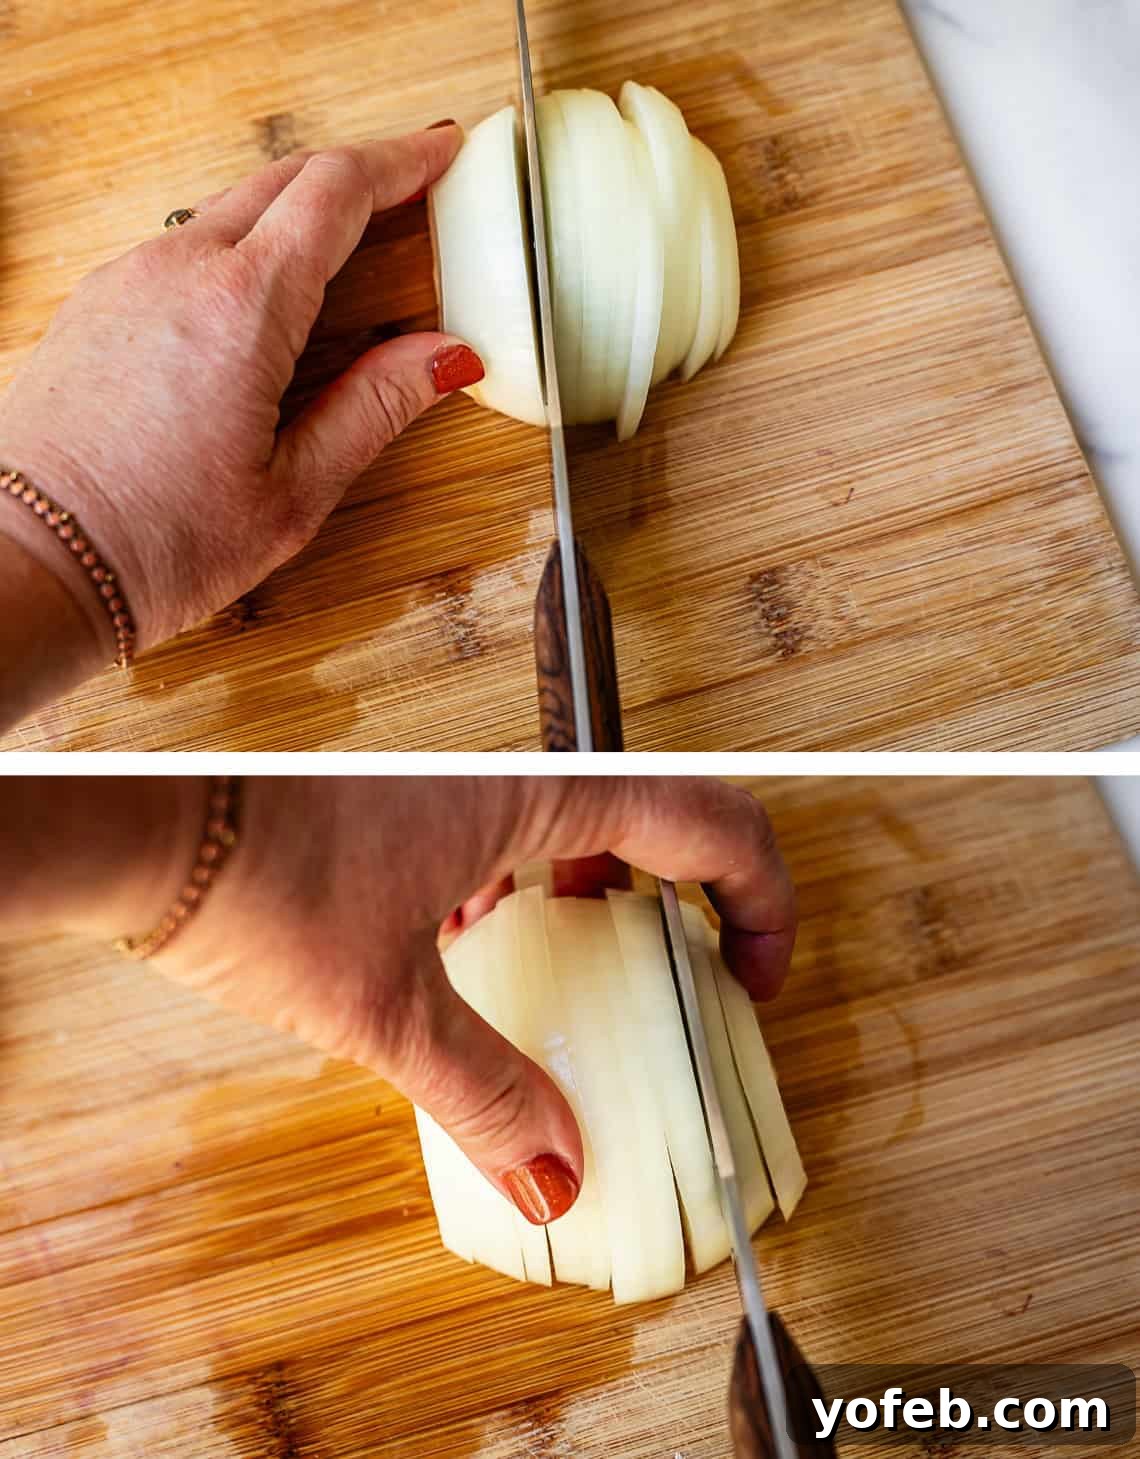
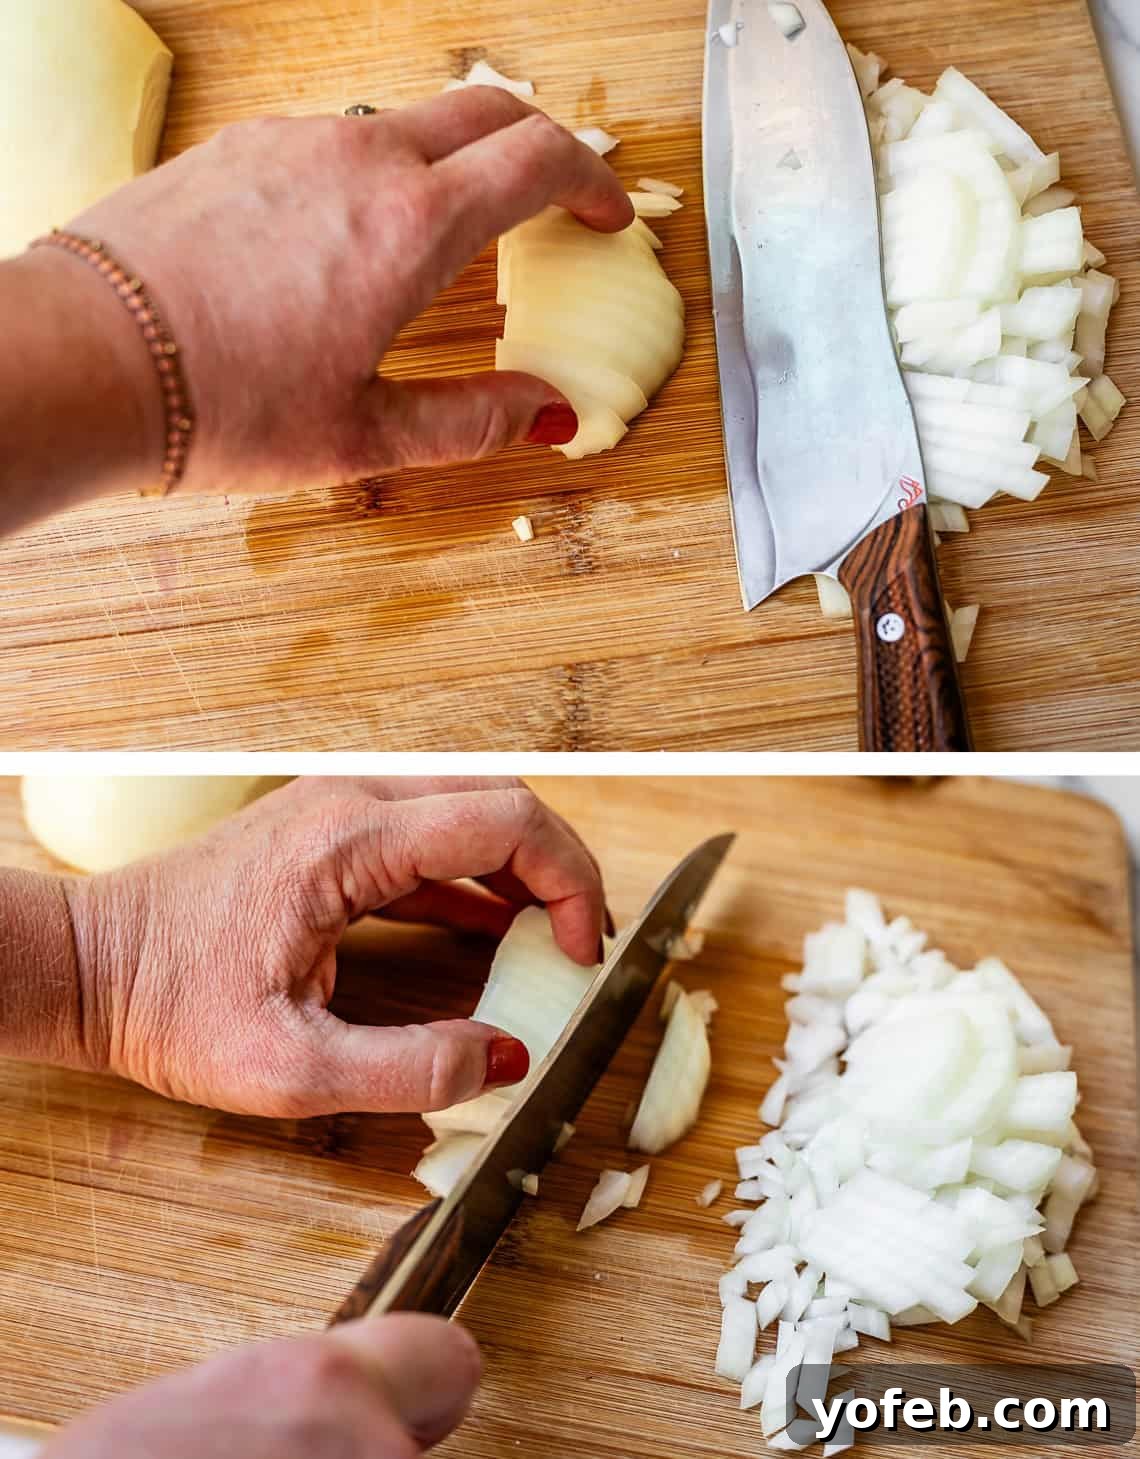
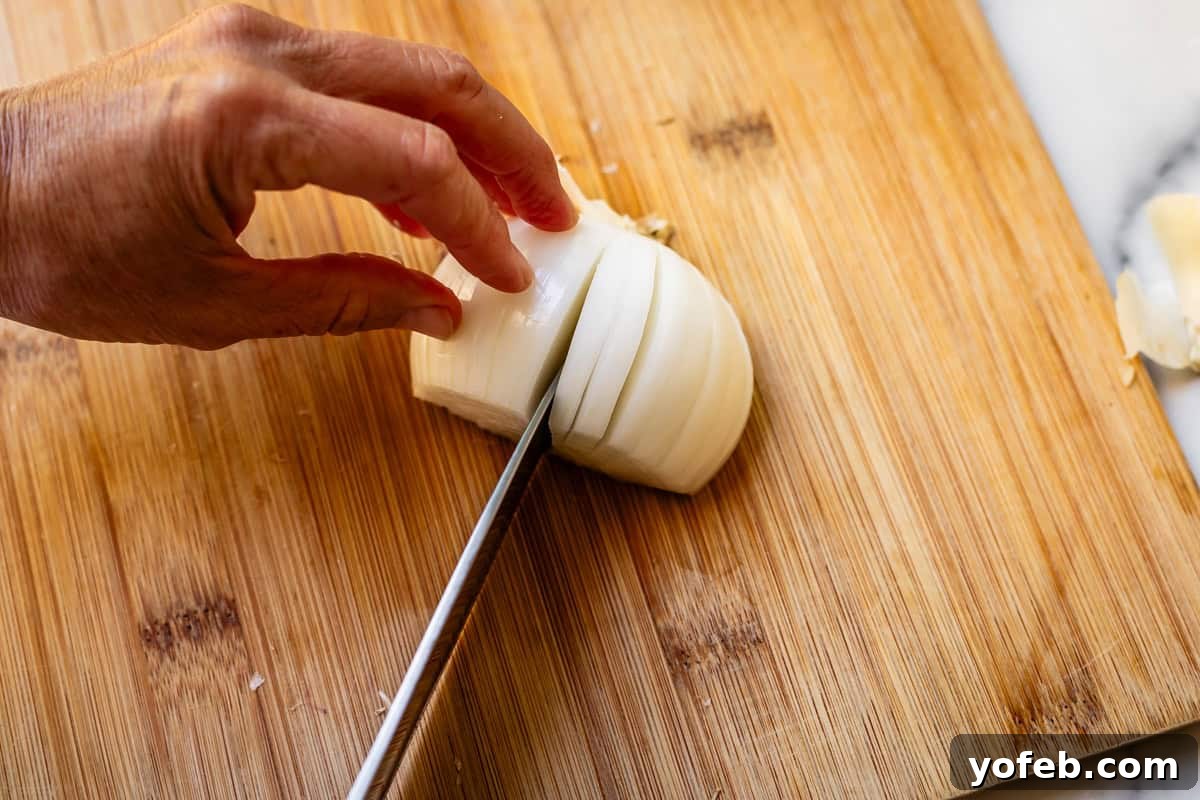
First Slices (Horizontal): Place one onion half, flat side down, on the cutting board. Make horizontal slices across the onion, from the top (where the stem was) towards the root end, but don’t cut all the way through the root. These slices should be spaced according to the desired dice size. Use your non-knife hand to hold the onion together, maintaining its half-moon shape. As you get closer to your thumb, flip the onion 180 degrees to keep your fingers safe and continue slicing.
-
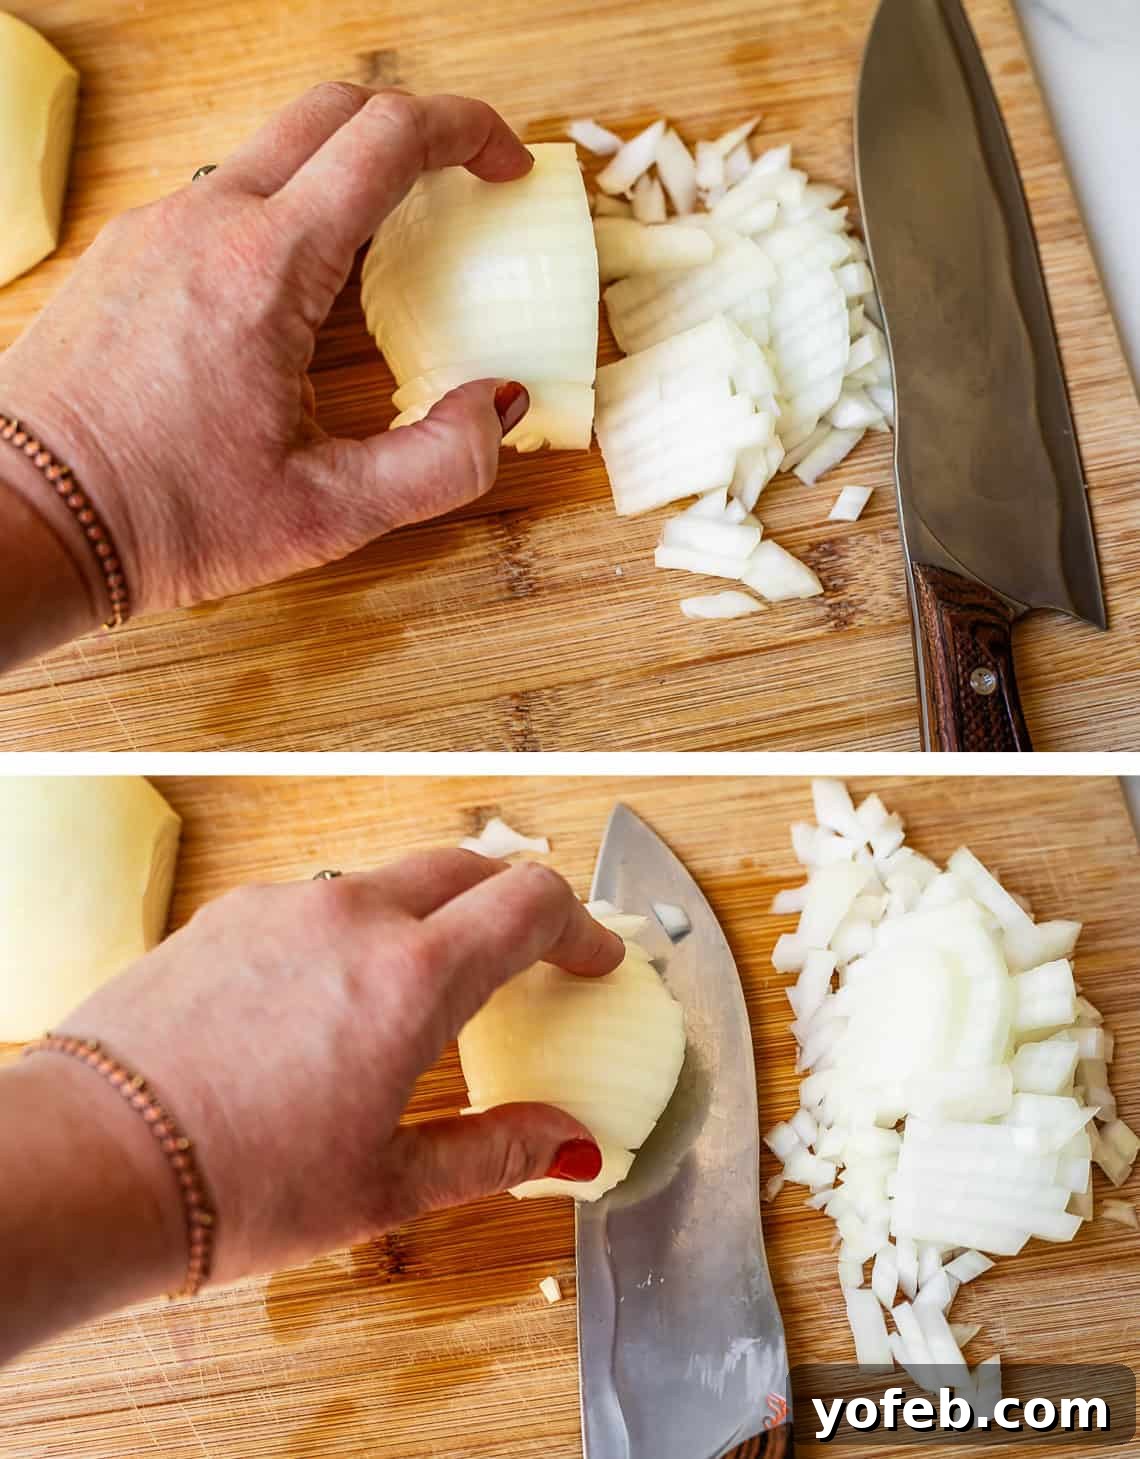
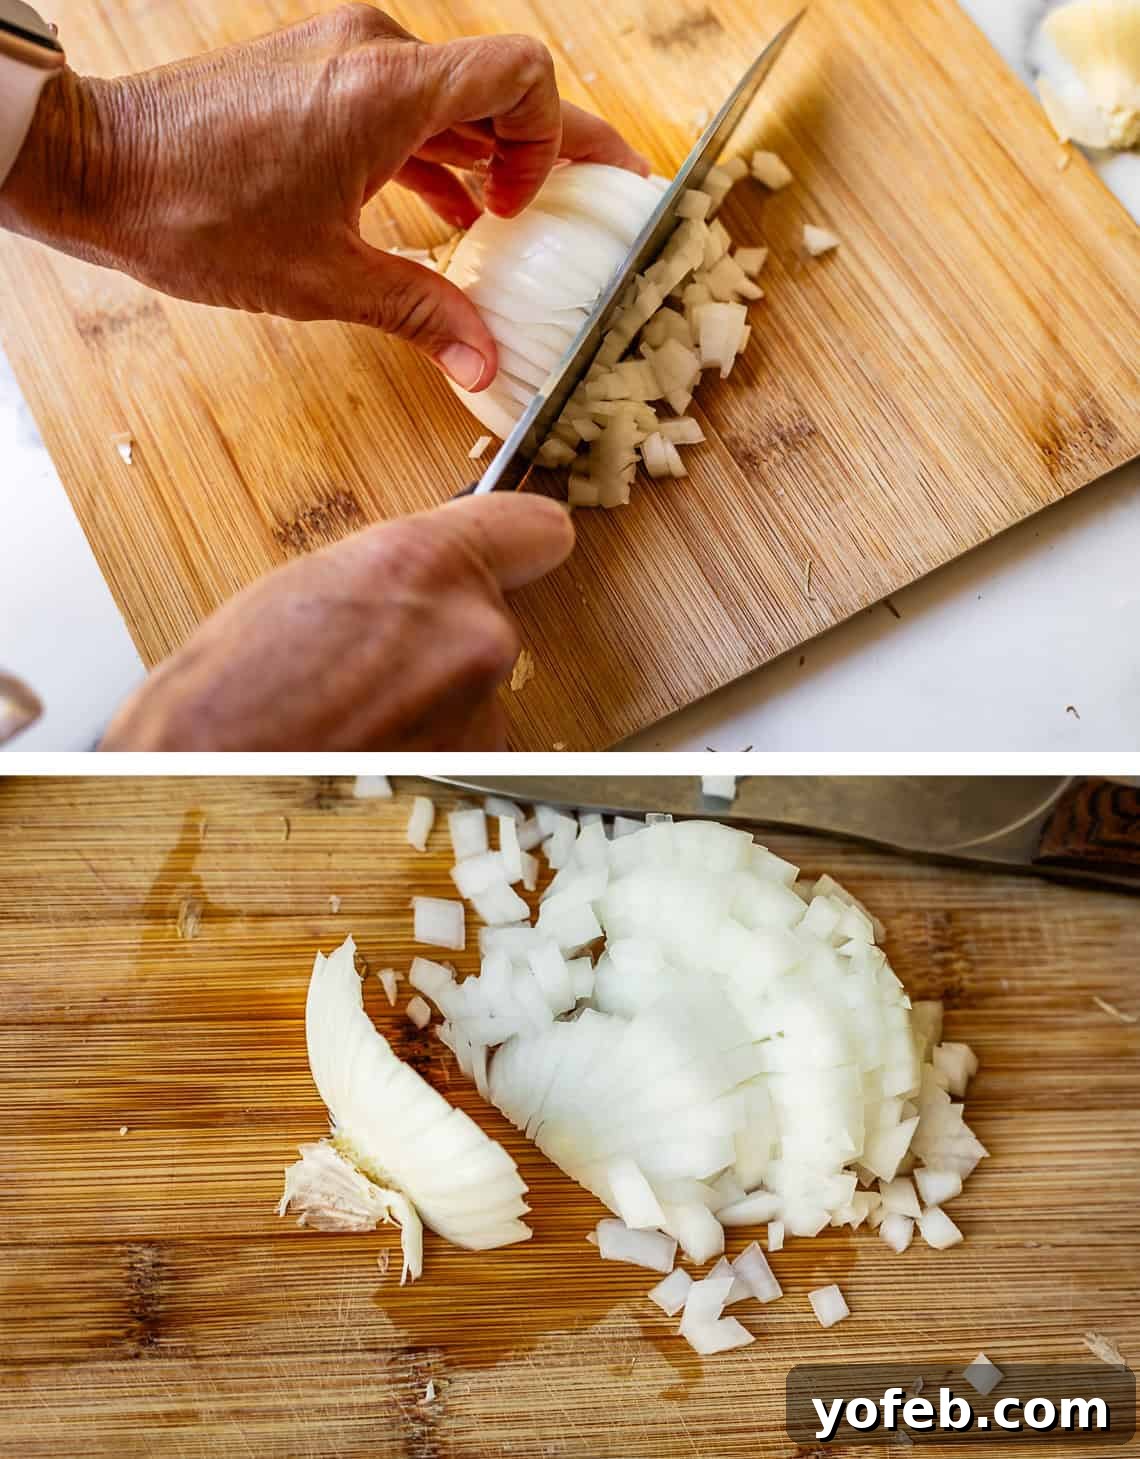
Second Slices (Vertical): Now, turn the onion half 90 degrees. Starting from one end, make vertical slices downwards, cutting through the horizontal slices you just made. These cuts will create your dice. Again, maintain a steady grip on the onion. As you approach your fingers, tilt the remaining onion piece down so the longest flat edge is on the cutting board, providing a more stable base for the final cuts. This part requires a bit of dexterity, but with practice, it becomes quick and safe.
-
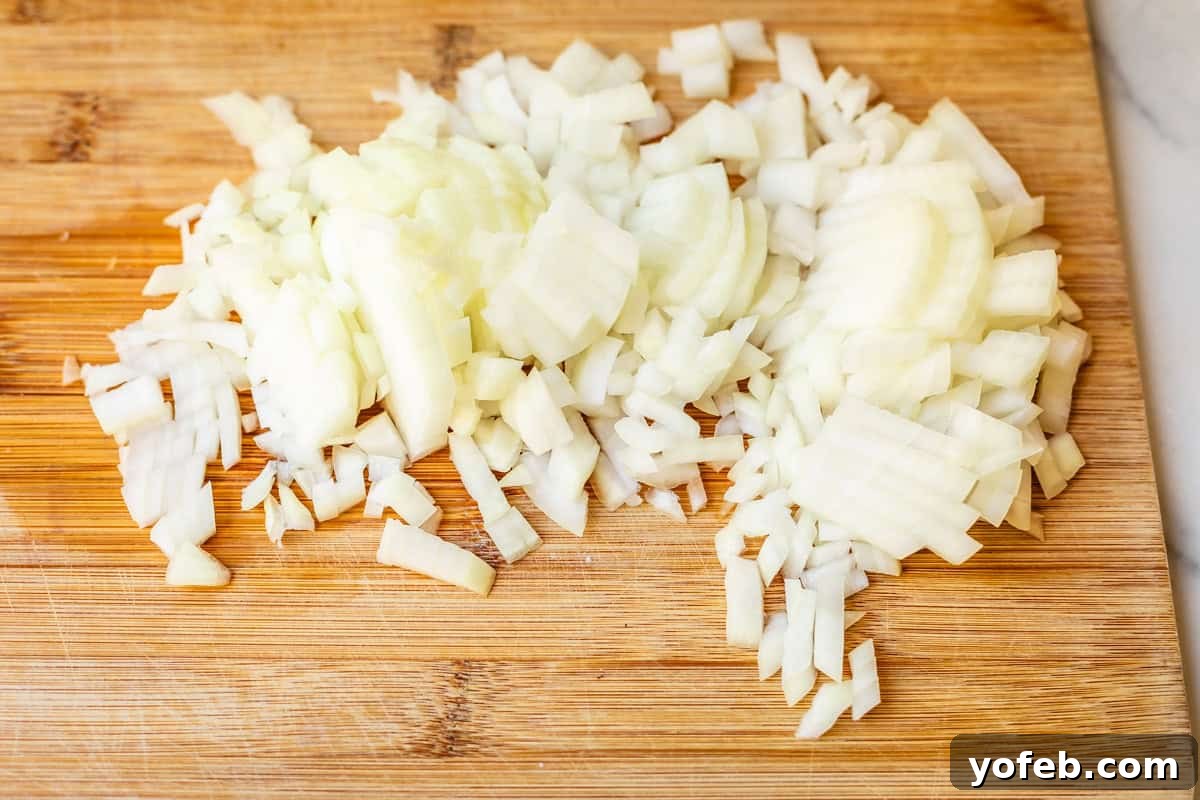
The Final Dice: Continue dicing until you’ve worked through the entire onion half. Repeat with the second half. Voila! You’ll have beautifully diced onions ready for your recipe.
How to Dice an Onion: The Chef’s Method
This technique is favored by culinary professionals for its efficiency and precision, often seen in high-paced kitchens. My kitchen assistant, Katie, who previously prepped for none other than Giada De Laurentiis, showed me the ropes of this “Real Chef” method. The key difference here is utilizing the root end to keep the onion intact, allowing for very uniform dicing.
-
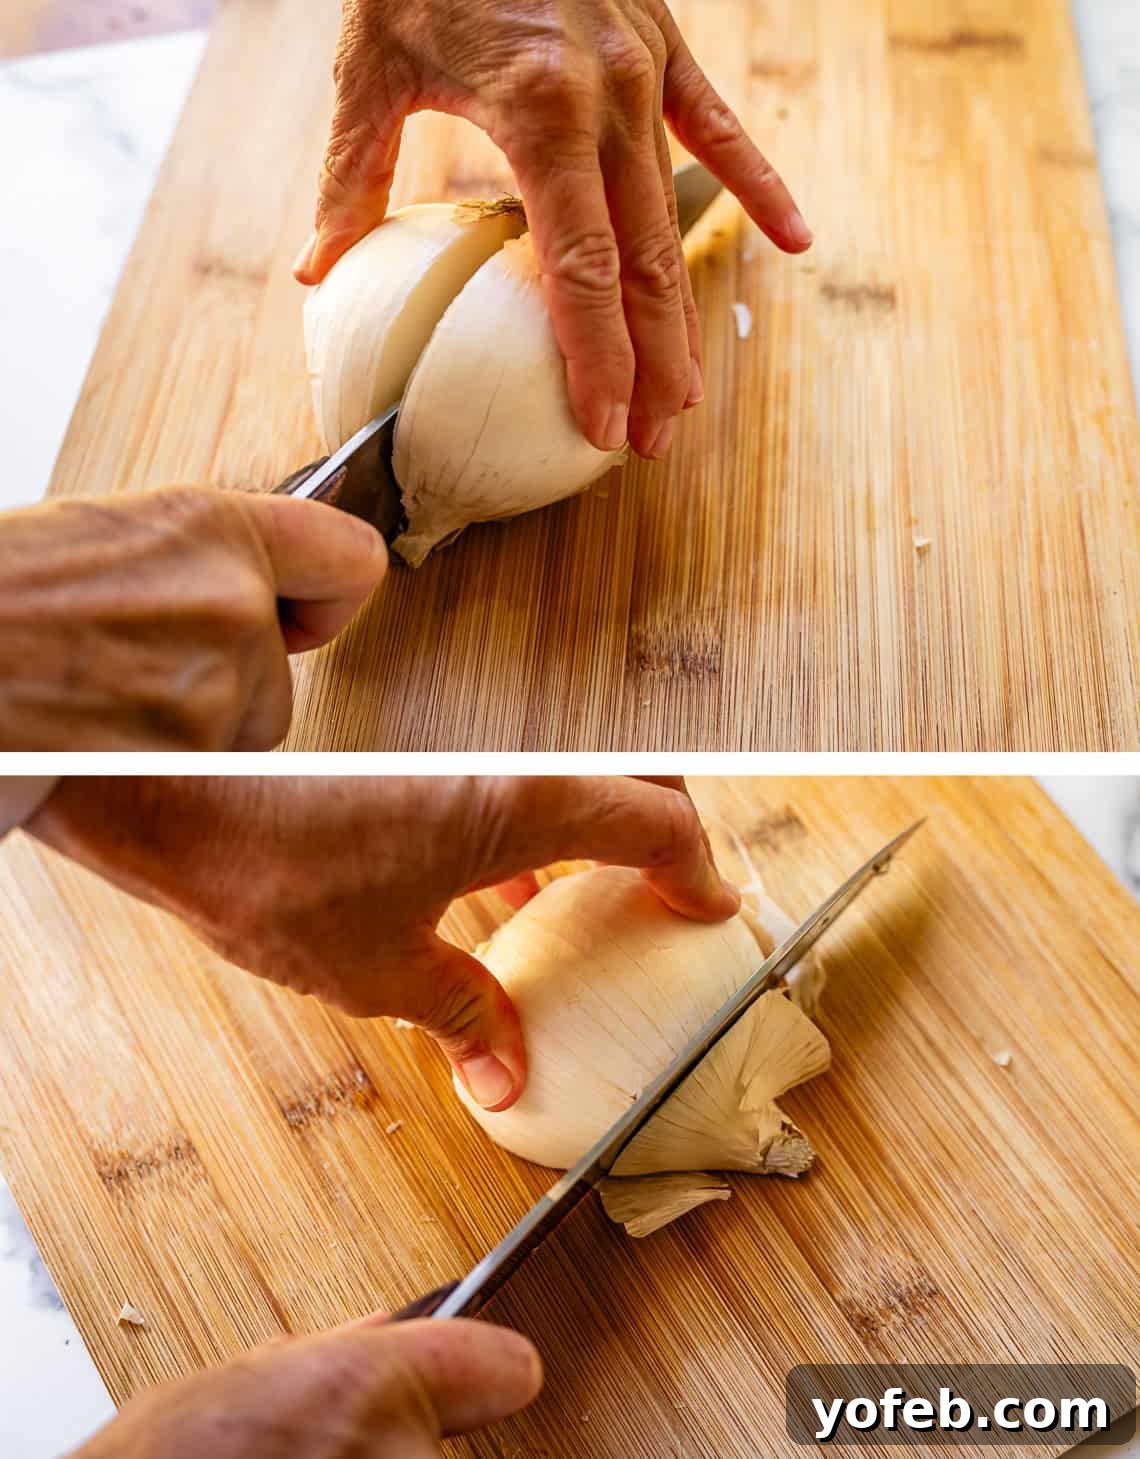
Halve Through the Root: Place the onion on its side. Using a sharp knife, cut the onion in half lengthwise, directly through the root end. This preserves the root, which will act as a natural handle and binder for the onion layers.
-
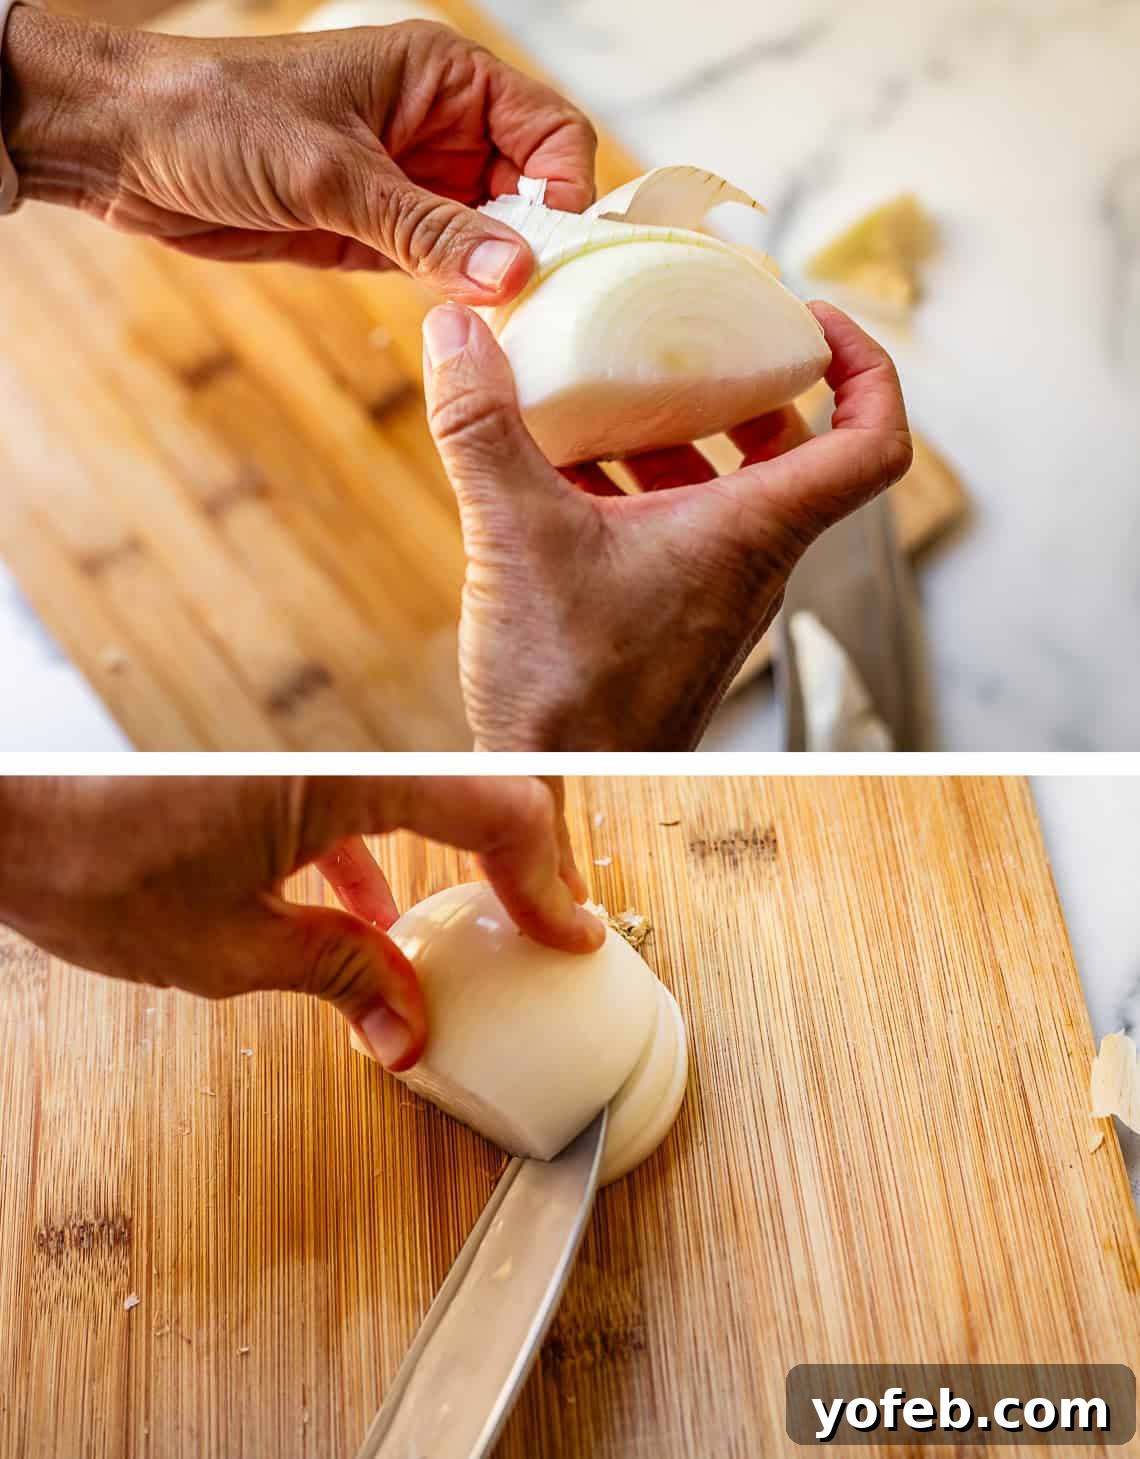
Trim and Peel: Place one onion half, cut side down, on the cutting board. Trim off only the papery stem end (the non-root end). Now, peel off the dry outer layers. You’ll need to yank the peel off the intact root end, but leaving the root intact ensures the onion layers stay together.
-
Horizontal Slices (Parallel to Cutting Board): With the cut side flat on the board and the root end still intact, make several horizontal cuts into the onion. For a fine dice, make more slices closer together. For a larger dice, fewer, wider slices. Be careful not to cut all the way through the root end, as it’s vital for holding the onion together. For the outermost layers, you might need to angle your knife slightly.
-
Vertical Slices (Towards the Root): Now, turn the onion 90 degrees so the root end is facing away from you. Make vertical cuts downwards, from the top (stem end) towards the root. Again, don’t cut through the root. These cuts will intersect with your horizontal cuts, forming precise diced pieces. The root acts as a hinge, preventing the onion layers from falling apart as you cut.
-
The Final Dice: Continue making vertical cuts until you reach the root end. The diced pieces will naturally fall away from the onion. Once you’ve cut as close to the root as safely possible, discard the small root piece. Repeat with the second onion half. This method truly impressed me with its speed and uniform results!
How to Slice an Onion for Rings and Sauteing
Slicing an onion is different from dicing, yielding beautiful rings or half-moon shapes perfect for burgers, salads, or caramelizing. Here’s how to achieve clean, even slices safely:
-
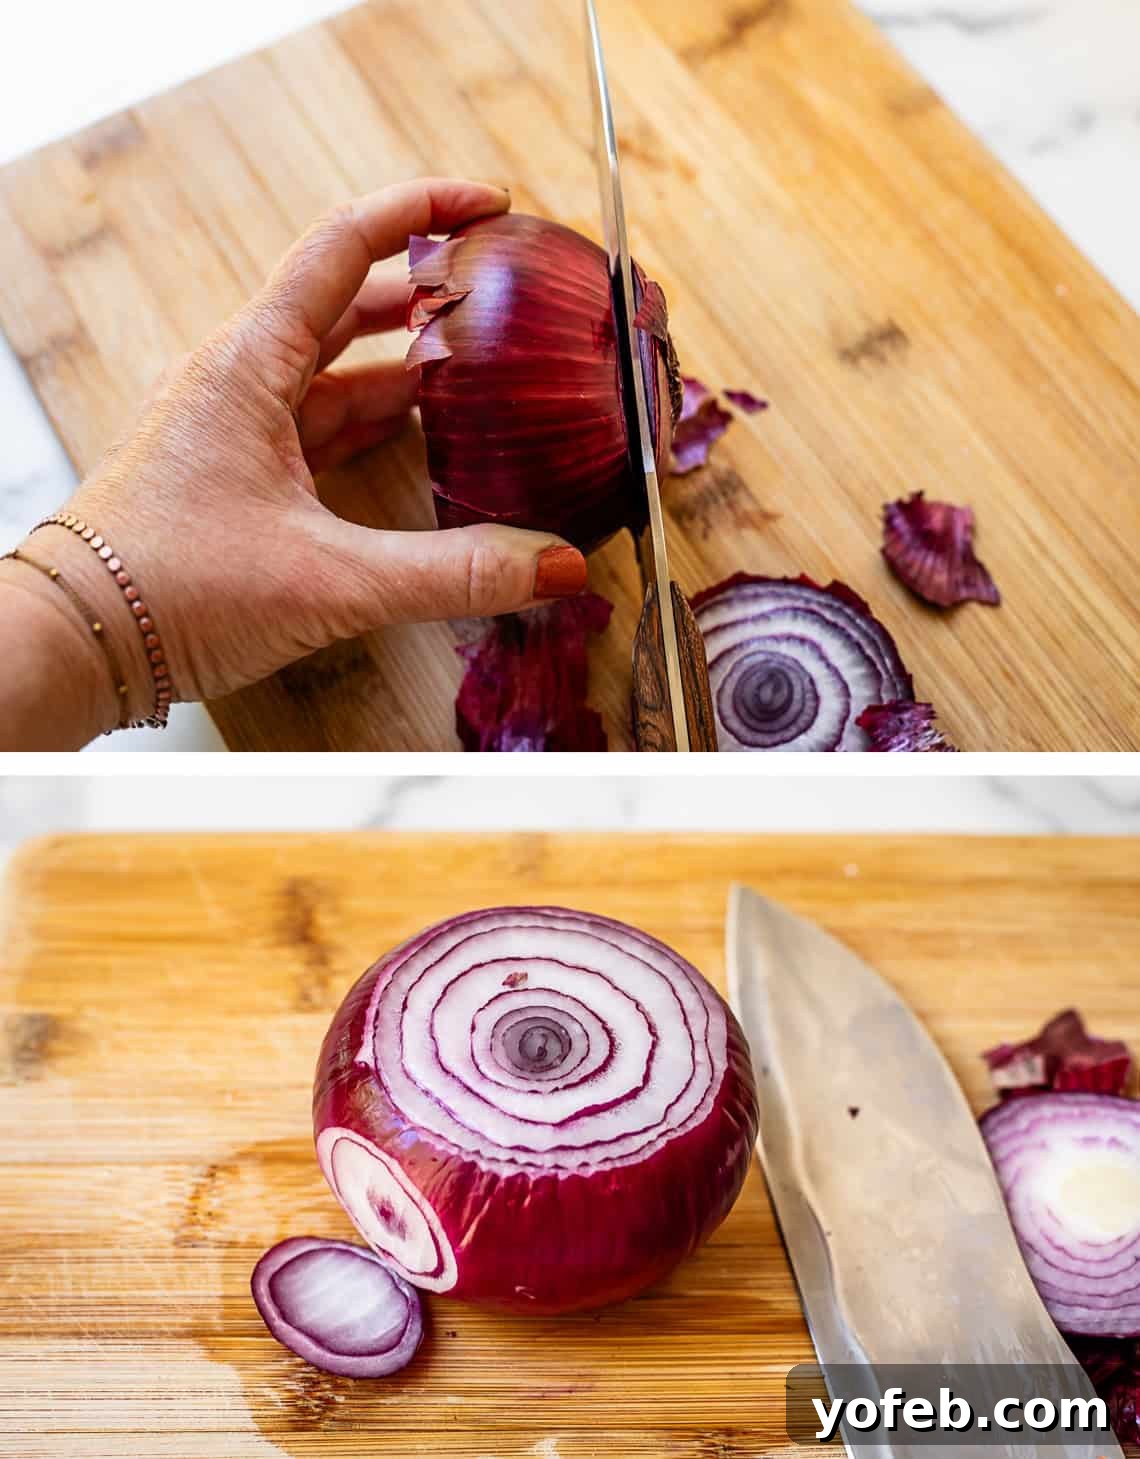
Prepare the Onion: For full rings, start by chopping off both the stem and root ends, just enough to create flat surfaces. For half-moon slices (often preferred for caramelizing or sautéing), you can halve the onion through the root first, then trim and peel.
-
Create a Stable Base: This is the key safety step. After trimming the ends, make a small, shallow slice along one rounded side of the onion. This creates a flat edge that you can place directly on your cutting board. This stable base prevents the onion from rolling, making it much safer to slice.
-
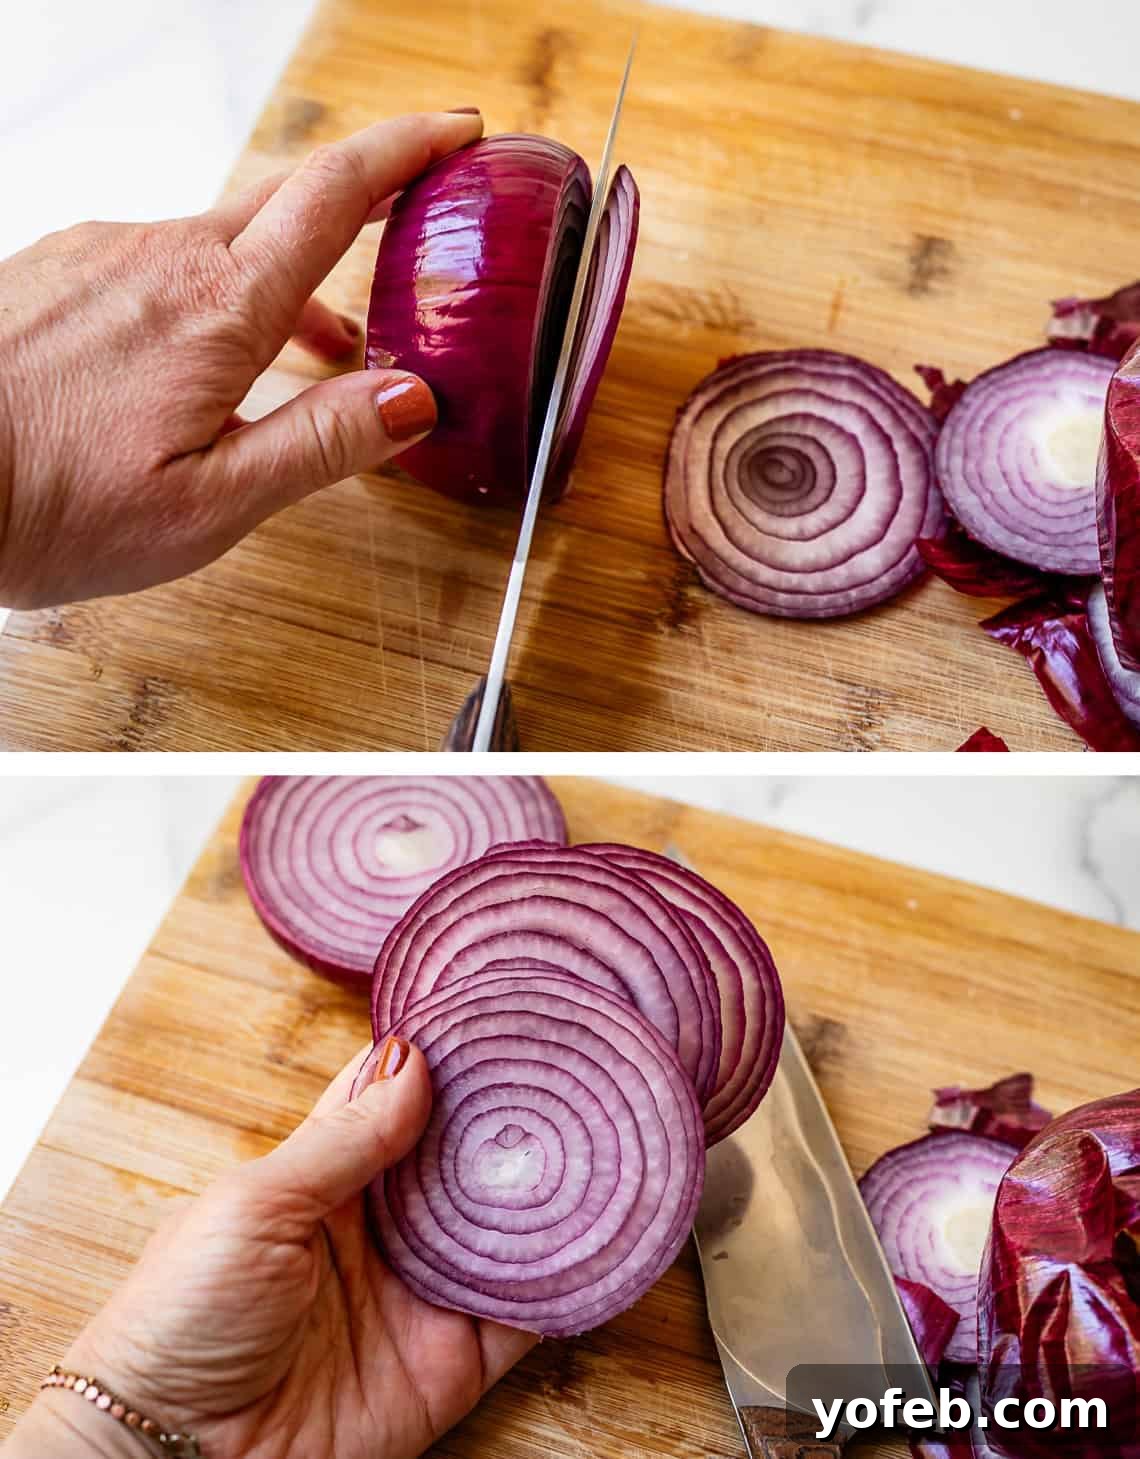
Slice to Desired Thickness: With the onion stable on its flat side, begin slicing across the onion to your desired thickness. Thinner slices are ideal for sandwiches, salads, or quick pickling. Medium slices are great for sautéing or stir-fries. Thicker slices are perfect for making onion rings or grilling. Maintain a consistent thickness for even cooking or uniform presentation.
-
Separate and Use: Once sliced, you can gently separate the onion rings or half-moons by hand. They’re now ready for your next culinary creation, whether it’s a juicy burger, a rich batch of caramelized onions, or a fresh salad!
Different Types of Onions and Their Uses
The world of onions is diverse, with each variety offering a distinct flavor profile and best use. Understanding these differences can elevate your cooking:
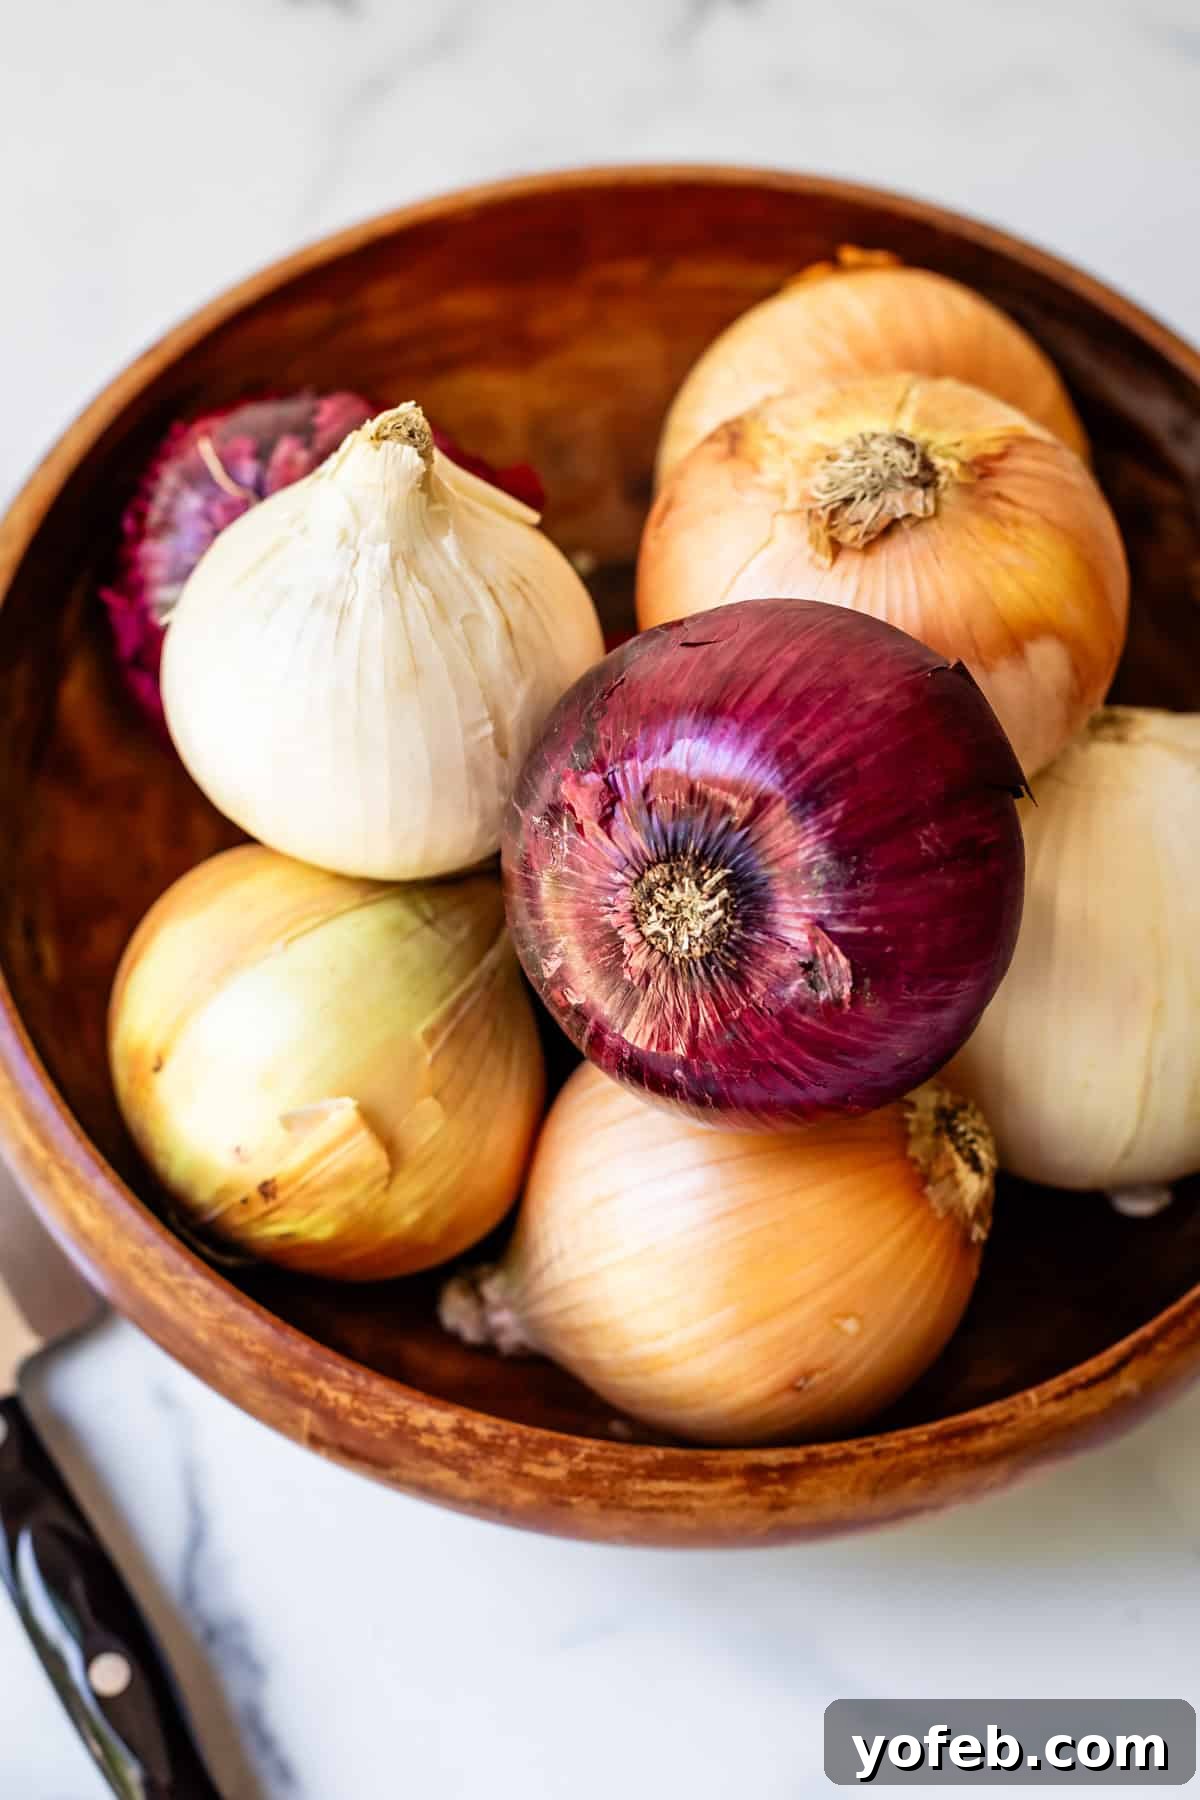
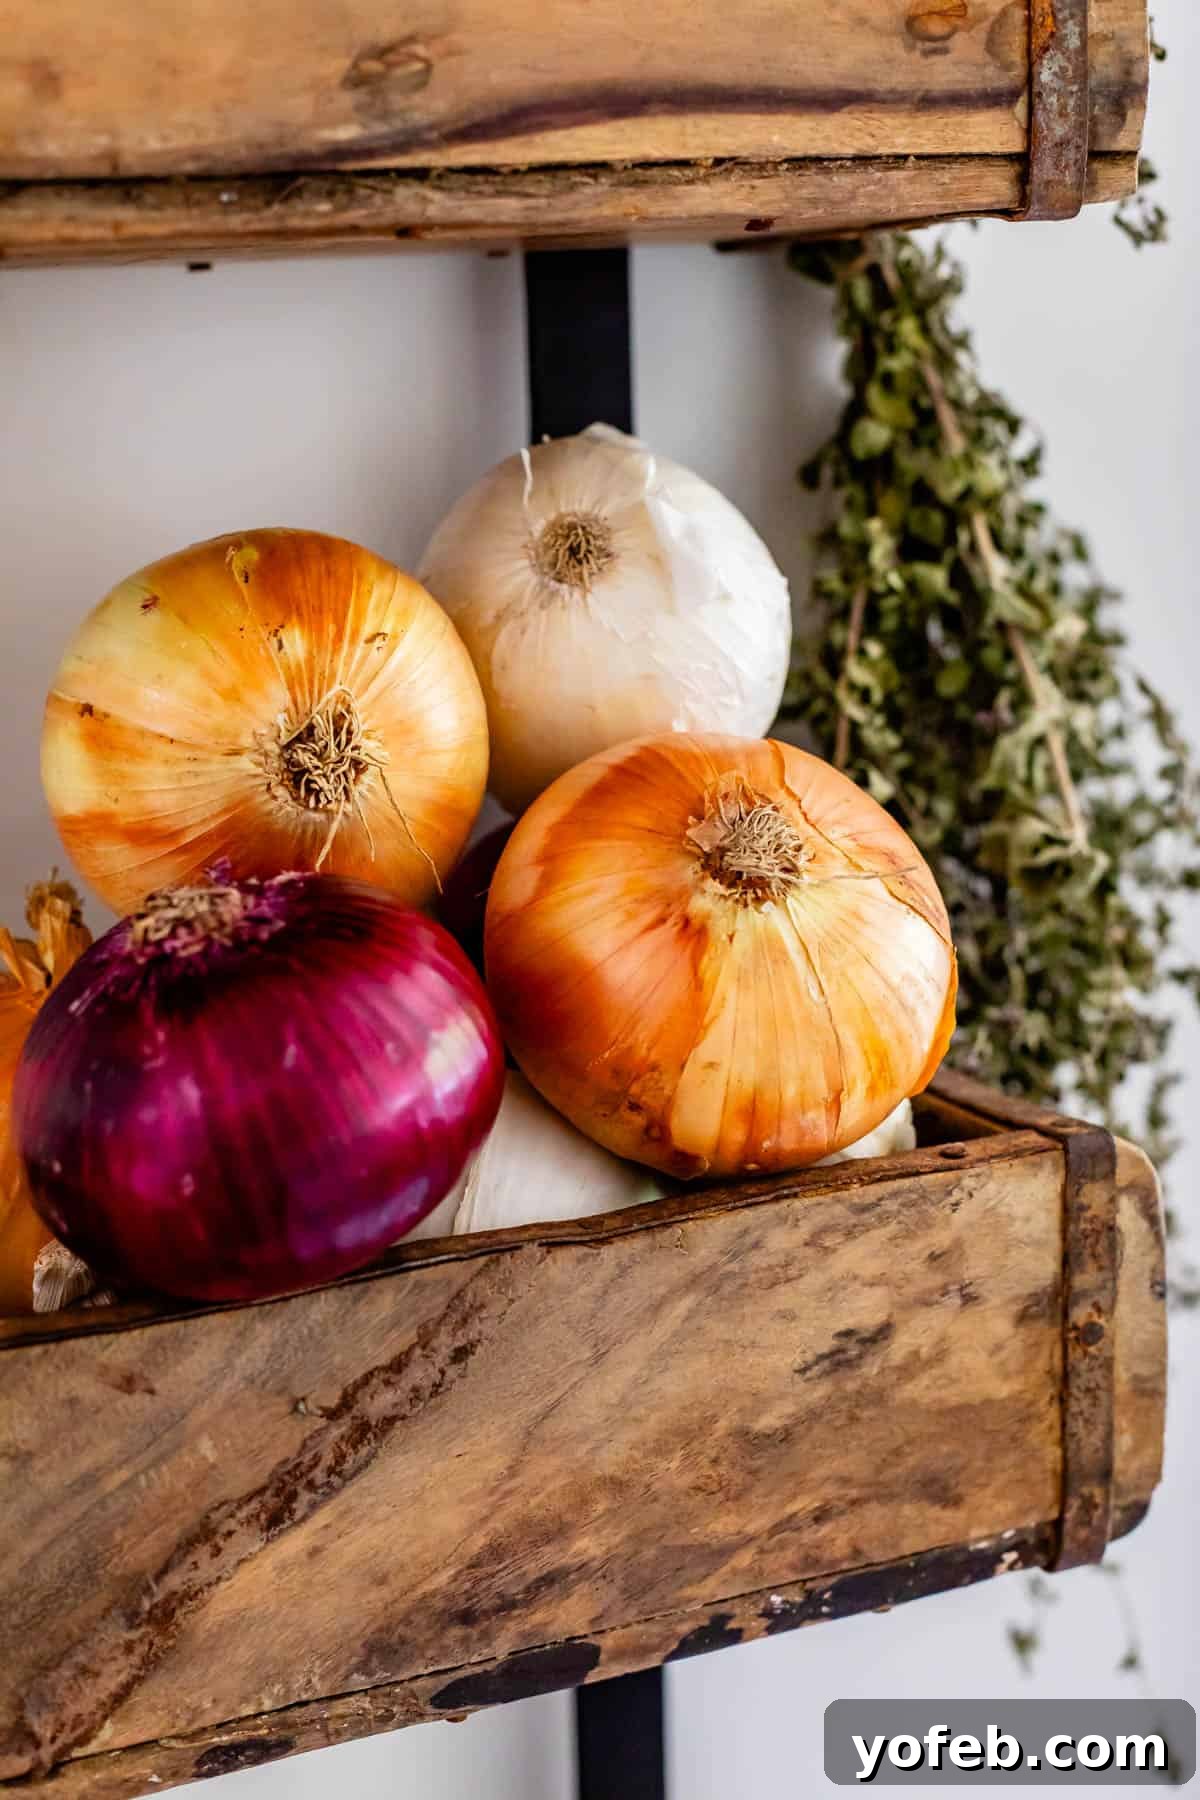
- Yellow Onions: The most common cooking onion. They have a strong, pungent flavor when raw but become sweet and mellow when cooked. Ideal for sautéing, caramelizing, soups, stews, and almost any savory cooked dish.
- White Onions: Generally milder and crisper than yellow onions. They have a sharper, more pungent flavor raw but sweeten quickly when cooked. Often used in Mexican cuisine, salads, and for dishes where a strong onion flavor is desired but quickly cooked out.
- Red Onions: Known for their beautiful purple-red skin and distinct color. They have a moderately pungent, slightly sweet flavor when raw, making them perfect for salads, sandwiches, and pickling. When cooked, their color can fade, and their flavor becomes milder.
- Sweet Onions (Vidalia, Walla Walla): These varieties are specifically bred for their high sugar content and low sulfur content, resulting in a very mild, sweet flavor even when raw. Excellent for onion rings, grilling, and raw applications where a gentle onion flavor is desired without the harsh bite.
- Shallots: Smaller and more delicate than standard onions, with a milder, sweeter, and more garlicky flavor. Often used in French cuisine, vinaigrettes, and sauces where a nuanced onion flavor is preferred.
Choosing the right onion for your recipe can significantly impact the final taste and texture of your dish. Don’t be afraid to experiment!
Storing Onions Properly
Once you’ve mastered cutting onions, knowing how to store them is crucial for maintaining freshness and preventing spoilage. Proper storage varies depending on whether the onion is whole or cut:
Whole Onions: Uncut, whole onions (yellow, white, red, sweet, or shallots) should be stored in a cool, dark, and dry place with good air circulation. A pantry, cellar, or basket in a cupboard is ideal. Avoid storing them in plastic bags, which can trap moisture and accelerate sprouting or spoilage. Keep them away from potatoes, as both release gases that can cause the other to spoil faster.
Cut Onions: Once an onion is cut, its shelf life dramatically decreases, and it starts to emit more pungent odors. To store sliced or diced onions:
- Refrigeration: Place cut onions in a tightly sealed airtight container or a heavy-duty freezer-grade ziplock bag. Standard sandwich bags are often too thin, allowing the smell to permeate your refrigerator. Stored this way, they will last for 3-5 days in the refrigerator.
- Freezing: For longer storage, freeze your chopped onions. Spread them in a single layer on a baking sheet and freeze until solid, then transfer them to a freezer-safe bag or container. This prevents them from clumping together. Frozen onions are fantastic for tossing directly into soups, stews, casseroles, omelets, or any cooked dish where texture isn’t paramount. However, freezing changes their cellular structure, making them softer. Therefore, frozen onions are not recommended for recipes requiring a crisp texture, like fresh pico de gallo or salads.
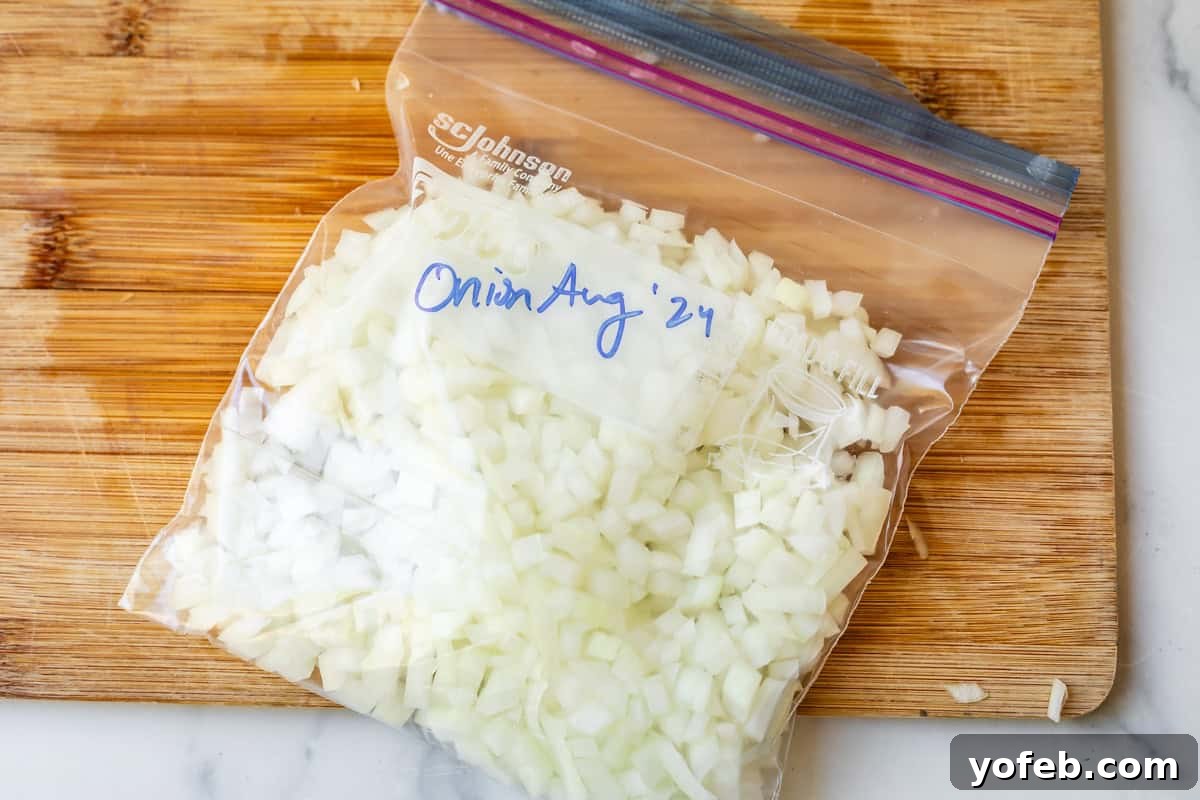
Proper storage not only extends the life of your onions but also ensures they retain their best flavor and texture for your culinary endeavors.
Frequently Asked Questions About Cutting Onions
Do you have to peel an onion before cutting it?
Yes, for most culinary uses, you should peel the dry, papery outer skin of an onion before cutting it. This skin is tough, unappetizing, and doesn’t break down well during cooking. The easiest way to peel is by first trimming off both the stem and root ends, which allows the skin to be more easily detached. If the skin is particularly stubborn, you can make a shallow lengthwise incision through the skin on one side and then peel it away from that point.
What side of the onion do you not cut?
In many professional cutting techniques, particularly when dicing, you intentionally leave the root end of the onion intact for as long as possible. The root end, with its fibrous network, acts as a natural binder, holding the onion’s concentric layers together. This stability makes it easier and safer to make precise cuts without the onion falling apart, allowing for more uniform dice and reducing the risk of accidental slips.
How do I properly chop an onion like Gordon Ramsay?
To chop an onion like a professional chef, akin to methods often demonstrated by Gordon Ramsay, follow the “Chef’s Method” described earlier in this article. This involves cutting the onion in half through the root, making horizontal cuts (without severing the root), and then making vertical cuts towards the root. This technique leverages the root’s integrity to achieve highly uniform diced pieces with efficiency.
How do I properly chop an onion like Chuck Norris?
Chuck Norris chopped an onion. The onion cried.
Delicious Recipes Starring Onions!
Now that your onion cutting skills are sharpened, it’s time to put them to good use! Onions are the unsung heroes of the kitchen, forming the aromatic base for countless dishes. Here are some of my favorite recipes where onions truly shine, showcasing their versatility and flavor impact:
- French Onion Soup >> The quintessential onion dish. Layers of caramelized onions simmered in rich broth, topped with crusty bread and melted cheese – pure comfort!
- Caramelized French Onion Dip >> Forget the store-bought stuff! This homemade version, bursting with slow-cooked caramelized onion sweetness, is a thousand times more amazing.
- Mac and Cheese with Caramelized Onions >> A sophisticated twist on a classic, the sweet onions add incredible depth to this creamy comfort food.
- The Chicken Fajitas Recipe That Changed My Mind >> Sautéed onions and peppers are the heart of perfect fajitas, adding essential sweetness and texture.
- Bacon and Goat Cheese Aioli Burger with Crispy Onion Strings >> Elevate your burger game with the irresistible crunch and flavor of crispy onion strings.
- How to Make Pico de Gallo >> Fresh, finely diced red onion is a non-negotiable ingredient for vibrant and flavorful salsa.
- French Onion Soup from Marion’s Kitchen >> Another fantastic recipe for the ultimate onion soup.
- Beer Battered Onion Rings from Don’t Go Bacon My Heart >> Perfect for those thicker onion slices you mastered!
- Easy Blooming Onion from Small Town Woman >> A show-stopping appetizer that puts your knife skills to the test.
And remember, you can always peruse my Dinner Recipes collection, as most of them happily feature the humble, yet powerful, onion!
Facebook | Pinterest | Instagram

How to Cut an Onion: Recipe Guide
Rate this Recipe
Print Recipe
Master the art of onion cutting without the tears! This guide provides easy-to-follow instructions for dicing and slicing onions, along with practical tips to prevent eye irritation. Perfect your skills for dishes like Pico de Gallo, French Onion Dip, or Spaghetti.
Equipment
- Sharp Chef’s Knife
- Swim Goggles (optional, but highly recommended for tear prevention)
- Cutting Board
Ingredients
- Onions (yellow, white, or red, depending on recipe)
Instructions
- Home Cook’s Method (Karen’s Version): (Refer to photo tutorial above for visuals) Begin by putting on your goggles if using. Chop off both the root and stem ends of the onion to create flat surfaces. Stand the onion on one flat end and slice it in half lengthwise. Peel off the outer papery layers from each half.
- Place one onion half, flat side down, on the cutting board. Make horizontal slices across the onion, without cutting through the root end, to achieve small half-moon shaped pieces. Use your non-knife hand to keep the slices together. As you near your fingers, rotate the onion or cutting board to maintain safety.
- Once the onion is sliced horizontally, turn your cutting board 90 degrees. Start making vertical cuts through the onion to dice it. When you get close to your fingers, lay the remaining onion piece down on its long flat end for stability and continue chopping until fully diced.
- Chef’s Method: Slice the onion in half lengthwise, directly through the root end. Trim off only the papery stem end. Peel the dry outer layers from each half, pulling firmly at the root end to keep the layers intact.
- Place an onion half, cut side down, on the board. Make several horizontal slices into the onion, ensuring not to cut all the way through the root end. Angle your knife slightly for the curved outer layers.
- Turn the onion 90 degrees so the root end faces away. Make vertical cuts downwards, from the stem end towards the root, forming diced pieces. The root will hold the layers together. Continue until the onion is fully diced, then discard the small root piece.
- How to Slice an Onion into Rings: First, cut a small, shallow slice off one rounded side of the whole onion to create a flat, stable base. Place the onion on this flat side to prevent it from rolling. Then, slice through the onion at your desired thickness. Thinner slices are best for sandwiches and salads, while thicker ones are ideal for onion rings or grilling.
- How to Slice an Onion (Half-Moons) for Caramelizing/Salads: Cut off both the root and stem ends. With a flat end on the bottom, slice the onion in half lengthwise. Peel the outer layers from each half. Place the flat, cut side of the onion down on the cutting board. Slice the onion across, creating uniform half-moon shapes.
- How to Mince an Onion: Follow either the Home Cook’s or Chef’s dicing method, but make all your initial horizontal and subsequent vertical cuts much closer together to achieve very fine pieces.
- Once finished with any method, use the flat side of your knife to scoop the chopped, diced, or sliced onion off your cutting board and into your dish.
- Storage: To save cut onions for later, place them in an airtight container or a heavy-duty ziplock bag. They can be refrigerated for 3-5 days or frozen for longer storage (best for cooked dishes, as texture softens).