
Effortlessly Elegant: The Ultimate Unfrosted Coconut Layer Cake Recipe
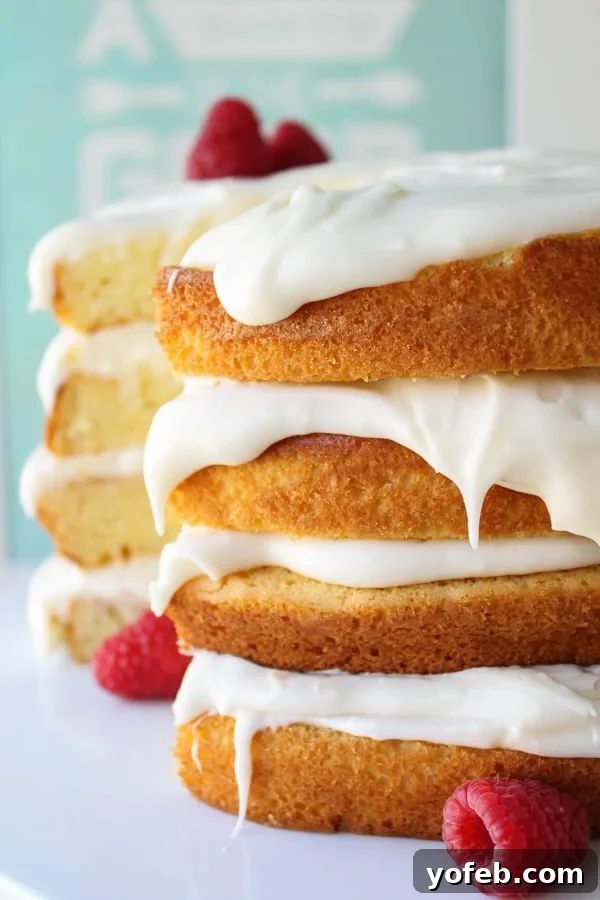
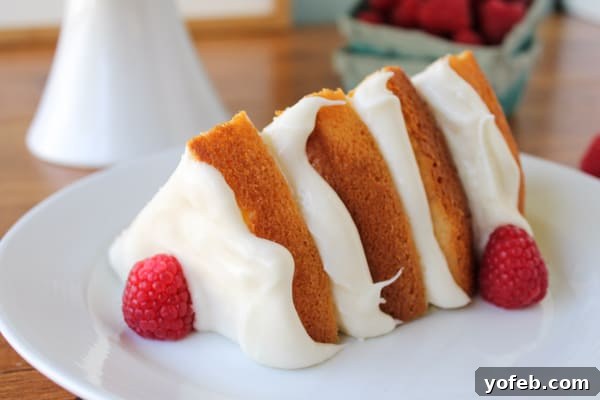
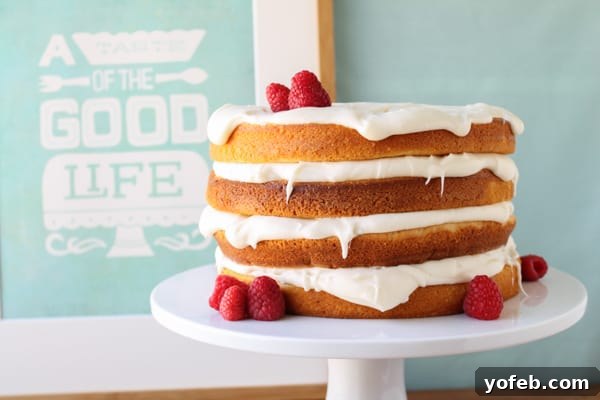
Are you one of those bakers who sighs at the thought of frosting a cake? The endless pursuit of smooth, perfect sides, the frustration of crumbs mixing with your pristine icing? If so, you’re in for a treat! This easy, unfrosted Coconut Layer Cake, affectionately known as a “naked cake,” is your perfect solution. Instead of striving for perfection, we embrace the “rustic” look, celebrating the beautiful layers of cake and luscious filling without the pressure of a flawlessly frosted exterior. It’s a delightful way to present a cake that feels both sophisticated and wonderfully approachable.
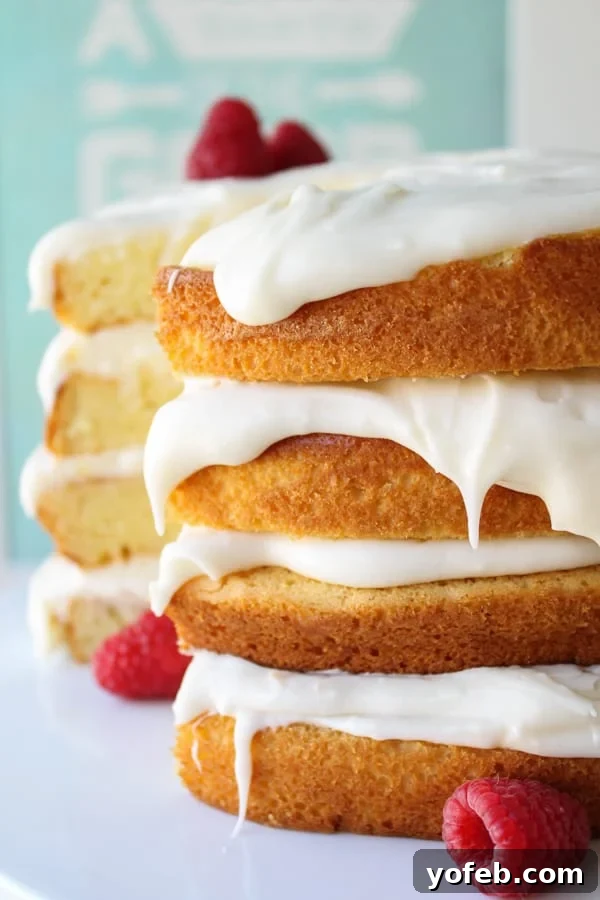
Life is full of moments where we aim for an ideal, whether it’s managing a busy schedule or presenting a picture-perfect dessert. Sometimes, however, the most charming results come from letting go of rigid expectations and embracing simplicity. That’s exactly the philosophy behind this naked coconut cake. It’s designed for those who want to impress with flavor and presentation, but without the elaborate frosting techniques. You get all the incredible taste and satisfying texture of a multi-layered cake, with a presentation that’s naturally elegant and inviting.
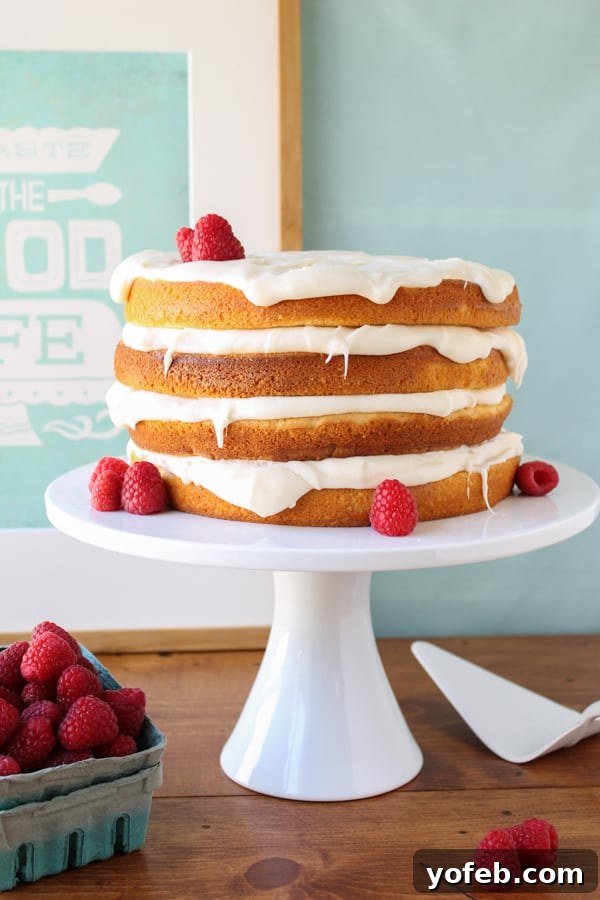
This recipe transforms a humble box of white cake mix into something extraordinary. By “doctoring” the mix with a few key ingredients like vanilla pudding, sour cream, and a generous splash of coconut extract, we achieve a cake that is unbelievably moist and bursting with a clean, tropical coconut flavor. The best part? There’s no shredded coconut in the cake itself, making it ideal for those who love the taste but aren’t keen on the texture of coconut flakes. However, for true coconut enthusiasts, a sprinkle of toasted flakes on top would be a fantastic addition!
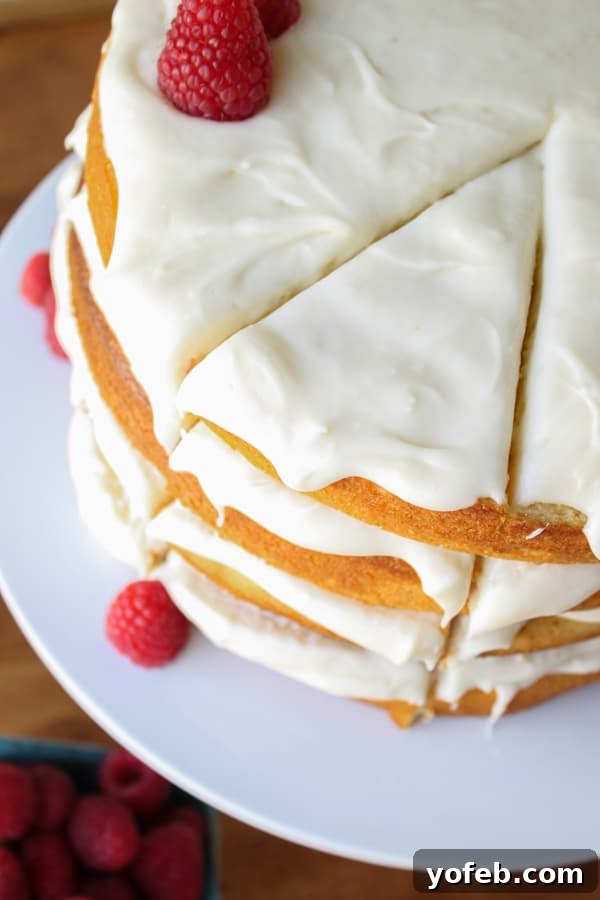
The Allure of the Naked Cake
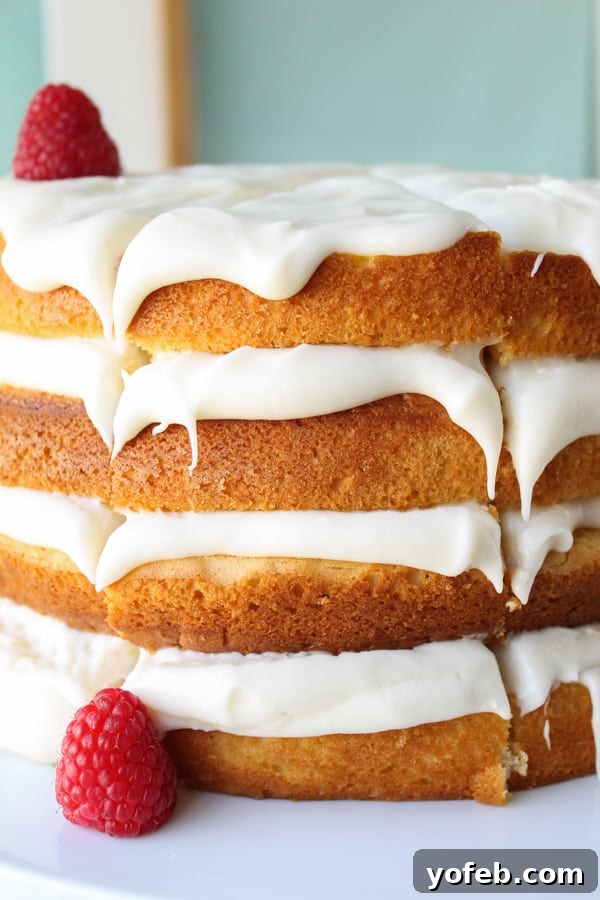
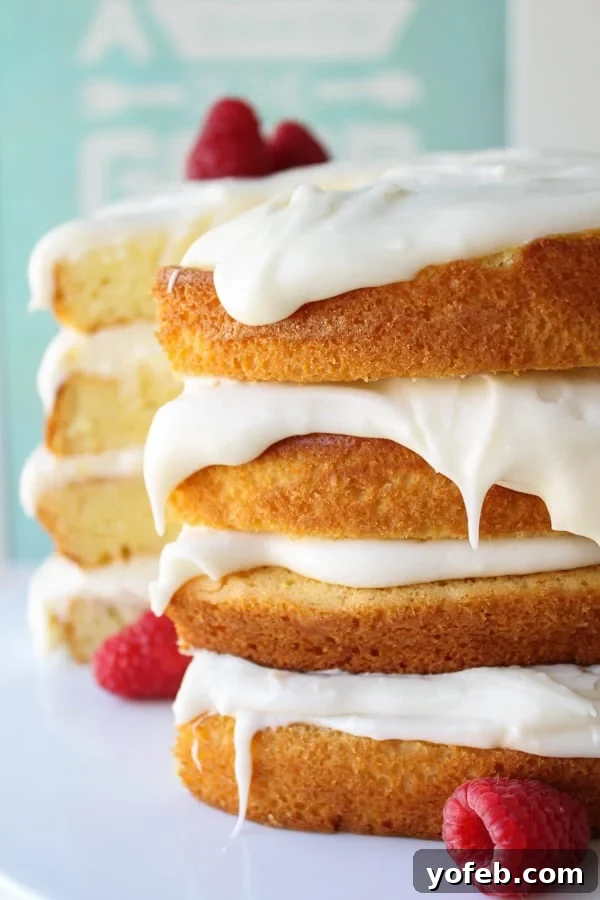
The “naked cake” trend has captured the hearts of bakers and dessert lovers worldwide, and for good reason. It’s a beautiful departure from heavily frosted confections, allowing the natural colors and textures of the cake layers and the creamy filling to shine through. This style of cake offers several advantages:
- Effortless Elegance: The visible layers create a rustic, yet sophisticated appeal that is perfect for any occasion, from casual family dinners to elegant celebrations.
- Reduced Sweetness: With less frosting on the exterior, these cakes can often feel lighter and less overwhelmingly sweet, allowing the flavors of the cake and filling to truly stand out.
- Focus on Flavor: The emphasis shifts from intricate frosting designs to the quality and taste of the cake itself and the delicious filling between the layers.
- Beginner-Friendly: For those intimidated by traditional cake decorating, the naked cake is a liberating choice. Imperfections are celebrated as part of its charm.
Ingredients That Make the Difference
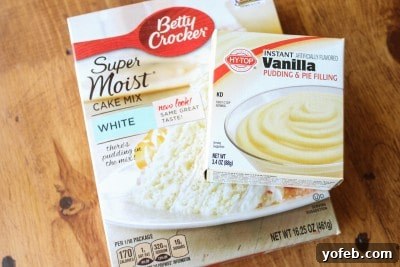
Our Coconut Layer Cake starts with a convenience item – two boxes of white cake mix – but we elevate it to gourmet status with a few simple additions. This clever approach saves time without sacrificing flavor or texture. Here’s a closer look at what makes this cake so special:
- White Cake Mix: Provides a reliable base, ensuring a consistent and tender crumb every time. Using two boxes creates a beautifully tall, impressive four-layer cake.
- Vanilla Pudding Mix (dry): This is the secret to an incredibly moist cake. When added directly to the batter, the pudding mix works its magic during baking, creating a super tender and luscious texture that lasts.
- Sour Cream: Another key ingredient for moisture and richness. Sour cream adds a delightful tang and helps create a fine, soft crumb, preventing the cake from becoming dry.
- Coconut Extract: This is where the intense coconut flavor comes from. Unlike shredded coconut, which can alter the cake’s texture, the extract infuses pure coconut essence throughout the layers, satisfying your tropical cravings without any chewy bits.
- Cream Cheese Frosting: A classic pairing for coconut, our frosting is rich, tangy, and perfectly balanced. It serves as the delicious “glue” between our layers, providing a creamy contrast to the moist cake.
Tips for Baking Flawless Cake Layers
Even though this is an “easy” cake, a few simple tips will ensure your layers bake up perfectly every time, providing a sturdy and delicious foundation for your naked masterpiece:
- Room Temperature Eggs: Always use room temperature eggs. They incorporate more evenly into the batter, leading to a smoother mixture and a more consistent cake texture. If you forget to set them out, simply place them in a bowl of warm water for 10-15 minutes.
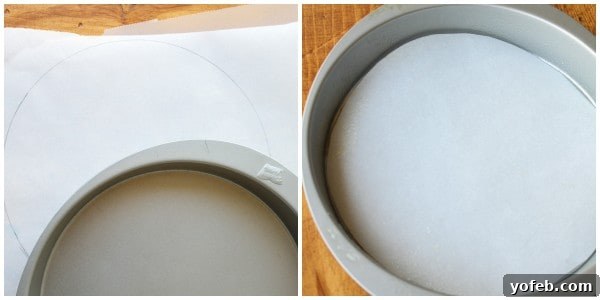
- Prepare Your Pans Properly: Lining the bottoms of your cake pans with parchment paper is crucial for easy release. After greasing the pans, trace the bottoms onto parchment, cut out circles, and place them in the pans. This step is a lifesaver for ensuring your cakes don’t stick.
- Don’t Overmix: While you want to thoroughly combine ingredients, overmixing can develop the gluten in the flour, resulting in a tough cake. Beat until just combined and fluffy.
- The Low and Slow Bake: Baking at 300°F (rather than the higher temperature often recommended on cake mix boxes) is a deliberate choice. This lower temperature ensures that the cake bakes evenly, allowing the edges to remain tender and prevent excessive browning – which is particularly important for an unfrosted cake where the edges will be visible.
- Cool Completely: Allow your cakes to cool in their pans for about 10 minutes before inverting them onto a wire rack to cool completely. This prevents breakage and allows the cake to set. Leaving the parchment paper on during cooling can also help.
- Leveling is Key: Once cooled, use a sharp serrated knife to carefully slice off any domes from the top of your cake layers. This creates flat surfaces, essential for a stable and even stacked cake. Don’t discard the scraps – they’re perfect for filling in gaps during assembly!
- Consider Freezing Layers: For ultimate ease of handling and an even moister cake, wrap each cooled, leveled cake layer tightly in plastic wrap (use plenty!) and freeze for at least an hour, or up to 24 hours. Assembling a frozen cake makes it much less prone to breakage and crumbling. Just remember to allow a few hours for it to thaw once assembled.
Crafting Your Luscious Coconut Cream Cheese Frosting
The filling for this cake is a rich and tangy coconut cream cheese frosting. It’s simple to make but delivers big on flavor and texture, providing the perfect counterpoint to the sweet cake layers.
- Butter First: Start by beating the unsalted butter until it’s light and fluffy. This aerates the butter, contributing to a lighter frosting.
- Cold Cream Cheese: Unlike butter, cream cheese should be cold when you add it. This helps it hold its shape and prevents a runny frosting. Beat it well with the butter until creamy and smooth.
- Coconut Extract & Salt: These are essential for depth of flavor. The coconut extract enhances the tropical notes, while a good pinch of salt balances the sweetness of the powdered sugar.
- Gradual Sugar Addition: Add powdered sugar one cup at a time, mixing well after each addition. This prevents a powdery explosion and allows you to control the consistency. If your frosting seems too thin, a little more powdered sugar can firm it up; if too thick, a tiny splash of milk or cream can loosen it.
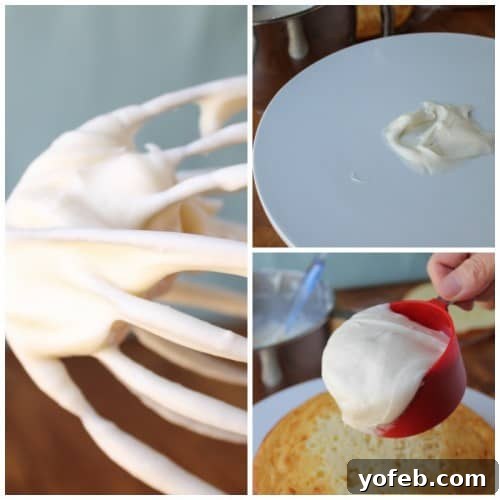
Assembling Your Rustic Masterpiece
Assembling a naked cake is where the “rustic” charm truly comes to life. Don’t worry about perfection; instead, embrace the natural flow of the frosting and layers.
- Secure the Base: Place a small dollop of frosting on your cake plate or stand before positioning the first cake layer. This acts as an anchor, preventing the cake from sliding around during assembly and serving.
- Generous Filling: Don’t be shy with the frosting between layers! Heap about a cup in the center of each layer and use an offset spatula to spread it gently towards the edges. Let it peek out slightly for that classic naked cake look.
- The “Rustic” Edge: If you prefer a clean, sharp look, spread your frosting neatly to the cake’s edge. But for a charmingly “rustic” appearance, allow the frosting to spread unevenly, creating a more organic, free-form border. Both are beautiful!
- Stabilize Any Tilting: If you notice your cake layers are slightly uneven or the stack begins to tilt, don’t despair! Use small cake scraps (saved from leveling the layers) to fill in any low spots in the middle of a layer before adding more frosting and the next cake layer. This trick helps create a level cake effortlessly.
- Chilling for Stability: If you’re concerned about your frosting becoming too soft or “smooshing” out the sides, refrigerate the assembled cake for about an hour. This helps the frosting firm up, providing more stability. Be mindful not to chill for too long, as naked cakes can dry out faster.
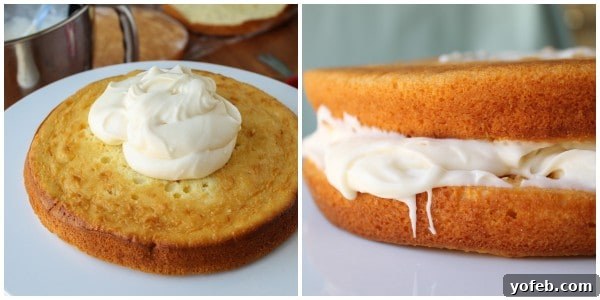
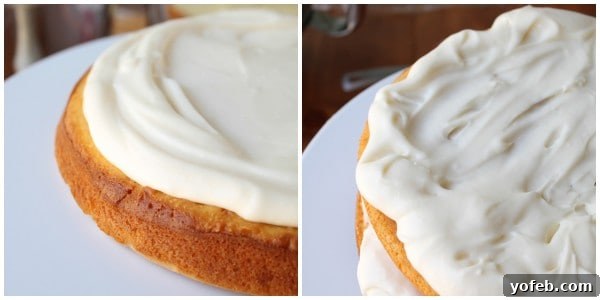
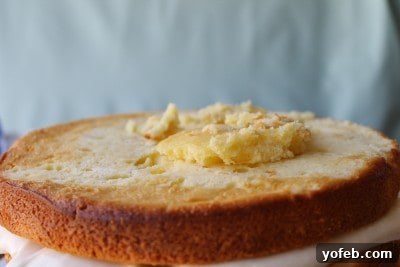
Serving and Storage for Your Coconut Layer Cake
To enjoy your beautiful cake to the fullest, here are some final tips:
- Slicing: For clean slices, use a very sharp serrated knife. Wipe the knife clean with a damp towel between each slice to prevent dragging frosting and crumbs through the cake.
- Garnish: Fresh fruit like raspberries, strawberries, or even mango complements the coconut flavor beautifully and adds a vibrant pop of color. A light dusting of powdered sugar can also add an extra touch of elegance.
- Storage: Because naked cakes have less frosting protecting the exposed cake layers, they can dry out faster than fully frosted cakes. Plan to serve this cake within 1-2 days of assembly for optimal freshness. Store it loosely covered in the refrigerator. For longer storage, you can freeze individual slices, well-wrapped, for up to a month.
Connect with us on Facebook | Pinterest | Instagram
Coconut Layer Cake
Average Rating: 5 out of 5 stars based on 2 votes.
Prep: 20 mins | Cook: 30 mins | Cooling Time: 10 mins | Total: 1 hr
Servings: 10 Servings
This easy unfrosted Coconut Layer Cake is the perfect solution for people who love delicious cake but hate spreading frosting. Instead of “sloppy,” we get to call it “rustic.”
Pin Recipe
Rate this Recipe
Print Recipe
Ingredients
For the cake:
- 2 16.5-oz boxes white cake mix
- 2 3.4-oz packages vanilla pudding mix, dry. (Don’t make pudding!)
- 1 cup water, divided
- 1 cup oil, divided
- 2 cups sour cream, divided
- 6 large eggs, room temperature, divided
- 2 tablespoons coconut extract, divided
For the frosting:
- 10 tablespoons unsalted butter
- 2 & 1/2 8-oz packages cream cheese, cold
- 2 & 1/2 teaspoons coconut extract
- 1/2 teaspoon salt, heaping
- 5 cups powdered sugar
- fresh fruit, to garnish
- powdered sugar, to garnish, optional
Instructions
- Unless you have a huge stand mixer, you will need to make the cake in 2 batches. (I only have 2 cake pans anyway, so it worked for me.)
- Preheat your oven to 300 degrees F.
- In a large bowl or stand mixer, beat together 1 cake mix, 1 package of pudding mix, 1/2 cup water, 1/2 cup oil, 1 cup sour cream, 3 eggs, and 1 tablespoon coconut extract.
- Scrape down the sides and bottom. Beat for at least 3 minutes.
- Pull out enough parchment paper so that both your cake pans fit on it. Fold the paper in half. Use a pencil to trace the bottom of one cake pan onto the paper. Then cut out the folded paper so you get 2 circles. Place the 2 circles in the cake pans. Spray the sides of the cake pans with nonstick spray.
- Divide the batter between the pans. Drop each pan onto your counter from a few inches up, so that some of the air bubbles pop.
- Bake the cakes at 300 degrees for about 30 minutes. (The lower temperature is so that the edges stay tender and don’t darken as much – important because there will be no frosting to cover it.) I baked one cake on a high rack and one on a low rack. After 20 minutes, I switched the cakes and rotated each one 180 degrees. After 10 minutes, the top one was done and the bottom one needed 1 more minute. You will know the cakes are done when they do not shake in the center; when a toothpick comes out clean; or when the center springs back immediately when you press on it.
- Let the cakes cool in the pan for 10 minutes, then remove to a wire rack to cool completely. Leave the parchment paper on.
- When the cakes are cool, use a sharp serrated knife to slice off the dome of each cake.
- Repeat all of the above steps with the other cake mix.
For the frosting:
- In a large bowl or stand mixer, beat the butter until it is fluffy, about 2 minutes. Add the cream cheese. Beat until it is fluffy, at least 2 minutes, scraping the sides and bottom. Add the coconut extract and salt and beat together. Add the powdered sugar, 1 cup at a time, mixing in between each addition. If the frosting seems too thin, add a little more powdered sugar.
- To assemble:
- Add a small dab of frosting on your cake plate. Place the first layer on top.
- Heap about 1 cup of frosting in the center of the cake. Use an offset spatula to spread the frosting to the edge of the cake. It doesn’t have to be perfect. Add the next layer. Continue to layer the cakes and frosting.
- Garnish the cake with raspberries or other fresh fruit. Sprinkle with a dusting of powdered sugar, if desired.
- To serve, use a very sharp serrated knife to slice the cake all the way to the bottom. Wipe off the knife with a wet towel in between each slice.
Notes
If you forget to set your eggs out, put them in a bowl of hot water for 10 minutes.
This cake doesn’t have to be four layers! You can halve the recipe and just do one cake mix for 2 layers. Don’t forget to halve the frosting as well.
If you are nervous about handling the cakes without breaking them, you can wrap each cake tightly in plastic wrap (use plenty) and transfer to the freezer. Wait 1 hour or up to 24 hours, then assemble the cake while it’s frozen. You will have to wait a couple hours for it to thaw, of course!
Nutrition
Serving: 1 slice | Calories: 678kcal | Carbohydrates: 62g | Protein: 5g | Fat: 46g | Saturated Fat: 15g | Polyunsaturated Fat: 8g | Monounsaturated Fat: 21g | Trans Fat: 1g | Cholesterol: 166mg | Potassium: 117mg | Fiber: 1g | Sugar: 61g | Vitamin A: 802IU | Vitamin C: 1mg | Calcium: 73mg | Iron: 1mg
Recipe Details
Course: Dessert
Cuisine: American
Calories: 678
Keyword: Coconut, Layer Cake, Naked Cake, Unfrosted Cake
Did you make this? We’d love to see it!
Mention @thefoodcharlatan or tag #thefoodcharlatan!
Some Other Cakes You Might Like:
- Almond Sheet Cake
- Blackberry Cake with Coconut Cream Cheese Frosting
- Spiced Poppyseed Cake with Almond Buttercream Frosting
- Strawberry Truffle Cake
Other Beautiful “Naked Cakes” from Around the Web:
- Chocolate Raspberry Cake from Glorious Treats
- Lemon Strawberry Layer Cake from Crunchy Creamy Sweet
- Irish Drunken Cake from Eat the Love