
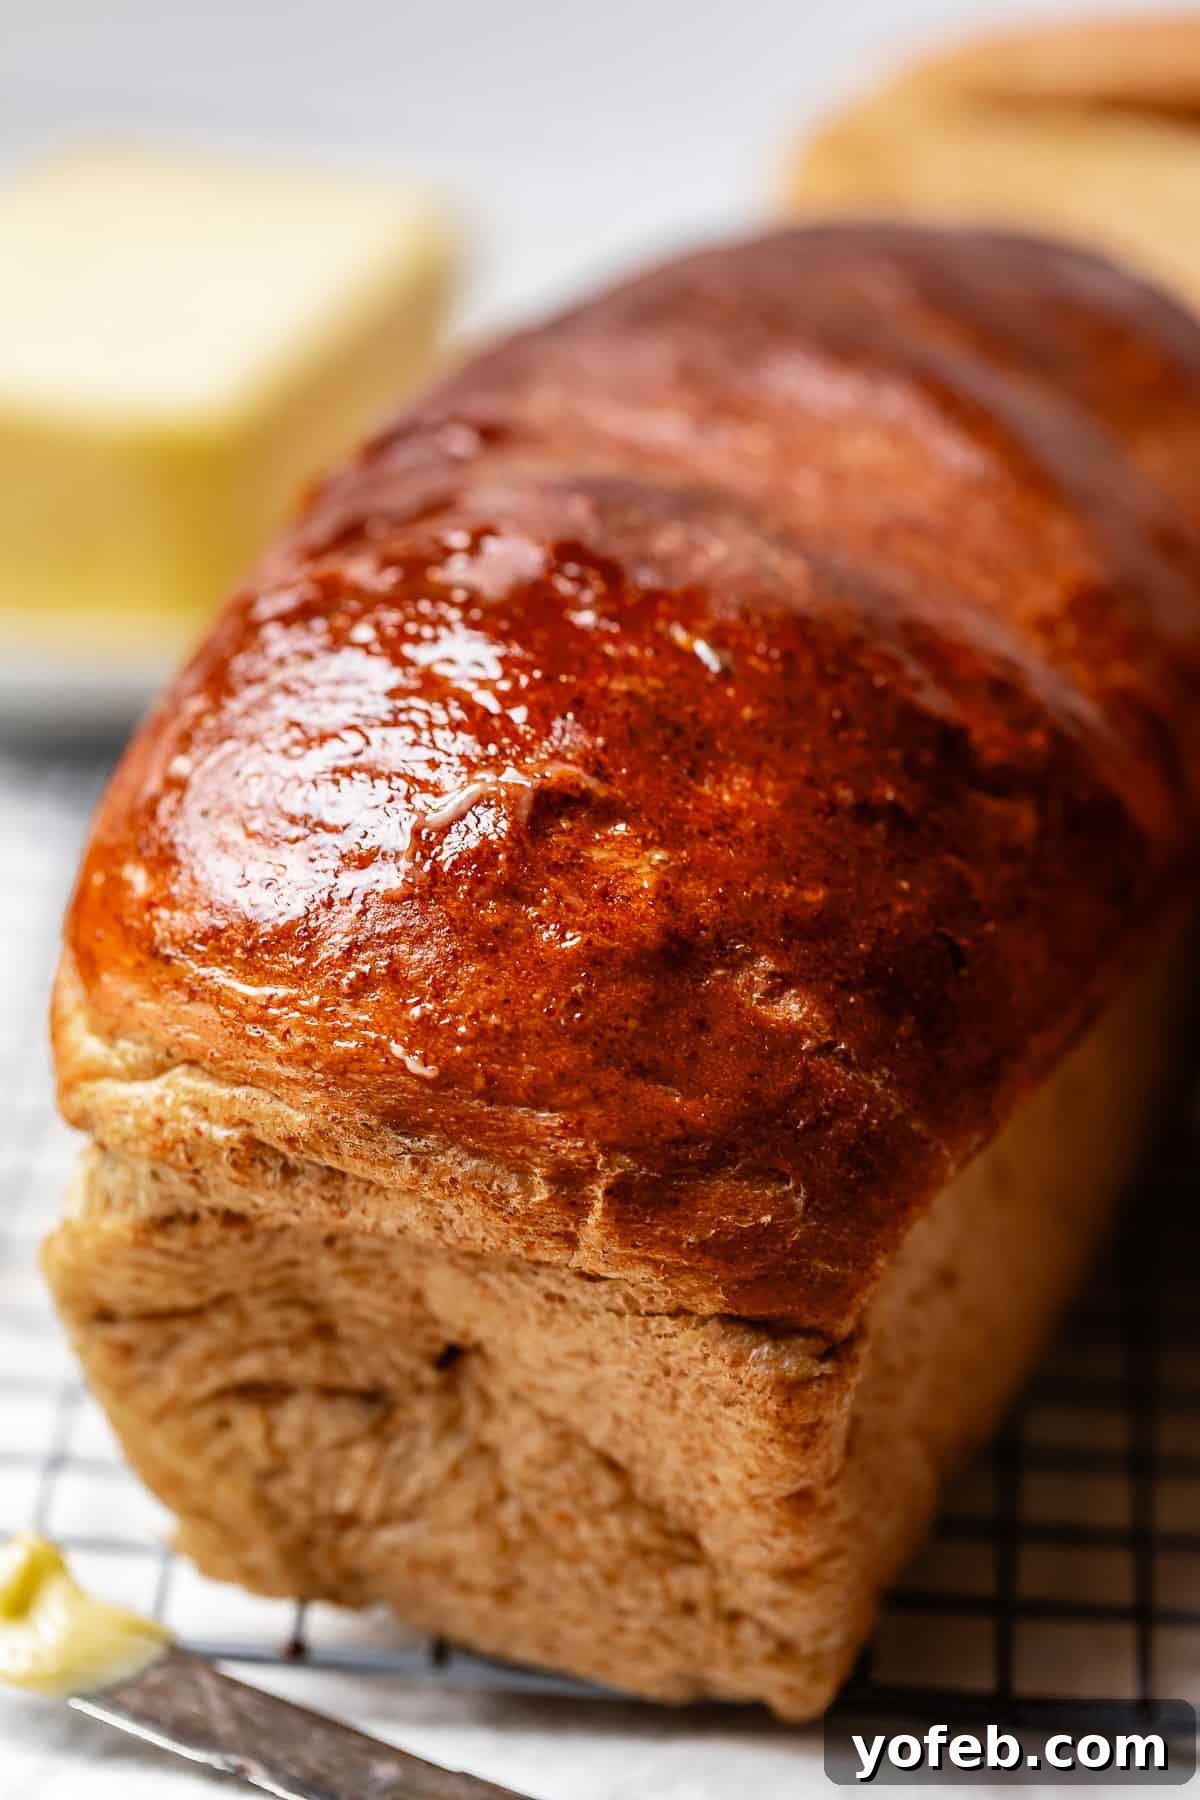
Discover the Secret to the Best Swedish Rye Bread You’ll Ever Taste! Forget everything you thought you knew about rye bread being dense, sour, or heavy. This cherished family recipe, passed down through three generations from my husband’s Swedish great-grandma Prudy, will redefine your expectations. Prepare for an experience of incredibly light, remarkably soft, and profoundly flavorful rye bread with an earthy, nutty essence that stands in a class of its own. It’s truly unlike anything you’ve tried before. Every Christmas Eve, we celebrate with this special bread, alongside traditional Liver Paté and our famous Swedish Meatballs, a testament to its enduring legacy and beloved status in our home.
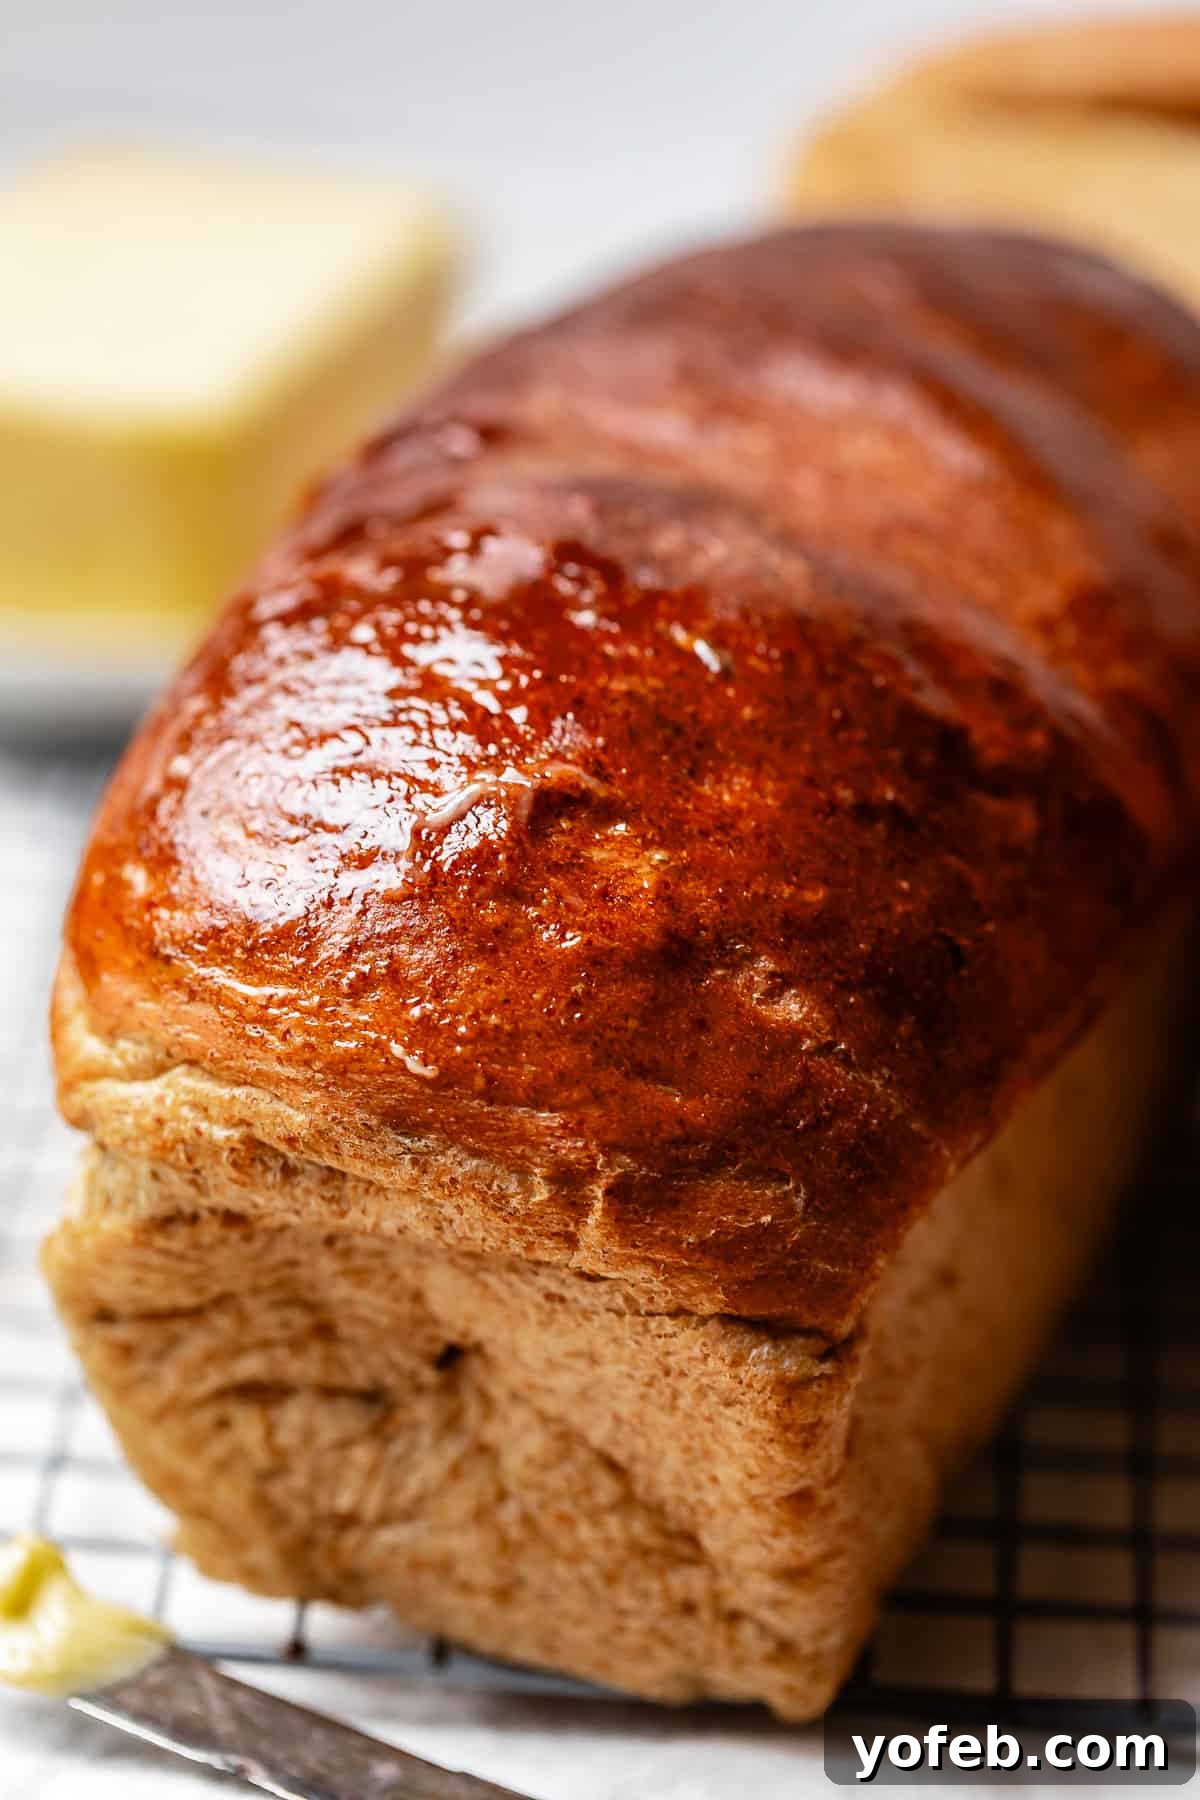
Table of Contents
- A Legacy of Love: Grandma Prudy’s Story
- Understanding Swedish Rye Bread: A Delightful Departure
- The Perfect Occasion: When to Enjoy This Rye Bread
- The Secrets Unveiled: Why This Rye Bread Recipe Excels
- Essential Ingredients for Your Homemade Rye Bread
- Baking Mastery: Step-by-Step Guide to Rye Bread
- Expert Tips for Flawless Rye Bread
- Creative Ways to Enjoy Your Homemade Rye Bread
- Storing Your Rye Bread for Lasting Freshness
- Can You Freeze Rye Bread? Yes, And Here’s How!
- Frequently Asked Questions About Rye Bread
- More Irresistible Bread & Roll Recipes to Explore
- Grandma Prudy’s Rye Bread Recipe
Fifteen years ago, when I married into my husband Eric’s family, I quickly learned a few things: their intense competitiveness during board games, their charming insistence on using cloth napkins at every meal, and their profound obsession with Spritz cookies. But beyond these delightful quirks, I discovered something truly extraordinary – a Swedish rye bread that was so coveted, it often sparked friendly family skirmishes over who would claim the last slice.
Initially, when they spoke of Spritz Cookies, Cardamom treats, and Butter Pecans, I’d simply smile and nod, picturing the rather bland, mass-produced cookies found in tins around the holidays. How wrong I was! My culinary world was about to be expanded, and I soon learned that nothing, absolutely nothing, compares to the warmth and flavor of a freshly baked Swedish family cookie.
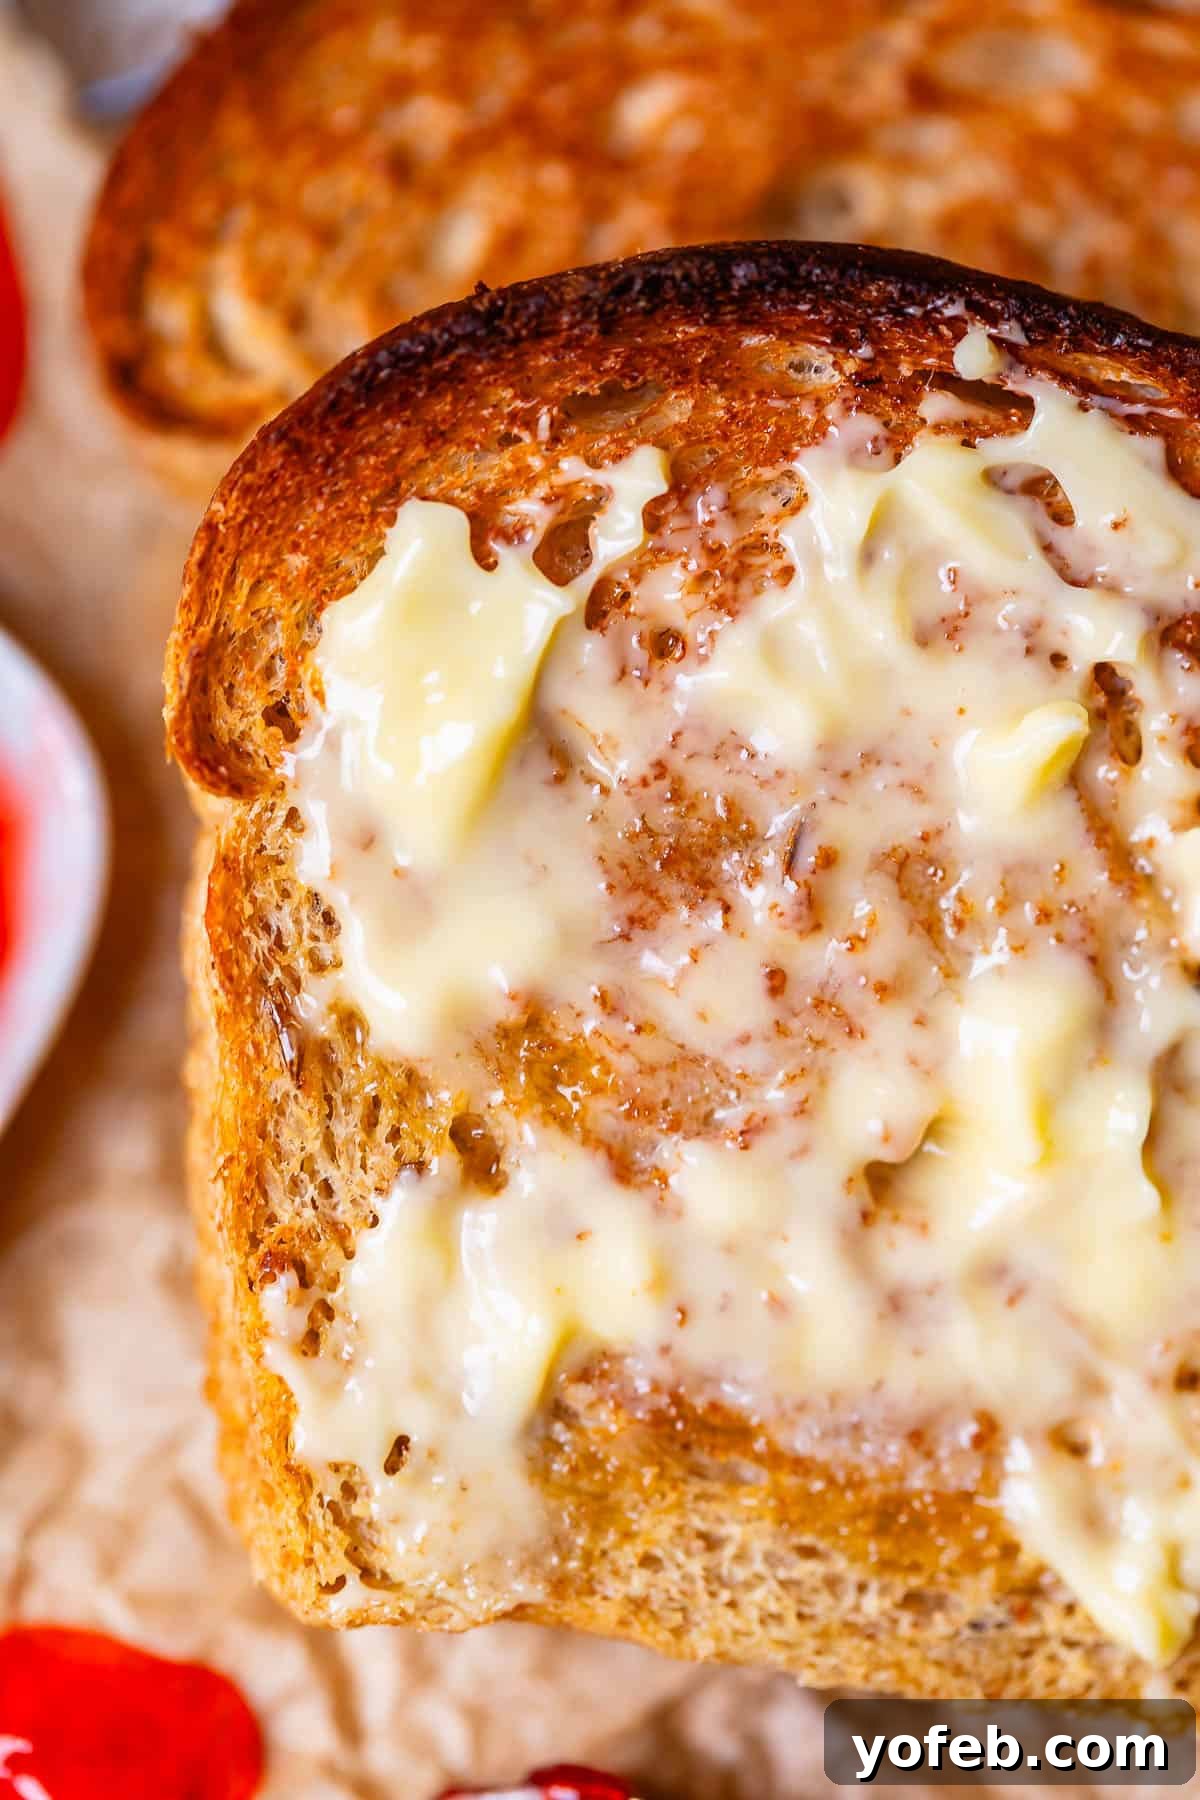
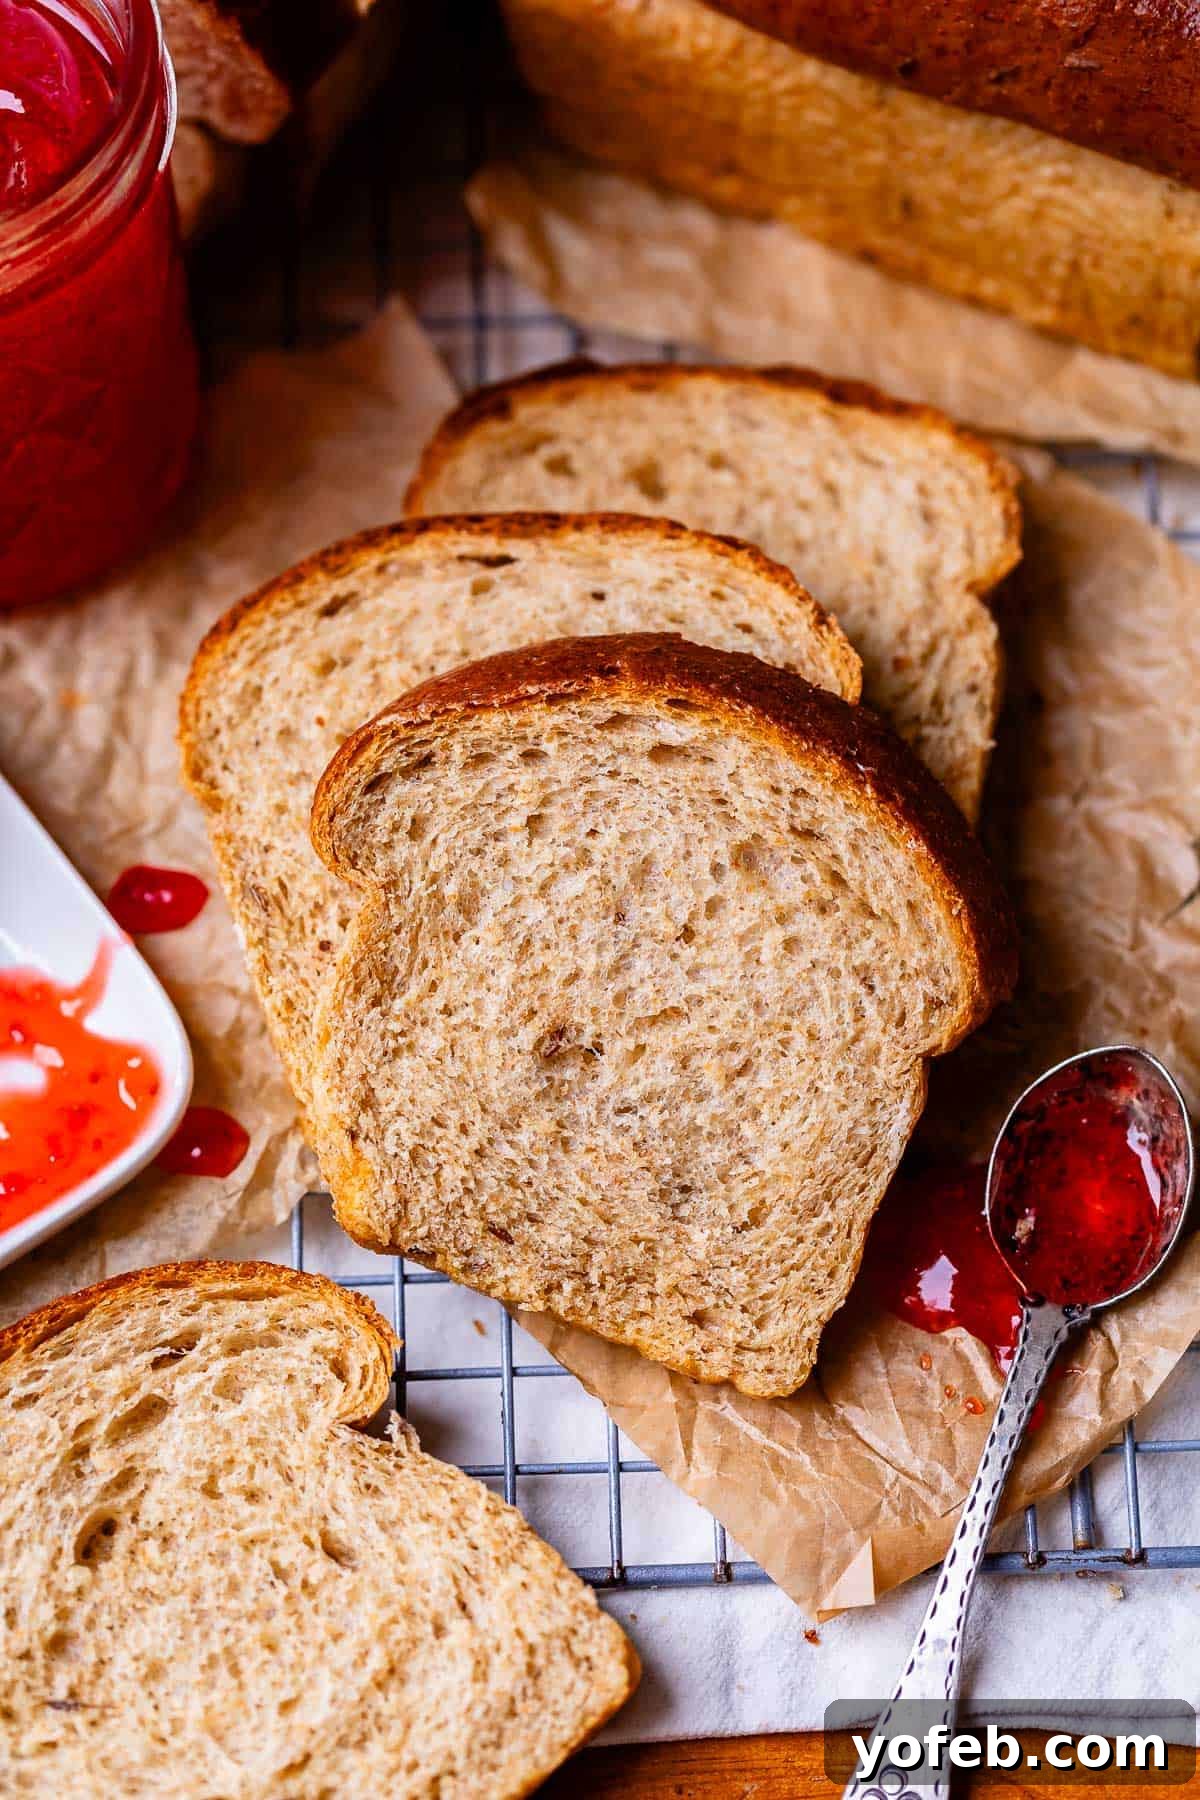
My first encounter with “rye bread” conjured images of the dark, dense, swirled loaves typical of Jewish or German bakeries – the kind perfect for a hearty Reuben sandwich. I braced myself for something similar. What I received, however, was a revelation: tiny, cloud-like slices so light and fluffy, I found myself repeatedly toasting them, slathering them with butter, and savoring every bite. This was not the rye bread I knew; it was a completely different, magical experience.
Growing up, homemade bread wasn’t a staple in my household. My mom, bless her heart, sent me off to college with a humble booklet of “easy recipes” to ensure I could manage simple meals. Flipping through, I found a section dedicated to bread.
Here’s a glimpse of that page:
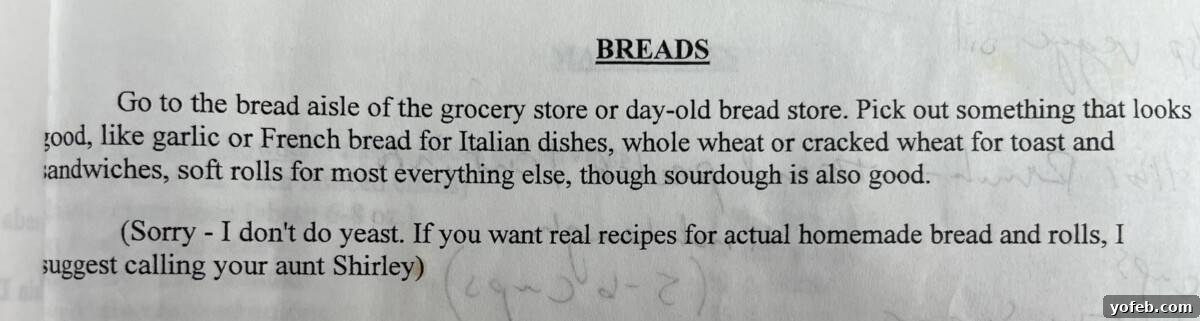
Needless to say, the bread-making legacy on my side of the family was, shall we say, a bit modest – with the exception of my Aunt Shirley, who truly reigns as the queen of rolls, gifting the world with her Famous Buttery Dinner Rolls. Marrying Eric brought with it the wonderful bonus of doubling my family, and with that, a vibrant new culinary heritage to explore. It has since become my joyful mission to master all the cherished old Swedish recipes that Eric’s family holds so dear, and this rye bread recipe quickly rose to the top of that list.
A Legacy of Love: Grandma Prudy’s Story
The origins of this renowned family rye bread recipe trace back to a remarkable woman: Prudence Henrietta Toren Johnson, Eric’s maternal great-grandmother, affectionately known as Prudy. Born in 1898 to Swedish immigrant parents in the heart of Minnesota, Prudy was a woman ahead of her time. Standing at a petite 4’11”, she broke societal norms by graduating from college, a rare accomplishment for women of her generation. Though she passed away before I had the privilege of meeting her, her culinary legacy lives on. Prudy was an exceptional cook, preserving and perfecting traditional Swedish recipes passed down through her own family. Her grandchildren even compiled an official printed book of all her beloved Swedish creations, ensuring her flavors would never be forgotten.

Here is Prudy, on the right with her husband Carl, at their son’s wedding (Eric’s grandpa) in 1955, a snapshot of the family history that nourishes our culinary traditions.
Eric’s mother, Kris, vividly recalls Prudy’s annual Christmas ritual in the 1950s and 60s: baking dozens upon dozens of her signature rye bread. Prudy’s original recipe was a double batch of what you’ll find on today’s recipe card – she made enough dough for eight small loaves at a time. Picture this: she would hand-knead batch after batch, tirelessly baking until she had amassed around 50 loaves! These golden treasures, along with plates stacked high with Swedish cookies, were then lovingly delivered as gifts to all their neighbors and every employee at their family hardware store.
What a legend, truly! Her dedication and generosity are the kind of community-building spirit I aspire to emulate. I eagerly anticipate the day I can meet Prudy and thank her for this incredible recipe!
Understanding Swedish Rye Bread: A Delightful Departure
Let’s talk about rye, specifically the kind found in this recipe. As I mentioned earlier, this isn’t the heavy, overtly tangy, sturdy loaf you might envision from a Jewish deli or German bakery. This recipe creates something entirely different: appetizer-sized loaves of bread that are so exquisitely pillow-soft and mildly sweet, you could easily devour half a loaf before realizing how quickly it disappeared. It’s a revelation for anyone who associates rye bread with denseness or a strong, overpowering flavor.
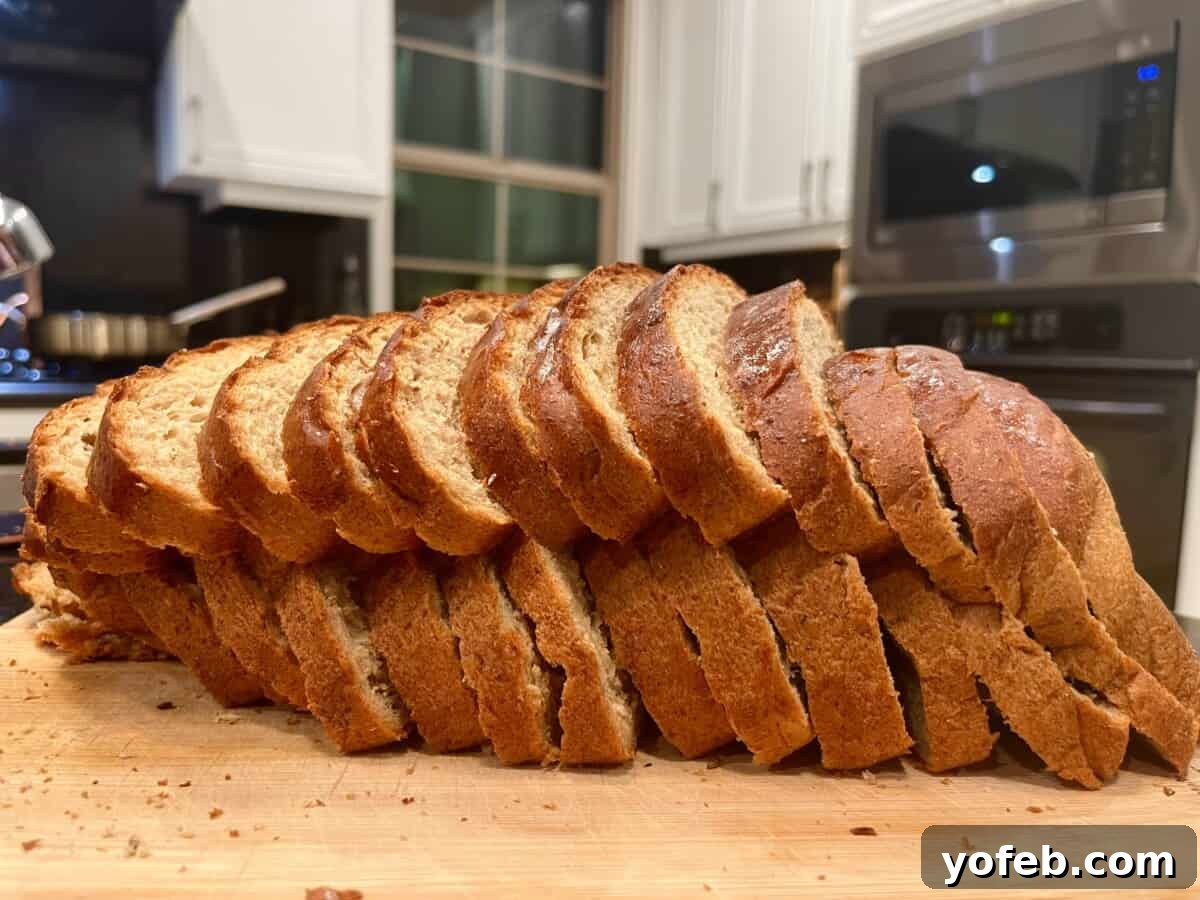
When I pressed my family for a detailed description of this unique Swedish rye bread, their responses echoed a common theme:
“It’s hard to describe… it’s distinctly nuttier. Somehow, it seems seedier, in the best way. It has a texture similar to whole wheat, but without actually being whole wheat, if that makes sense?”
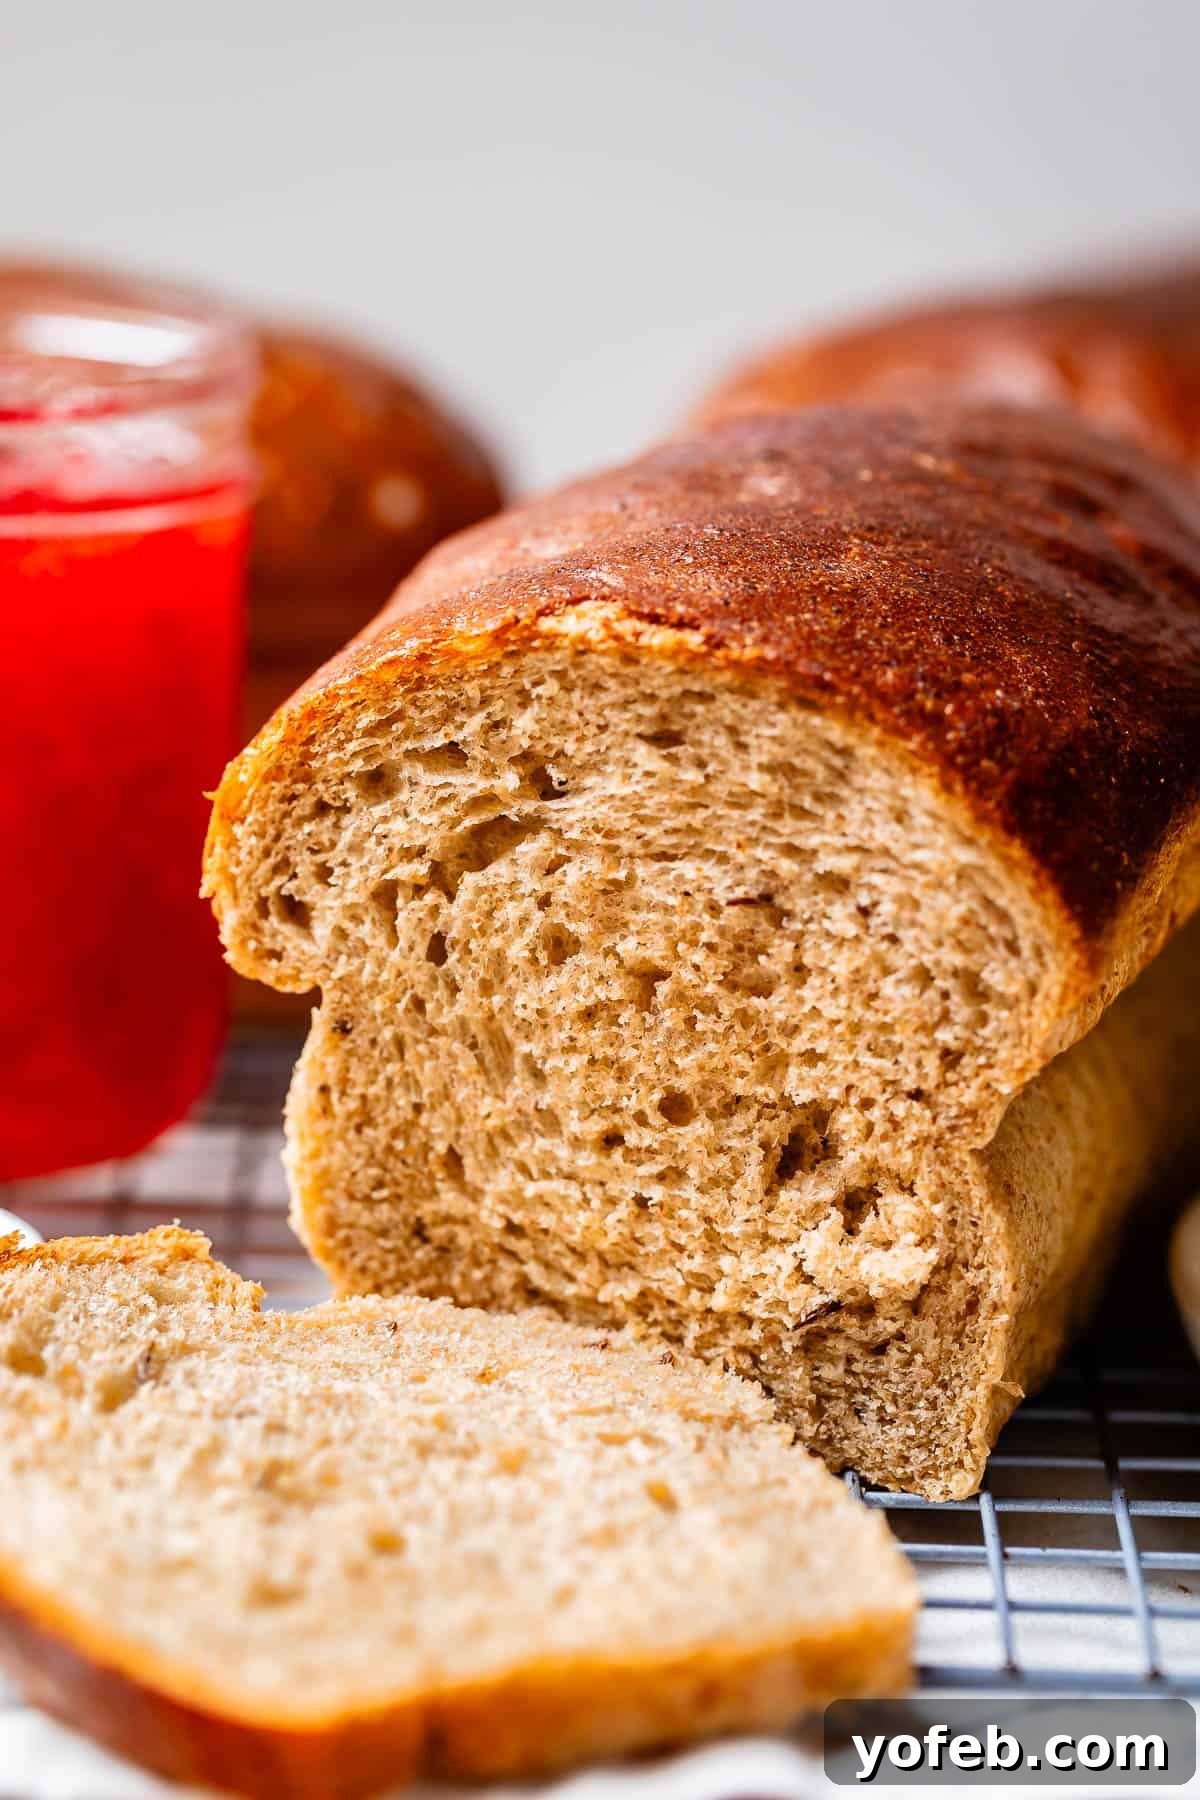
Indeed, its color often resembles that of whole wheat bread, yet its texture is incomparably lighter and softer. Far from dense, it melts in your mouth like a cloud, offering a delightful chewiness and hearty satisfaction, all infused with a rich, nutty, and earthy flavor. It possesses a depth and complexity that far surpasses ordinary white bread, making it genuinely hard to categorize. Have you encountered rye flour in your baking before? Its contribution is truly unique. A quintessential element of this recipe is caraway seeds, which I adore for their warm, slightly peppery, and anise-like notes. However, if caraway isn’t to your taste, feel free to omit them – the bread will still be wonderfully delicious.
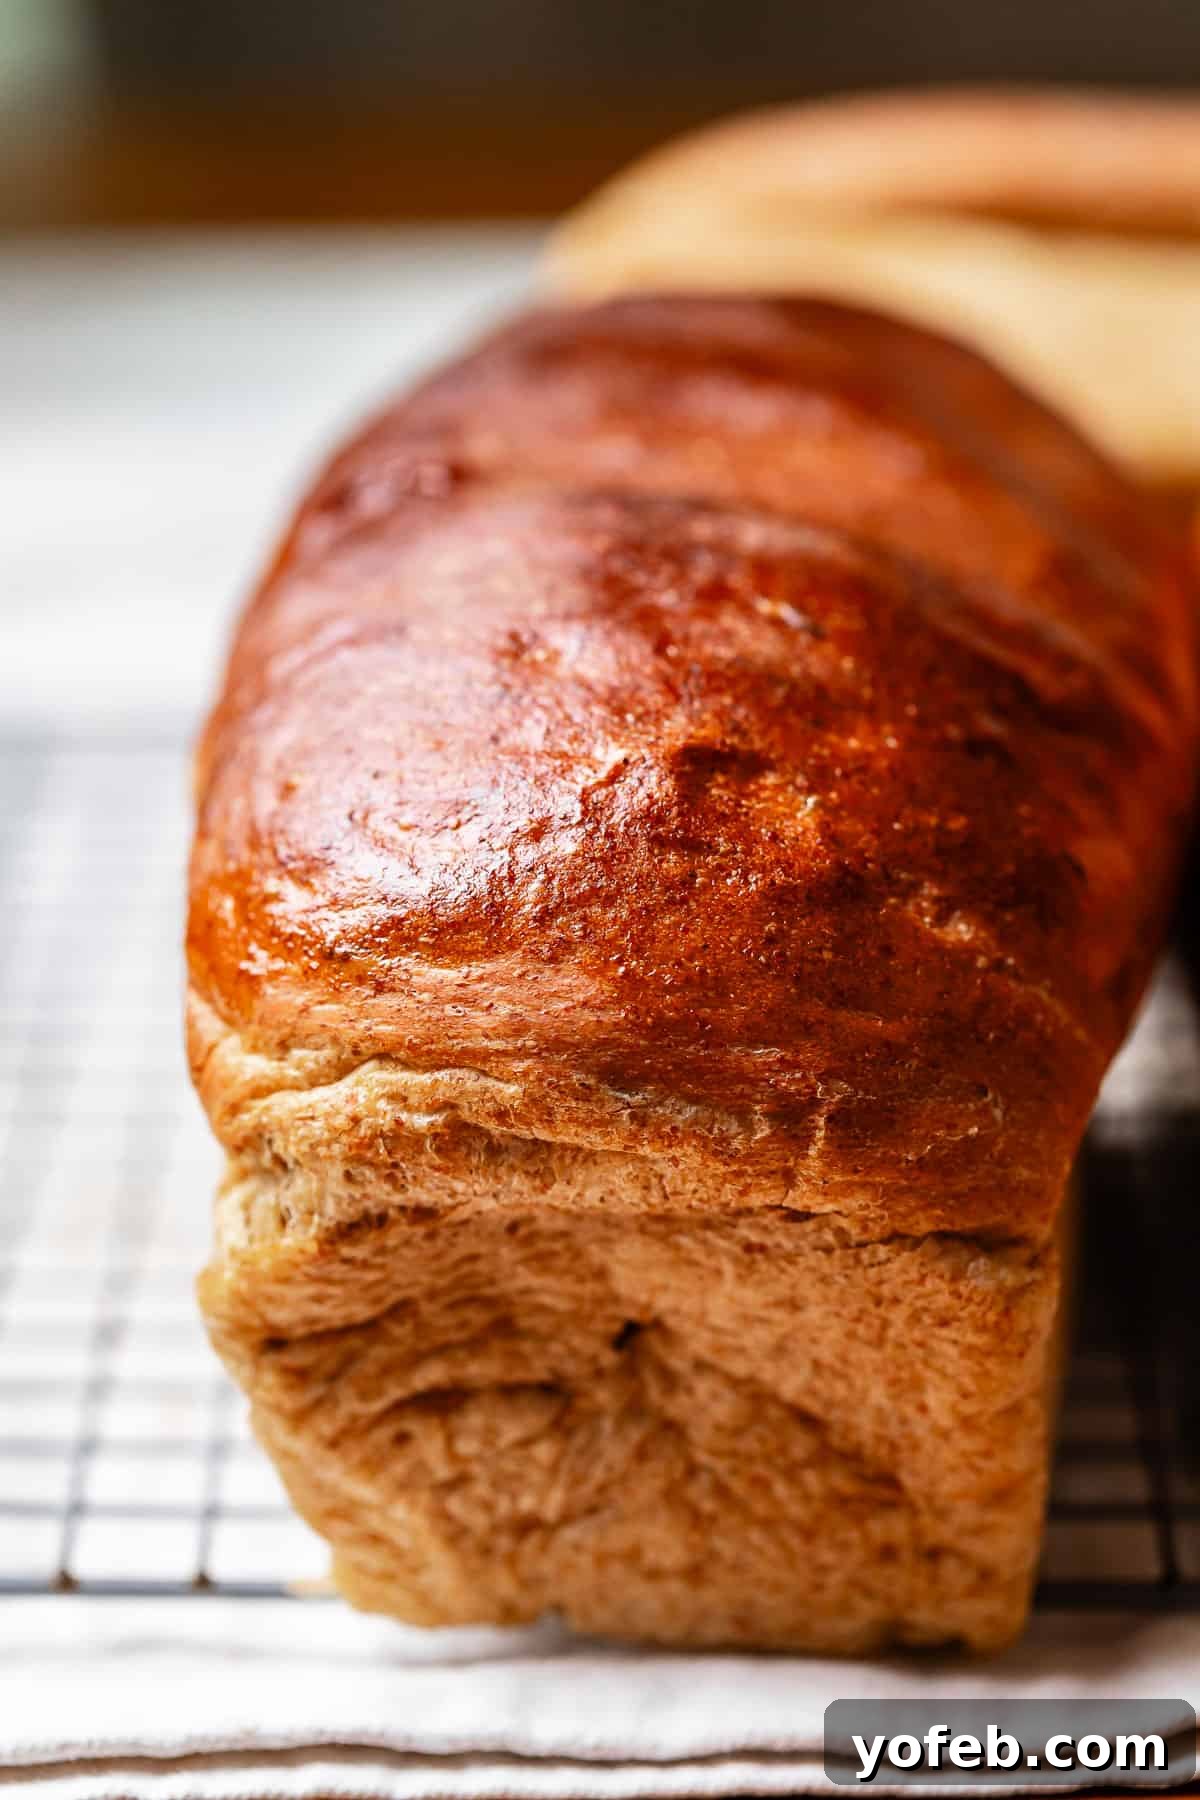
I recently shared this photo with my esteemed business coach, Jadah Sellner, who instantly remarked, “That bread looks amazing! It looks like Brioche.” She hit the nail on the head – this rye bread truly boasts a brioche-like softness, a testament to its exceptional texture.
The Perfect Occasion: When to Enjoy This Rye Bread
This particular Swedish rye bread is intentionally designed for snacking or as a delightful appetizer, which is why it’s baked in much smaller pans than the typical 9×5 inch loaf pans we’re accustomed to. The resulting tiny loaves are utterly adorable and perfectly portioned, inviting you to simply pop an entire slice into your mouth. The beautiful, 70-year-old pans featured in these photos (lovingly brought by Kris from Montana specifically for our photoshoot) measure approximately 7×4 inches. (You can easily find your own charming little loaf pans here, or similar options). Don’t worry if you only have standard pans; I’ve included detailed instructions in the recipe for adapting it to the normal 9×5 loaf pan size.
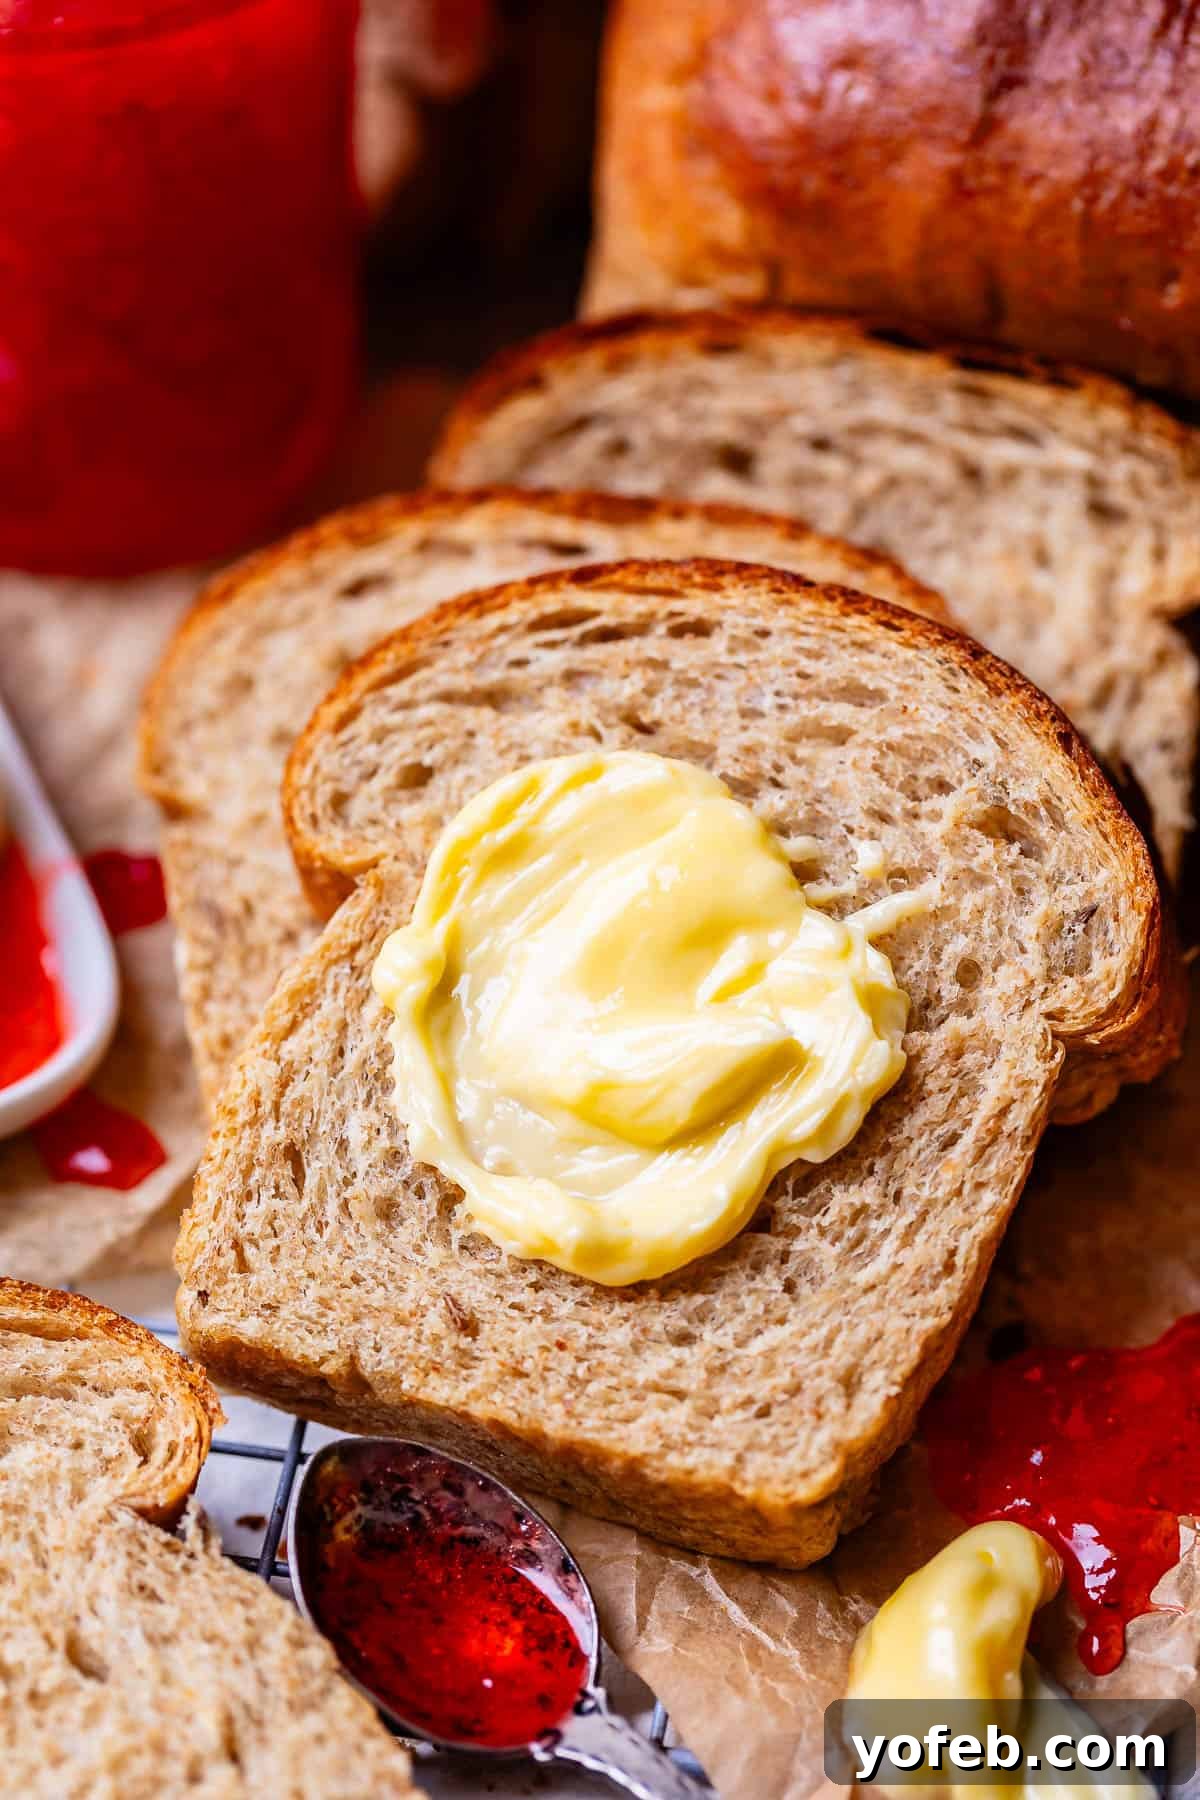
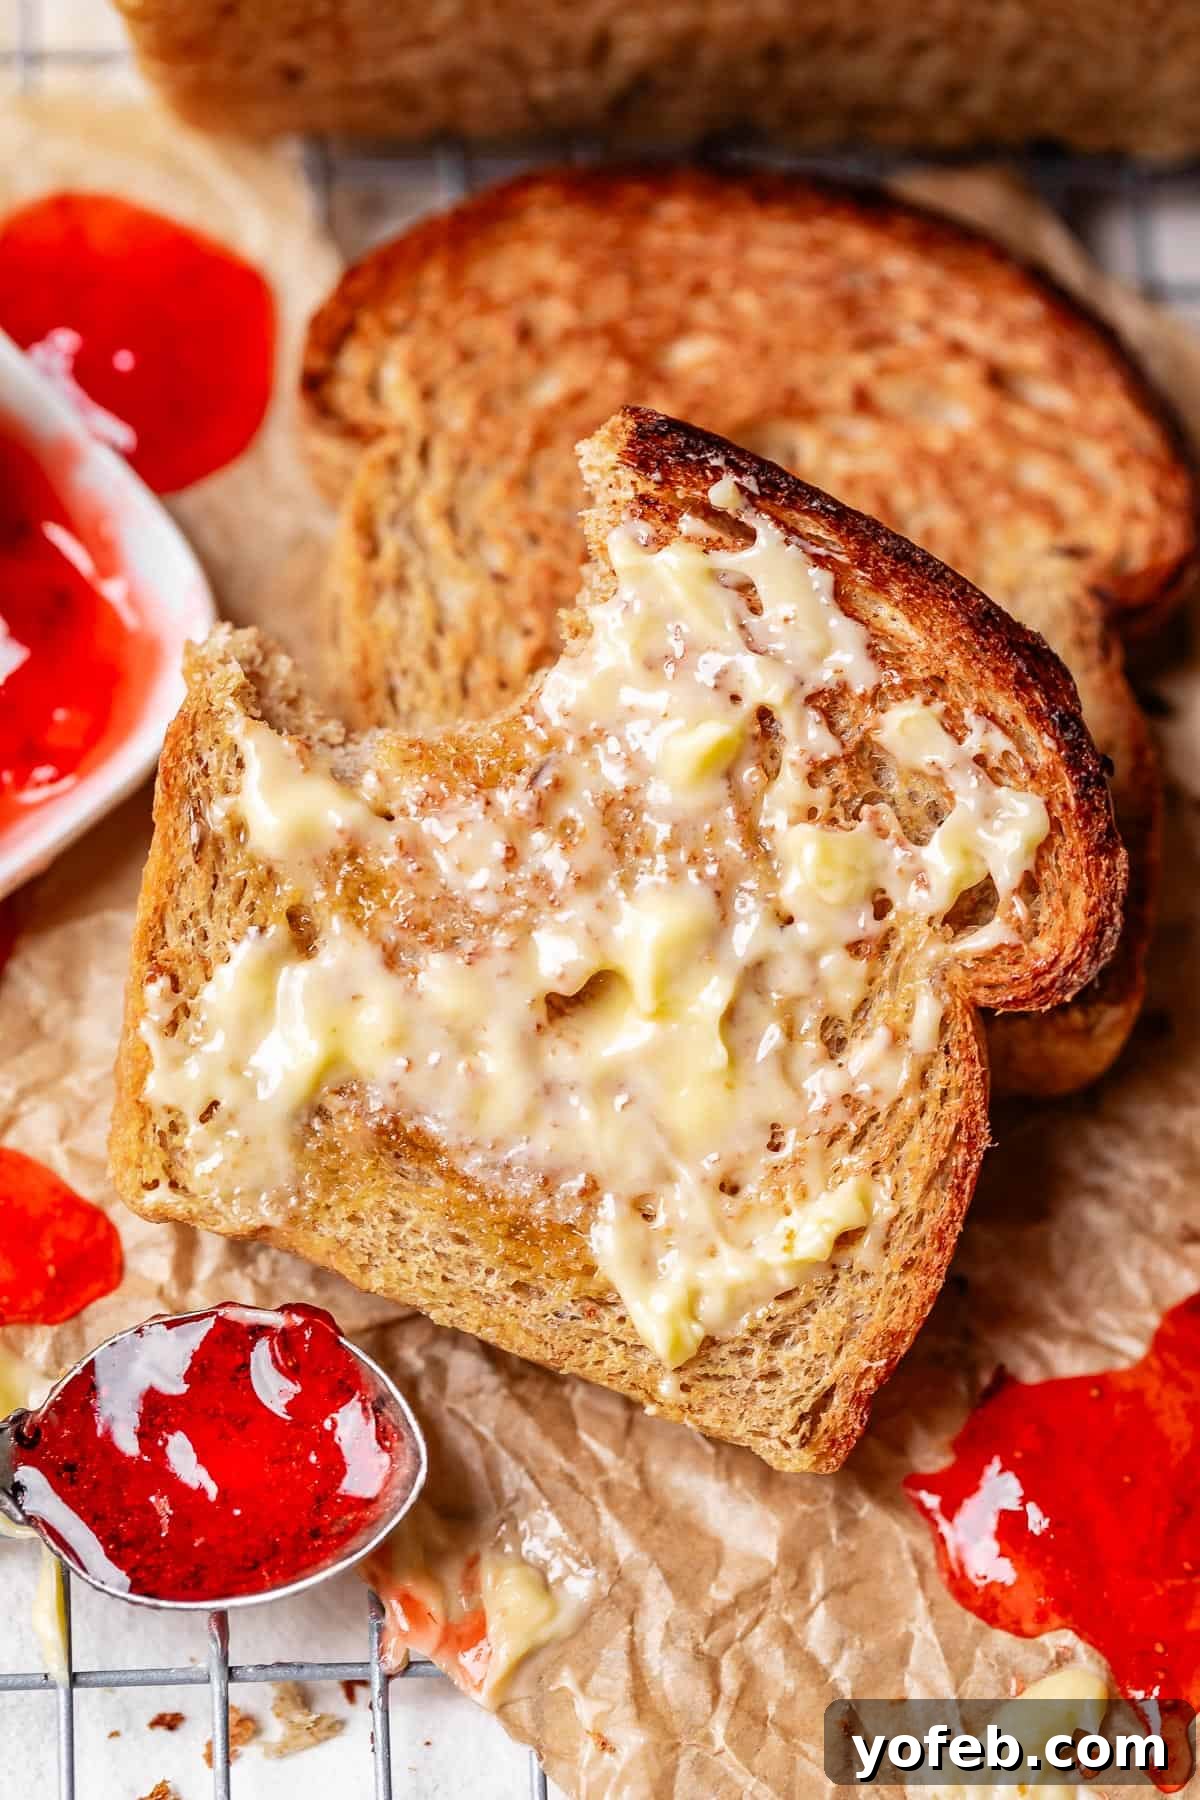
While this rye bread would undoubtedly make an incredible Reuben sandwich, we typically don’t use it as a conventional sandwich bread. Instead, its charm shines brightest when the tiny loaves are sliced and served as an elegant appetizer, especially during Christmastime, often paired with creamy Liver Paté. Beyond festive gatherings, it’s a simple pleasure to toast a slice, slather it generously with butter, and enjoy it with a side of sharp cheese. This ritual feels profoundly “family” to me; I’ve witnessed Eric’s dad, roused from a pre-bedtime couch slumber, shuffle into the kitchen for precisely this – a warm butter-on-rye-toast and cold Muenster cheese snack. It’s a comfort food tradition that speaks volumes.
Technically, rye is considered a savory bread. However, that hasn’t stopped Eric and me from enthusiastically spreading it with jam at every opportunity. Kris finds this unconventional, especially with the caraway seeds, but perhaps I’m just hopelessly devoted to jam, okay? My philosophy is that this delightful bread is good any way you slice it – whether savory or sweet, it always hits the spot.
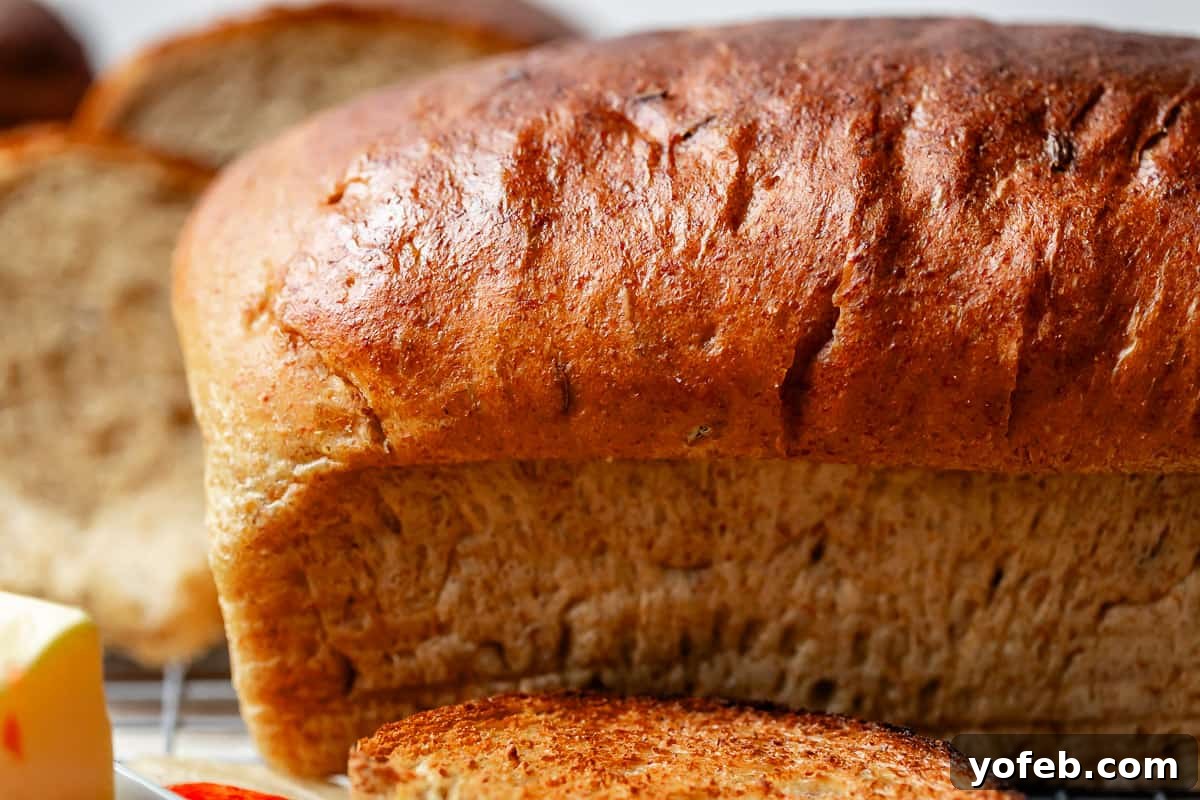
The Secrets Unveiled: Why This Rye Bread Recipe Excels
This recipe, meticulously refined by Kris from her grandma’s original, has been perfected over the years to ensure modern cooks achieve outstanding results. There are several crucial secrets that elevate this rye bread from a potentially dense, heavy loaf to one that is wonderfully light, airy, and springy. Mastering these techniques is key to unlocking the true magic of Prudy’s recipe.
- Triple Rise for Unparalleled Lightness: Unlike most bread recipes that typically call for one rise in the bowl and then a second rise after shaping, this Swedish rye bread demands a triple rise. It undergoes two distinct one-hour rises in the bowl before it’s even shaped into loaves, followed by a third, final rise in the baking pans. While this might sound like an extra step, it’s absolutely non-negotiable for success. Rye flour naturally contains very low amounts of gluten, which means it doesn’t rise as readily as breads made purely with wheat flour. This extended rising time allows the yeast ample opportunity to work its magic, developing air pockets and contributing significantly to the bread’s characteristic lightness and fluffy texture.
- The Power of Vital Wheat Gluten: To compensate for rye flour’s inherent lack of gluten – the protein responsible for elasticity and structure in bread – we incorporate Vital Wheat Gluten. This potent additive is a game-changer, providing the necessary structure to the dough. It acts like a scaffold, creating a robust network that effectively traps the carbon dioxide gas produced by the yeast. This trapped gas is what causes your bread to puff up beautifully, resulting in a significantly higher and lighter loaf. I’m such a proponent of vital wheat gluten that I often add it to all my bread recipes, even those made entirely with wheat flour, like this Homemade White Bread, for an even more superior rise and texture.
- The Art of “Not Too Much Flour”: This is perhaps the most critical tip for perfect rye bread. Rye dough has a fundamentally different consistency than traditional wheat bread dough; it is inherently stickier. With most bread recipes, you typically add flour until the dough is no longer sticky and becomes easy to handle. However, with rye bread, this approach will lead to a dense, heavy, and disappointing loaf every single time. The trick is to resist the urge to add excessive flour. Your dough *should* remain sticky. In fact, when shaping, we don’t even use a floured surface; instead, we work on an oiled workspace to prevent sticking without incorporating additional flour that would stiffen the dough.
- Molasses for Depth of Flavor: Molasses isn’t just a sweetener here; it’s a cornerstone of rye bread’s iconic flavor profile. Its rich, dark, and slightly smoky notes contribute an unparalleled depth and complexity that defines classic rye, perfectly balancing its earthy undertones.
- Shortening for Supreme Softness: For that signature pillow-soft texture that makes this rye bread so irresistible, shortening is our secret weapon. While you can substitute butter, be aware that butter won’t yield quite the same ethereal softness. Shortening helps create an incredibly tender crumb that simply melts in your mouth.
- Kosher Salt: The Flavor Magnifier: Never underestimate the power of salt in baking. I recommend at least 2 teaspoons of kosher salt because it acts as a phenomenal magnifier for all the other flavors in the bread, elevating every note. If you’re using table salt, which is finer and denser, reduce the amount to 1 and ¾ teaspoons. A poignant family anecdote highlights salt’s importance: in her later years, Grandma Prudy’s doctor advised her to reduce her sodium intake, and she took it to heart, eliminating all salt from her recipes. Kris often recounts how, sadly, nothing tasted quite the same afterward! As a side note, the small amount of salt in your baked goods is typically not the primary source of dietary sodium concern, so don’t be afraid to season for flavor.
Essential Ingredients for Your Homemade Rye Bread
To embark on your journey of baking the best Swedish rye bread, you’ll need a selection of simple yet powerful ingredients. This is a quick overview; for precise measurements and comprehensive instructions, please refer to the detailed recipe card below.
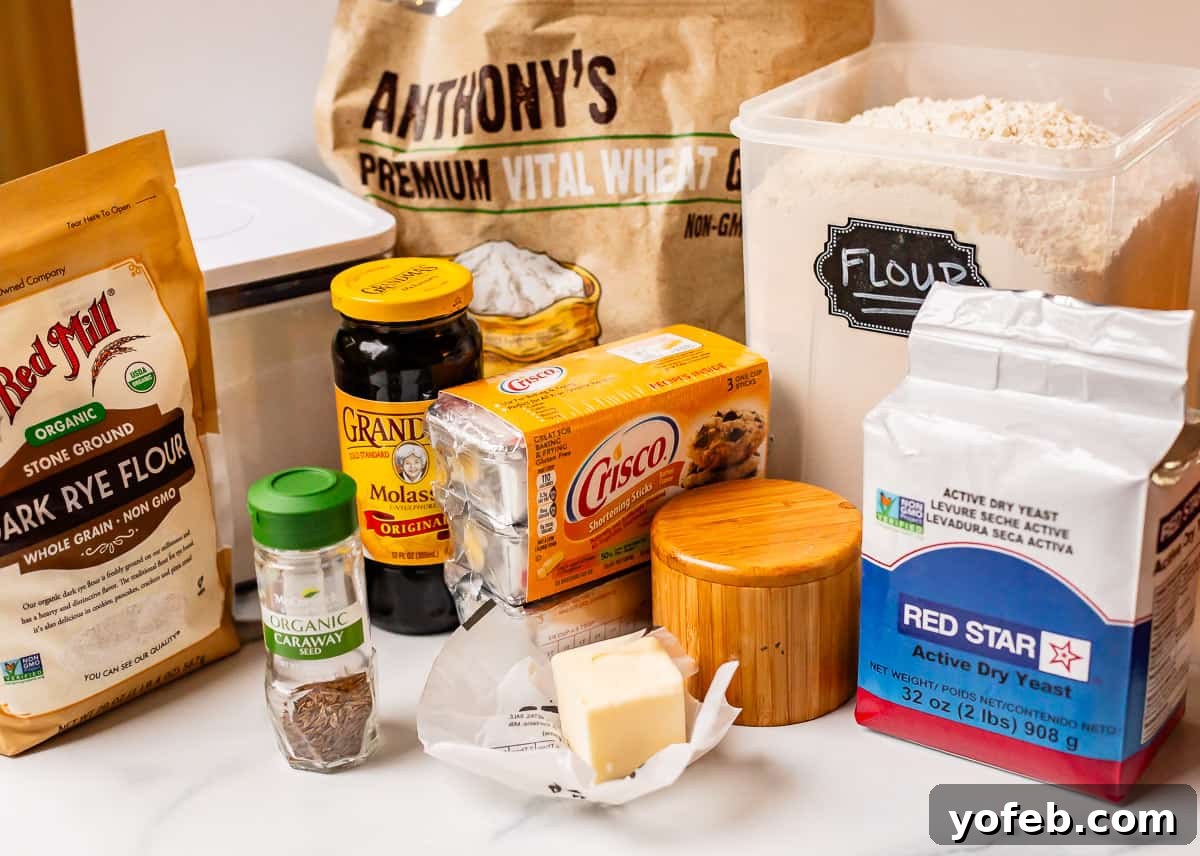
- Active Dry Yeast
- Warm Water
- Granulated Sugar
- Molasses
- Shortening
- Kosher Salt
- Caraway Seeds (Optional, but highly recommended for authentic flavor)
- Vital Wheat Gluten
- Light or Dark Rye Flour
- All-Purpose Flour
- Vegetable Oil (for greasing)
- Butter (for post-bake rub)
Baking Mastery: Step-by-Step Guide to Rye Bread
Unlike sourdough, our journey begins with classic active dry yeast. In your mixing bowl, add about a scant tablespoon of yeast to a quarter cup of warm water. The water temperature is crucial – aim for roughly 105-110°F, feeling like a baby’s bath. If it’s too hot for a baby, it’s too hot for your yeast! Treat your yeast gently; it’s key to a successful rise.
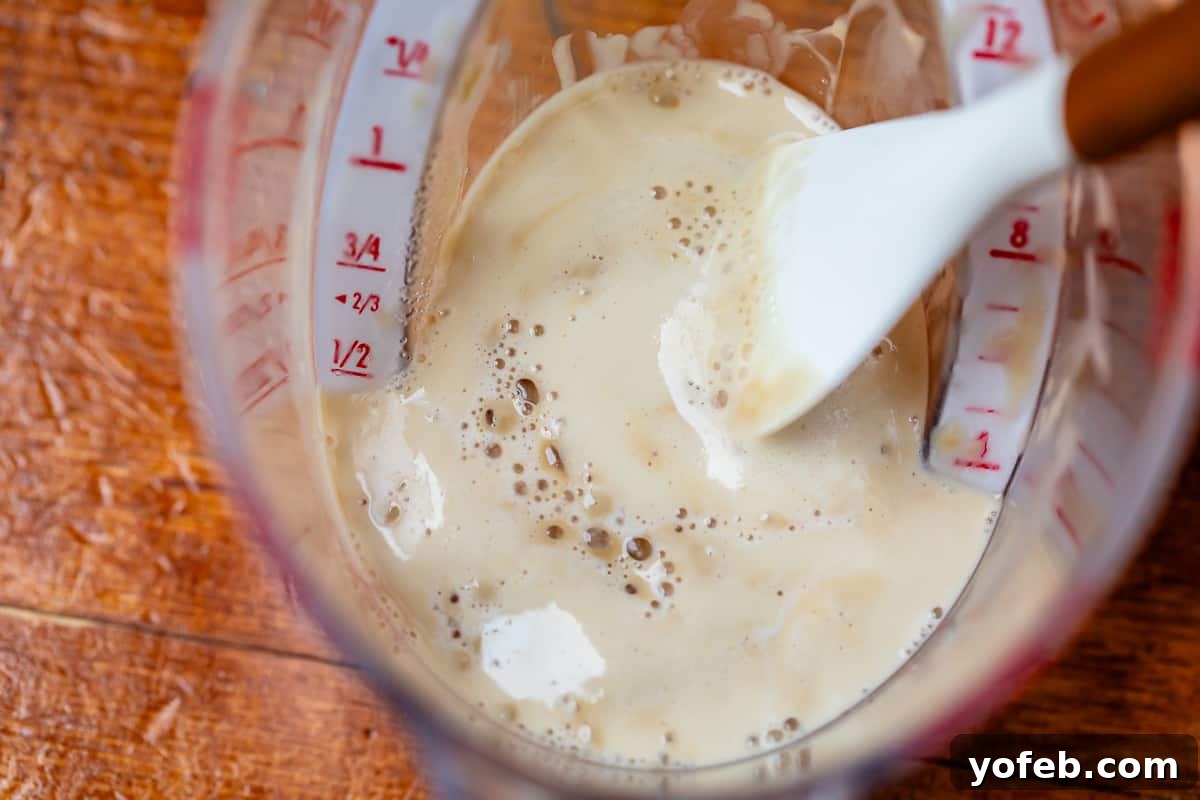
After about five minutes, you should observe a bubbly, foamy layer forming on your yeast mixture. This effervescence confirms your yeast is alive and active! If there are no bubbles, sadly, your yeast has met its demise, and it’s best to discard the mixture and begin anew. It’s far better to restart now than to invest hours in dough that simply won’t rise.
Now, it’s time to infuse that classic, irresistible rye bread flavor.
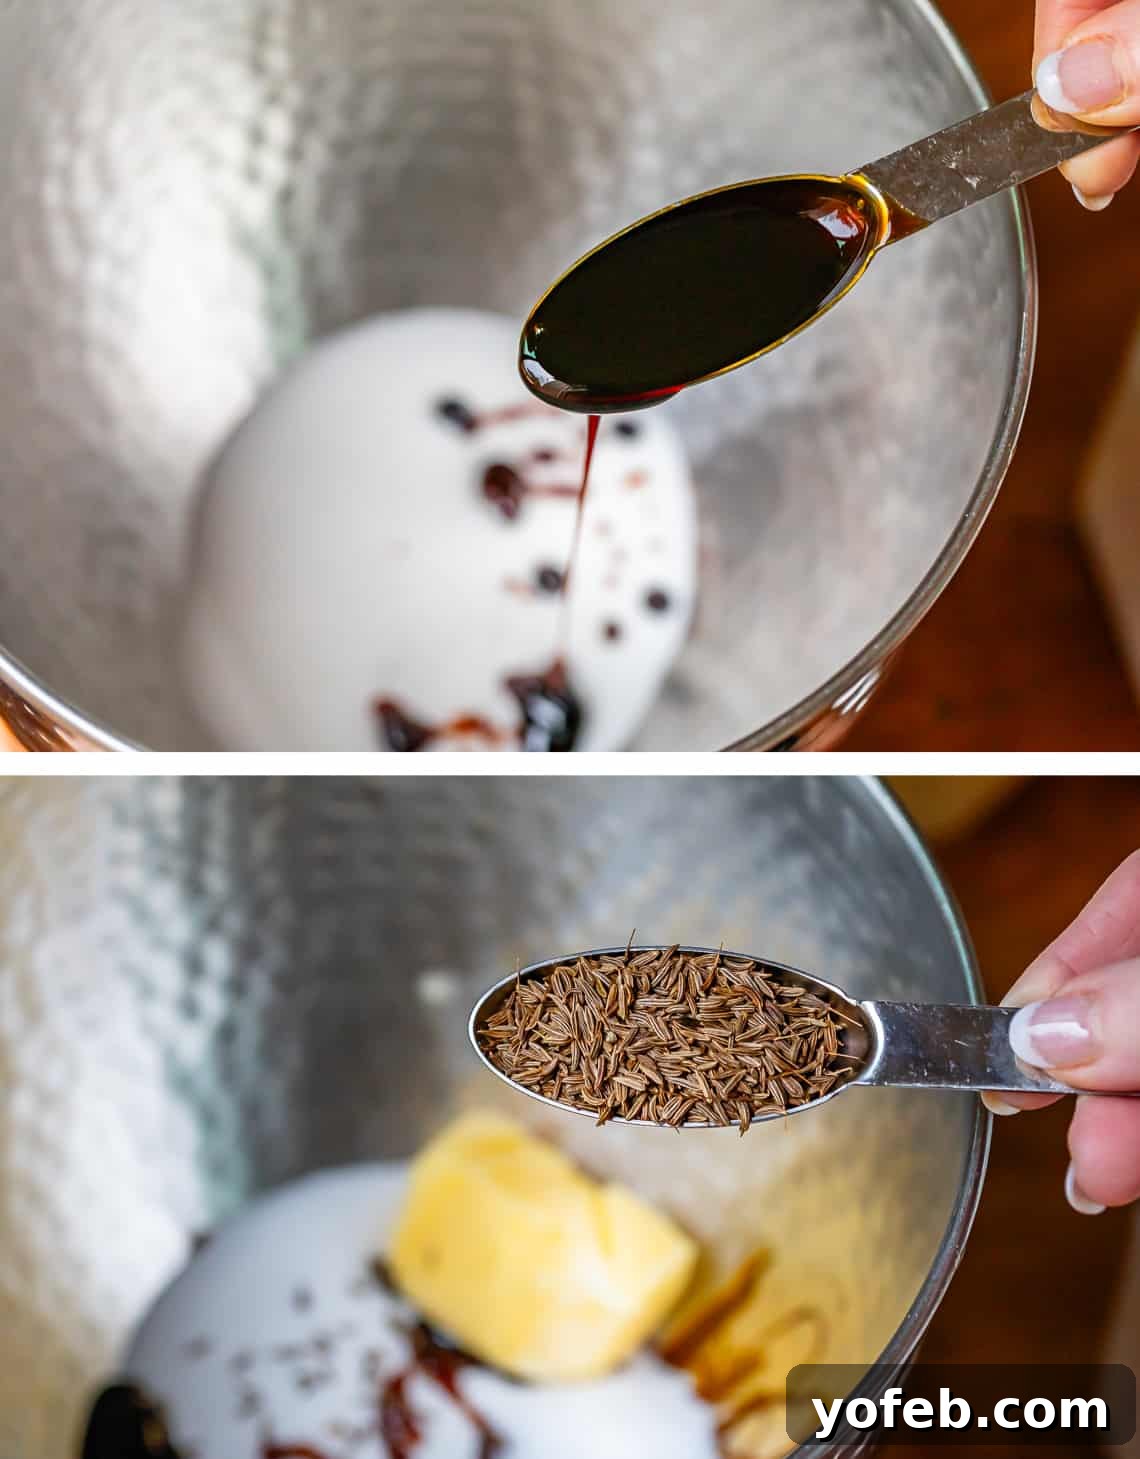
The rich, deep, and complex sweetness of molasses is indispensable for authentic rye bread. Alongside it, caraway seeds are introduced, intensifying rye flour’s naturally earthy, bright, and subtly bittersweet notes. Have you ever baked with caraway before? Its unique flavor profile is truly delicious and perfectly complements the rye.
Next, we’ll incorporate additional warm water, granulated sugar, shortening, and kosher salt. While the recipe card below provides all the precise details, I want to guide you through the visually important stages so you can grasp the essential techniques.
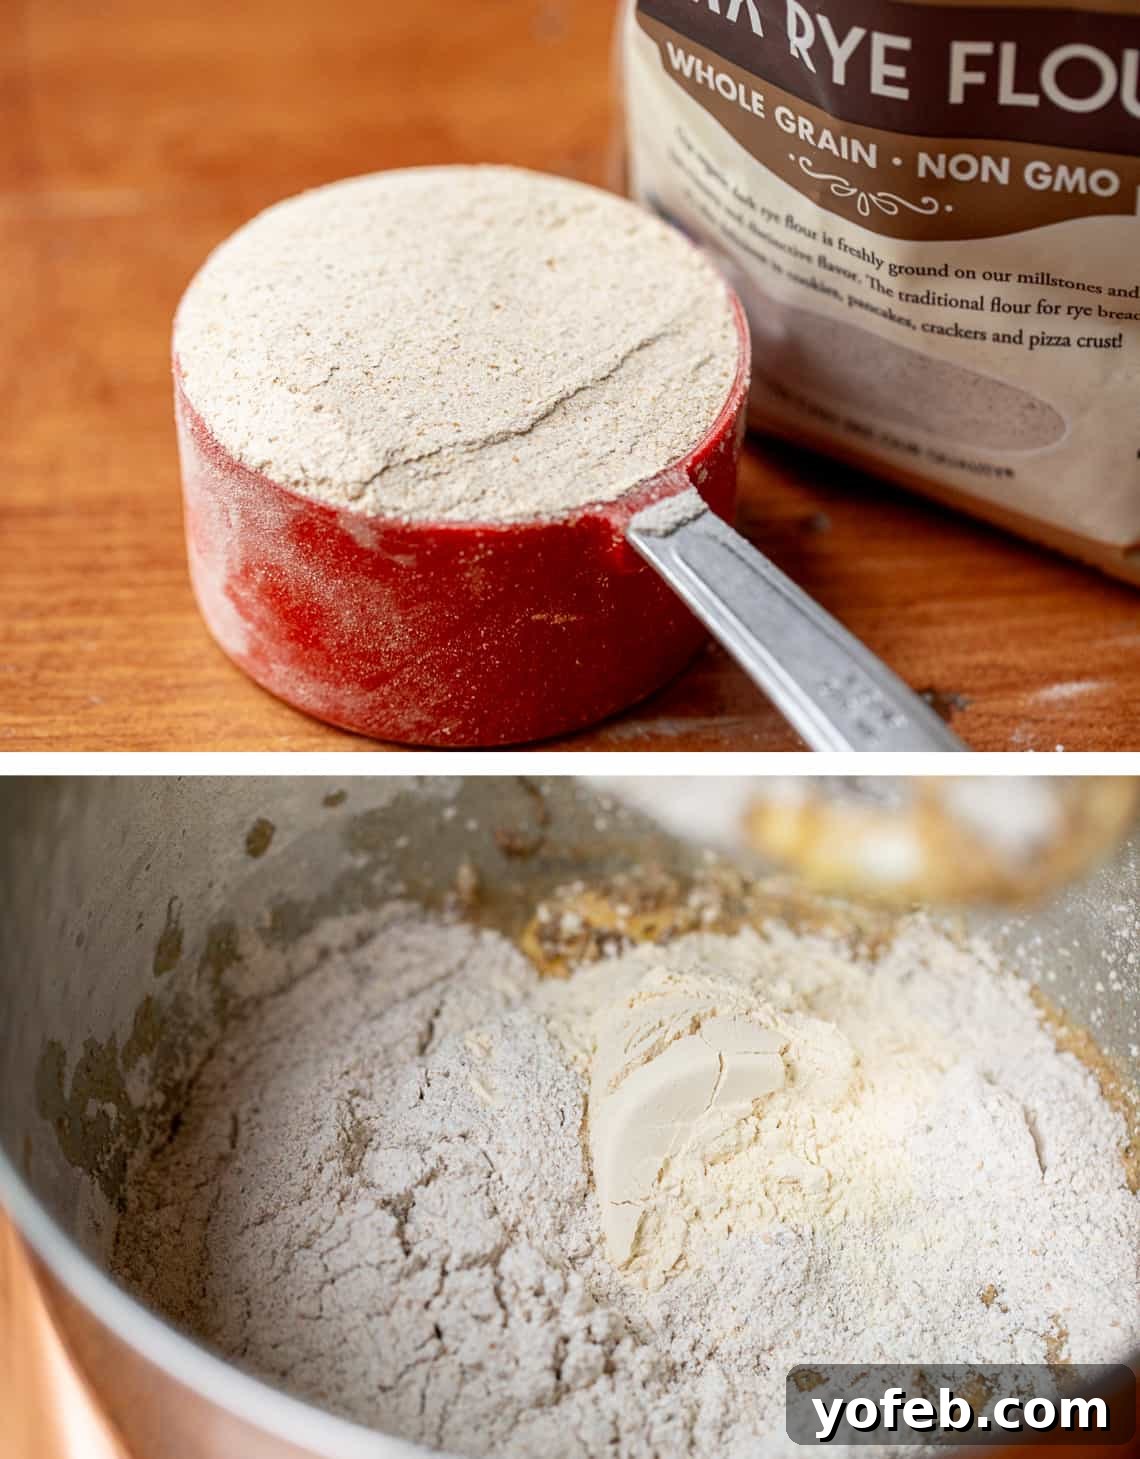
Observe the appearance of rye flour here. It’s noticeably grainier than all-purpose white flour, offering a textural distinction that hints at its robust flavor. It truly is flavor you can see!
Add in your two cups of rye flour, the vital wheat gluten, and then three cups of all-purpose flour. Crucially, do not add the final half-cup of all-purpose flour at this stage. Always remember to “spoon and level” your flour: use a spoon to gently scoop the flour into your measuring cup, then level off the top with a straight edge. This technique prevents over-measuring and ensures your dough isn’t too dense.
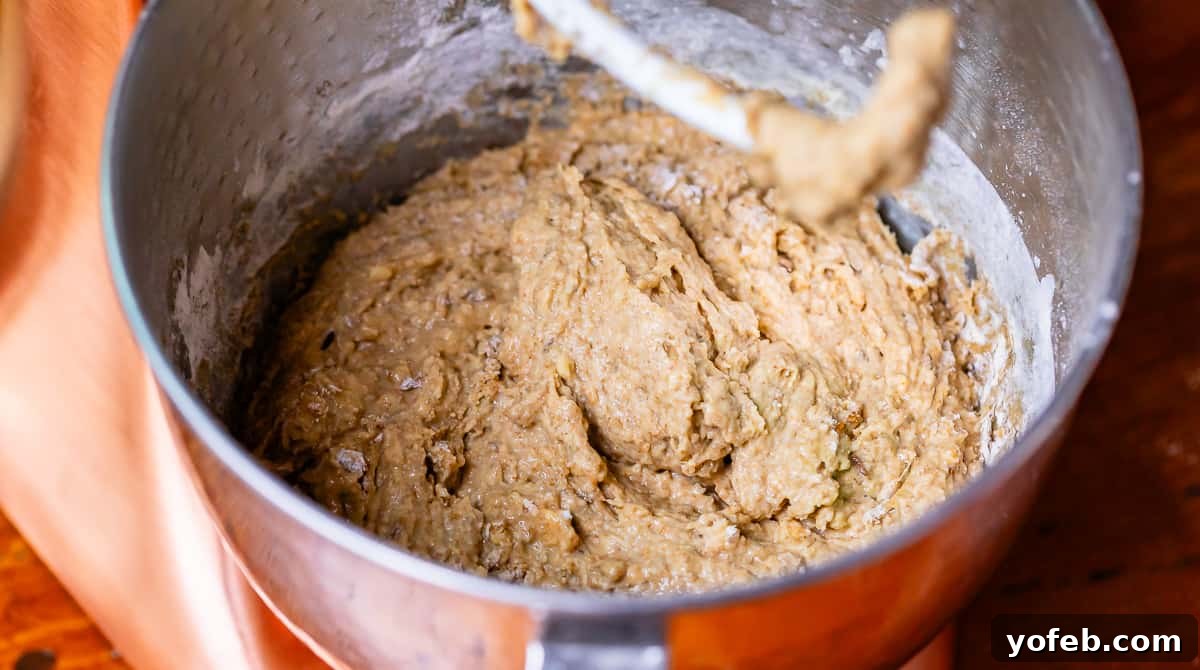
Mix these ingredients until the dough appears wet and sticky, just as depicted above. It’s vital to resist the temptation to add more flour at this point! This consistency is entirely normal and expected for rye dough, which differs significantly from typical wheat bread dough. If you’re not already using a dough hook with your stand mixer, switch to it now.
Now, it’s time for thorough kneading. You’ll want to keep this dough moving for a solid 5 to 8 minutes. Kneading is a crucial process where the proteins in wheat flour combine to form gluten. Gluten creates an elastic network within the dough, acting like a delicate web that traps the carbon dioxide gas released by the developing yeast. This trapped gas is precisely what gives your bread its beautiful rise and airy texture – pure science in action! An interesting fact to remember: wheat flour contains approximately three times more gluten than rye flour. This is why we combine the two flours in this recipe; rye flour alone wouldn’t achieve the desired height and lightness.
(If you are kneading this dough by hand, it’s imperative to use the absolute minimum amount of flour possible on your hands and work surface. Opt for an oiled surface rather than a floured one to prevent the dough from becoming too stiff.)
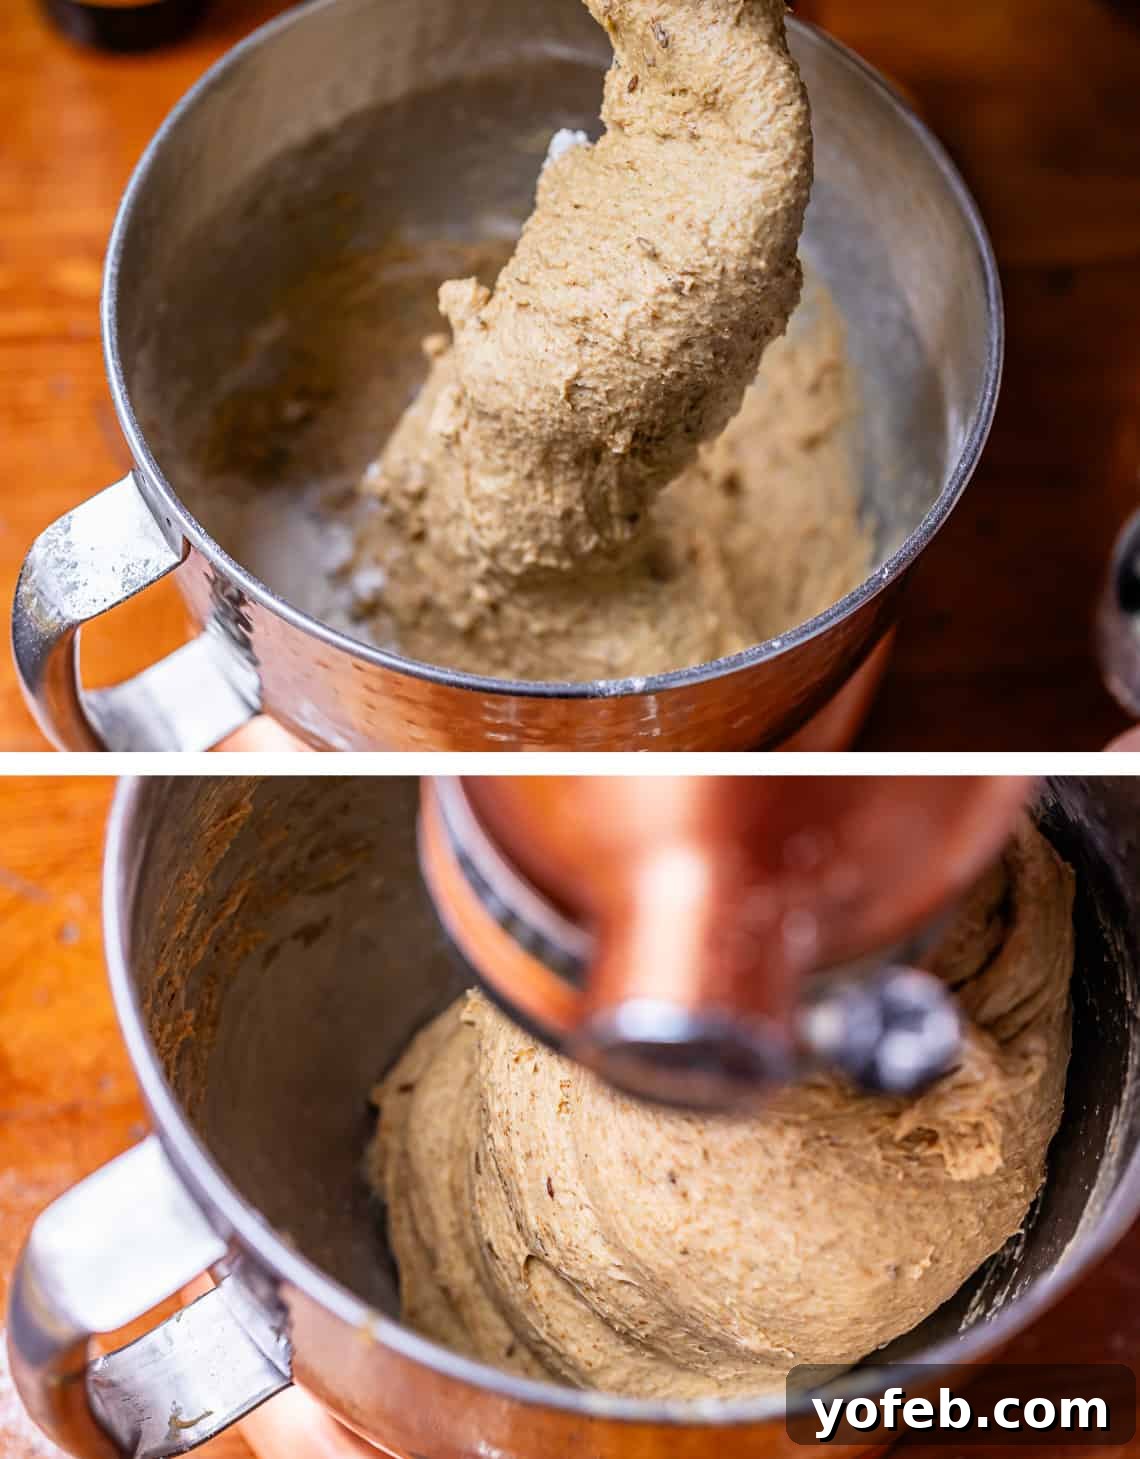
As the dough continues to knead, measure out your final half-cup of all-purpose flour. Add it to the dough gradually, a shake or two at a time, while the mixer is running, until it’s fully incorporated.
Once all the flour has been added and the dough has kneaded for several minutes, it should *almost* be cleaning the sides of the bowl (but not necessarily the bottom). If it still looks very sticky all the way up to the top edges, you may add a couple more tablespoons of flour, but be extremely cautious! This is a critical juncture that can make or break your bread; overdoing the flour will result in a dense, heavy loaf. Trust the process, even if it feels stickier than you’re used to.
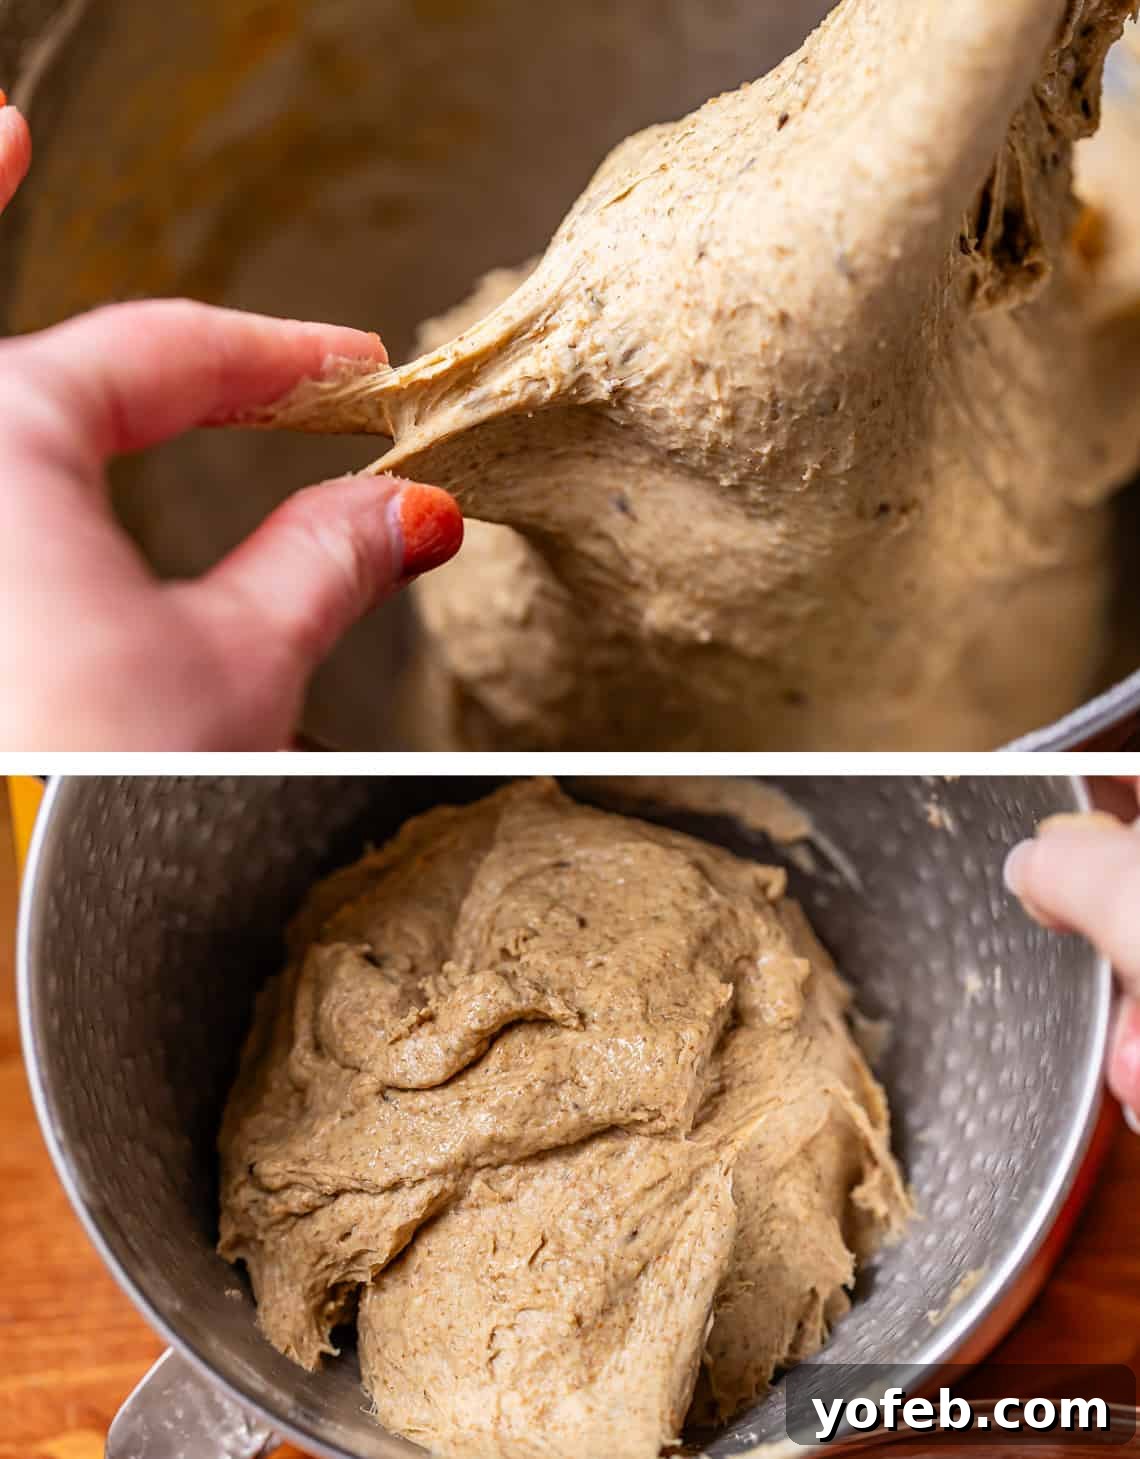
This image shows the dough at its final stage after kneading and all flour additions. Notice it will still stick to your fingers. It will have mostly come together but won’t form a completely solid, smooth ball of dough. This sticky texture is exactly what we want for a tender, light rye bread.
Next, generously oil a clean, large bowl with about a full tablespoon of vegetable oil. Use your fingers to thoroughly spread the oil around the entire interior surface. It’s crucial that this dough does not dry out, and we must avoid adding any more flour from this point onward. It’s oil or bust for handling this delicate dough.
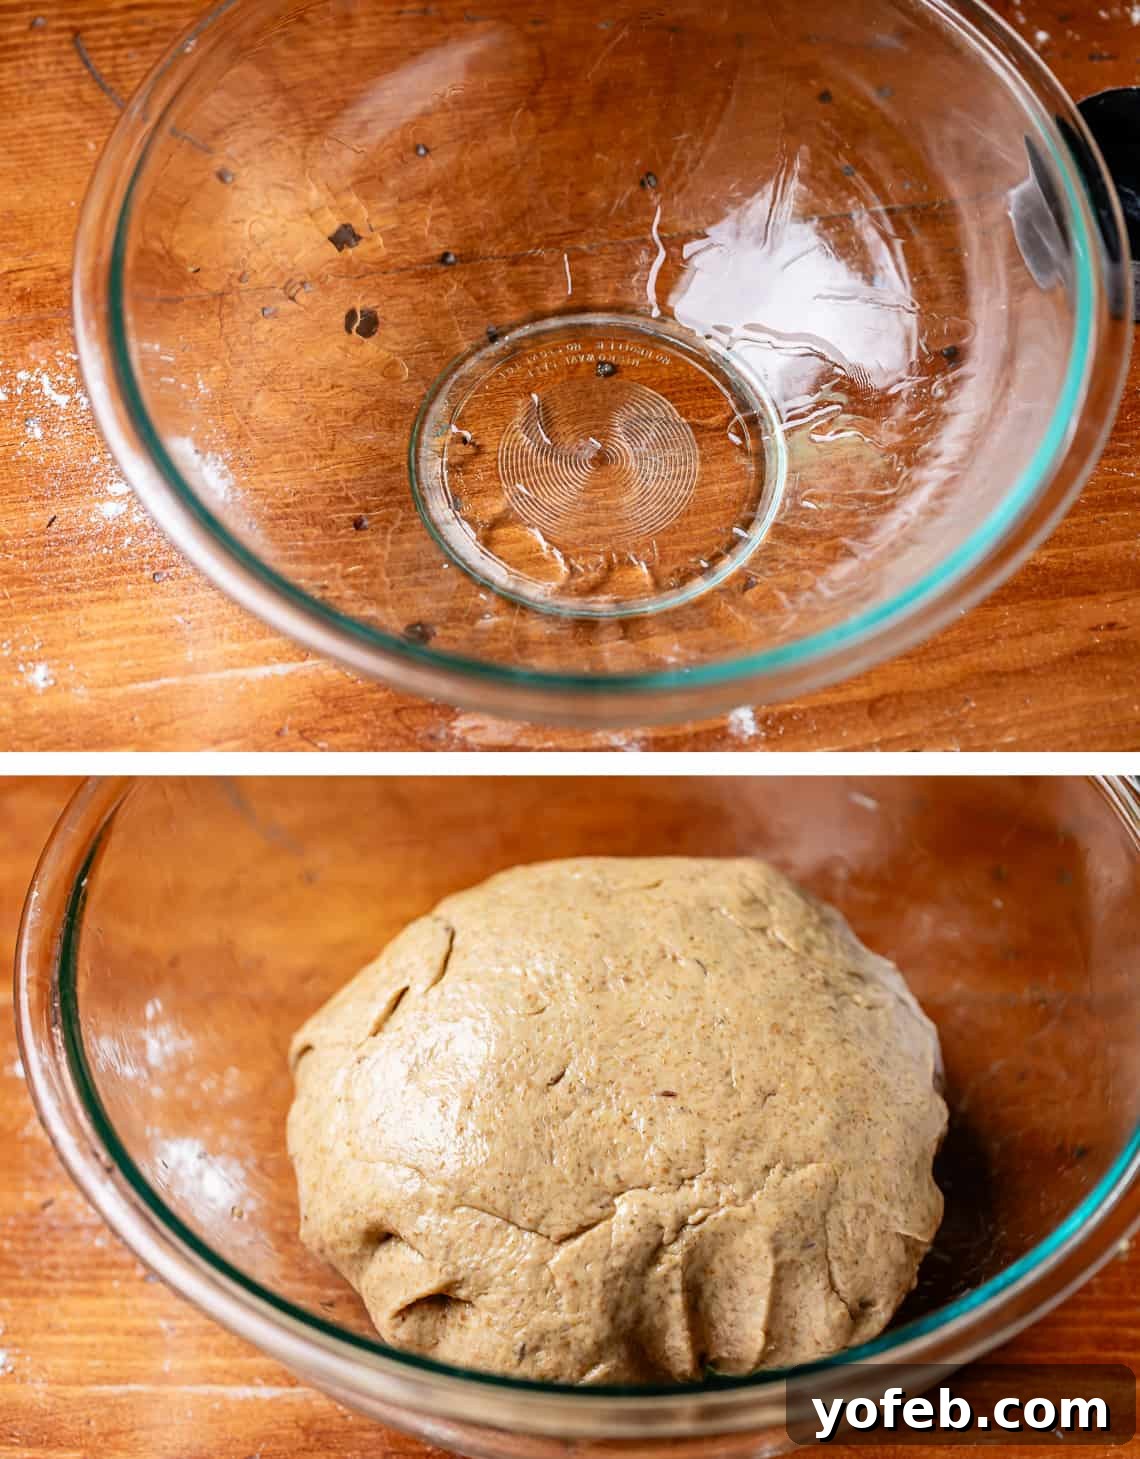
With your now-oiled fingers, gently transfer the dough into the prepared bowl. Shape it into a neat ball, then turn it over once to ensure it’s completely coated with oil. This layer of oil helps prevent a crust from forming and keeps the dough supple during its rise.
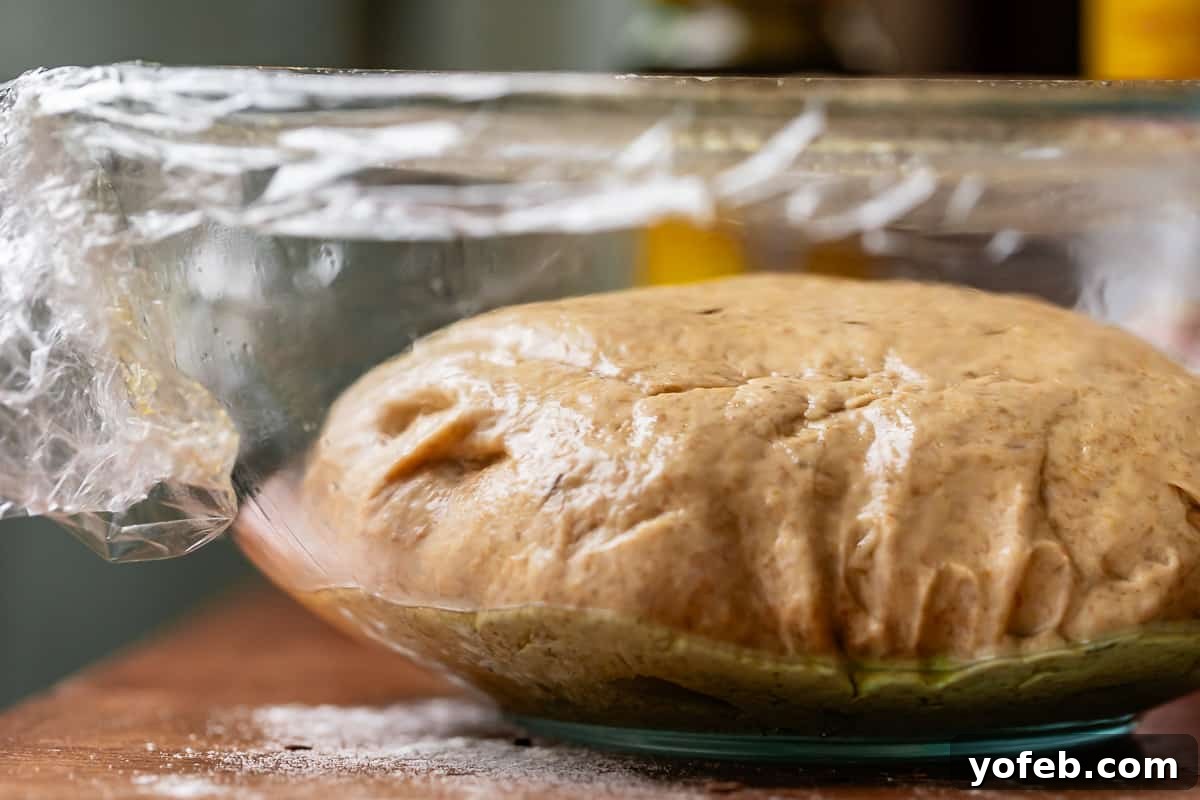
Lightly spray a piece of plastic wrap with nonstick spray, and then loosely cover the bowl. Place the dough in a warm environment to rise for approximately one hour, or until it has noticeably doubled in size. A handy trick for a consistently warm rising spot is to preheat your oven to 350°F for about 45 seconds, then immediately turn it off. You’re aiming for a gentle warmth, not a hot oven. Test the racks with your fingers; if they’re too hot to touch comfortably, leave the oven door ajar for a few minutes until it cools down slightly. If you’re prone to forgetting (like me!), set a timer so you don’t accidentally leave the oven on with your precious dough inside!
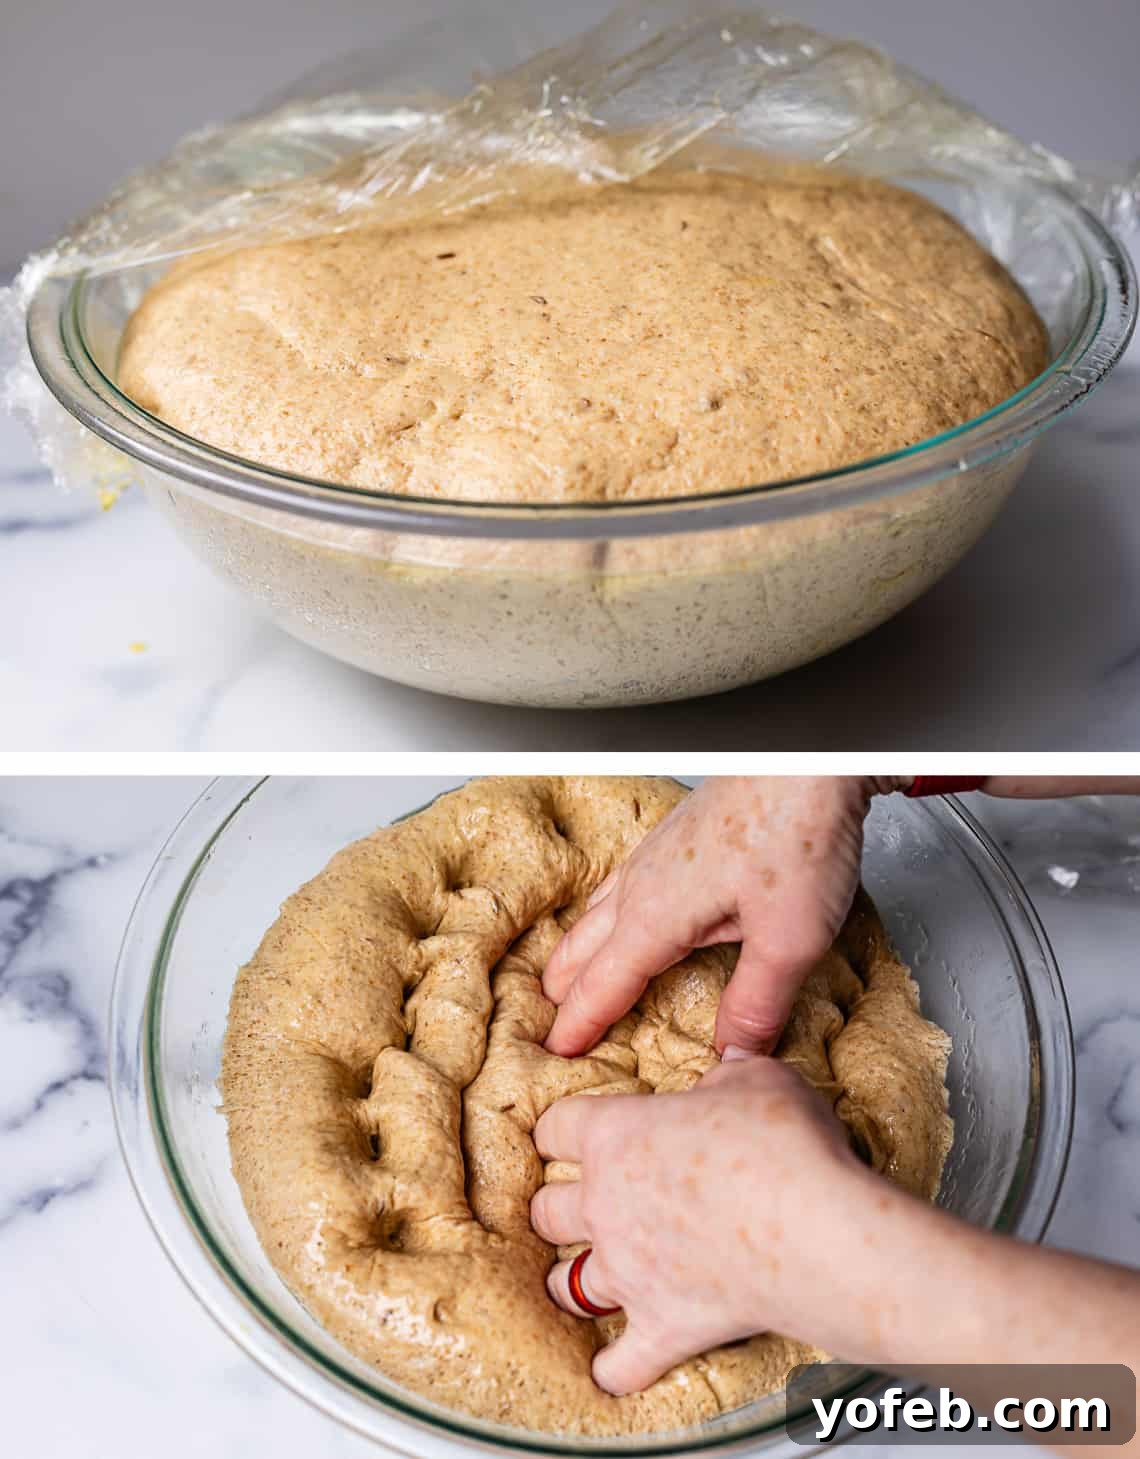
Behold, the beautifully risen dough after its first hour! It’s plump and full of promise. Now, gently punch it down to release the trapped gases. Take it out of the bowl, reshape it back into a ball, and then re-grease the bowl with a little more oil. Return the dough to the bowl, turn it to coat, and re-cover. Warm your oven again for just a minute if needed, and let the dough rise a second time for another hour, or until it has doubled in size once more. This crucial second rise is not to be skipped; it’s a key step for achieving that signature light texture.
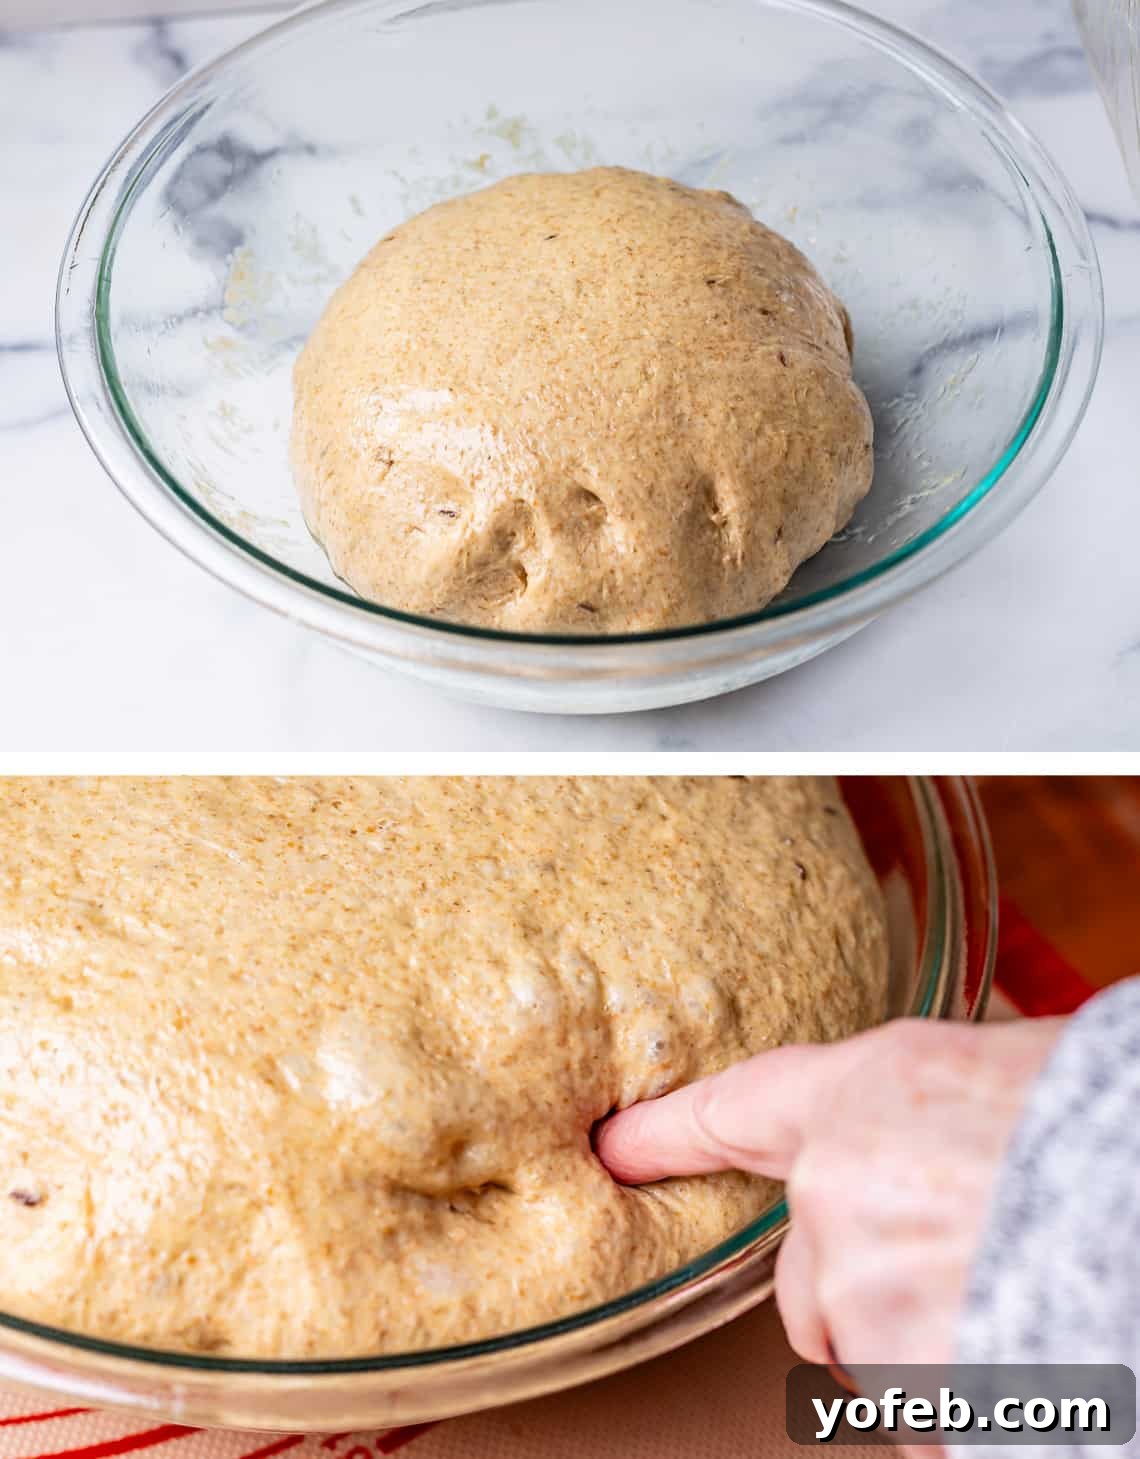
Following the second rise, your dough should be noticeably airy and elastic. You can test its readiness by gently poking your finger into the dough: a proper indentation should remain, and the dough should not spring back immediately. This indicates it’s perfectly proofed and ready for the next stage.
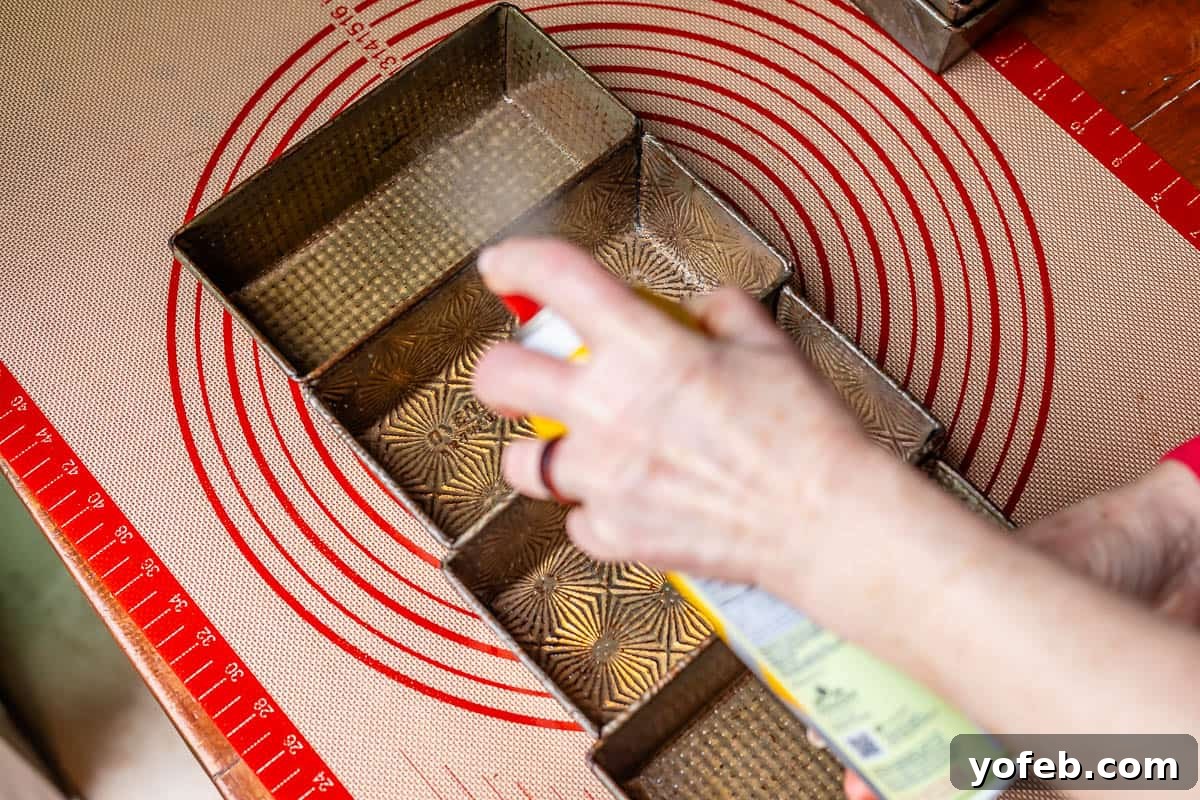
Generously spray your loaf pans with nonstick spray. We are using Prudy’s original 7×4 inch pans, which yield four charming, small loaves. If you only have standard 9×5 inch loaf pans, don’t worry – the recipe card includes notes for adapting the recipe to make two larger loaves, which are excellent for sandwiches.
Prepare your work surface by laying out a silicone mat, or if you don’t have one, drizzle a tablespoon or so of oil directly onto a clean, flat, non-porous countertop. Spread the oil around with your hands, creating a lightly greased surface for shaping.
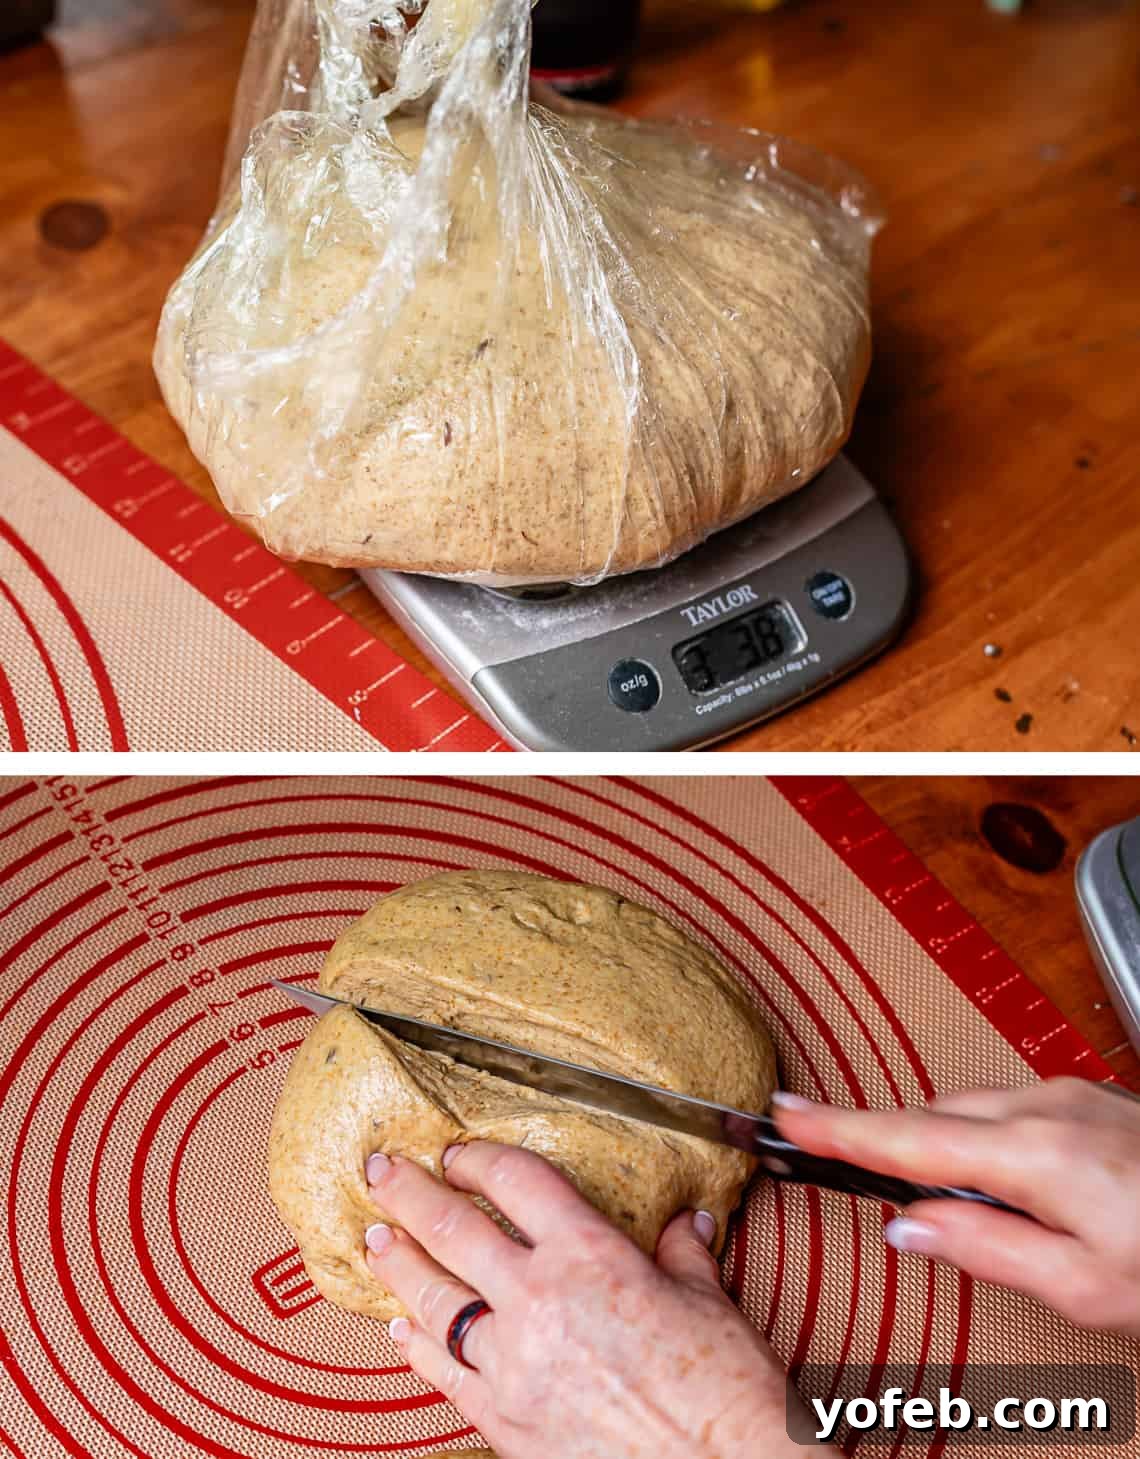
Kris, ever the meticulous baker, always weighs her dough portions to ensure each loaf is perfectly uniform. If you don’t have a kitchen scale, simply eyeball it – divide the dough into four equal pieces for the 7×4 inch pans, or in half for larger 9×5 or 8×4 inch pans.
Take the first portion of dough and gently press it into a rectangular shape on your oiled surface. The dough should be wonderfully soft and pliable, so a rolling pin probably won’t be necessary; your fingers will do the trick! Notice Kris’s finger marks in the photo – she simply patted it down. Ensure the rectangle is roughly the length of your chosen bread pan.
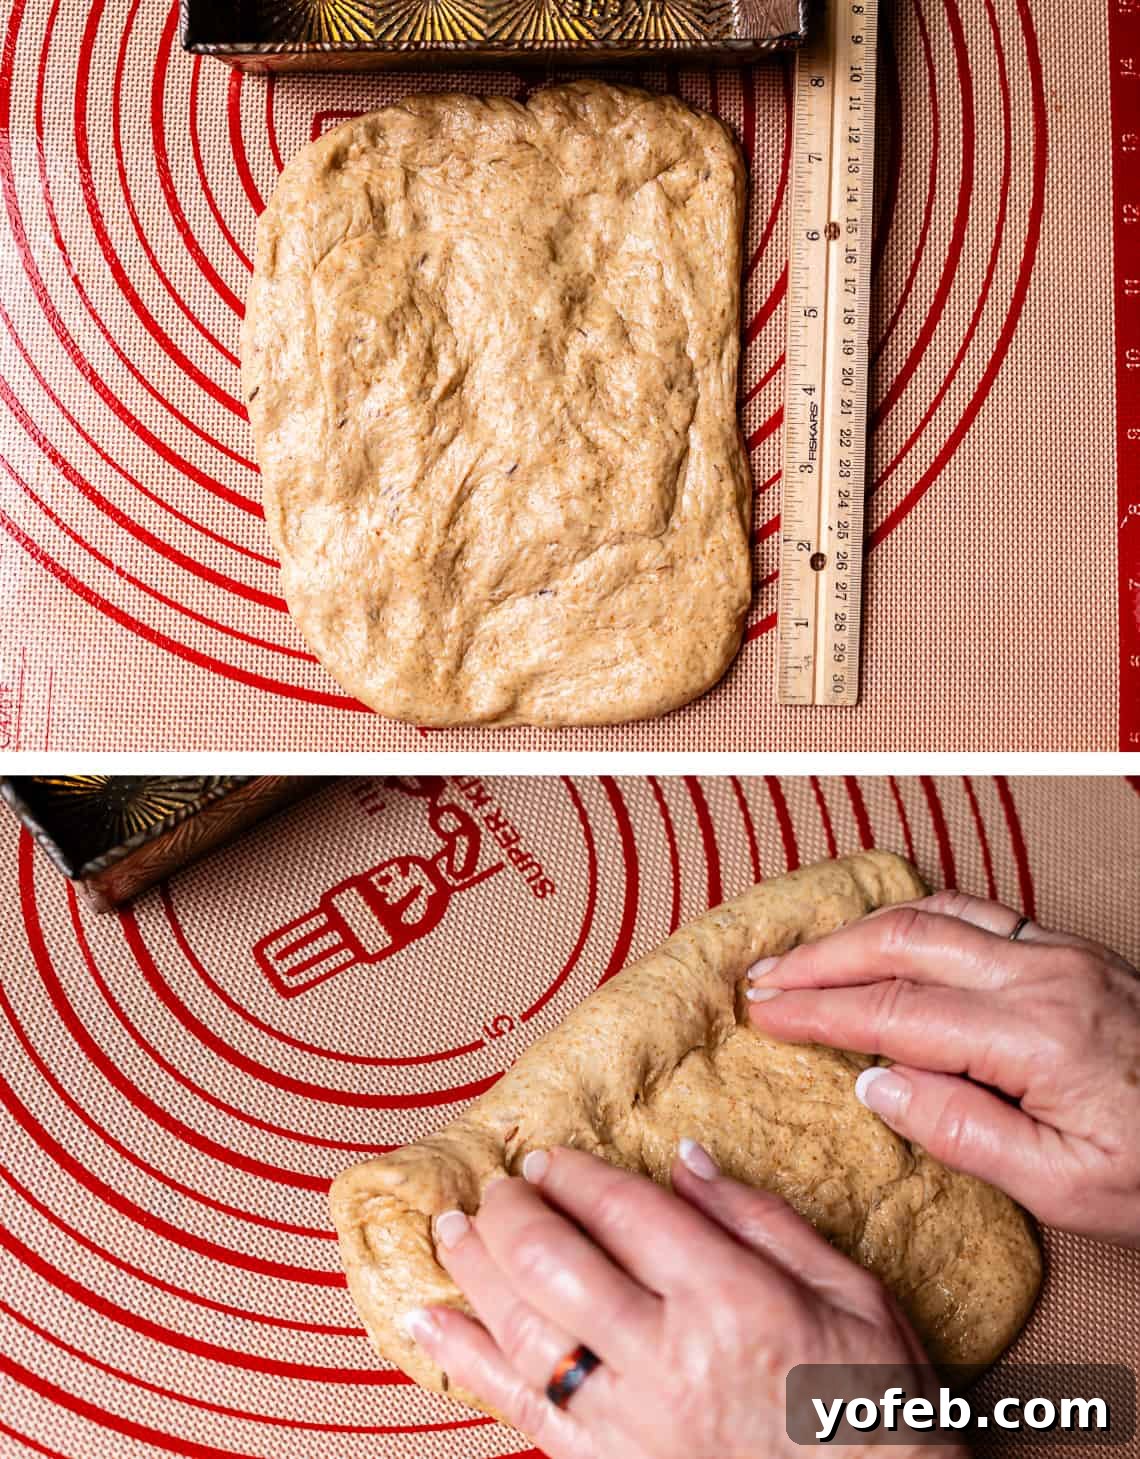
Now, begin the “roll-pinch” technique. Starting from the edge of the dough that corresponds to the length of your pan, gently roll and lightly pinch the dough upwards. This method helps create a tight, even loaf. Continue rolling and pinching until you have a compact, charming little dough log.
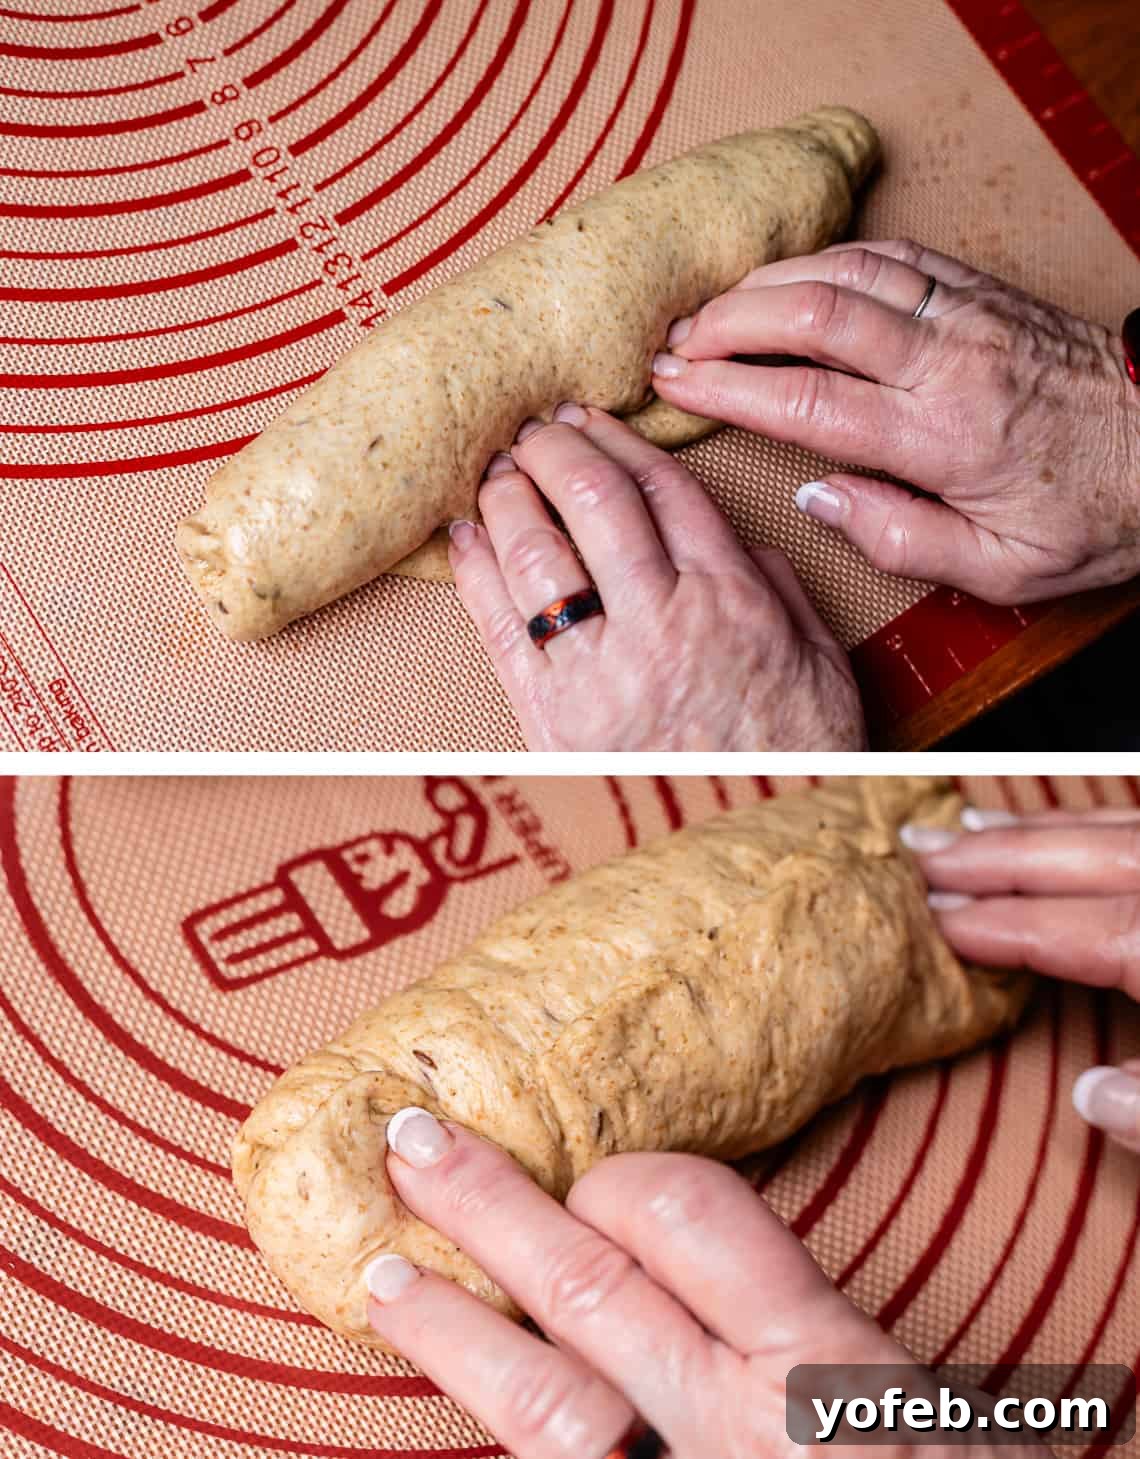
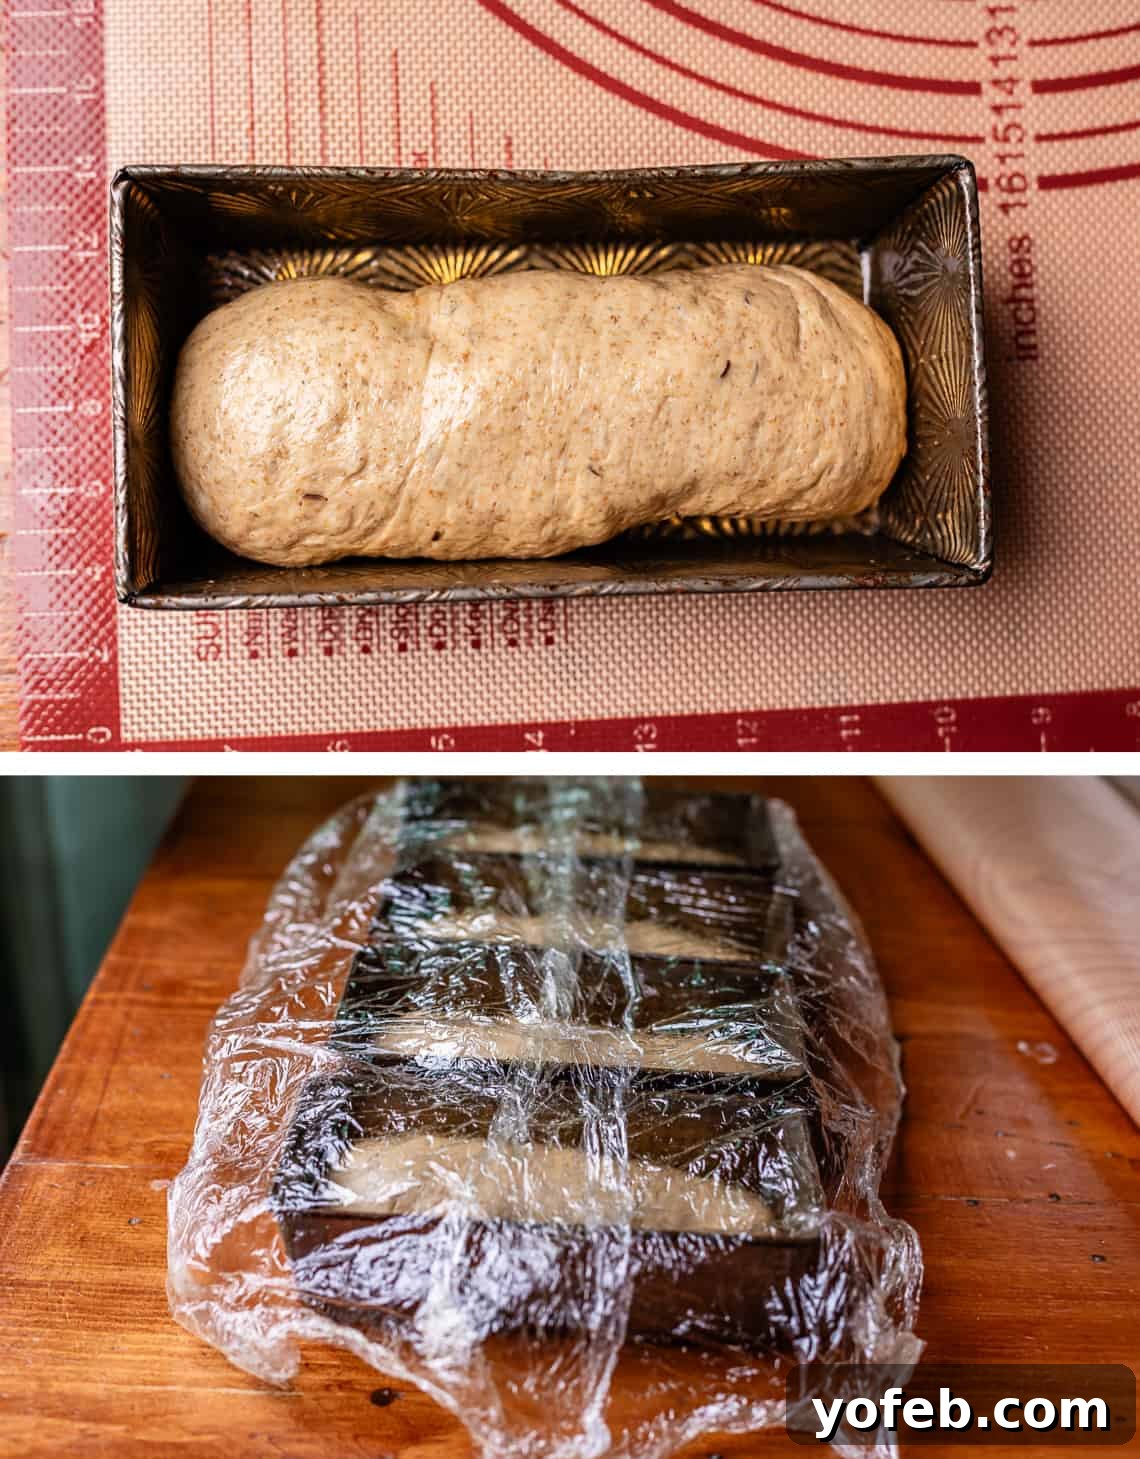
Once rolled, tuck the ends of your loaf neatly underneath so that the seam is at the bottom. Gently smooth out your “baby burrito bread” to create a cohesive shape. Carefully lift the shaped dough and place it seam-side down into your well-greased pan. Cover the pans loosely but well with greased plastic wrap or parchment paper, and return them to a warm place for their third and final rise.
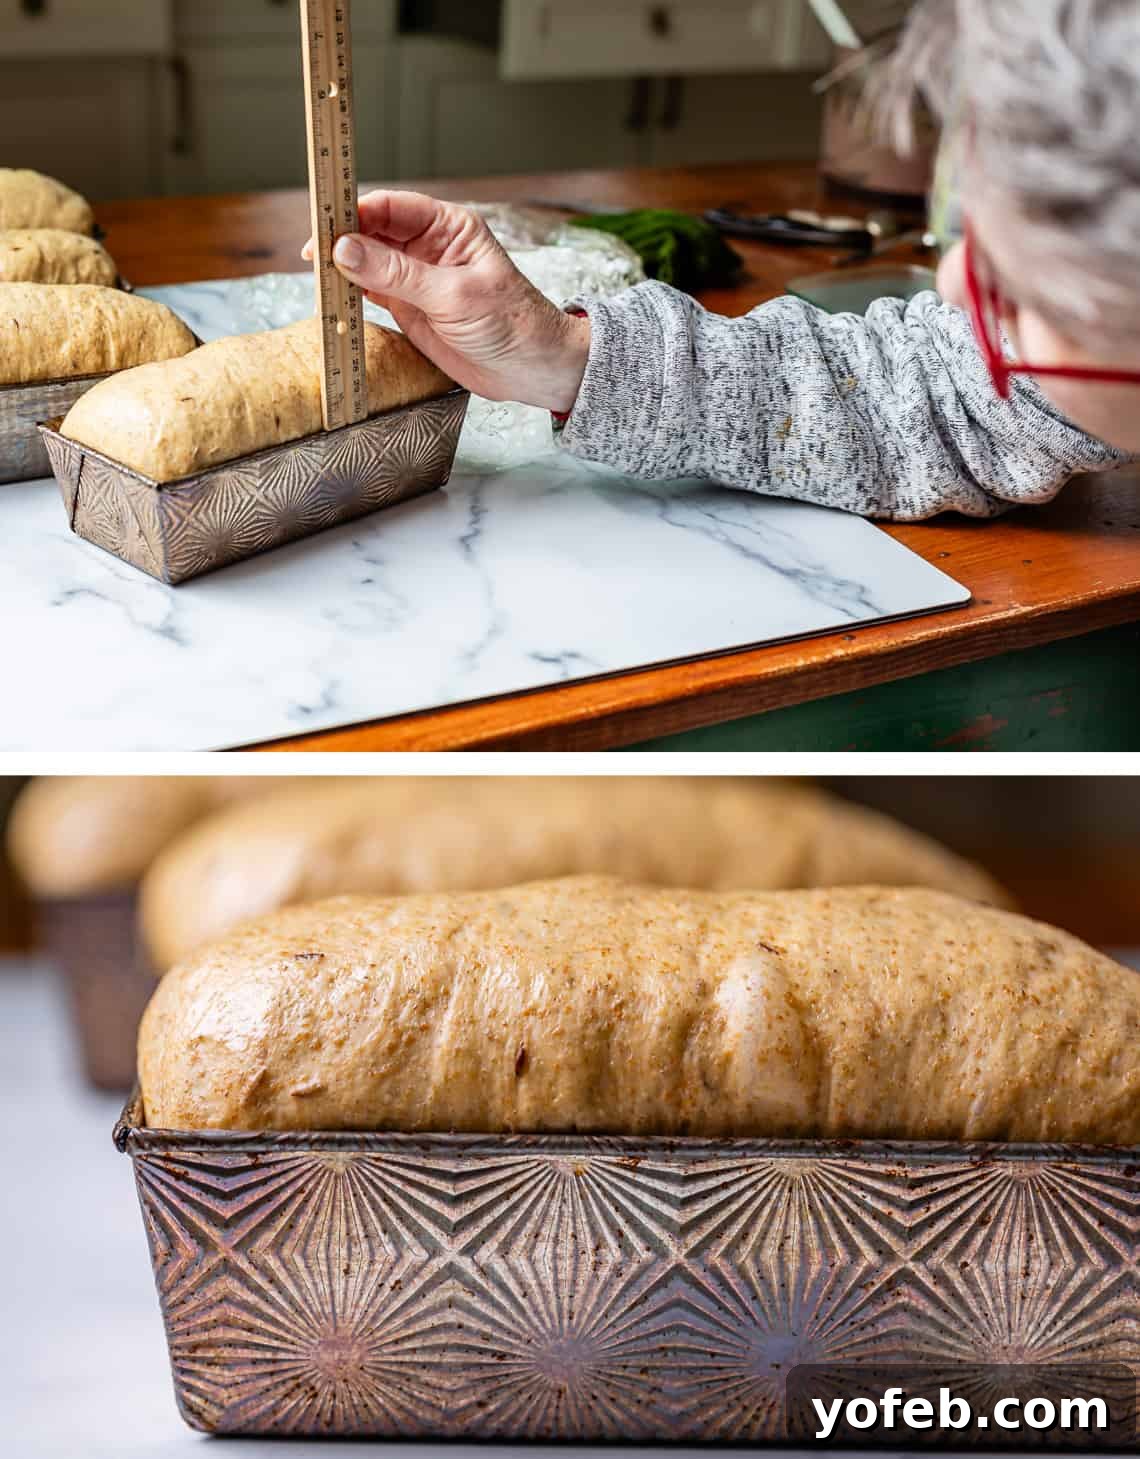
Here, my mother-in-law Kris meticulously measures her rye bread to ensure it has risen at least an inch above the rim of the pan. This visual cue is crucial for knowing when your loaves are perfectly proofed and ready for the oven.
Once your loaves are beautifully risen, it’s time for baking! Preheat your oven to 375°F. If you’ve been proofing your bread in a warm oven, remember to remove the pans about 30 minutes before this final rise is complete, ensuring they are out before the oven starts heating to baking temperature!
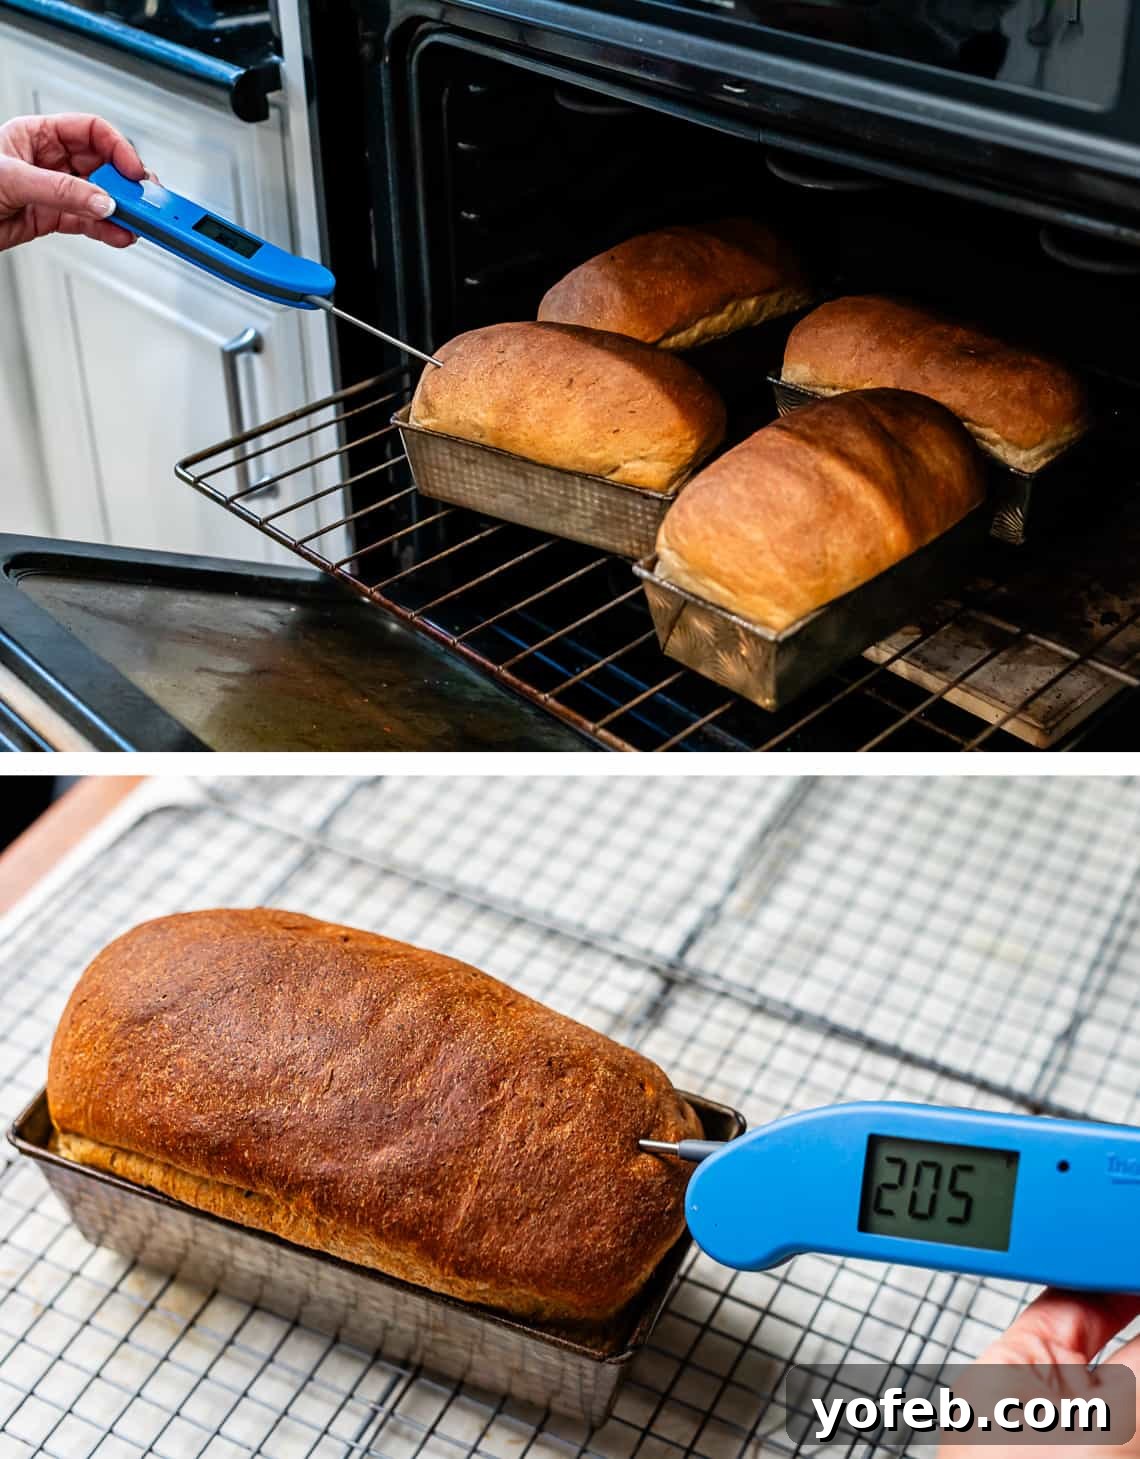
Bake the bread at 375°F. For the smaller 7×4 inch pans, this typically takes about 30-35 minutes. If you’re using larger 9×5 inch pans, extend the baking time to approximately 40-45 minutes. I cannot stress enough the importance of using an instant-read thermometer to ensure perfect doneness. Even Kris, who has baked this recipe countless times, relies on her thermometer every single time. The internal temperature of the bread should reach 205°F for the smaller loaves, and 208-210°F for the larger 9×5 inch loaves, before you remove them from the oven.
If you don’t have a thermometer, wait until the tops of the loaves are deeply browned, almost appearing slightly burned. Remember, rye flour is naturally darker than white wheat flour, so this deep color is normal and desirable. It is always better to slightly overbake than to risk an underbaked, doughy center. You can always revive dry bread with a little butter, but a gooey, undercooked loaf is unfortunately unsalvageable.
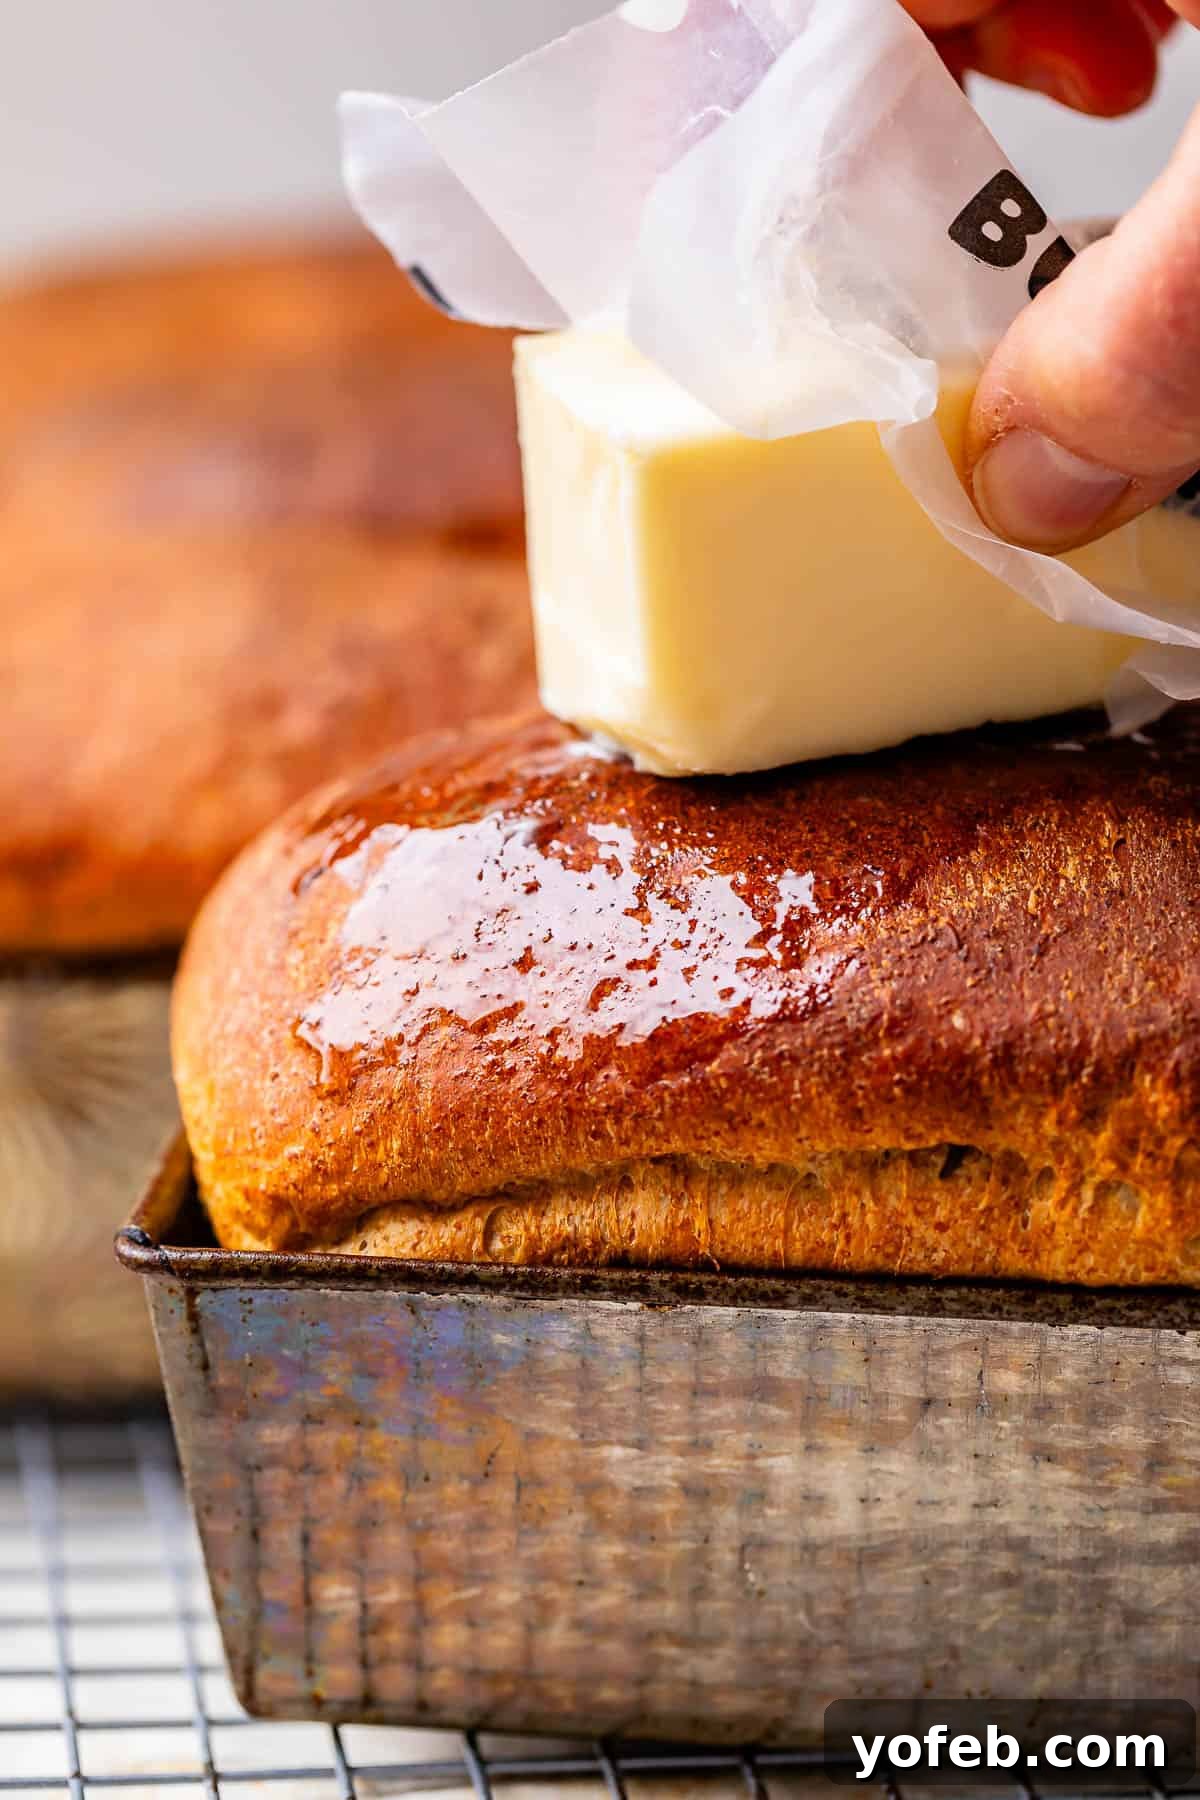
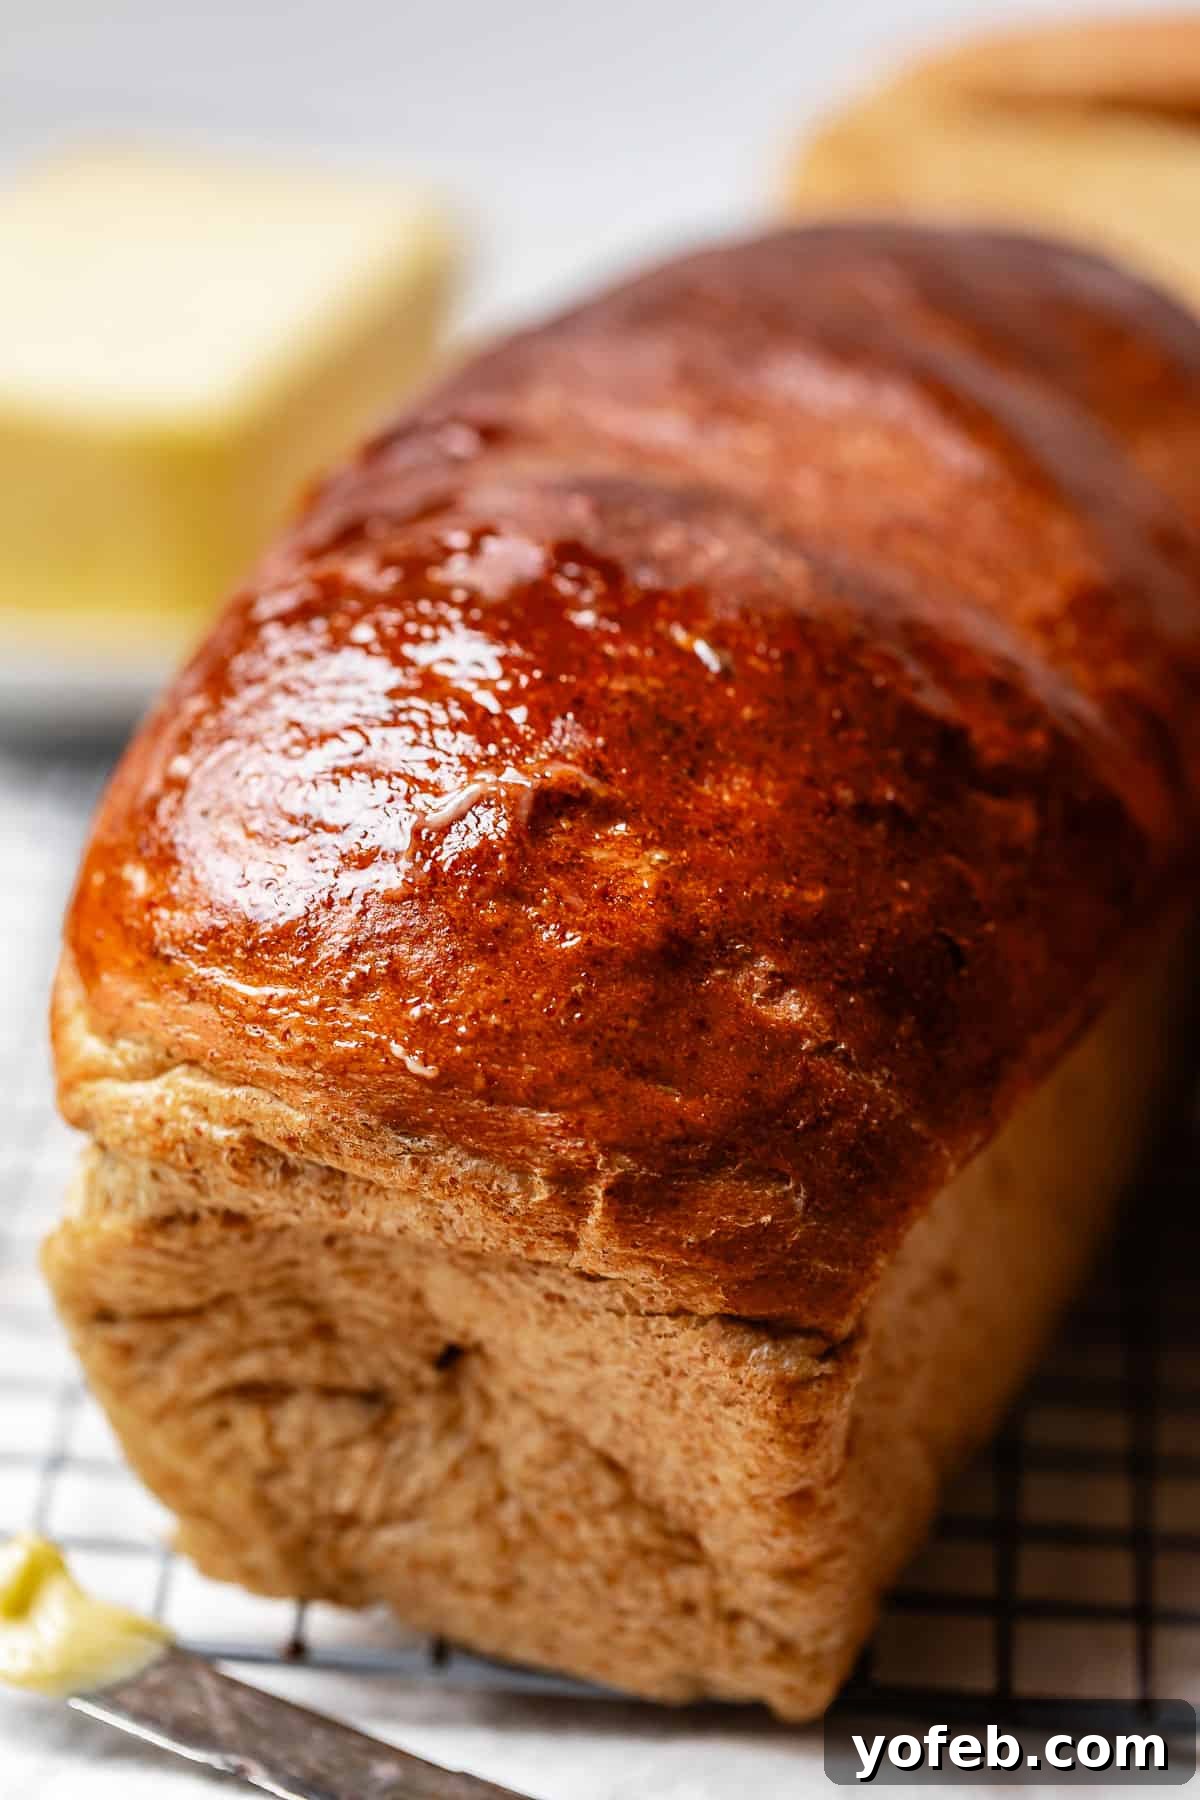
Immediately upon removing the bread from the oven, place the hot pans on wire racks. Take a stick of butter and generously rub it all over the tops of the loaves until they are completely coated with melted butter. This step not only adds incredible flavor but also contributes to the bread’s wonderfully soft crust.
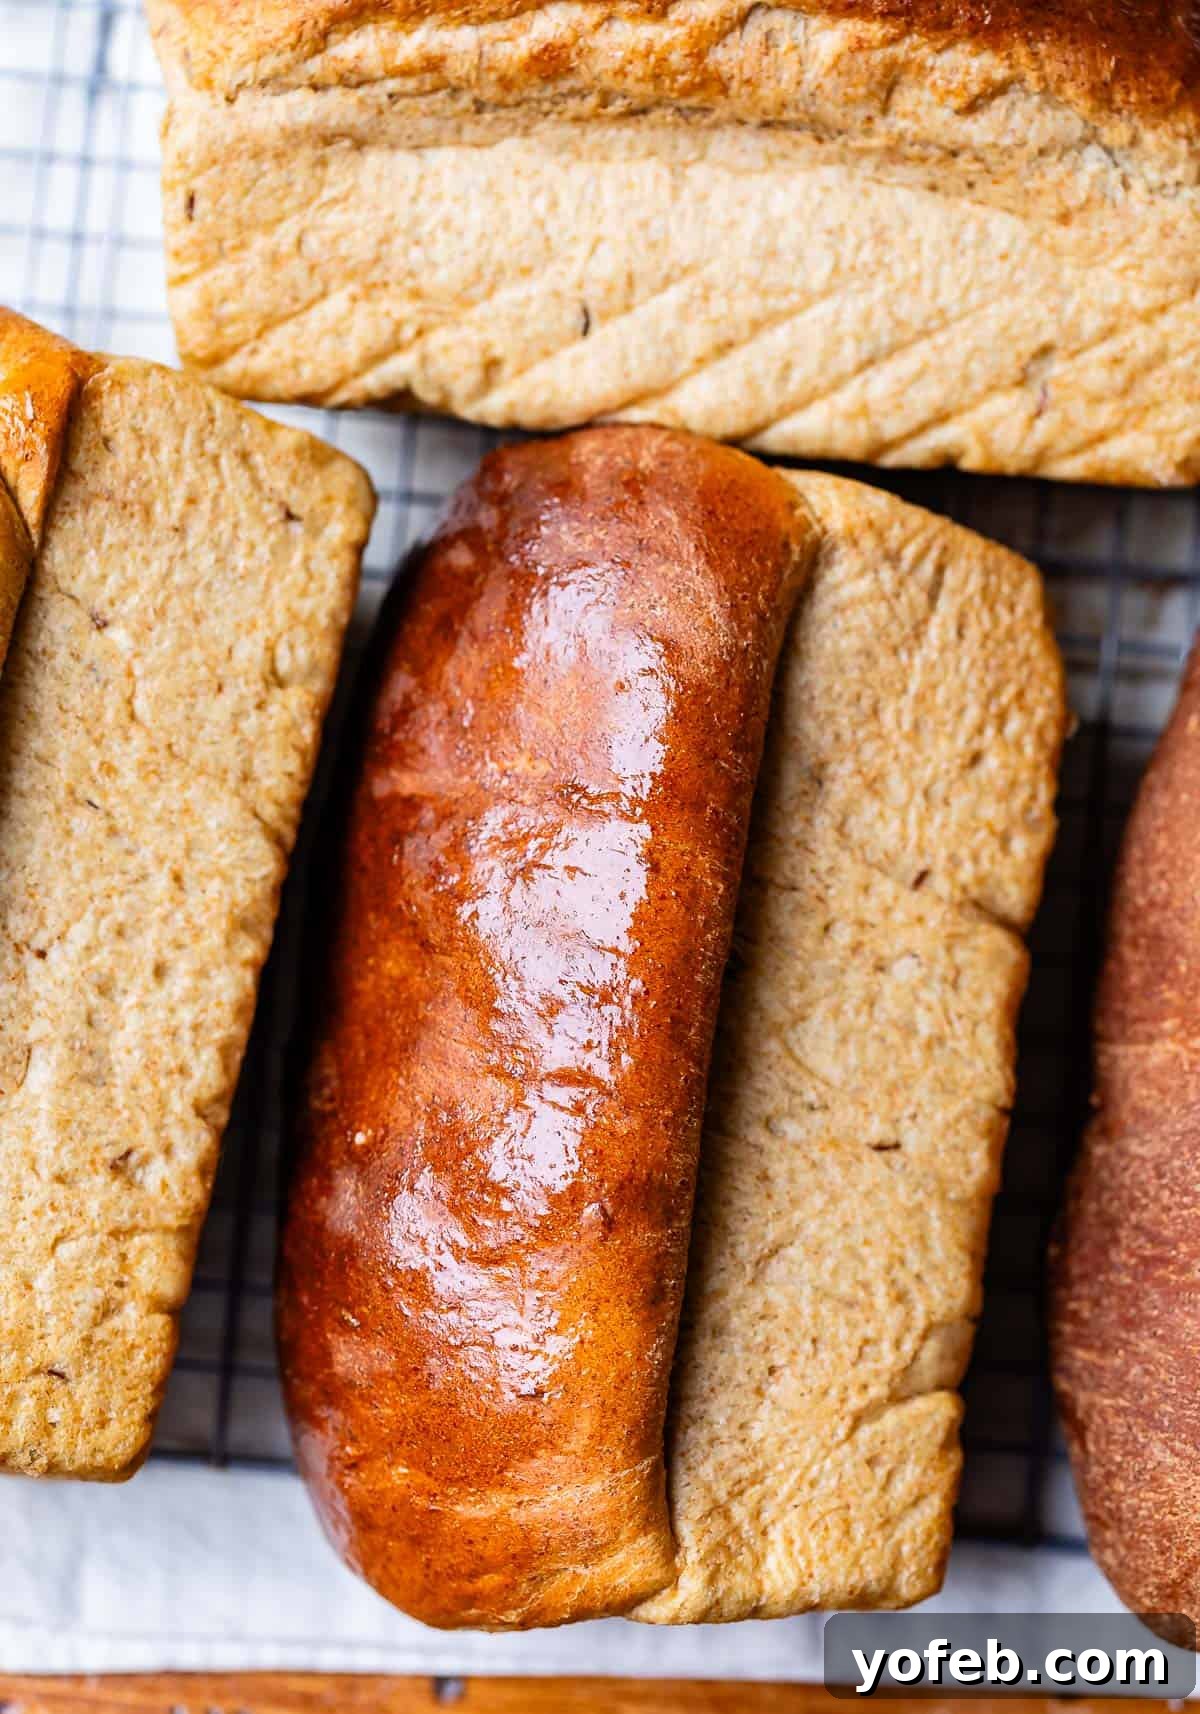
Within a minute or two, and with extreme care using hot pads, turn the bread loaves out onto the cooling racks. They should release easily; if not, gently loosen the edges with a knife. Crucially, let the bread cool out of the pan on the racks, turned on their sides. Kris always employs this method because this particular rye bread is so exceptionally tender and soft (and often a bit top-heavy) that cooling it upright can lead to the bottom half getting smooshed.
I know this is pure torture, but you absolutely *must* allow rye bread to cool significantly – ideally for 30 to 60 minutes – before attempting to slice it. Its tender, soft crumb will compress and crush if you slice it while it’s still too warm. I often struggle with my own advice here, but patience is a virtue when it comes to perfect slices! Use your sharpest serrated knife and employ a gentle sawing motion, rather than pushing down, to achieve clean cuts. If you’re struggling to wait, try slicing the bread on its side. Now, it’s finally time to devour your masterpiece with copious amounts of butter! Or, explore the delightful serving ideas below.
Expert Tips for Flawless Rye Bread
Achieving that perfect, light, and flavorful Swedish rye bread is simple if you keep these crucial tips in mind:
- Choose Your Rye Flour Wisely: For the lightest, fluffiest bread that still delivers that distinct, wonderful rye flavor, opt for light rye flour. If your goal is a more nutrient-dense or darker rye bread, select whole grain rye flour (sometimes labeled as pumpernickel flour). Both options work beautifully with this recipe.
- Don’t Skip the Wheat Flour: Because rye flour has a naturally low gluten content, it doesn’t rise effectively on its own. While there are other complex methods to overcome this, the simplest and most effective approach is to use a blend of rye and regular wheat flours, as specified in this recipe. This combination ensures a good rise and desirable texture.
- Embrace the Stickiness: Be prepared for a dough consistency that might feel different from what you’re accustomed to with wheat-based breads. Rye dough will be noticeably stickier and less elastic or pliable. This is entirely normal and a characteristic of good rye dough – do not be tempted to add excess flour!
- Respect the Triple Rise: Once again, due to rye’s lower gluten content, it proofs more slowly than traditional wheat bread doughs. This is precisely why our recipe incorporates three distinct rises instead of the usual two. Each rise is essential for developing the bread’s airy structure and cannot be skipped for optimal results.
Creative Ways to Enjoy Your Homemade Rye Bread
Your freshly baked homemade rye bread is incredibly versatile, offering a myriad of delicious ways to enjoy its unique flavor and texture beyond just buttered toast. Here are some fantastic ideas to inspire your culinary adventures:
- The Classic Appetizer: True to Eric’s Swedish great-grandmother’s tradition, we cherish this bread as a sophisticated cocktail appetizer, especially during the holidays. It pairs exquisitely with creamy Liver Pâté. Trust me, don’t knock it until you’ve tried it – the combination is surprisingly delicious and a true family favorite.
- Simple Pleasures: Enjoy it toasted and generously slathered with butter. While Kris insists rye bread is strictly savory and avoids jam, I wholeheartedly disagree! I find it absolutely divine with my favorite fruit preserves. It’s a delightful breakfast or snack any time of day.
-
Elevate Your Sandwiches: While our family primarily enjoys it toasted, this rye bread makes an exceptional foundation for sandwiches, adding a distinctive flavor and texture that transcends ordinary wheat bread. Imagine the simple elegance of a turkey and cheese sandwich elevated by the nutty notes of rye! Here are some specific sandwich creations I’m eager to try:
- The timeless classic: a hearty Reuben sandwich, piled high with corned beef, Swiss cheese, sauerkraut, and Russian dressing.
- Oven-roasted turkey breast with sharp cheddar for a comforting, familiar bite.
- Thinly sliced roast beef complemented by creamy provolone cheese.
- Spicy hot honey chicken with delicate Havarti for a modern twist.
- Classic pastrami and Swiss on rye – a deli staple reinvented.
- Flavorful Corned Beef, perfect for St. Patrick’s Day leftovers or any time you crave it.
- A creamy Egg Salad sandwich, with the rye adding a subtle depth.
- A gourmet grilled ham & cheese, utilizing rye for an unexpected twist.
- Luxurious Cream cheese with smoked salmon, a Scandinavian-inspired delight.
- Any imaginative combination of holiday leftovers – think turkey, ham, and cranberry sauce for an irresistible post-feast sandwich.
- Charcuterie Board Enhancement: Cut toasted slices of the small loaves and arrange them elegantly on a charcuterie board, offering a robust and flavorful base for cheeses, cured meats, and spreads.
- Perfect for Dipping: This rye bread makes an excellent dipper for rich, creamy recipes like Extra Cheesy Spinach Artichoke Dip, spicy Cheesy Buffalo Chicken Dip, or decadent Bacon Blue Cheese Dip – a truly indulgent pairing!
- Savory Bread Puddings & French Toast: Inject a new kick into your savory dishes! Use rye bread in place of wheat bread in recipes like Savory Bread Pudding with Ham and Asparagus or Savory Parmesan French Toast with Hollandaise Sauce for an intriguing flavor dimension.
- Homemade Croutons: Transform leftover rye bread into deliciously crunchy homemade croutons, perfect for topping salads or, even better, as the base for a flavorful Traditional Stuffing.
- Soup Accompaniment: Pair slices with a hearty soup, like this Savoy Cabbage Soup with Ham, Rye Bread, and Fontina from Brenda Gantt Recipes, for a truly satisfying meal.
Storing Your Rye Bread for Lasting Freshness
To keep your homemade Swedish rye bread at its absolute best, proper storage is key. The ideal way to store leftover rye bread is in a sealed ziplock bag or an airtight container on the counter. This method helps lock in its moisture and preserves its soft texture. A crucial tip: do NOT refrigerate your rye bread! Refrigeration will accelerate the staling process, causing your bread to dry out incredibly fast and lose its delightful texture.
If, after a few days on the counter, your bread begins to feel a little dry, there’s a simple trick to revive it. Lightly dampen (but don’t soak!) a clean towel or paper towel, wrap it around the bread, and place it on a baking sheet. Pop it into a preheated 200°F oven for about 5 to 10 minutes. Alternatively, you can use a similar method by wrapping the bread and microwaving it for approximately 10 seconds at a time until it reaches your preferred softness. These methods gently reintroduce moisture, bringing your rye bread back to life.
Can You Freeze Rye Bread? Yes, And Here’s How!
Absolutely! Just like many other varieties of homemade bread, this Swedish rye bread freezes beautifully, making it an excellent candidate for baking ahead. You can easily prepare several loaves in advance and simply pull one out whenever the craving strikes. After our recent photoshoot, where we baked numerous batches, my freezer is still happily stocked with this delicious bread! It’s also a cherished family tradition: every Christmas when we visit Montana, Kris has an abundance of loaves lovingly tucked away in the freezer, ready for us to enjoy and, inevitably, playfully squabble over. For us, rye bread truly is a language of love.
To ensure optimal results when freezing, make sure the bread is **completely cool** before wrapping. Even a hint of warmth can create steam that gets trapped, potentially making the bread soggy upon thawing. Once cool, wrap each loaf tightly and thoroughly a few times in plastic wrap. For an extra layer of protection against freezer burn, you can then either place the wrapped loaves into freezer-safe ziplock bags, ensuring as much air is pressed out as possible, or wrap them securely in aluminum foil. Properly stored, it will maintain its quality in the freezer for up to 3 months, though for the very best texture and flavor, we recommend enjoying it within 1 to 2 months to prevent it from drying out from prolonged exposure to cold air.
When you’re ready to enjoy a frozen loaf, simply thaw the bread at room temperature, keeping it in its wrapping until fully defrosted. If you prefer your bread warm, be sure to remove all plastic wrap first. Then, wrap the loaf in aluminum foil to retain moisture during reheating. Place the foil-wrapped loaf in a preheated 350°F oven for about 5-10 minutes. The exact time will vary depending on the size of your loaf, so keep a close eye on it until it’s heated through to your liking.
Frequently Asked Questions About Rye Bread
Rye bread is a type of bread made from the rye grain, which is a botanical cousin to wheat but boasts a distinct texture and taste. Rye flour is naturally very low in gluten, meaning it doesn’t rise as well on its own as wheat flour. Consequently, most successful rye bread recipes either combine rye flour with wheat flour (like this traditional Swedish recipe) or employ specialized techniques to achieve a good rise. In the United States, caraway seeds are a popular addition to many rye bread recipes, contributing a unique and aromatic flavor.
Yes, rye bread is generally regarded as a very healthy bread option. Rye grain is packed with a wide array of beneficial nutrients, many of which differ in type or quantity from those found in wheat bread, making it a fantastic addition for dietary variety. It’s also a good source of dietary fiber and often has a lower glycemic index compared to many other breads. This means it can help regulate blood sugar levels more effectively, causing a slower and more sustained rise. For the maximum nutritional benefit, opting for whole grain or sprouted rye (often labeled as dark rye) is recommended. While this recipe often uses light rye flour, which is still healthy, if you’re aiming for the most nutrient-dense loaf, dark rye flour, a whole grain, is your best choice. Both light and dark rye flours work perfectly in this recipe without any adjustments needed.
This question often refers to the denser, heavier styles of rye bread, such as traditional German or Jewish varieties. However, if you diligently follow the instructions in this Swedish rye bread recipe, your loaves will be delightfully light, not heavy. The reason some rye breads are dense lies in rye’s unique chemical composition compared to wheat. Rye has less gluten, which, if not properly supplemented or managed, results in a more compact and denser bread structure. Furthermore, rye contains a different carbohydrate structure, specifically starches called Pentosans. These Pentosans absorb significantly more water than wheat starches and retain that moisture even after baking. This contributes to a very “full” feeling and a bread that is dense yet moist, helping you feel satiated faster and for longer – much like the difference between eating raw fruit and dried fruit. Our recipe counteracts this natural tendency through careful ingredient balance and a triple-rise method to ensure a light, airy crumb.
More Irresistible Bread & Roll Recipes to Explore
There’s an undeniable magic in the aroma (and taste!) of freshly baked homemade bread. If you’ve enjoyed mastering this Swedish rye bread, you’ll love exploring these other incredible bread recipes from our collection:
- The Only White Bread Recipe You’ll Ever Need >> A quick, easy, and incredibly buttery classic that’s perfect for everyday baking.
- Quick and Easy French Bread Recipe >> Believe it or not, this amazing French bread is ready in just ONE HOUR!
- Best Irish Soda Bread >> Experience a tender, flavorful bread, enhanced with browned butter – a perfect accompaniment to tea.
- Garlic and Rosemary Skillet Bread >> This bread boasts an unbelievably crispy crust, akin to a deep-dish pan pizza!
- Samoan Coconut Rolls >> If you’re a fan of Hawaiian rolls, prepare to fall in love with these irresistibly soft and sweet coconut rolls.
- Big Fat Crescent Rolls >> Get ready for the lightest, fluffiest crescent rolls of your life – seriously!
- Soft and Fluffy Parker House Roll Recipe >> Cloud-like rolls featuring a swoon-worthy swirl of butter in the center.
- Easy Cheese Pull-Apart Garlic Bread from Sizzling Eats – a crowd-pleasing, cheesy delight.
- Challah Rolls from Rich and Delish – rich, braided, and beautiful.
- Traditional Kaiser Rolls from Karen´s Kitchen Stories – classic, crusty, and perfect for sandwiches.
Facebook | Pinterest | Instagram

Grandma Prudy’s Rye Bread
20
30
2 30
3 20
40 slices
Rate this Recipe
Print Recipe
Ingredients
- 1 scant tablespoon active dry yeast, about one (1/4 ounce) packet yeast
- 1 teaspoon sugar, to feed the yeast
- 1/4 cup warm water
- 1/2 cup granulated sugar
- 2 tablespoons molasses
- 2 tablespoons shortening, I like butter-flavored Crisco
- 2 teaspoons kosher salt, use less if using table salt
- 1 tablespoon caraway seed, optional
- 2 cups warm water
- 2 cups light or dark rye flour*, spooned and leveled
- 1/4 cup vital wheat gluten
- 3 cups all purpose flour, plus an extra 1/2 cup flour, about
- vegetable oil or olive oil, for greasing, plus more for rolling
- 1/4 cup butter, for rubbing on bread
Instructions
-
Activate the Yeast. In the bowl of your stand mixer, add 1 scant tablespoon of active dry yeast (approximately one 1/4-ounce packet). Remember, “scant” means just under a full tablespoon.
-
Add 1 teaspoon of granulated sugar to give the yeast a boost, along with 1/4 cup of warm water. The water temperature should be between 105-110°F – think pleasant bathwater temperature. Test it on your wrist; if it feels too hot for a newborn, it’s too hot for your yeast!
-
Stir the mixture gently and let it sit for 5 minutes. You’re looking for a bubbly, foamy layer to form, which indicates your yeast is alive and active. If you don’t see any bubbles, your yeast is likely inactive, and it’s best to discard and start over with fresh yeast. This ensures your bread will rise properly.
-
Once your yeast is visibly foaming, add the remaining 1/2 cup of granulated sugar, 2 tablespoons of molasses, 2 tablespoons of shortening (butter-flavored Crisco works wonderfully here), 2 teaspoons of kosher salt (reduce slightly if using finer table salt), and 1 tablespoon of caraway seeds (if using).
-
Pour in 2 more cups of warm water (again, not too hot). Attach the dough hook to your stand mixer and mix these ingredients together on low speed, or stir thoroughly with a sturdy wooden spoon.
-
Add 2 cups of rye flour. Ensure you “spoon and level” the flour for accurate measurement – don’t scoop directly from the bag.
-
Along with the rye flour, add 1/4 cup of vital wheat gluten. Start your mixer on low speed to prevent flour from dusting your kitchen.
-
Gradually add 3 cups of all-purpose flour, one cup at a time, mixing well after each addition. It’s crucial not to add more than 3 cups of all-purpose flour at this initial stage. This is a critical step that dictates the final texture of your bread; rye bread dough has a unique consistency that is inherently stickier than traditional wheat dough. Over-flouring will result in a dense, dry, and disappointing loaf.
-
Knead the Dough. Continue kneading the dough on medium-low speed for approximately 5 minutes. At this point, the dough will be quite sticky. As it kneads, it will gradually begin to pull away from the sides of the bowl, but it will still remain very sticky, clinging to the bottom. Now, gradually add the remaining 1/2 cup of all-purpose flour, a tablespoon or two at a time, as the dough kneads. Use your best judgment here, as humidity and flour types can vary. Aim for a dough that mostly cleans the sides of the bowl but still sticks to the bottom. Continue kneading for a full 7-10 minutes. If kneading by hand, work on a generously oiled surface (not floured) for 10-12 minutes to prevent sticking and over-flouring.
-
Prepare for the first rise by thoroughly greasing the inside of a large, clean bowl with 1 tablespoon of vegetable or olive oil.
-
First Rise. Scrape the sticky dough into the prepared greased bowl and gently shape it into a ball. Turn the ball over to ensure it’s completely coated with oil. This prevents a dry crust from forming. Cover the bowl loosely with parchment paper or greased plastic wrap, and let it rise in a warm place for 1 hour, or until it has noticeably doubled in size. (Refer to the oven warming trick mentioned earlier for an ideal warm spot.)
-
Second Rise. Once the dough has doubled, gently punch it down to release the gases. Remove the dough from the bowl, reshape it into a ball, and re-grease the bowl with a little more oil. Return the dough to the bowl, turn to coat it, and re-cover. Warm your oven for another minute if needed, and let the dough rise a second time for approximately 1 hour, or until it has doubled in size once more. This double-rise in the bowl is critical for rye bread’s light texture.
-
After the second rise, gently punch down the dough again. Prepare your work surface: lay out a silicone mat or two on your counter and generously drizzle them with about a tablespoon of oil. Spread the oil evenly. It’s imperative not to use flour for rolling this bread, as it will make the dough too stiff and dense.
-
Prepare four 7×4 inch loaf pans** by generously spraying them with nonstick spray. This generous coating is crucial to prevent the bread from sticking. (Alternatively, you can use two 9×5 inch or 8×4 inch loaf pans.)
-
Shape the Loaves. Divide the dough into 4 equal pieces (or 2 pieces for larger pans). Using your oiled hands, gently pat each piece of dough into a rectangle roughly the length of your chosen pan (approximately 7 inches for mini pans). Use your fingers to gently fold the top 7-inch edge of the dough down about an inch, press it in, then roll the dough forward, continuing until it forms a cute, compact roll. Pinch the edges gently to seal. Tuck the ends underneath the roll. Place each shaped roll seam-side down into its well-greased pan.
-
Third Rise (in Pans). Cover all the filled pans loosely with parchment paper or greased plastic wrap. Let them rise in a warm place (like your gently warmed oven, as described earlier) until they have doubled in size and significantly crowned over the edges of the pan, at least an inch or so. This usually takes about 45 minutes, but be patient and wait longer if necessary for optimal rise.
-
Prepare for Baking. Preheat your oven to 375°F. Remember to remove the bread pans from the oven before it starts preheating if you were using it as a warm proofing spot!
-
Bake the Bread. Bake the smaller 7×4 inch loaves for about 30-35 minutes. For larger 9×5 inch loaves, extend the baking time to approximately 40-45 minutes. Read the next step carefully for crucial doneness tips:
-
I highly recommend using an instant-read thermometer to accurately test for doneness. Even seasoned bakers like Kris use one every time. Insert the thermometer into the center of a loaf; it should read 205°F for the smaller 7×4 inch loaves, and 208-210°F for the larger 9×5 inch loaves, before they are removed from the oven.
-
If you don’t have a thermometer, monitor the loaves until they are very well browned on top, almost appearing slightly burned. This deep coloration is normal for rye flour, which is darker than wheat. It’s always better to slightly overbake than to underbake; you can always add more butter to dry bread, but a doughy-in-the-middle loaf is unfortunately unsalvageable.
-
Once baked, immediately place the hot pans of bread on wire racks. Take a stick of butter and rub it generously over the tops of all the hot loaves until they are thoroughly coated with melted butter. This adds flavor and helps create a soft crust.
-
After 1-2 minutes of cooling in the pans, carefully (using hot pads!) turn the bread loaves out onto the cooling racks. They should release easily; if not, gently loosen the edges with a knife. Position the loaves on their sides on the racks. Kris always cools them this way because this rye bread is exceptionally soft and tender (and often a bit top-heavy), which can cause the bottom to compress if cooled upright.
-
This is the hardest part, but crucial: you MUST allow the rye bread to cool down significantly for at least 30-60 minutes before slicing. Its tender, soft crumb will crush if cut while too warm. I often struggle with my own advice here!
-
Use your sharpest serrated knife to slice the bread, employing a gentle sawing motion rather than pushing down. If you’re still too impatient and the bread is slightly warm, try slicing it on its side to minimize compression.
-
Now, indulge! Slather with generous amounts of butter and enjoy immediately. Or, toast slices until almost burned, add an obscene amount of butter, and savor the shatteringly crisp texture and rich flavor. Add jam if you’re like me. For a traditional retro twist, spread with Liver Pate – a cherished ritual every Christmas Eve.
-
How to Store: Once the bread is completely cool, store it in a large ziplock bag or airtight container on the counter for up to 3 days. For best freshness, slice the bread only as you need it to prevent it from drying out. If you don’t plan to eat it within a few days, freezing is the best option to preserve its quality.
-
How to Freeze: Ensure the bread is completely cool. Wrap each loaf tightly multiple times in plastic wrap, then place in a large freezer-safe ziplock bag (pressing out as much air as possible) or wrap in aluminum foil. Freeze for up to 3 months. To thaw, leave the wrapped bread on the counter for an hour or so until defrosted. For quicker thawing, use your microwave’s defrost setting or low power, keeping a close eye to prevent it from getting hot and tough. Partially-frozen slices can be popped directly into the toaster for a perfectly thawed and crisp result.
Notes
**In our family, it’s a cherished tradition to bake this rye bread in these charming small 7×4 inch loaf pans. These pans typically measure about 3 inches across at the bottom and 4 inches across at the top. When I married into the family, I received my own set of these mini pans as a wedding gift. The bread is traditionally served as a mini cocktail party appetizer, hence the smaller size. However, you can absolutely use two standard 9×5 inch loaf pans (or even better, slightly smaller 8×4 inch pans if you can find them). If using larger pans, simply split the dough in half and bake for approximately 40 minutes.
Prudy, in her incredible generosity, always made double this amount of bread, yielding EIGHT 7×4 inch loaves. If you have a powerful stand mixer like a Bosch or a large Kitchenaid, or an abundance of patience for hand-kneading like she did, you can certainly double the recipe!
Nutrition
Calories: 84kcal |
Carbohydrates: 15g |
Protein: 2g |
Fat: 2g |
Saturated Fat: 1g |
Polyunsaturated Fat: 0.3g |
Monounsaturated Fat: 1g |
Trans Fat: 0.1g |
Cholesterol: 3mg |
Potassium: 47mg |
Fiber: 1g |
Sugar: 3g |
Vitamin A: 36IU |
Vitamin C: 0.03mg |
Calcium: 8mg |
Iron: 1mg
Did you make this? I’d love to see it!
Mention @thefoodcharlatan or tag #thefoodcharlatan!