
The Secret to Fluffy Glazed Donuts: An Irresistible Homemade Recipe
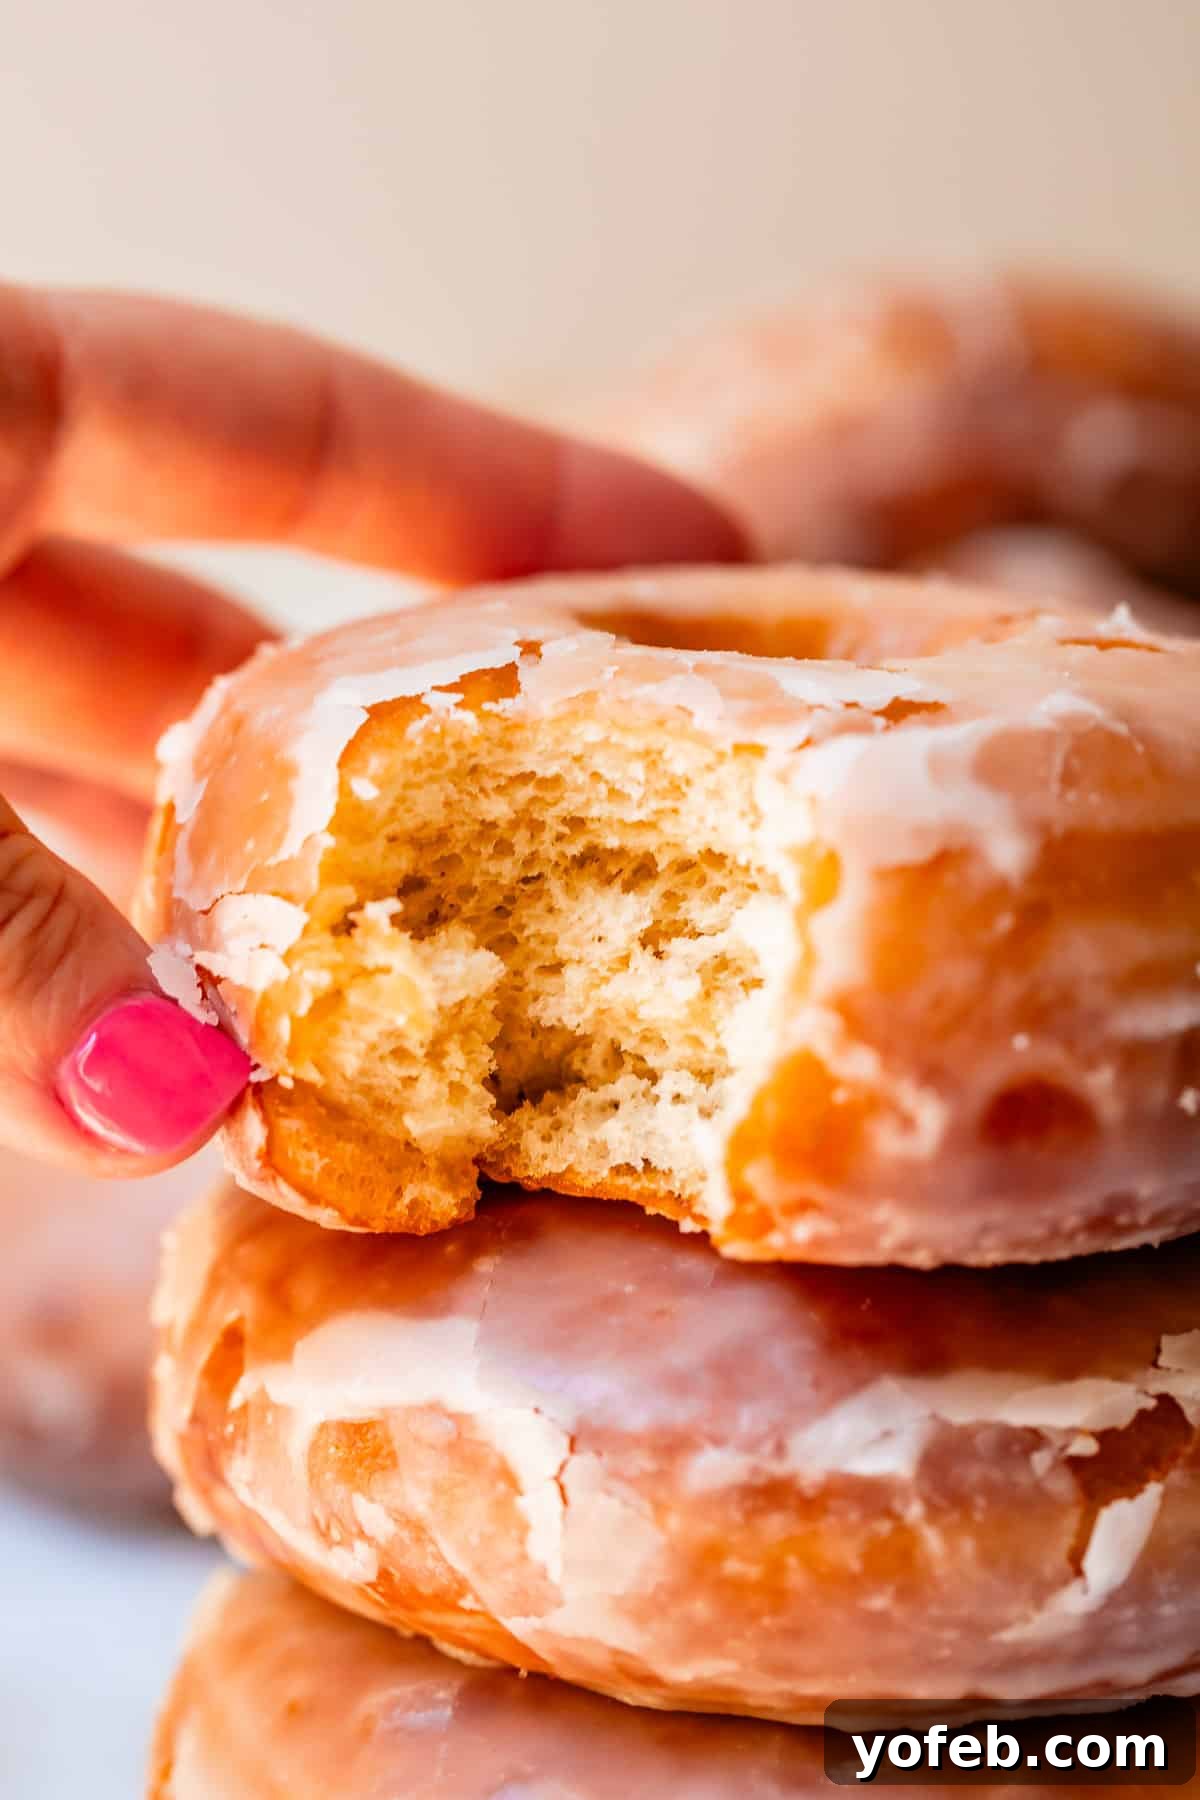
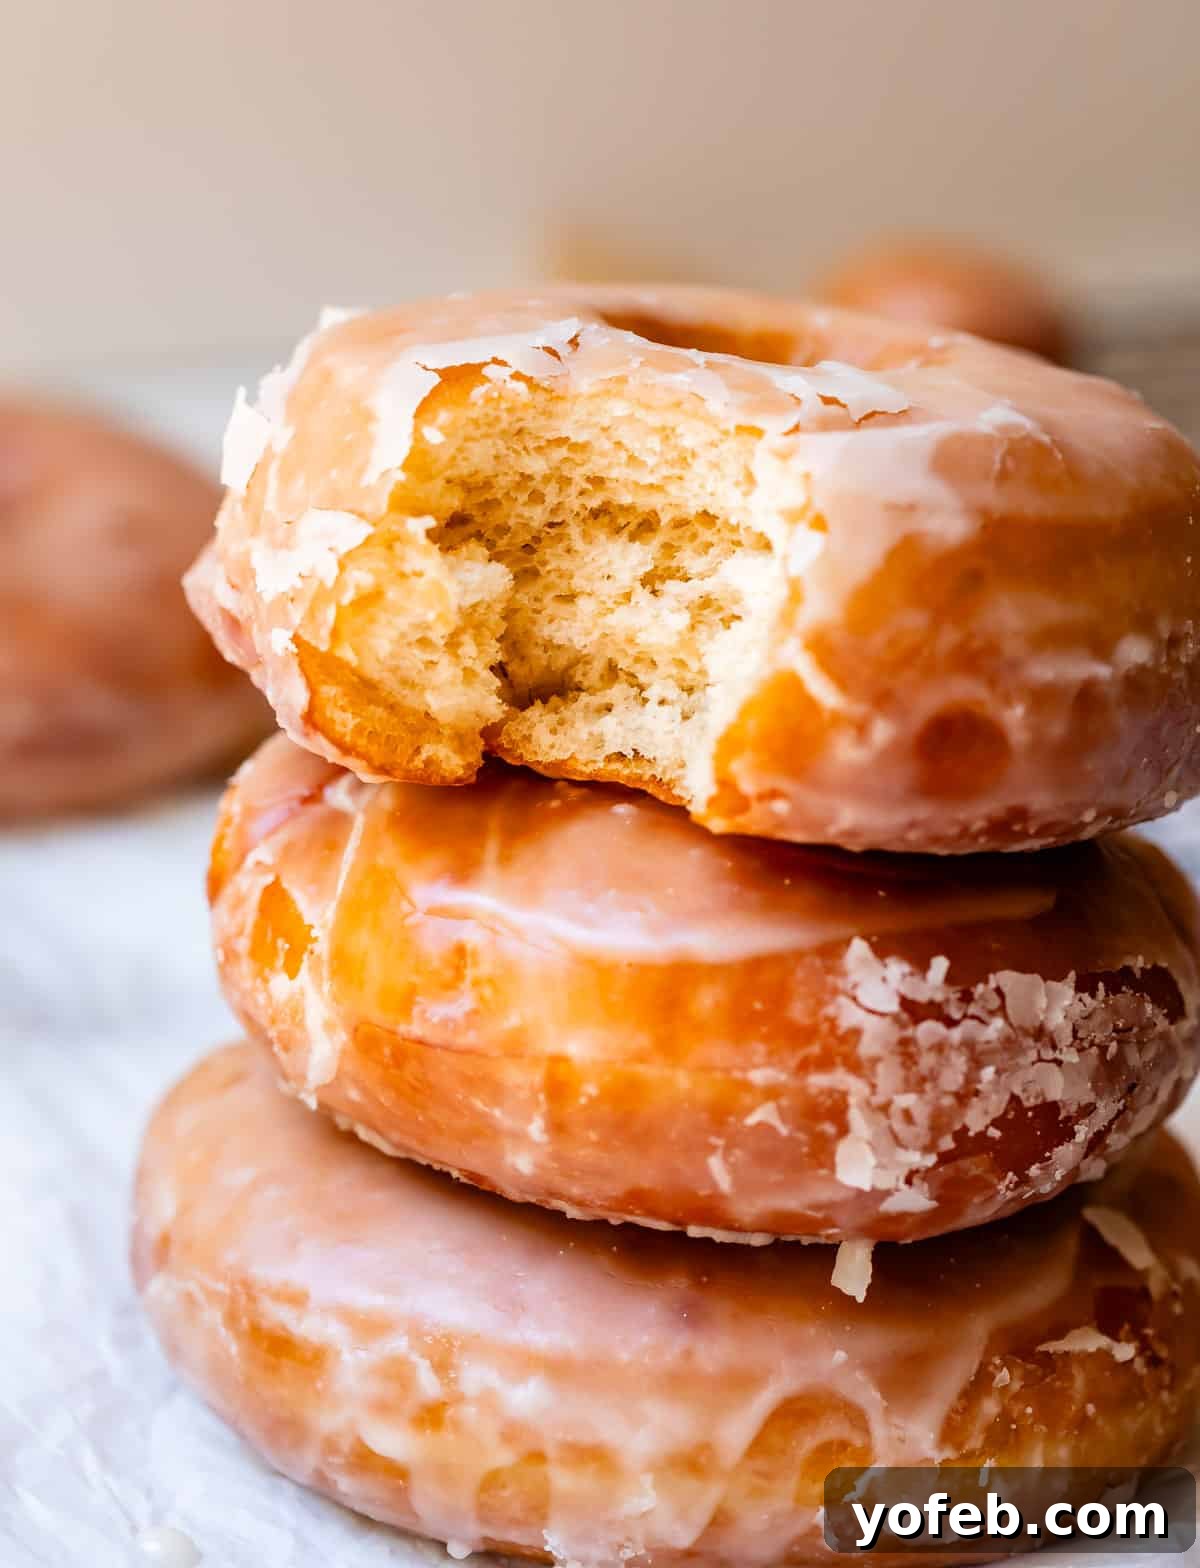
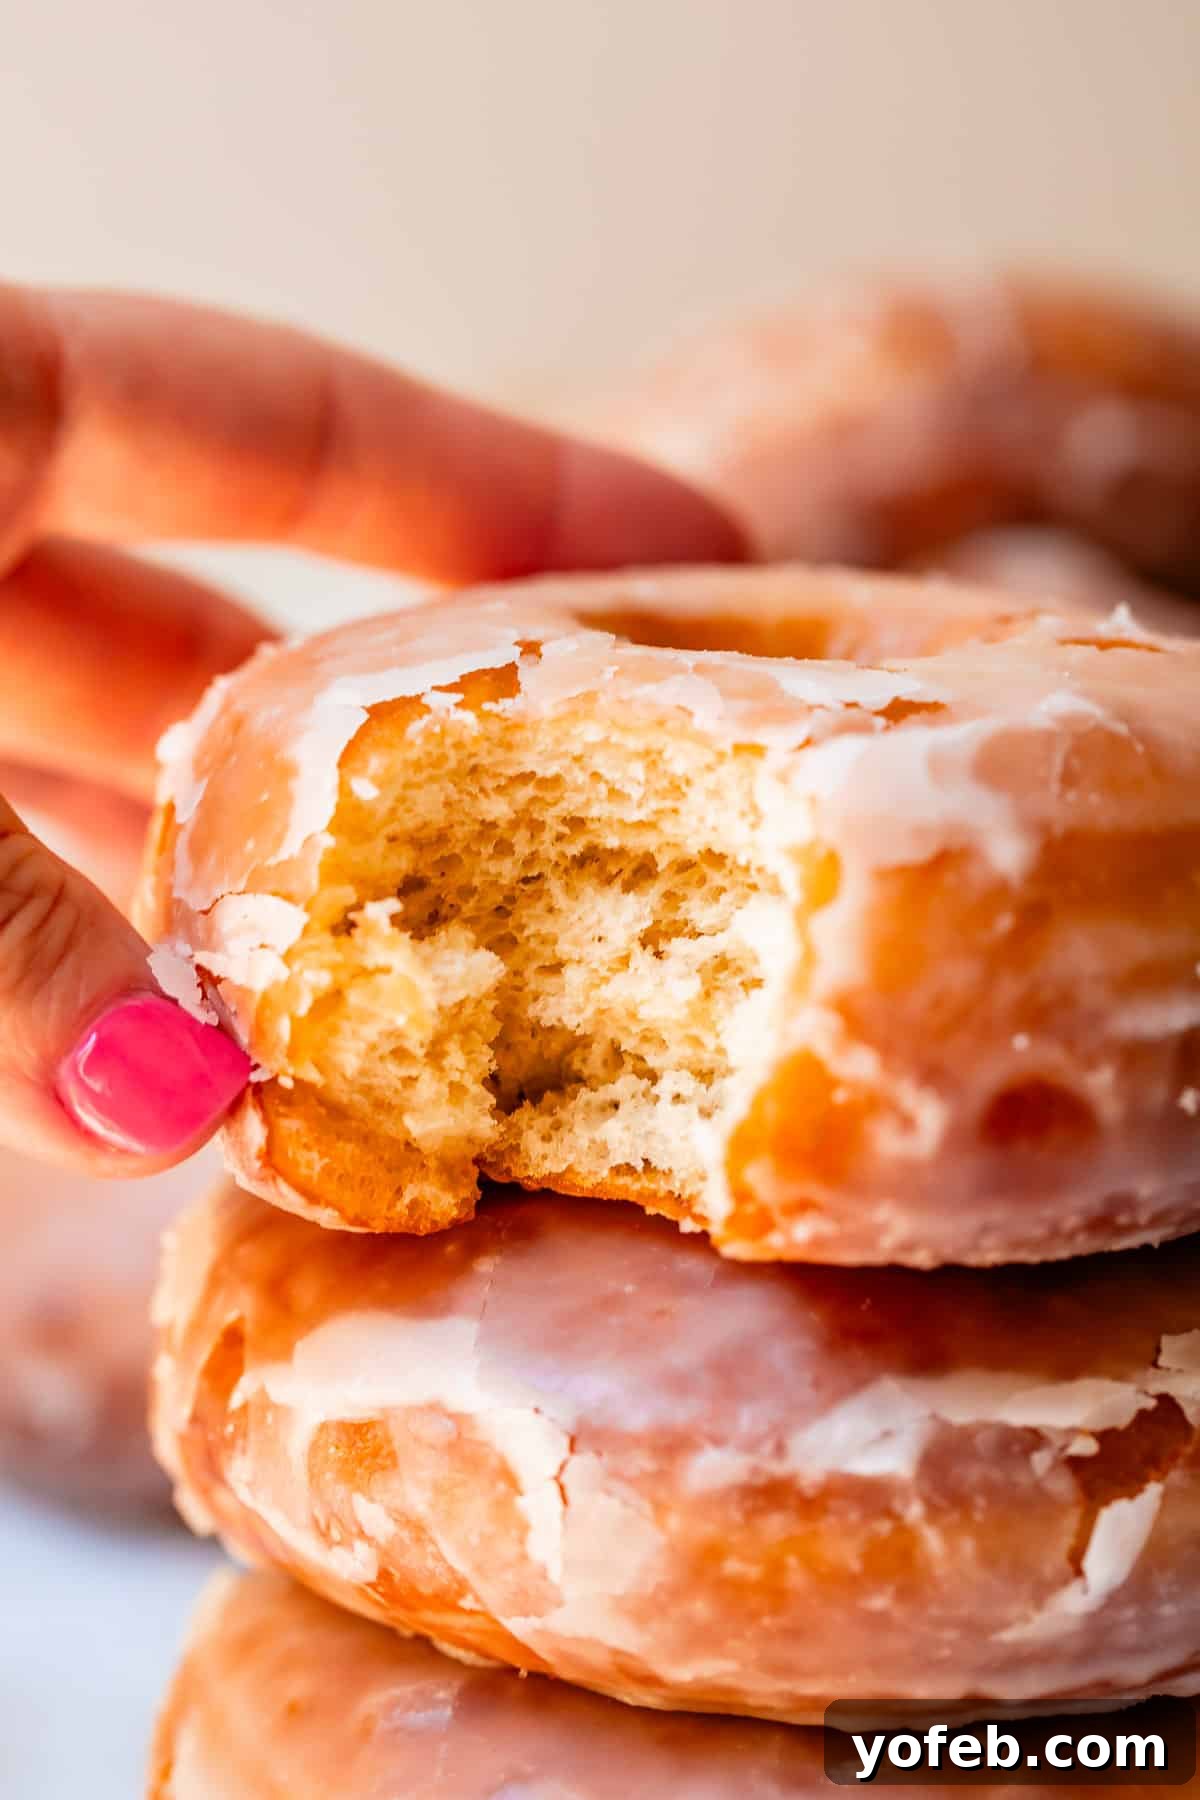
Craving the ultimate fluffy glazed donuts? Look no further! This comprehensive guide reveals the secrets to making light, airy, and utterly delicious yeast donuts right in your own kitchen. Forget bland chain store offerings; once you taste these homemade delights, you’ll understand what true donut perfection feels like. This fried donut recipe is surprisingly easy, making it a fun and rewarding baking project for anyone, no fancy equipment – not even a donut cutter – required!
Beyond the classic glazed, this versatile dough can be transformed. Imagine filling these beauties with rich Pastry Cream to create decadent Bavarian Cream Donuts. Explore those dedicated posts for all the intricate details on how to elevate your donut game even further. Originally published on September 28, 2023, this recipe has been perfected to bring you the best homemade donuts of your life.
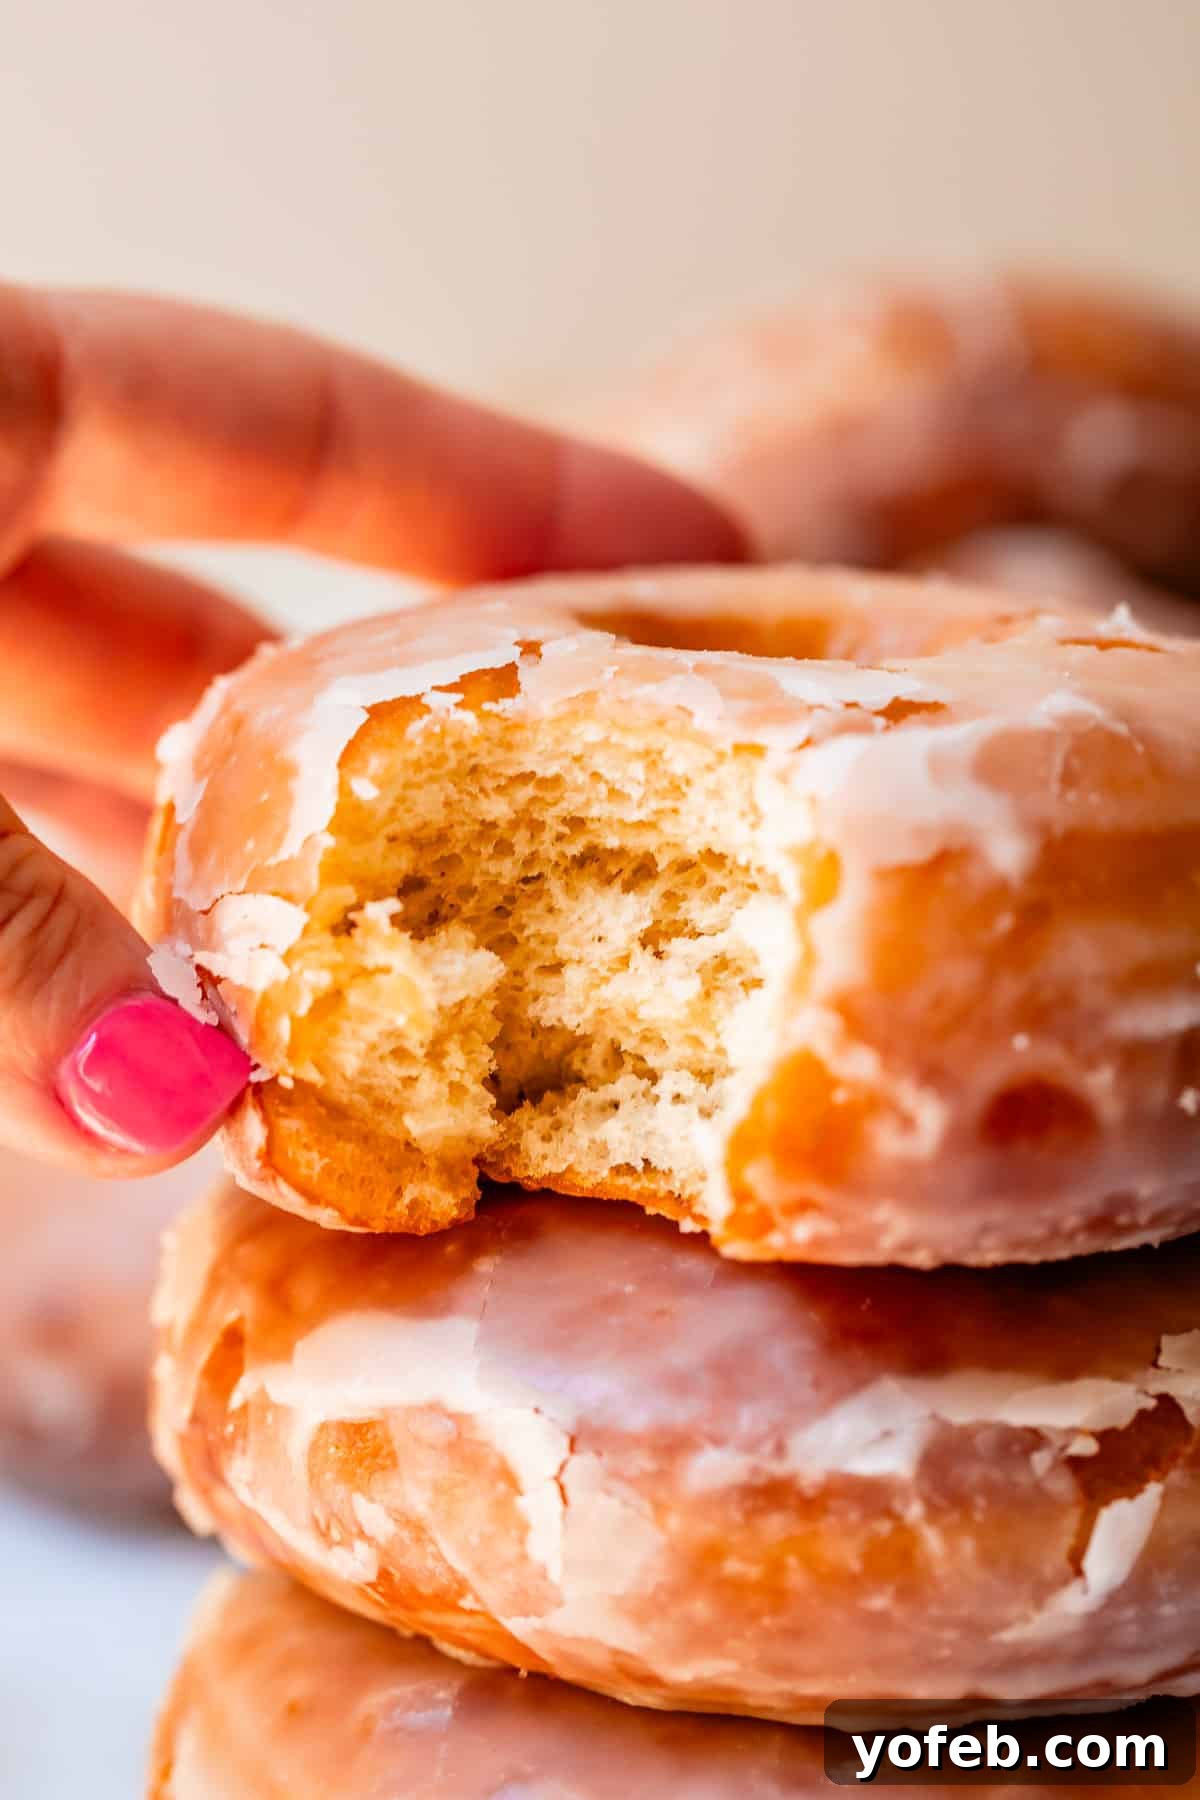
Table of Contents
- California Donuts: A League of Their Own
- Homemade vs. Commercial Donuts: The Ultimate Showdown
- The Ultimate Fluffy Glazed Donut Recipe
- Essential Ingredients for Your Homemade Donuts
- Step-by-Step Guide to Making Homemade Donuts
- Creative Donut Topping Ideas
- Perfect Pairings: What to Serve with Your Homemade Donuts
- Storing and Freezing Leftover Donuts
- Frequently Asked Questions About Donuts
- More Sweet Breakfast Recipes to Savor
- Homemade Donut Recipe
My childhood memories are intrinsically linked to my hometown of Manteca, California—a place whose name, amusingly, means “lard” in Spanish. My parents still reside in the same house, on the same street, nestled between the church and the high school, precisely one mile from the Taco Bell on Main Street. This exact distance was ingrained in my mind as a child, serving as my personal benchmark for “a mile.”
Lately, my parents have embraced unique ways to combine exercise with decluttering. My dad, facing an accumulating collection of loose change (a relic from a time before digital payments!), devised a plan. Once a week, their “date night” involves a leisurely one-mile walk to Taco Bell. There, they meticulously count out $4.99 in coins for a Crunchwrap Supreme to share. During one such transaction, the young cashier politely offered them a “senior discount,” leading to an outburst of laughter. My parents, far from impoverished, simply embody a lifelong spirit of frugality. And really, what better way to spend a late summer evening?
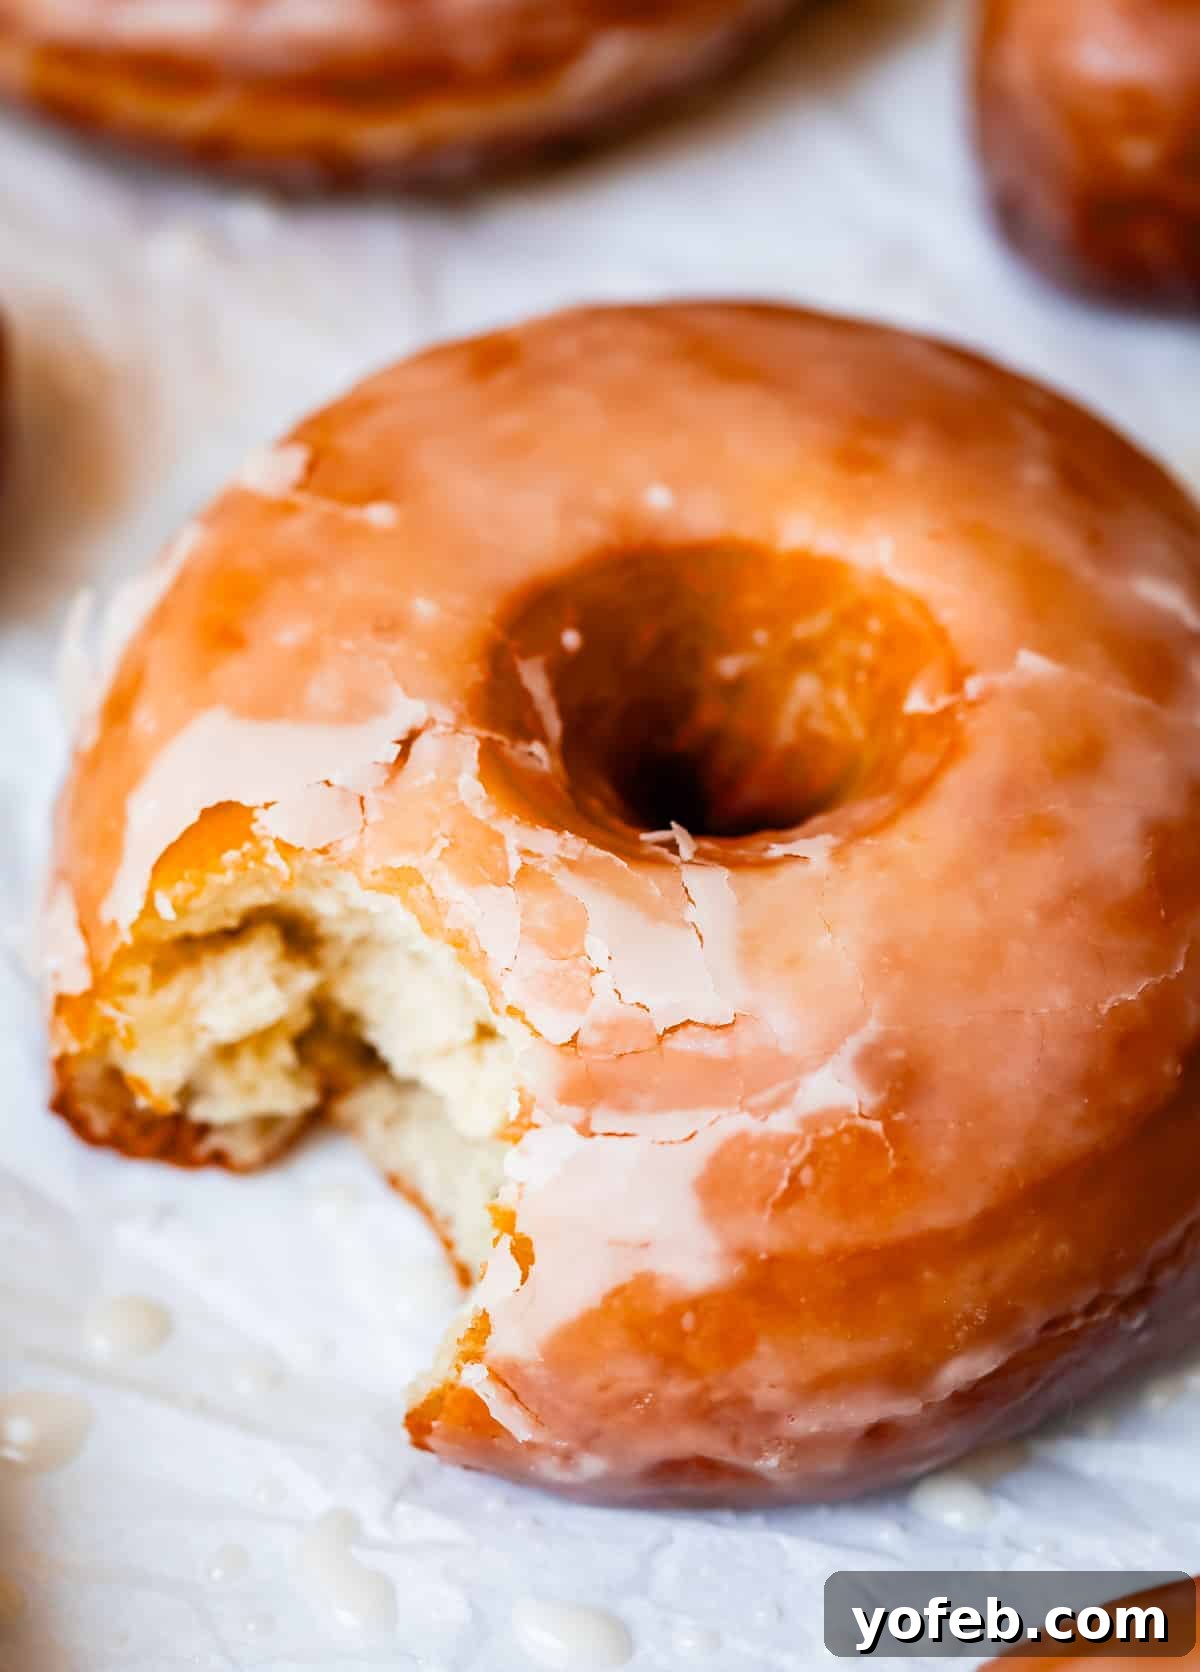
However, I often think they should extend their walk just a half-mile further to Sam’s Donuts on Main Street. Perhaps a Saturday morning ritual is in order, Mom and Dad? I would gladly empty all my loose change for those donuts. They are, without exaggeration, the fluffiest, puffiest, most ethereal donuts in the entire region. Let me tell you why.
California Donuts: A League of Their Own
As a child, I never questioned why my local donut shop produced such magical, heavenly treats. I simply assumed Sam, the owner, was a culinary angel sent from the pastry gods. Years later, my understanding deepened when I read an article about Ted Ngoy, the legendary Cambodian donut king of California. His incredible rags-to-riches-to-rags-to-riches story is truly captivating. I also discovered the significance of the iconic pink boxes that always held the best donuts. Most importantly, I finally comprehended why every donut I sampled outside of California tasted like dry cardboard compared to the impossibly fluffy, sky-high, perfectly glaze-crackled morsels of delight I grew up with.
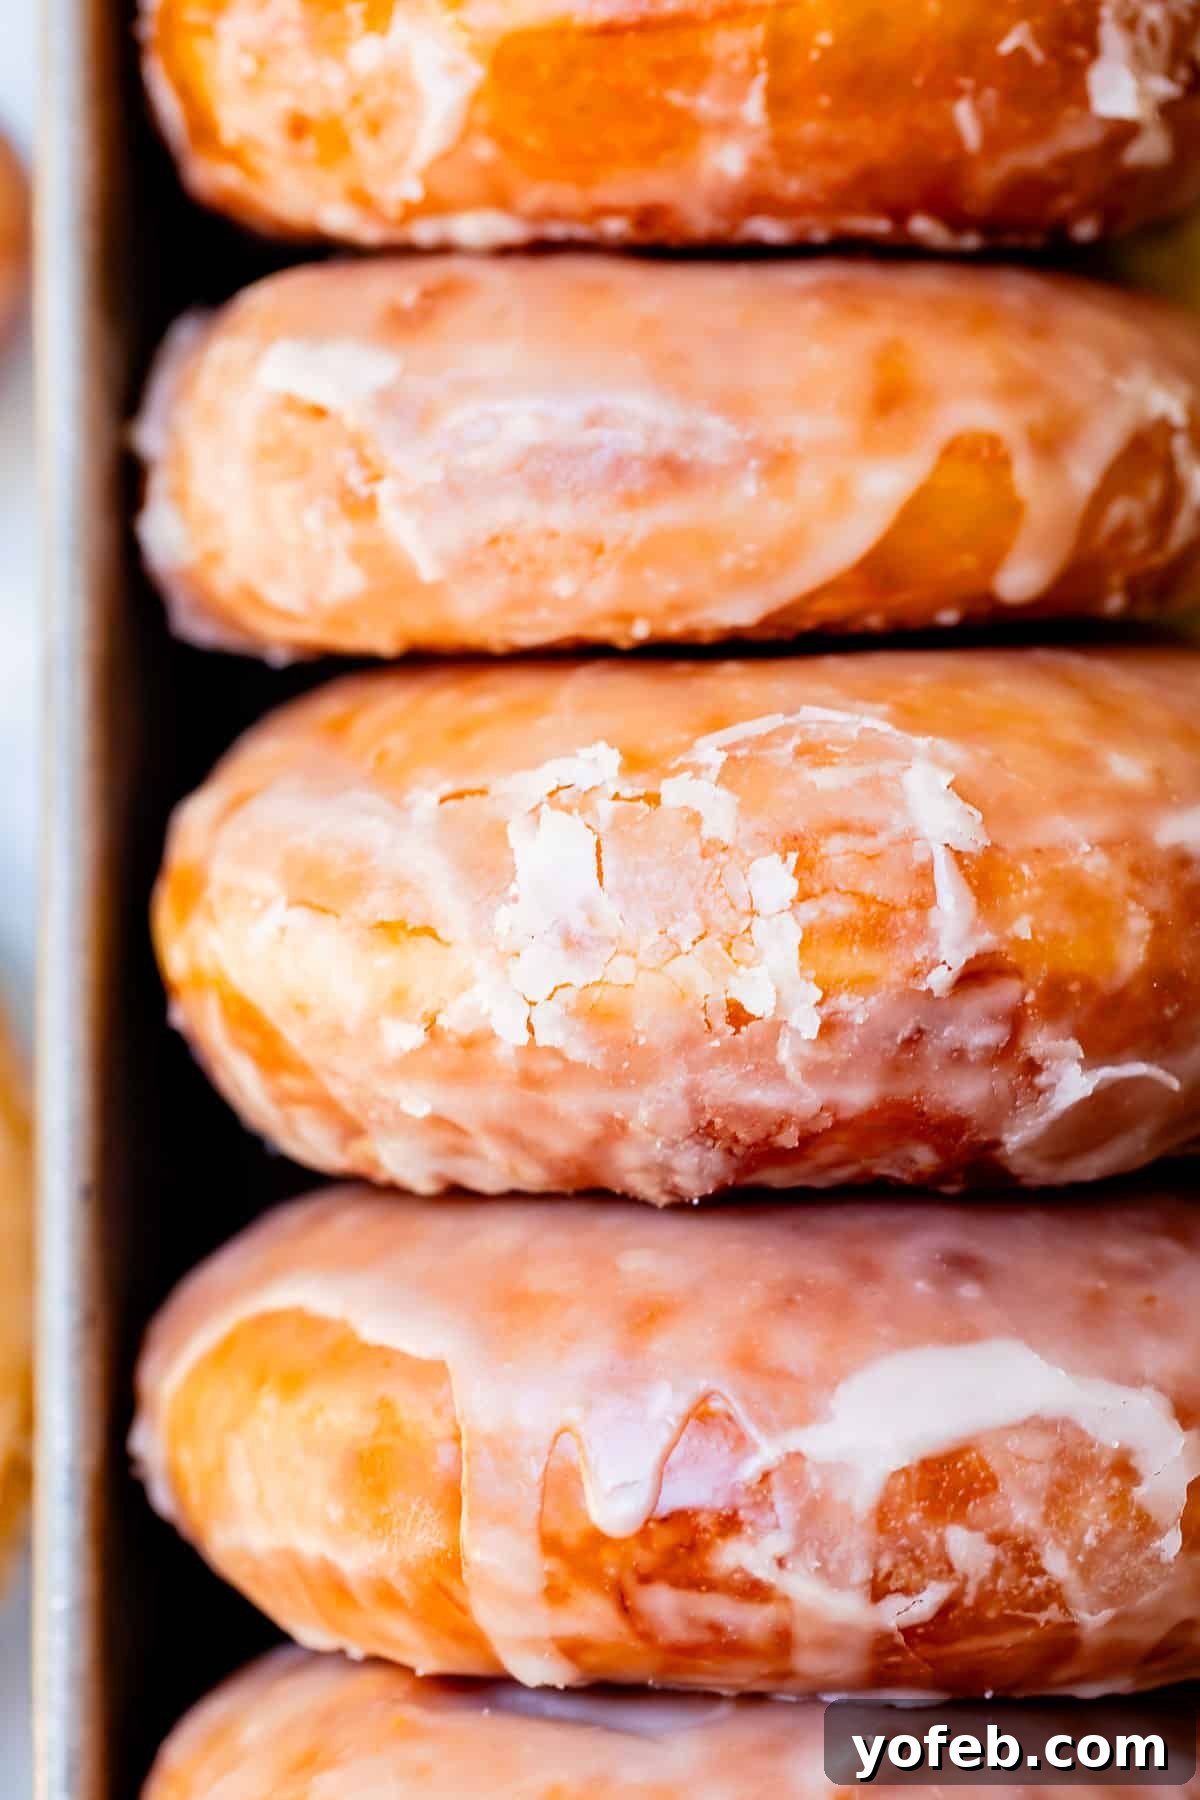
Ted Ngoy arrived in the U.S. as a refugee and began working at a local donut shop. Through sheer determination and hard work, he eventually saved enough to purchase his own shop, and many more thereafter. However, he introduced a crucial innovation to the existing system:
- Instead of making one massive batch in the morning, his employees prepared smaller batches throughout the day, ensuring constant freshness. (Because, let’s be honest, a day-old donut is hardly a treat.)
- While he allowed each acquired shop to retain its unique recipes (understanding that customers resist change), he insisted on upgrading to the finest ingredients available. Inferior flour, he knew, leads to an inferior donut.
Ted’s empire flourished due to his unwavering commitment to quality and his ingenious network. He connected with incoming refugee families, offering them opportunities to own their businesses. This created a built-in network of incredibly hardworking individuals, eager to achieve the American dream. For decades, this business model became the gold standard for virtually every independent donut shop across California.
Homemade vs. Commercial Donuts: The Ultimate Showdown
My aim in sharing Ted Ngoy’s legacy is to set the benchmark for what we’re striving for with our homemade donuts. We’re not aiming for the mass-produced uniformity of Dunkin’ Donuts, or even Krispy Kreme. My standards for donuts are exceptionally high. Dunkin’ operates on a “Just Baked on Demand” model, where donuts are baked off-site, frozen, delivered, and then merely warmed in ovens on location. This explains their often disappointing quality.
Krispy Kreme presents a different scenario; their donuts are indeed fried fresh on-site. However, in my opinion, they often fall short in flavor and can be overly greasy, simply unable to compete with the exquisite texture and taste of a classic California donut.
Dunkin’s attempt to penetrate the California market in the 80s and 90s was a resounding failure. They eventually closed every single outlet, unable to stand against the superior quality of Ted’s independent shops. Consumers, it turns out, aren’t easily fooled. Why settle for a frozen, reheated donut when a fresh, perfectly fried one is available just down the road? (Dunkin’ has made a resurgence in California over the past decade, with dozens of new stores. It was through one of these that I recently tried my very first Dunkin’ donut, and I can honestly say I almost spat it out.)
Of course, there are undoubtedly many exceptional stand-alone donut shops across the country that adhere to Ted’s principles: fresh batches made throughout the day with top-tier ingredients. But few have managed to franchise without compromising quality, a pitfall Dunkin’ exemplifies. Krispy Kreme comes close, in my opinion, as does Top Pot in Seattle.
Currently residing near Sacramento, CA, my new local favorite is BJ Cinnamon’s—my modern-day Sam’s Donut. Just ask any California native; they’ll enthusiastically point you to their cherished local spot, whether it’s a “Sam’s” or a “BJ’s.” (I once saw a Yelp question inquiring, “Do they have anything keto?” to which owner Chanthoeun simply replied, “NO! It’s a donut shop!” These are my kind of people.)
So, if you’re lucky enough to live in California, you might not technically *need* this recipe. Head to your nearest independent shop and grab a dozen. Perhaps even pay with loose change, following my parents’ charming example! 😂
However, if your area is dominated by chain donut shops, then let me assure you: making homemade donuts is ABSOLUTELY worth every single ounce of effort. The difference is truly night and day.
The Ultimate Fluffy Glazed Donut Recipe
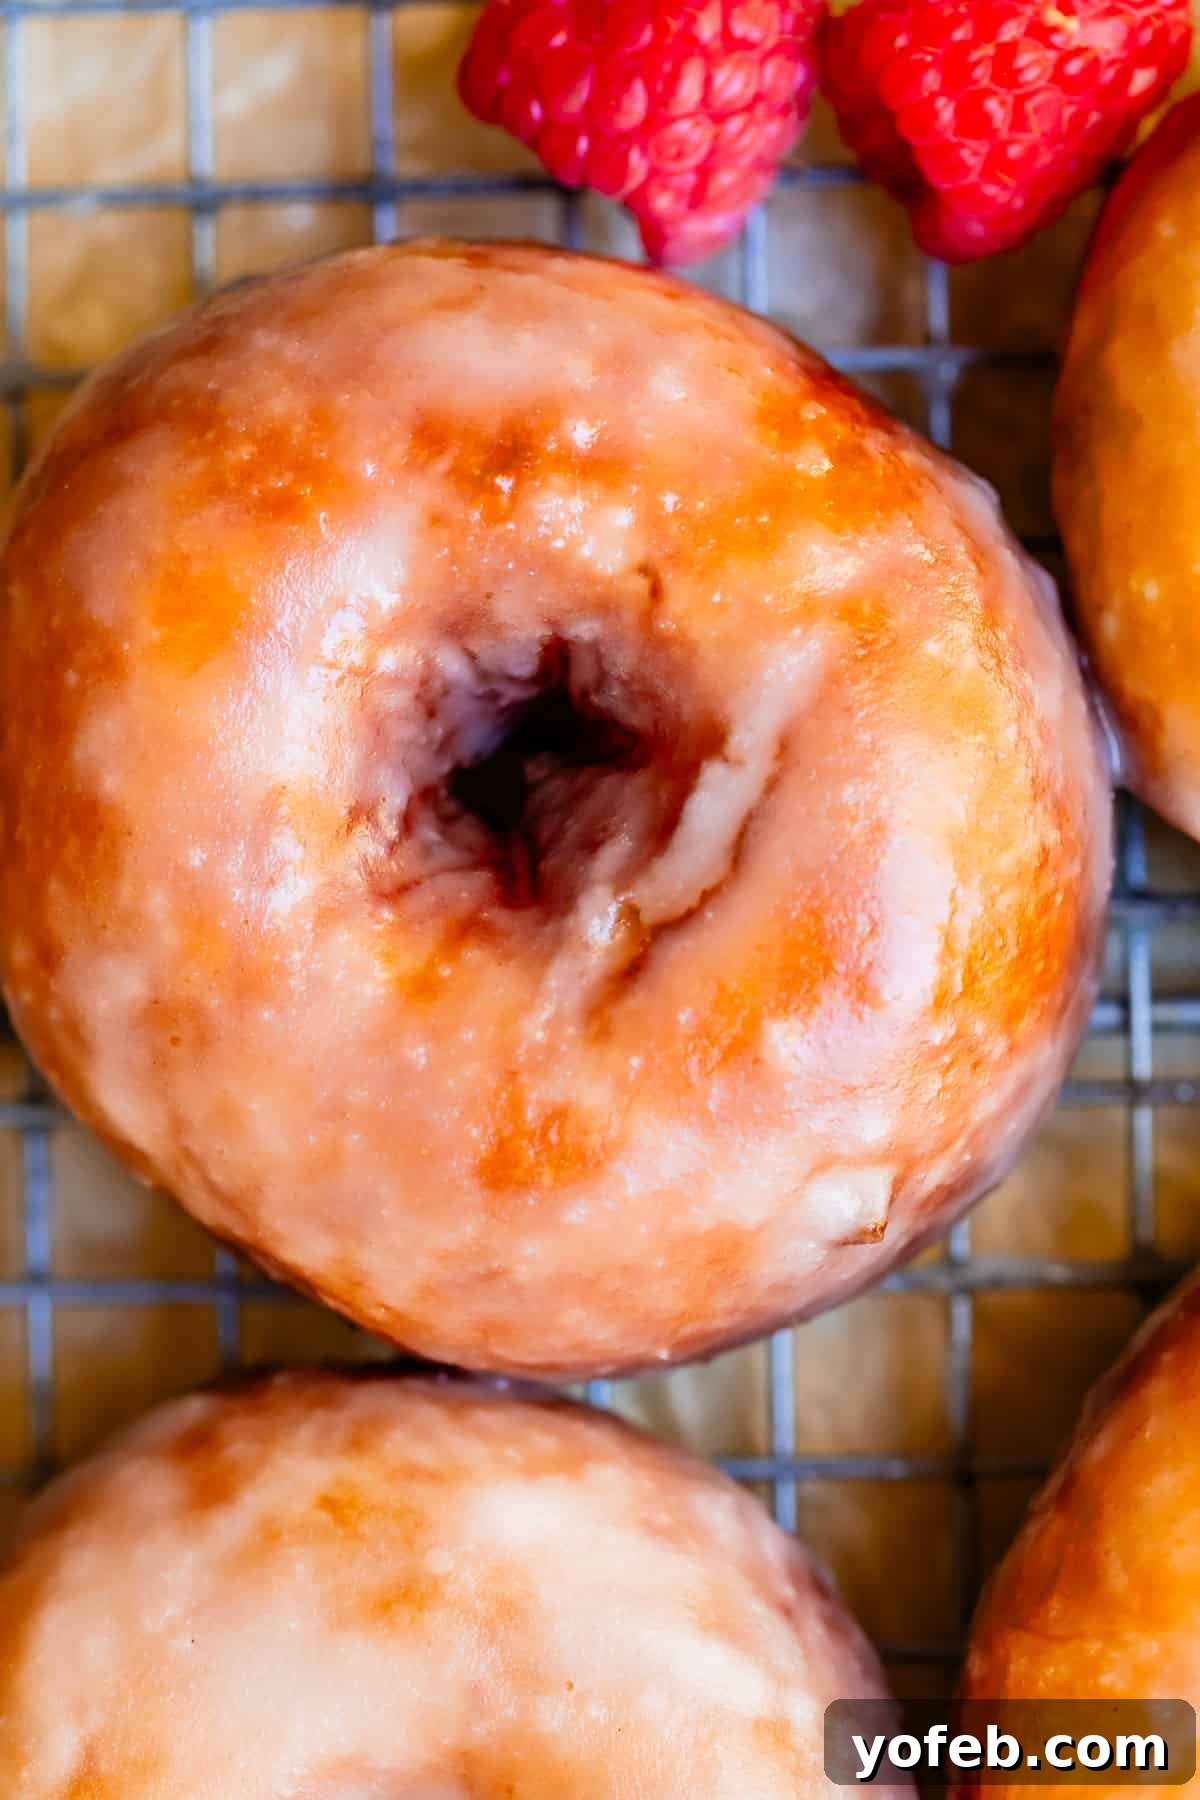
This recipe delivers the exact fluffy, soft, and exceptionally puffy yeast donuts of my youth, fulfilling all my California donut dreams. It relies on high-quality ingredients, requires no specialized tools (you genuinely DON’T need a donut cutter!), and can be completed from start to finish in just a couple of hours.
The resulting donut is pure bliss. The distinction between an excellent donut and a mediocre one hinges not just on ingredient quality and the recipe itself, but also significantly on freshness. By making them at home, you are guaranteeing the freshest fried dough experience of your life. It’s truly unparalleled.
Our recipe incorporates whole milk for a rich depth of flavor and uses bread flour to impart that coveted chewy texture and essential dough structure. In addition to active dry yeast, we include a touch of baking soda and baking powder. This dynamic trio ensures an incredible rise and an even puffier final product. When I say fluffy and puffy, I mean it!
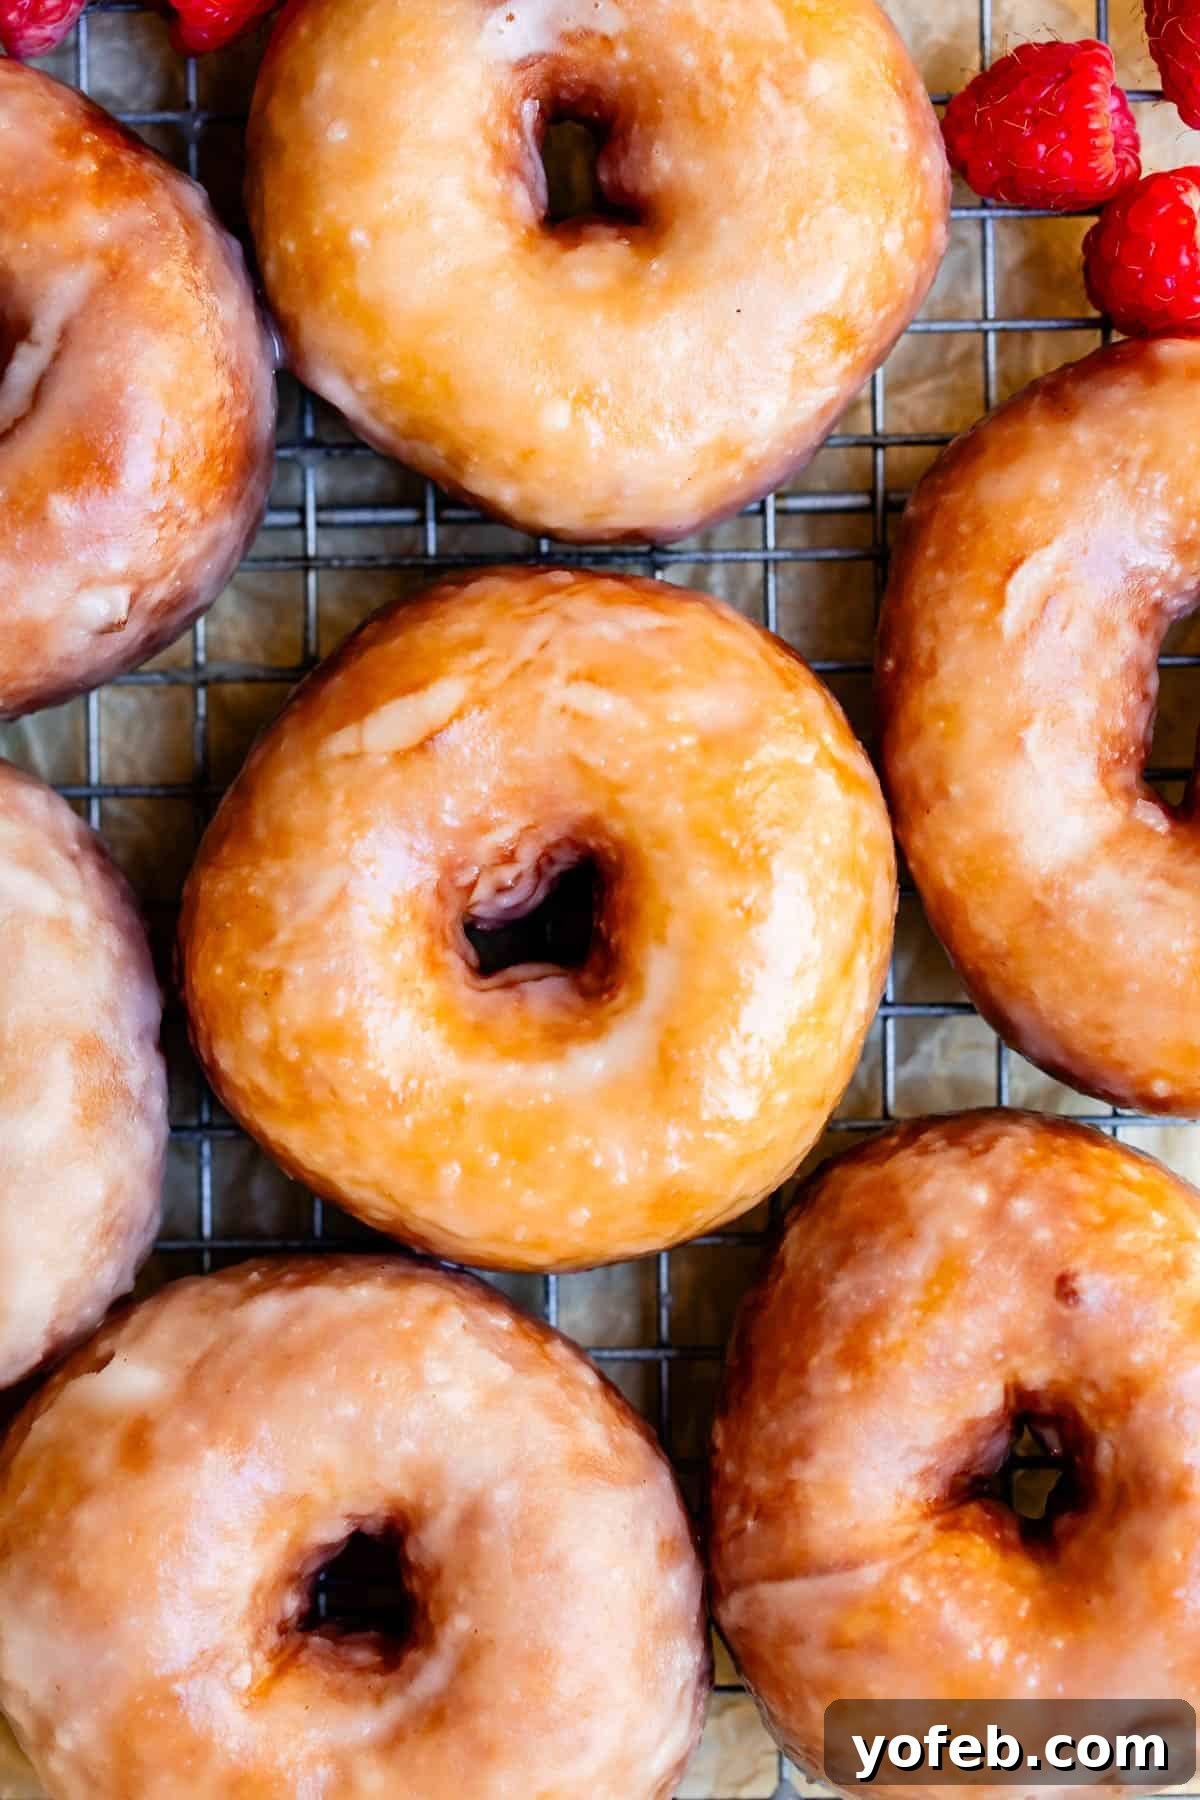
Finally, each warm donut is submerged in a simple yet sublime glaze. This glaze features a special ingredient: granulated sugar, first incorporated into a simple syrup. This seemingly odd addition significantly enhances the glaze’s adherence to the donut, creating that signature crackled finish. Trust me, once you try these, you’ll never go back to store-bought.
Essential Ingredients for Your Homemade Donuts
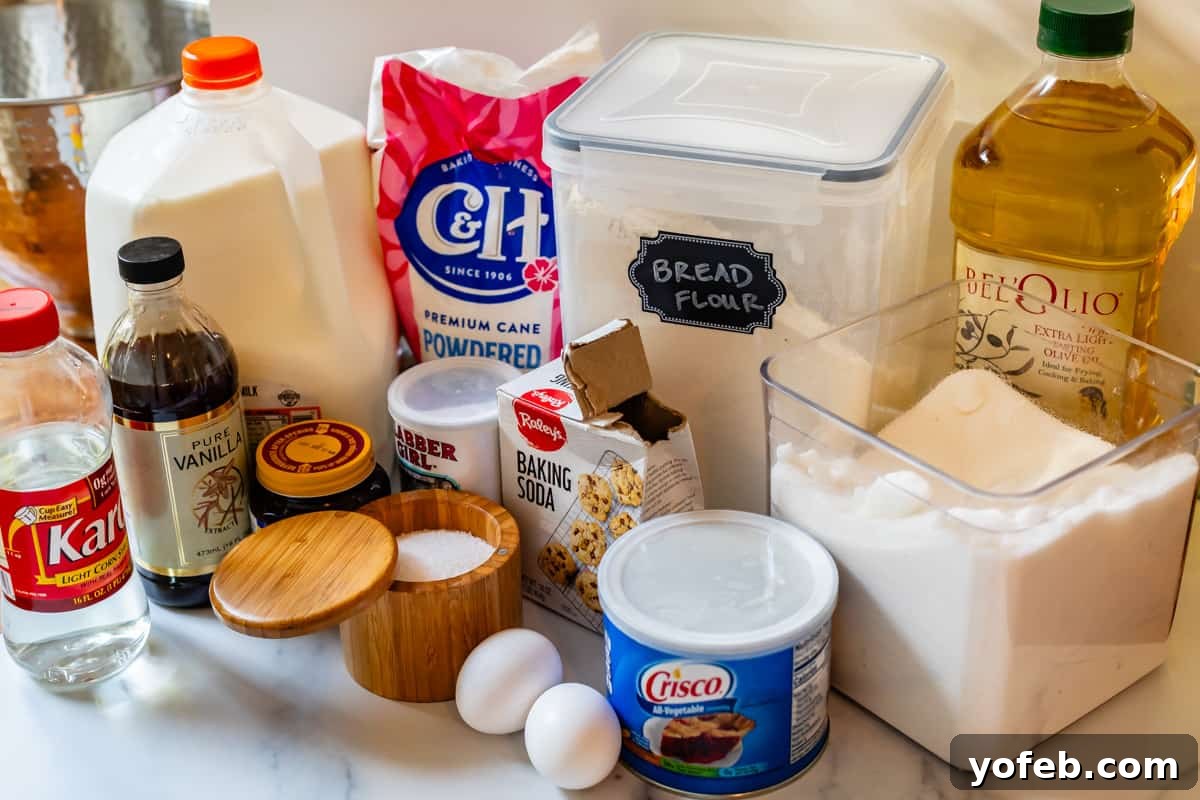
Like many classic recipes, these incredible donuts are crafted from surprisingly simple, readily available ingredients. To give you an idea of what you’ll need, here’s a handy shopping list. The complete recipe with detailed instructions can be found in the recipe card at the bottom of this post.
For the Dough:
- Whole milk
- Active dry yeast
- Granulated sugar
- Shortening
- Eggs (one large egg, one large egg yolk)
- Vanilla extract
- Bread flour
- Kosher salt
- Baking powder
- Baking soda
For Frying & Glaze:
- Oil for frying (canola or peanut oil recommended)
- Powdered sugar
- Corn syrup
- Cornstarch
- Butter
- Cold water
Step-by-Step Guide to Making Homemade Donuts
- Proof the Yeast: Begin by warming 1 cup of whole milk in a measuring cup in the microwave. It should be warm to the touch, but not hot – imagine a comfortable bath temperature for a baby, roughly 105-110°F. If it’s too hot, you risk killing the yeast.
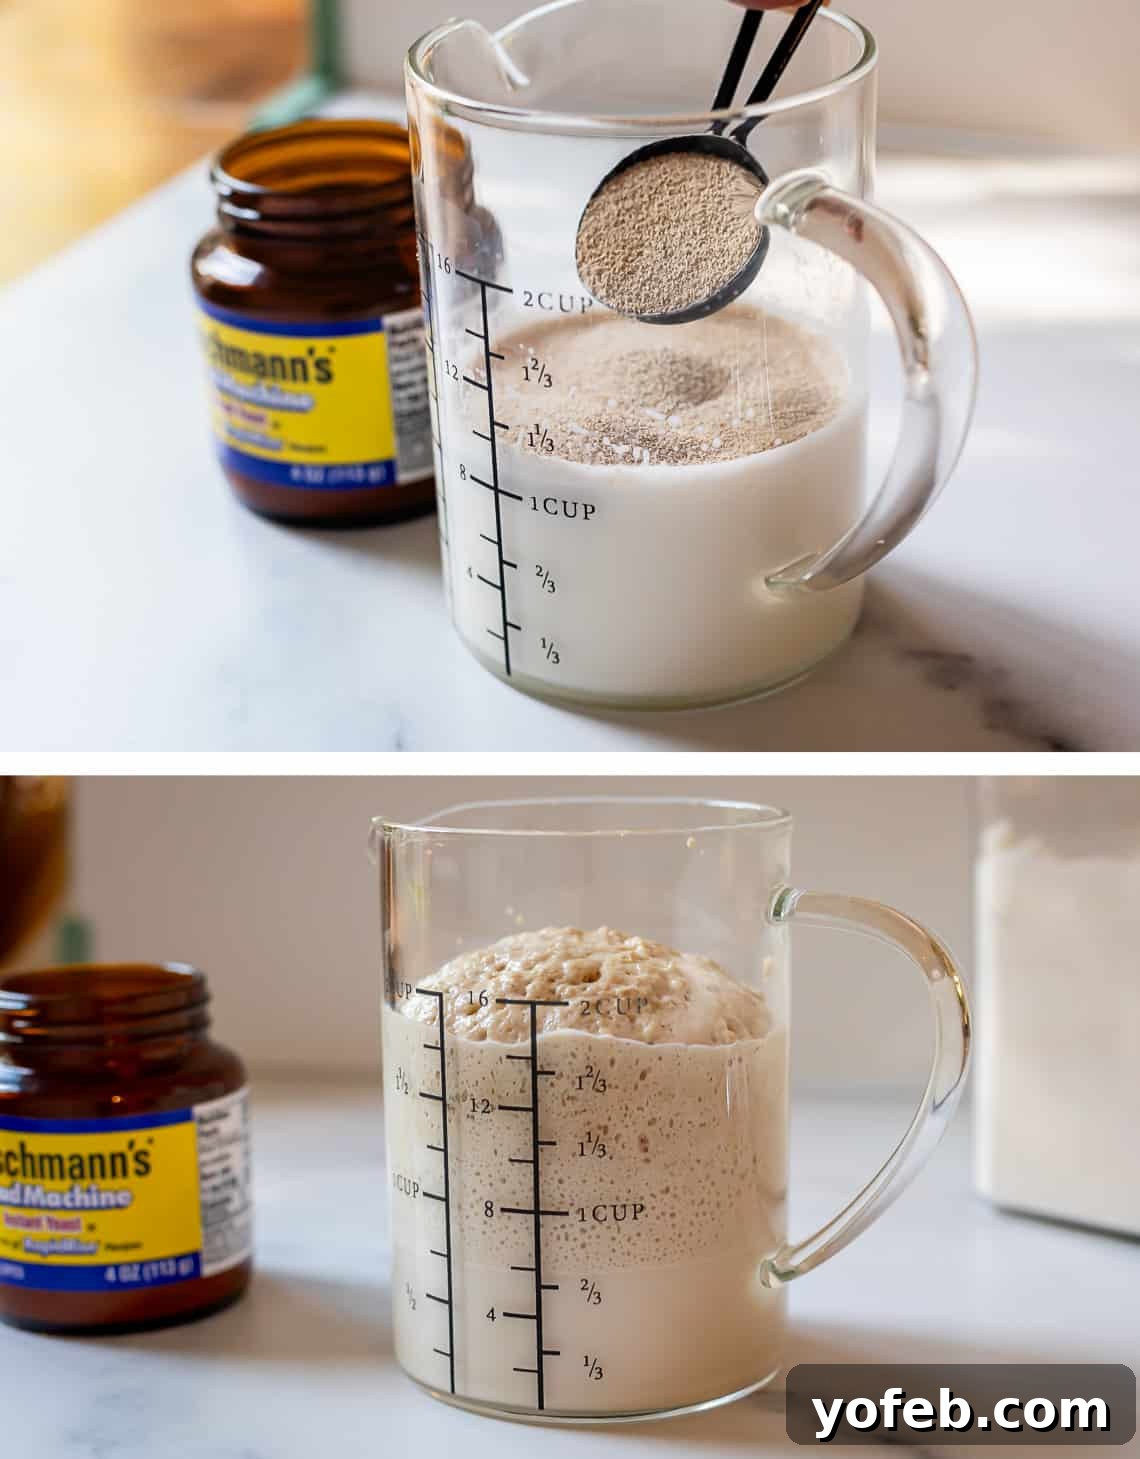
- Once the milk is at the correct temperature, stir in 1 tablespoon of granulated sugar and a generous 3 tablespoons of active dry yeast. Yes, that’s a lot of yeast – it’s key to achieving that incredible fluffiness! Let it sit for a few minutes until it becomes notably puffy and bubbly, indicating the yeast is active and thriving. If it remains flat, your yeast may be inactive, and you’ll need to start this step over.
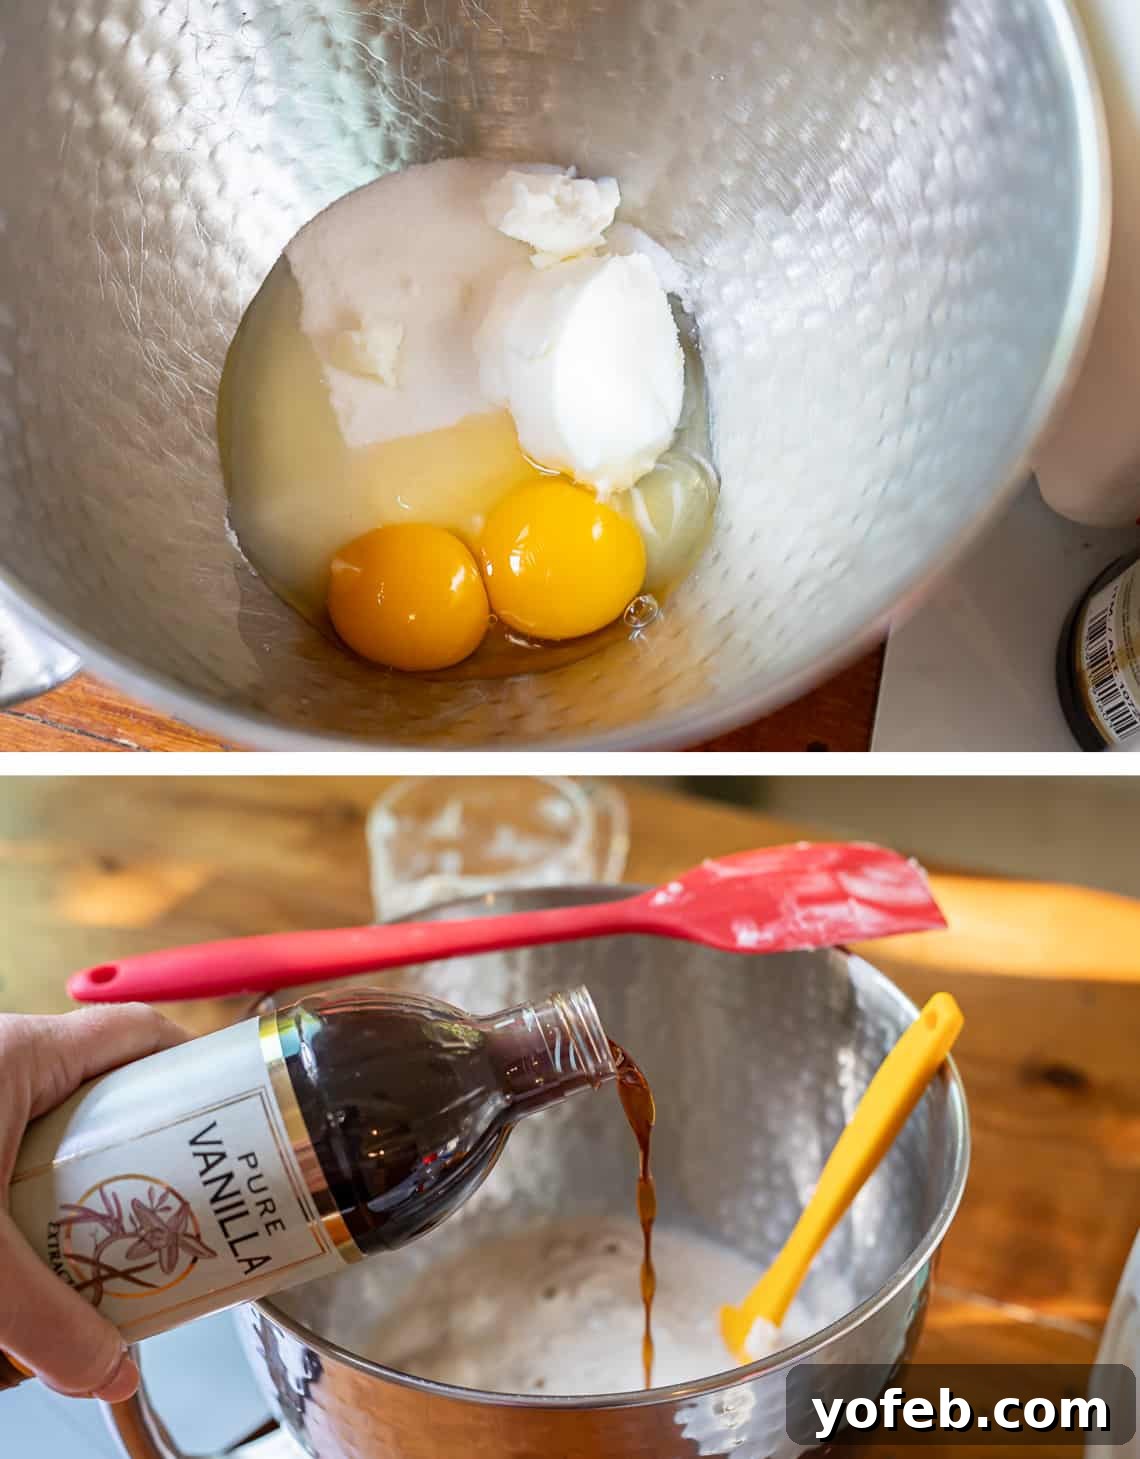
- In a separate large mixing bowl, combine the remaining granulated sugar, shortening, one large egg, one large egg yolk, and 1½ teaspoons of vanilla extract. Stir these wet ingredients together. The vanilla will infuse the dough with a delightful aroma.
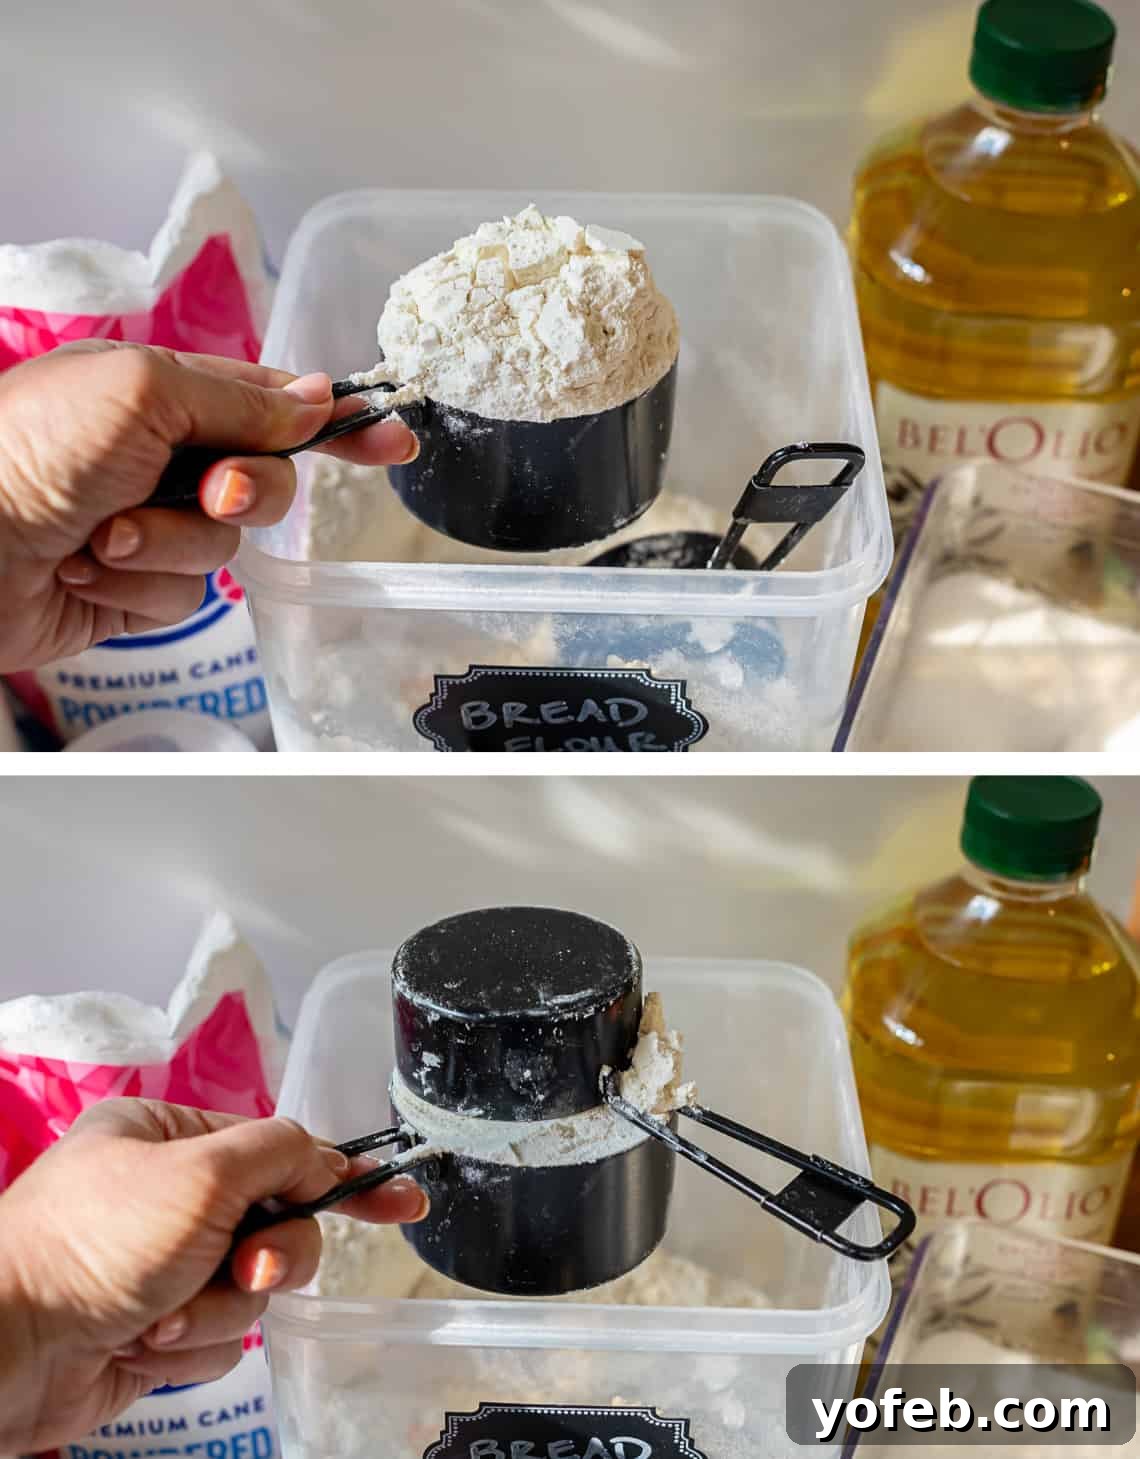
- Carefully measure 3¼ cups of bread flour. For accuracy, spoon the flour into the measuring cup and then level it off. Bread flour is crucial here because its higher protein content develops more gluten, providing the essential structure and chewiness characteristic of superior donuts. (For a deeper dive into the benefits of bread flour, check out my Homemade Bread recipe.) Add the flour to the wet ingredients, but don’t mix yet.
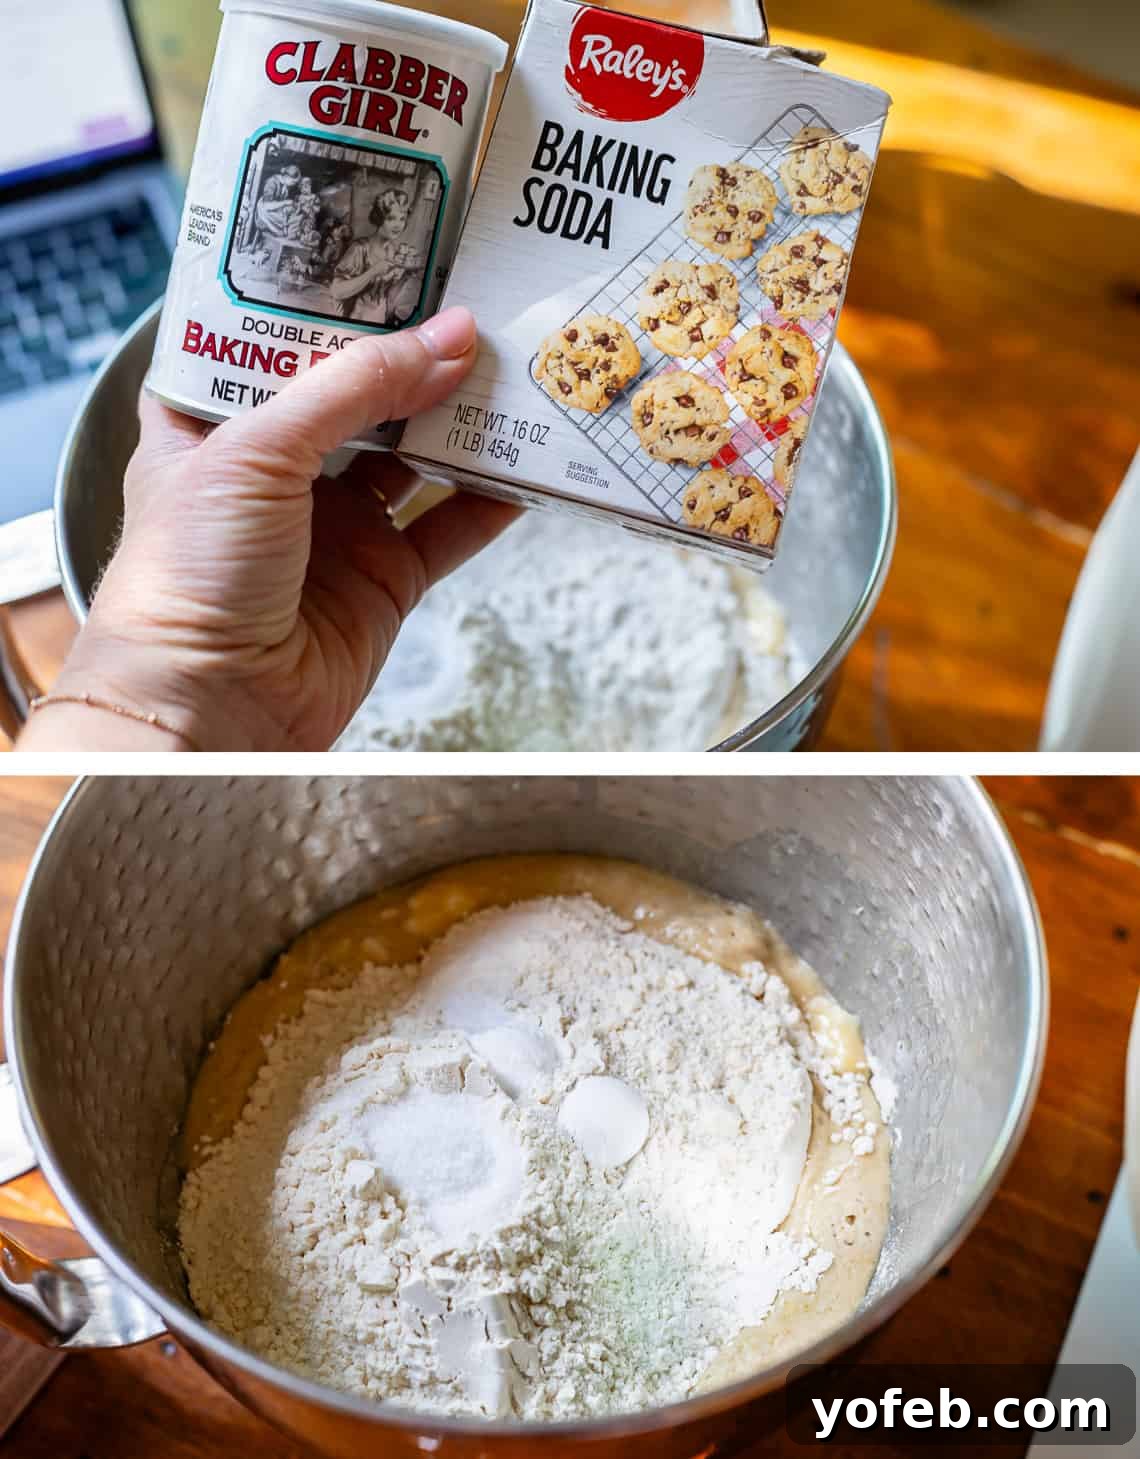
- Add 2½ teaspoons of kosher salt (or 2 teaspoons of table salt), ½ teaspoon of baking powder, and ½ teaspoon of baking soda to the flour. The baking soda and baking powder, alongside the yeast, provide an extra lift, making these donuts exceptionally light and airy.
- Using a spatula or wooden spoon, gently mix the dough until it just comes together. Then, switch to a dough hook on a stand mixer or begin kneading by hand.
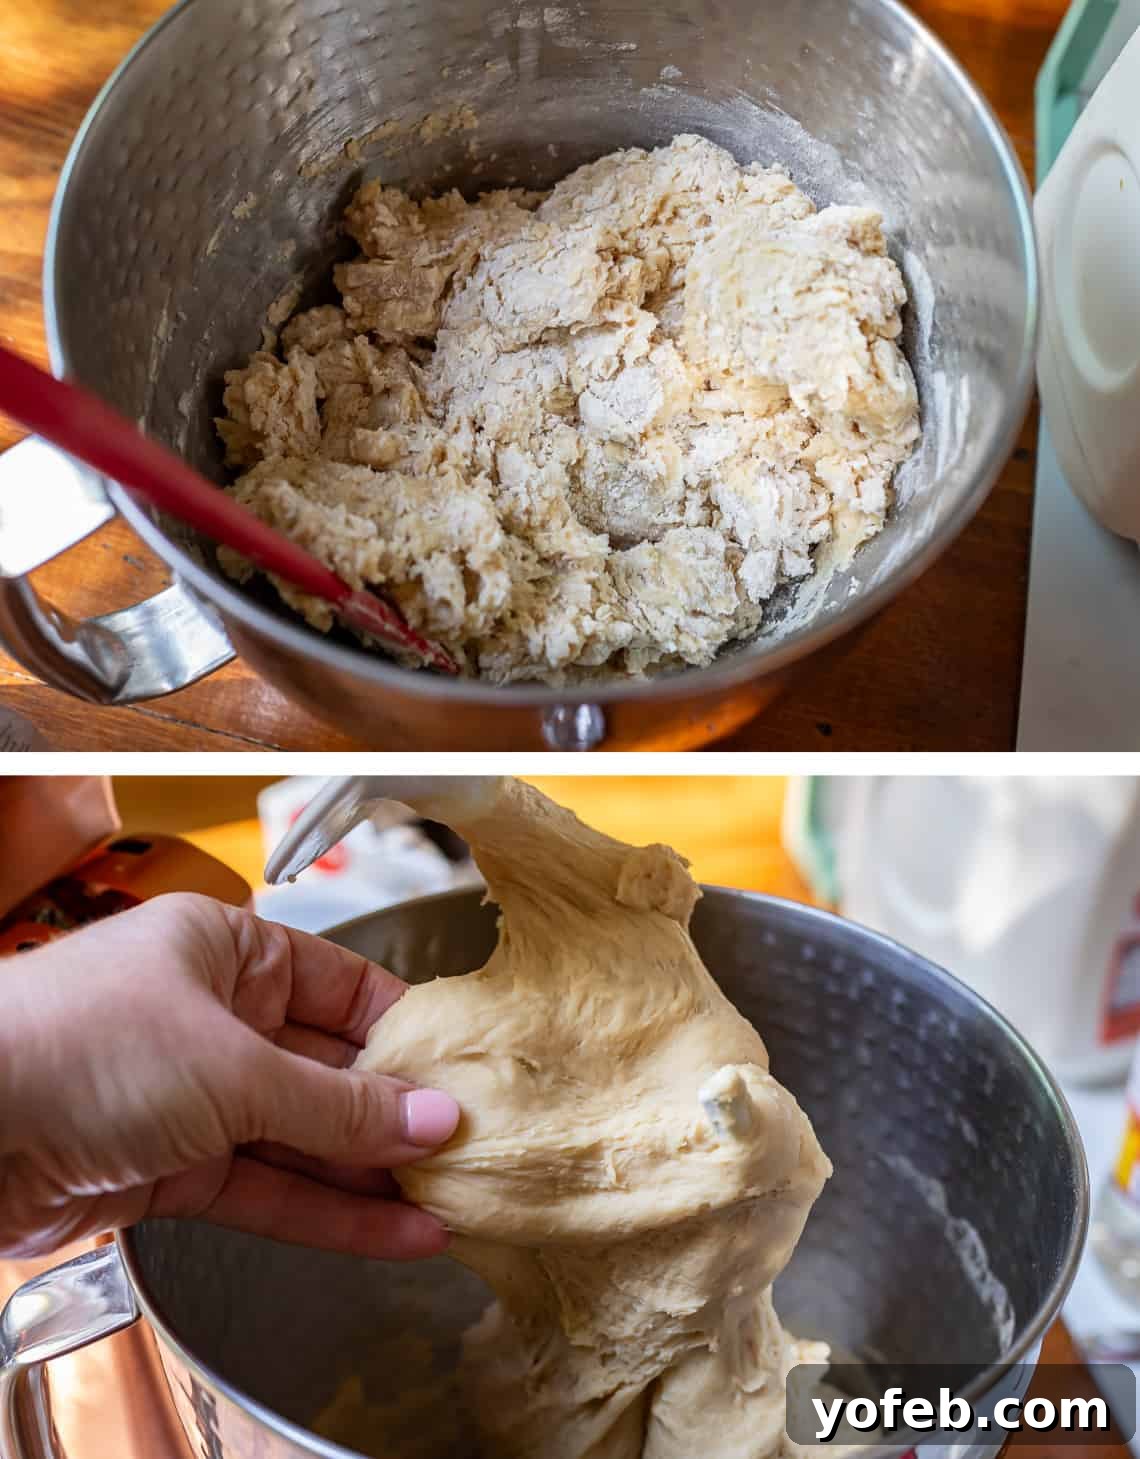
- Knead the dough for a full 5 minutes. It should transform into a smooth, elastic ball that pulls away cleanly from the sides of the bowl. Resist the urge to add too much flour; if it’s very sticky, add an additional ¼ cup of flour sparingly to achieve a workable consistency. Over-flouring will result in dry, tough donuts.
- Lightly grease a large bowl with oil or nonstick spray. Form the dough into a ball and place it in the greased bowl, turning it once to ensure the top is also lightly coated. Cover the bowl tightly with plastic wrap that has also been generously sprayed with nonstick spray to prevent sticking as it rises.
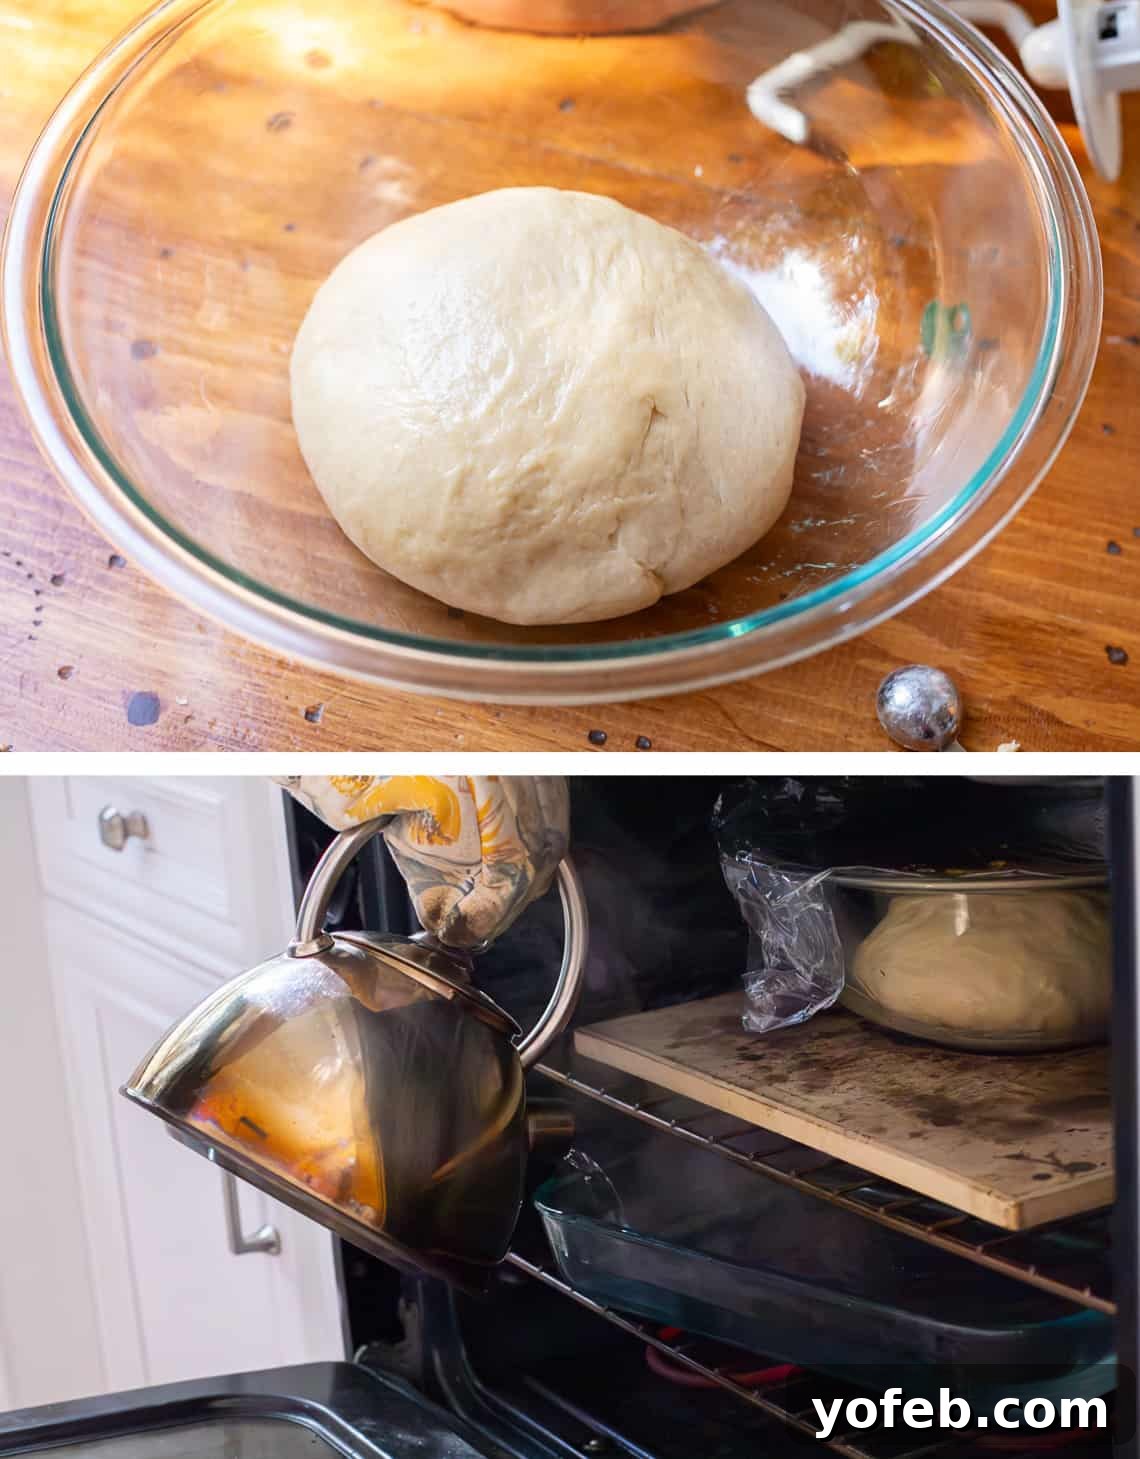
You might notice my oven isn’t pristine in these photos, but don’t let that distract you! This technique works wonders for dough rising. The secret is creating a warm, humid environment.
- Create a Proofing Box: Boil a pot or kettle of 8-10 cups of water. Briefly turn your oven on to 350°F for about 30-60 seconds, then immediately turn it off. The oven should be warm, but not hot – you should be able to comfortably touch the racks. This creates a cozy environment for your dough.
Place the covered bowl of dough on the top rack of your warmed, but off, oven. On the bottom rack, place a 9×13 inch cake pan. Carefully pour the boiling water into the pan and quickly close the oven door to trap the steam and warmth. This improvised proofing box provides the ideal climate for yeast to flourish. Let the dough rise for 1 hour, or until it has noticeably doubled in size.
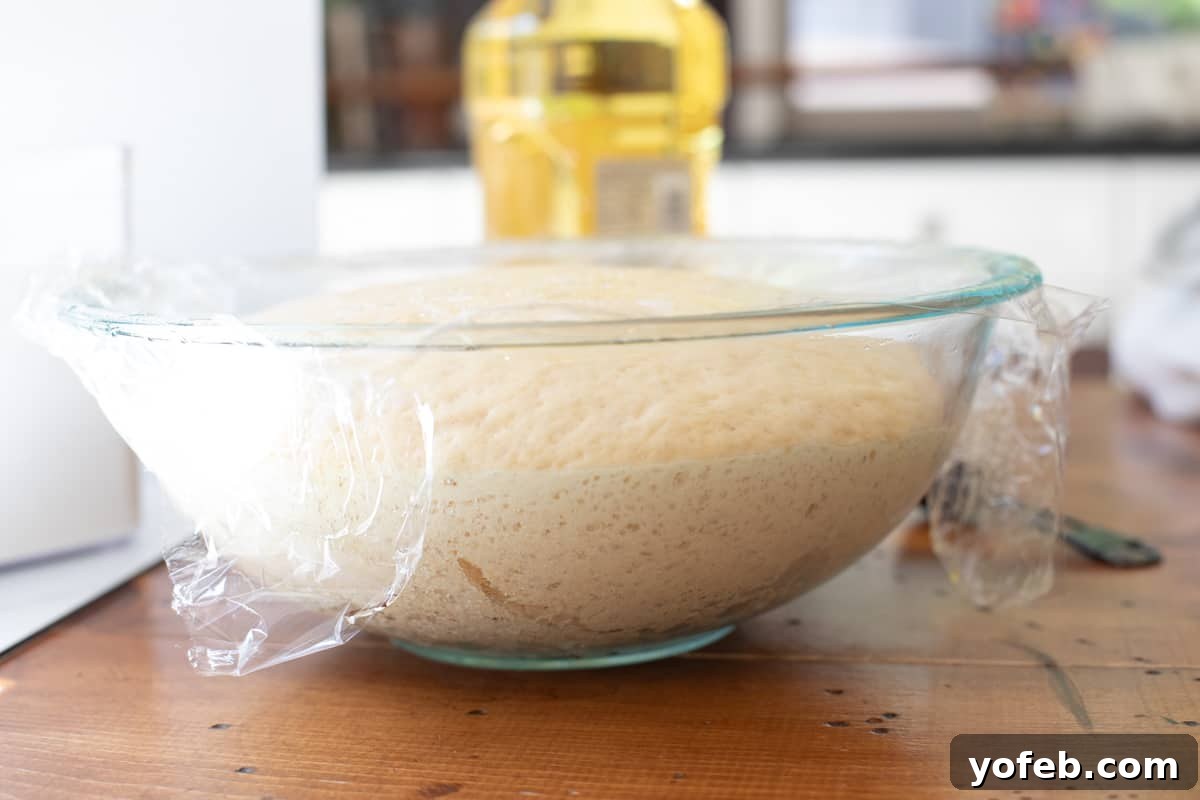
- Once the dough has risen beautifully, gently punch it down to release the air, and then smooth it out on a lightly floured surface.
How to make donuts without a donut cutter
Don’t have a donut cutter? No problem! Hand-shaping your donuts yields a superior, fluffier result. Here’s how:
- Take a piece of dough roughly this size, fitting comfortably in your fingertips.
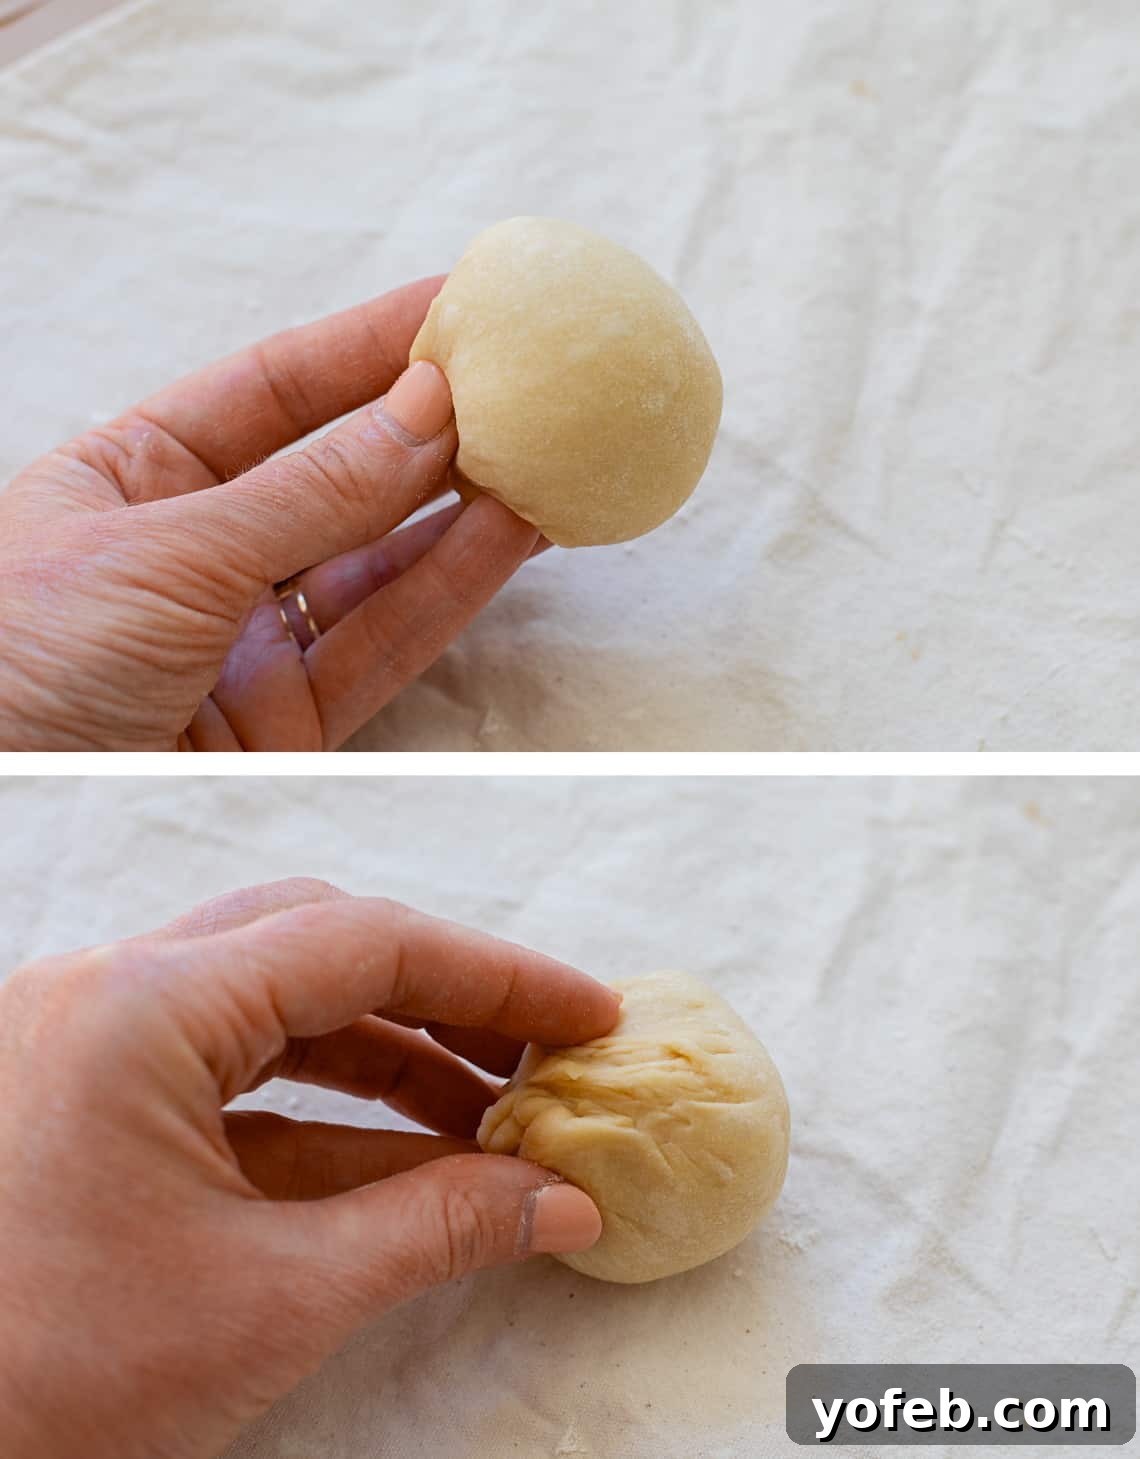
- Gently shape it into a smooth, even ball.
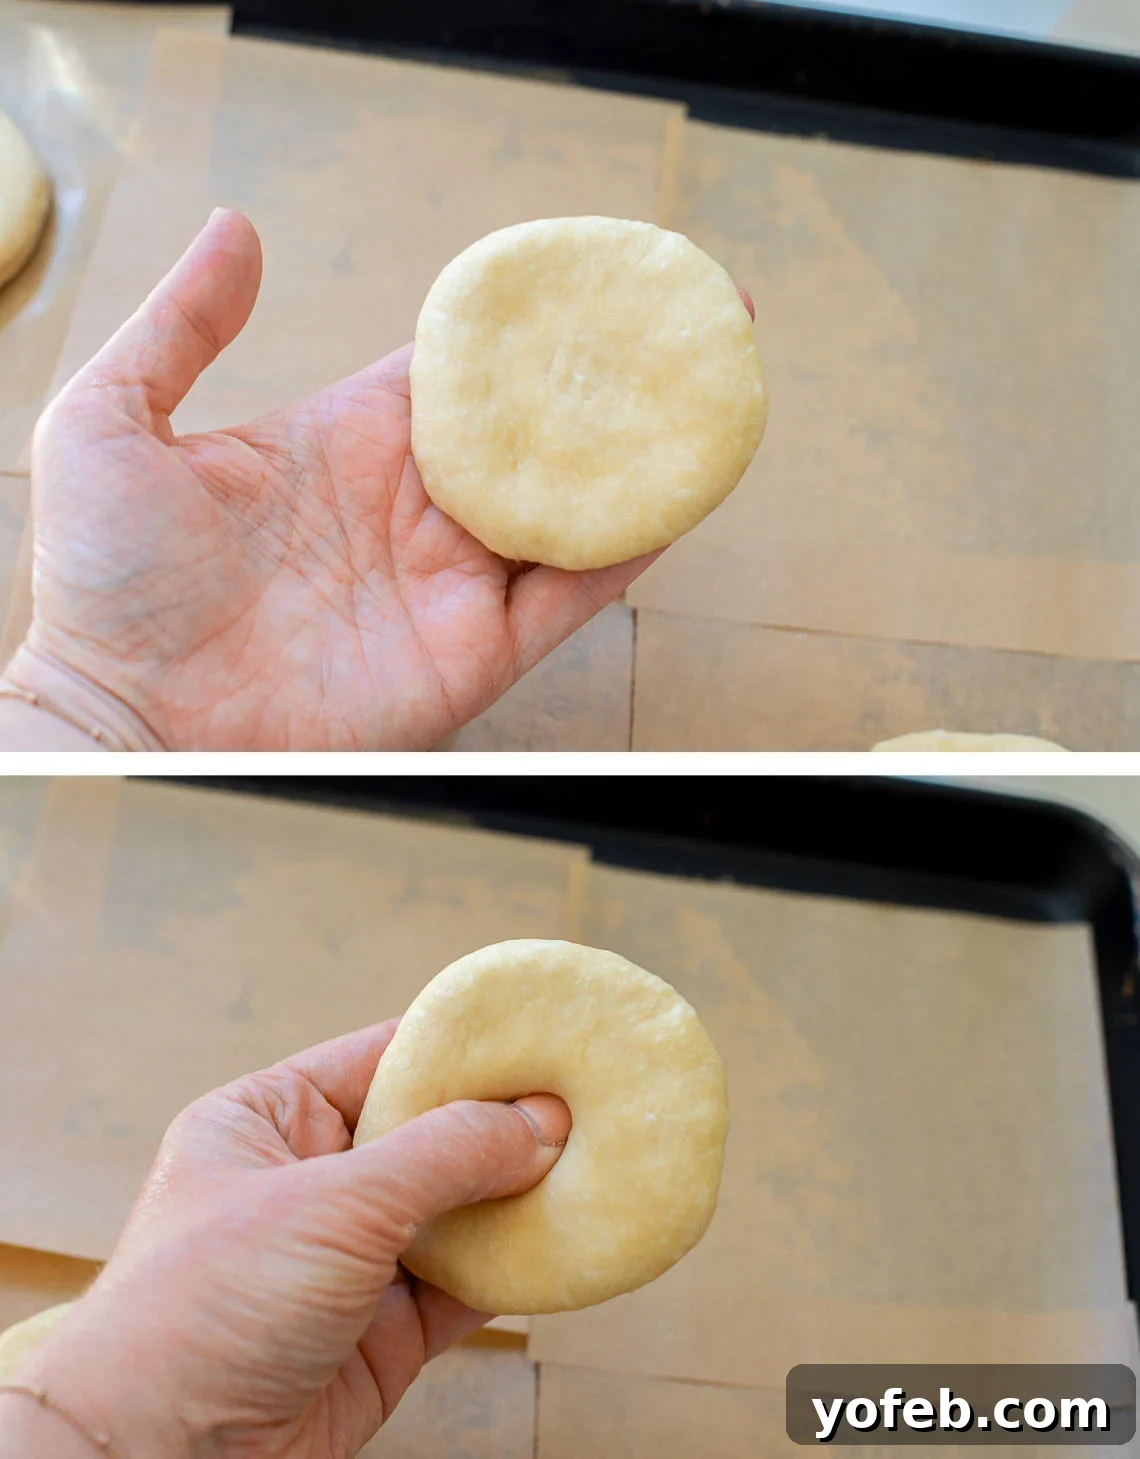
- Flatten the dough ball into a disc, about 3-4 inches wide. Press your thumb through the center until it pokes through to create the hole. Flour your hands if the dough becomes sticky.
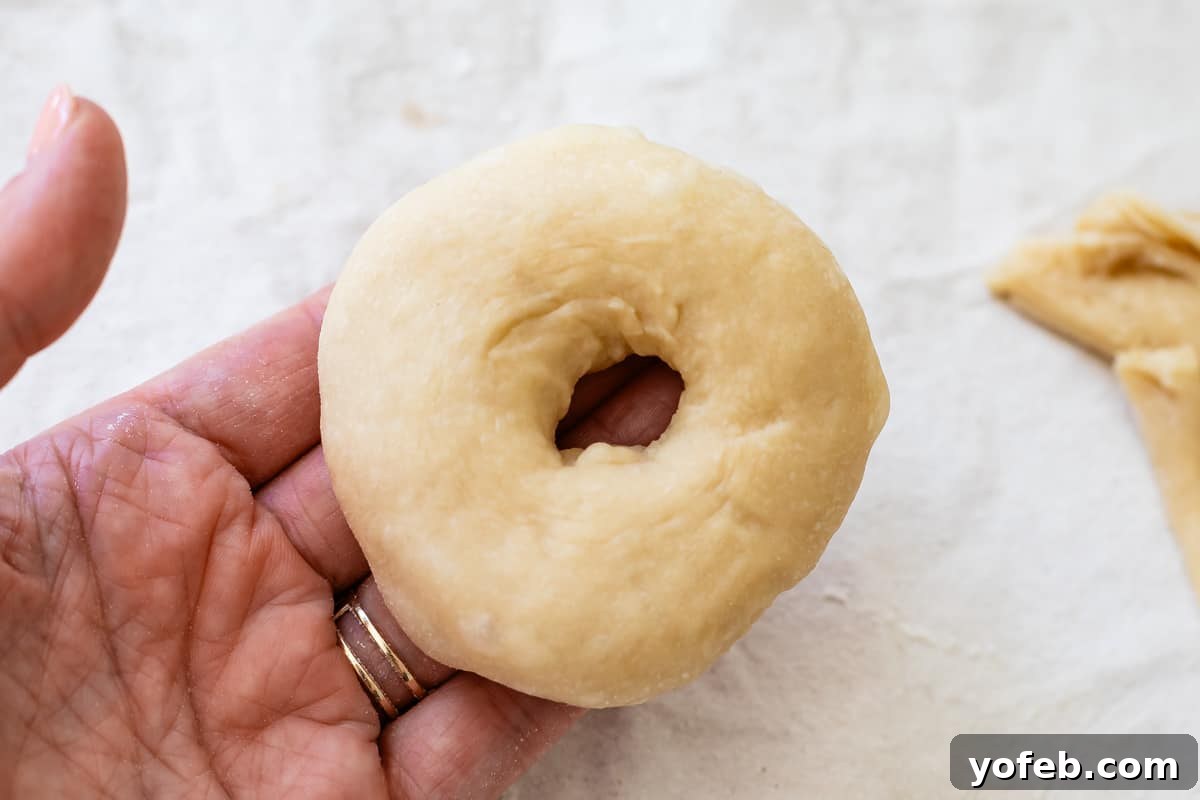
- Now, stretch and shape the dough into a proper donut. A fun and effective trick is to place the dough on your finger and spin it around a few times. This centrifugal force helps to widen the hole and encourages the dough to expand outwards evenly. It’s a great activity to involve kids in!
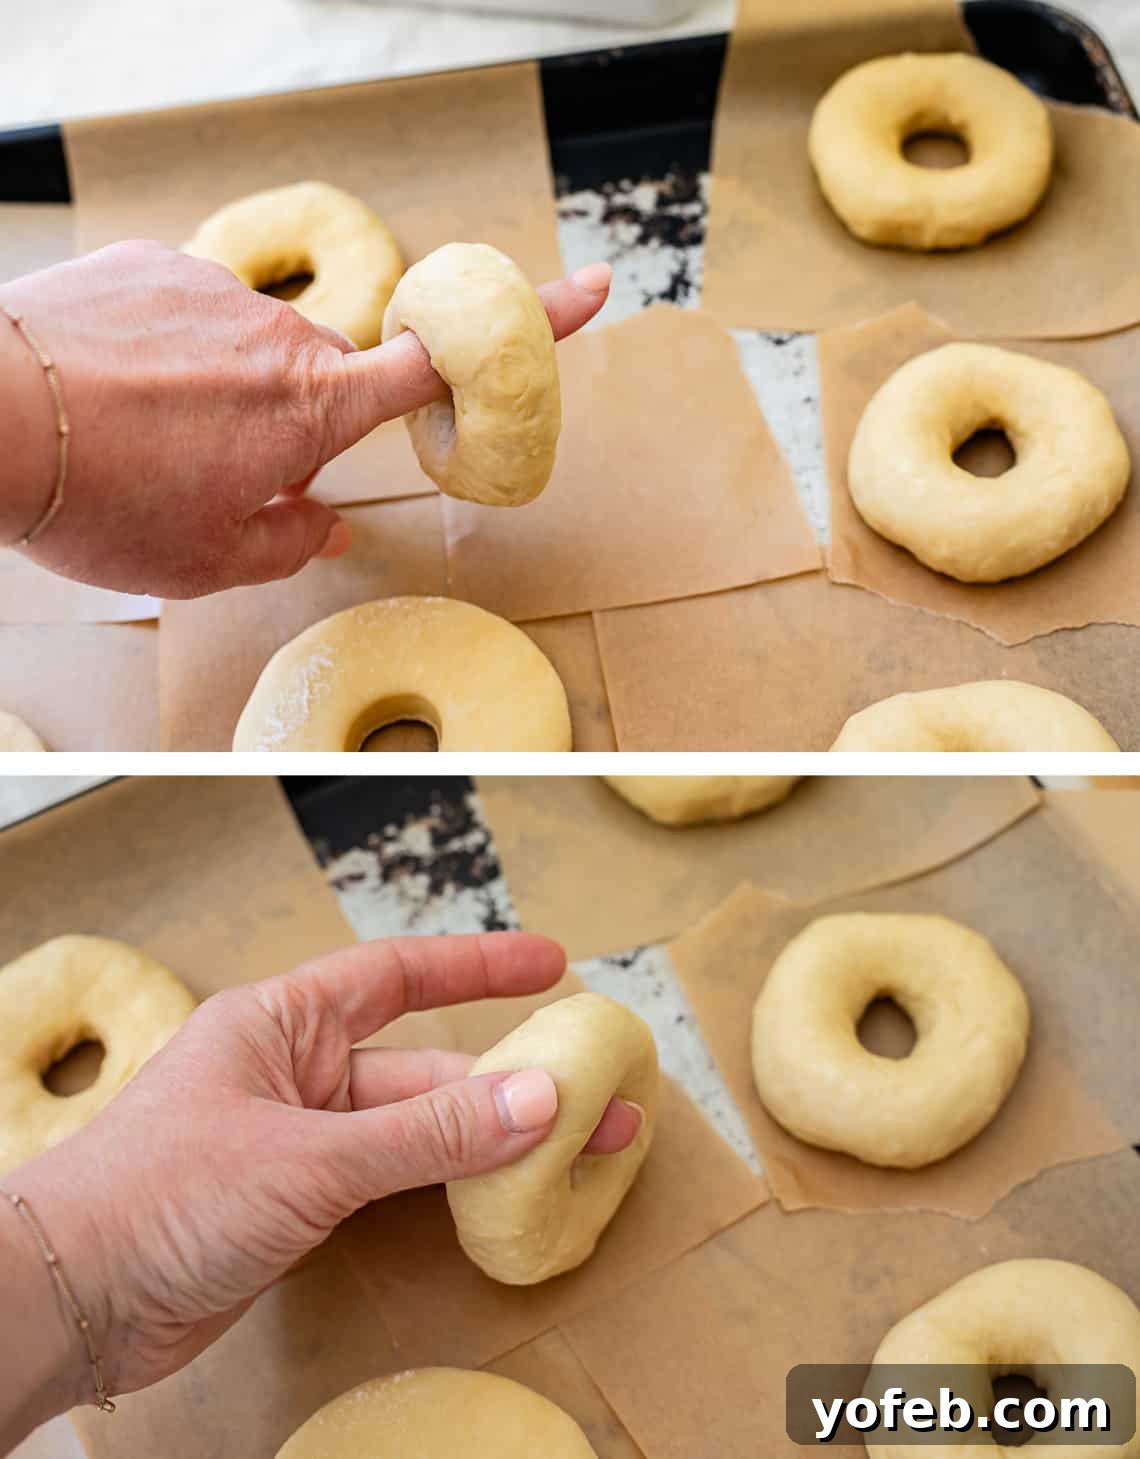
- Use your fingers to ensure the donut has a nice, tall, plump shape. We want them to rise UP! Make the hole in the center larger than you might think necessary, as it will shrink during rising and frying.
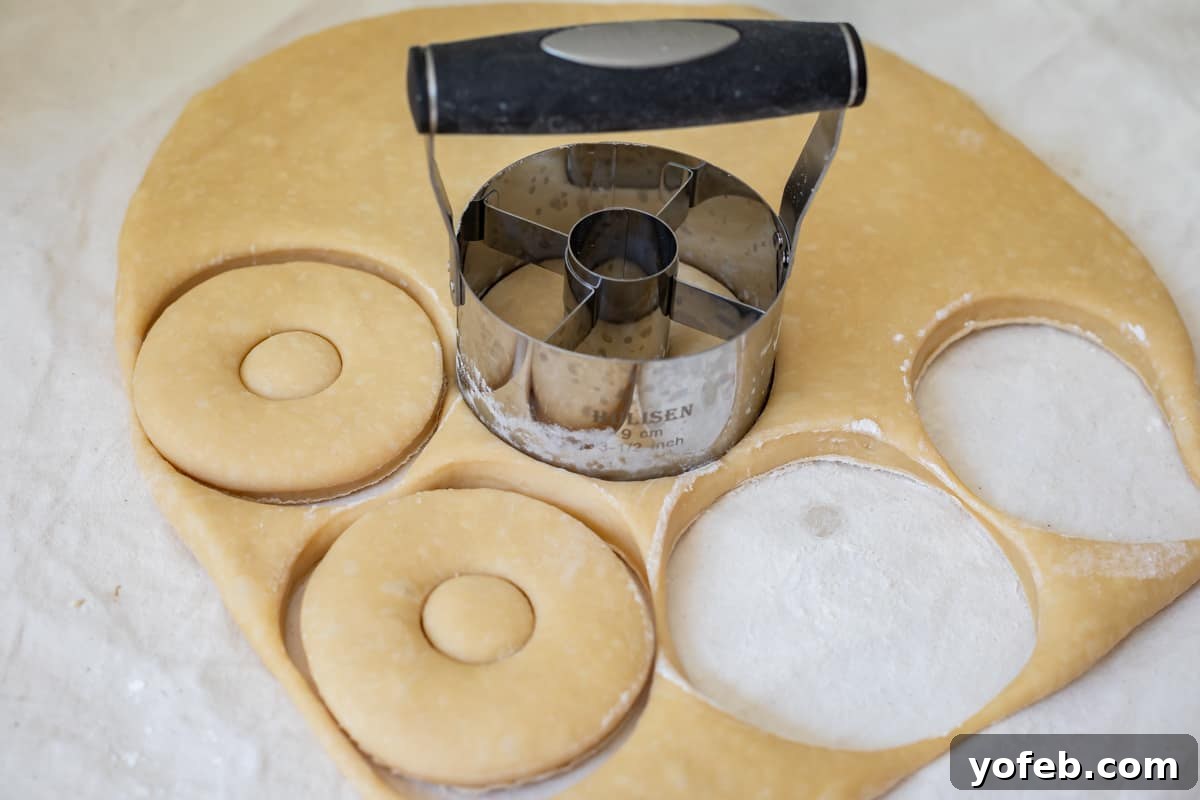
While I’ve shown you how to roll out the dough and cut them the traditional way with a donut cutter (I even bought one for this very post!), I genuinely prefer hand-shaping. I found that hand-shaping allows the outer edges of the donut to rise more effectively, resulting in a noticeably “plumper” and softer texture compared to the slightly sloped edges often seen with cutter-made donuts. This is a subtle detail, and both methods produce delicious donuts!
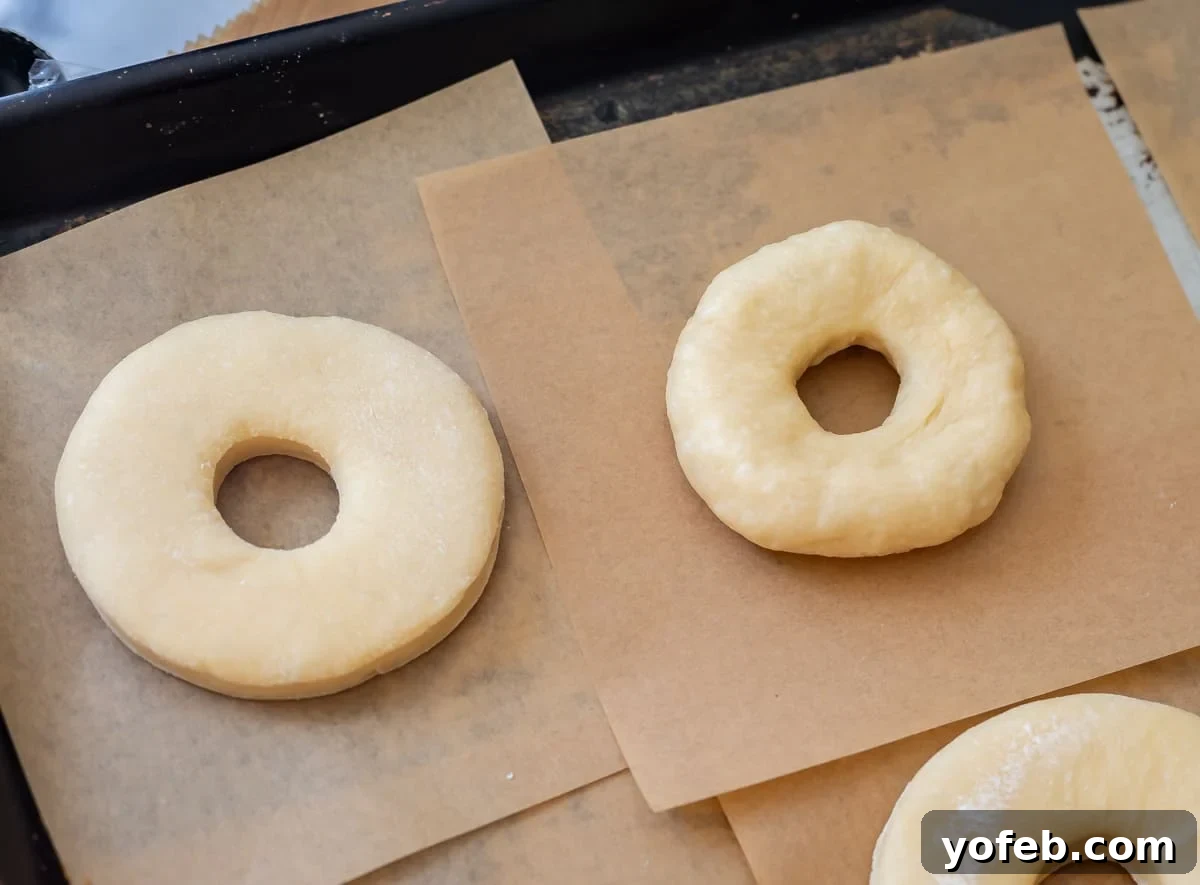
As you can see in the images above, the donuts on the left were made using a cutter, while those on the right were hand-shaped. Both are delicious and rose well, but the hand-shaped ones have a more rounded, robust profile. If you hand-shape, you won’t automatically have donut holes, but you can always form small balls of leftover dough and fry those separately – because who doesn’t love a fresh donut hole?
- Line a couple of baking sheets with individual squares of parchment paper. I highly recommend these handy 6×6 inch parchment paper squares, as they make transferring the risen donuts effortless. Arrange your shaped donuts on these squares, ensuring ample space between each for their second rise. Do not cover them this time.
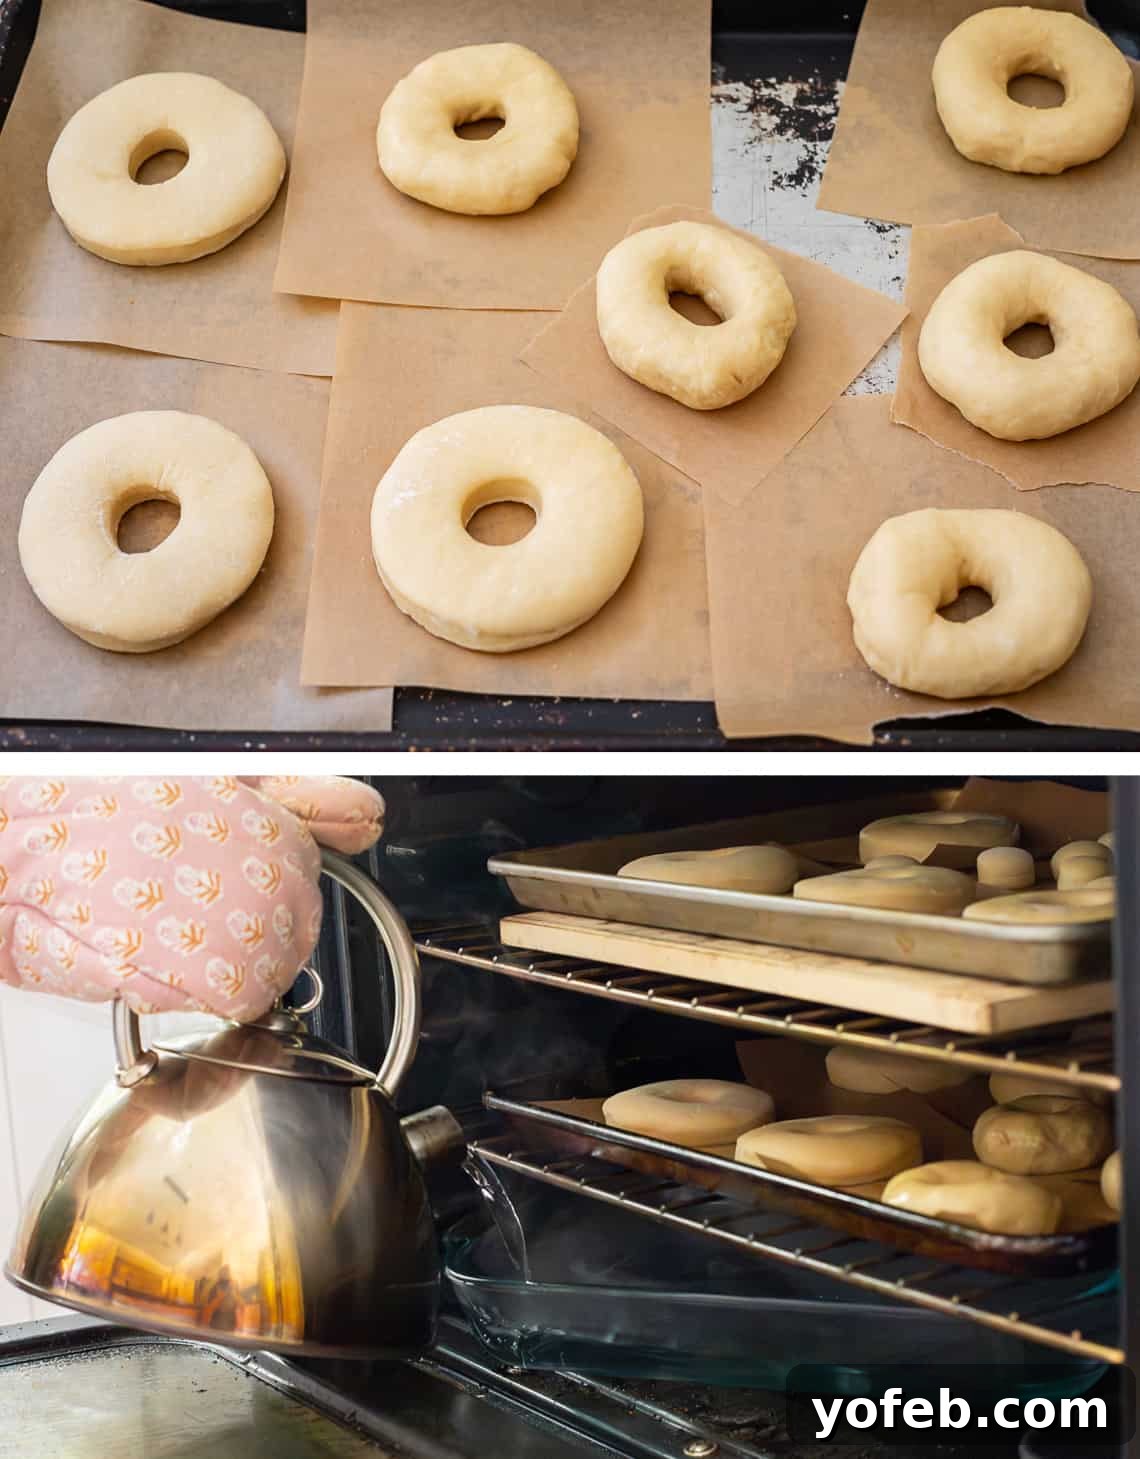
- Repeat the proofing box method: heat water to a boil and briefly warm your oven to create a warm, moist environment. Place the baking sheets with the shaped donuts in the oven, with the pan of boiling water on the bottom. Close the door and let them rise for another 30-45 minutes, until doubled in size. Important Safety Note: If placing a pan directly on the oven element, ensure the oven is turned OFF and cool to the touch before doing so. Never turn the oven on with a pan directly on the element in this manner.
How to make glaze for donuts
The glaze is best applied when both the donuts and the glaze are warm, so prepare it during the final donut rise.
- In a small saucepan, whisk together ½ cup cold water and 1 tablespoon cornstarch until smooth. This creates a slurry that will help thicken the glaze.
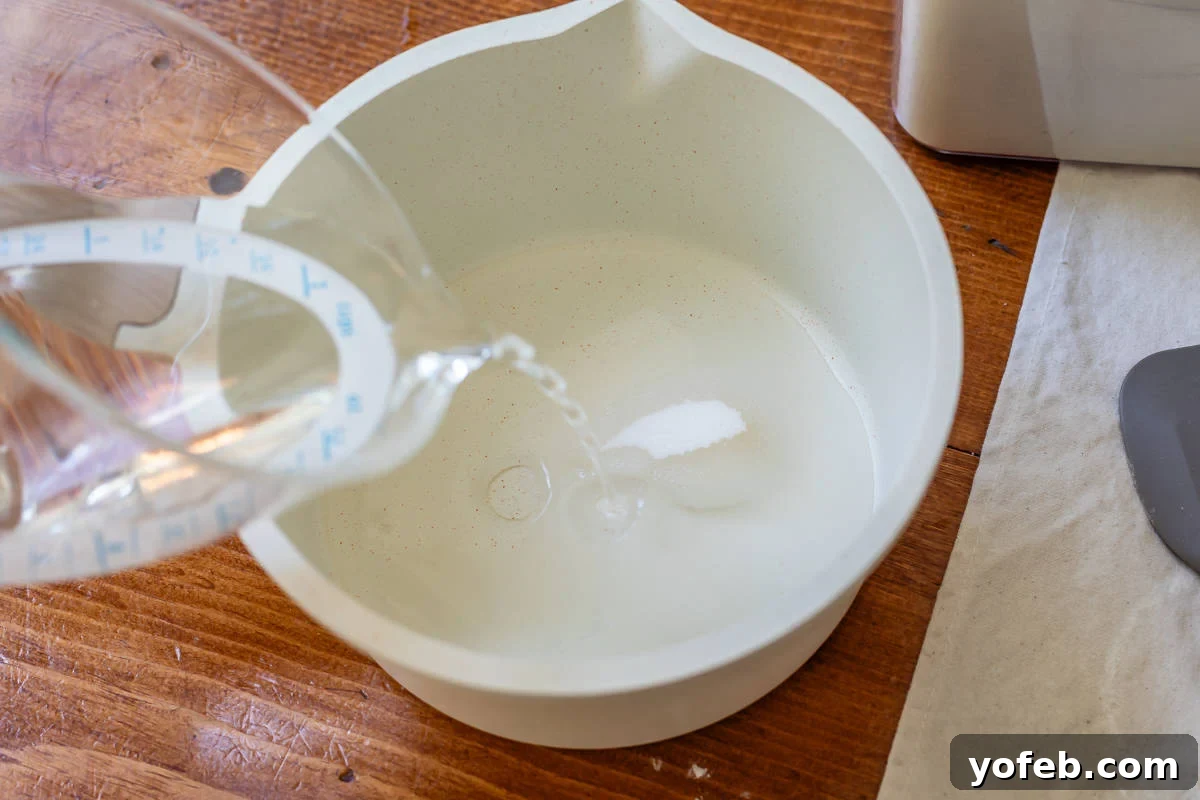
- Add 3 tablespoons granulated sugar and ¼ cup butter to the saucepan. Heat over medium, whisking constantly for about 2 minutes, until the butter is melted and small bubbles just begin to form around the edges. Remove from heat immediately to prevent the cornstarch from thickening too much.
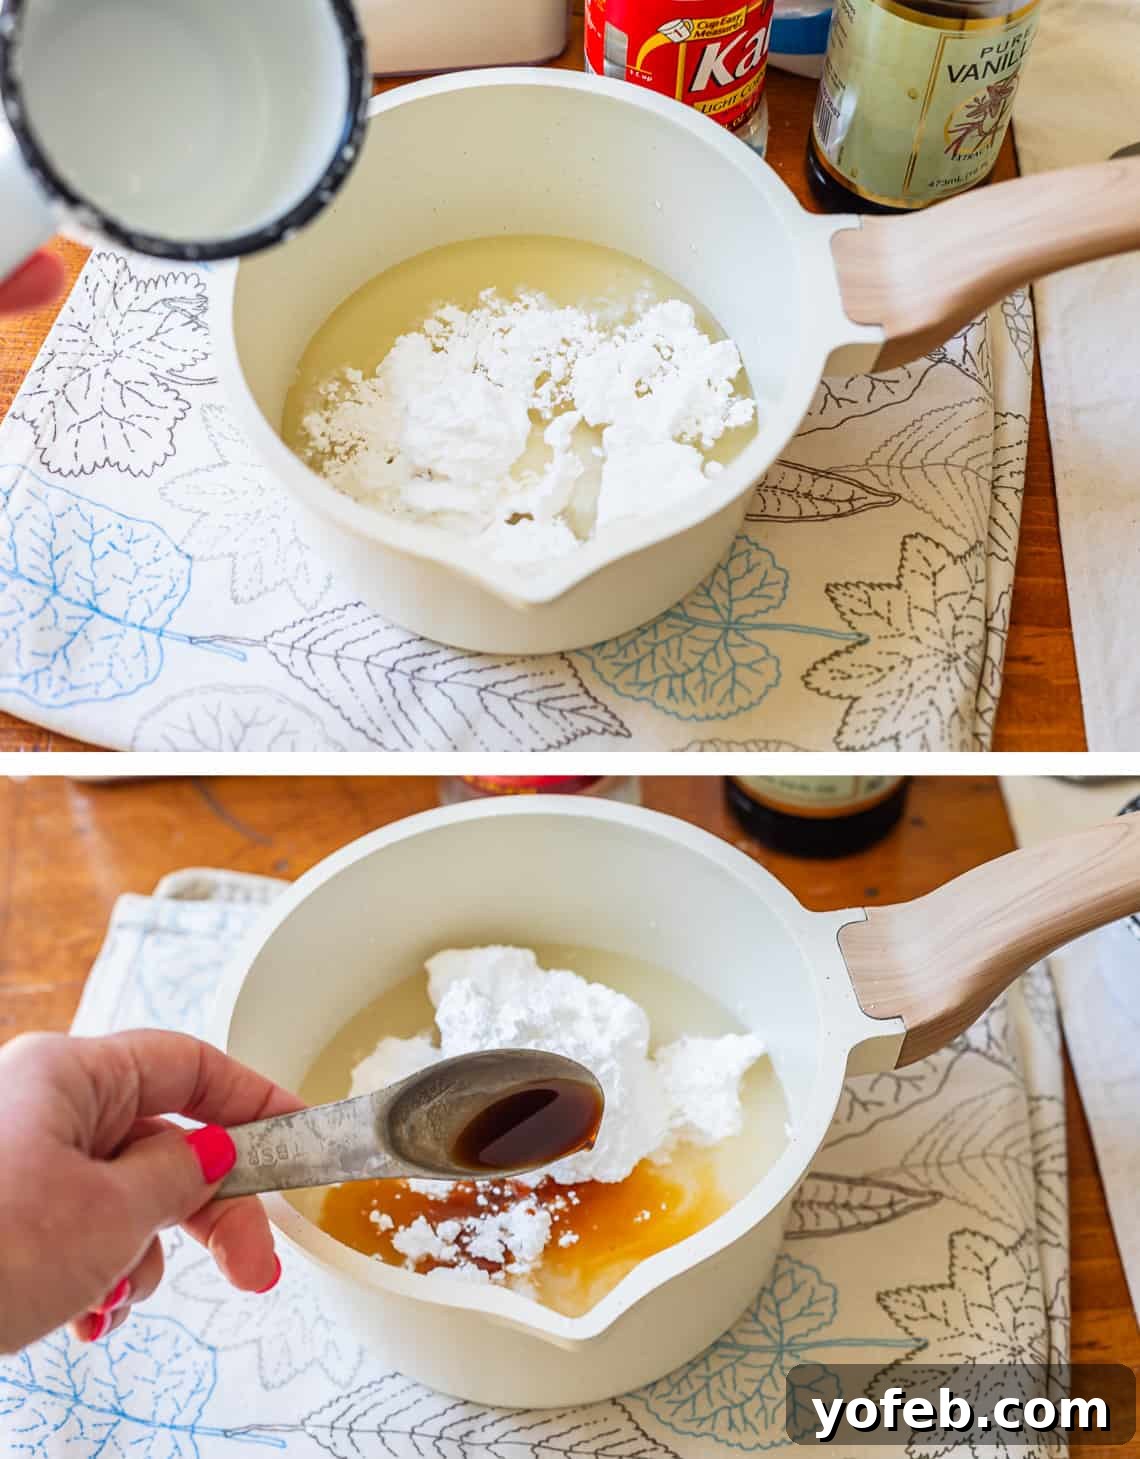
- Stir in 1 tablespoon corn syrup, 2 teaspoons vanilla, and ½ teaspoon kosher salt. Then, sift in 4 cups of powdered sugar. Sifting is crucial to prevent lumps, which are very difficult to whisk out of a glaze. Whisk everything together until completely smooth. Keep your whisk nearby; the glaze will naturally start to firm up, so you’ll need to whisk it occasionally to maintain its silky consistency. Adjust thickness with more water or powdered sugar, adding one tablespoon at a time.
Fry the donuts
- As the glaze is prepared and the donuts finish their second rise, heat your frying oil. In a high-sided skillet (at least 12 inches), pour canola or peanut oil to a depth of about 2 inches.
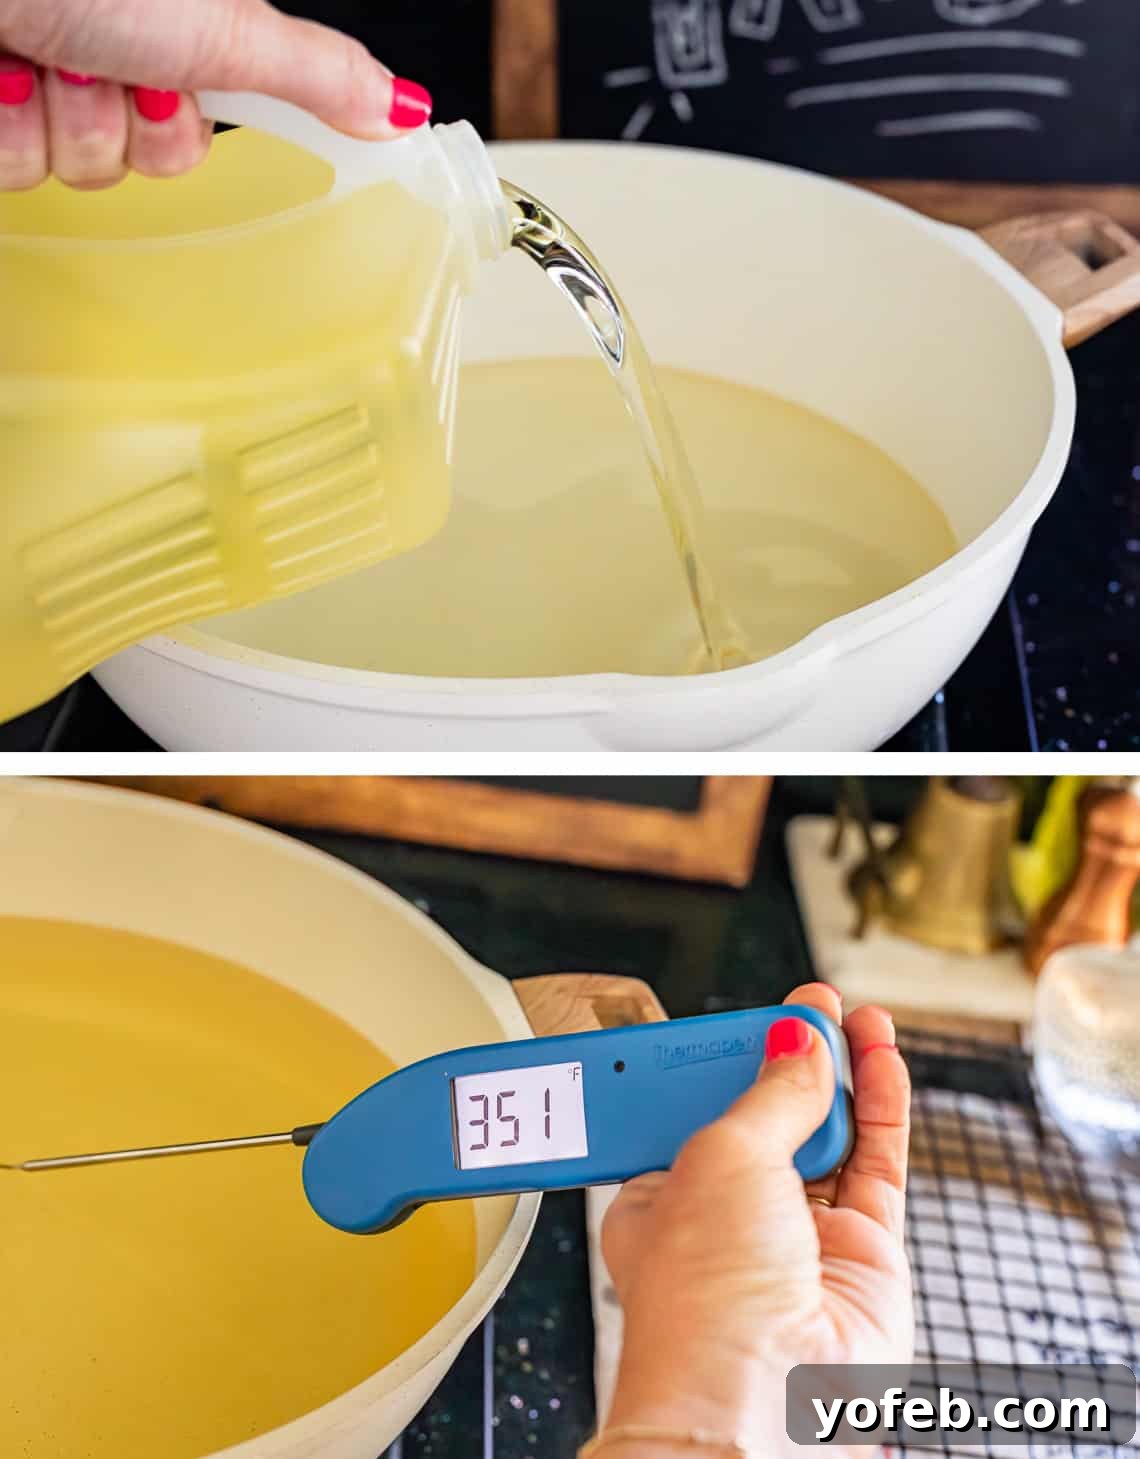
- Heat the oil over medium heat for at least 15 minutes, aiming for a consistent temperature of 350°F. A candy thermometer is essential for accurate temperature monitoring. It’s important to use enough oil (at least 2 inches deep) to maintain a steady temperature. Too little oil will cause rapid temperature fluctuations, leading to unevenly cooked or burnt donuts.
- Set up your frying station for efficiency:
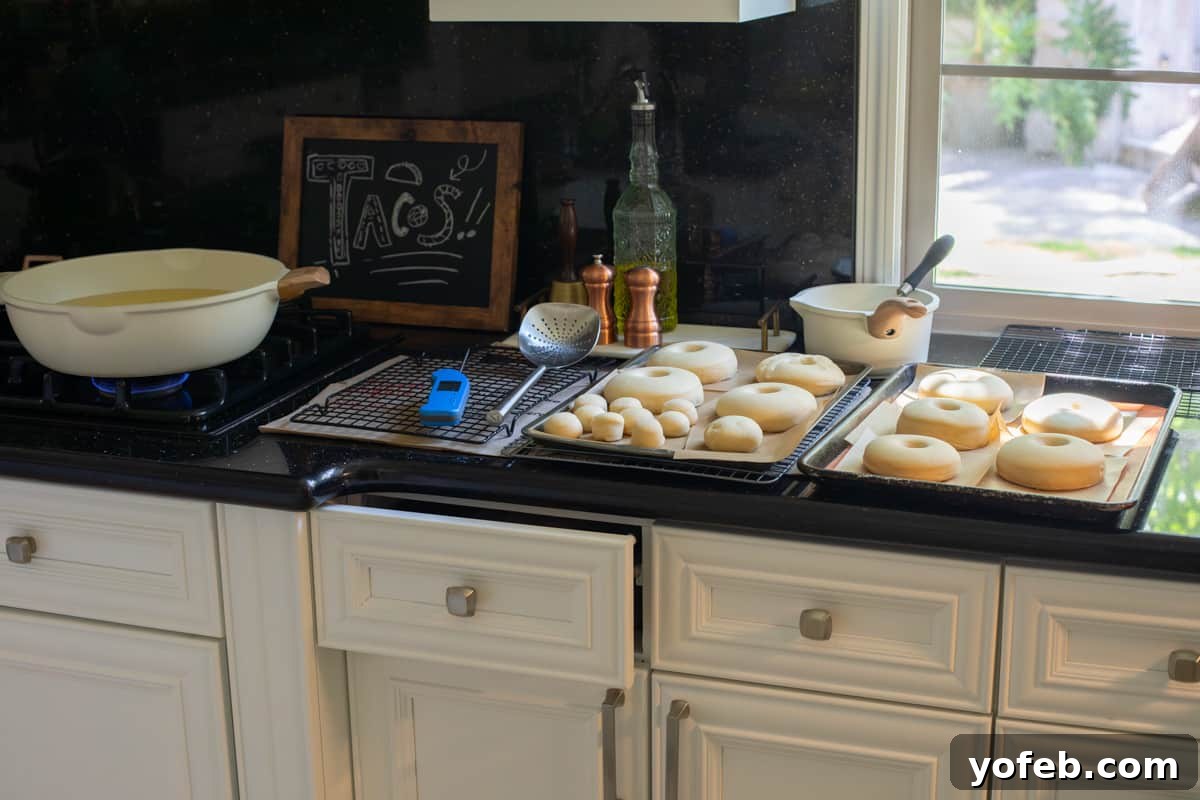
Your frying station should include: heated oil with a thermometer, a cooling rack placed over paper bags or paper towels (for draining excess oil), and a slotted spoon or spider strainer for removing donuts. Have your risen donuts and the prepared glaze close by.
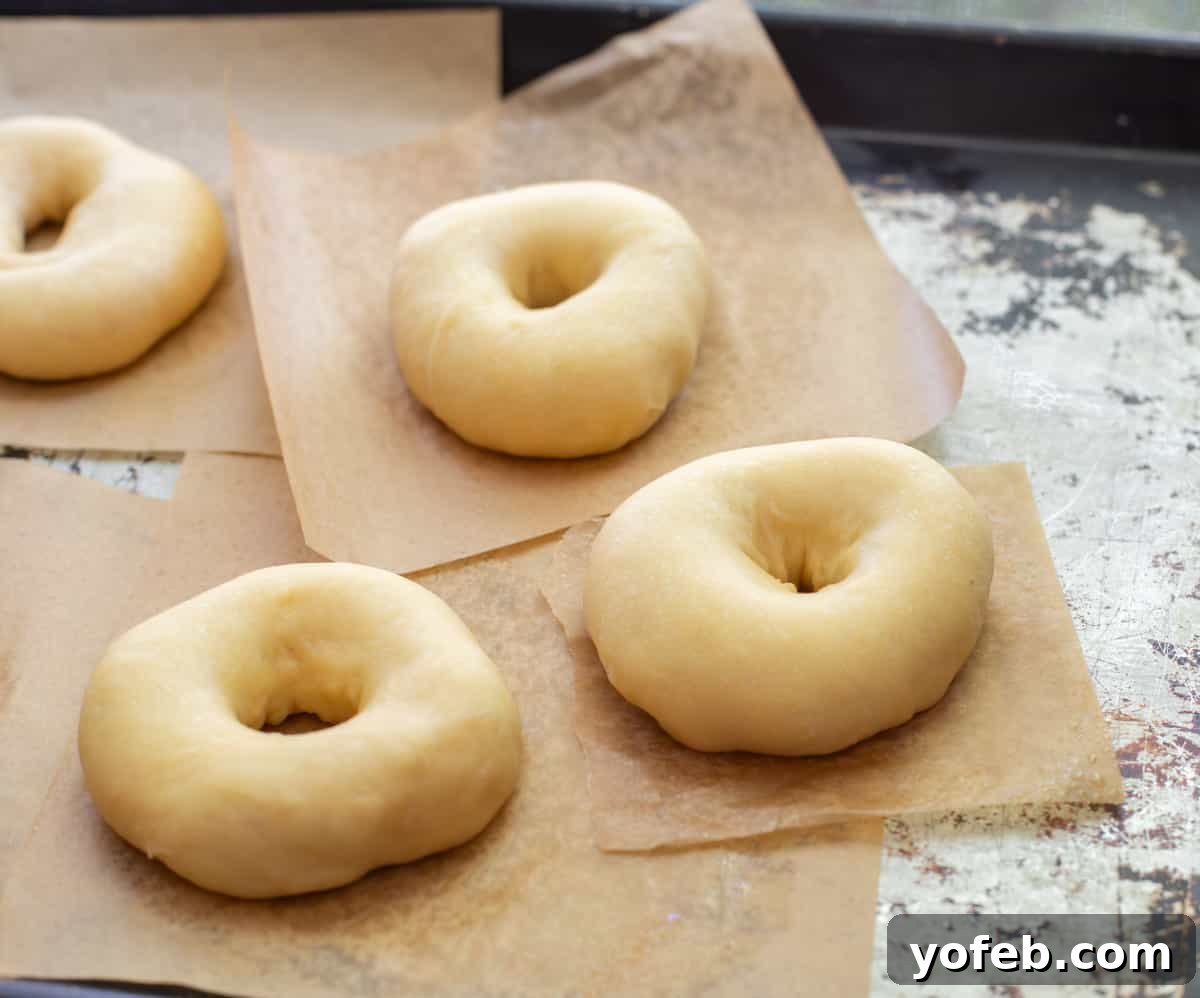
Admire these beauties! They’re perfectly proofed and ready for their hot oil bath.
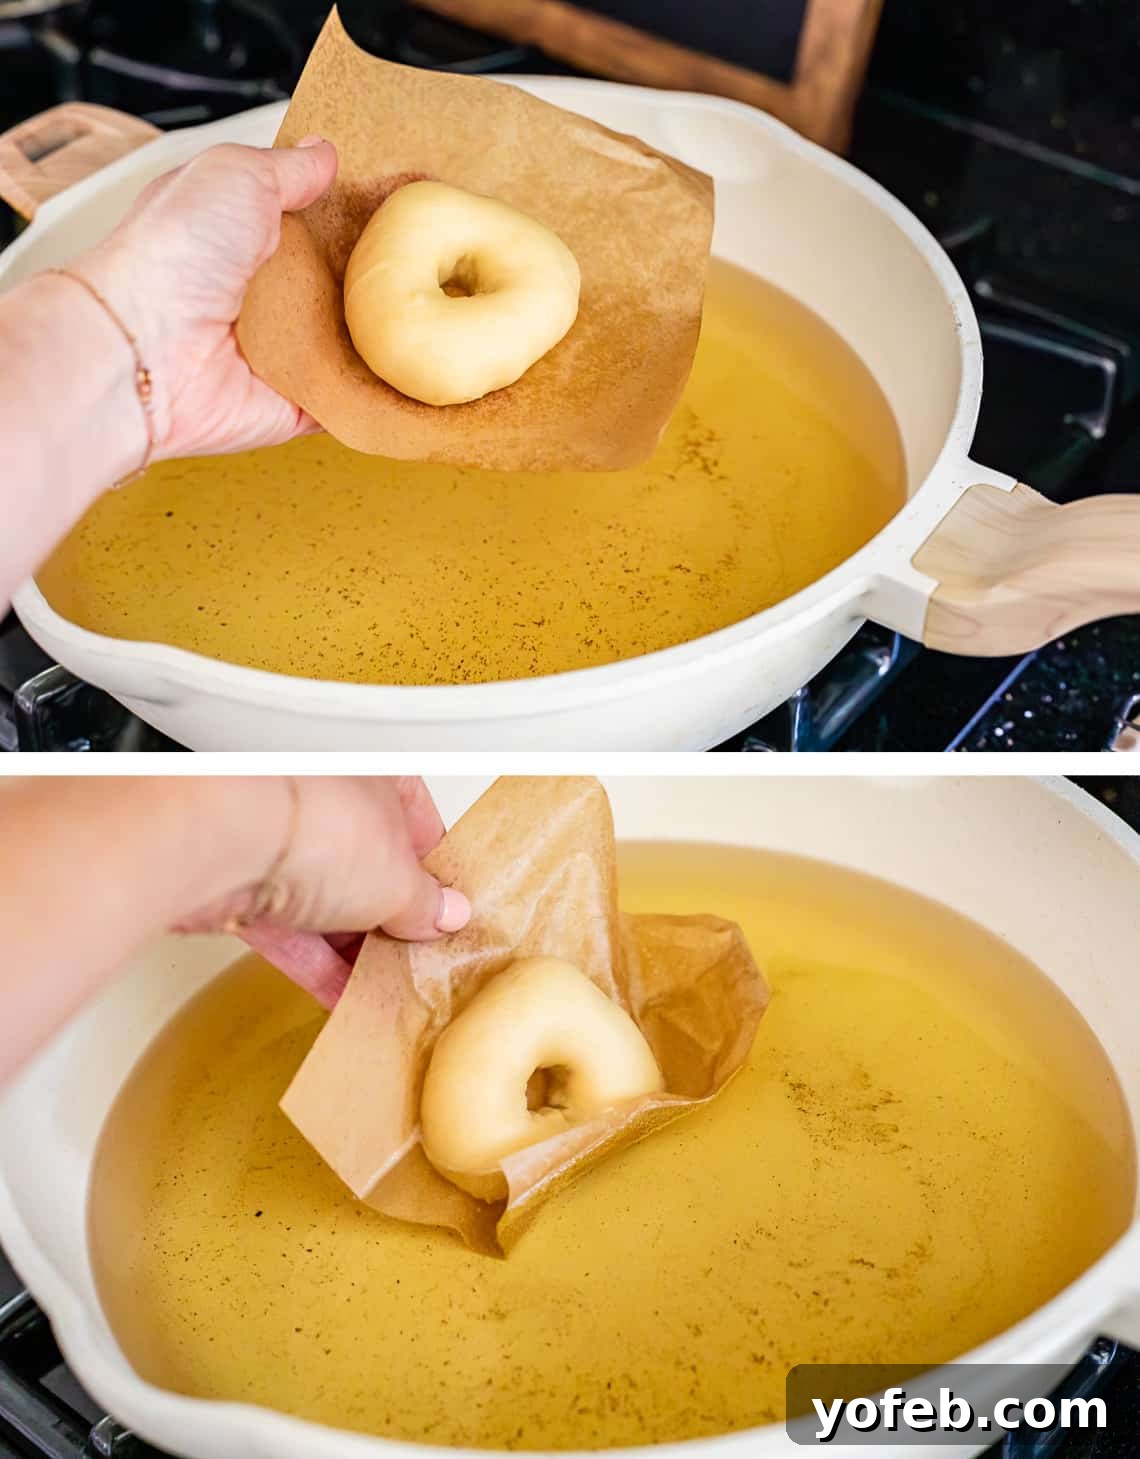
- This is where those parchment paper squares truly shine! They solve the common problem of deflating beautiful risen donuts when transferring them to the oil. Simply lift the parchment square with the donut and gently lower it into the hot oil.
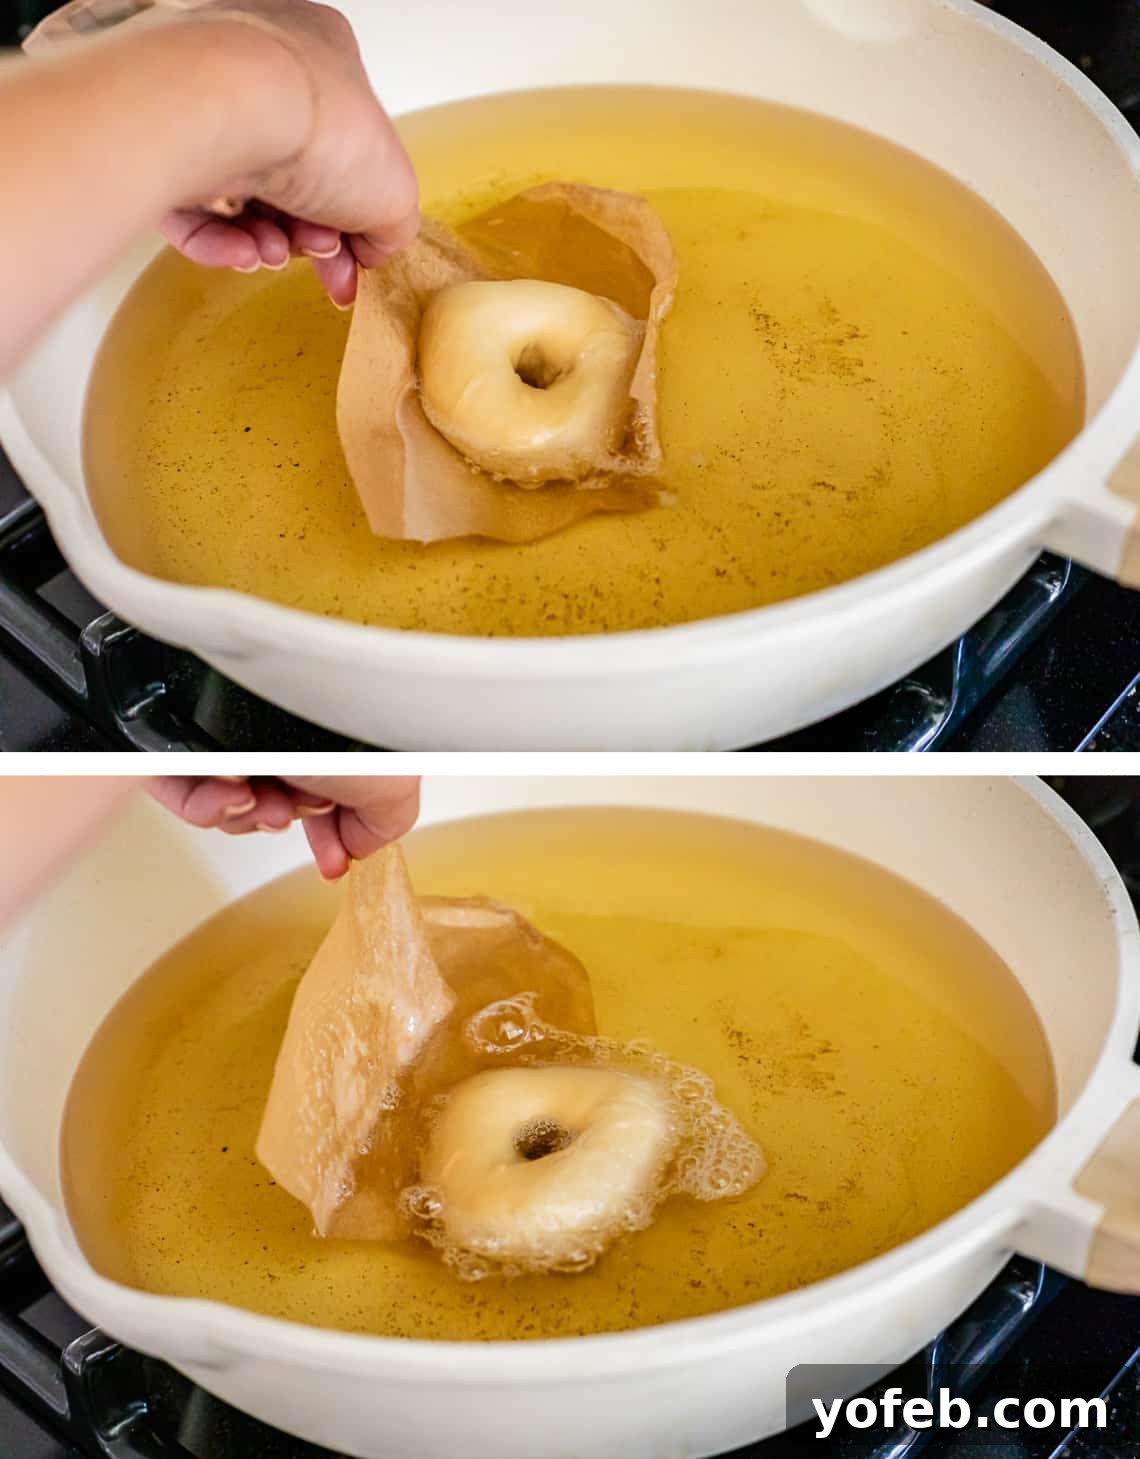
- Hold the corner of the parchment paper for a few seconds as the donut cooks, allowing it to gently release and float free in the oil. Be extremely cautious as hot oil can cause severe burns.
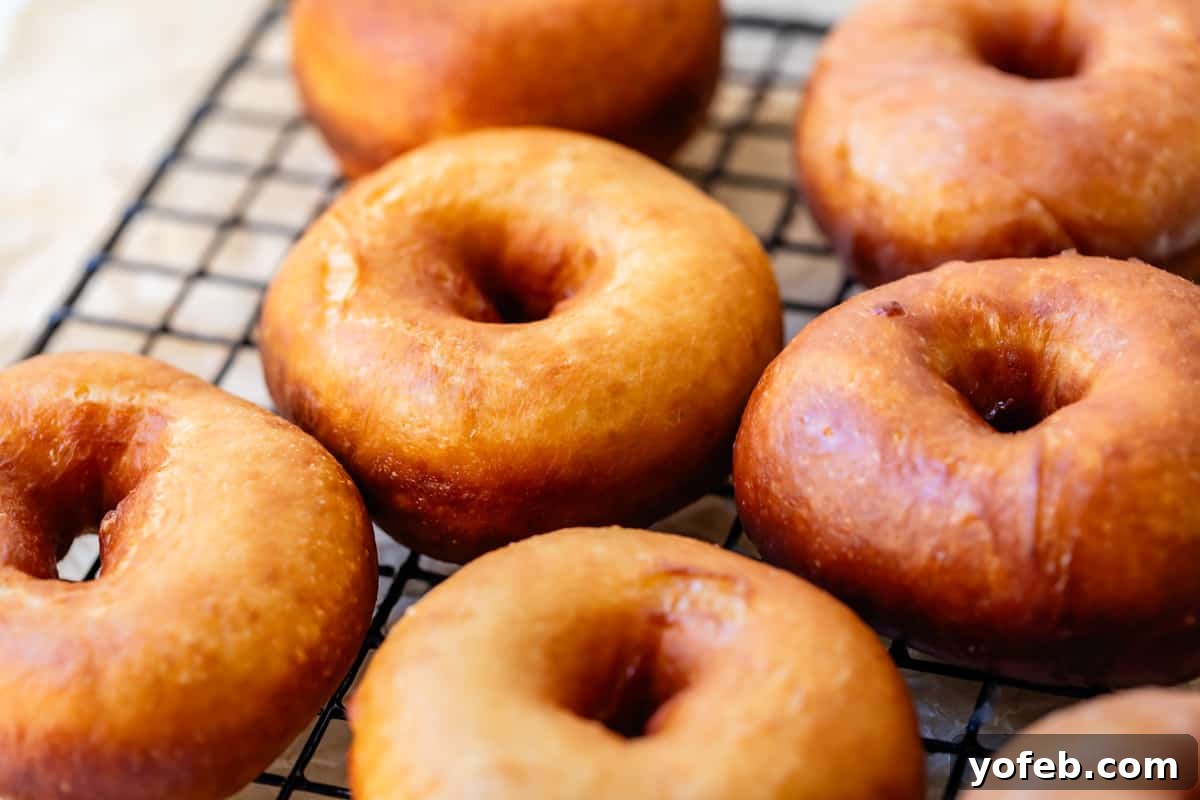
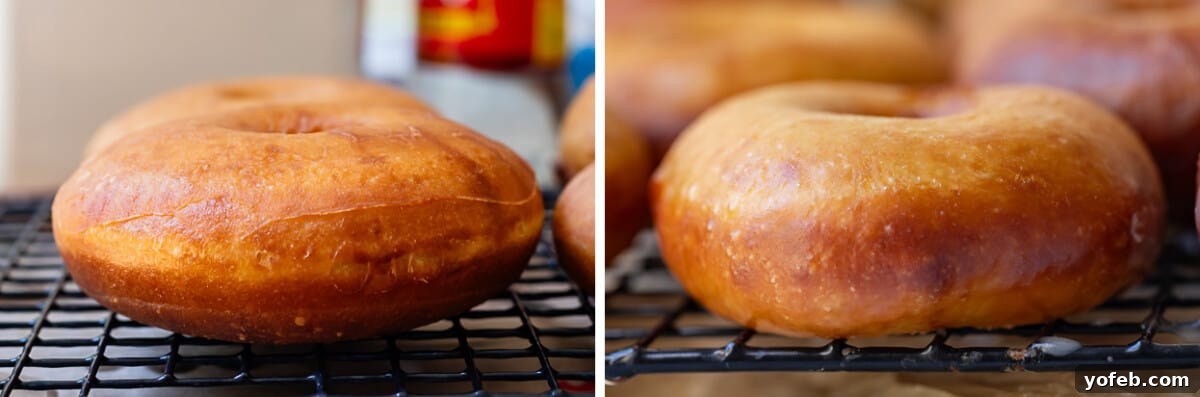
- Fry each donut for approximately 45-120 seconds per side, until golden brown. Remember that the color will continue to deepen slightly after removal from the oil. However, ensure they are cooked through to avoid a doughy interior.
- Between batches, always recheck the oil temperature. You might need to pause for a couple of minutes to allow the oil to climb back to 350°F. Maintaining a consistent oil temperature is crucial for perfectly cooked donuts.
Glazing the donuts
- Allow the freshly fried donuts to cool for a few minutes, just enough so you can handle them without burning your fingers. The key to the best glaze is dipping them while both the donuts and the glaze are still warm.
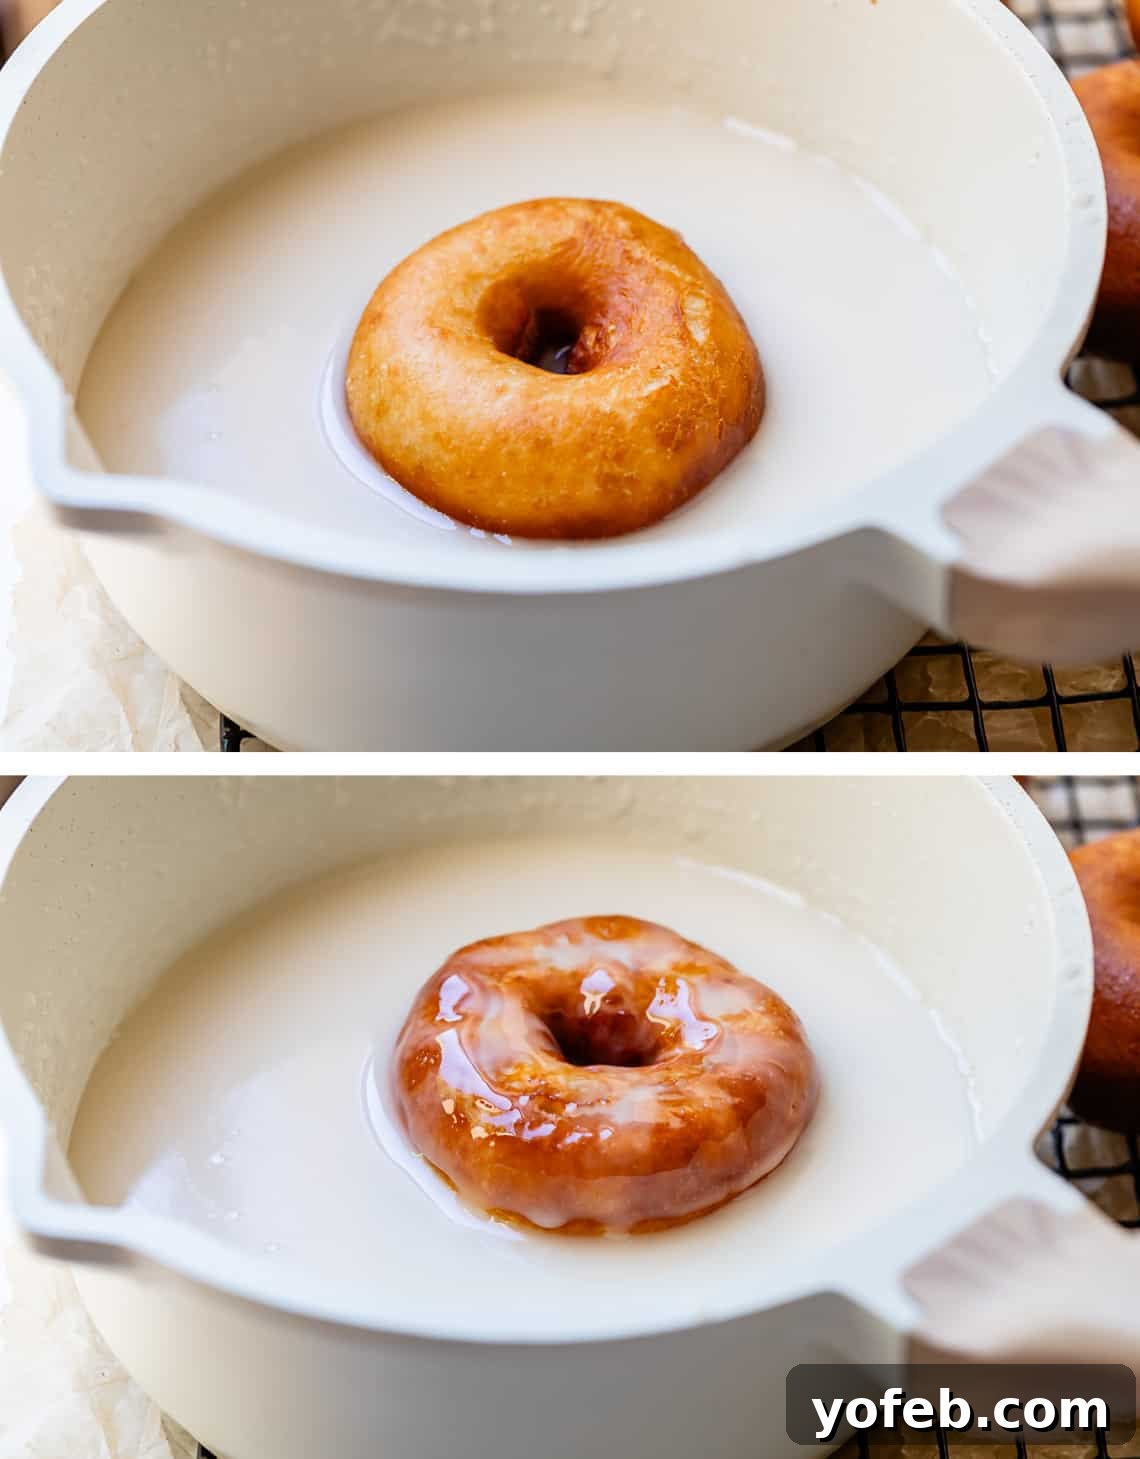
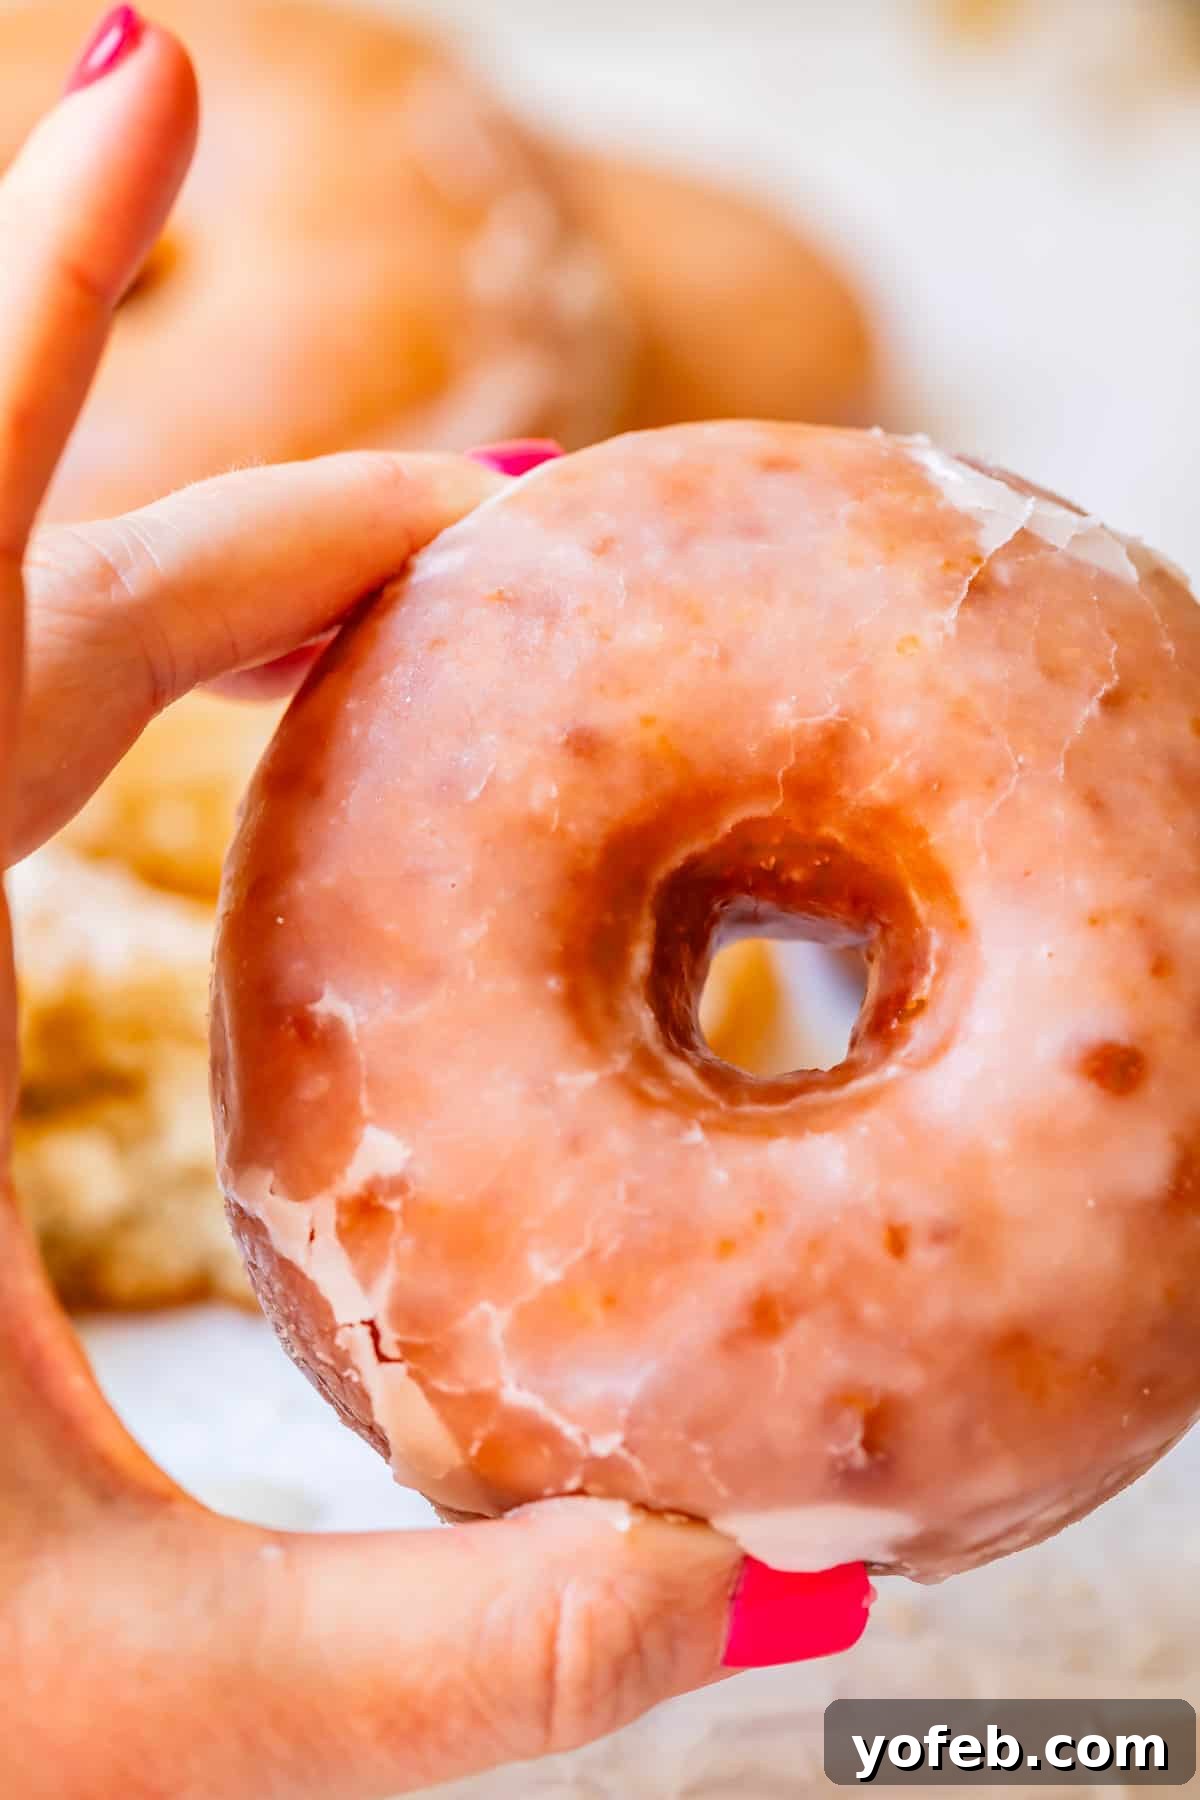
- Working one donut at a time, gently immerse it in the warm glaze, then flip it over to ensure both sides are fully coated.
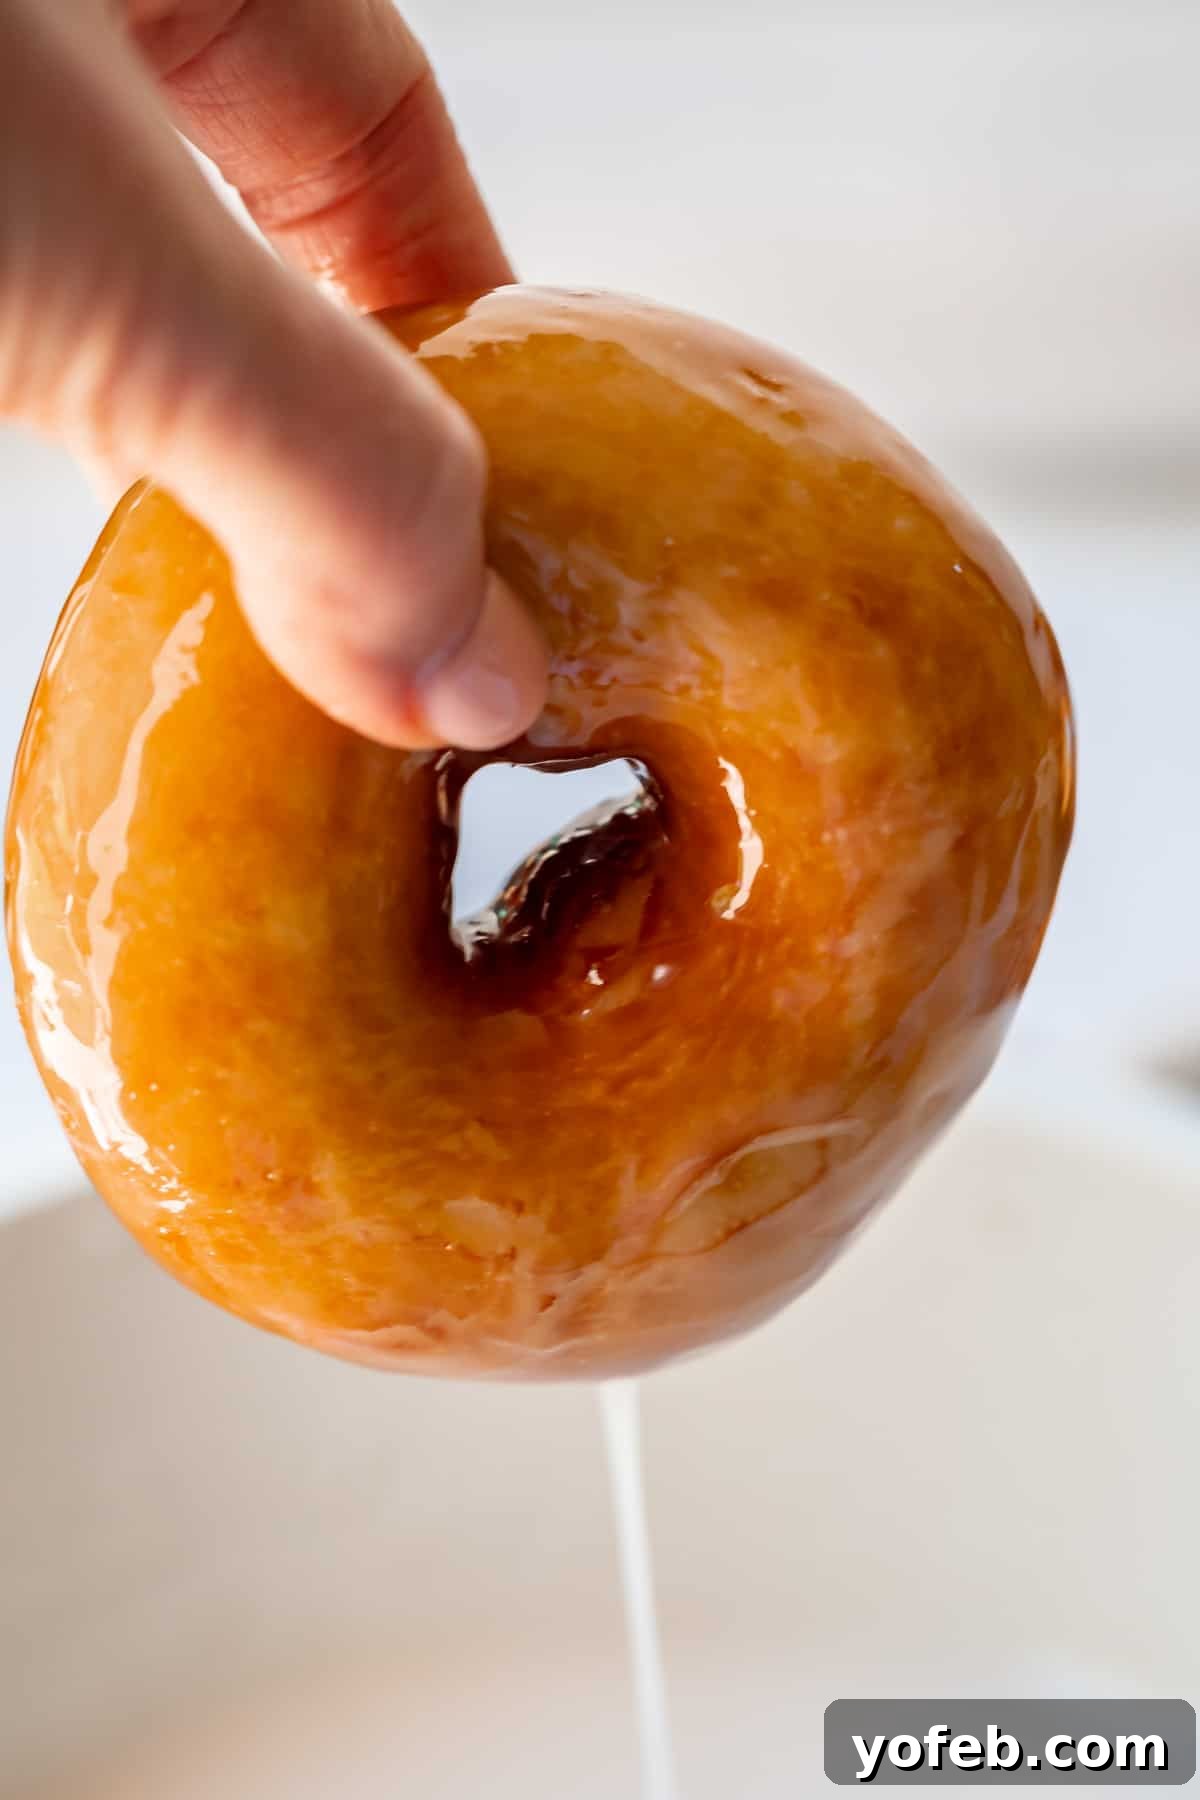
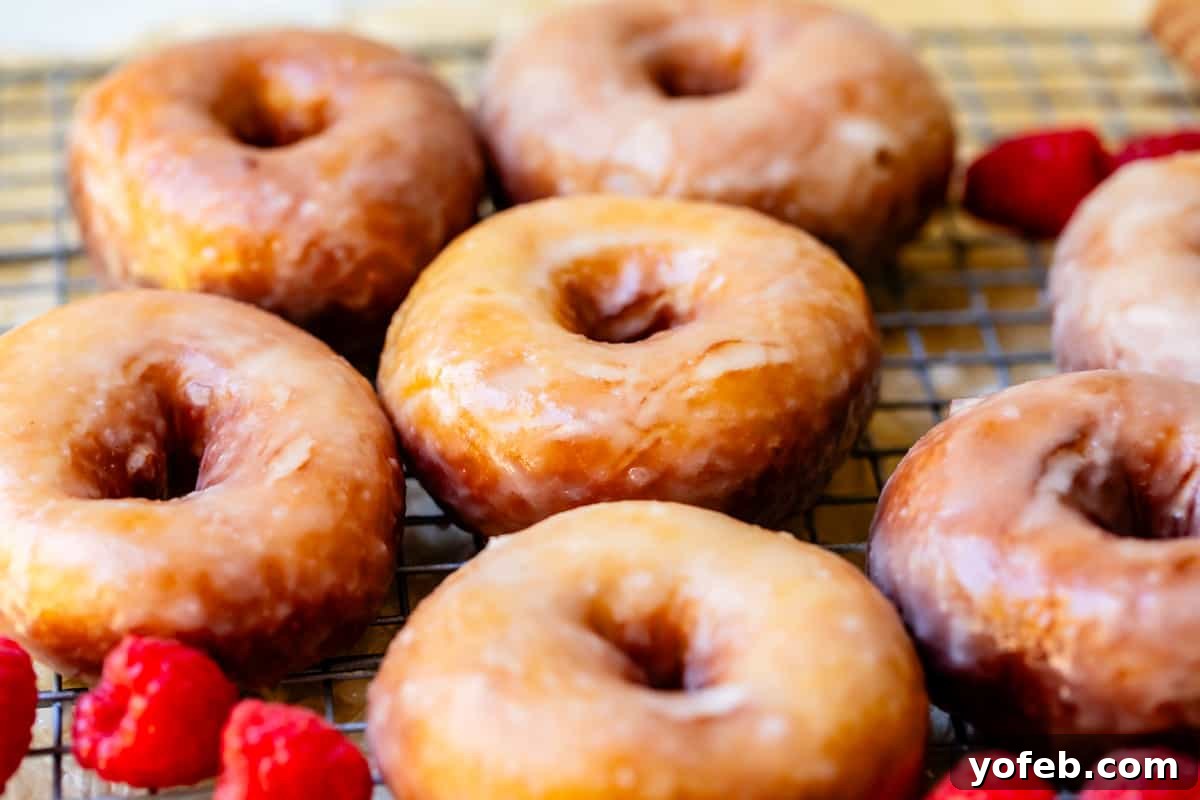
- Allow any excess glaze to drip off for a second, then place the glazed donut on a cooling rack to allow the glaze to set and harden. It’s tempting to take a bite immediately, but the glaze develops a superior crisp, crackled texture if given 20-30 minutes to set.
- For an even more irresistible experience, double-dip each donut after the first layer of glaze has partially set. A single-dipped donut is good; a double-dipped one is truly fantastic.
- You’ll know the glaze is perfectly set when it crackles and flakes as you pick up the donut. If it’s still gooey, give it a little more time. Professional donut shops often use ingredients like agar or emulsifiers to achieve a rapid-setting glaze. Our recipe uses cornstarch, which offers a similar, albeit slightly slower, effect. If you’re keen to experiment with faster setting, you can find agar on Amazon.
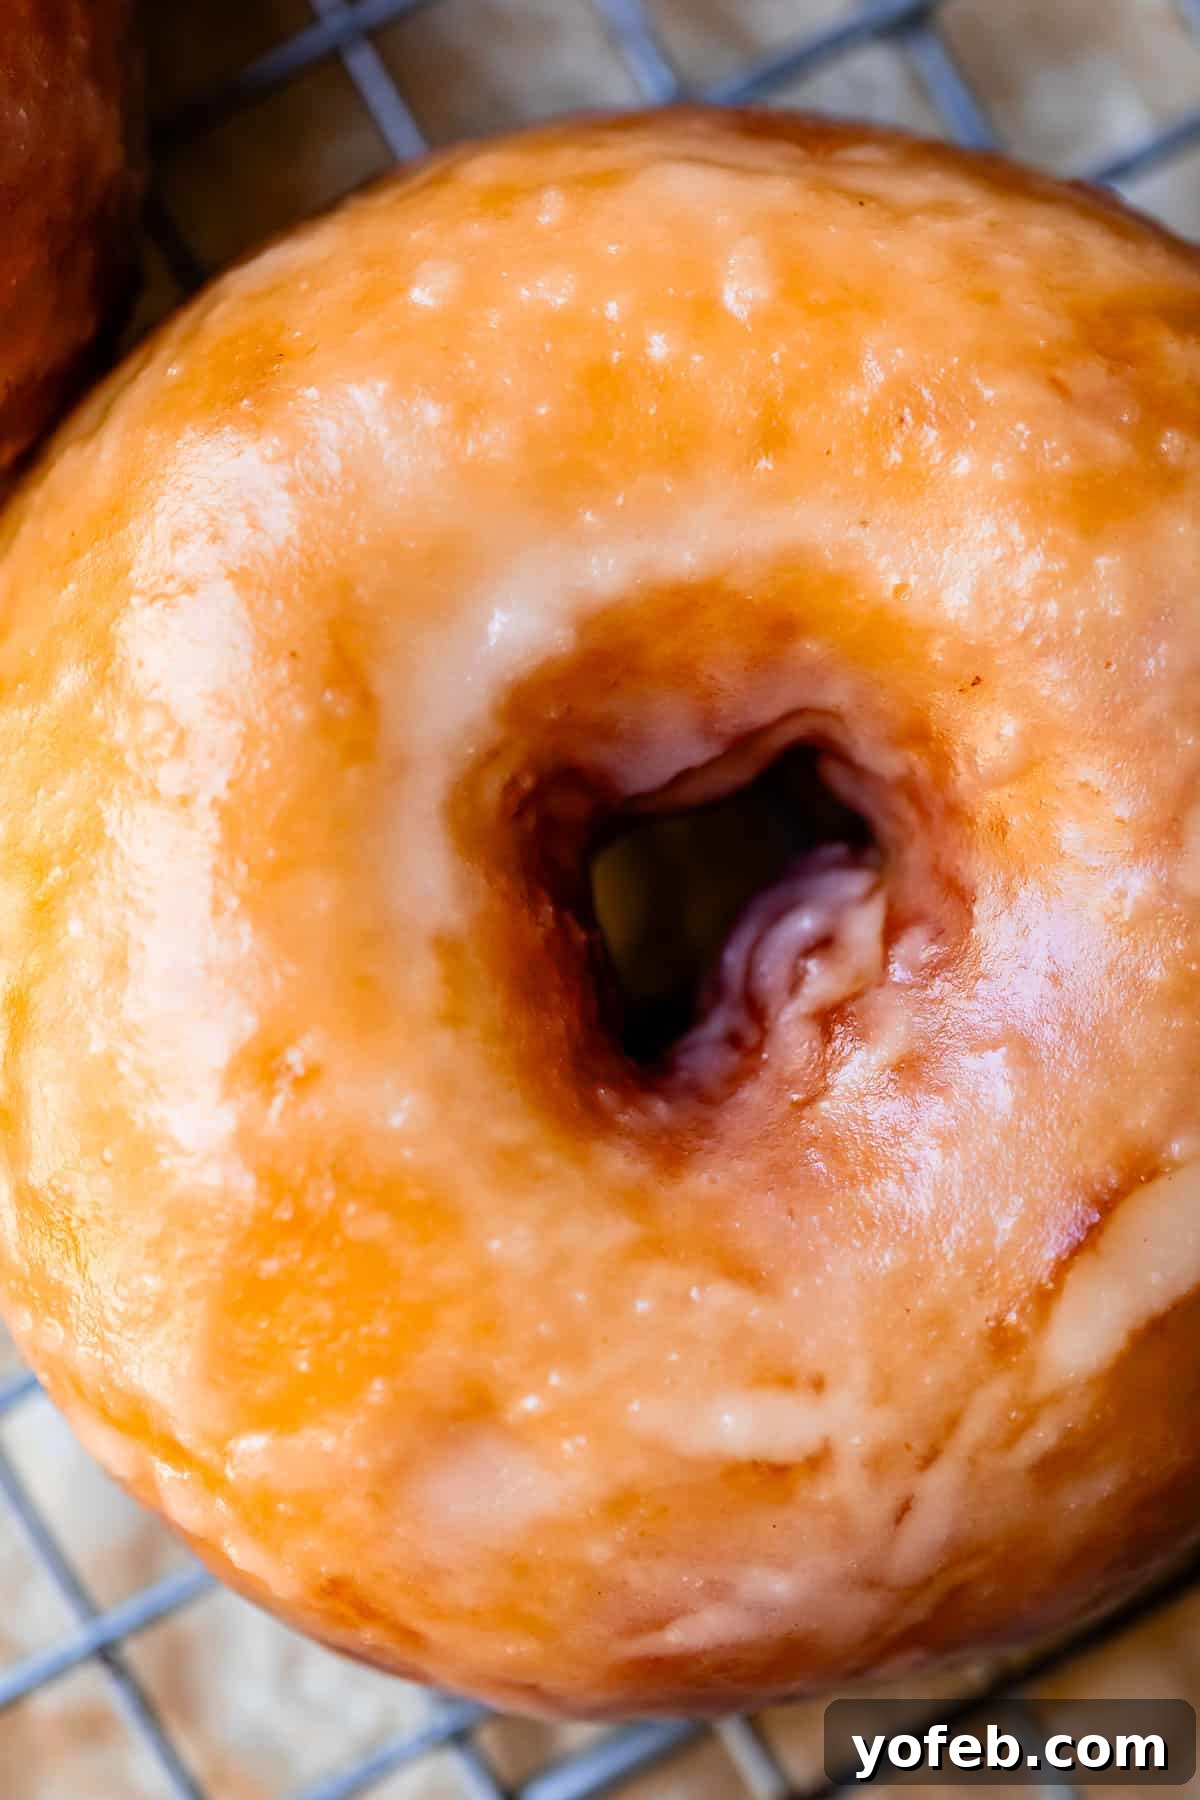
Just behold this beauty queen! And there you have it! Now, who are you going to share your glorious homemade donuts with?
Creative Donut Topping Ideas
Generally, I’m a purist when it comes to donuts; I believe a simple glaze or icing is all that’s truly needed to highlight their inherent deliciousness. Toppings, in my humble opinion, often distract from the donut’s true greatness.
However, I realize I might be a bit of a “grouchy grouch” on this topic! So, if you’re determined to personalize your donuts, live your best life! Consider setting up a delightful donut bar for a party, allowing guests to choose their own toppings. I’m all for donut parties, after all!
- Sprinkles! A classic for a reason.
- Crushed Cereal: Think Fruit Loops or Cocoa Puffs for a playful crunch (though I confess, I judge this choice).
- Crushed Cookies: Oreos or Nutter Butters (again, prepare for my silent judgment).
- Chopped Nuts, Pretzels, or Bacon: For a sophisticated salty-sweet twist. This could be particularly good on a Maple Bar.
- Finely Chopped Fresh Fruit: Must be added immediately before eating to prevent the donut from becoming soggy.
- Crushed Freeze-Dried Fruit: This one I wholeheartedly approve of! It adds intense flavor and a lovely texture without sogginess.
- Mini Chocolate Chips or M&Ms: (Girl, no.)
- Shredded Sweetened Coconut: I can definitely get behind this tropical addition.
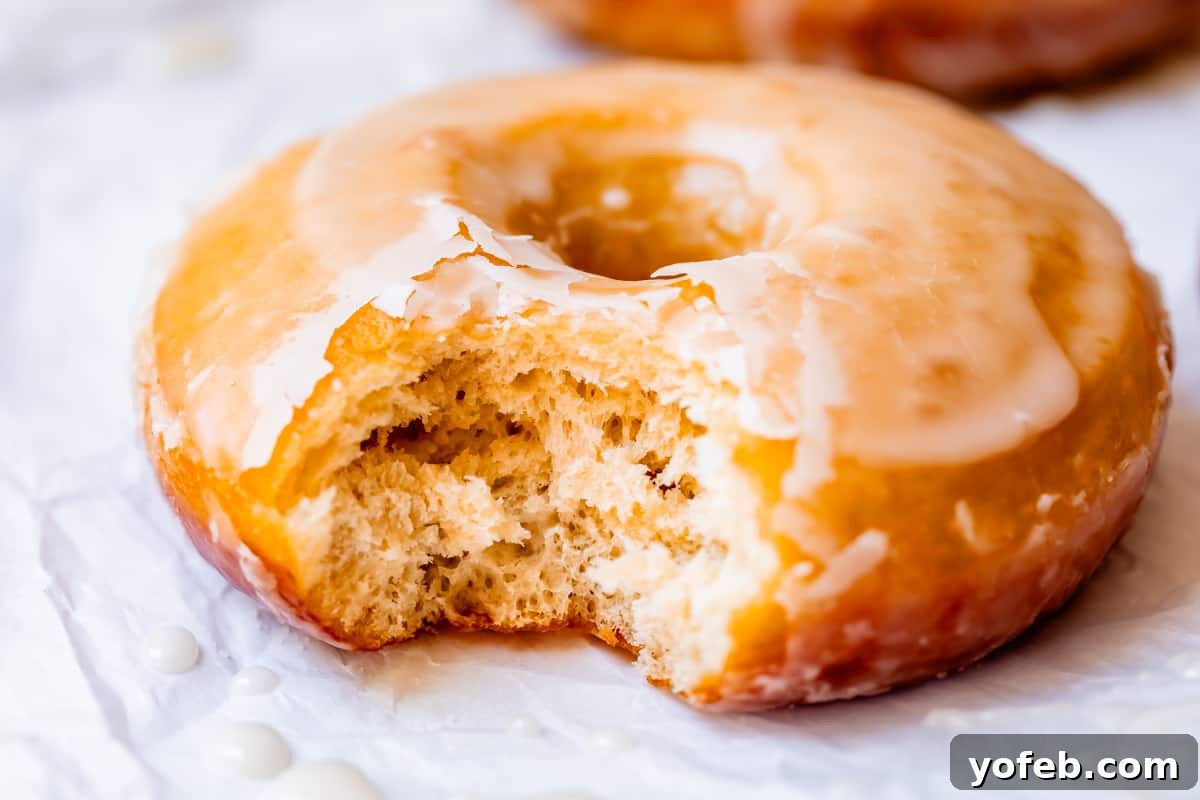
Perfect Pairings: What to Serve with Your Homemade Donuts
My preferred accompaniment for donuts? More donuts, of course! It’s like pizza – do you truly *need* a side dish? Just saying. But for those occasions when you’re feeding a larger crowd or simply desire a more balanced spread, here are some excellent ideas to complement your delectable donuts:
- Naturally, donuts pair flawlessly with a fresh cup of coffee, tea, or a cold glass of milk.
- Baked Bacon: Ready in about 10 minutes, offering the perfect savory contrast to all that sweet goodness.
- Make Ahead Scrambled Eggs: Incredibly creamy, tender, and effortlessly waiting for you while you finalize the donuts.
- Cheesy Hashbrown Breakfast Casserole with Ham: Prepare it the night before and simply pop it into the oven on the morning of your gathering.
- Best Breakfast Casserole Recipe with Sausage: Another fantastic make-ahead option, ideal for all the sausage enthusiasts at your table.
- Chili Rellenos Casserole: Trust me, you’ll be amazed by the incredible depth of flavor in this dish!
- Cheesy Ham and Broccoli Frittata: Quick, easy, and bursting with cheesy deliciousness.
- Fresh Rainbow Fruit Skewers from The Recipe Critic: A vibrant and healthy addition to your breakfast spread.
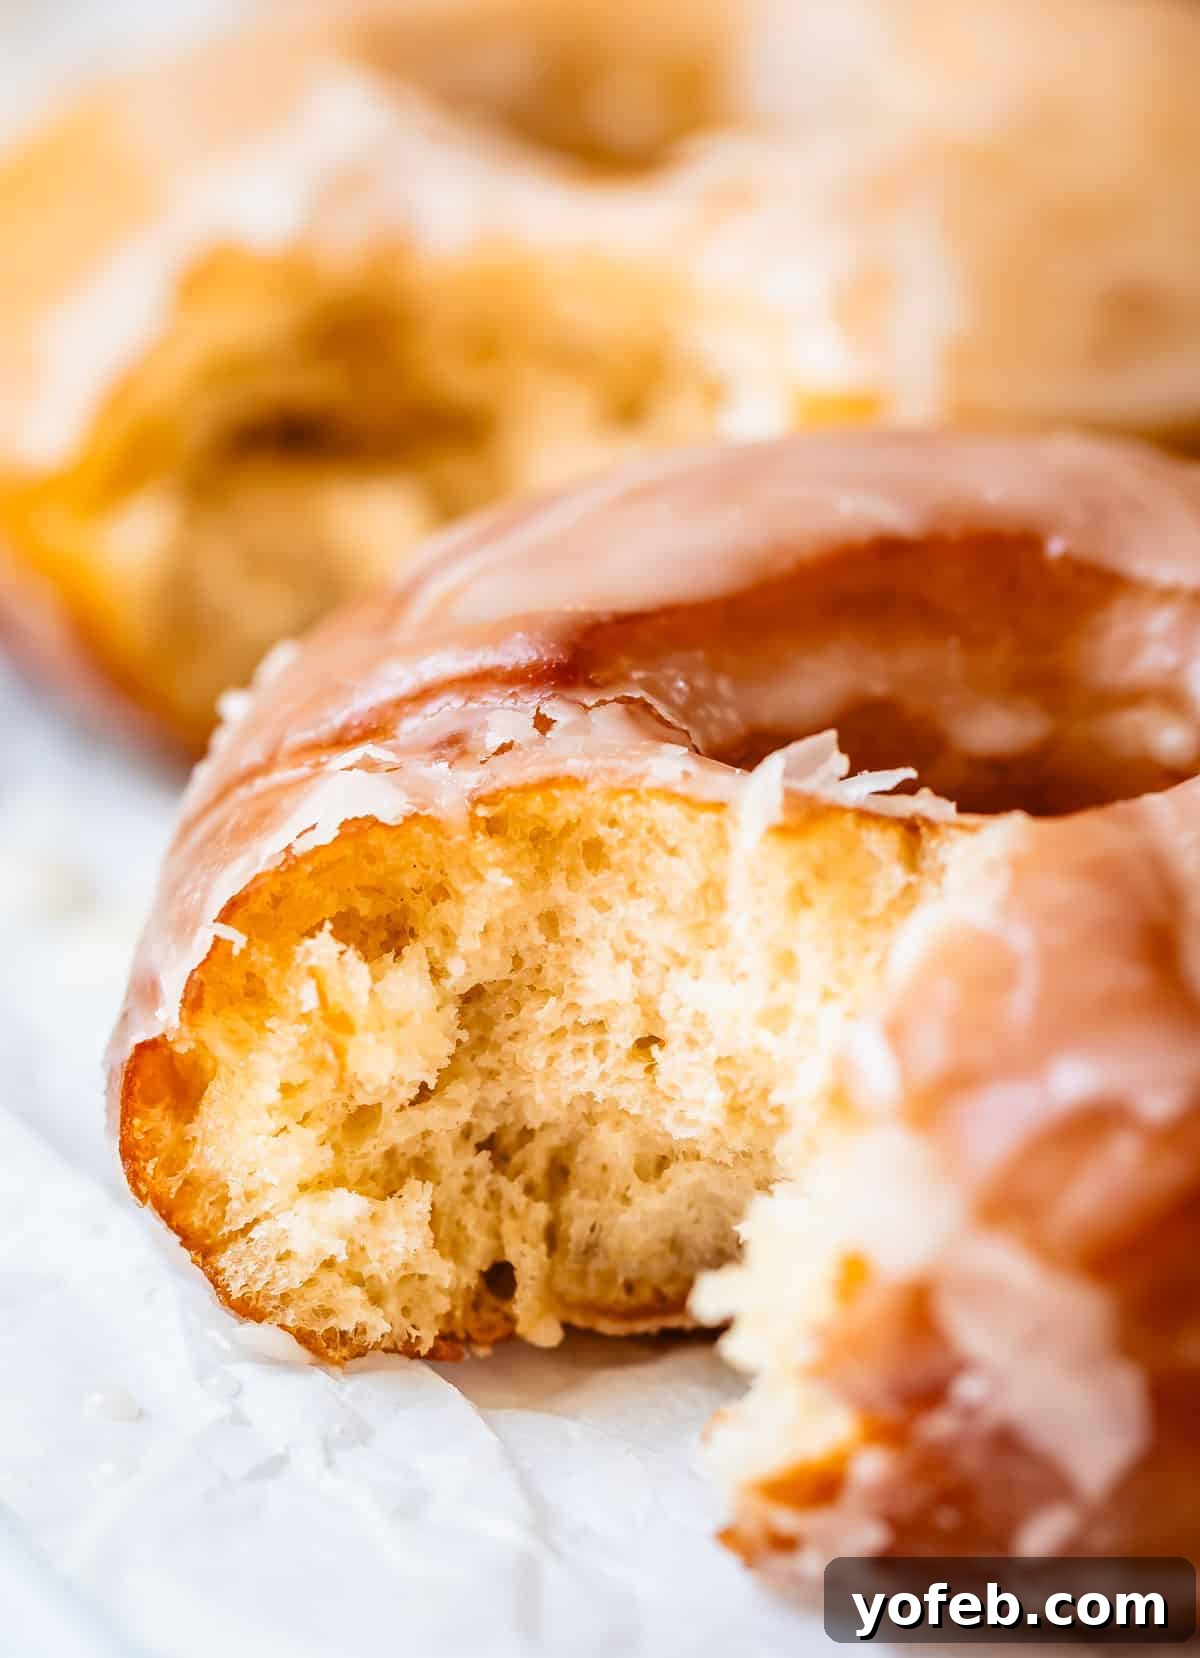
Storing and Freezing Leftover Donuts
The absolute best way to enjoy these donuts is fresh, right after they’ve been made. If you find yourself with more than you can reasonably consume within a few hours, consider inviting over your neighbors for an impromptu donut party! However, if you must store them, here’s how to do it effectively:
Avoid the Refrigerator! The cold, circulating air in a fridge will quickly dry out your donuts, making them stale and unappealing.
Instead, choose one of these methods for short-term storage:
- Airtight Container: Placing them in an airtight container will keep the donuts themselves fresh and moist. However, the glaze might become a bit soggy over time.
- Loosely Closed Paper Bag: Storing them in a paper bag (loosely closed) helps maintain the crispness of the glaze. The trade-off is that the donuts will dry out faster than in an airtight container. The choice depends on whether you prioritize a moist interior or a crisp glaze!
Regardless of the method, freshly made donuts are best enjoyed within about 2 days at room temperature. To refresh leftover donuts, place them on a baking sheet and warm in a 300°F oven for 5-10 minutes. Be careful not to overheat, or the glaze will melt off.
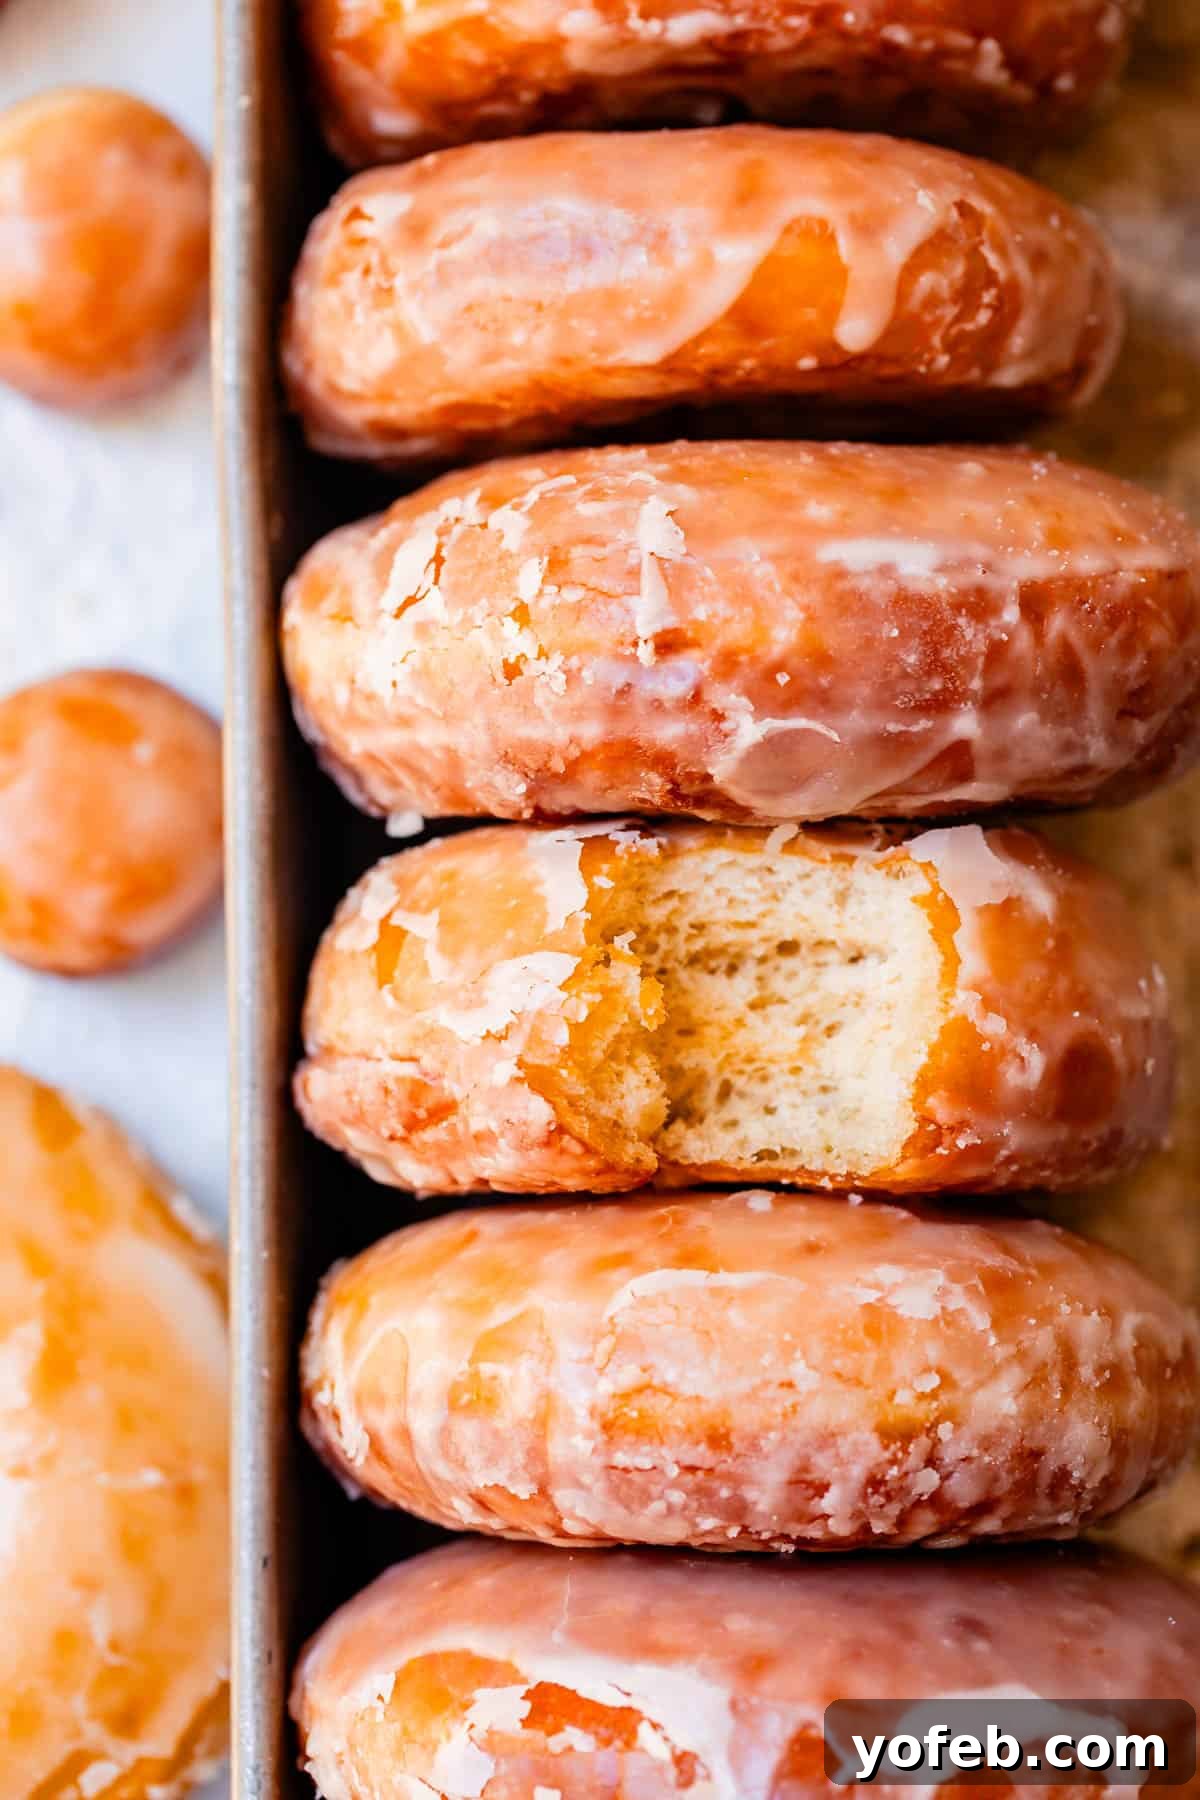
Can you freeze donuts?
Absolutely, yes! Freezing is often a much better option than letting them sit out overnight to become stale. Here’s how to properly freeze your homemade donuts:
Lay your freshly made (and glazed) donuts on a baking sheet, ensuring they don’t touch, and flash freeze them for 20-30 minutes. This prevents them from sticking together. Once firm, layer them in a freezer-safe ziplock bag with wax paper or parchment paper between layers. Seal the bag tightly, removing as much air as possible. Frozen donuts can last a good 2-3 months in the freezer.
To defrost, simply leave the bag on the counter overnight, and they’ll be ready to enjoy by morning. If you’re thawing several, a gentle warm-up in a 300°F oven for 5-10 minutes will bring them back to life. For just one or two donuts, remove them from the bag and microwave in 10-second intervals until perfectly soft and warm again!
Frequently Asked Questions About Donuts
While most English-speaking countries officially use ‘doughnut,’ the alternative spelling ‘donut’ has been widely accepted in America for about a century. This simplified spelling was reportedly adopted to aid immigrants in pronunciation. Today, both spellings are perfectly fine and commonly used!
Fried sweet dough is a culinary concept found in nearly every culture worldwide. As the Joy of Cooking eloquently puts it, “It seems to us that the various forms of fried dough enjoyed by people across the globe may well have been invented to assuage the ills of the human condition.” Indeed, donuts bring a little peace to the world!
The traditional ring-shaped donut, however, is an American innovation. Legend has it that a sailor, frustrated by the uncooked centers of larger “dough-nuts,” punched a hole in the middle, creating a fully cooked, evenly fried treat. This ingenious solution quickly caught on, and the iconic donut ring was born.
If the question is about taste, fried donuts undoubtedly win. The added fat and richness, combined with the irresistible crispy exterior, are hard to beat. If your concern is health, then baked donuts are the better choice, as they significantly reduce calories by eliminating frying oil. However, in my opinion, donuts are inherently a indulgent treat packed with sugar, carbs, and fat. So, if you’re going to indulge, go all out and fry them for the authentic experience, or don’t bother!
Yes, old-fashioned donuts are distinct! Also known as “cake donuts,” they skip the yeast entirely and instead use chemical leavening agents like baking powder or baking soda, similar to cakes. This difference in composition also means they are typically fried at a lower temperature, which gives them their characteristic craggy, rough edges. They tend to be denser and less light and airy than the classic yeast-risen glazed donuts.
More Sweet Breakfast Recipes to Savor
If your sweet tooth is still calling after enjoying these incredible homemade donuts, explore these other delightful breakfast and pastry recipes:
- Bavarian Cream Donuts: Elevate your donuts by stuffing them with luscious Pastry Cream – a truly heavenly experience.
- Maple Donut Recipe (Maple Bars): One of my all-time favorite donut varieties, rich with maple flavor.
- Nutella Stuffed Donuts: Soft, puffy donuts generously filled with creamy Nutella? Yes, please!
- 4 Ingredient Apple Cider Doughnuts: Incredibly easy to make and absolutely perfect for autumn days.
- Best Cinnamon Roll Recipe: Indulgently fluffy and can even be prepared overnight for convenience.
- Soft Caramel Pecan Sticky Buns Recipe: A decadent recipe that tastes like it came straight from a gourmet bakery.
- Swedish Cinnamon Buns with Cardamom: Similar to traditional cinnamon rolls, but uniquely dotted with pearl sugar instead of frosting.
- Puff Pastry Recipe from Preppy Kitchen: Master the art of homemade puff pastry.
- Butter Braid Pastry (Amish Recipe) from Amish-Heritage: A rustic and delicious braided pastry.
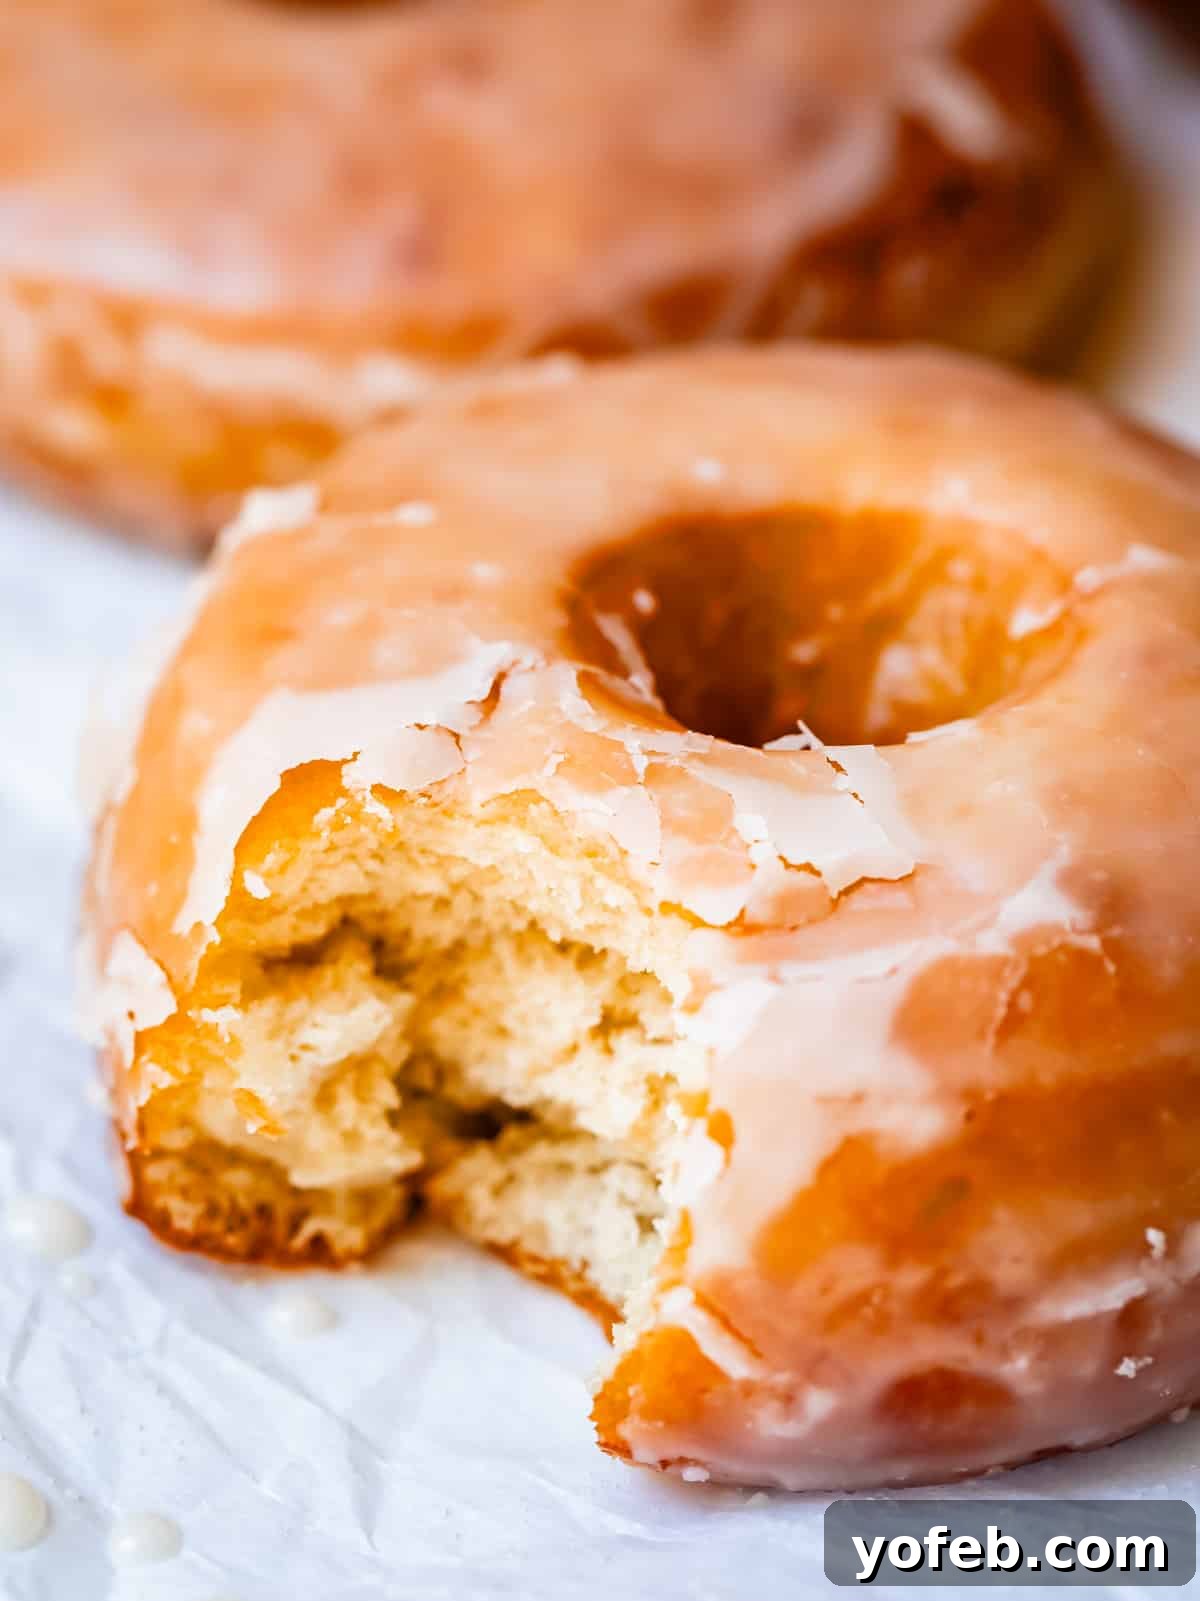
I believe I’ve shared every secret to making exceptional yeast donuts! If you’re not absolutely craving a donut after reading this post, you truly possess a will of steel. I would be thrilled to see your creations! Please share your experience and tell me how your homemade donuts compare to your local, non-chain shop. Don’t forget to tag @thefoodcharlatan on Instagram!
And for more incredible variations, be sure to check out the related posts for Bavarian Cream Donuts and their luscious Pastry Cream filling. It really can get even better!
Facebook | Pinterest | Instagram
Homemade Donut Recipe
This recipe unlocks the secret to making the BEST fluffy glazed donuts of your life! Say goodbye to mediocre chain store options. This easy fried donut recipe is a joy to make, resulting in incredibly light, airy yeast doughnuts. Learn to make them step-by-step at home, no special equipment needed!
Prep Time: 30 minutes
Cook Time: 2 minutes
Rising Time: 1 hour 30 minutes
Total Time: 2 hours 2 minutes
Yields: 12 donuts
Print Recipe
Equipment
- Nonstick spray
- Parchment paper squares
- Pastry mat
- 12-inch high-sided skillet
- Candy thermometer
- Spider strainer
Ingredients
For the Dough:
- 1 cup whole milk
- 3 tablespoons active dry yeast*
- 1 tablespoon granulated sugar (for yeast)
- 1/2 cup granulated sugar (for dough)
- 1/4 cup shortening
- 1 large egg
- 1 large egg yolk
- 1 1/2 teaspoons vanilla extract
- 3 1/4 cups bread flour, plus 1/4 cup if necessary
- 2 1/2 teaspoons kosher salt, or 2 teaspoons table salt
- 1/2 teaspoon baking powder
- 1/2 teaspoon baking soda
For Frying:
- 12 cups canola oil, or peanut oil
For the Glaze:
- 1/2 cup cold water
- 1 tablespoon cornstarch
- 3 tablespoons granulated sugar
- 1/4 cup butter
- 1 tablespoon corn syrup
- 2 teaspoons vanilla
- 4 cups powdered sugar
- 1/2 teaspoon kosher salt, or 1/4 teaspoon table salt
Instructions
- Make the Dough: In a glass measuring cup, warm 1 cup whole milk in the microwave until it is warm (105-110°F), but not hot. It should feel like a comfortable bath temperature.
- Add 3 tablespoons active dry yeast and 1 tablespoon granulated sugar to the warm milk. Stir gently.
- Wait a couple of minutes until the mixture becomes puffy and bubbly, indicating the yeast is active. If no bubbles form, your yeast may be inactive, and you should start over with fresh yeast.
- In a large mixing bowl (or the bowl of a stand mixer), combine the proofed yeast mixture with 1/2 cup granulated sugar, 1/4 cup shortening, 1 large egg, 1 large egg yolk, and 1 1/2 teaspoons vanilla extract. Stir everything together with a rubber spatula.
- Carefully measure 3 1/4 cups bread flour by spooning it into the measuring cup and leveling off the top. Add the flour to your wet ingredients.
- Add 2 1/2 teaspoons kosher salt, 1/2 teaspoon baking powder, and 1/2 teaspoon baking soda to the flour. Stir these dry ingredients into the flour before fully combining with the wet ingredients.
- Knead the Dough: Attach the dough hook to your stand mixer (or use a wooden spoon). Mix the dough until it comes together, then knead with the dough hook (or by hand on a lightly floured surface) for 5 minutes. The dough should be smooth, stretchy, and elastic. If it feels too sticky, gradually add up to an additional 1/4 cup of flour until it’s workable, but avoid over-flouring, which can make donuts dry.
- Lightly grease a large bowl with oil or nonstick spray. Form the dough into a ball, place it in the bowl, and turn it once to coat the top. Cover tightly with plastic wrap that has been generously sprayed with nonstick spray.
- Create a Proofing Box: Boil 8-10 cups of water in a kettle or pot. Briefly turn your oven on to 350°F for 30-60 seconds, then turn it OFF. The oven should be warm, not hot.
- Place the covered bowl of dough on the top rack of the oven. Place a 9×13 inch cake pan on the bottom rack. Pour the boiling water into the pan and quickly shut the oven door to trap the steam.
- Let the Dough Rise: Allow the dough to rise in this warm, humid environment for 1 hour, or until it has doubled in size.
- While the dough rises, prepare your baking sheets. Line two half baking sheets with parchment paper squares (approximately 6×6 inches, one per donut).
- After the first rise, pour the water from the 9×13 inch pan back into the pot or kettle and bring it to a boil again. Briefly warm your oven to 350°F for 30-60 seconds as before, then turn it off.
- Shape the Donuts: Gently scrape the risen dough onto a lightly floured work surface or greased pastry mat. Knead the dough a couple of times, then divide it into 12-14 equal pieces. (You can also make tiny balls for donut holes if desired).
- Pat each piece of dough into a 3 to 4-inch disc. Press your thumb through the center to create a hole. Use your fingers to widen the hole to at least 1 1/2 inches, gently smoothing the edges. Stretch and mold your donut to achieve a round, puffy shape. Placing the donut on your finger and spinning it can help widen the hole and even out the shape.
- Let the Shaped Donuts Rise: Place each shaped donut on its own parchment paper square on the prepared baking sheets, ensuring plenty of space for rising. Do not cover them this time. Maximum of 8 donuts per pan.
- Place the baking sheets with the shaped donuts in the warm oven. If space allows, place both pans on the top rack. Place the 9×13 inch pan (with boiling water) on the bottom rack. (If using the bottom of the oven for the water pan, ensure the oven is OFF and cool before placing the pan directly on the element).
- Once all shaped donuts are in the oven, pour the boiling water into the 9×13 inch pan and quickly shut the door. Let the donuts rise for 30-45 minutes, until doubled in size.
- Make the Glaze: During the final donut rise, prepare the glaze. In a small saucepan, whisk together 1/2 cup cold water and 1 tablespoon cornstarch until smooth. Add 3 tablespoons granulated sugar and 1/4 cup butter. Heat over medium, whisking constantly for about 2 minutes, until butter is melted and small bubbles just begin to form on the edges. Remove from heat immediately.
- Stir in 1 tablespoon corn syrup, 2 teaspoons vanilla, and 1/2 teaspoon kosher salt. Then, gradually add 4 cups SIFTED powdered sugar, stirring until smooth and lump-free. Keep the whisk handy, as the glaze may need occasional whisking to maintain its consistency. Adjust thickness with a tablespoon of water or powdered sugar as needed.
- Heat the Oil: Halfway through the final rise, begin heating your oil. In a 12-inch high-sided skillet, add canola or peanut oil until it reaches approximately 2 inches up the sides. Heat over medium heat until a candy thermometer reads 350°F.
- Prep Your Work Station: Line your counter with a few paper grocery bags or paper towels and place 2 cooling racks on top. Have tongs or a spider strainer ready. Keep your thermometer clipped to the pan or nearby for frequent temperature checks.
- Fry the Donuts: Once the donuts have doubled in size, remove the pans from the oven. Using two hands, lift a parchment paper square with one donut on it. Slowly lower the paper and donut into the hot oil, dropping one side completely while holding the other corner. The paper and donut should be submerged, except for the corner you’re holding. Gently shimmy the paper back and forth until the donut slides off into the oil.
- Fry the donut for 30-60 seconds per side, until light golden brown. Use tongs or chopsticks to carefully flip the donut. Remember, donuts will continue to darken slightly after being removed from the oil, so don’t overcook, but ensure they are cooked through.
- Using a spider strainer or slotted spoon, gently lift the fried donut to the cooling rack set over absorbent paper.
- Before frying the next batch, check the oil temperature. You may need to wait a couple of minutes for it to climb back to 350°F. Maintaining a steady oil temperature is key to evenly cooked donuts.
- Continue frying 3-4 donuts per batch, checking the temperature frequently. Once all donuts are fried, turn off the heat and allow the oil to cool.
- Glaze the Donuts: When the donuts are cool enough to handle but still warm, dip them one at a time in the prepared glaze, ensuring they are fully coated. Let excess glaze drip off, then place on a cooling rack.
- Allow the glaze to set for 20 minutes, then double-dip each donut for an even more fantastic coating.
- Let the donuts cool completely for about 20-30 minutes. The glaze develops its best crisp, crackly texture when given time to dry.
- Enjoy your donuts fresh on day one! They are truly best on the day they are made. Share with neighbors, throw a donut party—calories don’t count today! Day-old donuts, while still edible, just aren’t as magical.
- How to Store Donuts: If you do have leftovers:
- Option 1 (Airtight Container): Keeps donuts moist, but glaze may become soggy.
- Option 2 (Loosely Closed Paper Bag): Maintains glaze crispness, but donuts may dry out faster.
Either way, they are best consumed within 2 days at room temperature. To revive, warm in a 300°F oven for 5-10 minutes (watch carefully to prevent glaze melt).
- What to do with Leftover Oil: Once the oil is completely cool, use a funnel and a strainer to pour it back into its original container or mason jars. You can reuse frying oil 2-3 times before disposing of it.
Notes
- *For faster results, you can use instant yeast and shorten rise times by about 20 minutes, following other cues in the recipe.
- Overnight Instructions: You can perform either of the two rises overnight in the refrigerator. For this method, active dry yeast is recommended over instant yeast.
- First Rise Overnight: Mix and knead the dough, then place it in a greased bowl, cover it well, and refrigerate for 8-12 hours. The next day, let the dough rest at room temperature for a few minutes before shaping your donuts. Proceed with the second rise using the proofing box method as described, and continue with the recipe as written.
- Second Rise Overnight: Alternatively, mix and knead the dough, allow it to complete its first rise (1 hour), then shape the dough into donuts and place them on baking sheets. Cover with very well-greased plastic wrap and refrigerate overnight. The next morning, take the pans out of the fridge and allow them to complete their second rise using the proofing box method in the oven for 30-45 minutes. Then, follow the rest of the recipe as instructed.
Nutrition
Calories: 682 kcal |
Carbohydrates: 80g |
Protein: 6g |
Fat: 38g |
Saturated Fat: 6g |
Polyunsaturated Fat: 10g |
Monounsaturated Fat: 21g |
Trans Fat: 1g |
Cholesterol: 43mg |
Potassium: 85mg |
Fiber: 1g |
Sugar: 54g |
Vitamin A: 195 IU |
Vitamin C: 0.003mg |
Calcium: 47mg |
Iron: 1mg
Course: Breakfast
Cuisine: American
Calories: 682
Keyword: donut, doughnuts, glaze
Did you make this? I’d love to see it!
Mention @thefoodcharlatan or tag #thefoodcharlatan!