
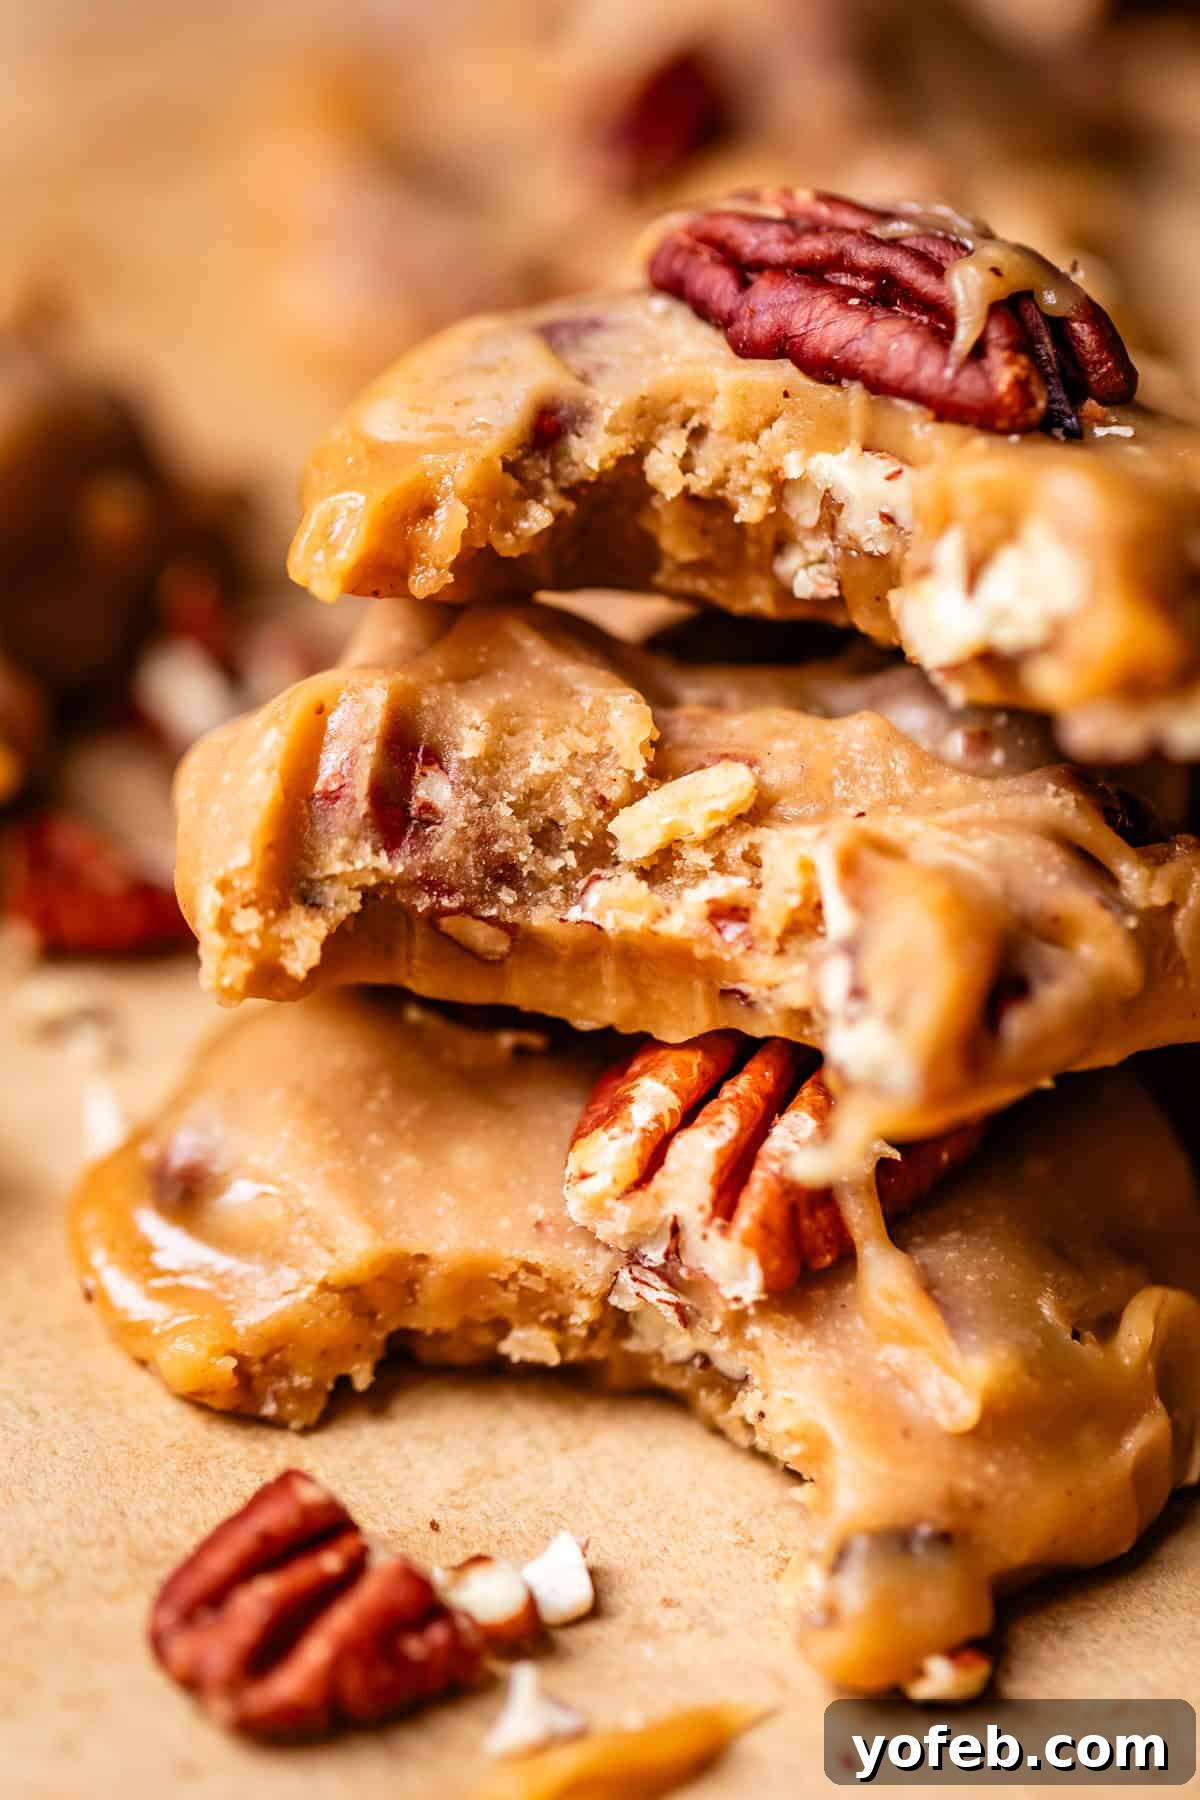
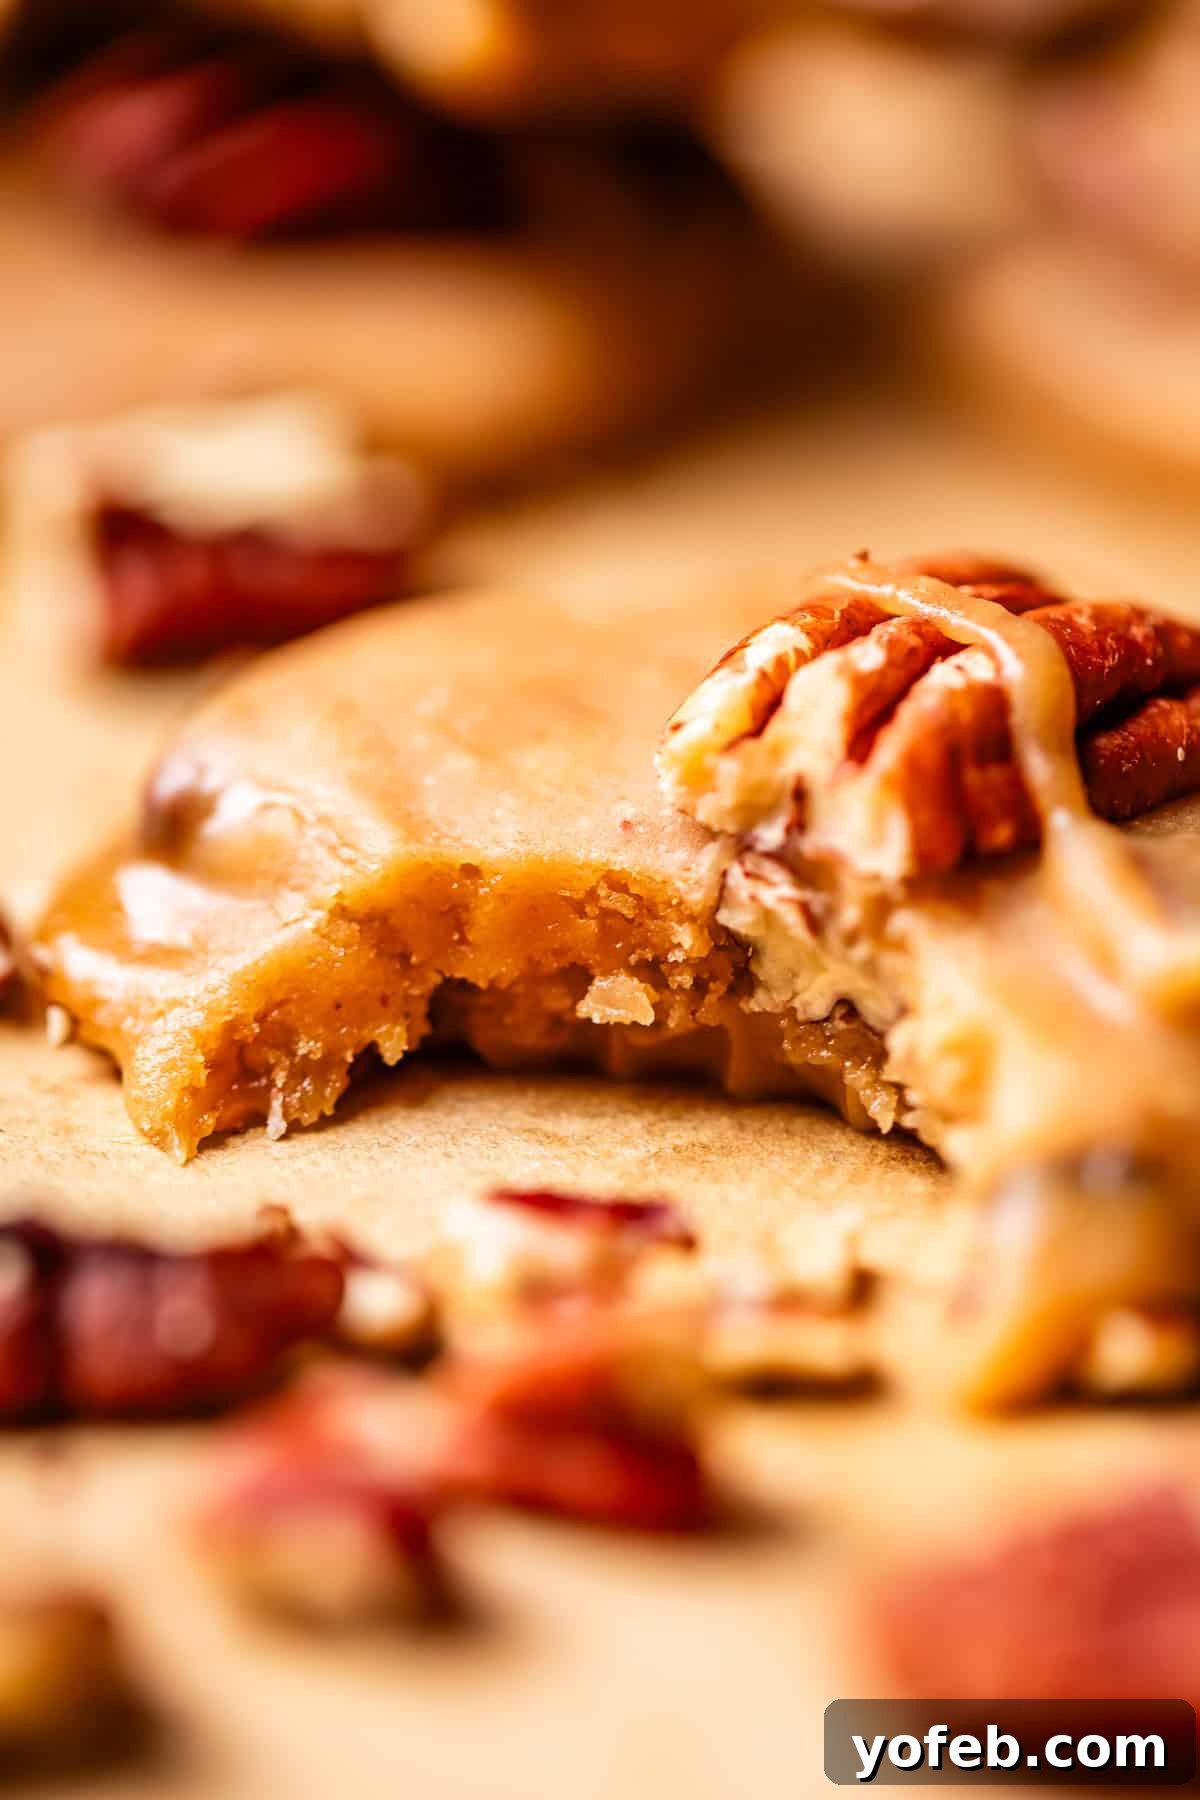
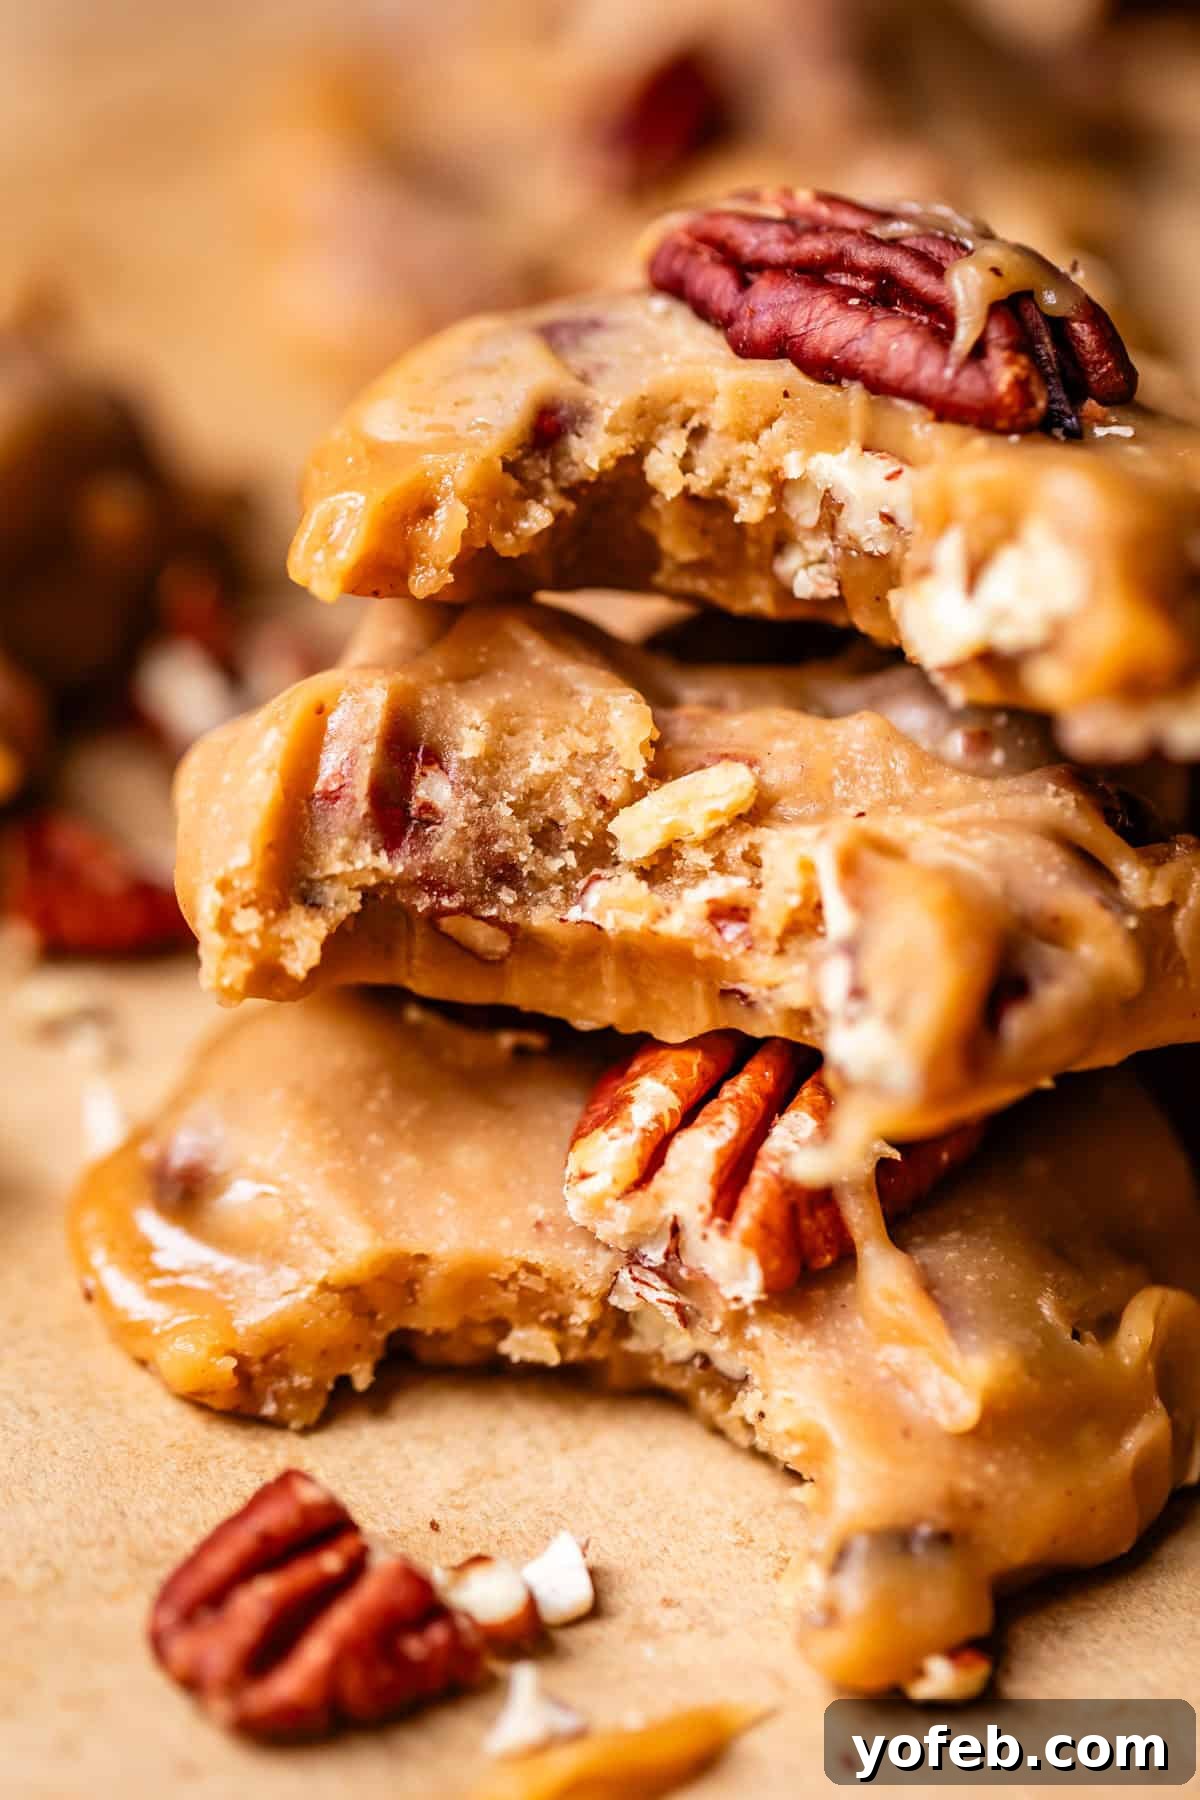
Pecan pralines are a delectable Southern treat, blurring the lines between a cookie and a candy. Imagine a harmonious blend of toasted, crunchy pecans suspended in a creamy, melt-in-your-mouth cloud of buttery brown sugar caramel, artfully dropped into individual, irregular shapes. A true New Orleans classic, these candies have captivated hearts and taste buds for generations, and I am utterly obsessed with them. This comprehensive guide will walk you through mastering this beloved confection, requiring just a few simple ingredients and a keen eye for detail. Get ready to create your new favorite homemade delight, perfect for holiday gifting or an indulgent personal treat!
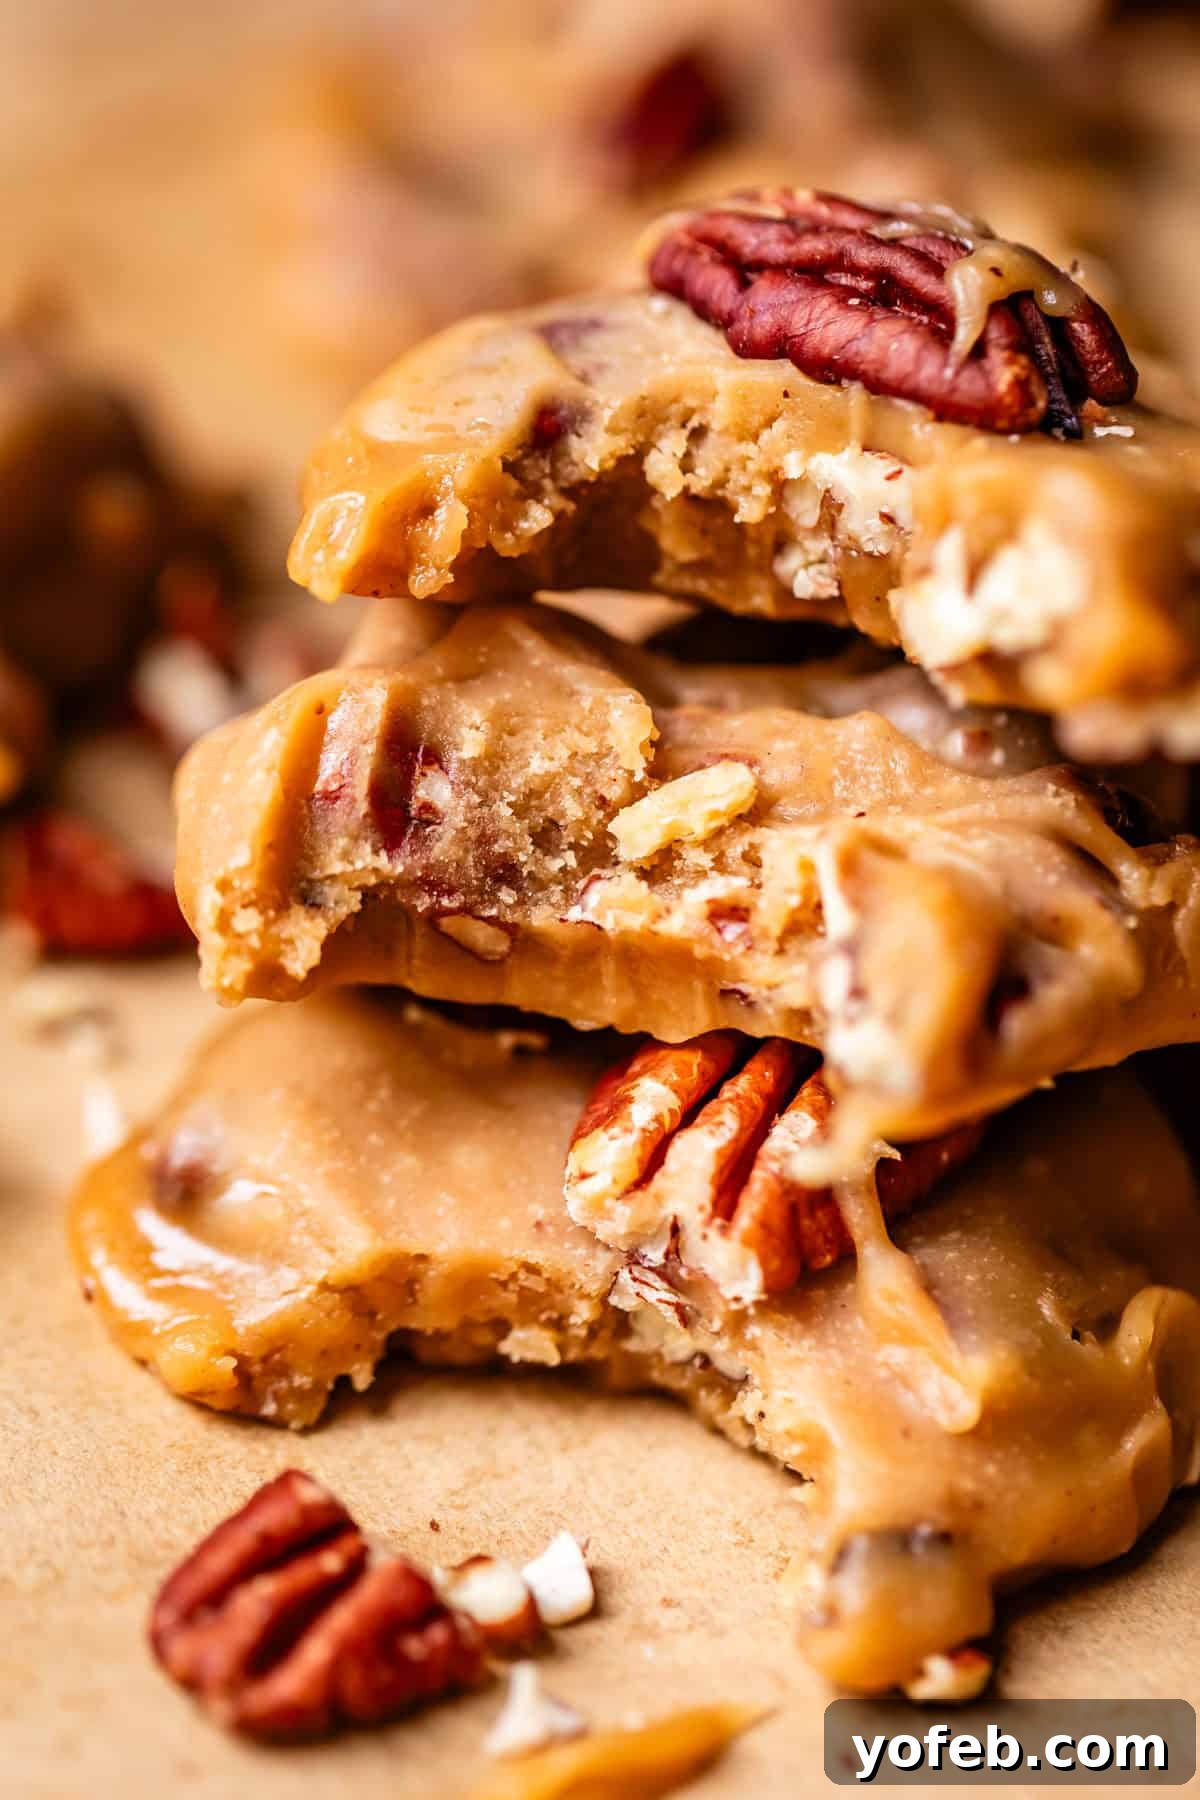
The Ultimate Guide to Perfect Pecan Pralines
Ah, Pecan Pralines! It took countless attempts to truly get these right, but the journey was worth every sticky moment. Today, I’m thrilled to share the perfected recipe for this iconic Southern candy. Prepare to add these exquisite treats to your must-make list, especially as the holidays approach!
My profound love affair with pecan pralines began in 2022 during a girls’ trip to New Orleans for my sister-in-law Britta’s 40th birthday. Amidst the vibrant music, historic streets, and adventurous culinary experiences (yes, even deep-fried alligator!), one bite stands out vividly in my memory: my very first pecan praline.
It was nothing short of a revelation. The buttery, brown sugar-infused caramel, perfectly creamy and subtly fudgy, melted on my tongue, beautifully complemented by the crisp, toasty crunch of fresh pecans. This singular moment ignited an insatiable quest over the next three days, as I scoured every confectionery and shop in the city, determined to uncover the secrets of the absolute best pecan pralines.
Pralines are, understandably, a staple across New Orleans, found in almost every corner. Yet, discerning a truly exceptional praline proved to be a delightful challenge. One might assume that any praline in the South would be sublime, but alas, that’s not always the case. (Much like my disillusioning experience with a supposedly authentic crepe from a Parisian street vendor who generously doused my rubbery pancake with artificial lemon juice – a memory that still stings, I assure you.)
Indeed, not all pralines are created equal. The diversity of textures and flavors labeled as “praline” was surprising. Having never tasted one before that trip, I sampled enough versions to understand precisely the qualities I sought in a homemade recipe – a quest that ultimately led to the masterpiece I’m sharing with you today.
What Defines a Superior Pecan Praline?
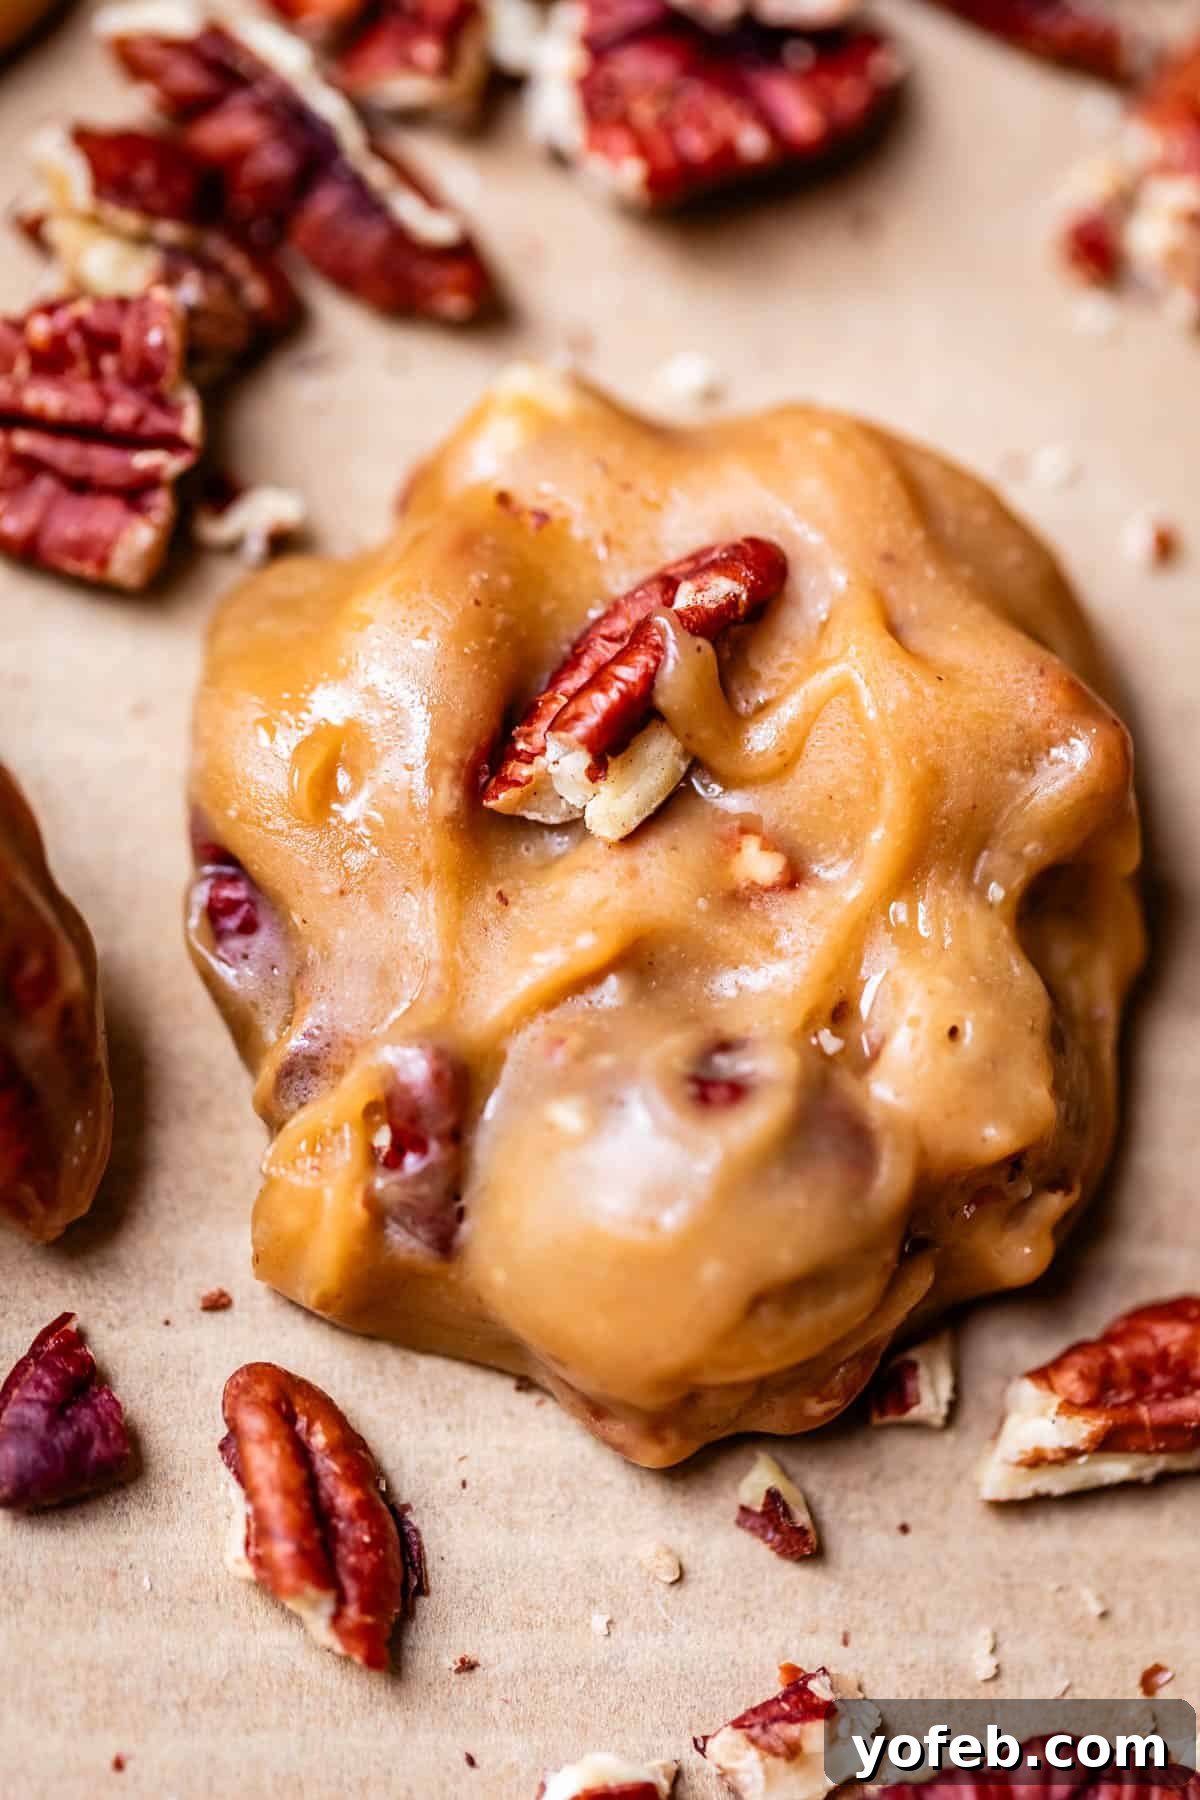
So, what elevated those New Orleans pralines from merely good to truly fabulous? It comes down to a few critical characteristics that set the best apart:
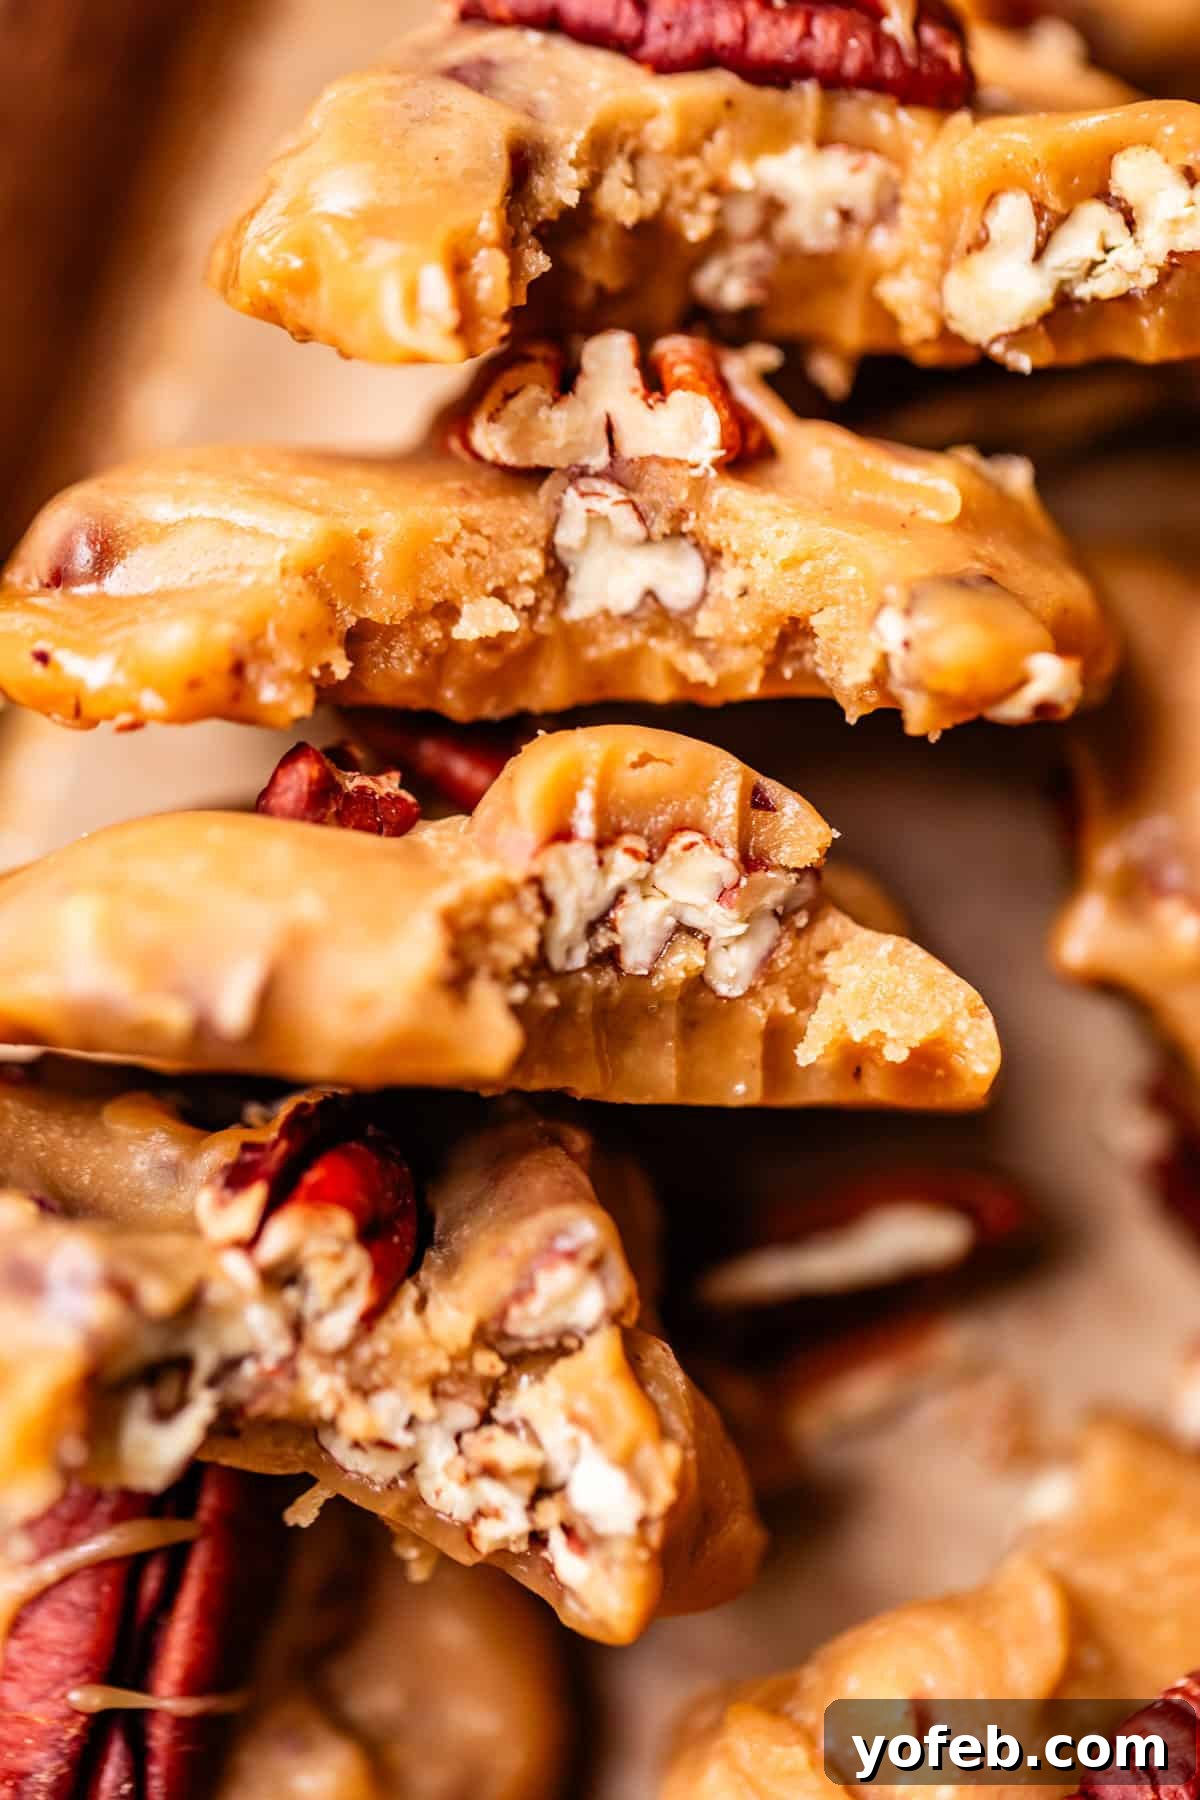
- Creamy Texture: A top-tier praline is wonderfully creamy, distinct from a chewy caramel. There should be no significant “stretch” when you take a bite, but rather a smooth, yielding consistency that melts effortlessly. Baking soda plays a pivotal role in achieving this desired creaminess.
- Fudgy Consistency: The perfect praline boasts a delightful fudgy texture. This isn’t achieved by chance but by precisely cooking the candy mixture to the exact right temperature, ensuring a rich, dense mouthfeel.
- Never Overcooked: The mark of an expertly made praline is its soft, delicate structure. Overcooked pralines often become crystalized, dry, hard, or brittle, losing their signature tenderness. The ideal praline offers a unique “crumble-stretch” – a technical term for that perfect balance of soft give and slight resistance.
Hailing from California, pralines weren’t a common sight in my upbringing. Yet, without fail, every person I’ve introduced to these homemade pecan pralines has had the same wide-eyed reaction, exclaiming, “What is this?!” They are, truly, that exceptional.
Essential Rules for Praline Perfection
Ready to embark on your praline-making adventure? Listen closely, because crafting candy requires precision and adherence to a few non-negotiable rules. Candy making is an art, and these guidelines are your keys to success:
- A Candy Thermometer is Your Best Friend: Unless you possess years of expert candy-making intuition, judging candy temperatures by sight and feel alone is risky. A reliable candy thermometer is absolutely essential for consistently perfect results.
- Toast Your Pecans – No Exceptions: Skipping this step is a disservice to your pralines. Toasting intensifies their nutty flavor and ensures the ideal crisp, snappy texture. Untoasted pecans tend to be soft and mushy; we want them to audibly *snap* with every bite.
- Master the Stirring Technique: Follow the precise instructions regarding when to stir and, more importantly, when *not* to stir. This meticulous approach is critical for preventing sugar crystallization, a common pitfall we’ll delve into further below.
- Observe Opacity Before Dropping: Only begin dropping your pralines onto the prepared pan when the mixture transforms from glossy to opaque. If the mixture is still shiny, your pralines will struggle to set properly, resulting in a sticky, unset mess.
The Art of Preventing Crystallization (and Those Pesky White Spots)
Achieving a silky-smooth praline without those tell-tale white spots was one of the most maddening challenges in perfecting this recipe. These white spots indicate crystallization, where the sugar molecules reform into solid crystals. While crystalized pralines still taste acceptable, they lack visual appeal and tend to dry out much faster.
Many online recipes, and even some New Orleans shops, feature crystalized pralines. However, the truly exceptional pralines are uniformly smooth, with no hint of dry, white spots. The distinction is paramount for both aesthetics and texture.
Crystallization is a chemical process where sugar molecules, initially dissolved into a syrup, re-bond to form solid crystals as the candy cools. Many of the very specific instructions in this recipe are designed precisely to mitigate this common issue.
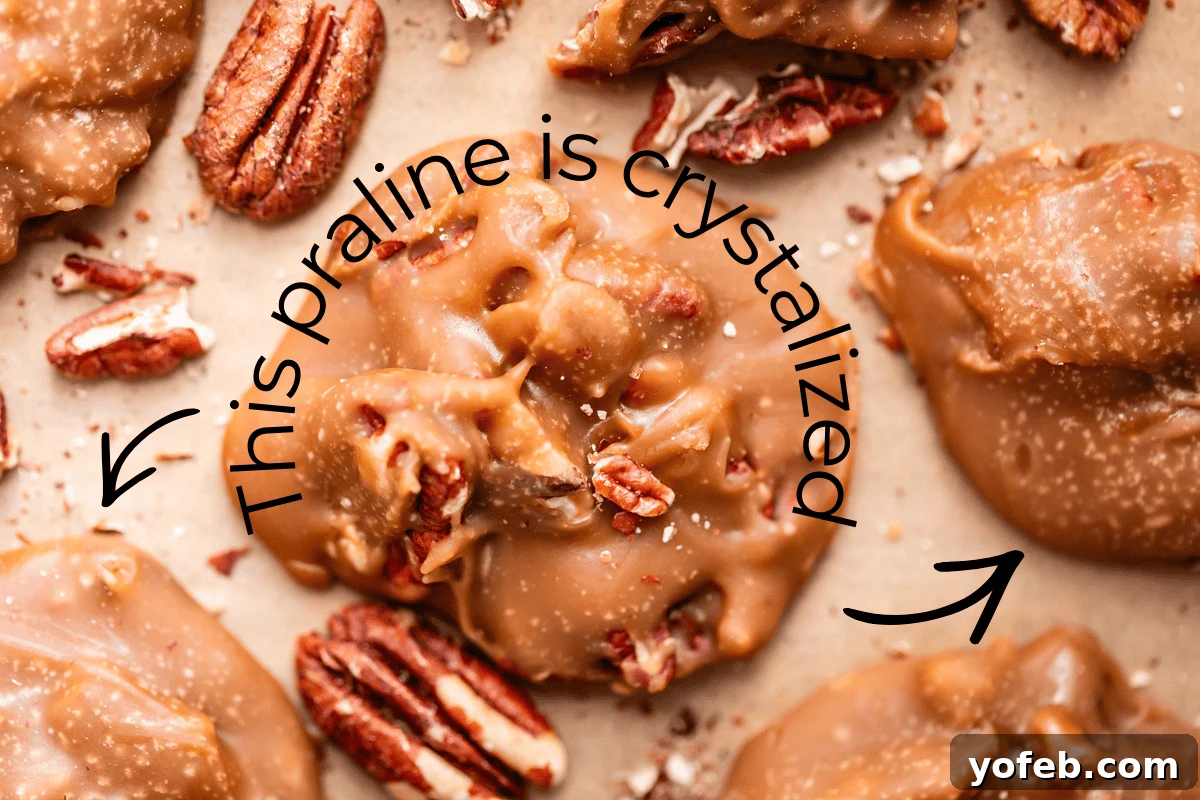
Crystallization can occur at two critical stages of praline making: first, when the mixture is brought to a boil, and later, during the stirring and cooling process. Here’s how to prevent it at each step:
- Generously Grease the Pot Edges: Use some of the butter specified in the recipe to thoroughly grease the inner edges of your pot, all the way to the top. This layer of fat creates a barrier, encouraging sugar to dissolve slowly in the center rather than crystallizing on the cooler edges.
- Dissolve Sugar Slowly Before Boiling: It is crucial that all sugar granules are fully dissolved into the liquid mixture *before* it reaches a vigorous boil. If the mixture boils too quickly before the sugar is dissolved, crystallization is almost guaranteed, resulting in brittle, chalky pralines instead of smooth, creamy ones.
- Hands Off During Boiling: Once the mixture reaches a rolling boil, resist the urge to stir! The candy is actively cooking and stirring with a spoon that might carry stray sugar crystals can trigger crystallization. Let the mixture boil undisturbed.
- Cool Completely Without Disturbance: After removing the pot from the heat, allow the candy mixture to cool completely and undisturbed. Stirring too early after boiling will agitate the sugar molecules, causing them to re-form crystals. They need time to cool and stabilize.
- Vigorous Stirring at the Right Temperature: Once the candy has cooled to the specified temperature (around 115-120 degrees F), the risk of crystallization is significantly reduced. At this point, add the baking soda and vanilla, and stir vigorously. This final stirring helps the mixture thicken and achieve the desired opaque, fudgy consistency for dropping.
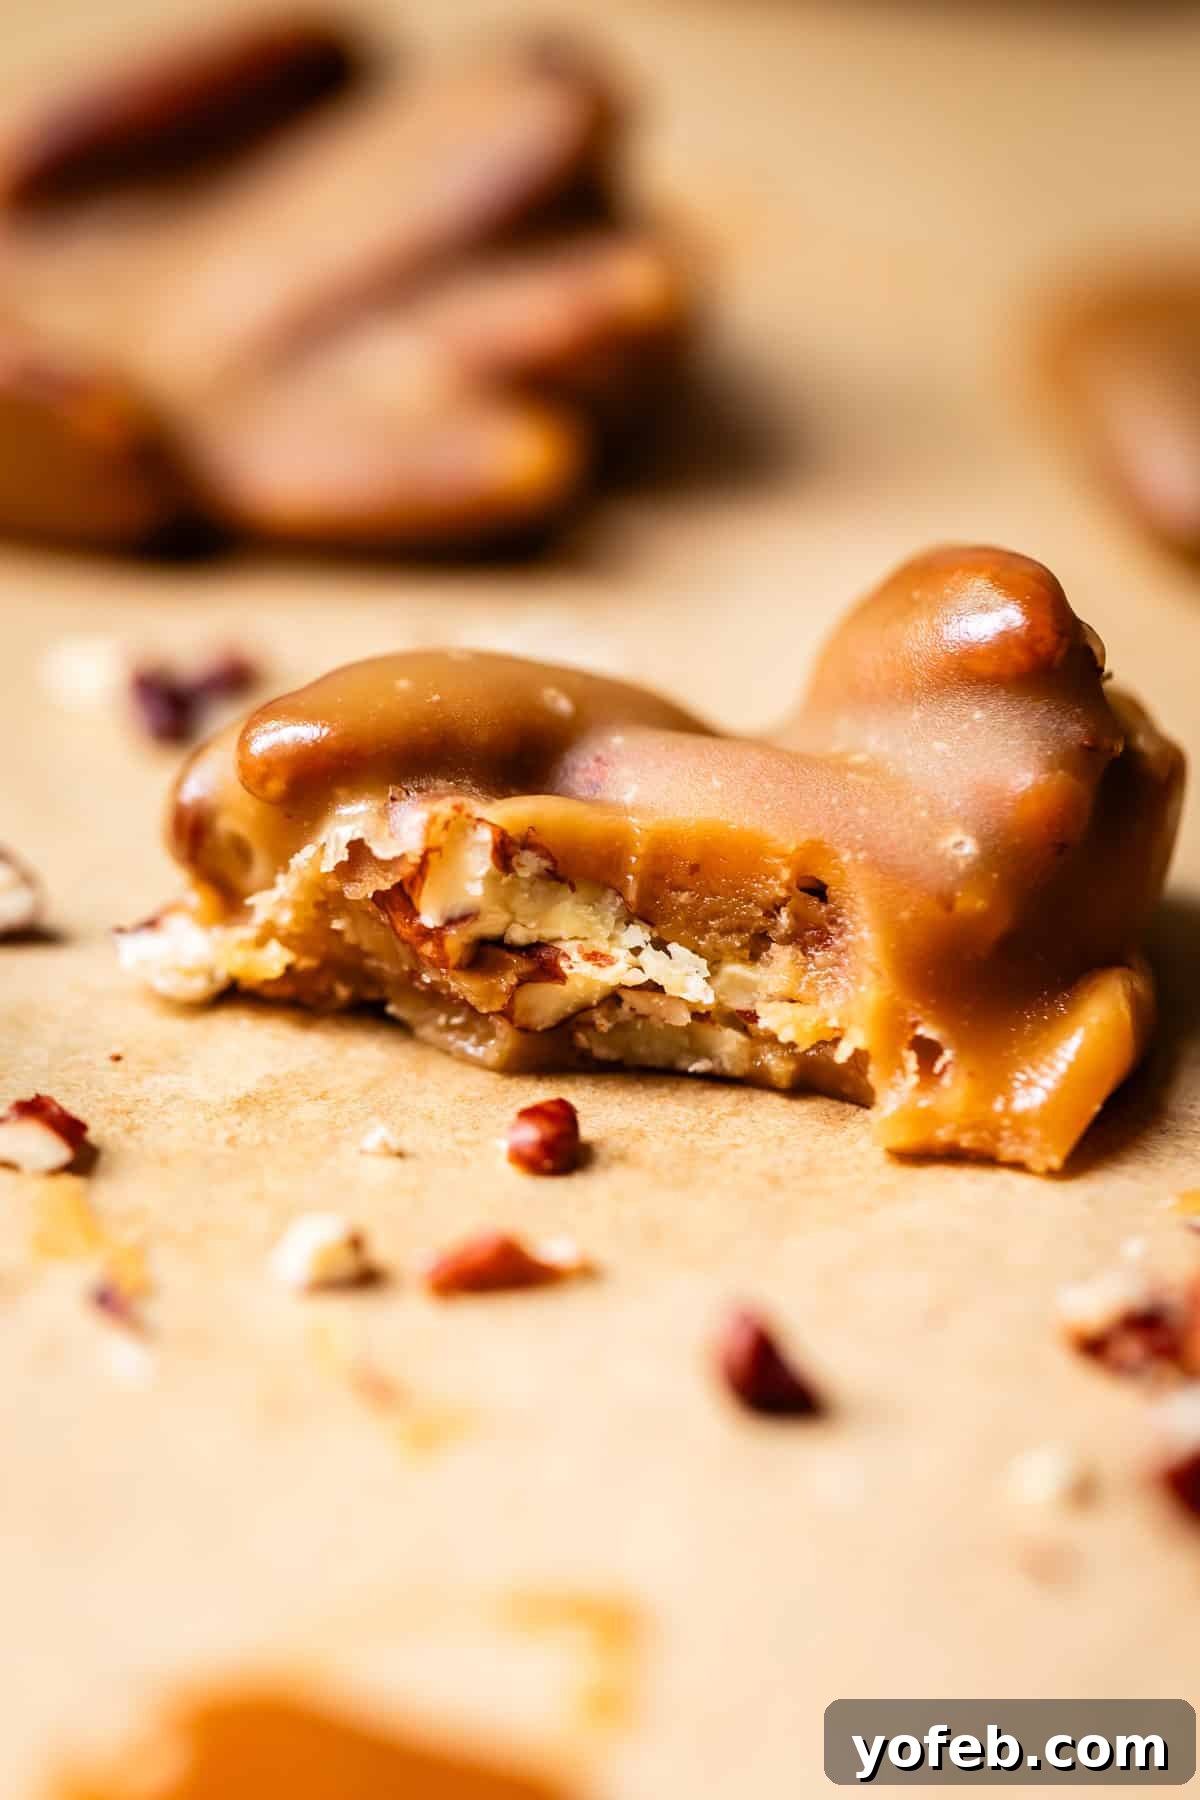
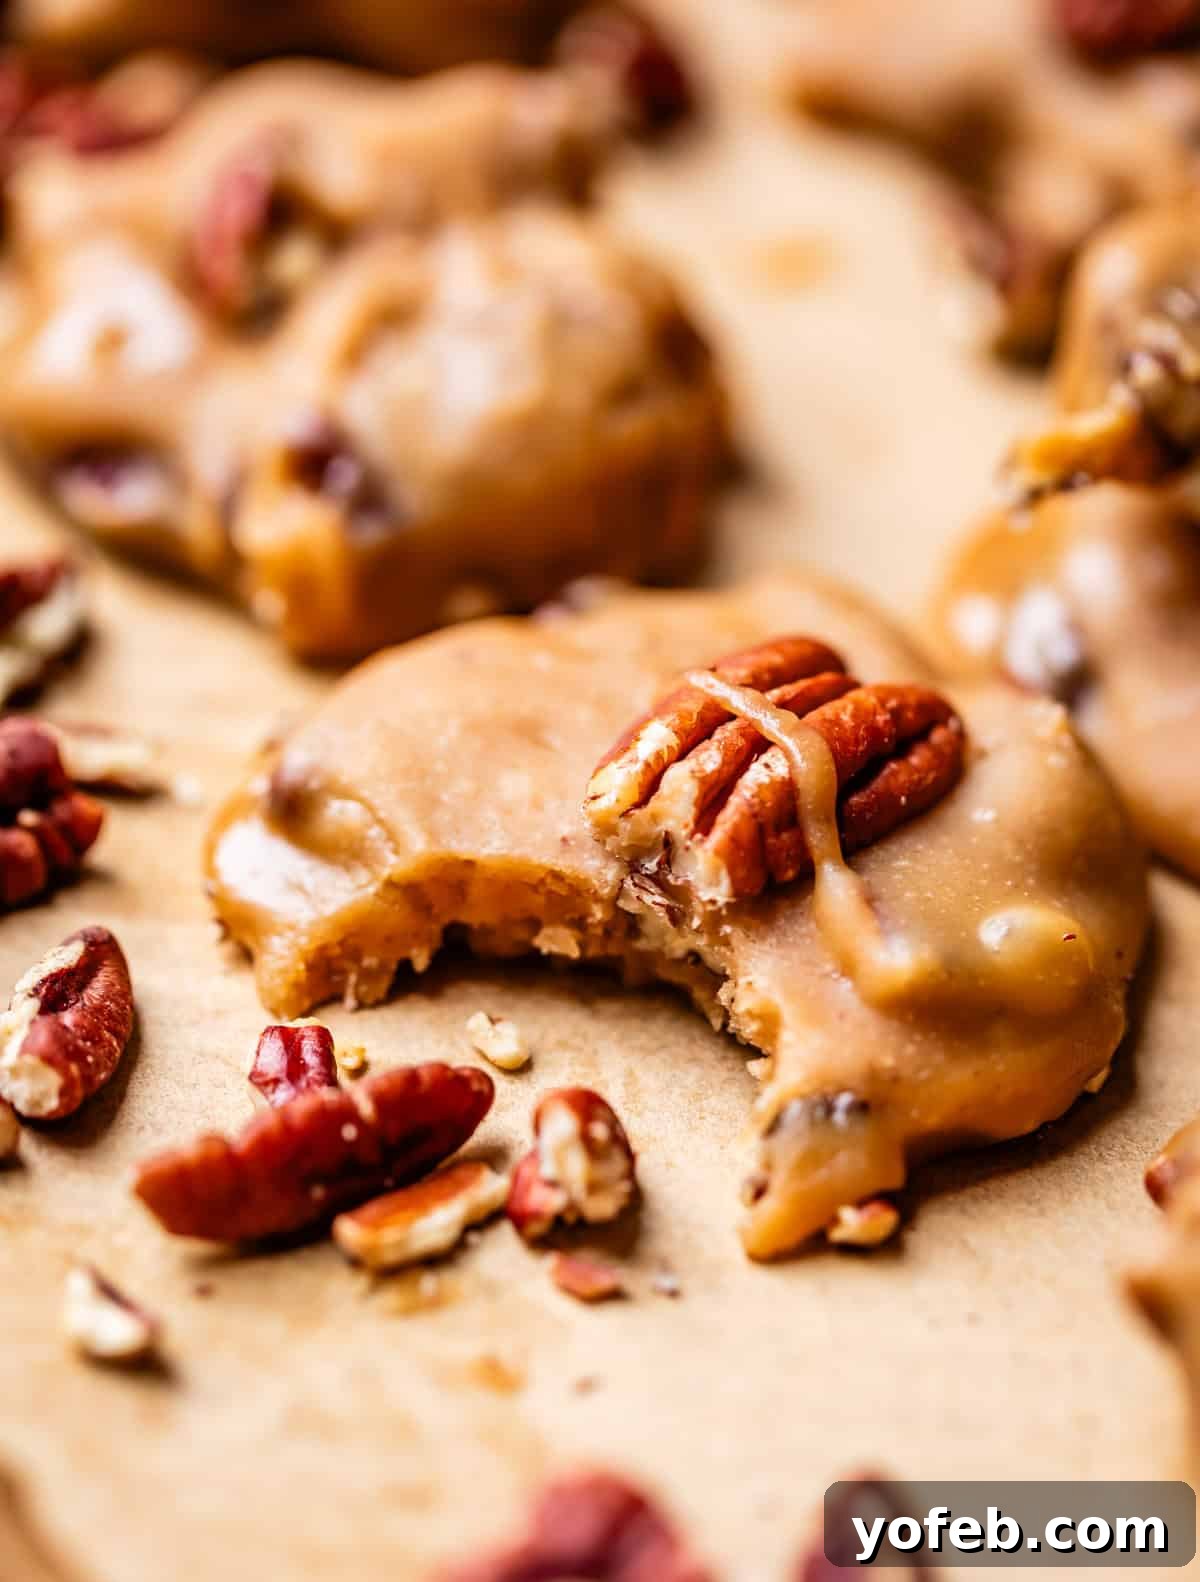
(You might notice some white spots on the praline in this photo. These are typically bubbles, not crystallization. They result from the baking soda added at the end, a necessary ingredient for achieving creamy, light pralines. You’ll recognize crystallization if the white spots continuously spread, resembling a “measles” pattern, and if the pralines completely change color to a pale white from a rich caramel within a day or two.)
Unlocking Flavor: Essential Ingredients for Pecan Pralines
Each ingredient in this recipe plays a vital role in crafting the perfect praline. Understanding their specific contributions will help you appreciate the magic unfolding in your kitchen:
- TOASTED Pecan Halves: I cannot stress this enough – toasting your pecans is paramount for that warm, deep, nutty flavor and a satisfying, brittle crunch. If you’re tempted to skip this step, please reconsider; the flavor and texture will be undeniably compromised. I aim for a robust toast, where some edges are nearly blackened, ensuring they are snappy and crisp, not mealy or bendy. Toast them or bust, seriously!
- Heavy Cream and Butter: These rich dairy components are the foundation of the praline’s luxurious caramel flavor and silky texture. They provide the depth and richness essential for a truly indulgent treat.
- *Substitution Tip:* Evaporated milk can be used as a suitable alternative to heavy cream if preferred.
- Lemon Juice: Now, this might sound unusual for a candy recipe, but hear me out. We’re adding a generous three tablespoons for a very specific reason.
- *The Crystallization Killer:* Lemon juice, being acidic, is a powerful inhibitor of sugar crystallization. It actively works to prevent those dreaded white spots from forming, ensuring your pralines remain smooth. Additionally, it contributes a subtle brightness that is perfectly balanced by the baking soda later, leaving no noticeable lemony taste, just a light and vibrant finish.
- Baking Soda: This is arguably my favorite ingredient in the praline recipe! When introduced to the hot sugar mixture and lemon juice, baking soda creates tiny, effervescent bubbles. These bubbles are the secret to achieving that coveted softer, creamier, and incredibly smooth texture, transforming the candy from a sticky-caramel consistency to a delightful, fudgy praline. It’s a true game-changer!
Step-by-Step Guide to Crafting Perfect Pecan Pralines
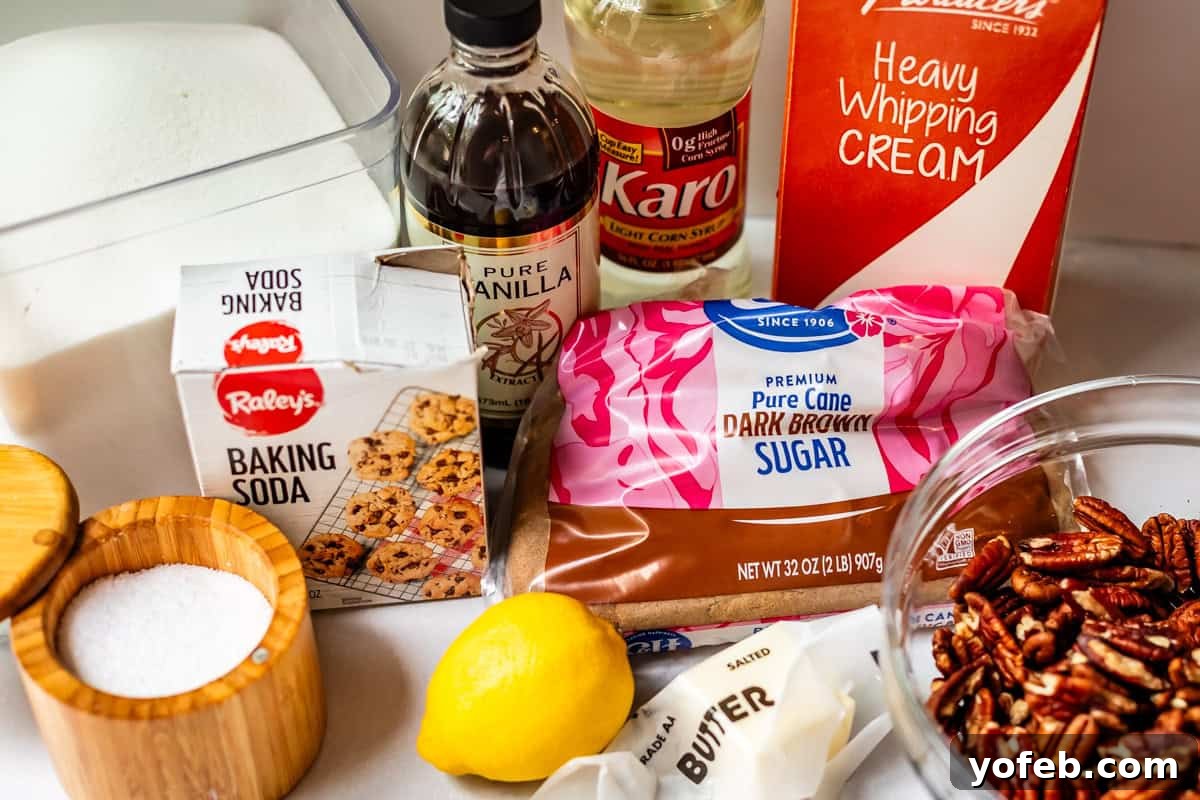
Here’s an overview of the ingredients you’ll need for this recipe, mostly pantry staples. Are pecans a pantry staple for you? They certainly are for me; I keep a generous supply in my freezer, ready for spontaneous praline cravings or whipping up a batch of Butter Pecan Cookies!
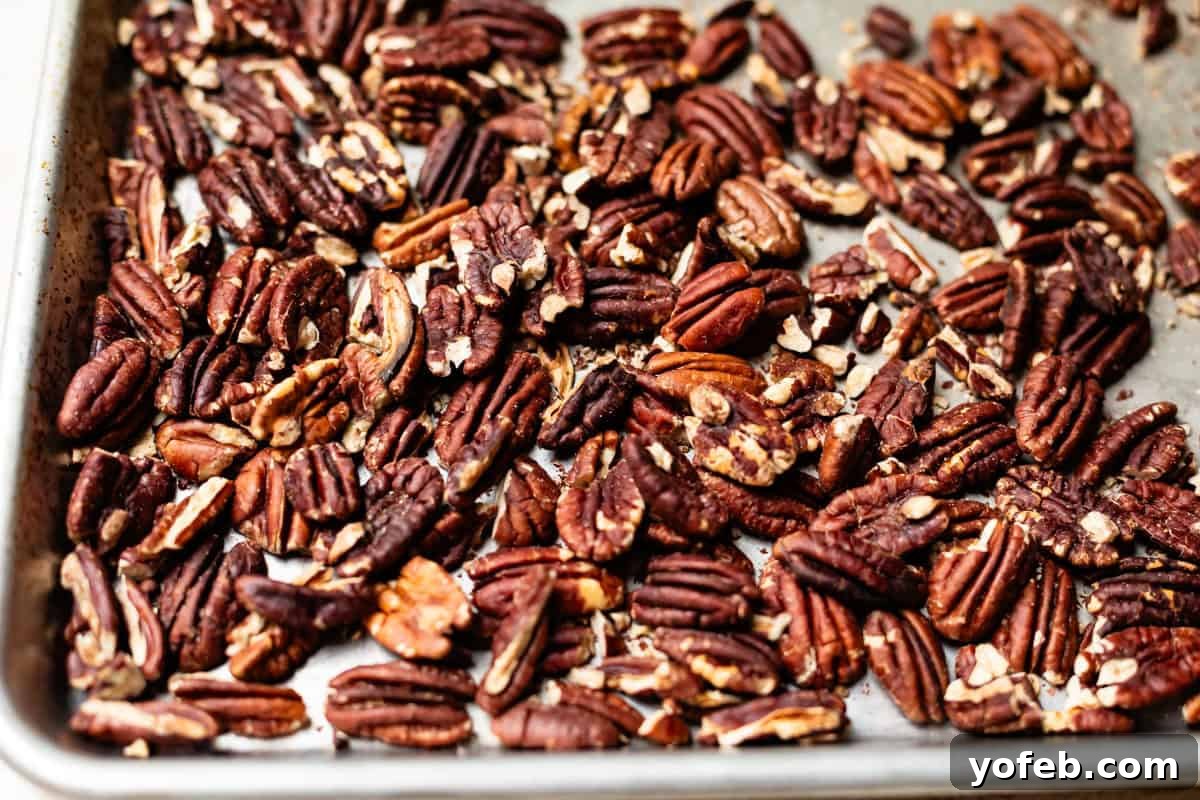
1. Toast Your Pecans Thoroughly: Begin by toasting your pecans until they’re deeply fragrant and some edges are nearly blackened. I’m serious – if they’re not robustly toasted, you’re missing out on essential flavor and texture. Spread them in a single layer on a baking sheet and bake at 350°F, stirring every couple of minutes, until they achieve that perfect brittle snap. Remove and let them cool completely.
2. Prepare Your Pot and Pans: Line two half baking sheets with parchment paper or silicone mats. Next, select a heavy-bottomed pot (this is crucial for even heat distribution and preventing burning – Aunt Olga’s thin pot from your wedding won’t cut it here!). Add butter to the pot and, as it melts over medium-low heat, use a wooden spoon to generously grease the bottom and sides of the pot, all the way to the top rim. This acts as a protective barrier against crystallization.
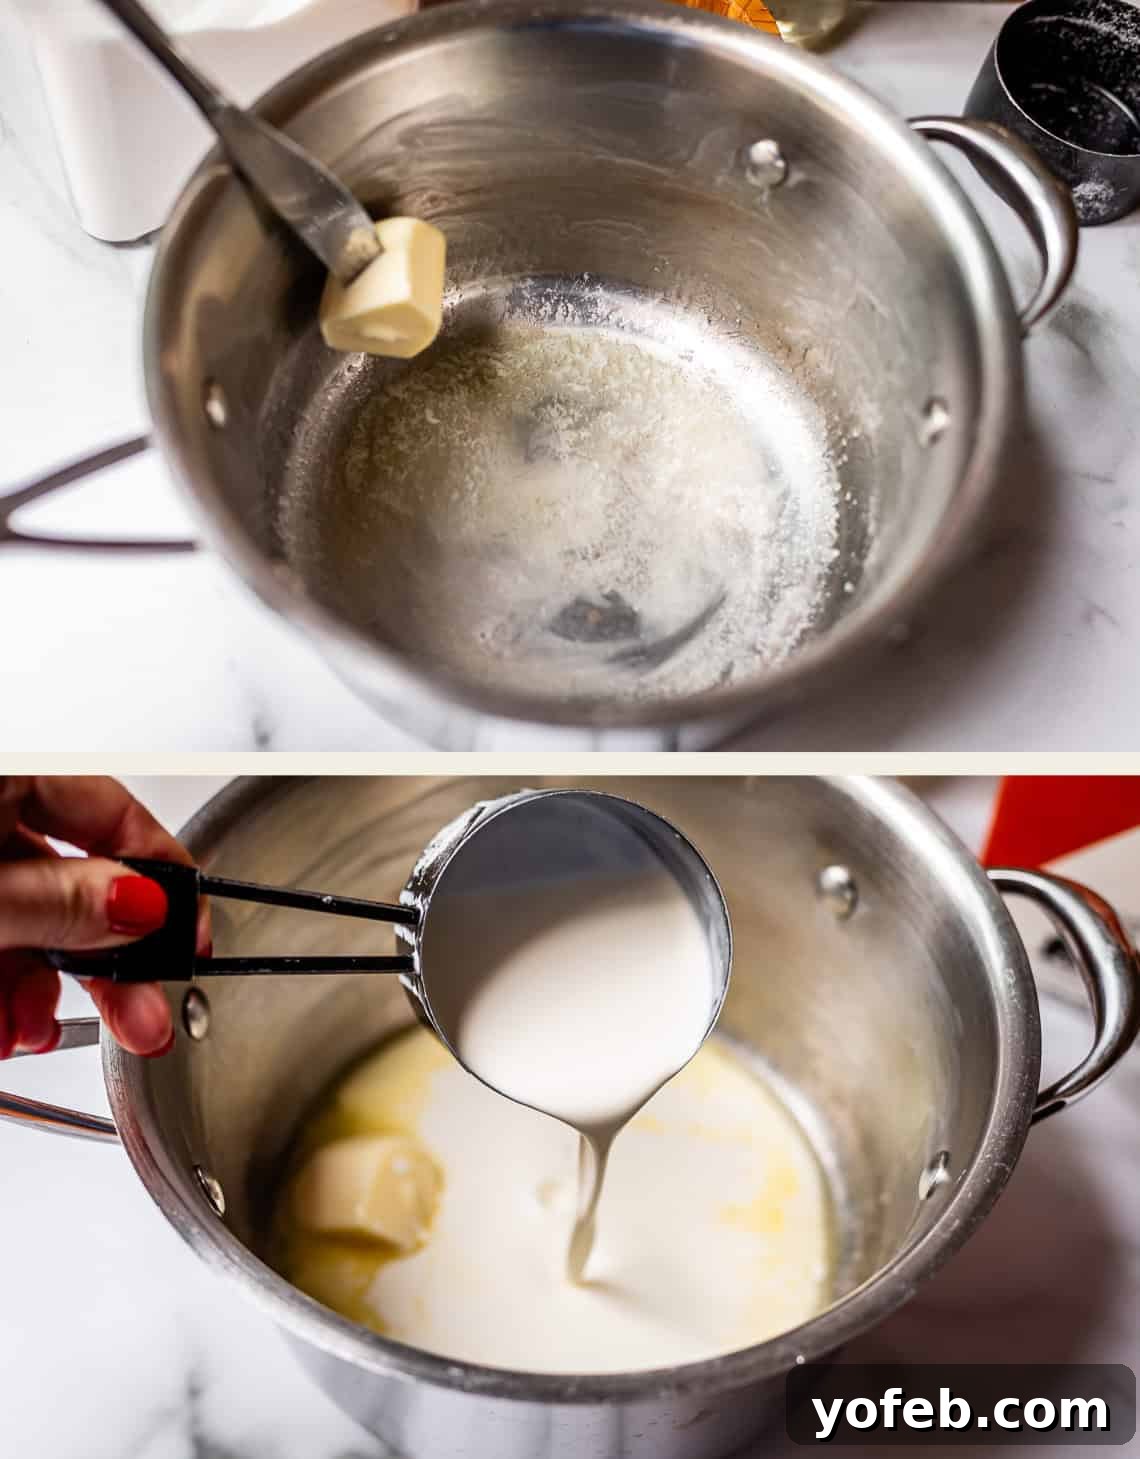
3. Combine Wet and Dry Ingredients (Carefully): Pour in the heavy cream. Then, add the brown sugar and granulated sugar directly into the center of the pot, taking care to avoid scattering sugar granules onto the sides. This helps prevent premature crystallization. Gently stir the mixture to combine.
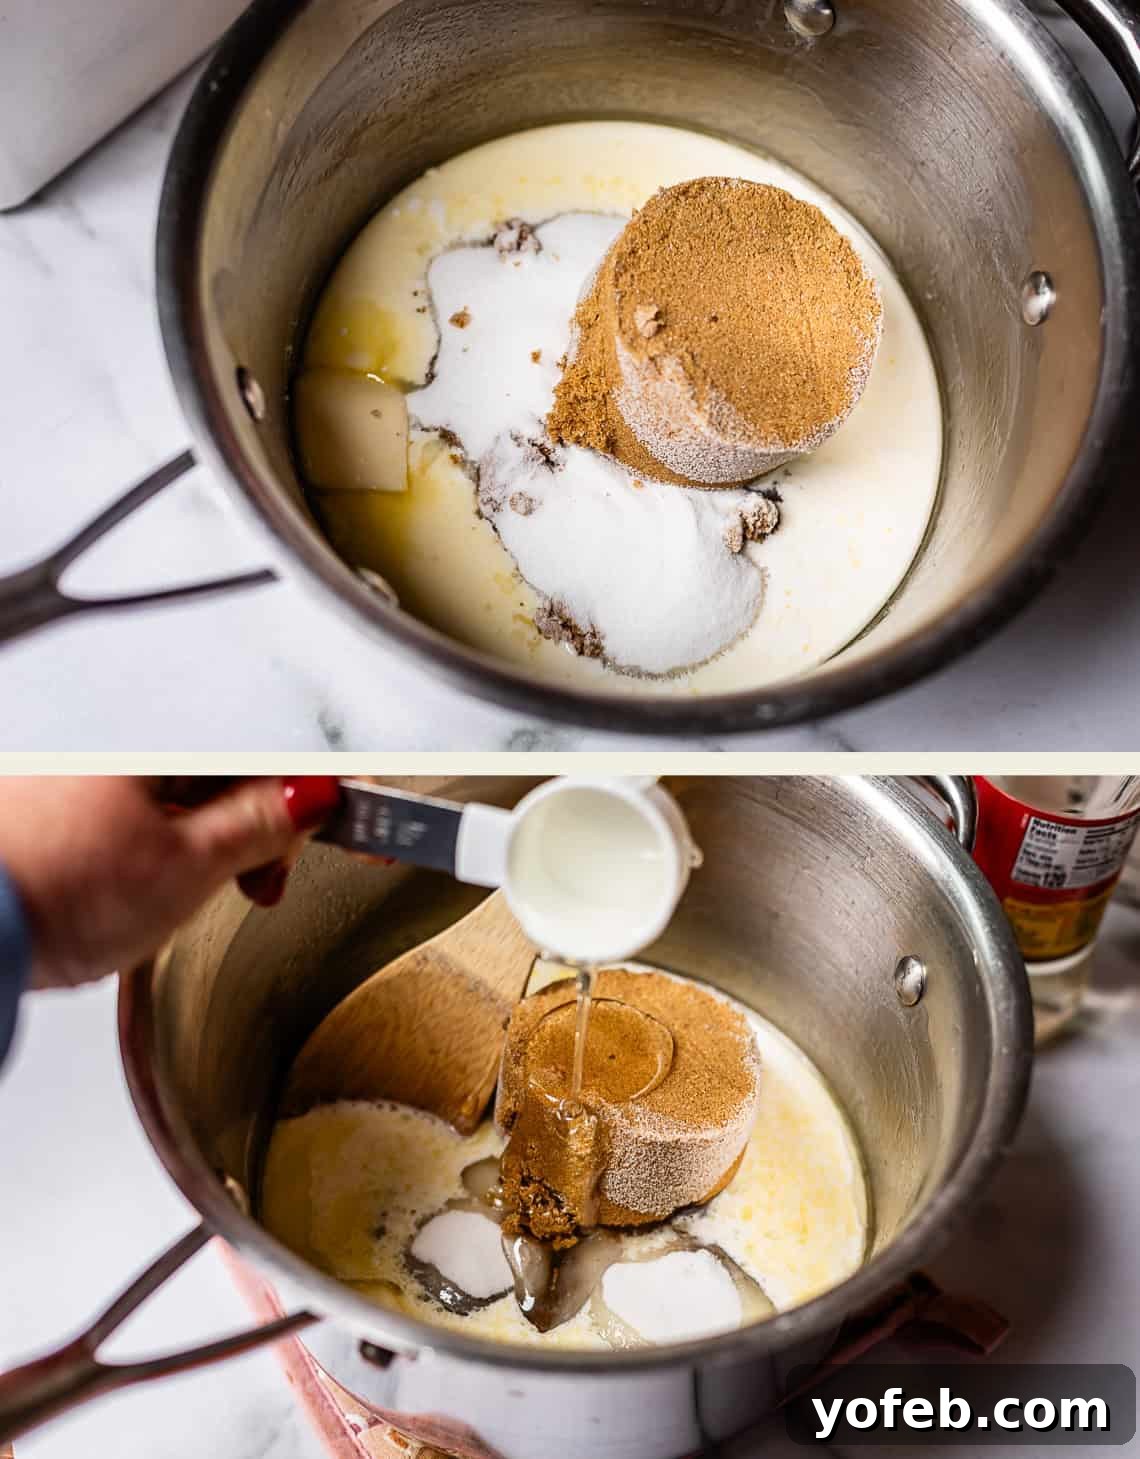
4. Add Corn Syrup and Lemon Juice: Incorporate the corn syrup and fresh lemon juice into the mixture. Both of these ingredients provide additional insurance against crystallization, ensuring a smoother candy.
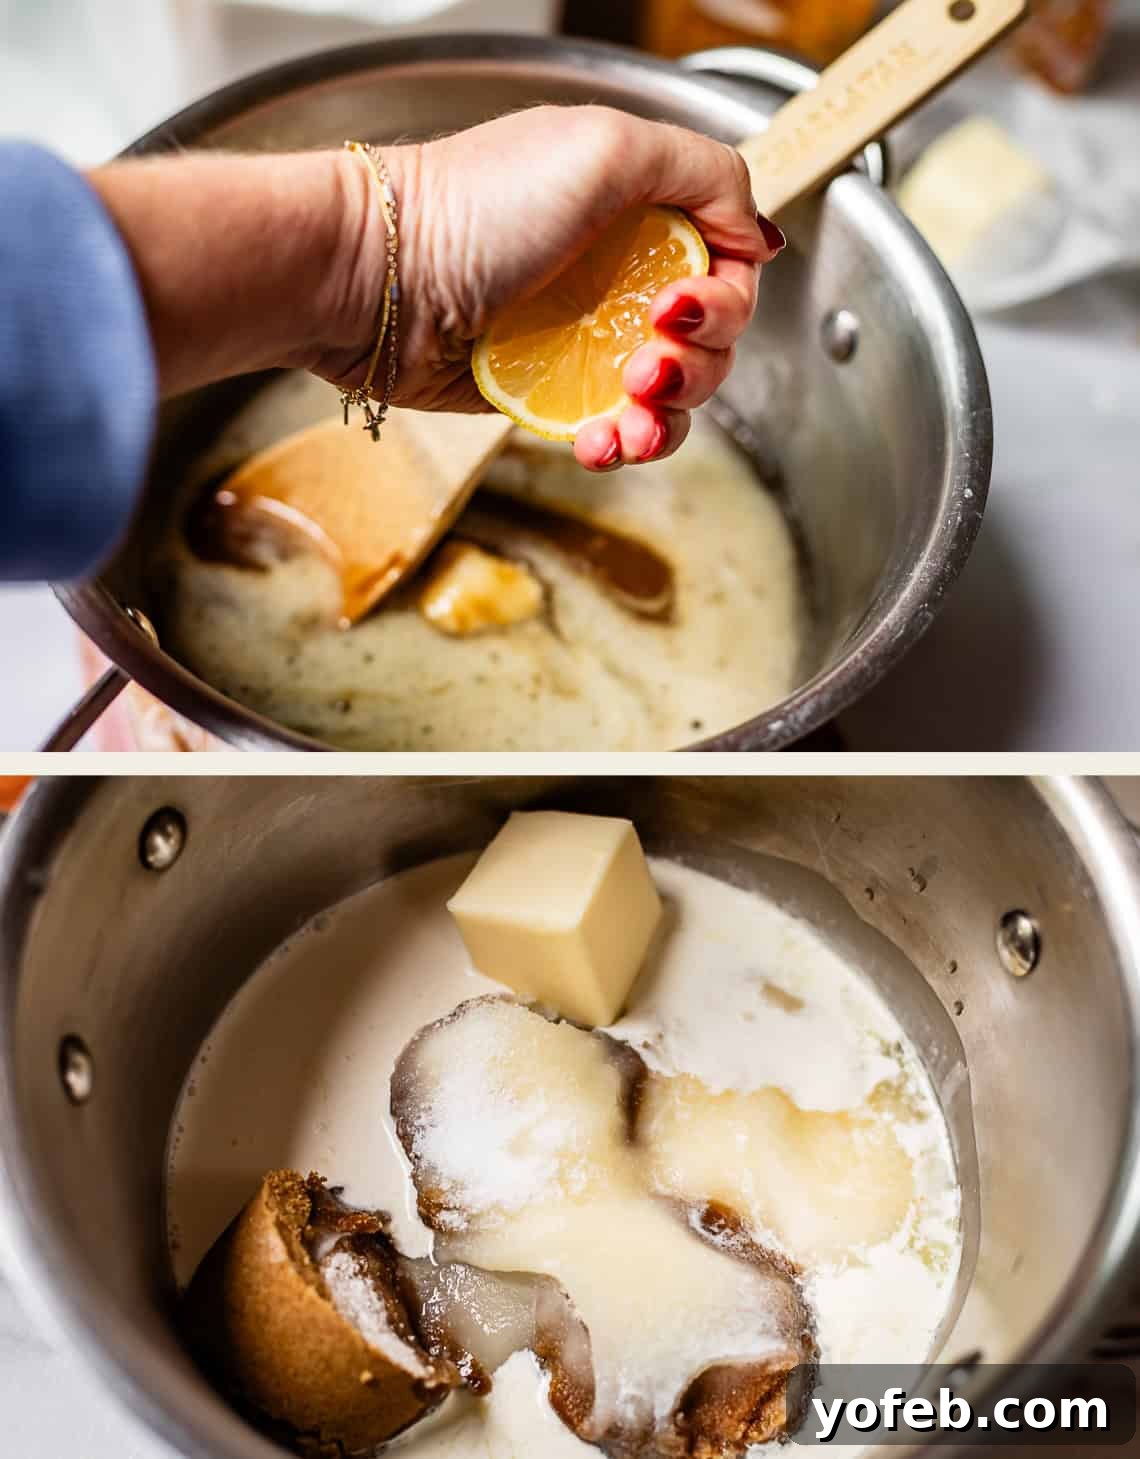
5. Dissolve Sugar Slowly and Thoroughly: Over medium-low heat, gently stir the mixture for at least 5-10 minutes. The primary goal here is to completely dissolve all the sugar crystals before the mixture even begins to simmer or boil. You can slightly increase the heat to medium if progress is too slow, but be vigilant – avoid a rapid boil at this stage. You’ll know the sugar is fully dissolved when you can rub a tiny bit of the mixture between your fingers and it feels perfectly smooth, with no grittiness.
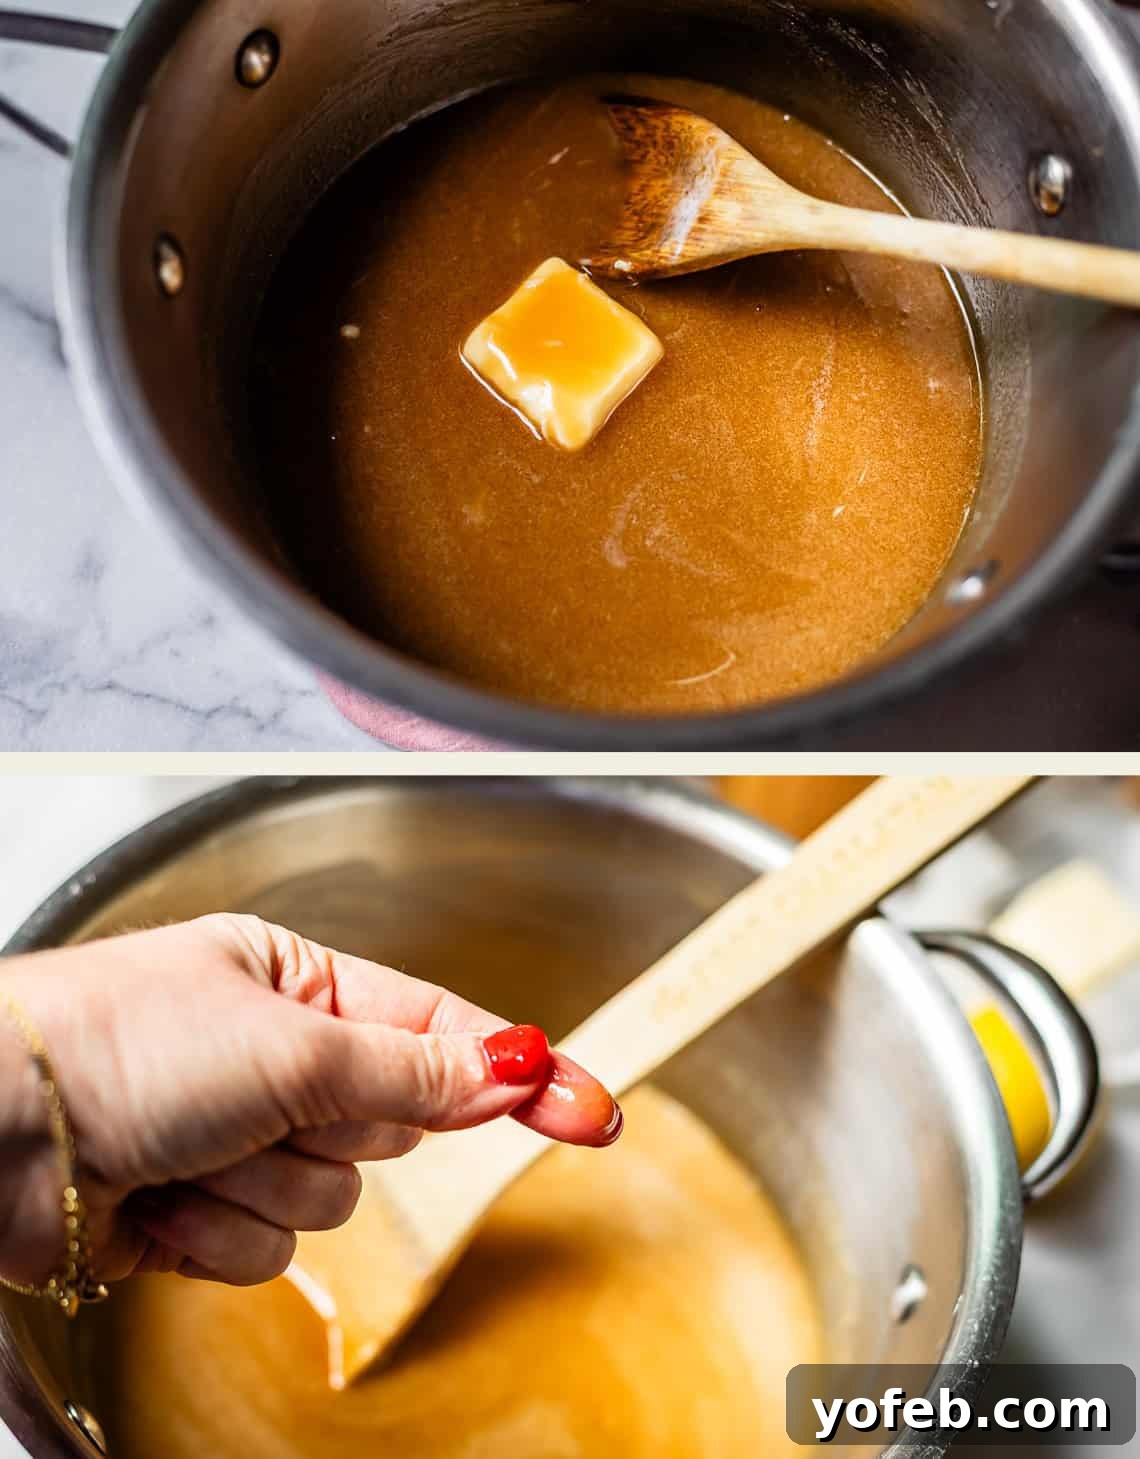
6. Bring to a Boil and Monitor Temperature: Once you’ve confirmed all sugar is dissolved, increase the heat to medium and bring the mixture to a rolling boil. Crucially, once boiling vigorously, remove your spoon from the pot and do NOT stir. Stirring at this stage can induce crystallization. Insert your candy thermometer, ensuring it doesn’t touch the bottom of the pot, and allow the mixture to boil undisturbed until it reaches precisely 236°F (between 235-237°F is acceptable).
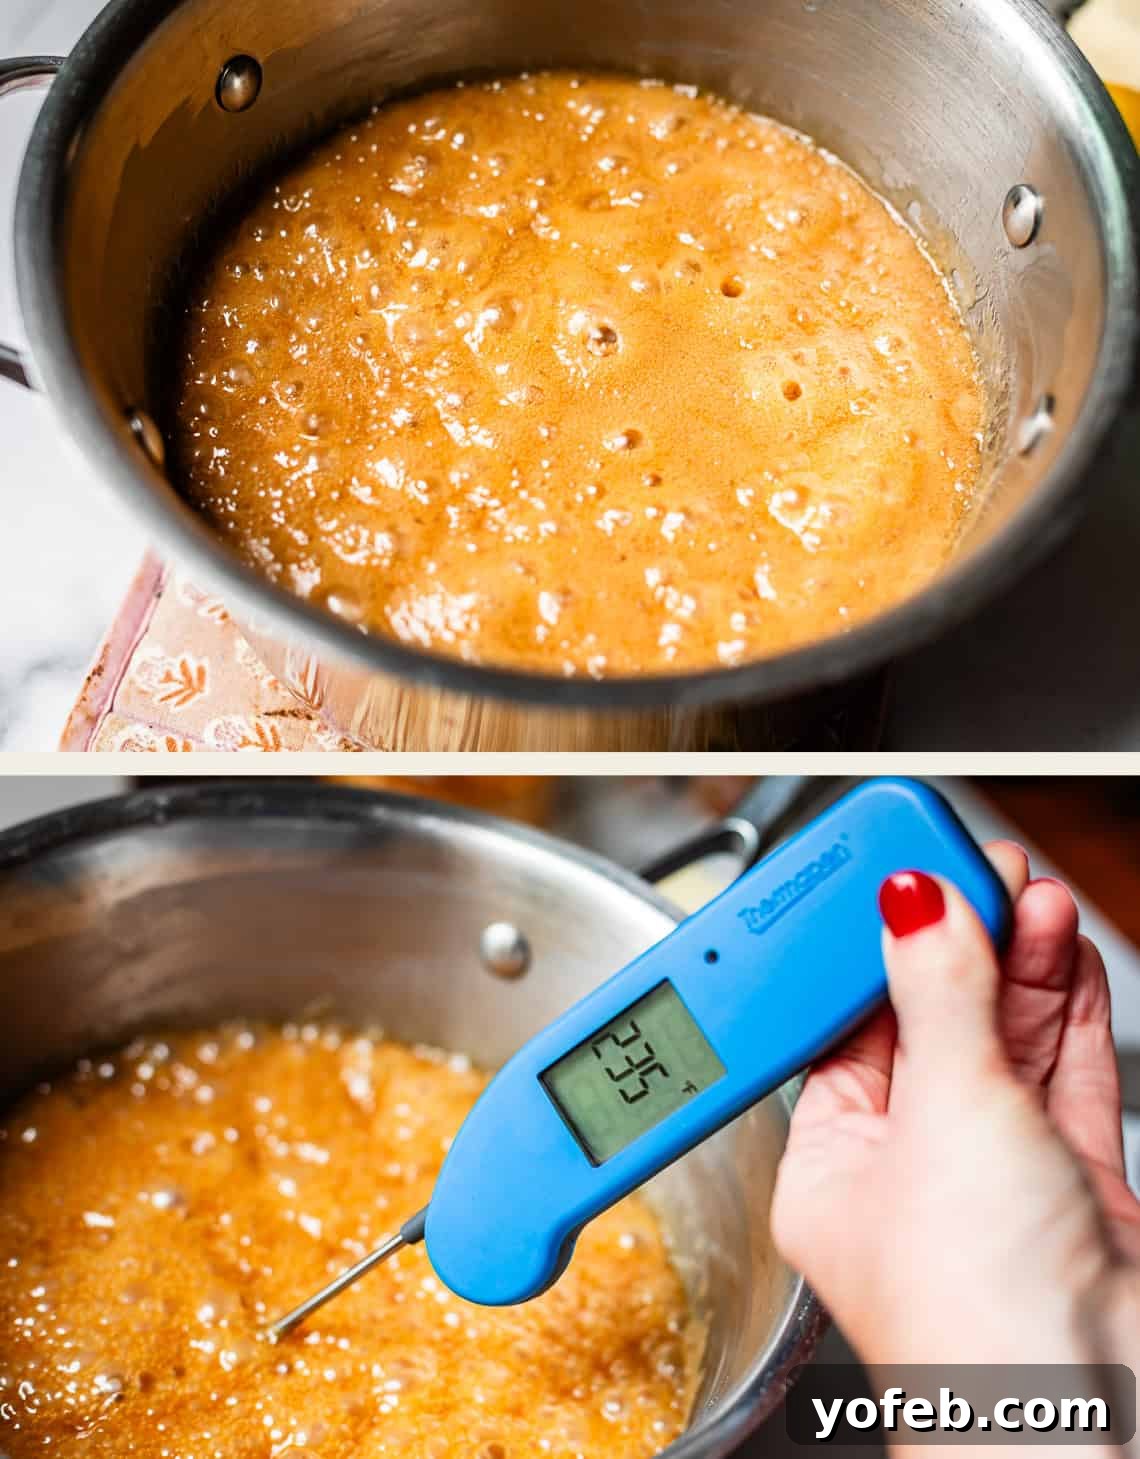
7. Cool Undisturbed: As soon as the candy reaches 236°F, promptly remove the pot from the heat and place it on a cooling rack. Resist any temptation to stir! This undisturbed cooling period is vital to prevent crystallization. Allow the mixture to cool for approximately 20-40 minutes (depending on your room temperature) until it reaches 115-120°F.
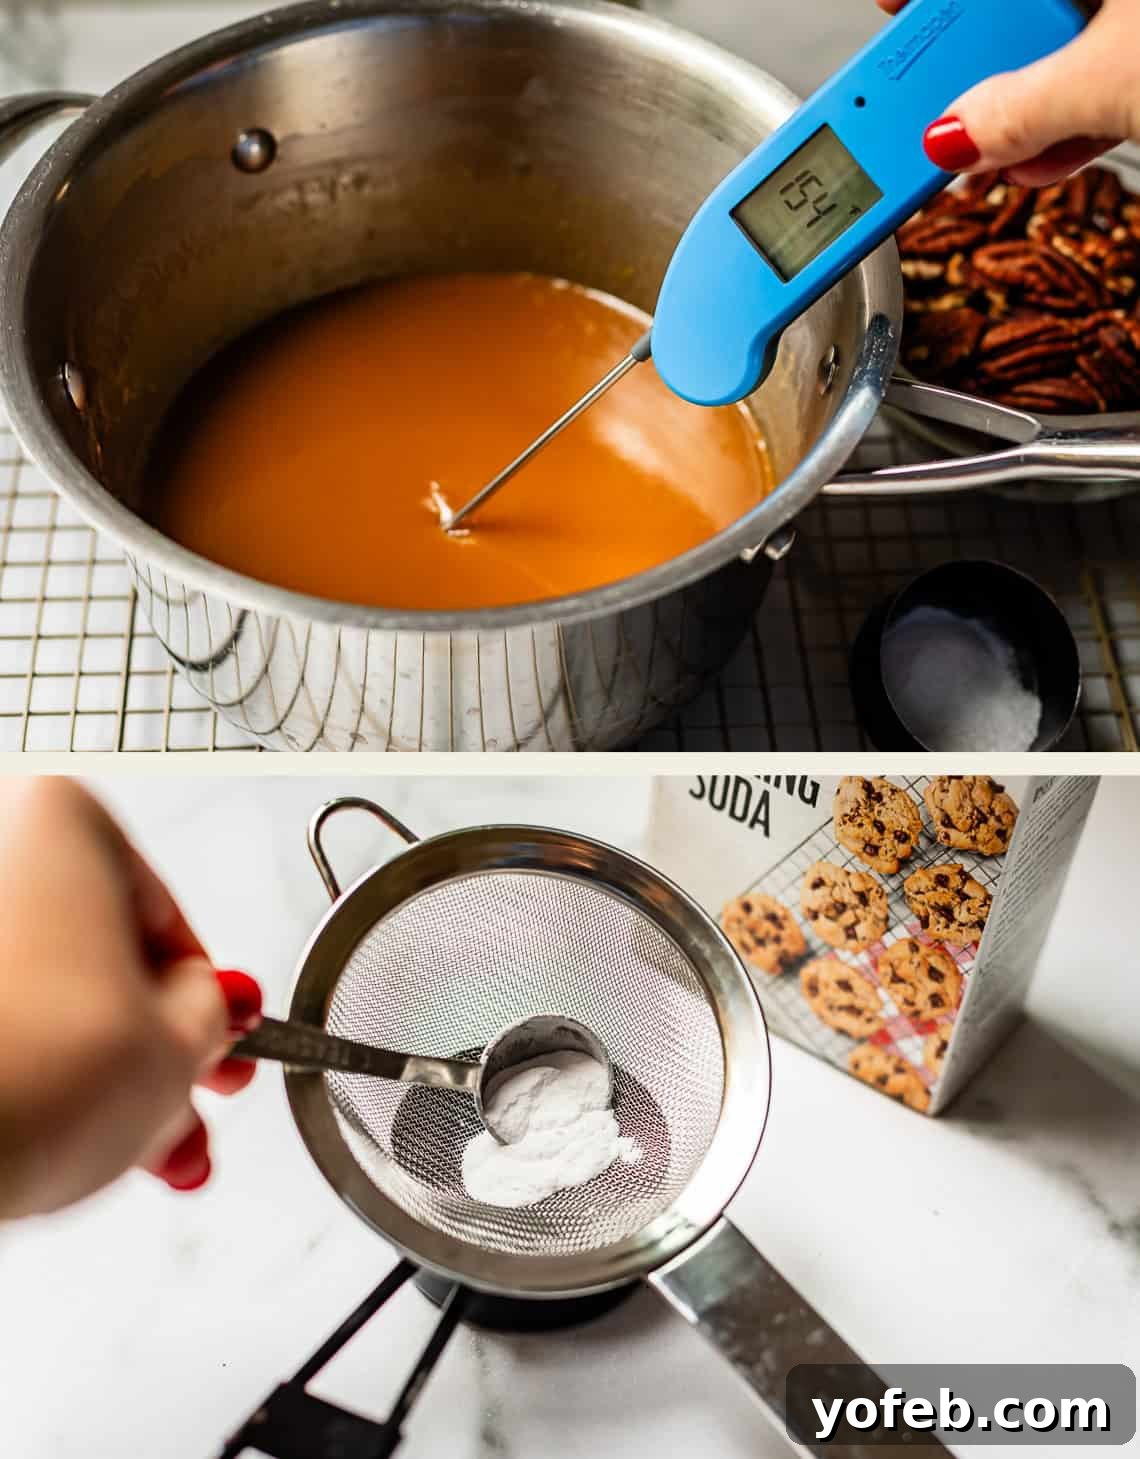
8. Incorporate Baking Soda and Vanilla: While the candy cools, sift one teaspoon of baking soda to ensure there are no clumps. Once the mixture’s temperature drops to 115-120°F, add the sifted baking soda and vanilla extract. Use a fresh, clean wooden spoon for this step.
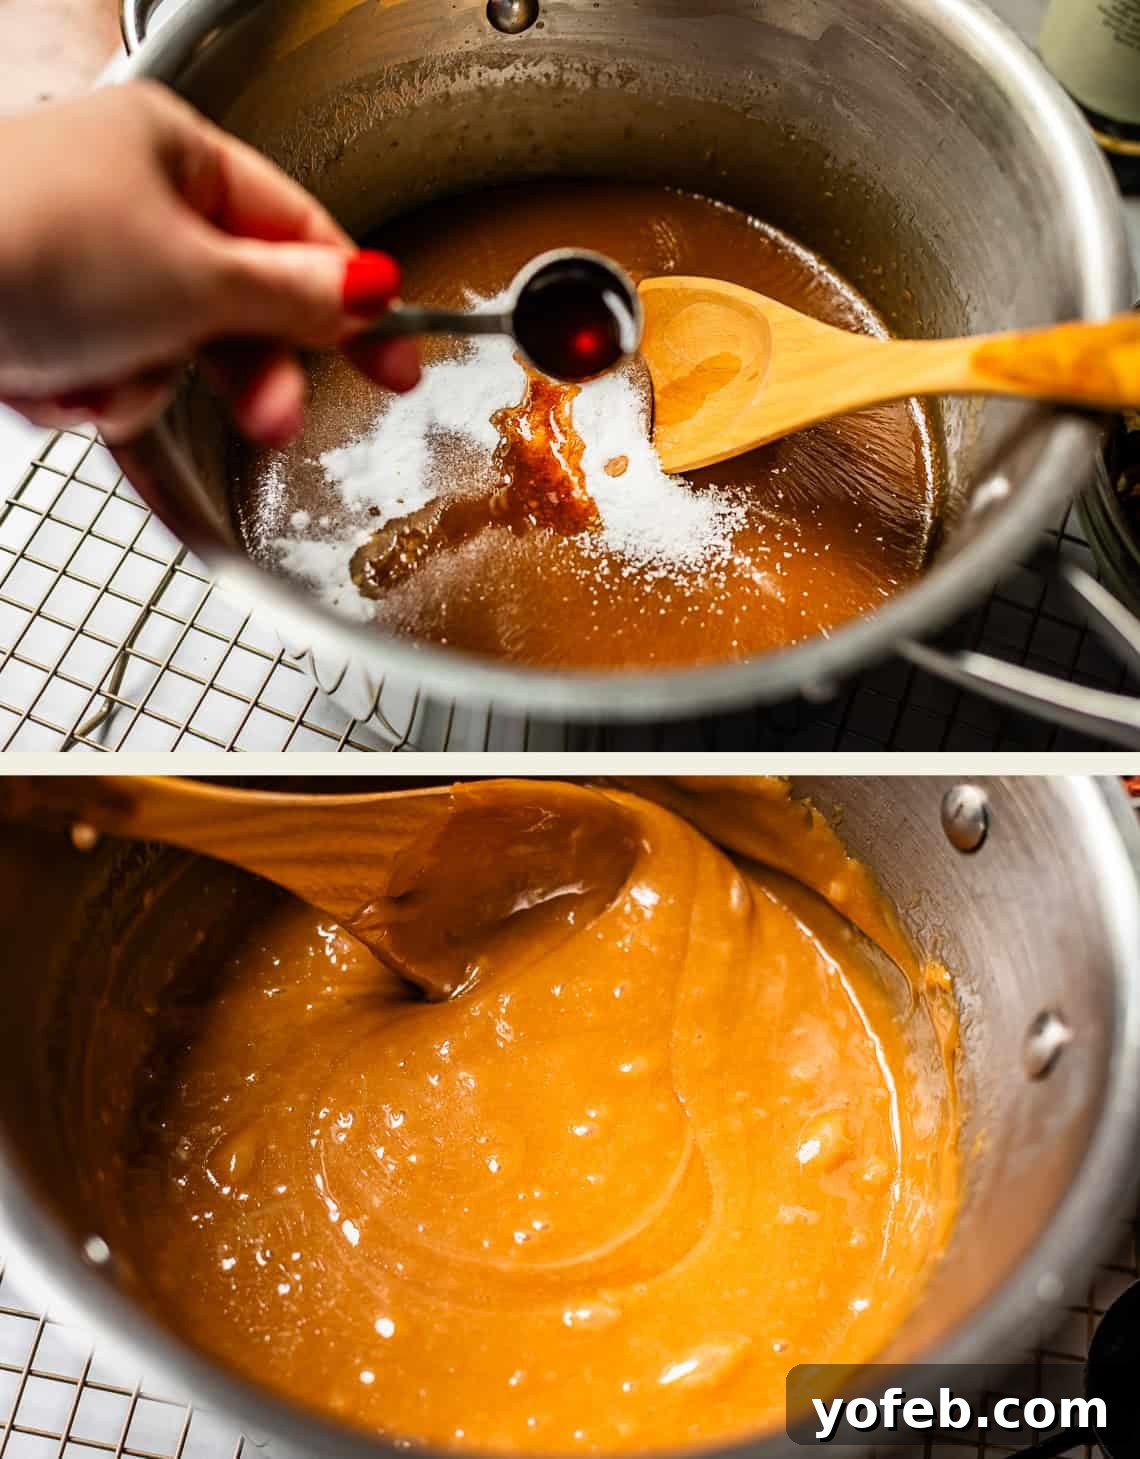
9. Stir Vigorously and Add Pecans: Now is the time to stir with conviction! Beat the mixture vigorously for about two minutes. You’ll observe the baking soda activating, causing the mixture to bubble and froth – this effervescence is crucial for achieving that signature creamy, light praline texture. After two minutes, stir in the toasted pecan halves.
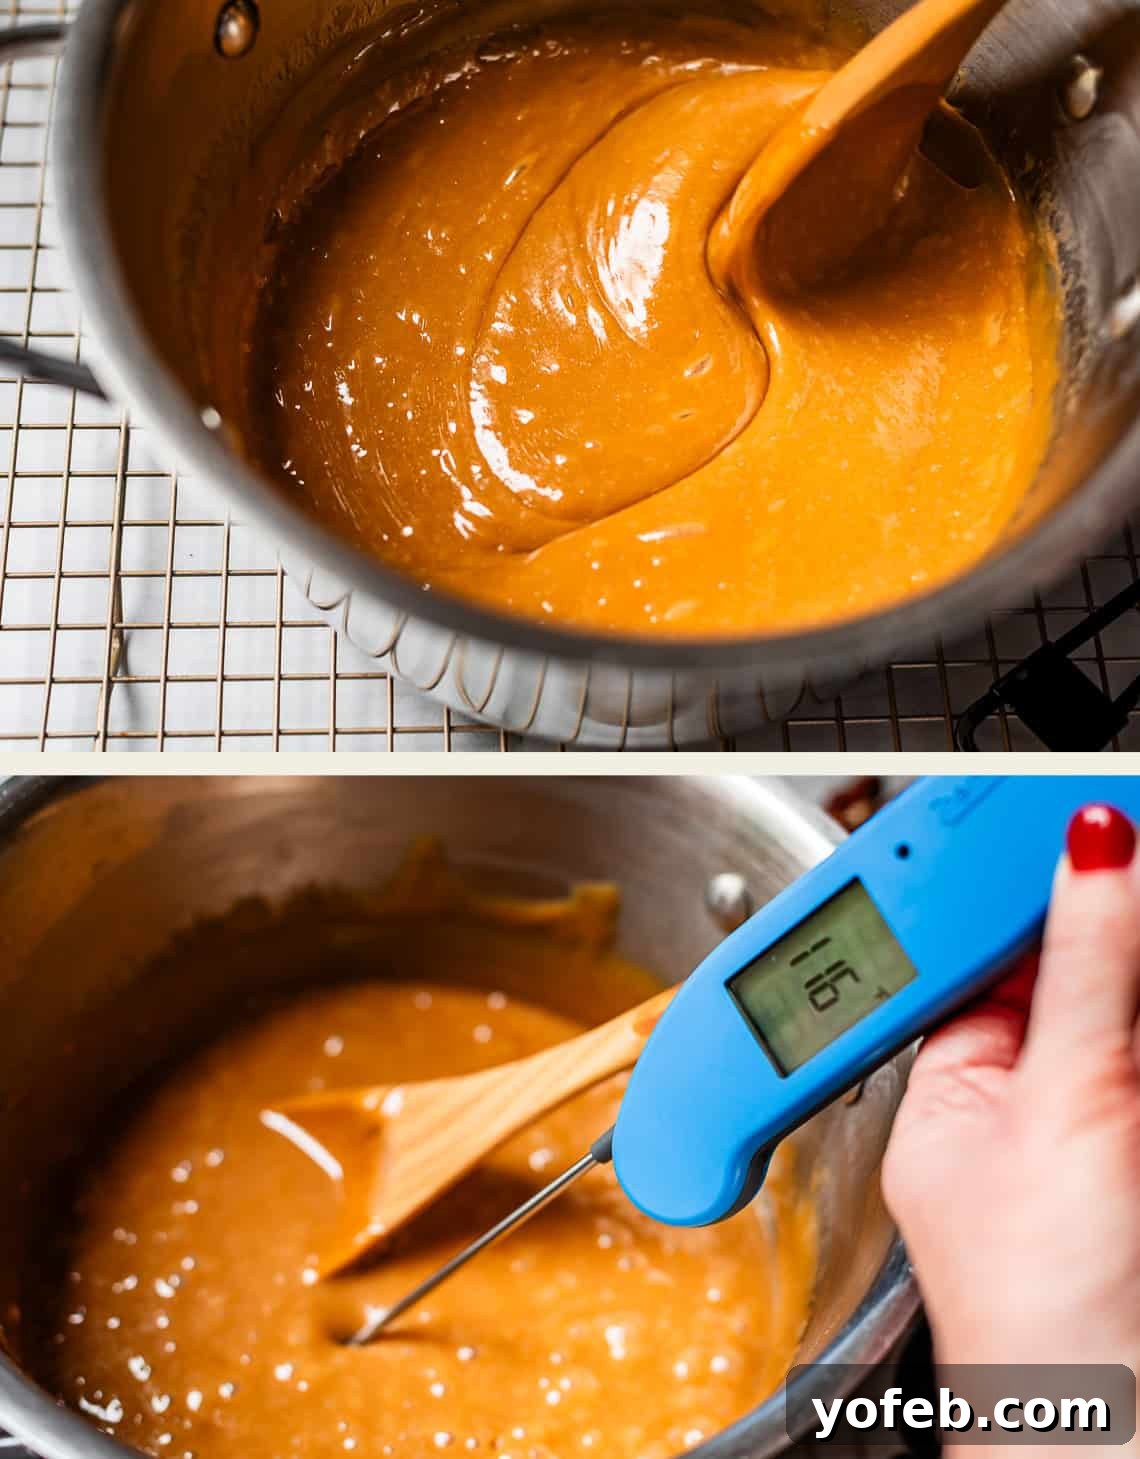
10. The Critical Opacity Test and Rapid Dropping: Continue stirring the pecan-infused candy. This is the trickiest part, requiring a bit of practice to find the perfect “dropping window.” Maintain your thermometer in the candy. When the mixture reaches around 105-110°F, it’s time to start testing its readiness. Scoop a small teaspoon of the mixture (without pecans) from the edge of the pot and drop it onto your parchment-lined pan. If it appears glossy and spreads like a shiny pool, it’s still too early – keep stirring. As you continue to stir, the mixture will gradually thicken and become more opaque, less shiny. The edges of the dropped test praline will start to hold a rounded, plump shape instead of flattening out. This transition from glossy to opaque is your cue! Once the candy is opaque, indicating it’s ready, you must work very quickly as the optimal dropping temperature window is brief.
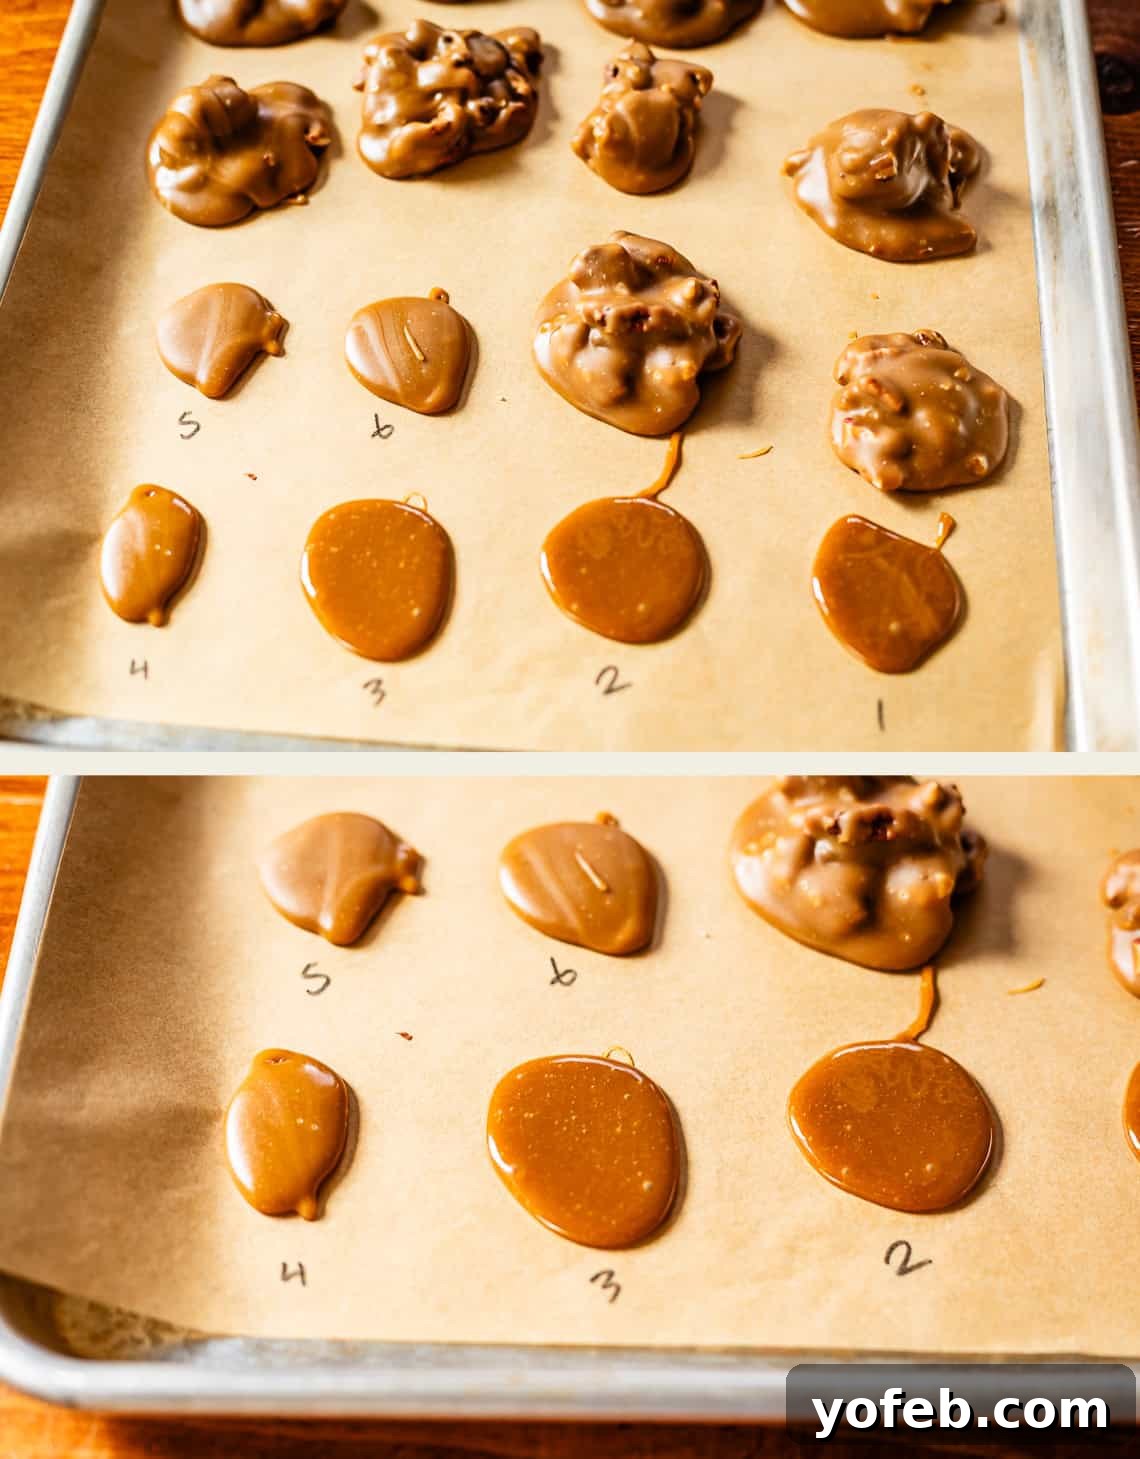
This image illustrates the crucial visual difference: Notice how drops #1, #2, and #3 are glossy and spread. Drop #4 starts to show improvement, and #5 and #6 are distinctly opaque with rounded edges. This is what you’re looking for!
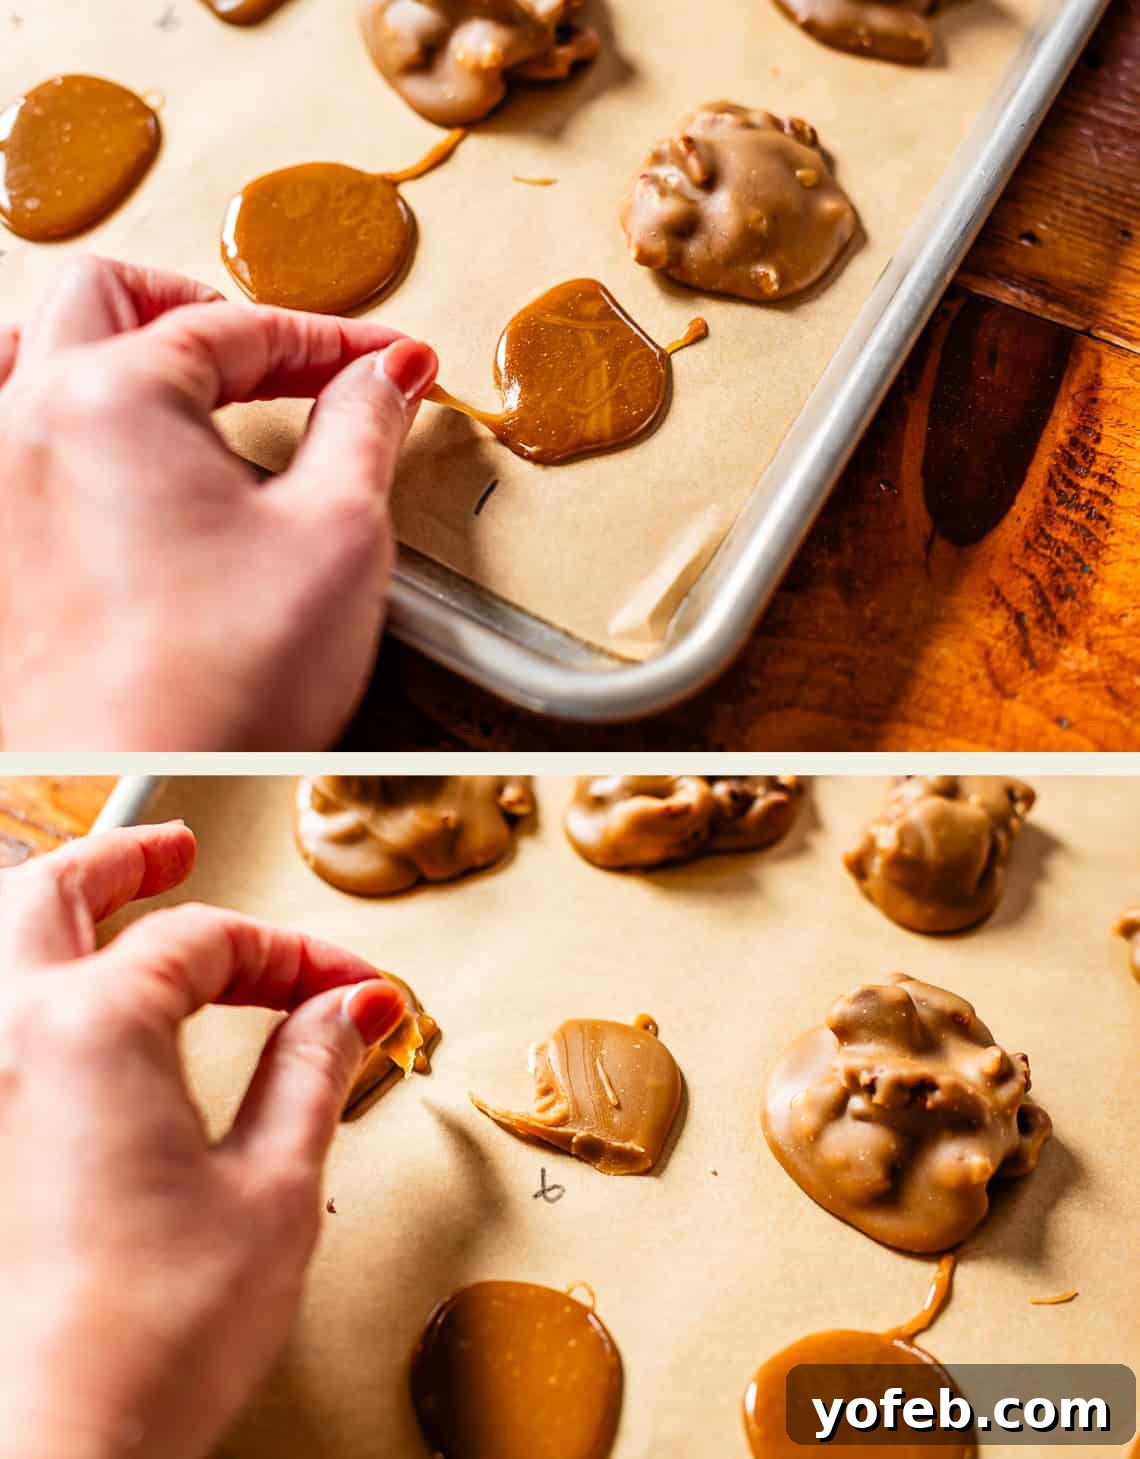
The first praline dropped too early (like #1 in the photo above) will remain sticky and impossible to handle, even hours later. The properly set pralines, like #6, will be fudgy, hold their shape, and won’t leave your fingers sticky. Move quickly, using a spoon or a 1 3/4-inch cookie scoop, to drop individual pralines onto your prepared sheets, leaving space between them.
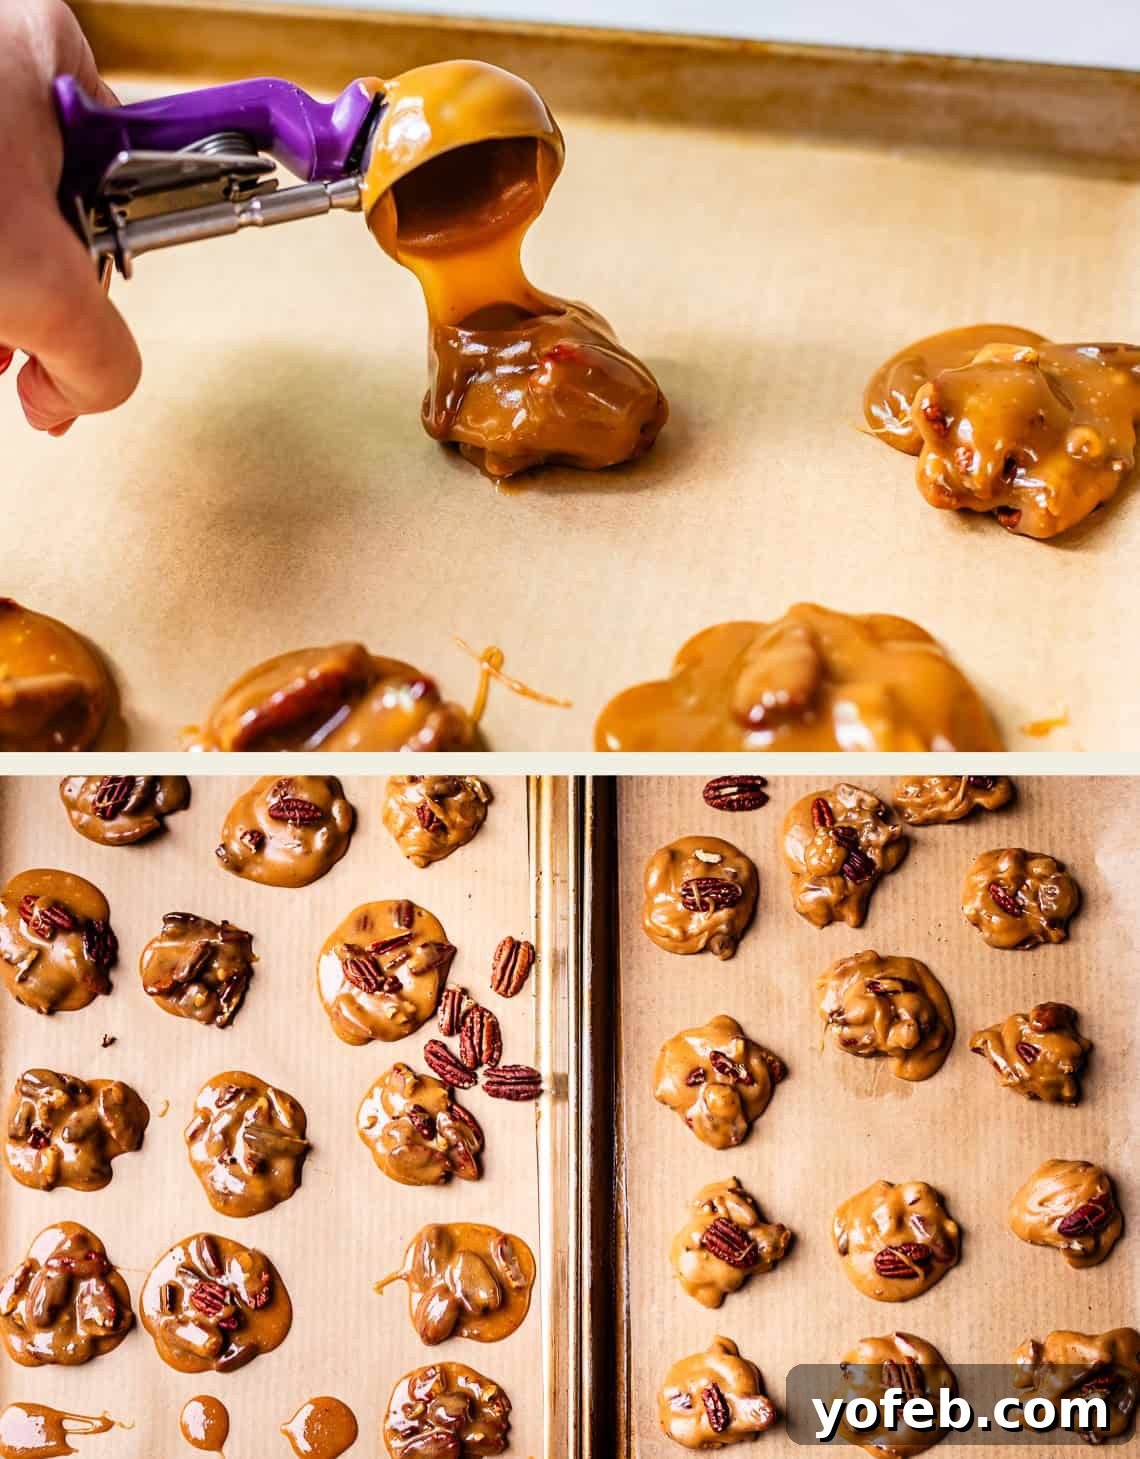
If at any point your dropped pralines start looking glossy again, stop immediately and stir the pot vigorously once more to bring the mixture back to the correct consistency. Continue dropping until all the candy is shaped; this recipe yields approximately 27-30 pralines.
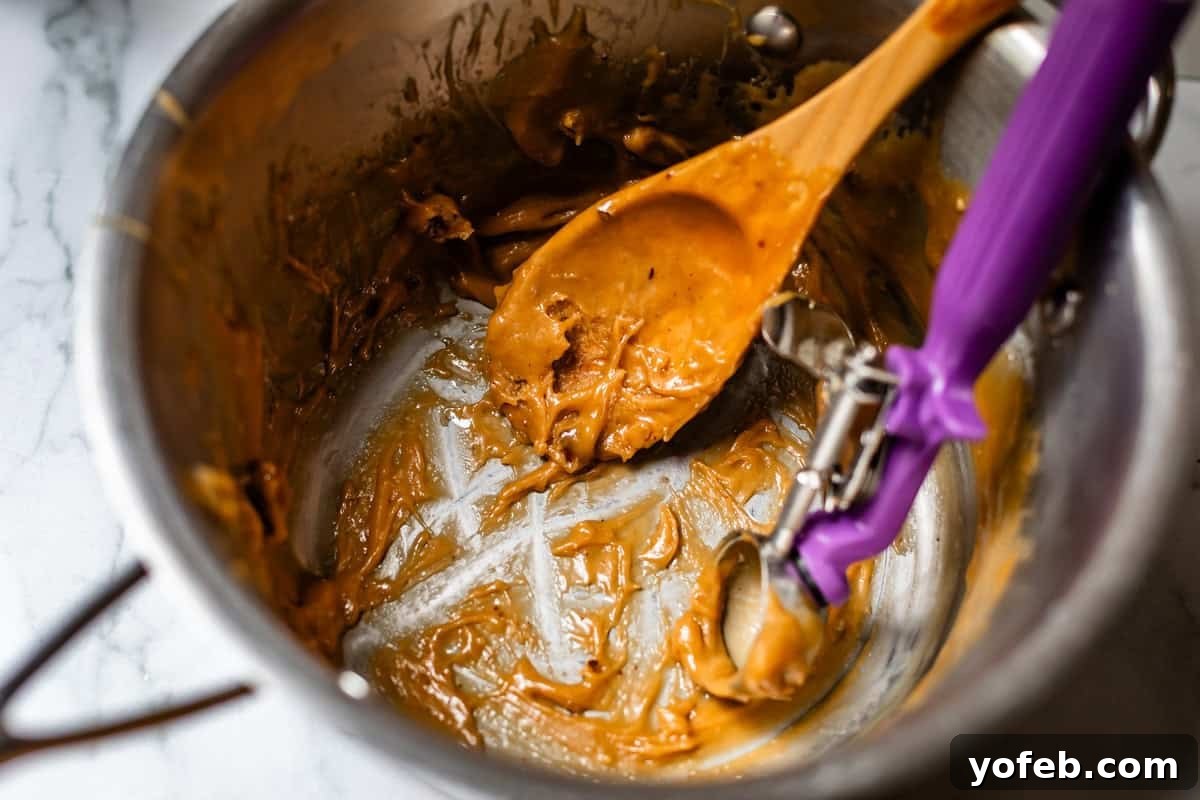
The candy will rapidly harden as it cools, making it impossible to scoop if you hesitate too long. That’s why speed is of the essence!
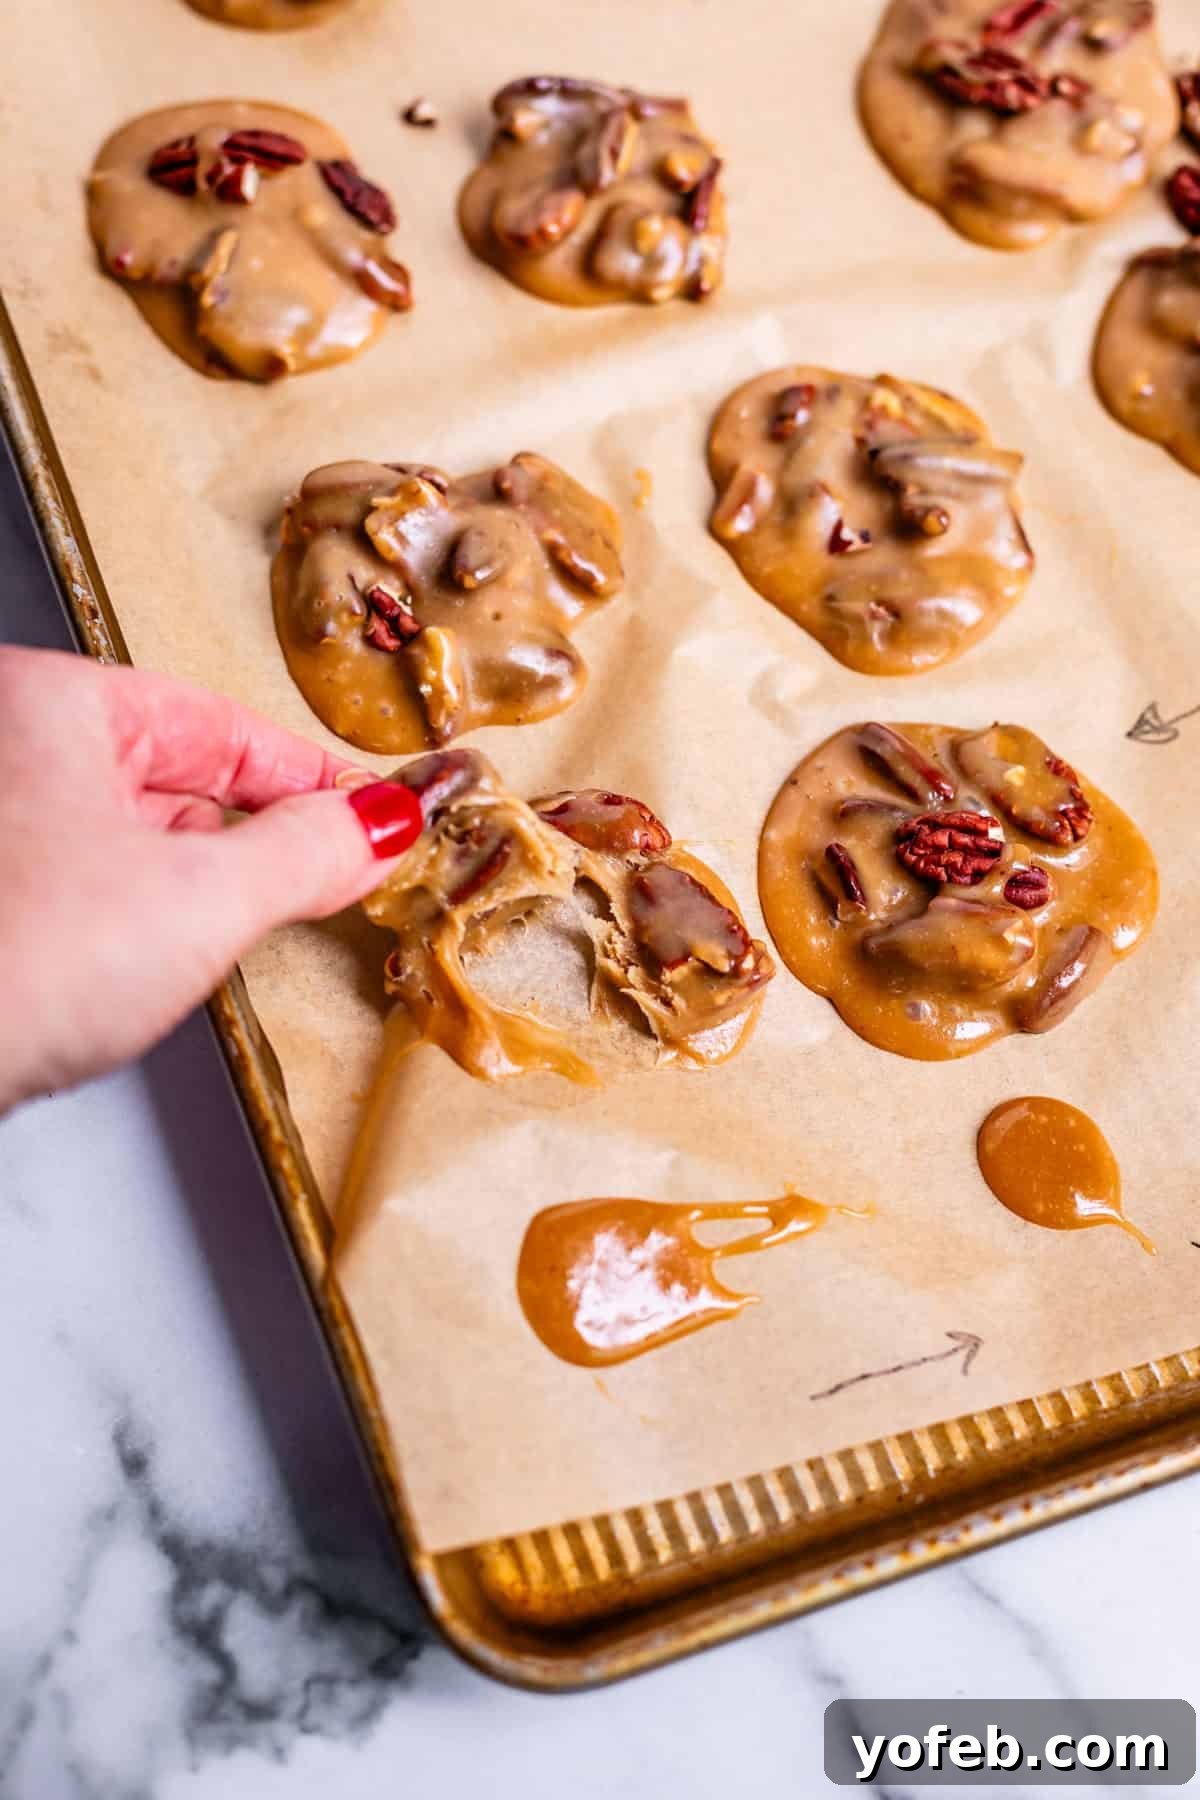
If you drop a praline too early, it will not set. The good news? You can transform these unset pralines into a delicious ice cream topping – nothing goes to waste!
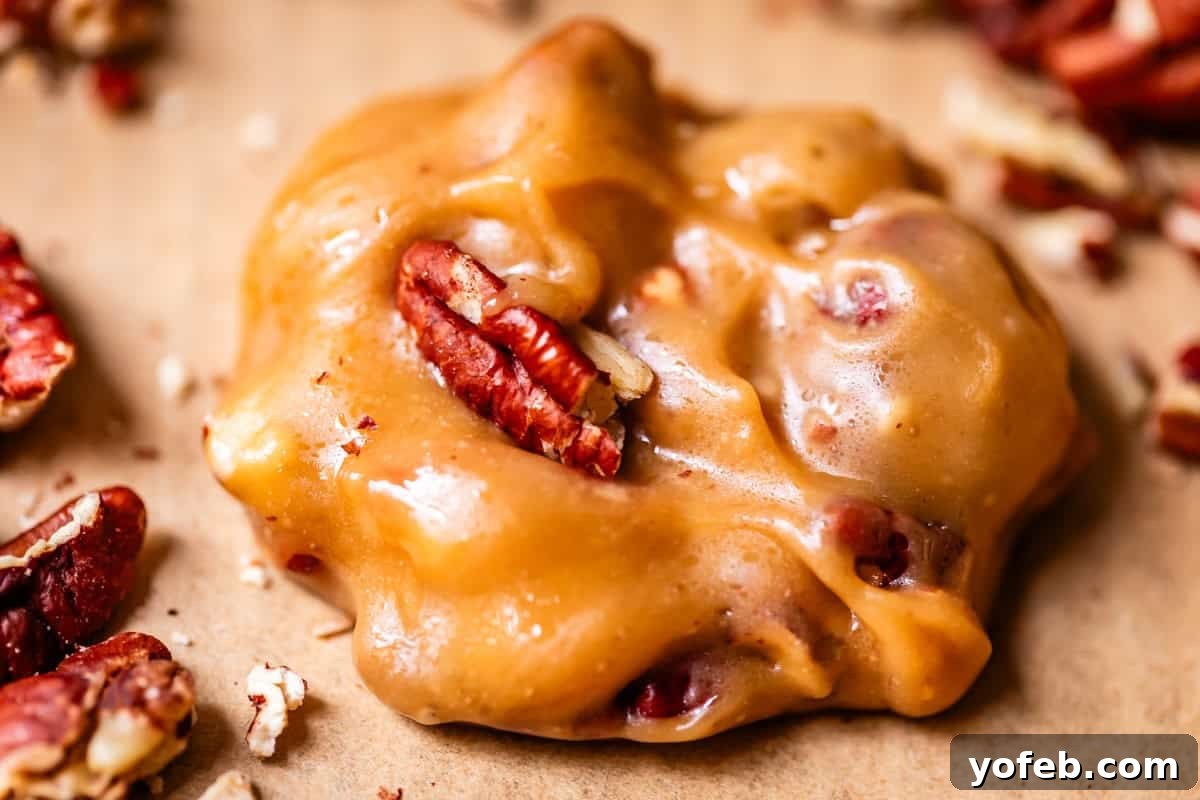
11. Cool Completely: Allow the pralines to cool fully on the pan at room temperature. They are ready when they can be easily lifted with a spatula without bending or sticking, typically after 20-30 minutes. Once you achieve this, you’ve successfully made perfect, non-crystallized pralines! I would absolutely love to see your creations – tag me on Instagram @thefoodcharlatan. Praline making is a rewarding journey, especially when you nail that perfect batch!
Expert Tips for Consistently Perfect Pralines
- Always use a heavy-bottomed pot for any candy-making endeavor. It ensures even heat distribution, preventing scorching and promoting consistent cooking.
- Employ low and steady heat to gradually dissolve sugar and achieve that signature glossy praline look (before it turns opaque). Crucially, do NOT stir during the boiling phase, and always use a reliable candy thermometer to hit the precise temperature targets.
- Work quickly when spooning out the pralines. The mixture sets rapidly, so efficiency is key. Drop them onto a silicone mat or parchment paper to prevent sticking.
- Weather conditions can significantly impact candy making. High humidity can prevent pralines from setting properly, resulting in a sticky texture. Whenever possible, choose a dry, low-humidity day for making pralines.
Frequently Asked Questions About Pecan Pralines
Sticky pralines are most commonly caused by not cooking the candy mixture to the correct temperature (it needs to reach 236°F to set properly) or by making them in a humid environment. Use a candy thermometer for accuracy. If you live in a very humid region and still experience stickiness, try cooking the mixture to 239-240°F. For slightly sticky pralines, refrigerating them (covered) for 10-15 minutes before serving can help firm them up.
Grainy pralines occur when the sugar crystals crystallize. This can happen from improper cooking temperature, sugar crystals splashing onto the pot’s sides, stirring while the mixture boils, or stirring too soon after removing it from the heat. These actions disrupt the delicate chemical process of sugar dissolution and recrystallization. Ensure you use a candy thermometer, avoid stirring during boiling, and wait until the mixture cools to about 120°F before stirring post-cooking.
While not guaranteed every time, you can attempt to salvage them.
Stovetop Method: Place the affected pralines into a clean, heavy-bottomed pot (ensure no residual sugar crystals from previous attempts). Add 2 tablespoons of cream and heat on low until the pralines melt back into a thick liquid. Increase heat to medium (do NOT stir once boiling!) and cook until the mixture reaches 236°F, then continue with the recipe instructions from that point.
Microwave Method: Microwave a few pralines at a time in a bowl with 2 teaspoons of water. Heat for 10 seconds, stir, and repeat until smooth. Let the mixture rest for 30-60 seconds, then re-drop new pralines onto parchment paper.
If these methods don’t work, don’t despair! Transform them into a delicious praline sauce for ice cream or cheesecake. Just add more cream or half-and-half until you reach a smooth, pourable consistency. Yum!
Storing Your Homemade Pecan Pralines
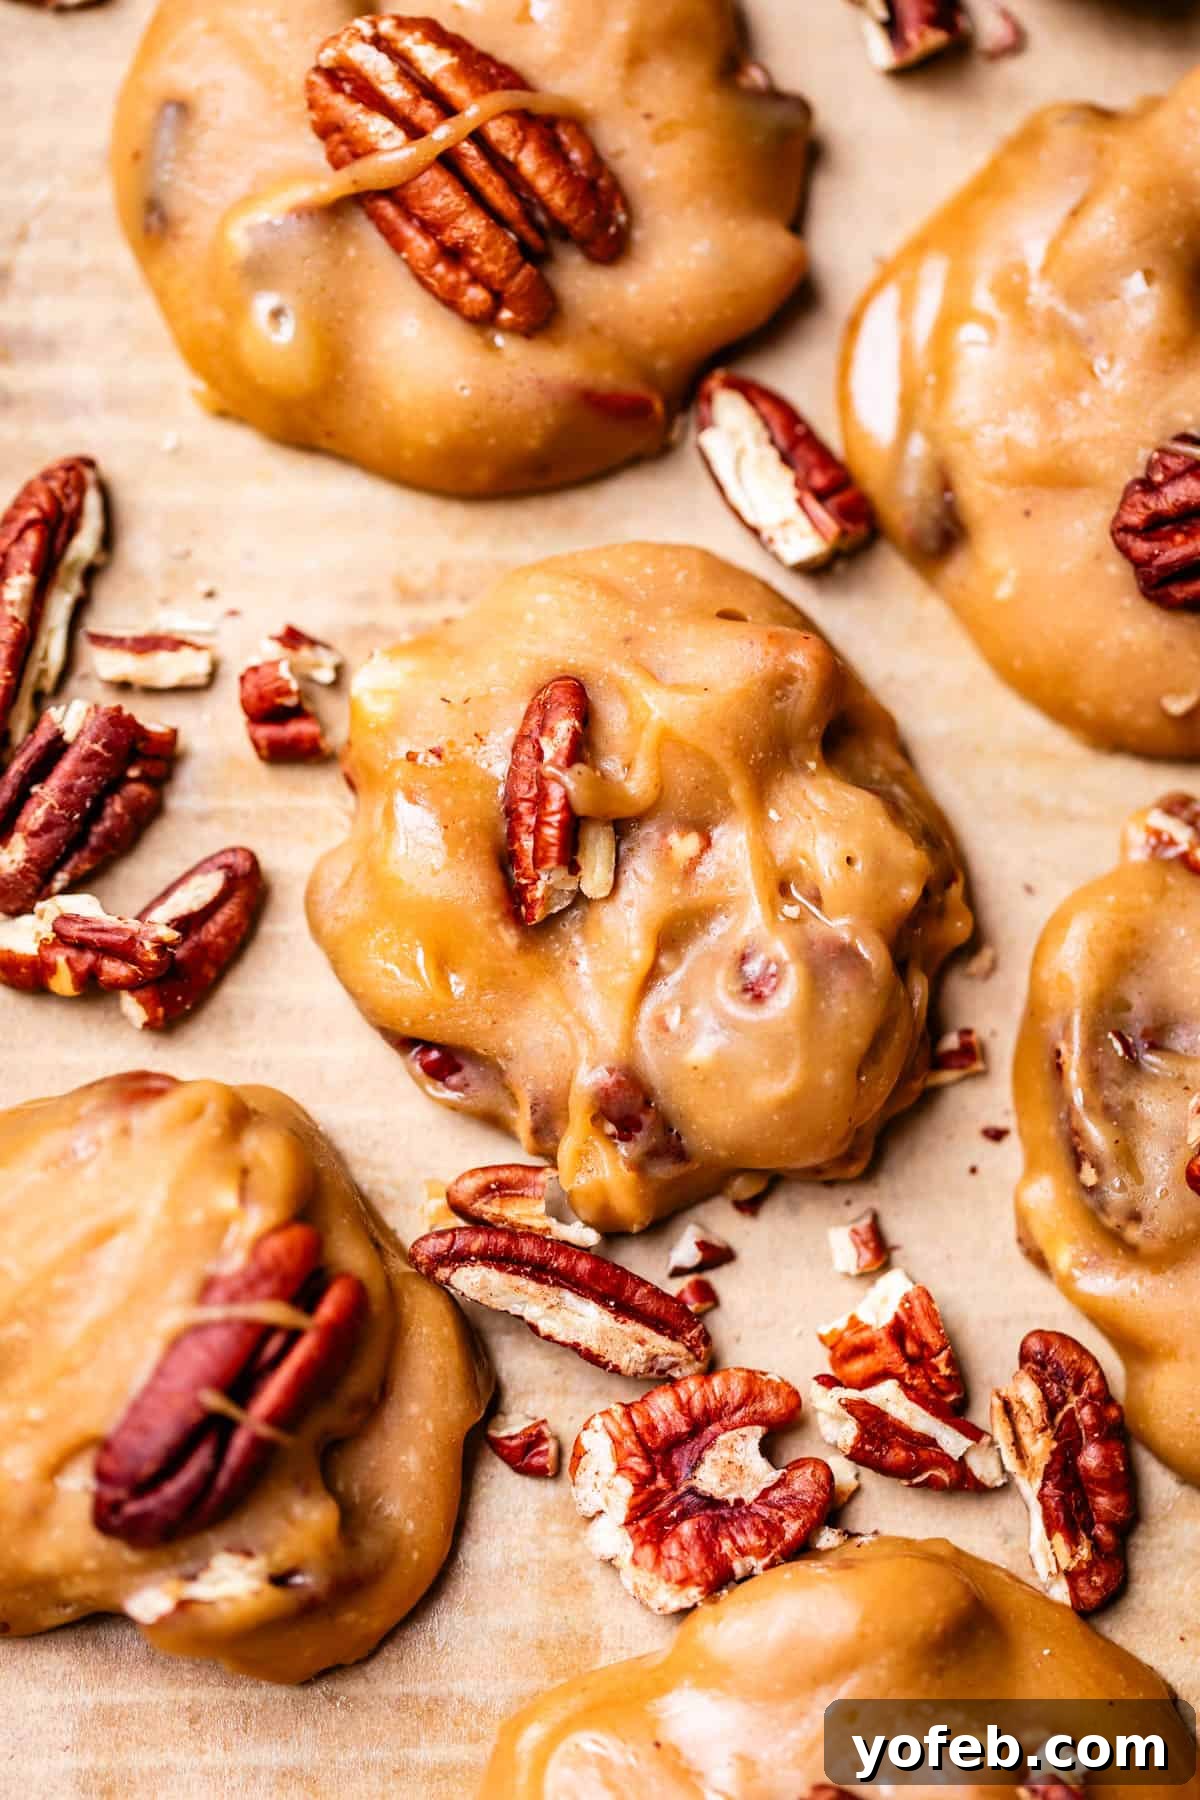
Repeat after me: room temperature is best! Like many candies, the high sugar content acts as a natural preservative, so the goal is to maintain their freshness and soft texture. Refrigerating pralines will quickly dry them out due to the circulating cold air. Instead, store them in an airtight container between layers of parchment paper to prevent sticking. They will remain wonderfully fresh on your countertop for up to two weeks!
Can You Freeze Pecan Pralines?
Absolutely! Pecan pralines freeze remarkably well, making them an excellent make-ahead option. For the absolute best results after freezing, individually wrap each praline tightly in plastic wrap. Then, place all the wrapped candies into a freezer-safe ziplock bag, pressing out as much air as possible before sealing. This method ensures they don’t stick together and retain their soft, chewy texture perfectly.
If individually wrapping feels too time-consuming, you have a couple of alternative options:
1. Place all the pralines (still on their parchment-lined baking sheet) into the freezer for about 20-30 minutes for a “flash freeze.” Once firm, transfer them all to a freezer-safe ziplock bag.
2. Layer the pralines directly into a freezer ziplock bag, separating each layer with parchment paper.
In both alternative methods, remember to remove as much air as possible from the bag before sealing.
For optimal quality, consume frozen pralines within 2-4 weeks (air exposure is the culprit for quality degradation), though they can remain frozen for up to two months. To serve after freezing, arrange the pralines so they are not touching, keep them covered, and allow them to thaw at room temperature for 2-3 hours until they are soft and ready to enjoy.
Satisfy Your Sweet Tooth: More Delicious Candy Recipes
Candy making, while initially challenging, offers incredibly sweet rewards! Homemade candies are also fantastic options for sharing during the holidays. Here are a few of my absolute favorites, but feel free to explore the full Candy & Fudge page on the blog for even more tempting ideas!
Dessert
Caramel Nougat Pecan Rolls
Candy & Fudge Recipes
Peanut Butter Fudge Recipe
Dessert
Mom’s Easy Fudge Recipe
Candy & Fudge Recipes
Soft Homemade Caramel Candy
Facebook | Pinterest | Instagram

Pecan Pralines
Rate this Recipe
Print Recipe
Pecan pralines are a buttery, caramel-y, melt-in-your-mouth cookie. Or is it candy? It’s kind of both! The recipe consists of toasted, crunchy pecans in a dreamy cloud of brown sugar, caramel-y, creamy, fudgy candy, dropped into the shape of a cookie. They are a New Orleans classic, and I am obsessed. You only need a few easy ingredients to make them! Follow my step-by-step guide for your new favorite Christmas neighbor treat!
Ingredients
- 4 tablespoons butter
- 1 cup heavy cream
- 1 and 1/2 cups brown sugar, packed
- 1 and 1/4 cups granulated sugar
- 2 tablespoons corn syrup
- 3 tablespoons fresh lemon juice
- 1/2 teaspoon kosher salt
- 1 teaspoon baking soda, sifted
- 1 teaspoon vanilla extract
- 2 cups pecans, TOASTED (essential for flavor!)
Instructions
- Toast your pecans. Preheat the oven to 350 degrees F. Spread 2 cups pecan halves in a single layer on a rimmed baking sheet. Toast for about 5 minutes, then stir. Continue stirring every 2 minutes until the pecans are very fragrant and the tips of some turn dark brown. This indicates they are perfectly toasted. Remove from the oven and set aside to cool.
- Prepare your pans. Line 2 half baking sheets with parchment paper or silicone mats. Set aside.
- Butter the pot: Place a heavy-bottomed 3-quart pot on the stove over medium-low heat. Add 4 tablespoons butter to the pot. Use a wooden spoon to spread the melting butter all around the inner edges, coating the bottom and sides of the pot completely, all the way to the top. This crucial step helps prevent sugar crystallization.
- Immediately add 1 cup heavy cream to the pot.
- To the center of the pot, avoiding the sides, add 1 and 1/2 cup packed brown sugar and 1 and 1/4 cups granulated sugar. Gently stir the mixture with a wooden spoon.
- Add 2 tablespoons corn syrup, 3 tablespoons fresh lemon juice, and 1/2 teaspoon kosher salt.
- Dissolve the sugar SLOWLY. Continue stirring the mixture occasionally over medium-low heat for about 5-10 minutes. The primary goal is to ensure all sugar is completely dissolved into the liquid before the mixture comes to a boil. You may increase the heat to medium if it’s dissolving too slowly, but be cautious not to bring it to a boil too quickly.
- Rub the mixture between your fingers: Test for dissolved sugar by dipping a finger into the mixture and rubbing it between two fingers. If it feels completely smooth, all the sugar is dissolved. If you detect any grittiness, continue cooking at medium-low heat until smooth.
- Bring to a boil. Once you are certain the sugar is completely dissolved, increase the heat to medium and bring the mixture to a rolling boil.
- Do not stir: As soon as the mixture begins to bubble vigorously from the center, remove your wooden spoon and place it in the sink. Do NOT stir while the mixture boils, as this can cause crystallization.
- Candy thermometer. Allow the mixture to boil for 3-7 minutes (exact times vary depending on many factors). Insert your candy thermometer into the pot, ensuring it doesn’t touch the bottom, and monitor the temperature. Continue boiling until the thermometer reads 236 degrees F.
- Remove from heat immediately when the candy reaches 236 degrees F. DO NOT STIR. Place the pot on a cooling rack, away from the stove, to begin cooling.
- WAIT. This step requires patience. Let your candy cool undisturbed for approximately 20-40 minutes (this duration will vary based on your room temperature). Periodically check the temperature with your candy thermometer. When the candy cools down to about 115 degrees F, it’s time for the next steps.
- When your candy has cooled to 115 degrees F, use a brand new, clean wooden spoon to add 1 teaspoon of SIFTED baking soda (to prevent clumps) and 1 teaspoon vanilla extract.
- Stir the mixture for 2 minutes: NOW, it’s finally time to stir! Do not skip this step, or your pralines will not set properly. Beat the baking soda and vanilla into the mixture vigorously. Even though it’s off the stove, you will observe the baking soda working its magic, causing the mixture to bubble and froth slightly. This is how we achieve creamy pralines.
- Add 2 cups pecans. Stir in the 2 cups of toasted pecan halves.
- Keep your thermometer in the candy. Continue stirring. When the candy reaches about 105-110 degrees F, it’s time to start testing the mixture on the cookie sheet.
- Test: Drop a small teaspoon of the candy (without any nuts) onto a parchment-lined pan. If the drop is shiny and glossy, even after a moment, it’s too early. Continue stirring. Refer to the photos in the main article for visual cues.
- When you drop a teaspoon of candy and it begins to look opaque, not glossy or shiny, that’s your signal that the candy is ready to drop. The candy should appear fudgy and creamy, with rounded edges that look plump, rather than instantly flattening out like a liquid.
- GET MOVING. Once your candy reaches this perfect dropping temperature, you must work very quickly. You have a limited window before the mixture cools too much to be properly dropped.
- Drop the pralines. Use a spoon, or a 1 3/4-inch cookie scoop, to drop individual pralines onto your prepared sheets, leaving adequate space between them to prevent merging.
- If you notice the pralines you are dropping look too glossy and shiny, stop immediately and stir the pot again to bring the mixture back to the correct consistency. Dropping them before they are opaque will prevent them from setting and holding their shape.
- Continue dropping pralines until all the candy is shaped. You should yield about 27-30 pralines, depending on their size.
- Let cool completely. Allow the pralines to cool on the pan at room temperature until they are firm enough to be easily lifted with a spatula without bending, typically 20-30 minutes.
- Store pralines tightly sealed on the countertop. Avoid refrigeration, as it will dry them out quickly. Store them in an airtight container; for maximum freshness, wrap each praline individually in plastic wrap.
- Freezing: Pralines freeze exceptionally well, making them a great make-ahead option. Individually wrap each praline in plastic wrap. Place all wrapped candies into a freezer-safe ziplock bag, remove as much air as possible, and seal. This ensures they won’t stick together and will maintain their soft, chewy texture. They are best when consumed within 2-4 weeks, but can remain frozen for up to 2 months.
- To serve after freezing, ensure candies are not directly touching each other to prevent sticking. Keep them covered and let them thaw at room temperature for 2-3 hours until soft.
Notes
*Toasting pecans: You can also toast pecans on the stovetop in a dry pan over medium heat, stirring constantly until they are fragrant and turning brown. However, stovetop toasting can be less even, so the oven method is generally preferred for consistent results.
**Heavy cream: Heavy cream is found in the dairy section near milk. It is not coffee creamer. It may also be labeled as whipping cream or ultra-heavy whipping cream; any type of cream will work for this recipe, with higher fat content yielding richer candy.
**Heavy cream substitutes: You can use 1 cup of evaporated milk in place of the heavy cream!
HUMIDITY WARNING: Do not attempt to make pralines if the humidity is over 80%!
My extensive testing revealed that humidity dramatically impacts praline setting. On days with high humidity (e.g., 88% and foggy), even drastic temperature adjustments (like cooking to 245°F instead of 236°F) failed to make them set properly. To ensure success, wait for a dry, low-humidity day!
Nutrition
Calories: 165kcal | Carbohydrates: 21g | Protein: 1g | Fat: 9g | Saturated Fat: 3g | Polyunsaturated Fat: 2g | Monounsaturated Fat: 4g | Trans Fat: 0.1g | Cholesterol: 13mg | Potassium: 52mg | Fiber: 1g | Sugar: 21g | Vitamin A: 167IU | Vitamin C: 1mg | Calcium: 20mg | Iron: 0.3mg
Mention @thefoodcharlatan or tag #thefoodcharlatan!