
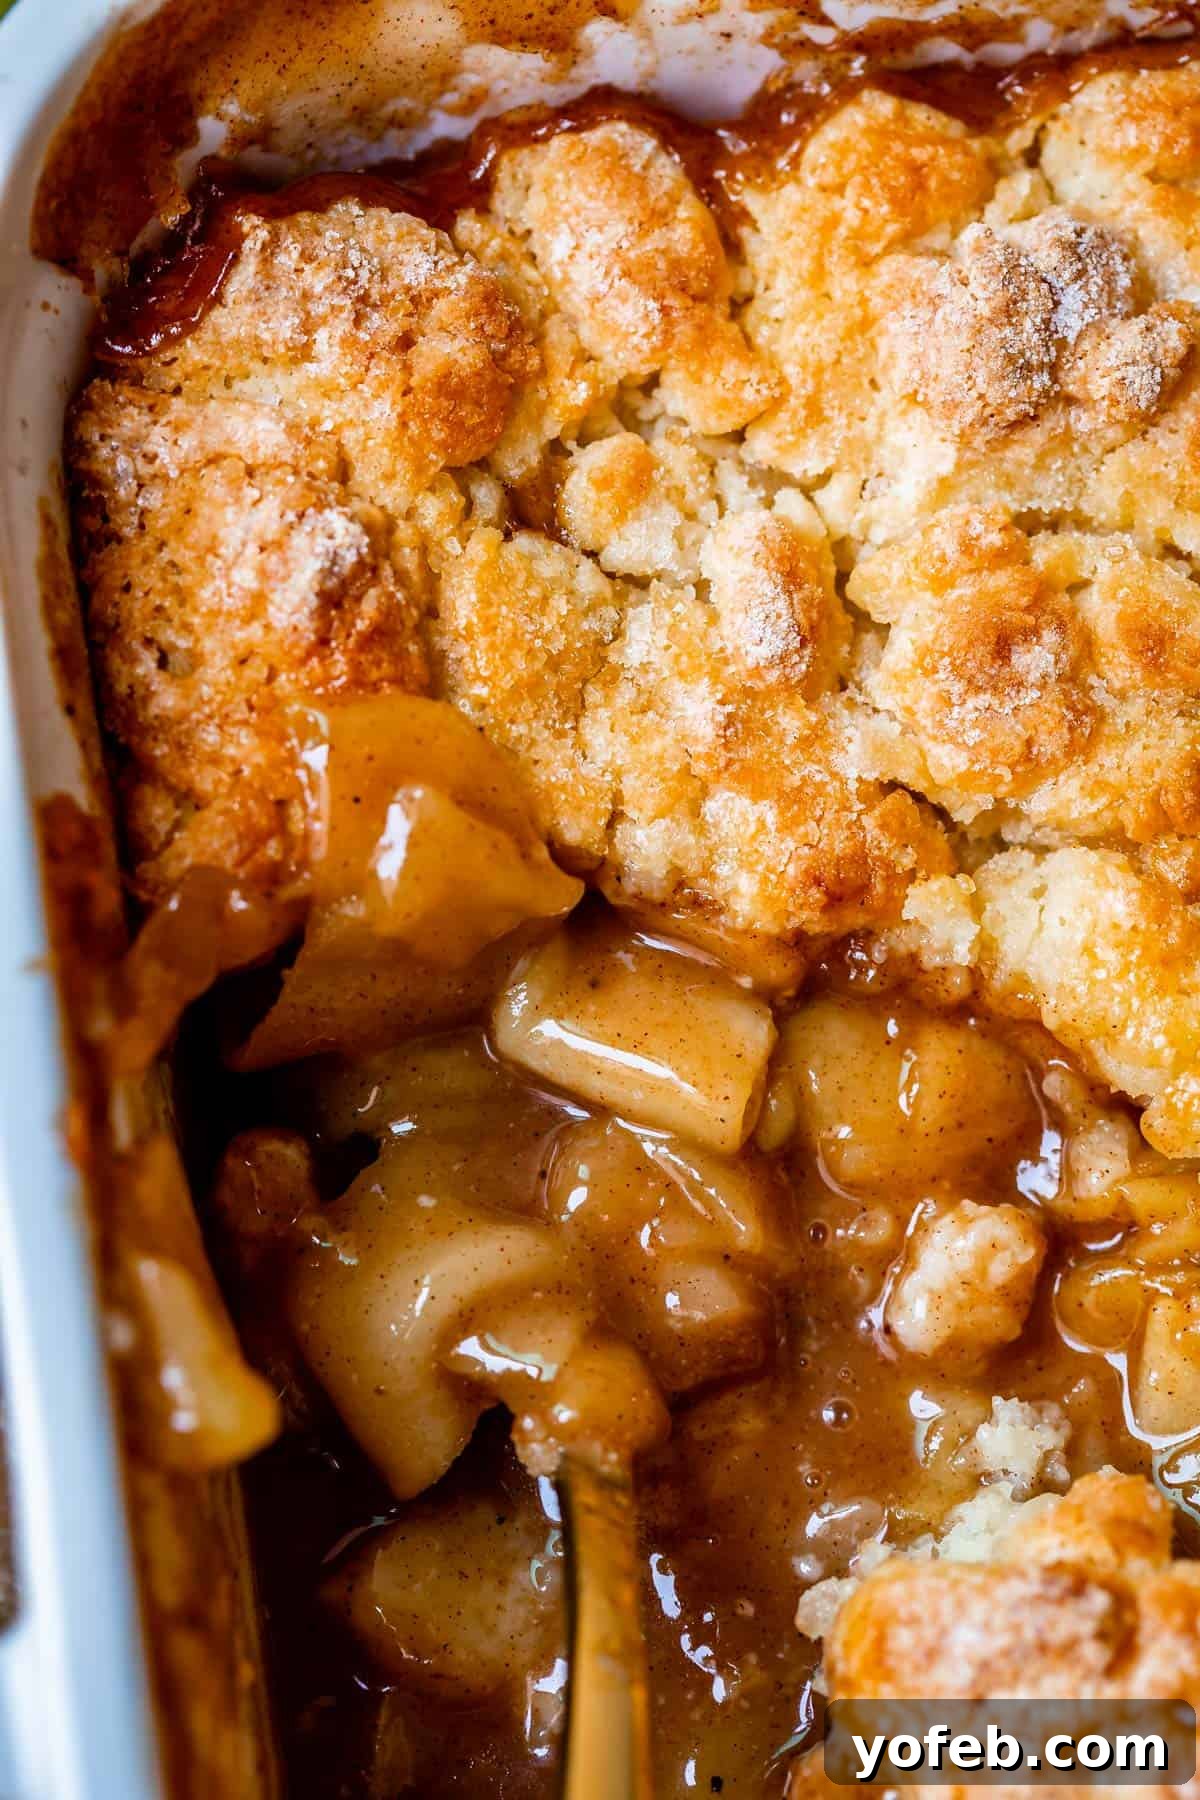
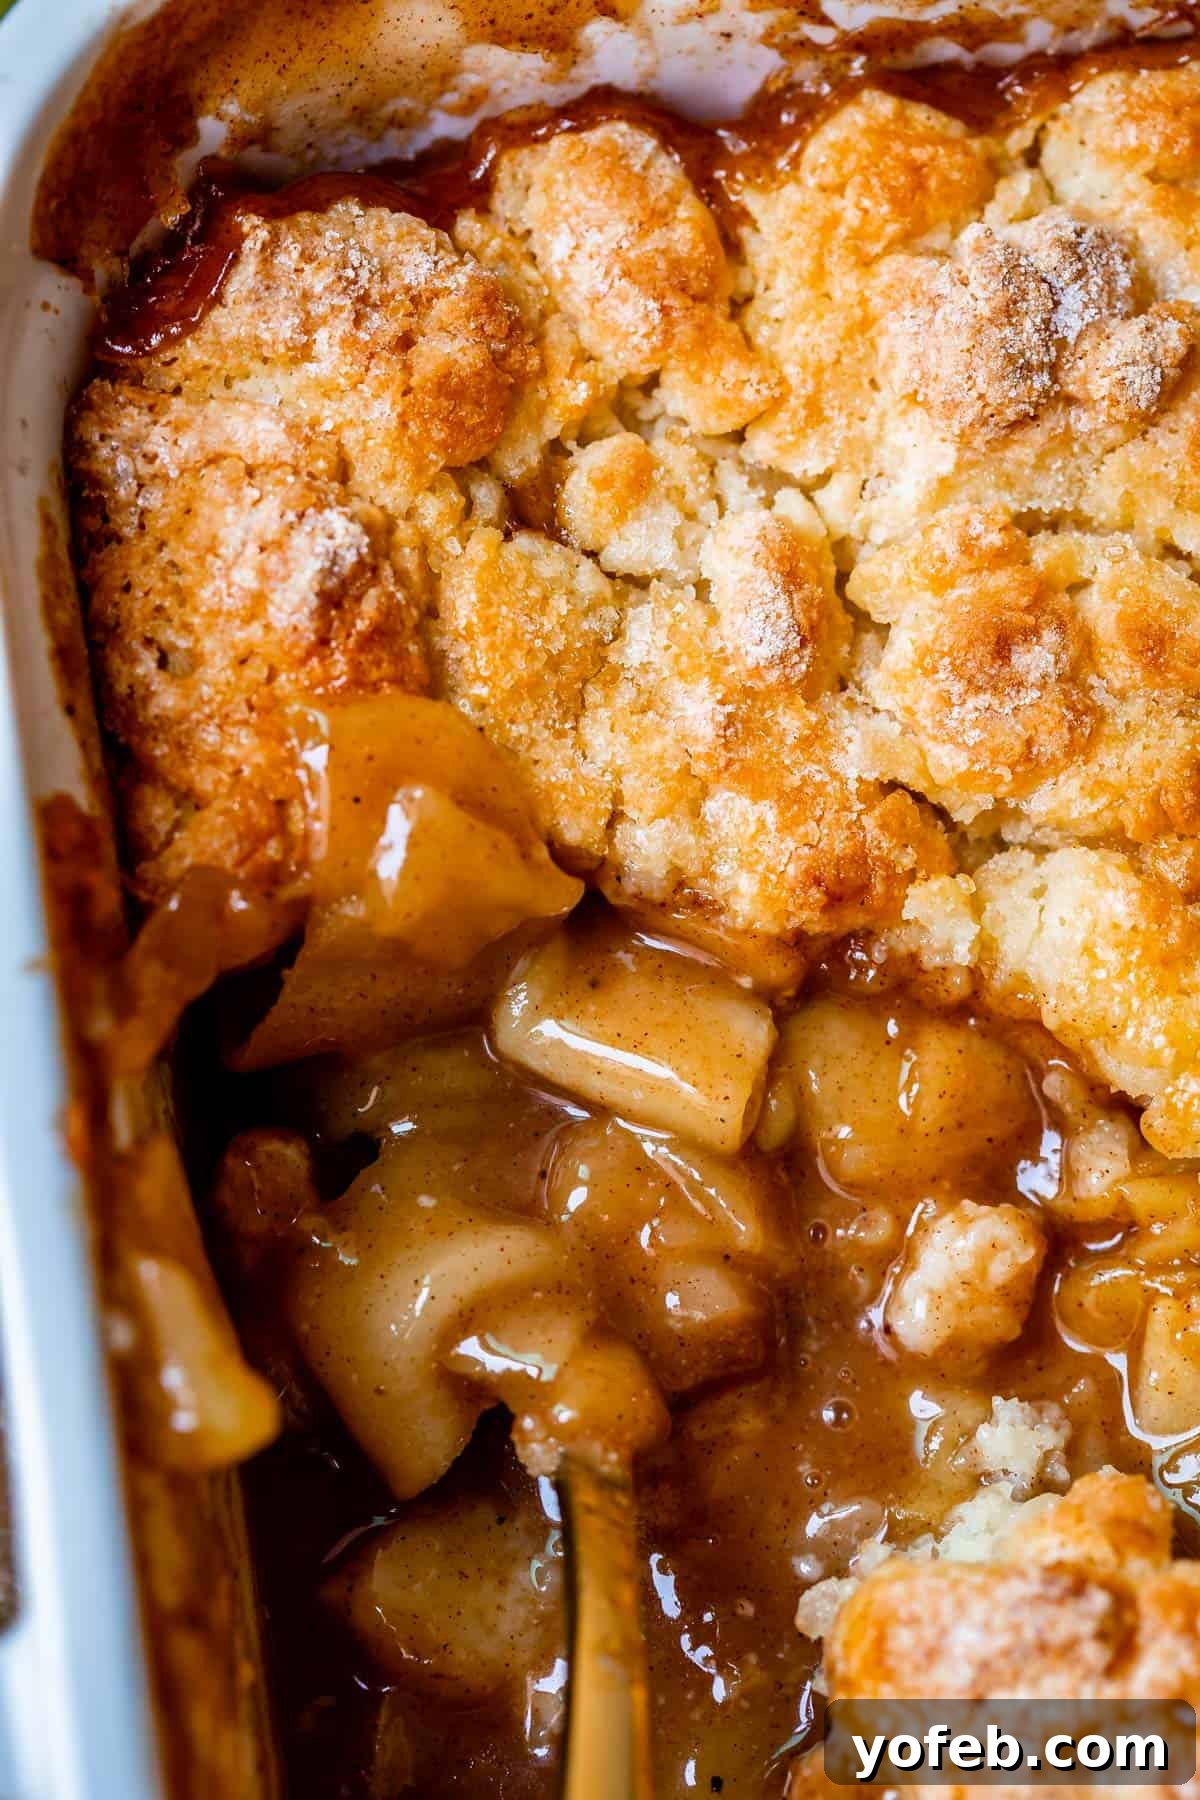
There’s something truly special about a homemade apple cobbler. It’s the kind of dessert that instantly transports you to cozy autumn evenings, family gatherings, or simply a moment of pure comfort. Forget its more crumbly cousin, the apple crisp; apple cobbler stands out with its distinct, biscuity, cake-like topping that offers a tender bite with a perfectly golden, crisp edge. Filled with perfectly spiced, juicy apples, this dessert is an irresistible way to celebrate the bounty of a fresh apple harvest. Our easy recipe ensures a moist, flavorful experience every time, making it a crowd-pleaser for any occasion, from a festive holiday meal to a casual backyard BBQ.
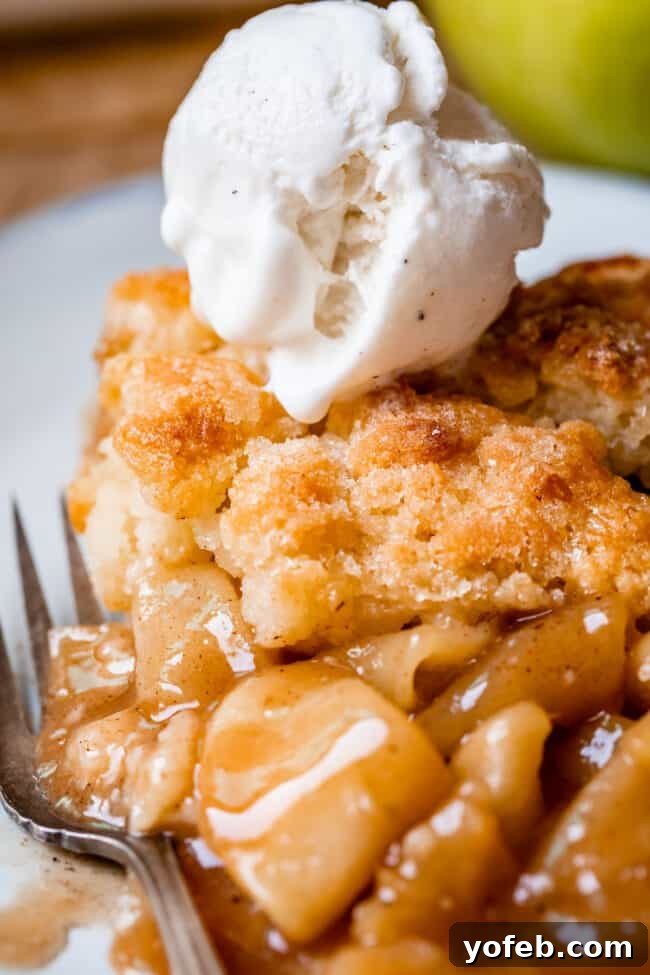
Table of Contents
- Why This Easy Apple Cobbler Recipe is a Must-Try
- What Exactly is an Apple Cobbler?
- Cobbler vs. Crisp: Understanding the Difference
- Essential Ingredients for Your Homemade Apple Cobbler
- Step-by-Step Guide to Making the Best Apple Cobbler
- The Secret to a Perfect Cobbler Topping
- Serving and Storing Your Apple Cobbler
- Frequently Asked Questions About Apple Cobbler
- More Delicious Apple Recipes to Explore!
- Easy Recipe for Apple Cobbler
Forget the mundane and embrace the extraordinary with this spectacular apple cobbler. While the world may be obsessed with staying hydrated with high-tech water bottles, we believe some indulgences are simply essential for the soul. And few things nourish the soul quite like a warm, comforting dessert that speaks of home and tradition. This recipe, a delicious hybrid of our wildly popular peach cobbler and a beloved apple pie, promises to be a new family favorite. It’s not just a dessert; it’s an experience, a celebration of simple, wholesome flavors that come together to create something truly magical.
Whether you’ve just returned from a delightful trip to the apple orchard, armed with a bushel of freshly picked fruit, or simply found a fantastic selection at your local market, this easy apple cobbler recipe is the perfect way to transform those crisp apples into a warm, inviting dessert. It’s robust enough for a holiday feast and comforting enough for a quiet weeknight treat. Get ready to impress your loved ones with this incredible concoction that’s sure to become a cherished part of your culinary repertoire.
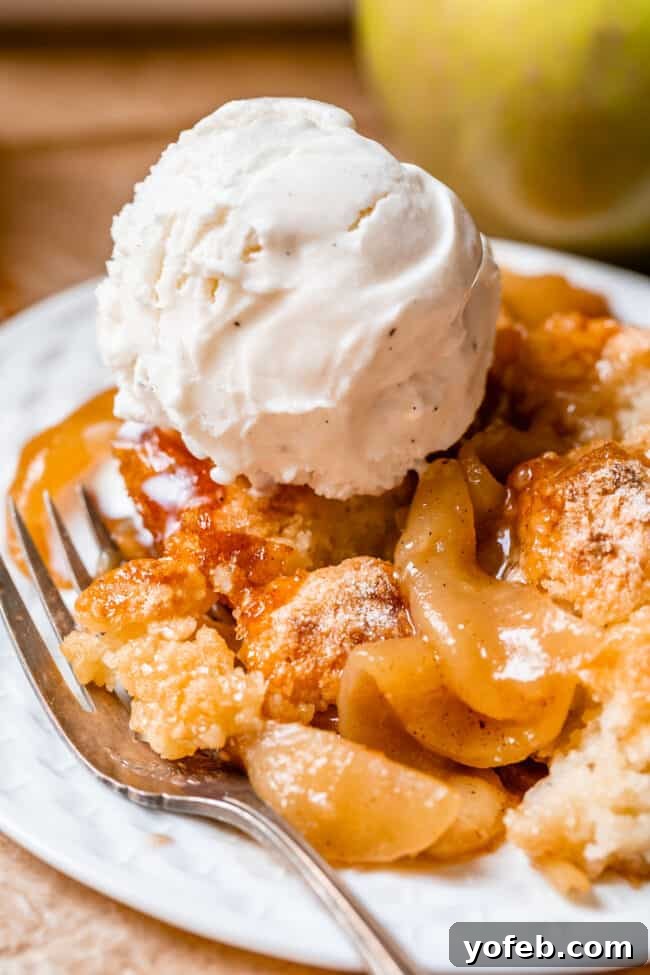
Why This Easy Apple Cobbler Recipe is a Must-Try
This isn’t just another apple dessert; it’s a culinary masterpiece that combines the best elements of classic fruit bakes. We’ve taken the rich, comforting flavors of our popular Apple Pie filling and paired it with the beloved, tender topping from our top-rated Peach Cobbler recipe. The result is an apple cobbler that’s unparalleled in flavor and texture. The apples are simmered to perfection before baking, ensuring they are fork-tender and bursting with caramelized flavor, without becoming mushy. This pre-cooking step is a game-changer, transforming ordinary apples into a luxurious, spiced fruit base. Topped with a fluffy, buttermilk biscuit-like dough that bakes into a golden, slightly crunchy crust, this cobbler offers an incredible contrast of textures and tastes. It’s simple enough for novice bakers yet delivers gourmet results that will impress even the most discerning dessert connoisseurs.
What Exactly is an Apple Cobbler?
A cobbler is a traditional baked fruit dessert characterized by a juicy fruit base, typically topped with a thick, scone-like or biscuit-like dough. Unlike pies, cobblers do not have a bottom crust, making them simpler and quicker to prepare. For an Apple Cobbler, slices of fresh apples are lovingly seasoned with a blend of warm spices like cinnamon, nutmeg, and a hint of cardamom, then often sweetened with sugar. This flavorful fruit mixture is then transferred to a casserole dish. The defining feature is the generous layer of sweet biscuit or cake-like dough strategically placed over the fruit, which puffs up during baking to create a rustic, “cobbled” appearance, hence the name.
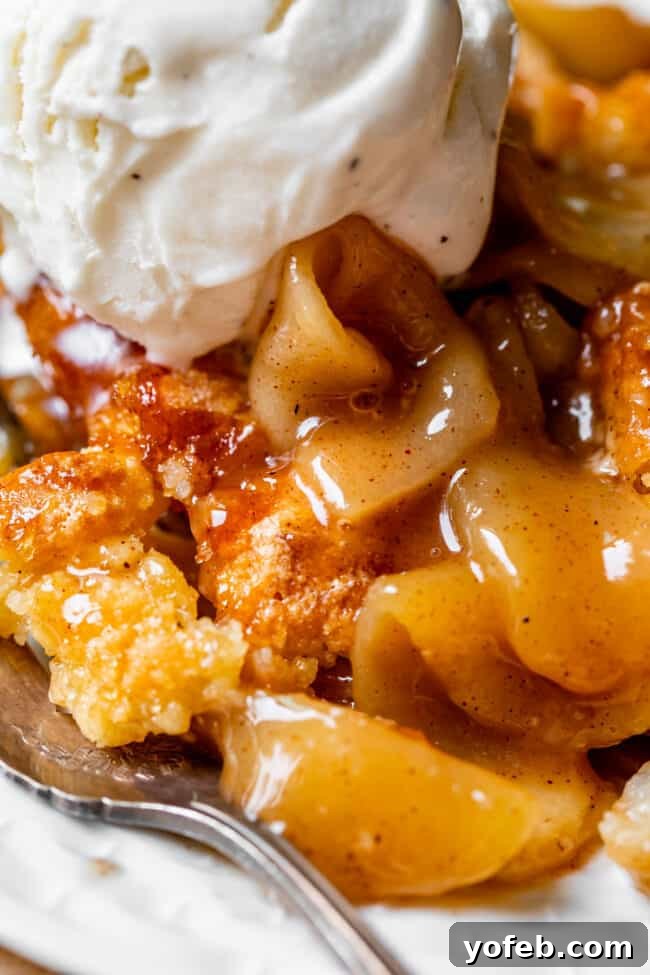
Our specific recipe elevates the classic by pre-cooking the apple filling before it even enters the oven. While it might seem like an extra step, this technique is a culinary secret weapon. Apples naturally contain a lot of water, and cooking them gently on the stovetop helps to evaporate some of this excess moisture, concentrating the apple flavor. More importantly, this process stabilizes the pectin in the apples. This scientific magic means the apples will maintain their desired “al dente” texture even after further baking, preventing them from turning into an unappetizing mush. You get full, vibrant apple flavor and a perfectly tender bite every time, something that’s harder to achieve with raw apples that can often end up half-baked or watery.
Cobbler vs. Crisp: Understanding the Difference
The world of baked fruit desserts can be a bit confusing with all its delightful variations. Let’s set the record straight on the key differences between apple crisp and apple cobbler:
- Apple Crisp: This dessert features a fruit filling (apples, in this case) baked beneath a streusel topping. The streusel is typically made with oats, flour, brown sugar, and butter, creating a crumbly, often crunchy, texture. While some crisps have a thin topping, our Apple Crisp with a Ridiculous Amount of Streusel goes for maximum crunch and flavor!
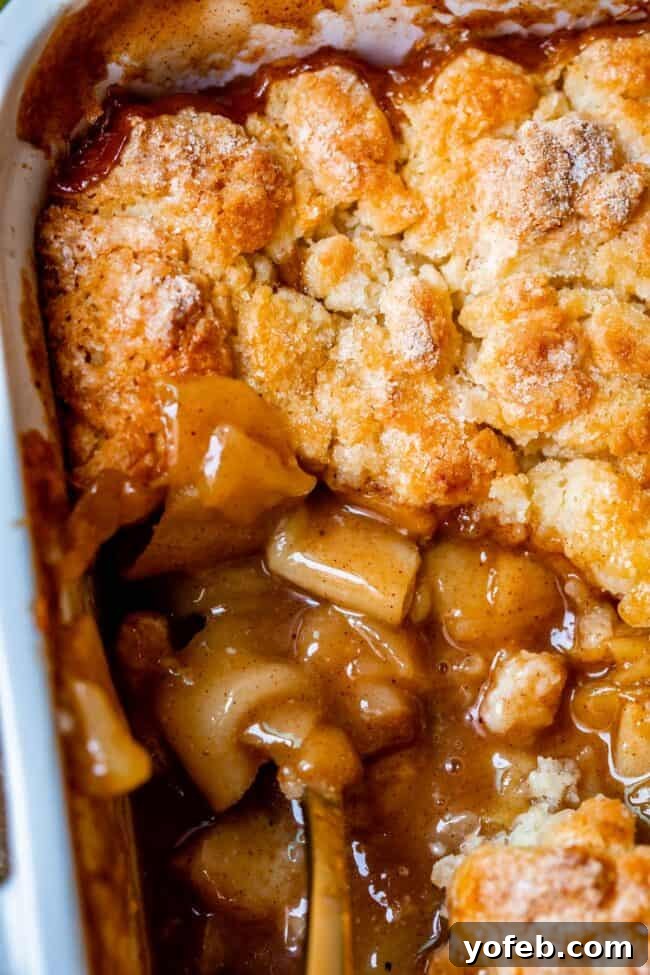
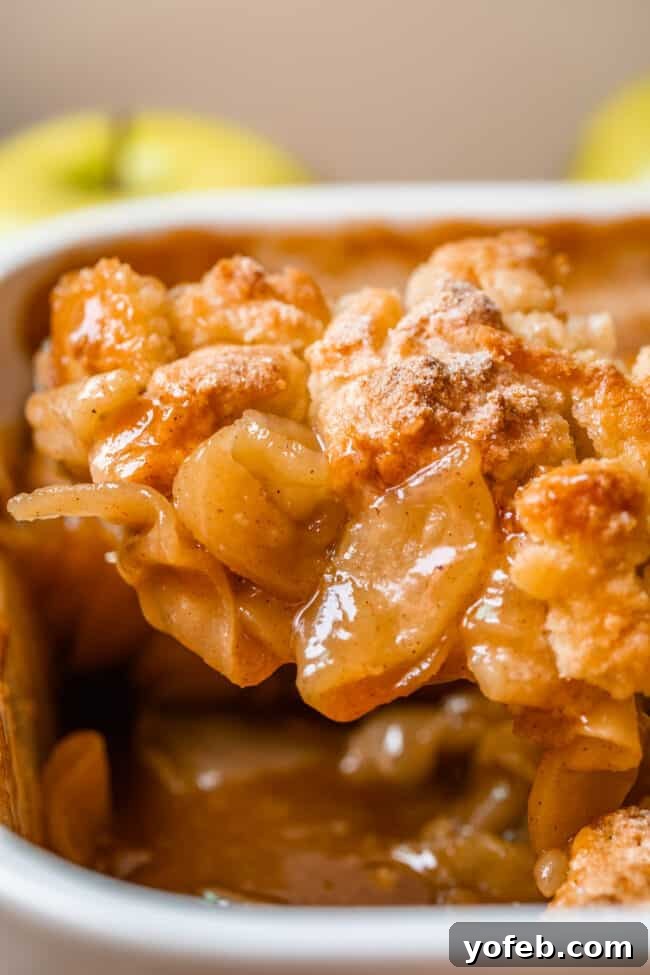
- Apple Cobbler: In contrast, an apple cobbler boasts a topping made from a biscuit-like dough. This dough is often enriched with buttermilk, giving it a soft, cake-like interior with a golden, slightly crispy exterior. There are no oats or nuts in a traditional cobbler topping. The dough is dropped or spread over the fruit, creating a “cobbled” or somewhat uneven, rustic look as it bakes and puffs up. The result is a tender, sweet biscuit layer contrasting beautifully with the rich, caramelized apples below.
So, while both are glorious ways to enjoy baked apples, their toppings are what truly set them apart. Now that we’re clear on our apple dessert terminology, let’s dive into making this exceptional Apple Cobbler!
Essential Ingredients for Your Homemade Apple Cobbler
Crafting the perfect apple cobbler begins with selecting the right ingredients. Here’s a comprehensive list of what you’ll need. Consider this your shopping guide for a truly unforgettable dessert. The full, detailed recipe with exact measurements can be found at the end of this post.
For the Apple Filling:
- Apples: A blend of sweet and tart varieties (e.g., Gala, Honeycrisp, Granny Smith) for balanced flavor and texture.
- Lemon: Both zest and juice, to brighten flavors and prevent browning.
- Sugars: Granulated sugar and brown sugar for a complex sweetness and caramel notes.
- All-purpose flour: To thicken the apple juices into a luxurious sauce.
- Spices: Cinnamon, nutmeg, and optional (but highly recommended) cardamom for warmth and depth.
- Kosher salt: To balance the sweetness.
- Vanilla extract: A touch of aromatic sweetness.
For the Cobbler Topping:
- All-purpose flour: The structural base for our tender topping.
- Granulated sugar: For sweetness in the biscuit dough.
- Kosher salt: To enhance flavors.
- Baking powder: The leavening agent that makes the topping light and fluffy.
- Buttermilk: Essential for a tender crumb and tangy flavor. (Don’t have it? We’ll show you how to make a “cheater” version!)
- Egg: Adds richness and helps bind the dough.
- Cold butter: Cut into chunks, crucial for creating that desirable crispy edge and flaky texture.
- Extra sugar: For sprinkling on top, adding a beautiful sparkle and extra crunch.
Step-by-Step Guide to Making the Best Apple Cobbler
Creating this delicious apple cobbler is a straightforward process, especially with our proven methods. Follow these steps for a perfect outcome.
1. Prepare Your Apples
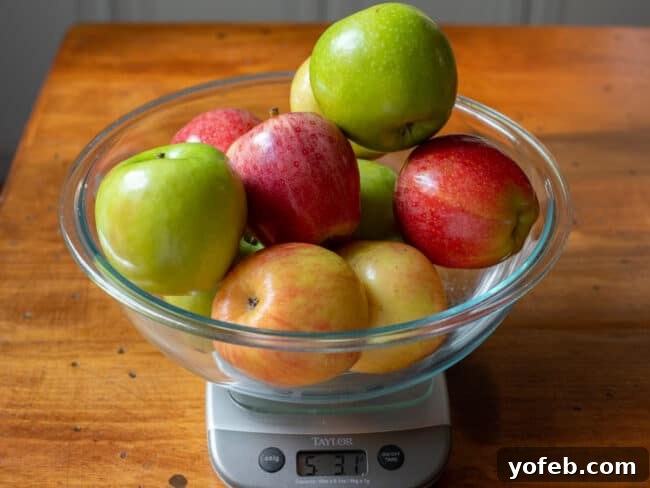
The first crucial step is selecting and preparing your apples. For the most nuanced and delicious flavor, we highly recommend using a variety of apples. Combining sweet, tart, and firm varieties (like Gala, Honeycrisp, and Granny Smith) creates a complex flavor profile and ensures a satisfying texture. Aim for about 5 pounds, which typically translates to 9-11 large apples. Begin by peeling all your apples using a sturdy vegetable peeler or a specialized apple peeler. Next, slice them thinly, aiming for about 1/8 inch thickness. Thin slices are essential to ensure the apples cook evenly and are tender throughout, preventing any tough, undercooked chunks in your cobbler. As you slice, toss the apples with fresh lemon juice and zest in a large, high-sided skillet to prevent browning and add a bright, fresh note.
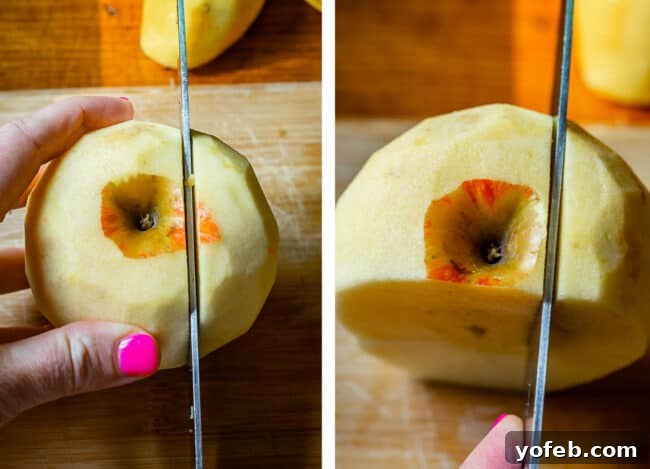
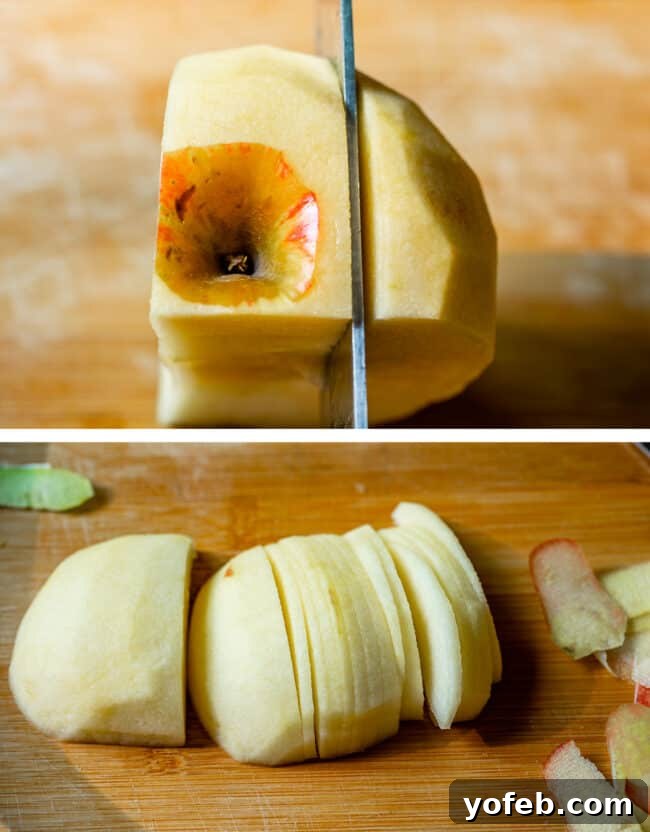
2. Pre-Cook the Apple Filling (Highly Recommended!)
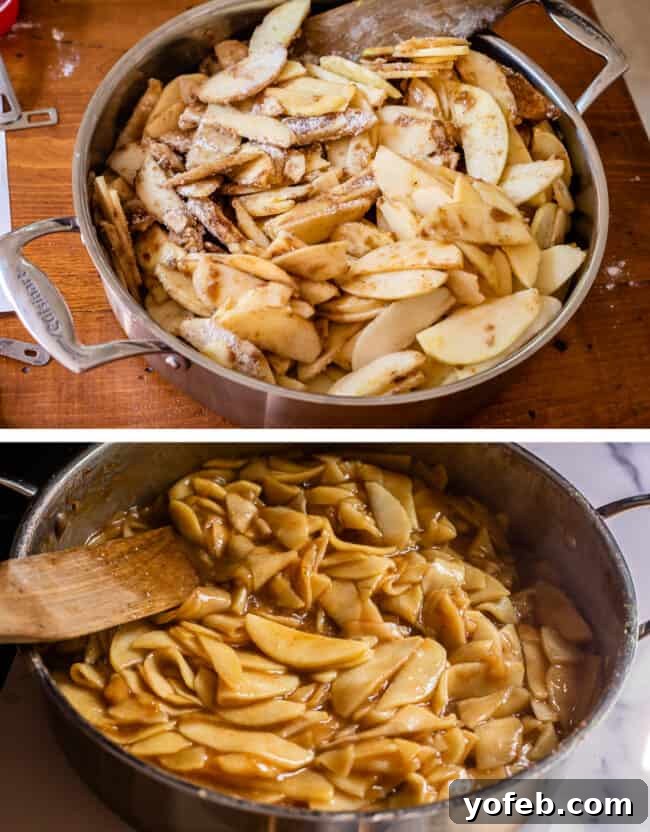
This step is where our cobbler truly shines! Once your apples are sliced and mixed with lemon, add the granulated sugar, brown sugar, flour, cinnamon, nutmeg, cardamom (if using), and kosher salt to the skillet. Stir gently to combine everything. Place the skillet over medium heat, cover it with a lid, and let the apples simmer for about 20 minutes. Be sure to stir the mixture every 2-3 minutes, replacing the lid each time to trap the steam. This gentle cooking process allows the apples to soften and release their juices, which then combine with the sugars and flour to create a rich, caramel-like sauce. The pectin in the apples stabilizes during this stage, meaning your apples will hold their tender-crisp texture even after baking in the oven. You can adjust the cooking time here to achieve your preferred level of tenderness: cook longer for softer apples, or slightly shorter if you prefer them with a bit more bite.
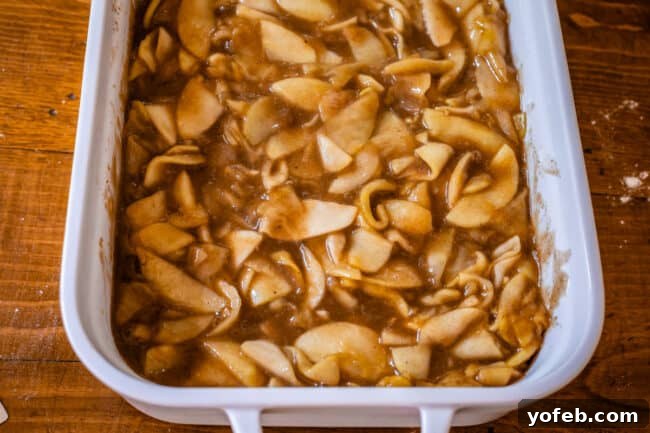
After 20 minutes, remove the skillet from the heat and stir in the vanilla extract. Transfer this glorious, bubbling apple mixture into a 9×13 inch casserole dish. Set it aside to cool slightly while you prepare the topping.
Optional: Skipping the Pre-Cook Step
While we strongly advocate for pre-cooking the apples for superior flavor and texture, we understand that sometimes you’re short on time. If you choose to skip this step, here’s what to consider:
Benefits of Cooked Apples:
- Intensified apple flavor due to reduced moisture.
- Consistently tender, “al dente” apples throughout.
- A rich, deeply caramelized sauce that coats every apple slice.
- Predictable results – no worrying about undercooked centers.
Considerations for Raw Apples:
- Faster prep time.
- Potentially more watery sauce.
- Flavor may be less concentrated.
- Apples might cook unevenly (softer at edges, firmer in the center).
- Requires more flour for thickening (1/2 cup instead of 5 tablespoons).
If opting for raw apples, combine all filling ingredients (remembering the increased flour amount) directly in the baking dish. Gently toss to coat the apples, ensuring no dry flour patches remain. Press the apples down lightly to create space for the topping.
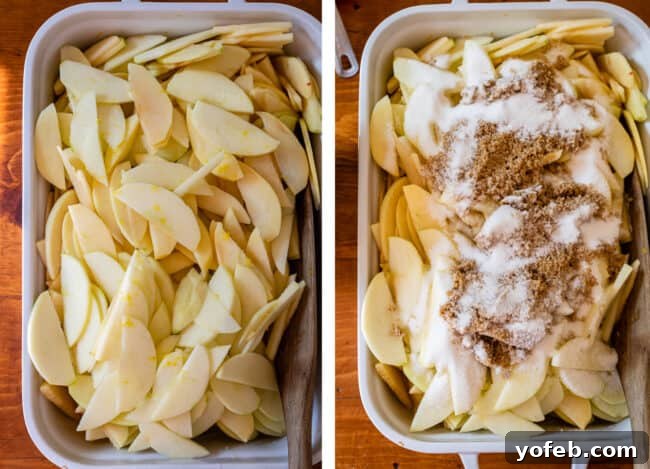
Ultimately, both methods yield a delicious apple cobbler, but the pre-cooking method offers a noticeable edge in terms of flavor and texture. The choice is yours, but we like to arm you with all the information!
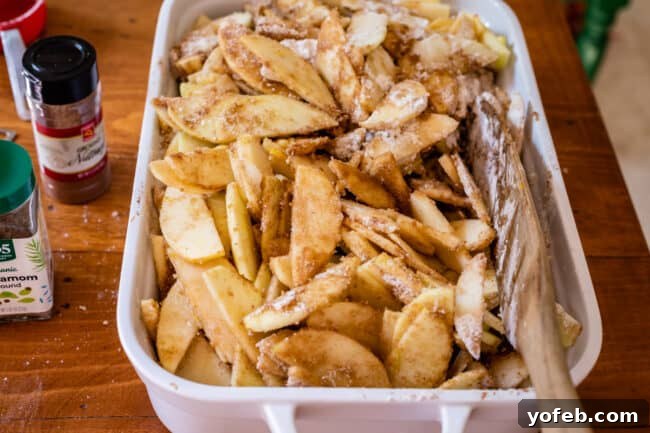
3. Thickening the Apple Filling
Whether you pre-cook your apples or use them raw, flour is key to achieving a beautifully thick, non-gummy sauce. The amount of flour needed varies based on whether the apples are cooked or raw:
- For pre-cooked apples: Use 5 tablespoons of all-purpose flour.
- For raw apples: Increase to 1/2 cup of all-purpose flour.
This adjustment ensures the perfect consistency for your cobbler’s filling, absorbing excess moisture and creating that luscious, spoonable sauce everyone craves. Don’t worry about memorizing these details; they are all clearly outlined in the full recipe below.
The Secret to a Perfect Cobbler Topping
Now for the crowning glory of your apple cobbler: the tender, golden topping. This biscuit-like layer is what truly defines a cobbler and our method ensures it’s perfectly moist inside with delightful crispy edges.
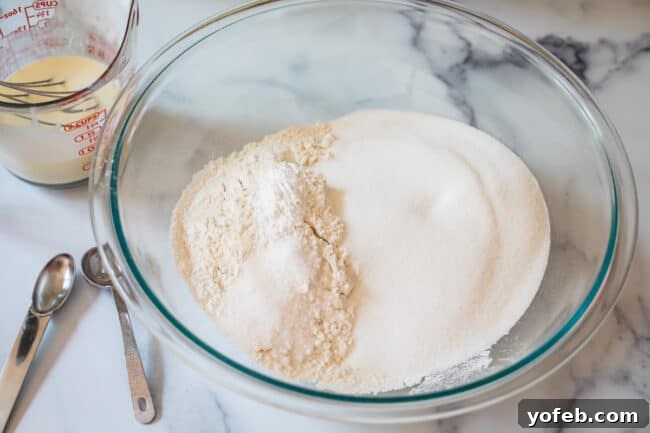
- Combine Dry Ingredients: In a large mixing bowl, whisk together the all-purpose flour, granulated sugar, kosher salt, and baking powder. These are the fundamental building blocks of a great topping.
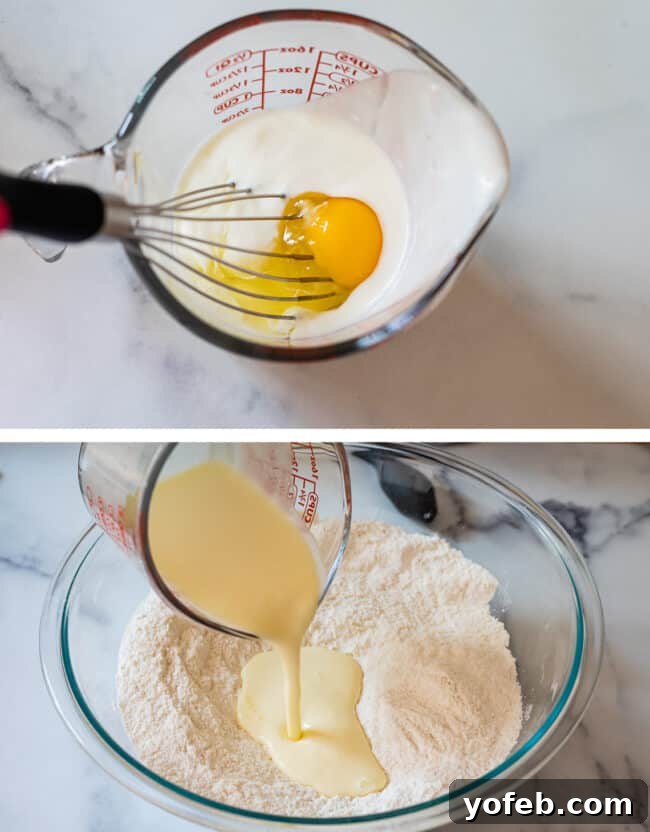
- Whisk Wet Ingredients: In a separate small bowl, whisk together the buttermilk and egg until well combined. Buttermilk is crucial for tenderness and flavor; if you don’t have it, a simple “cheater buttermilk” made with milk and lemon juice or vinegar works wonderfully (see recipe notes for details).
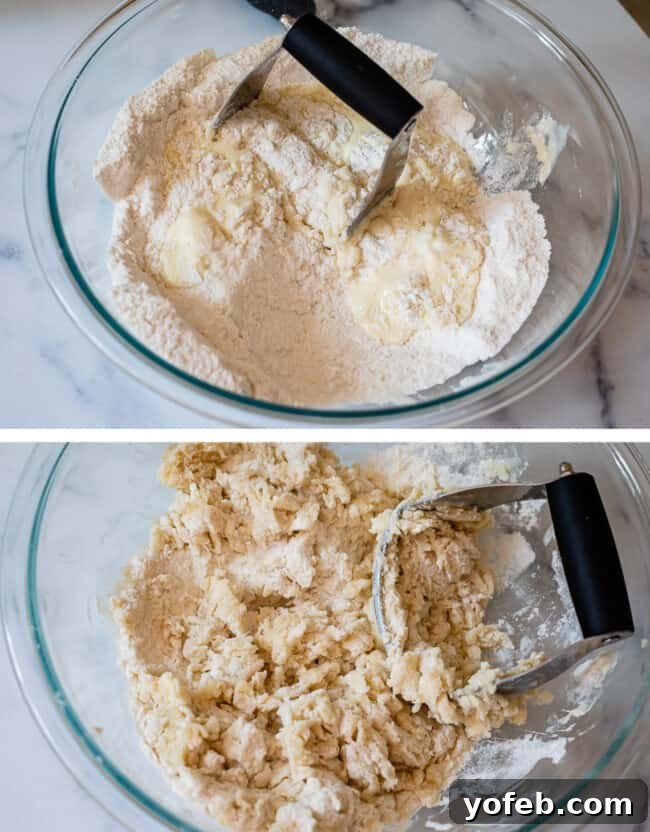
- Cut in the Wet Mixture: Pour the buttermilk and egg mixture into the dry ingredients. Instead of stirring, use a pastry cutter to “cut” the liquid into the flour mixture. This technique is vital for achieving that desirable shaggy, biscuit-like texture. If you don’t have a pastry cutter, a fork can work, but focus on a cutting motion rather than vigorous stirring. It’s perfectly fine if some dry spots of flour remain; this contributes to the rustic, cobbled appearance.
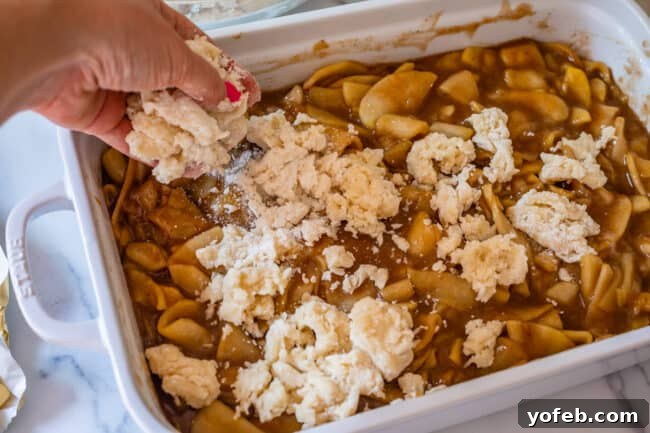
- Top the Apples: Gently spoon or scrape the shaggy dough mixture evenly over the pre-cooked (or raw) apples in the casserole dish. Don’t worry about making it perfectly smooth; its unevenness is part of its charm.
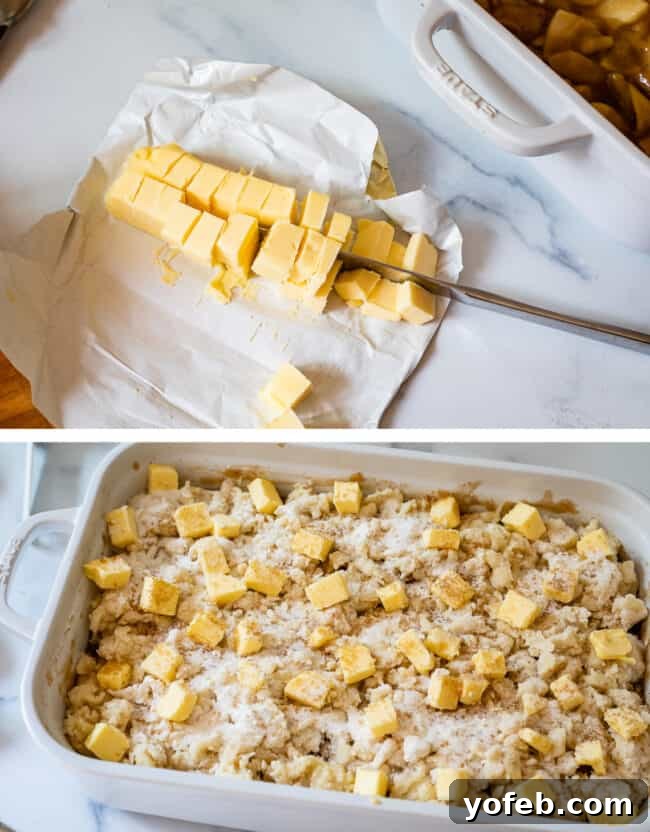
- Add Cold Butter: Take a stick of cold butter and chop it into 1/2-inch pieces. Scatter these butter chunks evenly over the top of the cobbler dough. As the cobbler bakes, this butter will melt and seep into the topping, creating those irresistibly golden, crispy edges.
- Sprinkle with Sugar: Finish by sprinkling 2 tablespoons of sugar over the entire surface of the topping. Granulated sugar works, but using a mix of granulated and demerara (raw) sugar can add extra sparkle and a delightful crunch.
- Bake to Golden Perfection: Your apple cobbler is now ready for the oven! Preheat your oven to 375°F (190°C) and bake for approximately 45-55 minutes.
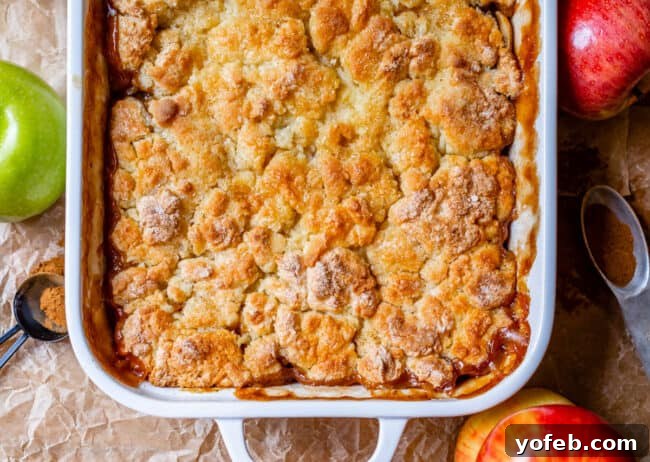
Knowing When Your Apple Cobbler is Perfectly Done
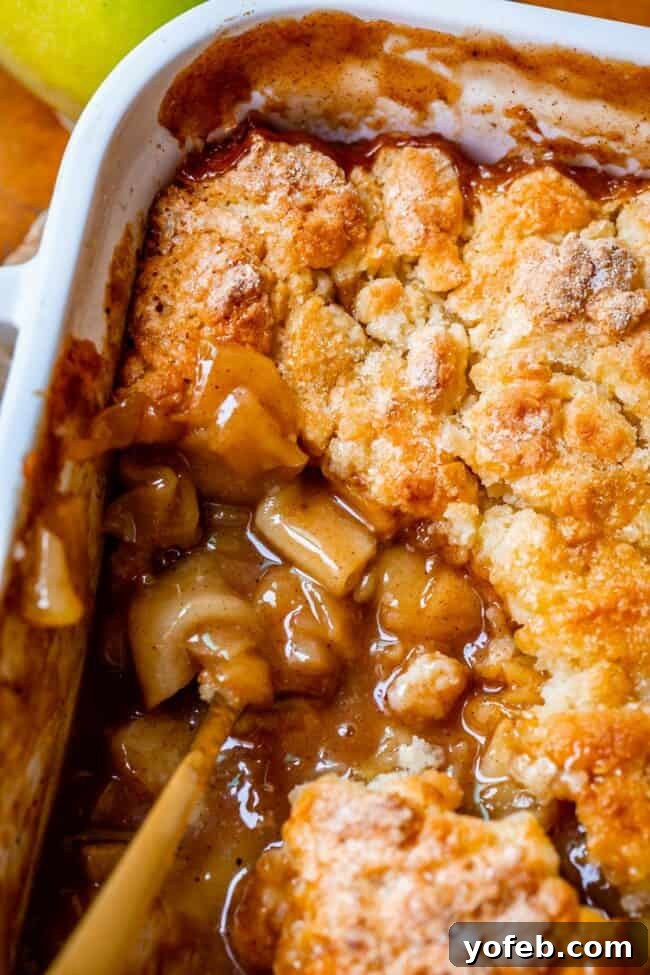
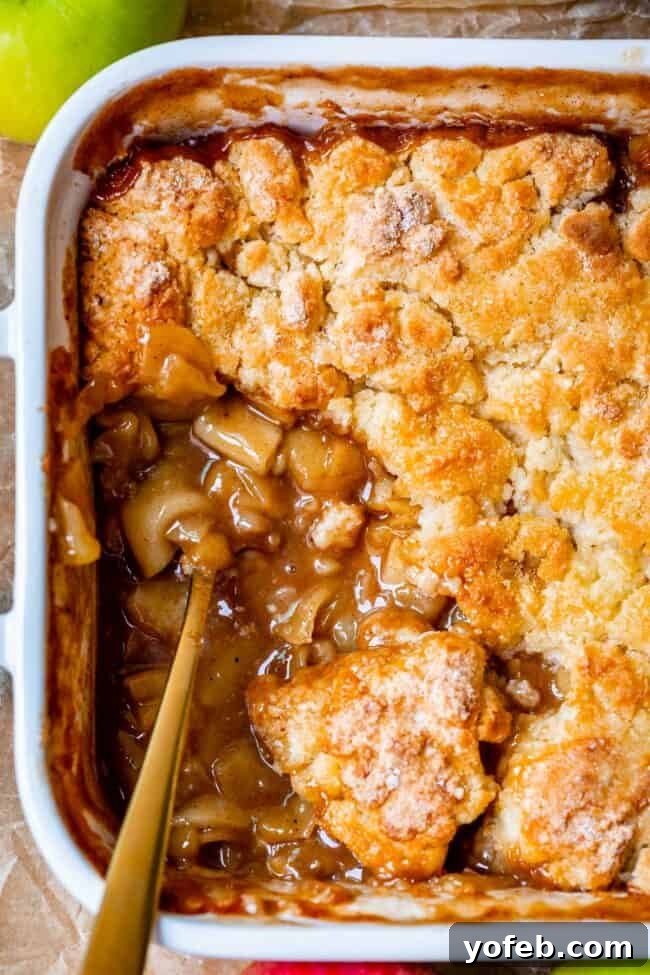
A perfectly baked cobbler is a sight to behold! You’ll know it’s ready when the apple filling is visibly bubbling around the edges of the pan, indicating it’s hot and thickened. The topping should be a beautiful golden-brown color, with darker, crispy spots. For an extra-crispy top, feel free to switch your oven to broiler mode for the last 1-3 minutes of baking. Just be vigilant – broilers can brown quickly, so watch it closely to prevent burning!
If you opted for raw apples, consider loosely covering the cobbler with foil during the last few minutes of baking. This helps prevent the topping from over-browning while allowing the apples maximum time to soften in the oven.
Once out of the oven, resist the urge to immediately dig in. Let the cobbler rest for about 15 minutes. This allows the juices to set up, preventing a soupy mess and protecting your tongue from lava-hot apples. Then, grab your spoon and indulge!
Serving and Storing Your Apple Cobbler
Serving Suggestions
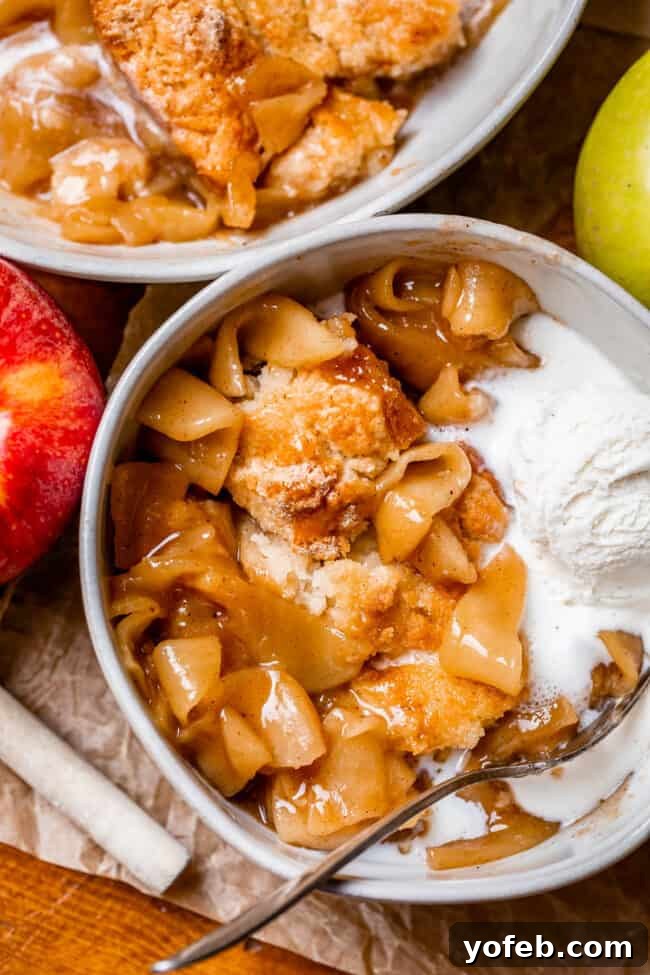
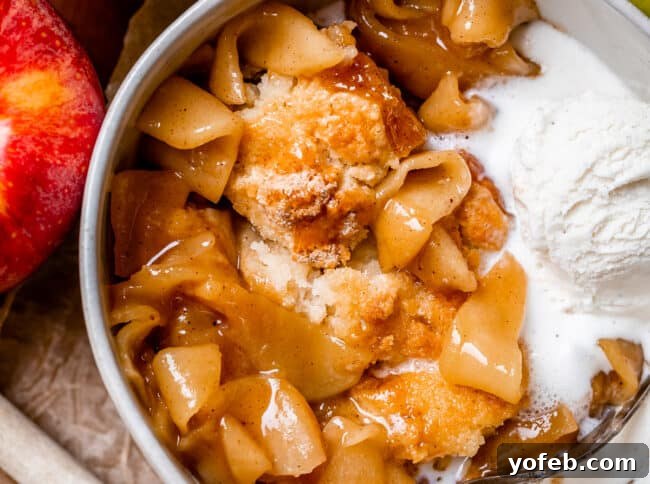
To truly experience the magic of this apple cobbler, serving it warm with a scoop (or two!) of vanilla ice cream is absolutely non-negotiable. The melting cold creaminess against the warm, spiced apples and tender topping is a match made in dessert heaven. If vanilla ice cream isn’t your preference, a dollop of freshly whipped cream or a drizzle of warm caramel sauce would also be delightful.
If you’re serving leftovers on subsequent days, we recommend reheating the cobbler in a 350°F (175°C) oven for about 15-20 minutes. This helps to re-crisp the topping, which tends to soften after the first day due to the moisture from the apple filling. While microwaving is quick, it won’t give you that desirable texture, so an oven re-heat is always best.
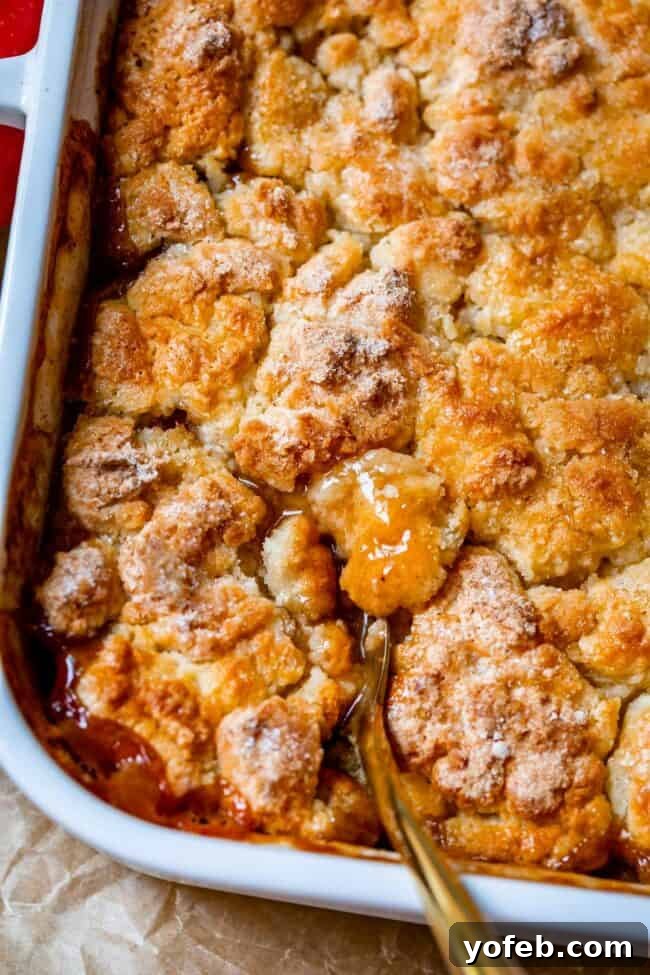
Storing Leftover Apple Cobbler
Apple cobbler is undoubtedly best enjoyed fresh on the day it’s made. However, leftovers are still delicious and can be stored at room temperature, lightly covered with plastic wrap or foil, for up to 2 days. If you still have some after two days, transfer it to the refrigerator, where it will keep for an additional 2-3 days. Make sure it’s well-covered to prevent it from drying out or absorbing refrigerator odors.
Can This Easy Apple Cobbler Be Frozen?
While technically possible, freezing a fully baked apple cobbler is not ideal for the topping’s texture, which can become mushy upon thawing. For best results, we recommend a smarter freezing strategy:
- Freeze the Apple Filling Separately: This is our top recommendation! Prepare and cook the apple filling according to the recipe, then allow it to cool completely. Transfer the cooled filling to a freezer-safe ziplock bag or airtight container. It can be frozen for 3-4 months. When ready to use, thaw the filling overnight in the refrigerator or for several hours on the counter. Then, simply prepare a fresh batch of the cobbler topping and bake as directed. This ensures a fresh-tasting topping with perfectly tender apples.
- Freezing a Whole Baked Cobbler: If you absolutely must freeze a whole cobbler, let it cool completely after baking. Wrap it tightly with a double layer of plastic wrap, followed by a layer of aluminum foil. It can be stored in the freezer for up to 3 months. Thaw it overnight in the refrigerator, then reheat in a moderate oven (around 350°F / 175°C) until warmed through and the topping has re-crisped as much as possible. Be aware that the topping may still absorb some moisture from the apples. Using a disposable aluminum pan for freezing can be convenient to avoid tying up your bakeware.
- Freezing Individual Portions: You can also freeze individual servings in airtight containers. While convenient, these are best reheated in the microwave, which often leads to a softer, less desirable topping texture compared to oven reheating.
Frequently Asked Questions About Apple Cobbler
A gooey or soggy cobbler topping is often a result of moisture migrating from the juicy apple filling into the biscuit layer, especially after the cobbler has been cut into or stored in the refrigerator. Cobblers are truly at their peak on day one for this reason. To revive a soggy topping, reheat the entire pan in a 350°F (175°C) oven for a few minutes; this can help crisp it up again.
While often used interchangeably, there’s a subtle distinction! A crumble is essentially a crisp, but without oats or nuts in its topping. The topping consists primarily of flour, butter, and sugar, similar to the streusel on a Dutch Apple Pie (minus the bottom crust). A cobbler, on the other hand, is defined by its leavened, biscuit-like topping, typically made with baking powder to give it a light, fluffy rise.
An Apple Brown Betty is a distinct dessert where layers of spiced apples are alternated with sweetened bread crumbs, rather than a biscuit topping. It’s often served with a lemon sauce or whipped cream. The bread crumbs absorb the apple juices, giving it a texture closer to a bread pudding or apple pudding, differentiating it significantly from the biscuit-topped cobbler.
More Delicious Apple Recipes to Explore!
Apples are incredibly versatile, offering endless possibilities for delectable desserts. If you’ve loved this cobbler, be sure to try these other fantastic apple creations:
- Homemade Apple Pie << Our ultimate apple pie, featuring the same incredible filling as this cobbler!
- Peach Cobbler<< The inspiration for this apple cobbler’s fantastic topping. A must-try!
- Dutch Apple Pie Recipe << The best of both worlds: a flaky pastry crust beneath a sweet crumble streusel, with a heavenly apple filling.
- Apple Pie Bars << All the flavor of apple pie, but in a convenient, handheld bar format – perfect for parties!
- Apple Crisp, with a Ridiculous Amount of Streusel << For those who believe more streusel is always better.
- Apple Custard Pie with Cinnamon Streusel << A truly luxurious pie with a creamy custard layer and a delightful cinnamon streusel.
- Caramel Cinnamon Apple Enchiladas from Worth Whisking
- Fresh Apple Cake from Miss In The Kitchen
- German Apple Pancakes from Girl vs Dough
Facebook |
Pinterest |
Instagram

Easy Recipe for Apple Cobbler
30
45
1
15
12
Ingredients
For the apple filling
- 5 pounds apples, peeled, about 9-11 large apples; use a variety of flavors
- 1/2 teaspoon lemon zest, from 1 small lemon
- 3 tablespoons lemon juice, from 1 small lemon
- 3/4 cup granulated sugar
- 3/4 cup brown sugar, packed
- 5 tablespoons all purpose flour*, See notes if you are making this without cooking the apples
- 1 & 1/2 teaspoons cinnamon
- 3/4 teaspoon nutmeg
- 1/2 teaspoon cardamom, optional
- 1/4 teaspoon kosher salt
- 1 teaspoon vanilla extract
For the cobbler topping
- 2 & 1/2 cups all purpose flour, spooned and leveled
- 1 & 1/2 cups granulated sugar
- 1 teaspoon kosher salt
- 1 teaspoon baking powder
- 1/2 cup buttermilk**, cheater version okay, see notes
- 1 egg
- 1/2 cup cold butter, chopped into chunks
- 2 tablespoons sugar, granulated or raw sugar or both
- vanilla ice cream, for serving, not optional 😉
Instructions
-
Make the apple filling: Choose your apples. You need 5 pounds of apples for this recipe, which is about 9-11 large apples. We recommend using a mix of apples for the best flavor, such as Granny Smith, Gala, and Honeycrisp.
-
Use a microplane grater to zest 1/2 teaspoon lemon peel into a high-sided 12-inch skillet. (SEE NOTE for instructions on how to make this without cooking the apples first; you can skip the skillet and place raw apples directly in the baking dish.) Slice the lemon in half and squeeze about 3 tablespoons of juice into the pan.
-
Peel all the apples with a vegetable peeler or a handy apple peeler. Slice the apples very thin, approximately 1/8 inch, as shown in the photos. You should yield about 9 cups of sliced apples. Add the sliced apples to the skillet with the lemon juice and zest, tossing occasionally to prevent browning.
-
Cook the apples. (Remember, this step is optional but highly recommended! See notes for the uncooked method.) Once all apples are peeled and sliced in the pan, place the skillet over medium heat on the stove.
-
Add 3/4 cup granulated sugar and 3/4 cup packed brown sugar over the apples. Sprinkle with 5 tablespoons flour, 1 1/2 teaspoons cinnamon, 3/4 teaspoon nutmeg, 1/4 or 1/2 teaspoon cardamom (optional but delicious), and 1/4 teaspoon kosher salt. Stir gently to combine all ingredients without breaking the apple slices.
-
Once the mixture is moistened and no dry patches of flour or cinnamon are visible, set a timer for 20 minutes. Cover the skillet with a lid, but stay close by. Stir the mixture every 3 minutes or so, replacing the lid each time. Cook for 20 minutes, until the apples are fork-tender but still hold their shape. Due to the magic of pectin, the apples will not soften further in the oven, so taste and adjust cooking time to your desired “al dente” perfection level.
-
Remove from heat and stir in 1 teaspoon vanilla extract. Scrape the cooked apples and all their delicious caramel-like sauce into a 9×13 inch casserole dish. Set aside to cool slightly.
-
Make the cobbler topping:
Preheat your oven to 375 degrees F (190°C). -
In a large bowl, combine the dry ingredients: 2 1/2 cups flour, 1 1/2 cups granulated sugar, 1 teaspoon kosher salt, and 1 teaspoon baking powder. Whisk them together thoroughly.
-
In a small bowl, whisk together 1/2 cup buttermilk** and 1 egg. Pour this mixture into the bowl with the dry ingredients. Use a pastry cutter to cut the wet ingredients into the flour, forming a shaggy dough. If you don’t have a pastry cutter, a spoon or fork using a cutting motion will work. It’s okay if there are still some dry spots of flour. Pour or spoon the flour mixture evenly over the apples in the 9×13 inch pan.
-
Chop one stick (1/2 cup) of cold butter into 1/2-inch pieces. Scatter these pieces evenly over the top of the flour mixture.
-
Sprinkle 2 tablespoons of sugar over the top. For extra crunch and sparkle, we recommend using a mix of granulated sugar and demerara (raw) sugar.
-
Bake at 375°F (190°C) for 45-55 minutes. The cobbler is done when the top is light golden brown all over (not just in a few spots) and the filling is bubbling vigorously around the edges.
For an extra crispy top, you can broil the cobbler for 1-3 minutes at this point. Keep a very close eye on it, as broilers can quickly burn! Check every 60 seconds to prevent over-browning. -
While tempting, resist cutting into it immediately. Let it cool for at least 15 minutes to allow the juices to set. Then, dig in! Serving with vanilla ice cream is highly recommended.
-
Store leftovers loosely covered on the counter for up to 2 days; transfer to the refrigerator for up to 2 additional days after that.
Notes
While we prefer the flavor and texture of pre-cooked apples, you can make a delicious cobbler with raw apples if you’re short on time. Here’s how:
Follow all instructions as given, but instead of mixing the lemon and sliced apples in a skillet, place them directly in a 9×13 inch casserole dish. Add all the ingredients for the filling directly on top of the raw apples, with one crucial change: *use 1/2 cup all-purpose flour instead of 5 tablespoons.* This extra flour helps thicken the sauce as it cooks in the oven.
Add 1 teaspoon vanilla. Gently stir the mixture together, being careful not to let the apples fly out of the dish. Your apples should have a light sauce clinging to them, with no obvious patches of dry flour or sugar. Press the apples down gently in the pan to make room for the topping.
Top as instructed in the recipe with the cobbler dough.
Bake as directed, keeping in mind that the raw apples will need more time to soften. Remove from the oven when the cobbler topping is nicely browned. You can even top with foil in the last few minutes of baking if the topping is browning too quickly, allowing the apples more time to soften.
**Cheater buttermilk: In a glass measuring cup, add 1 teaspoon of vinegar or lemon juice (lemon juice is preferred for flavor). Fill to the 1/2 cup line with milk, preferably whole milk. Stir gently and let it sit for 5 minutes before using as directed in the recipe.
Can you freeze? We generally don’t recommend freezing a fully baked apple cobbler, as the topping can become soggy upon thawing. However, you can freeze the cooked apple filling ahead of time. Allow the cooked filling to cool completely, then seal it in a freezer-safe ziplock bag. It will keep for 3-4 months. Thaw completely overnight in the fridge or for several hours on the counter. Then, prepare fresh cobbler dough and bake as normal for an easy, delicious dessert.
This recipe is super easy to halve! Simply cut all ingredient amounts in half and bake in an 8×8 or 9×9 inch square pan. (To halve an egg, whisk one egg in a bowl and use approximately 2 tablespoons of it, or use just the yolk and discard the white.)
Hungry for Apple Crisp? Here’s our favorite Apple Crisp Recipe, it’s incredibly easy to make!
Nutrition
Serving:
1serving
Calories:
492kcal
Carbohydrates:
102g
Protein:
4g
Fat:
9g
Saturated Fat:
5g
Polyunsaturated Fat:
1g
Monounsaturated Fat:
2g
Trans Fat:
0.3g
Cholesterol:
35mg
Potassium:
280mg
Fiber:
6g
Sugar:
73g
Vitamin A:
376IU
Vitamin C:
10mg
Calcium:
67mg
Iron:
2mg
Dessert
American
492
apple, cobbler
Did you make this? We’d love to see it!
Mention @thefoodcharlatan or tag #thefoodcharlatan!