
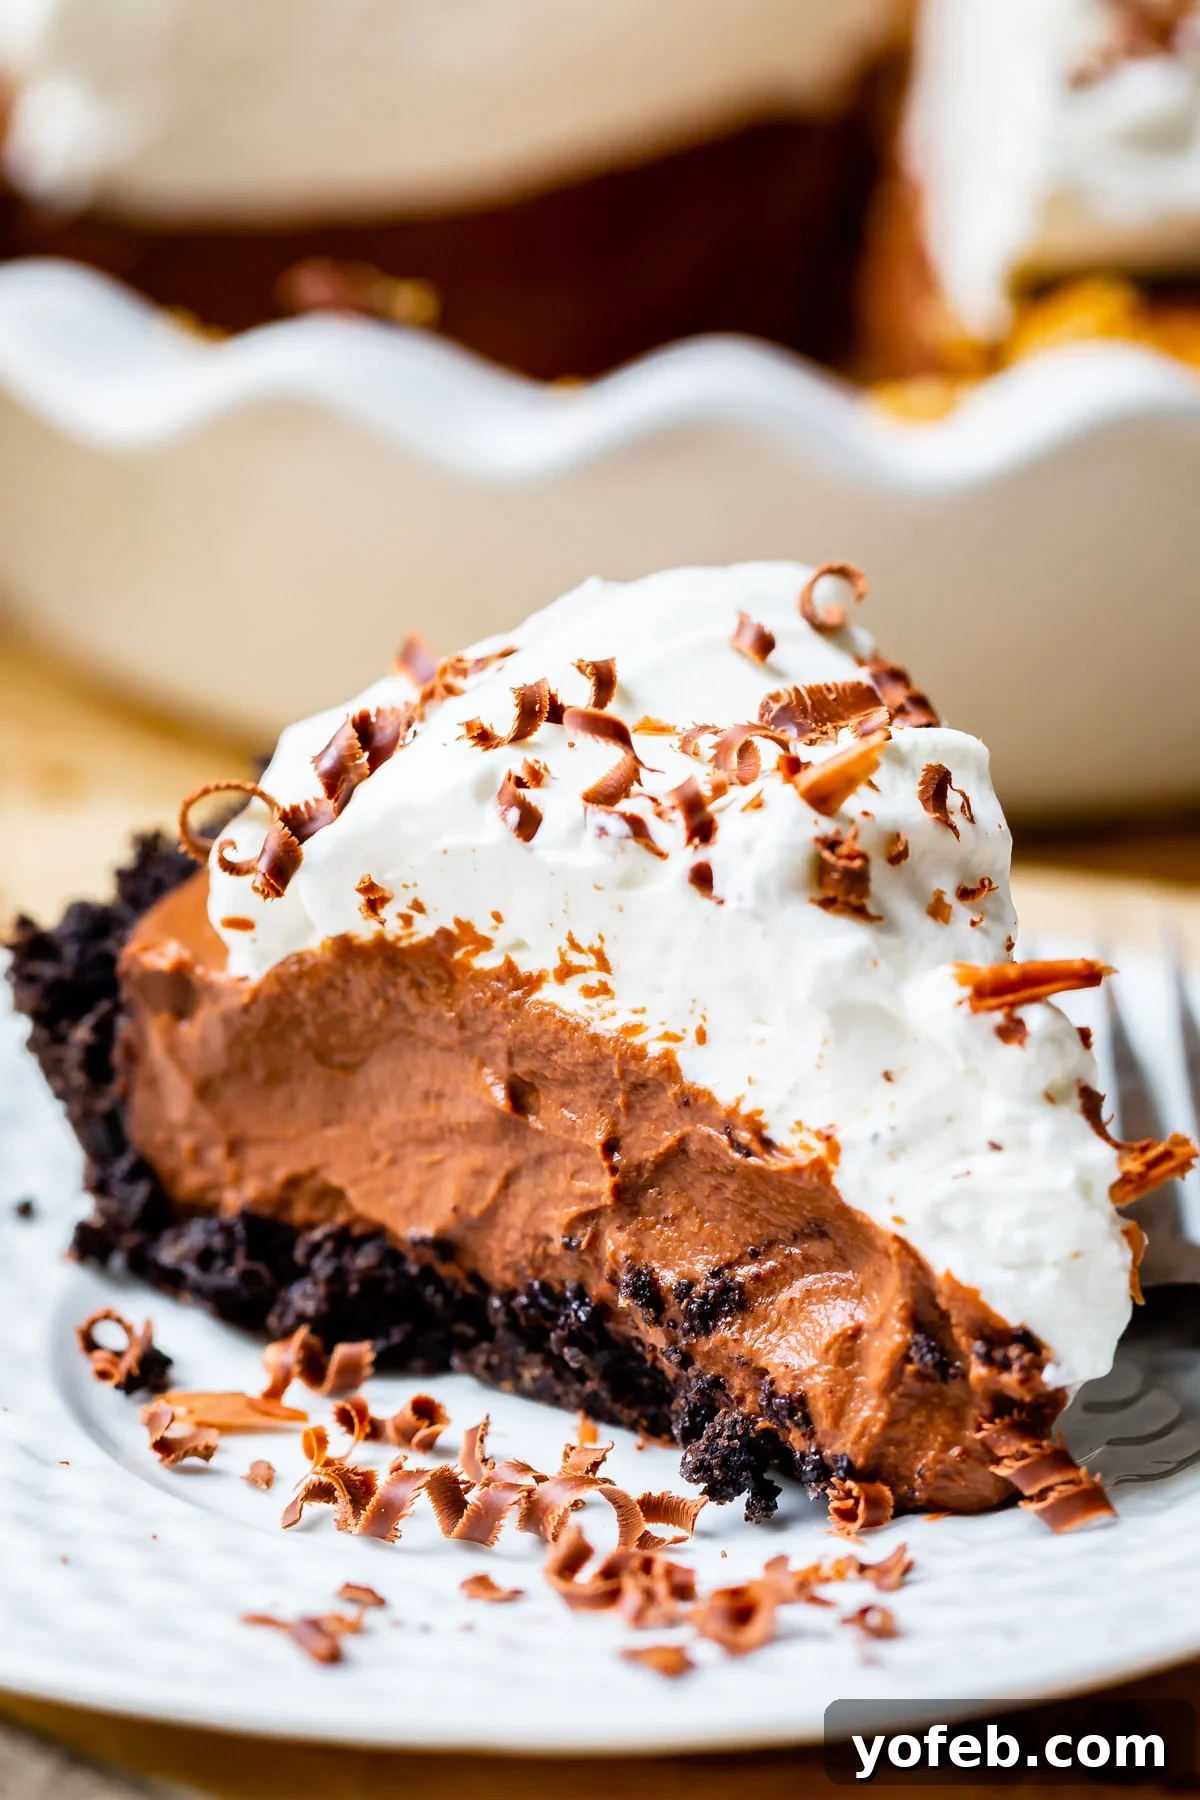
Have you ever had a chocolate cream pie that just… didn’t quite hit the spot? One that was too bland, too dense, or just plain forgettable? So many chocolate cream pies unfortunately fall into the “ho-hum” category. But what if there was one that could redeem all those past disappointments? A recipe that promises a truly unforgettable experience, transforming a classic dessert into something extraordinary? You’ve found it. This isn’t just another dessert; it’s *The One*. With its perfect balance of textures and rich, deep chocolate flavor, topped with a cloud of sweetened whipped cream and delicate chocolate curls, this easy chocolate cream pie recipe will become your go-to for every occasion, forever and ever. It boasts a velvety smooth, double-chocolate pudding and a perfectly crisp crust, all thanks to a special technique that elevates it above the rest. Originally published on November 22, 2022, this recipe has been perfected to ensure every bite is pure bliss.
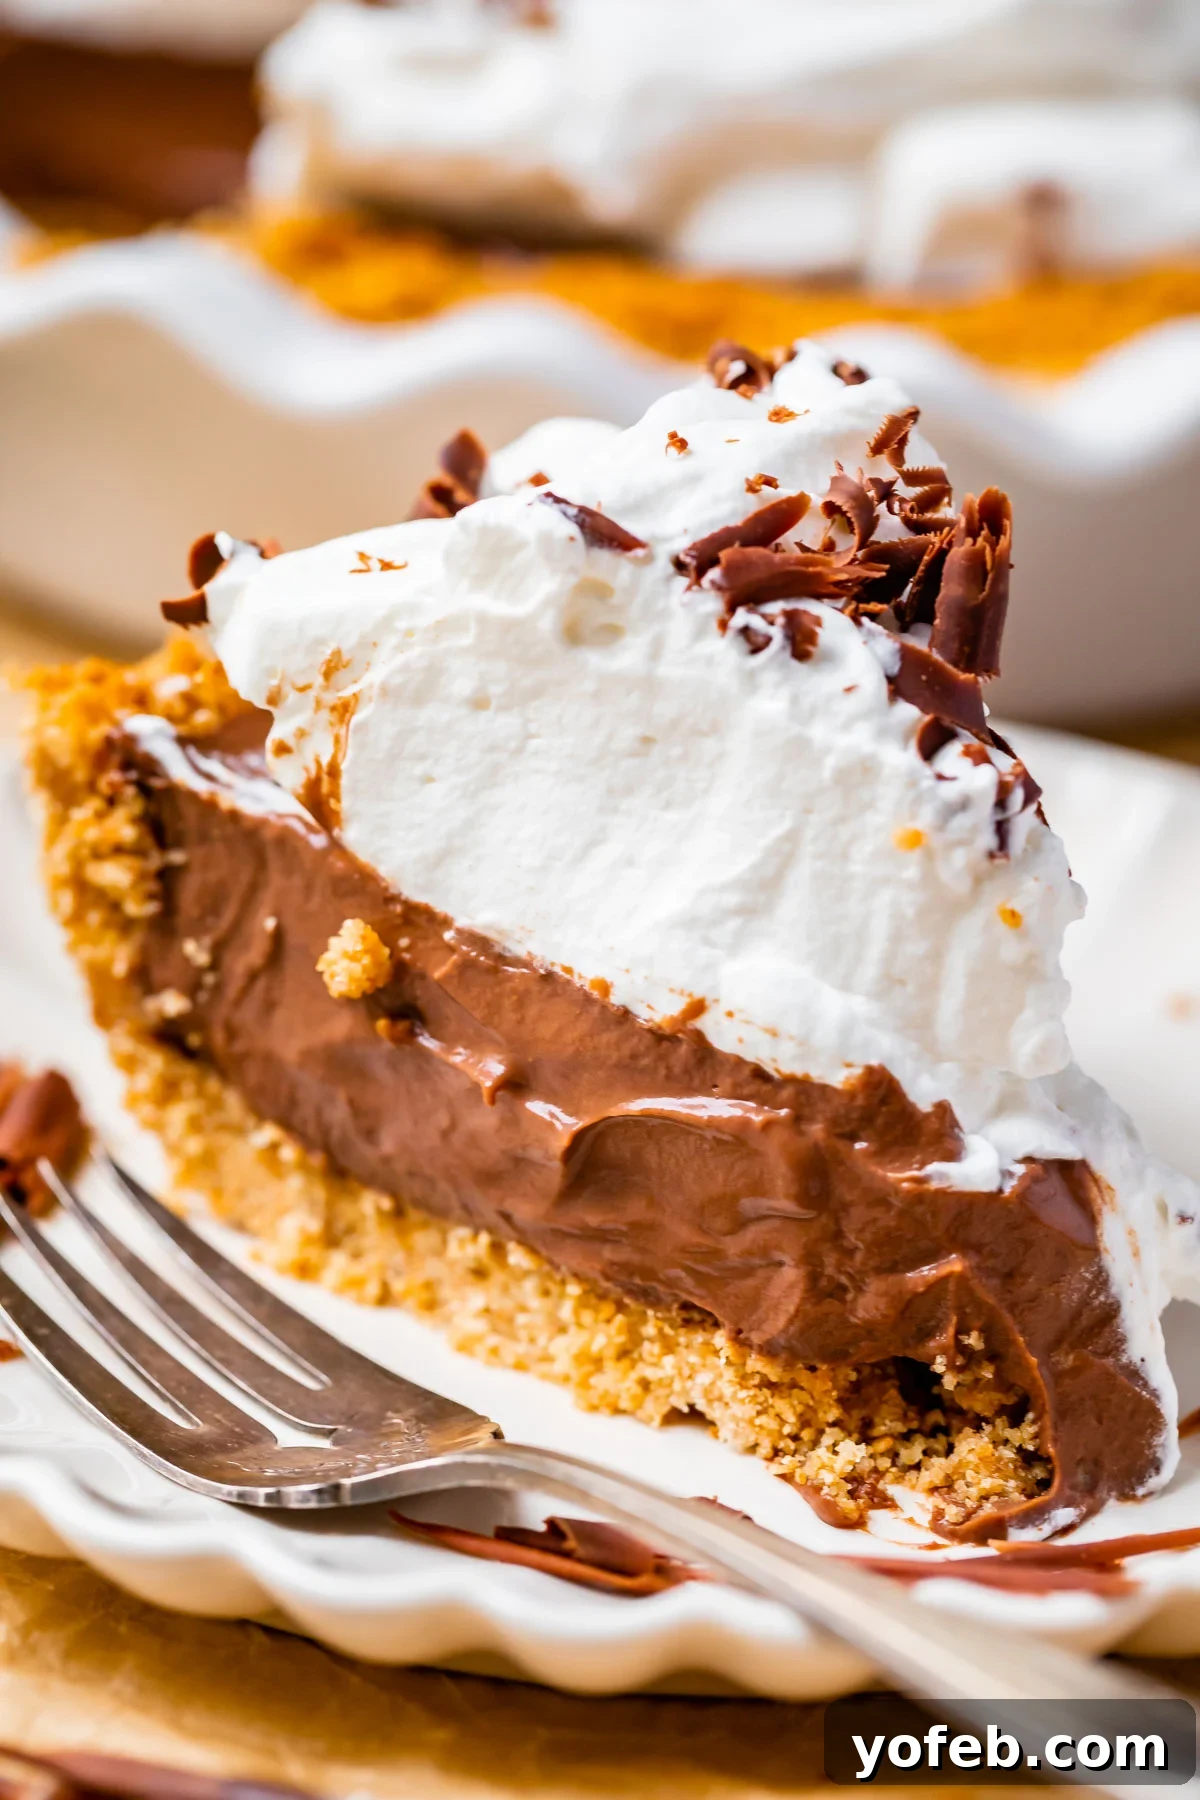
Table of Contents
- This Easy Chocolate Cream Pie is What Dreams Are Made Of
- Why You’ll Adore This Unforgettable Chocolate Cream Pie Recipe
- Essential Ingredients for Your Perfect Chocolate Cream Pie
- Choosing the Ideal Crust for Your Chocolate Cream Pie
- Step-by-Step Guide: Crafting the Ultimate Chocolate Cream Pie
- Mastering Chocolate Curls for Your Pie
- Creating a Cloud-Like Whipped Topping
- Top Tips for the Best Chocolate Cream Pie
- Serving Your Masterpiece
- Storage: Do You Need to Refrigerate Your Chocolate Cream Pie?
- Can You Freeze a Chocolate Pie?
- More Irresistible Pie Recipes You’ll Love!
- Chocolate Cream Pie Recipe (Easy)
The journey to culinary perfection often involves a bit of trial and error, and my quest for the ultimate chocolate cream pie was no exception. I dedicated an entire Friday to making cream pies, meticulously testing various combinations of flavors and textures, all in pursuit of achieving that elusive “Creamy-Chocolate-Level-Transcendent” status. I baked countless pies that day: some turned out too grainy, others too thick, and many were simply too complicated to be confidently labeled “easy.” Just when I thought I had finally cracked the code, my mother-in-law, Kris, arrived for a visit.
Known for her discerning palate and honest feedback, Kris took one bite of my latest creation at dinner and, without hesitation, declared, “This pie isn’t sweet enough!” My carefully crafted conclusions, it seemed, were momentarily thrown into disarray.
Many of you who follow my culinary adventures know Kris, my beloved mother-in-law. Her reputation and influence on this blog often precede her. She’s undeniably one of the most talented home cooks I’ve ever met, and my blog owes a great deal to her refined taste and candid opinions. When Kris speaks about food, I always pay close attention.
The rest of the family at the table, including my husband Eric, who had witnessed my arduous journey of testing countless pies, immediately sprang to my defense. “I think the pie tastes great, Karen!” they protested. Yet, I know Kris well enough to understand that she isn’t typically one for overly sweet desserts. So, if even she believed my pie needed a bit more “oomph,” it was a clear signal to investigate further. I defended her, stating, “Kris isn’t an overly-sweet person, so if she thinks it needs more sugar, that’s really saying something!” My father-in-law, always quick with a witty remark, burst into laughter: “Kris isn’t an overly-sweet person? You can say *that* again!”
The following day, Kris attempted to apologize, feeling somewhat regretful for her blunt assessment of the pie. I quickly reassured her, “I’m not offended at all! I genuinely value your opinion; you always have a very sharp tongue.” She laughed heartily, replying, “You can say *that* again!” It made me wonder, was my subconscious subtly delivering backhanded compliments because someone suggested my pie needed improvement? What is it with me and these accidental remarks?
Later that day, Kris had another slice of pie and tried to backtrack a bit. “You know, I actually think I do like the pie, just the way it is!” she mused. “Sure, Kris,” I thought, “sure. You can’t put the genie back in the bottle.”
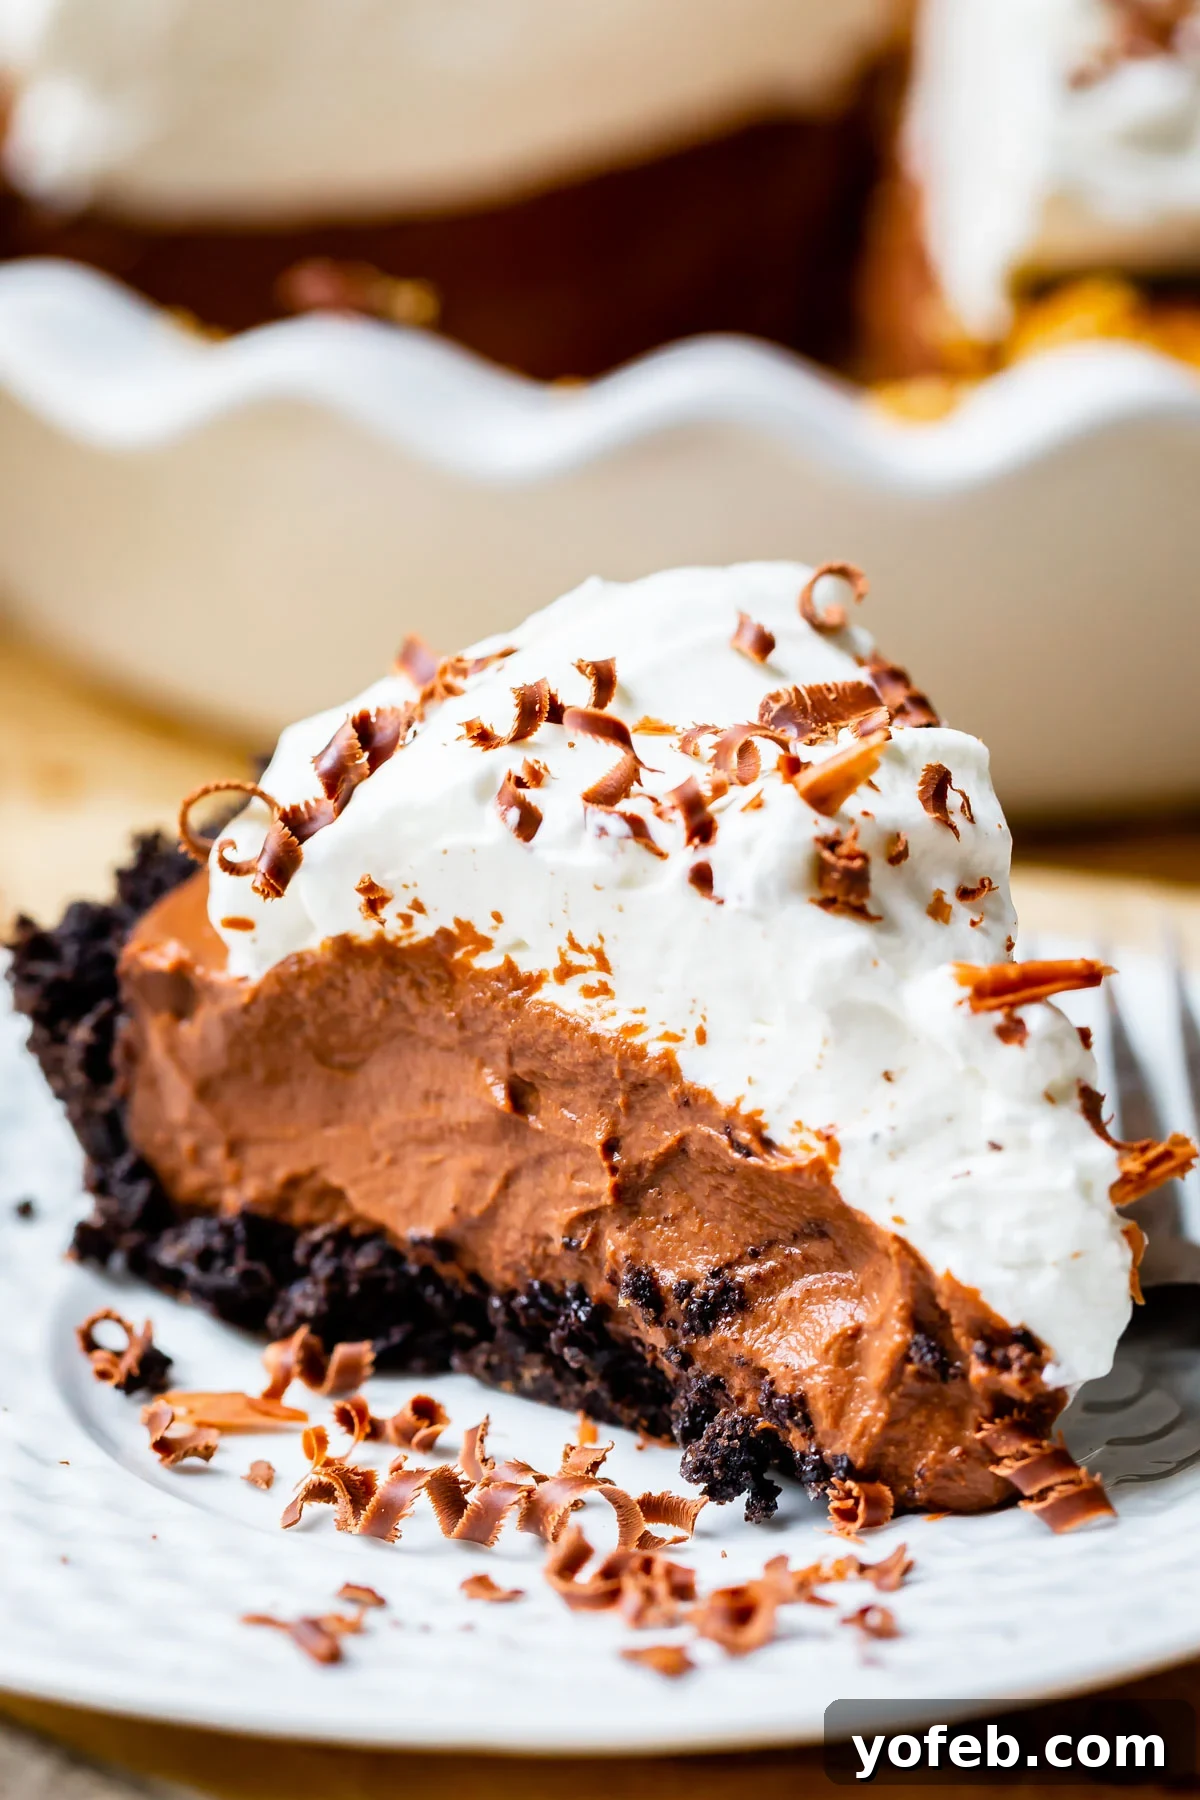
Determined to perfect it, I made the pie one last time, this time incorporating more sugar, just as Kris had suggested. And, of course, she was absolutely right. The result was nothing short of amazing. We gathered around the kitchen counter, forks in hand, each bite eliciting contented groans and exclamations like, “This is it!” and “I didn’t think it could get better, but it truly did.”
Well, humble pie was certainly being served in every direction that day! But it was unequivocally worth every effort. Now, you understand just how much we all owe to Kris and her wonderfully sharp tongue for guiding me to this truly exceptional chocolate cream pie! 😉
This Easy Chocolate Cream Pie is What Dreams Are Made Of
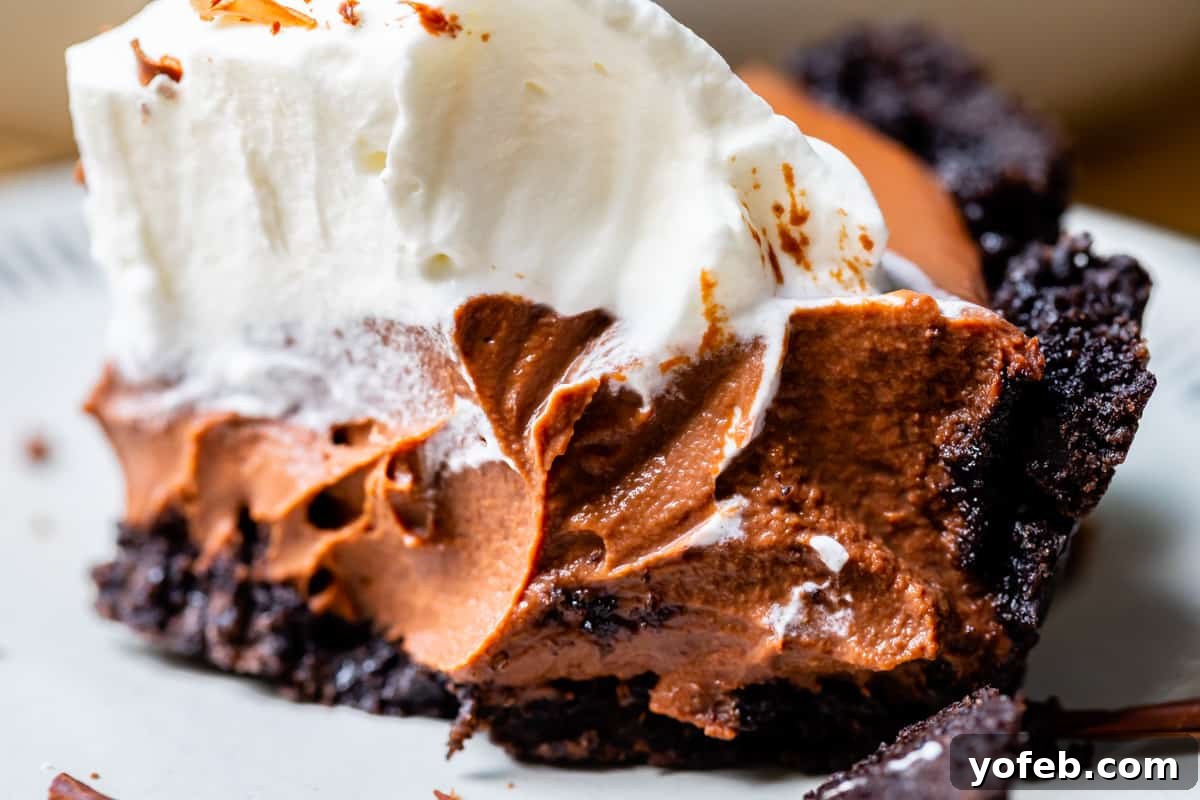
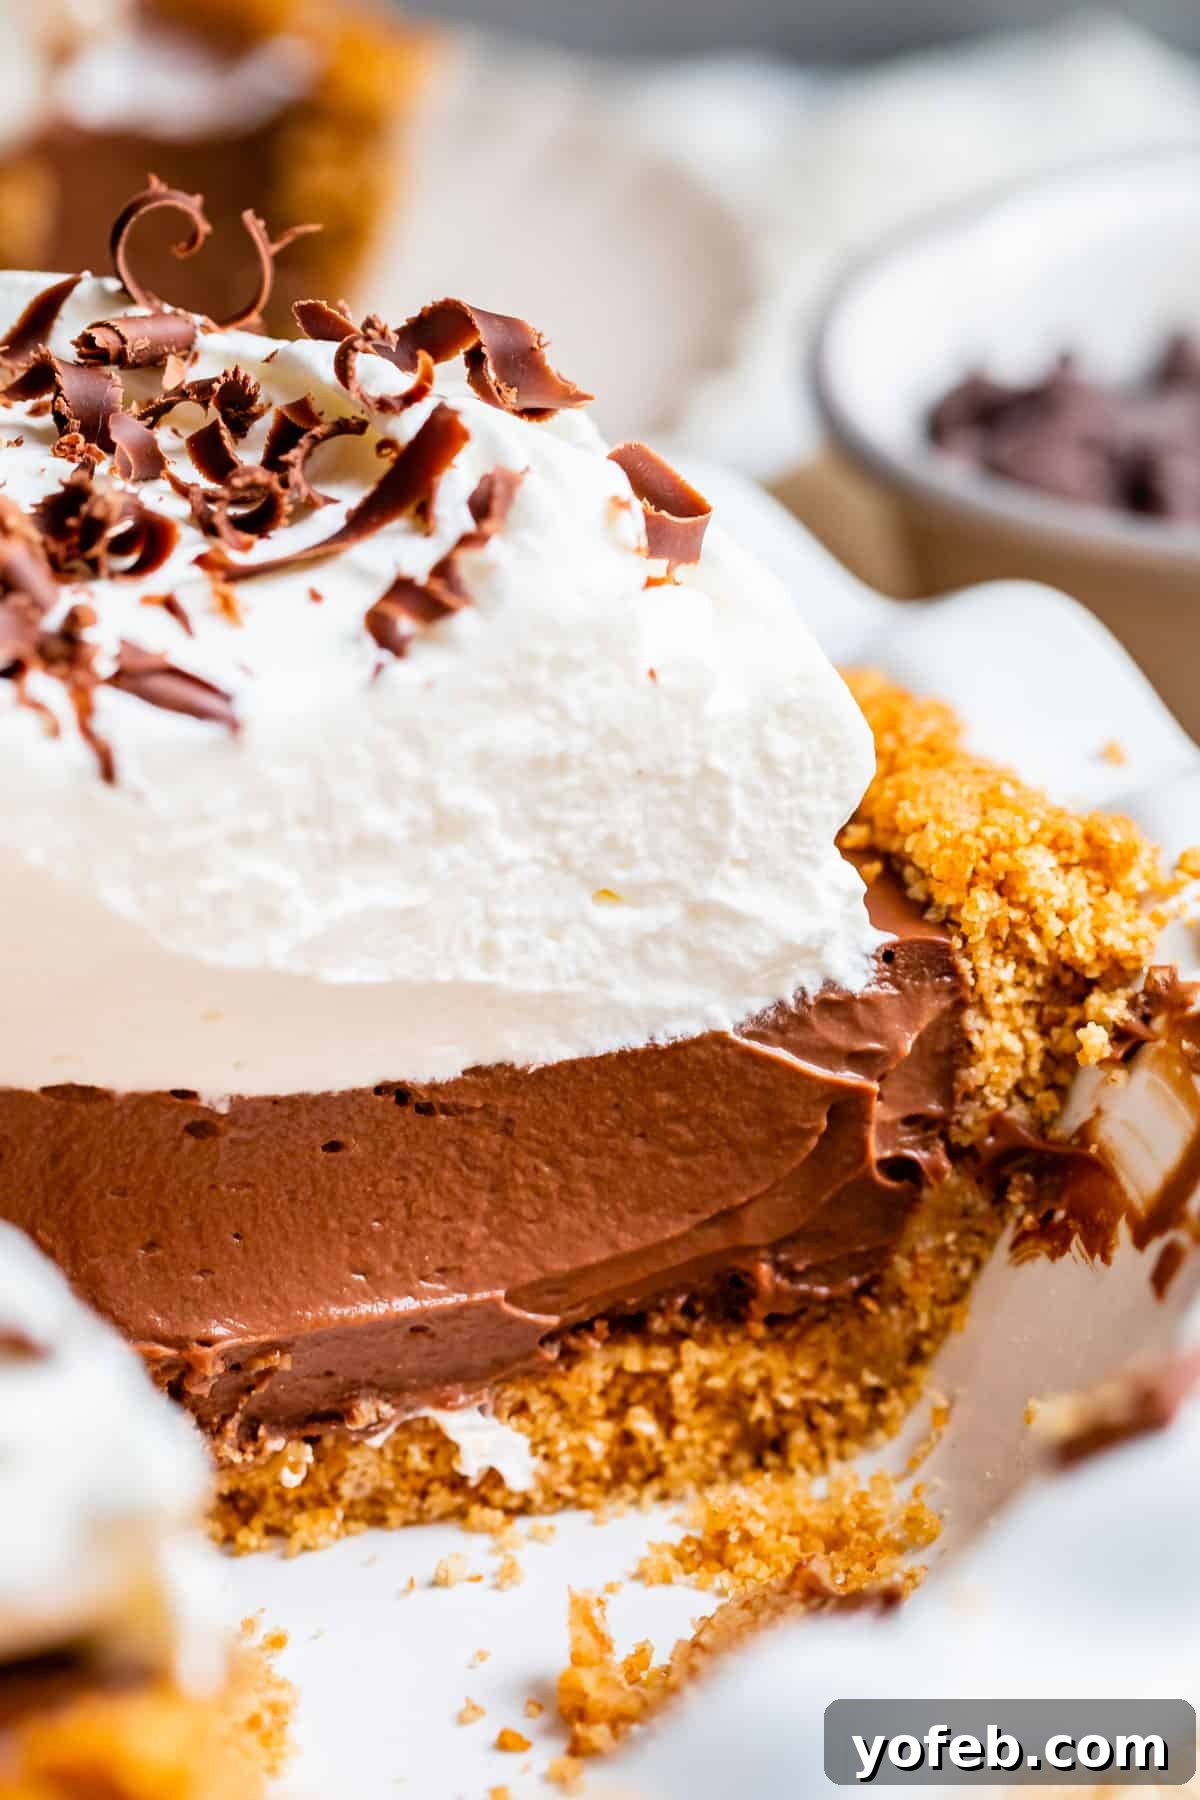
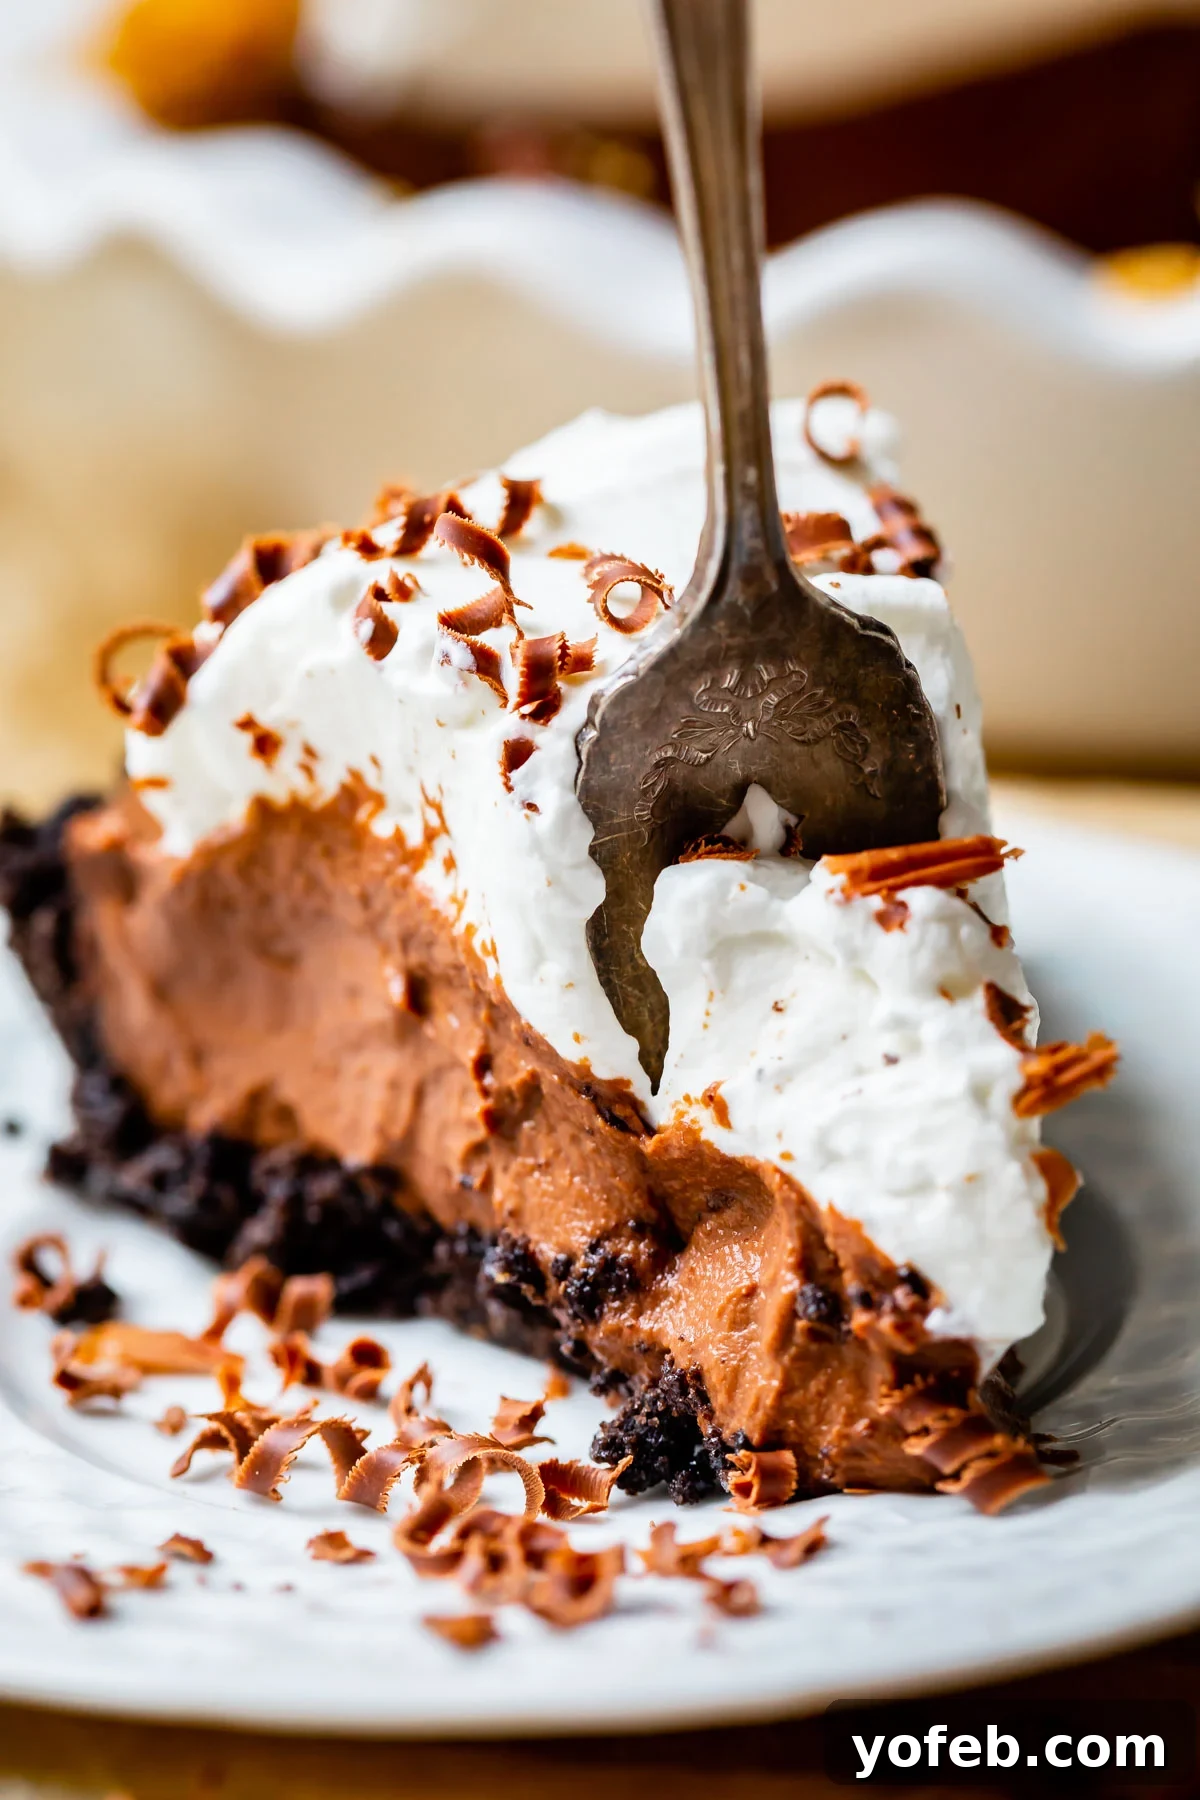
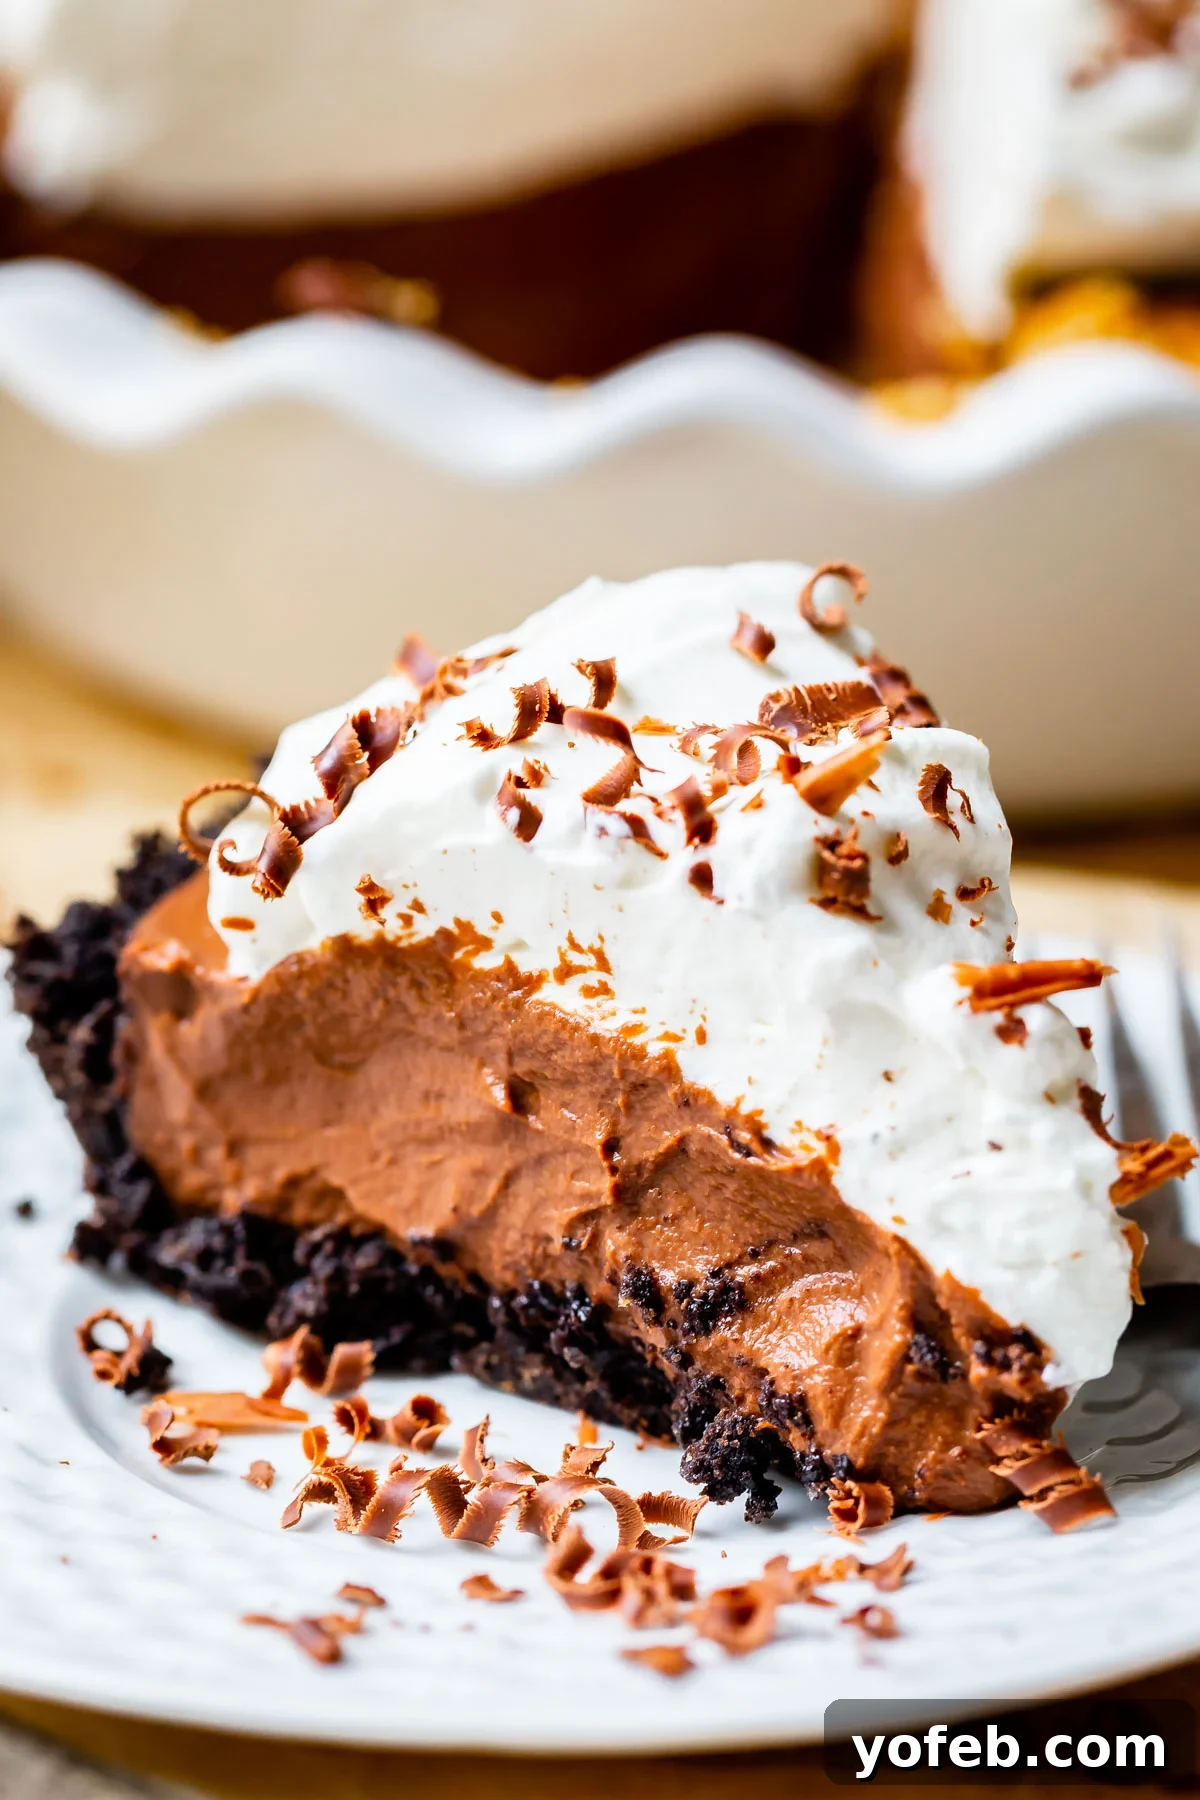
Imagine a dessert that combines a perfectly crisp crust with a luxurious, thick layer of homemade double chocolate pudding, all crowned with a generous swirl of sweetened whipped cream and delicate chocolate curls. This, my friends, is the essence of this easy chocolate cream pie. It’s rich, it’s incredibly creamy, and it’s so decadently dreamy it feels almost ethereal!
Even at an event brimming with a delightful array of desserts, this chocolate cream pie consistently vanishes first. It’s an undeniable truth, deeply ingrained in the American culinary psyche: we are simply obsessed with chocolate. I once encountered a quote from a renowned chef discussing dessert menu planning, who succinctly put it: “You always have to provide a chocolate option. People will riot if you don’t.” This pie isn’t just an option; it’s a celebration of chocolate, destined to be the star of any dessert table.
Featured Comment
“I just made this pie for Thanksgiving, and it truly is an amazing recipe! I did this exactly following the recipe, and it was SOOOOO EASY! This method eliminates the “scrambled egg” happening on the stove!!! I am now fearless lol!!” -Karen
See All Comments
Why You’ll Adore This Unforgettable Chocolate Cream Pie Recipe
This chocolate cream pie doesn’t just promise to satisfy your chocolate cravings; it utterly transcends them. Every element is thoughtfully designed to deliver a phenomenal dessert experience. Here’s why this recipe will become your new favorite:
- It’s a Homage to Homemade Goodness: Unlike many quick recipes, this pie is definitively not made from instant pudding. While instant pudding has its place, it simply cannot replicate the depth of flavor and luscious texture that only a homemade pudding can achieve. This recipe elevates the classic for a truly gourmet feel.
- Triple (or Quadruple!) Chocolate Indulgence: We’re serious about chocolate here, which is why we use three kinds of chocolate for maximum flavor intensity. Rich cocoa powder and high-quality semi-sweet chocolate are meticulously folded into the velvety pudding, while delicate chocolate curls provide a final flourish on top. And for the ultimate chocolate lovers, if you opt for an Oreo crust, you’re looking at a glorious quadruple-chocolate experience!
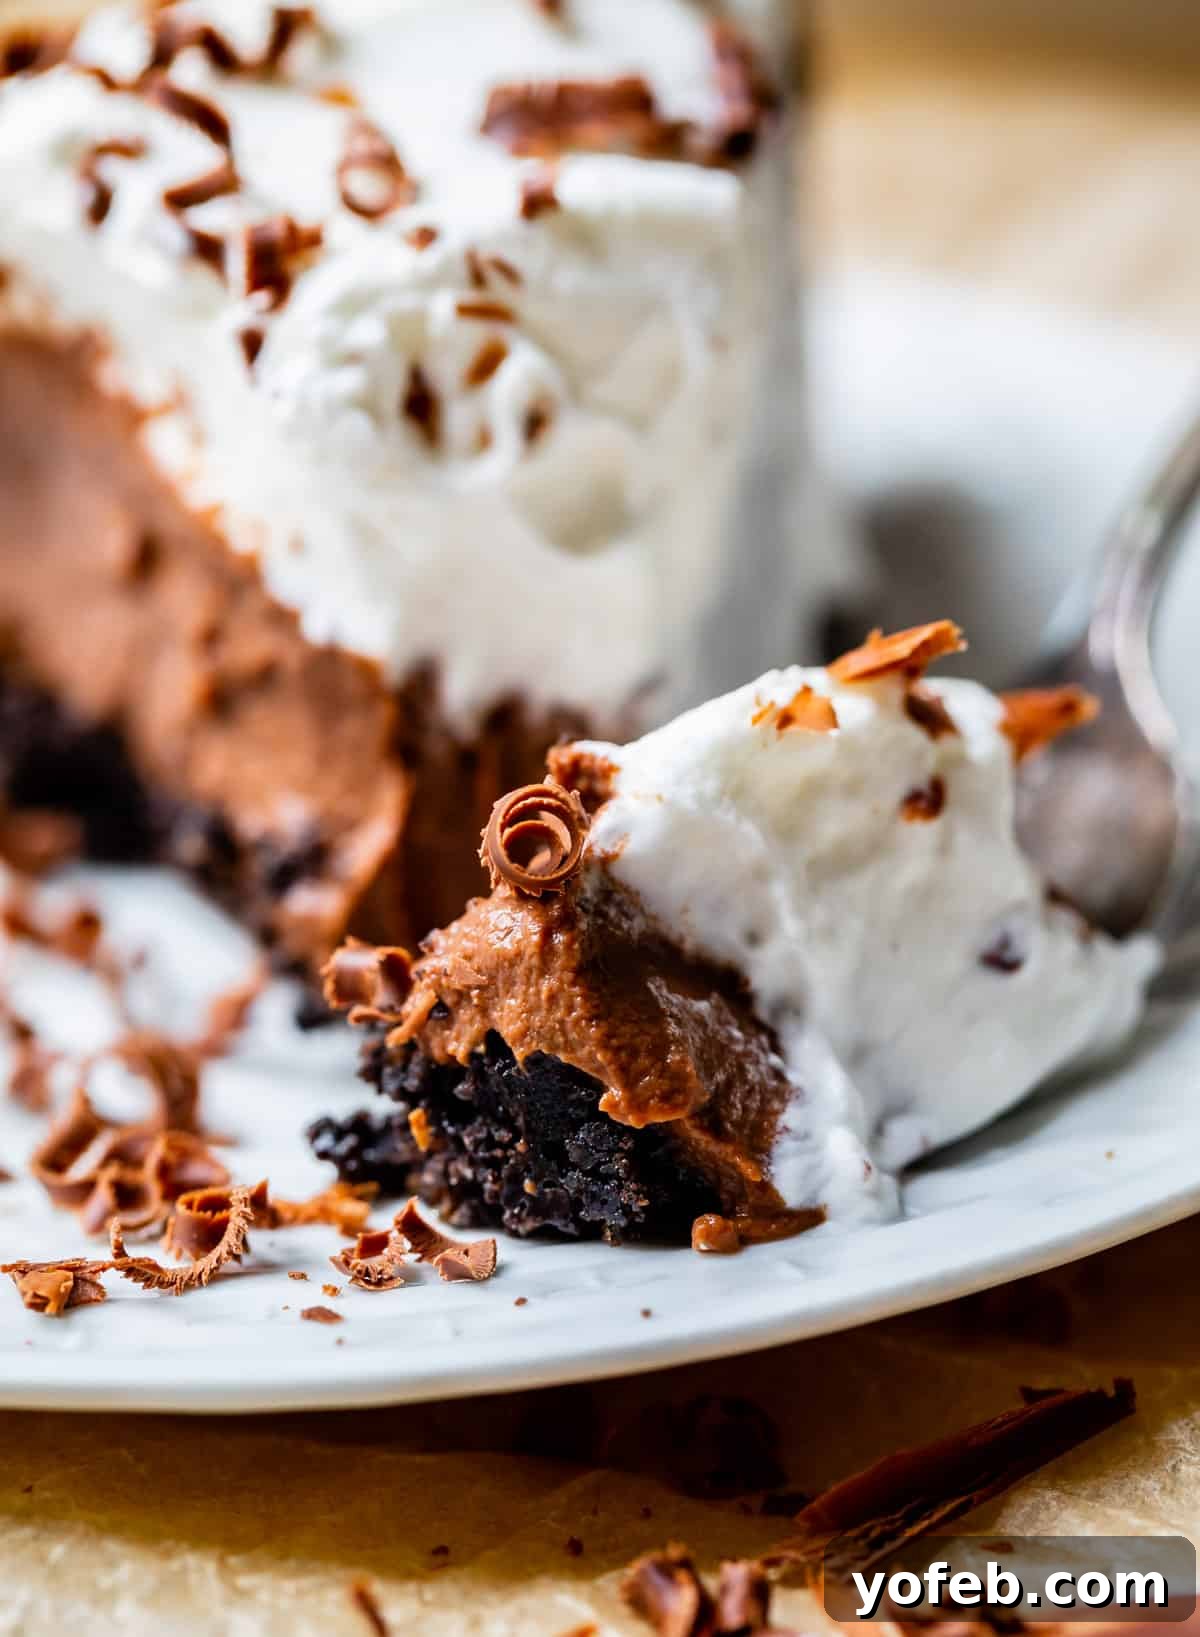
- Chocolate Curls are Non-Negotiable: Speaking of chocolate curls, what might seem like a mere garnish is actually an essential component. I once considered making them optional, but after tasting the pie both with and without, I can definitively say: they are NOT OPTIONAL! They add a crucial textural contrast and an elegant visual appeal that completes the pie. Don’t worry, the recipe notes include an easy hack using a chocolate bar and a vegetable peeler, so no complicated melting and scraping is required.
- Quality Matters, Always: This recipe emphasizes using high-quality chocolate. Skimping on this ingredient will inevitably result in a less satisfying, “cheap-tasting” pie. For the pudding itself, invest in a good quality chopped chocolate bar (like Ghirardelli). You might feel a little “grouchy” about the price, but trust me, that feeling means you’re buying the right kind of chocolate – it truly makes all the difference. For the curls, chocolate chips can be acceptable, but prioritize quality for the pudding.
- The Secret to Unrivaled Richness: Prepare for a generous amount of egg yolks. These golden treasures are the undisputed secret to achieving the BEST, richest texture and a wonderfully deep flavor in your pudding. No store-bought pudding mix can ever compete with this level of homemade decadence. 🎶 Ain’t nothing like the real thing, baby… 🎶
- The Game-Changing Hand Mixer Technique: This is my big secret and the reason for the pie’s PERFECT texture: use a hand mixer to beat the pudding mixture at key stages – before, during, and after it’s heated on the stove. This innovative technique whips a significant amount of air into the pudding, making it incredibly light, fluffy, and ultra-creamy, ensuring it absolutely melts in your mouth with every spoonful. It’s a complete game-changer, my friends!
- Deceptively Easy: Despite its gourmet taste and sophisticated texture, this recipe is surprisingly easy to make. Once you’ve completed about 10 minutes of active stirring by the stove, the most challenging part is over. The rest is mostly chilling time, allowing you to prepare other dishes or simply relax.
Essential Ingredients for Your Perfect Chocolate Cream Pie
Gathering your ingredients ahead of time ensures a smooth and enjoyable baking process. Here’s a quick overview of what you’ll need for this truly amazing chocolate cream pie. For the complete list of quantities and detailed instructions, please jump to the recipe card below!
- For the Crust: Oreo cookies or graham crackers for crumbs.
- Fats: Unsalted butter (for crust and pudding).
- Dairy: Whole milk and heavy cream (for rich, creamy pudding and fluffy whipped cream).
- Eggs: 1 large egg and 4 large egg yolks (the secret to extraordinary pudding texture).
- Sweeteners: Granulated sugar (for pudding) and powdered sugar (for whipped cream).
- Thickeners: Cornstarch (essential for pudding consistency).
- Chocolate Powerhouses: Unsweetened cocoa powder (for deep chocolate flavor) and high-quality semi-sweet chocolate (opt for bars over chips for superior melting and flavor).
- Flavor Enhancers: Pure vanilla extract (a must for any dessert) and kosher salt (balances sweetness and enhances all flavors).
- For Chocolate Curls: Semi-sweet chocolate chips and a touch of shortening (or butter/coconut oil).
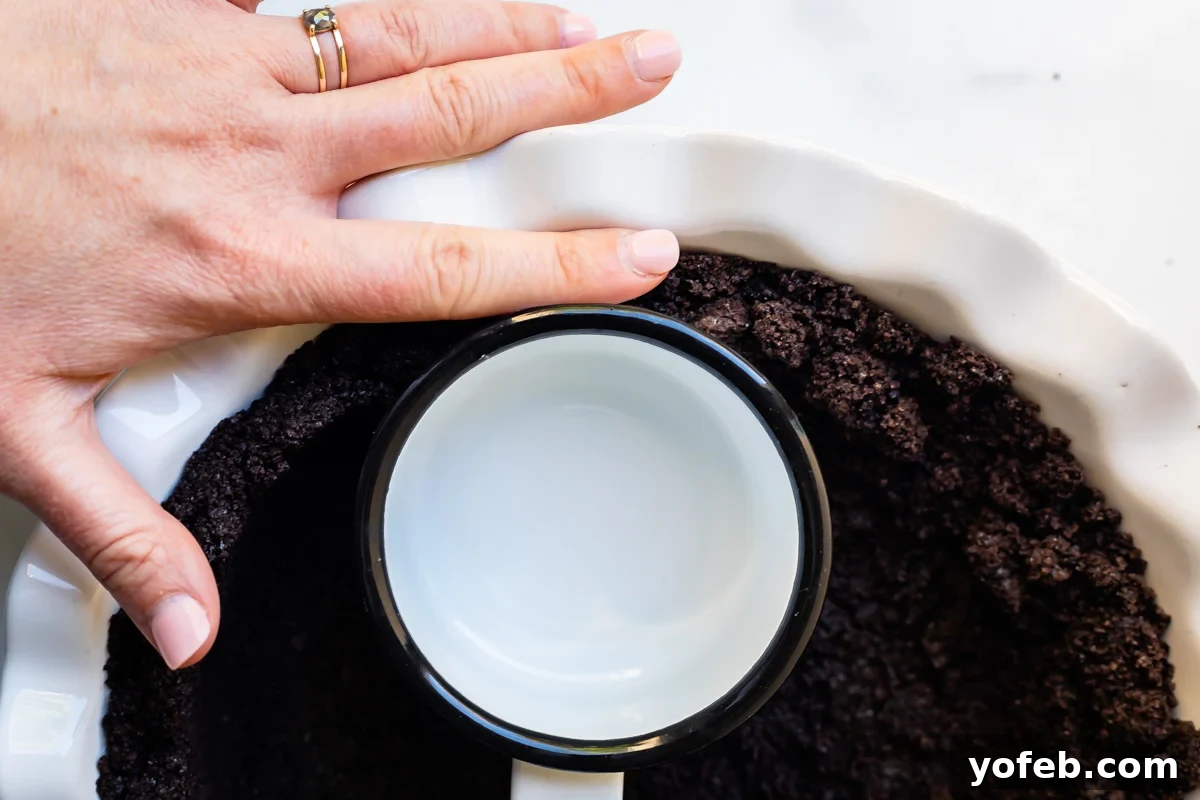
Choosing the Ideal Crust for Your Chocolate Cream Pie
A truly exceptional pie begins with an exceptional crust. For this chocolate cream pie, you have three classic options, each offering a distinct flavor and texture profile:
- Oreo Cookie Crust: A decadent, deeply chocolatey, and delightfully crunchy base.
- Graham Cracker Crumb Crust: A classic, buttery, and slightly sweet foundation that complements the chocolate perfectly.
- Classic Flaky Pastry Pie Crust: The traditional choice, offering a tender and buttery pastry texture.
I recently conducted an informal poll on Instagram while developing this recipe, and the Oreo crust narrowly edged out the graham cracker crust in popularity. It’s simply hard to resist the allure of chocolate in a crunchy, buttery cookie form, isn’t it? However, a homemade graham cracker crust holds a very close second place for me. Both are fantastic choices, and the decision ultimately rests on your personal preference.
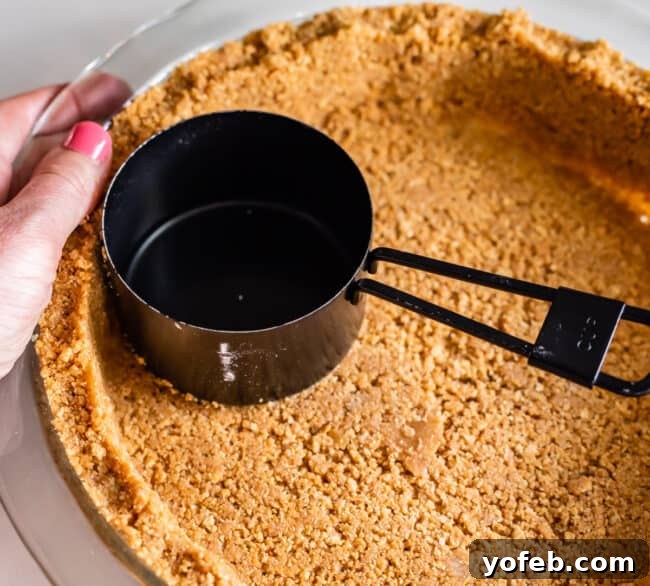
Interestingly, I didn’t even include a regular pastry pie crust in my poll. Why? Because, in my humble opinion, it truly shouldn’t be considered for a chocolate cream pie. Chocolate cream pie, with its rich and creamy filling, is SO much more enjoyable when nestled in a crumb crust. I stand by this, people! While tradition might dictate that chocolate pie belongs in a classic pastry crust, I’m thoroughly convinced that this tradition originated long before the glorious invention of Oreos. A crumb crust provides a delightful textural contrast and enhanced flavor that truly elevates this dessert.
When forming your crumb crust, I find that a simple measuring cup or a drinking glass, along with your fingers, works best to press the mixture firmly and evenly into the pie pan. Pay special attention to pressing it well into the corners and up the sides. Crucially, don’t skip baking your crumb crust for about 10 minutes. This essential step ensures it becomes wonderfully crisp and golden, preventing any dreaded sogginess. We need that sturdy, flavorful foundation to perfectly complement our creamy, dreamy chocolate filling!
Step-by-Step Guide: Crafting the Ultimate Chocolate Cream Pie
Let’s dive into the process of creating this luxurious chocolate cream pie. This recipe employs a unique method to ensure a velvety smooth and incredibly light pudding every time.
First, gather your eggs. You’ll need one large whole egg and four large egg yolks. These egg yolks are truly the secret weapon in puddings and custards, imparting an unparalleled richness and creamy texture. They are packed with flavor and provide that luscious mouthfeel that no shortcut can replicate.
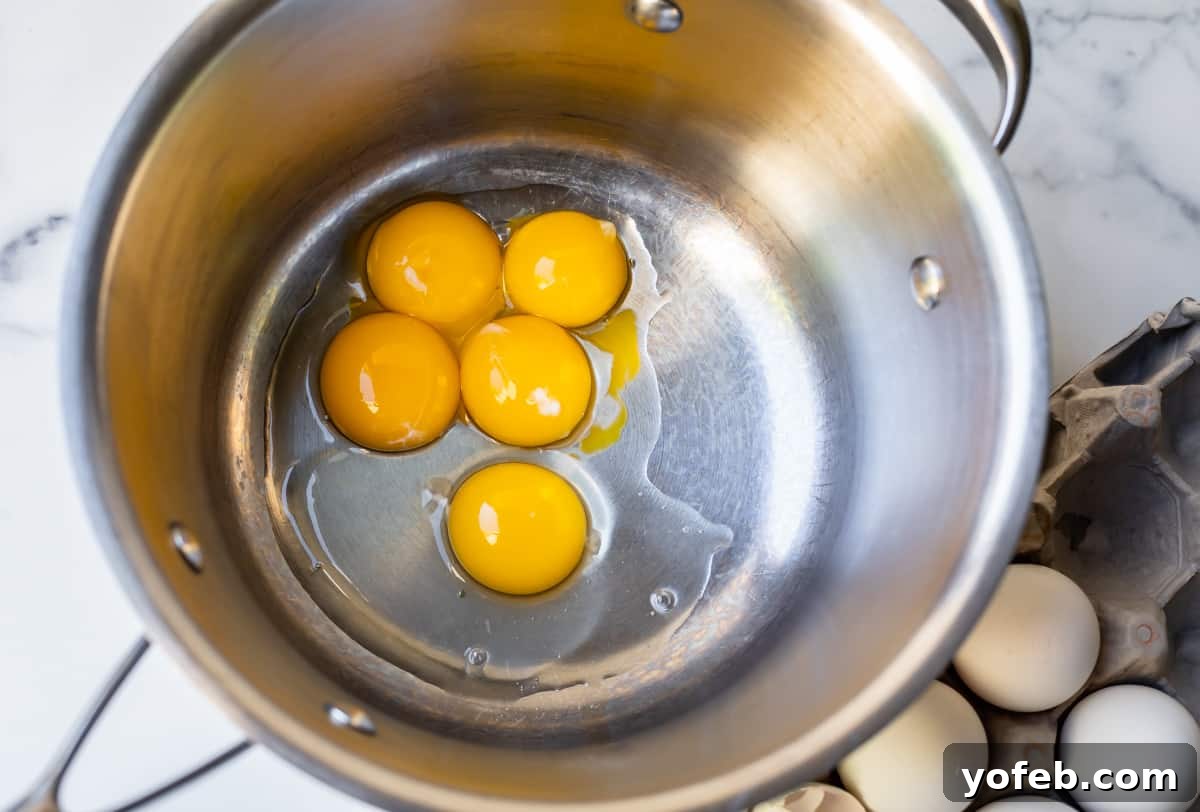
Carefully crack them into a clean, stone-cold 3-quart saucepan. It’s crucial that the pan is *not* on the stove yet. For now, we’re simply using it as a mixing bowl. We have some important business to take care of before we even think about turning up the heat.
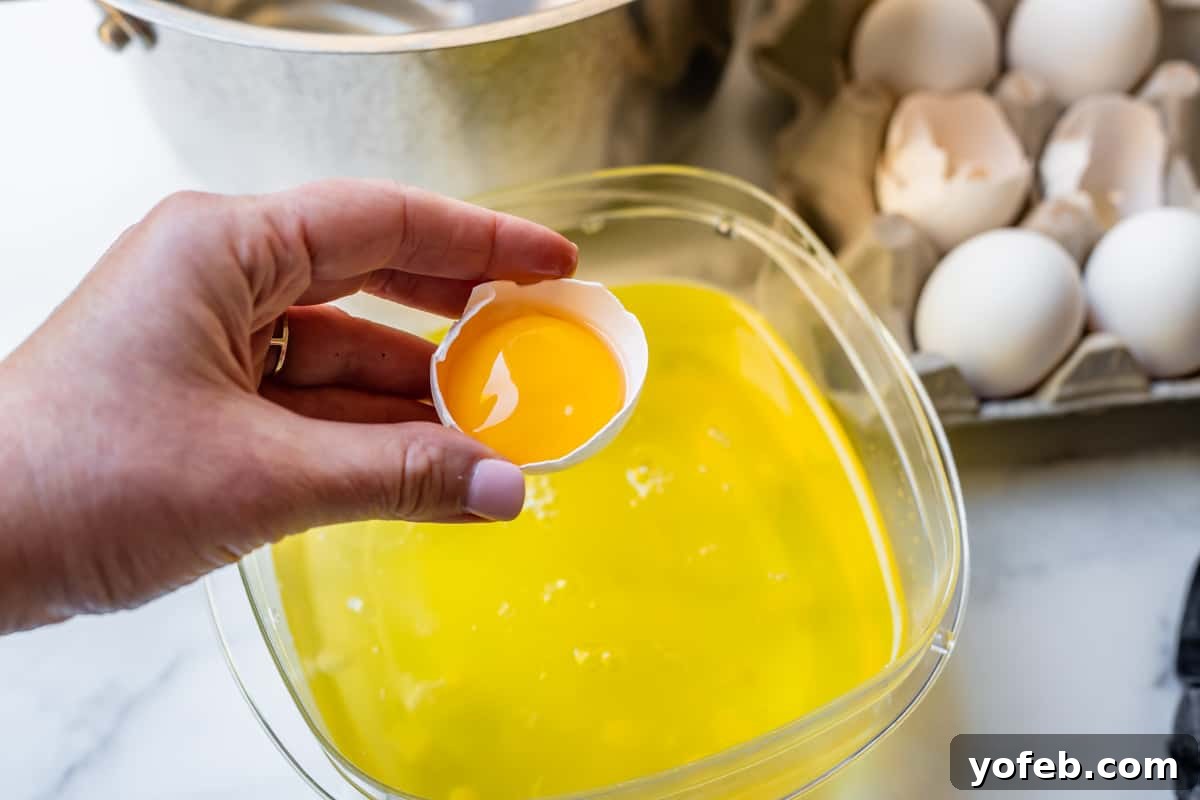
As a fun aside, here are all the egg whites I accumulated from my “million tests” on this recipe. Someday, I promise, I’ll concoct an amazing egg white omelette recipe for you all. For now, feel free to store them in your fridge and entertain the notion of using them later. (Just kidding, mostly!) I typically add a few whites at a time to my kids’ scrambled eggs – it’s a great way to reduce waste and boost protein.
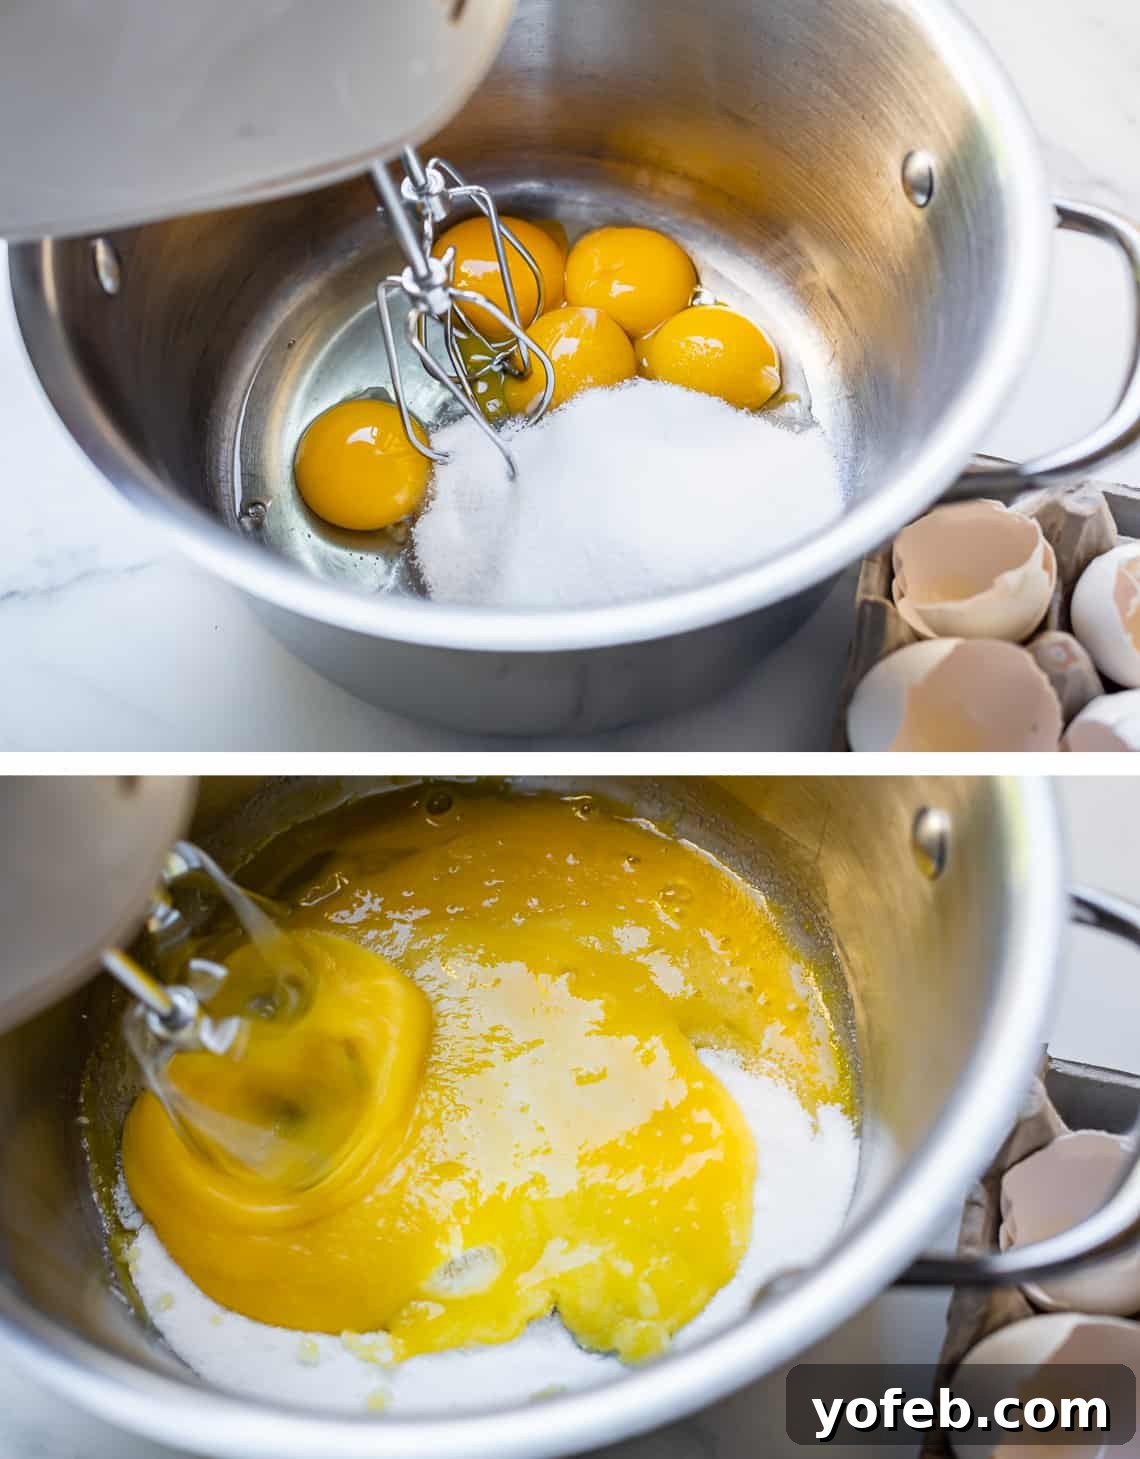
Now, add the granulated sugar to the saucepan with the eggs. This is where our “secret weapon” comes into play: grab your hand mixer. Beat the mixture vigorously until it has significantly lightened in color and become fluffy, as you’ll see in the next image. Using an electric mixer is key to achieving the pudding’s exceptional, light texture. While you *can* accomplish this with a whisk and plenty of elbow grease, your final product won’t be quite as airy and melt-in-your-mouth tender.
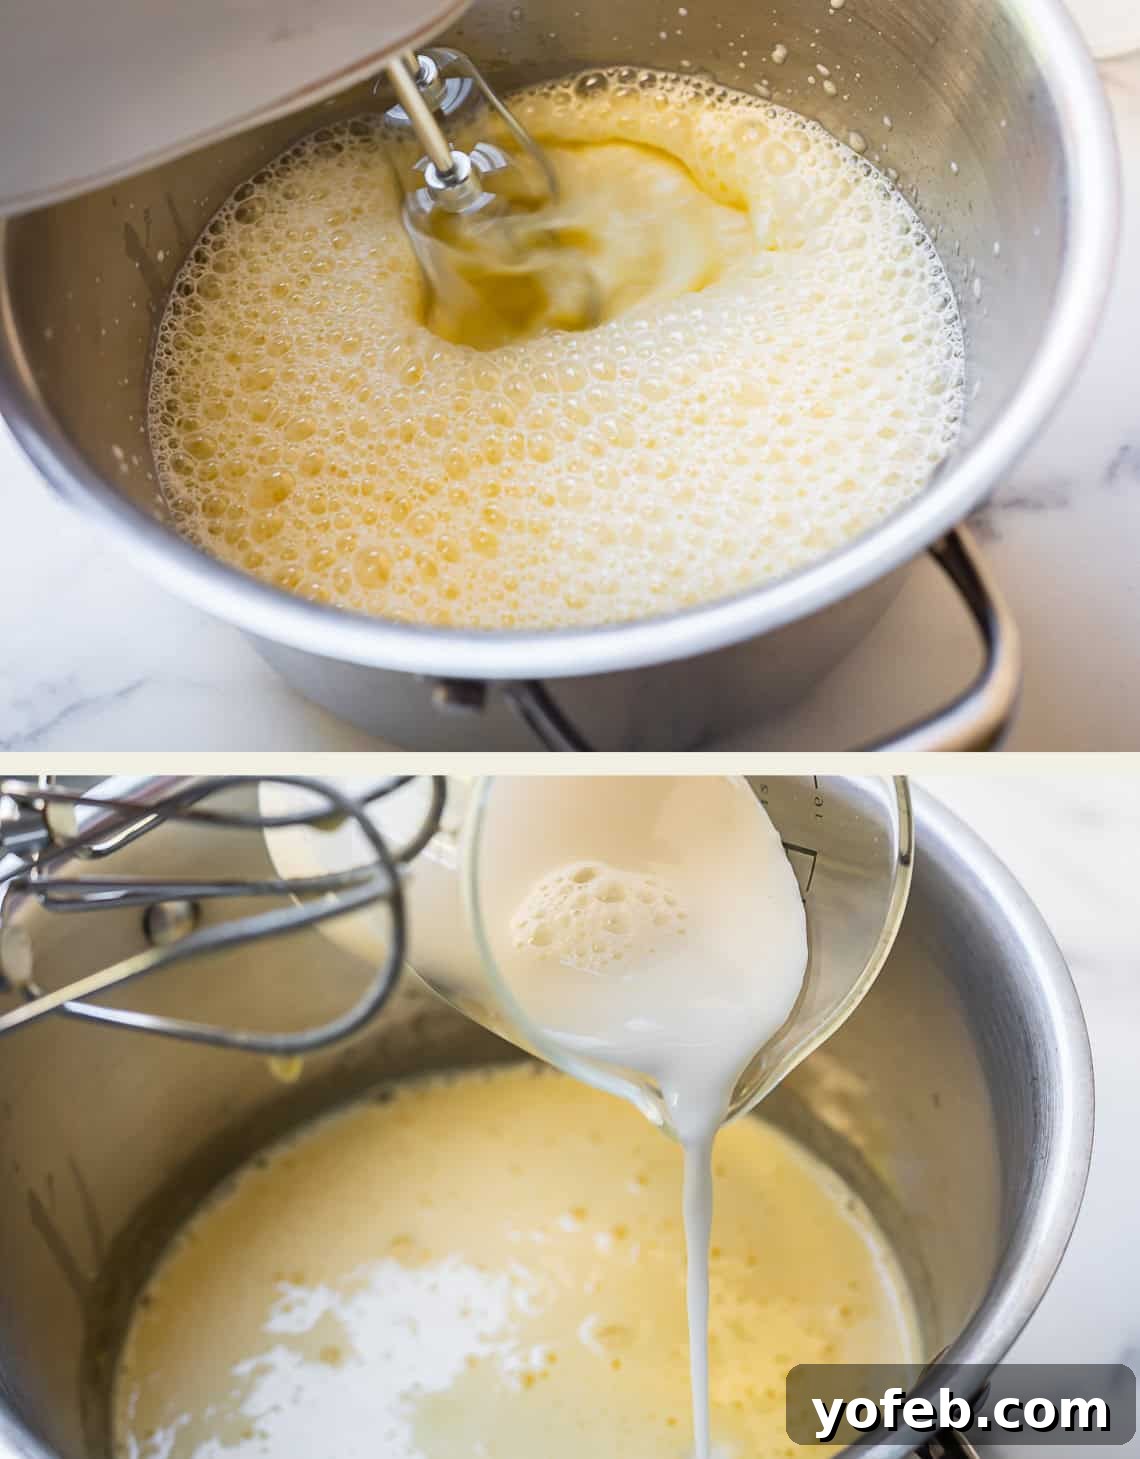
Notice how wonderfully light and airy the egg mixture has become? Next, pour in one cup of cold whole milk and continue beating with the hand mixer. The mixture will become beautifully frothy and fully incorporated, forming a light base for your pudding.
Now, it’s time to introduce the dry ingredients: cornstarch, high-quality unsweetened cocoa powder, and a touch of salt. These are crucial for both thickening and deep chocolate flavor.
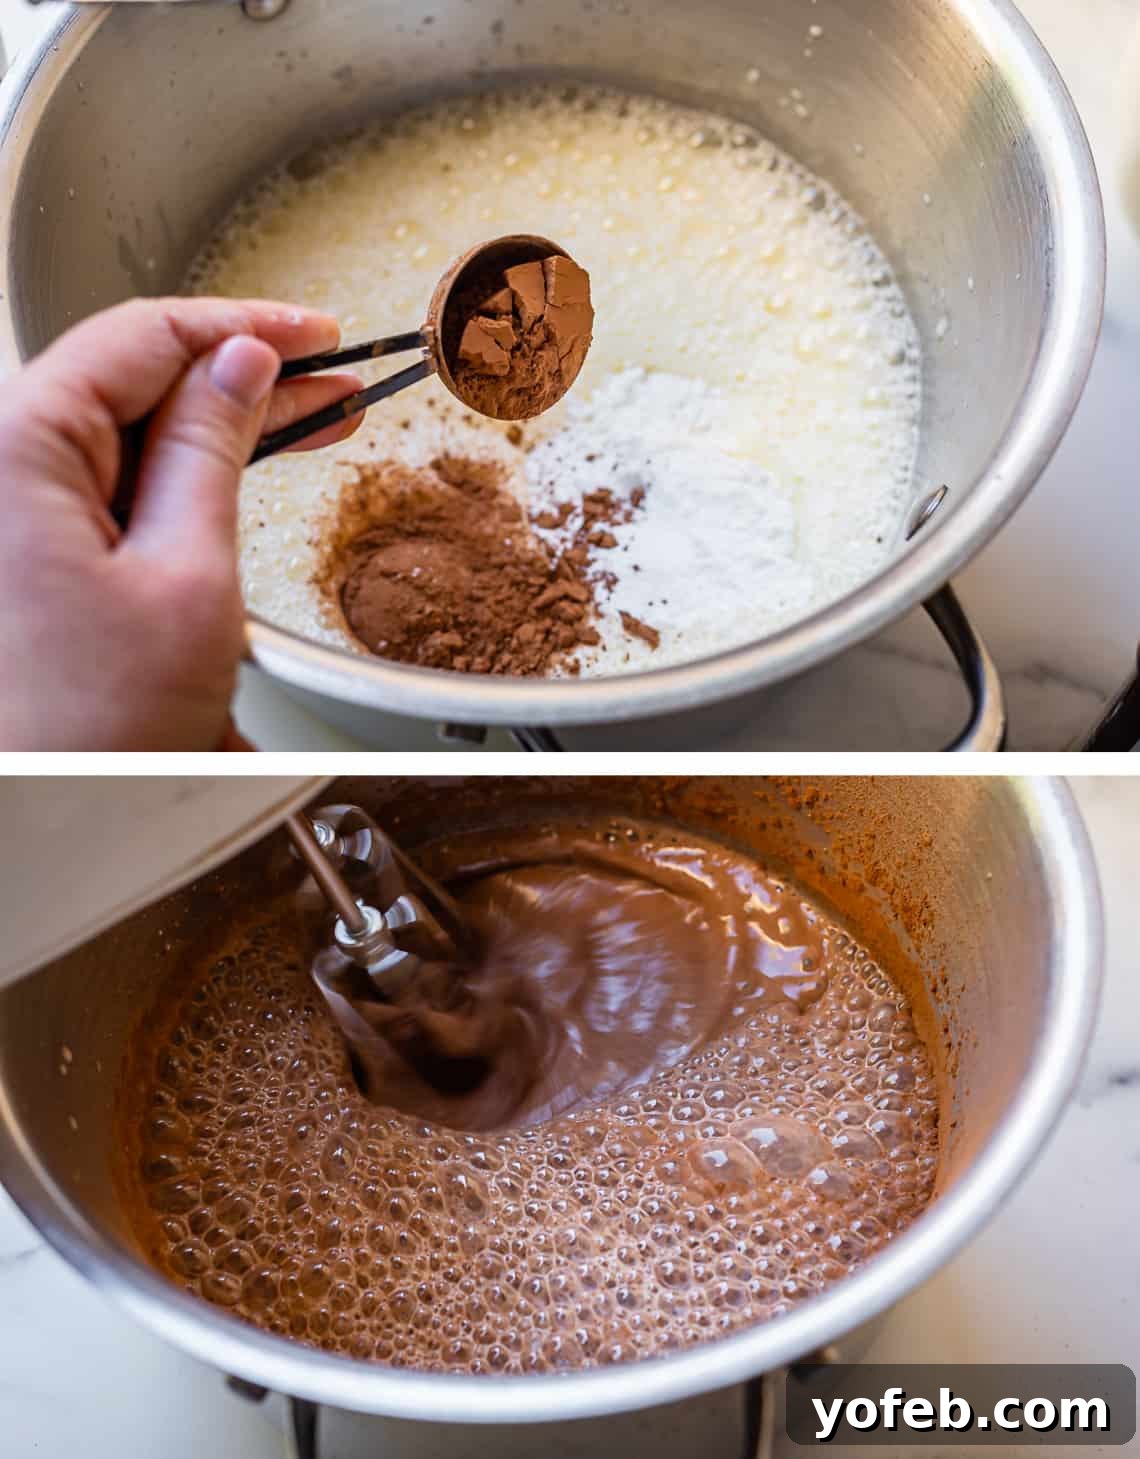
Carefully beat these dry ingredients into the mixture with your hand mixer on low speed, taking care to minimize the inevitable “cocoa dust cloud” that might poof up. Once combined, be sure to scrape down the edges of the saucepan to ensure everything is thoroughly incorporated.
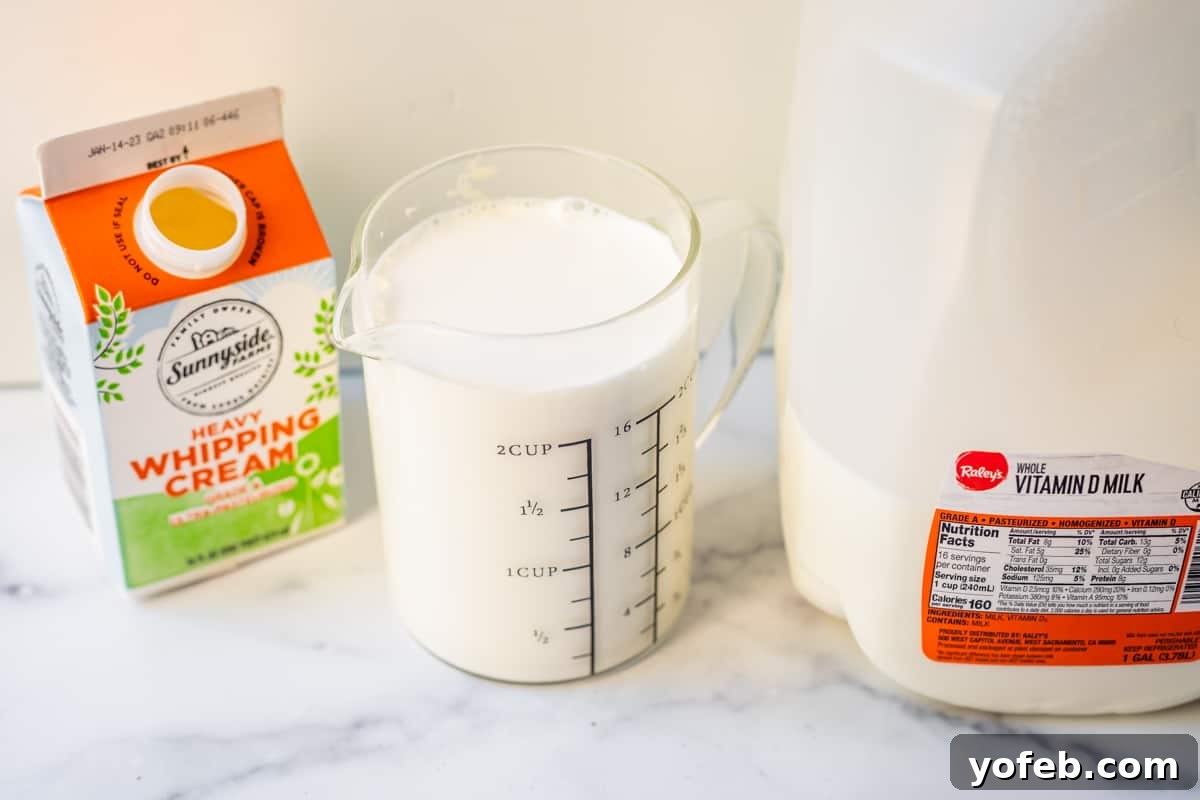
While you’re mixing, heat up the remaining milk and cream in the microwave until it’s very hot and just beginning to bubble. This is my simplified hack for tempering eggs, a step often considered intimidating in traditional pudding making. Typically, you’d heat milk on the stove, whisk eggs separately, then slowly pour some hot milk into the eggs while whisking constantly (to “temper” them and prevent scrambling), before returning the mixture to the hot pan. It’s a rather fussy and confusing process!
Thanks to our hand mixer, we’ve already thoroughly whipped the eggs in the pan. This beating action effectively breaks up their proteins, preventing them from clumping and scrambling – which is the entire purpose of tempering! We’re achieving the same result with far less hassle.
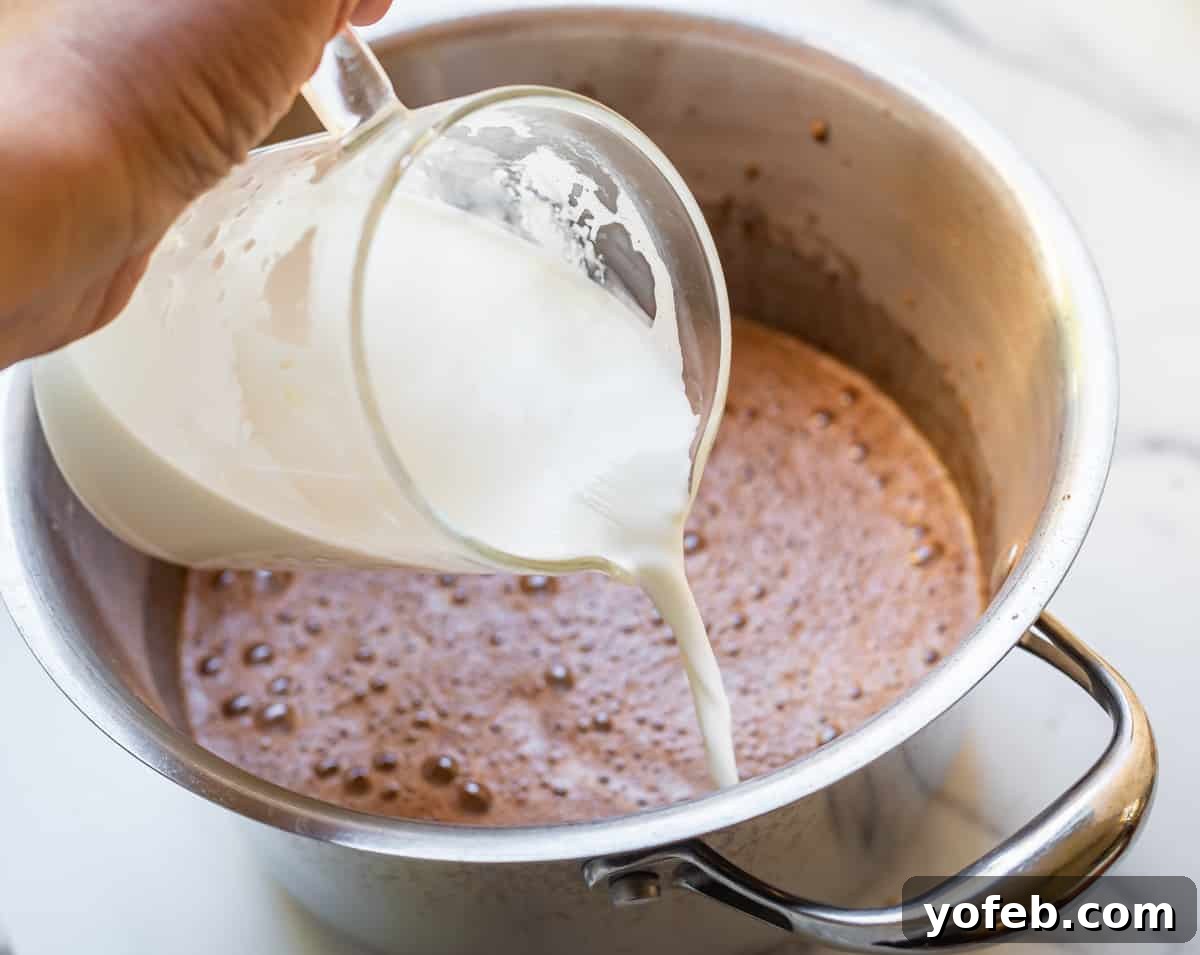
Now, with your hand mixer running on low speed, slowly and steadily pour the hot milk and cream mixture into the egg mixture in the saucepan. Don’t worry about any thin film that might have formed on top of the hot milk; it usually sticks to the measuring cup you’re pouring from. We’re aiming for exquisitely smooth pudding, so if a bit of film does make its way into the pot, it’s not the end of the world, but ideally, we avoid it. Continue beating until everything is well combined and frothy again. Keep that mixer nearby!
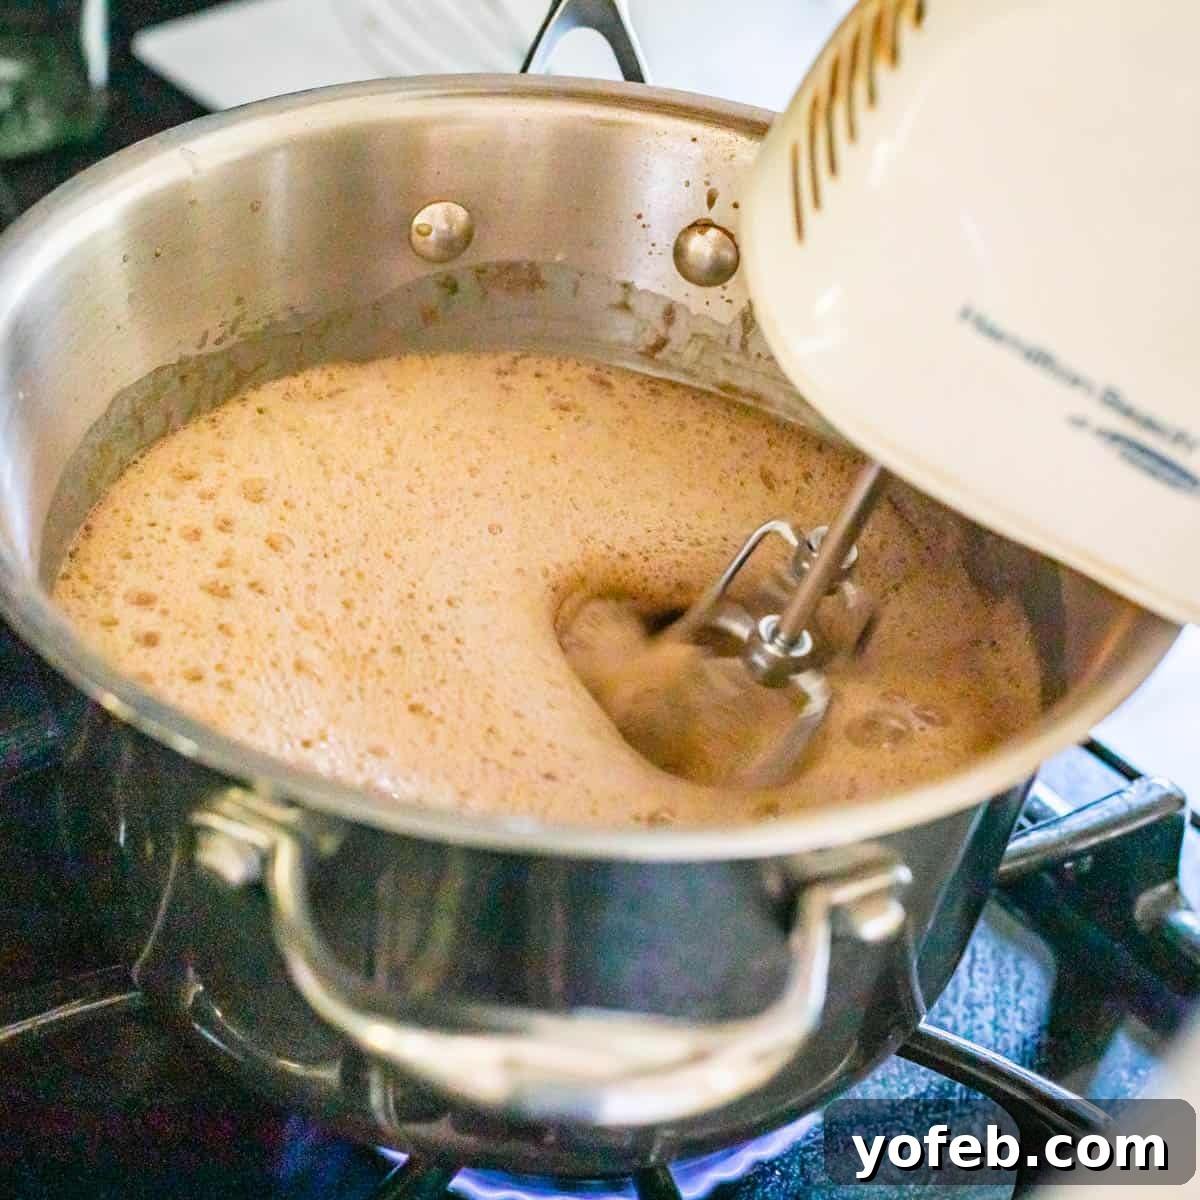
Finally, you can move your saucepan to the stove burner. Apologies for this slightly grainy photo – the lighting wasn’t ideal, but I wanted to convey the confidence to bring your mixer right onto your stovetop! Turn the heat to medium and use the hand mixer to give the mixture one last beat as it begins to warm up. Then, turn off the mixer and switch to a whisk. I particularly love these flat whisks because their design allows them to reach into the corners of the pot far more effectively than traditional balloon whisks, ensuring no lumps form.
Maintain medium heat and, critically, do not walk away from the stove during this stage. You’ll need to whisk your mixture every 30 seconds or so, increasing to constant stirring toward the end. This diligence is key to preventing lumps and scorching. The pudding will need to cook on the stove for approximately 7-10 minutes. You’re looking for a gradual thickening and, right at the very end, a small “pop” of one or two bubbles – no more than that. Overcooking can lead to a dense, pasty pudding.
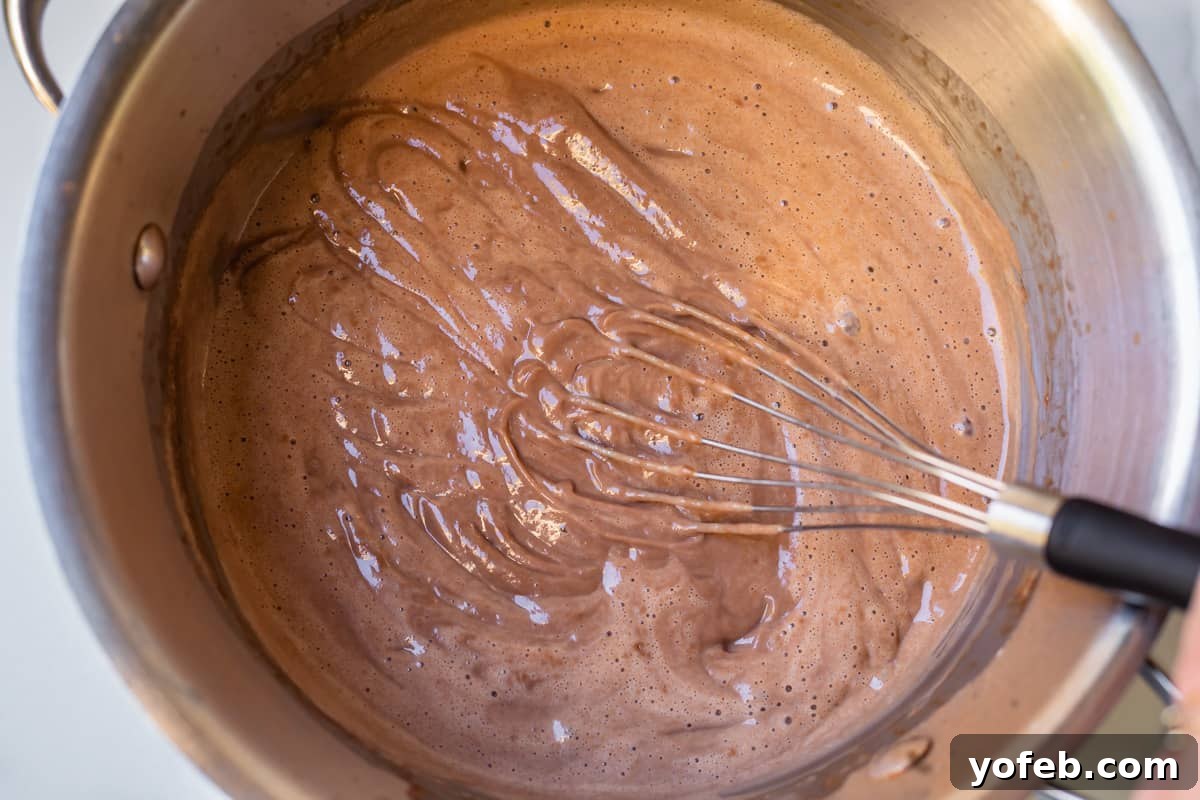
You’ll know your pudding is perfectly done when you can drag your whisk across the surface, and it leaves clear, distinct marks. Remove the saucepan from the heat immediately. Even off the heat, continue whisking whenever you can as you prepare the next ingredients; this keeps it smooth and prevents a skin from forming.
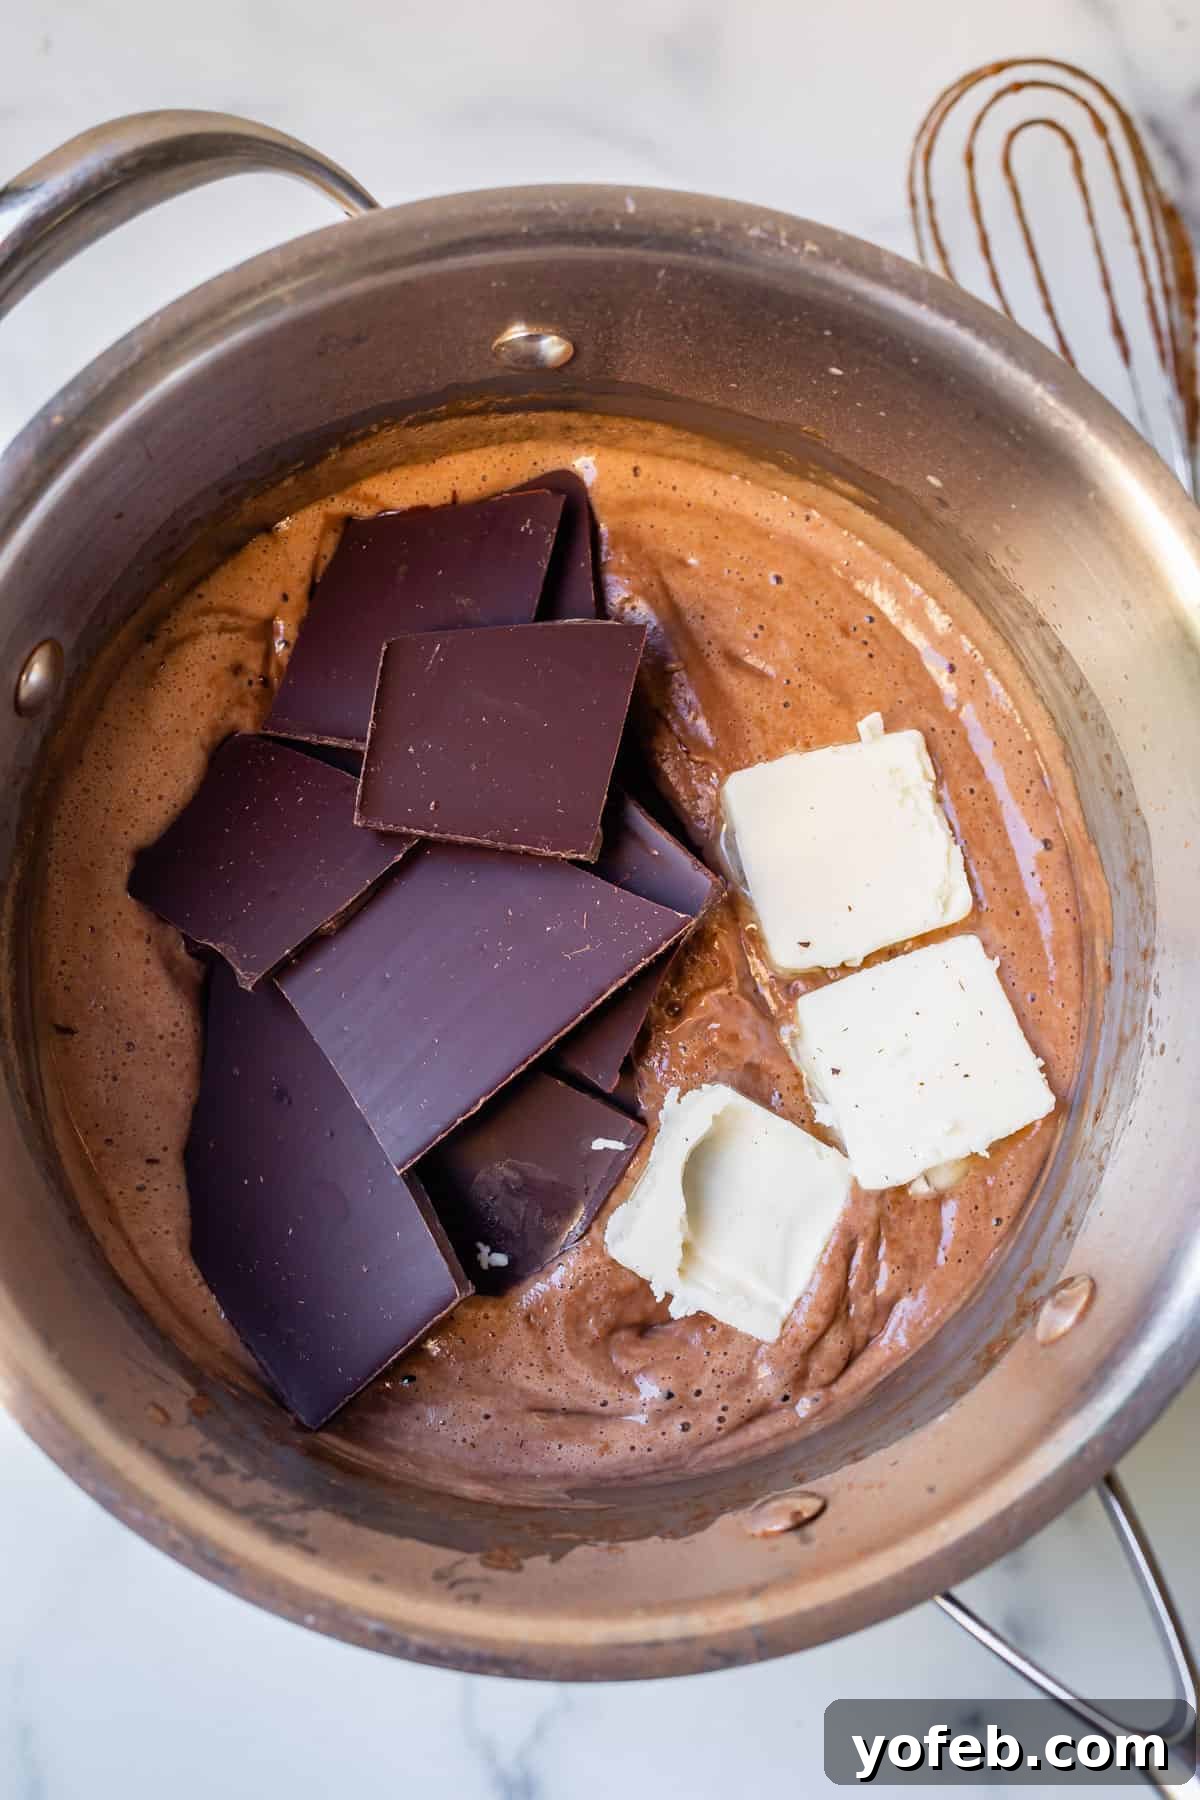
Immediately add 8 ounces of high-quality semi-sweet chocolate (chopped from a good bar, please, not chocolate chips if you can help it!), a generous bit of unsalted butter, and a dash of vanilla extract. I highly recommend using a nice bar of semi-sweet chocolate, such as Ghirardelli. It’s not just about the quality of flavor, but also about how smoothly it will melt into your hot pudding, ensuring a silky finish. Whisk everything until it’s perfectly smooth and glossy.
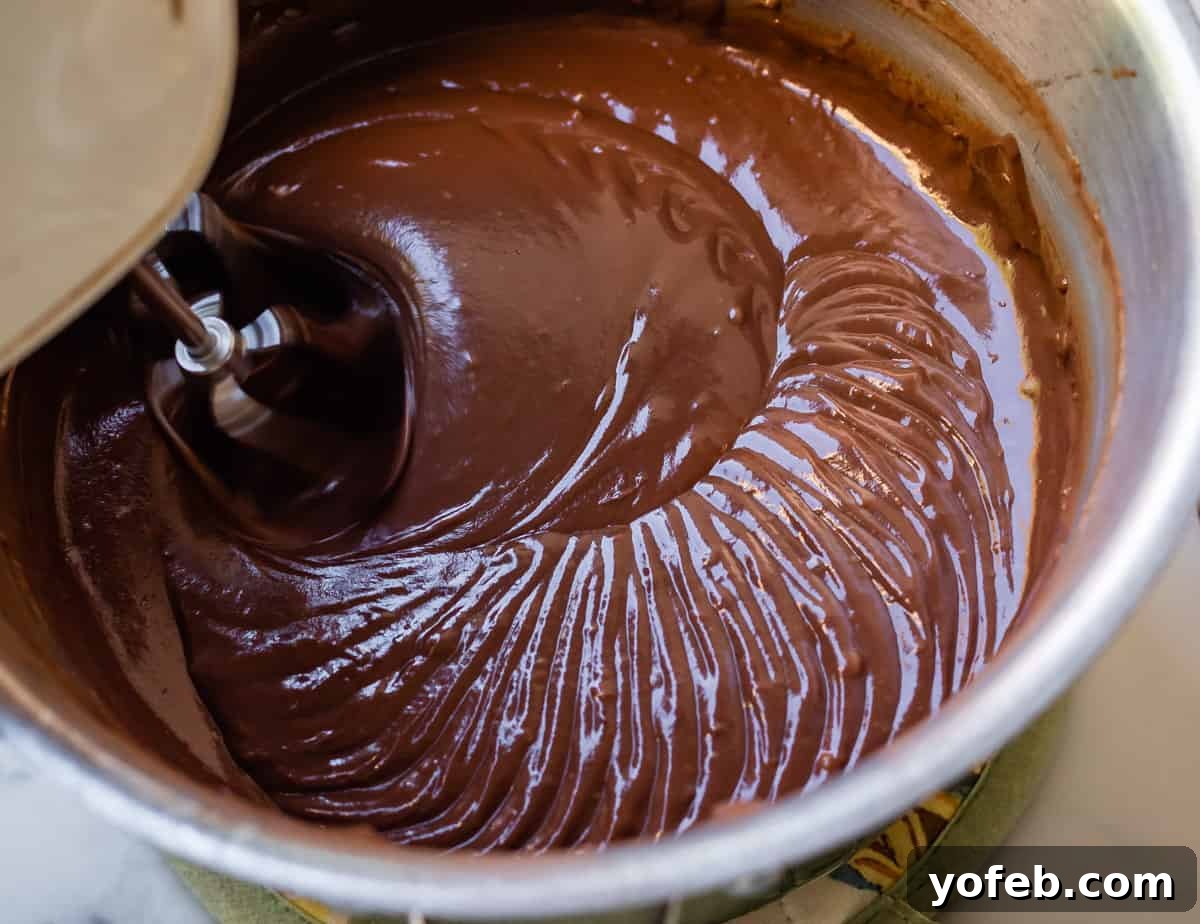
One final, crucial step! Bring out that hand mixer again – no need to even wash the beaters. Beat the finished pudding for about a minute. I know it might seem counterintuitive to beat the pudding at this stage (it probably already looks perfect!), but I implore you, do not skip this step. This final beating whips a significant amount of air into your pudding, transforming it into an incredibly light, airy, and fluffy texture. You simply cannot achieve this exquisite texture any other way! (Okay, I confess, one recipe I found suggested transferring the entire mixture to a food processor and pulsing it, but who wants that extra cleanup? It was a huge pain, and beating with a hand mixer achieves the exact same, superior effect with far less fuss.)
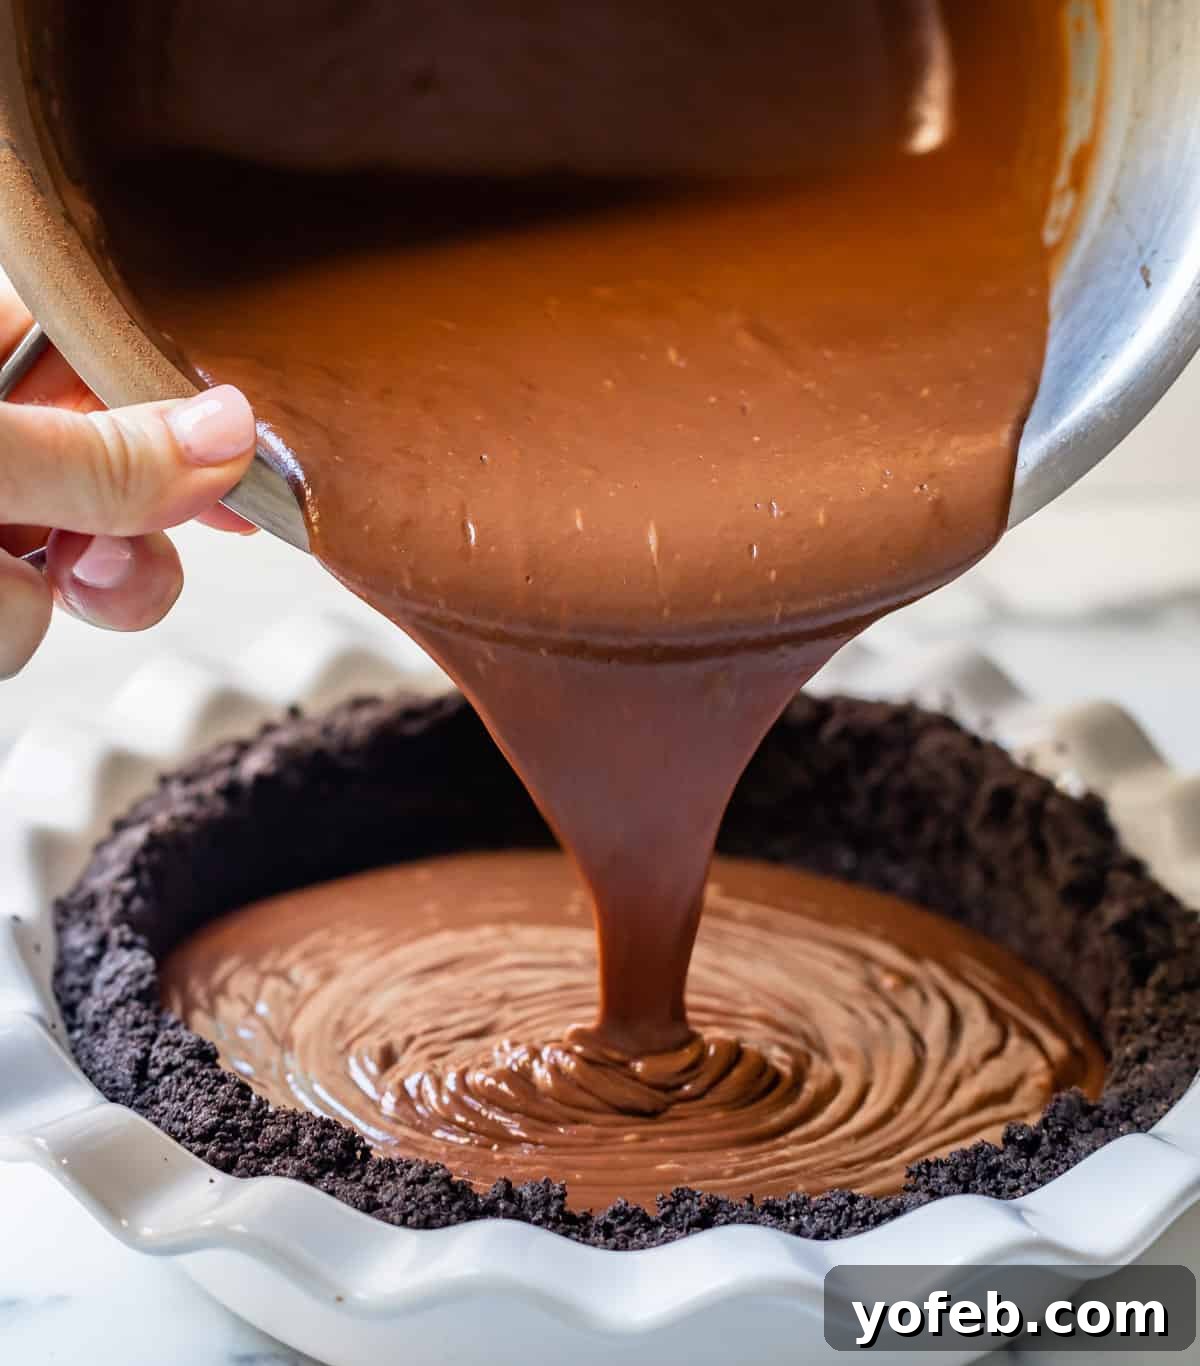
Immediately pour the hot, freshly beaten pudding into your prepared pie crust. Speed is key here; don’t wait around! If the pudding sits still in the pot for any length of time, it will begin to form a “skin” on top. If you then mix this skin back into the pudding before pouring, it will inevitably make your final pudding less creamy and perfectly smooth. It’s not the end of the world if it happens, but we want to avoid it if possible. Work quickly and decisively.
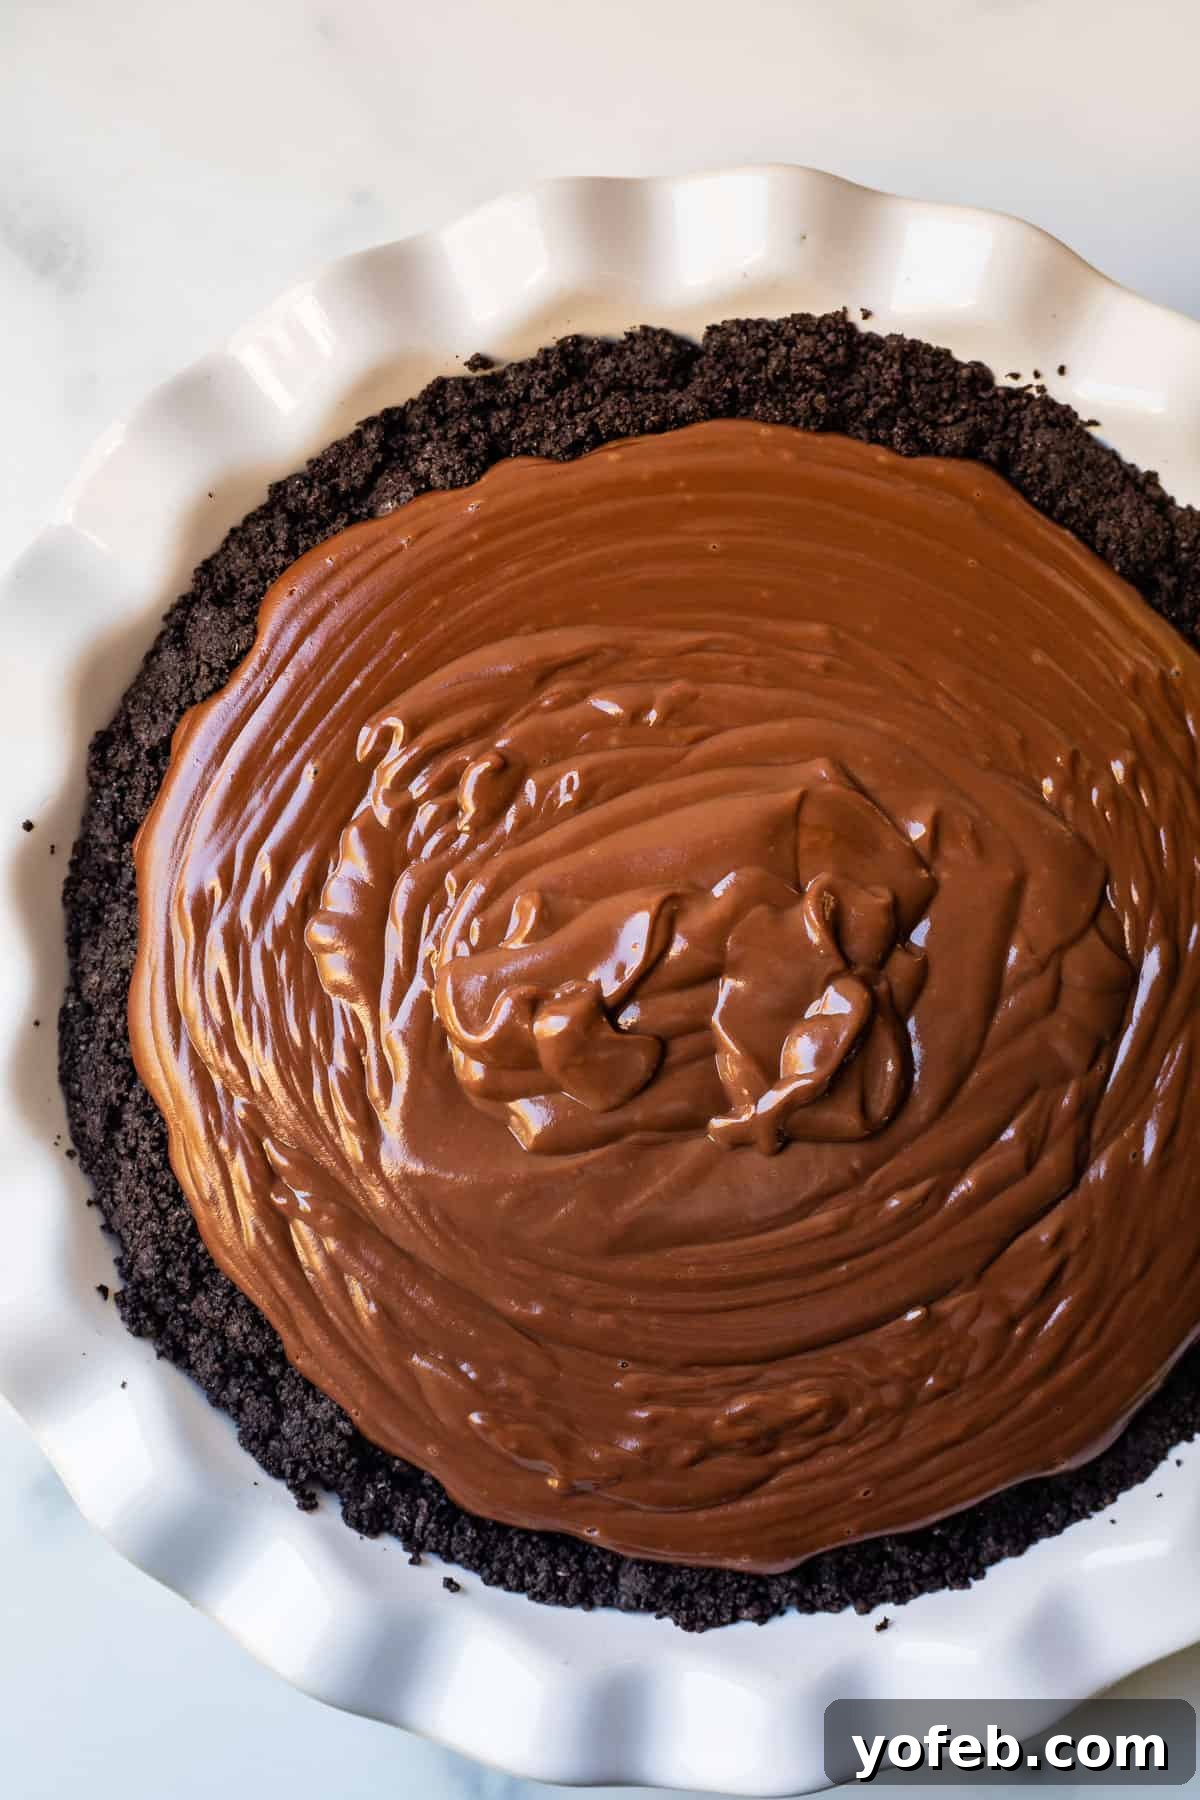
As you pour, you might initially think there’s too much pudding for the pie pan. Just keep adding it slowly, a little at a time; you’ll be surprised how well it fits. If, by some miracle, you absolutely cannot fit another drop, then I have an important directive for you: scrape the remaining pudding into a small bowl *for yourself* and devour it immediately. Do not tell anyone else about this secret treat! You earned this pie, Little Red Hen; it’s all yours.
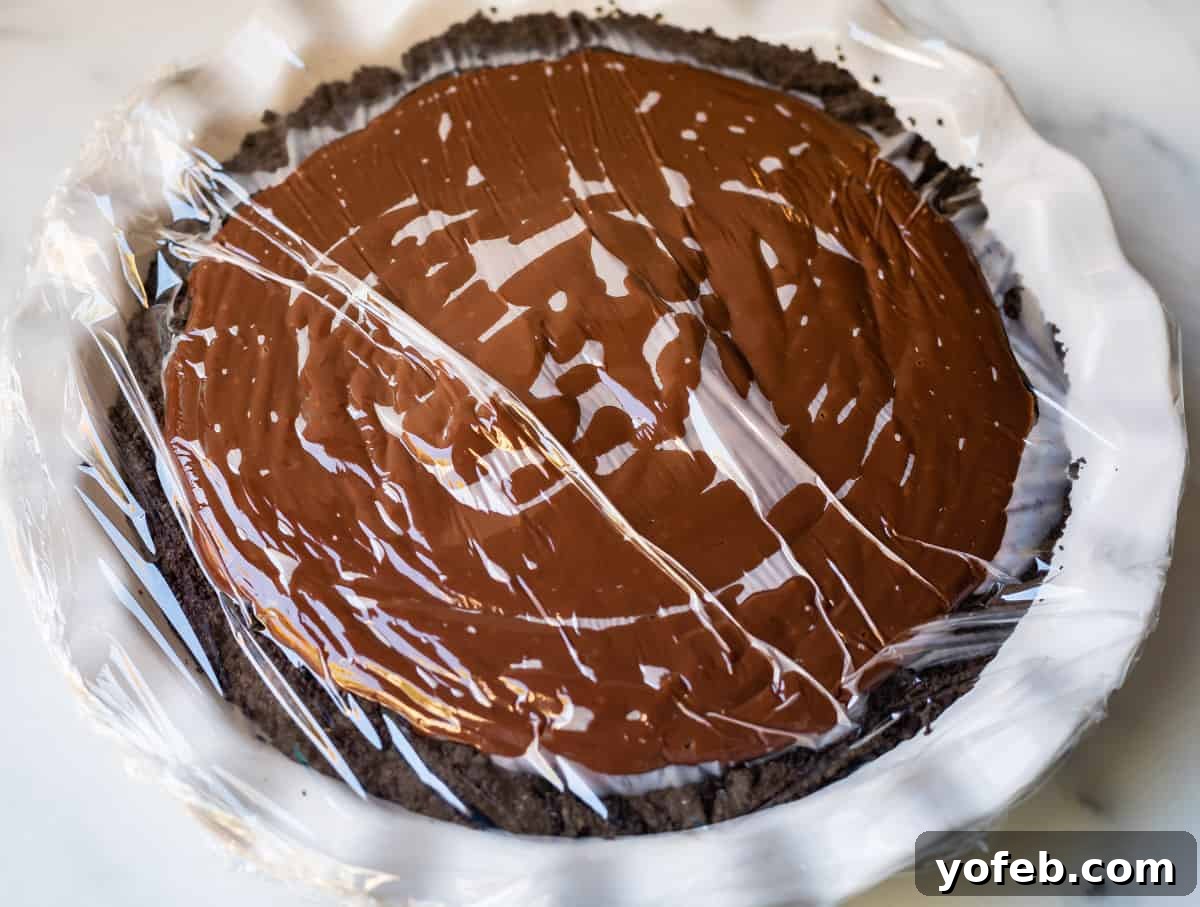
As soon as the pudding is poured, cover the pie with plastic wrap, pressing it directly onto the surface of the pudding. This crucial step prevents the formation of an undesirable “skin” or film on top as it cools. Then, transfer the pie to the refrigerator for at least 4 hours, though 8 hours or even overnight is ideal for the best set and flavor development. This makes it a perfect make-ahead dessert, ideal for entertaining or simply preparing in advance!
Mastering Chocolate Curls for Your Pie
While your pie is chilling to perfection in the refrigerator, it’s the ideal time to create those elegant chocolate curls. They’re surprisingly easy to make, adding a professional and delicious touch. However, if you find yourself short on time or energy for “one more thing,” don’t fret – check the recipe notes for a brilliant hack using a vegetable peeler and a good quality chocolate bar!
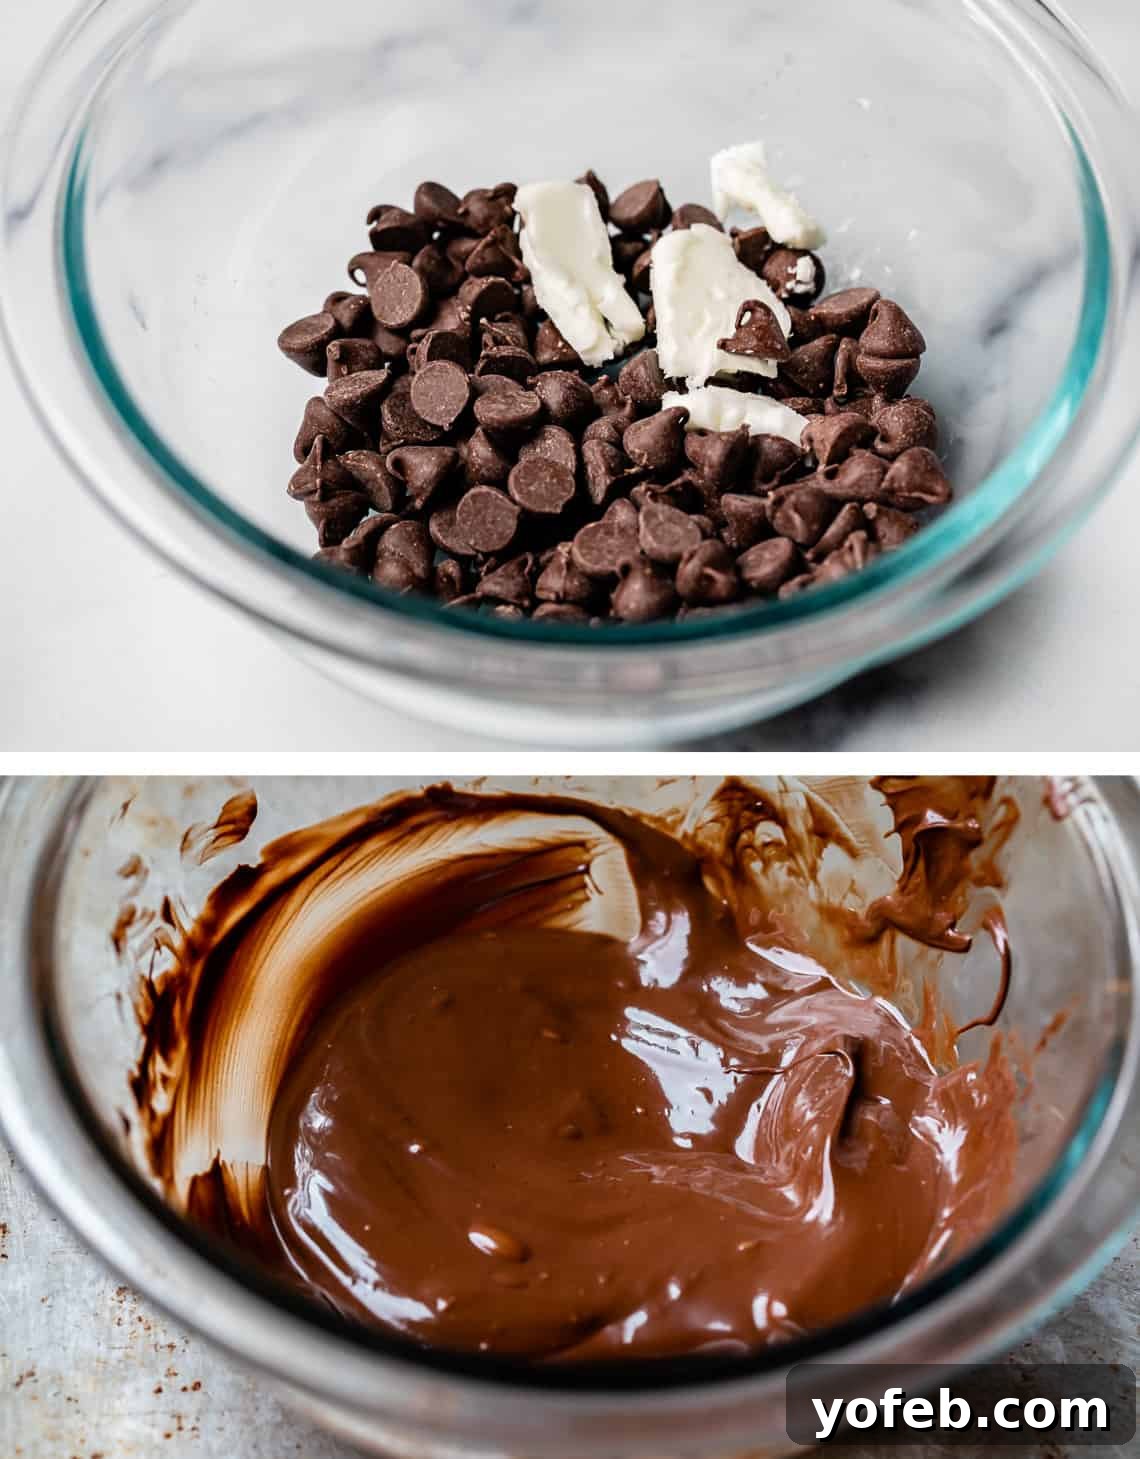
To begin, melt your chocolate chips with a bit of shortening (or butter/coconut oil) in increments in the microwave, stirring well after each interval until the mixture is smooth and completely melted. Once melted, use an offset spatula to spread the chocolate into a very thin, even layer across a large baking sheet. Aim for a consistent thickness to ensure even curling.
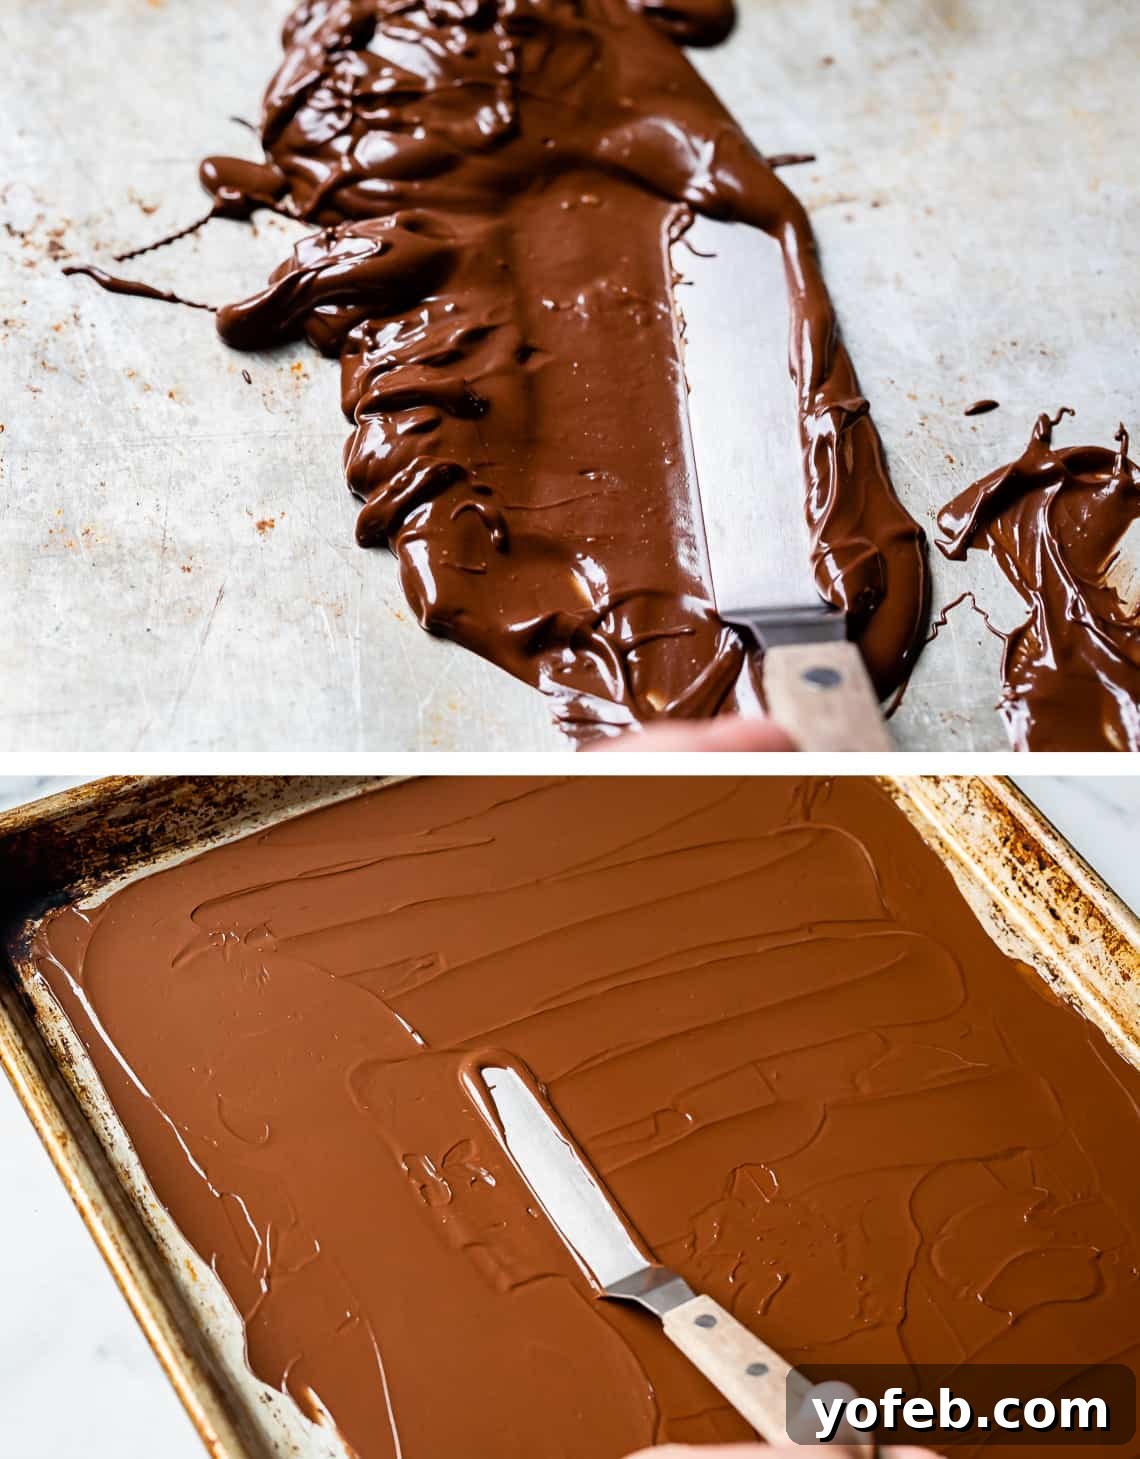
Place the baking sheet in the freezer for just a couple of minutes; the chocolate hardens remarkably fast. Remove it from the freezer and let it rest at room temperature for a few minutes. This resting period is crucial. If you try to scrape the chocolate immediately after freezing, it will likely come off in brittle shards rather than beautiful curls. Exercise a little patience and try again in about one minute.
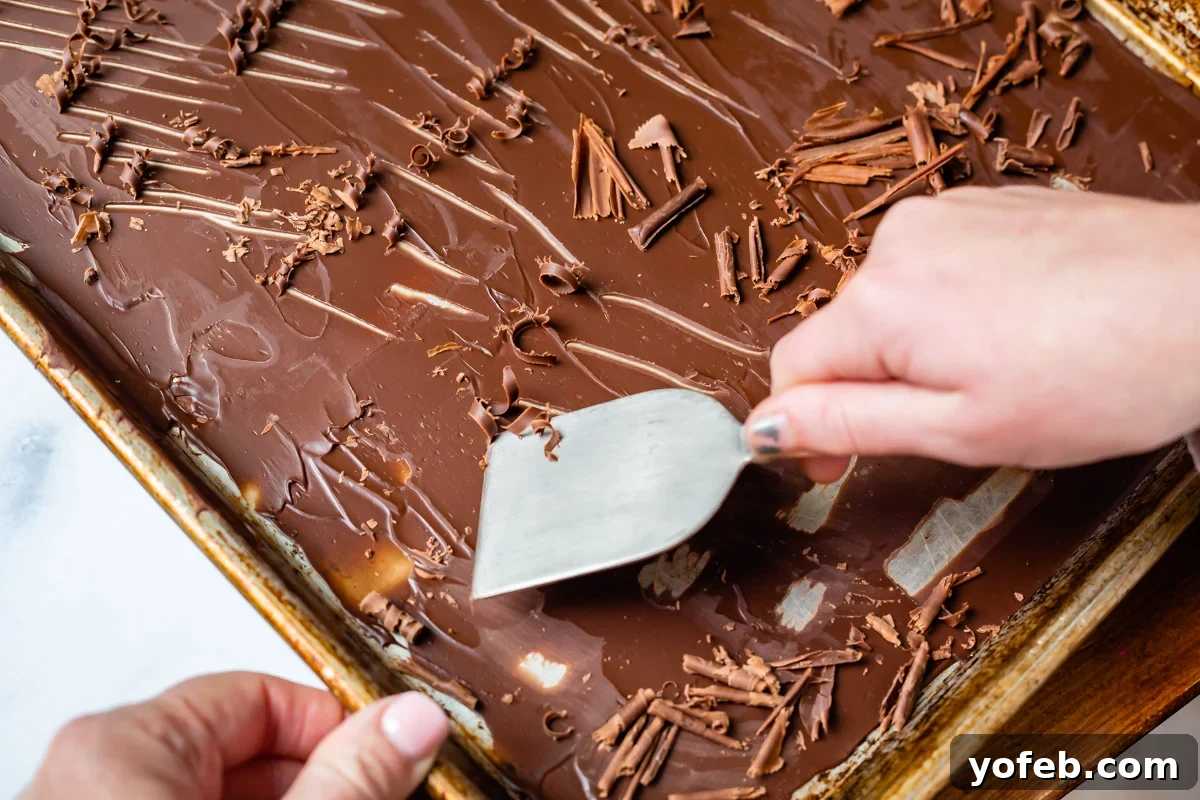
Continue testing and scraping with an upside-down metal spatula (or any flat metal kitchen tool) until you achieve elegant curls. You can use the full length of the spatula for tightly rolled, classic curls, or just the edge for more delicate spiral shapes. If the chocolate becomes too warm and starts to slump or bend instead of curling when you push with the spatula, simply pop the baking sheet back into the fridge or freezer for another minute to firm up. Conversely, if it’s too cold and produces only brittle shards, let it warm up for a minute or two more. Once you’ve created your beautiful curls, gather them and store them in the freezer until you are ready to top and serve your pie. This ensures they remain firm and distinct.
Creating a Cloud-Like Whipped Topping
Once your chocolate cream pie is thoroughly chilled and your gorgeous chocolate curls are ready, it’s time to prepare the crowning glory: the fresh, easy whipped cream! (Since developing this particular recipe, I’ve actually dedicated an entire post to how to make whipped cream – I highly recommend checking it out for my most current tips and tricks to achieve absolute perfection!)
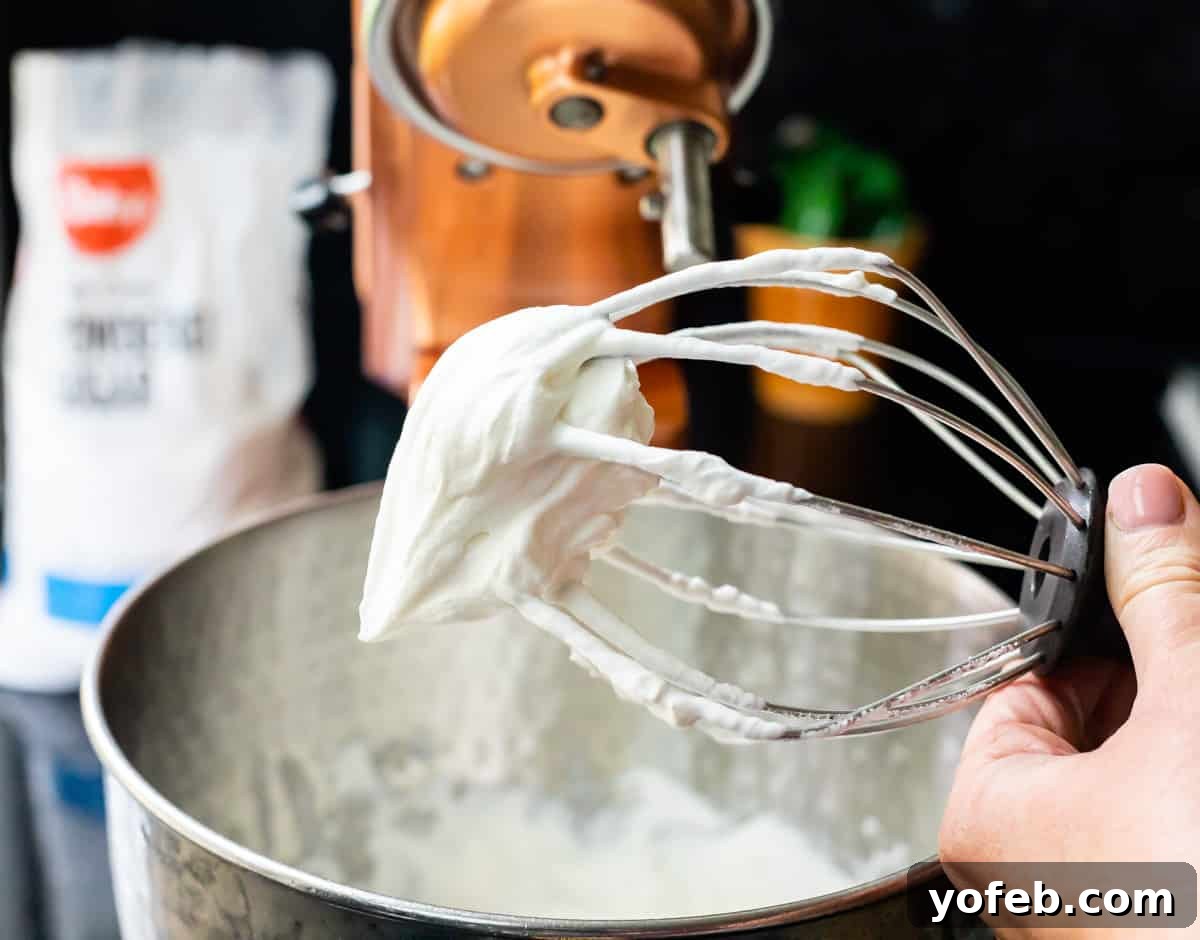
For the lightest, fluffiest whipped cream, take a few extra minutes to chill your mixing bowl and whisk attachment (or hand mixer beaters) in the refrigerator or freezer. This cold environment helps the cream whip up faster and hold its volume better.
When selecting your cream, remember that “heavy cream,” “whipping cream,” and even “ultra-heavy whipping cream” are all suitable, though they may have slightly varying fat contents. For the most stable and luxurious whipped cream, always choose the highest fat content available. For instance, Costco often sells Darigold cream which is 40% fat, among the highest you’ll find. Anything above 35% is perfectly fine and will yield excellent results. Some brands might not explicitly state the fat percentage on the packaging, but as long as it’s labeled “cream” or “heavy cream,” you’re good to go. Just be absolutely sure you don’t accidentally grab coffee creamer!
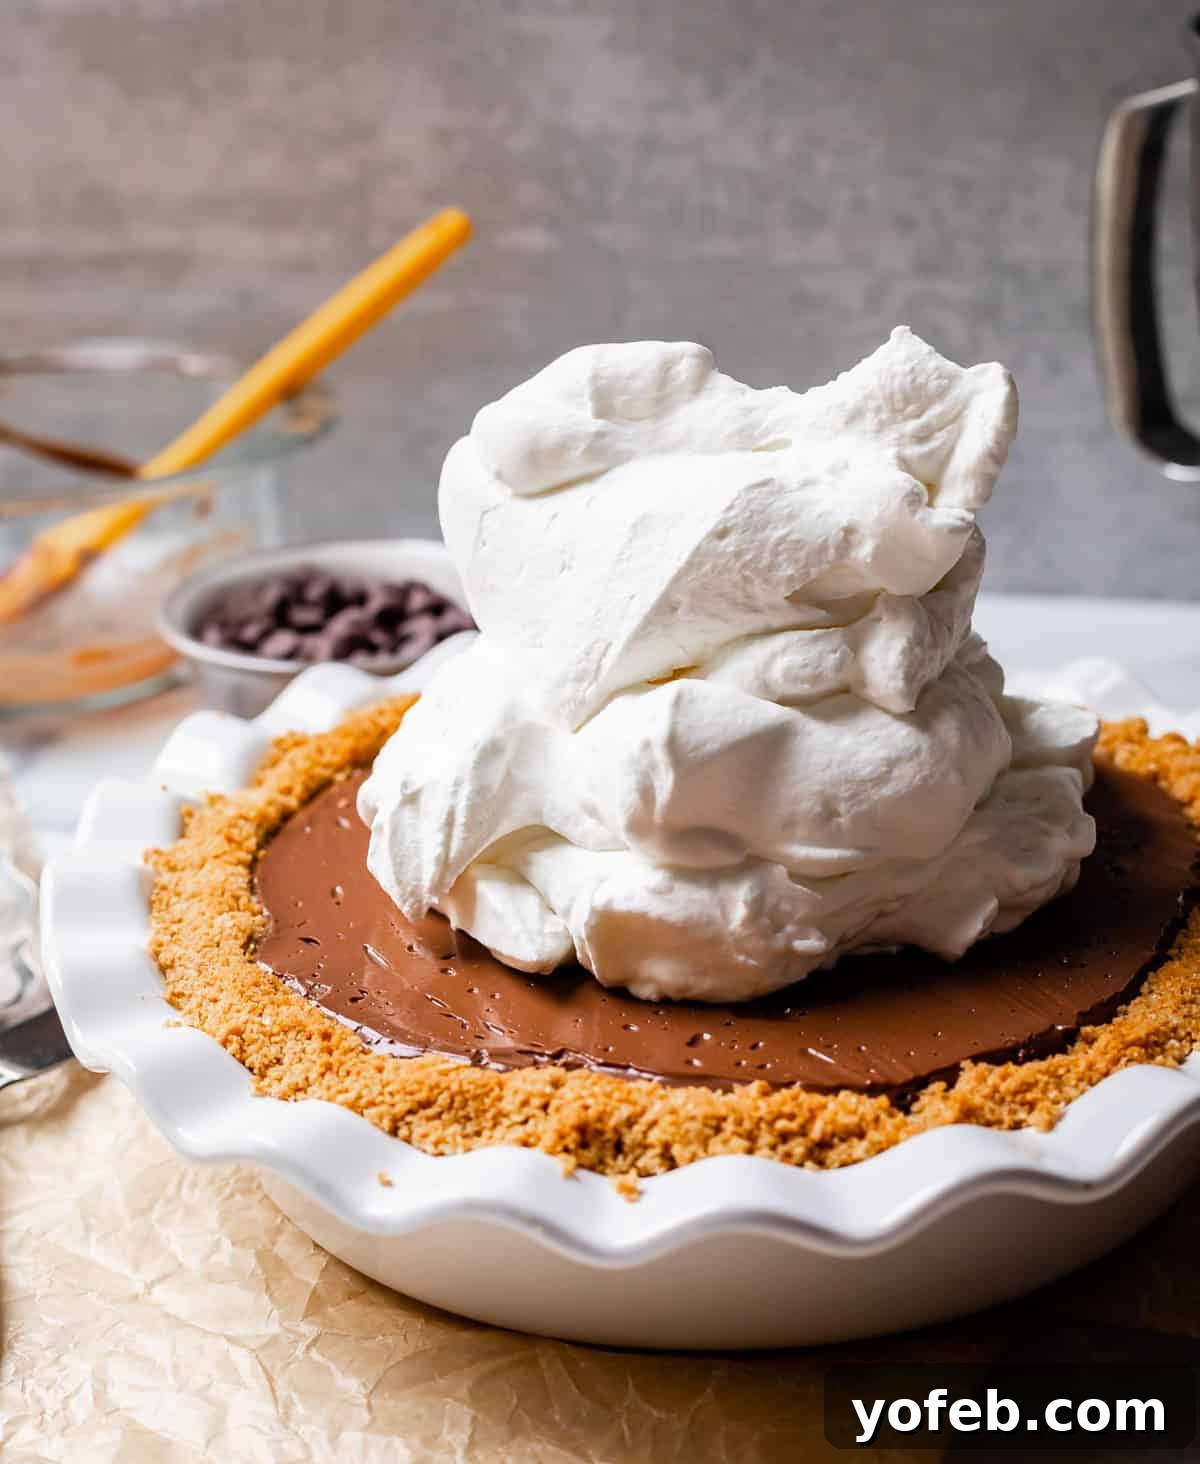
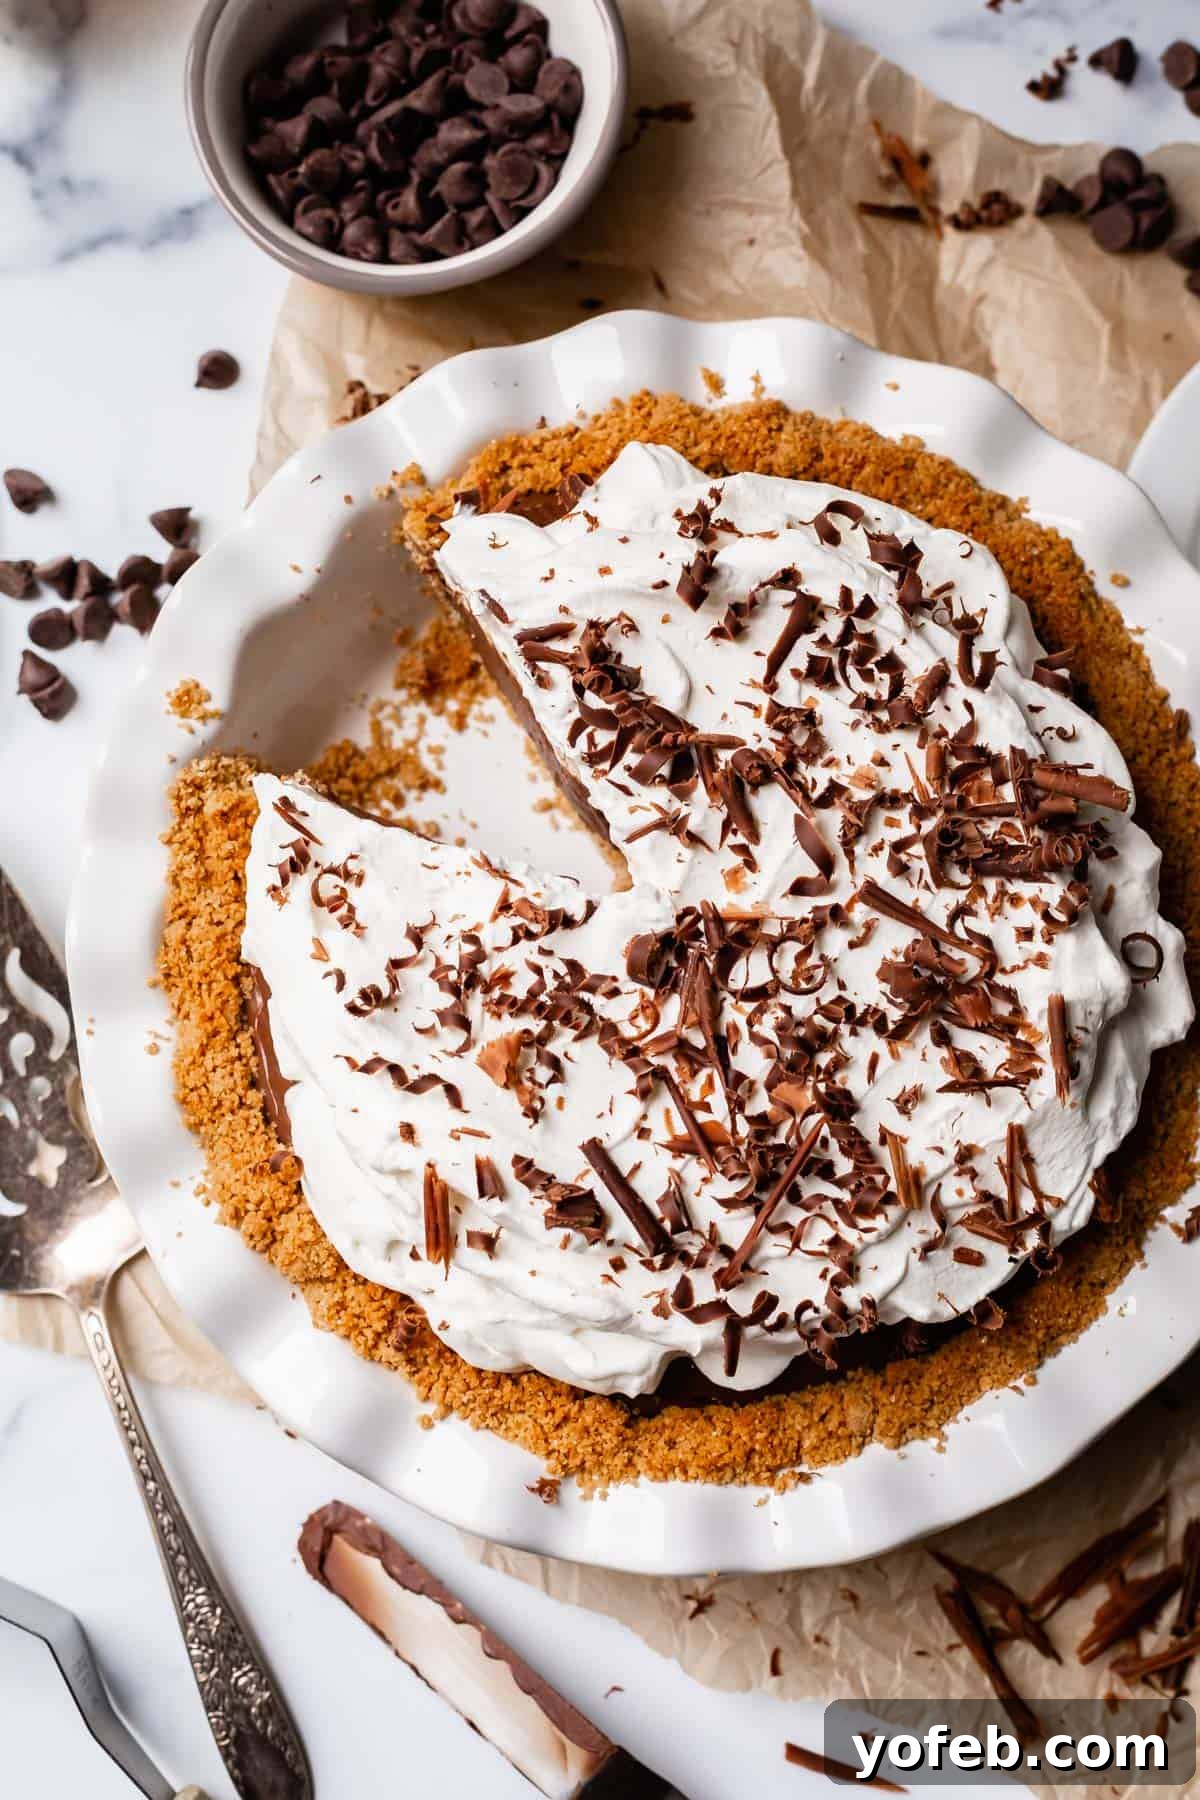
Once your whipped cream is perfectly fluffy and holds stiff peaks, pile it generously onto your chilled chocolate cream pie. There’s truly never “too much” whipped cream when it comes to a pie this decadent, right? Spread it artfully, or simply dollop it high for a rustic, inviting look.
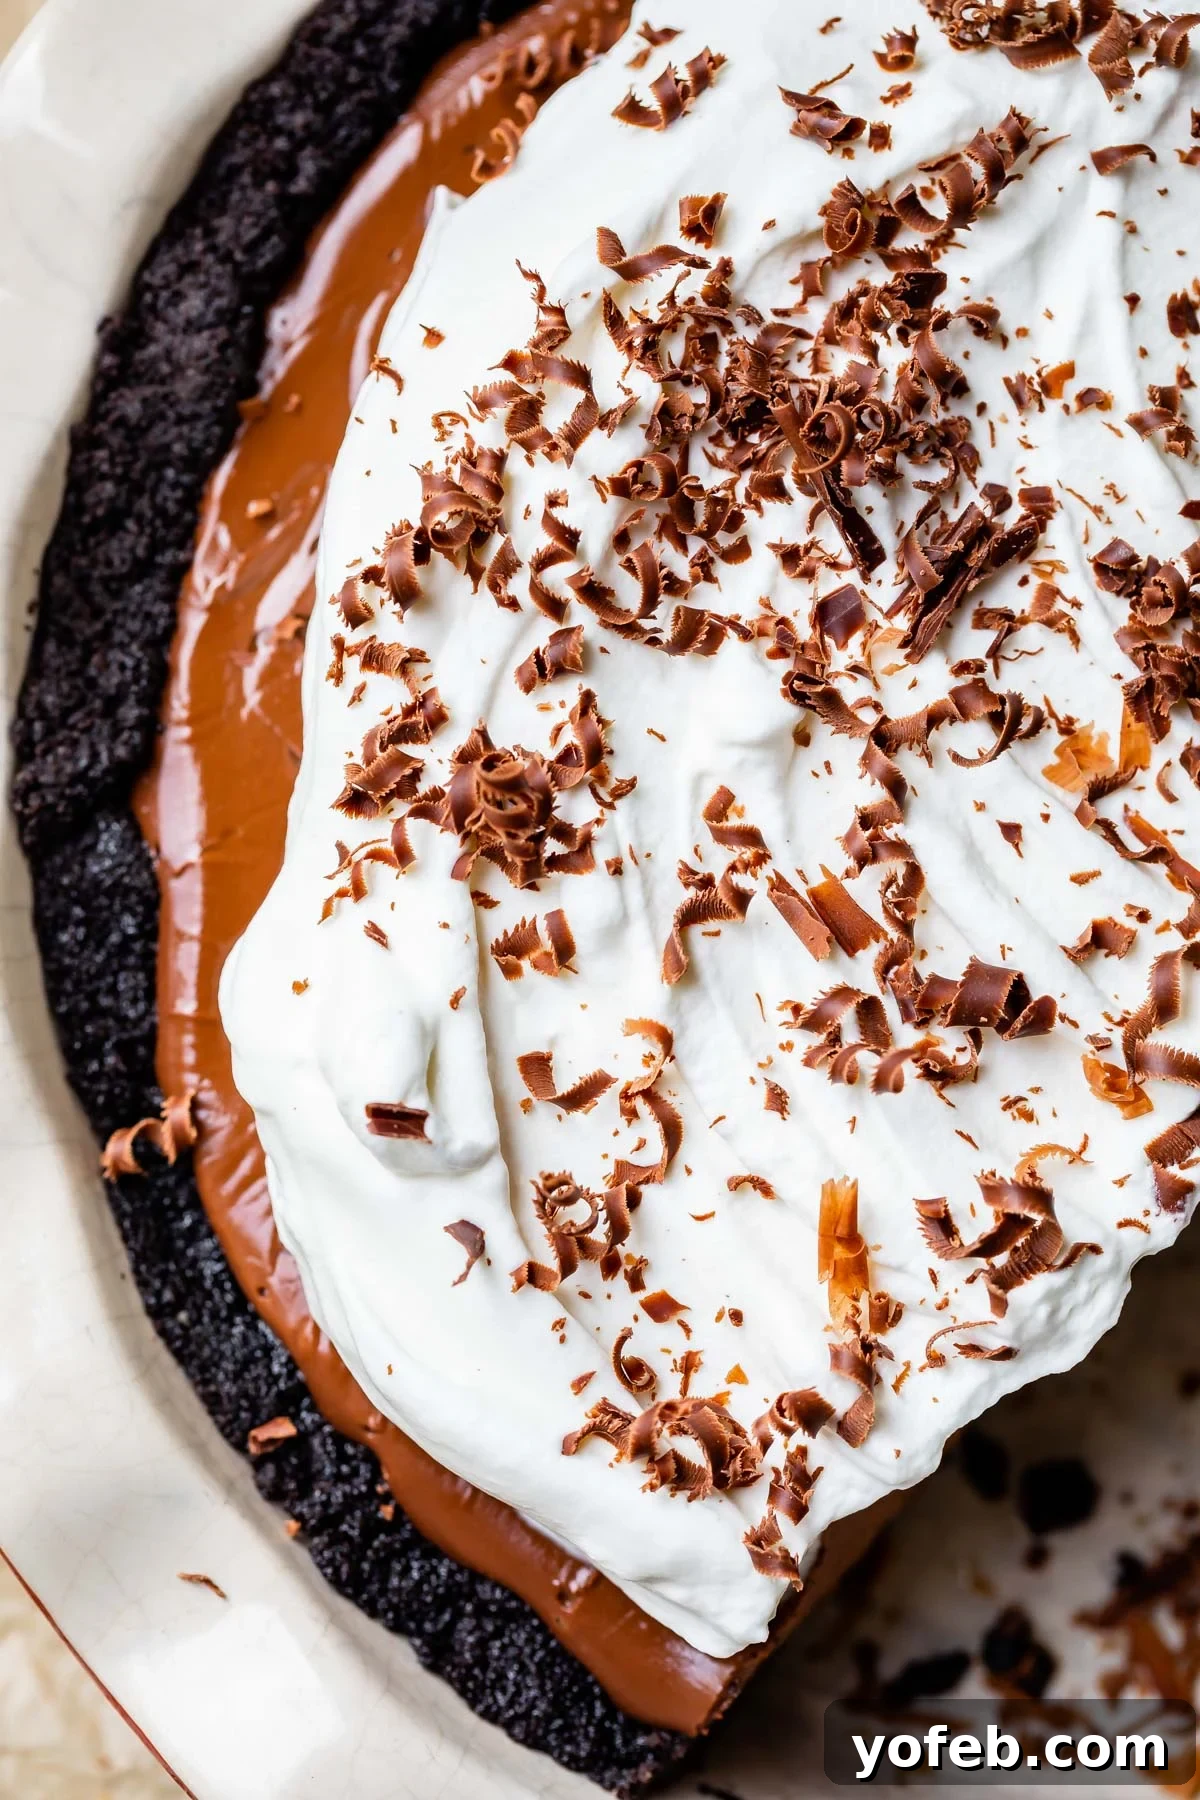
Finally, artfully sprinkle your prepared chocolate curls over the whipped cream, creating a stunning visual contrast and adding another layer of delightful chocolate flavor. And voilà! Your masterpiece is complete and ready to be admired, then devoured.
Top Tips for the Best Chocolate Cream Pie
Achieving chocolate cream pie perfection is within your reach! Follow these expert tips to ensure your pie turns out absolutely flawless and delicious every single time:
- Embrace the Chocolate Curls: Seriously, don’t skip the chocolate curls! They are not merely decorative; they add a critical textural element and an extra layer of chocolate flavor that elevates the entire pie. You can create them using the melted chocolate spreading method outlined in the recipe, or take the easy route by shaving a chocolate bar with a vegetable peeler. Either way, they are absolutely incredible and essential.
- Leverage Your Electric Mixer: While a whisk might seem traditional, using an electric mixer to whip your eggs and pudding components is a game-changer for this recipe. It ensures an incredibly light, airy, and creamy pudding texture that’s difficult to achieve by hand. Your arm muscles will thank you, and your pie will be exponentially better.
- Constant Whisking is Key: When the pudding is cooking on the stove, whisk it constantly. Plan to remain at the stovetop for the entire 7-10 minutes during this crucial thickening stage. Walking away, even for a moment, significantly increases the risk of scorching the bottom of the pudding or developing undesirable lumps. A smooth, silky pudding is worth the undivided attention!
- Consider a Flat Whisk: If you don’t already own one, I highly recommend investing in a flat whisk. You don’t *need* one to make this pie, but it is truly worth it! Its design allows it to easily reach into the corners of your saucepan, ensuring even cooking and preventing any pudding from sticking or burning in those hard-to-reach spots.
Serving Your Masterpiece
This chocolate cream pie is exceptionally rich, so it’s perfectly acceptable, and often recommended, to serve it in slightly smaller slices. Each bite is packed with intense flavor and luxurious creaminess. Or, if you’re feeling indulgent, go all out and plan to unbutton your pants a little – I’m certainly not judging! I firmly believe that life is too short for pie that isn’t worth every single calorie, and this pie is undeniably WORTH IT. Serve it cold for the best experience.
Storage: Do You Need to Refrigerate Your Chocolate Cream Pie?
YES! After all your meticulous hard work, please do not leave this exquisite pie sitting out for extended periods. Pudding-based pies are absolutely meant to be enjoyed COLD, COLD, COLD. Therefore, any leftovers should be promptly covered and chilled in the refrigerator to maintain optimal flavor and texture.
That said, if you’re transporting your pie to an event, it can certainly sit out at room temperature for a couple of hours without any problem. However, I personally find that the ultra-chilled version offers a superior flavor and a more satisfying, firm texture.
Ideally, you should top your pie with whipped cream at the very last moment before serving for the freshest presentation. But if you absolutely must prepare it ahead of time, covering it can be a bit tricky. For leftovers, simply cover with plastic wrap, accepting that your beautiful presentation might be slightly compromised. If you’re taking a whole pie to a party and want to preserve its appearance, try sticking a few toothpicks into the top of the whipped cream, then gently draping plastic wrap over the entire pie. The toothpicks will create a tiny dome, preventing the plastic from flattening your lovely whipped peaks. Just remember to remove them discreetly before serving – an old trick my grandma taught me!
Properly refrigerated, your chocolate cream pie should remain delicious for about 3-4 days. Be aware that the longer it sits, the softer and potentially soggier the crust might become, so aim to enjoy it sooner rather than later for the best quality.
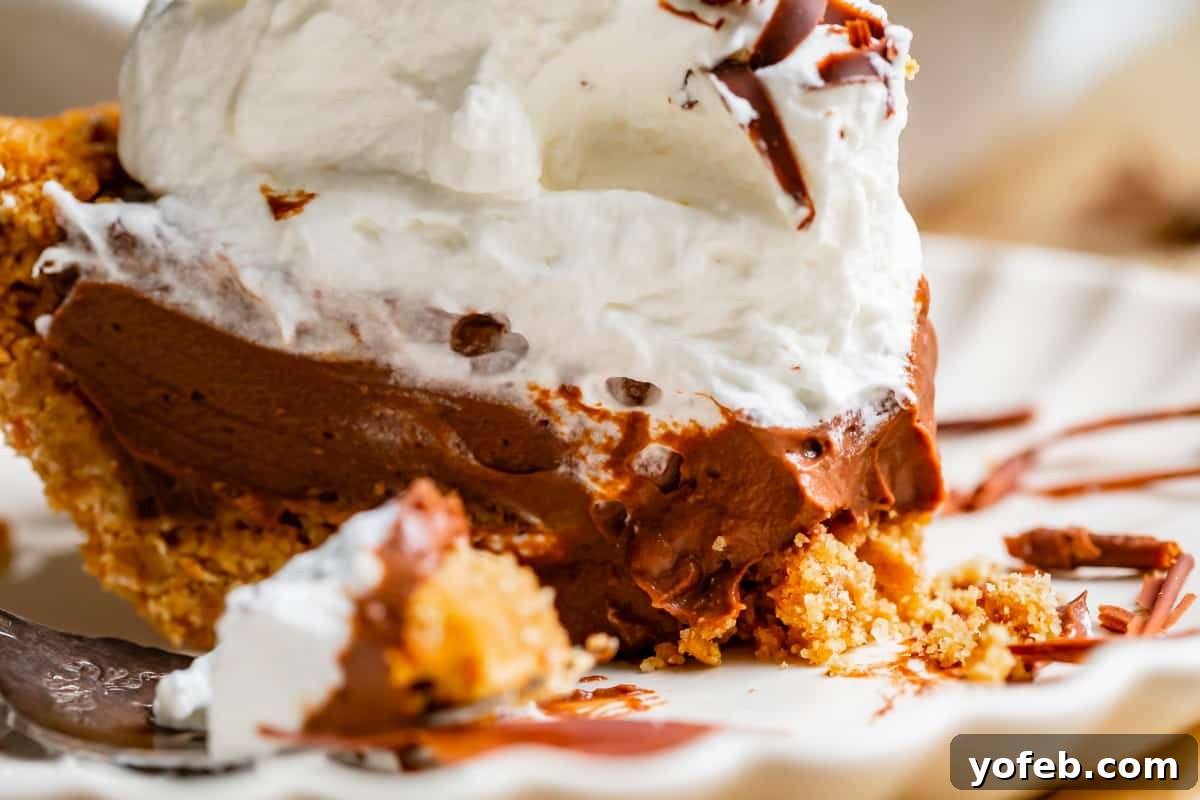
Can You Freeze a Chocolate Pie?
Absolutely, yes! And I can confirm this from personal experience, as I’ve successfully frozen it myself. It works like a charm! The simplest method is to freeze the pie *before* adding the whipped topping. Wrap the entire pie tightly in several layers of plastic wrap, then either slip it into a large freezer-safe ziplock bag or wrap it thoroughly in aluminum foil. This double-layer protection is key to preventing freezer burn.
If you’re particularly concerned about the crust becoming soggy (though with proper wrapping, it’s usually not an issue), you can also freeze the baked crust and the cooled pudding filling separately. Once both are thawed, simply assemble the pie. Either way, your chocolate cream pie will remain in excellent condition in the freezer for approximately two months.
To thaw your frozen pie, place it on the kitchen counter for 2-4 hours, or for a more gradual thaw, transfer it to the refrigerator overnight. Once fully thawed, top with freshly whipped cream and sprinkle with chocolate shavings or curls right before serving for the ultimate fresh taste and presentation.
And that, my friends, is a wrap! I am genuinely head-over-heels in love with this pie, and I truly believe you will be too. Chocolate cream pie is a timeless classic that every home baker should have in their repertoire, and I am so delighted to finally have discovered “The One.” I sincerely hope it becomes a new and cherished family favorite for you all, just as it has for mine! Happy Thanksgiving, or happy any-occasion, to everyone!
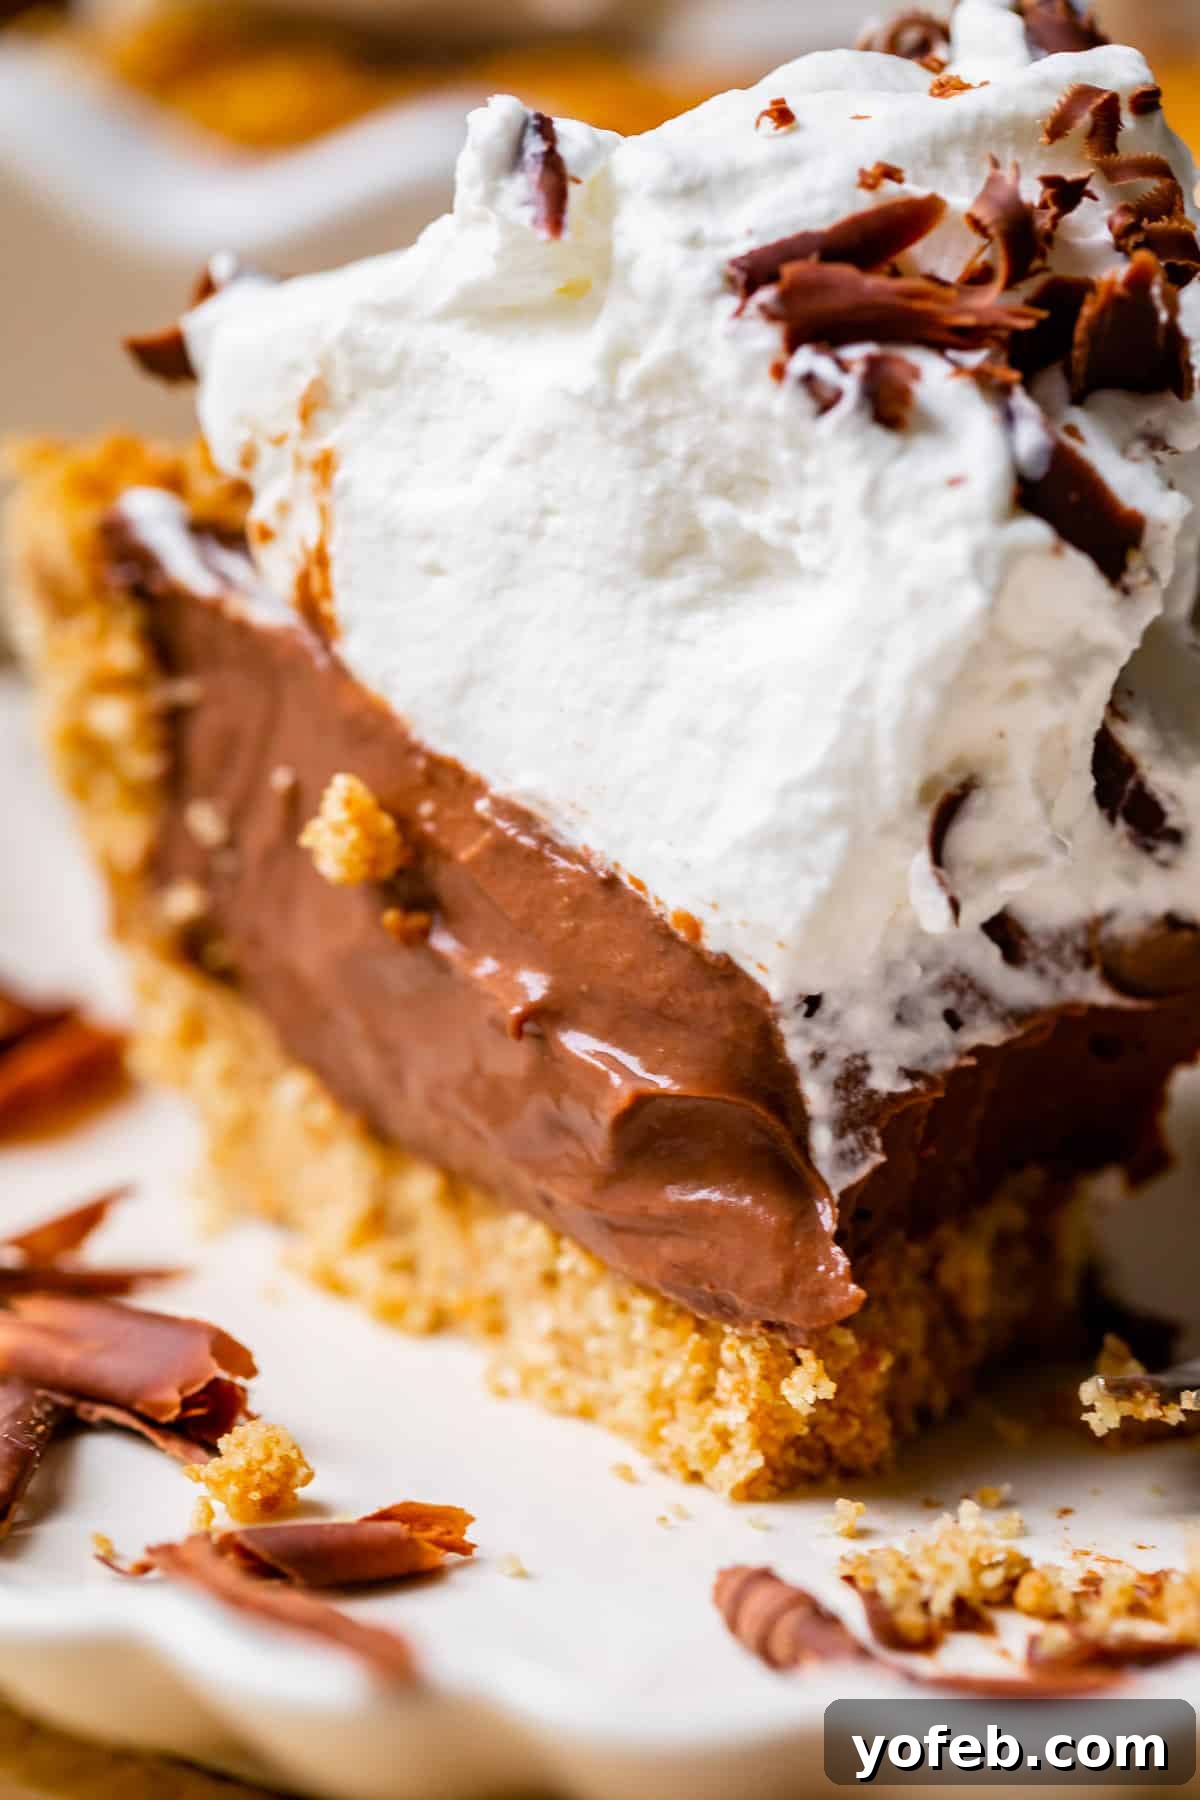
More Irresistible Pie Recipes You’ll Love!
If you’re planning to create an epic dessert for an upcoming holiday, a special occasion, or simply “just because,” pie is truly one of the most comforting and satisfying choices. Here’s a curated list of some of my absolute favorite pie recipes that are guaranteed to impress and delight:
- The Best Homemade Apple Pie >> Unquestionably my most popular and highly-rated pie recipe, a true classic done right!
- My Favorite Homemade Banana Cream Pie >> If you loved this chocolate cream pie, prepare for another dream-worthy cream pie experience!
- The Only Blueberry Pie that I Truly Love >> I was never a fan of blueberry pie until I perfected this recipe – it’s a definite keeper.
- Creme Brûlée Pumpkin Pie >> This is classic pumpkin pie taken to an entirely new level, elevated by a delightful crackly brûlée top.
- Pecan Pie Recipe with Buttery Streusel Topping >> Bake this, and you’ll undoubtedly win many new friends with its rich, nutty, and crumbly goodness.
- No Bake Cherry Cream Cheese Pie >> Incredibly easy to whip up and incredibly delicious – perfect for a quick yet satisfying dessert.
- THE Chocolate Chip Pie Recipe >> Super easy to make, and tastes just like a warm, giant deep-dish chocolate chip cookie.
- Peach Apricot Slab Pie >> An expansive, crowd-pleasing fruit pie, ideal for summer gatherings or any time fresh stone fruit is available.
- The Best Zesty Key Lime Pie Recipe >> Wonderfully tart and refreshing, made exactly the way authentic Key Lime Pie should be.
- No Bake Peanut Butter Pie with Hot Fudge >> A symphony of smooth, creamy peanut butter deliciousness, made even better with warm fudge.
- Cranberry Cherry Pie with Almond Glaze >> A delightful twist on classic cherry pie, offering a lovely tart pop from the cranberries.
- Marionberry Pie from Life’s Ambrosia >> A unique and flavorful berry pie, worth exploring.
- Black Folks Sweet Potato Pie Recipe from The Soul Food Pot >> A soulful and comforting classic that’s rich in flavor and tradition.
- Buttermilk Pie from Well Plated >> A wonderfully tangy and sweet custard pie, often called “southern custard pie.”
Facebook | Pinterest | Instagram

Chocolate Cream Pie Recipe (Easy)
Ingredients
For the Oreo crust (see notes for graham cracker crust)
- 25 Oreos
- 1/8 teaspoon kosher salt
- 1/4 cup butter, melted (half stick)
For the chocolate pudding
- 1 large egg
- 4 large egg yolks
- 1/2 cup + 2 tablespoons granulated sugar
- 1 cup whole milk
- 3 tablespoons cocoa powder
- 3 tablespoons cornstarch
- 1/2 teaspoon kosher salt
- 2 cups whole milk
- 6 tablespoons heavy cream
- 8 ounces high quality semi sweet chocolate, (I love using two Ghirardelli 4 oz chocolate bars)
- 3 tablespoons butter, chopped
- 1 and 1/2 teaspoons vanilla
For the chocolate curls
- 1/2 cup semi-sweet chocolate chips
- 1 teaspoon shortening, butter, coconut oil, or vegetable oil can be substituted
For the whipped cream
- 1 and 1/2 cups heavy cream
- 1/3 cup powdered sugar
- 1/8 teaspoon kosher salt
- 1 teaspoon vanilla
Instructions
-
CRUST DECISION TIME: Decide on your preferred pie crust: Oreo, Graham, or a traditional pastry crust. If you opt for a pastry crust, please refer to my How to Make Flaky Pie Crust guide, and then follow the instructions for How to Blind Bake a Pie Crust.
Instructions for a Graham cracker crust are provided in the recipe notes section!
-
To prepare the Oreo crust: Combine 25 Oreo cookies (about one full package) and 1/8 teaspoon of kosher salt in a food processor. Pulse the mixture until the cookies are finely crushed into crumbs. Add 1/4 cup of melted butter and pulse again until the crumbs are thoroughly moistened and resemble wet sand. (Alternatively, you can crush the Oreos by hand in a ziplock bag using a rolling pin, then transfer them to a bowl, add melted butter, and stir well to combine.)
-
Transfer the Oreo crumb mixture into a 9-inch pie pan. Using the bottom of a drinking glass or a measuring cup, press the mixture firmly and evenly into the bottom and up the sides of the pan. Ensure the crust reaches all the way to the top edge of the pie pan. For a neat finish, press the back of a spoon around the inner corners of the crust to create a smoothly rounded edge rather than a sharp, square one.
-
Preheat your oven to 350°F (175°C). Bake the prepared crust for 10 minutes. This step helps to crisp up the crust and prevent sogginess. Once baked, remove from the oven and allow it to cool completely while you prepare the chocolate filling. (As an alternative, you can skip baking and simply chill the crust in the fridge or freezer for at least 30 minutes, but for superior crispness and flavor, baking is highly recommended.)
-
Begin making the chocolate pudding: Crack 1 large egg and carefully separate 4 large egg yolks into a clean 3-quart saucepan. Ensure the saucepan is cold and not yet on the stove; we’re using it as a mixing bowl for now. Add 1/2 cup plus 2 tablespoons of granulated sugar to the eggs.
-
Using a hand mixer, beat the eggs and sugar together vigorously for about 1 minute. Continue beating until the mixture becomes notably fluffy and transforms into a light yellow color. This aeration is key to the pudding’s final texture.
-
Pour 1 cup of cold whole milk into the egg and sugar mixture. Beat again with the hand mixer until the mixture is well combined and becomes light and bubbly.
-
Now, add the dry ingredients: 3 tablespoons of unsweetened cocoa powder, 3 tablespoons of cornstarch, and 1/2 teaspoon of kosher salt. With the hand mixer on a low speed to prevent a cloud of cocoa dust, carefully beat the mixture until all the cocoa is fully incorporated and the mixture is frothy. Remember to scrape down the sides of the saucepan to ensure everything is mixed in.
-
In a separate glass measuring cup (or a bowl with a spout), combine 2 cups of whole milk and 6 tablespoons of heavy cream. Heat this dairy mixture in the microwave for approximately 2 minutes, or until it is very hot and just beginning to bubble around the edges.
-
With your hand mixer still running on low speed, slowly and steadily pour the hot milk and cream mixture into the egg mixture in the saucepan. If a thin “skin” has formed on top of the hot milk, you don’t need to scrape it into the pudding (it usually adheres to the pouring vessel). Continue beating until the entire mixture is frothy and well combined. Keep the hand mixer nearby, as you’ll use it again shortly.
-
Carefully transfer the saucepan to a burner on your stove and set the heat to medium. Begin stirring the mixture constantly with a whisk. I find that flat whisks are particularly effective as they can reach into the corners of the saucepan, preventing any sticking or scorching.
-
Cook the pudding mixture over medium heat for approximately 8-10 minutes. It’s crucial to stay at the stove and stir at least every 30 seconds for the initial few minutes, then transition to continuous stirring with the whisk as the mixture thickens. The pudding is done when it begins to bubble gently, and when a whisk dragged across its surface leaves distinct marks. Immediately remove the saucepan from the heat and continue to whisk intermittently as you prepare the next additions, to prevent a skin from forming.
-
While the pudding is cooking, break two 4-ounce bars of high-quality semi-sweet chocolate into smaller pieces, and chop 3 tablespoons of butter. Once the pudding is off the heat, immediately add the semi-sweet chocolate pieces, chopped butter, and 1 1/2 teaspoons of vanilla extract. Whisk vigorously until all the chocolate and butter have melted completely and the pudding is smooth and glossy.
-
For the final magical touch, grab your hand mixer one last time – no need to wash the beaters! Beat the finished pudding for about 1 minute. This step is absolutely essential; do not skip it! It whips a significant amount of air into the pudding, creating an incredibly light, airy, and truly melt-in-your-mouth texture that sets this pie apart.
-
Without delay, pour the perfectly beaten pudding into your cooled pie crust. You might initially think it’s too much pudding for the pan, but continue to scrape it in gently; you’ll be surprised how well it fits. Add the final drops to the very center of the pie. If you genuinely believe that even one more drop will cause an overflow, then, by all means, scrape the remainder into a small bowl just for yourself and indulge immediately. Trust me, you won’t regret it – you’ve earned this baker’s treat!
-
Immediately cover the pie with plastic wrap, pressing it directly onto the surface of the pudding. This crucial step prevents the formation of an undesirable film or “skin” on top as the pie chills. Refrigerate the pie for a minimum of 4 hours, though allowing it to chill overnight will yield the best set and flavor. This makes it a perfect make-ahead dessert.
-
To make chocolate curls:* In a small, microwave-safe bowl, combine 1/2 cup of semi-sweet chocolate chips and 1 teaspoon of shortening. Microwave in 30-second intervals, stirring thoroughly after each, until the chocolate is almost completely melted, then stir until perfectly smooth. Use an offset spatula to spread the melted chocolate into a very thin, even layer across a large baking sheet. Place the baking sheet in the freezer for just 5 minutes, until the chocolate is hardened. Then, remove it and let it rest at room temperature for 1-2 minutes.
Using an upside-down metal spatula (or any flat metal kitchen tool), scrape the chocolate to create curls. When the chocolate is at the ideal temperature, it will naturally curl up as you scrape. If it’s too cold, it will break into shards; simply wait another minute for it to warm slightly. If the scraped chocolate appears limp and doesn’t hold its curl, it’s too soft; pop it back into the freezer for a minute or two. Gather your beautiful chocolate curls and store them in the freezer until you are ready to serve your pie to maintain their shape.
-
Prepare the whipped cream. For optimal results, if time allows, chill your mixing bowl and whisk attachment (or hand mixer beaters) in the refrigerator or freezer for a few minutes before starting. This helps the cream whip up faster and hold its volume better.
-
Pour 1 1/2 cups of cold heavy whipping cream into the chilled bowl. Begin beating on high speed. Gradually add 1/3 cup of powdered sugar, 1 teaspoon of vanilla extract, and 1/8 teaspoon of kosher salt.
-
Continue beating for 1-3 minutes, adjusting the time based on your mixer’s power. It’s crucial to keep a close eye on the cream and not walk away. Over-beaten whipped cream can quickly turn grainy (a mistake I’ve made many times!). You want to stop beating just as the whipped cream becomes smooth and firm enough to hold stiff peaks – meaning it stays perfectly upright when you lift the beaters horizontally. Avoid beating it to the point where you see large air bubbles or a textured appearance. Gently spread the luscious whipped cream over the thoroughly chilled chocolate pudding, leaving a small border around the edges so the rich chocolate layer is still visible.
-
Generously decorate the whipped cream topping with your beautiful chocolate curls, then serve your magnificent pie immediately for the best experience!
-
This chocolate cream pie freezes exceptionally well, particularly before the whipped cream topping is added. To freeze, wrap the un-topped pie tightly in several layers of plastic wrap, then place it into a large ziplock freezer bag or wrap securely in foil. It can be stored in the freezer for up to 2 months. To thaw, transfer the pie to the refrigerator overnight or allow it to sit on the counter for 2-4 hours. Once completely thawed, top with fresh whipped cream and chocolate curls (or shavings) just before serving!
Notes
Graham Cracker Crust Instructions:
- 2 1/4 cups graham cracker crumbs (this usually requires about 1 1/2 packages or roughly 13.5 full graham crackers)
- 2 tablespoons granulated sugar
- 1/4 teaspoon kosher salt
- 7 tablespoons unsalted butter, melted
4. Bake the crust at 350°F (175°C) for 10 minutes. This step is crucial for a crispier, more flavorful crust. Remove from the oven and let it cool completely while you prepare the chocolate filling. (Alternatively, you can skip baking and simply chill the crust in the fridge or freezer for 30 minutes, but a baked crust offers superior texture and taste.)
How to store chocolate cream pie
Does chocolate cream pie need to be refrigerated?
YES, absolutely! After all your effort, you wouldn’t want to leave this delicious pie out. Pudding-based pies are best enjoyed very cold, so always chill it in the fridge immediately if you have any leftovers. However, if you’re bringing your pie to an event, it can safely sit at room temperature for a couple of hours. Personally, I find the flavor and texture are significantly enhanced when it’s ultra-chilled.
For the freshest appearance, try to add the whipped cream topping right before serving. If you must prepare it ahead of time, covering it can be tricky. For leftover slices, simply cover with plastic wrap, understanding that the pristine presentation might not last. If you’re transporting a whole pie to a party and want to protect its whipped cream, an old trick is to stick a few toothpicks into the top of the whipped cream, then gently drape plastic wrap over them. This creates a dome that prevents the plastic from sticking to and flattening the cream. Remove the toothpicks just before serving.
Chocolate Cream Pie will last approximately 3-4 days when stored properly in the refrigerator. Keep in mind, though, that the longer it sits, the softer the crust may become, so it’s always best to enjoy it sooner.
Can you freeze a chocolate pie?
Yes, you can! I’ve tested this myself, and it works wonderfully. The easiest method is to freeze the pie *before* adding the whipped topping. Wrap the pie tightly in plastic wrap, then place it inside a large ziplock freezer bag or wrap it securely with aluminum foil. This helps prevent freezer burn. If you’re concerned about the crust becoming soggy, you can also freeze the crust and the filling separately, then assemble the pie after both have thawed. Either way, the pie will maintain its quality in the freezer for about two months. To thaw, simply transfer it to the refrigerator overnight, or let it sit on the counter for 2-4 hours. Top with fresh whipped cream and chocolate shavings or curls right before serving.