
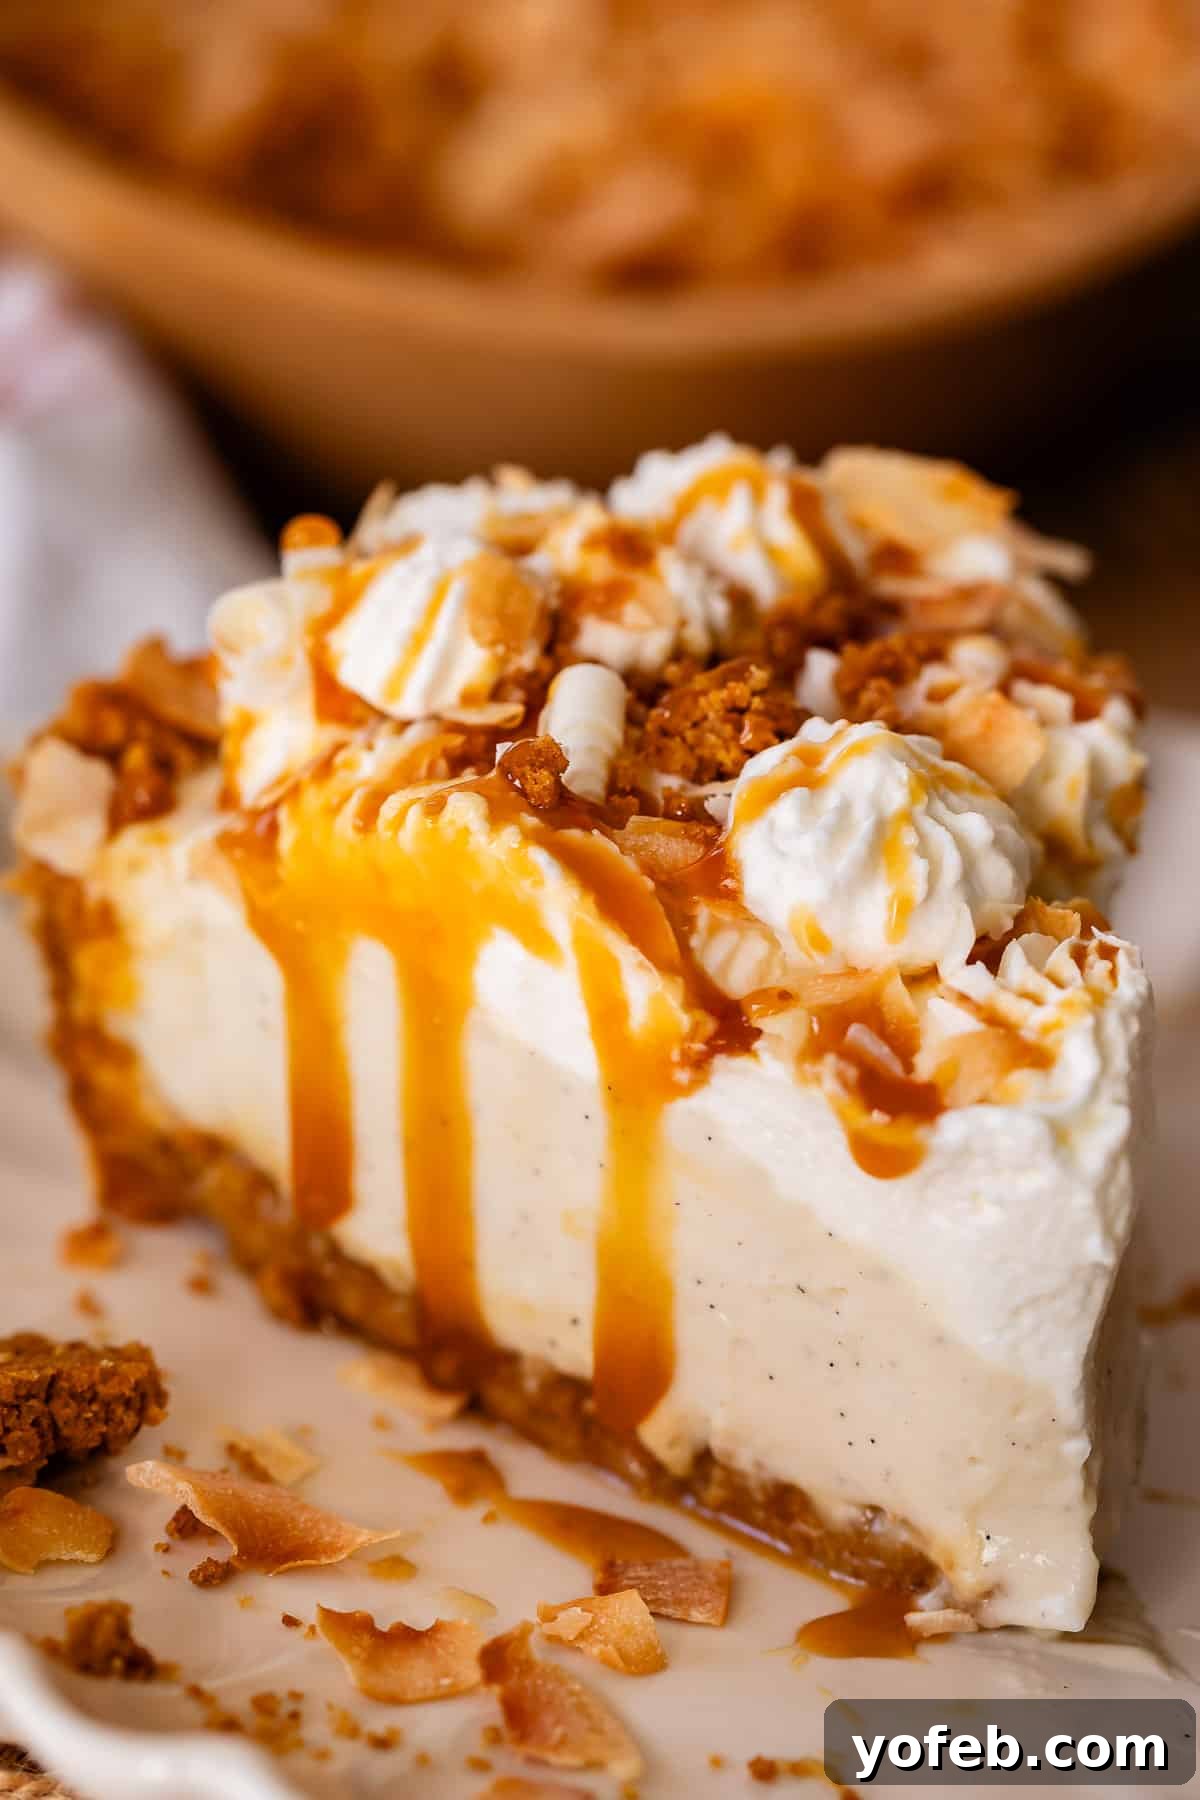
Welcome, fellow pie enthusiasts! I confess, for a long time, I was a “pie person” who couldn’t quite embrace Coconut Cream Pie. Every attempt I made to enjoy it ended in disappointment: bland flavors and an unappetizingly stringy, raw coconut texture that made me cringe. But those days are over! I’ve discovered the secret to making an easy and homemade Coconut Cream Pie recipe that delivers immense flavor without any of the undesirable weirdness. The magic lies in toasting the coconut until it’s perfectly golden and irresistibly crispy, transforming it from a texture foe into a delightful friend. And did I mention the decadent layer of caramel we’re adding? Oh yes, prepare for a pie experience like no other.
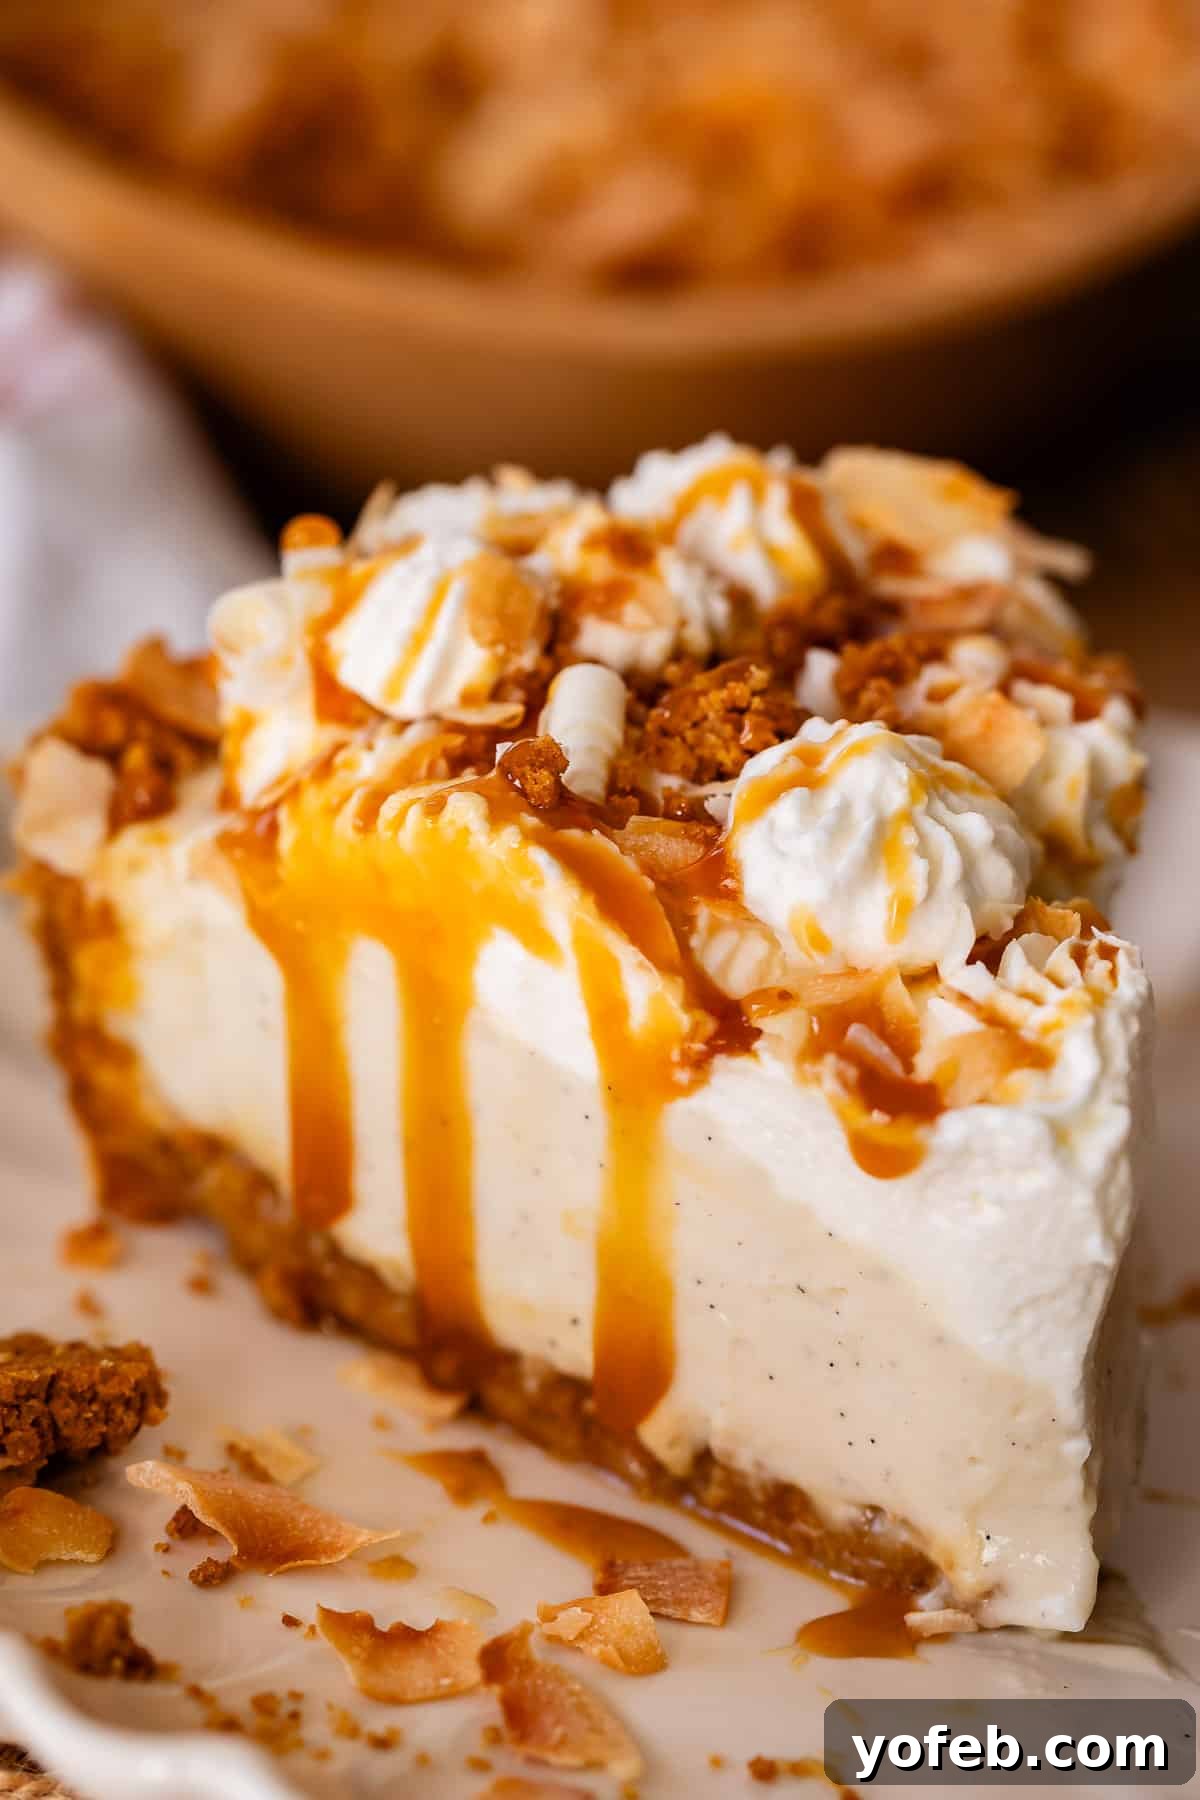
Table of Contents
- Can We Reimagine Coconut Texture?
- The Ultimate Coconut Cream Pie Recipe
- Homemade Coconut Cream Pie Ingredients
- How to Make the Best Coconut Cream Pie
- Does Coconut Cream Pie Need Refrigeration?
- How Long Does Coconut Cream Pie Last in the Fridge?
- Can You Freeze Coconut Cream Pie?
- Essential Tools for Coconut Cream Pie Baking
- Coconut Cream Pie Frequently Asked Questions
- More Delicious Coconut Recipes You’ll Love
- More Irresistible Cream Pies to Make
- Coconut Cream Pie Recipe Card
Life, much like baking, often presents unexpected challenges. Just the other day, my son Edison requested a popsicle, leading me to our garage freezer. To my surprise, I unearthed a lone Otter Pop, a relic from last summer. But alas, it was more slushy than frozen. This tiny freezer, a veteran from two moves ago, was an appliance I’d long expected to give up the ghost. It primarily holds condiments and the endless supply of grapefruit from my dad’s yard. I’d noticed a decline in its frosty performance but, in typical fashion, I opted for blissful ignorance.
My mother, visiting at the time, immediately investigated. Her discovery? “The temperature dial was turned completely off… and it’s within Edison’s reach.” It had been off for quite some time, a testament to my procrastination. While I could easily blame my four-year-old, I was the adult who failed to investigate. It seems I deserved that slushy popsicle.
A similar incident occurred last year with my minivan’s automatic sliding door. While packing for a move, I inadvertently placed a box near the door just as I pressed the button. A crunch, and then silence. The door ceased to function. I resigned myself to a future of manual doors, assuming our “nice” car era was over. The entire summer passed. My children, accustomed to the convenience of the automatic door, started exiting on the traffic side when I dropped them off for school in the fall, a clear sign the issue needed addressing.
Finally, I decided to take it to the dealership, bracing myself for a hefty repair bill. An hour later, I received a call: “Ma’am, the automatic door has an ON/OFF button. We’ve switched it on for you. No charge. You can pick up the van anytime.” Four months. It had been four months! The moral of the story: never trust my assessment when I claim something is “broken.” It’s often just a matter of checking the simplest solution.

Perhaps this is why sleep was invented; a cosmic “off and on again” button for us humans. My 13-year-old daughter, Charlotte, recently announced she’s signed up to bring a pie to her math class for Pi Day next week, March 14th. I adore this tradition! Are you hosting a Pi Day party? My friend Melissa used to throw the most delightful pie parties every March 14th, a wonderful excuse to indulge in an abundance of pies with friends, even on a random weekday. If you’re planning a celebration, or even just a solo Pi Day treat, you absolutely must consider making this Coconut Cream Pie. It’s a perennial crowd-pleaser for very good reason.
Can We Reimagine Coconut Texture?
For years, coconut cream pie was at the bottom of my dessert preference list. I’d choose a Key Lime Pie, a Chocolate Cream Pie, or a Banana Cream Pie any day of the week. Why? Because most coconut cream pies were, to put it mildly, boring. Worse still, they often contained an abundance of chewy, fibrous coconut strands that reminded me of soggy, vaguely coconut-flavored shredded wheat. It was an offensive texture that I simply couldn’t get past.
But I have seen the light! The secret to transforming this dessert is in the coconut preparation: we toast the coconut, and we toast it aggressively. Forget light toasting; we’re talking about an “hover-next-to-the-oven-to-make-sure-it-doesn’t-burn” level of toasting. This intense heat transforms the humble coconut flakes into crisp, golden shards of pure flavor, eradicating any hint of that unpleasant stringiness.
To further ensure ultimate crispness, we strategically incorporate the toasted coconut into the graham cracker crust and use it as a garnish, sprinkling it generously over each slice just before serving. This way, the coconut retains its delightful crunch, providing a perfect contrast to the creamy filling.
Crucially, we keep the actual coconut flakes out of the pie filling. Instead, we infuse the filling with rich coconut flavor through coconut milk and a touch of coconut extract, ensuring a silky-smooth custard. Then, for the ultimate indulgence, we fold fresh whipped cream into the chilled custard, creating a light, airy, and fluffy cloud of coconut heaven in every single bite. And as if that weren’t enough, did I mention we’re adding a luscious layer of caramel? I’m not sorry, and you won’t be either. This pie is a revelation.
The Ultimate Coconut Cream Pie Recipe
Prepare to elevate your dessert game. This Coconut Cream Pie isn’t just good; it’s a hundred times better than your typical, often disappointing, slimy, shreddy, fibrous versions. Here’s why this recipe stands head and shoulders above the rest:
- Perfectly Toasted Coconut: Every piece of coconut in this pie, from crust to garnish, is toasted to a shattery, golden crisp. This ensures a delightful crunch in every bite, completely eliminating any fibrous or chewy texture that plagues less-perfect recipes. It’s all about maximum flavor and irresistible texture.
- Supremely Smooth Pie Filling: A cream pie should be just that – supremely creamy. Our filling achieves an incredibly smooth, velvety texture, melting in your mouth with every spoonful. We achieve this by excluding solid coconut from the custard and focusing on infusing pure coconut essence.
- Flavor-Packed Graham Cracker Crust: We don’t just add coconut to the crust; we toast it and then finely grind it with the graham crackers. This technique ensures zero texture issues, only a pure, intense, and wonderfully toasty coconut flavor that forms the perfect foundation for our pie.
- The Secret Egg Yolk in the Crust: You might raise an eyebrow, but adding an egg yolk to the graham cracker crust is a game-changer! Inspired by gourmet baking techniques, this simple addition acts as an incredible binder, preventing the dreaded crumbly crust syndrome. Your slices will hold together beautifully, and the crust itself bakes to a superior crispness. I’m never going back to an egg-free crust!
- Baked for Maximum Crispness: Unlike many no-bake graham crusts, ours is baked. This extra step ensures a level-100 crispness that provides a delightful textural contrast to the silky filling, enhancing the overall experience.
- Balanced Custard-Whipped Cream Filling: Traditional coconut cream pies often feature a dense, thick layer of coconut custard (essentially a pastry cream made with coconut milk) topped with whipped cream. Our recipe takes a different approach: we make the rich coconut custard, chill it thoroughly, then gently fold it with a generous amount of fresh whipped cream. This creates a lighter, airier, and far more balanced filling that isn’t cloyingly sweet, offering a cloud-like texture.
- A Decadent Caramel Layer: This is a non-negotiable for me! A thin, luscious layer of caramel sauce at the bottom of the pie is absolutely crucial. Rest assured, it doesn’t transform the pie into a caramel pie. It’s a modest amount, but the sharp, salty contrast it provides against the creamy coconut layers is simply divine and cannot be overstated. Once you try it, you’ll understand why I’ll never make a coconut cream pie without it.
- Stabilized Whipped Cream: There’s nothing sadder than a beautiful cream pie arriving at an event only to find its whipped cream topping deflated and weeping. Our solution? Stabilized whipped cream! While there are various methods, the fastest and easiest is to incorporate a couple of tablespoons of instant pudding mix. The modified cornstarch in pudding mix acts as a thickening agent even when cold, preventing the whipped cream from deflating and keeping it gloriously fluffy for hours. Hallelujah for stable whipped cream!
- Extra Graham Cracker Crumbles: This is my golden rule for almost any cream pie: there’s never enough crust! We bake an extra portion of the coconut-graham crust mixture separately, then crumble it over the top of the finished pie. It adds another layer of crunchy texture and intensifies the delicious toasted coconut flavor.
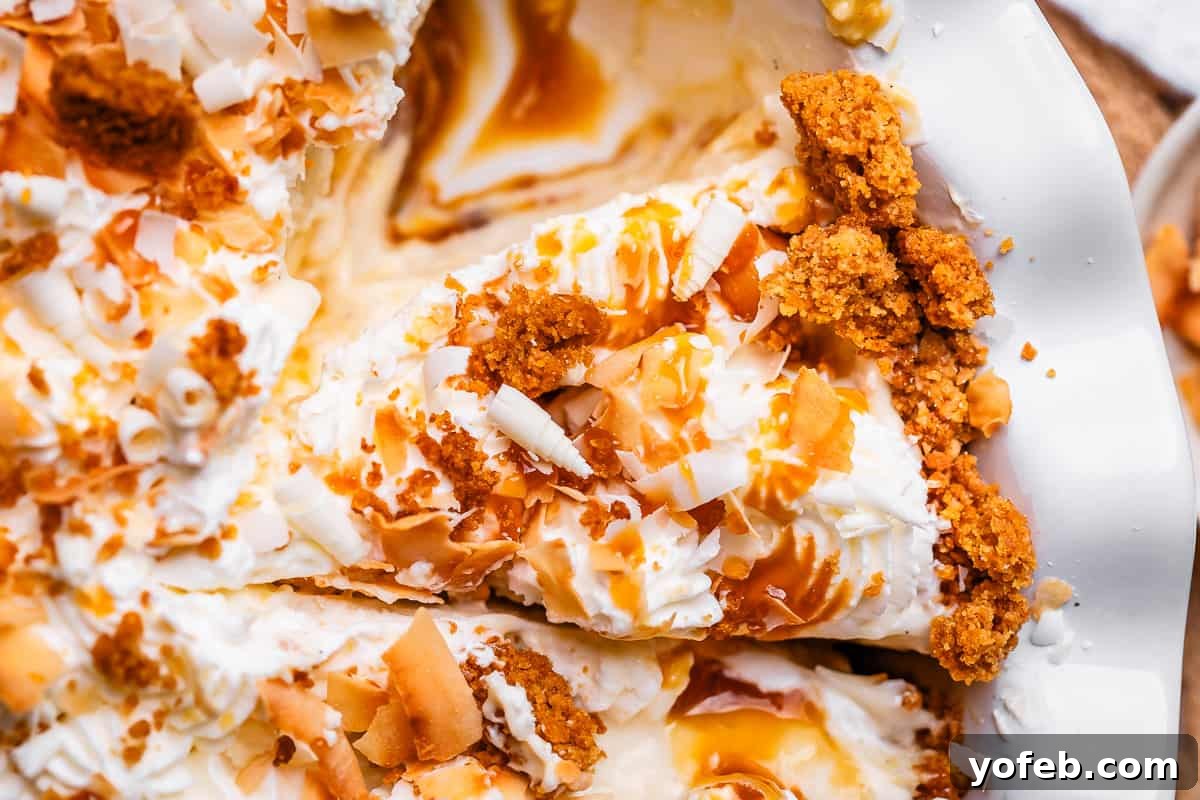
- White Chocolate Garnish: This pie might appear white-on-white-on-white, but do not underestimate the flavor powerhouse that is high-quality white chocolate. Shaved curls of white chocolate add a subtle, creamy sweetness and a hint of luxurious richness that provides the perfect counterpoint to the vibrant coconut and caramel. It’s the elegant finishing touch this pie deserves.
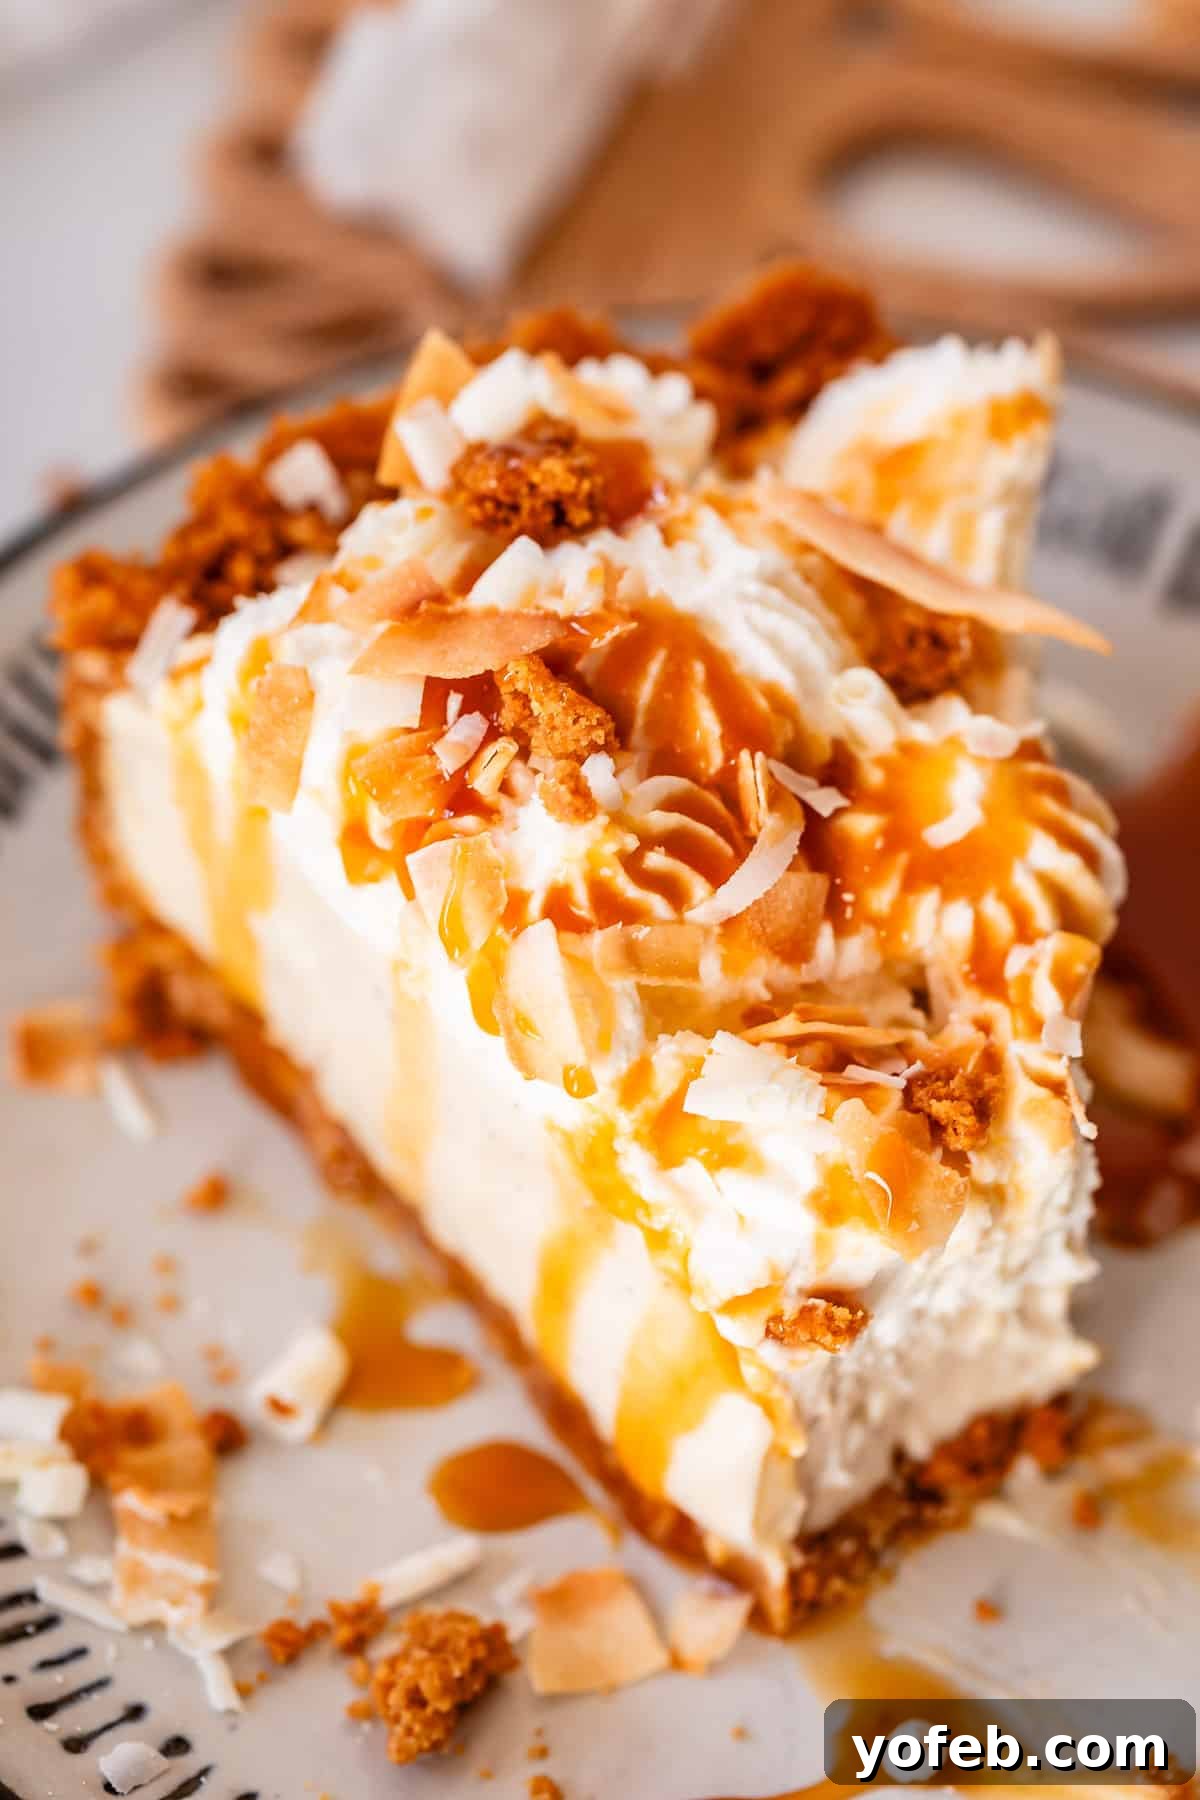
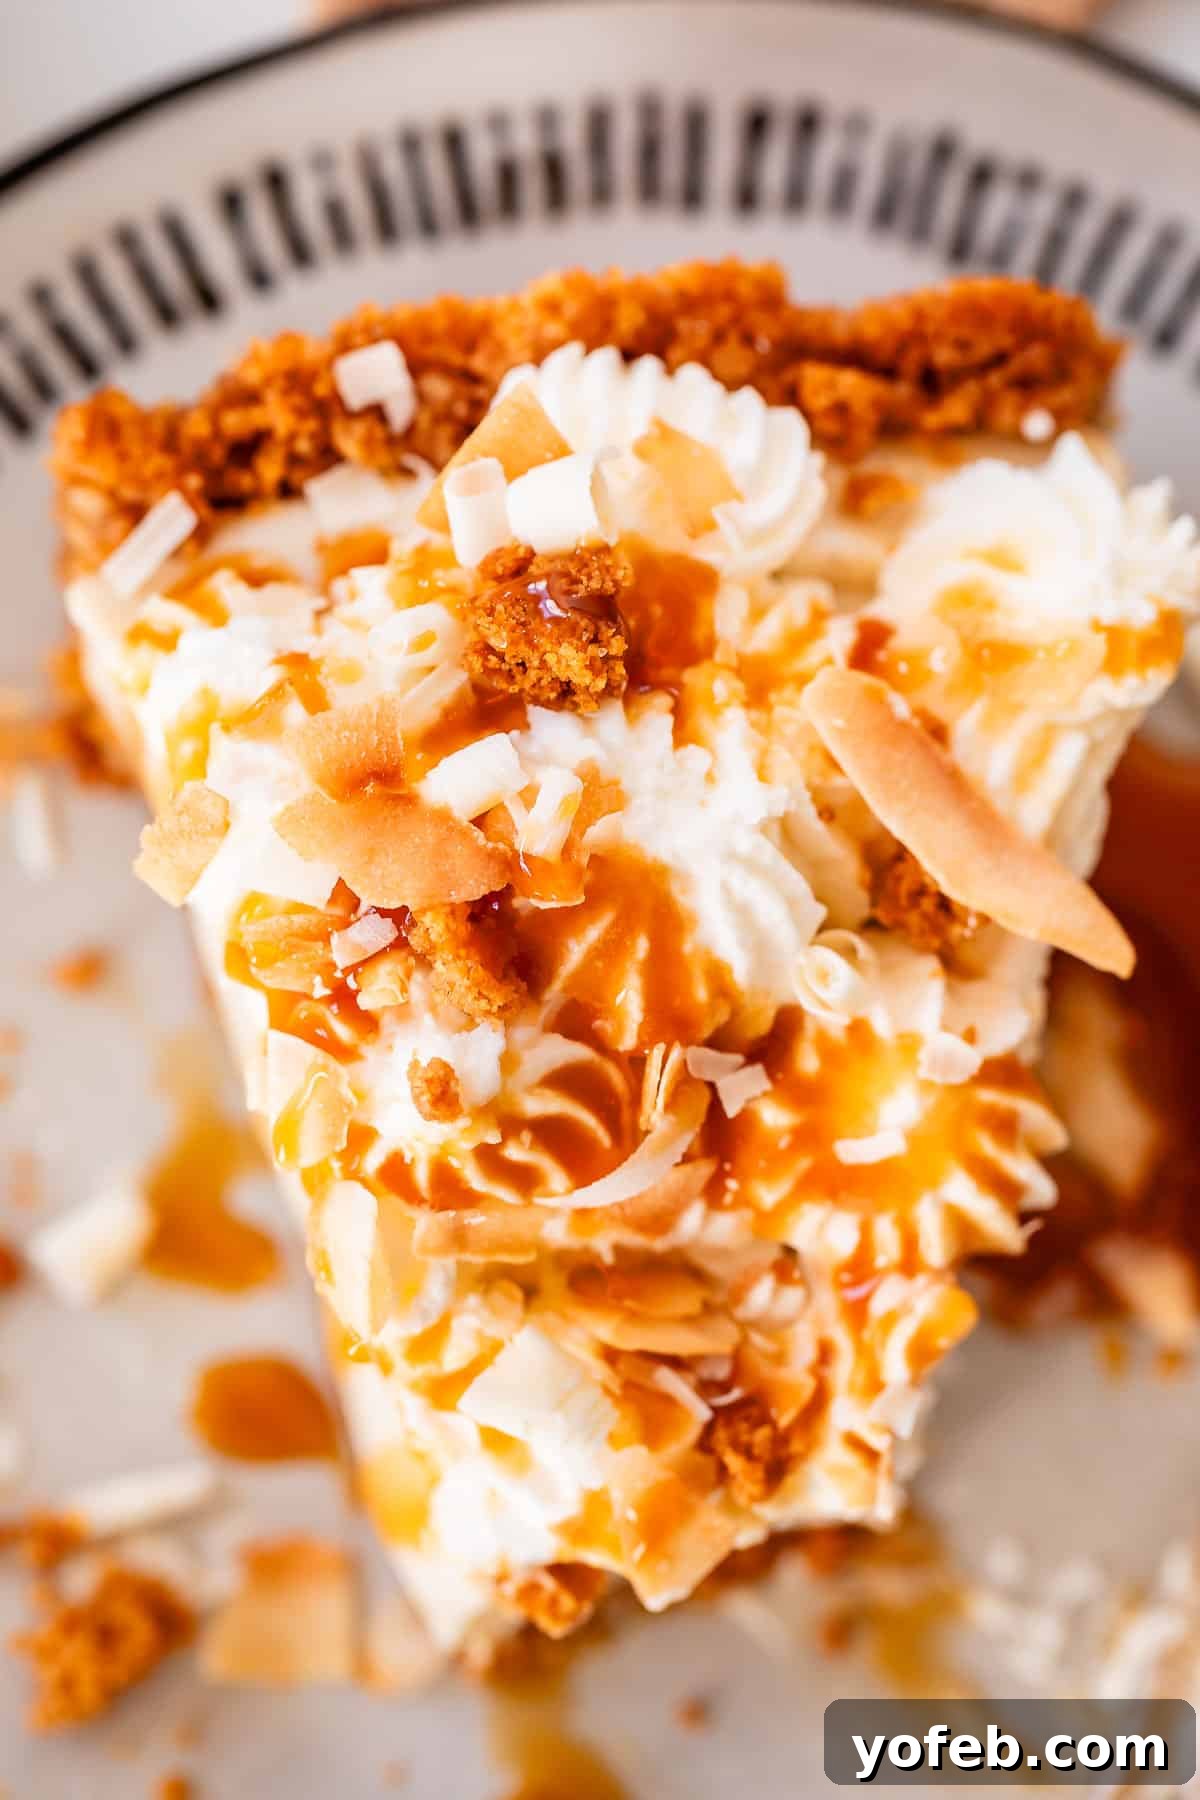
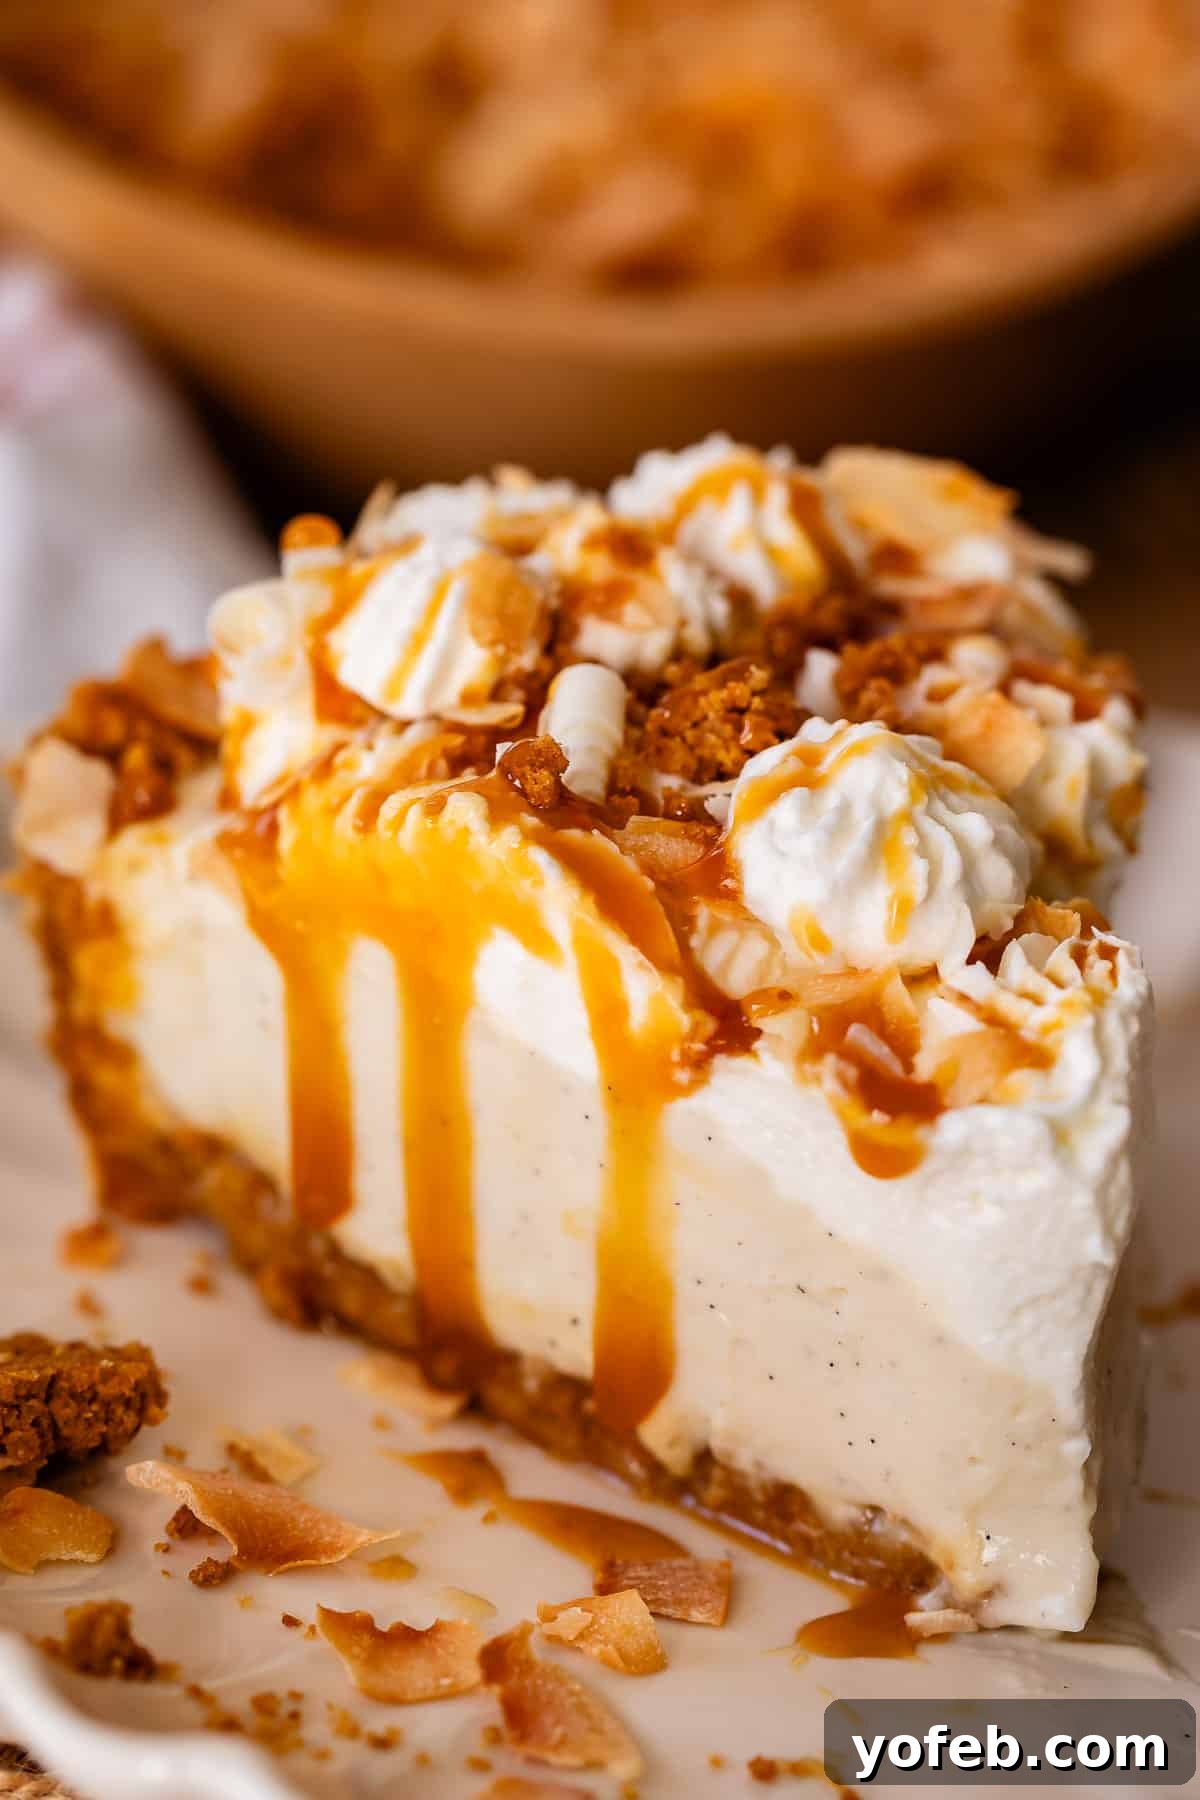
When you achieve that perfect bite—a symphony of crisp, coconut-infused crust, a swirl of rich caramel, light and creamy coconut custard, a dollop of whipped cream, an extra sprinkle of graham crumbles, and delicate white chocolate curls—it’s nothing short of culinary nirvana.
Homemade Coconut Cream Pie Ingredients
Crafting this exceptional Coconut Cream Pie requires a selection of fresh, high-quality ingredients. Each component plays a vital role in achieving the perfect balance of flavor and texture, from the deeply toasted coconut to the rich caramel and creamy custard. Below is a concise list of what you’ll need. For detailed measurements and step-by-step instructions, please refer to the comprehensive recipe card further down this page.
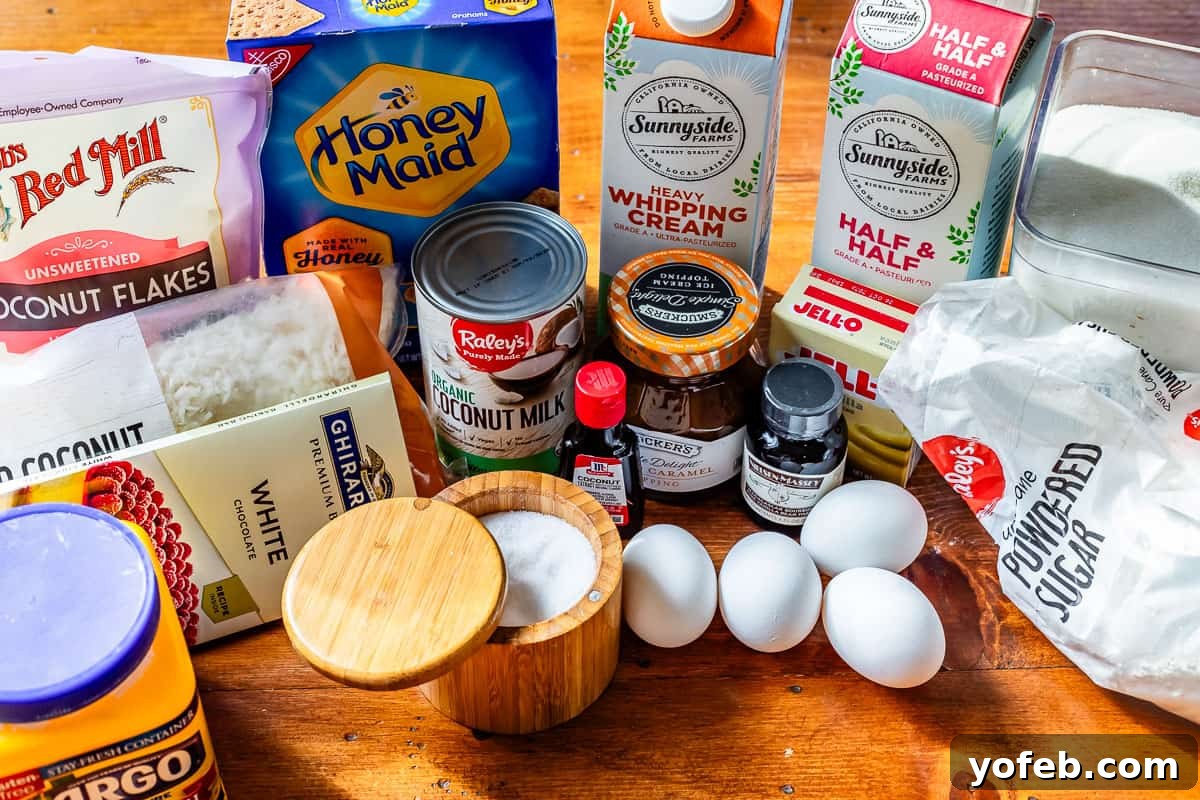
- Sweetened shredded coconut
- Graham crackers
- Granulated sugar
- Kosher salt
- Unsalted butter
- Eggs (for yolks)
- Caramel sauce (best with Homemade Caramel Sauce!)
- Cornstarch
- Unsweetened full-fat coconut milk
- Half and half
- Vanilla bean paste (or extract)
- Coconut extract
- Vanilla instant pudding mix (dry powder)
- Heavy whipping cream
- Powdered sugar
- Unsweetened coconut flakes (large flakes for garnish)
- High-quality white chocolate bar
How to Make the Best Coconut Cream Pie
Embark on your journey to the best Coconut Cream Pie with confidence! The first step is to decide on your caramel. If you’re feeling ambitious and truly want the best results, I highly recommend making your Homemade Caramel Sauce first, allowing it ample time to cool. Store-bought caramel can work in a pinch, but homemade caramel offers a thicker consistency that won’t spread as much when you slice the pie, yielding a more elegant presentation and superior flavor.
Next up, we tackle the star of the show: the silky-smooth coconut custard filling!
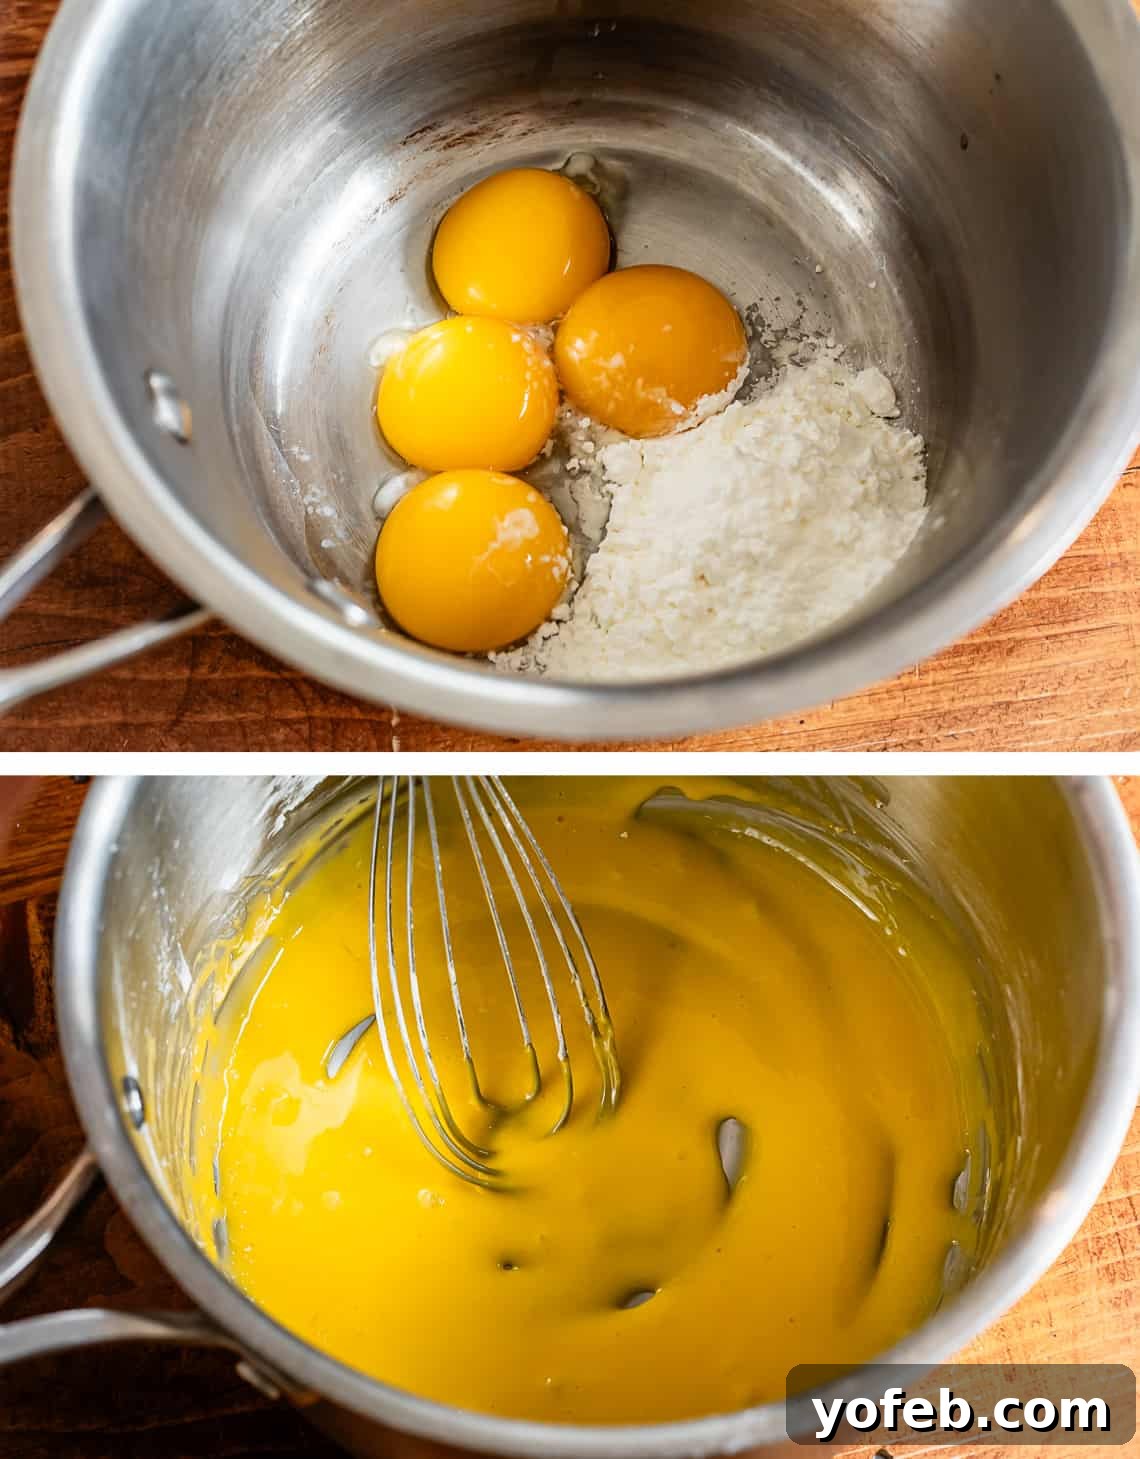
Begin by adding four large egg yolks to a sturdy, heavy-bottomed pot (off the stove for now). Whisk in the cornstarch and half and half until the mixture is perfectly smooth and completely free of any lumps. This initial whisking is crucial, as any lumps at this stage will be difficult to remove later. Then, incorporate the full-fat unsweetened coconut milk, granulated sugar, and kosher salt. Whisk everything together until well combined.
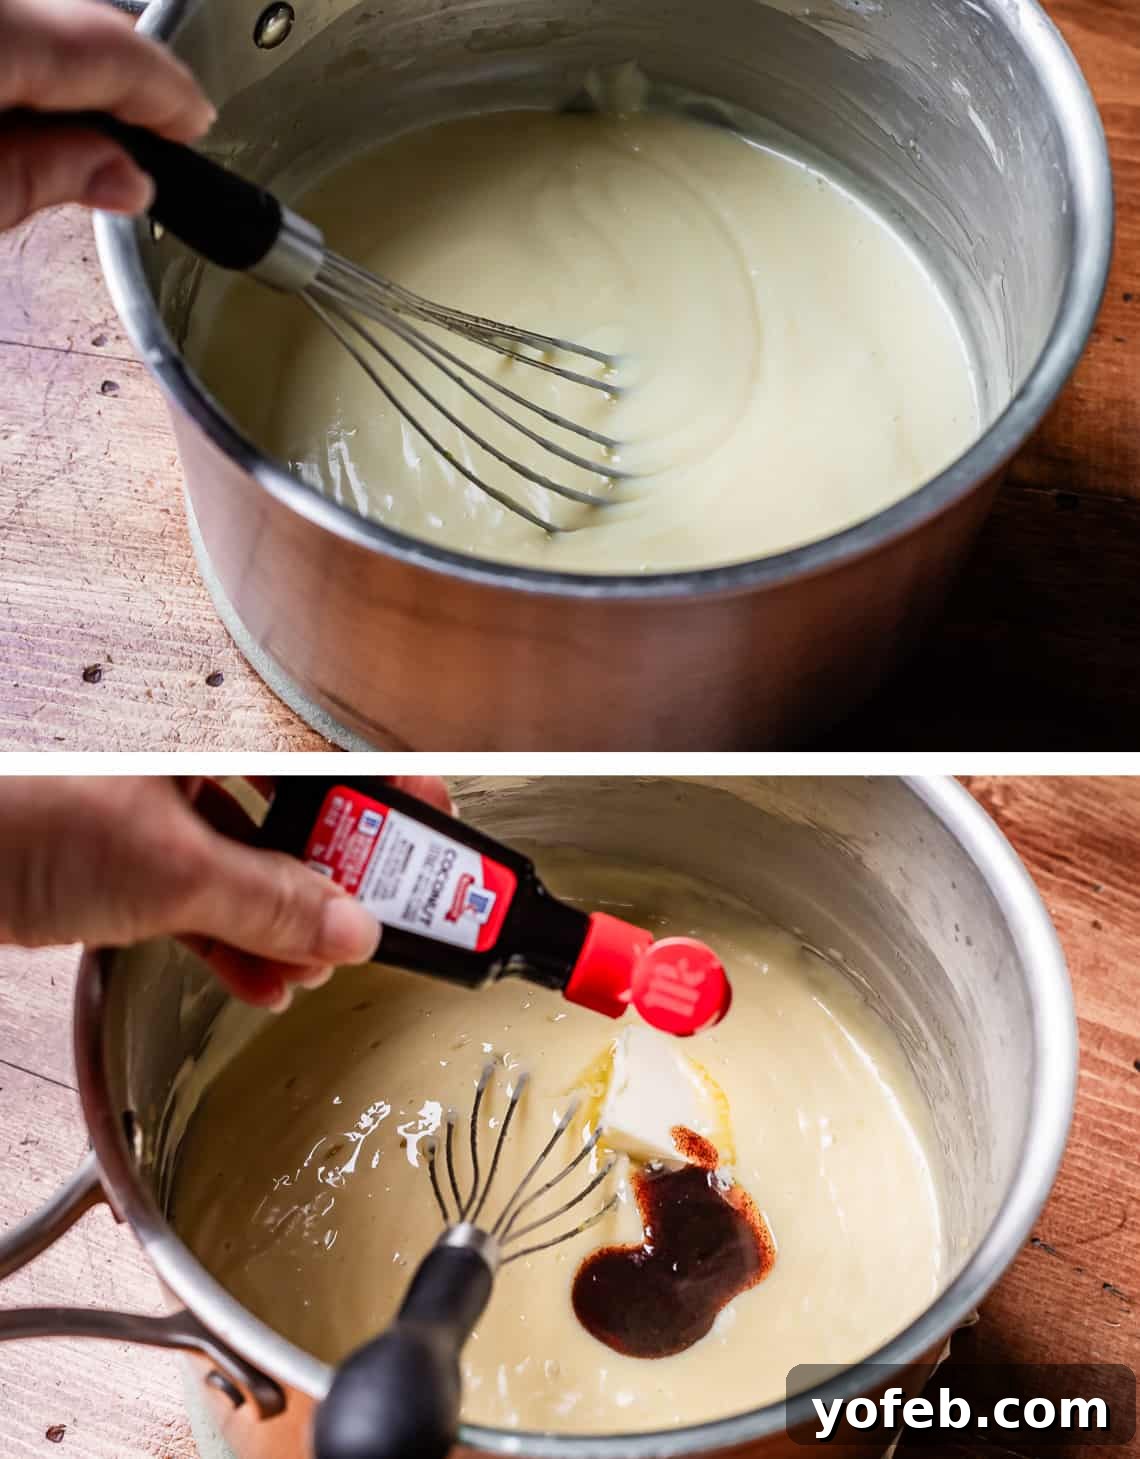
How do you thicken coconut cream pie filling?
The coconut cream pie filling thickens as it cooks on the stove. Place your pot over medium heat and stir constantly with a flat whisk, making sure to scrape the bottom and corners of the pot. Continue cooking for about 7-8 minutes until the mixture comes to a boil and the foam on top begins to recede. The whisk should leave distinct marks on the surface when you drag it across. Once it reaches this consistency, remove the pot from the heat and stir in the butter, coconut extract, and vanilla bean paste (or vanilla extract if vanilla bean paste isn’t available).
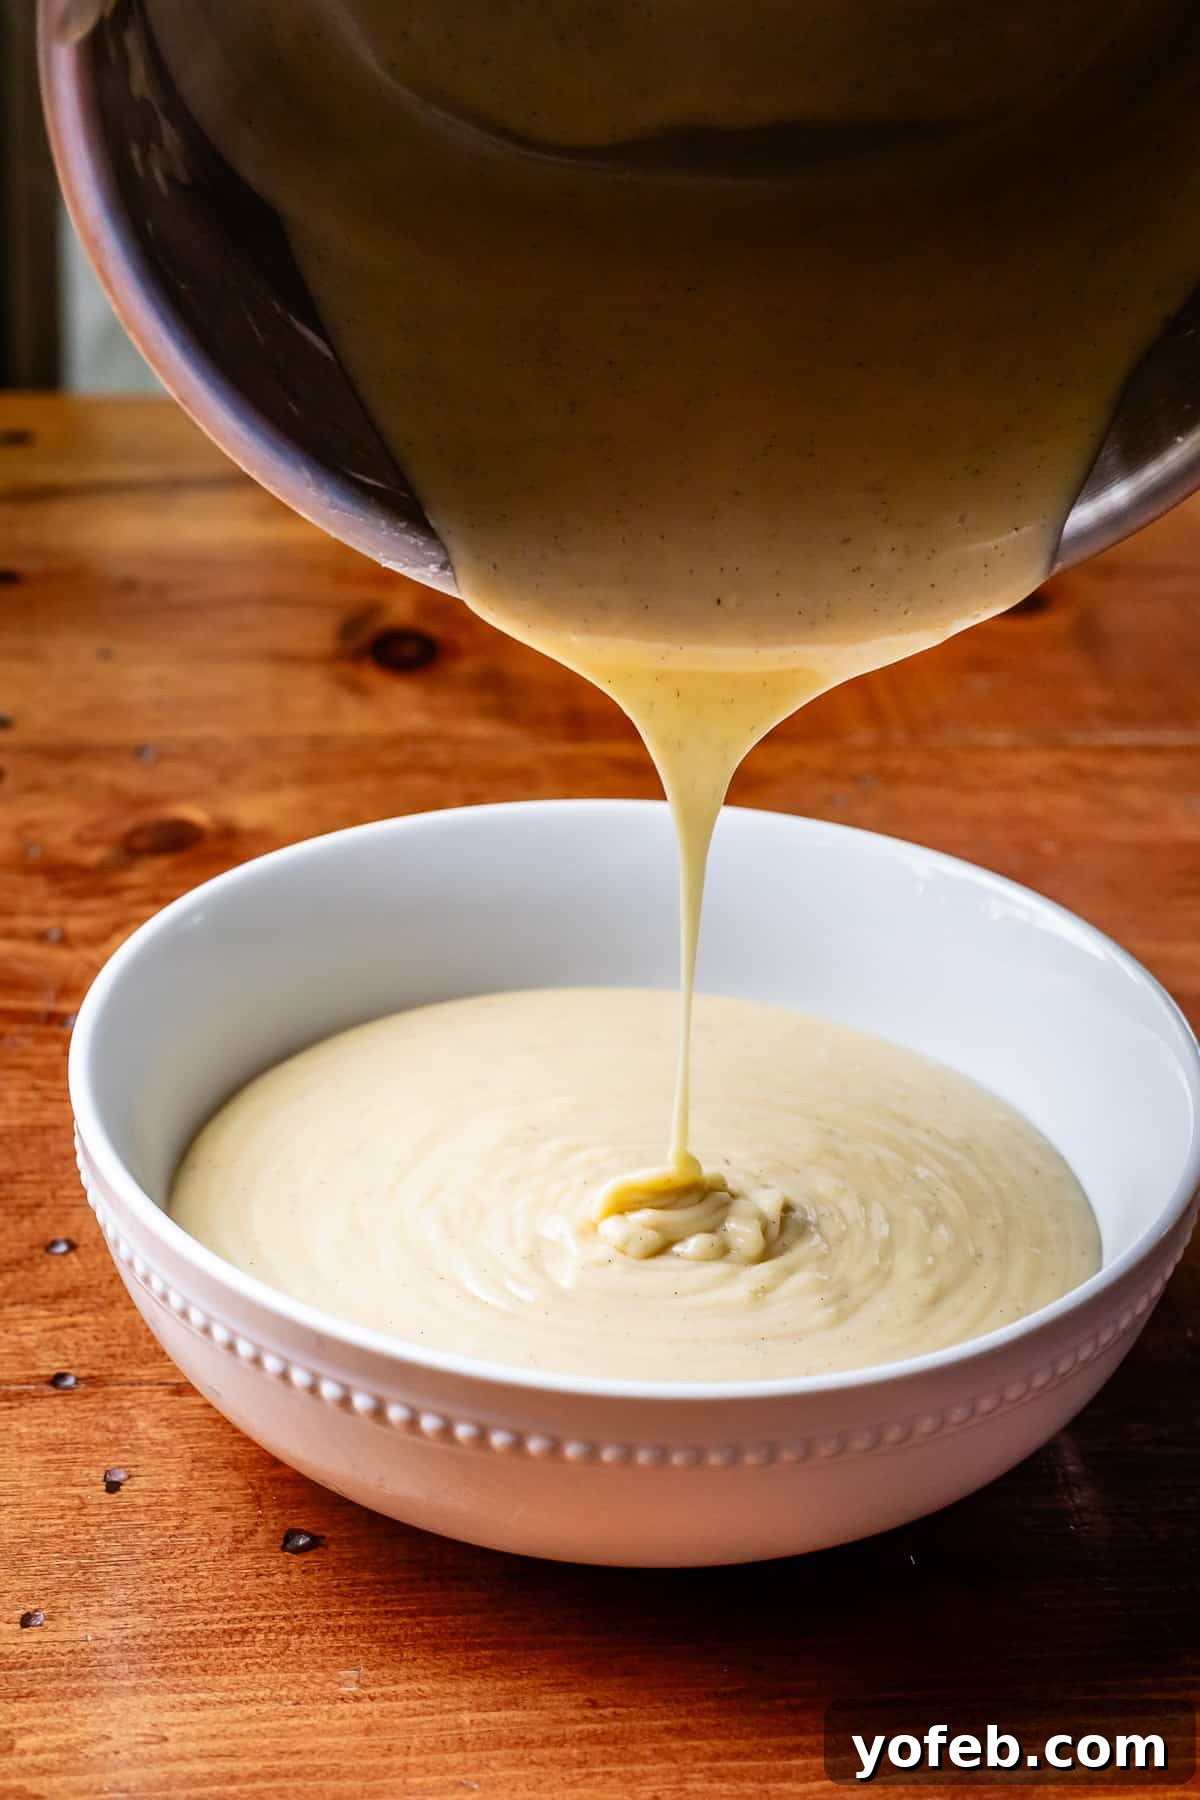
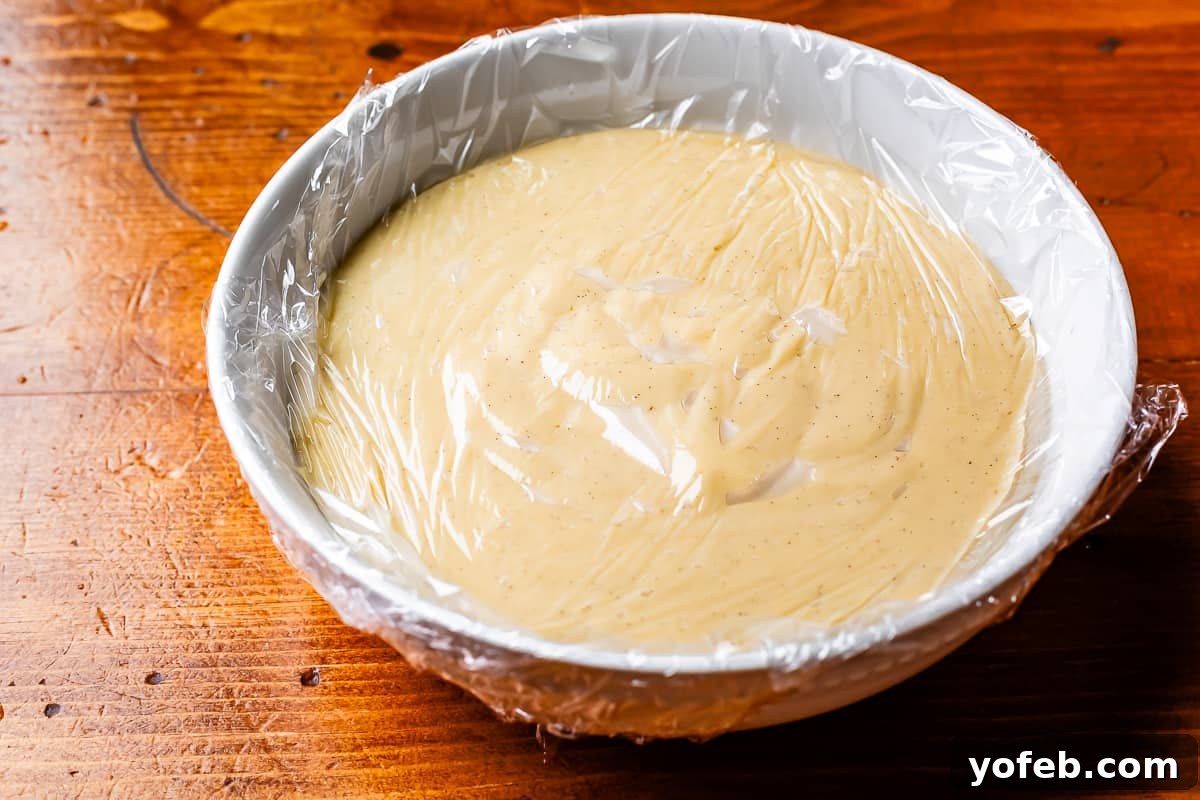
Transfer the warm coconut custard to a clean bowl. Immediately press plastic wrap directly onto the surface of the custard, ensuring no air is trapped between the plastic and the filling. This prevents a skin from forming as it cools. Place the bowl in the refrigerator for at least two hours to chill completely. For a quicker chill, you can place it in the freezer for about 30 minutes, but be sure to set a timer and move it to the fridge afterward to ensure even cooling and prevent freezing at the edges.
Now, it’s time for the star ingredient’s transformation: toasting the coconut! We’ll do this in two batches, and it’s a surprisingly quick process, usually taking only a couple of minutes per batch.
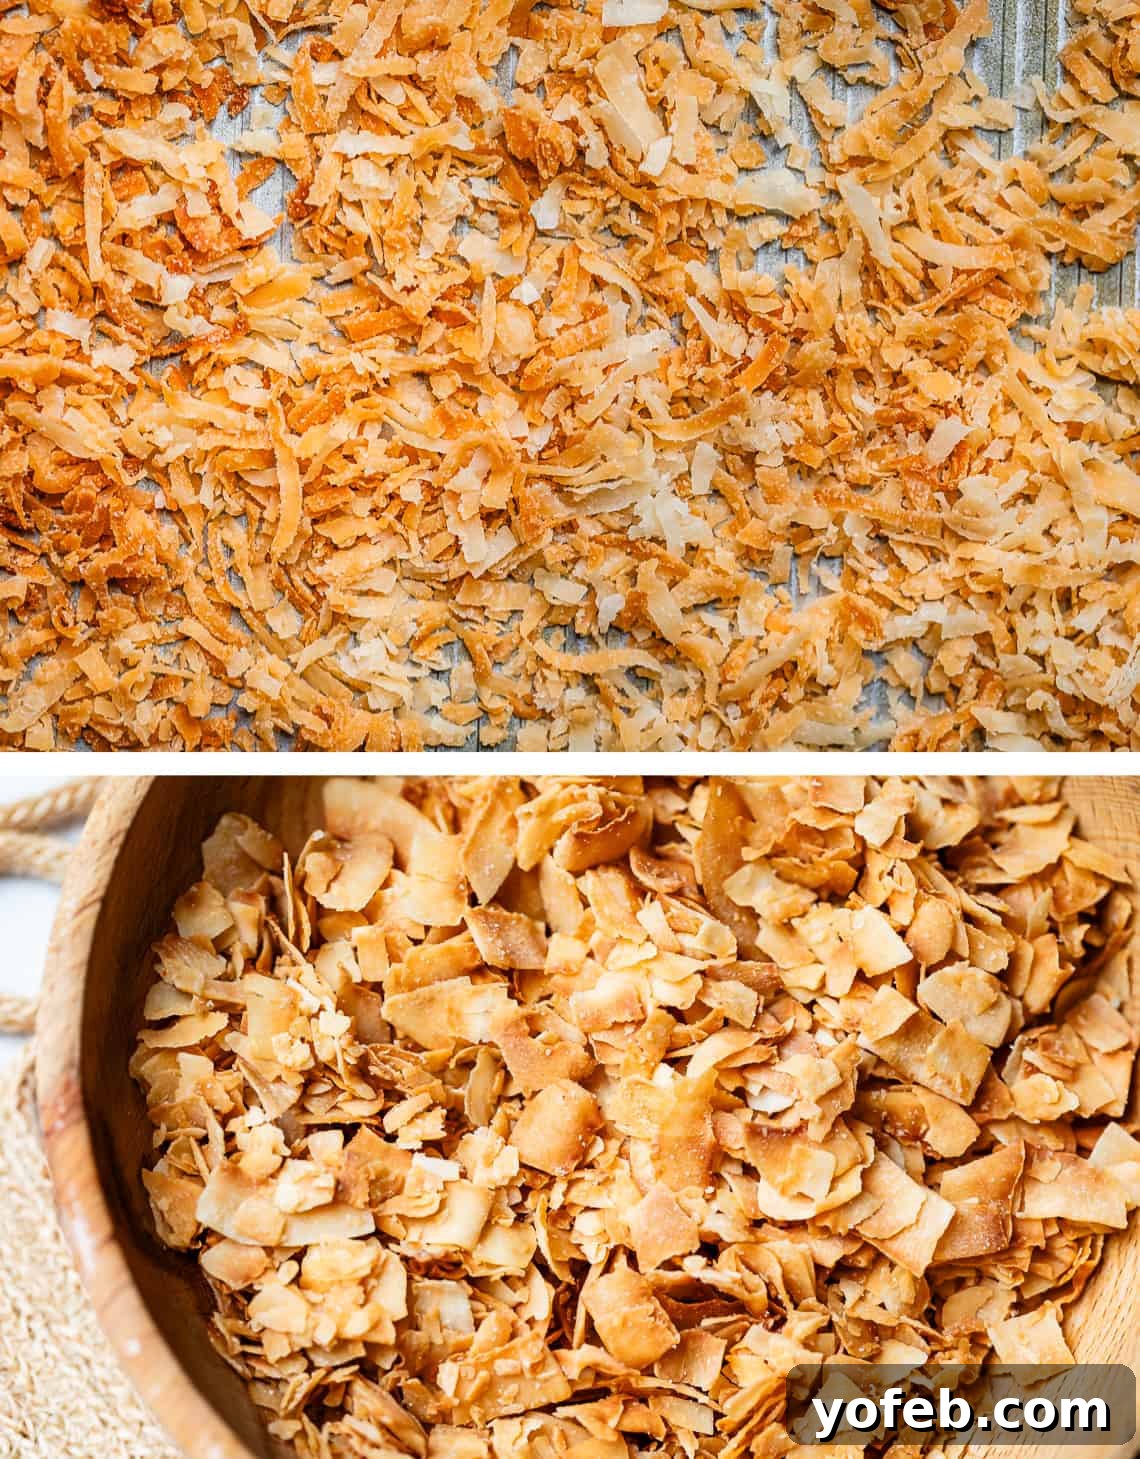
Toast your coconut with extreme prejudice! This step is paramount, as it’s the difference between a good-textured pie and chewing on a phone cord. Keep a vigilant eye on the oven, especially towards the end, as coconut can go from perfectly golden to burnt in a matter of seconds. You want the flakes to be a deep, rich golden brown, with almost no white left. Once cooled enough to handle, taste a piece. If it doesn’t absolutely shatter in your mouth with a burst of nutty flavor, keep toasting. The bottom photo illustrates the larger flake coconut, which we reserve for garnishing the top of the pie. Its size and crunch make for a more beautiful and textural garnish than smaller flakes. If large flakes aren’t available, any type of coconut will do for the garnish, just toast it aggressively!
Transfer all the smaller, sweetened toasted coconut into your food processor for the crust.
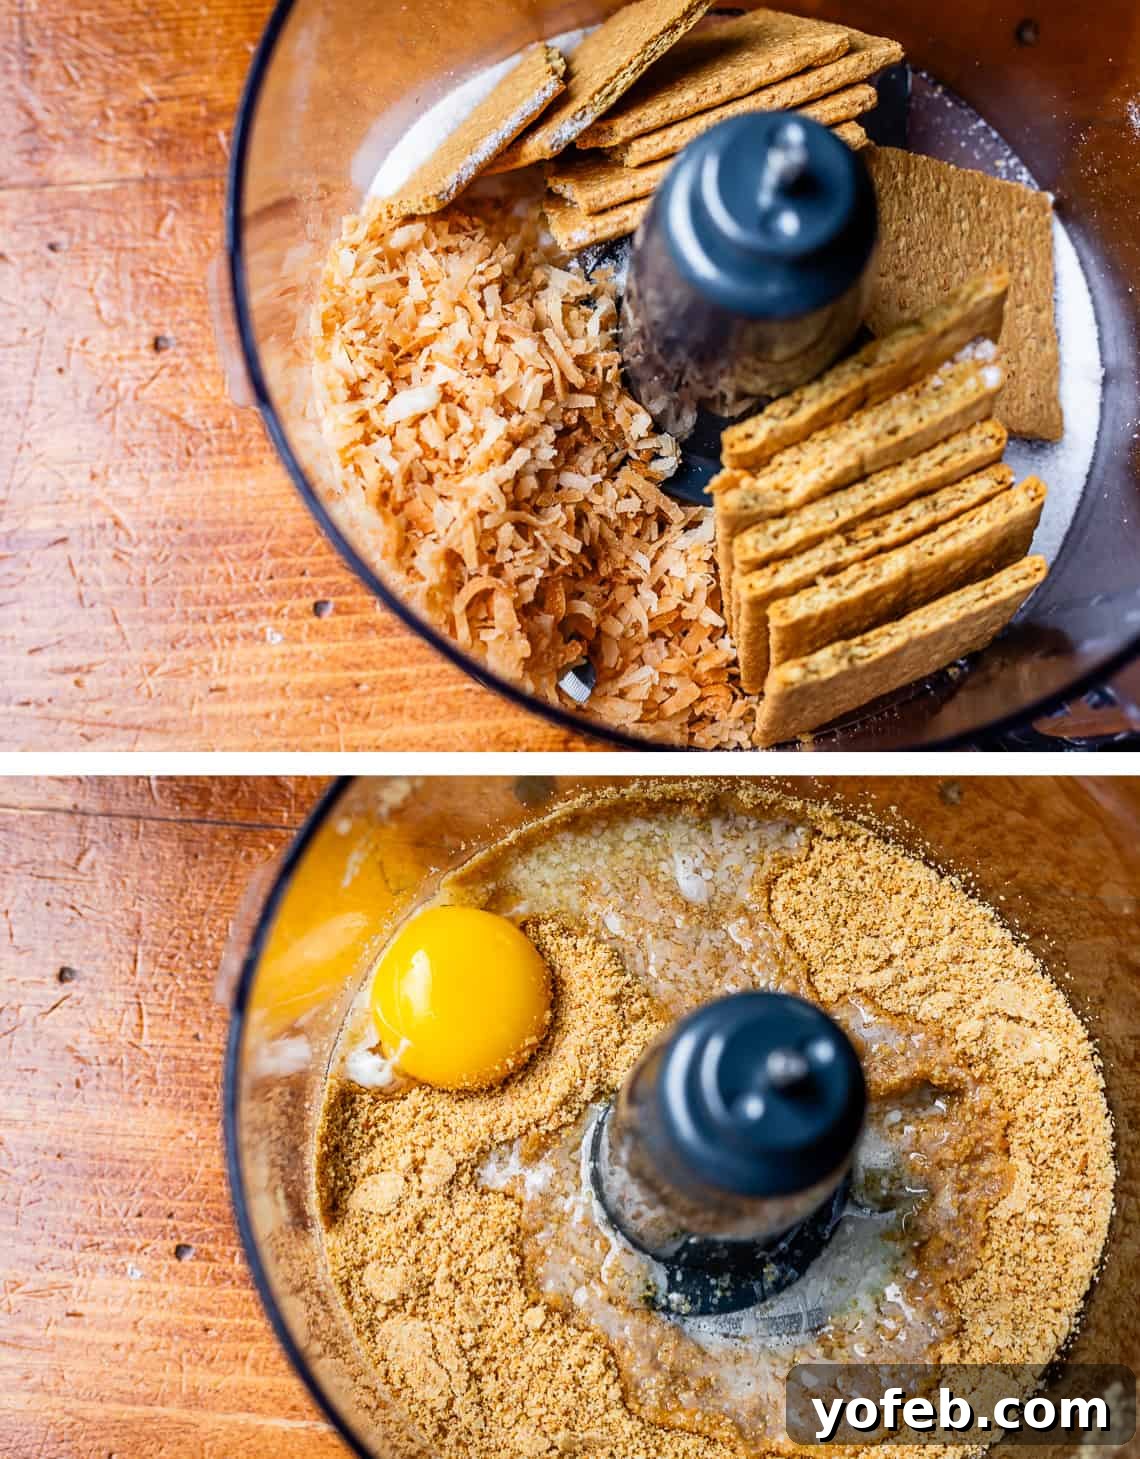
Now for the truly exciting part: the crust! I had never heard of adding an egg yolk to a graham cracker crust before, but I’m absolutely thrilled with the results. Just as an unconventional egg addition can make my Flaky Pie Crust incredibly tender, an egg yolk here works wonders as a binder. It helps create a crust that is still wonderfully crispy but maintains its structure much better when sliced. Add the toasted sweetened coconut, graham cracker sheets, granulated sugar, and kosher salt to your food processor. Pulse until you achieve fine, uniform crumbs. Then, add the melted butter and the single egg yolk. Process until the mixture resembles wet sand—a perfect consistency for pressing into your pie pan.
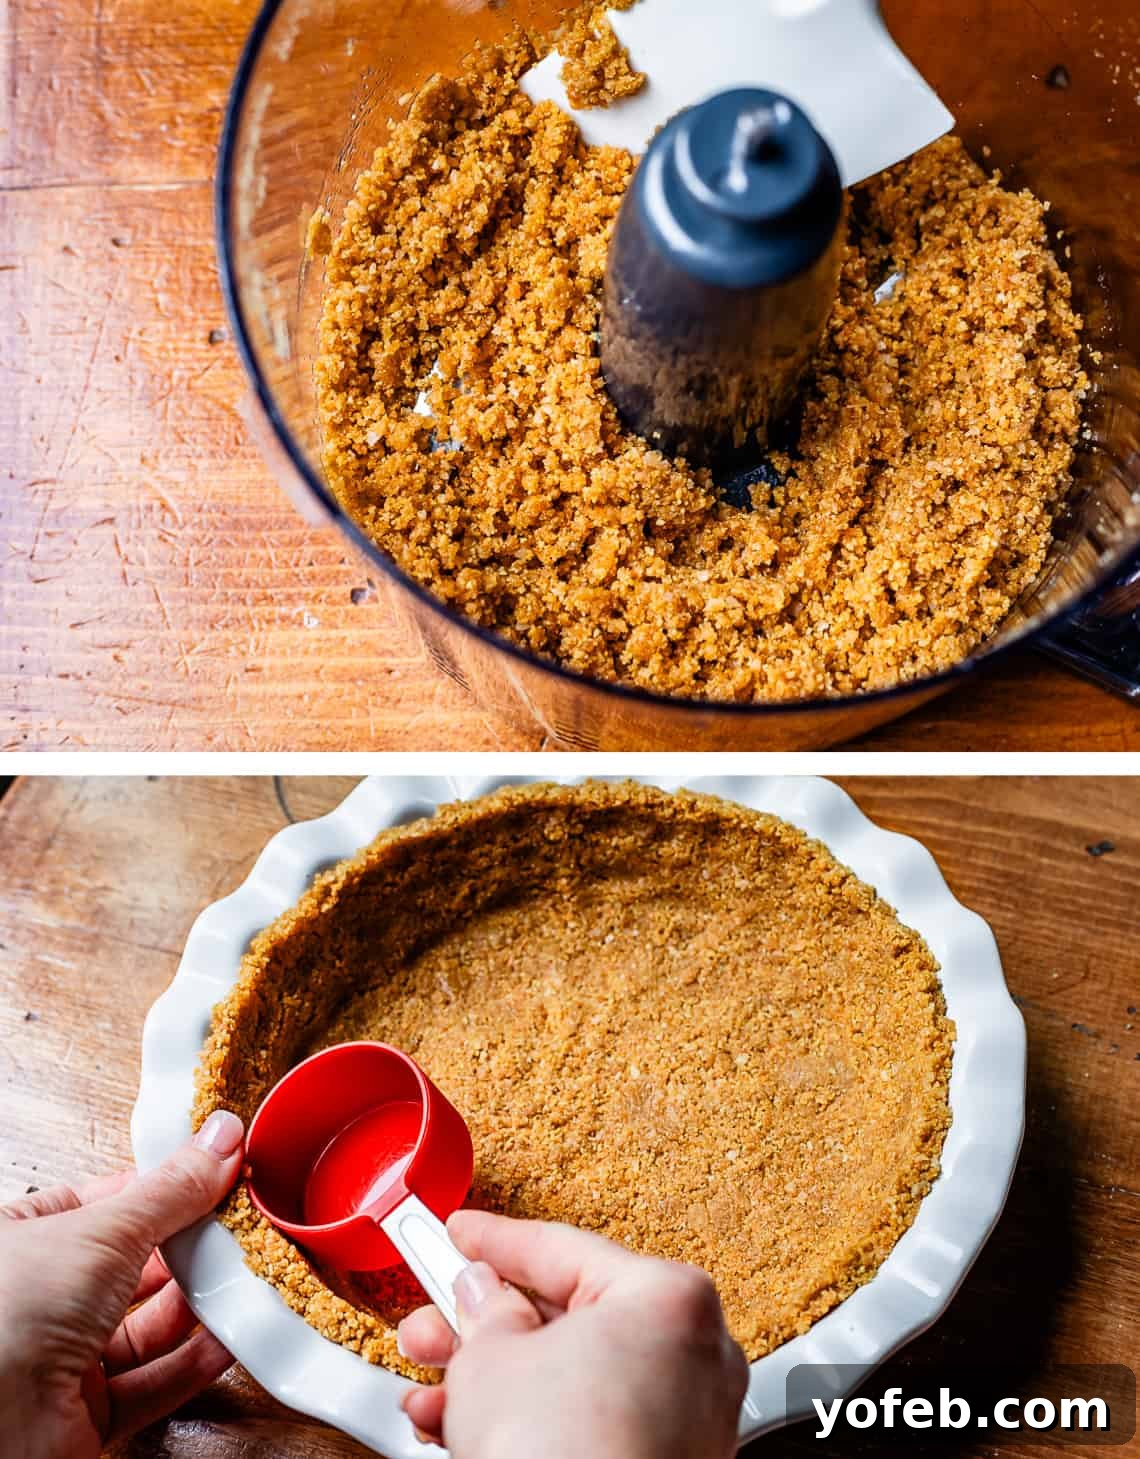
Evenly press about three-quarters of your graham cracker mixture into a 9-inch pie plate. Use your hands or the bottom of a measuring cup to firmly pack the crust onto the bottom and up the sides, ensuring an even thickness throughout. Pay special attention to the top edge, pressing it firmly to create a sturdy, defined rim that will hold its shape beautifully when sliced.
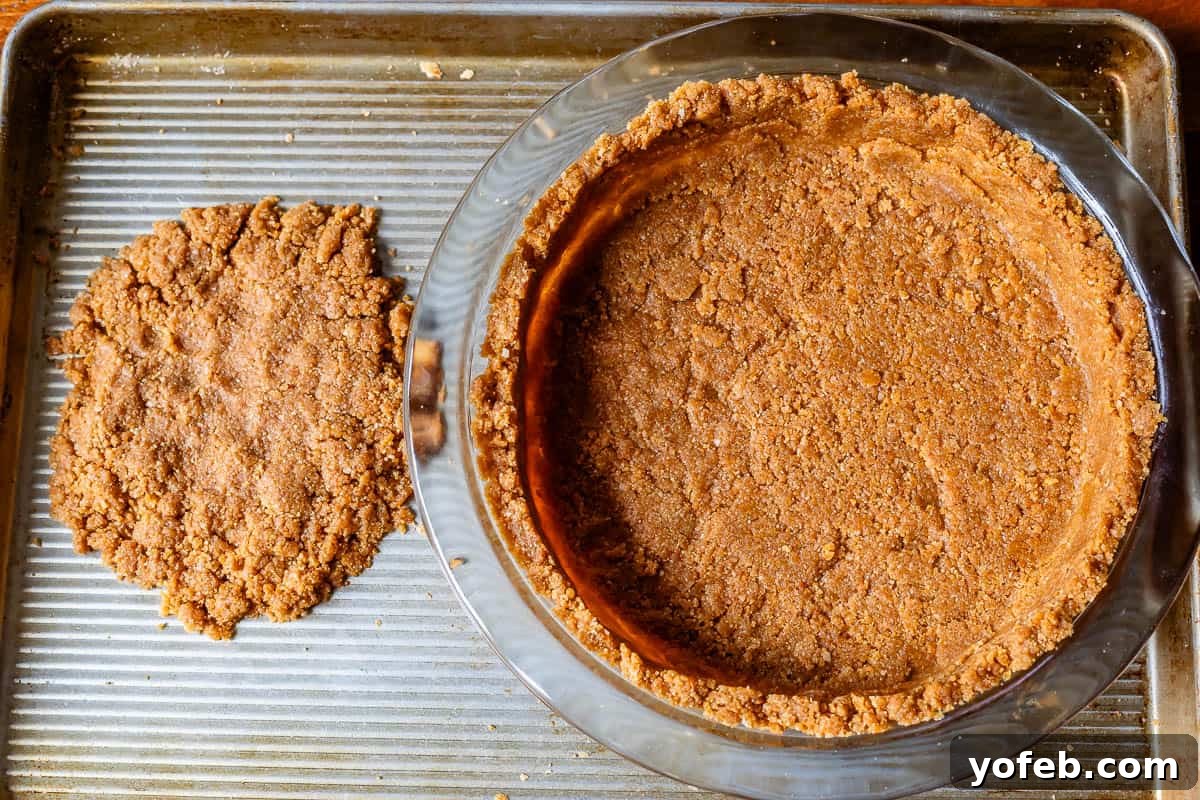
Place your pie pan on one side of the same baking sheet used for toasting the coconut. Take the remaining quarter of the graham mixture and dump it onto the other side of the baking sheet, pressing it into a flat disc. This will be baked separately and later crumbled as a garnish for the top of the pie. I’m utterly obsessed with this extra touch!
Bake both the pie crust and the graham crumble on the baking sheet in the preheated 350°F (175°C) oven for 10-15 minutes, until fragrant and lightly golden. The crust might appear a bit more bubbly than a typical graham crust due to the egg yolk, which is perfectly fine. Immediately after removing from the oven, gently reshape the sides of the crust with a spoon if they’ve slumped. Allow both the crust and crumble to cool completely. Once cool, break the baked graham crumble into bite-sized pieces, transfer to a bowl, cover, and set aside for garnishing.
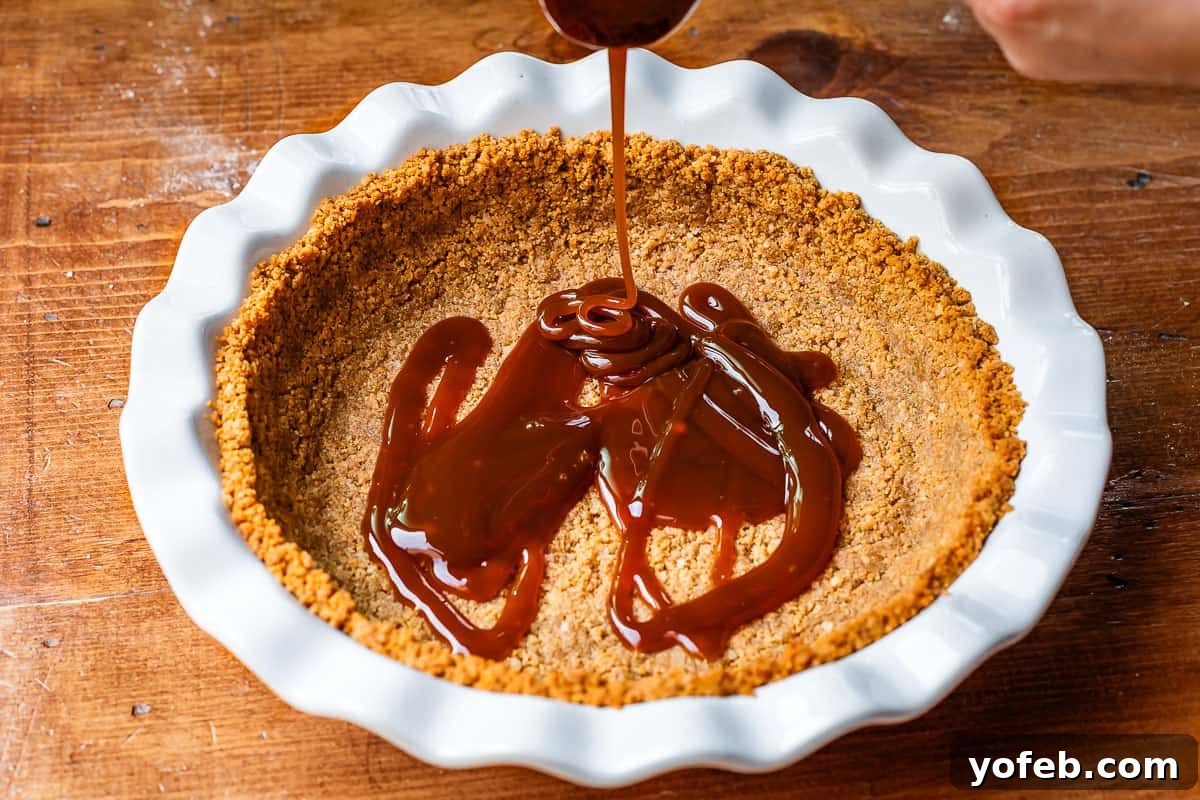
Once your pie crust is thoroughly cooled, spread a generous half cup of your cooled caramel sauce evenly across the bottom. This golden layer will provide an incredible depth of flavor and a delightful textural contrast. If your custard isn’t quite chilled yet, place the caramel-lined pie crust in the fridge to keep it cool.
Homemade Whipped Cream
Next, we create the luscious whipped cream, which will be folded into our custard and used to elegantly top the pie. In a large mixing bowl or the bowl of a stand mixer, combine cold heavy whipping cream, powdered sugar, a touch of kosher salt, and the secret ingredient: instant vanilla pudding powder. This pudding mix acts as a stabilizer, preventing the whipped cream from deflating and ensuring it remains beautifully fluffy. Whip the mixture on high speed until it forms soft, firm peaks that hold their shape when you lift the beaters, as shown in the image. Be careful not to over-beat, which can lead to a grainy texture.
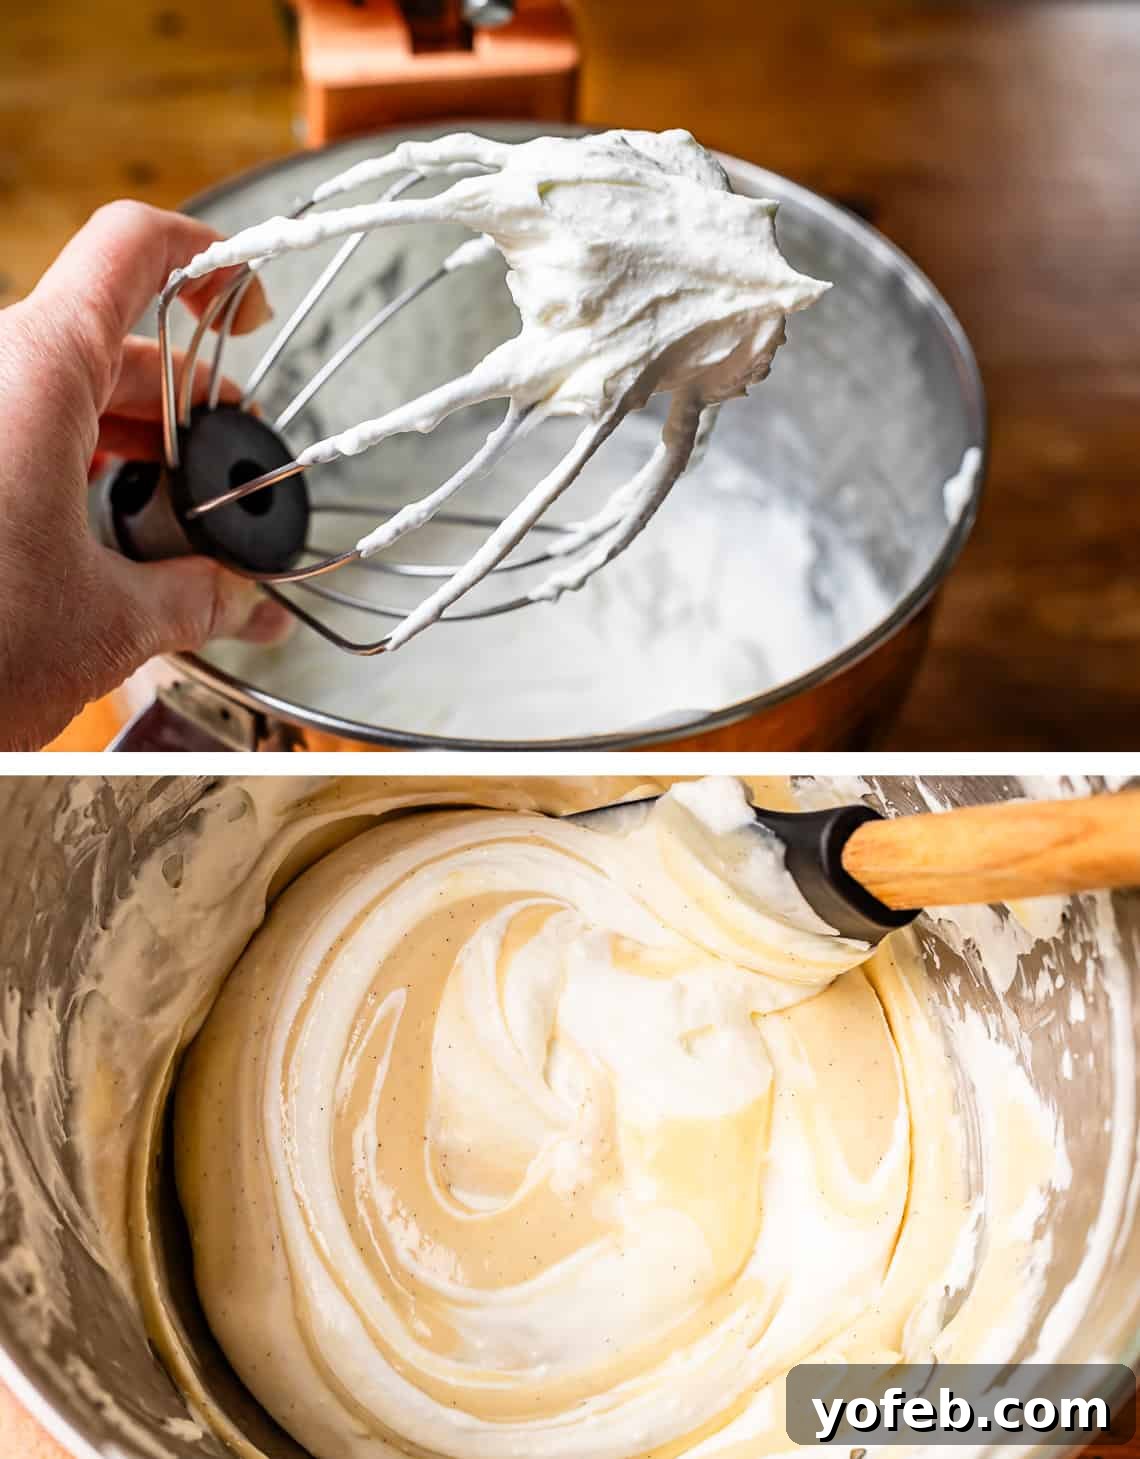
Once your whipped cream is ready, gently scrape half of it into a separate, covered bowl and chill it in the fridge. This portion will be reserved for decorating the top of the pie later. (For convenience, you can pipe it directly into a piping bag fitted with a large star tip and refrigerate it.) Now, whisk the thoroughly chilled coconut custard filling to ensure it’s lump-free and smooth. Carefully fold the custard into the remaining half of the whipped cream using a rubber spatula. Use gentle strokes to avoid deflating the cream; a few streaks are perfectly acceptable. This creates a light, airy, and creamy filling.
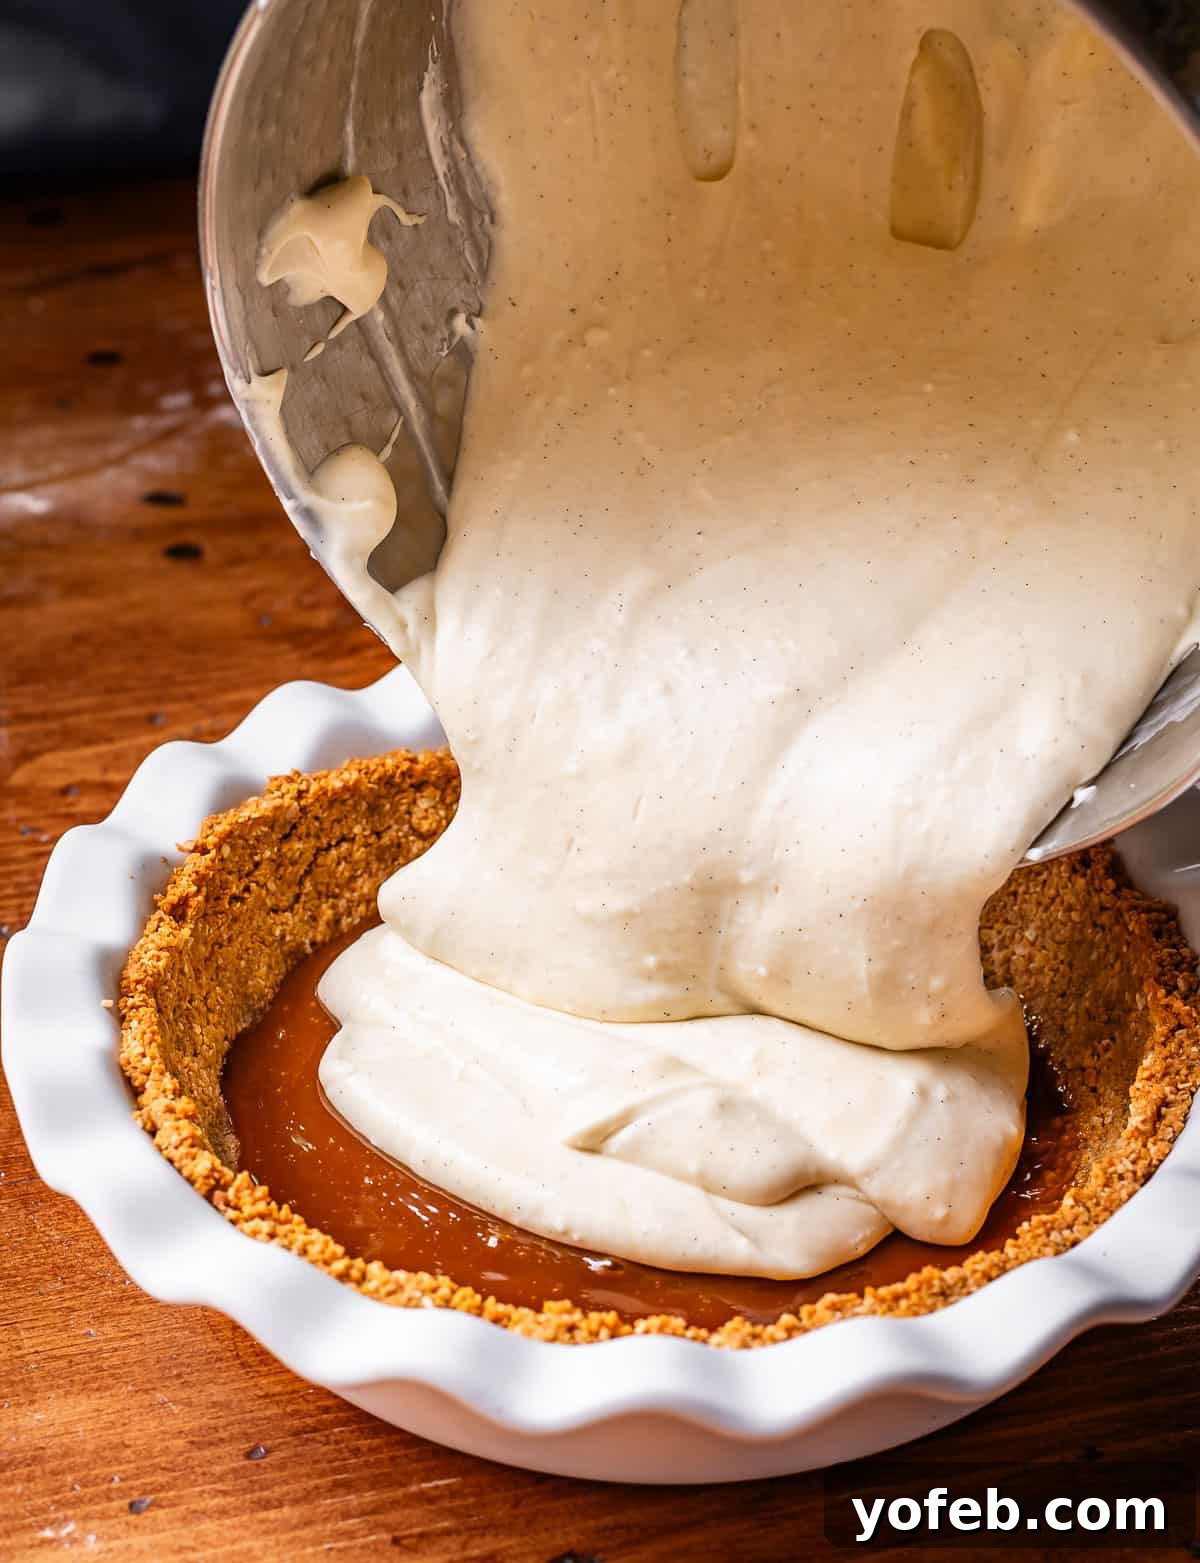
Pour the creamy coconut filling directly into your caramel-lined pie crust, spreading it evenly with a spatula to create a smooth, beautiful layer.
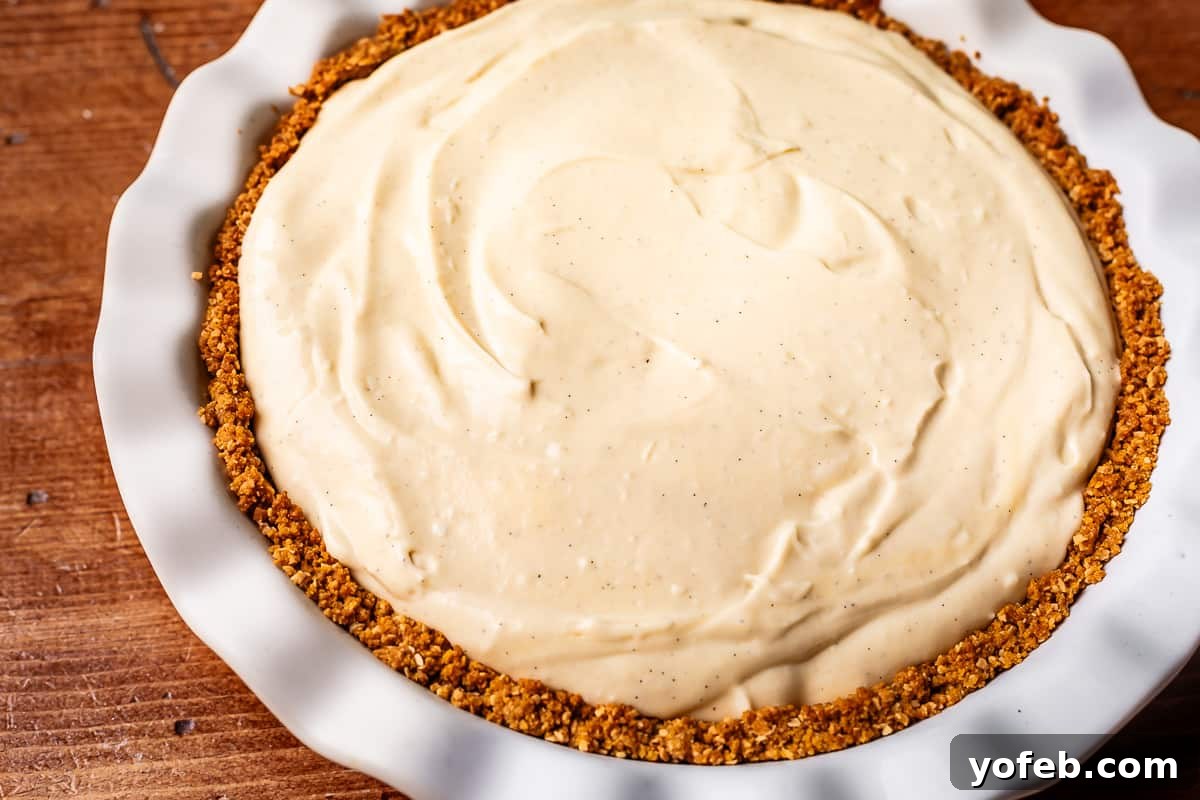
Cover the pie tightly with plastic wrap, ensuring it presses directly against the filling to prevent a skin from forming. Refrigerate for a minimum of 3 hours, though overnight chilling is ideal for the best set and flavor development.
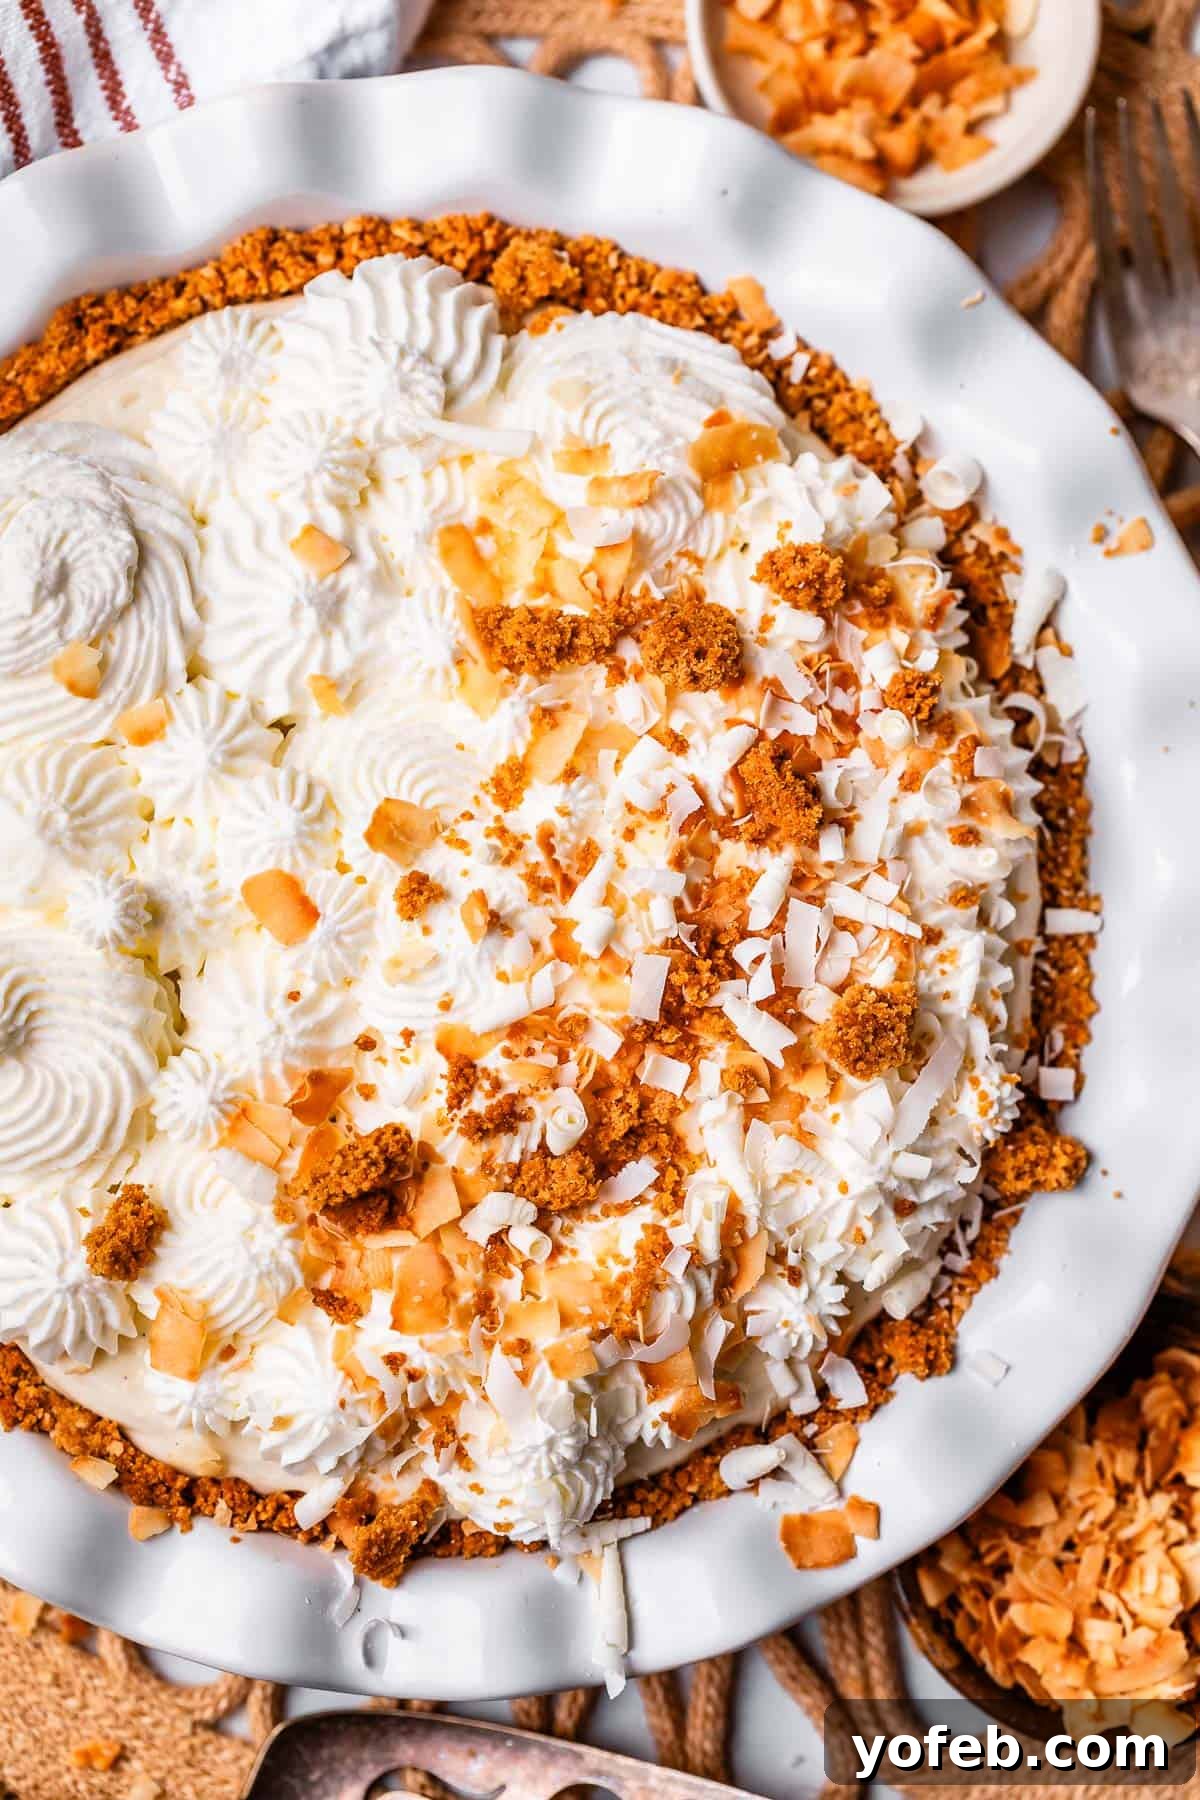
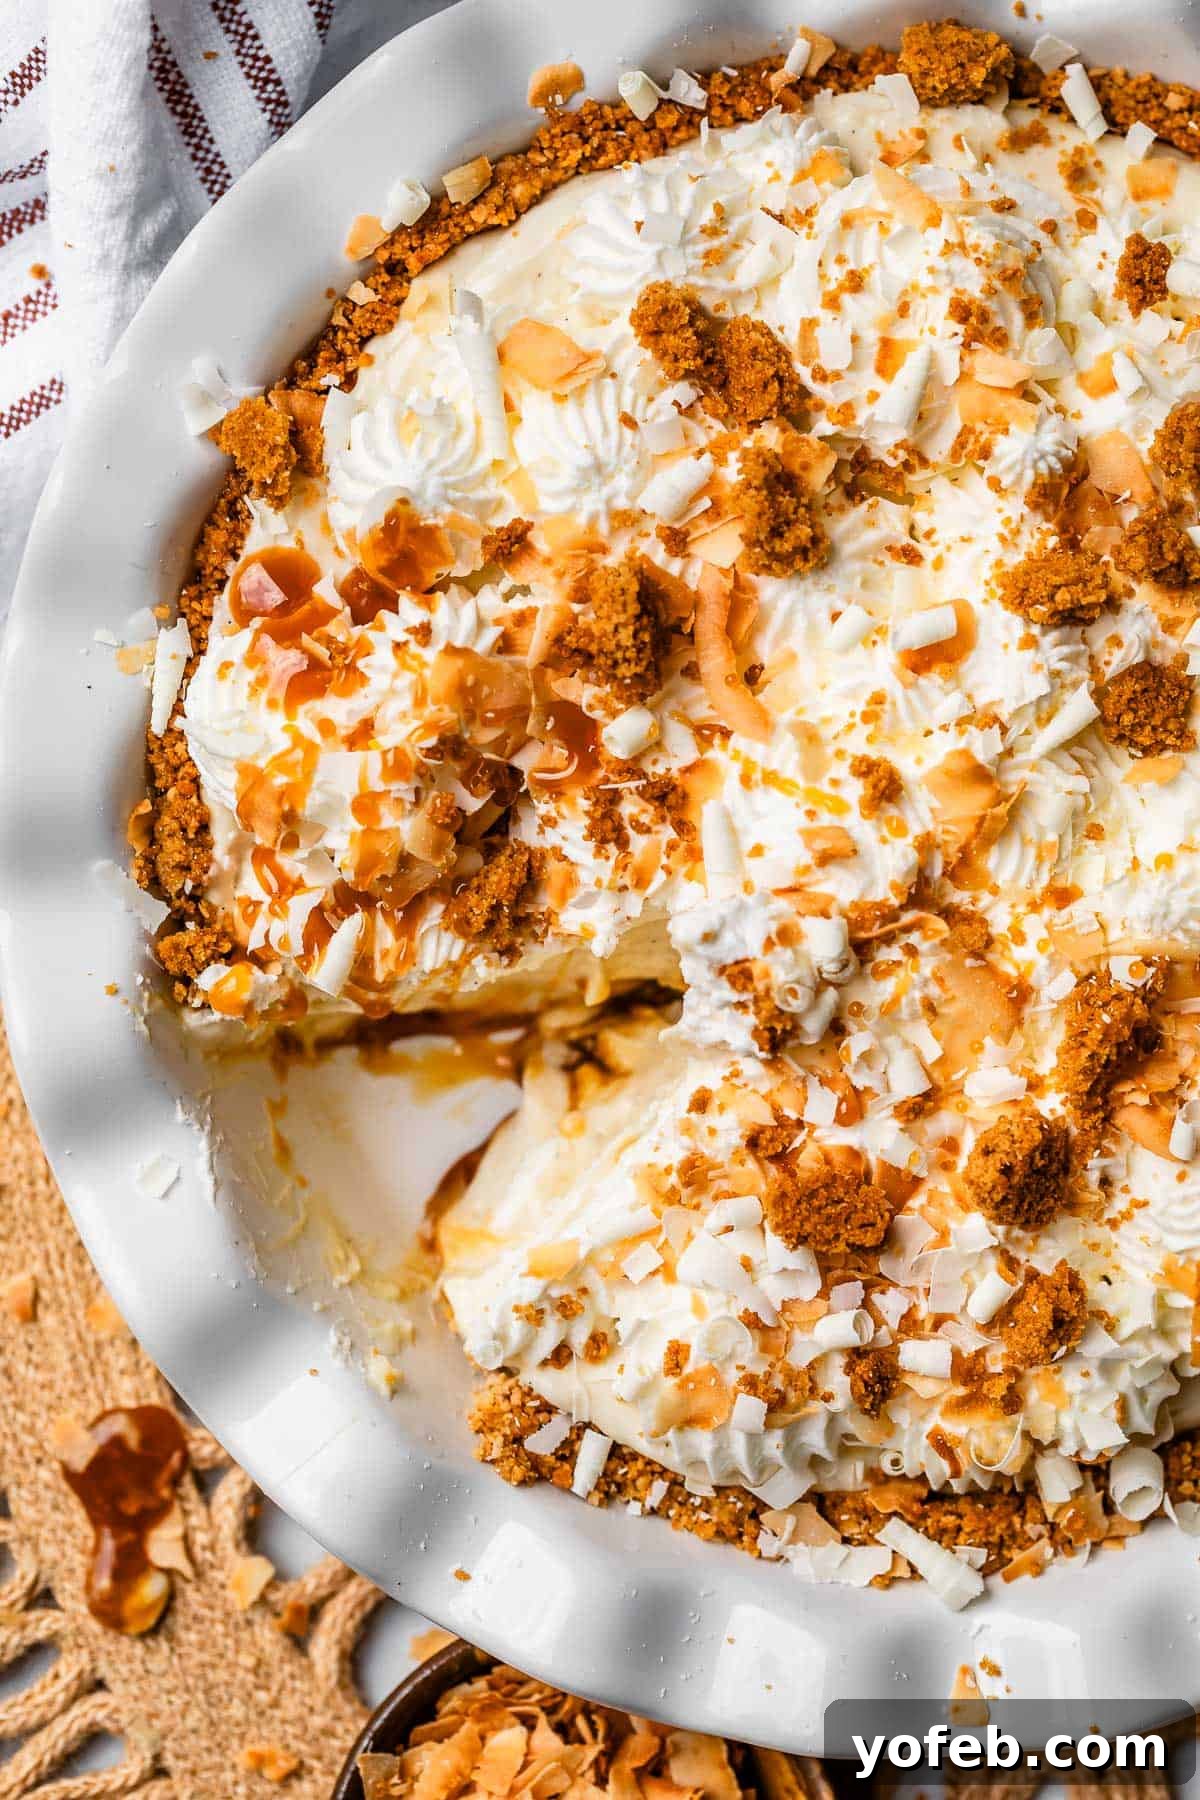
Once thoroughly chilled, remove the plastic wrap from the pie. Now, it’s time for the final artistic touches! Take the reserved whipped cream from the fridge. If you’ve placed it in a piping bag, pipe elegant swirls or rosettes over the entire top surface of the pie. Alternatively, use a spatula to spread it on top for a more rustic, yet equally delicious, presentation.
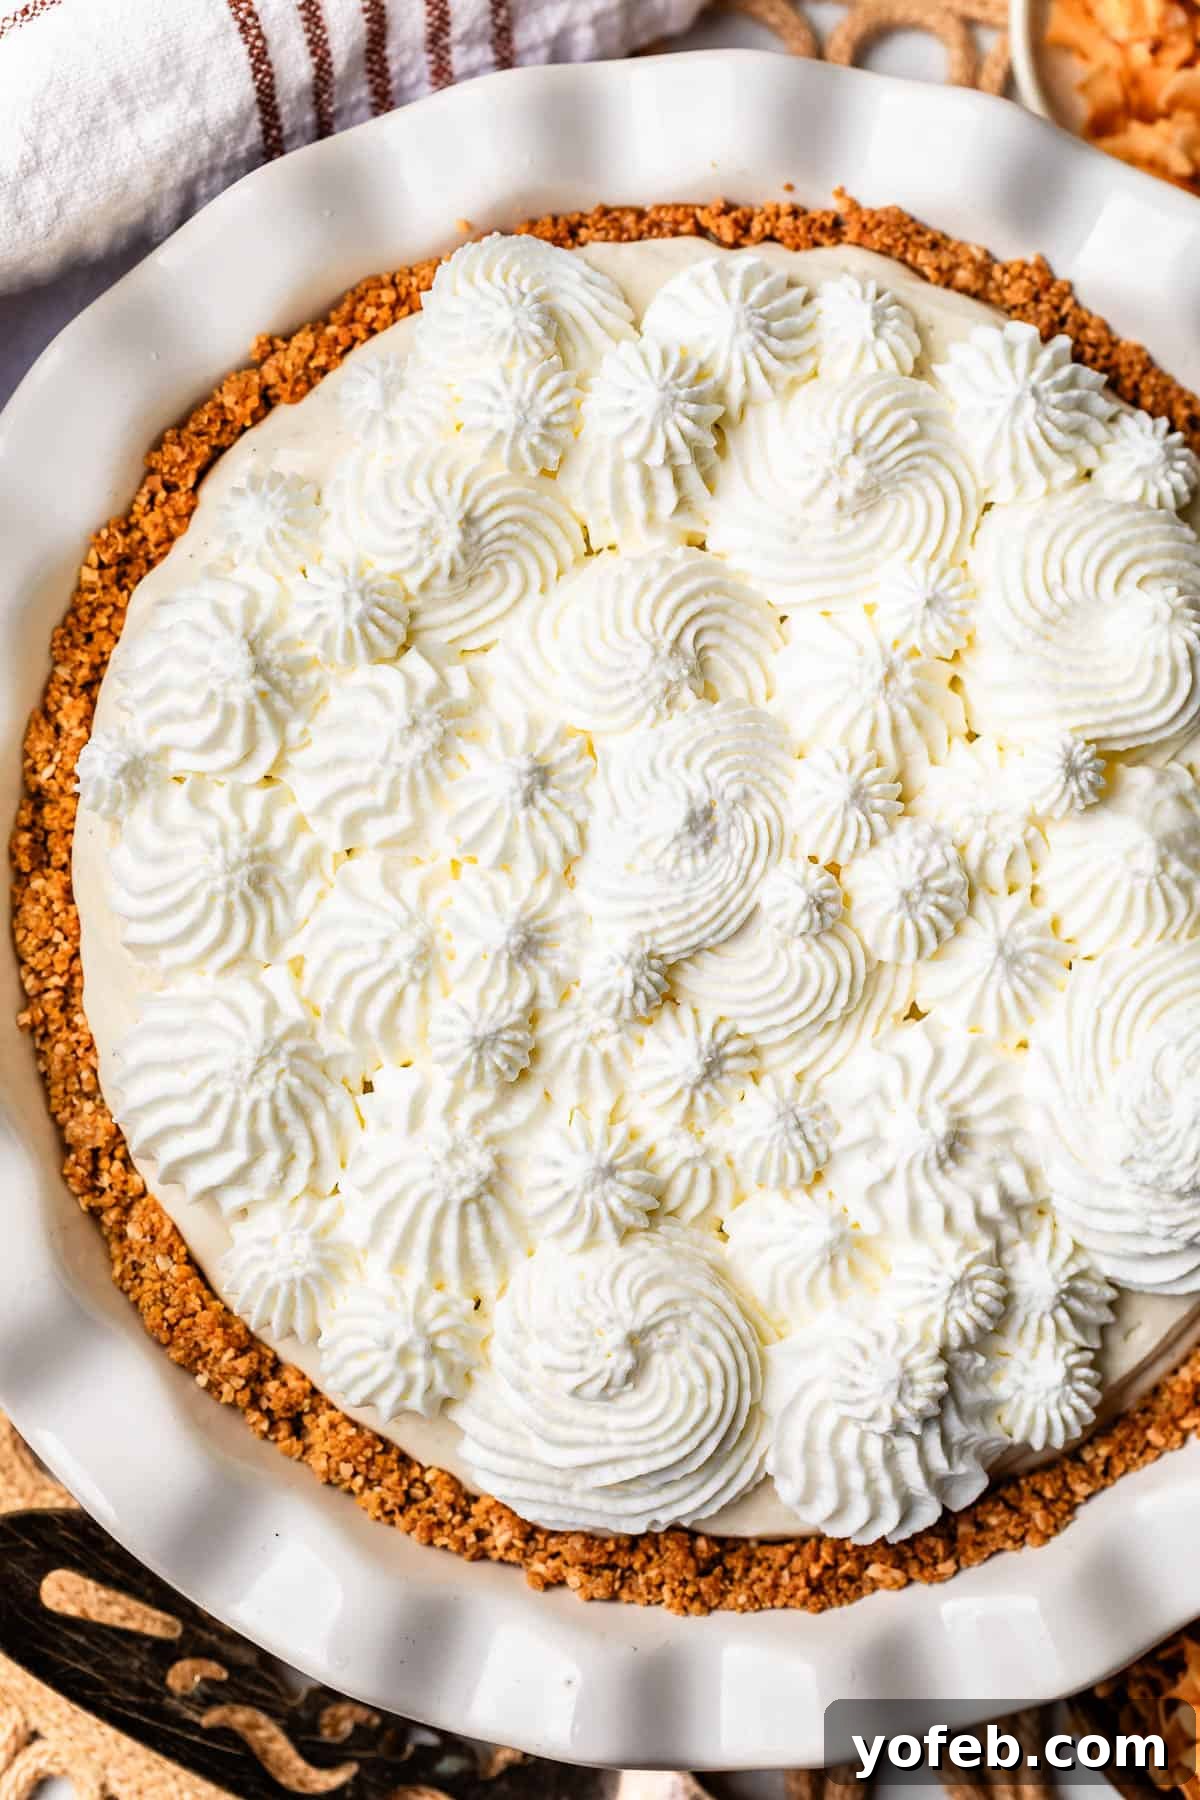
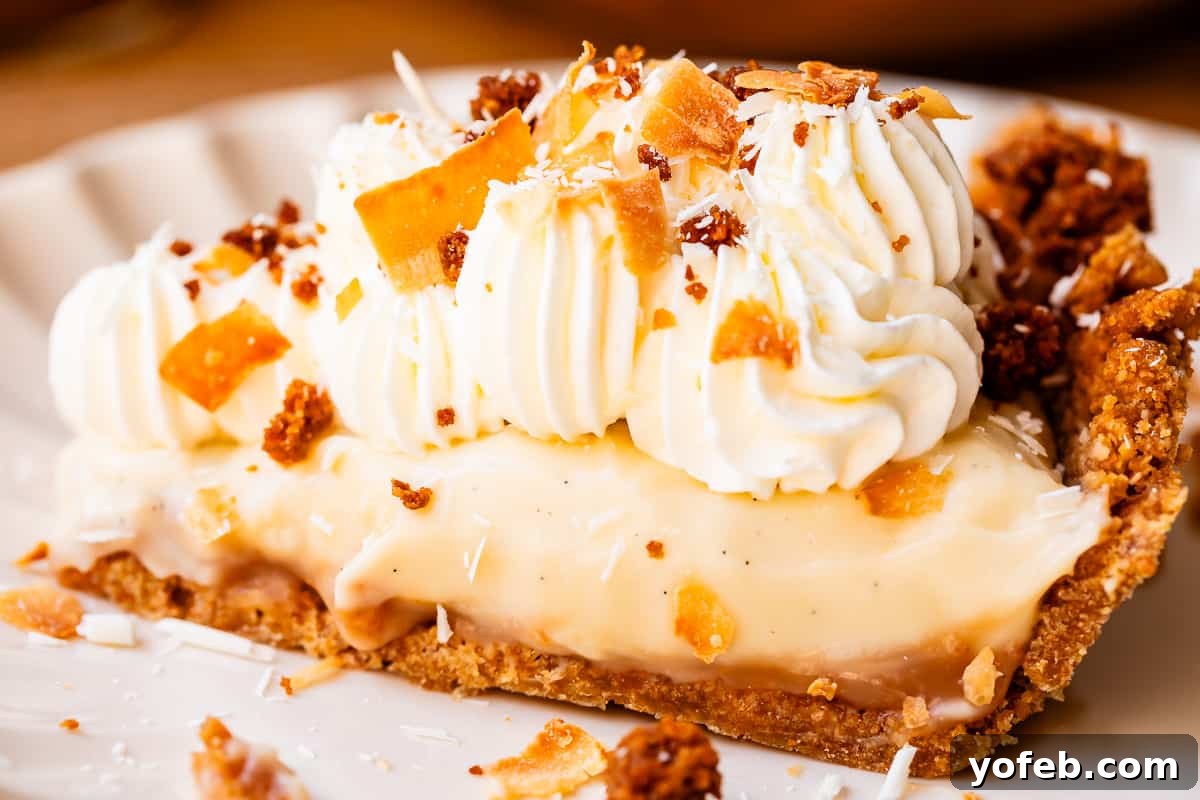
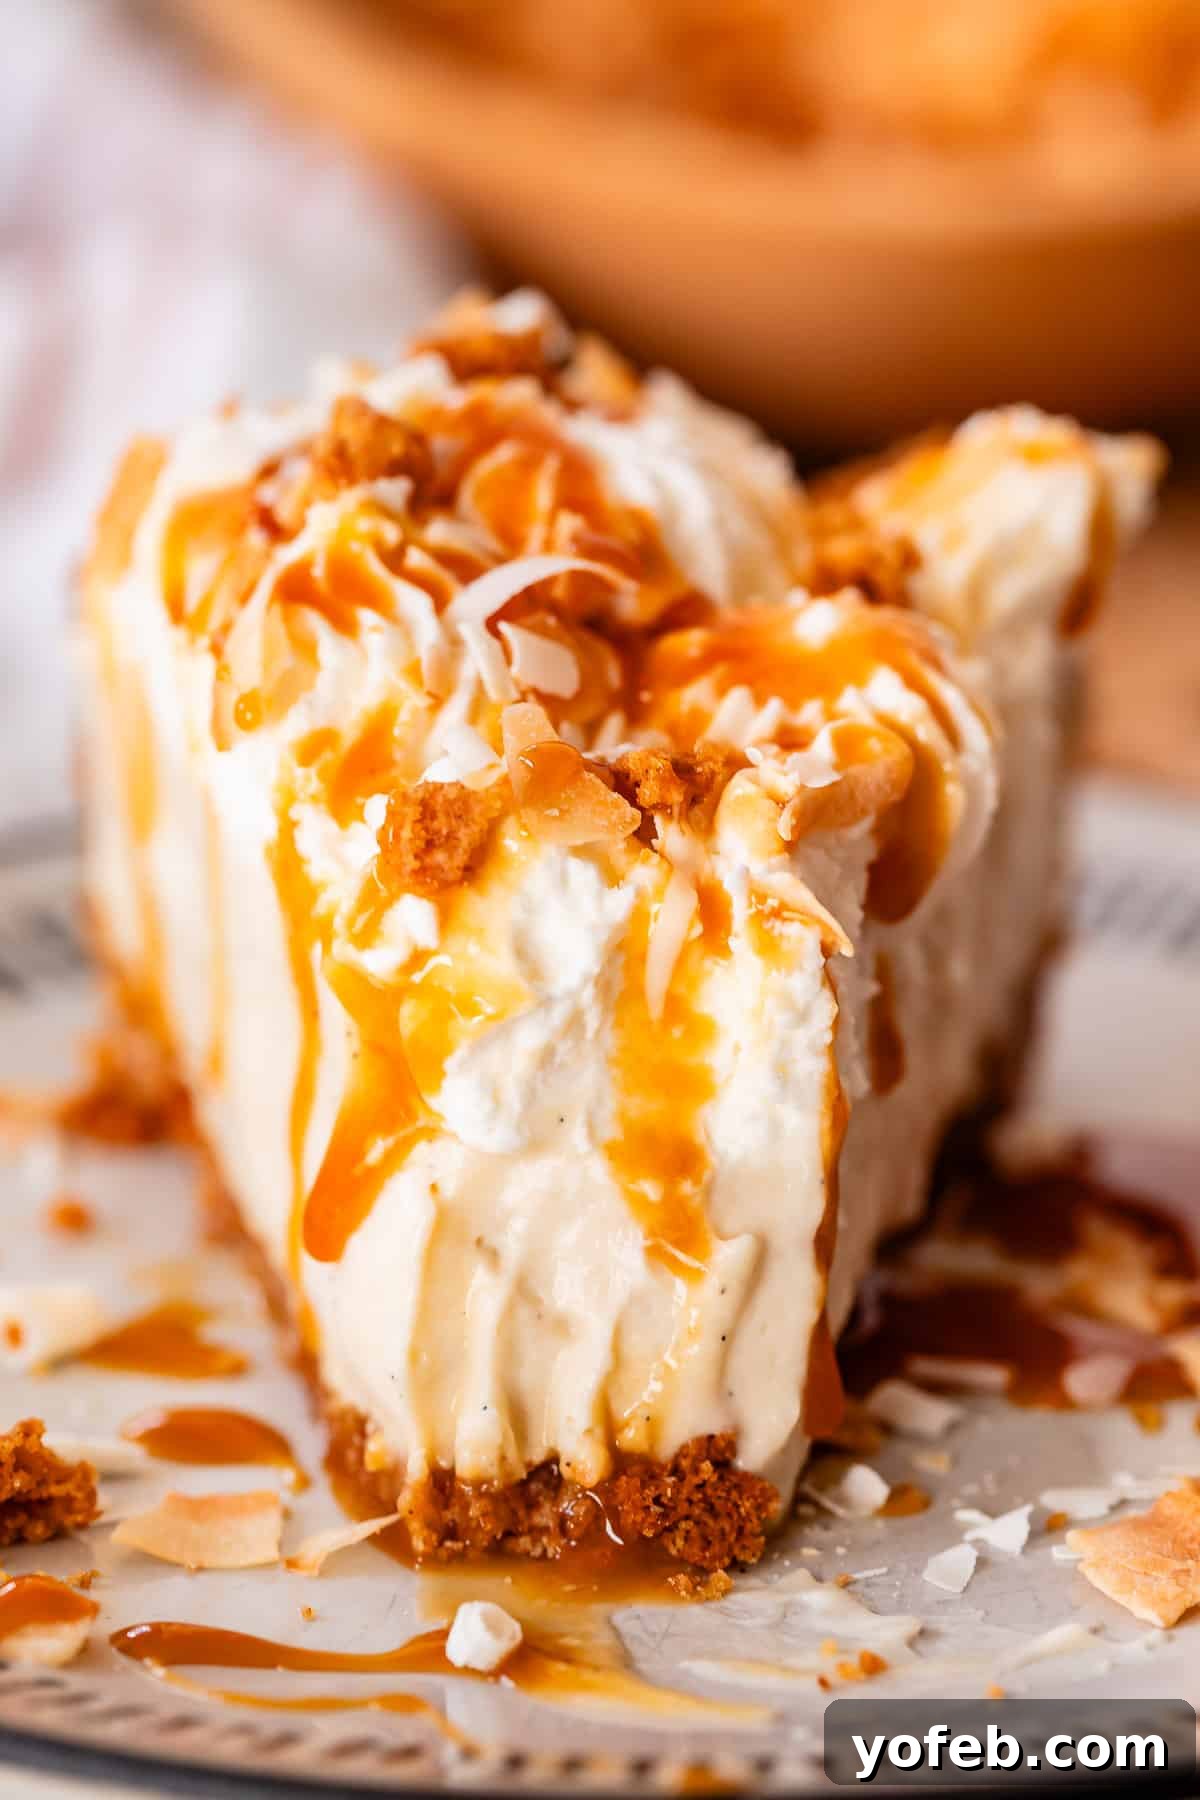
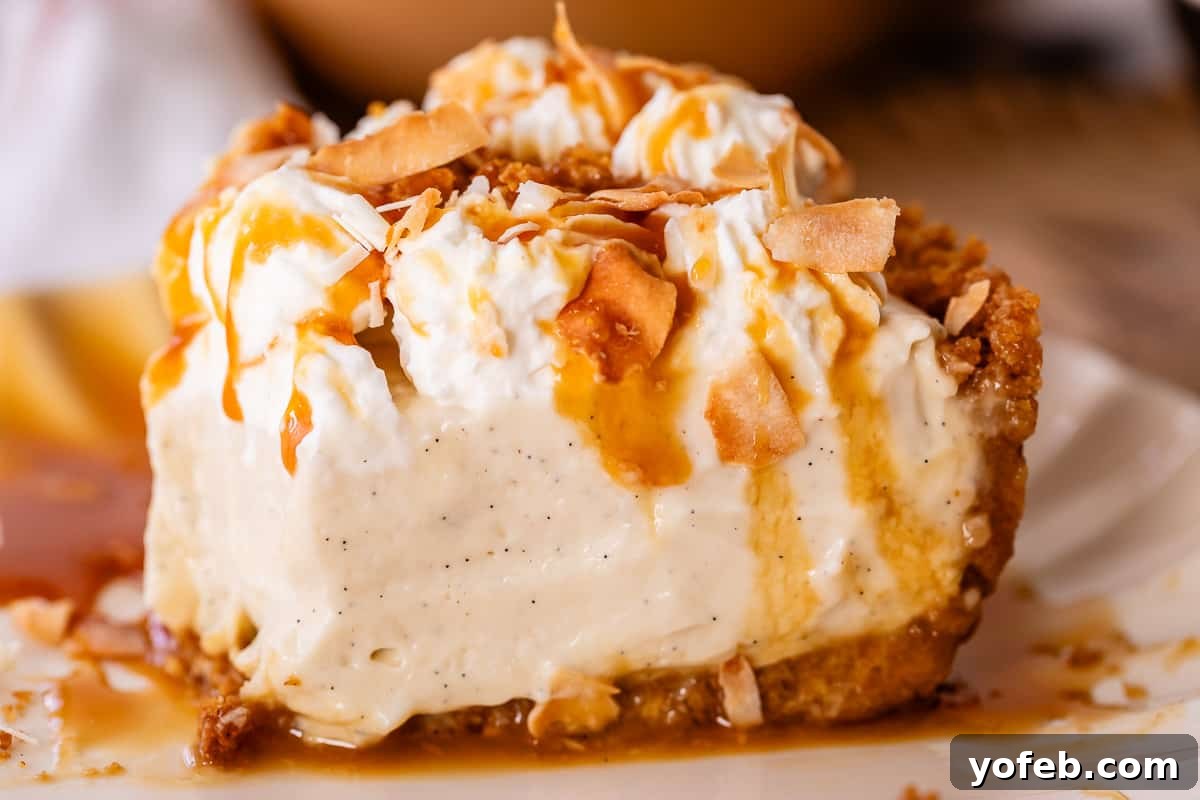
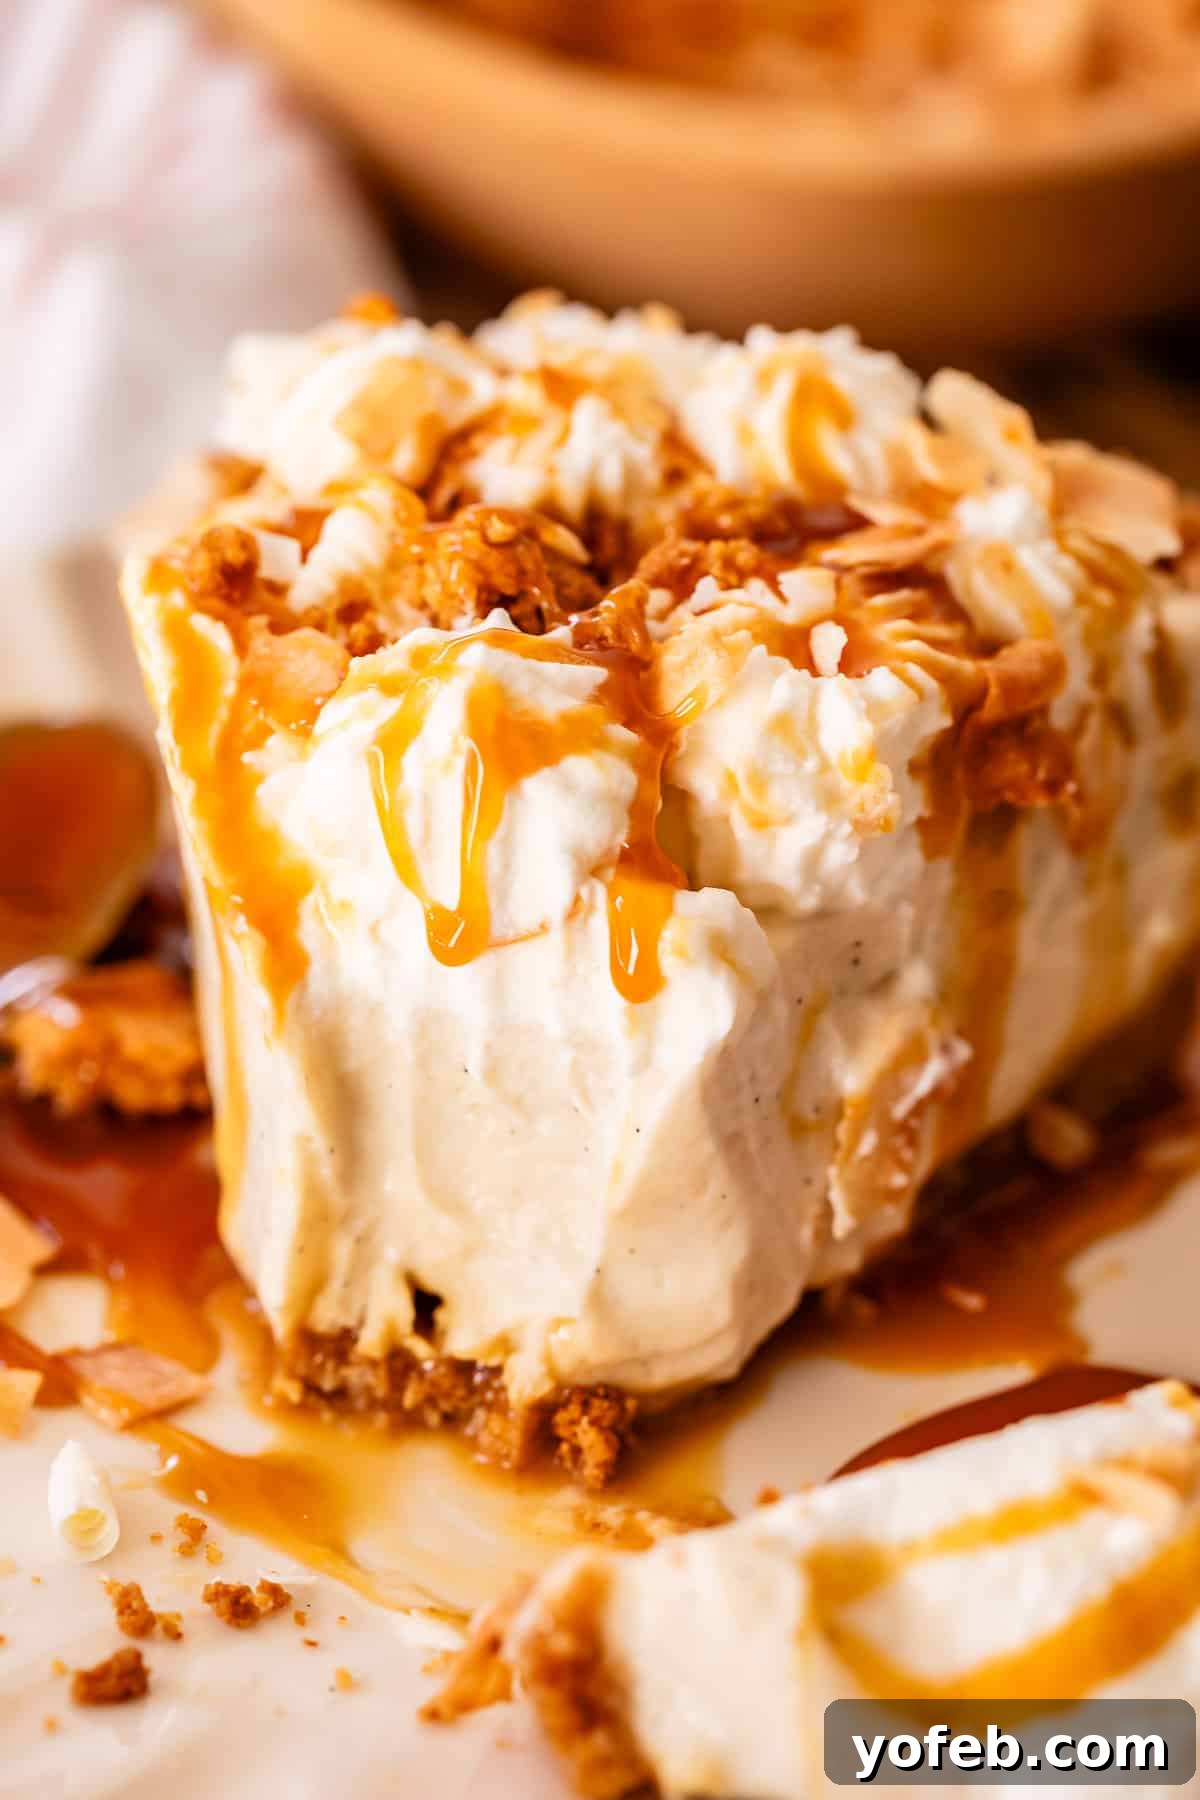
Finally, garnish your masterpiece with all the delicious accents: a generous sprinkle of the aggressively toasted unsweetened coconut flakes, the crunchy extra graham crumble (reserve some if you’re not eating the whole pie immediately, to maintain crispness), and delicate curls of high-quality white chocolate, shaved directly from the bar using a vegetable peeler. For an extra touch of indulgence, add a final drizzle of caramel sauce if you’re feeling decadent. Slice with a sharp knife, cutting through the crisp crust, and serve confidently with a pie server. The first slice is always the “ugly duckling,” so don’t fret! Offer any remaining garnishes at the table for guests to customize their perfect slice.
Does Coconut Cream Pie Need Refrigeration?
Absolutely, yes! Coconut cream pie contains a significant amount of perishable dairy products, including eggs, milk, and heavy cream. For both food safety and optimal taste, it must be kept refrigerated. Furthermore, a coconut cream pie is designed to be served chilled; it truly tastes a thousand times better when cold. Have you ever had a cream pie that’s been sitting out for too long? The texture becomes unpleasant, and the flavors dull. It’s almost as disheartening as room temperature cheesecake – definitely not the experience we’re aiming for!
How Long Does Coconut Cream Pie Last in the Fridge?
When properly stored in the refrigerator, coconut cream pie will typically last for about 3 to 4 days. While it won’t necessarily spoil immediately after this timeframe, the quality will start to degrade. The crisp graham cracker crust can begin to absorb moisture from the filling and become soggy, losing its desirable texture. For the absolute best flavor and texture, this pie is truly at its peak on days 1 and 2. For maximum crust crispness and a perfectly set filling, aim to serve the pie approximately 3 hours after you’ve assembled and chilled it.
Can You Freeze Coconut Cream Pie?
Hallelujah, yes, you can! In fact, I often have one stashed in my freezer, ready for an impromptu dessert craving. You can absolutely freeze a completely assembled and chilled coconut cream pie, with one important caveat: omit the decorative whipped cream topping until you’re ready to serve. To freeze, wrap the pie tightly in several layers of plastic wrap, then an additional layer of aluminum foil, ensuring it’s airtight to prevent freezer burn. It can be frozen for up to two months. When you’re ready to enjoy, transfer the frozen pie to the refrigerator and allow it to defrost slowly overnight. Once thawed, you can then add fresh whipped cream, slice, and serve for a delicious treat that tastes remarkably fresh.
Essential Tools for Coconut Cream Pie Baking
Having the right tools can make all the difference in achieving baking perfection. These are some of my go-to kitchen gadgets when I’m whipping up a Coconut Cream Pie. Among them, the flat whisk is a true game-changer; I’m utterly obsessed! It’s an indispensable tool for anyone making custards, as its unique shape allows it to reach into the corners of a pot in a way a regular balloon whisk simply can’t. This ensures every bit of your custard cooks evenly and smoothly.
Stand Mixer
Food Processor
Flat Whisk
Easy Coconut Cream Pie Frequently Asked Questions
I’m a little offended! Just kidding, I understand that sometimes convenience is key. Coconut cream pie is quite popular, so you might find decent versions at a well-stocked local bakery or even a high-quality grocery store. However, if you truly desire the BEST coconut cream pie experience—one that’s fresh, perfectly textured, and bursting with flavor—I wholeheartedly recommend trying this homemade recipe. It’s a game-changer!
A watery coconut cream pie filling is often a result of using ingredients with insufficient fat content. It’s crucial to use full-fat unsweetened coconut milk – avoid “lite” versions at all costs. Similarly, ensure you’re using full-fat heavy whipping cream, not a lighter substitute like half and half for the whipped topping. The fat is essential for a rich, stable, and creamy consistency. Also, as with many custard-based desserts, a pie that has been cut into and then stored for several days can gradually become less stable and slightly watery due to moisture release.
There are a few key reasons why your coconut cream pie might not be setting properly. Firstly, it’s critical to use the precise amount of cornstarch specified in the recipe. Cornstarch is our primary thickening agent, and too little will prevent setting. Secondly, the custard needs to be cooked exactly as described, reaching the correct temperature and consistency. Undercooking at this stage means the cornstarch won’t fully activate, and the pie simply won’t set, regardless of how long you chill it. While this recipe yields a wonderfully soft and creamy pie, it should still hold up as a distinct slice, albeit just barely. Finally, as mentioned before, ensure you’re using full-fat ingredients throughout the recipe; this is not the time for “lite” coconut milk or substituting half and half for heavy cream in the custard.
More Delicious Coconut Recipes You’ll Love
If you’ve fallen in love with the flavor of coconut through this pie, you’re in for a treat! Here are more fantastic coconut-infused recipes to explore:
- Coconut Layer Cake << Perfect if you adore coconut flavor but prefer a smooth texture without the flakes.
- Coconut Frosted Sugar Cookies with Strawberry Hearts << These charming cookies are as delightful to look at as they are to eat!
- Hawaii Coconut Syrup for Pancakes << Transport your breakfast to a tropical island with this exquisite syrup.
- Coconut Jasmine Rice with Cilantro << An ideal accompaniment for stir-fries or curries any night of the week.
- Samoan Coconut Rolls (Pani Popo) << If you enjoy Hawaiian rolls, prepare to be amazed – these are a million times better and absolutely worth the effort!
- Toasted Coconut Macaroon Cookies from The Slow Roasted Italian
- Coconut Bars from The Big Man’s World
More Irresistible Cream Pies to Make
Pi Day or any day, a classic cream pie is always a good idea! If you enjoyed perfecting this Coconut Cream Pie, you’ll love these other creamy delights:
- Key Lime Pie << This pie is unbelievably tart and vibrantly refreshing – I absolutely adore it!
- Chocolate Cream Pie << Featuring a delectable Oreo crust, this one holds a special place as my personal favorite. (Don’t tell the others!)
- Banana Cream Pie << You’ll notice a delightful trend here: this recipe also includes a luscious caramel drizzle and extra graham crumble!
- Dulce de Leche Cream Pie << A rich and sweet indulgence that’s simply wonderful.
- French Silk Pie << A timeless classic for a reason, pure chocolate bliss in every bite.
- Homemade Blueberry Pie << Bursting with fresh fruit, this pie is absolutely perfect for summer gatherings.
- Homemade Apple Pie << One of the top-performing recipes on my site, and don’t forget its equally delicious cousin, Dutch Apple Pie.
Facebook | Pinterest | Instagram

Coconut Cream Pie
★
★
★
★
5 from 3 votes
35 mins
20 mins
6 hrs
6 hrs 55 mins
12 people
Rate this Recipe
Print Recipe
I’m definitely a “pie person,” but I’m definitely NOT a Coconut Cream Pie person. Until now, that is! All the recipes I tried before turned out mostly-flavorless, with insultingly stringy raw coconut strands all throughout, gag. (I love coconut flavor but cannot handle the texture.) THIS Coconut Cream Pie recipe is easy and homemade, with all the flavor and none of the weird. The trick is toasting the coconut to within an inch of it’s life until it’s golden and crispy. And did I mention the layer of caramel we are adding in? Oh yeah.
Ingredients
- 1/2 cup Homemade Caramel Sauce, for spreading on the pie crust
For the custard filling:
- 4 large egg yolks
- 1 cup half and half
- 1/4 cup cornstarch
- 1 (13.5 ounce) can unsweetened full fat coconut milk
- 10 tablespoons granulated sugar (1/2 cup + 2 tablespoons)
- 1/2 teaspoon kosher salt (use half the amount of table salt)
- 1 teaspoon vanilla bean paste, or vanilla extract
- 1 teaspoon coconut extract
- 1 tablespoon butter
For the crust:
- 1 and 1/2 cups sweetened shredded coconut
- 14 full sheets graham crackers
- 1/4 cup granulated sugar
- 1 teaspoon kosher salt (use half the amount of table salt)
- 7 tablespoons butter, melted and cooled
- 1 large egg yolk
For the whipped cream:
- 2 cups heavy whipping cream, cold
- 1/4 cup powdered sugar
- 2 tablespoons instant vanilla pudding, dry powder
- 1/4 teaspoon kosher salt (use half the amount of table salt)
- 1/2 teaspoon coconut extract
To garnish:
- 3/4 cup unsweetened coconut flakes, toasted (large flakes)
- 2 ounces white chocolate, from a good quality bar
- The extra graham crumble
Instructions
- Make the caramel: If you are committed, make your Caramel Sauce from scratch so that it has time to cool to room temperature. (It really is the best choice, but store-bought caramel works too.)
- Make the coconut filling: In a large, heavy-bottomed pot, add 4 egg yolks, 1 cup half and half, and 1/4 cup cornstarch. Use a flat whisk to beat it very well, until you are sure there are no cornstarch lumps.
- Add a 13.5 ounce can of full-fat coconut milk, 10 tablespoons granulated sugar, and 1/2 teaspoon kosher salt. Beat again, but don’t stress about getting the coconut milk lumps out.
- Set the pot on the stove over medium heat and stir with a flat whisk constantly for about 7-8 minutes, digging into the corners of the pot. The mixture will start to thicken and eventually bubble into a boil. Once it boils, turn the heat down to medium-low and continue whisking constantly for about 60-90 seconds, until the foam has receded completely, and the top is smooth. When you drag your whisk across the top, it should leave well-defined marks. It will feel pretty thick, like pudding. If you are inexperienced, a thermometer can be handy; it should reach 200 degrees.
- Remove from the heat. Whisk in 1 teaspoon vanilla bean paste, 1 teaspoon coconut extract, and 1 tablespoon butter.
- Pour the coconut custard into a bowl and press plastic wrap directly on top. This helps prevent a film from forming. Put it in the fridge and chill for about 2 hours. Sometimes I cheat and put it in the freezer for 30 minutes to give it a head start, but be sure to start a timer and move it to the fridge eventually; you don’t want to freeze the edges.
- Toast the sweetened coconut: Preheat oven to 350 degrees F (175 C). Spread 1 and 1/2 cups sweetened shredded coconut in a thin layer on a baking sheet. Bake for 2-3 minutes, stir it thoroughly, then bake another 2-5 minutes until golden brown, checking every 2 minutes. Do not walk away; keep a close eye on it so you don’t scorch it. You want the flakes to be a very deep golden, hardly any white left. When it’s cooled enough that you can handle it, carefully transfer the hot coconut flakes to your food processor.
- Toast the unsweetened coconut garnish (large flakes): You don’t need this until later, but your oven is on and it takes just a couple minutes. Spread 3/4 cup unsweetened coconut flakes out on the same baking sheet (any kind of coconut will do; I like this kind because they usually come in larger, prettier flakes, perfect for garnishing.) Bake at 350 F (175 C) for 2 minutes at a time, stirring every time you check. Don’t walk away! Toast until they are a deep golden brown. Toast a little longer than you think. Try to get all the white toasted out. Remove from the oven and transfer to a bowl. Set aside to garnish your finished pie. Don’t bother washing the baking sheet, we need it again later. Leave the oven on for the crust.
- Make the crust and crumble garnish: To the food processor that has the 1 and 1/2 cups toasted coconut, add 14 full-size graham cracker sheets, 1/4 cup sugar, and 1 teaspoon kosher salt. Pulse until you have fine crumbs.
- Add 7 tablespoons melted butter and 1 egg yolk. Run the food processor until you have a mixture that is the texture of wet sand.
- Add about three quarters of the amount of graham mixture to a 9-inch pie plate. Use your hands or the bottom of a measuring cup to press the crust on the bottom and up along the sides of your pie plate. You want it to be evenly thick. Press all along the top edge with your thumb, to pack it together into a nice crust for each piece of pie.
- Place the pie pan on one side of the same baking sheet that you toasted the coconut on. Dump the remaining quarter of the graham mixture onto the other side of the baking sheet. Use your measuring cup or a drinking glass to press the crumble into a flat disc, it doesn’t have to be perfect. We will be crumbling this later to garnish the top of the pie.
- Bake the pie pan and the graham crumble on the baking sheet in the 350 F (175 C) oven for 10-15 minutes, until fragrant and very lightly turning golden. It will look a little more bubbly than your average graham crust, that’s ok. Immediately after you’ve taken it out of the oven, use a spoon to reshape the sides of the crust a bit if they have slumped down. Set the crust and crumble aside to cool.
- Once cool, break up the graham crumble on the baking sheet into bite-size pieces, add to a bowl, and cover with plastic wrap. Set aside to use as a garnish later.
- Add the caramel to the pie crust: Once your pie crust is completely cool, use the back of a spoon to spread 1/2 cup of caramel sauce on the bottom of the pie crust. Place the caramel-pie crust in the fridge to chill if your custard is not chilled yet.
- Stabilized whipped cream: Add 2 cups heavy whipping cream to a large mixing bowl or stand mixer. Add 1/4 cup powdered sugar and 2 tablespoons vanilla instant pudding mix (the dry powder. This keeps your whipped cream from deflating!) Add 1/4 teaspoon kosher salt and 1/2 teaspoon coconut extract.
- Beat on high speed for 2-3 minutes, depending on how powerful your mixer is. Use your whisk attachment if you have a stand mixer. Scrape the sides. Keep an eye on it and don’t walk away. Over-beaten whipped cream is so sad (I accidentally do this all the time). You want to stop beating when your whipped cream is still very smooth. You should be able to hold a beater horizontally and the whipped cream stays up. It should not look textured.
- Scrape half of the stabilized whipped cream into a covered bowl and chill in the fridge. (This will be used to garnish the top of the pie; if it’s easier, you can add it straight to a piping bag set up with a large star tip, and place in the fridge.)
- Add custard to the whipped cream: Thoroughly whisk the chilled coconut custard filling so there are no lumps. Scrape the custard into the bowl with the remaining half of the whipped cream. Use a rubber spatula to gently fold the custard into the whipped cream. Be careful, you don’t want to deflate the whipped cream. Once it’s combined (a couple streaks are ok), spoon the filling into the caramel-bottomed pie crust.
- Cover it with plastic wrap, pressing the plastic against the filling, and refrigerate for at least 3 hours, overnight is great.
- Assemble and serve: Remove the plastic wrap from the chilled pie.
- If you haven’t already, add the remaining whipped cream to a pastry bag with a large star tip, and pipe the reserved whipped cream on top of the pie. You can also just spread it on top with a spatula.
- Sprinkle the top of the pie with the toasted unsweetened coconut flakes (large flakes).
- Sprinkle with the extra graham crumble that you baked alongside the crust. (If you don’t plan to eat the whole pie now, reserve some of it for adding later so it stays crunchy.)
- Use a vegetable peeler to shave curls from the end of the white chocolate bar directly onto the top of the pie. If the bar starts getting soft and melty, pop it in the freezer for a couple minutes before continuing.
- Slice the pie using a sharp knife, cutting the crust on the bottom. Lift each piece confidently with a pie server. The first slice is always the ugly duckling, don’t stress.
- Serve each slice of pie with extra caramel sauce drizzled on top if you know what’s good for you! Pass any remaining garnishes (coconut, graham crumble, white chocolate curls, caramel sauce) at the table for your guests.
Notes
*I tested this recipe with store-bought caramel sauce. I used Smucker’s ice cream topping. It didn’t go as well as I would have hoped; the caramel oozed a lot more once the pie was cut into. Still tasty, but I highly recommend making your own Caramel Sauce if you have the time.
If you want to try spreading out the steps of this pie, make your crust ahead of time. Cover with plastic wrap for up to 24 hours on the counter, or freeze the baked crust, tightly wrapped, for up to 2 weeks. The coconut custard can also be made up to 48 hours ahead of time and chilled; don’t freeze it.
**Cream is what rises to the top when you milk a cow. It is sold in the dairy section near the milk and is sometimes labeled “heavy cream”, “whipping cream” or “ultra heavy whipping cream”. They are all the same thing. The different names refer to different fat content levels. Any type will do for this recipe. (The higher the fat content, the richer your pie will be.)
Nutrition
Serving: 1 slice | Calories: 481kcal | Carbohydrates: 40g | Protein: 4g | Fat: 35g | Saturated Fat: 24g | Polyunsaturated Fat: 1g | Monounsaturated Fat: 8g | Trans Fat: 0.3g | Cholesterol: 149mg | Potassium: 165mg | Fiber: 1g | Sugar: 35g | Vitamin A: 1000IU | Vitamin C: 1mg | Calcium: 78mg | Iron: 1mg
Dessert
American
481
Coconut, cream, pie
Did you make this? I’d love to see it!
Mention @thefoodcharlatan or tag #thefoodcharlatan!