
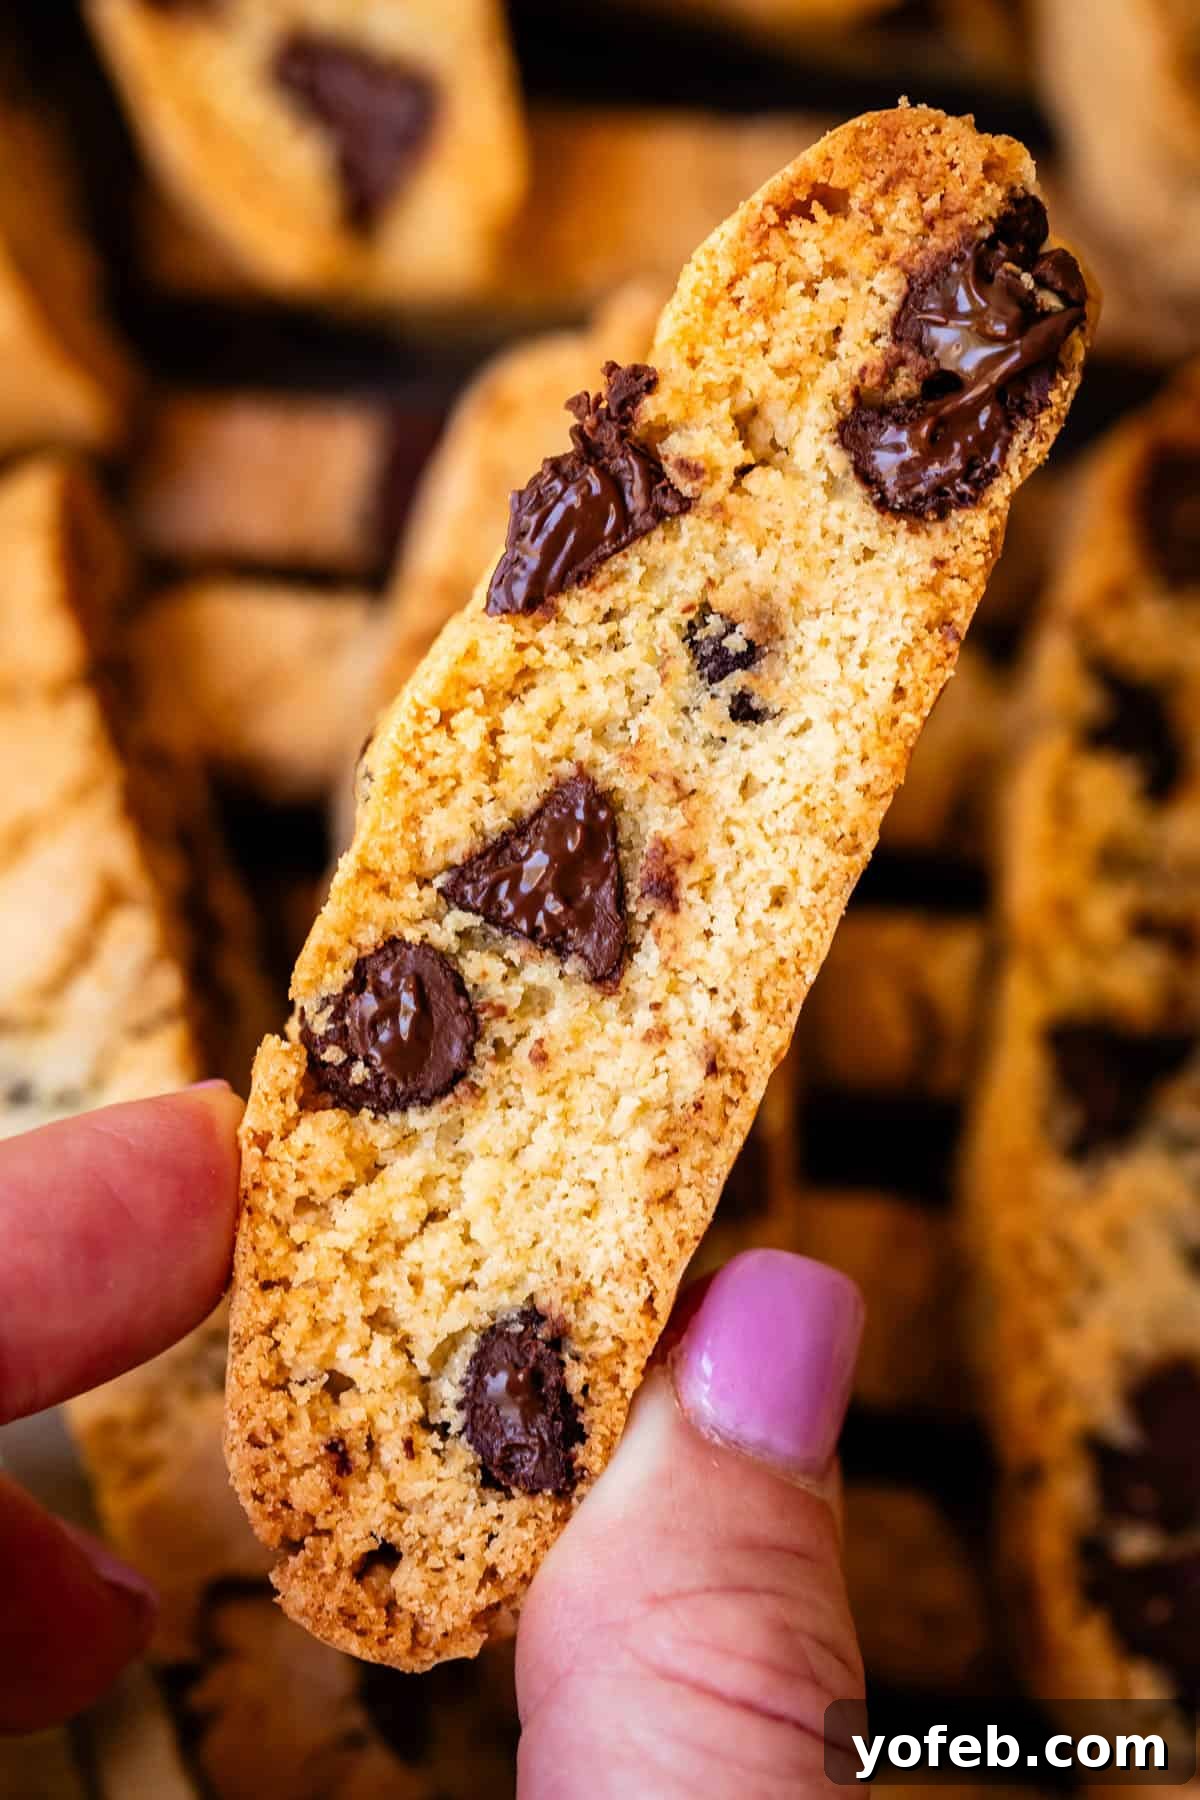
For years, I believed biscotti was exclusively for a very particular demographic – perhaps elderly Italian women, enjoying what I perceived as flavorless, dry biscuits. My younger self, with unadulterated taste buds, simply couldn’t comprehend the appeal of what felt like edible cardboard. Oh, how delightfully wrong I was! The revelation of fresh, homemade biscotti changed everything. This isn’t just a cookie; it’s a soul-satisfying, crisp, crunchy, and delightfully snappy treat bursting with almond flavor and generous chocolate chips. It’s absolutely perfect for dunking into hot chocolate, milk, or a steaming cup of coffee. My culinary world has quite literally been transformed!
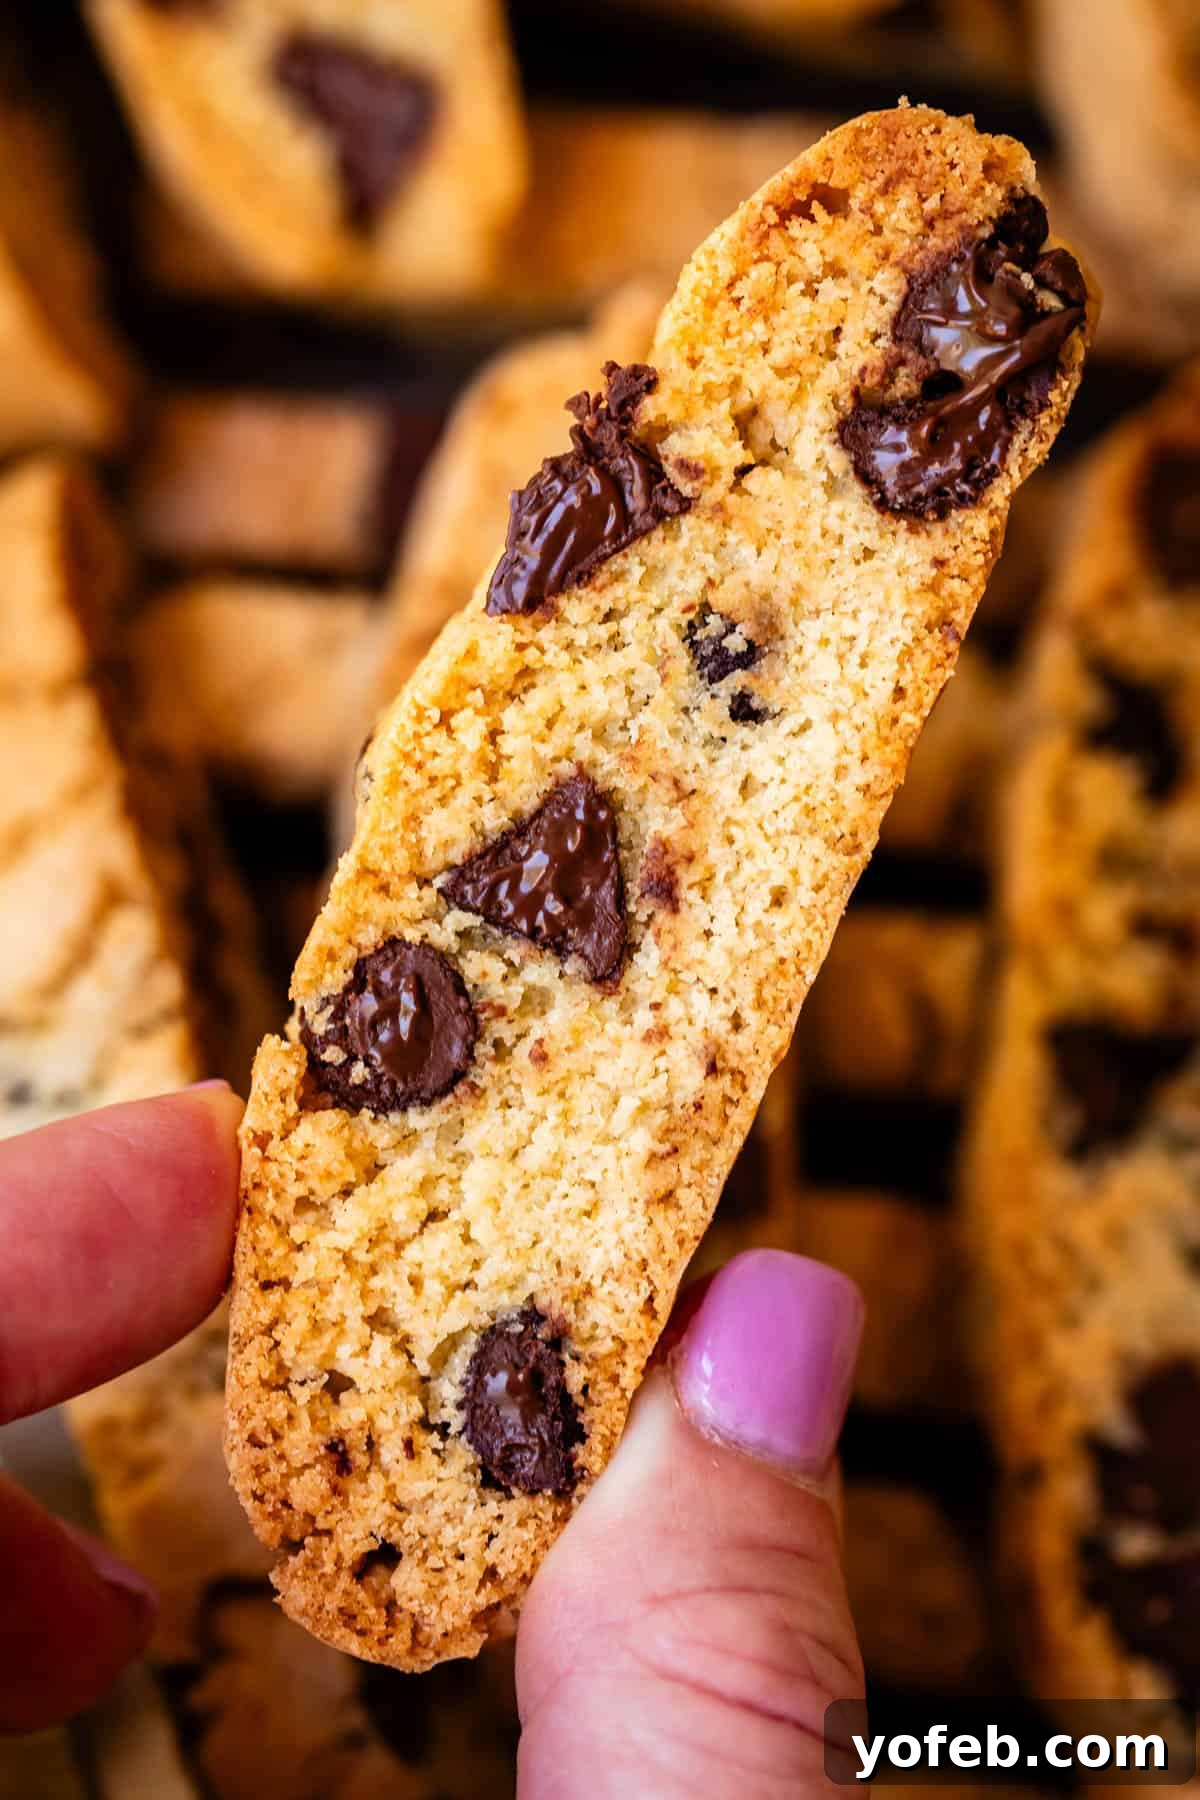
Table of Contents
- The Myth of the Dry Biscotti: Shattering the Stereotype
- What Exactly is Biscotti? The Italian vs. American Perspective
- Unlocking the Secrets: Important Rules for the Best Biscotti
- A Teenager Reviews Biscotti: Proof That It’s Not Just for Grandmas!
- Simple Biscotti Recipe Ingredients You Already Have
- Step-by-Step: How to Make Perfectly Crispy Biscotti Cookies
- Proper Storage and Shelf Life for Your Homemade Biscotti
- Can You Freeze Biscotti Cookies? A Make-Ahead Favorite
- Biscotti Frequently Asked Questions: Your Top Queries Answered
- Creative Biscotti Variations: Endless Flavor Possibilities
- More Delicious Dunking Cookies to Enjoy
- Biscotti Recipe For Biscotti Haters
Life in our household is always an adventure, often teetering on the edge of glorious chaos. Just last Saturday, for Valentine’s 8th birthday, I hosted an “Art Party” – because inviting fourteen energetic little girls armed with acrylic paints into your home sounds like pure, unadulterated fun, right? 🤩 😳
In anticipation, I ordered drop cloths in bulk. My husband, Eric, raised an eyebrow when the massive box arrived. “Thirty drop cloths?” he queried. My response was simple: “Darling, is there a version of this party where you *want* our actual furniture ruined if artistic pandemonium ensues?” I was half-joking, half-seriously contemplating drop-clothing our youngest, Edison, to prevent him from taking a paint-pool dive. Safety first!
Miraculously, we navigated the party without a single paint splatter on the couch or rug. An absolute triumph, or so I thought! Just as we were basking in our success, a minor mishap transformed our victory into a glittering disaster. Someone, during cleanup, accidentally dropped a glass bowl overflowing with Doritos. The resulting explosion was deafening, sending millions of minuscule glass shards scattering across my kitchen floor, which was, of course, still laden with drying art projects and party snacks. My kitchen, once immaculate, was now sparkling with diamond-like death traps.
It was one of those moments so absurdly shocking that all I could do was laugh, standing frozen with tiny bits of glass in my hair. The universe had clearly decided to balance out our earlier success.
Mother: 0. Children: 1. Even though it wasn’t their direct doing, it certainly felt like a win for the forces of playful chaos. I swear I could hear them cackling from the other room about the inevitable dominance of entropy.
But fear not, my kitchen is now glass-free and back to normal, because we have far more important matters to discuss. Matters as crucial and delicious as BISCOTTI.
The Myth of the Dry Biscotti: Shattering the Stereotype
I must confess, before my best friend Sarah enlightened me, I had never once considered baking biscotti. “Why would I?” was my internal monologue. To me, biscotti conjured images of those unyielding, dusty cookie-sticks lurking in coffee shop glass jars, destined to chip a tooth if attempted without a proper dunk. My perception was that they were the world’s driest, most uninspiring cookie, barely worth a second glance when surrounded by more enticing holiday treats.
Then Sarah, a culinary mastermind behind countless delicious recipes like her Chicken Fajitas and Green Goddess Salad, dropped a bombshell: she bakes a massive batch every year, specifically for her husband to enjoy throughout the Christmas season. “Excuse me?” I exclaimed. “Biscotti says ‘Christmas’ to you? When you could be indulging in festive Gingersnaps, delicate Linzer Cookies, or decadent Chocolate Crinkles? What a missed opportunity!”
But Sarah is no amateur. If she deemed biscotti worthy of a yearly quadruple batch, I knew there had to be more to it than met my prejudiced eye. Her conviction spurred me to explore the true potential of this often-misunderstood cookie. I was ready to challenge my preconceived notions and discover if biscotti could, in fact, be a genuinely delightful addition to my baking repertoire.
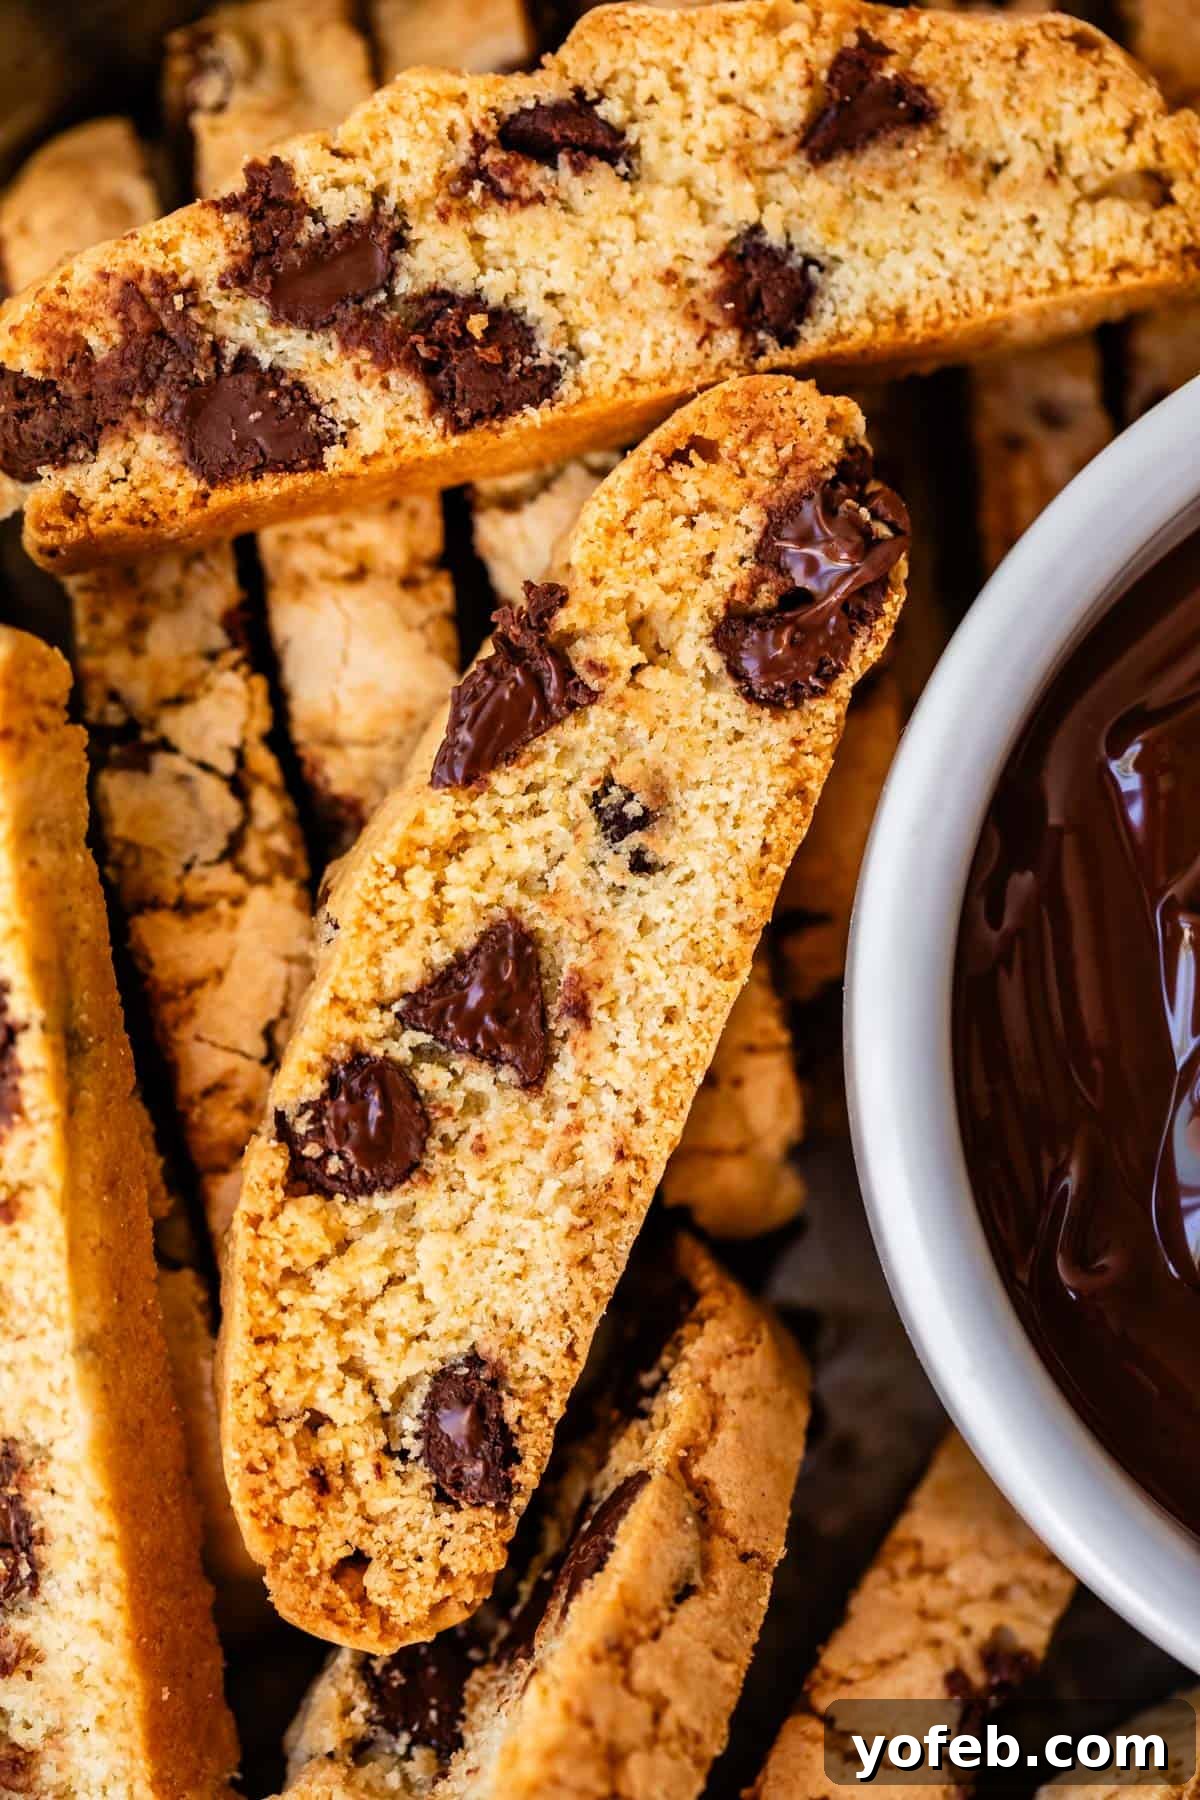
What Exactly is Biscotti? The Italian vs. American Perspective
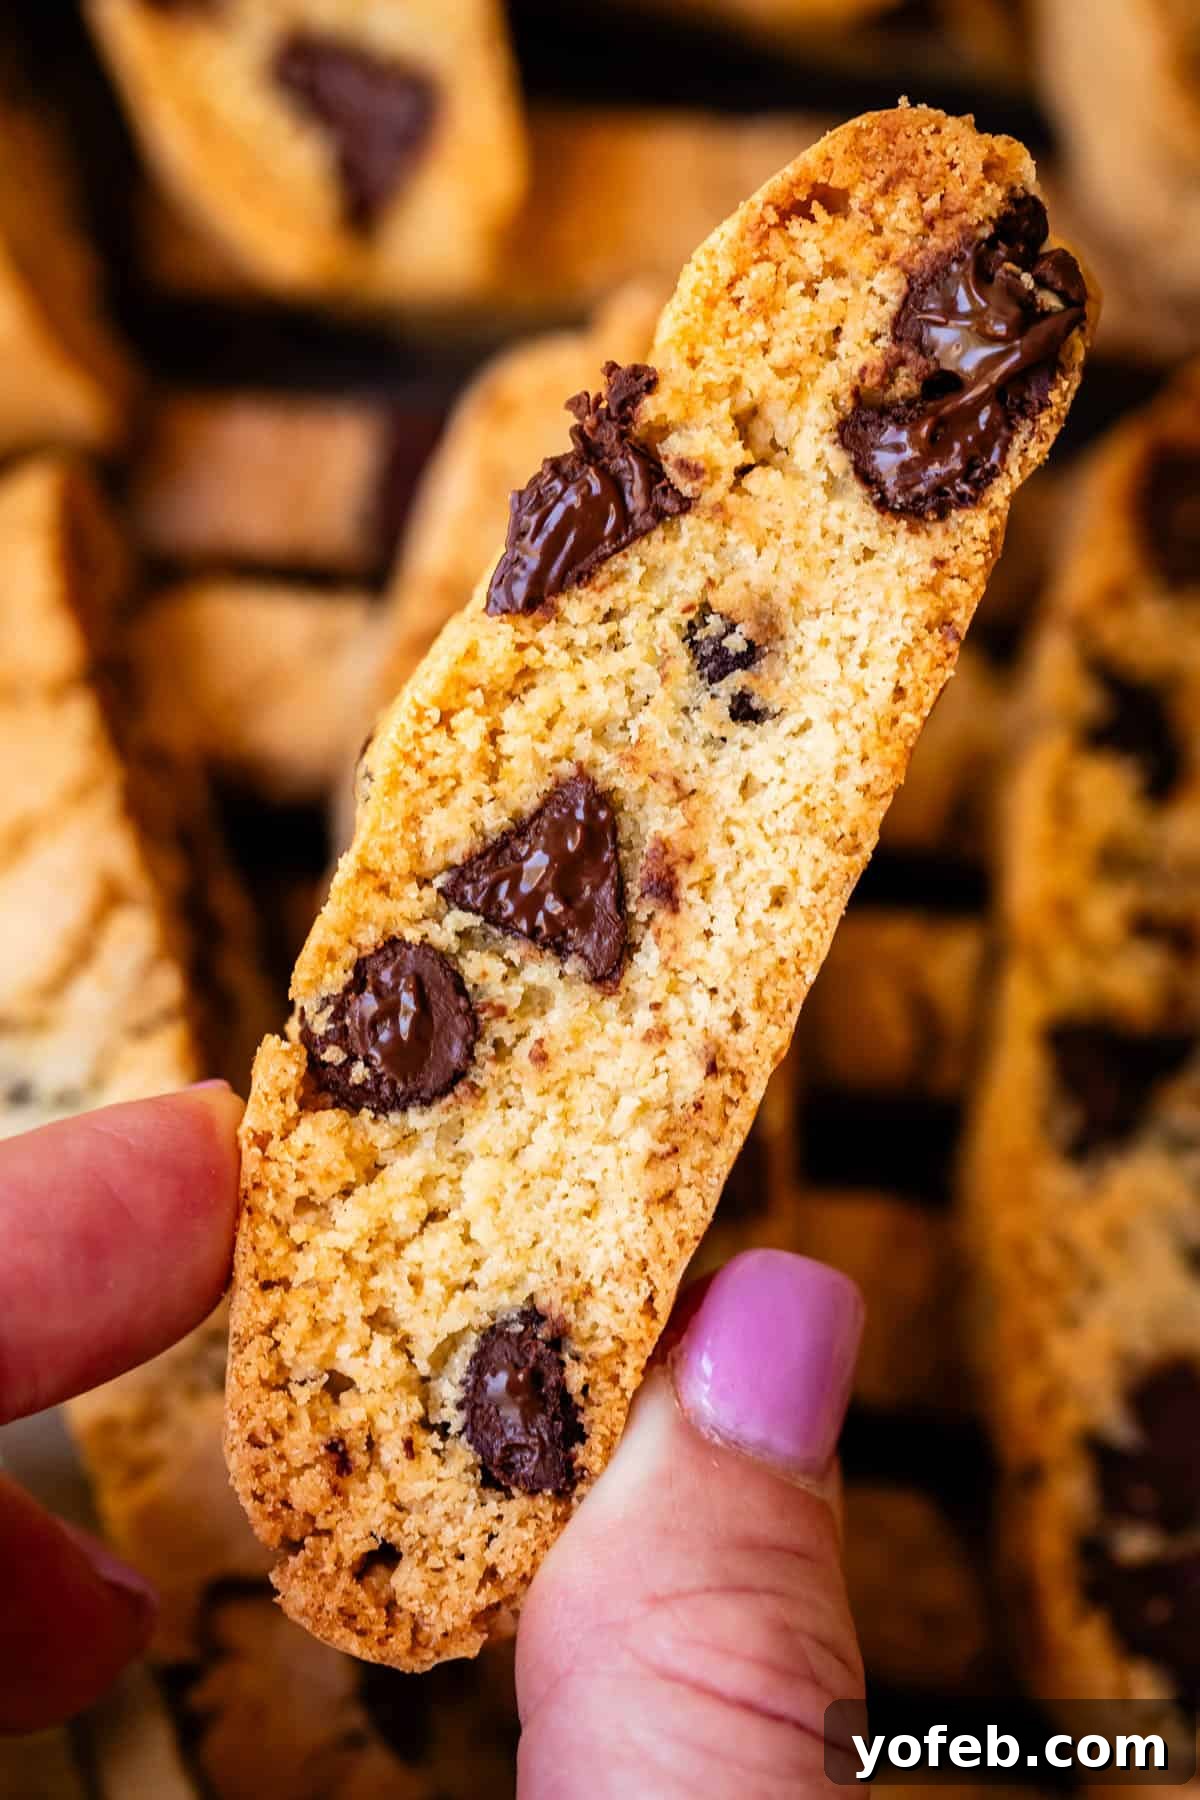
The term “biscotti” in Italy is a generic word meaning “cookie” – encompassing any biscuit, baked twice (bis-cotto literally means “twice-baked”). However, in America, “biscotti” has regrettably become synonymous with those famously rock-hard, crunchy cookie-sticks often found in glass jars at coffee shops. If that’s your only experience, I completely understand your skepticism! But wait, don’t dismiss them just yet. This recipe is designed to change your mind, offering a vastly superior version that’s more tender, buttery, and packed with flavor.
My quest was to develop a biscotti that still delivers that satisfying snappy crispness, yet remains tender enough to enjoy on its own, and absolutely shines when dunked. The secret lies in a careful balance of ingredients and a precise baking method, resulting in a biscotti that boasts irresistible almond notes and a generous scattering of chocolate chips. They maintain their characteristic delightful crispness and the ideal shape for dipping into your morning coffee, a comforting mug of hot chocolate, or a refreshing glass of milk.
If you’re still on the fence, consider this: declaring your hatred for biscotti based solely on the mass-produced coffee shop variety is akin to saying you despise all spaghetti after only ever trying a can of Spaghettios. True Italian food, and indeed, true homemade versions of any classic, are an entirely different experience. The Italians, as we know, are masters of culinary delight, and traditional biscotti, when made correctly, are a testament to that expertise!
Sarah generously shared her biscotti recipe, originally adapted years ago from America’s Test Kitchen. While it was a decent starting point, I immediately recognized room for improvement. It wasn’t bad, but it lacked the vibrant flavor and tender texture I envisioned. So, I embarked on a mission to enhance it, making crucial adjustments to elevate it from simply “good” to “exceptionally delicious” – a biscotti even a self-proclaimed hater could fall in love with.
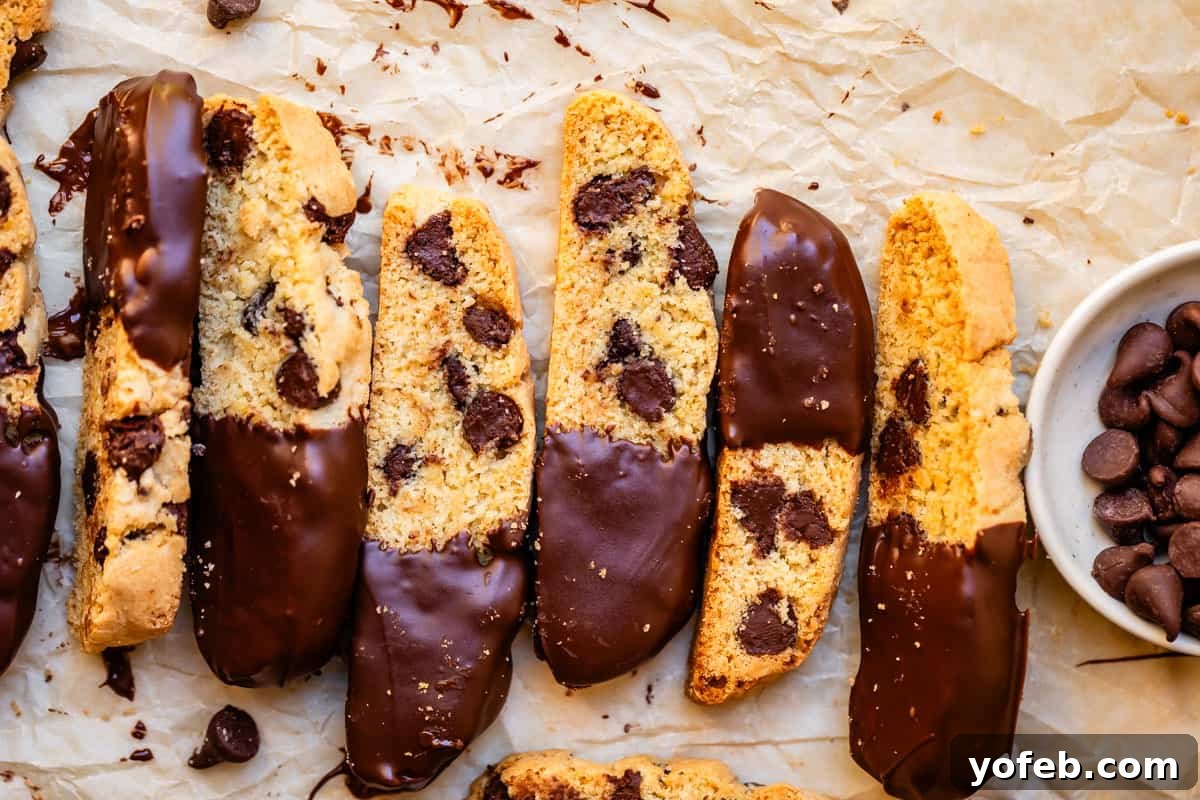
Unlocking the Secrets: Important Rules for the Best Biscotti
If you want to bake biscotti that truly stands out from the often-disappointing store-bought varieties (like those tough, anise-flavored ones from Costco that make me gag just thinking about them!), paying attention to a few key details is crucial. This recipe isn’t just about ingredients; it’s about technique and understanding how each component contributes to the perfect biscotti experience. Here’s what sets this recipe apart and makes it truly exceptional:
- Brown Sugar for Moisture and Flavor: While traditional biscotti often relies solely on white granulated sugar, we incorporate brown sugar. This isn’t just a minor swap; brown sugar introduces a delightful depth of flavor with subtle caramel notes and, more importantly, adds crucial moisture. This extra moisture is key to achieving a biscotti that’s tender on the inside, preventing it from becoming overly dry and tough.
- The Magic of an Extra Egg Yolk: This is a game-changer! Adding an extra egg yolk to the dough significantly enhances both the moisture and richness of the biscotti. The fat in the egg yolk contributes to a more tender crumb, ensuring that while our biscotti retains its characteristic satisfying snap, it never feels like chewing on a brick. It’s the secret to that perfectly balanced texture.
- Precision in Slicing: The Thinner, The Better: The thickness of your biscotti slices dramatically impacts its texture. Aim to slice the partially baked loaves as thinly as possible – ideally around 1/2 inch – without them crumbling. Thinner slices mean a more delicate, crisp texture that shatters beautifully with each bite. This avoids the dreaded “biscotti baseball bat” effect, where thicker slices require an uncomfortable jaw-unhinging effort to enjoy. We want a biscotti that snaps satisfyingly, not one that puts your dental work to the test.
- Embrace the Mix-Ins, Especially Chocolate Chips: For those new to the world of homemade biscotti, or if you’re baking for a crowd-pleasing effect, chocolate chips are your best friend. They bring an incredible burst of flavor and a delightful textural contrast that makes these cookies universally appealing. Don’t be shy with them! For the more seasoned bakers, or if you’re feeling adventurous, elevate your biscotti with toasted nuts like almonds, pistachios, or hazelnuts, or introduce chewy elements with dried fruits such as cranberries, cherries, or diced apricots. Someday, I aspire to be as cool and mature as those who opt for such sophisticated additions!
By following these rules, you’re not just baking biscotti; you’re crafting an experience – a cookie that’s rich in flavor, perfectly textured, and utterly addictive.
A Teenager Reviews Biscotti: Proof That It’s Not Just for Grandmas!
Sometimes, the most honest and unfiltered opinions come from the most unexpected sources. In my quest to prove that this biscotti recipe is truly a revelation, I turned to my resident 13-year-old critic, Charlotte. (Do your tweens even know what biscotti is? Sometimes I feel like my kids are living under a culinary rock, and then I remember it’s my mission to expand their palates! 🤪)
Our conversation went something like this:
Me: “What did you initially think biscotti was going to be like?”
Charlotte: “I had never even heard of it before you made it. But when I saw them, I was like, ‘Wow, what is this new thing?’ I thought they looked a bit like a type of bread, maybe with raisins in them. But then I realized those were actually chocolate chips, which is, like, way better, obviously.” (Amen, Charlotte! Chocolate always wins.)
Me: “Tell me about your very first bite.”
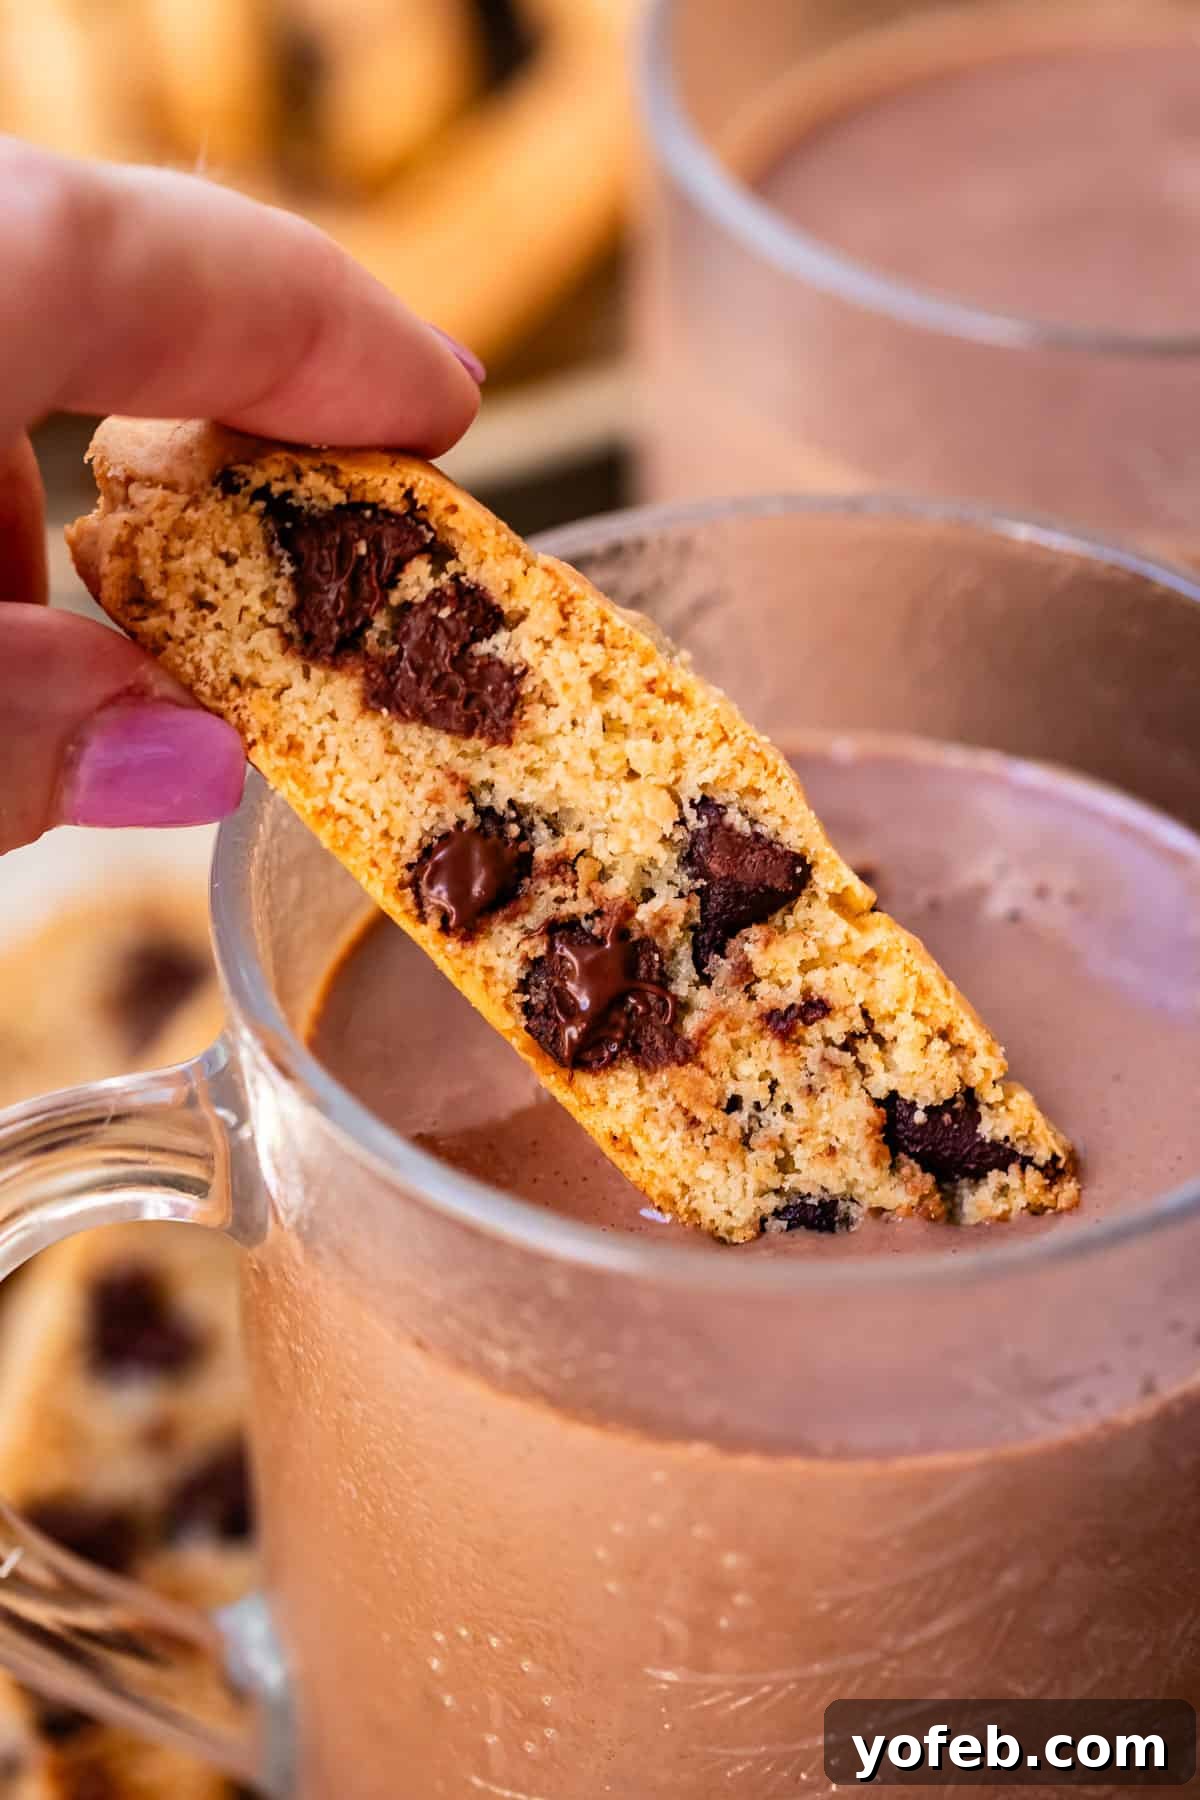
Charlotte: “I took a bite, and it was good on its own. It’s really crispy. But then I dipped it in hot chocolate, and that’s when it became AMAZING. Seriously, it’s so much better dipped. And it’s especially good right after it comes out of the oven because it’s super snappy and crispy, but the chocolate chips inside are still warm and melty.”
And there you have it, folks. From the mouth of a discerning teenager: biscotti and chocolate – a truly winning combination that transcends generations and proves this cookie is anything but boring. The crispy texture, enhanced by warm, gooey chocolate, makes it an undeniable hit. No longer a cookie just for “old ladies,” this homemade biscotti has found a firm fan in the younger generation!
Simple Biscotti Recipe Ingredients You Already Have
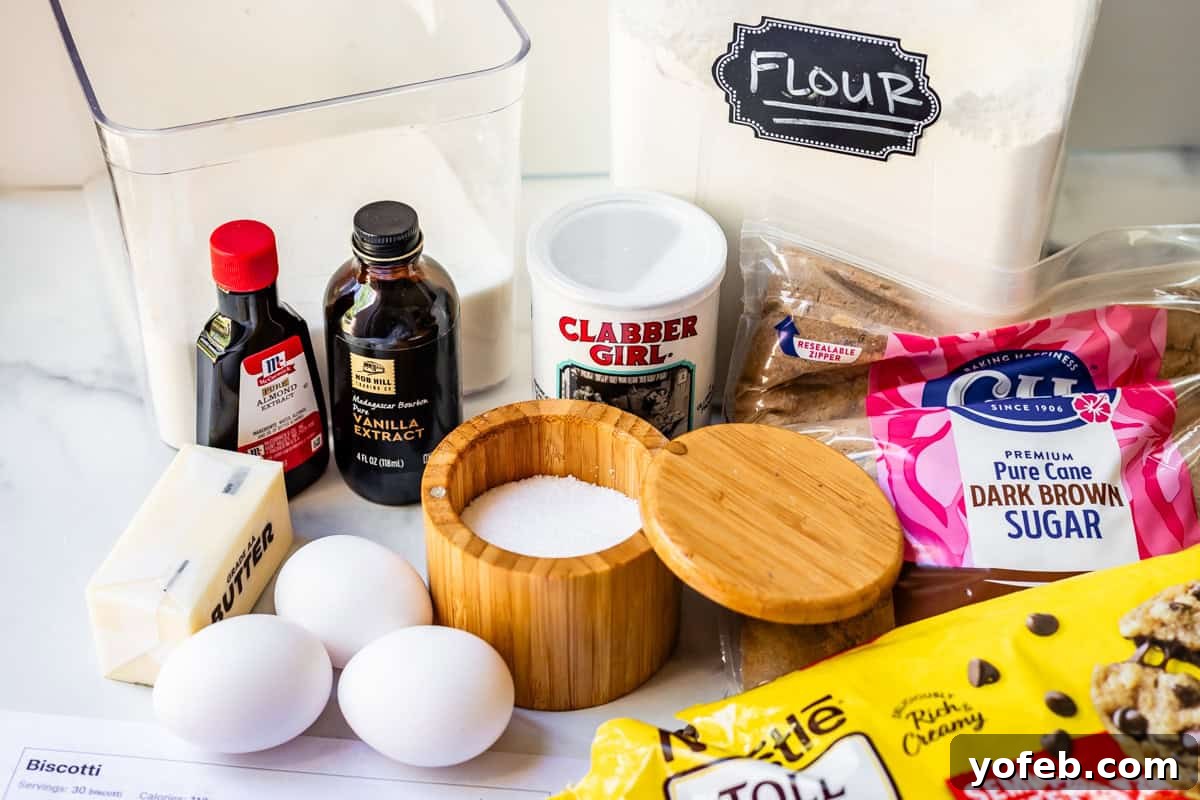
Despite its reputation as a “fancy” cookie often reserved for coffee shop displays, biscotti actually comes together surprisingly quickly, with no need for chilling the dough! Better yet, most of the ingredients required are common pantry staples you likely already have on hand. Take a quick glance through the list to ensure you’re prepared, but remember to consult the full recipe card below for precise measurements and detailed instructions.
- All-purpose flour
- Baking powder
- Kosher salt
- Granulated sugar
- Salted butter
- Large eggs
- Vanilla extract
- Almond extract
- Semi-sweet chocolate chips
Step-by-Step: How to Make Perfectly Crispy Biscotti Cookies
Let’s dive into the delicious process of creating these irresistible biscotti. The key is in the technique, ensuring a tender crumb with that signature crisp snap. Follow these steps for a perfect batch every time!
First, begin by creaming your butter. It should be slightly softened – not rock hard from the fridge, but definitely not melted or overly soft. The ideal consistency is just yielding to the touch. This slight firmness is important because we won’t be chilling this dough, and overly soft butter can lead to a dough that’s too difficult to handle.
Next, add both white and brown sugar to the creamed butter. While white sugar is traditional, the addition of brown sugar is one of our secret weapons for superior biscotti. It introduces an extra layer of moisture and a subtle caramel depth, which contributes significantly to a more tender and flavorful cookie. If you’re already a fan of brown sugar in your baking, you now know why it makes such a difference here!
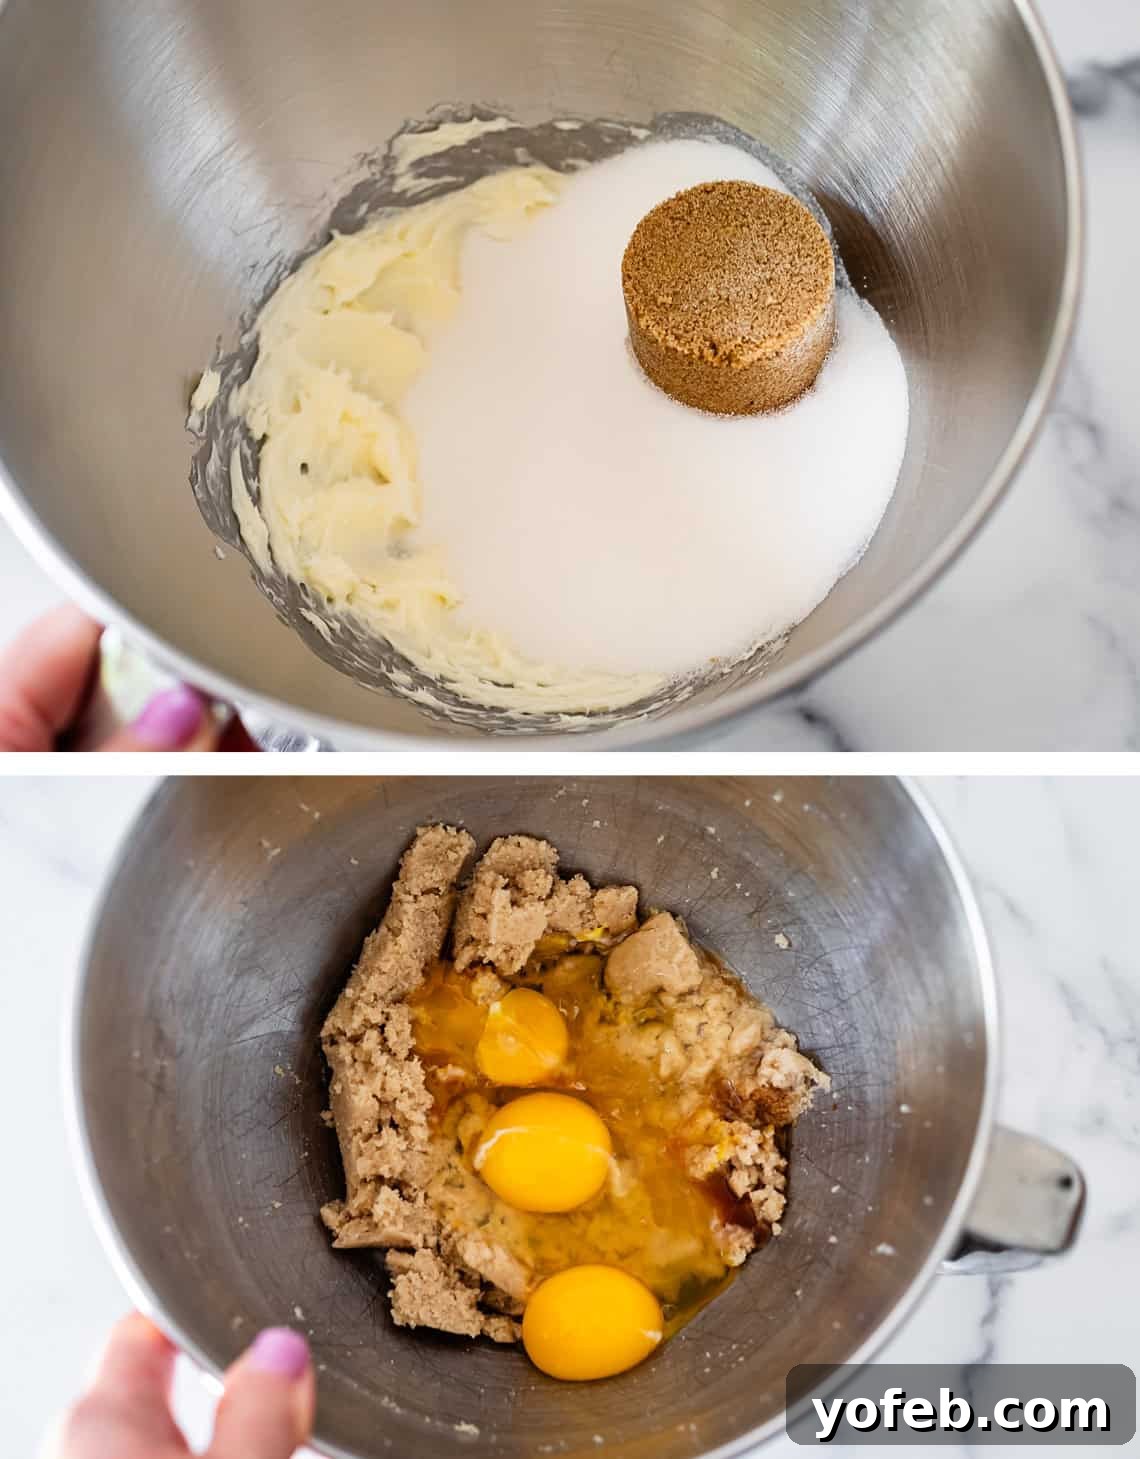
Now, it’s time for the eggs. Incorporate two large eggs along with an additional egg yolk. This extra yolk is a crucial step that makes all the difference in this recipe! It boosts the moisture content, ensuring your biscotti are richer and more tender without sacrificing their characteristic crispness. Don’t forget to add both vanilla extract and almond extract for a beautifully balanced flavor profile – the almond note is classic for biscotti and truly elevates the taste.
Once your wet ingredients are perfectly combined, it’s time to introduce the dry components: all-purpose flour, baking powder, and kosher salt. Ensure your flour is spooned and leveled for accuracy, as too much flour can lead to a dry, tough biscotti.
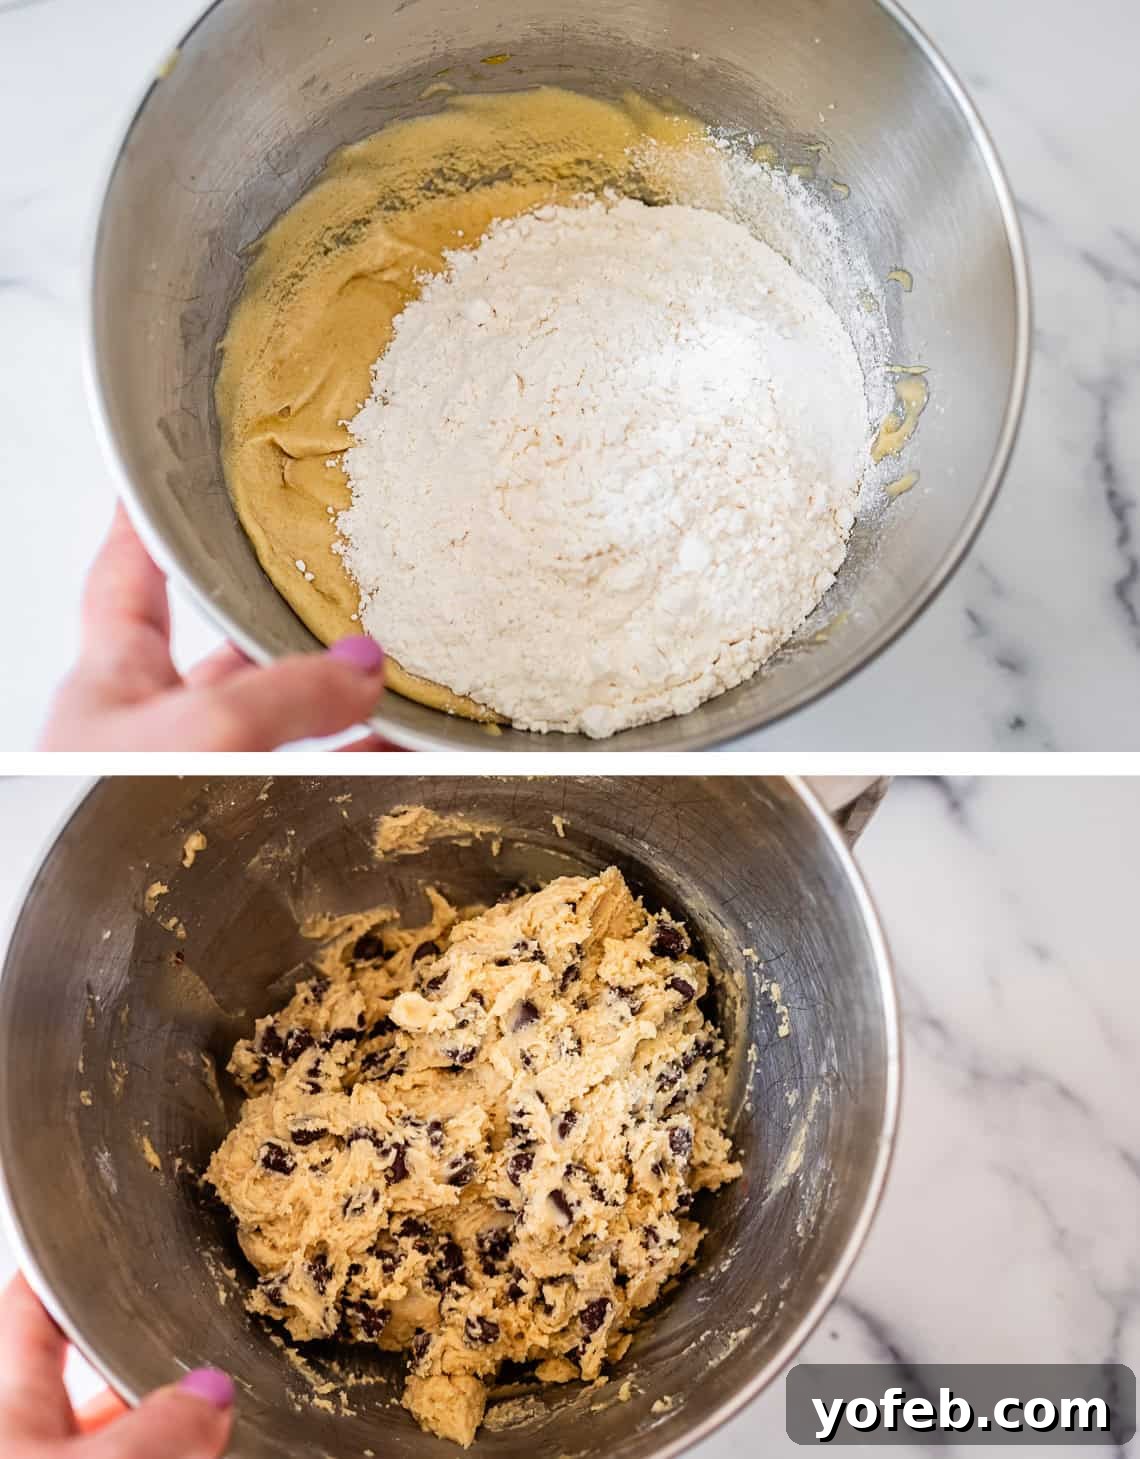
Gently beat the dry ingredients into the butter mixture until they are *almost* fully combined. At this point, add your generous portion of chocolate chips. While you can certainly experiment with various mix-ins, chocolate chips are wonderfully accessible and universally loved, making them perfect for biscotti beginners. Continue mixing just until the chocolate chips are evenly distributed and all the flour streaks have disappeared. Be careful not to overmix, as this can develop the gluten in the flour, resulting in a tougher biscotti.
The dough will be quite sticky, which is perfectly normal and contributes to the tender final product. To handle it, use your spatula to divide the dough roughly in half within the mixing bowl. I often lightly flour my spatula when doing this, but I prefer not to add extra flour to the main dough itself, as this can dry out the cookies. Instead of your hands, use the spatula to scoop the dough directly onto your prepared baking sheet.
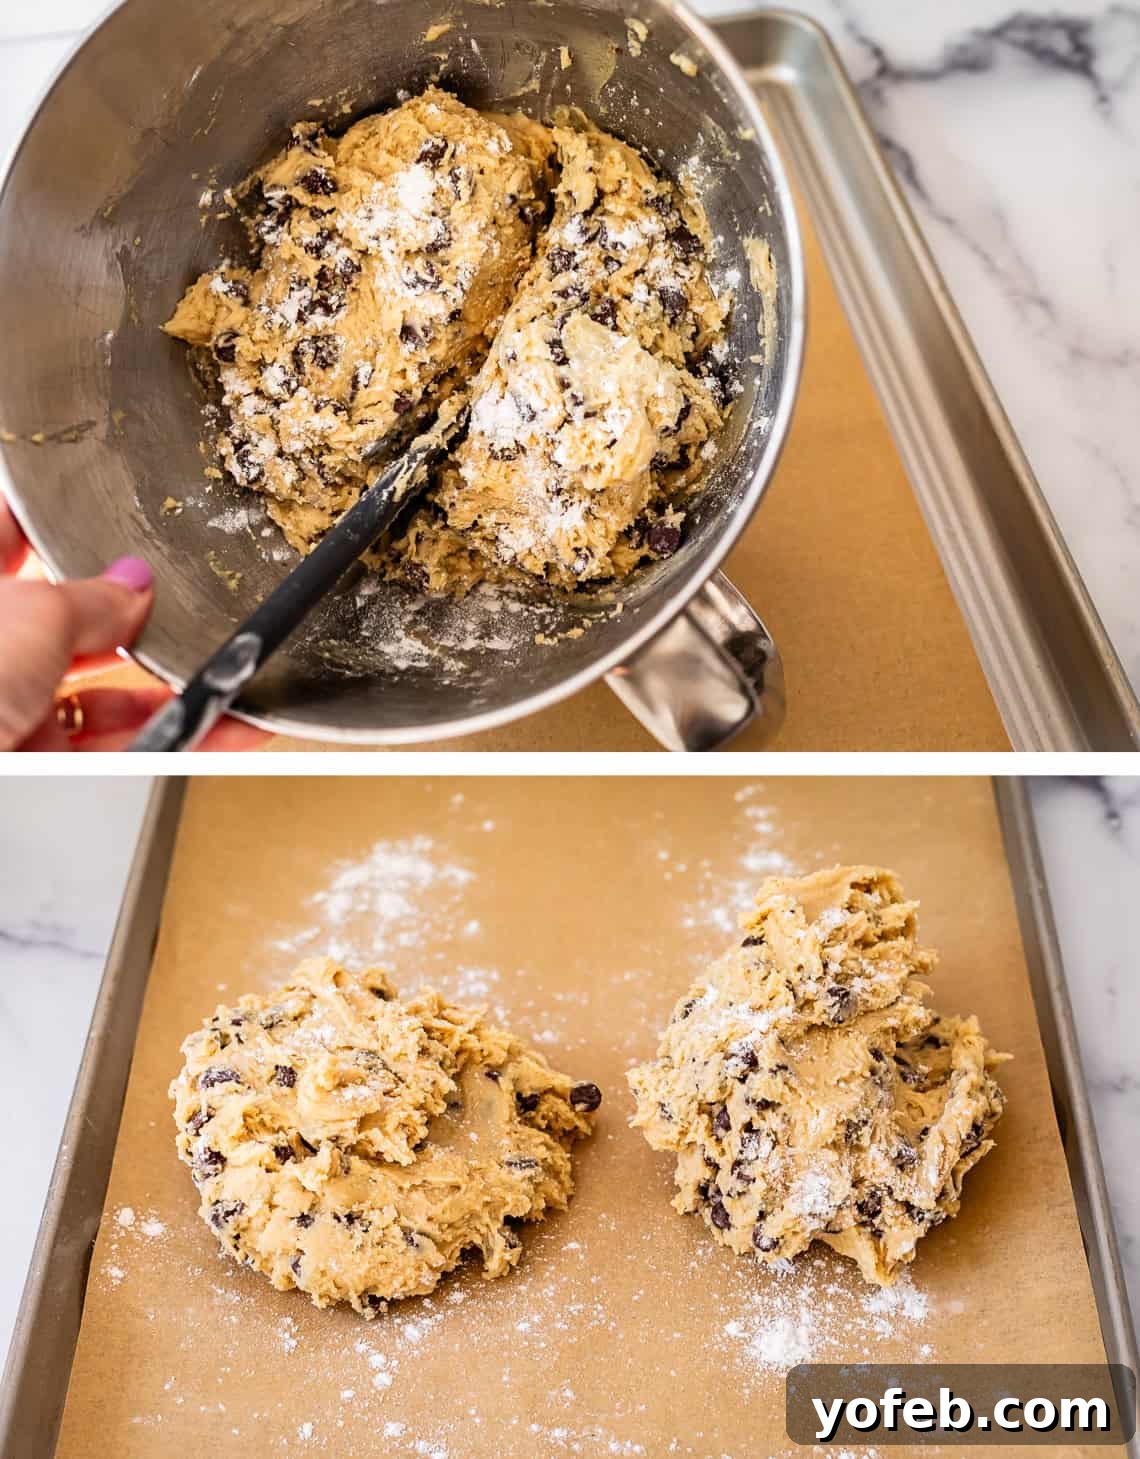
Once on the lined baking sheet, gently scrape each half of the dough into a distinct mound, leaving ample space between them. Now, to shape the logs without the dough sticking excessively to your hands, lightly wet your fingertips or rub a small amount of butter onto your palms. Avoid using additional flour here, as it can make the dough too dry. Using your dampened hands, carefully shape each mound into a long, flat log, approximately 2 inches wide and 12 inches long. Crucially, ensure the tops are flattened, not rounded, to encourage even baking and a consistent shape for slicing. Leave plenty of room for spreading during the first bake.
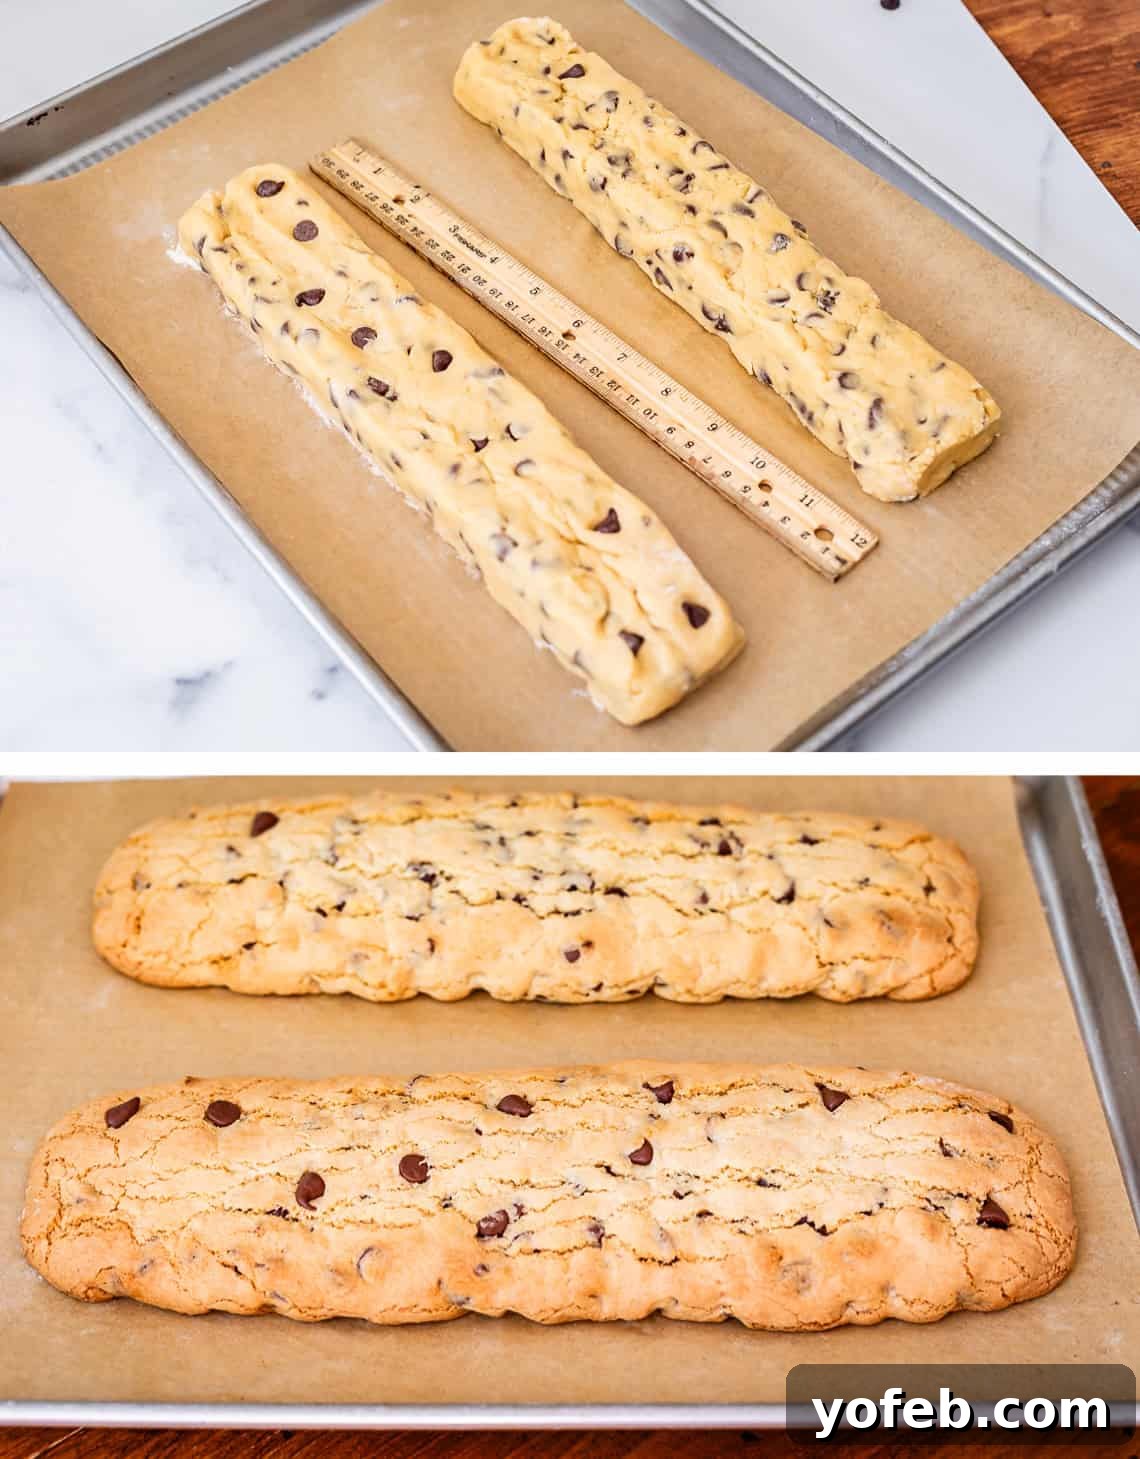
Now, for the first bake! Biscotti is famously “twice-baked,” so embrace this unique process. Bake your shaped dough logs for about 26-29 minutes at 350°F (175°C). The exact time will depend on your oven, but you’re looking for the edges to turn a beautiful golden brown and for visible cracks to appear along the top surface of each loaf. These cracks are a sign that the biscotti is baking through properly. If they don’t look quite golden enough, give them another minute or two. Once baked, remove the pan from the oven and let the loaves cool on the pan for approximately 10 minutes. This cooling period is vital; it allows the loaves to firm up slightly before slicing.
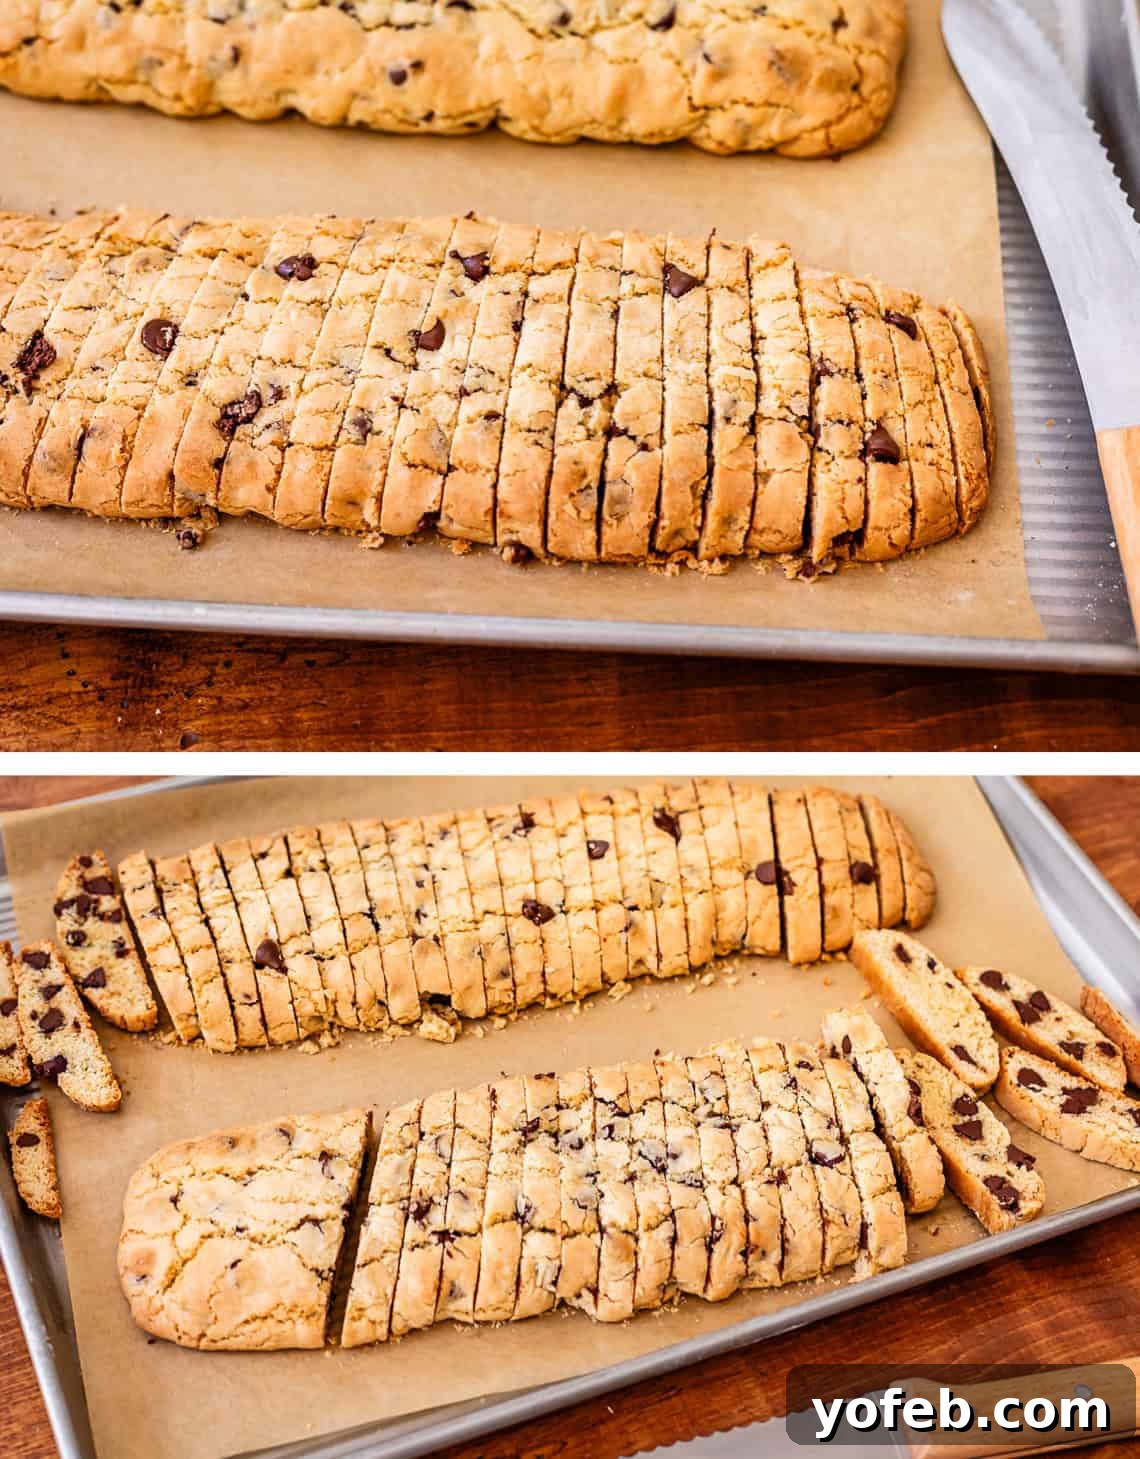
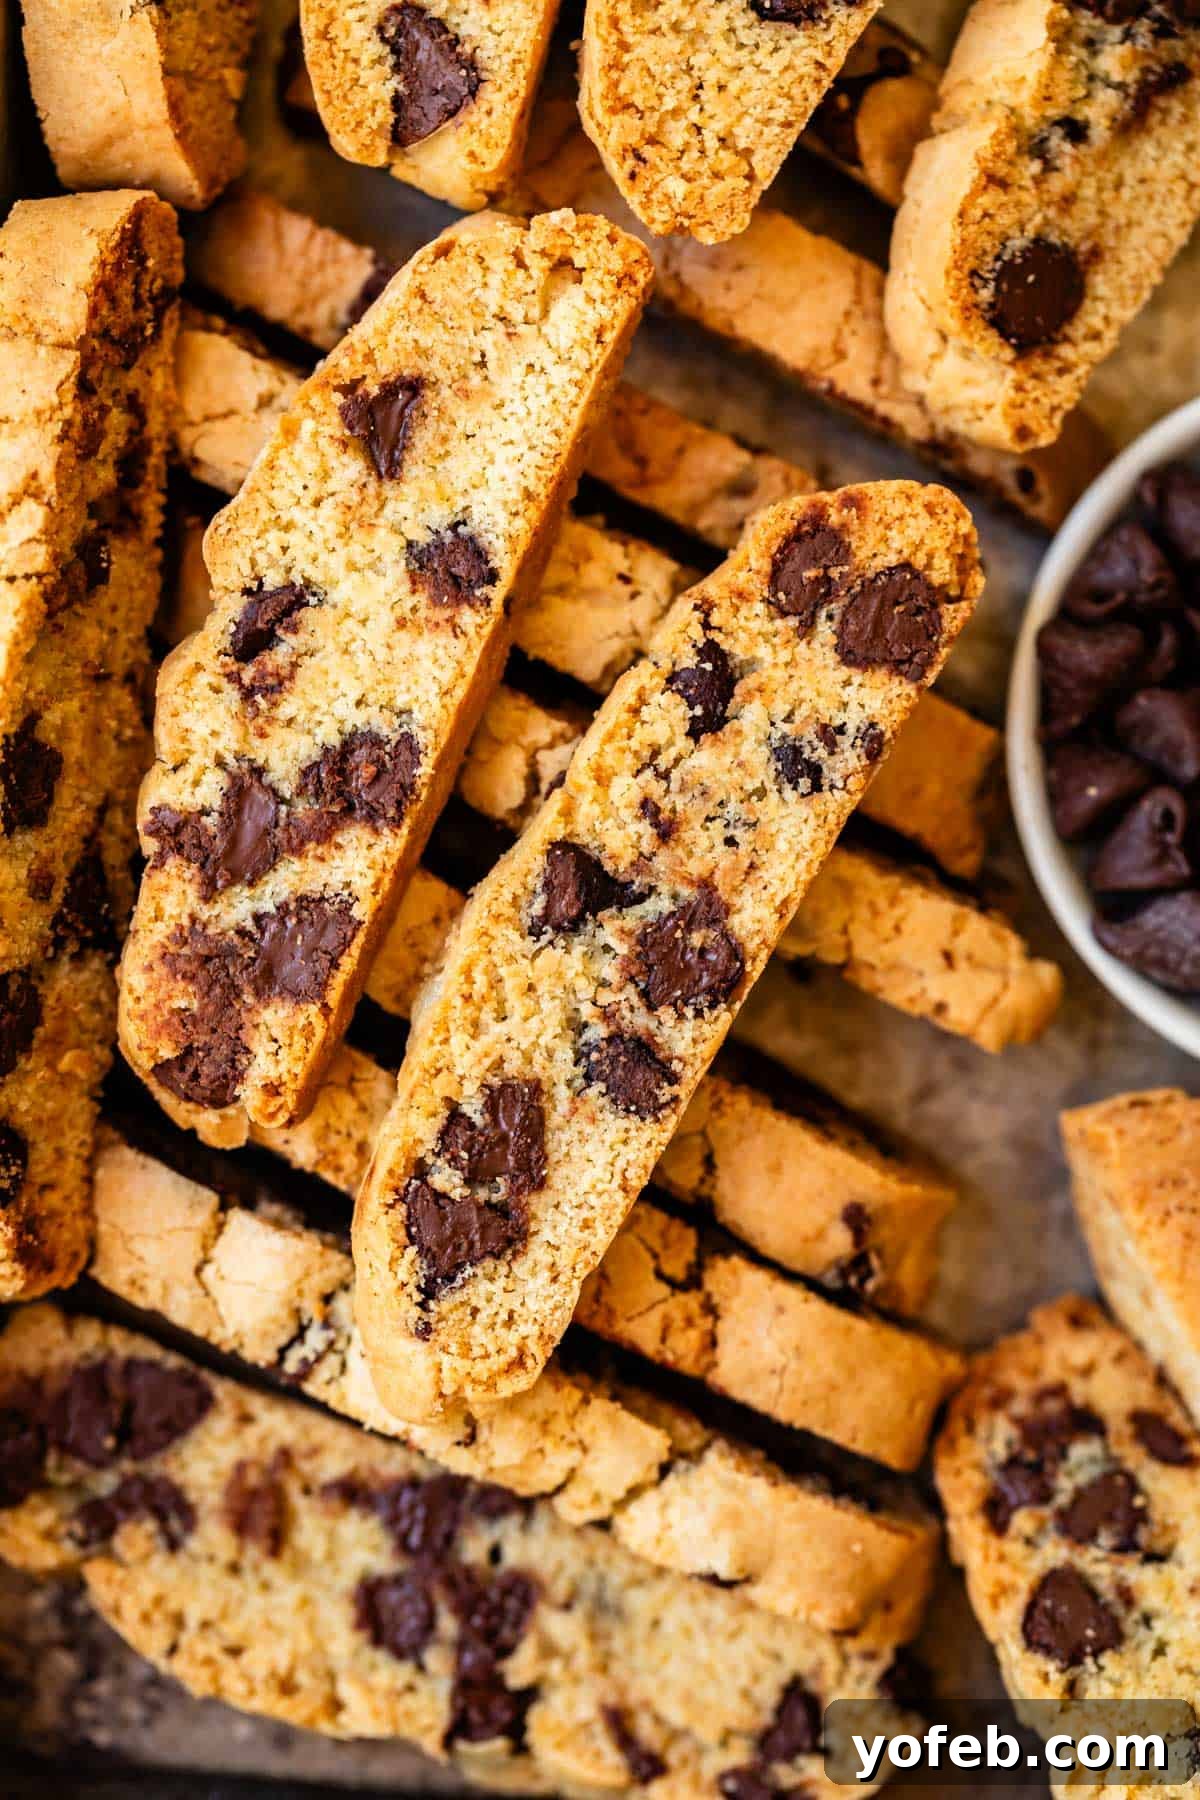
After the initial 10-minute cooling period, it’s time to slice your loaves into individual biscotti. For the best results, use a sharp serrated knife. You can slice straight across or, for the classic elegant shape, slice on a slight bias. The ideal thickness is about 1/2 inch. Resist the urge to cut them much thicker; while some recipes suggest thicker cuts, I firmly believe that a 1/2-inch thickness yields a superior, more enjoyable biscotti. Thinner slices allow for that satisfying snap and shatter with ease, preventing the need to “gnaw” on a too-chunky cookie stick. We’re aiming for delicate crispness, not jaw-breaking density!
Pro Tip: If you’re not as perpetually lazy as I am, consider carefully transferring the loaves to a sturdy cutting board for easier slicing. But rest assured, I often perform this step directly on the baking sheet – just be extra cautious!
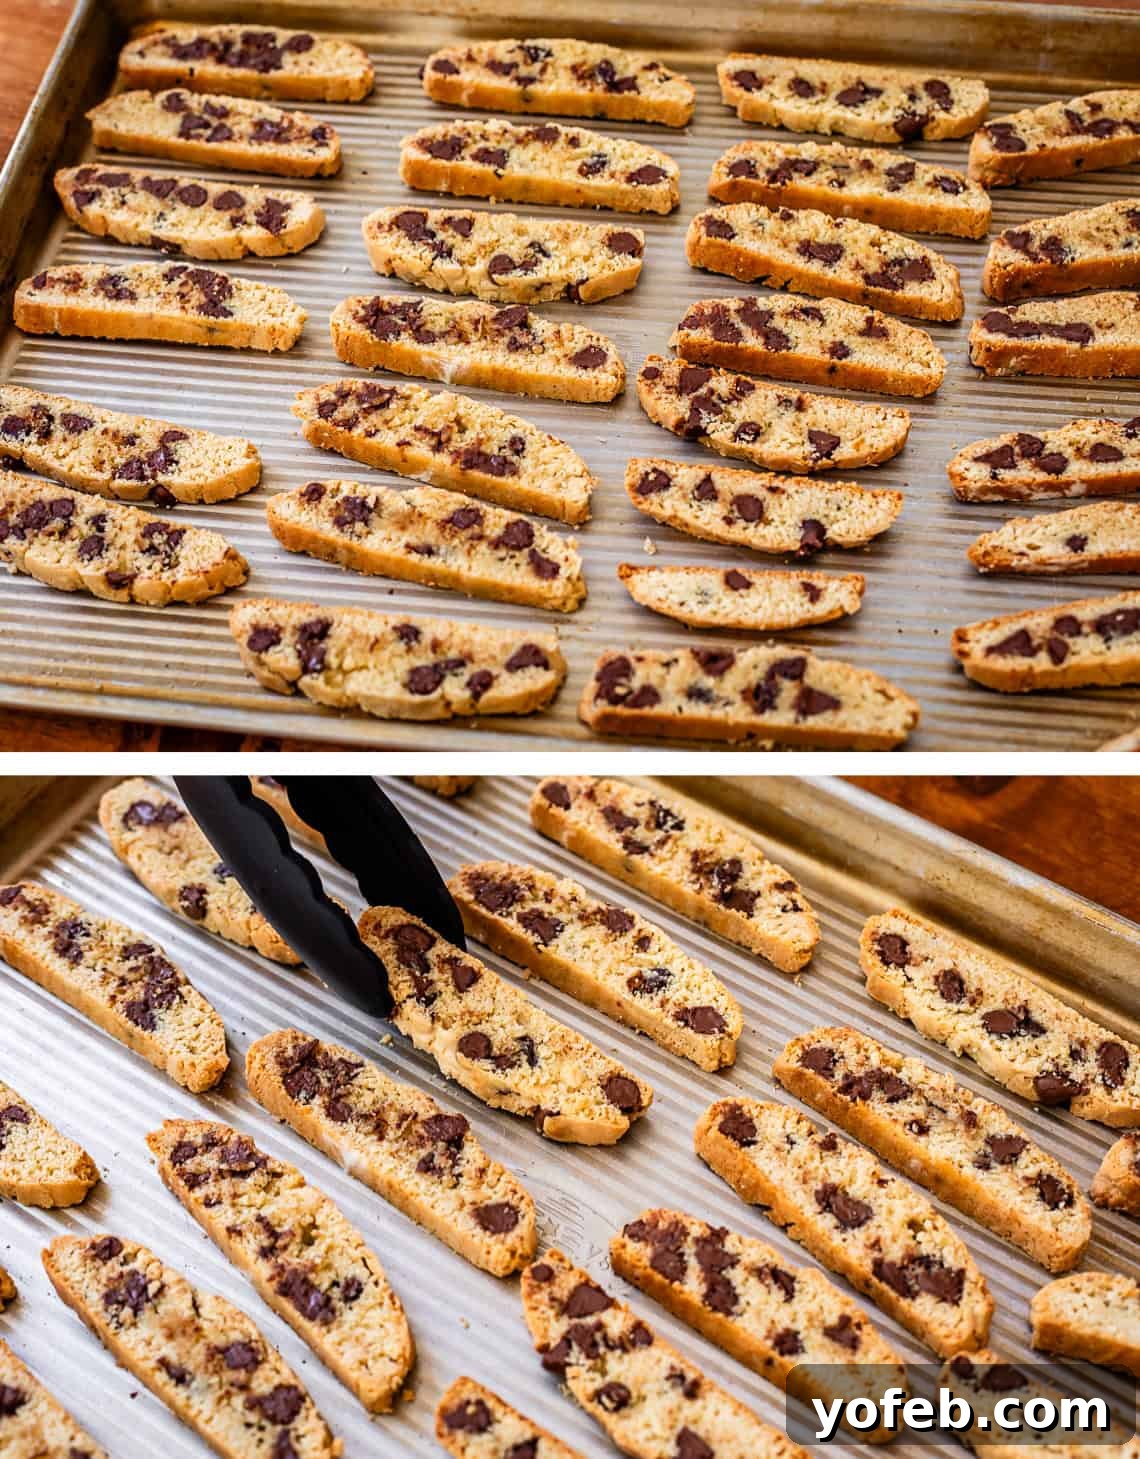
Once sliced, arrange the individual biscotti pieces cut-side down on an unlined baking sheet. This is important: for the second bake, you want the biscotti to make direct contact with the metal pan for optimal crisping. If your first pan was lined, remove the parchment or silpat. Spread the biscotti out, leaving at least an inch of space between each piece to ensure air circulation and even toasting. You might need a second unlined baking sheet to accommodate all the slices.
For this second bake, lower your oven temperature to 325°F (160°C). Bake for approximately 9 minutes. The biscotti should begin to feel crisp to the touch. If you opted for slightly thicker slices, you might need an extra minute or two. Then, carefully remove the pans from the oven (but keep the oven door closed to maintain heat!). Use tongs to flip each biscotti over, exposing the other side to the heat. Return the pans to the oven, switching their positions (top rack to bottom, bottom to top), and bake for another 7-9 minutes, or until the biscotti reach your desired level of golden brown crispness. The centers should have a very slight give when gently pressed but should feel mostly firm and toasted. This twice-baked process is what gives biscotti its characteristic dry, crunchy texture, perfect for dunking.
Finally, remove the biscotti from the oven and let them cool completely on a wire rack if you’re aiming for that truly satisfying snap and plan to dunk them in a cold glass of milk. However, I won’t judge if you grab one fresh off the cooling rack – still warm, slightly melty chocolate, and simultaneously crispy – it’s an undeniable treat!
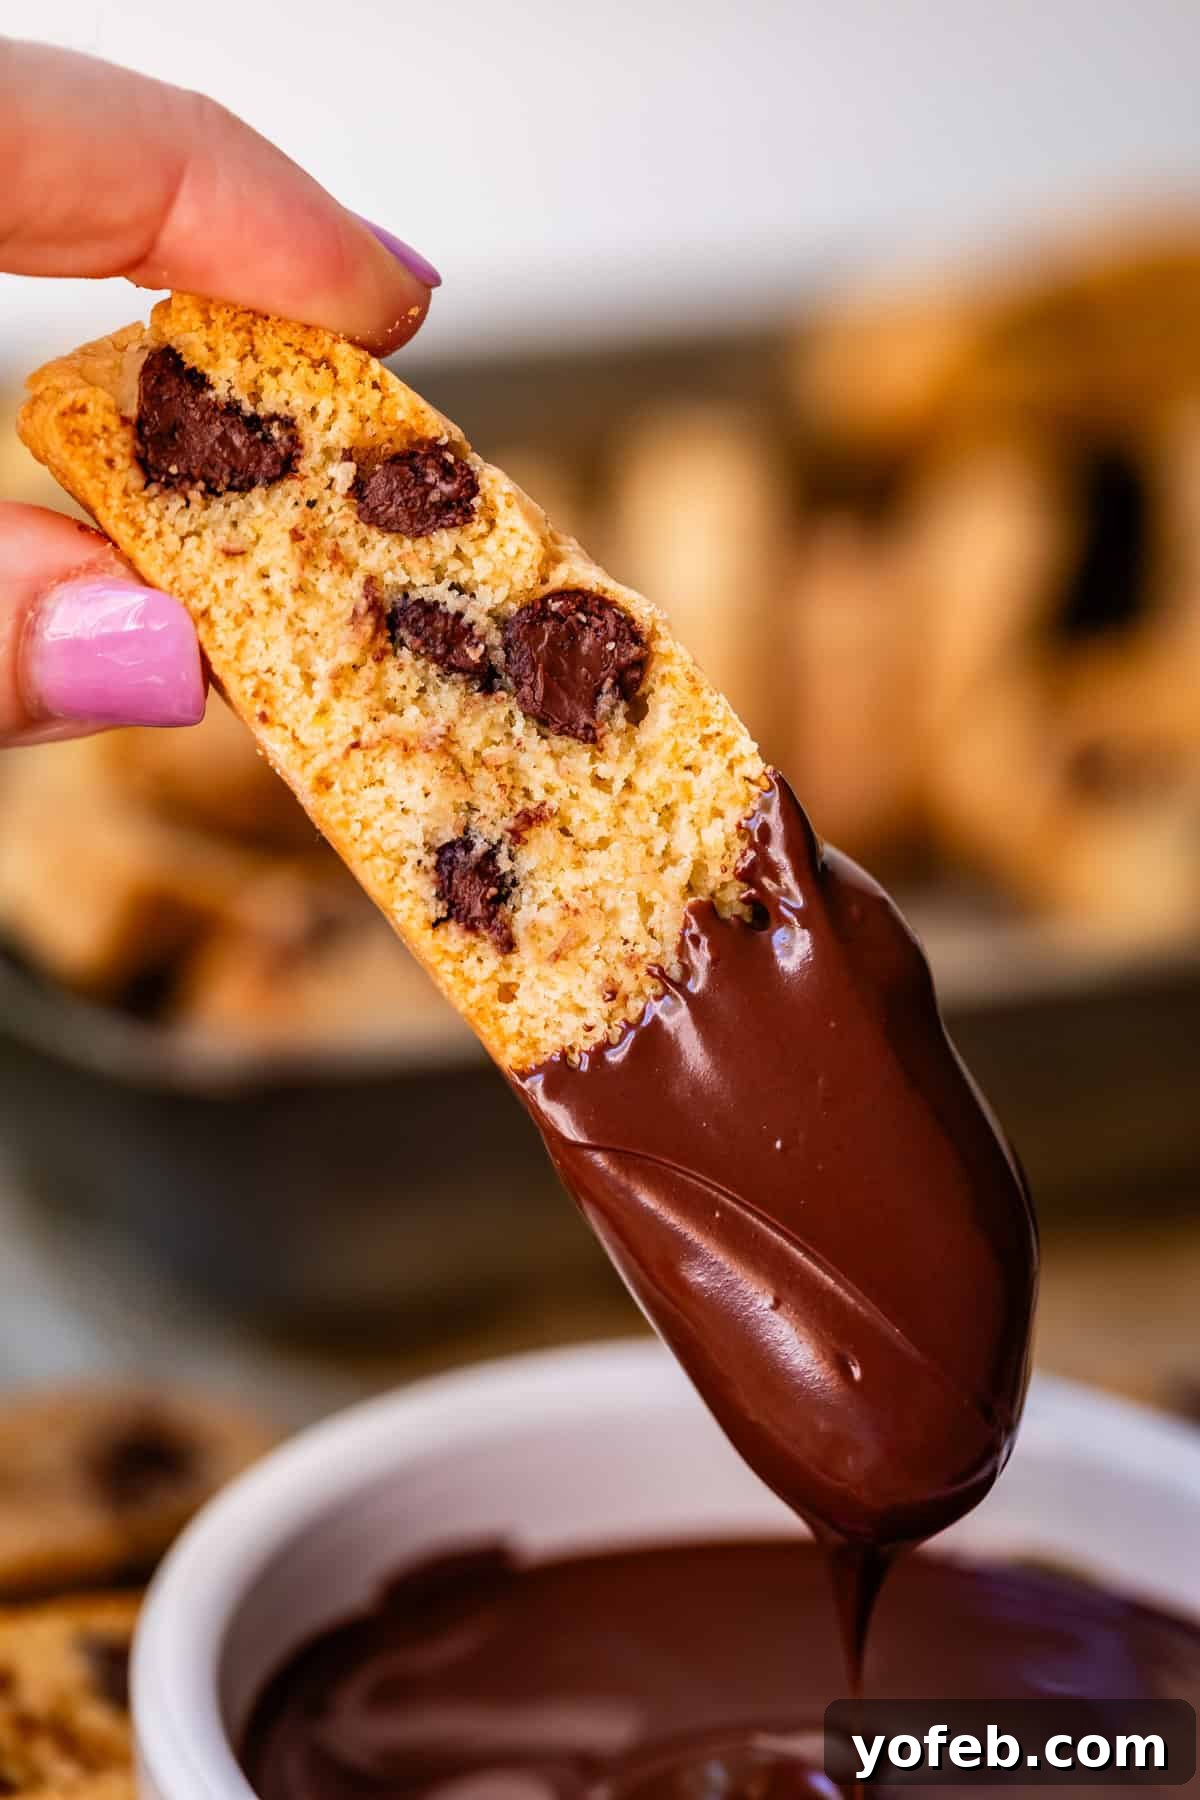
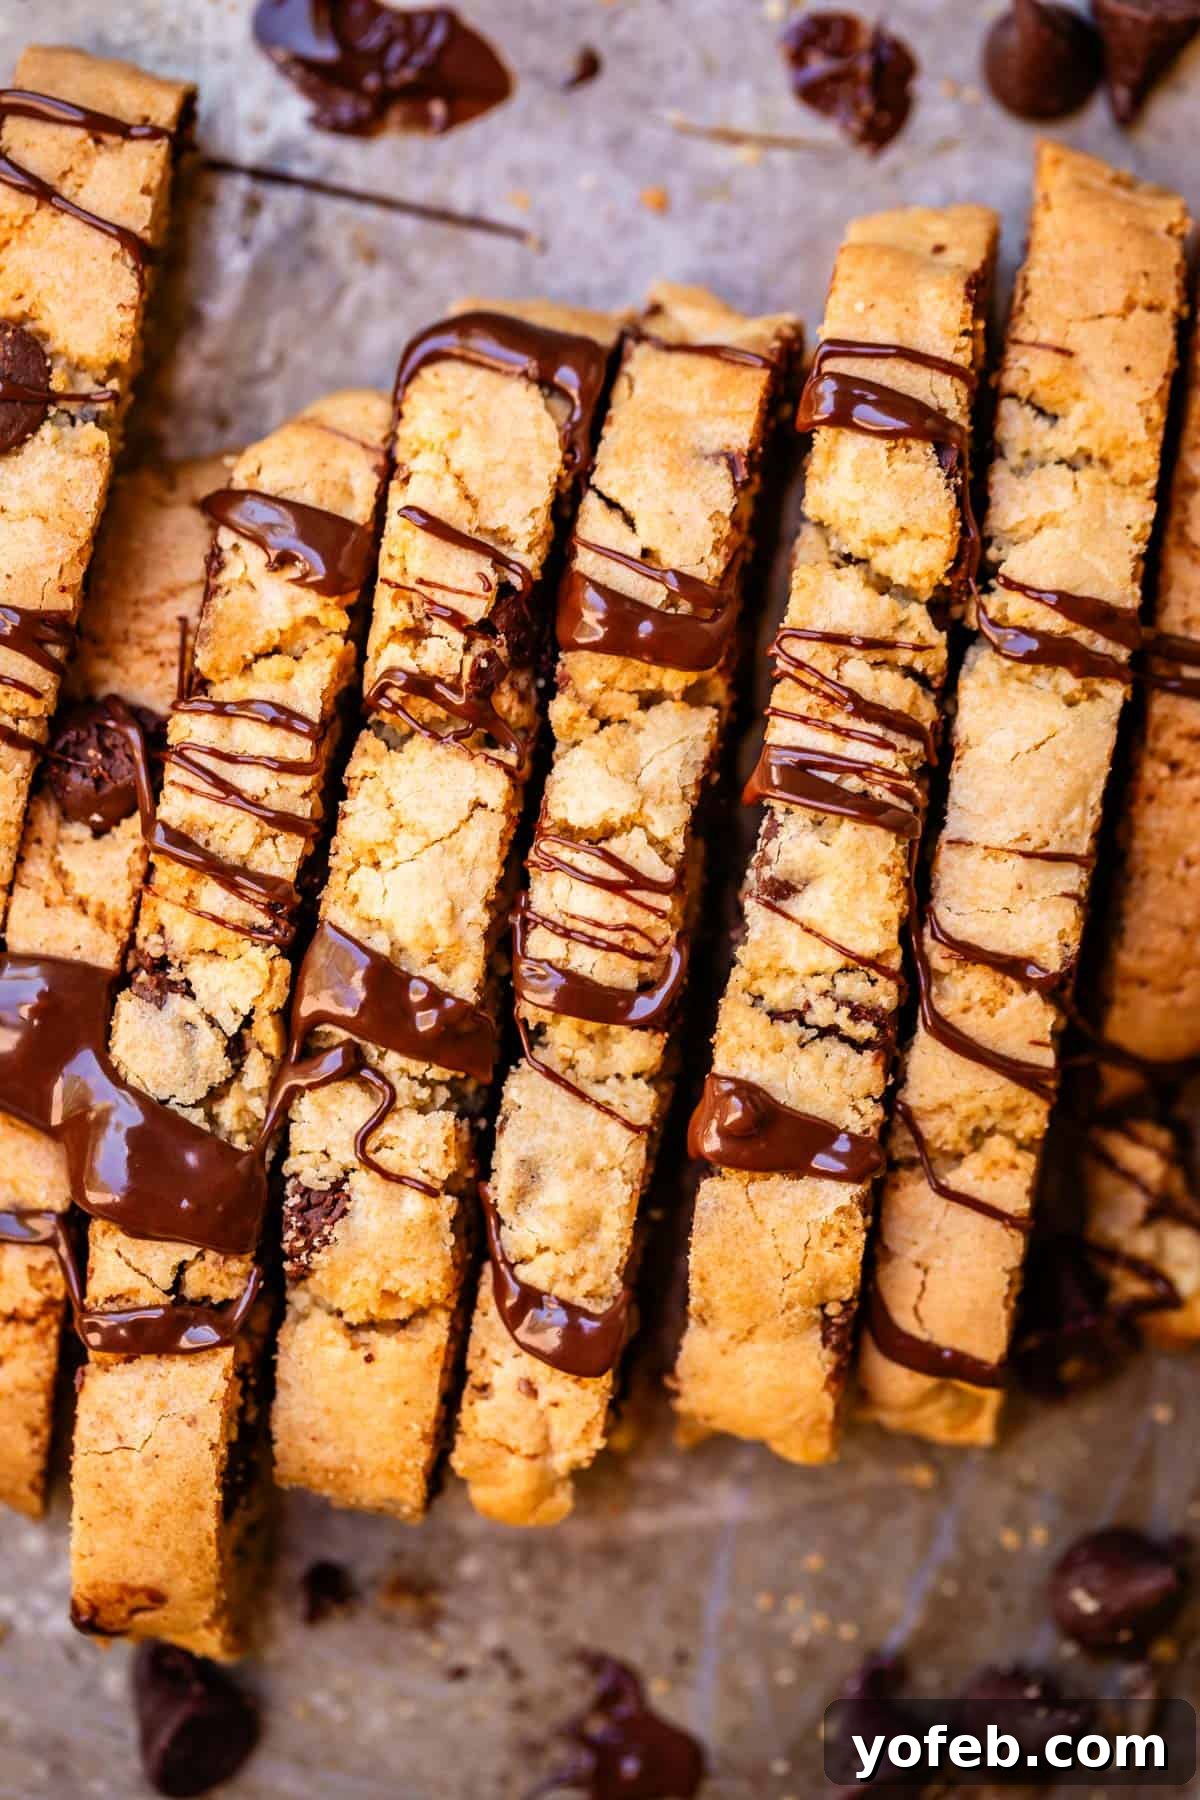
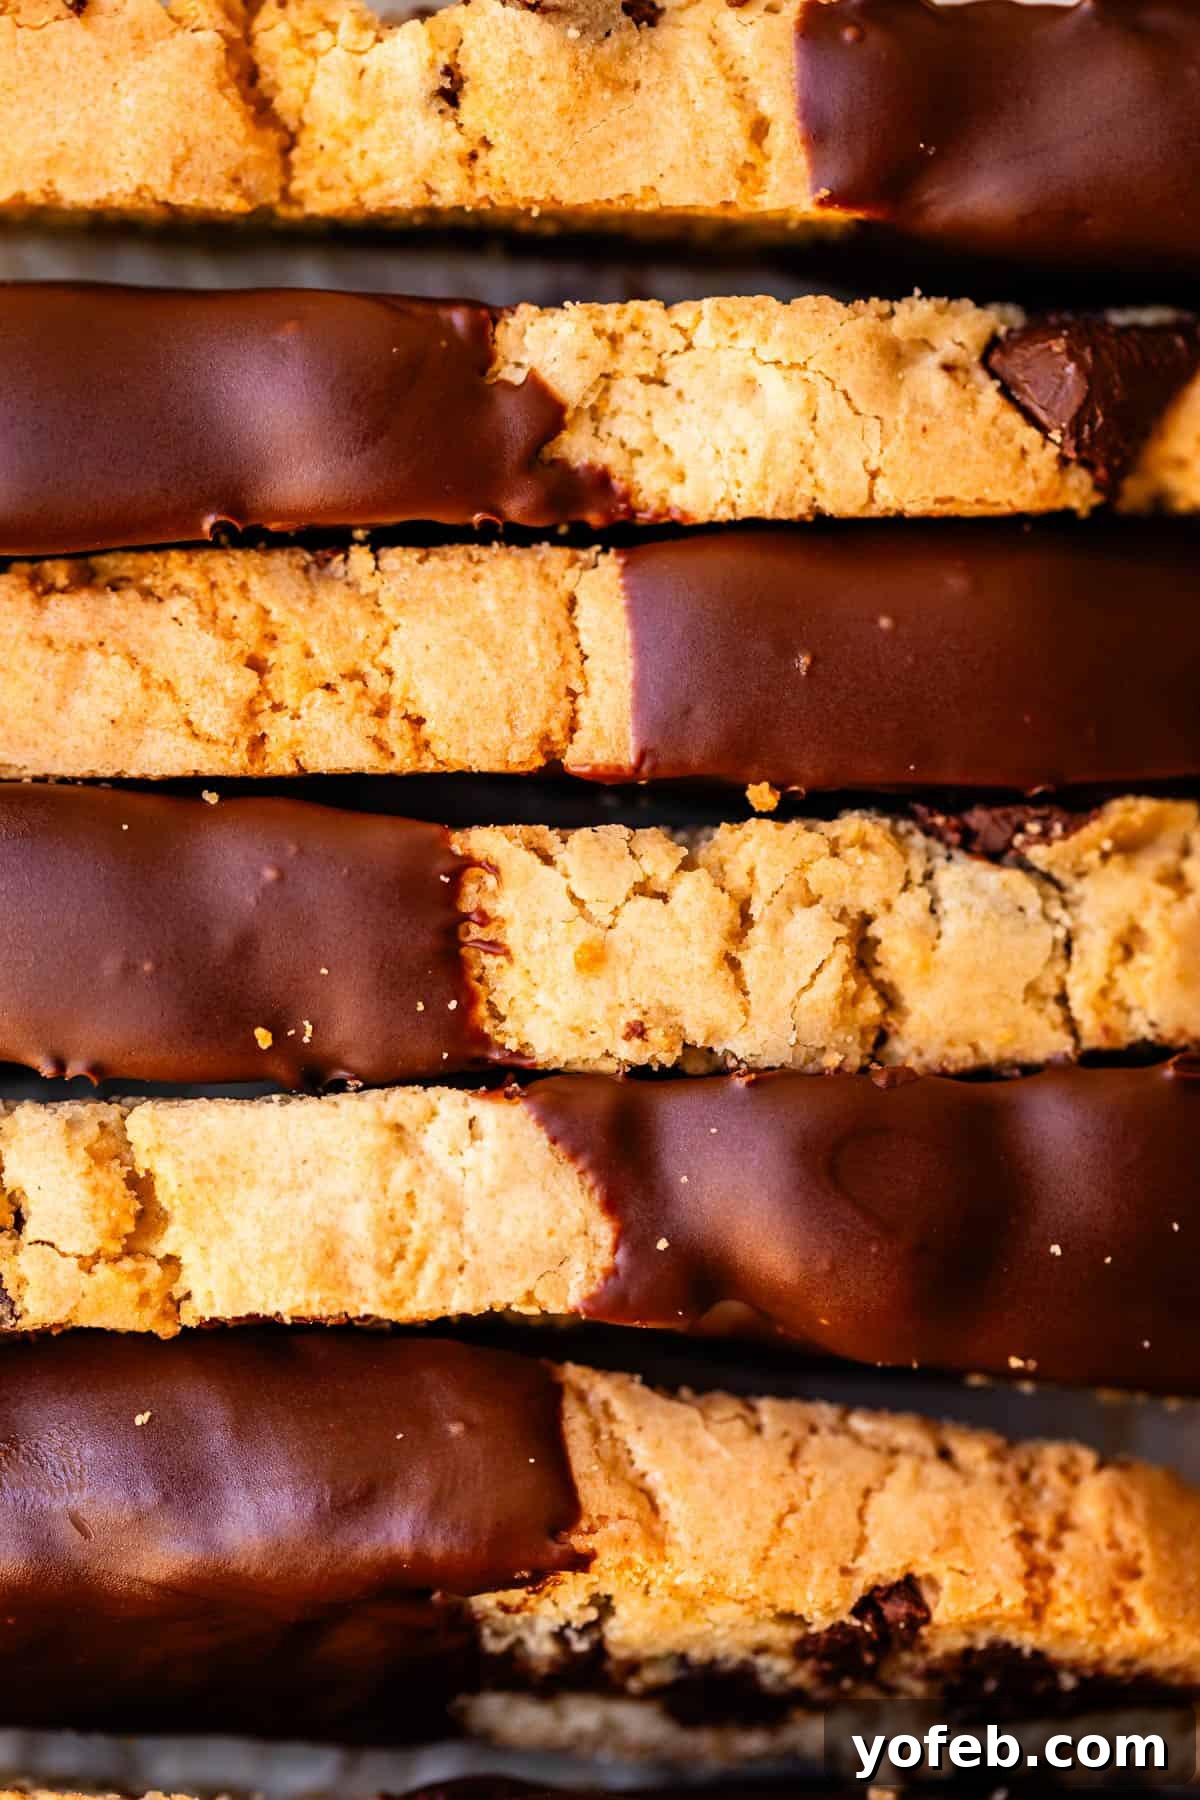
And for the ultimate indulgence, if you know what’s good for you, dip those cooled biscotti in melted chocolate! It adds an extra layer of decadence and visual appeal that’s simply irresistible.
Proper Storage and Shelf Life for Your Homemade Biscotti
One of the many advantages of biscotti is its impressive shelf life, thanks to its twice-baked, low-moisture nature. You can store leftover biscotti in an airtight container at room temperature on your counter for a surprisingly long time – typically at least one to two weeks, and sometimes even longer! Because they’re essentially dehydrated during the second bake, they’re less prone to spoiling quickly compared to other types of cookies.
However, like most baked goods, they are always at their absolute best when fresh. If you anticipate that it will take more than 3-4 days to enjoy your entire batch, I highly recommend freezing them. Freezing not only preserves their fresh taste and texture but also makes them a perfect make-ahead treat (more details on freezing below).
Their excellent keeping qualities also make biscotti ideal for gifting and shipping! They travel remarkably well. If you’re sending them to loved ones for the holidays, carefully nestle them into a ziplock bag. Partially seal the bag, then use a straw to suck out as much air as possible before sealing completely. This creates a vacuum, protecting them from damage. Wrap the vacuum-sealed bag in 2-3 layers of bubble wrap. Place them snugly into your shipping box, filling any empty spaces with additional items or packing paper to prevent them from shifting and rattling around. Seal the box tightly, and your delicious homemade gift is ready to be sent!
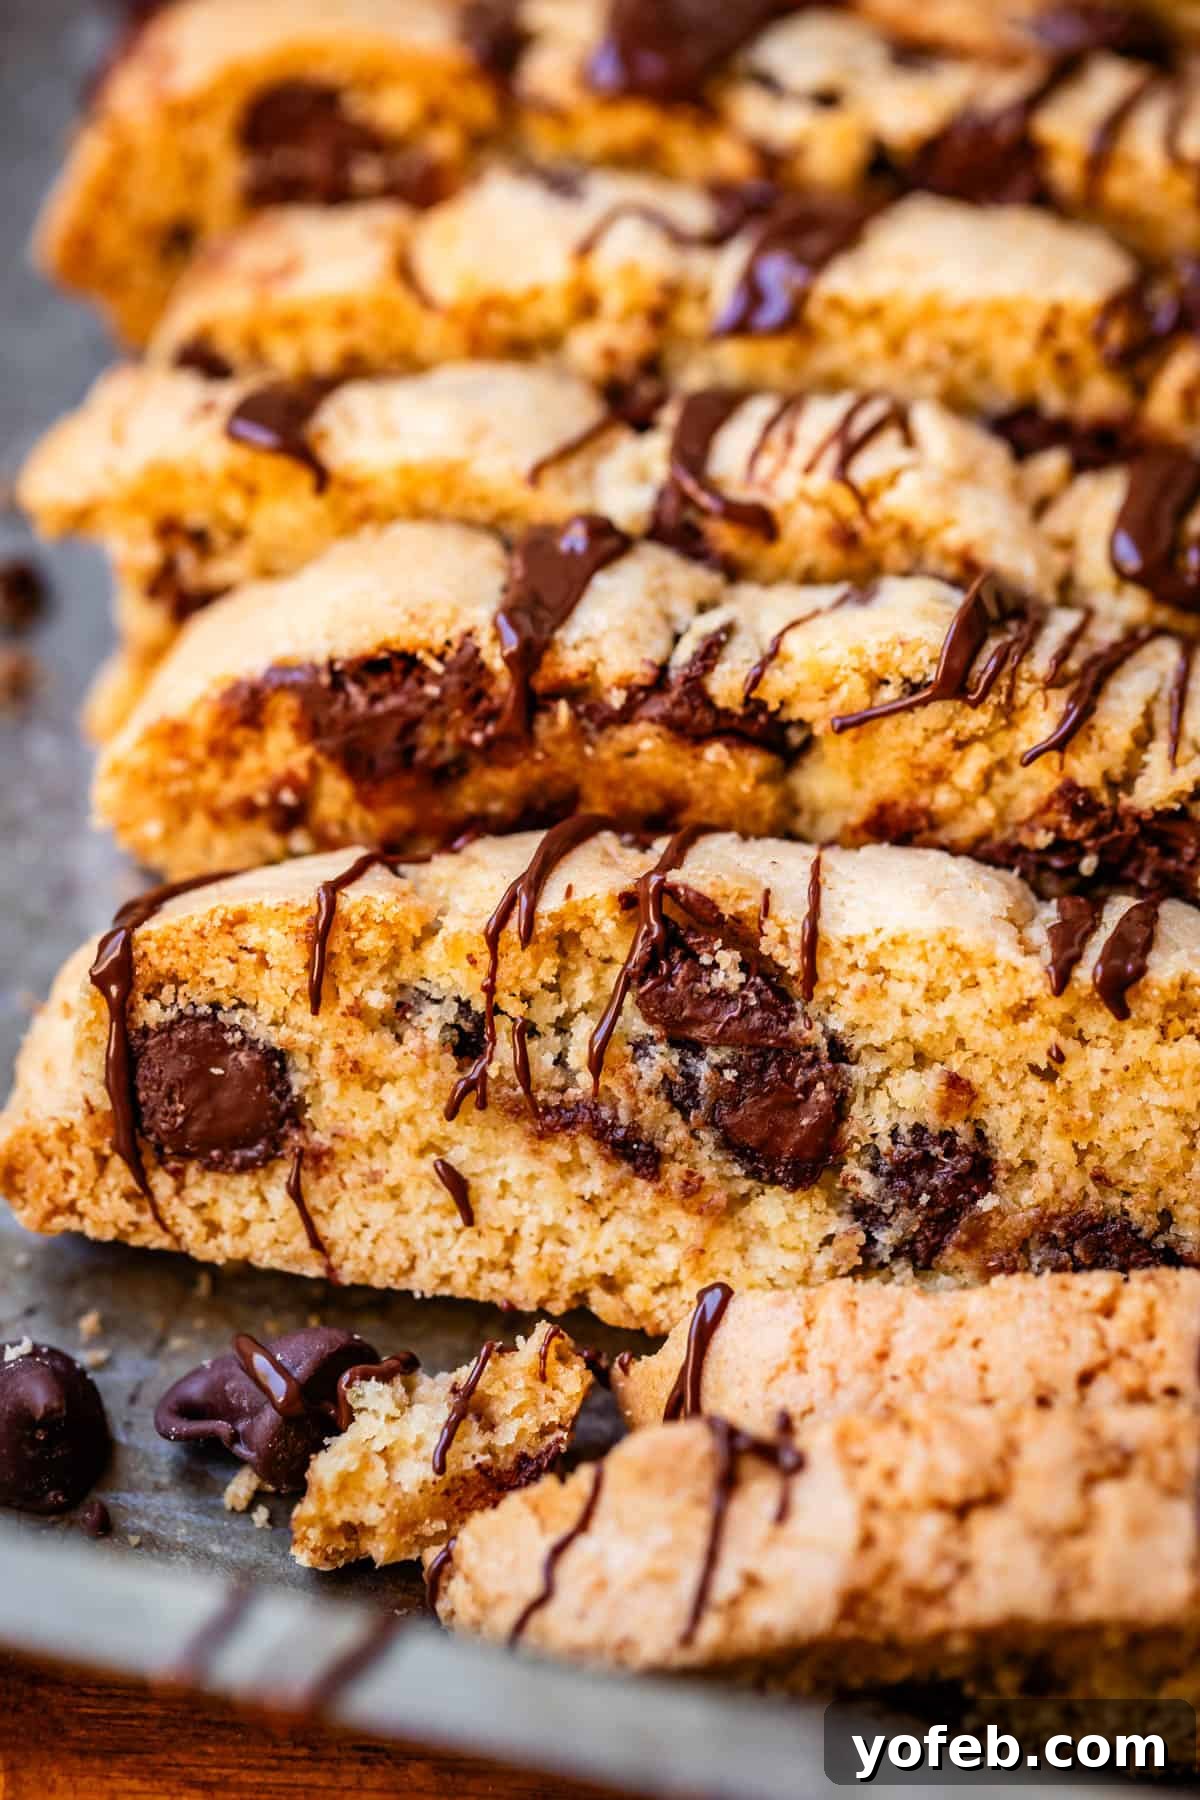
Can You Freeze Biscotti Cookies? A Make-Ahead Favorite!
Absolutely, biscotti are an excellent candidate for freezing, making them a fantastic make-ahead recipe, especially for busy times like the holidays! This is precisely why my best friend Sarah dedicates a day each year to baking and immediately freezing her biscotti for her husband, who adores them. She even labels the freezer bags with a stern “DAD’S BISCOTTI DO NOT EAT” to deter her children from devouring them too quickly!
When stored properly, biscotti can last anywhere from 2 to 4 months in the freezer without any noticeable loss in quality. This makes them an incredible pantry staple to have on hand. Imagine the convenience of pulling out a homemade, sweet treat when unexpected guests drop by, or simply when you’re craving a little indulgence without the effort of baking from scratch. They defrost quickly and maintain their superb texture and flavor, just as if they were freshly baked.
To freeze them, simply place the cooled biscotti into a heavy-duty ziplock freezer bag. For added protection against freezer burn or accidental crushing by other freezer items, you can also store them in an airtight container. When you’re ready to enjoy them, just remove the desired amount from the freezer and let them come to room temperature on the counter for a couple of hours. They will be perfectly ready for dipping in your favorite hot beverage or enjoying on their own.
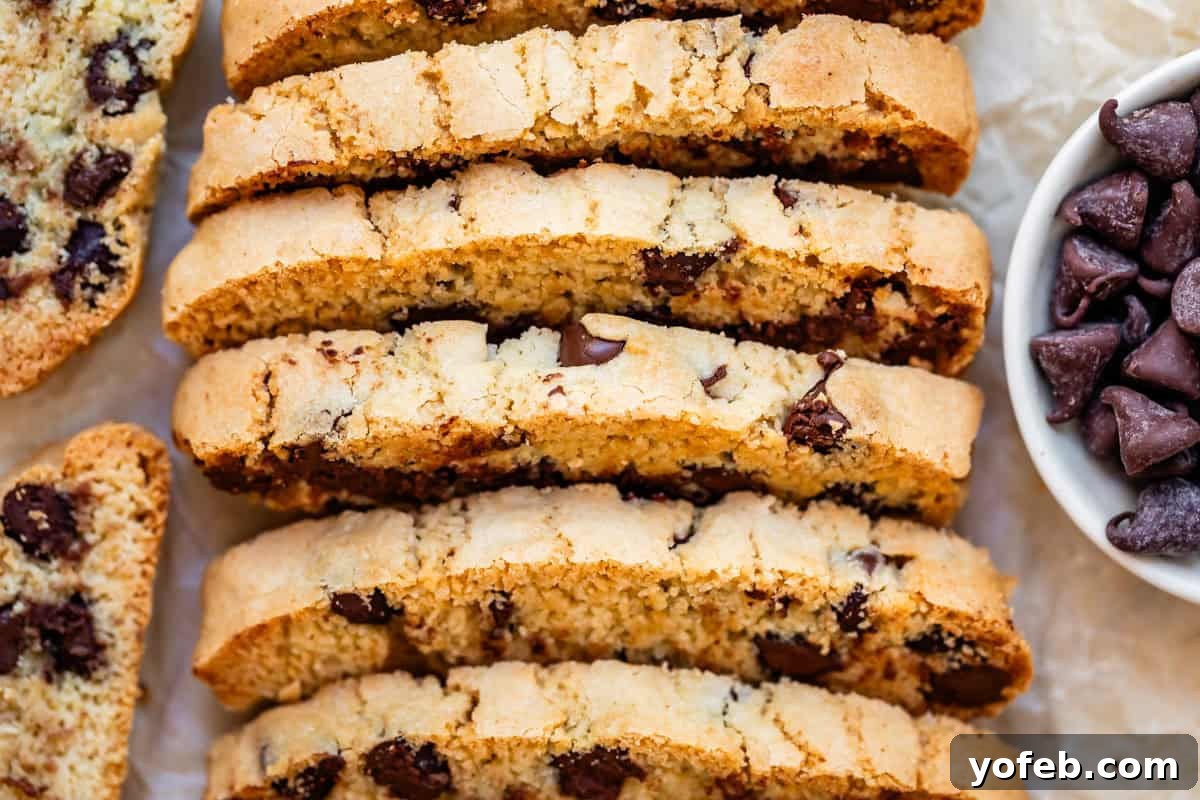
Biscotti Frequently Asked Questions: Your Top Queries Answered
The magic of biscotti lies in its unique “twice-baked” nature. You first bake the dough in logs, then slice it into the classic shape, and finally bake it again. This second bake is what gives it that signature crispness. (As my sister-in-law Britta famously quipped about twice-baked potatoes, “Why do something twice? Unless it’s twice-microwaved potatoes, then maybe.” I still chuckle at that!) The real secret to truly exceptional biscotti, however, is making it yourself. This ensures it won’t be overly hard and dry like many store-bought varieties. Additionally, incorporating the precise ratios from this recipe – especially the extra egg yolk for moisture and richness, and generous amounts of both vanilla and almond extract for depth of flavor – will elevate your homemade biscotti far beyond anything you’d find pre-packaged, free from unnecessary preservatives.
Generally speaking, biscotti can be considered a slightly “healthier” option compared to many other cookies, but it really depends on your definition of healthy! They typically contain less butter and sugar than, say, a decadent chocolate chip cookie or a rich brownie. However, they are still a delightful treat, often made with white flour. While you shouldn’t eat the entire batch in one sitting, enjoying a biscotti or two with your hot chocolate or coffee is perfectly fine and a lovely indulgence. After all, if you’re already having hot chocolate, a little biscotti won’t hurt!
Biscotti, in various forms, have a long history, dating back to the Roman Empire where they served as long-lasting provisions for soldiers on journeys. These ancient versions were quite different from the sweet, crunchy cookies we enjoy today. Traditionally, Italian biscotti (specifically cantucci from Tuscany) are grain-based, often featuring almonds and sometimes anise. Today’s recipe, while inspired by tradition, focuses on creating a more tender and flavorful cookie using slightly different ratios of familiar baking ingredients: all-purpose flour, granulated sugar, brown sugar, butter, baking powder, kosher salt, eggs, and vanilla and almond extracts, complemented by chocolate chips.
In Italy, “biscotti” is a broad term for any cookie, derived from “bis-cotto” meaning “twice-baked.” The specific cookie we refer to as biscotti in America is inspired by the Italian cantucci, which are characteristically very hard, dry, and not overly sweet almond cookies. These Italian versions are almost always dipped into a beverage, traditionally Vin Santo (a dessert wine), to soften them before eating. American biscotti, on the other hand, tend to be softer, richer, and come in a vast array of flavors, such as our beloved chocolate chip version. Perhaps the most significant distinction is that while traditional Italian biscotti *require* dipping to be enjoyable, our tender American-style biscotti can be delightfully eaten on its own, though dipping certainly enhances the experience!
Technically, yes, you *can* eat biscotti by itself. Our particular recipe, with its enhanced moisture and flavor, is designed to be enjoyable on its own thanks to its tender crumb and rich taste. However, to truly unlock the full potential of biscotti and experience it at its best, dipping is highly recommended! Just like Oreos are undeniably better when dunked in milk, biscotti truly shines when softened by a hot cup of coffee, tea, cocoa, or a cold glass of milk. There’s no secret cookie police to judge your dipping preferences, so feel free to experiment and find your favorite pairing!
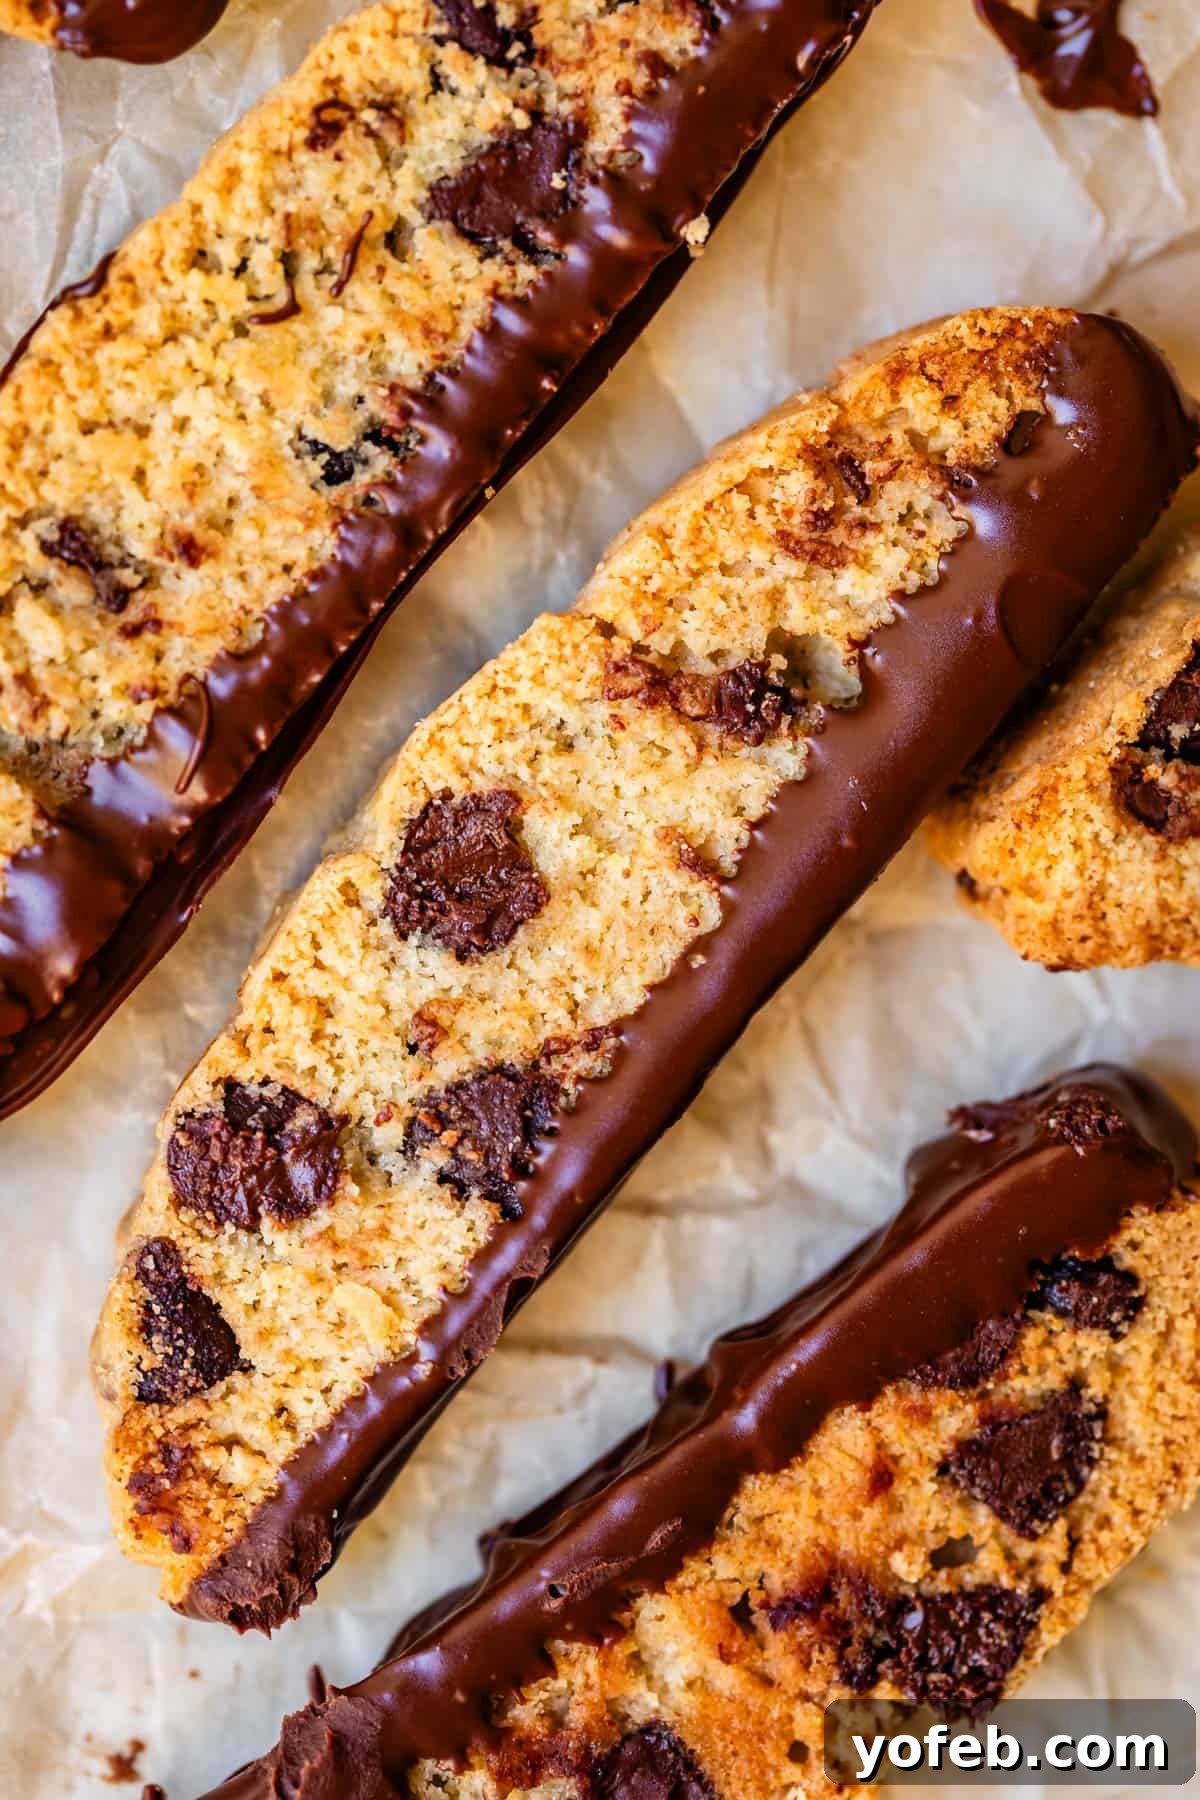
Creative Biscotti Variations: Endless Flavor Possibilities
Once you’ve mastered the basic chocolate chip and almond biscotti, the possibilities for customization are virtually endless! Biscotti is incredibly versatile, adapting beautifully to a wide range of flavors and mix-ins. Here are some inspiring variations to spark your culinary creativity:
- Nutty Delights: Replace the chocolate chips with your favorite chopped nuts. Pistachios offer a vibrant color and distinct flavor, while toasted almonds enhance the classic profile. Pecans, walnuts, or hazelnuts (especially when toasted) add a wonderful crunch and depth.
- Fruity Infusions: Introduce a chewy element by adding dried fruits. Craisins (dried cranberries) or dried cherries bring a tart sweetness, while finely diced dried pineapple or apricots offer a tropical twist.
- Chocolate Alternatives: Beyond semi-sweet, experiment with different types of chocolate chips. White chocolate chips provide a creamy sweetness, peanut butter chips offer a nutty richness, and cinnamon chips can add a warm, spicy note perfect for autumn.
- Citrus Zest zing: Brighten your biscotti with fresh citrus zest. Orange zest pairs beautifully with chocolate chips for a chocolate-orange sensation, while lemon zest adds a refreshing tang that complements almond.
- Extract Experiments: Change up the extract to dramatically alter the flavor profile. Coconut extract can transport you to a tropical paradise, rum extract adds a sophisticated warmth, and anise extract will give you a truly traditional Italian flavor (though beware, it’s a divisive one!).
- Spiced Biscotti: Incorporate warm spices like cinnamon, nutmeg, ginger, or cardamom into your dough for a cozy, aromatic treat. These work wonderfully with nuts or dried fruits.
- Glazes and Drizzles: Beyond dipping in melted chocolate, consider a simple glaze made from powdered sugar and a liquid (milk, lemon juice, or an extract like maple or orange) for an elegant finish.
Don’t be afraid to mix and match these ideas to create your signature biscotti flavor combinations. Happy baking and experimenting!
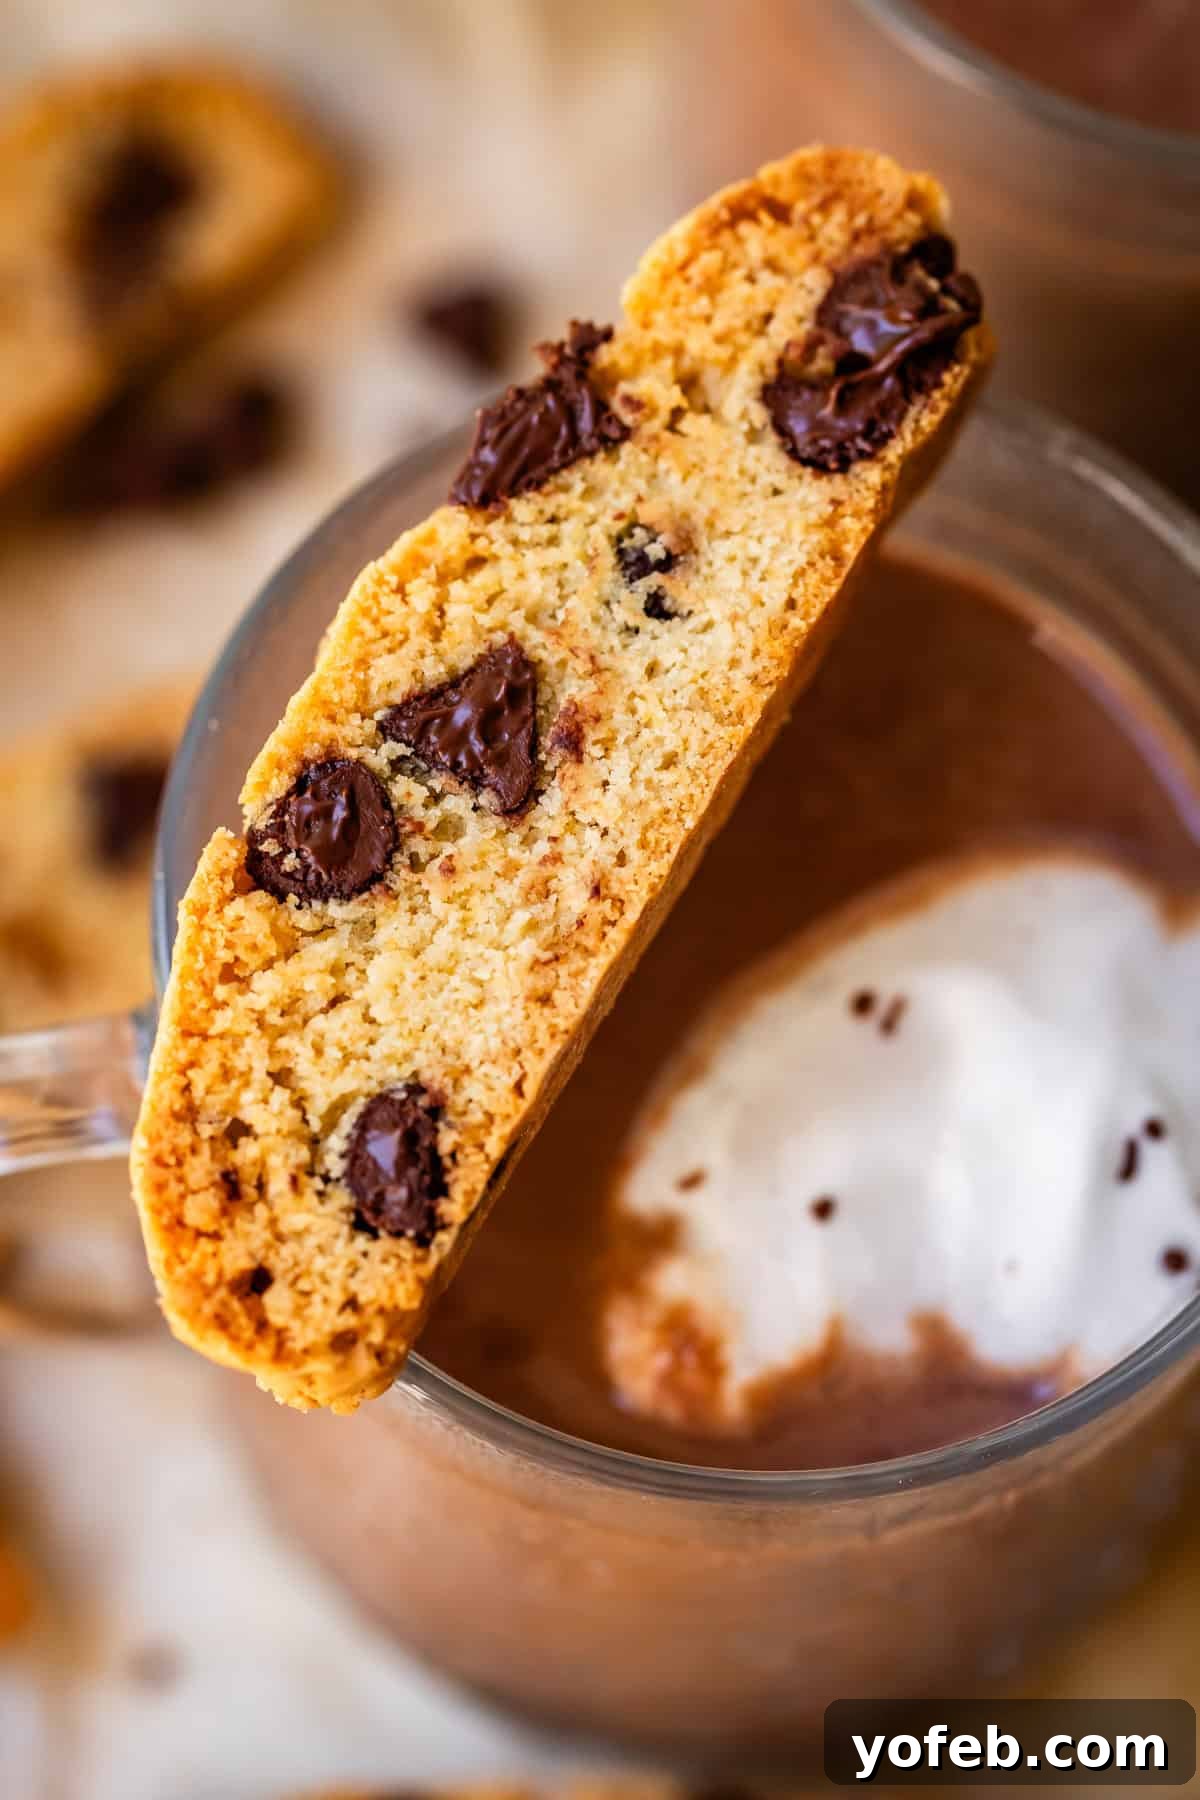
More Delicious Dunking Cookies to Enjoy
If you’ve fallen in love with the art of dipping cookies into your favorite hot or cold beverages, then you’re in for a treat! Here are more fantastic cookie recipes that are simply begging to be dunked:
- Crispy Swedish Cardamom Cookies >> A cherished family recipe from Eric’s Grandma Prudy, offering unique spice and crispness.
- Thin and Crispy Sugar Cookies >> I once thought I didn’t like crispy cookies, but these proved me delightfully wrong!
- Perfect Linzer Cookies >> The absolute cutest jammy-almond shortbread-ish cookies you’ll ever bake, beautiful and delicious.
- The Best Snickerdoodle Recipe >> A timeless classic where a glass of milk is not just optional, but essential for the full experience.
- My All-Time-Favorite Shortbread Cookies >> If you’re a connoisseur of classic, melt-in-your-mouth cookies, you absolutely NEED to make these.
- Spritz Cookies >> Grab your cookie press; it’s time to whip up (and devour) a million of these delicate beauties.
- Mexican Hot Chocolate Cookies >> Richly chocolatey with a tantalizing cinnamon kick, a truly unique flavor profile.
- Swedish Sour Cream Twists >> A fun and engaging recipe: chill the dough, roll in sugar, then twist!
- Traditional Italian Breakfast Cookies from An Italian in My Kitchen >> Perfect for starting your day the Italian way.
- Coffee Cake Cookies from Kroll’s Korner >> All the flavor of coffee cake in a convenient, dunkable cookie form.
Connect with us! Facebook | Pinterest | Instagram

Biscotti Recipe For Biscotti Haters
15
50
10
1
15
45
Ingredients
- 6 tablespoons salted butter, slightly softened
- 1 cup white sugar
- 1/4 cup brown sugar, packed
- 2 large eggs
- 1 large egg yolk
- 1 teaspoon vanilla extract
- 1 teaspoon almond extract
- 2 and 1/4 cups all purpose flour, spooned and leveled
- 1 and 1/4 teaspoon baking powder
- 3/4 teaspoon kosher salt
- 1 and 1/4 cups semi sweet chocolate chips
For dipping:
- 1 cup semi sweet chocolate chips
- 1 teaspoon oil
Instructions
-
Preheat the oven to 350 degrees F (175°C). Line a 11×17 inch (half baking sheet) pan with parchment paper or a silpat baking mat. Have a second baking sheet on hand (no lining needed on the second pan).
-
Make the dough: In a large bowl or stand mixer, add 6 tablespoons slightly softened butter. Beat until smooth and creamy, scraping down the sides of the bowl to ensure no chunks remain.
-
Add 1 cup granulated sugar and 1/4 cup packed brown sugar. Beat for 2-3 minutes, scraping down the sides and bottom at least once, until the mixture is light and fluffy.
-
Add 2 large eggs and 1 large egg yolk. Incorporate 1 teaspoon vanilla extract and 1 teaspoon almond extract. Beat thoroughly, scraping the sides and bottom of the bowl as needed, until the mixture is completely combined and smooth.
-
Use the spoon and level method to add 2 and 1/4 cups all-purpose flour; do not stir yet. To do this, spoon flour into your measuring cup, then level it off with a straight edge (avoid packing the flour in).
-
Add 1 and 1/4 teaspoon baking powder and 3/4 teaspoon kosher salt. Use your teaspoon to lightly mix the baking powder and salt into the flour before fully incorporating.
-
Using the beaters, mix the dry ingredients into the butter mixture until it is almost combined but not quite. Scrape the bottom of the bowl to ensure everything is incorporated.
-
Add 1 and 1/4 cups of semi-sweet chocolate chips and mix just until blended, then stop immediately. It’s important not to overmix, as this can lead to tough biscotti. All the flour should be fully incorporated.
-
Transfer the dough to a pan. Split your sticky dough in half with your spatula and scrape each half onto the lined baking sheet you prepared, forming two separate mounds. The dough is quite sticky, which is desirable for moisture!
-
Shape into loaves. Lightly wet your fingertips or rub them with a little oil. Use your hands to shape each mound of dough into a long, skinny loaf, approximately 2 inches across and 12 inches long. Ensure there is at least 3-4 inches of space between the two loaves, as they will spread significantly while baking. The tops of the loaves should be flat, not rounded (refer to photos for visual guidance).
-
Bake the loaves at 350°F (175°C) for 28-30 minutes. The edges should be noticeably golden brown, and distinct cracks will be running down the top of the loaves. If they don’t look golden enough, extend the baking time by a couple of minutes.
-
Lower the oven temperature to 325°F (160°C).
-
Let the loaves cool on the pan for 10 minutes. This allows them to firm up slightly before slicing.
-
Transfer to a cutting board. (For convenience, I often carefully slice directly on the baking sheet, but using a large cutting board provides more room.) Use a bread knife or a sharp serrated knife to slice the loaves on a slight diagonal into pieces about 1/2 inch thick, or slightly larger if preferred. I find 1/2 inch to be ideal for that satisfying “snap.” Cut to your personal preference!
-
Lay out each cut biscotti on its side, ensuring at least 1 inch of space around each piece. For this second bake, I recommend placing the biscotti directly on the metal baking sheet without parchment paper or a silpat, as direct contact helps achieve maximum crispness. Remove any lining from the first pan and fill it with cut biscotti. Use your second unlined pan for the remaining biscotti, ensuring they all have ample room to crisp up in the oven.
-
Bake the cut biscotti. Ensure your oven temperature is set to 325°F (160°C). Bake the two pans of biscotti simultaneously, one on the top rack and the other on the bottom rack. Bake for 9 minutes. The biscotti should begin to get crisp on top. (If you cut your biscotti thicker, you might need 10-11 minutes for this step.) Remove the pans from the oven and shut the oven door to retain heat.
-
Flip each biscotti. Use tongs to carefully flip each biscotti over, or if you’re feeling brave, use your fingers (just be mindful of the heat!).
-
Bake the flipped biscotti. Switch the pans so that the one previously on the top rack is now on the bottom rack, and vice versa. Bake for another 7-9 minutes, or until the biscotti are browned to your liking and feel quite firm. The centers of each biscotti should have a very slight give when gently pressed, but overall they should be firm and golden.
-
Cool. Allow the biscotti to cool completely on a wire rack for the ultimate crisp texture. However, don’t hesitate to sneak one right off the cooling rack – still warm and melty-crispy, it’s a unique delight!
-
Dip (Optional, but highly recommended!). If you wish to dip your biscotti in chocolate, melt 1 cup semi-sweet chocolate chips and 1 teaspoon oil or shortening in a shallow bowl in the microwave. Heat in 30-second intervals, stirring after each, until mostly melted. Then stir continuously until completely smooth and free of lumps. Dip one end of the cooled biscotti into the melted chocolate. Place the dipped biscotti on sheets of parchment or wax paper to set. For faster setting, you can place them in the fridge or freezer.
-
Serve the biscotti with a fresh glass of milk, a warm cup of coffee, or a comforting mug of hot chocolate. Biscotti truly shines when dipped!
-
Storage: Store your biscotti in an airtight container on the counter for up to 2 weeks, or pop them into a ziplock bag or airtight container and freeze for longer storage. These make excellent gifts for teachers, neighbors, and friends!
Notes
Nutrition
Serving:
1
g
|
Calories:
112
kcal
|
Carbohydrates:
18
g
|
Protein:
1
g
|
Fat:
4
g
|
Saturated Fat:
2
g
|
Polyunsaturated Fat:
0.1
g
|
Monounsaturated Fat:
1
g
|
Trans Fat:
0.1
g
|
Cholesterol:
15
mg
|
Potassium:
35
mg
|
Fiber:
0.2
g
|
Sugar:
11
g
|
Vitamin A:
62
IU
|
Calcium:
17
mg
|
Iron:
0.5
mg
Dessert
American, Italian
112
Almond, biscotti, Cookies
Did you make this? I’d love to see it!
Mention @thefoodcharlatan or tag #thefoodcharlatan!