
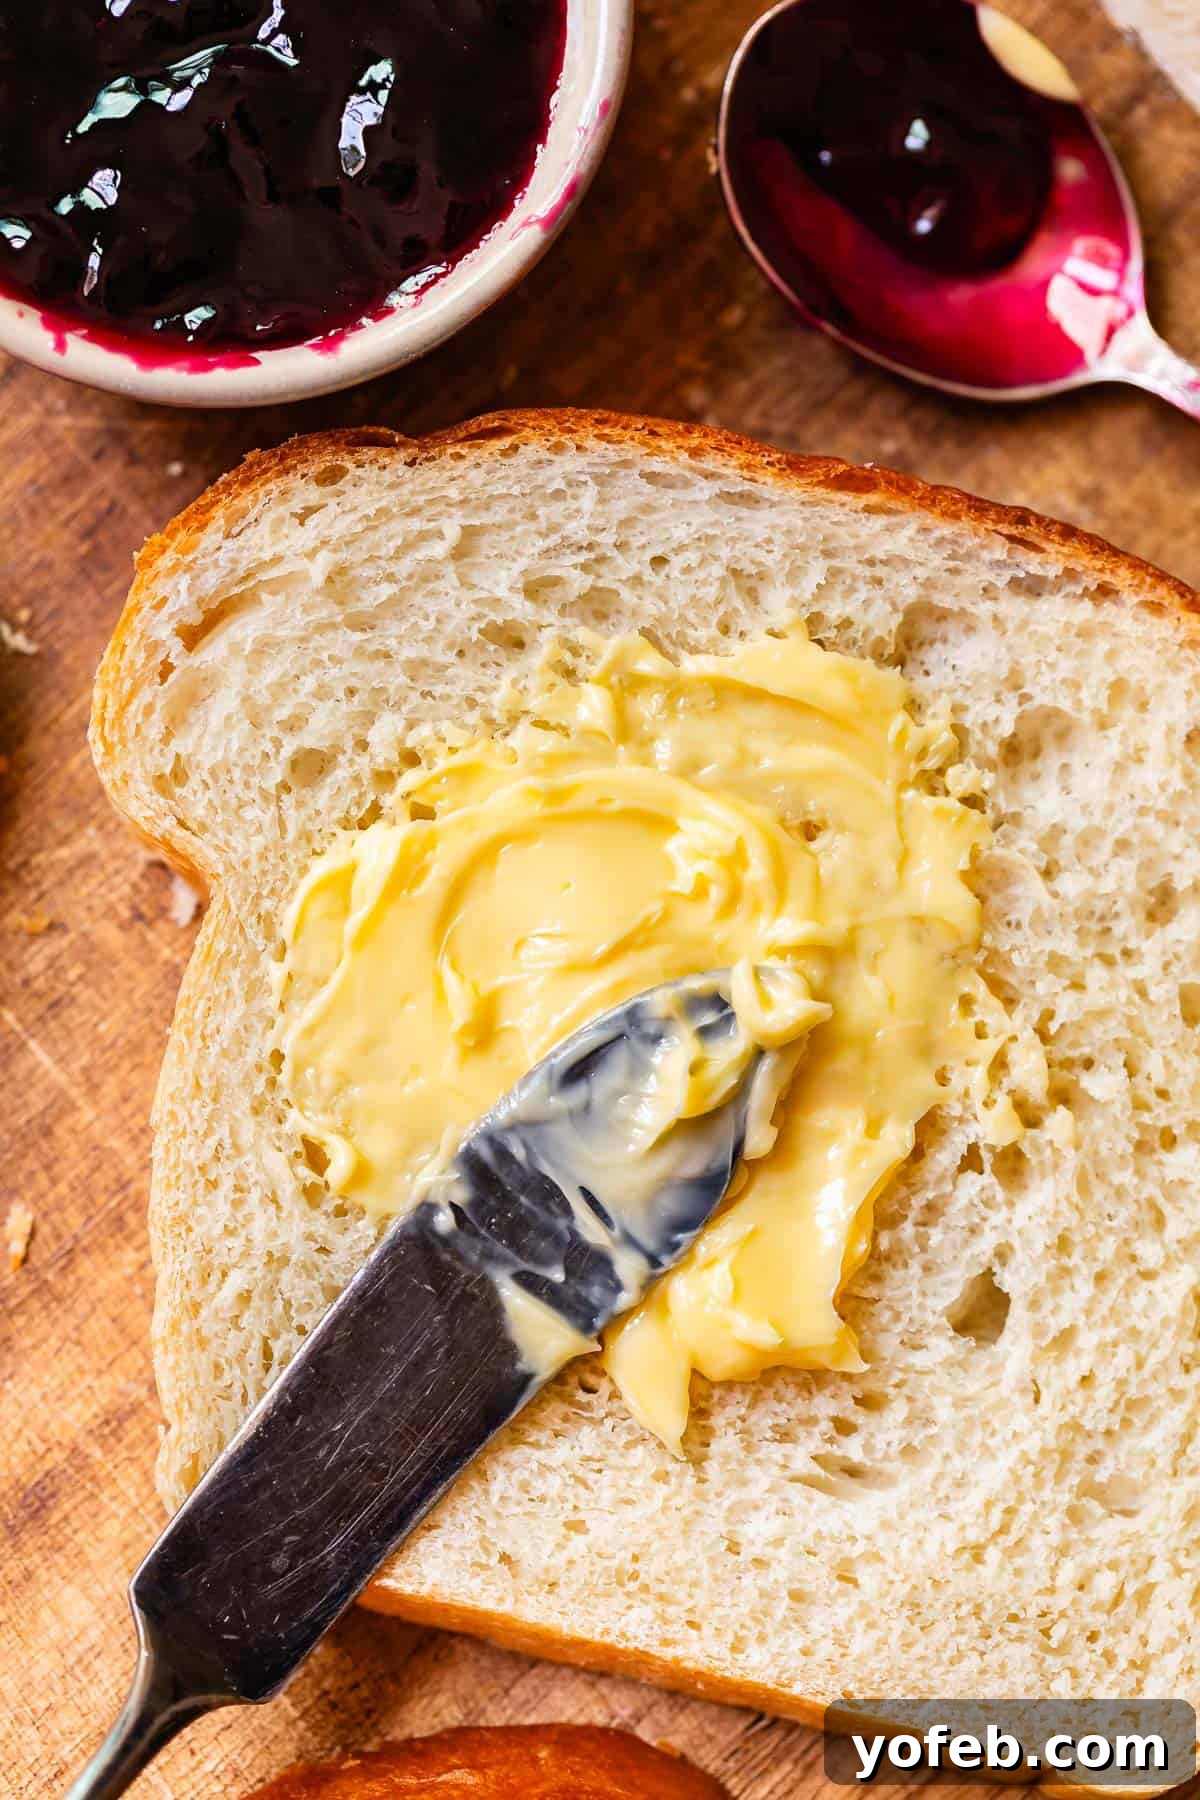
Are you searching for that elusive, perfect homemade white bread recipe? Look no further! This recipe delivers a truly unforgettable loaf of fluffy, tall, and buttery white bread. It’s so simple and quick to prepare that even novice bakers can achieve remarkable results, taking you from start to finish in just about one hour. Get ready to bake the best sandwich bread of your life, step by step! Originally published August 23, 2023.
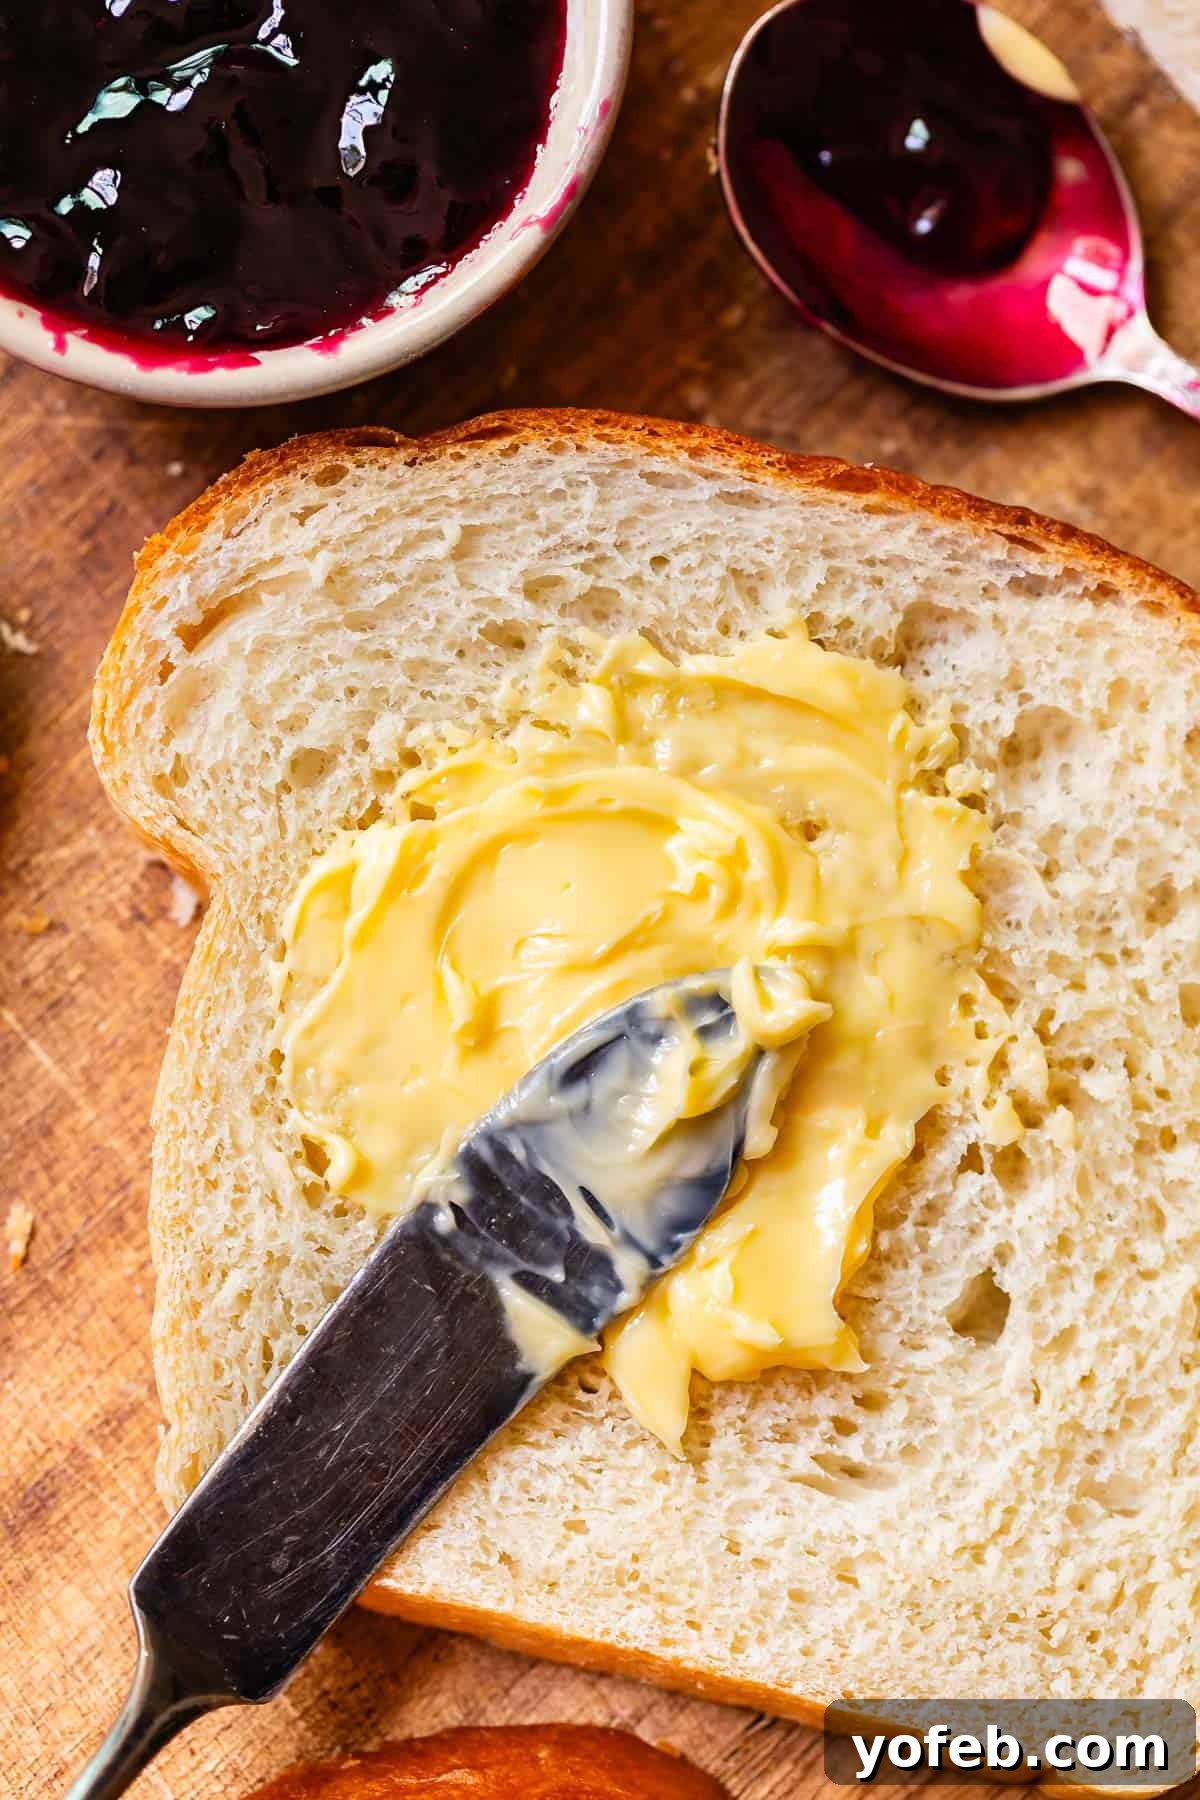
Table of Contents
- The Best Homemade White Bread of All Time
- Essential Ingredients for Homemade White Bread
- How to Make the Best White Bread: A Step-by-Step Guide
- Elevating Your Bread: Making This Recipe Even Better
- The Science of Flavor: Why Dough Needs to Rise
- Exploring Different Dough Rising Methods
- Creative Ways to Enjoy Your Homemade White Bread
- Storing Homemade Bread for Maximum Freshness
- Freezing White Bread: A Smart Storage Solution
- Doubling This Easy Bread Recipe: What You Need to Know
- Halving This White Bread Recipe for a Single Loaf
- More Easy Bread Recipes to Expand Your Baking Skills
- Easy Homemade White Bread Recipe
Life has a funny way of speeding up, doesn’t it? One moment you’re enjoying the last days of summer, and the next, the “ber” months are upon us, bringing with them a whirlwind of activities and holidays. It feels like just yesterday I was planning my fall projects, and now Halloween is practically around the corner! This rapid passage of time often leaves us feeling overwhelmed, especially when it comes to finding time for wholesome, homemade cooking.
That’s precisely why I’m so excited to share this extraordinary homemade white bread recipe with you. It’s a game-changer for anyone who loves the comfort and taste of fresh bread but doesn’t have hours to spare. Whether you’re navigating the back-to-school rush or simply craving something warm and delicious, this recipe fits perfectly into a busy schedule.
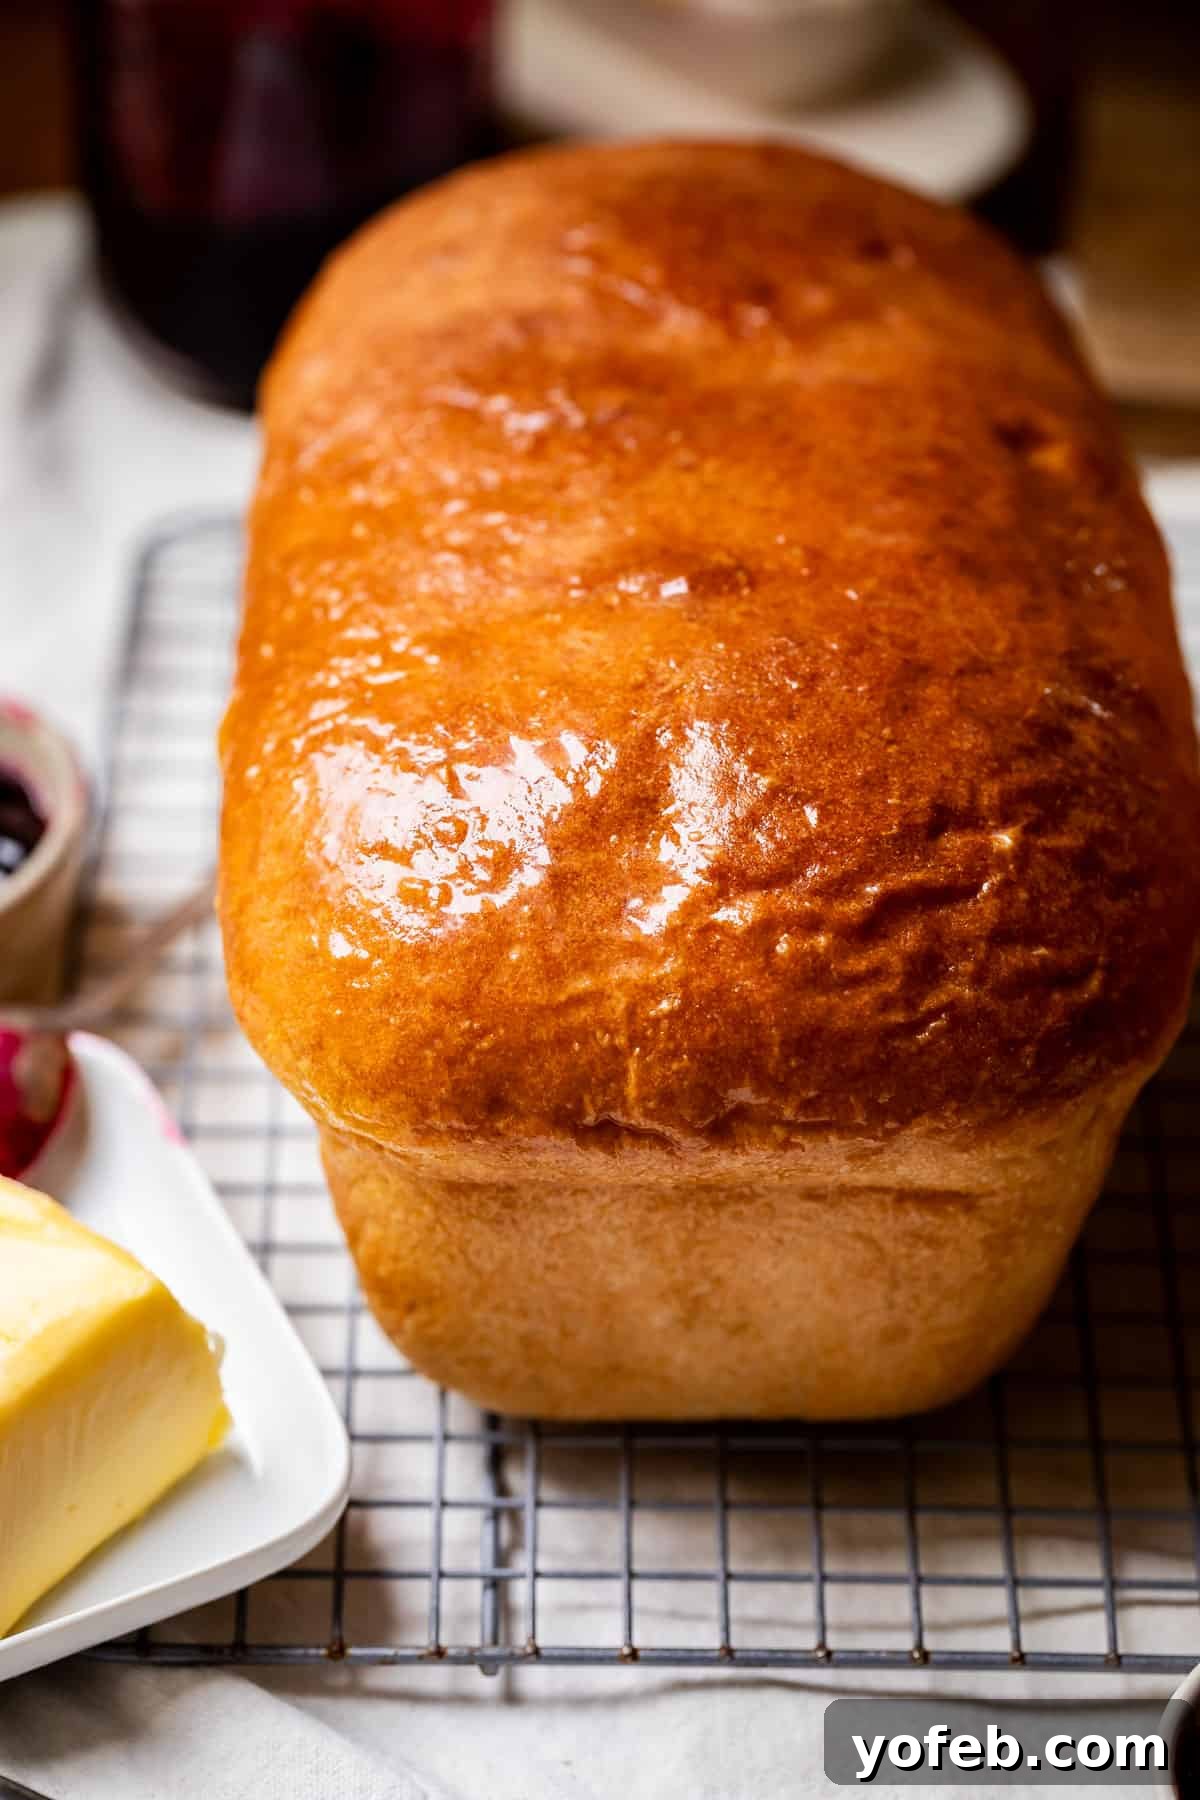
The beauty of homemade bread extends beyond just its incredible taste. It’s about the warmth it brings to your kitchen, the comforting aroma that fills your home, and the simple joy of creating something truly special from scratch. This white bread is ideal for making the most amazing peanut butter and jelly sandwiches you’ve ever tasted, or for transforming into the perfect slice of buttered toast – a simple pleasure that never gets old.
I recently had the pleasure of making this bread with a group of young women from my church, and their enthusiasm for the beautifully rising dough was infectious. It was a wonderful experience, culminating in us donating some of the loaves for our Sunday sacrament. It’s moments like these that remind me of the power of food to bring people together and create lasting memories.
The process of baking can be both therapeutic and rewarding. Seeing the dough transform, rise, and bake into a golden-brown loaf is a simple magic that never ceases to amaze me. This recipe, in particular, has become a favorite not just for its speed, but for the consistent, delicious results it yields every single time.

From lively conversations with my daughter Charlotte about her tween years to sharing a funny story about our church’s sacrament bread (resulting in gloriously large pieces!), this recipe is intertwined with cherished memories. It’s a reminder that cooking is more than just sustenance; it’s an act of love, community, and joy. Now, let’s get into the details of this truly exceptional recipe.
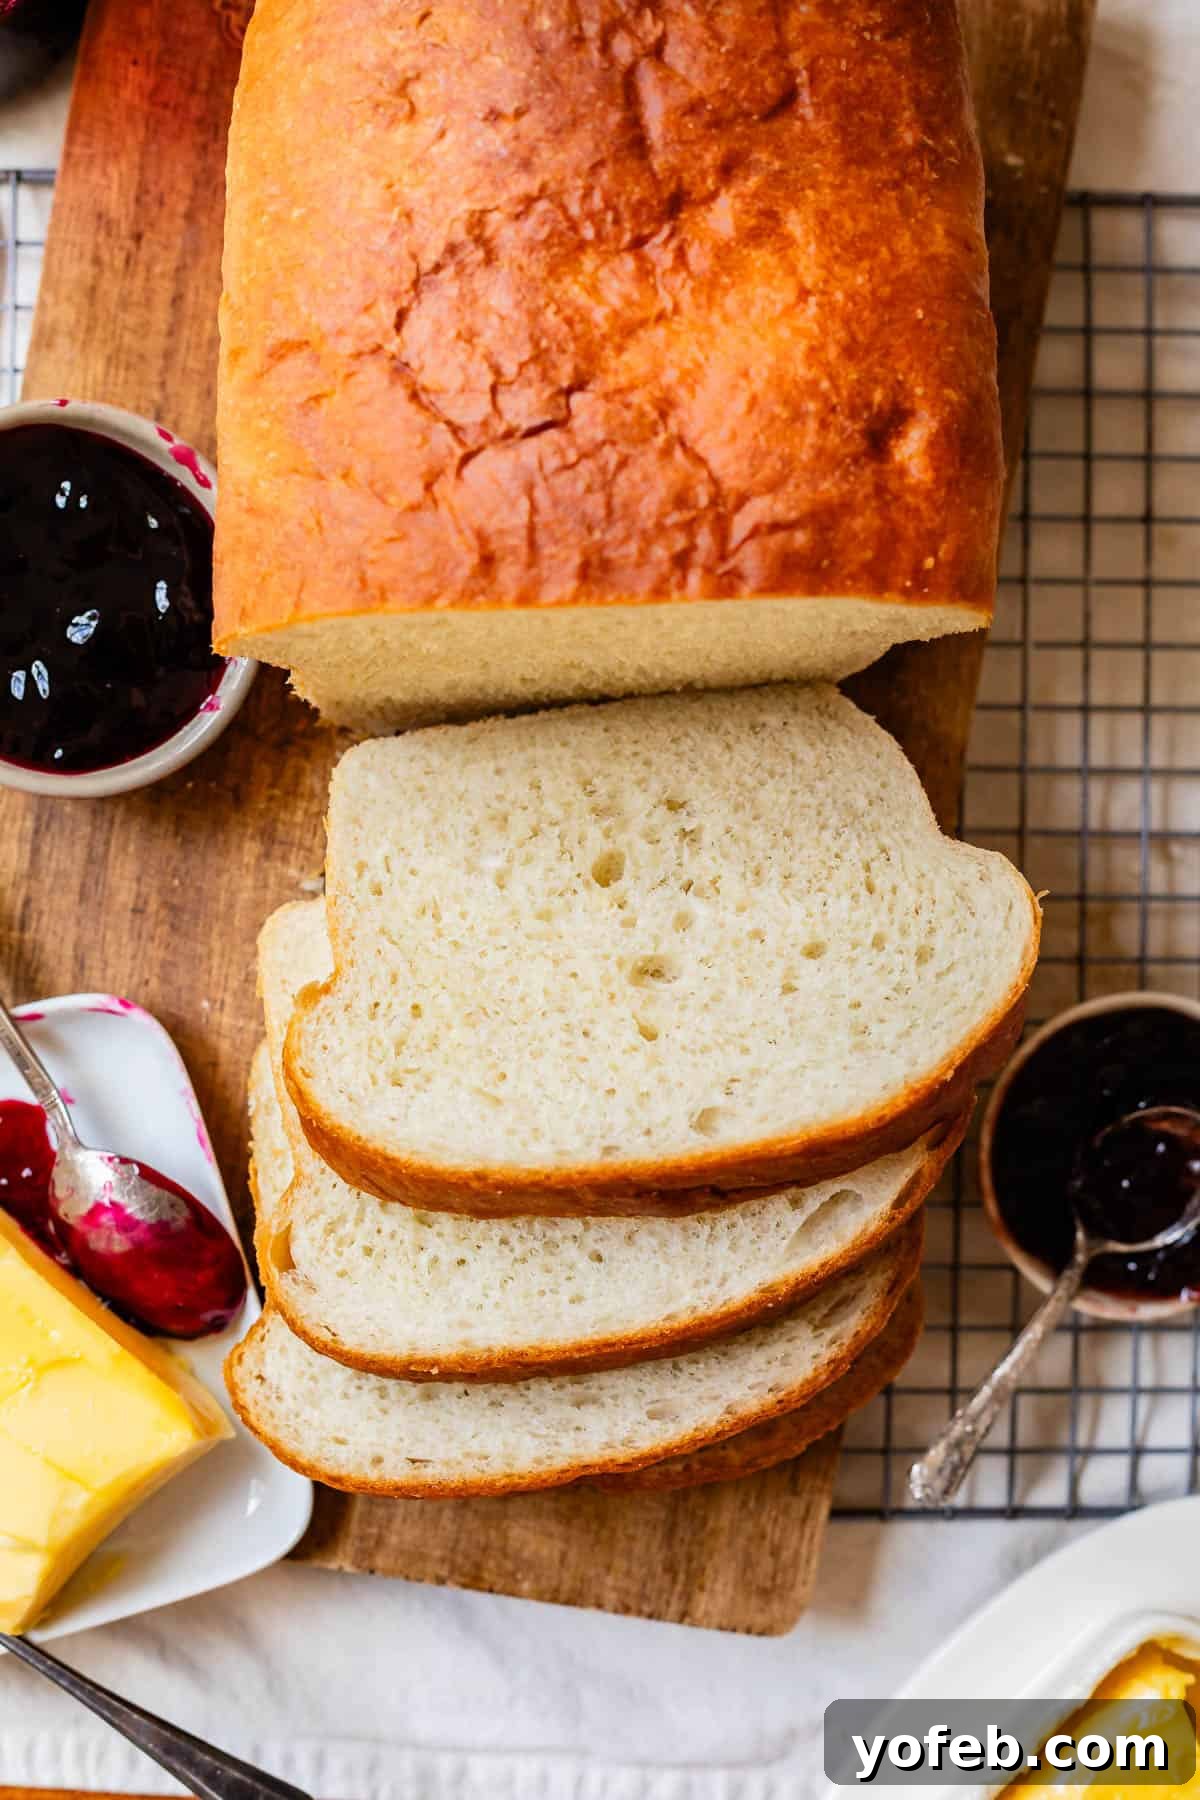
The Best Homemade White Bread of All Time
There are countless recipes for homemade white bread, and many share similar core ingredients: flour, water, yeast, salt, sugar, and some form of fat. However, many beginner recipes often lead to common frustrations: loaves that are tough, don’t rise adequately, or lack robust flavor.
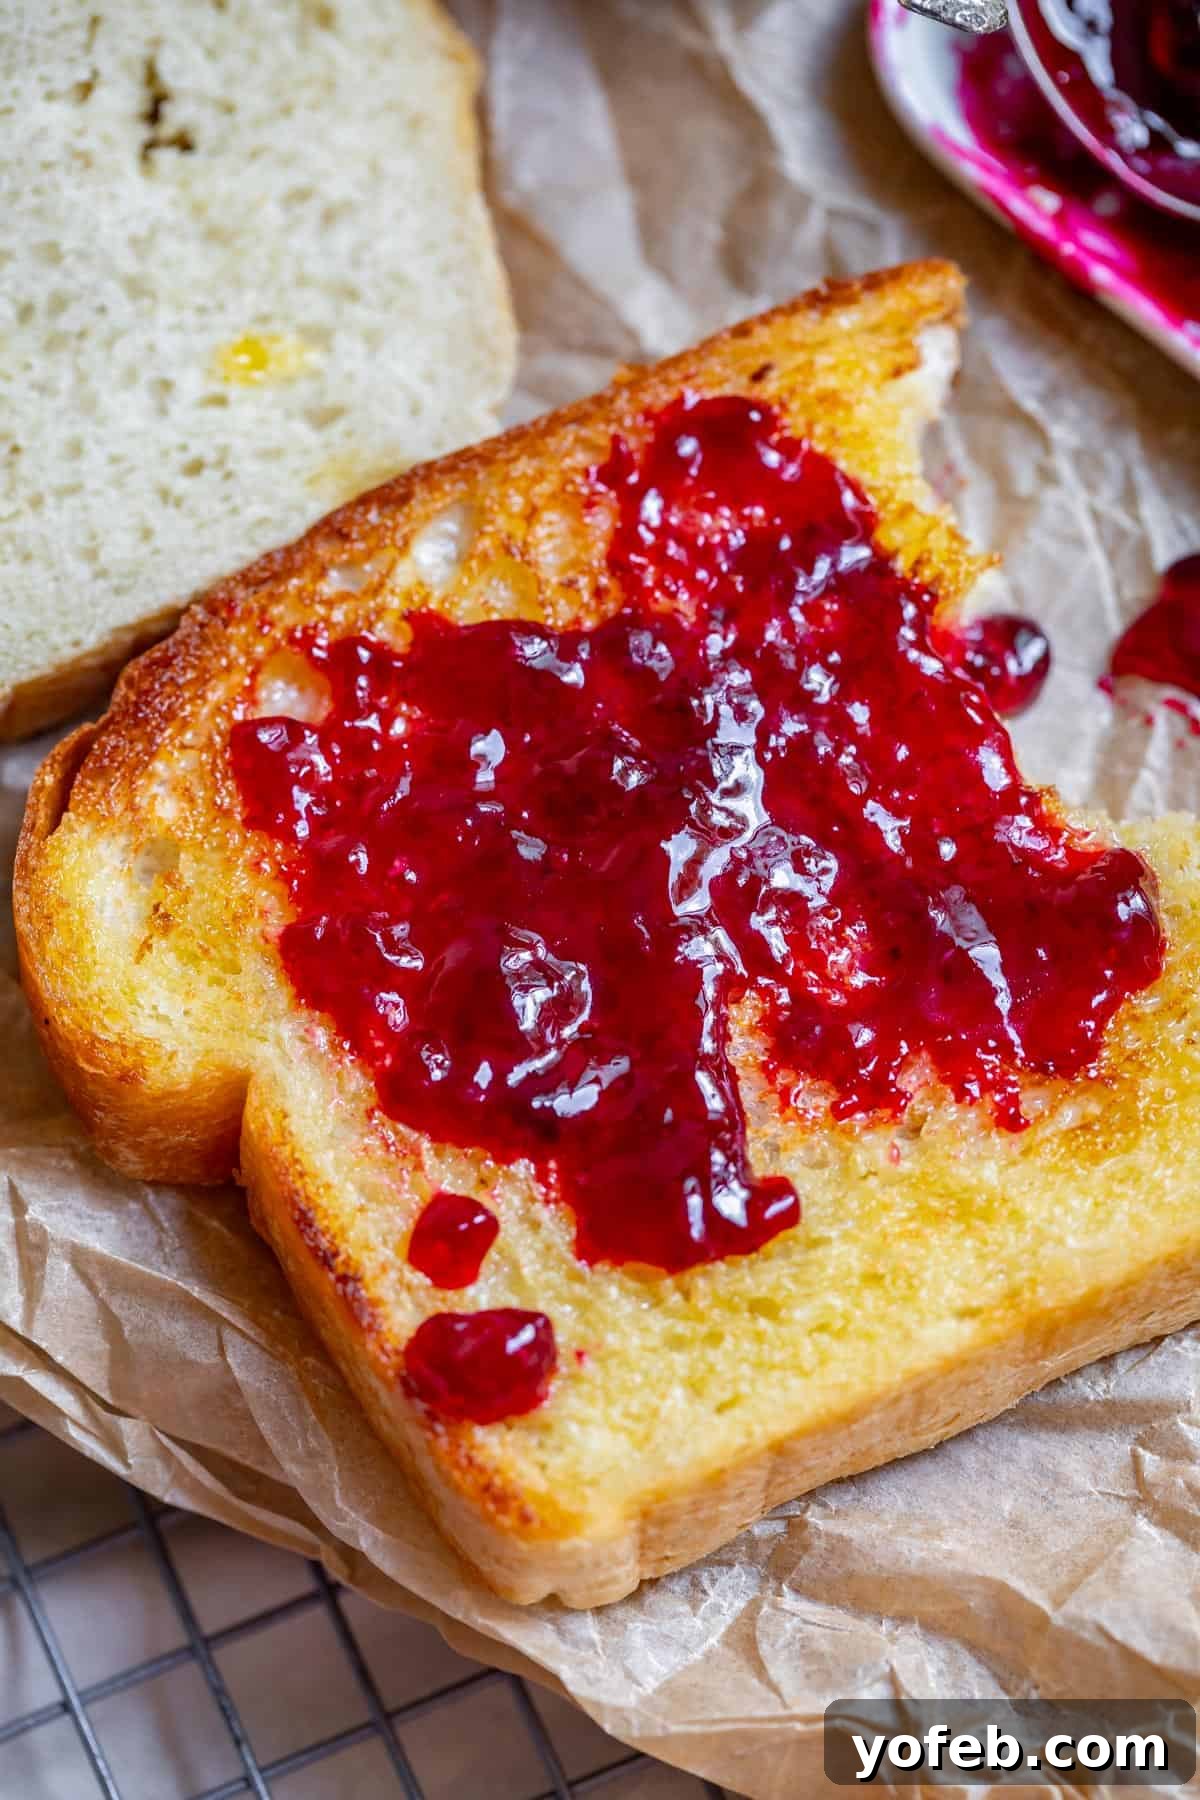
This recipe is different! It incorporates a few key secrets that ensure an exceptionally fluffy bread with an ideal texture and incredible depth of flavor. The inclusion of vital wheat gluten is a game-changer; it dramatically improves the bread’s elasticity, resulting in a superior crumb structure and a delightful chewiness. The finished product is wonderfully soft and tender, making it perfect for slicing into sandwiches or enjoying on its own. The dough itself is a dream to work with – smooth, pliable, and responsive.
But here’s the most exciting part: this finished bread can be on your table in approximately one hour (or perhaps 70 minutes, depending on your kitchen’s warmth). Yes, you read that correctly – only one rise is required for this incredibly delicious bread. It’s a marvel of baking efficiency!
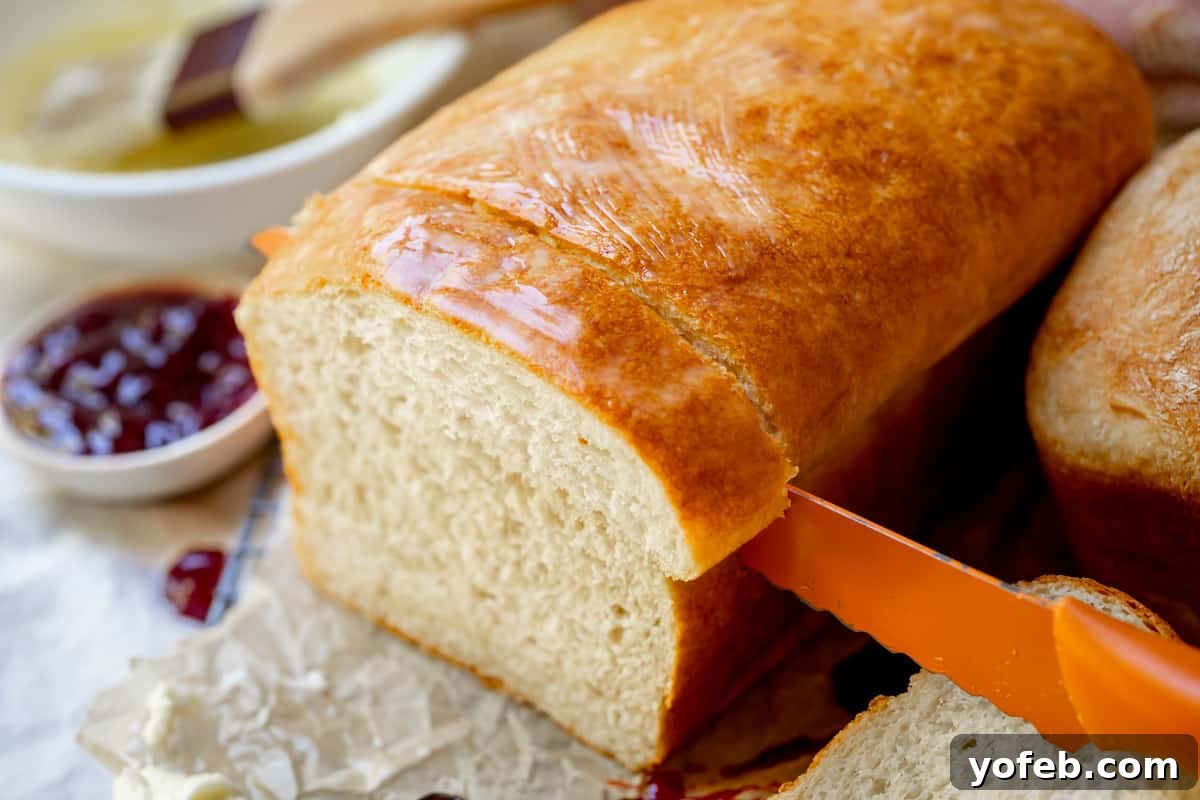
And did I mention how incredibly high it rises? The height and airy structure are truly amazing, especially considering we’re skipping the traditional long proofing periods. These impressive results are thanks to a couple of special ingredients that work like magic, accelerating the rise and delivering a beautifully light loaf in record time.
Essential Ingredients for Homemade White Bread
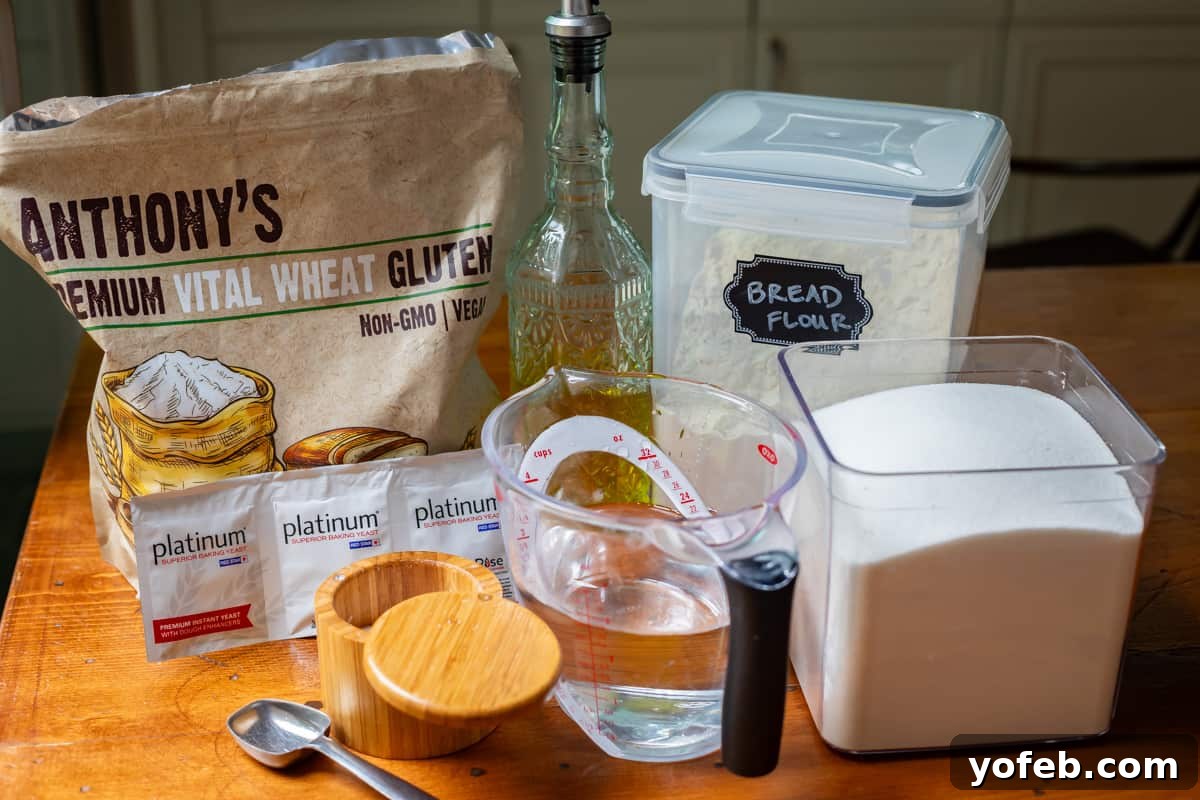
Let’s dive into the core components that make this bread truly special. Understanding each ingredient’s role will not only improve your baking but also deepen your appreciation for this simple yet profound craft.
- Instant Yeast: This is our rapid-action hero! Instant yeast activates and bubbles much faster than traditional active dry yeast, making it perfect for quick recipes like this one. While active dry yeast will also work, be prepared for a slightly longer rise time. The quicker activation means less waiting, a boon for busy bakers.
- Bread Flour: Not all flours are created equal, and bread flour is specifically formulated for baking superior bread. It boasts a higher protein content compared to all-purpose flour. This protein is crucial for gluten development. Gluten forms a resilient network when flour and water are kneaded, trapping the carbon dioxide gases produced by the yeast. This robust structure is what allows your bread to rise impressively and maintain its shape. Without sufficient gluten, the gases would escape, leading to a dense, flat loaf.
- Vital Wheat Gluten: This is a secret weapon for an elevated rise and texture. Vital wheat gluten is essentially concentrated wheat protein. By adding a small amount to your dough, you significantly enhance its ability to form that crucial gluten framework, often referred to as dough structure. This additional gluten provides ample space for the yeast to work its magic, resulting in a remarkably high-rising, airy, and light loaf. It’s particularly beneficial in this accelerated one-hour recipe, compensating for the shorter rise time. Beyond structure, vital wheat gluten also boosts the bread’s flavor, adding a subtle, satisfying depth. I find it indispensable for consistently perfect homemade bread.
- Generous Salt: I exclusively use Diamond Crystal kosher salt for its clean flavor and perfect salinity. This recipe, yielding two loaves, calls for a full 7 teaspoons of kosher salt. While this might seem like a lot, I assure you it’s the ideal amount to bring out the rich flavors of the bread. Under-salted bread is a common pitfall; no matter how perfectly it rises or how golden its crust, a lack of salt will leave it tasting bland and uninspired, much like cardboard. It’s truly a foundational ingredient for flavor.
- Warm Water: The perfect temperature for warm water is crucial. It acts as the catalyst, activating the yeast and kick-starting the fermentation process. Water that is too hot can kill the yeast, while water that is too cold will inhibit its activity. Aim for a temperature around 105-110°F (40-43°C), which feels comfortably warm, like a baby’s bath.
- Oil: Any neutral oil, such as olive oil or vegetable oil, provides essential fat to the dough. This fat contributes to the bread’s tender crumb, helps keep it moist, and adds a subtle richness to the flavor profile. It also aids in the kneading process, making the dough more pliable.
- Sugar: Granulated sugar plays a dual role in this recipe. Firstly, it feeds the yeast, providing the necessary energy for it to produce carbon dioxide and make the bread rise. Secondly, it contributes to the bread’s delightful flavor and helps achieve that beautiful golden-brown crust. I prefer 1/3 cup for a slightly sweet loaf, but you can reduce it to 1/4 cup if you prefer a less sweet profile.
How to Make the Best White Bread: A Step-by-Step Guide
This recipe is designed for maximum ease and efficiency. You’ll be surprised how quickly you can bring this dough together – about 10 minutes, tops. It’s largely a “dump and mix” process, making it incredibly accessible for all skill levels.
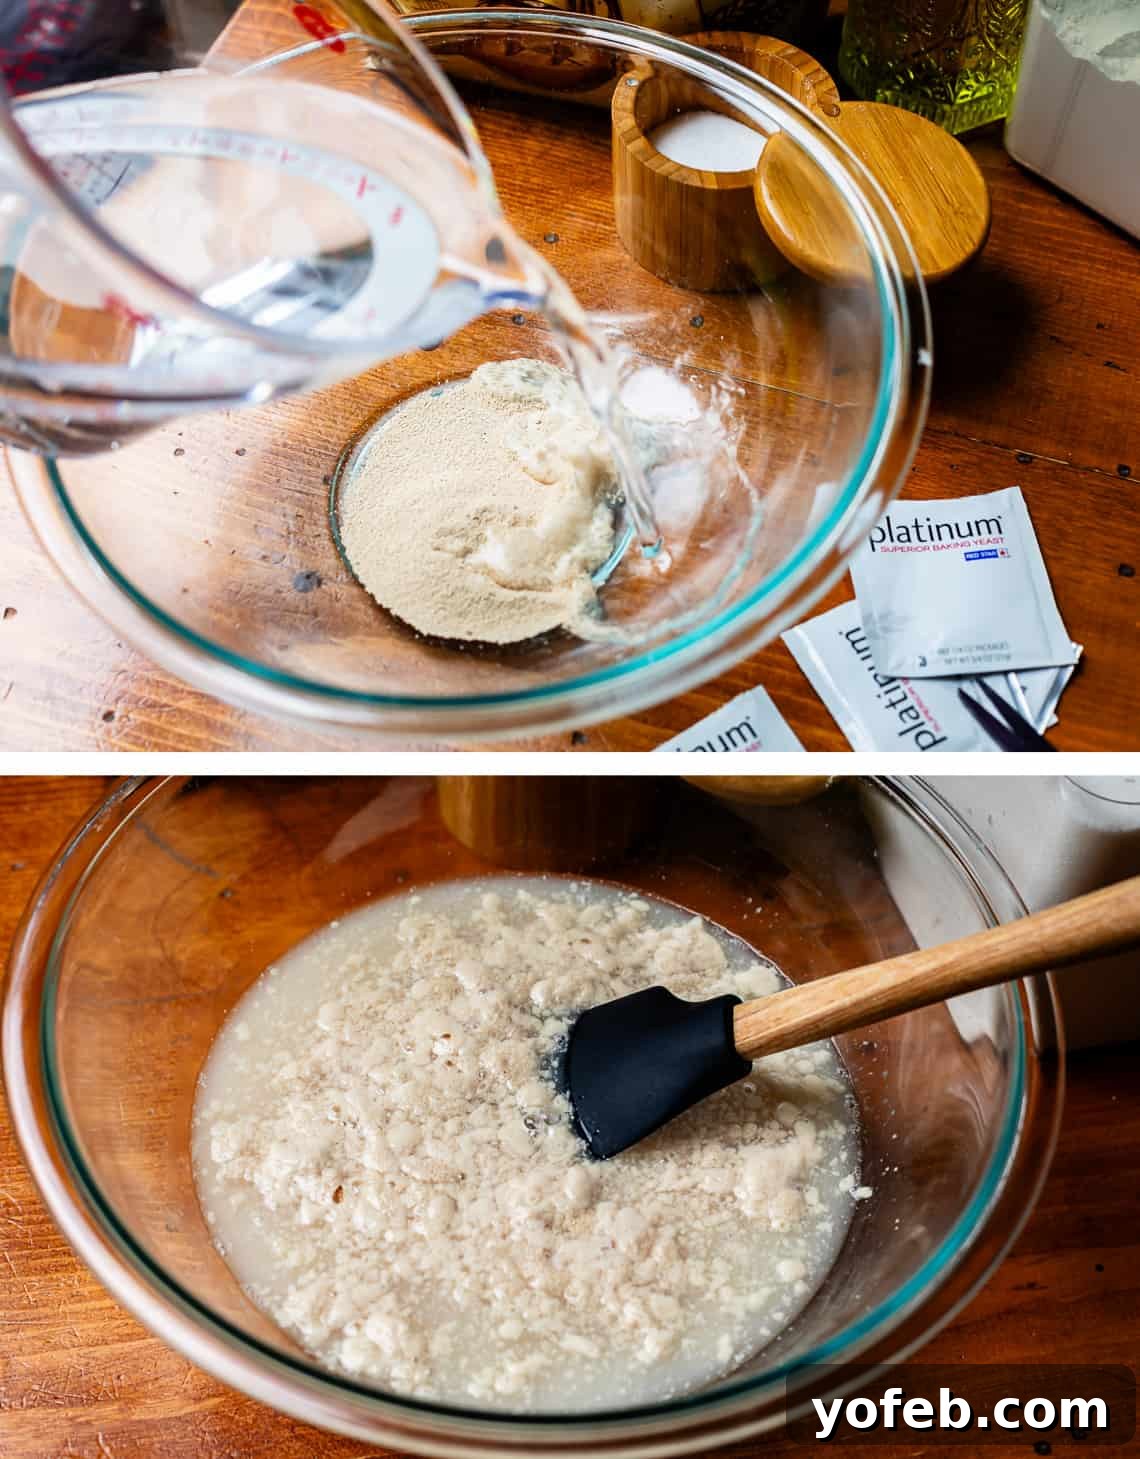
Begin by combining your warm water, sugar, and yeast in a large bowl. If you have a stand mixer, this is the perfect time to use it. I highly recommend Red Star Platinum instant yeast; it activates incredibly fast and contains dough enhancers that contribute to an exceptionally nice loaf. However, any brand of instant yeast will yield excellent results.
In my recipe testing, I found a noticeable difference between instant and active dry yeast. Instant yeast (regardless of brand) proofs and rises quicker, making it the preferred choice when time is a factor. Both types, however, will ultimately produce delicious bread.
If you’re new to bread-making, take a moment to ensure your yeast is active. After adding it to the warm water and sugar, you should see small bubbles or a slight foam appearing within a minute or two. This indicates the yeast is alive and ready to work. If the mixture remains flat and doesn’t show any activity, your water may have been too hot, unfortunately killing the yeast. In that case, it’s best to start over with fresh yeast and properly warmed water.
Don’t fret if you only have yeast packets; each typically contains 2 1/4 teaspoons, but a quick measurement ensures accuracy before adding.
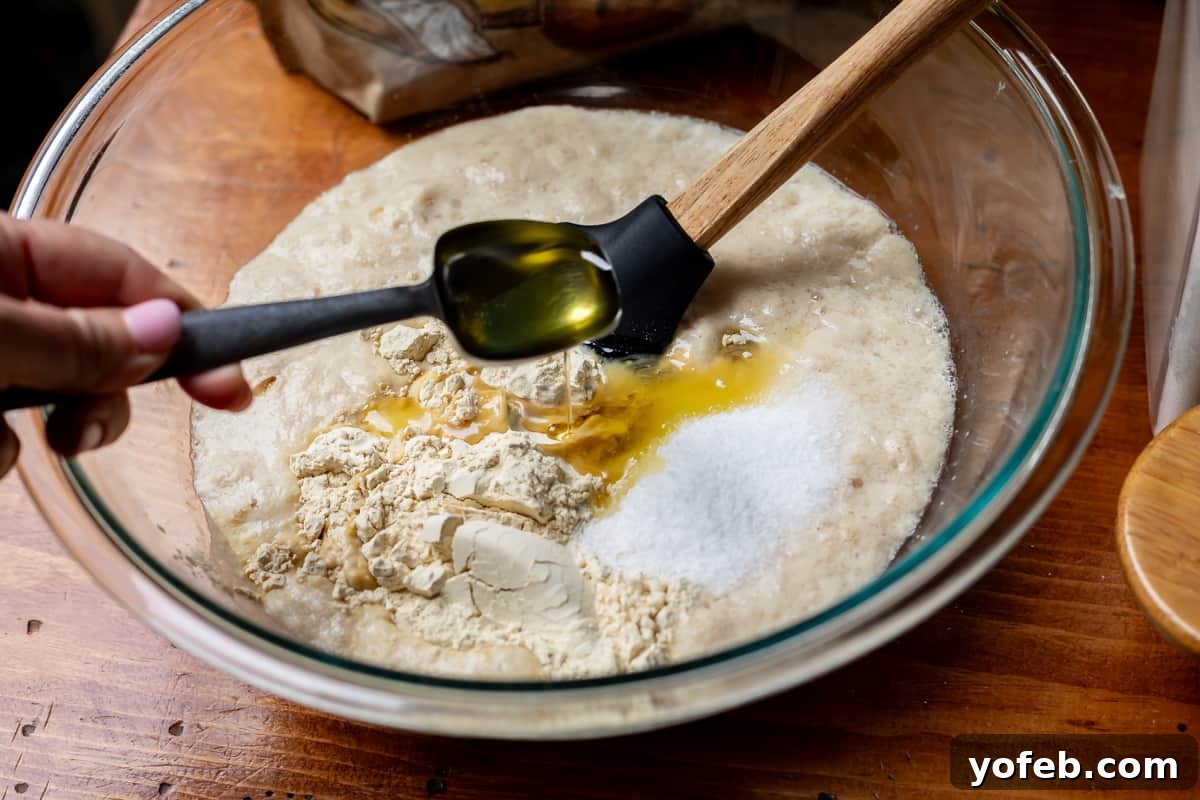
Next, incorporate the vital wheat gluten, olive oil, and kosher salt. Notice the substantial amount of salt – 7 teaspoons of Diamond Crystal kosher salt, to be precise. Please don’t be intimidated by this quantity! This bread contains just over 1 teaspoon of kosher salt per cup of flour, which is perfectly balanced and yields a gloriously flavorful loaf. Many people are overly cautious with salt, but I promise you, this amount is not excessive for such a large recipe and will prevent your bread from being bland. (Important: If you’re using a different brand, like Morton’s coarse kosher salt or table salt, adjust the amount as their salinity can differ significantly. For example, use about 5 teaspoons of Morton’s coarse kosher salt or 4 teaspoons of fine table salt.)
The final ingredient to add is bread flour. Proper flour measurement is key to achieving the desired texture:
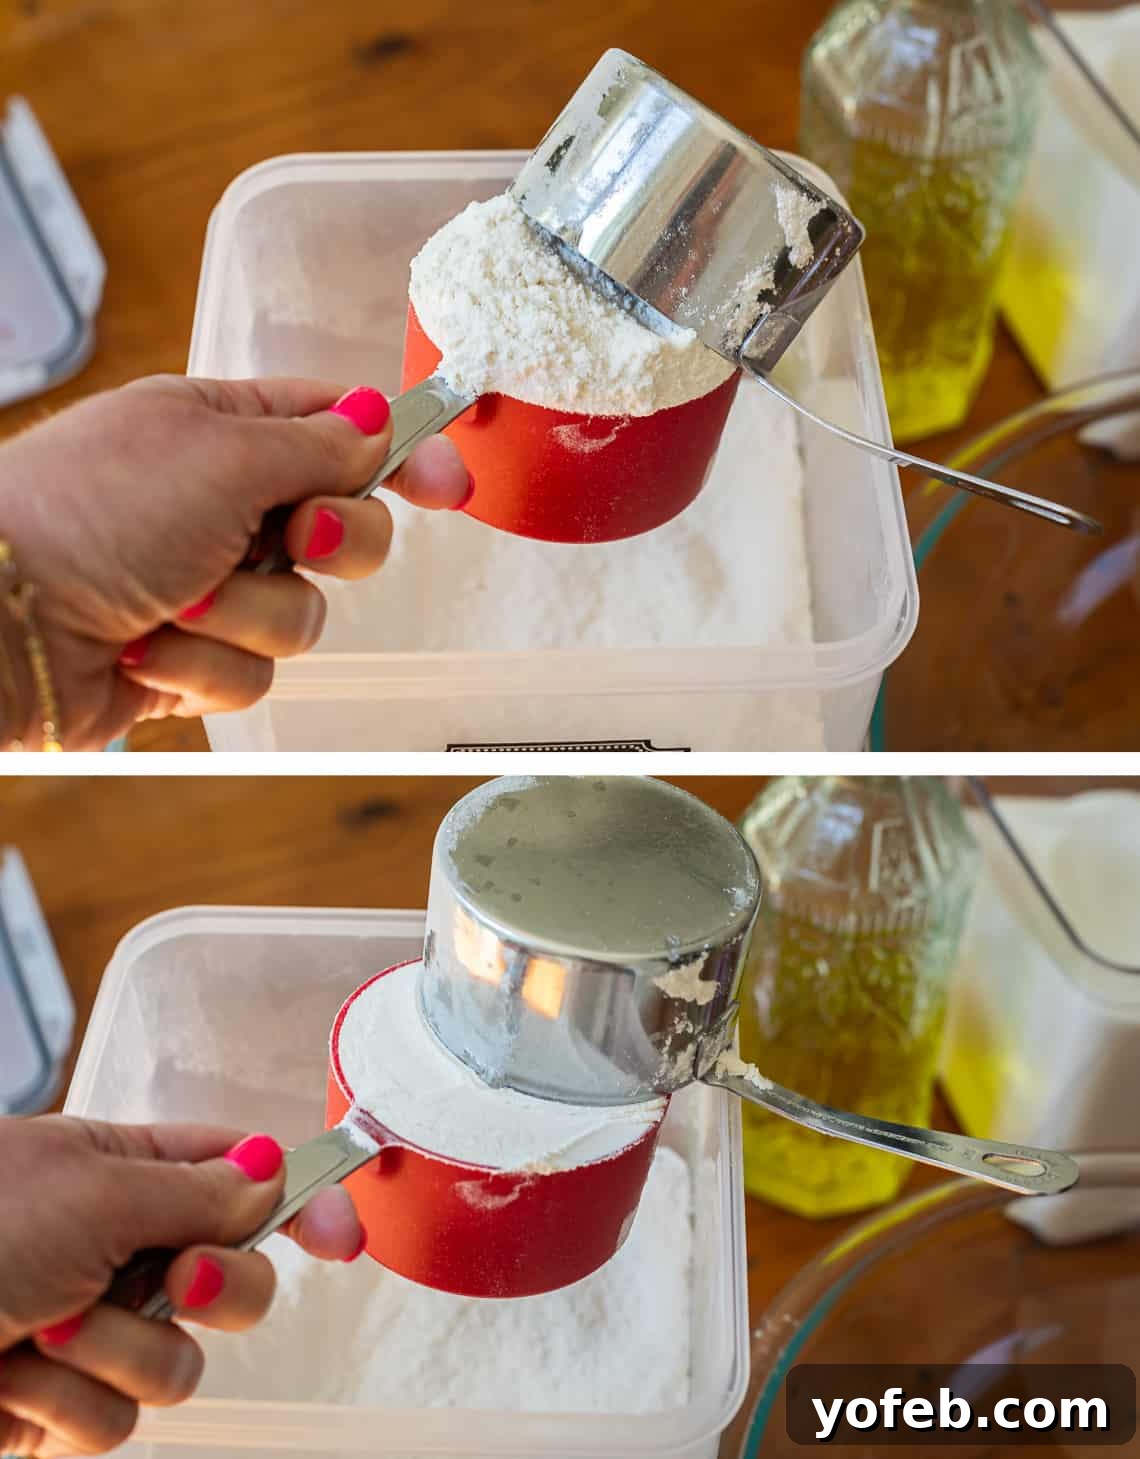
To measure flour accurately, use a spoon or another cup to gently scoop the flour into your measuring cup, then level off the top with a straight edge (like the back of a knife). This method prevents you from compacting the flour, which would result in too much flour and a dense, heavy bread. While weighing is the most accurate method, this spoon-and-level approach is a fantastic alternative for consistent results.
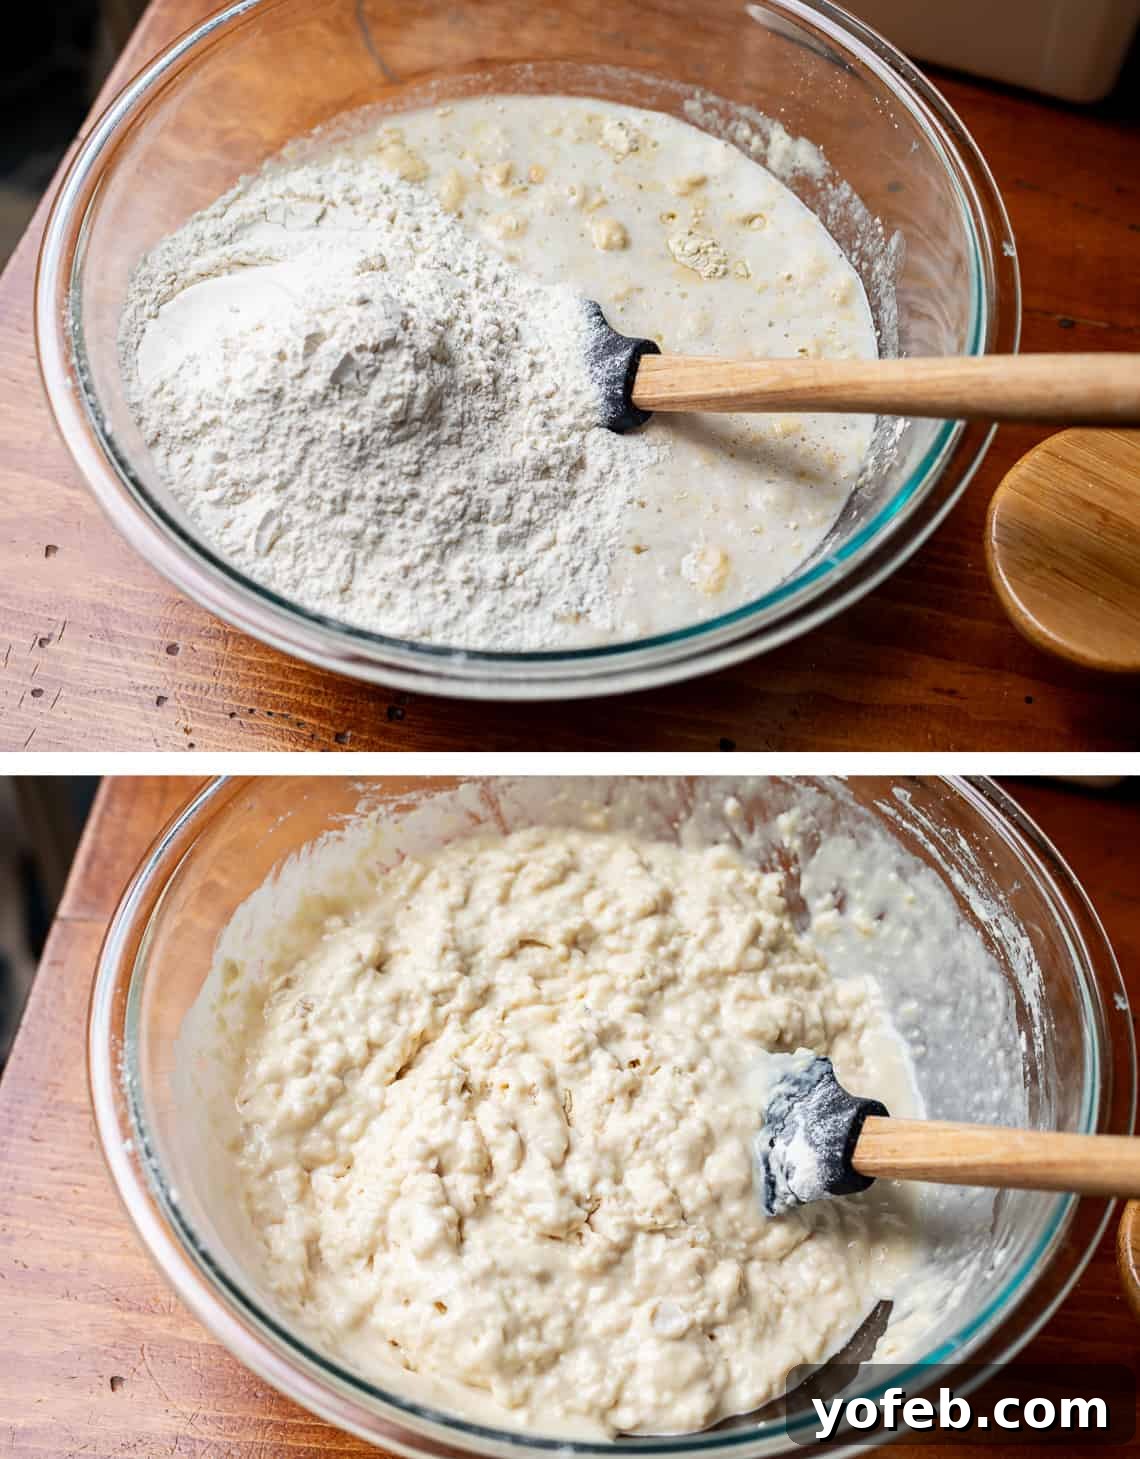
If you started in a separate bowl to show the yeast activation, now is the time to transfer the mixture to your stand mixer bowl (if using one). Start mixing everything together with the dough hook on medium-low speed until the flour is mostly incorporated.
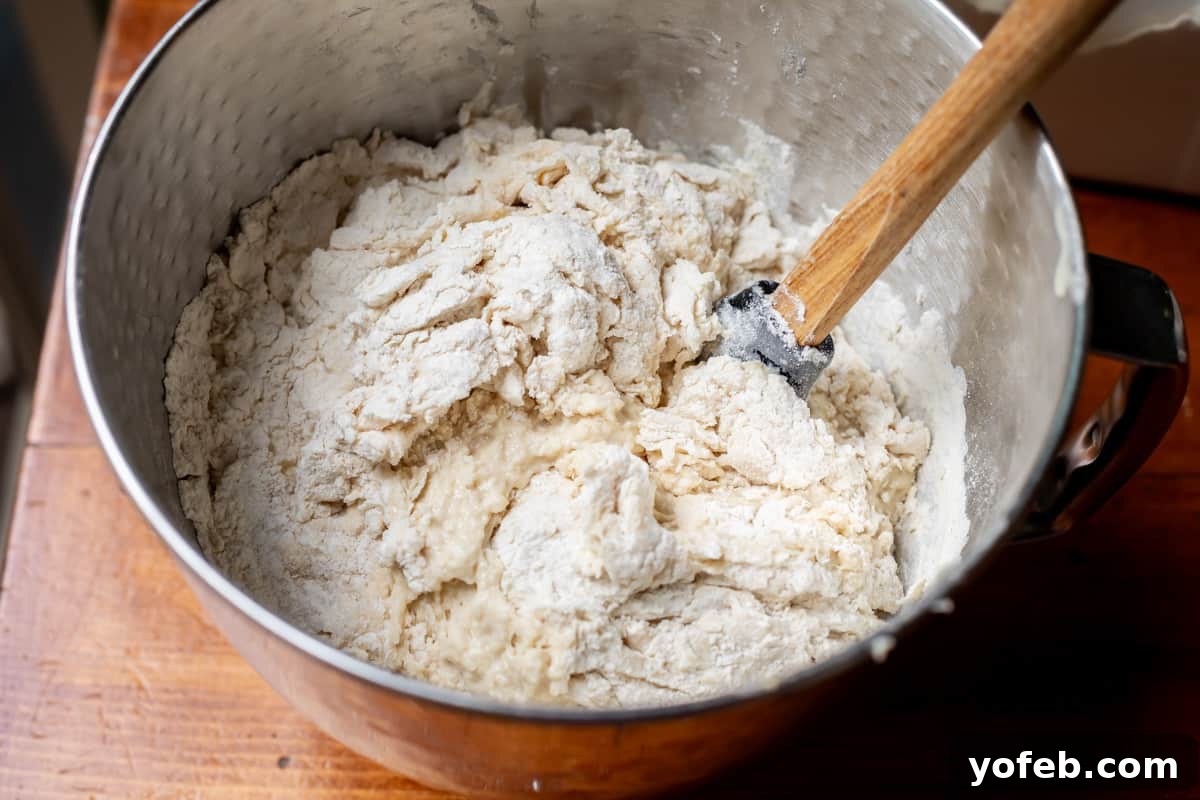
Once the dough begins to come together, switch to your dough hook for mechanical kneading, or if kneading by hand, set your spoon aside, lightly flour your hands, and prepare to get hands-on!
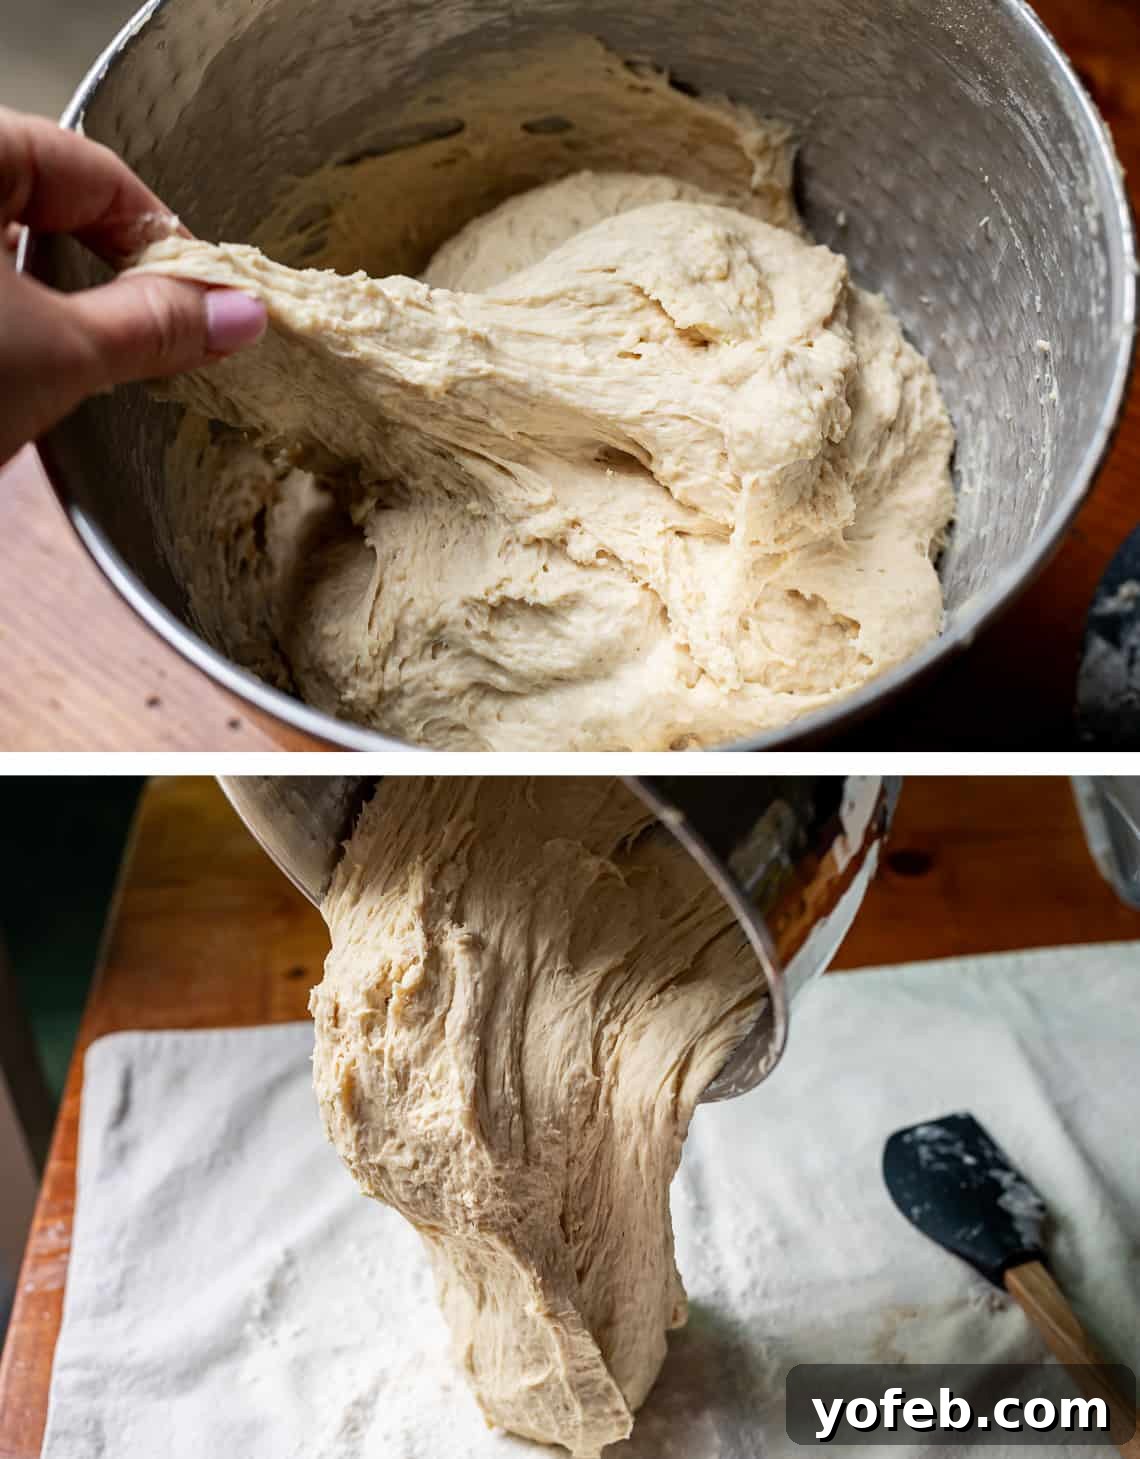
After about 5-6 minutes of kneading in a stand mixer, your dough should be smooth, elastic, and slightly tacky. It’s a delicate balance: too much flour makes for a tough, heavy bread, while too little can compromise its structure and rise. Aim for a dough that is not quite forming a perfect ball in the mixer, but rather remains a bit sticky. When you gently press your finger into the dough, it should come away glossy but not with dough stuck to it. However, if you pinch it harder with two fingers, a small amount of dough will stick. This tackiness is a good sign for a soft, fluffy loaf. Scrape the dough onto a lightly floured or nonstick-sprayed surface and knead a few more times to form a cohesive ball. Then, using a serrated knife, divide the dough in half.
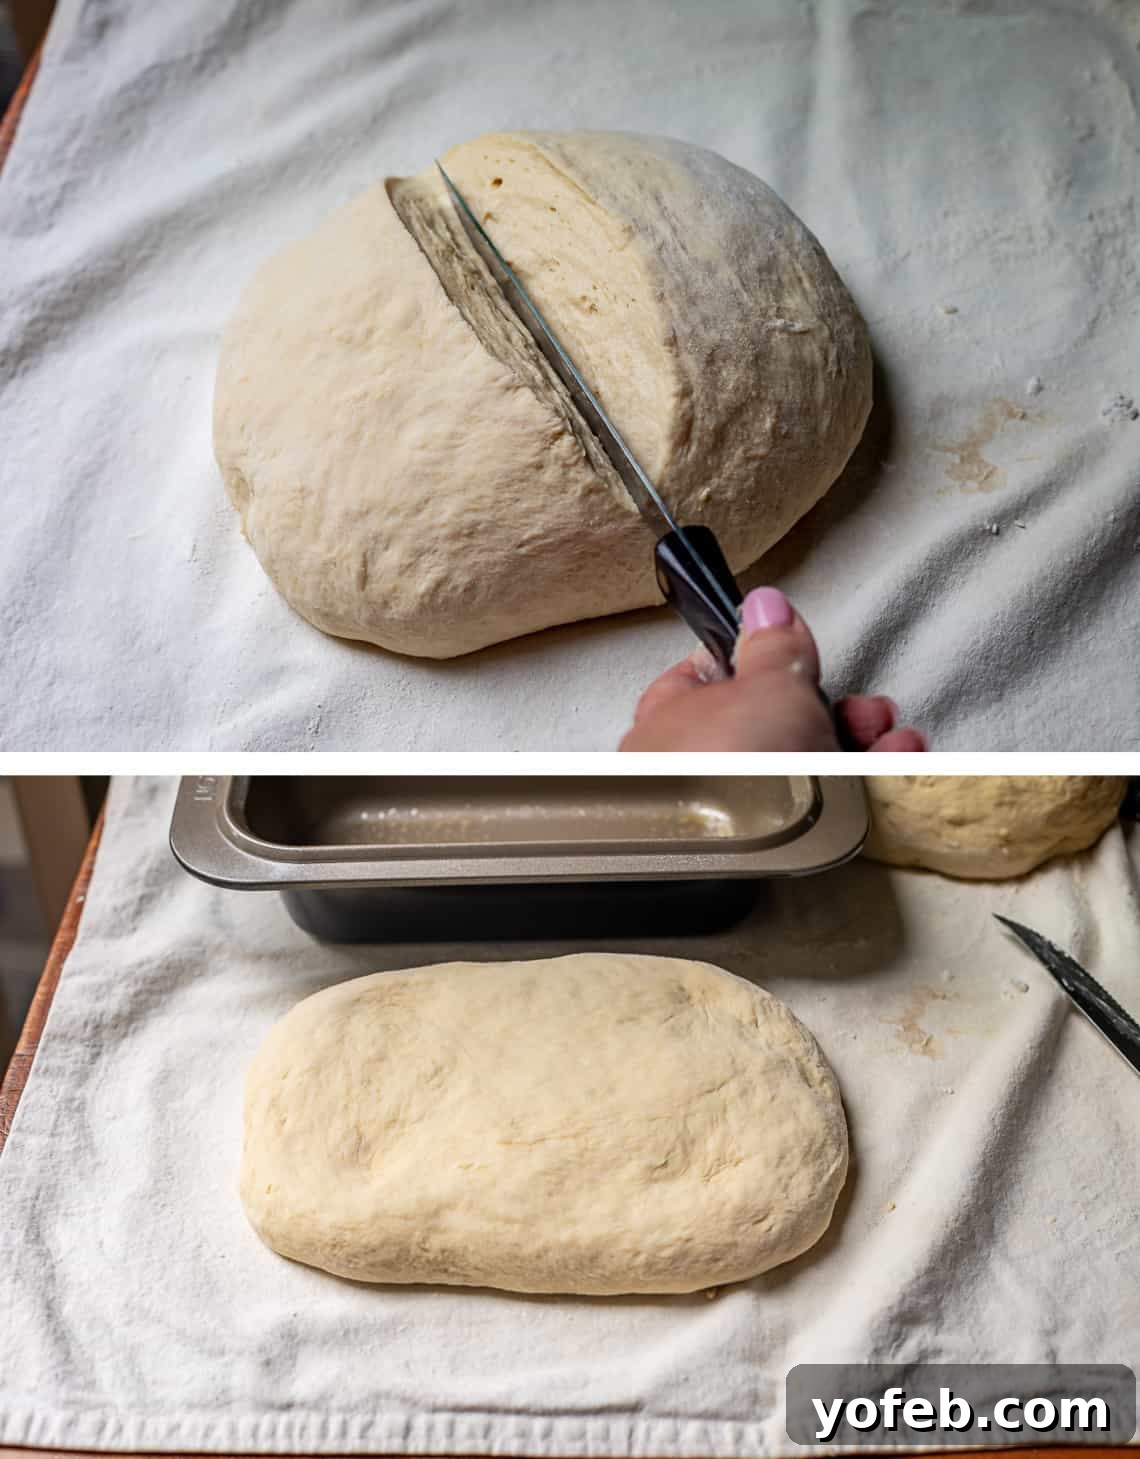
Using your hands, gently pat and shape one half of the dough into a rectangle roughly the size of your 9×5-inch loaf pan. Ensure the smoothest side of the dough is facing down. Then, starting from one of the long ends, tightly roll up the dough to form a log. Pinch the seam firmly to seal it, and tuck the ends slightly underneath before carefully placing the shaped loaf into a well-greased loaf pan.
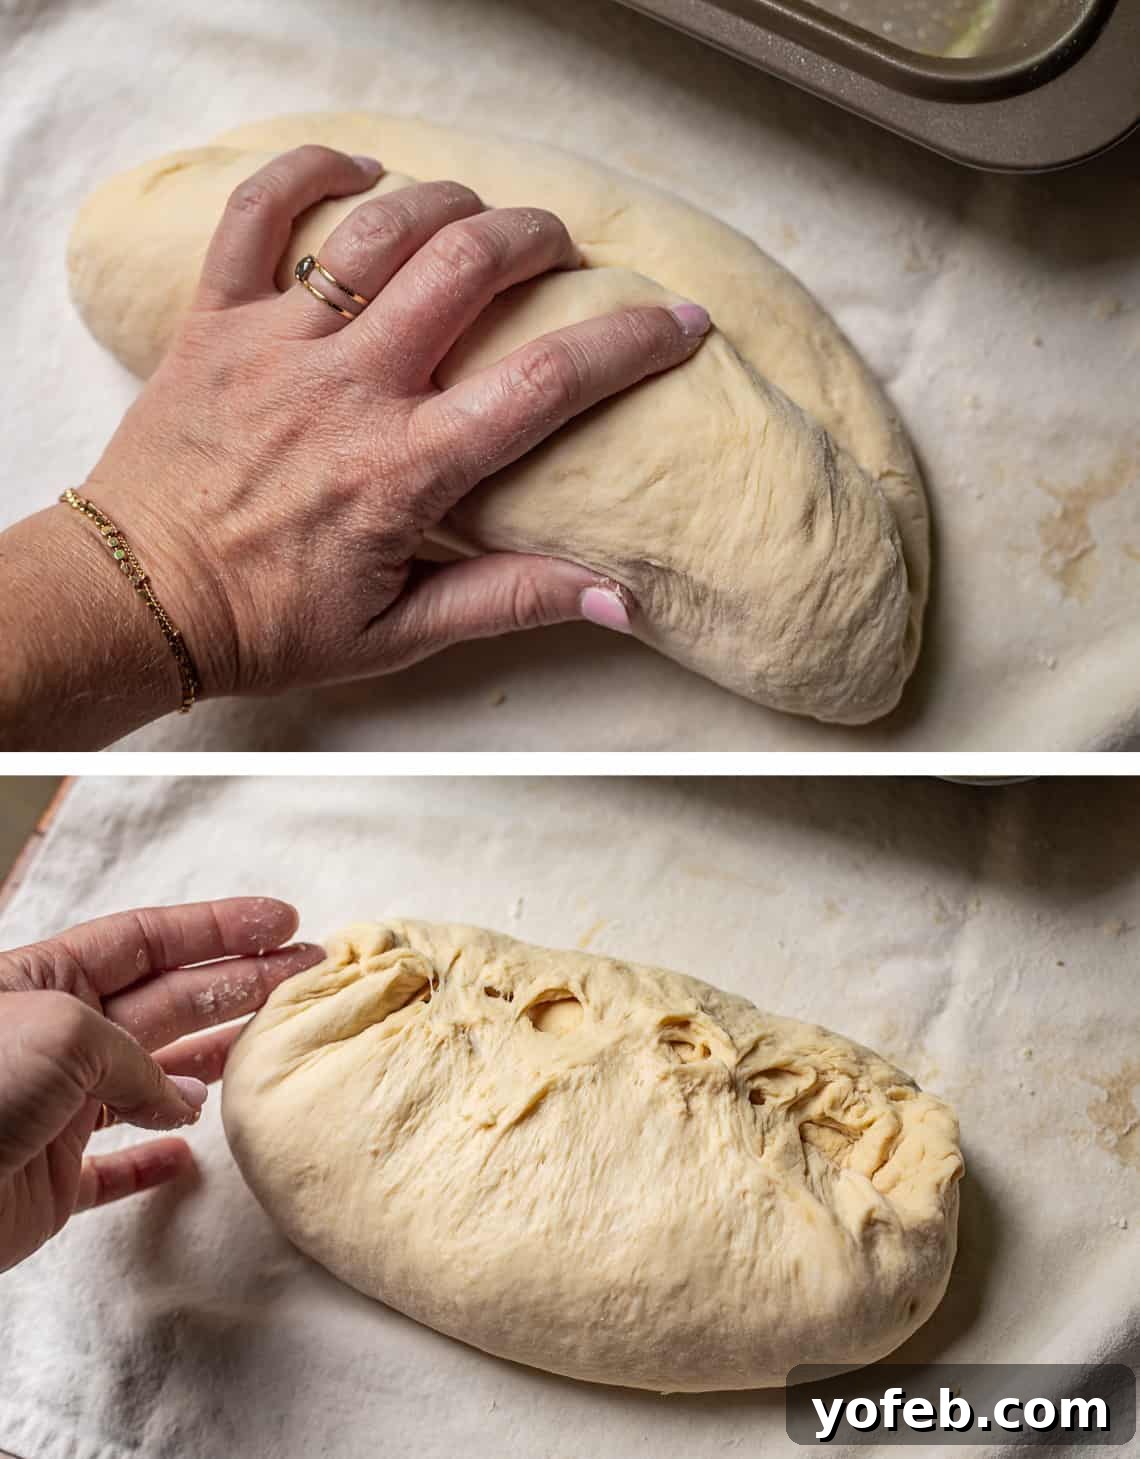
After placing the dough in the greased loaf pan, make sure the top surface is relatively smooth. Repeat this shaping process with the second half of the dough.
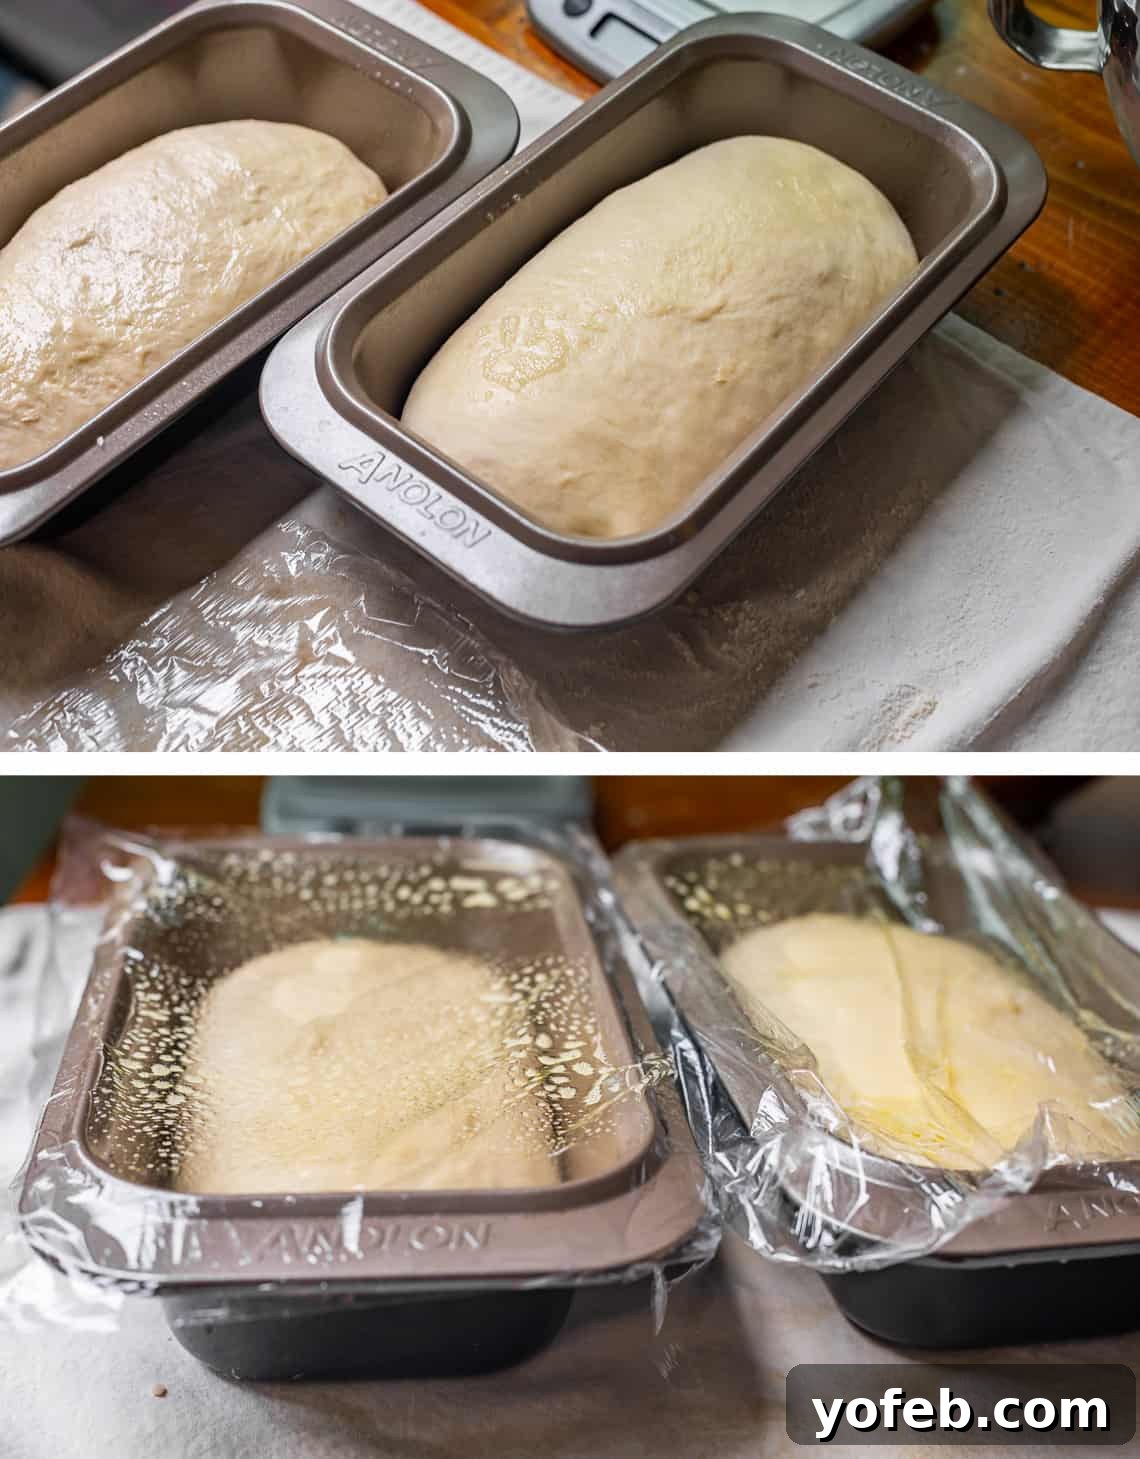
Now for the rise! Generously spray a piece of plastic wrap with nonstick spray and use it to cover your dough-filled pans. This step is critical: ungreased plastic wrap will undoubtedly stick to your beautifully risen dough, potentially tearing it and ruining its structure when removed. Learn from my past tears – spray that plastic generously!
To create the ideal environment for a quick rise, preheat your oven to 350°F for a mere 30 seconds, then turn it off. The goal is a warm, not hot, oven – you should be able to comfortably place your hand on the rack. Place your covered dough pans inside and let them rise for 15 minutes. After this initial warm rise, move the pans to a warm spot on your counter (like on top of the preheating oven for baking) and preheat your oven to 350°F. Allow the dough to continue rising for another 10-15 minutes, or until the tops have dramatically risen at least an inch above the pan edges, looking wonderfully puffy and domed.
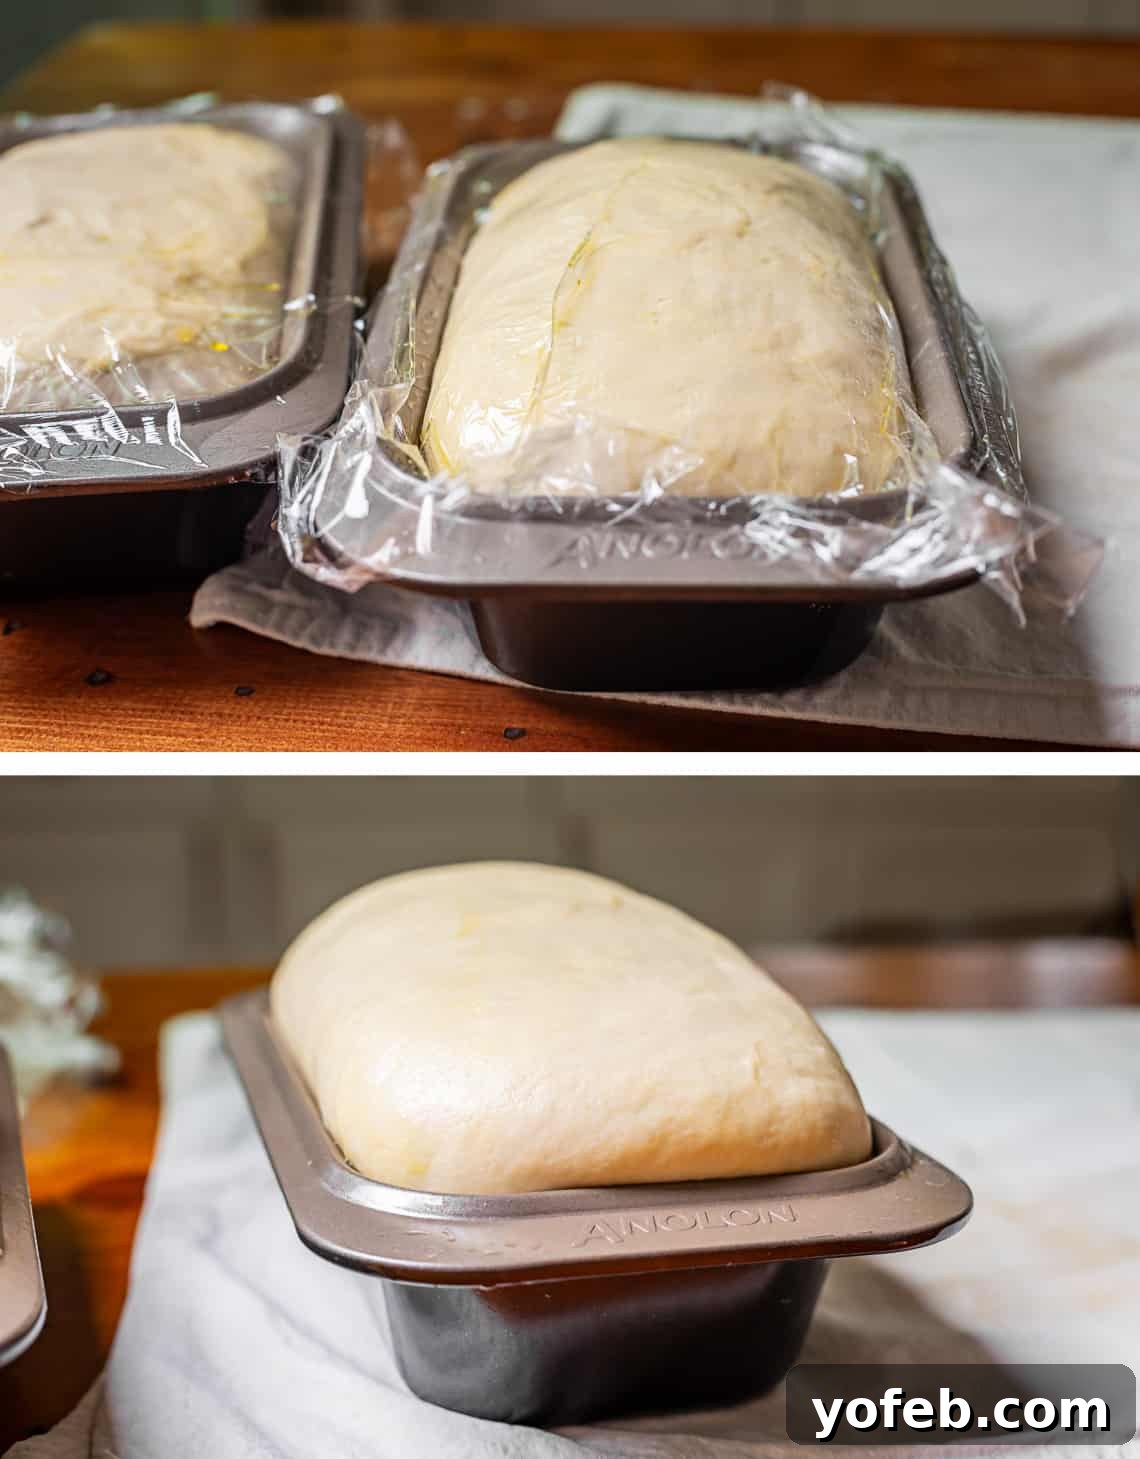
At high altitudes, dough tends to rise even faster, so keep a close eye on it. Over-risen dough can unfortunately deflate when it hits the oven, leading to a disappointing result. Be attentive to your dough’s progress!
Once perfectly risen, remove the plastic wrap and bake your loaves at 350°F for 25-30 minutes. You’ll know the bread is ready when the tops are beautifully golden brown, the sides begin to pull away from the pan, and the bottom and edges are nicely browned. For absolute certainty, use an instant-read thermometer; the internal temperature should register around 200°F (93°C).
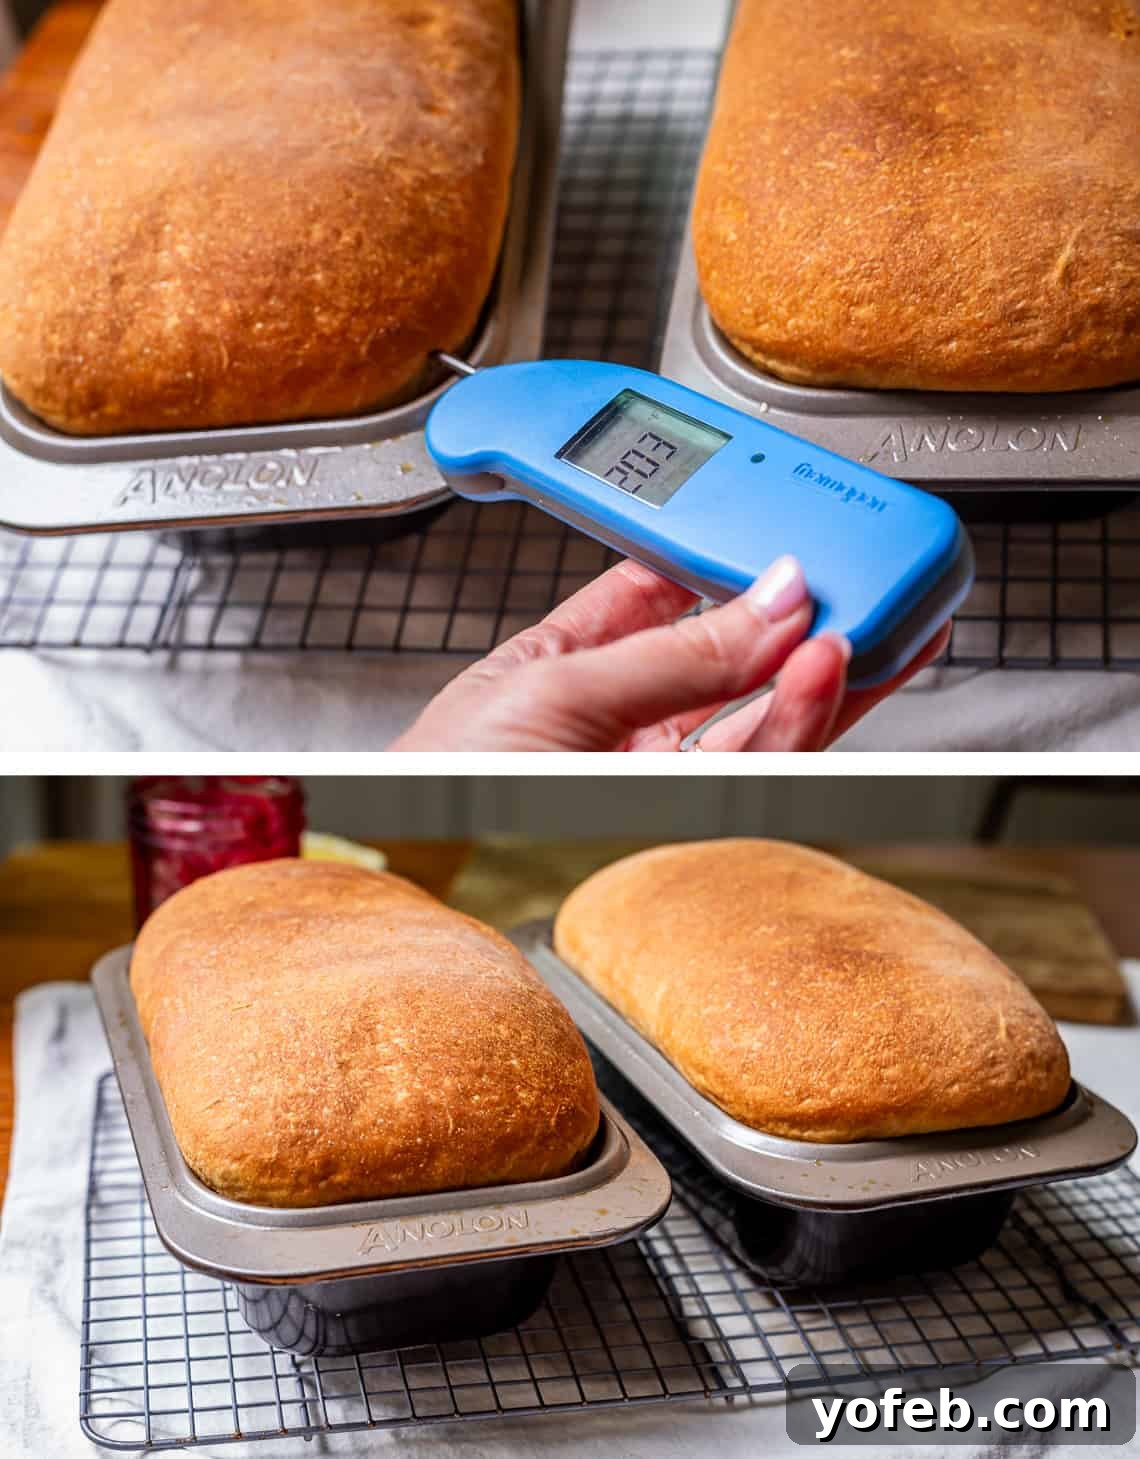
After baking, let the bread rest in the pans for just one minute before carefully inverting them onto a cooling rack. Immediately transferring the loaves helps prevent a soggy bottom and ensures even cooling. I recommend cooling your bread on its side; this technique helps the bread retain its impressive height, preventing gravity from compressing the beautiful rise we worked so hard to achieve.
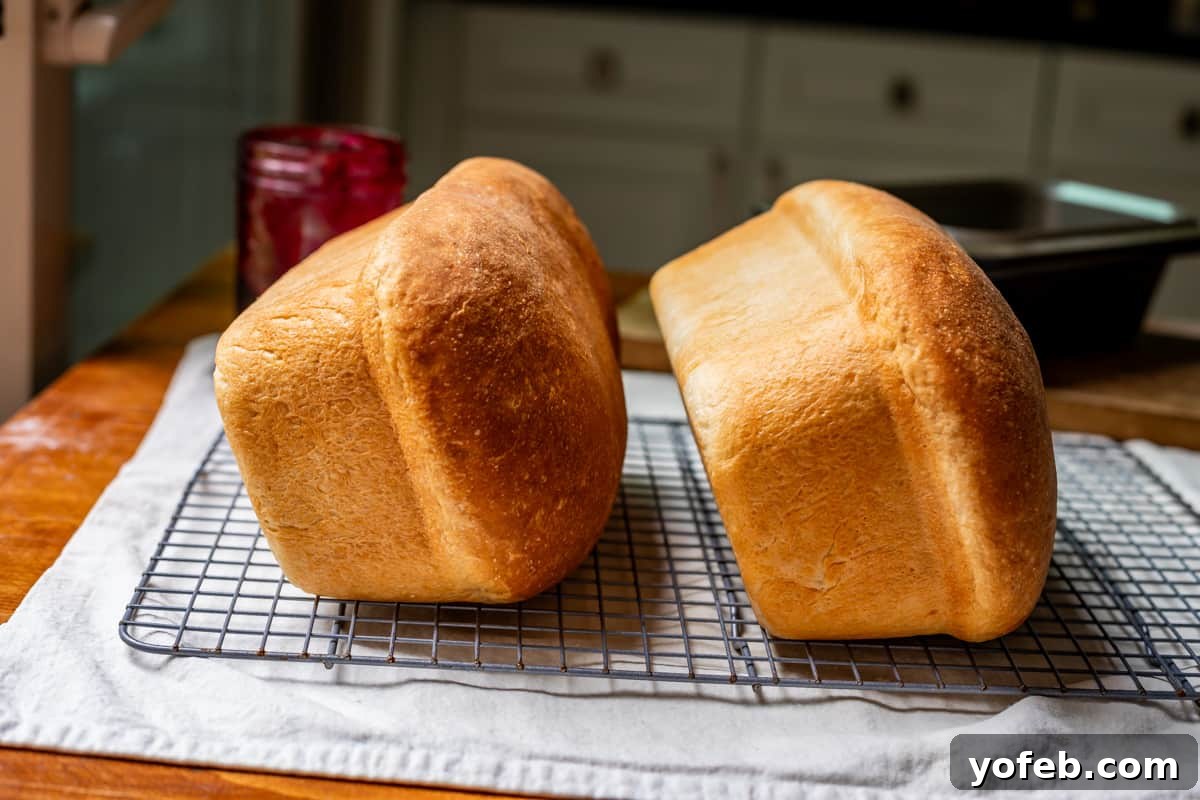
If you discover upon removal that the bottom of your loaf isn’t browned enough, don’t despair! As long as you catch it within a minute or two of taking it out of the oven, simply place the loaf back in the pan and return it to the oven for another 5-10 minutes. This quick fix works wonders.
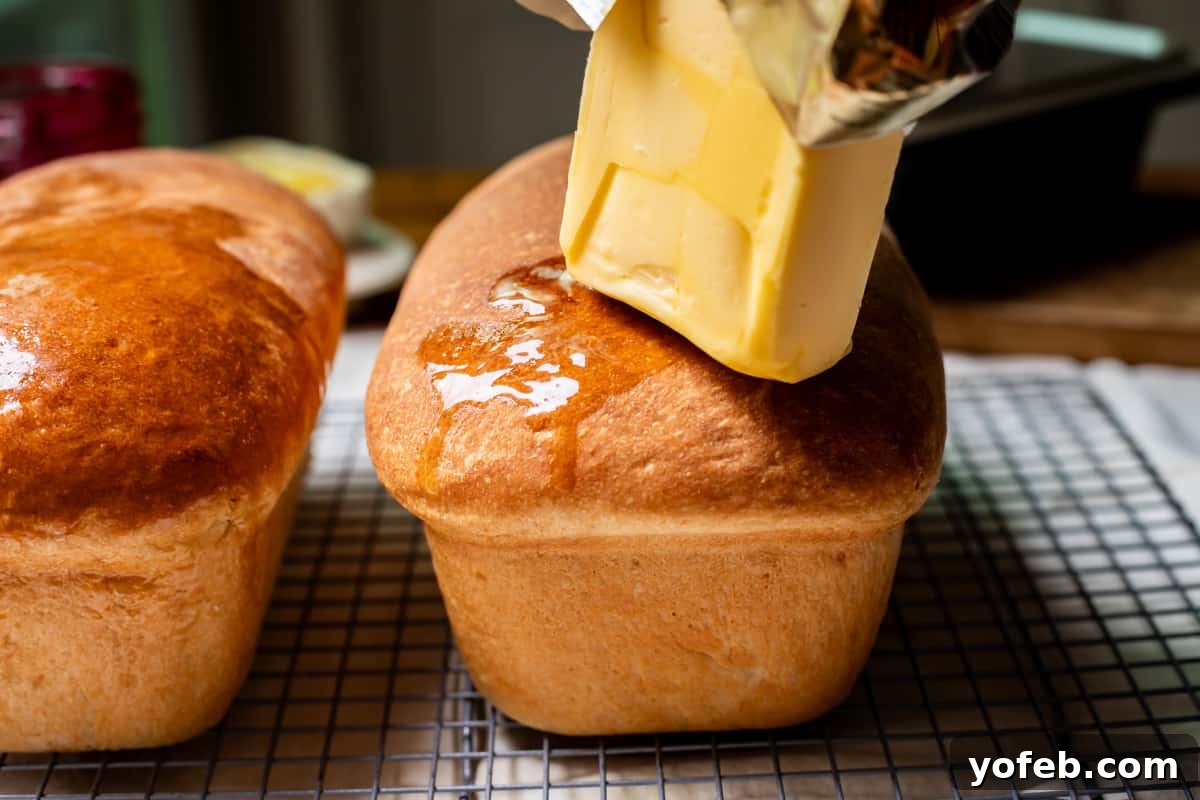
For an extra touch of indulgence, while your bread is still piping hot, take a stick of butter and generously rub it all over the top crust. The melting butter will soak in, creating an irresistible, rich flavor and a soft, flavorful crust.
Finally, and perhaps the hardest step of all: patience. You absolutely must allow your bread to cool for at least 30 minutes, ideally an hour, before slicing. Cutting into hot bread too soon can crush its delicate structure, leading to a gummy texture. Resist the urge, and you’ll be rewarded with perfectly textured slices.
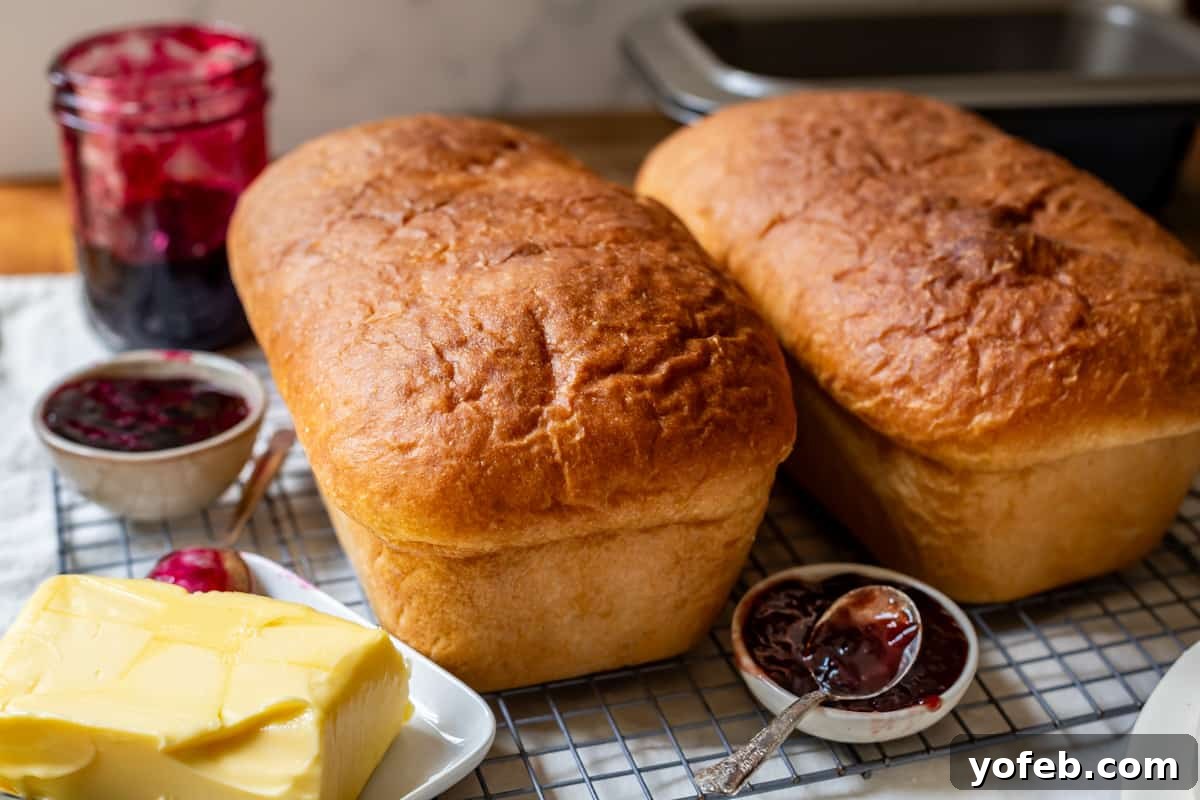
And there you have it! This truly easy and incredibly rewarding recipe takes you from raw ingredients to warm, fresh, homemade bread in approximately one hour. Enjoy the fruits of your labor!
Elevating Your Bread: Making This Recipe Even Better
This recipe is crafted for the modern cook, acknowledging that most of us don’t have an entire day to dedicate to baking. It consistently produces a fantastic loaf of bread in about an hour, and I stand by it as an excellent, efficient method. However, for those times you have a little more flexibility and desire an even more complex and nuanced flavor profile, there’s a simple way to enhance this bread: allow the dough to rise longer, even incorporating multiple rises.

The Science of Flavor: Why Dough Needs to Rise
The act of rising isn’t merely about increasing dough volume; it’s a transformative process that shifts a bland mixture into a loaf bursting with rich, complex flavors. This magic happens thanks to the development of acids and esters within the dough during fermentation. The longer your dough has the opportunity to sit and ferment—whether it’s at room temperature or in a cooler environment—the more these aromatic compounds will develop.
This slower fermentation (or rising) allows yeast to produce a wider array of byproducts, including organic acids and esters. These compounds are responsible for the rich, wheat-y aroma and the subtle, pleasing tang characteristic of artisanal breads. Beyond flavor, the acids also play a critical structural role by strengthening the gluten strands in your dough. This reinforcement encourages the bread to rise vertically, creating a tall, beautiful loaf rather than spreading outwards. While it simply takes more time, the enhanced flavor and structure are well worth the wait when you have the opportunity.
Exploring Different Dough Rising Methods
While this recipe is excellent with its quick rise, incorporating an extra proofing stage will undeniably add a richer dimension to your bread’s flavor and texture. Here are several rising options you can adapt for this versatile white bread recipe:
- Standard Single Rise (as written): Follow the recipe exactly, performing the single rise in the loaf pan. This is perfect for when you need fresh bread quickly.
- One Hour Bowl Rise + Pan Rise: Prepare the dough as instructed, then place it in a greased bowl, cover, and let it rise at room temperature for 1 hour until doubled in size. Gently punch down the dough, shape it into loaves, and then proceed with the recipe as written, allowing the shaped loaves to rise in the pans until they’ve crowned generously above the rim before baking. This adds a layer of flavor development without significantly extending the overall process.
- Double Rise for Enhanced Flavor: Make the dough as instructed, then let it rise in a greased bowl for 1 hour. Punch down the dough, and allow it to rise for a second hour. After the second rise, punch down, shape into loaves, and proceed with the recipe, baking once the loaves have risen well above the pan edges. Each rise contributes to a more complex flavor and finer crumb.
- Overnight Cold Fermentation: For a truly deep and complex flavor, you can let the dough rest overnight in the refrigerator. If choosing this method, reduce the instant yeast in the recipe to 1 tablespoon to prevent over-fermentation in the cold. Prepare the dough as instructed, place it in a very large, lightly oiled bowl with a loose-fitting lid (to allow gases to escape), and refrigerate for 8-12 hours. The slow, cold fermentation significantly develops flavor. The next day, punch down the chilled dough, shape it immediately into loaves, and let them rise at room temperature for at least 60 minutes, or until they have warmed up and risen generously above the edge of the pan. Then, bake as instructed. This method requires more foresight but rewards you with exceptional depth of taste.
Creative Ways to Enjoy Your Homemade White Bread
Once you’ve baked this incredible white bread, the possibilities for enjoying it are endless. Here are some of my favorite ways to savor every delicious slice:
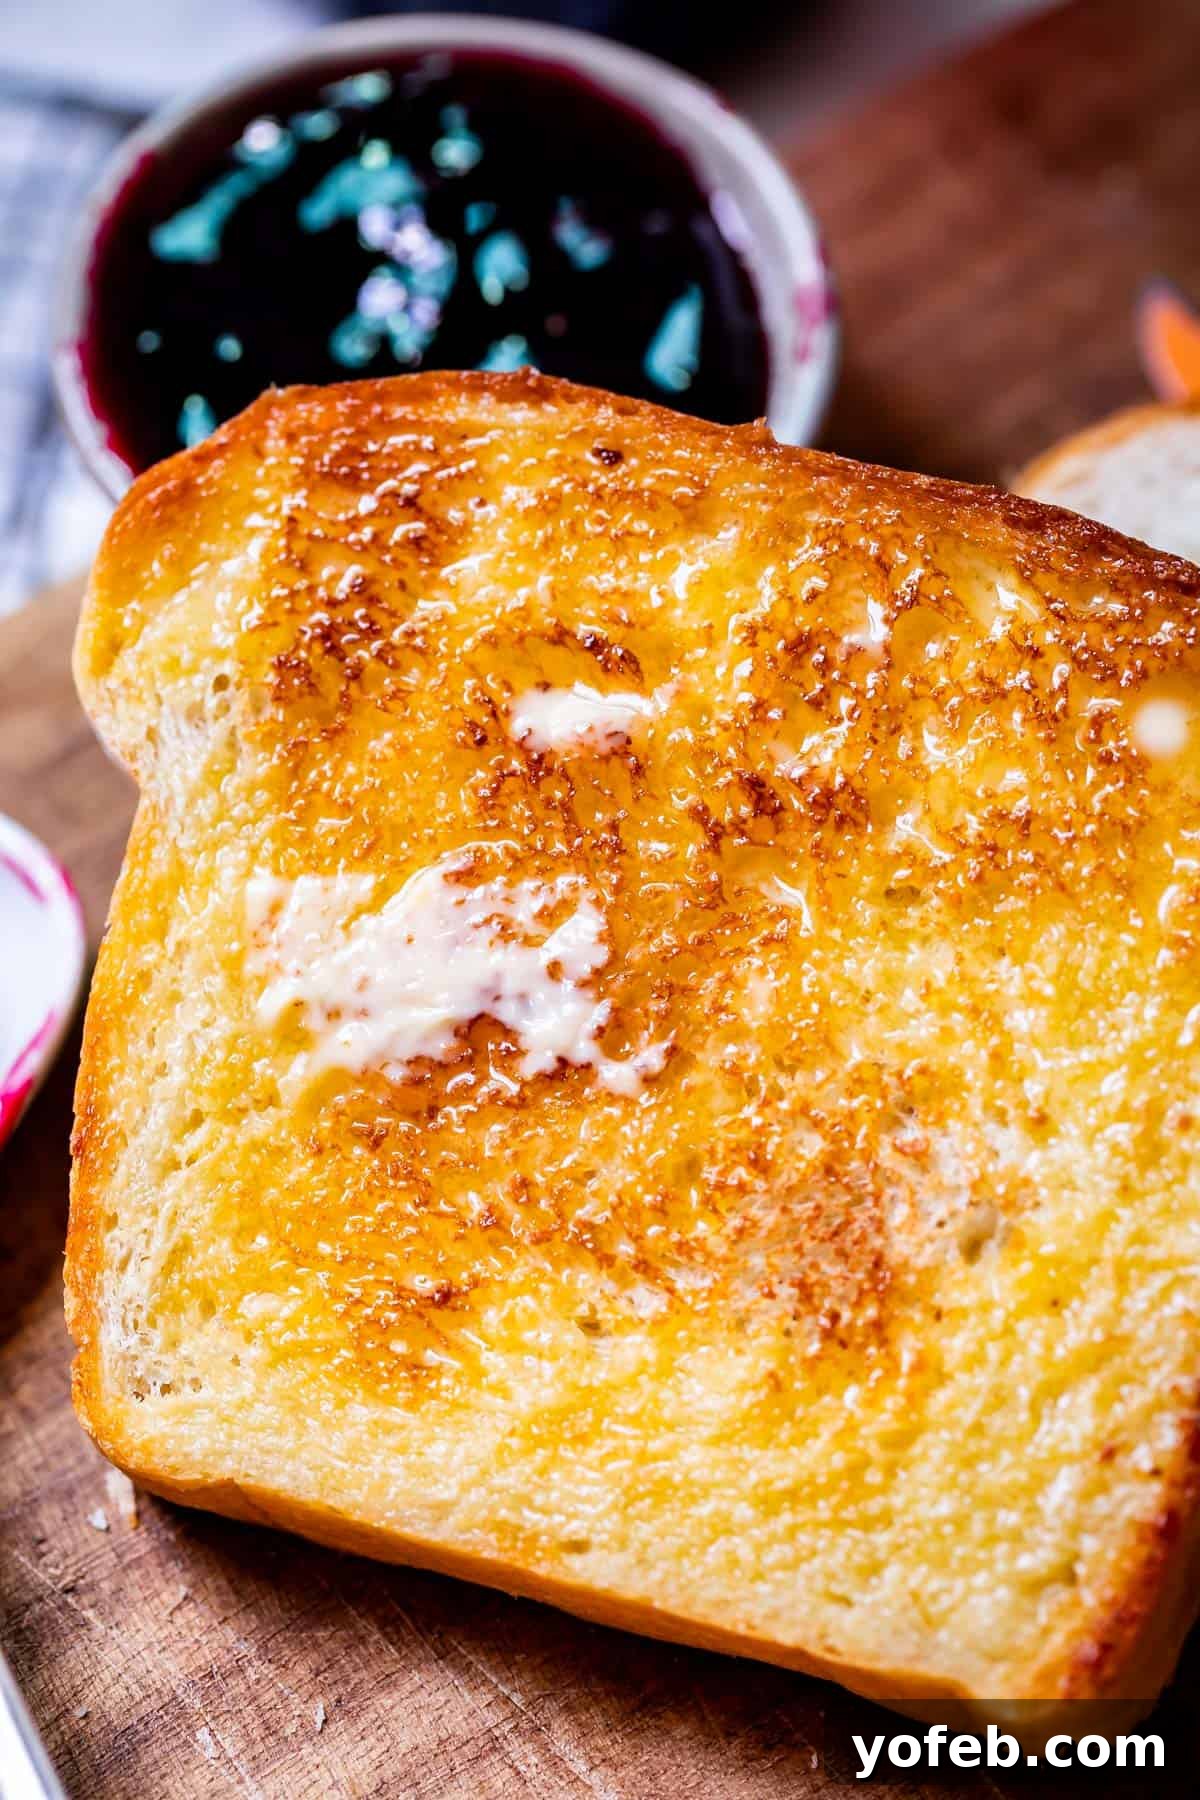
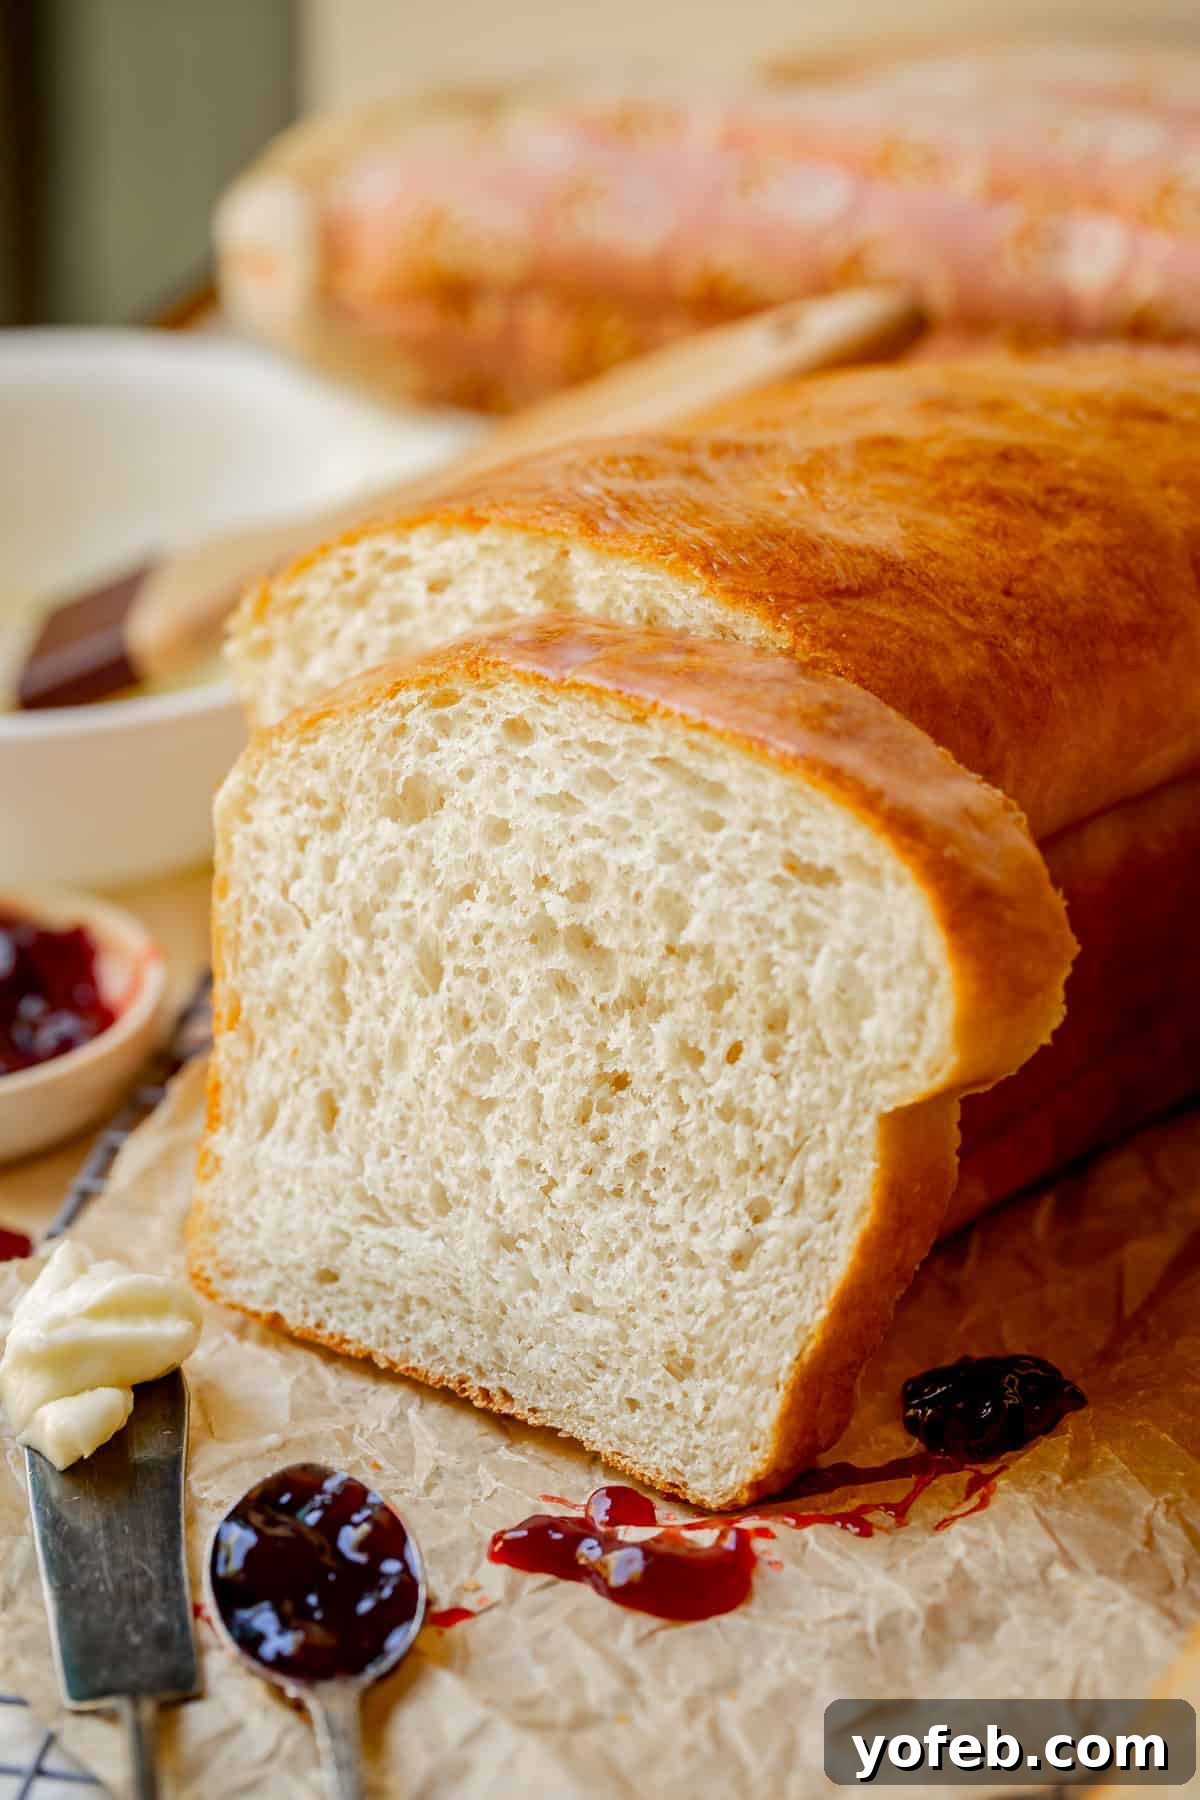
- Simple Pleasures: The most obvious and perhaps most satisfying way is to eat it freshly baked and still warm, perhaps with a smear of softened, salted butter. Or, my absolute favorite, toasted until golden brown and slathered with plenty of salted butter and your favorite jam. There’s truly nothing more deliciously nostalgic and comforting!
- Perfect Sandwiches: This bread forms the perfect foundation for literally ANY sandwich. From classic peanut butter & jelly and turkey & cheese to gourmet creations like The Best BLT Sandwich or The Best Grilled Cheese of Your Life, homemade bread elevates every flavor combination.
- Gourmet Toast Creations: Elevate your breakfast or snack game with avocado toast, Nutella & banana toast, or any other creative toppings you can imagine. Embrace your inner millennial and live your best toast life!
- Decadent French Toast: While challah is often my go-to, thick slices of this homemade white bread make an incredible Caramelized French Toast. Its fluffy texture soaks up the custard beautifully for a truly indulgent treat.
- Savory & Sweet Bread Puddings: Give leftover bread new life by transforming it into a hearty Savory Breakfast Bread Pudding with Ham and Asparagus, or a delightful Caramel Apple Upside Down French Toast Bake.
- Homemade Croutons or Bread Crumbs: Stale bread is never wasted! Cut it into cubes and bake for crispy homemade croutons for salads or soups, or process it into fresh bread crumbs for coatings and binders.
- Meatball Magic: Many chefs swear by using white bread in their meatballs to achieve a light, tender texture, such as in this recipe for How to Make Freaking Great Meatballs from Fox Valley Foodie.
- Panzanella Salad: For a unique and refreshing twist, try a Strawberry Panzanella Salad. The fried or toasted bread cubes add a wonderful texture and absorb the delicious dressing.
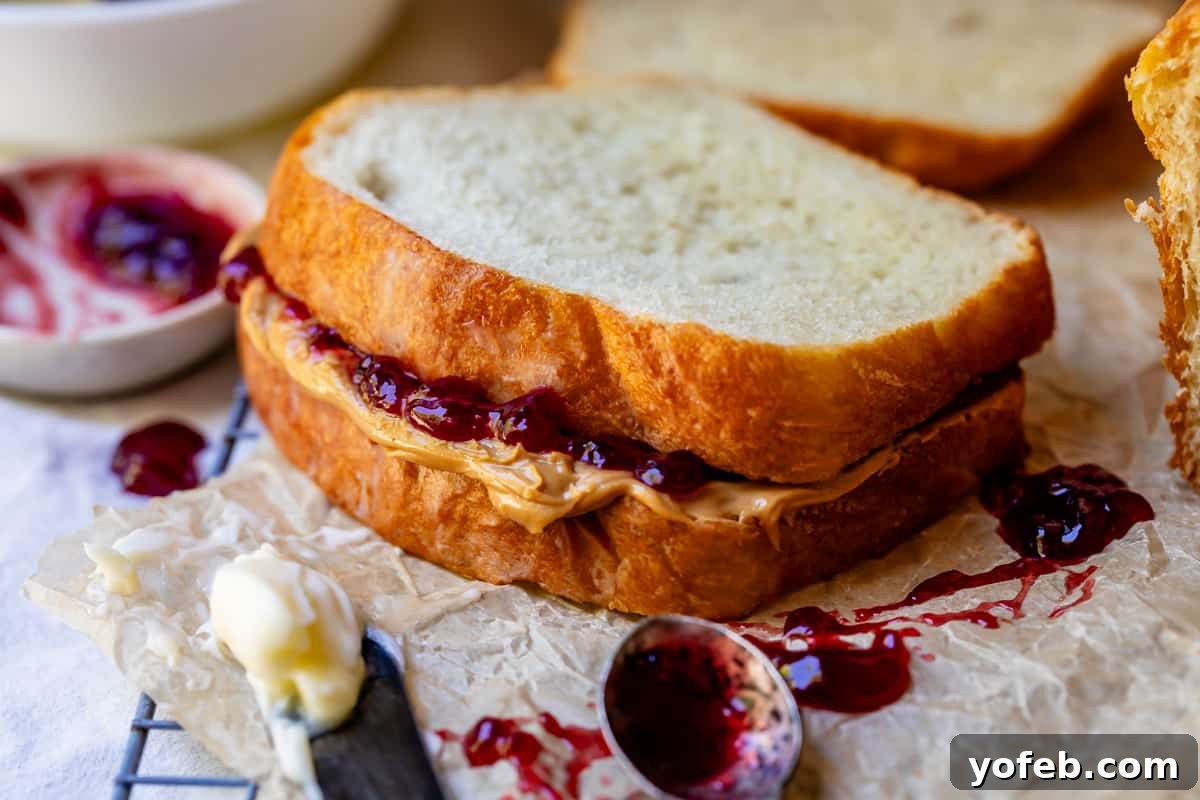
Just look at that peanut butter and jelly sandwich! Doesn’t it make your mouth water?
Storing Homemade Bread for Maximum Freshness
The key to preserving the deliciousness of homemade bread is to protect it from drying out. Since homemade bread lacks the preservatives found in store-bought varieties, it has a shorter shelf life at room temperature. For optimal freshness, store your loaf in a well-sealed plastic bag (like a gallon-sized Ziploc) or an airtight container. It should remain fresh and soft for up to 2 days on your counter.
Seeing mold on your carefully crafted homemade bread is incredibly disheartening, so be proactive! While refrigerating bread can extend its life to 6-7 days, I generally advise against it because the circulating air in a refrigerator can cause bread to dry out and become stale more quickly. My preferred method for long-term storage is the freezer, which truly locks in freshness.
Freezing White Bread: A Smart Storage Solution
Yes, absolutely! Homemade bread freezes exceptionally well, yielding fantastic results when thawed. I make a habit of freezing any bread I don’t anticipate eating within about 12 hours of baking. The beauty of freezing is that it preserves the bread at precisely the freshness level it was when you put it in the freezer. Thawing is also remarkably simple.
Ensure your bread is completely cool before freezing. For convenience, place a whole loaf in a gallon-sized freezer bag, pressing out as much air as possible before sealing. These 2-gallon Ziploc bags are perfect for fitting two loaves at once. If you don’t have freezer bags, wrap the cooled loaf tightly once in plastic wrap, then again in aluminum foil. For extra protection against freezer burn, consider adding a third layer of plastic wrap over the foil.
To thaw your frozen bread, simply place it on your counter overnight or for a few hours, keeping it sealed within its wrapping or bag. This allows the moisture to redistribute within the bread as it thaws, preventing it from going stale. Air is bread’s worst enemy when thawing, so keep it wrapped until it’s fully defrosted.

Doubling This Easy Bread Recipe: What You Need to Know
Yes, you can double this bread recipe, but with a few important considerations. The main challenge lies with your equipment. If you own an extra-large stand mixer (like a commercial-grade model or a high-capacity Bosch mixer), it might handle the increased volume of dough. However, most standard home stand mixers, such as a 6-quart KitchenAid, typically aren’t powerful enough or large enough to knead four loaves’ worth of dough effectively. Overloading your mixer can strain its motor and lead to improperly kneaded dough.
If you’re unsure, I highly recommend making a single batch first to observe how your mixer performs and how much space the dough occupies in the bowl. If you feel confident after that experience, then you might try a double batch. Alternatively, you can always double the ingredients and knead the dough by hand, though this requires considerable strength and endurance! For most home bakers, making two separate single batches is the safest and most reliable approach, especially since one batch already yields two generous loaves.
Halving This White Bread Recipe for a Single Loaf
Absolutely! This recipe is incredibly adaptable and can be easily halved to make a single 9×5-inch loaf. All the instructions for mixing, kneading, rising, and baking remain the same. This is a perfect option if you only need one loaf or want to experiment with a smaller batch. Here are the precise measurements you’ll need for a single loaf:
- 1 and 1/3 cups warm water (105-110°F)
- 1 tablespoon instant yeast
- 3 tablespoons granulated sugar
- 1 and 1/2 tablespoons olive oil (or other neutral oil)
- 1/4 cup vital wheat gluten
- 3 and 1/2 teaspoons Diamond Crystal kosher salt (adjust if using other types)
- 3 cups bread flour, plus 2-3 tablespoons extra for kneading/adjusting
While both share similar foundational ingredients, the primary differences between classic French bread (like a baguette) and our easy white sandwich bread lie in their structure, crust, and sometimes, the shaping. French bread typically has a denser, chewier interior and a distinctive hard, crisp crust. This is achieved through less sugar, sometimes longer fermentation, and often baked with steam. Our white sandwich bread, thanks to extra yeast and vital wheat gluten, is designed to be much springier, softer, and tender, with a softer crust, making it ideal for daily sandwiches. The shape also plays a role; French bread’s long, thin baguette form naturally contributes to its extra crispness and chewiness.
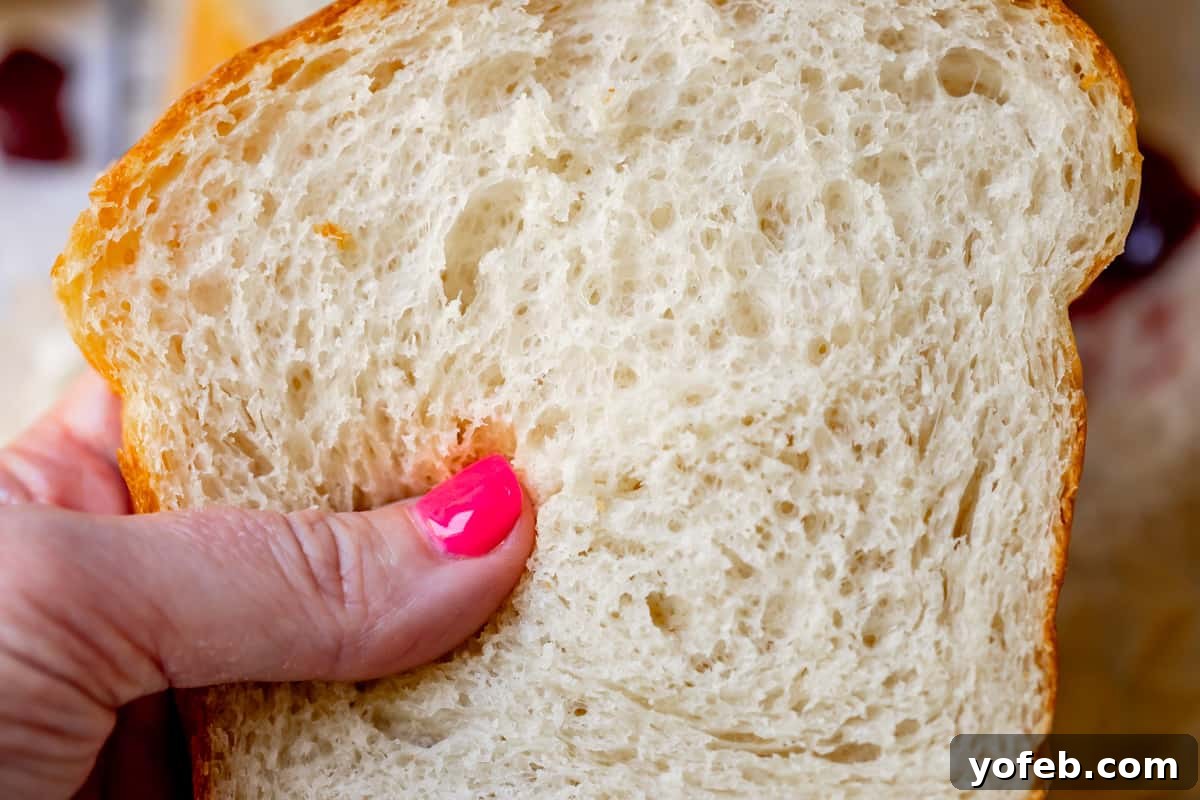
The lightness and fluffiness of homemade bread are a beautiful result of culinary chemistry, primarily driven by the interaction between gluten and yeast. Yeast, a living organism, feeds on sugars in the dough and produces carbon dioxide gas as it ferments. These gases create countless tiny bubbles, which are the air pockets you see in a well-baked loaf. Gluten, formed from the proteins in flour when kneaded with water, creates a strong, elastic network that traps these gas bubbles. This robust gluten framework allows the bread to rise significantly and hold its tall, airy structure. A good rise, coupled with an abundance of trapped gas bubbles, results in that wonderfully light and fluffy texture we all crave. During my recipe tests, I encountered many dense, flat loaves – visual evidence of insufficient gluten development or yeast activity.
I prefer to avoid labeling foods as inherently “good” or “bad,” as balance and moderation are key in any diet. However, white bread is sometimes criticized because the milling process for white flour removes the bran and germ from the wheat kernel. These components are where many of wheat’s natural vitamins, minerals, and fiber are concentrated. Consequently, traditional white bread has a lower nutritional density compared to whole wheat varieties. That being said, homemade white bread offers significant advantages over many store-bought options. It contains no artificial preservatives, high-fructose corn syrup, or unknown chemicals, and its flavor is incomparably superior. This recipe offers a delicious middle ground – a wholesome, homemade version of a comfort food classic, enjoyed mindfully as part of a balanced diet.
The characteristic white color of white bread comes primarily from the type of flour used. White flour is produced by carefully milling wheat kernels to remove the bran and wheat germ, leaving only the starchy endosperm. These removed parts are responsible for the darker color and higher nutrient content of whole wheat flour. Removing them also makes the flour more shelf-stable. Furthermore, many commercial white flours undergo a bleaching process, using agents like potassium bromate, azodicarbonamide, or chlorine dioxide gas. This not only removes any slight natural yellowish tint, making the flour appear whiter, but also alters its protein structure, often resulting in more predictable and consistent baking properties for industrial use.
Generally, making your own bread at home can be cheaper per loaf than buying comparable quality bread from the store, especially if you buy ingredients in bulk. However, it’s important to factor in the initial cost of equipment (like a stand mixer, if you choose to use one) and the value of your time. For many families, homemade bread is an occasional treat due to time constraints, and store-bought bread remains a daily necessity. For others, the process of baking becomes a cherished hobby, and they rarely purchase bread from the store. Consider your lifestyle and how often you plan to bake to determine if it’s a cost-effective choice for you. The joy and satisfaction of baking it yourself are often priceless!
The fundamental ingredients for white sandwich bread are flour, water, and yeast (unless using a sourdough starter for leavening). For a soft, flavorful, and tender loaf like this one, sugar and oil are also essential additions. I highly recommend incorporating vital wheat gluten, as it significantly enhances the bread’s rise and overall texture, leading to a truly superior result.
For the best results, I strongly recommend using bread flour. It contains a higher protein content than regular all-purpose flour, which translates to superior gluten development. This extra gluten allows for a higher rise and contributes to an wonderfully chewy yet tender texture. While you can substitute some whole wheat flour, be aware that whole wheat contains less gluten and will result in a denser loaf that doesn’t rise as high or have the same characteristic chewiness as bread made with pure bread flour.
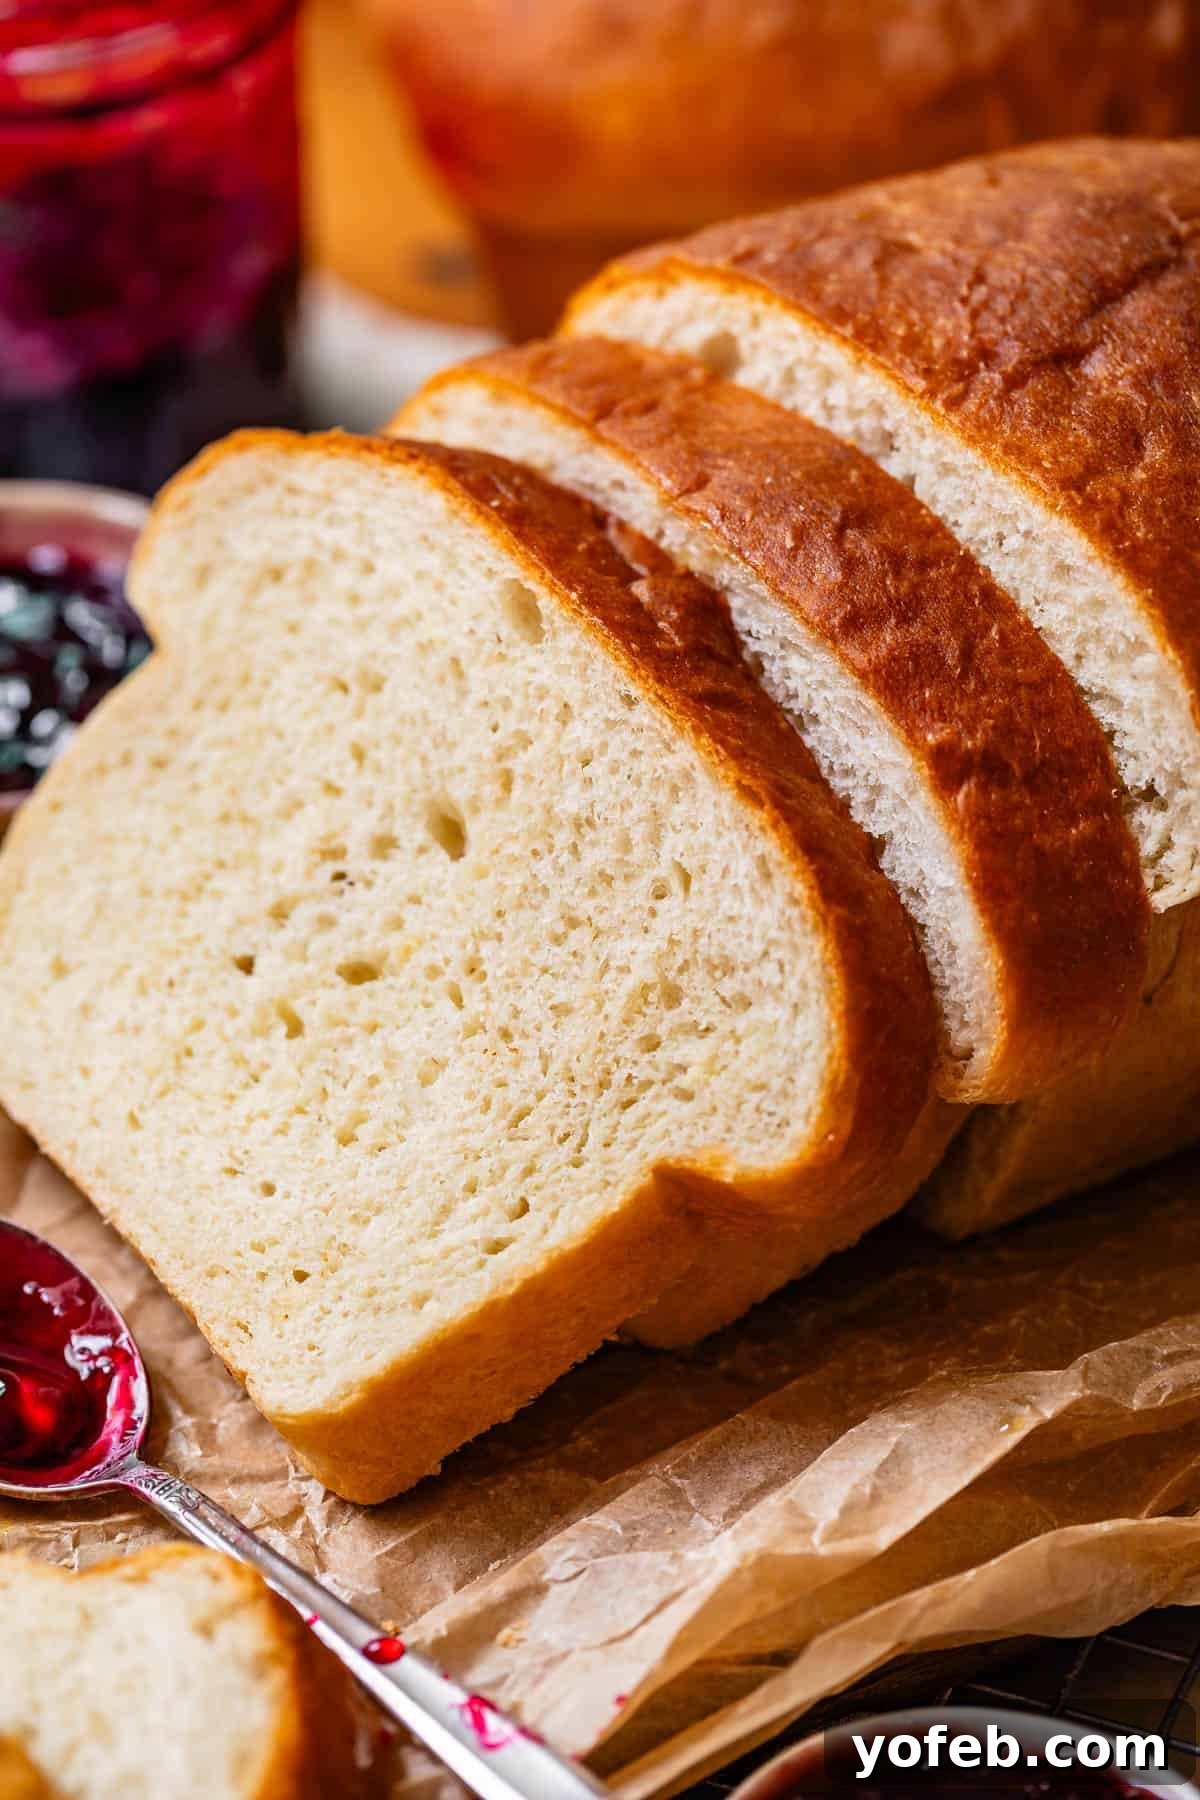
I hope this comprehensive guide has inspired you to bake your very own batch of homemade white bread soon! It’s a truly rewarding experience that fills your home with warmth and delicious aromas. Recently, I playfully texted my girlfriends, offering them bread from my freezer, only to remember those loaves were the “not quite perfect” ones from my early testing phases – the life of a food blogger! But now, with this perfected recipe, you’re guaranteed success.
If you make this bread, I would absolutely love to see your creations! Share your photos on Instagram and tag me @thefoodcharlatan or use the hashtag #thefoodcharlatan. You might have also noticed the beautiful pomegranate jelly in some of the photos; I made that with my mom while testing this recipe. You can catch some of our fun shenanigans here!
More Easy Bread Recipes to Expand Your Baking Skills
Once you’ve mastered this amazing white bread, you might find yourself eager to explore other simple and delicious bread recipes. Here are some more of my favorite easy bread recipes to help you expand your baking repertoire:
- Quick and Easy French Bread Recipe >> A tried-and-true favorite that consistently delivers excellent results.
- Easy Fluffy One Hour Dinner Rolls >> Super easy, wonderfully fluffy, and ready in just an hour – perfect for any meal.
- The Ultimate Garlic Bread Recipe >> This is the one you’ve been searching for, truly irresistible!
- Big Fat Crescent Rolls >> Prepare for the best crescent rolls of your life, I promise!
- Garlic and Rosemary Skillet Bread >> If you love a profoundly flavorful bread with a perfect, crispy crust, this recipe is for you.
- Pizza Dough Recipe for Beginners >> While different from loaf breads, mastering this is an essential yeast baking experience, with step-by-step guidance.
- My Favorite Go-to Sourdough Bread Recipe from Bless this Mess.
- Easy White Gluten Free Bread Recipe for Sandwiches from Gluten Free on a Shoestring.
Facebook |
Pinterest |
Instagram

Easy Homemade White Bread Recipe
10 minutes
25 minutes
30 minutes
1 hour
5 minutes
2
loaves
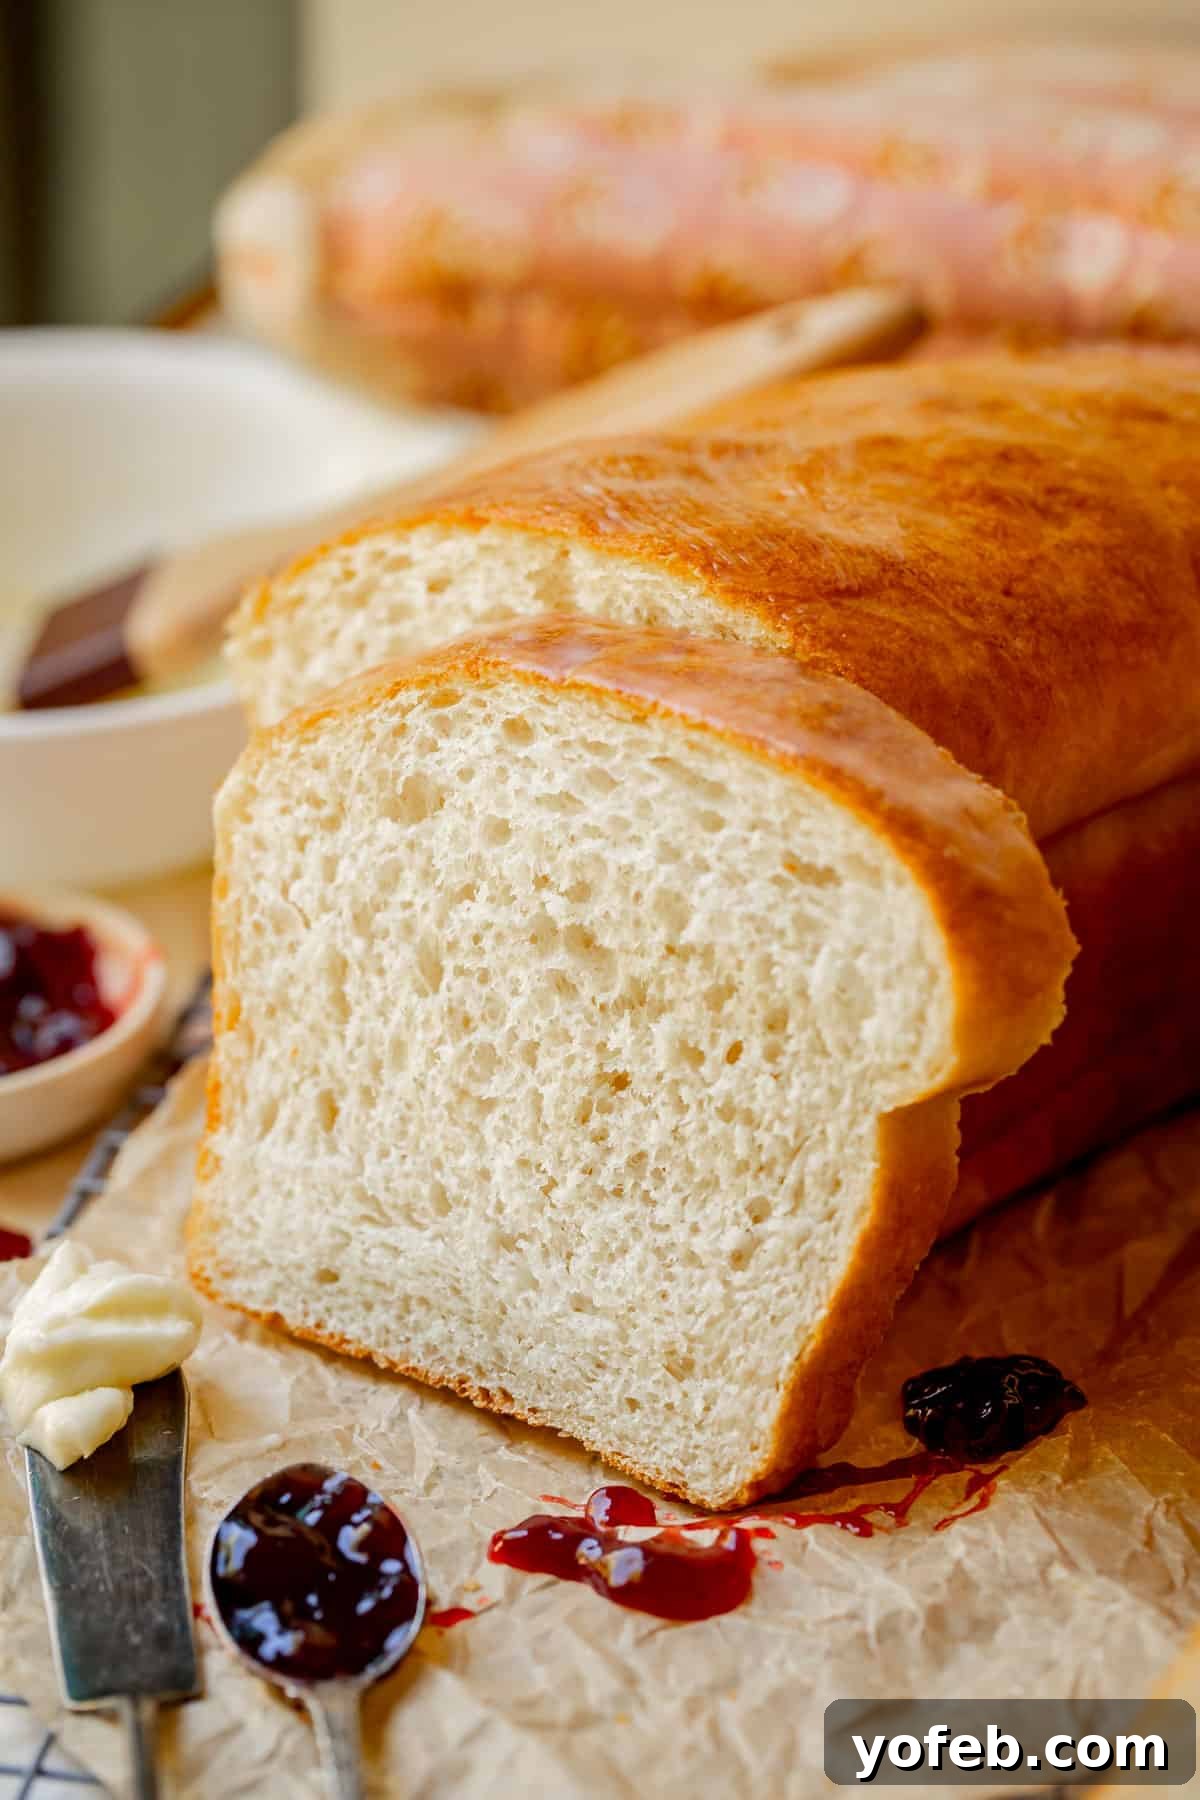
This is the ultimate easy homemade white bread recipe you’ll ever need! Achieve a wonderfully fluffy, tall, and buttery loaf in just about one hour, perfect for beginners and seasoned bakers alike. Follow these simple steps for delicious results every time.
Equipment
-
Nonstick spray
-
Plastic wrap
-
(2) 9×5 inch loaf pans
-
Stand mixer with dough hook (optional, but highly recommended)
Ingredients
-
2 & 2/3
cups
very warm water,
105-110 degrees F -
2
tablespoons
instant yeast*,
active dry yeast works too, see note -
1/3
cup
granulated sugar -
3
tablespoons
oil,
olive oil or vegetable oil -
1/2
cup
vital wheat gluten**,
can replace with equal amount of bread flour, see notes -
7
teaspoons
Diamond Crystal kosher salt***,
use 4 teaspoons total if using table salt -
6 and 1/4
cups
bread flour****,
spooned and leveled, plus more for dusting
Prevent your screen from going dark
Instructions
-
In a large bowl or the bowl of your stand mixer, add 2 and 2/3 cups of very warm water. The ideal temperature is between 105-110°F (40-43°C), which feels comfortably warm to the touch, like a baby’s bath. Avoid water that is too hot, as it can kill the yeast.
-
Add 2 tablespoons of instant yeast* and 1/3 cup of granulated sugar to the warm water. Stir gently and let it sit for a minute or two. You should observe small bubbles or a light foam forming on the surface, indicating the yeast is active. If the mixture remains flat, the yeast may be dead (usually from water that’s too hot); discard and start again.
-
Add 3 tablespoons of olive oil (or your preferred neutral oil) and 1/2 cup of vital wheat gluten. (If vital wheat gluten is unavailable, substitute with an equal amount of bread flour.)
-
Next, add 7 teaspoons of Diamond Crystal kosher salt. Yes, 7 teaspoons! This amount is perfectly balanced for a flavorful loaf. (If using table salt, reduce to 4 teaspoons. For Morton’s coarse kosher salt, use 5 teaspoons.)
-
Measure 6 cups of bread flour by gently spooning it into a 1-cup measuring cup and leveling off the top. Add this flour to the bowl with the wet ingredients.
-
If using a stand mixer*****, attach the dough hook and mix on medium-low speed until the flour is mostly incorporated. Scrape down the sides of the bowl with a spatula, then continue mixing on low speed. Gradually add the remaining 1/4 cup of bread flour as needed (refer to the next step for guidance).
-
The consistency of the dough is crucial. Avoid adding too much flour, which results in a stiff, heavy bread. Too little flour, however, will hinder its rise. You’re looking for a dough that is smooth, elastic, and slightly sticky. It should NOT form a completely shapely ball in the mixer; it will remain quite tacky. To test, press your finger into the dough: it should come away glossy but without dough sticking to it. If you pinch it harder with two fingers, a small amount of dough will stick. This tackiness is ideal.
-
Once all the necessary flour has been incorporated, continue kneading with the dough hook for a total of at least 5-6 minutes to develop the gluten. If kneading by hand, continue for 7-8 minutes.
-
Generously spray two 9×5 inch loaf pans with nonstick spray, or rub them thoroughly with oil.
-
Remove the dough hook (if using a mixer) and scrape the dough onto a work surface lightly sprayed with nonstick spray, or a lightly floured surface like a pastry cloth.
-
Using a serrated knife or a dough scraper, divide the dough exactly in half.
-
Gently pat one half of the dough into a rectangle roughly the size of your loaf pan (about 9×5 inches). Starting from one of the long ends, roll up the dough tightly to form a log or loaf shape. Pinch the seam firmly to seal it, then gently fold the ends slightly underneath. Place your shaped dough into a greased loaf pan, ensuring the top surface is smooth. Repeat with the other half of the dough.
-
Lightly spray the tops of the shaped dough loaves with nonstick spray. Cover each pan with plastic wrap that has also been generously coated with nonstick spray. This prevents the delicate rising dough from sticking to the plastic, which could ruin its structure when removed.
-
To create a warm rising environment, turn your oven on to 350°F (175°C) for just 30 seconds, then immediately turn it off. The oven should be warm, not hot (you should be able to comfortably touch the rack). Place your two covered dough pans in the warm oven and shut the door. Set a timer for 15 minutes for the initial rise.
-
After 15 minutes in the warm oven, remove the pans to another warm spot in your kitchen (e.g., on top of the fridge or near a sunny window). Now, preheat your oven to 350°F (175°C) for baking.
-
Allow the dough to continue rising for another 10-15 minutes, or longer if needed, while the oven preheats. The exact timing can vary based on your kitchen’s temperature and altitude. Your dough is ready for baking when the tops have risen at least 1 inch above the edge of the pan and look wonderfully puffy and domed. Be careful not to let it over-rise, as this can lead to deflation in the oven.
-
Carefully remove the plastic wrap from the risen loaves. Bake at 350°F (175°C) for 25-30 minutes. The bread is done when the tops are deeply golden brown, the edges are pulling away from the pan, and the bottom and sides are also browned. For accuracy, an instant-read thermometer inserted into the center of a loaf should read about 200°F (93°C).
-
Immediately upon removing from the oven, place the two hot bread pans on a cooling rack and let them rest for about 1 minute. Then, using hot pads, carefully invert each pan to release the bread onto the cooling rack. If a loaf sticks, gently loosen the sides with a butter knife.
-
This step is optional but highly recommended: while the loaves are still hot, rub a stick of butter generously over their tops. This adds incredible buttery flavor and a lovely sheen, though it may cause a slight wrinkling of the crust. You might try buttering one loaf and leaving the other plain to compare your preference!
-
Place each loaf on the cooling rack on its side. This helps the risen bread maintain its tall, beautiful shape, as freshly baked bread can be a bit top-heavy. Allow the loaves to cool completely for at least 30 minutes to an hour. This crucial cooling time prevents the bread from becoming gummy and ensures a perfect texture when sliced.
-
Once cooled, slice the bread with a serrated knife, using a gentle sawing motion to avoid smashing the delicate crumb. Serve with plenty of butter, jam, or your favorite toppings! Toasting it first is also highly recommended.
-
How to Store: Store cooled loaves in gallon-sized ziplock bags, or both loaves can fit into a 2-gallon ziplock bag. I prefer to leave loaves unsliced and slice only as needed to best preserve their freshness. Homemade bread, lacking preservatives, molds more quickly than store-bought bread. It will keep on the counter for up to 2 days. If you don’t plan to eat it within this timeframe, freeze it immediately.
-
Freezing Instructions: This bread freezes beautifully. For best results, freeze it as soon as possible after it has completely cooled. Thawed frozen bread will retain its freshness for a few months. You can slice the entire loaf before freezing for easy access to individual slices, or freeze it whole.
-
To toast a frozen slice of bread, place it directly into your toaster on a low setting. Toast twice on low, or as many times as needed to thaw and toast to your liking.
-
Traditional 1-Hour Rise Method (for enhanced flavor): While this recipe is designed for a fast, single rise, allowing yeast more time to ferment before baking significantly develops flavor. If you have extra time and desire a richer taste, follow the recipe as written, but after kneading, place the dough in a greased bowl, cover, and let it rise at room temperature for 1 hour until doubled. Then proceed with shaping the loaves and the rest of the instructions without further changes to rising times.
-
Overnight Cold Fermentation (for deepest flavor): To achieve the most complex flavor, you can let this dough rise overnight in the refrigerator. Reduce the instant yeast in the recipe to 1 tablespoon to prevent over-fermentation. Prepare the dough as instructed, then place it in a very large, loosely covered bowl (to allow gases to escape) and refrigerate for 8-12 hours. The next day, punch down the dough, shape it into loaves, and let them rise at room temperature for at least 1 hour (or more) until they reach room temperature and have risen well above the pan edges. Then, bake as directed.
Notes
**Vital Wheat Gluten: Vital wheat gluten is concentrated protein from wheat that significantly enhances dough structure and allows for a higher rise and better texture. It’s especially beneficial in this accelerated recipe where a traditional long rise is skipped. If you cannot find it, replace it with an equal amount of bread flour (preferred) or all-purpose flour. Without vital wheat gluten, your bread may require a longer rise time.
***Salt content in this bread recipe: Proper salting is essential for flavor. This recipe uses a ratio of about 1 1/8 teaspoons of Diamond Crystal Kosher salt per cup of flour/gluten. Since flour amounts can vary slightly during kneading, adjust if you add significantly more flour. Diamond Crystal Kosher salt is recommended for its pure flavor. If using Morton’s coarse kosher salt, use about 5 teaspoons total; for table salt, use 4 teaspoons total.
****Bread Flour: Bread flour’s higher gluten content provides a superior rise and chewy texture. All-purpose flour can be used as a substitute, but your bread may not rise as high and might require more flour and a slightly longer baking time (5-10 minutes extra) and rise time (closer to 45 minutes instead of 30).
*****No stand mixer? This bread can be mixed and kneaded by hand. Combine ingredients with a wooden spoon until too stiff, then flour your hands and knead the dough in the bowl until it comes together. Transfer to a lightly floured surface and knead by hand for a full 7-8 minutes, using minimal extra flour. Then proceed with the recipe instructions.
******Rising tips: It’s crucial not to let your bread over-rise, as it will deflate when baked. If you’re unsure, use the “poke test”: gently poke the dough with a finger to create a 1-inch indentation. If it springs back slowly, it’s still rising. If the indentation remains, it’s ready for the oven. The poke mark will disappear during baking.
*******If you underbaked: If you remove the bread from the pans within a minute and notice the bottom is not browned, it’s not too late. Place the loaf back in its pan and return it to the oven for an additional 5-10 minutes. Cover the top with foil if it’s already sufficiently browned.
How to halve this recipe: Easily make one loaf by halving all ingredients and using a single 9×5 inch pan. Here are the precise measurements for a single loaf:
-
- 1 and 1/3 cups warm water
-
- 1 tablespoon instant yeast
-
- 3 tablespoons sugar
-
- 1 and 1/2 tablespoons olive oil
-
- 1/4 cup vital wheat gluten
-
- 3 and 1/2 teaspoons Diamond Crystal kosher salt
-
- 3 cups bread flour, plus 2-3 tablespoons
Nutrition facts: The calories listed represent one entire loaf. If you slice each loaf into 12 pieces, it’s approximately 116 calories per slice.
Nutrition
Calories:
1391
kcal
|
Carbohydrates:
243
g
|
Protein:
58
g
|
Fat:
20
g
|
Saturated Fat:
2
g
|
Polyunsaturated Fat:
6
g
|
Monounsaturated Fat:
9
g
|
Trans Fat:
0.1
g
|
Potassium:
351
mg
|
Fiber:
8
g
|
Sugar:
34
g
|
Vitamin A:
6
IU
|
Vitamin C:
0.01
mg
|
Calcium:
96
mg
|
Iron:
4
mg
Bread
American
1391
bread, sandwich, white, easy, homemade, fluffy
Did you make this? I’d love to see it!
Mention @thefoodcharlatan or tag #thefoodcharlatan!