
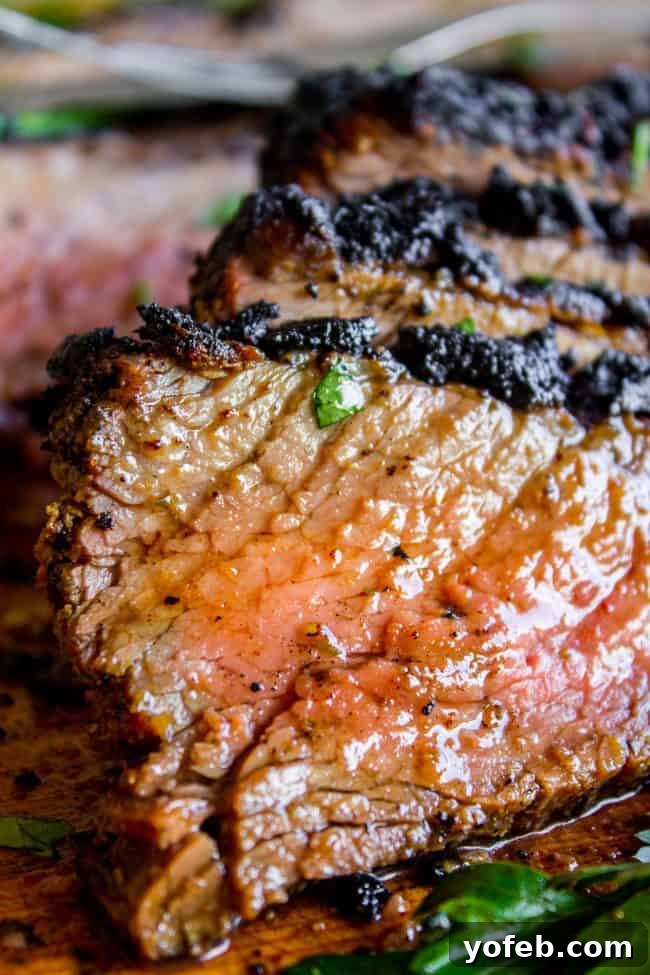
If you’ve never experienced the rich, tender flavor of a perfectly cooked tri-tip, prepare for a culinary revelation! This comprehensive guide will show you exactly how to cook tri-tip, whether you prefer the smoky char of the grill or the consistent heat of your oven. It’s incredibly straightforward, and the resulting taste is absolutely unbeatable. For many, including my family, tri-tip is a beloved tradition, gracing our Christmas dinner table and making any holiday meal truly impressive. It’s also a fantastic choice for a summer barbecue, especially when paired with classic Santa Maria Pinquito Beans!
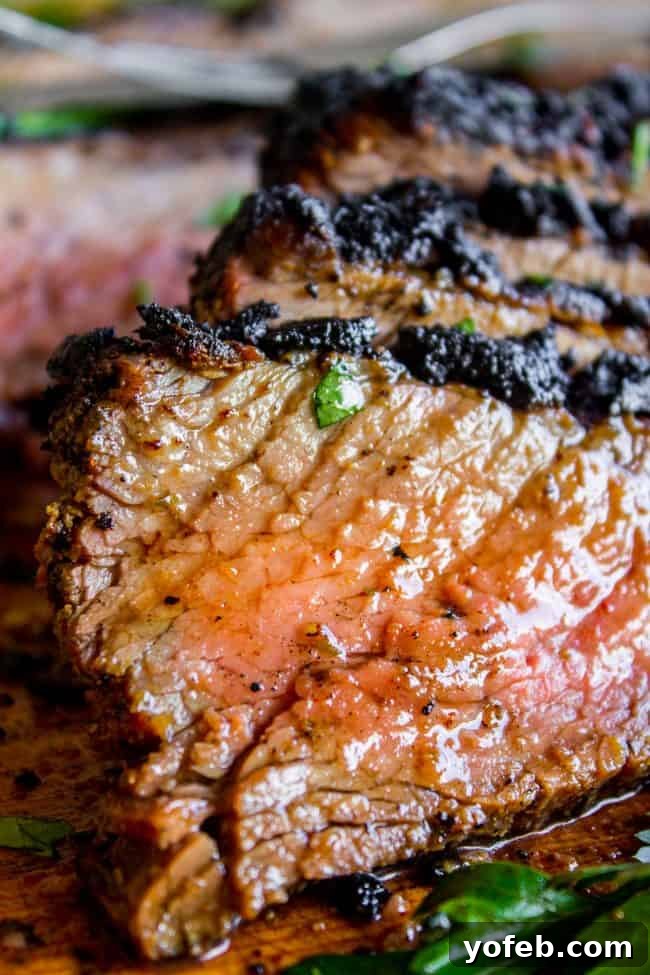
Table of Contents
- What is Tri-Tip? An Introduction to This Flavorful Cut of Beef
- Is Tri-Tip Roast the Same as Tri-Tip Steak?
- Mastering the Perfect Tri-Tip: Grilled or Oven-Roasted
- Essential Ingredients for Your Tri-Tip Recipe
- How to Cook Tri-Tip: A Step-by-Step Guide
- How to Grill Tri-Tip for That Perfect Smoky Flavor
- How to Cook Tri-Tip in the Oven for Tender Results
- Fat Side Up or Down? The Tri-Tip Cooking Dilemma
- The Art of Slicing: How to Cut Tri-Tip Against the Grain
- Serving Suggestions for Your Tri-Tip Steak
- Beef Tri-Tip Storage and Reheating Tips
- Tri-Tip Steak Recipe FAQs
- More Holiday and Special Occasion Dinner Ideas!
- Tri Tip (2 Ways) Recipe
Sometimes, life throws a lot at you. You might find yourself juggling endless to-do lists, whether for home projects or daily errands. It’s easy to get sidetracked, like when you head out for one item, only to realize your list has grown exponentially. But amidst all the busy-ness, there’s always time for something truly delicious.
Forget the endless chores for a moment, and let’s focus on a reward that’s far more satisfying: tri-tip. This incredible cut of beef is about to become your new favorite. Are you ready to dive in?
What is Tri-Tip? An Introduction to This Flavorful Cut of Beef
Tri-tip is a remarkable triangular cut of beef derived from the bottom sirloin, notable for its distinct “three tips.” While it gained significant popularity for grilling in Santa Maria, California, back in the 1950s, it’s still relatively unknown in many parts of the country. Outside of California, you might hear it referred to as a “triangle roast” or even a “California cut.” If your local butcher seems unfamiliar, these alternative names can help you secure this fantastic cut.
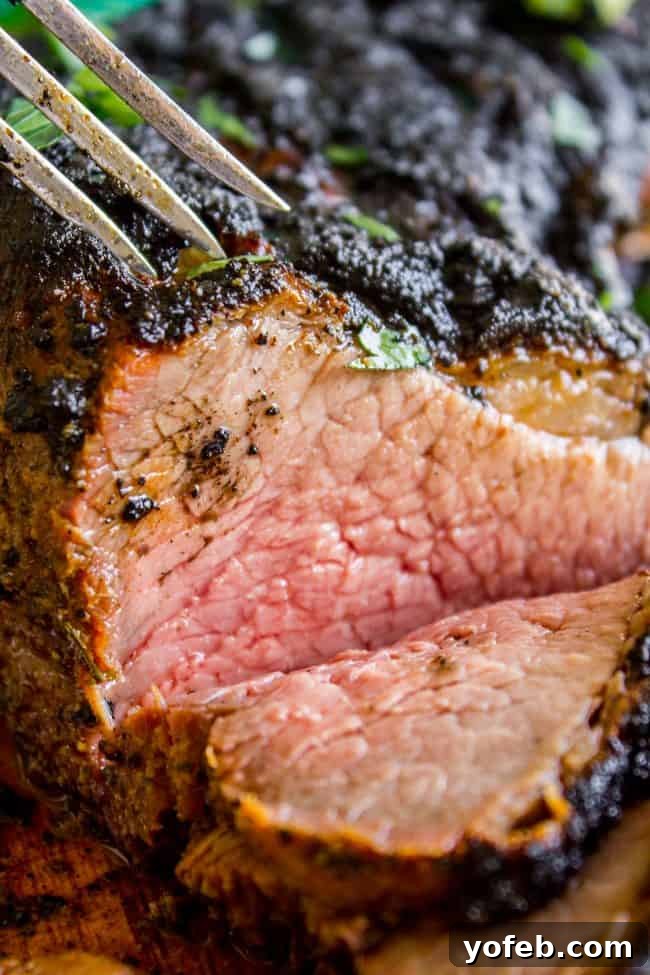
What makes tri-tip so special is its unique dual nature: it’s part steak, part roast. This means you get the best of both worlds. When cooked correctly, especially on the grill, you achieve a wonderfully tender, rosy-pink interior complemented by a beautifully browned and caramelized, slightly crispy exterior. Unlike a traditional large roast, tri-tip cooks much faster, making it perfect for weeknight dinners or special occasions when you don’t want to spend hours in the kitchen. Plus, it’s often more affordable than buying an equivalent quantity of premium steaks, offering exceptional value for its delicious, beefy goodness.
Featured Comment
“I NEVER leave reviews. This was an absolute hit with the family! I had it this morning as leftovers and even after the microwave the meat was still wonderfully tender. 5 stars for sure! ⭐️⭐️⭐️⭐️⭐️ “
– Jen
See All Comments
Is Tri-Tip Roast the Same as Tri-Tip Steak?
Technically, when you refer to “tri-tip,” you’re typically talking about the whole cut of meat, which could be called a “tri-tip roast.” A “tri-tip steak,” on the other hand, would be an individual slice from that roast. However, it’s crucial not to cut your tri-tip into strips before cooking and call it “steak”! The magic of tri-tip lies in cooking it as a whole roast to achieve that perfect sear and tender interior. Once cooked and rested, you’ll slice it into individual portions. If you wish to call these slices “tri-tip steak,” that’s perfectly fine!
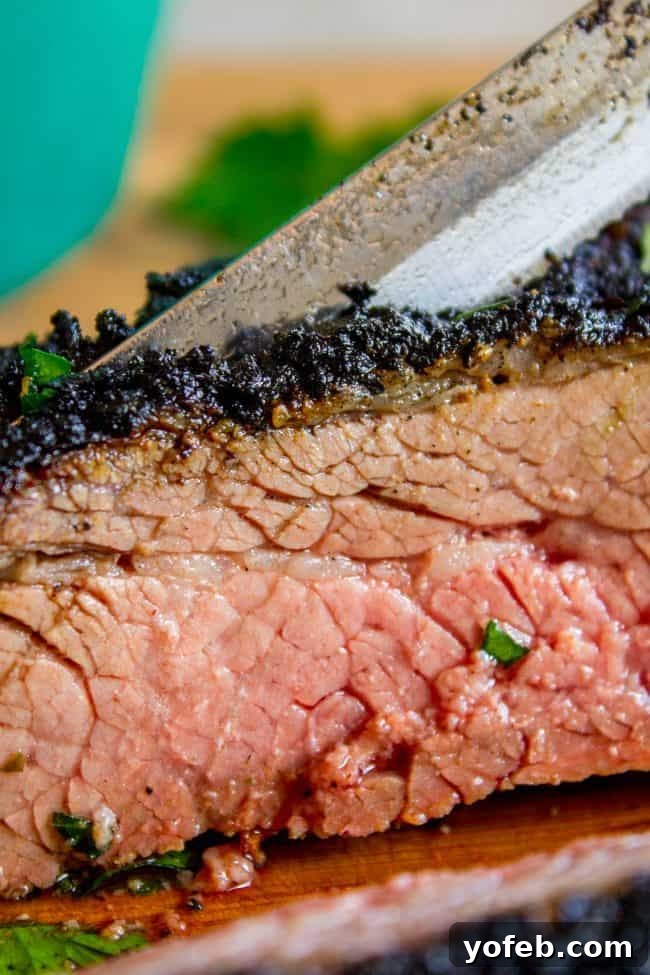
(Imagine the delicious juices flowing as this was sliced!)
In California, where I grew up, “tri-tip” is simply what we call the meat, whether it’s whole, cooked, or sliced. My family, deeply rooted in California culture, has enjoyed tri-tip at every Christmas dinner for as long as I can remember. It was a genuine surprise when I moved out of state as an adult to discover that many people hadn’t heard of this incredible cut of beef, underscoring its regional popularity.
Mastering the Perfect Tri-Tip: Grilled or Oven-Roasted
Is tri-tip a common sight in your area? If not, you are truly missing out on a fantastic culinary experience! Today, I’m excited to share two foolproof methods for cooking tri-tip: the highly recommended grilling method, which imparts an unparalleled smoky char, and a reliable oven-roasting technique for those without a grill. Both will deliver an incredibly tender and flavorful meal.
Growing up, tri-tip was a holiday staple, but we rarely cooked it ourselves. Our tradition involved ordering a large, perfectly grilled tri-tip tray from Fagundes Meats, a renowned butcher shop and deli in my hometown of Manteca, California. We’d pick it up on Christmas Eve and gently warm it in the oven for Christmas dinner the next day. This tradition instilled in me a deep appreciation for expertly cooked tri-tip.
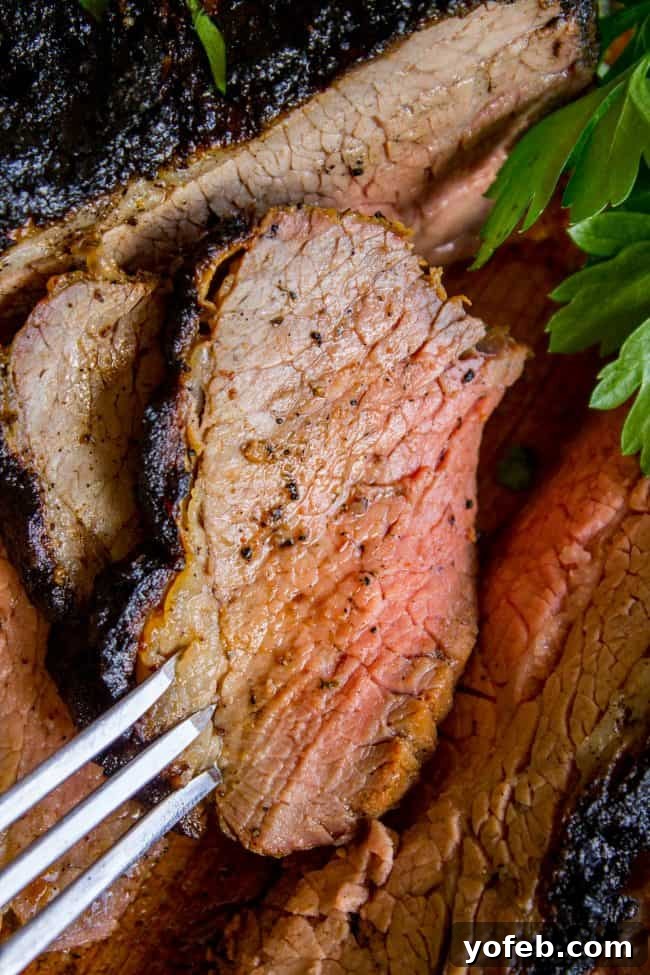
Now living an hour away in Sacramento, those spontaneous trips to Fagundes are less frequent. Driven by a desire to replicate that exquisite flavor at home, I contacted them to learn about their process. To my delight, their method was simpler and quicker than I had imagined – excellent news for any home cook looking for a delicious yet manageable recipe!
Essential Ingredients for Your Tri-Tip Recipe
Gathering your ingredients is the first step to a successful tri-tip. Below is a quick shopping list. For precise measurements and full instructions, make sure to jump to the recipe card!
- Tri-Tip Roast: Aim for a 2 ½-pound roast. When purchasing, ask your butcher for a well-marbled “California cut” or “triangle roast.” If these terms draw a blank, request the “bottom sirloin butt” or “subprimal cut.” Marbling is key for a juicy, flavorful result.
- Garlic Salt: A fundamental component for a savory base.
- Seasoning Salt: Adds depth and complexity to the flavor profile.
- Sugar: A small amount helps create a beautiful crust and balances the savory spices.
- Garlic Powder: Enhances the garlic flavor without adding moisture.
- Parsley: Fresh or dried, it adds a touch of herbaceous freshness.
- Olive Oil: Essential for the marinade, helping the spices adhere and contributing to tenderness.
Fagundes Meats is famous for its proprietary Santa Maria-style dry rub. While their secret recipe remains guarded, extensive research and experimentation have led to a seasoning blend that, to me, tastes just right. It’s incredibly simple yet powerfully delicious, relying on a balanced mix of salt, pepper, garlic, and other spices that elevate that classic garlicky essence. The best part? No chopping required – just a quick mix, and you’re ready to go!
How to Cook Tri-Tip: A Step-by-Step Guide
Here’s an overview of the process to prepare your tri-tip. For comprehensive, detailed instructions, please refer to the recipe card! Before you begin, decide on your cooking method:
- If you’re grilling, trim the fat cap from the roast for a crispier exterior.
- If you’re oven roasting, leave the fat cap on; it helps keep the meat moist.
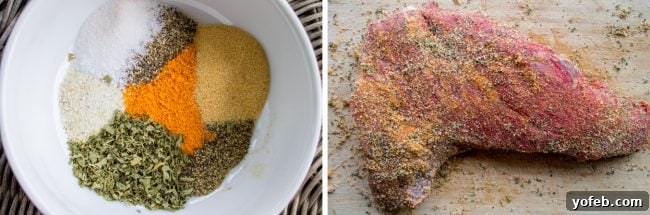
Regardless of your chosen method, the marination process is key. Begin by coating your tri-tip in a flavorful mixture of olive oil and spices: garlic salt, seasoning salt, Kosher salt (Diamond Crystal recommended – avoid table salt for better results!), black pepper, sugar, garlic powder, and fresh or dried parsley. Allow it to marinate for a minimum of 8 hours for maximum flavor and tenderness. This critical step infuses the meat with incredible taste and helps break down fibers for a wonderfully tender bite.
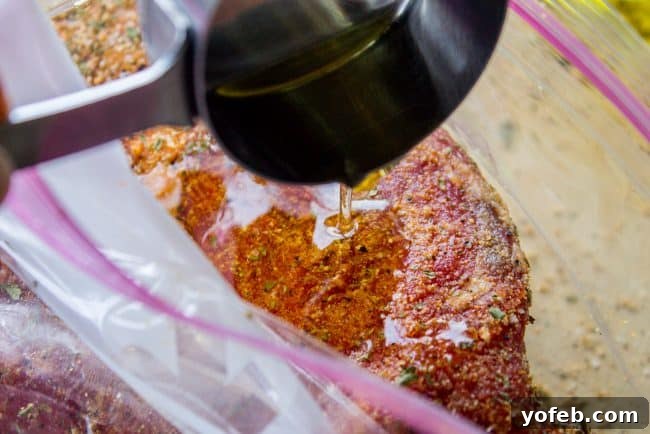
While both methods yield a delicious and tender tri-tip, it’s worth noting that they aren’t entirely equal. Tri-tip is truly designed for the grill, which provides that irresistible, ultra-crispy, blackened exterior and a depth of smoky flavor that’s hard to replicate indoors. Traditional Santa Maria tri-tip is often grilled over red oak, but a standard gas or charcoal grill will deliver excellent results. Don’t worry if you don’t have access to specialized wood – your regular grill will do the job beautifully!
How to Grill Tri-Tip for That Perfect Smoky Flavor
Grilling tri-tip creates a fantastic crust and smoky aroma that truly elevates this cut. Follow these steps for an unforgettable outdoor cooking experience:
- Bring to Room Temperature: Remove your marinated tri-tip from the refrigerator about 30 minutes before you plan to grill. This allows for more even cooking.
- Preheat the Grill: Ignite your grill and preheat it to high heat. Give it at least 15-20 minutes to reach optimal temperature for a good sear.
- Prepare for Searing: Transfer the roast to a clean plate and discard any leftover marinade (unless you plan to use it for a pan sauce). Lightly grease your grill grates or brush a little oil directly onto the meat to prevent sticking.
- Initial Sear: Place the tri-tip directly over high heat. Sear each side for approximately 2-3 minutes until a rich, dark brown crust develops. Keep the lid closed as much as possible to retain heat.
- Indirect Cooking: Turn off the burner directly beneath the meat. Reduce the heat on the other side(s) of the grill to low. You want to cook the tri-tip over indirect heat. If using charcoal, arrange your coals to one side and place the meat on the opposite side.
- Grill to Perfection: Close the lid and grill for about 20-25 minutes, or roughly 10-15 minutes per pound, depending on your desired doneness. Use a reliable meat thermometer inserted into the thickest part of the roast to monitor the internal temperature. For rare, aim for 135°F; for medium-rare, 145°F. Avoid cooking past 145°F to prevent dryness.
- Rest the Meat: Once the desired temperature is reached, remove the tri-tip from the grill and place it on a rimmed serving platter. Tent it loosely but completely with aluminum foil and let it rest for 10-15 minutes. This crucial step allows the juices to redistribute, ensuring a tender and moist final product.
- Slice and Serve: Slice the tri-tip against the grain (refer to our detailed slicing tips below) and serve immediately.
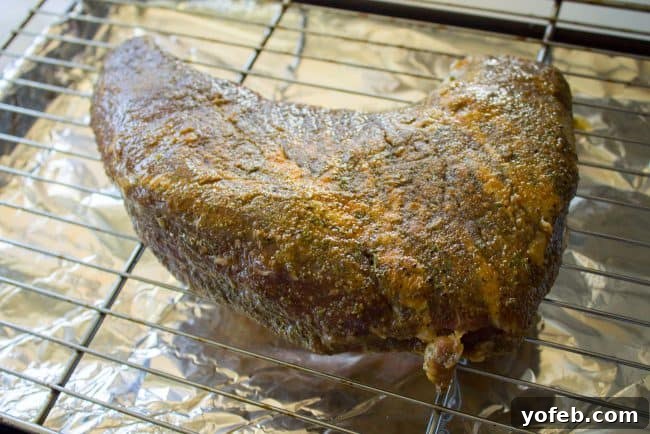
How to Cook Tri-Tip in the Oven for Tender Results
While grilling is often preferred, oven-roasting is an excellent alternative that still delivers a tender and flavorful tri-tip. Here’s how to achieve delicious results in your kitchen:
- Room Temperature Start: Take your marinated tri-tip out of the refrigerator 30 minutes before cooking. This helps ensure even heat penetration.
- Preheat Oven: Preheat your oven to a consistent 400°F (200°C).
- Prepare Baking Sheet: Line a rimmed baking sheet with aluminum foil for easier cleanup. Place an oven-safe cooling rack on top of the foil-lined sheet. This setup allows for even air circulation around the roast.
- Sear on Stovetop: Heat 2 tablespoons of olive oil in a large, heavy-bottomed skillet (such as cast iron) over medium-high heat until the oil shimmers. Place the tri-tip, fat-side down (if applicable), into the hot skillet. Sear for about 3-4 minutes until a deep brown crust forms. Flip the roast and sear the other side for an equal duration. This searing step locks in juices and creates a flavorful exterior.
- Transfer to Rack: Carefully transfer the seared tri-tip from the skillet to the prepared cooling rack on your baking sheet. If you plan to make a pan sauce, save the drippings and any remaining oil in the skillet.
- Oven Roast: Place the baking sheet with the tri-tip in the preheated oven. Bake for approximately 20-30 minutes, or roughly 10-15 minutes per pound, depending on how rare you prefer your meat.
- Internal Temperature Guidelines: For a rare tri-tip, aim for an internal temperature of 130-135°F (54-57°C). For medium-rare, target 135-145°F (57-63°C). It’s generally not recommended to cook tri-tip beyond medium-rare, as its lean nature can lead to dryness. Always use a reliable meat thermometer inserted into the thickest part of the roast to accurately check the temperature.
- Rest for Tenderness: Once the tri-tip reaches your desired doneness, remove it from the oven. Cover the roast generously with aluminum foil and let it rest for 10-15 minutes. This resting period is critical for the juices to redistribute throughout the meat, ensuring maximum tenderness and flavor.
- Slice and Serve: After resting, slice the tri-tip against the grain (see detailed instructions below) and serve immediately.
Fat Side Up or Down? The Tri-Tip Cooking Dilemma
The decision of whether to cook tri-tip fat-side up or down largely depends on your cooking method and how the meat is trimmed. Many tri-tips purchased from a butcher will already be trimmed, meaning the external fatty layers have been removed. If your cut still has a significant fat cap, here are my recommendations:
- For Grilling: I generally prefer to trim most, if not all, of the fat cap before grilling. This allows for a more even sear across the meat’s surface and prevents excessive flare-ups. Use a very sharp knife to carefully pull the fat away from the meat as you trim, removing any large, thick layers.
- For Oven Baking: When roasting in the oven, it’s beneficial to leave a thin layer of fat on one side. Place the tri-tip fat-side up. As the roast cooks, the fat will slowly render and baste the meat, helping to keep it moist and tender throughout the baking process. Ensure that at least one side is trimmed of thick fat for even cooking and browning.
After your tri-tip is cooked and has rested, if there’s any remaining thick fat, it should separate fairly easily. Use a sharp knife to fully remove it before you slice the meat for serving. This ensures every bite is pure, tender beef.
The Art of Slicing: How to Cut Tri-Tip Against the Grain
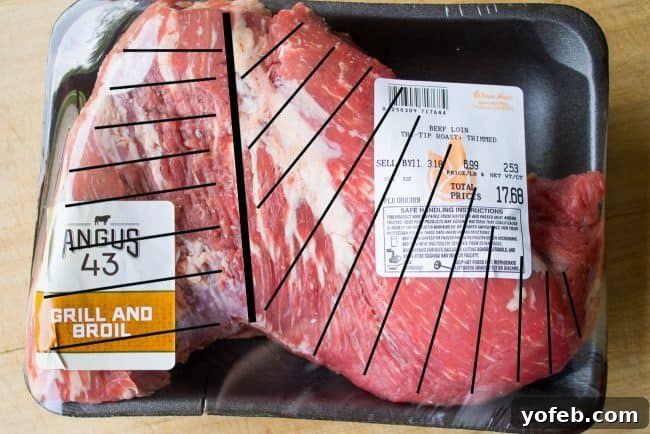
Slicing tri-tip correctly is just as important as cooking it properly for optimal tenderness. This cut is unique because its muscle fibers, or “grain,” run in two different directions, meaning you cannot slice it uniformly across the entire piece. The image above, though showing raw meat, serves as an excellent visual guide: the black lines indicate where you should make your cuts once the meat is cooked. (Remember, always slice cooked meat! The photo merely helps illustrate the grain direction.)
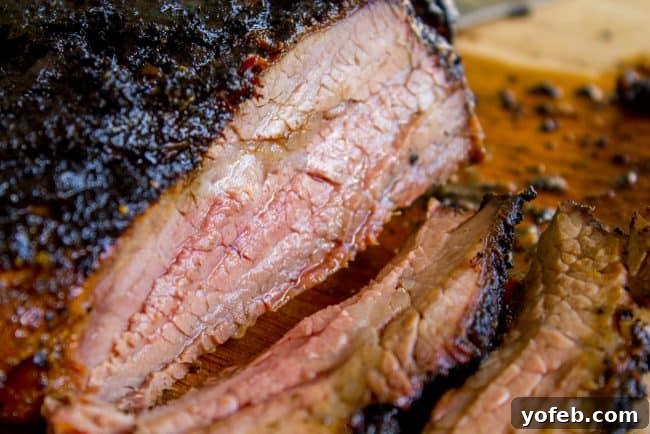
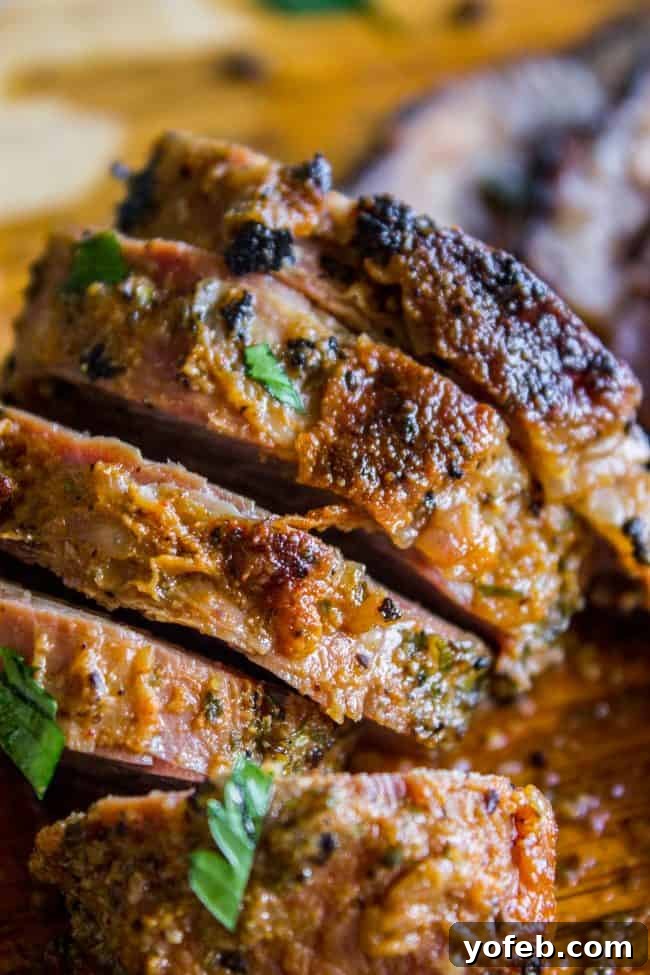
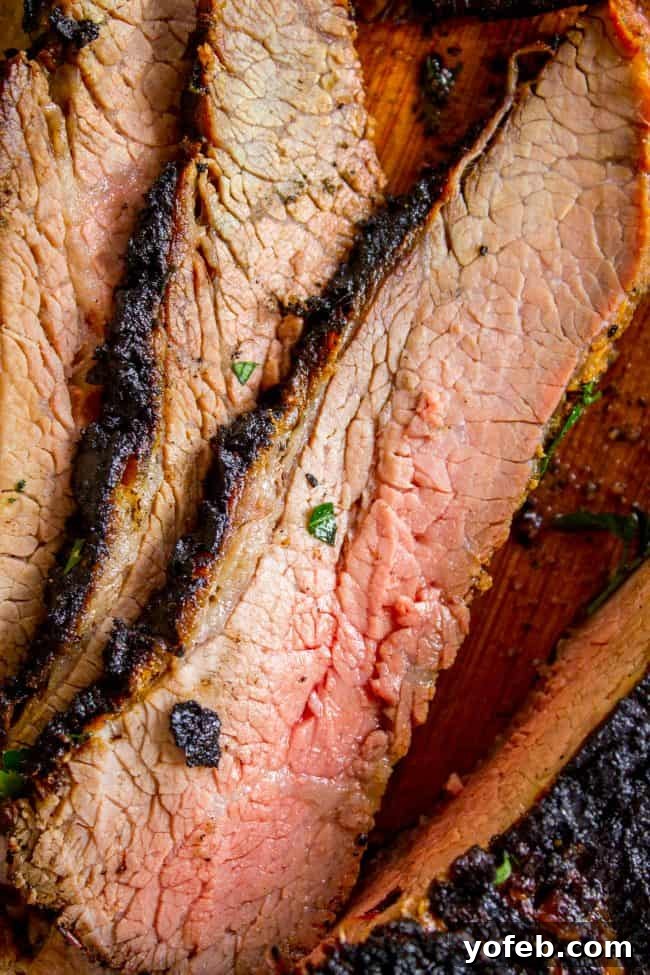
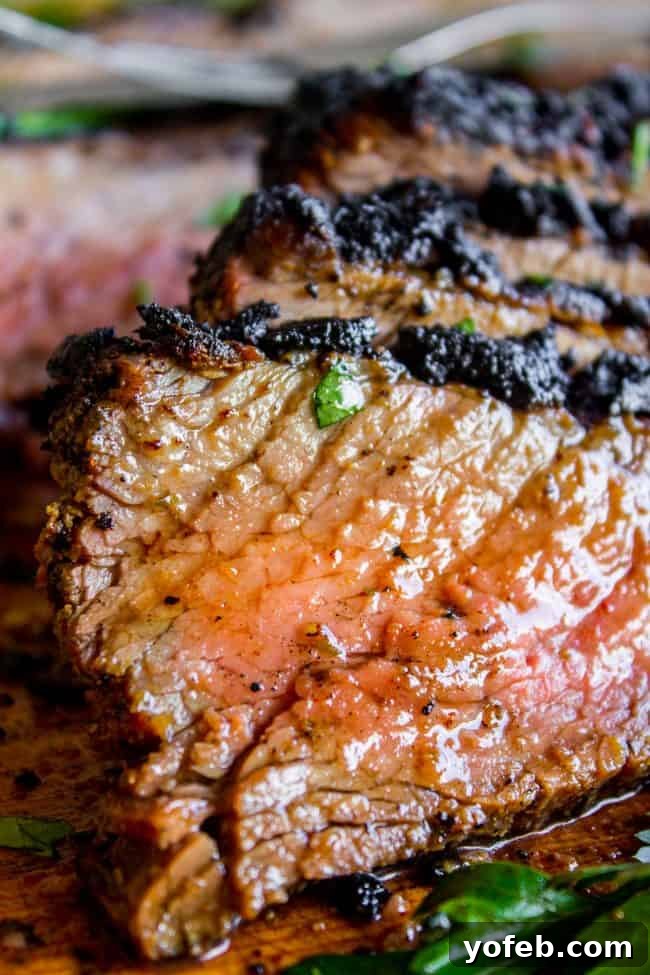
To ensure tender slices, all meat should be cut “against the grain.” This means your knife blade should be perpendicular to the visible lines of the muscle fibers. For tri-tip, observe the thicker fat line you see in the photo; this is generally where you can divide the roast into two main sections. Each section will have a different grain direction. Slice each of these sections individually, always ensuring your knife is cutting across the muscle fibers. This technique shortens the fibers in each bite, making the meat much more tender and enjoyable, which explains why some photos might show shorter slices and others long, thin ones, like the example below:
Serving Suggestions for Your Tri-Tip Steak
Tri-tip’s versatility means it pairs beautifully with a wide array of sides and can be enjoyed in various ways. Traditionally, in my family, it’s served as the star of our Christmas dinner, accompanied by classic holiday fixings like creamy mashed potatoes, rich gravy, savory stuffing, and warm dinner rolls. It’s a truly memorable holiday centerpiece.
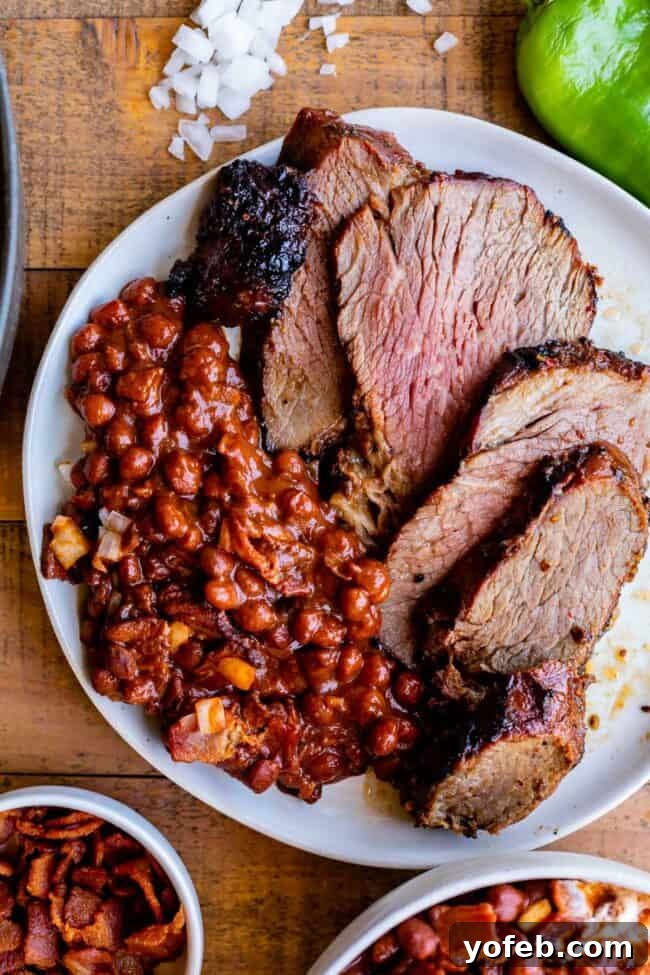
Beyond holiday meals, I discovered the quintessential companion for tri-tip: Santa Maria Pinquito Beans. These small, flavorful beans, native to the Santa Maria Valley, are slow-cooked with a smoky, slightly sweet profile that perfectly complements the beef. They are an absolute must-try, especially for a summer BBQ.
However, one of the most popular ways to enjoy tri-tip in California is in a sandwich. Imagine soft rolls – kaiser, hoagie, or ciabatta – generously filled with thinly sliced tri-tip, a smear of mayonnaise, a drizzle of your favorite BBQ sauce, and tender grilled onions. It’s pure heaven in every bite.
For a different take, consider using leftover tri-tip in tacos. Warm corn tortillas piled with flavorful tri-tip, fresh pico de gallo, and creamy sliced avocado create an irresistible and easy meal. You truly can’t go wrong!
If you’re hosting a summer cookout, alongside those essential Santa Maria pinquito beans, you have many excellent BBQ side options. Consider dishes like Jiffy Corn Casserole, a refreshing Greek Tomato Cucumber Salad, classic Deviled Eggs, or a hearty Macaroni Salad. And don’t forget dessert! The Pig Pickin’ Cake (Sunshine Cake), a delightful yellow cake with mandarin oranges and pineapple whipped cream, is the perfect sweet ending to any BBQ.
Beef Tri-Tip Storage and Reheating Tips
Like most steaks, tri-tip is at its absolute best when enjoyed fresh, immediately after cooking. However, any leftovers can be stored and still taste great with proper handling. Store cooked tri-tip tightly covered in the refrigerator for up to 5 days.
For best results, it’s ideal to leave any portion you won’t eat on the first day unsliced. Keeping the meat whole helps to retain its moisture and prevents it from drying out during storage and reheating. To reheat, wrap the unsliced tri-tip tightly in two layers of aluminum foil and warm it in an oven preheated to about 250°F (120°C) for approximately 30 minutes, or until heated through. Slice it against the grain only after it has been reheated.
If you only have sliced tri-tip leftovers, you can still reheat them using the same method. Be aware, however, that sliced meat tends to dry out a little more quickly during reheating. To mitigate this, you might place a small amount of beef broth or water with the sliced meat inside the foil packet before reheating.
Tri-Tip Steak Recipe FAQs
Nobody wants chewy tri-tip, and thankfully, it’s entirely preventable! The key to achieving a consistently tender tri-tip lies in several important steps:
1. Proper Marination: Ensure you generously rub the oil and spice mixture into the meat. This isn’t just about flavor; the oil helps tenderize the fibers. An ideal marination time is 8 hours, but even 1-3 days in the fridge can further enhance tenderness and flavor. If you’re short on time, even 15 minutes with a good rub and massage will make a difference.
2. Bring to Room Temperature: Always remove the tri-tip from the refrigerator 30-40 minutes before cooking. Starting at room temperature promotes more even cooking throughout the roast.
3. Avoid Overcooking: Tri-tip is a lean cut and can become tough if overcooked. Use a reliable meat thermometer! Remember that the internal temperature will continue to rise by a few degrees after the meat is removed from the heat (this is called carryover cooking). Take the tri-tip off the grill or out of the oven when it reaches about 5 degrees below your desired final doneness (e.g., 135°F for medium-rare, knowing it will climb to around 140°F).
4. Slice Against the Grain: This is arguably the most critical step for tenderness. As explained above, tri-tip has muscle fibers running in two different directions. Always slice perpendicular to these fibers to shorten them, making each bite much more tender.
The approach to using foil depends on your cooking method.
For Grilling: Absolutely do not wrap your tri-tip in foil during grilling! The foil would prevent the meat from developing that incredible crispy, smoky crust that is a hallmark of grilled tri-tip. You want those direct heat elements. If you’re concerned about it drying out, reduce the heat and move it to an indirect heat zone, but keep it uncovered.
For Oven Baking: This recipe’s baking times are designed for cooking without foil. However, if you notice the exterior is browning too quickly towards the end of the cooking time, but the internal temperature is still below 135°F, you can loosely tent the tri-tip with aluminum foil. This helps protect the surface from over-browning while allowing the interior to finish cooking. After cooking, always tent the roast with foil during its resting period to retain heat and redistribute juices.
No, tri-tip and brisket are distinctly different cuts of beef. Brisket is a much larger cut, typically weighing between 8 to 20 pounds or more, and is known for its higher fat content. It’s often slow-cooked or smoked for many hours to break down its tough connective tissues. Tri-tip, in contrast, is a leaner, smaller cut, usually weighing 2-6 pounds. It cooks much faster and offers a more steak-like texture, making it more versatile for grilling or roasting in less time than a brisket.
Compared to some other premium steak cuts like ribeye or filet mignon, tri-tip is generally a more affordable option. While it’s certainly not as inexpensive as ground beef, it delivers a high-quality, tender, juicy, and delectable steak experience without the premium price tag. It truly offers excellent value for a sophisticated beef dish, making it a smart choice for impressing guests or simply enjoying a fantastic meal.
Tri-tip goes by several names, especially outside of California. You might hear it called a “California cut,” a “triangle roast,” a “Newport steak,” or even a “Santa Maria steak,” acknowledging its origins. Some might even refer to it as a “poor man’s brisket,” though I strongly disagree, as it offers a rich and luxurious dining experience that is anything but “poor.” If your butcher is still unsure what you mean, asking for the “bottom sirloin butt” or “subprimal cut” should clarify your request.
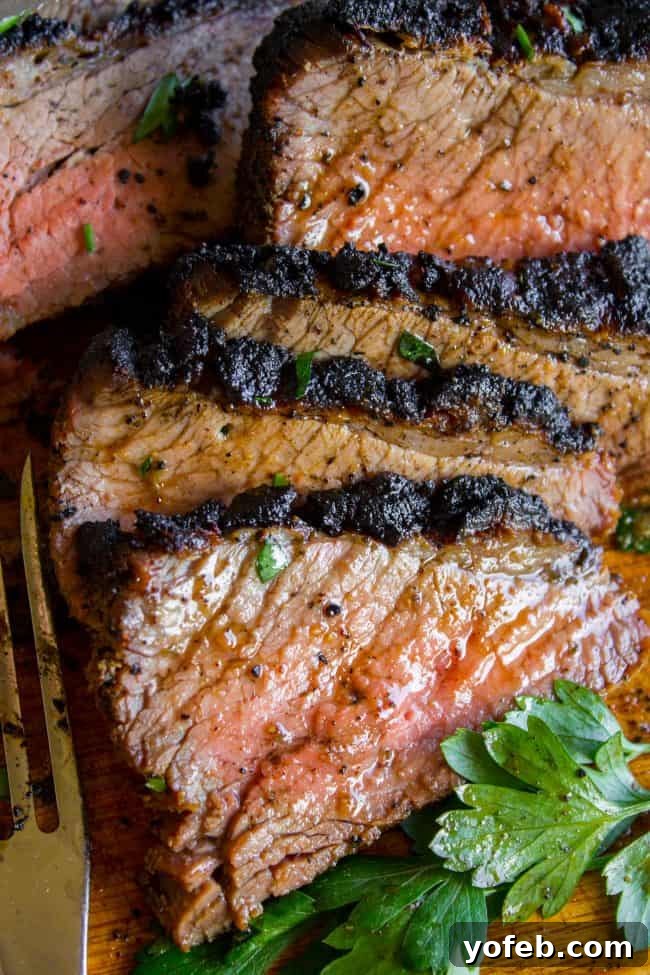
Now you’re equipped with all the knowledge to cook a magnificent tri-tip! This versatile cut is not just for summer BBQs; it makes an exceptional main course for Thanksgiving, offering a delicious alternative to turkey, or a grand statement for Christmas dinner alongside your traditional holiday sides like mashed potatoes and gravy. Its rich flavor and tender texture are sure to impress.
Remember, the classic Californian way to enjoy tri-tip is in a sandwich. Slice it thin, pile it high on a soft roll – be it a hoagie, kaiser, or ciabatta – and layer with mayo, grilled onions, and a generous slather of BBQ sauce. It’s a combination that truly sends you to culinary heaven! For an authentic pairing, I highly recommend our Santa Maria Pinquito Beans, a traditional side that perfectly complements the smoky beef.
If you’re eager to expand your grilling repertoire, be sure to check out my guides on How to Cook Flank Steak and How to Cook Ribeye Steak. Happy cooking!
More Holiday and Special Occasion Dinner Ideas!
- Prime Rib Recipe To Impress Your Guests >> a holiday main dish worth the hype!!
- Texas Beef Brisket In The Oven >> tender and smoky, and easy – you’ll be crying happy tears, promise
- Easy Fall-Apart Pot Roast with Carrots (Slow Cooker) >> this is my favorite pot roast ever!
- Cuban Mojo Marinated Pork (Lechon Asado) >> my most popular recipe of all time!
- Bacon Blue Cheese Brisket (Slow Cooker!) >> how can you go wrong with bacon??
- Oven Roasted Cranberry-Dijon Glazed Ham >> this is so great for the holidays!
- Pork Crown Roast with Drunken Apples from Jess Pryles
- Pork and Currant Roasted Duck from Beyond Sweet and Savory
Facebook | Pinterest | Instagram

Tri Tip (2 Ways)
Rate this Recipe
Print Recipe
Ingredients
- 2 & 1/2 pound tri tip roast
- 1 & 1/2 teaspoons garlic salt
- 1 tablespoon Lawry’s seasoning salt
- 1 & 1/2 teaspoons kosher salt, Diamond Crystal
- 1 teaspoon black pepper
- 1/2 teaspoon sugar
- 2 teaspoons garlic powder
- 1 tablespoon dried or fresh parsley
- 1/4 cup olive oil
Instructions
Choose your tri tip:
-
If you can, source your tri-tip from a local butcher. They often carry “prime” cuts, which boast superior marbling and fat content compared to what’s typically found at a grocery store. This extra marbling contributes significantly to flavor and will require a slightly longer cooking time.
-
When buying from a grocery store, opt for a high-end establishment. These stores usually offer mid-range cuts of meat with better marbling. Discount stores, conversely, may have leaner cuts that shrink more during cooking and require less time.
-
Always ask your butcher or grocery clerk for a well-marbled tri-tip roast, or use the alternative names like “California cut” or “triangle roast.” If they’re still unfamiliar, try asking for the “bottom sirloin butt” or “subprimal cut.”
Prepare the marinade:
-
In a small bowl, thoroughly combine all the dry spices: garlic salt, seasoning salt, kosher salt (Diamond Crystal is preferred – avoid table salt as it can make the meat too salty), black pepper, sugar, garlic powder, and parsley. Use 1 tablespoon of dried parsley, or 2-3 tablespoons if using fresh.
-
If you are planning to grill, carefully trim the fat cap from the roast. For oven roasting, you can leave the fat cap on to help keep the meat moist.
-
Rub the spice mixture generously over the entire roast with your hands, ensuring an even coating. Place the seasoned tri-tip in a large zip-top bag and add 1/4 cup of olive oil. Seal the bag, then massage the oil into the meat, ensuring it’s fully coated. Refrigerate and marinate for at least 8 hours, turning the bag a few times to redistribute the marinade. (This marination time is ideal for maximum flavor and tenderness, but even an hour or 15 minutes will make a difference. You can marinate for up to 3 days.)
How to Grill Tri Tip:
-
Remove the tri-tip from the refrigerator approximately 30 minutes before you intend to cook it. This allows the meat to come closer to room temperature for more even cooking.
-
Preheat your grill to high heat. Ensure it heats up thoroughly for a good 15-20 minutes before placing the meat on it.
-
Place the marinated roast on a clean plate and discard any leftover marinade (unless you plan to create a pan sauce from it).
-
Lightly grease the grill grates, or brush a small amount of oil directly onto the meat just before placing it on the grill.
-
Sear the tri-tip directly over high heat for about 2-3 minutes per side, until a beautiful, rich brown crust has formed. Flip the roast once, greasing again if necessary, and sear the second side for another 2-3 minutes. Keep the grill lid closed as much as possible during searing to maintain high heat.
-
After searing, turn off the heat on the side of the grill where the meat is positioned. Adjust the other side(s) of the grill to low heat. The goal is to finish cooking the tri-tip over indirect heat. If you are using a charcoal grill, arrange the coals to one side and place the meat on the opposite side, away from direct heat.
-
Close the grill lid and cook for approximately 20-25 minutes, or roughly 10-15 minutes per pound. The exact time will depend on your desired level of doneness. Use a meat thermometer inserted into the thickest part of the roast to check the internal temperature. Aim for 135°F for rare and 145°F for medium-rare. Avoid cooking beyond 145°F to prevent the meat from becoming dry.
-
Once the tri-tip reaches the desired internal temperature, carefully remove it from the grill and place it on a rimmed serving platter. Tent the roast completely with aluminum foil and allow it to rest for 10-15 minutes. This crucial resting period allows the juices to redistribute throughout the meat, ensuring maximum tenderness and moisture.
-
Slice the tri-tip against the grain (refer to our detailed photo guide) and serve immediately. It pairs wonderfully with its traditional side dish, Santa Maria Pinquito Beans!
How to Roast Tri Tip in the Oven:
-
Remove the tri-tip from the fridge about 30 minutes before cooking to allow it to reach room temperature for more even roasting.
-
Preheat your oven to 400°F (200°C).
-
Line a rimmed baking sheet with aluminum foil and place an oven-safe cooling rack on top. Set this aside.
-
Heat a large skillet over medium-high heat. Add 2 tablespoons of olive oil. Once the oil shimmers, place the roast in the pan, fat side down (if applicable). Sear the roast for approximately 3-4 minutes until a deep brown crust develops. Flip and sear the other side for an equal amount of time.
-
Transfer the seared roast from the skillet to the cooling rack on the prepared baking sheet. If you plan to make a pan sauce, save the drippings and oil from the searing.
-
Place the baking sheet with the roast into the preheated oven and bake at 400°F for about 20-30 minutes, or roughly 10-15 minutes per pound, depending on your preferred doneness. For rare, aim for 130-135°F (54-57°C). For medium-rare, target 135-145°F (57-63°C). It is generally not recommended to cook tri-tip past 145°F (medium-rare) as it is a leaner cut and can become dry. Always use a reliable meat thermometer inserted into the center of the roast to check the temperature accurately.
-
Remove the roast from the oven, and cover it well with aluminum foil. Let it rest for 10-15 minutes. This step is crucial for the juices to redistribute, ensuring a tender and moist roast.
-
Slice the tri-tip against the grain (refer to our photos for guidance) and serve. Don’t forget to try it with its traditional side dish, Santa Maria Pinquito Beans!
To make a pan sauce:
-
Save all meat drippings from the pan after searing and any excess marinade. Transfer these to a small saucepan and add 2 cups of beef broth. Bring the mixture to a boil. In a separate small bowl, whisk together 1/3 cup of cold water and 3 tablespoons of all-purpose flour until smooth. Slowly pour this slurry into the boiling broth, whisking continuously. Continue to simmer the sauce for 5-10 minutes, or until it has thickened to your desired consistency. Finally, stir in 2 tablespoons of butter, season with salt and pepper to taste, and serve alongside your delicious tri-tip.