
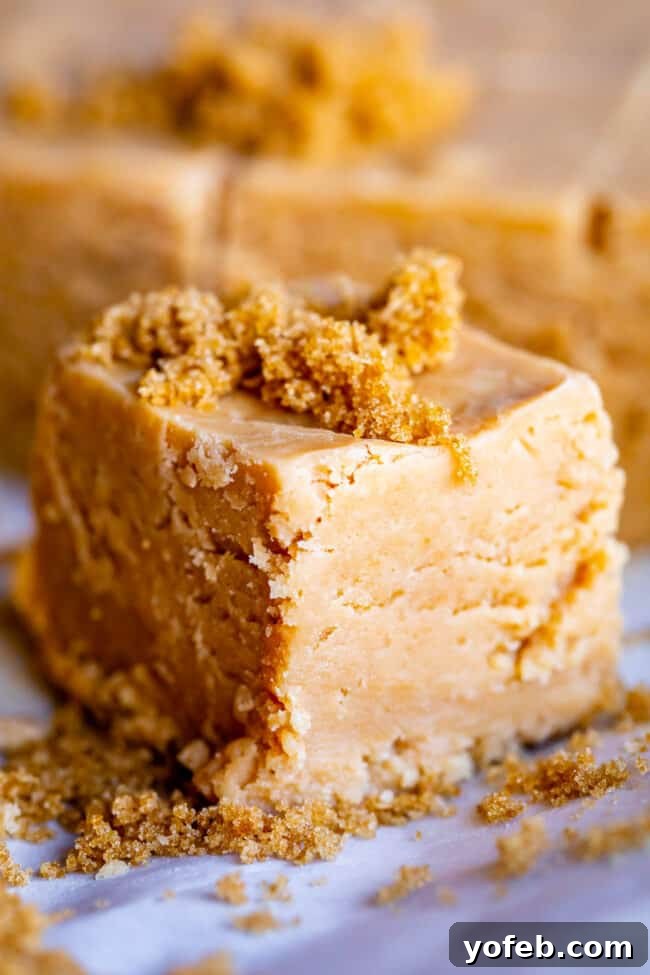
Welcome to the enchanting world of Penuche Fudge – a decadent brown sugar confection that promises to melt in your mouth with every bite. If you’ve been searching for an easy, foolproof fudge recipe that delivers exceptional texture and unparalleled flavor, your quest ends here. This Penuche Fudge, a delightful cousin to classic chocolate fudge, swaps cocoa for the rich, caramelized notes of brown sugar and the creamy elegance of high-quality white chocolate. It’s a recipe that takes mere minutes to prepare but leaves a lasting impression, making it perfect for holiday platters, thoughtful gifts, or simply a sweet indulgence.
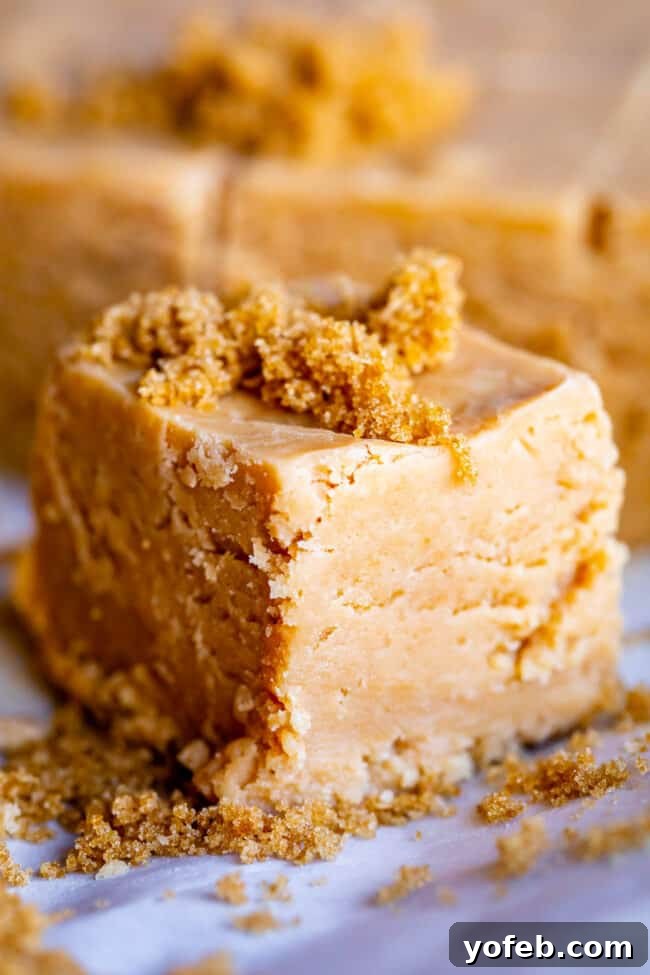
Table of Contents
- The Allure of Penuche Fudge
- What Exactly is Penuche?
- Discovering the Magic of Penuche Fudge
- Selecting the Best White Chocolate for Your Brown Sugar Fudge
- Mastering This Foolproof Penuche Fudge Recipe
- Elevate Your Brown Sugar Fudge with Delicious Toppings
- More Irresistible Recipes Like This Penuche Fudge:
- Penuche Recipe (Brown Sugar Fudge) Recipe
Life, much like baking, can present unexpected twists. Just this morning, I found myself in a moment of pure, unexpected laughter, even as chaos unfolded. It began pre-dawn, with the sound of my husband rummaging in the medicine cabinet. I imagined him reaching for ibuprofen, perhaps before heading to the gym. Then came the crash, followed by an “Oh no.”
What ensued was a scene that might have been dramatic if it weren’t so utterly absurd: shattered glass and vibrant red nail polish splattered across our vanity, the wall, the floor, Eric’s pajamas, and even my charging phone. The culprit? A bottle of nail polish I’d carelessly placed in the medicine cabinet the night before, right in front of the ibuprofen. A definite case of “things not belonging where they are.”
It’s fascinating how truly unfunny situations can sometimes provoke the most maniacal laughter. After forty-five minutes of scrubbing and liberal amounts of bleach, our bathroom is mostly restored. Still, I have a feeling this is the kind of incident where, six months from now, I’ll discover a rogue red drop on the ceiling or in some forgotten corner. The whole ordeal also made me realize how quickly a minor accident can escalate to “maybe we should just remodel this bathroom after all!” Thankfully, we managed to get it back to normal, avoiding a bathroom renovation alongside the arrival of our new baby, who is due tomorrow!
Yes, he’s almost here! With Christmas next week and our baby’s due date upon us, I’m brimming with excitement. Hopefully, my next post will be able to share some pictures of our little boy!
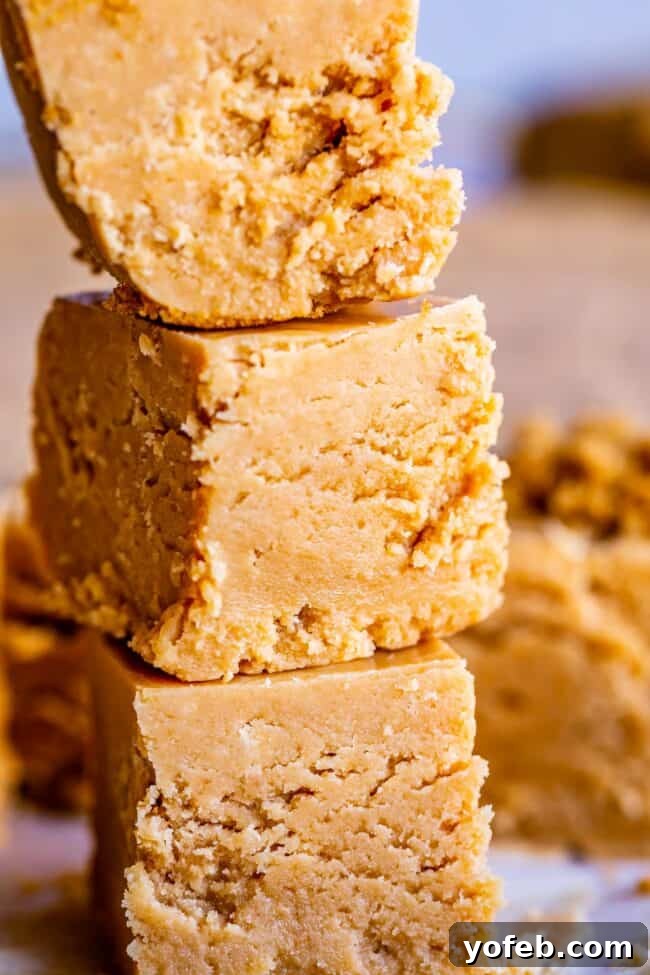
The Allure of Penuche Fudge
But before all that, I absolutely must share my excitement for today’s Penuche Fudge recipe! One of the most beloved recipes on my site, especially during the Christmas season, is My Mom’s Chocolate Fudge. It’s a truly foolproof, no-fail creation, crafted with chocolate chips and marshmallow creme. What makes it a perennial favorite is its incredible ease – it comes together in just a few minutes – and a texture that, in my honest opinion, surpasses any store-bought fudge. It’s simply the BEST. And here’s the wonderful news: today’s Penuche Fudge boasts the exact same perfect, melt-in-your-mouth texture, but with a unique brown sugar twist.
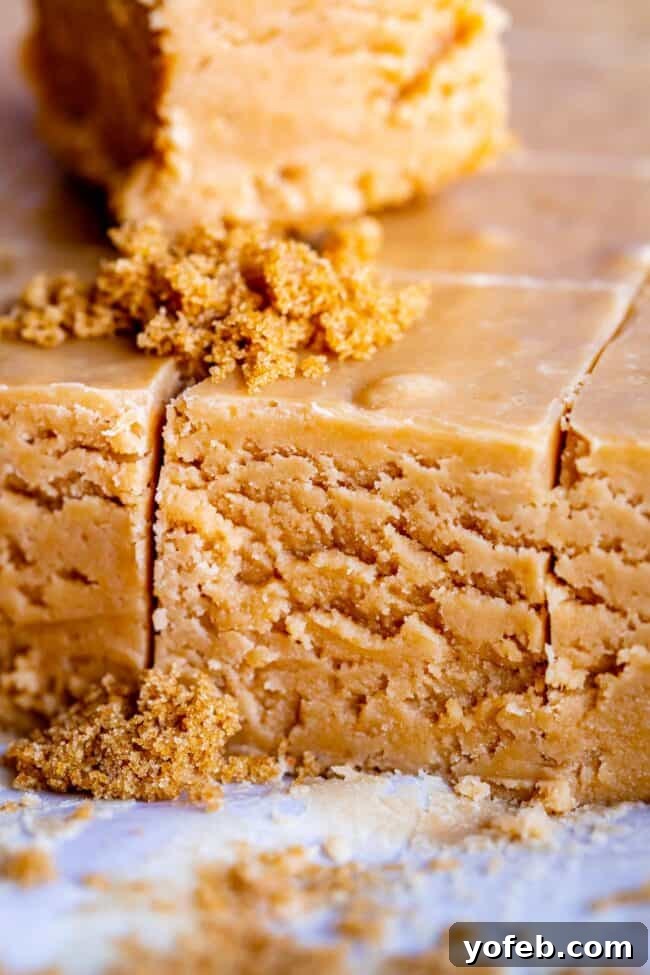
My mom’s original chocolate fudge recipe, which has become a cherished holiday tradition for us, is actually based on the classic “Fantasy Fudge” recipe that used to be printed on the marshmallow fluff jar. She made a few subtle adjustments over the years, perfecting it into the version we all adore. I only learned of its famous origin when I first shared it on the blog! To me, it will always be “My Mom’s Fudge” – the recipe we meticulously prepared every Christmas for our neighbors, a sweet ritual that has been a part of my life for as long as I can remember. This Penuche version takes that same reliable technique and infuses it with a rich, caramelly depth that is simply divine.
What Exactly is Penuche?
Penuche is a distinctive type of candy, renowned for its rich, buttery, and deeply caramelized brown sugar flavor. Unlike traditional chocolate fudge, Penuche focuses entirely on the unique nuances of brown sugar, butter, and milk, with vanilla typically being the only added flavor. This simplicity allows the inherent molasses notes of the brown sugar to truly shine through, creating a deep, complex sweetness that is both comforting and sophisticated.
Regionally, Penuche holds different names. In New England, it’s fondly known as Penuche, a term that evokes images of old-fashioned candy shops and homemade treats. Travel to the American South, however, and you’ll find a very similar confection often referred to as Praline Fudge. While classic Penuche candy can sometimes have a slightly grainy texture, today’s recipe offers a smoother, more fudgy rendition, perfectly blending the rich flavors of Penuche with the creamy consistency of classic fudge. It’s a delightful journey into a lesser-known but equally beloved candy tradition, offering a refreshing alternative to chocolate for your sweet cravings.
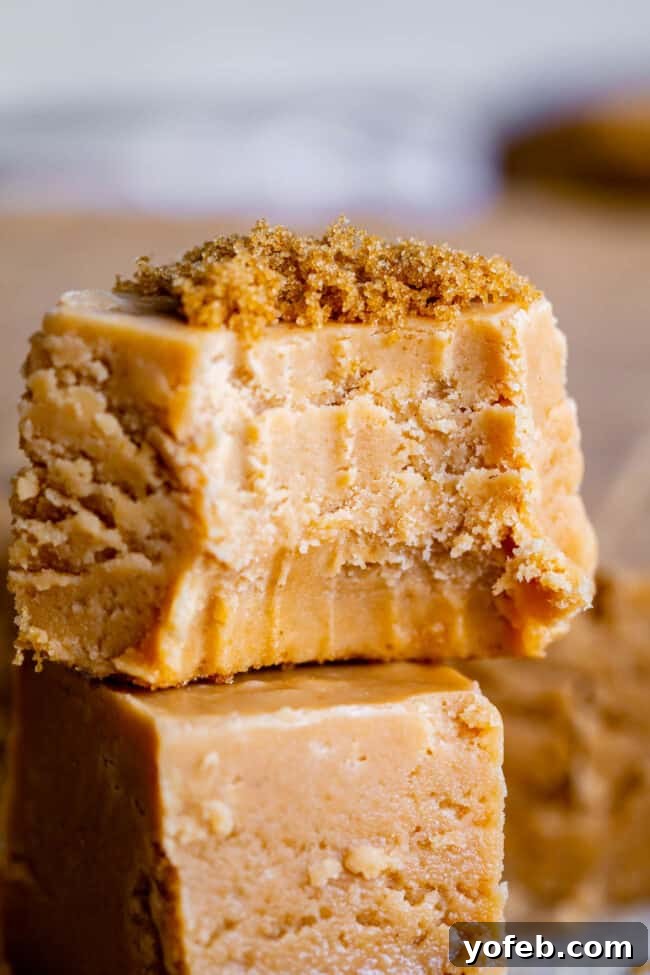
Discovering the Magic of Penuche Fudge
This particular recipe for Penuche Fudge truly sets itself apart. While many traditional penuche recipes rely on powdered sugar or specific crystallization techniques, ours takes a slightly different, more approachable path by incorporating luxurious white chocolate. The white chocolate isn’t merely an addition; it plays a crucial supporting role, contributing to the fudge’s velvety smooth texture and subtly enhancing its overall richness. It’s important to note that the quality of your white chocolate will directly influence the final taste, so opting for a high-quality product is key to achieving optimal results.
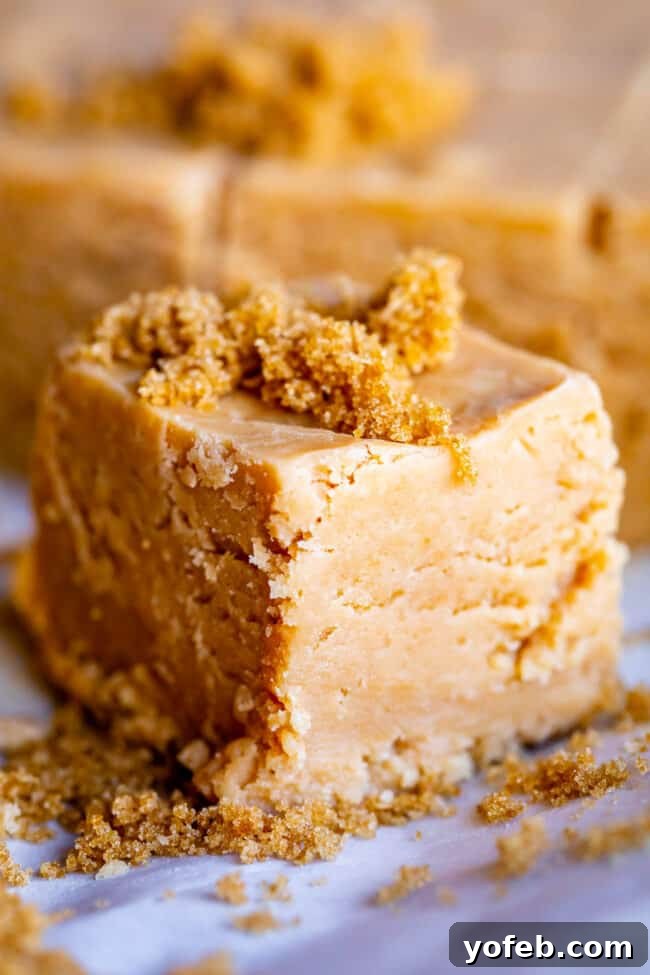
However, make no mistake: the star of this show is undoubtedly the brown sugar. Its deep, molasses-y goodness dominates the flavor profile, creating a caramel-like experience that’s incredibly satisfying. You’ll even notice subtle maple overtones, a delightful surprise given that there’s no actual maple in the recipe. This unique blend of flavors, combined with an unbelievably smooth texture, makes this Penuche Fudge an unforgettable treat. It’s a wonderful twist on a classic, offering a sophisticated sweetness that is both familiar and exciting.
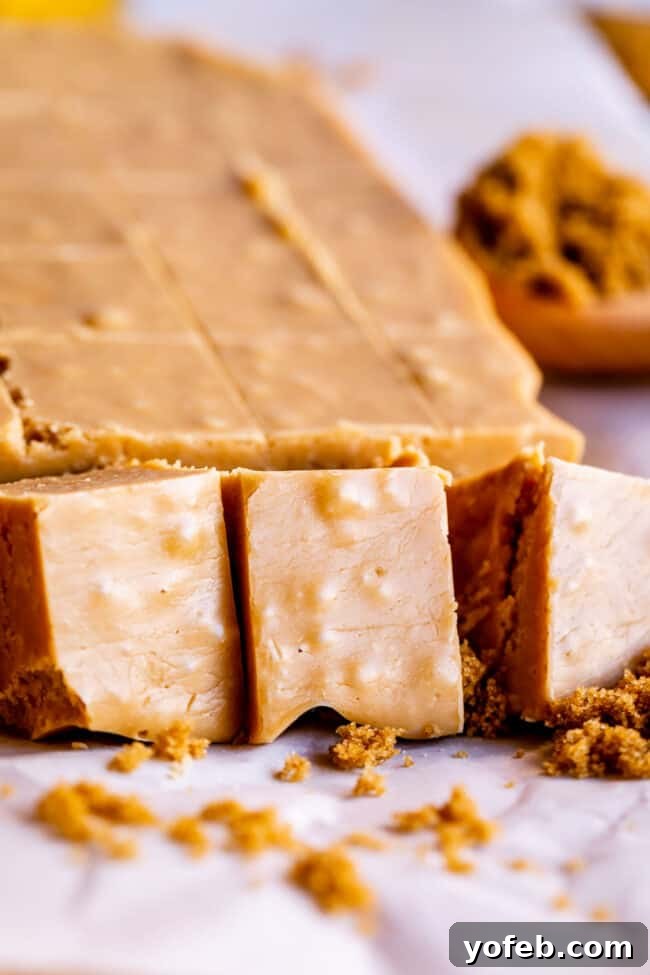
Selecting the Best White Chocolate for Your Brown Sugar Fudge
Before we dive into the steps of creating this magnificent Penuche Fudge, let’s talk about a critical ingredient: white chocolate. The quality of the white chocolate you choose is paramount, as it directly influences the flavor and luxuriousness of your final fudge. To ensure the best possible taste, always opt for white chocolate that explicitly lists **cocoa butter** as an ingredient. This is the hallmark of true white chocolate.
Unfortunately, many brands of white chocolate chips on the market do not contain cocoa butter. Instead, they are often made with a blend of oils and milk powder, which can result in a less flavorful and sometimes waxy texture. If it doesn’t contain cocoa butter, it’s technically not real white chocolate, and its impact on your fudge will be noticeably different.
I’ve experimented extensively with this recipe, and the results speak for themselves. I once made a batch with Ghirardelli white chocolate chips (which, surprisingly, lacked cocoa butter – come on, Ghirardelli!). Another attempt used a generic brand of almond bark, also without cocoa butter. The third, and by far the superior batch, utilized chopped Ghirardelli white chocolate baking bars, where cocoa butter was proudly listed as the second ingredient. The difference in taste was remarkable. The fudge made with real white chocolate was infinitely more delicious, boasting a richer flavor and smoother finish.
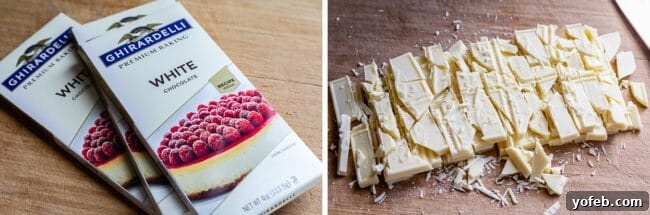
While the batch made with “fake” white chocolate was still edible and perfectly fine if you’re on a tight budget, the genuine article elevates this Penuche Fudge to an entirely new level. If you’re curious to learn more about distinguishing real white chocolate from its imitations and discover the best brands, I highly recommend checking out this Serious Eats article. The bottom line remains: if cocoa butter is in the ingredients list, you’re on your way to a fudge that’s 10 times more flavorful and truly exceptional.
Mastering This Foolproof Penuche Fudge Recipe
Creating this irresistible Penuche Fudge is a straightforward process, but a few key techniques will ensure a perfectly smooth and creamy result every time. Follow these steps closely for fudge success:
1. Prepare Your Pan and Ingredients: Before you begin cooking, ensure your 8 or 9-inch square pan is lined with aluminum foil or parchment paper. If using foil, a light coat of nonstick spray will prevent sticking. Crucially, have all your other ingredients measured and ready, as speed is key once the cooking process begins. Chop your high-quality white chocolate into small, uniform pieces to facilitate quick melting. Prepare your marshmallow creme by removing the lid and any foil lining – you can optionally microwave it for about 20 seconds later to make scooping easier, a little trick that saves time and effort. Also, have your vanilla extract and kosher salt within easy reach.
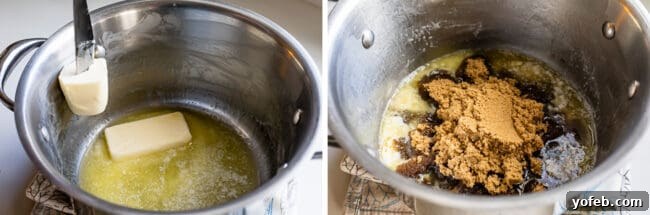
2. Preventing Sugar Crystals: In a heavy 3-quart saucepan over medium-high heat, begin to melt the butter. As it melts, take a moment to use your spoon or a piece of butter wrapper to rub the melted butter around the sides of the pot, almost to the top. This crucial step helps prevent sugar crystals from forming on the edges of the pan, which can prematurely crystallize your fudge and affect its smooth texture. When adding the brown sugar, gently pour it into the center of the pot, again being careful to avoid getting sugar granules on the pan’s sides.
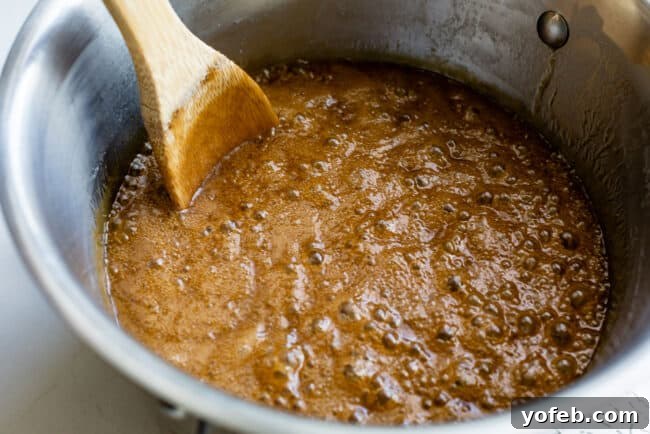
3. Boiling to Perfection: Add the evaporated milk and light corn syrup to the butter mixture. Stir slowly with a wooden spoon until the butter is completely melted and fully incorporated into the mixture. The corn syrup is essential here as it helps prevent sugar crystallization, ensuring a silky-smooth fudge. Bring the mixture to a full rolling boil over medium-high heat, stirring constantly. A “rolling boil” means there are vigorous bubbles erupting across the entire surface of the mixture, not just around the edges. Once you achieve this rolling boil, set a timer for exactly 5 minutes. Reduce the heat slightly to medium to maintain a steady boil without scorching the bottom, and continue stirring constantly for the full 5 minutes. If you’re using a candy thermometer, aim for a temperature of approximately 236°F (113°C) – the “soft ball” stage.
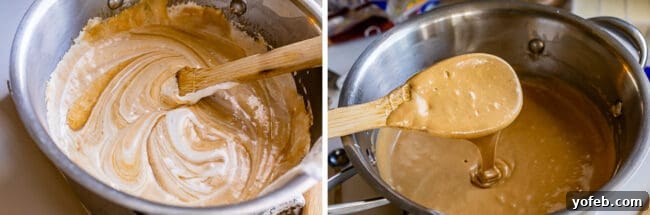
4. Rapid Incorporation of Ingredients: The moment your 5-minute timer sounds, immediately remove the pot from the heat. This is where speed becomes paramount. Stir in your chopped white chocolate with urgency, continuing to stir until every last lump has dissolved and the mixture is perfectly smooth. Any hesitation here can cause the fudge to begin hardening prematurely. Next, if you chose to microwave your marshmallow creme, it should now be soft and easy to scoop. Quickly add the entire jar to the fudge mixture. Again, stir vigorously and without pause until the marshmallow creme is fully incorporated and there are no streaks. This quick action is what locks in the creamy texture.
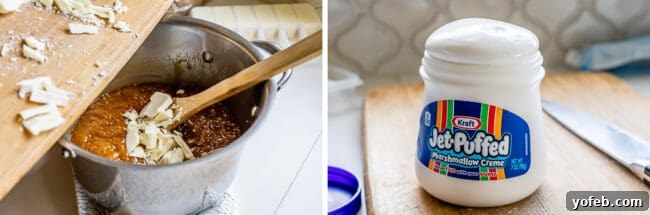
5. Final Touches and Setting: Add the vanilla extract and kosher salt to the fudge. Now, beat the fudge with your wooden spoon, making sure to scrape the bottom and sides of the pot thoroughly. Continue beating until all the marshmallow is completely incorporated and the fudge boasts an even, light golden color with no streaks remaining. At this stage, if you’re keen on adding nuts, now is the time to fold in your chopped toasted pecans or walnuts – about 2/3 to 3/4 cup would be ideal. Don’t worry if the fudge still looks like it has tiny lumps; these are often just air bubbles that will resolve as it sets, contributing to its smooth, creamy finish. Immediately pour the prepared fudge into your lined square pan, smoothing the top with a spatula if desired.
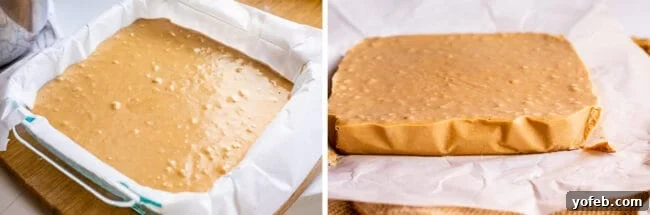
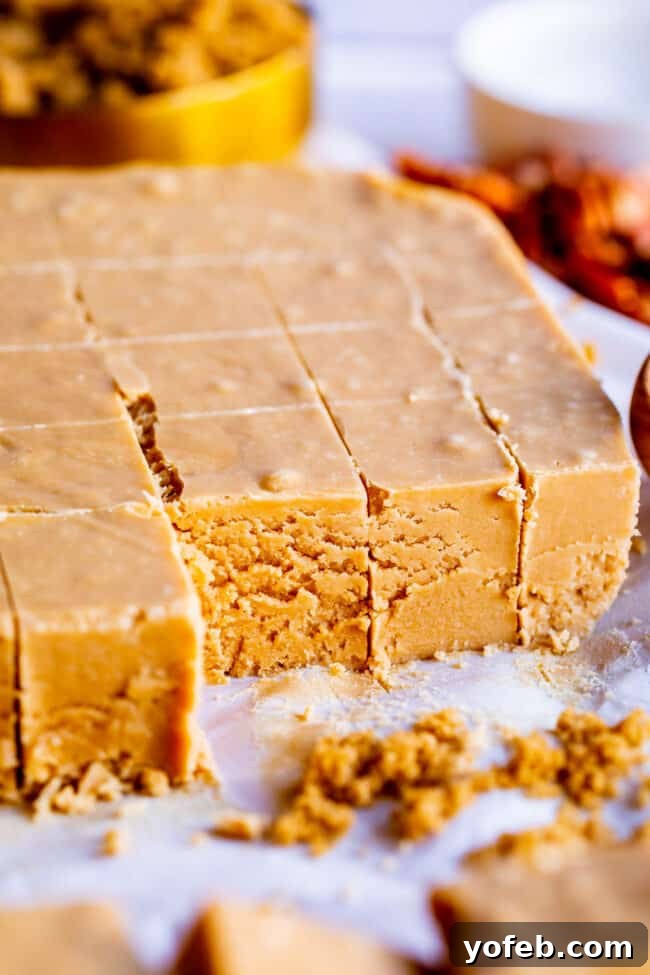
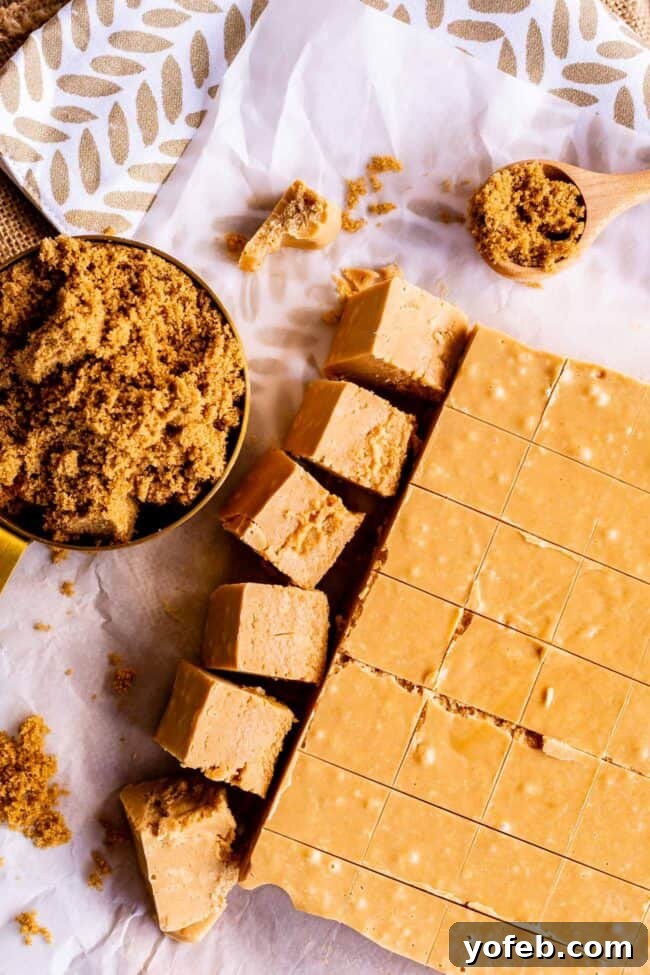
6. Cooling and Storage: Allow the fudge to cool completely to room temperature, which typically takes 3-5 hours depending on your home’s ambient temperature. Once it has cooled for about half an hour, cover it tightly with plastic wrap or a lid to prevent it from drying out. While you can refrigerate it to speed up the cooling process, it’s best to let it return to room temperature before attempting to slice for the cleanest cuts. When ready to serve, simply lift the parchment paper or foil out of the pan, use a long chef’s knife for even slices, and enjoy! Store the fudge covered on the counter, where it will remain fresh for 3-5 days before starting to dry out.
This recipe is not just for immediate enjoyment; it’s also perfect for holiday prep! You can easily freeze this fudge. I do it every year for Christmas. For best results, freeze it in a solid block and allow it to thaw to room temperature before slicing. Alternatively, slice it into individual pieces, arrange them in a sealed freezer-safe container, and then freeze. This latter method is my preferred approach, as it allows me to conveniently grab pieces directly from the freezer to add to cookie platters or enjoy as a quick treat. This Penuche Fudge is truly a gift that keeps on giving, making your holiday preparations or any spontaneous craving a little sweeter and a lot simpler.
Elevate Your Brown Sugar Fudge with Delicious Toppings
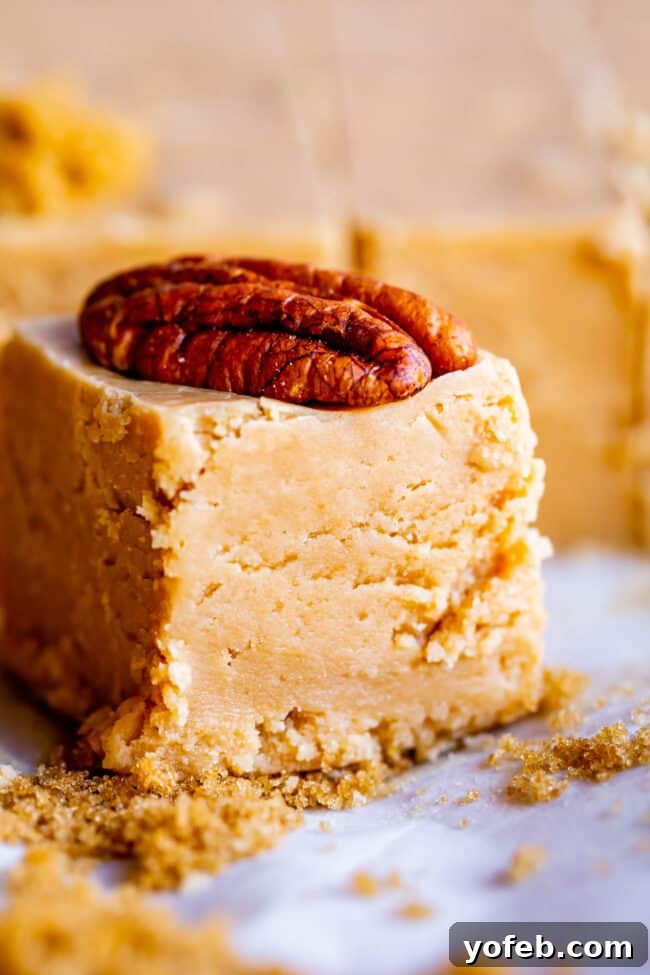
While this Penuche Fudge is undeniably delicious on its own, it truly shines when paired with certain toppings. One of my absolute favorite enhancements for this brown sugar delight is the addition of toasted pecans. I confess, I’m generally a purist when it comes to fudge – typically preferring no nuts at all. However, I must admit that the combination of the deep, caramel-like brown sugar and the earthy crunch of toasted pecans is absolutely killer. It creates a harmonious balance of flavors and textures that is simply irresistible.
You have a couple of options for incorporating pecans. For an elegant presentation, you can gently press a pecan half onto the top of each freshly poured fudge piece before it sets. This not only adds a beautiful visual element but also ensures every bite gets that delightful crunch. Alternatively, for a more integrated flavor, you can mix about 2/3 to 3/4 cup of chopped toasted pecans directly into the fudge just before pouring it into your prepared pan. Beyond pecans, consider a sprinkle of flaky sea salt to enhance the caramel notes, or even a dusting of cinnamon for a warm, spicy twist. The possibilities are endless for customizing your Penuche Fudge to your perfect preference.
As this is my last post before Christmas, I want to extend my warmest wishes to all of you. Merry Christmas! Thank you so much for being a cherished part of my blog community. Your support and enthusiasm for these recipes mean the world to me.
More Irresistible Recipes Like This Penuche Fudge:
- My Mom’s Fudge << The classic, no-fail chocolate fudge recipe that served as the inspiration for today’s Penuche version, guaranteeing perfect texture every time!
- Caramel Nougat Pecan Rolls << My absolute favorite holiday treat to make for neighbors each year – a truly special and addictive confection!
- Soft Homemade Caramel Candy << Experience tiny, perfectly soft, and delightfully chewable caramel candy – absolute perfection in every bite.
- Sticky Sweet-and-Salty Chex Mix (Christmas Crack) << An incredibly fun and effortless neighbor gift that’s always a huge hit!
- How to Make Dulce de Leche << If you’ve never tried making this rich, caramelized milk, now is definitely the time to indulge.
- Caramel Cake with Caramel Icing << Prepare yourself for the richest, most decadent cake experience you will ever encounter!
- Oreo Truffles << A timeless classic! These delightful truffles are a fantastic addition to any festive Christmas cookie plate.
- Nana’s Famous Fudge Brownies << These are quite simply the fudgiest, most intensely chocolatey brownies you could ever dream of!
- The Best English Toffee Recipe << A quintessential holiday classic, perfect for gifting or enjoying with loved ones.
- Chocolate Nutella Fudge with Sea Salt from Cookin Canuck
- Fudge Christmas Trees from Hungry Happenings
- Easy Peppermint Fudge from Kitchen Fun with my Three Sons
Facebook | Pinterest | Instagram

Penuche Recipe (Brown Sugar Fudge)
Ingredients
- 3/4 cup butter, (1 and 1/2 sticks)
- 2/3 cup evaporated milk
- 2 tablespoons light corn syrup
- 2 & 1/2 cups brown sugar
- 12 ounces white chocolate bars, high quality* not chips
- 1 (7-oz) jar marshmallow creme (fluff)
- 1 teaspoon vanilla
- 1/2 teaspoon kosher salt
Instructions
-
Line an 8 or 9 inch square pan with aluminum foil or parchment paper. If you are using foil, coat with nonstick spray. Set aside.
-
Prepare the ingredients you will need last, because you are going to be in a hurry later. Chop your white chocolate into small chunks for faster melting. Take the lid off your marshmallow creme and peel off all traces of the foil lining (so that you can microwave it later for easy scooping. Microwaving is optional). Set out your vanilla and salt.
-
In a 3 quart HEAVY saucepan over medium high heat, melt 3/4 cup butter. Before it melts all the way, use your spoon or knife to rub the sides of the pot with butter, almost all the way to the top. This helps prevent sugar crystals from forming on the edge of the pan, which can cause your fudge to not come to the right temperature.
-
Add 2/3 cup evaporated milk. Add 2 tablespoons corn syrup.
-
Add 2 and 1/2 cups brown sugar to the center of the pot. Be sure to avoid getting sugar on the edge of the pan to avoid the sugar crystals that I mentioned before.
-
Use a wooden spoon to stir slowly until the butter has melted completely and been fully incorporated.
-
Bring to a full rolling boil over medium high heat, stirring constantly with a long wooden spoon. Once it starts boiling (that means bubbles coming up from the CENTER of the pot, not the edges of the pot), set a timer for 5 minutes and turn the heat down to medium so that you don’t burn your fingers off–it should be at a rolling boil the full 5 minutes. Stir constantly. If you want to use a thermometer, boil until it reaches about 236 degrees F.
-
When the timer goes off, remove from heat and immediately add the chopped white chocolate. Stir until the white chocolate has melted completely and there are no lumps. You will notice that if you stop stirring even for a few seconds, the fudge will start to harden, so work quickly.
-
Take the lid off your marshmallow creme, remove all traces of foil, ignore the label that says “Do not microwave in jar,” and microwave in the jar for about 20 seconds, until you see the marshmallow start to rise above the lip of the jar. (You don’t need to microwave. It’s just a hack to make it really easy to get the marshmallow out of the jar, which can be a pain.) Use a spatula to add all the marshmallow creme to the fudge and stir. You will notice that if you stop stirring even for a few seconds, the fudge will start to harden, so work quickly.
-
Add 1 teaspoon vanilla and 1/2 teaspoon kosher salt to the fudge. Beat the fudge with your wooden spoon, scraping the bottom and sides well, until all the marshmallow has been incorporated and the fudge is an even light golden color with no streaks.
-
(At this point, add chopped toasted nuts if you are into that. I haven’t made it with nuts but I would guess between 2/3 cup to 3/4 cup chopped pecans will do ya.)
-
Immediately pour into the prepared and lined square pan.
-
Let cool to room temperature. This usually takes 3-5 hours depending on the temperature of your house. Once the fudge has had a half hour or so to cool, cover tightly with plastic wrap or a lid so it doesn’t get dried out. You can refrigerate the fudge to speed up cooling, but let it come back to room temperature before attempting to slice it.
-
When you are ready to serve, lift the parchment paper or foil out of the pan. Use a long chef’s knife to make even slices. Store on the counter covered. Fudge will keep on the counter for about 3-5 days before getting dried out.
-
You can freeze fudge! I do this every year for the holidays. Freeze in a block and allow to come to room temperature before slicing, or slice and arrange in a sealed container, then freeze. I prefer the latter, then I can just pop it out of the freezer and add pieces to the cookie plates I’m assembling.