
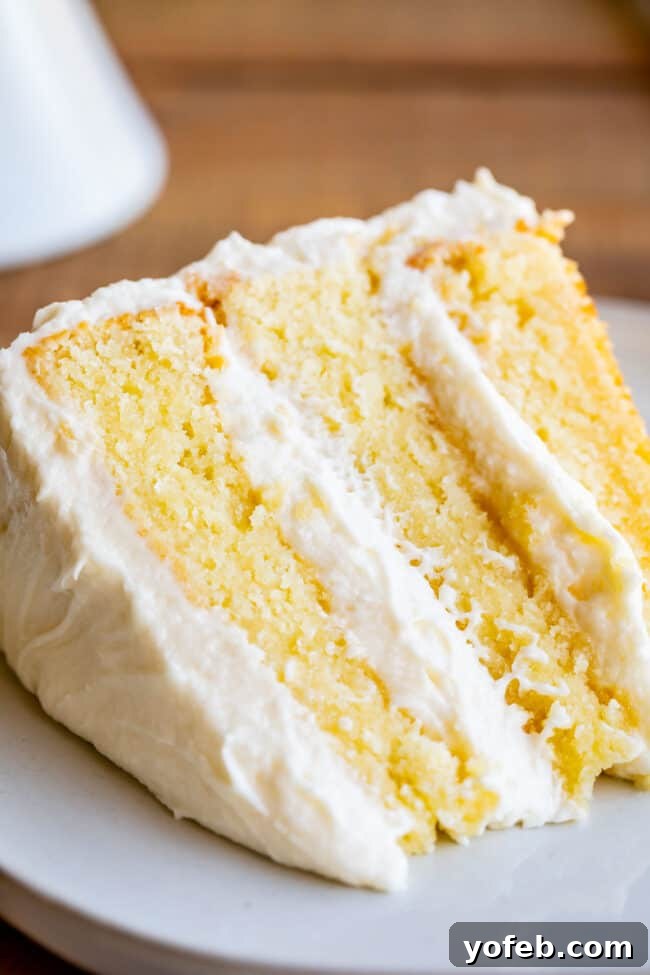
Get ready to discover the **best homemade white cake recipe** you will ever bake! This isn’t just another cake; it’s a culinary revelation that promises a delightful balance of softness and fluffiness, all while being incredibly moist. Say goodbye to dry, cardboard-like cakes and embrace a richly flavored, buttery masterpiece. I’m absolutely thrilled to share this recipe with you, and I’m confident it will become a cherished favorite in your kitchen!
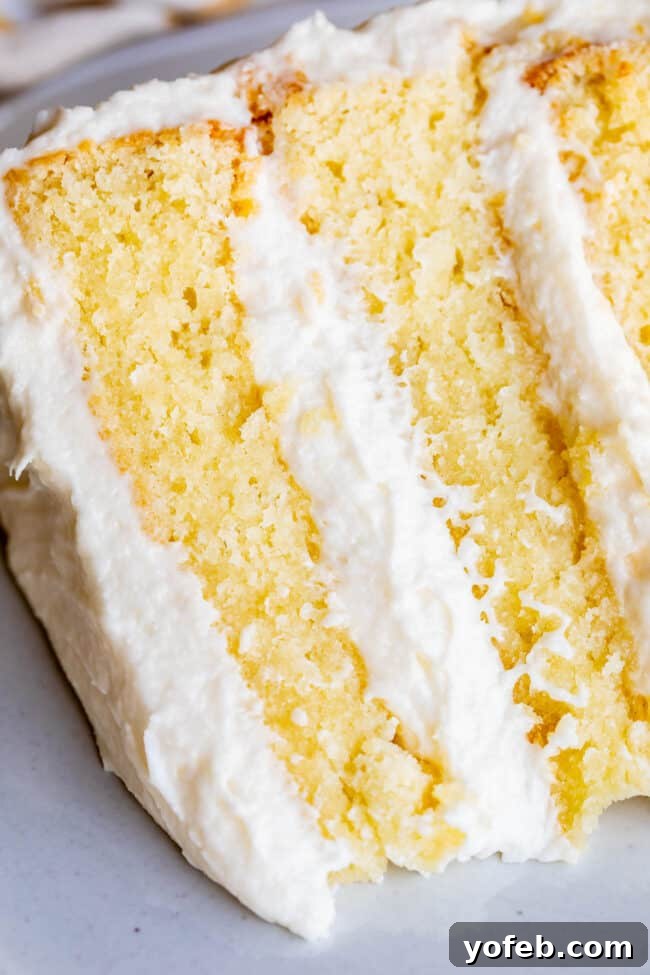
Table of Contents
- The Ultimate Moist White Cake Recipe
- Key Ingredients for the Perfect White Cake
- How to Make the Best Homemade White Cake from Scratch
- How to Store Homemade White Cake for Freshness
- Best White Cake Recipe FAQs
- More Irresistible Cake Recipes to Try:
- The Best Moist White Cake Recipe
- More Delicious Recipes You Will Love!
Life, especially after a certain age or significant life changes like having children, often brings a shift in perspective, even when it comes to food. What once felt like everyday indulgence, like a simple sandwich for lunch or a big bowl of pasta for dinner, can now be viewed with a different lens. Carbs, glorious carbs, start to feel less like a staple and more like a special occasion. You might find yourself weighing options: a nutritious meal or a delightful dessert?
This internal debate is real for many of us. Sometimes, the allure of a decadent treat is so strong that we find ourselves making mental compromises throughout the day. Skipping breakfast or choosing a lighter lunch to “save room” for that evening’s sweet reward is a familiar scenario. And when that reward is something as utterly delicious as this homemade white cake, the temptation is even greater.
It’s a slippery slope, isn’t it? One minute you’re planning a balanced diet, the next you’re contemplating whether a slice of cake counts as a perfectly acceptable breakfast, especially if you skipped your morning meal. The joy of baking and the irresistible aroma of a freshly made cake can easily lead us down a path of delicious indulgence. But with a cake this good, perhaps a little indulgence is exactly what we deserve!
The Ultimate Moist White Cake Recipe
For weeks, I embarked on a quest to perfect the ultimate white cake, a journey filled with countless test batches and enthusiastic taste-testers (my family, neighbors, and anyone who dared to cross my path!). The goal was simple: to create a **moist white cake recipe** that was far superior to any box mix, delivering a rich, buttery flavor and an impossibly soft texture. And I am thrilled to report, this recipe is the triumphant culmination of that effort!
Some might instinctively reach for a chocolate cake, assuming it’s always the superior choice. But I am here to challenge that notion, especially when it comes to this extraordinary **homemade white cake from scratch**. Many people’s perception of white cake has been tainted by dry, bland, or overly sweet versions from a box. This recipe, however, will completely transform your expectations.
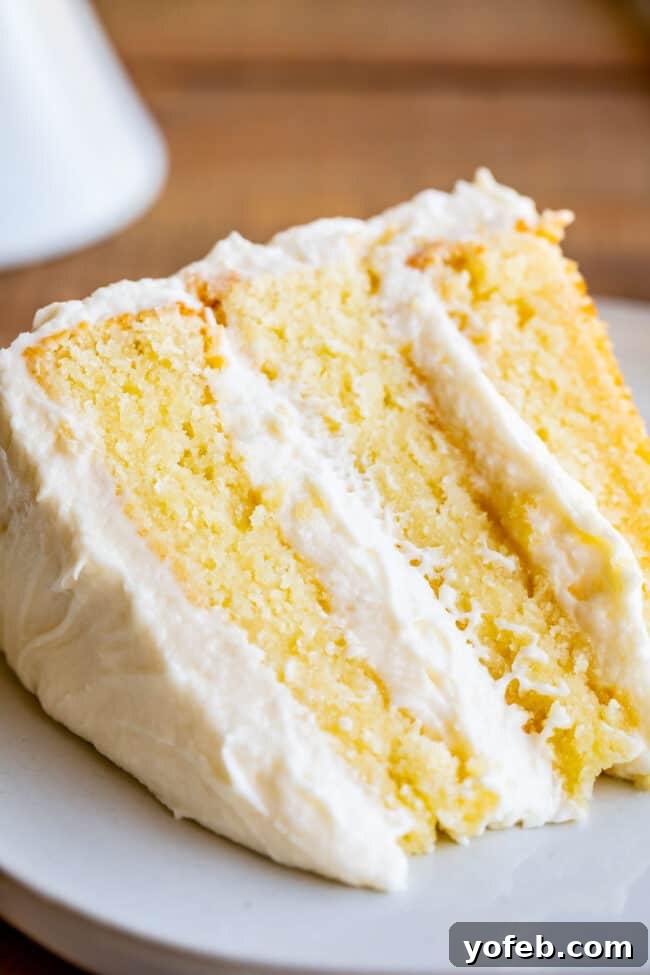
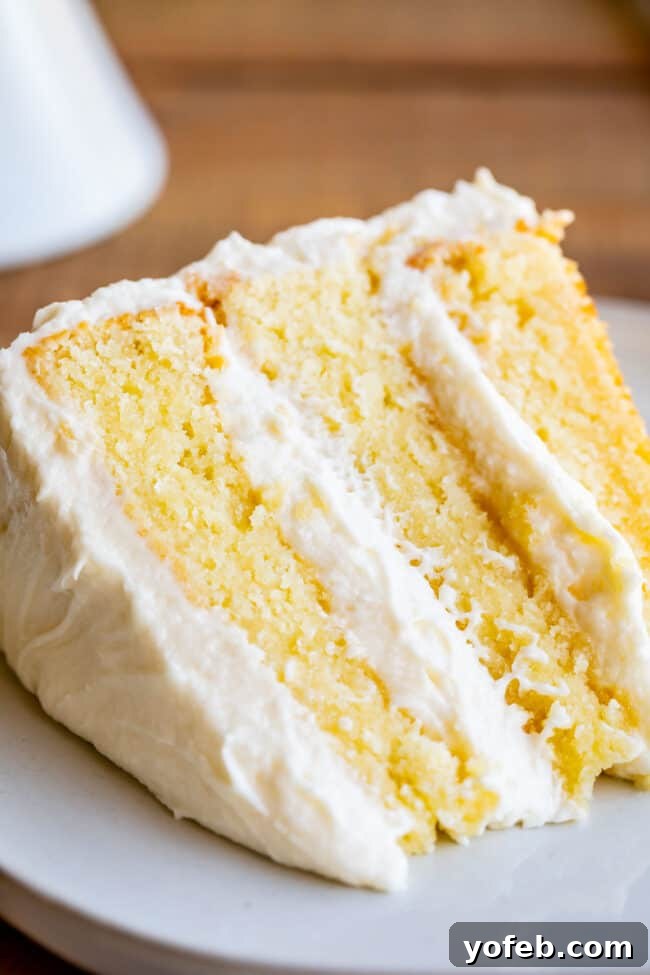
Imagine a cake that is incredibly moist and tender, with a light and fluffy crumb that melts in your mouth. This white cake is bursting with a true vanilla and buttery richness that will have you exclaiming with joy from the very first bite. It’s the kind of cake that makes you question why you ever settled for anything less. The delicate balance of textures and the vibrant, authentic vanilla flavor truly make it a winner that stands proudly against any chocolate counterpart.
This recipe will not only provide you with a cake that tastes phenomenal but also empower you with the knowledge and techniques to achieve bakery-quality results right in your own kitchen. Prepare to impress everyone with this perfect white cake!
Key Ingredients for the Perfect White Cake
Crafting the perfect **homemade white cake from scratch** involves a careful selection of ingredients that work in harmony to create its signature moist and fluffy texture. While many items will be pantry staples, a few specific choices elevate this recipe above the rest. Below are the essential components, with quantities detailed in the full recipe card.
- Salted Butter: Butter is crucial for imparting that rich, classic cake flavor. While unsalted butter can be used, consider adding an extra pinch of salt to compensate for the flavor balance. Ensure it’s softened to cream properly with the sugar, creating air pockets for a light texture.
- Granulated Sugar: Provides sweetness and helps tenderize the cake crumb. It also contributes to the cake’s golden-brown crust.
- Vegetable Oil: This is a secret weapon for moisture! While butter provides flavor, oil ensures the cake remains incredibly moist and tender, even days after baking. I prefer a light olive oil, but canola or other neutral vegetable oils work beautifully.
- Large Eggs: The eggs provide structure, richness, and moisture. In this recipe, we use whole eggs (including yolks!) for a more flavorful and moist result, challenging the traditional “egg-whites-only” white cake (more on that in the FAQs).
- Buttermilk*: Adds a delicate tang and incredible moisture. The acidity in buttermilk reacts with the baking powder, contributing to a lighter, more tender crumb.
- Vanilla Extract: The star flavor of a classic white cake. Use high-quality pure vanilla extract for the best taste.
- Full-Fat Sour Cream: Don’t skimp here! Full-fat sour cream is a game-changer for enhancing moisture and creating an incredibly tender cake crumb. It’s truly what sets this recipe apart in terms of richness and texture.
- All-Purpose Flour: Spooned and leveled correctly, all-purpose flour provides the necessary structure without making the cake dense. Sifting it helps ensure a light and airy texture.
- Kosher Salt: Balances the sweetness and enhances all the other flavors. If substituting with table salt, use ¾ teaspoon of table salt for every 1 teaspoon of kosher salt due to the difference in crystal size and density.
- Baking Powder: The primary leavening agent, responsible for the cake’s fluffy rise. Ensure your baking powder is fresh for optimal results.
**Cheater Buttermilk Tip:** No buttermilk on hand? No problem! You can easily make your own. Add 1 tablespoon of white vinegar (or lemon juice) to a 1-cup measuring cup, then fill the remainder with whole milk (the higher the fat content, the better!). Stir gently and let it sit for 5-10 minutes until it slightly curdles and thickens. This quick substitute works perfectly.
White Cake Frosting Ingredients
No **best homemade white cake** is complete without a luscious frosting! This recipe features a classic American buttercream – simple, sweet, and perfectly creamy. Here’s what you’ll need to create this dreamy topping (quantities are in the full recipe below):
- Butter: Like in the cake, butter forms the rich base of our frosting. Salted butter is generally preferred for a balanced flavor, but if you opt for unsalted, a small pinch of extra salt can be added. Make sure your butter is properly softened – not melted – for the best creamy consistency. A quick microwave trick involves 30-40 seconds on power level one.
- Powdered Sugar: Also known as confectioners’ sugar, this provides the bulk and sweetness. While sifting is often recommended to prevent lumps, if your powdered sugar isn’t overly clumpy, you might find you can skip this step and still achieve a smooth result after thorough beating.
- Heavy Cream*: Adds richness and helps achieve that wonderfully smooth, spreadable consistency. It also contributes to the frosting’s luxurious mouthfeel.
- Kosher Salt: A touch of salt is essential to cut through the sweetness of the sugar and enhance the overall flavor profile of the frosting. If using table salt, use approximately ½ teaspoon for every 1 teaspoon of kosher salt called for.
- Vanilla Extract: Pure vanilla extract is key for a bright, classic flavor that complements the white cake beautifully.
*Feel free to use whole milk or whatever milk you have on hand if heavy cream isn’t available. The frosting might be slightly less thick and creamy, but it will still be delicious and functional.
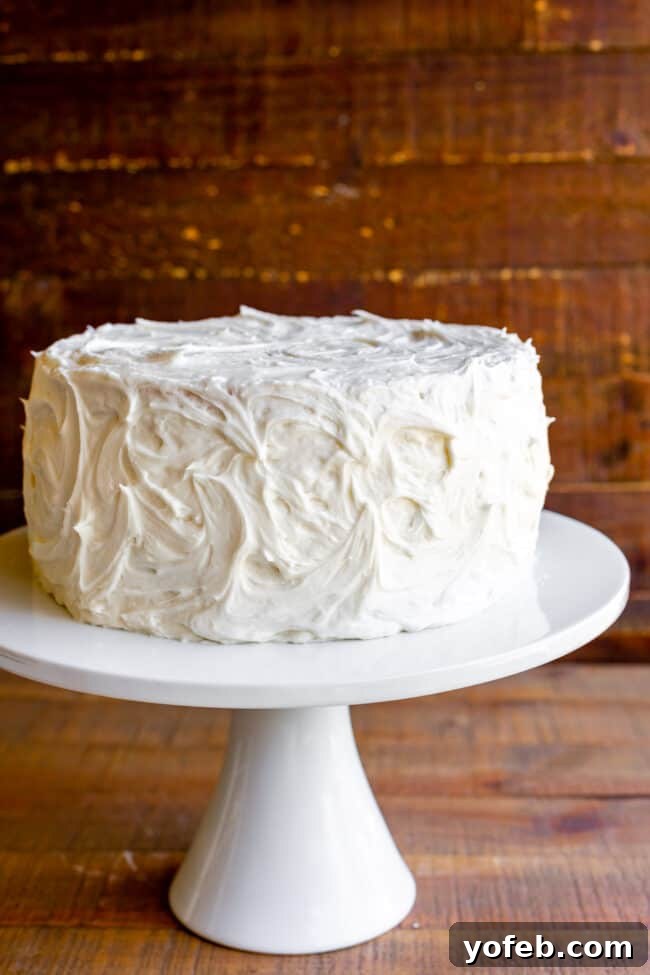
Can you substitute a different extract flavor besides vanilla?
While I often confess to being a fervent chocolate lover, the pure, unadulterated flavor of vanilla frosting on this white cake is truly special. It allows the rich butter and delicate vanilla notes of the cake to truly shine. However, if you’re looking to explore different flavor profiles or add a unique twist, this recipe is incredibly versatile! You can easily substitute or complement the vanilla extract with other flavors. Below are some fantastic ideas to replace or enhance the 1 tablespoon of vanilla typically used in the cake or frosting:
- ½ tablespoon almond extract: For a subtle, sophisticated nutty undertone that pairs beautifully with white cake.
- 1 tablespoon citrus zest: Lemon, orange, or lime zest can add a bright, refreshing zing. Use finely grated zest for maximum flavor impact.
- ½ tablespoon butter extract: To amplify the buttery notes even further, creating an extra decadent flavor.
- Combination Extracts: Don’t be afraid to experiment! A hint of almond with vanilla, or a touch of lemon zest in a vanilla-almond frosting can create truly memorable flavors.
Remember, when working with extracts, a little goes a long way. Start with smaller amounts and add more to taste, especially with potent flavors like almond. The goal is to enhance, not overpower, the delicious foundation of your **homemade white cake**.
How to Make the Best Homemade White Cake from Scratch
Let’s dive into the glorious process of baking this tall, delectable, and incredibly moist **homemade white cake** that will become your go-to recipe for any occasion. Every step is designed to ensure a perfect outcome, from the first beat of the butter to the final swirl of frosting. (All detailed instructions are provided in the comprehensive recipe card below.)
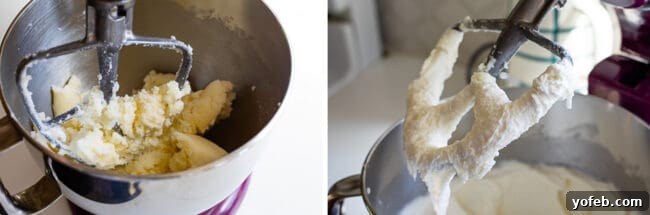
Step 1: Creaming Butter and Sugar for Airiness. Begin by vigorously beating the softened butter and granulated sugar together in a large bowl, preferably with a stand mixer. This creaming process is fundamental for incorporating air into the mixture, which is crucial for a light and fluffy cake texture. Continue beating until the mixture is visibly lightened in color and fluffy. Then, add the vegetable oil. The oil is a key player here; while butter provides unparalleled flavor, a touch of oil ensures a consistently moist cake, preventing it from drying out. Using only butter can sometimes result in a denser, drier crumb. I typically use a light olive oil, but any neutral vegetable oil will work perfectly.
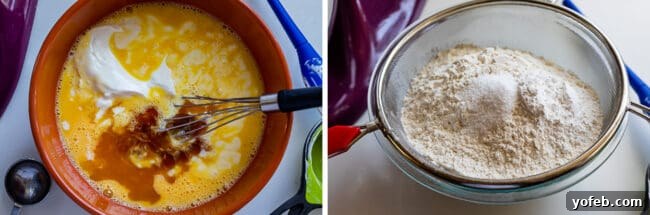
Step 2: Preparing Wet and Dry Ingredients. Next, prepare your wet and dry mixtures in separate medium bowls. In one bowl, whisk together the whole eggs*, buttermilk (or your cheater buttermilk, which works wonderfully!), a generous amount of vanilla extract, and full-fat sour cream. Sour cream is a secret weapon in my cake recipes; it adds an incredible richness and guarantees a tender, moist crumb. Seriously, if you’re ever making a box cake, a dollop of sour cream works wonders! In another bowl, sift together the all-purpose flour, kosher salt, and baking powder. Sifting these dry ingredients ensures they are evenly distributed and aerated, preventing pockets of unmixed ingredients and contributing to a fine, even crumb.
Step 3: Combining Ingredients with Care. Now, it’s time to combine the wet and dry mixtures with the butter-sugar-oil base. Alternate adding small portions of the liquid mixture and the sifted dry ingredients to the creamed butter mixture, mixing gently after each addition. The golden rule here is to mix ONLY until just combined. Overmixing the batter can develop the gluten in the flour too much, leading to a tough and dense cake. Scrape down the sides and bottom of the bowl frequently to ensure all ingredients are fully incorporated without overworking the batter.
*A quick note on those “controversial” egg yolks: Traditional white cake purists often insist on using only egg whites for a stark white color and super fluffy texture, akin to angel food cake. However, my extensive testing has consistently shown that including the egg yolks significantly enhances the flavor and moisture of the cake, creating a more decadent and satisfying experience. While it results in a creamy, pale yellow hue rather than a bright white, the superior taste is undeniable. For a truly rich and flavorful homemade white cake, whole eggs are the way to go!
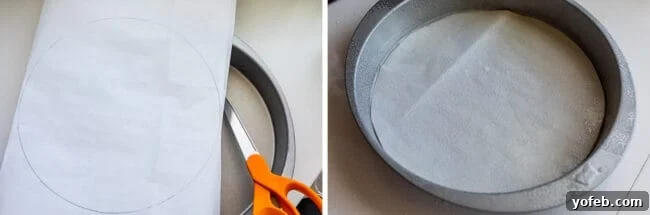
Step 4: Preparing Your Cake Pans. This step is non-negotiable for cake success! Line the bottom of two (or three, if you have them and plan to bake simultaneously) 9-inch round cake pans with parchment paper circles. Then, spray the pans generously with nonstick baking spray, ensuring both the bottom (over the parchment) and up the sides are well-coated. This meticulous preparation is your best defense against stuck cakes, especially if you’re using older or less-than-perfect cake pans. Trust me, I’ve had my share of cake-destroying moments, and parchment paper is always the hero!
Step 5: Baking Your Cakes to Perfection. Divide the batter evenly among the prepared pans. Preheat your oven to 325°F (160°C). I highly recommend baking your cakes one or two at a time, especially if your oven tends to have hot spots or uneven heating. While it takes longer, it ensures each cake bakes evenly and perfectly. Avoid baking all three layers at once unless you have a professional-grade oven you absolutely trust.
During baking, it’s crucial to rotate the cake pans about two-thirds of the way through the bake time (around the 22-minute mark for a 28-32 minute total bake). This means turning a single pan 180 degrees or switching the positions of two pans. Ensure the pans do not touch the oven walls. Most importantly, resist the urge to open the oven door unnecessarily! Opening the door too soon can cause the cake to deflate, especially if the top is still very liquidy. The cakes are done when a toothpick inserted into the center comes out clean.
Step 6: Cooling and Releasing Your Cakes. Once baked, remove the cakes from the oven and let them cool on a wire rack for about 10-15 minutes. This allows them to firm up slightly before handling. Then, gently run a knife around the edges of each pan to loosen the cake. Carefully invert each cake onto the cooling rack, remove the parchment paper, and let them cool completely. For faster cooling, you can place them in the freezer for about 20 minutes.
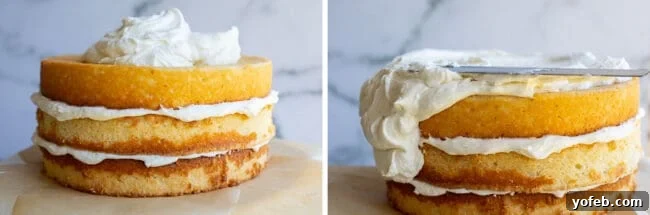
A Note on Cake Pans: Observing the layered cakes before frosting reveals a stark difference in their edges – some are torn, others pristine. This highlights the importance of good quality cake pans. My older, cheaper pans often caused tearing, while a new, inexpensive grocery store pan yielded a perfectly intact cake. Investing in high-quality pans, like the USA brand pans my mother-in-law Kris swears by, truly makes a difference in easy release and beautiful presentation. If Kris trusts them, so should we! (Update: I’ve used USA pans for years now and can attest to their phenomenal performance.)
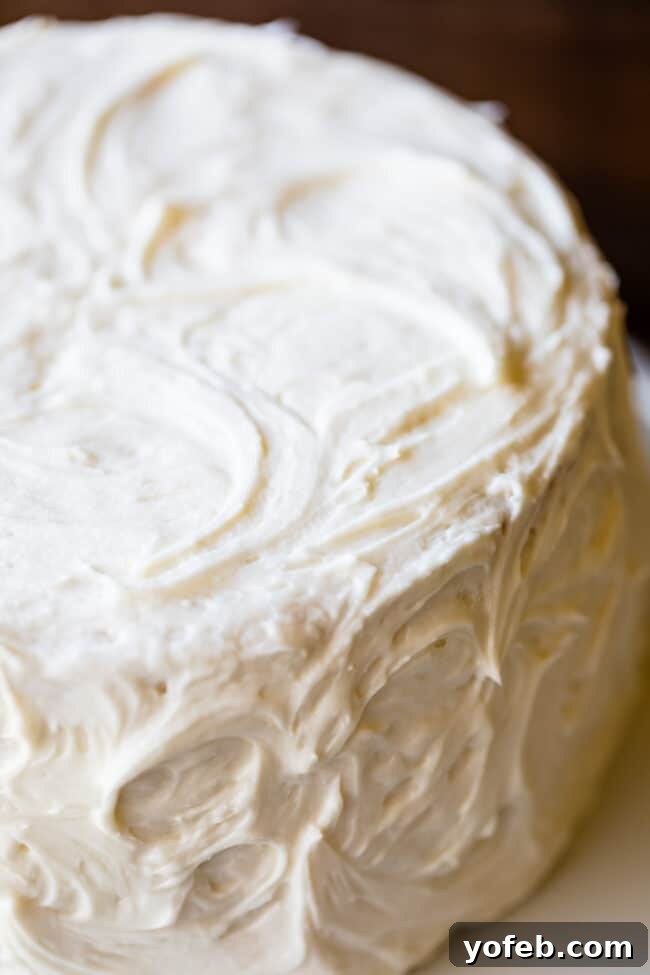
How to Make the Frosting for this White Cake Recipe
Creating the perfect creamy, dreamy American buttercream for your **best homemade white cake** is a simple yet satisfying process. Follow these steps for frosting success (full instructions are also in the recipe card below):
- Beat the Butter: In a large bowl or stand mixer, beat 2 cups (4 sticks) of softened butter until it is exceptionally smooth and light. This can take a couple of minutes, ensuring no lumps remain and air is incorporated.
- Add Powdered Sugar and Cream: Gradually add the powdered sugar to the butter, alternating with increments of heavy cream. Start with about 1 cup of powdered sugar, mix until mostly combined, then add ¼ cup of heavy cream. Repeat this process until all the sugar and cream have been added. This alternating method helps prevent a cloud of powdered sugar from coating your kitchen!
- Flavor and Salt: Once the sugar and cream are incorporated, add 1 tablespoon of pure vanilla extract and 1 teaspoon of kosher salt (adjust to ½ teaspoon if using table salt). These additions are crucial for developing a balanced and delicious flavor.
- Whip to Fluffy Perfection: Now, increase the mixer speed and beat the frosting for at least 2-3 minutes. This extended beating time is essential for creating a light, airy, and incredibly fluffy texture. Be sure to stop and scrape down the sides and bottom of the bowl frequently to ensure everything is thoroughly mixed and lump-free.
- Assemble Your Cake: Once your cakes are completely cool, it’s time for the fun part! To prevent your cake from sliding, smear a small amount of frosting onto your cake stand or serving plate. Carefully place the first cake layer on top. For a clean presentation, tuck several small squares of parchment paper just under the edges of your cake base – this will catch any errant frosting drips and can be easily pulled away once you’re done frosting.
- Layer the Frosting: Scoop approximately 1 ½ cups of frosting (you can eyeball it) onto the top of the first cake layer and spread it evenly using an offset spatula.
- Repeat for Layers: Gently place the second cake layer on top and repeat the frosting process. Add the final cake layer.
- Apply Crumb Coat (Optional, but Recommended): With the remaining frosting, apply a thin layer over the entire cake – top and sides. This is known as a “crumb coat” and helps to trap any loose crumbs, creating a smooth surface for your final layer of frosting. Chill the cake in the refrigerator for 15-20 minutes to set the crumb coat.
- Final Frosting Layer: Once the crumb coat is set, apply the remaining frosting more generously to the top and sides of the cake. Use your offset spatula to spread the frosting smoothly over the top, then gently drag some of that frosting over the edge and down the sides. Continue working your way around the cake until all sides and the top are beautifully covered.
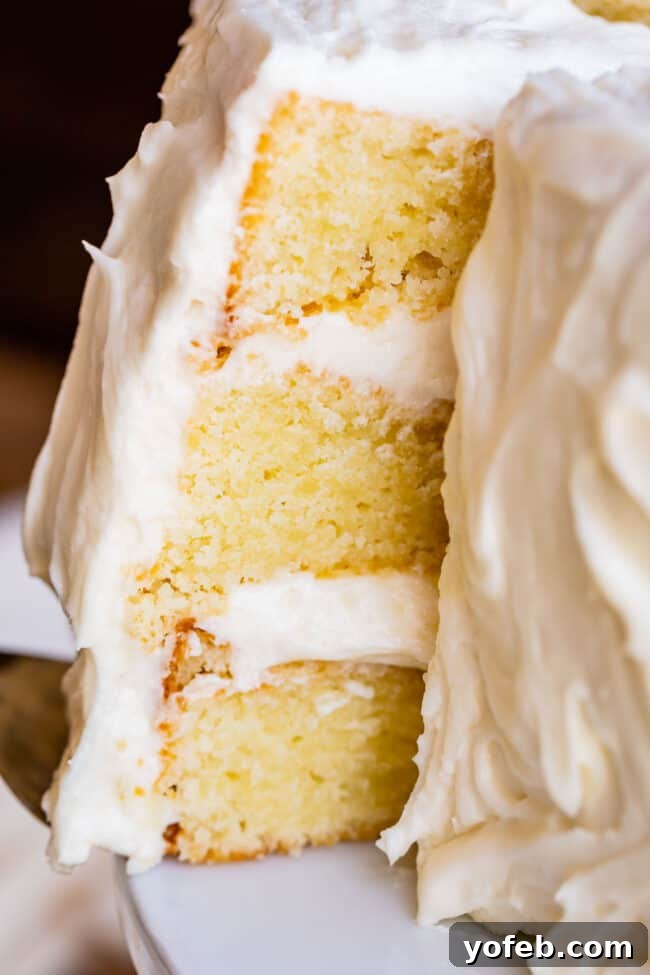
- Create Swirls: For that lovely, rustic swirled look you see in the photos, use the back of a spoon to create gentle peaks and swirls in the frosting.
- Devour! Now comes the best part – enjoying your magnificent creation! Try your absolute best not to eat it for breakfast (unless it’s a special occasion, then all bets are off!).
What to frost a simple White Cake with
The frosting for this **best homemade white cake** is an experience in itself! We’re using a classic American buttercream, a delicious blend of butter, powdered sugar, cream, vanilla, and a touch of salt. For this impressive three-layer cake, I typically use a full pound of butter just for the frosting. Yes, it’s a generous amount, but as my wise friend Melissa once declared, “If you don’t like frosting, don’t eat cake.” And I wholeheartedly agree! This rich, buttery frosting perfectly complements the tender white cake.
If you’re not quite the frosting enthusiast I am, or if you prefer a slightly less indulgent amount, I’ve included adjusted measurements in the notes section of the recipe card for a more moderate quantity that will still beautifully frost your cake. However, if you plan on doing a crumb coat (highly recommended for a neat finish!), sticking with the full amount will give you plenty to work with for a smooth, professional look.
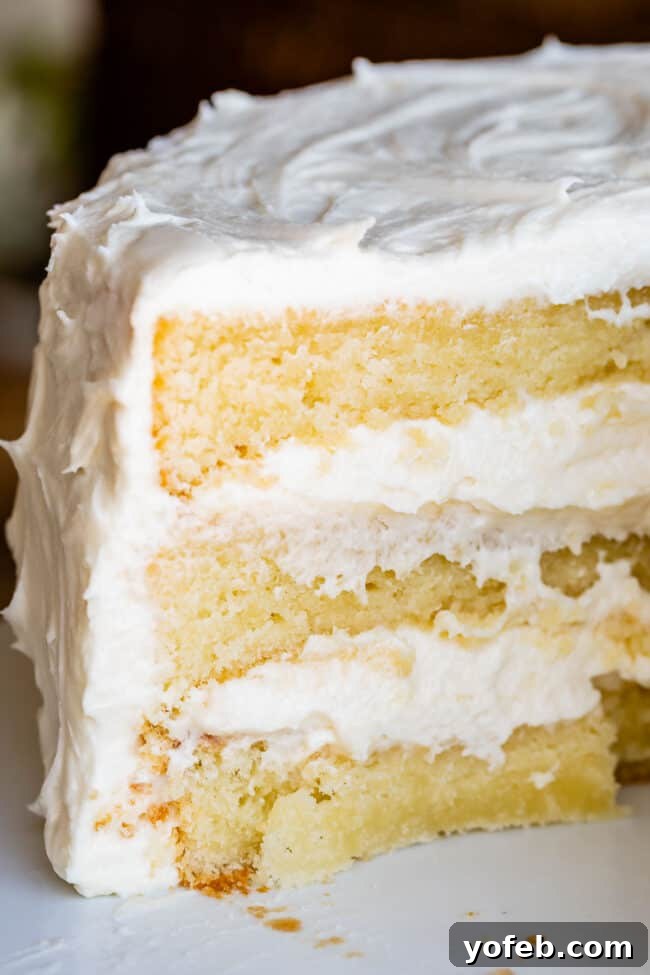
How to Store Homemade White Cake for Freshness
One of the beauties of this **best homemade white cake** is how well it keeps, allowing you to enjoy its deliciousness for days! Proper storage is key to maintaining its incredible moisture and flavor.
Room Temperature Storage: This white cake can be stored at room temperature for 3-4 days. The best way to keep it fresh is by using a cake stand with a tight-fitting cover or a dedicated cake carrier. If you don’t have one, placing an inverted large, airtight bowl over the cake will work wonders to protect it from drying out and keep it beautifully soft and moist.
Freezing for Later Enjoyment: Should you find yourself with leftover cake (a rare but possible occurrence with a cake this good!), don’t let it go to waste. This frosted cake freezes exceptionally well! You can freeze individual slices, tightly wrapped in plastic wrap and then aluminum foil, or freeze larger sections of the cake. Place the wrapped slices or sections in an airtight freezer-safe container to prevent freezer burn.
When you’re ready to enjoy a frozen slice, simply let it defrost at room temperature for a few hours, or in the refrigerator overnight if you prefer. The frosting holds up beautifully during freezing and thawing, so you’ll have a delightful treat ready for your next cake craving without any extra baking effort. It’s a fantastic way to extend the life of your delicious **white cake from scratch**!
Best White Cake Recipe FAQs
The terms “white cake” and “vanilla cake” are often used interchangeably, but historically, there’s a subtle distinction. Traditionally, a true “white cake” was made exclusively with egg whites to ensure a pristine, bright white crumb, often found in wedding cakes. “Vanilla cake,” on the other hand, typically uses whole eggs (whites and yolks), resulting in a richer, creamier yellow hue. Our recipe, while called “white cake,” leans towards the latter, producing a beautiful creamy yellow color you see in the photos. This is because we include egg yolks for unparalleled flavor and moisture. While purists might raise an eyebrow, we prioritize taste and texture over a purely aesthetic bright white. This is a homemade white cake designed for rich, creamy flavor and tender texture, not a showy, flavor-compromised wedding cake.
Your “white” cake takes on a lovely creamy yellow hue precisely because of the egg yolks! As discussed, many traditional white cake recipes call for only egg whites to achieve a stark white color. However, at our core, we believe taste is king. Think about it: would you rather have a delicious omelet made with whole eggs, or a bland egg white omelet? Most of the rich, savory flavor in eggs comes from the yolk. Leaving them out would significantly diminish the depth of flavor in this cake. Our recipe embraces the whole egg to deliver a more profound and satisfying taste profile. Rest assured, many fantastic white cake recipes use whole eggs, proving it’s a matter of preference for flavor over a purely white appearance.
This recipe is specifically designed for three 9-inch round cake pans. This quantity of batter is substantial and will not fit into just two 9-inch pans without overflowing and affecting the rise and texture. If you want to use different sized pans, such as a 9×13-inch rectangular pan or a Bundt pan, some adjustments will be necessary. When pouring batter into any pan, only fill it about two-thirds of the way full to allow for proper rising. Overfilling will cause the cake to rise too high and then potentially collapse in the center. Baking times will vary significantly with different pan sizes and shapes. For a larger pan like a 9×13-inch, it might take 35-45 minutes or more. A Bundt cake could take 45-60 minutes. Always check for doneness by inserting a toothpick into the center; if it comes out clean, your cake is ready.
Absolutely, this **best homemade white cake recipe** converts beautifully into delightful cupcakes! Here are the essential tips for perfect white cake cupcakes:
– Use paper cupcake liners: Always use liners to prevent sticking and for easy handling. While I often skip greasing the liners, if you’re concerned about them sticking, a quick spray with non-stick baking spray inside each liner can add an extra layer of protection.
– Fill correctly: Fill each cupcake liner only two-thirds full. This is crucial! Overfilling will cause the cupcakes to dome excessively and then potentially sink in the middle, creating an undesirable flat top.
– Adjust baking temperature and time: Bake cupcakes at a slightly higher temperature of 350°F (175°C) for a shorter duration. Start checking for doneness at around 12-18 minutes.
– Check for doneness: Insert a toothpick into the center of a cupcake. If it comes out clean with no wet batter, they are done. Avoid overbaking, as this is the quickest way to dry out cupcakes.
Achieving a supremely moist cake is a hallmark of this recipe, thanks to its carefully selected ingredients and techniques. However, for general cake baking or to ensure consistent moisture, here are the key principles and tips:
– Don’t overmix the batter: This is perhaps the most critical step. Mix wet and dry ingredients ONLY until they are just combined. Overmixing develops the gluten in the flour, leading to a tough, dry cake. Always scrape the bottom and sides of your bowl to ensure all pockets of dry ingredients are incorporated.
– Sift your dry ingredients: Sifting flour, salt, and baking powder not only removes lumps but also aerates them, contributing to a lighter, more tender crumb that retains moisture better.
– Do not overbake: Overbaking is the number one culprit for dry cakes. Set a timer and start checking for doneness at the lower end of the recommended baking time. A toothpick inserted into the center should come out clean. An internal thermometer reading around 200-205°F (93-96°C) for cakes is also a reliable indicator.
– Incorporate moisture-rich ingredients: Ingredients like sour cream, buttermilk, oil, and even mashed banana or applesauce (for different recipes) significantly boost moisture. This particular **homemade white cake recipe** uses both buttermilk and full-fat sour cream, ensuring an exceptionally moist result.
– Use room temperature ingredients: Room temperature eggs, butter, and dairy emulsify better, creating a smoother batter that traps air more efficiently, resulting in a lighter and more moist cake.
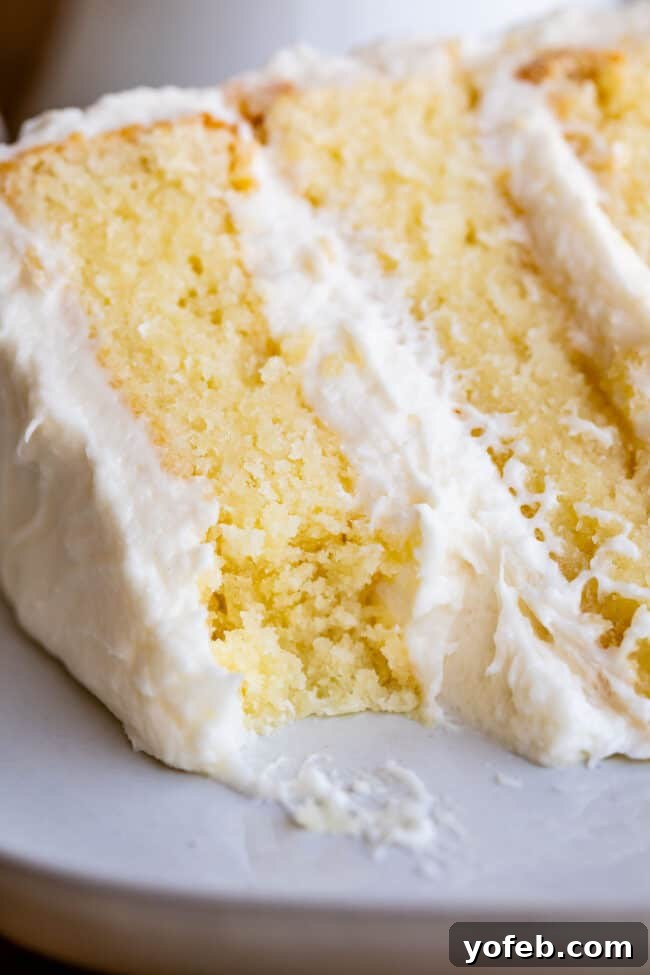
And there you have it – the definitive **best homemade white cake recipe**! A testament to how a simple cake, when made with care and the right ingredients, can be moist, tall, incredibly fluffy, and bursting with rich flavor. It’s a true celebration of classic baking, delivering a taste experience that will make you shout, “Hallelujah!”
This exquisite white cake is perfect for any occasion, from casual family gatherings to elegant holiday festivities. Imagine it as the centerpiece of your dessert table, perhaps adorned with fresh berries or a sprinkle of edible flowers for a truly stunning presentation. It’s guaranteed to be a crowd-pleaser and earn you endless compliments!
P.S. Update: Remember Eric’s book club? They never did see this cake. I opted to make them brownies instead. Some cakes are just too good to share with everyone, and this one holds a special place in my heart (and my fridge!). 😉
More Irresistible Cake Recipes to Try:
- Brown Sugar Yellow Cake with Chocolate Frosting << This yellow cake features the deep notes of brown sugar, creating a unique and utterly delicious twist. Don’t miss pairing it with my new favorite Creamy Chocolate Buttercream Frosting.
- The Best Chocolate Cake I’ve Ever Had << Okay, fine, I admit it: this one might just be my all-time favorite. Rich, decadent, and utterly divine!
- Layered Cornbread Cake with Whipped Honey Butter Frosting << Prepare to be obsessed with this unique creation – it’s like a delicious fusion of cornbread and white cake!
- Carrot Cake with Cream Cheese Maple Pecan Frosting << A classic favorite, elevated with a luscious cream cheese maple pecan frosting. Perfect for spring celebrations or any time you crave a comforting dessert.
- Homemade Spice Cake with Cream Cheese Frosting << The aroma alone from baking this cake is heavenly, filled with warm, inviting spices.
- Almond Sheet Cake << This unassuming sheet cake will surprise and delight you with its incredible almond flavor and moist texture.
- The Best Authentic Tres Leches Cake << A supremely moist and sweet cake soaked in three kinds of milk – a true Latin American classic.
- Easy Lime Cake from Love from the Oven << For a burst of bright, citrusy flavor.
- Strawberries and Cream Cake from Valerie’s Kitchen << A fresh and fruity delight, perfect for summer.
- The Very Best Coconut Cake Recipe from Shugary Sweets << A tropical escape in every bite, packed with rich coconut flavor.
Facebook | Pinterest | Instagram

The Best Moist White Cake Recipe
Ingredients
For the cake
- 3/4 cup salted butter, 1 and 1/2 sticks, softened
- 3 cups granulated sugar
- 3/4 cup vegetable oil, I like to use light olive oil
- 5 large eggs
- 1 cup buttermilk*
- 1 tablespoon vanilla extract
- 1/2 cup full fat sour cream
- 3 & 1/4 cups all-purpose flour, spooned and leveled
- 3/4 teaspoon kosher salt
- 1 tablespoon baking powder
For the frosting
- 2 cups butter, 4 sticks, softened
- 8 cups powdered sugar
- 1 cup heavy cream, divided
- 1 teaspoon kosher salt
- 1 tablespoon vanilla
Instructions
-
Preheat your oven to 325 degrees F. Trace the outline of 3 9-inch cake pans** on parchment paper. Cut out the circles and place in the bottom of each cake pan. See photos. With the paper in the bottom of the pan, use nonstick spray to grease each cake pan very well, including up the sides.***
-
In a large bowl or stand mixer, beat 3/4 cup butter until is is smooth. (You can actually start with cold butter if you have a stand mixer. Just beat a couple minutes, scraping sides, until it’s smooth.)
-
Add 3 cups granulated sugar. Beat butter and sugar for 2 minutes, stopping once to scrape sides and bottom.
-
Add 3/4 cup light olive oil (“light” refers to the taste, not the calorie level. Sad, right? 😉 Beat butter and sugar with the oil for 2 minutes, stopping to scrape once.
-
In a medium bowl (or in one of those giant 8 cup glass measuring cups, wish I had one), add 5 large eggs. Beat with a whisk until smooth. Add 1 cup buttermilk*, 1 tablespoon vanilla, and 1/2 cup full fat sour cream. Whisk it all together til smooth.
-
Place a fine mesh strainer over another medium bowl. Spoon and measure 3 and 1/4 cups all purpose flour into the strainer. Add 3/4 teaspoon salt and 1 tablespoon baking powder. Stir until it has all gone through the strainer and is sifted well.
-
Alternate adding the liquid and the flour mixture to the butter mixture, beating every time. I added half the liquid, stirred, half the flour, stirred, then repeated.
-
Mix ONLY until just combined. Scrape the bottom and sides to make sure it’s all incorporated.
-
Divide the batter between the 3 prepared pans.
-
Bake the cakes at 325 for about 28-32 minutes.
-
Notes on baking: I like to bake my cakes one at a time because my oven is not exactly amazing. I’ve also done 2 cakes at a time though. I wouldn’t do all 3 cakes at once, unless you have a pretty stellar oven that you trust.
-
However you choose to bake, make sure you rotate them 2/3 of the way through the bake time. This means turn the pan 180 degrees if there is one cake, or if there are two cakes, switch their places. The cake pans should NOT touch the edge of the oven.
-
Do NOT open the oven door at all, except for when you need to rotate the pans. Rotate the pans at about the 22 minute mark. If the whole top looks completely liquidy, do not rotate yet. You don’t want to deflate your cake. Again, the total bake time for each cake is about 28-32 minutes.
-
Remove the cake/s from the oven. Let cool on a cooling rack for about 10-15 minutes. Use a knife to loosen the edge of the cake from the pan. Use your hand to invert the cake onto the cooling rack and continue cooling. At this point I often put them in the freezer for 20 minutes or so to speed up the cool time.
-
Make the frosting: Beat 2 cups butter until it is completely smooth.
-
Add powdered sugar one cup at a time. Add the cream in 1/4 cup increments in between cups of powdered sugar. Add 1 tablespoon vanilla and 1 teaspoon kosher salt. (less if you’re using table salt) Beat until very fluffy, at least 2-3 minutes. Scrape the sides and bottom at least once or twice.
-
Once all the cakes are completely cool, assemble your cake. Smear a bit of frosting on your cake stand so it doesn’t go sliding off, then place your cake on the stand. Place several squares of parchment paper under the edge of your cake so that you don’t get frosting all over your cake stand (see photos).
-
Add about 1 and 1/2 cups frosting (just eyeball it) to the top of the cake and spread evenly.
-
Add the next cake. Repeat.
-
Add the final cake. Add all the remaining frosting to the top of the cake. Spread it over the top of the cake, and then use an offset spatula to drag some of the frosting from the top over the edge of the cake. Keep moving the frosting all the way down. Continue this method until all sides and top are frosting.
-
If you want to make nice swirls like you see in the photos, use the back of a spoon.
-
Devour! Try not to eat it for breakfast like I did!
Video
Notes
**I just bought these cake pans that I linked to. If you look at the photo of the layered cakes before I frosted them, you will see how torn up the outside edges are on the bottom two. This is because my cake pans are garbage apparently. I grabbed a new $6 one at the grocery store the 3rd time I made this cake, because I was tired of having to wait to bake my third cake (I only had 2 pans.) And that $6 cake pan did a way better job releasing my cake intact. You can see the top cake in that photo is perfectly intact. So the point is that high quality cake pans are actually important. (Or at least $6 grocery store ones are?? ha. That’s going to be a gamble.) I just bought these ones that are the USA brand, my mother-in-law Kris swears by USA pans. And well, if Kris trusts it, then you all know that we should too 😉
***I ALWAYS take the time to do this annoying step of lining my pans with parchment paper. I’ve destroyed too many cakes trying to release them from the pan! I don’t trust the grease-and-then-dust-with-flour method. It’s failed me too many times. Although now I’m thinking maybe this was because I had crappy cake pans. HMM.
Frosting:
If you do not want a ton of frosting but still want to be able to comfortably frost a 3 layer cake, use:
- 3 sticks of butter (1 and 1/2 cups)
- 6 cups powdered sugar
- 3/4 cup cream
- 2 teaspoons vanilla
- 1/2 teaspoon kosher salt
Follow directions above for making the frosting.
CUPCAKES: I haven’t made these as cupcakes, but if you want to try it, make sure you only fill the liners 2/3 of the way full and bake at 350 instead of 325! Start checking for doneness at 18-20 minutes.
Nutrition
More Delicious Recipes You Will Love!
- How to make Cornbread
- Creamed Corn Casserole
- Chocolate Chip Mint Cookies
- Zuppa Toscana Recipe
- Chicken Parm
- Oven Roasted Sweet Potatoes
- Tri Tip in Oven
- Pot Roast in Crock Pot
- Cooking Steak
- Red Beans and Rice Recipe
- Texas Sheet Cake Recipe