
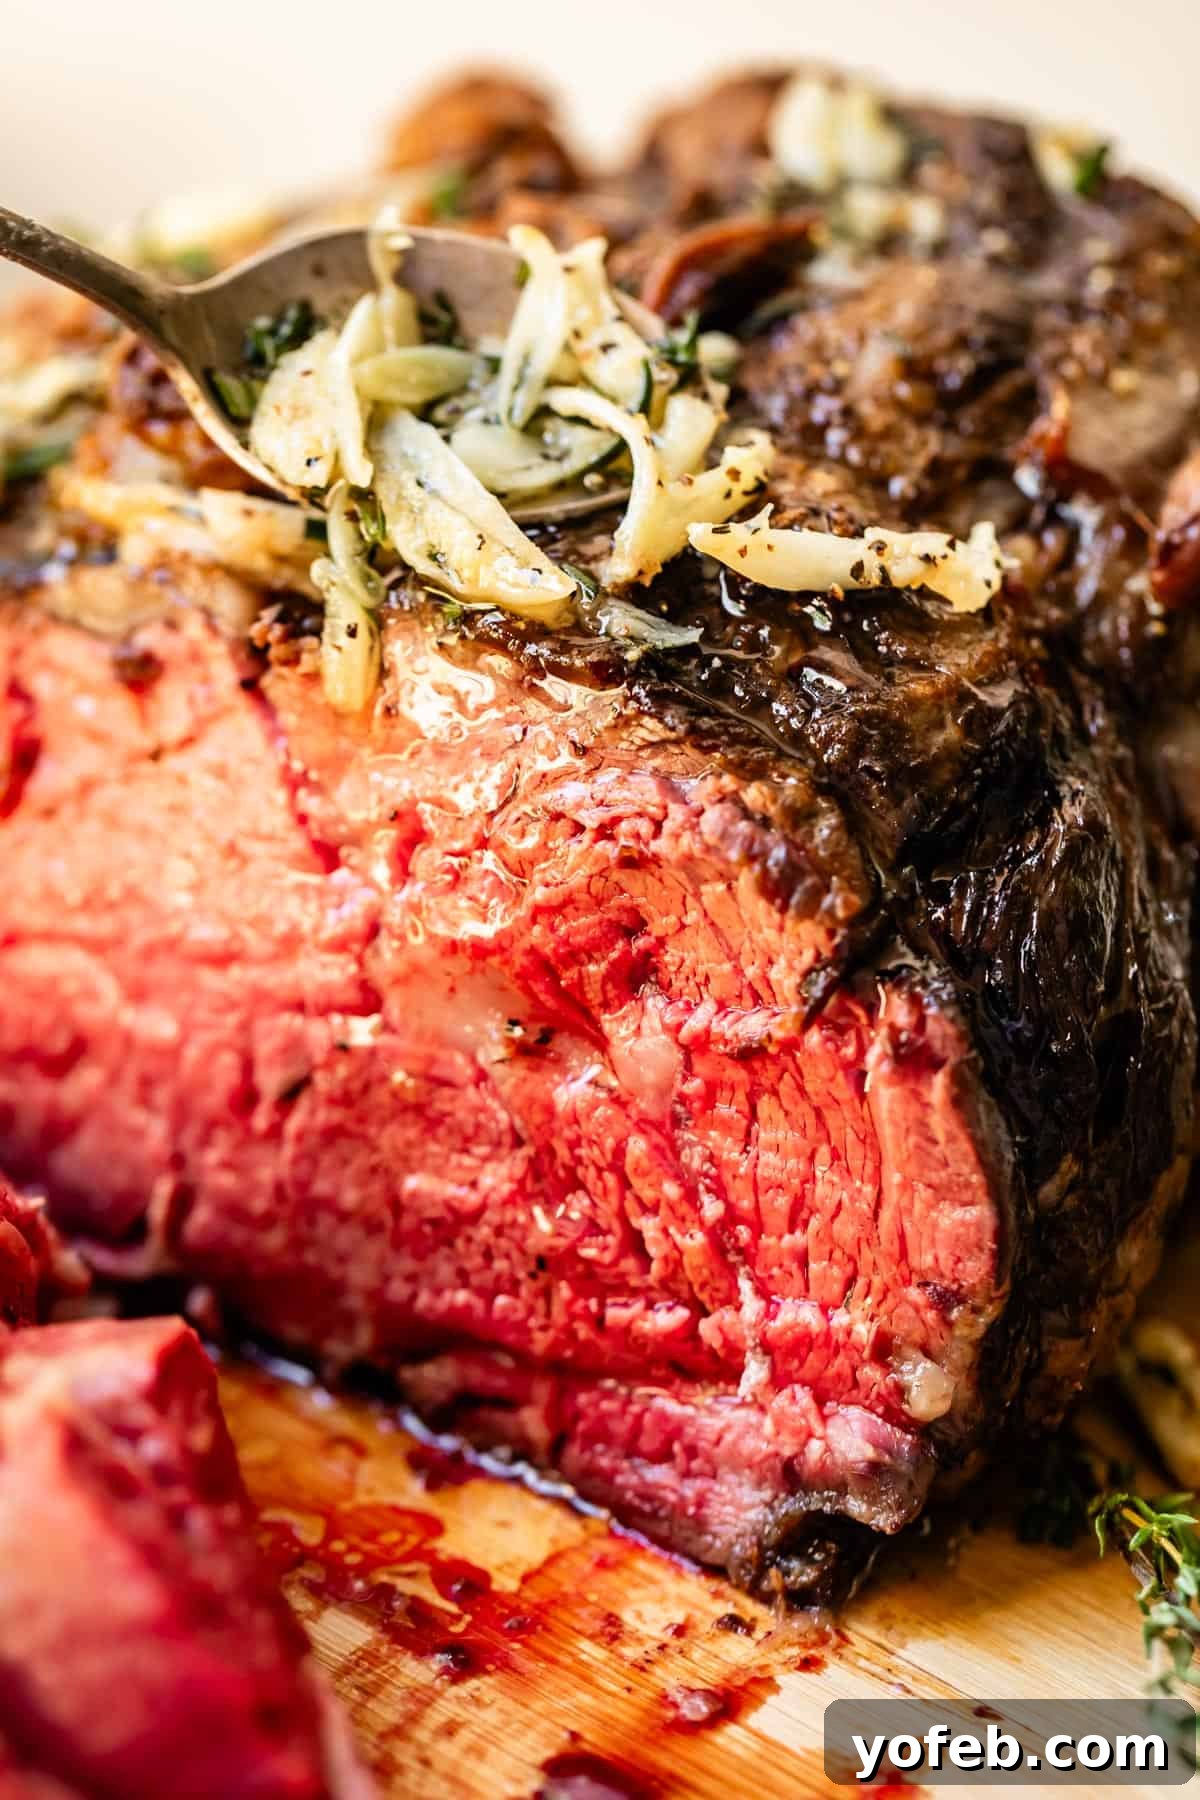
I once believed that prime rib was merely an extravagant indulgence, often hyped beyond its true worth. Yet, after perfecting this recipe, I can confidently say it not only lives up to but surpasses all expectations! There’s an undeniable magic to this majestic roast that transforms any meal into an unforgettable celebration. While the thought of preparing such a showstopping dish might seem daunting, fear not! I’m here to guide you through every single step with clear, concise instructions and a wealth of helpful tips and photographs. With the right techniques—especially a generous amount of time and the power of salt—you will achieve the MOST succulent, tender, and uniquely melt-in-your-mouth prime rib imaginable. This isn’t just a meal; it’s an event. Prepare this ultimate centerpiece for your Christmas, Easter, or Thanksgiving feast, and watch your guests be utterly amazed!
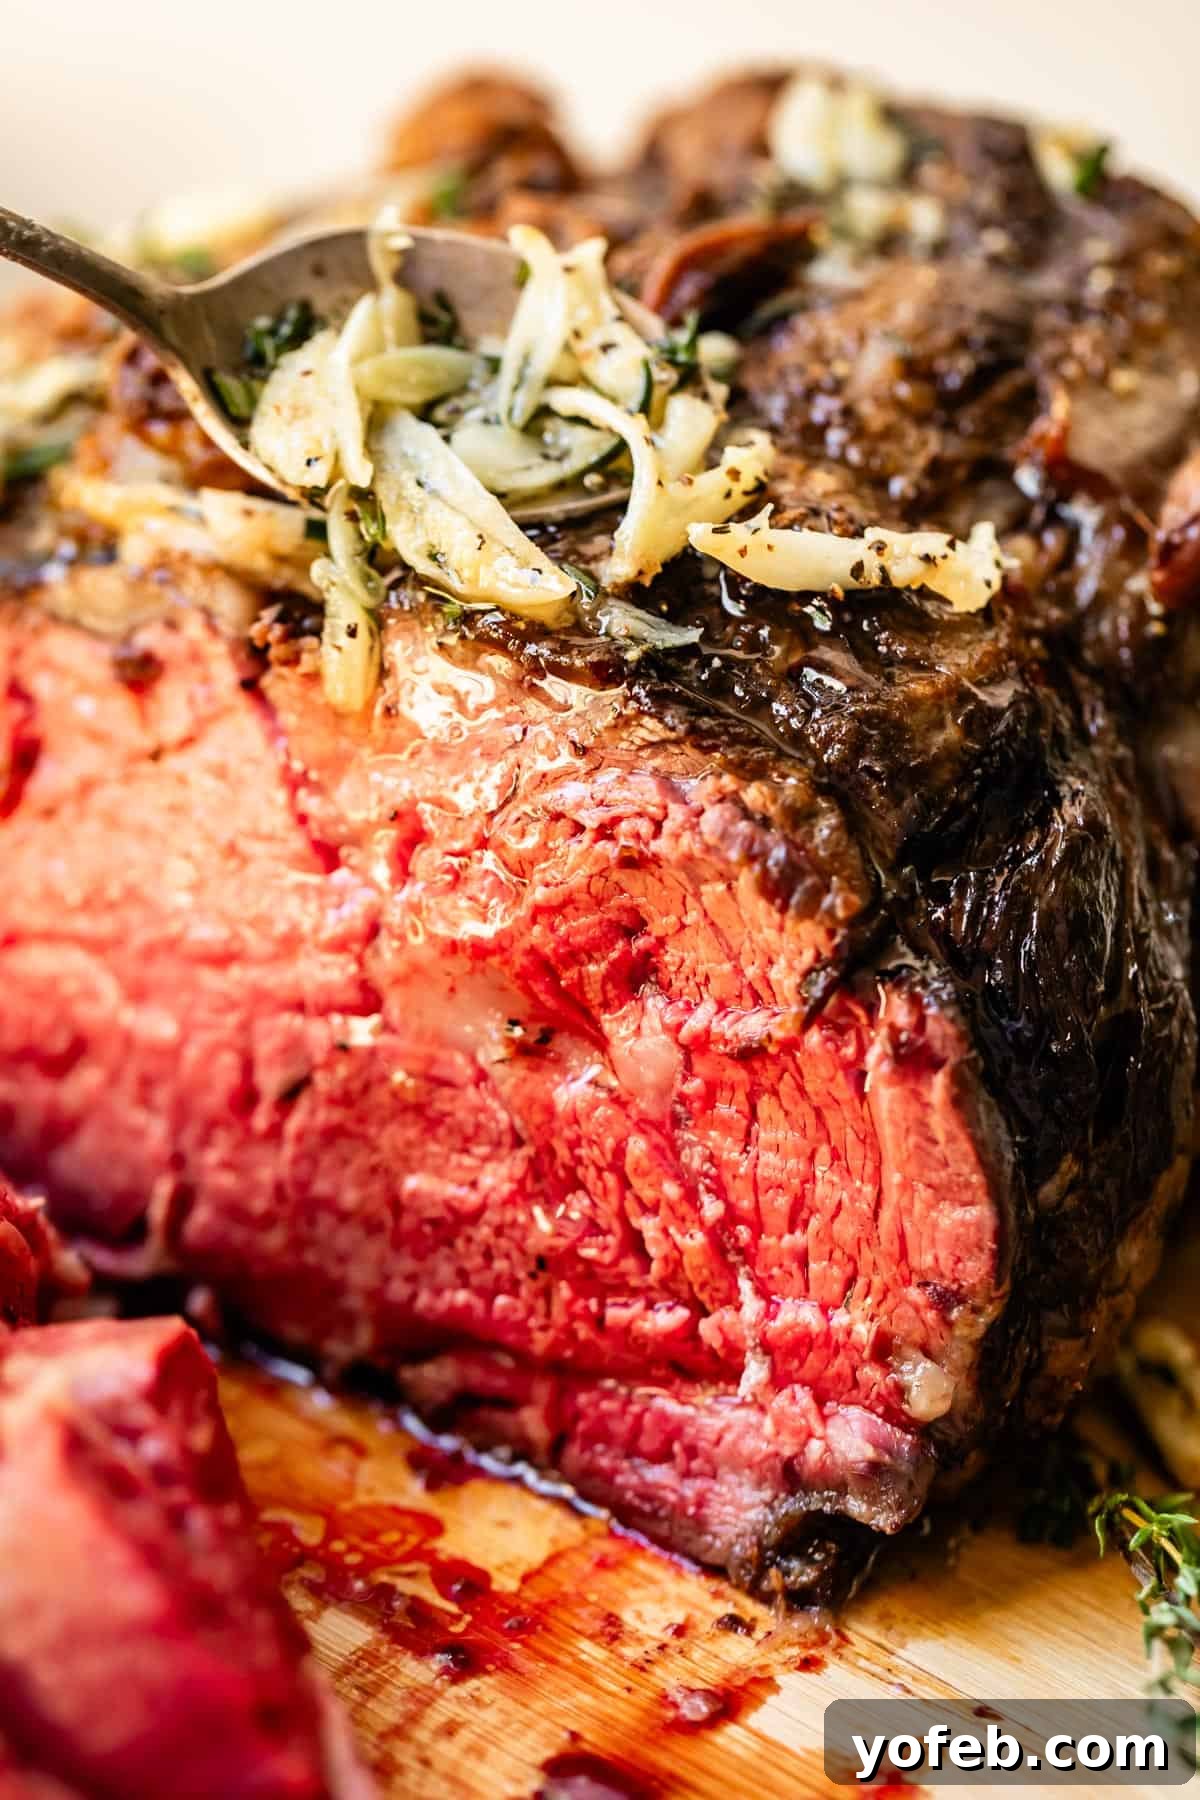
Table of Contents
- Prime Rib: The Ultimate Holiday Centerpiece (Not as Intimidating as You Think)
- Understanding Prime Rib: What is it, Exactly?
- The Art of Preparation: Getting Your Prime Rib Ready
- Choosing Your Prime Rib: A Butcher’s Guide
- The Secrets to Perfect Prime Rib: A Chef’s Essential Rules
- Your Best Friend in the Kitchen: The Indispensable Meat Thermometer
- The Golden Rule: Serving Prime Rib Rare (or Medium-Rare)
- Essential Ingredients for Your Prime Rib Masterpiece
- Planning Portions: How Much Prime Rib Per Person?
- Step-by-Step: Mastering the Prime Rib Roasting Process
- Crafting the Perfect Accompaniments: Rich Gravy and Aromatic Garlic Butter Sauce
- The Grand Finale: Broiling and Carving Your Roast
- What to Serve with Your Magnificent Prime Rib
- Leftovers: Storing and Reheating Prime Rib Like a Pro
- Freezing Prime Rib for Future Indulgence
- Frequently Asked Questions About Prime Rib
- Beyond Prime Rib: More Impressive Main Dishes
- The Best Prime Rib Recipe
Life often presents us with situations that seem more complicated than they actually are. Just last week, our fireplace had been non-functional for nearly six months. We called Roberto, the fireplace repairman – a charming fellow with an accent as distinctive as the ‘O’ at the end of his name. While my husband Eric discussed technical details, I, as is my habit around repairmen, felt awkwardly out of place in my own home, trying not to hover.
Five minutes later, Eric sent me a text: “Karen. The wall switch. It turns the fireplace off and on. It’s just been turned off.” You read that right. Six months of a “broken” fireplace, all because of an untouched light switch right beside it. This isn’t a singular event. There was the “broken” minivan door that just needed a button pressed, and the “dead” fridge whose temperature dial was simply off. Sometimes, the most impressive solutions are the simplest, and often, the obvious things are the easiest to overlook!
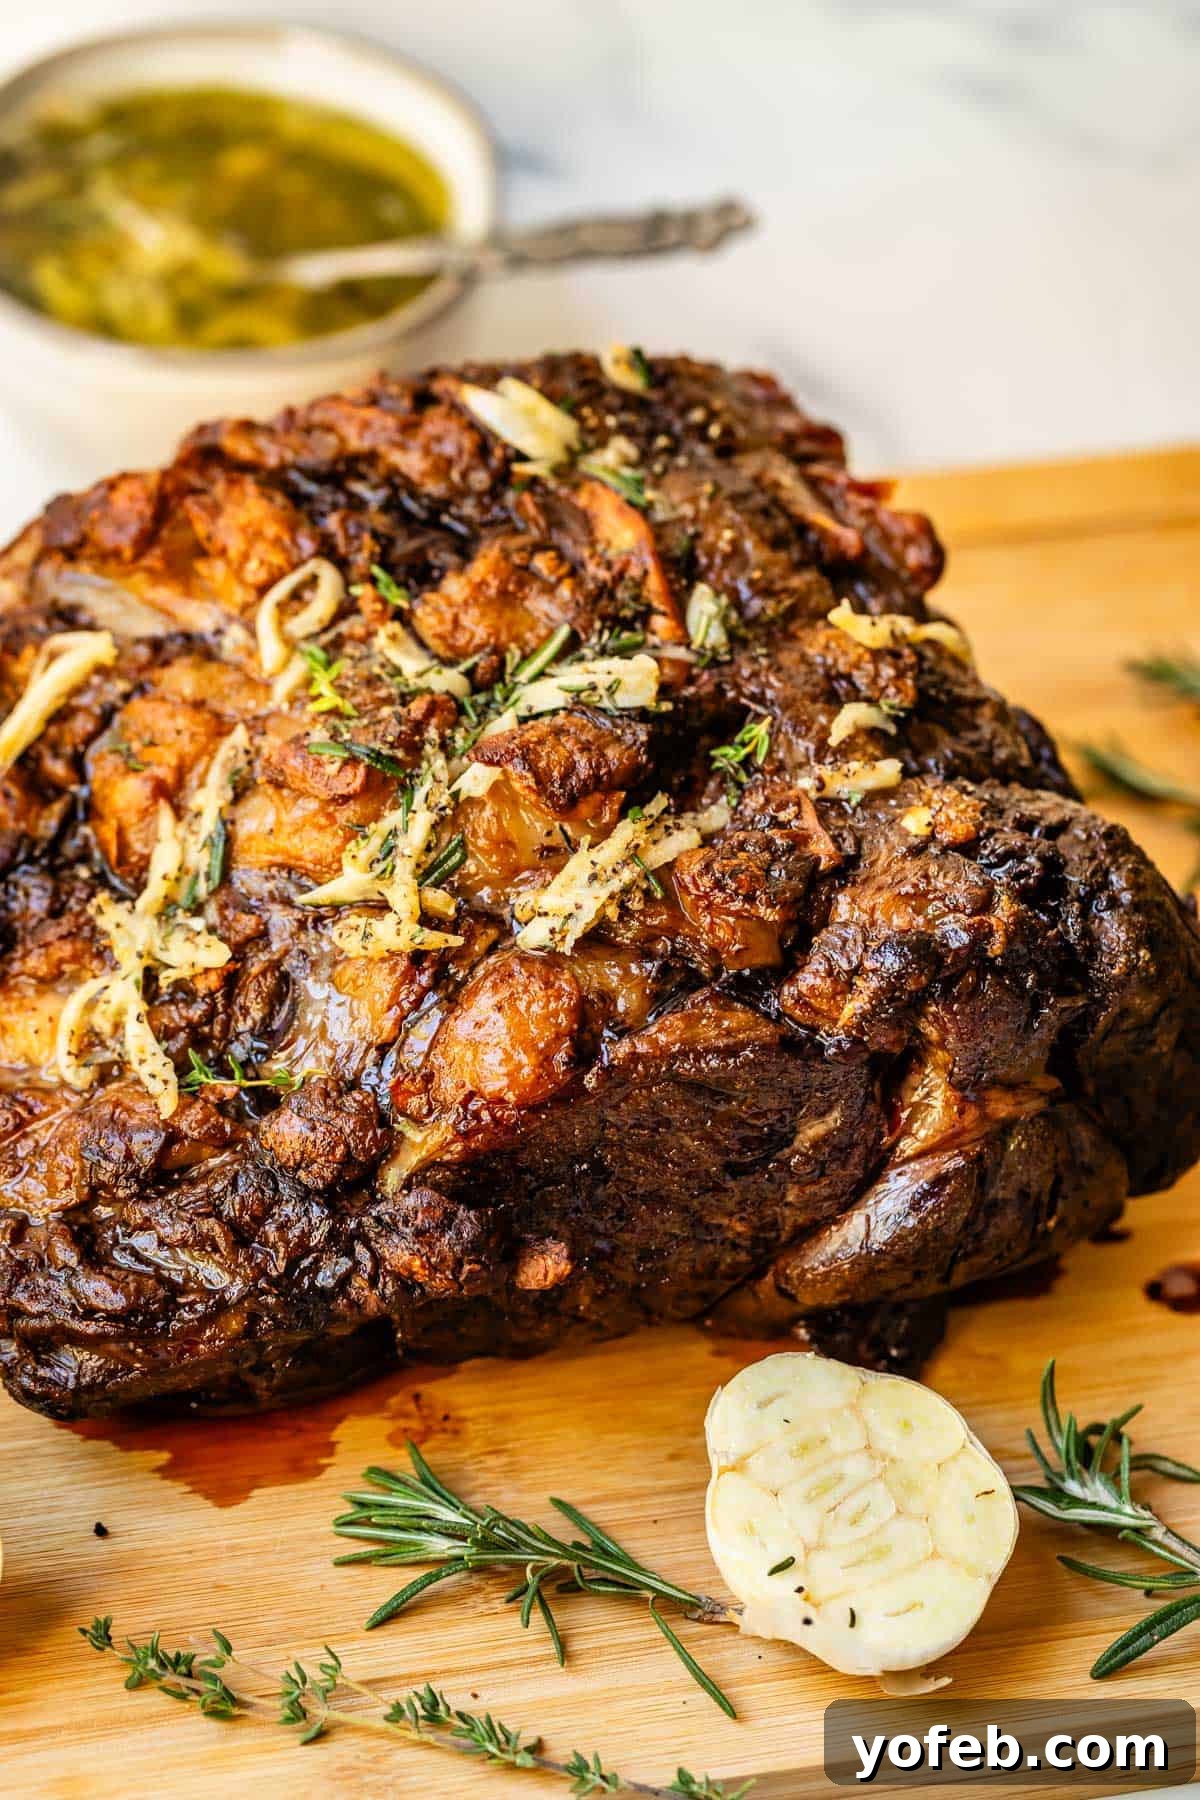
Thankfully, achieving an absolutely incredible prime rib requires no hidden switches or repairman calls. While I might stumble with the simplest household appliances, give me a complex holiday cooking project, and I dive deep with meticulous precision. I’m here to ensure your prime rib journey is smooth, successful, and utterly delicious.
Prime Rib: The Ultimate Holiday Centerpiece (Not as Intimidating as You Think)
For years, the “Prime Rib Project” sat on my culinary bucket list. This quintessential holiday roast has always been the gold standard for festive gatherings, and I pride myself on creating showstopping holiday meals. While I’ve conquered many a Thanksgiving dish – did you try my Dutch Apple Pie last WBT (Wednesday Before Thanksgiving, a truly official holiday in my book!)? – prime rib always felt like a leap into the unknown.
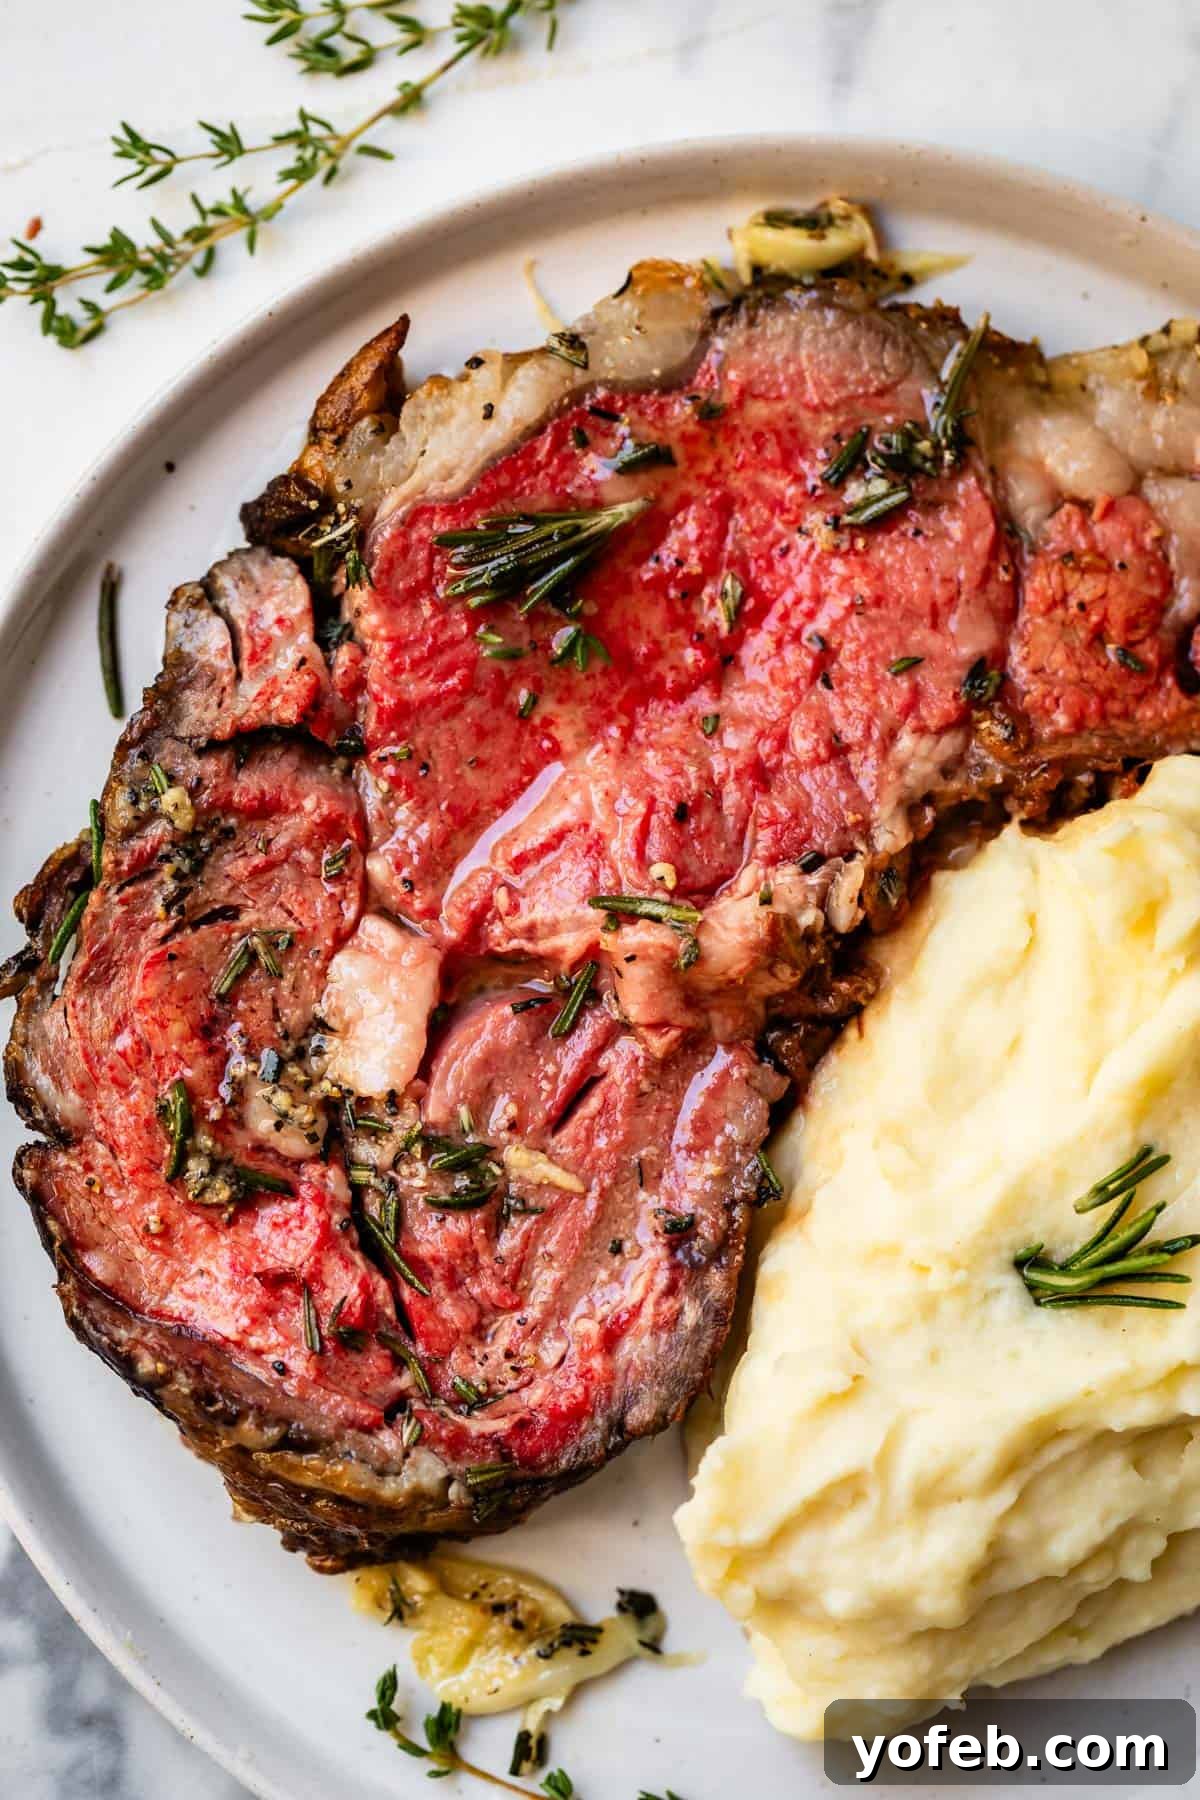
The sheer cost of a prime rib roast is enough to make any home cook a little hesitant. The biggest fear, of course, is overcooking it and wasting such a magnificent cut of meat. However, after extensive research and testing, I’m thrilled to report that preparing prime rib is far simpler than its reputation suggests. The key elements are straightforward: a reliable oven, a sturdy roasting pan, and, most importantly, a quality meat thermometer and a generous application of salt. I’ve included detailed photographs throughout this guide, showing you exactly what to look for at the butcher, and how the roast should appear at every stage of the cooking process. Let’s conquer this culinary challenge together!
Understanding Prime Rib: What is it, Exactly?
A prime rib, also known as a standing rib roast, is a highly prized cut of beef sourced from the beef rib primal section of a cow. It gets its name “standing rib roast” from the traditional method of roasting it upright on its rack of bones. This cut is celebrated for its exceptional tenderness, rich marbling, and a distinctive flavor that is truly unparalleled.
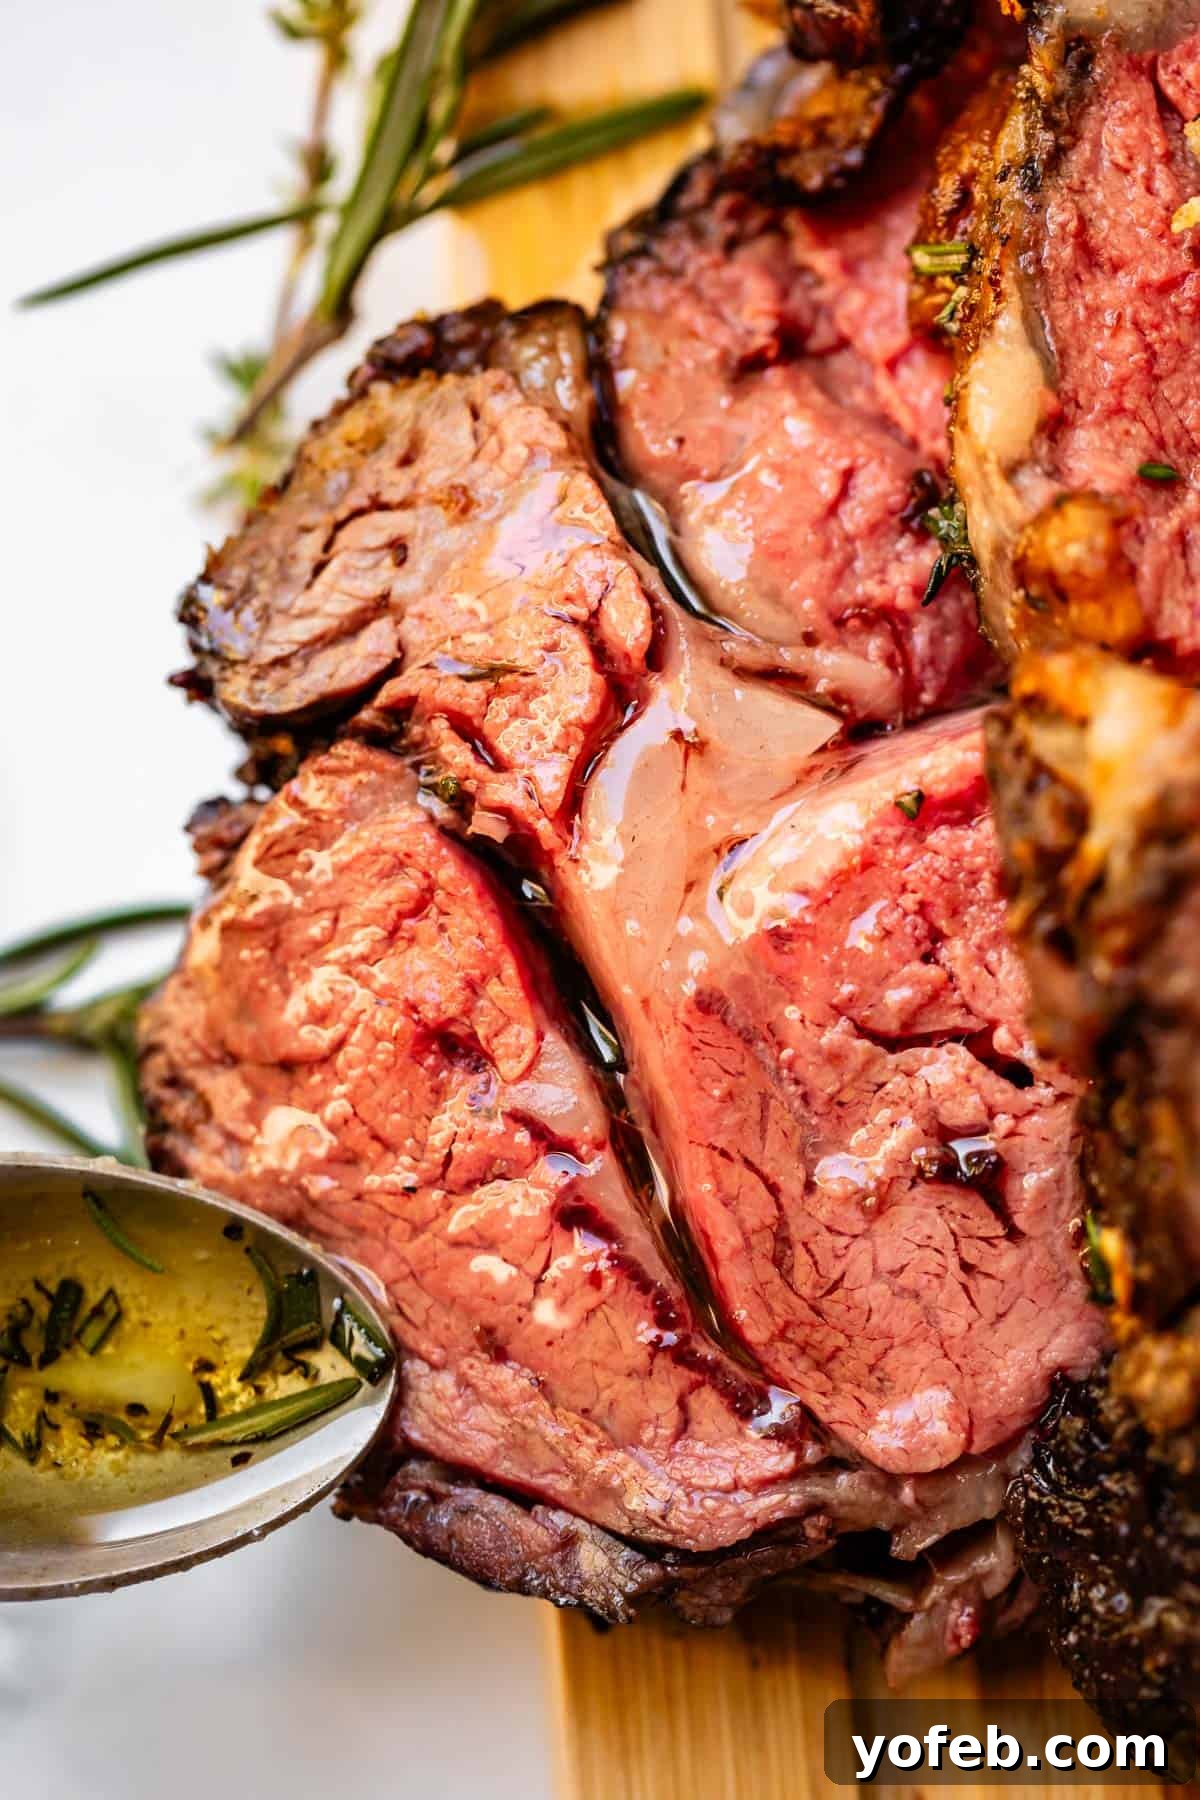
The central portion of a prime rib offers an incredibly tender texture and a profoundly unique taste that truly surprised me. Forget any comparisons to a standard pot roast; this is a cut that delivers the robust, concentrated flavor of a premium steak, masterfully prepared as a roast. The richness and depth of flavor are simply extraordinary.
Given its impressive size and powerful flavor, prime rib is the perfect choice for a spectacular holiday main dish. It’s the kind of meal that sparks conversation and creates lasting memories. Has your family ever made this a Christmas tradition?
To be completely candid, my initial hesitation in tackling prime rib wasn’t just its cost; it was also my personal preference for medium-cooked meats, whereas prime rib is traditionally enjoyed rare. However, this recipe completely transformed my perspective. When cooked precisely, prime rib reveals an unbelievably buttery softness and a flavor profile that you simply cannot replicate with any other cut. It is, without a doubt, an unforgettable culinary experience.
The Art of Preparation: Getting Your Prime Rib Ready
The inherently unique and rich flavor of prime rib means we don’t need to overcomplicate things with excessive seasonings. The beauty of this recipe lies in its elegant simplicity: primarily, generous kosher salt and a patient 24-hour waiting period. While an optional garlic butter sauce adds a delightful touch just before serving, the core preparation focuses on enhancing the meat’s natural excellence.
The Magic of Salting: Pass the Salt
One of the most crucial steps in achieving a perfectly seasoned and tender prime rib is to salt the roast a full 24 hours in advance. This process, known as dry brining, leverages the principles of osmosis to miraculously infuse flavor deep into the center of the meat. Initially, the salt draws moisture out from the roast, creating a glistening pool on the surface. But over time, through osmosis, this seasoned moisture is reabsorbed back into the meat, ensuring that every fiber of the roast, even its deepest core, is thoroughly seasoned. This crucial 24-hour period is essential for the salt to properly distribute and work its magic; it’s not simply about creating a salty crust.
Wait, Which Salt Should I Use?
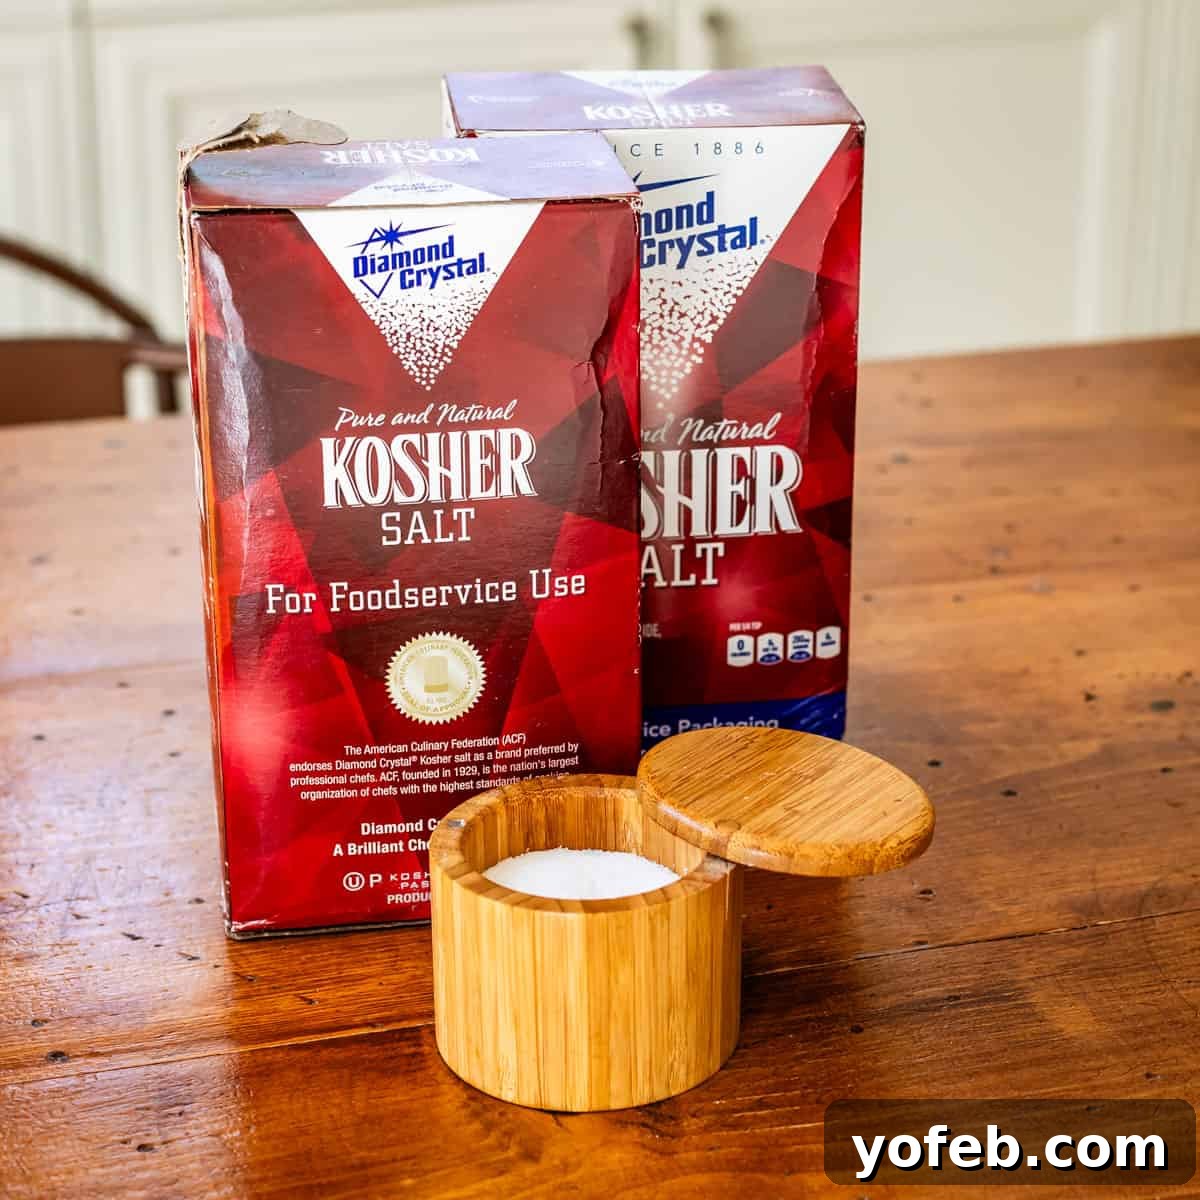
For this recipe, and indeed for most of my cooking, I highly recommend Diamond Crystal Kosher Salt. If you’re investing in a premium cut like prime rib, it’s worth investing in a salt that will truly enhance its flavor. Many cooks, myself included, find that regular table salt can taste overtly “salty” or even metallic due to its iodine content and finer grain. Kosher salt, when used correctly, doesn’t impart a harsh salty flavor; instead, it acts as a flavor amplifier, magnifying all the delicious notes already present in your dish. Once you try it, you may never go back to table salt for serious cooking.
Let Your Roast Dry Out in the Fridge Overnight
Beyond just salting, allowing your prime rib to sit uncovered in the refrigerator overnight is another vital step for achieving that coveted, crispy exterior. This “air-drying” process helps to significantly dry out the surface of the roast. Why is this important? Because a drier surface facilitates better browning and crisping during searing – a phenomenon known as the Maillard reaction, which creates those irresistible savory crusts. Don’t worry about your roast drying out internally; the overall moisture loss from the meat overnight is surprisingly minimal. The rich fat content within the prime rib holds the majority of its flavor and juiciness, ensuring your magnificent centerpiece remains incredibly succulent. Trust the process; it will not evaporate overnight!
Choosing Your Prime Rib: A Butcher’s Guide
Selecting the perfect prime rib is the first step to culinary success. A cow has 13 ribs per side, and ribs number 6 through 12 are what typically make up the prime rib section. However, not all ribs are created equal.
First Cut Prime Rib (Ribs 10-12): The Premium Choice
The most desirable portion of the prime rib consists of ribs 10, 11, and 12. These are located closest to the loin at the rear of the cow (rib 13 is usually sold as part of the loin). This section, often referred to as the “first cut” or “loin end,” is known for its leaner meat, finer grain, and superior tenderness, yielding the most elegant and uniform slices. If your budget allows, always request this cut from your butcher. Don’t hesitate to engage in a conversation with your butcher or meat department specialist to ensure you get precisely what you’re looking for.
Second Cut Prime Rib (Ribs 6-9): Flavorful with More Fat
Moving towards the front of the cow, ribs 6, 7, 8, and 9 comprise what is known as the “second cut” or “chuck end.” This section typically boasts more generous pockets of fat, which contributes immensely to its rich flavor. While incredibly tasty, the higher fat content may result in slices that are less uniformly marbled and aesthetically perfect than those from the first cut. When choosing, look for desirable marbling (fine streaks of fat within the muscle) over large, isolated pockets of fat.
Prime-Grade vs. Choice-Grade: Understanding Quality
Adding to the terminology, “prime” can also refer to the USDA grading system, which evaluates the overall quality of the meat. This can sometimes create confusion, as you can purchase a “prime-grade prime rib” or a “choice-grade prime rib.”
- Prime Grade: This is the highest USDA grade, indicating superior marbling, tenderness, and juiciness. Prime-grade beef is typically found in high-end restaurants and specialty butcher shops. It will offer the most exceptional eating experience.
- Choice Grade: This is the second-highest grade and is widely available in most supermarkets. Choice-grade beef is still of high quality, with good marbling, but generally less than prime. It still makes an excellent prime rib and is a fantastic option if prime grade is out of your price range or unavailable.
Ultimately, buy what you can comfortably afford, as both grades will yield a delicious roast when prepared correctly. However, if you are aiming for the absolute best, seek out a prime-grade first cut prime rib. If your local supermarket’s meat assistant looks puzzled by this request, it might be a sign to visit a specialized butcher who can guide you to the perfect selection.
The Secrets to Perfect Prime Rib: A Chef’s Essential Rules
Achieving prime rib perfection isn’t about complex culinary wizardry; it’s about adhering to a few fundamental rules with precision and patience. Heed these guidelines, and you’ll be rewarded with a roast that will undoubtedly impress even the most discerning palates:
- Choose Wisely: Always ask your butcher for the “first cut” of prime rib, specifically ribs 10-12. This selection guarantees the most tender and desirable meat.
- Salt Liberally and Early: Dry brine your roast 24 hours in advance. This is non-negotiable for deep seasoning and enhanced flavor. The salt needs time to penetrate the meat.
- Air Dry for Crispy Perfection: Allow your roast to air dry, uncovered, in the refrigerator for the full 24-hour salting period. A dry surface is crucial for a beautifully seared crust.
- Sear for Flavor and Texture: Before it goes into the oven, vigorously sear the meat in hot oil on all sides. This creates an incredible crust through the Maillard reaction, locking in juices and developing rich flavors.
- Low and Slow is the Way to Go: Cook your prime rib at a significantly low temperature, ideally 200°F. This gentle cooking ensures even doneness from edge to center and results in an unbelievably tender roast.
- Do NOT Overcook: This is arguably the most critical rule. Overcooked prime rib is a culinary tragedy. Embrace rare or medium-rare for optimal tenderness and flavor.
- Trust Your Thermometer: To absolutely guarantee perfect doneness, use an insert meat thermometer. This indispensable tool eliminates guesswork and ensures you hit your target temperature precisely.
- Rest and Enhance: After cooking, let the roast rest properly. Then, for an extra layer of decadence, generously top your finished roast with a flavorful garlic and herb butter.
Your Best Friend in the Kitchen: The Indispensable Meat Thermometer
If you’re investing in a premium cut like prime rib, then you absolutely must invest in the single most important tool that guarantees success and prevents culinary disaster: a reliable meat thermometer. I am not exaggerating when I say this is non-negotiable. Think of it this way: you wouldn’t attempt to bake a cake without an oven, would you? The meat thermometer is equally essential for prime rib.
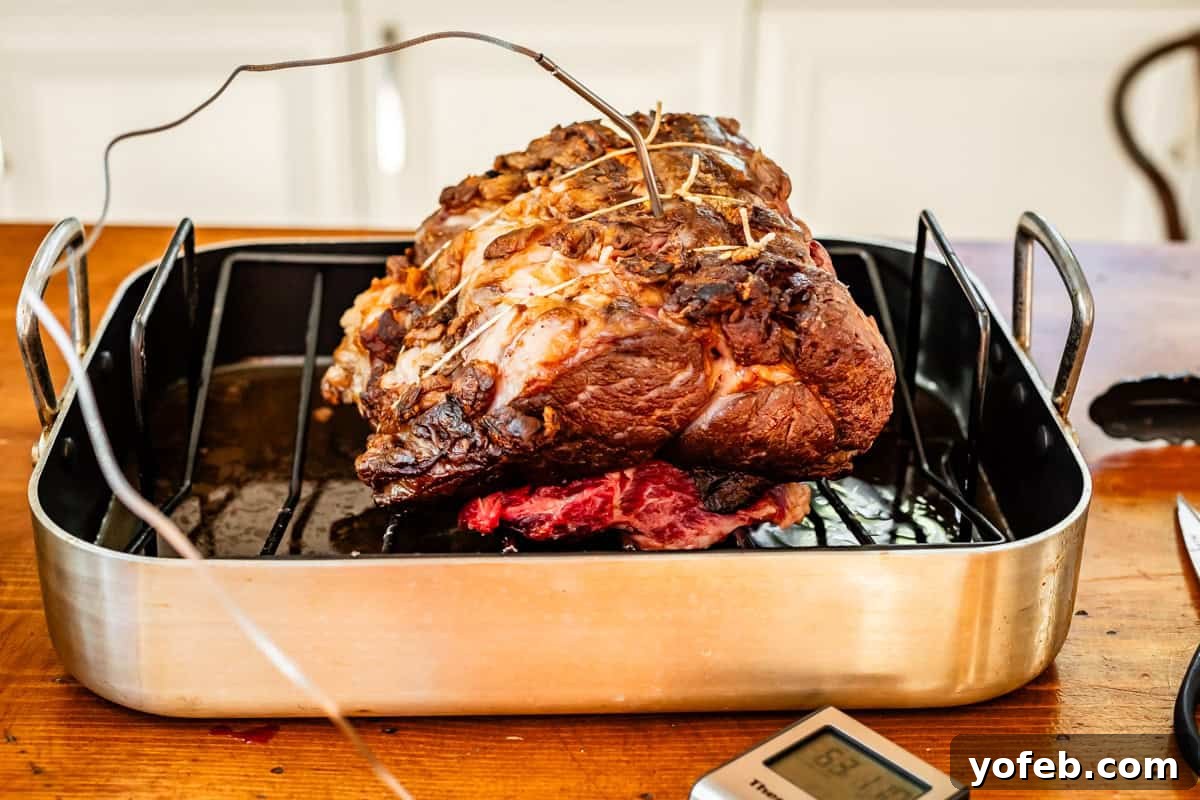
For roasting a prime rib, I strongly recommend a probe meat thermometer. This type features a stainless steel probe that remains inserted in the thickest part of the meat throughout the cooking process. The probe is connected by an oven-safe wire to a digital display unit that sits outside your oven. The brilliance of this device is that you can set an alarm to alert you the moment your roast reaches its precise target internal temperature. This eliminates all guesswork, preventing both undercooking and, more importantly, the tragic overcooking of your expensive roast. You won’t need to constantly open the oven door, losing precious heat, to check the temperature with an instant-read thermometer. It’s a game-changer for stress-free, perfect results every time.
The Golden Rule: Serving Prime Rib Rare (or Medium-Rare)
Let me be clear: while I typically prefer my steaks cooked to a comfortable medium, I cannot stress enough that prime rib absolutely shines when served rare or medium-rare. This preference for less-done meat was actually one of the main reasons I procrastinated on developing a prime rib recipe for so long. But I have seen the light, and it is glorious!
The unique, buttery-soft texture and incomparable flavor I’ve been raving about are fully realized when prime rib is cooked to these lower temperatures. A prime rib that is cooked to medium, or heaven forbid, well-done, becomes dry, tough, and rubbery – an absolute tragedy that wastes its incredible potential.
If the thought of rare or even medium-rare beef truly makes you uneasy, then, with all due respect, I strongly advise you to choose a different cut of meat. Do not waste the investment on a prime rib only to cook it past its prime (pun intended!). Consider an Easy Pot Roast, a perfectly cooked Tri Tip, or a comforting Meatloaf instead.
However, if you have guests with varying preferences – some who love rare, and others who are a bit squeamish – there’s a solution. My recommendation is to cook the entire roast to the lowest desired temperature (usually rare or medium-rare). Then, for those who prefer their meat more done, simply slice individual portions and give them a quick broil or pan-sear just before serving. This ensures everyone gets to enjoy the tenderness of the prime rib, adjusted to their liking, without compromising the integrity of the whole roast.
Essential Ingredients for Your Prime Rib Masterpiece
The beauty of prime rib lies in its inherent flavor, so the ingredient list is surprisingly short and sweet. The focus is on quality and simplicity to let the magnificent meat shine. Below is a quick glance at what you’ll need; for the full, detailed list and step-by-step instructions, please refer to the comprehensive recipe card at the bottom of this post.
For the Roast and Garlic Butter Sauce:
- Prime Rib Roast (bone-in or bone-out, preferably first cut)
- Diamond Crystal Kosher Salt (essential for dry brining)
- Vegetable Oil (for searing the roast)
- Better than Bouillon Beef Base (for depth of flavor in gravy and broth)
- Unsalted Butter (the star of our luscious garlic sauce)
- Fresh Garlic Cloves (minced or thinly sliced for aroma)
- Granulated Garlic (adds another layer of garlic flavor)
- Freshly Ground Black Pepper (for seasoning)
- Fresh Rosemary (adds an earthy, aromatic note)
- Fresh Thyme (complements the beef beautifully)
For the Rich Gravy:
- Pan Drippings (the flavorful foundation from your roast)
- All-Purpose Flour (for thickening)
- Black Pepper (to taste)
- Butter (optional, for richness and shine)
Planning Portions: How Much Prime Rib Per Person?
When preparing a feast with prime rib as the star, knowing how much to buy is crucial, especially if you’re hoping for delicious leftovers (which, let’s be honest, is always the goal!). Here’s a helpful guideline:
- Main Focus (Prime Rib Heavy Meal): If prime rib is the primary focus of your meal with minimal side dishes, aim for approximately 1 pound of prime rib per person. This often translates to one rib for every two diners. Keep in mind that this measurement includes the weight of the bones, which are not edible, so the actual meat portion will be less.
- Holiday Dinner (Plenty of Sides): For a more traditional holiday spread featuring a variety of hearty side dishes – think mashed potatoes, roasted vegetables, and salads – you can reduce the portion to about 1/2 to 3/4 pound per person. The abundance of accompaniments will ensure everyone is satisfied.
Always err on the side of caution and buy slightly more if you want guaranteed leftovers or have particularly enthusiastic eaters. Leftover prime rib, when reheated correctly, is a true delight!
Step-by-Step: Mastering the Prime Rib Roasting Process
Let’s walk through the entire process, from selecting your roast at the store to carving it at the table. Follow these detailed steps, and you’ll achieve prime rib perfection.
1. Procurement and Butcher Interaction:
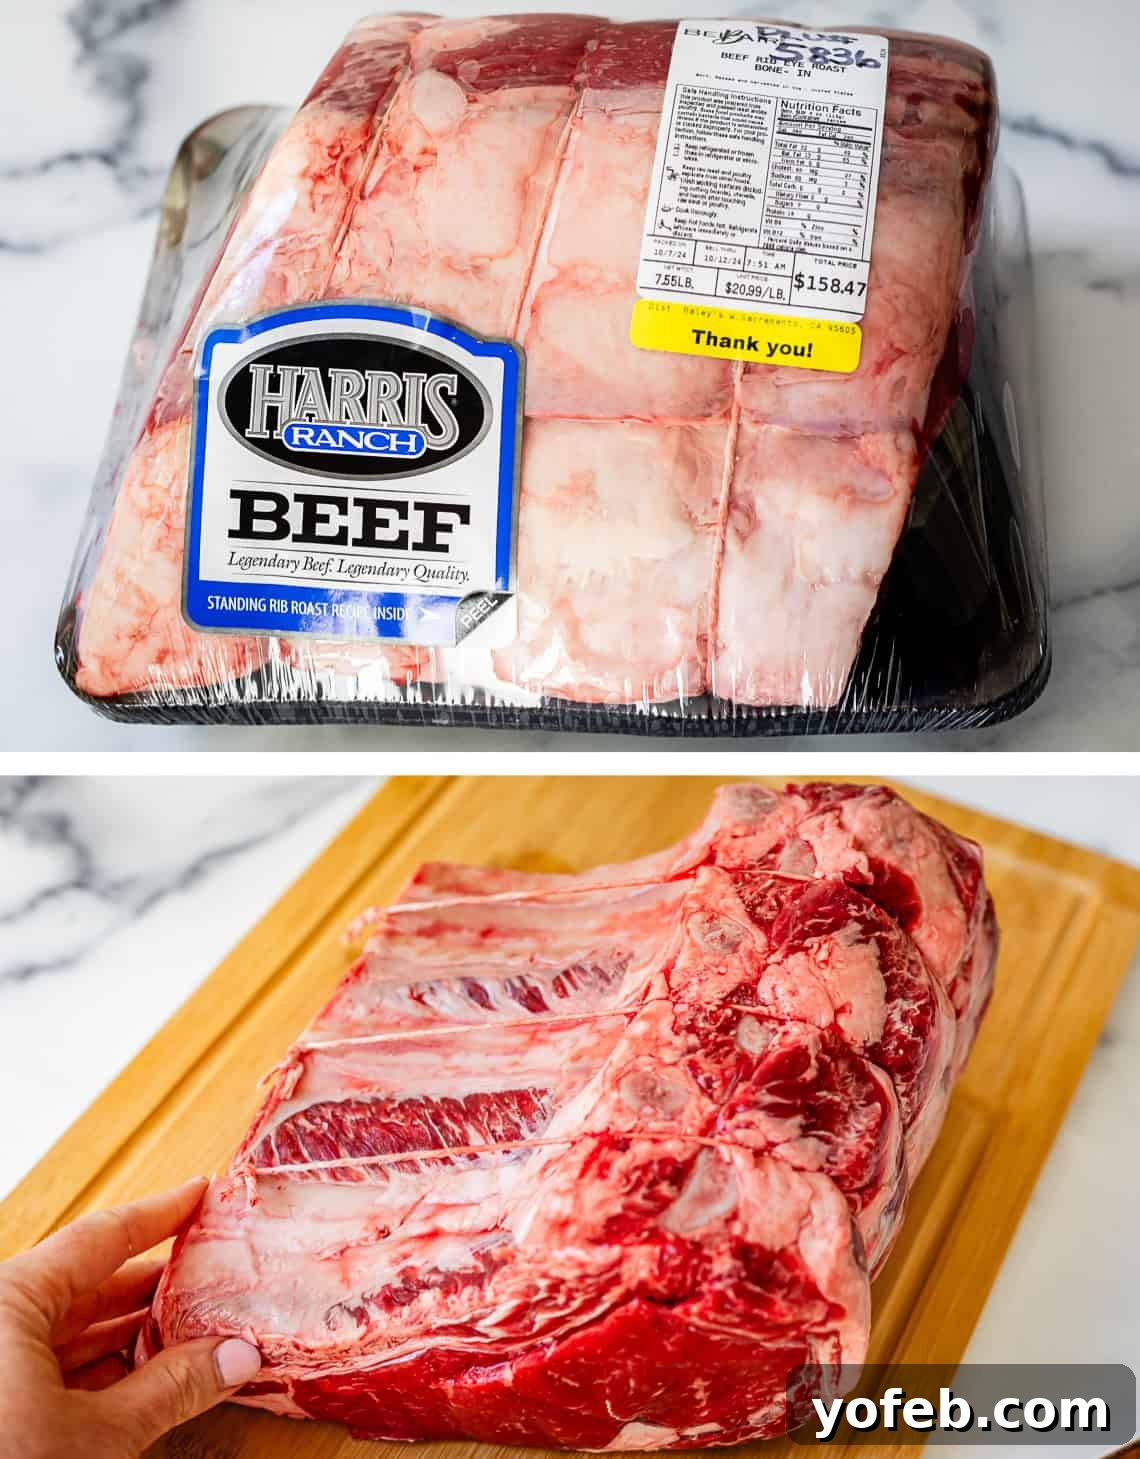
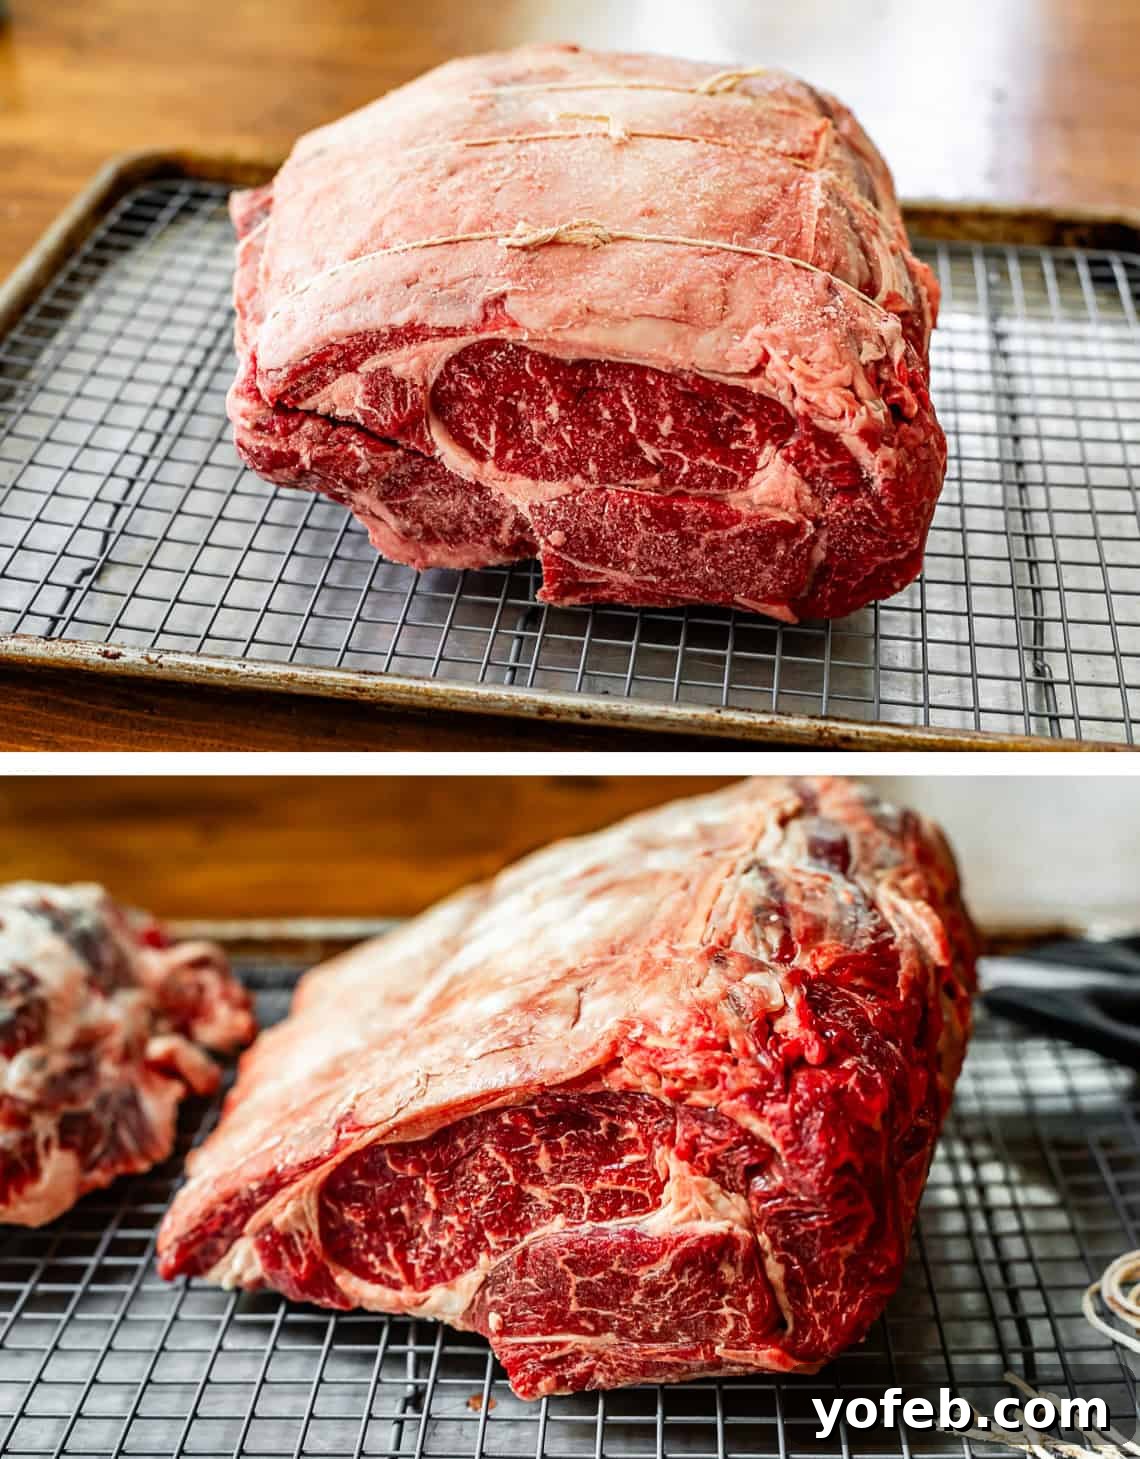
Start at your local butcher or meat counter. Confidently ask for the prime-grade “first cut” prime rib (ribs 10-12) if available. Crucially, ask your butcher to remove the rib bones from the roast and then tie them back on. This is a common practice that many butchers are familiar with, and it greatly aids in carving while ensuring the bones contribute maximum flavor during cooking. Don’t worry if this sounds like a foreign language; they’ll understand your request!
2. Unwrapping and Initial Inspection:
Once home, unwrap your prime rib. If your butcher has already cut and tied the bones, you’ll see twine holding them in place. Carefully cut this twine to separate the roast from its bone rack. This separation is temporary; we’ll reassemble it later.
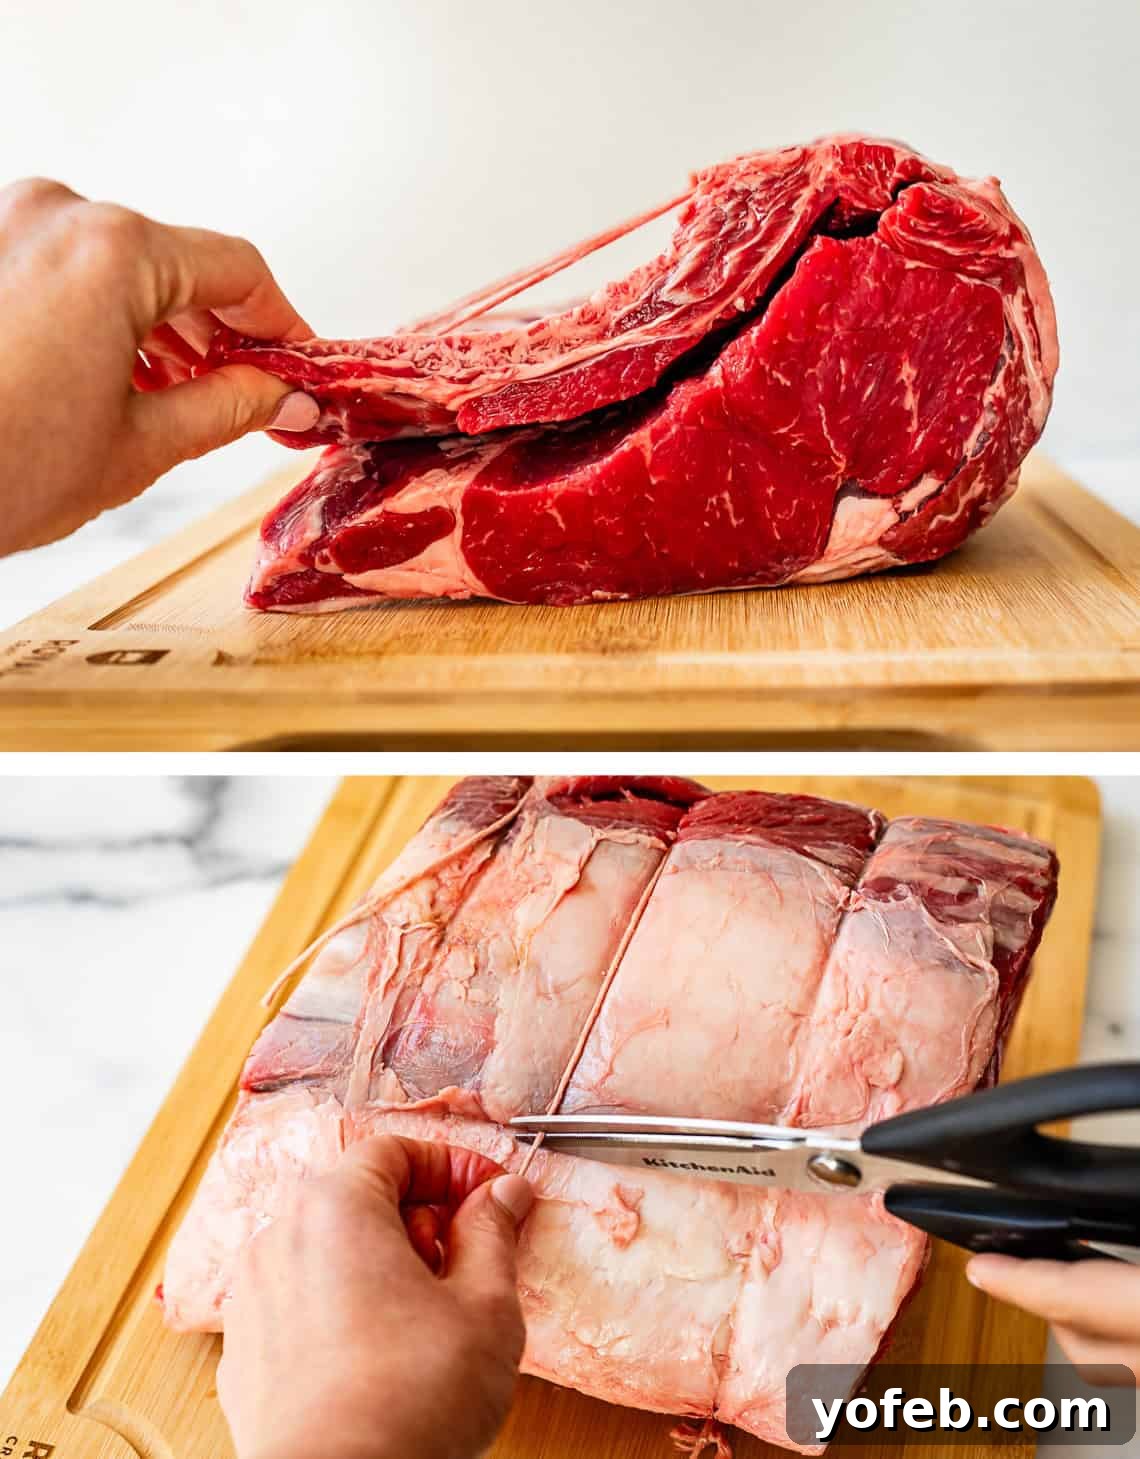
If, for some reason, the bones were not cut, now is your chance. Using a very sharp knife (preferably a serrated one), carefully run it along the edge of the bones, following their natural curve all the way down. This precise cut will detach the bones while keeping the meat largely intact.
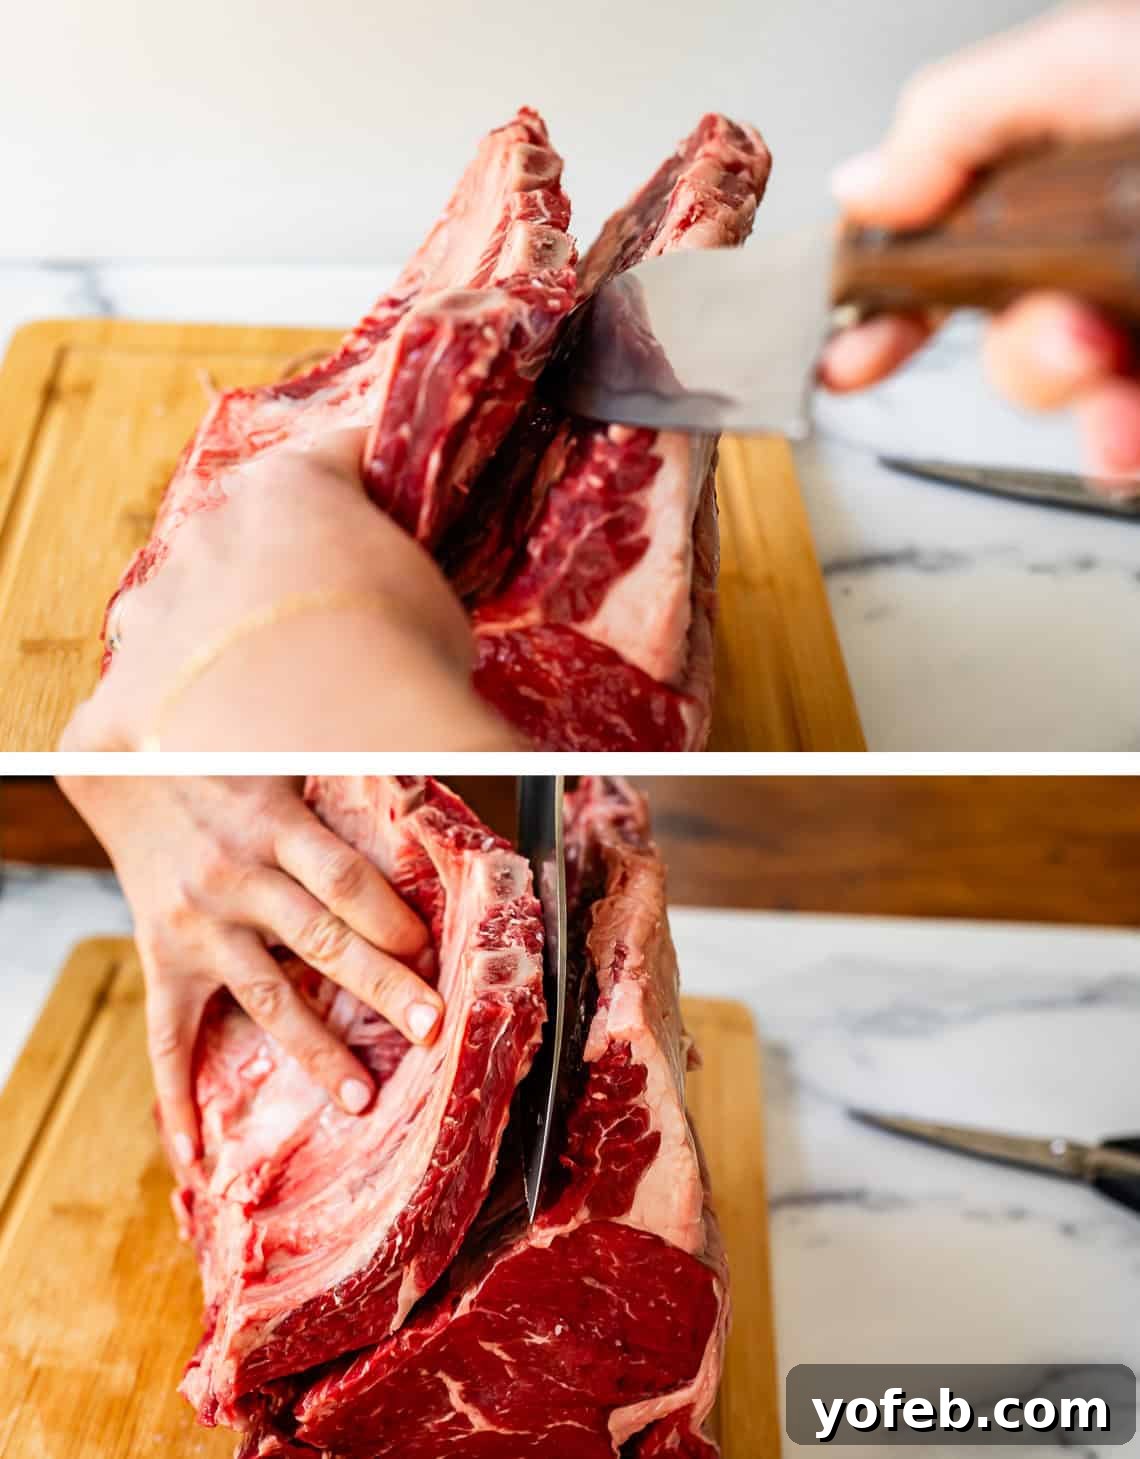
Remember, do NOT discard the bones! They are crucial for both insulating the roast during cooking and for creating a flavorful broth later.
3. Scoring the Fat Cap for Flavor and Crispness:
Place the prime rib, fat-cap-side up, on a sturdy cutting board. Using a sharp knife, carefully score the fat cap in a crosshatch pattern. The goal here is to cut through the fat, but not into the underlying muscle. These strategic cuts serve two important purposes:
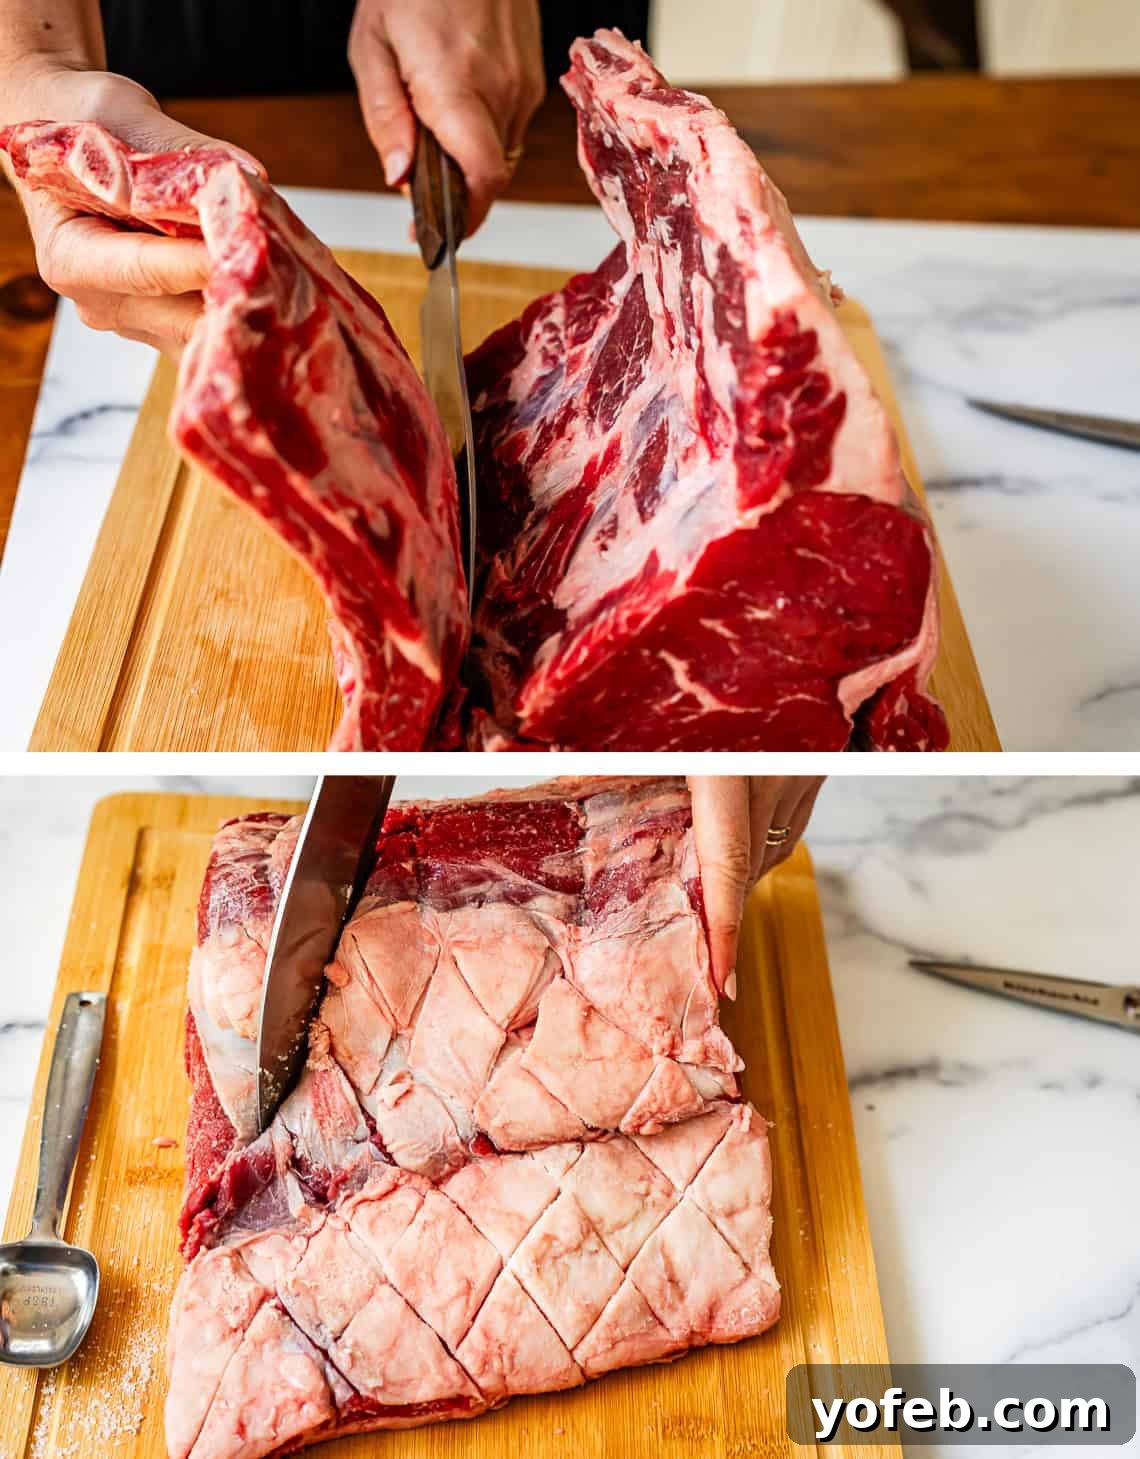
- Salt Penetration: The slits allow the kosher salt to penetrate more easily and deeply into the roast, ensuring even seasoning throughout the meat.
- Crispier Edges: During searing and broiling, these cuts allow the fat to render more efficiently, resulting in a significantly crispier and more flavorful crust.
4. The Essential Dry Brine: Salting and Chilling:
Now for the critical step: generously rub the entire prime rib with kosher salt. Don’t be shy – this isn’t just a surface seasoning. Remember our osmosis science lesson? This salt will work its way deep into the meat over the next 24 hours. Be sure to rub salt over all sides, including the area where the ribs were detached, and especially work it into those crosshatch cuts on the fat cap. Apply a little extra salt to the separated bones as well.
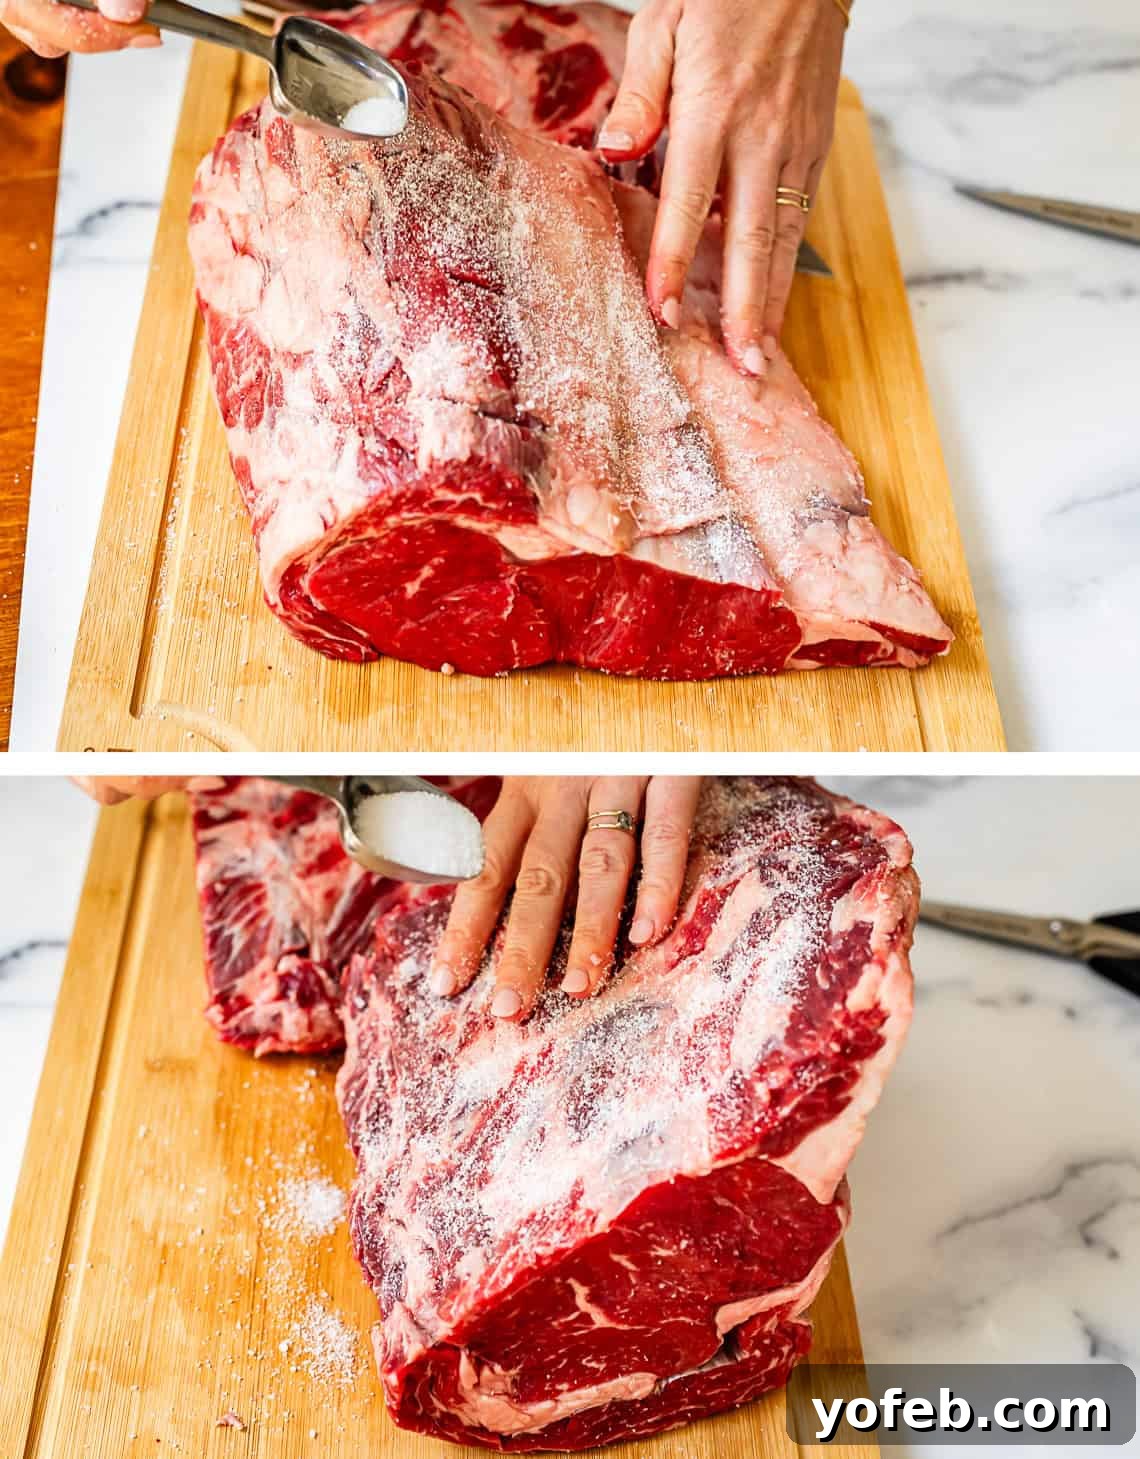
Place your generously salted prime rib, with the bones, on a cooling rack set over a rimmed baking sheet or directly into your roasting pan. This elevated position is crucial to prevent the roast from sitting in its own juices. Ensure your chosen pan fits comfortably in your refrigerator. Leave the roast completely uncovered in the fridge for a full 24 hours (or up to 48 hours). This air-drying period, combined with the salt, is paramount for developing a deeply flavored and perfectly crusted roast. Ignore any advice to tie the roast and bones together at this point; they will be separated again for searing.
5. Bring to Room Temperature & Preheat:
On the day of cooking, remove the prime rib from the refrigerator about 2 hours before you plan to roast it. Allowing it to come closer to room temperature ensures more even cooking. While it rests, preheat your oven to a low 200°F (93°C).* A low oven temperature is key for tender, evenly cooked meat.
6. The Searing Stage: Building a Flavorful Crust:
Heat a heavy-bottomed, high-sided stainless steel skillet or cast iron pan over medium-high heat for about 3 minutes until it’s smoking hot. Add about 1/4 cup of vegetable oil (like light olive oil) and swirl to coat the bottom. Place the prime rib (the meat portion, not the bones) in the hot pan. Sear each side for 2-3 minutes until a rich, crispy brown crust forms. Don’t forget the narrower edges; use sturdy tongs to hold the roast upright and sear all sides. This searing step is vital for developing complex flavors and a beautiful exterior through the Maillard reaction. Remove the seared roast from the pan and set it back on your rack.
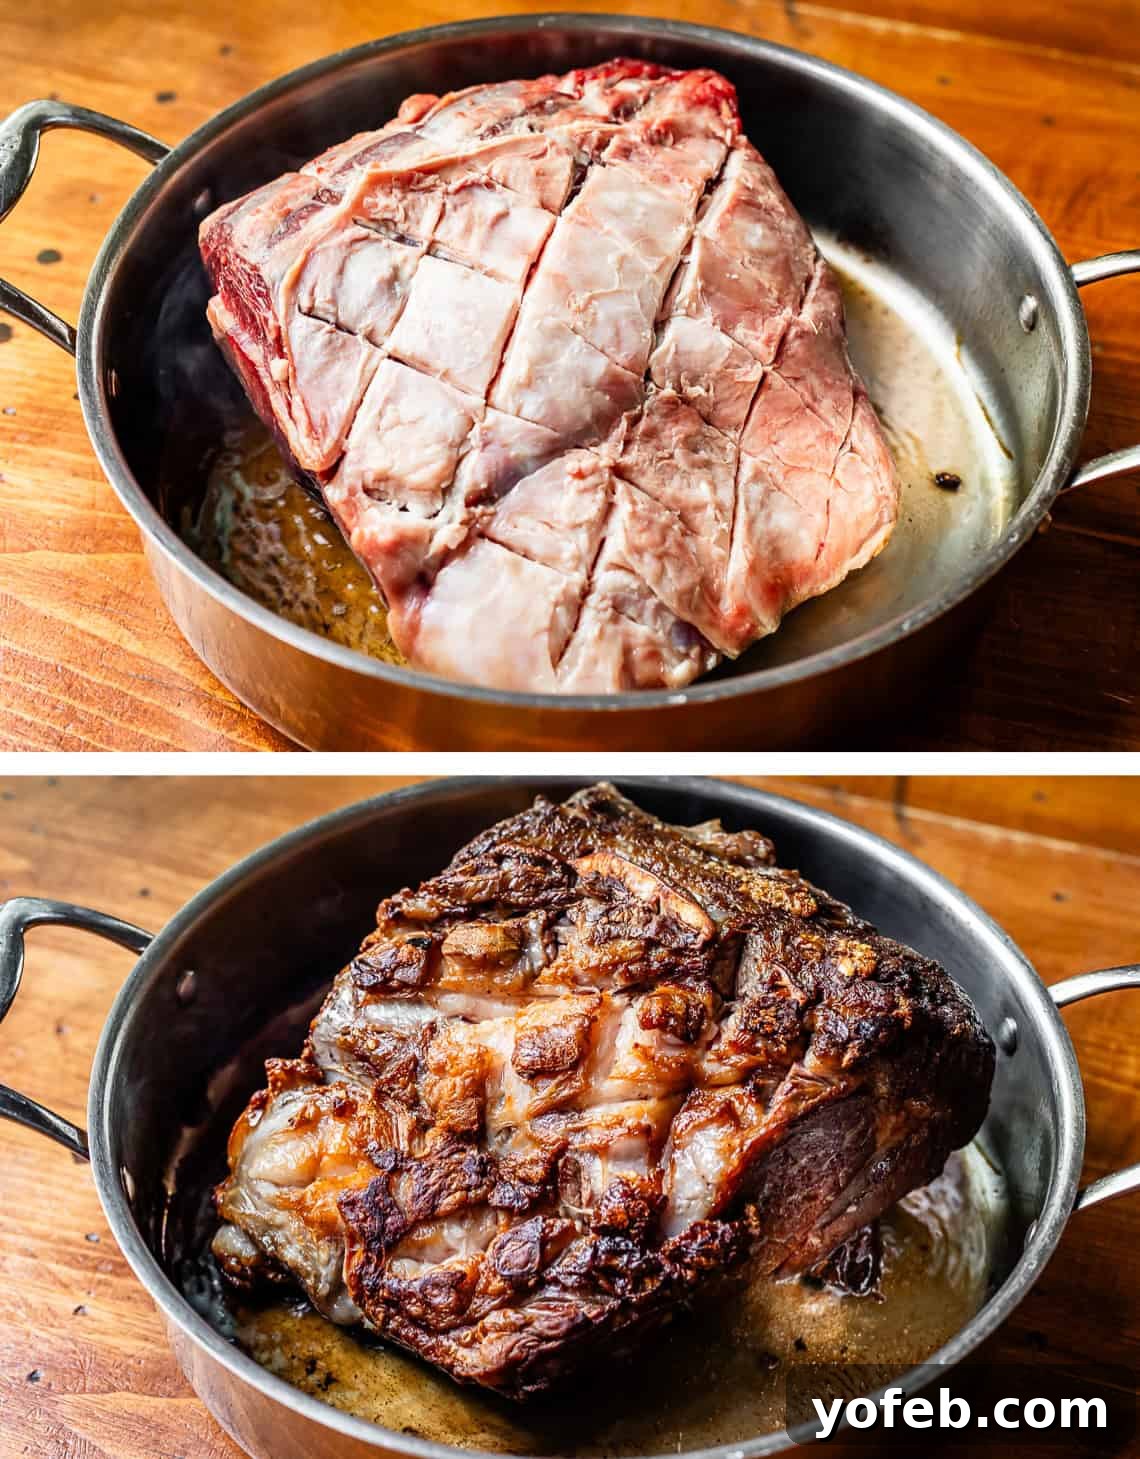
You can also briefly sear the separated bones if you wish, but it’s not strictly necessary. Remove them from the pan after searing.
7. Building the Broth Base:
After searing, don’t let those flavorful browned bits go to waste! Add 2 cups of water and 1 tablespoon of Better Than Beef Bouillon paste to the hot skillet. Bring the mixture to a boil over high heat, actively scraping up all the caramelized bits from the bottom of the pan. This creates a rich, savory broth that will be the foundation of your gravy.
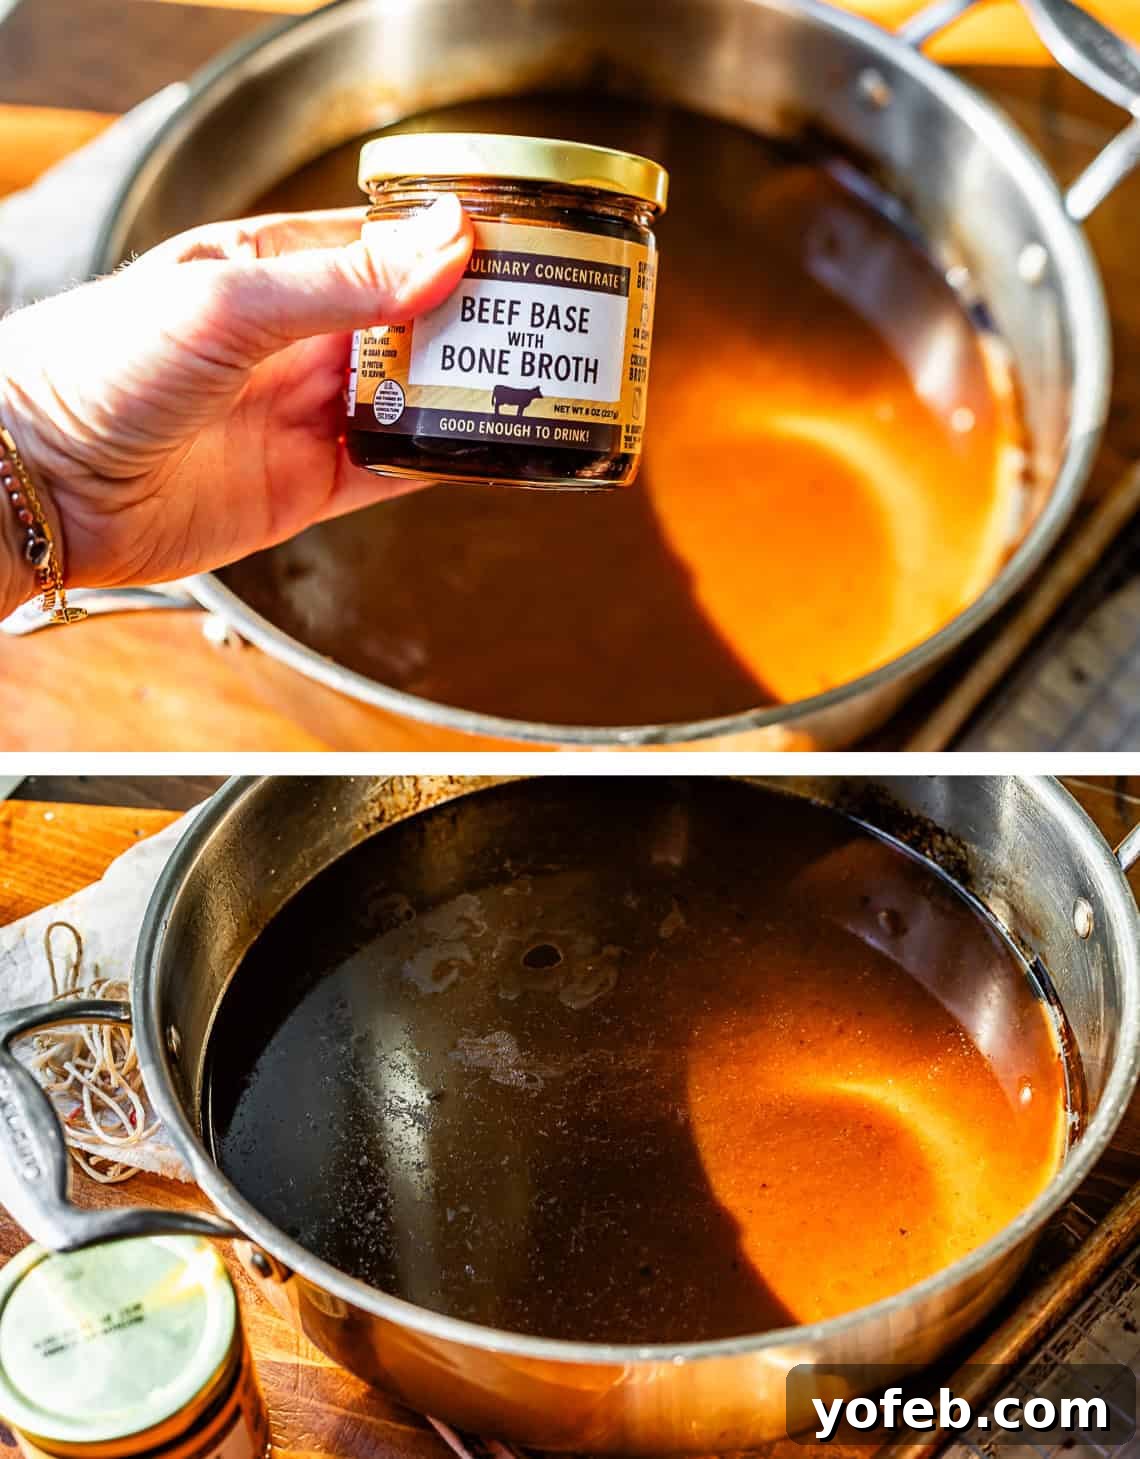
Carefully pour this flavorful beef broth into the bottom of the roasting pan you’ll be using for the oven. If you’re using a smaller rimmed baking sheet, be mindful not to add too much liquid, as it might overflow during cooking.
8. Reassemble and Insert Thermometer:
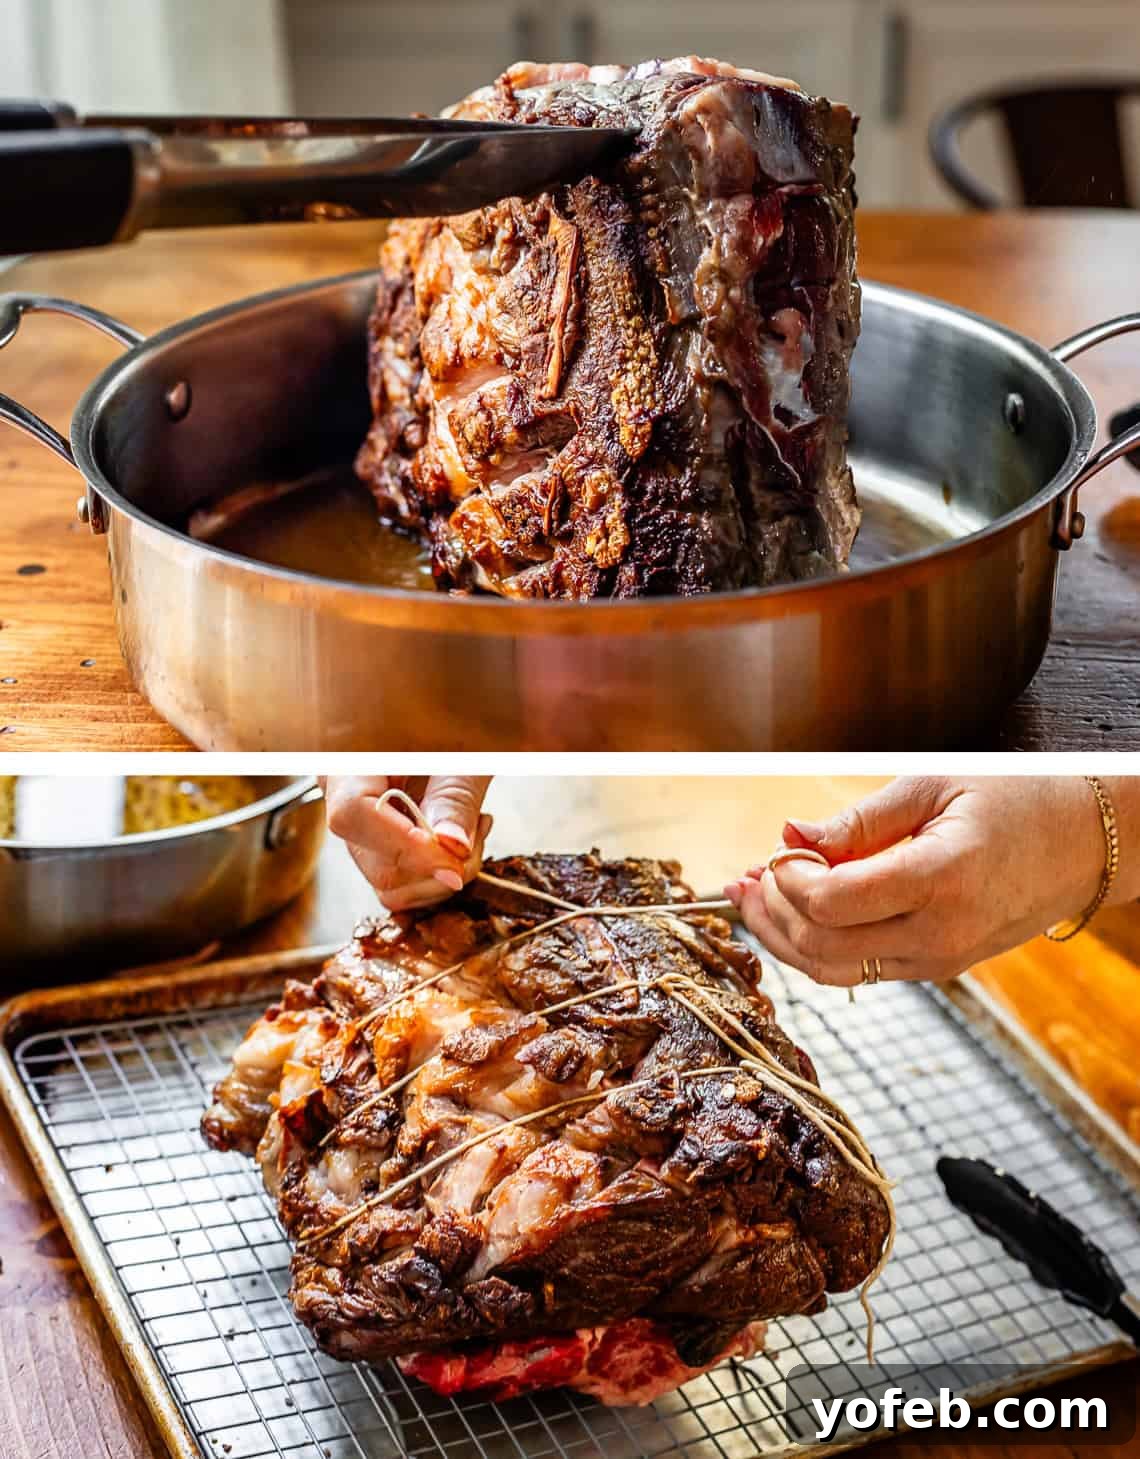
Place the seared bones on the rack within your roasting pan. Then, position the seared prime rib roast directly on top of the bones, aligning it as it was before separation. Now, use kitchen twine to securely tie the roast back to the bones. This step is crucial: the bones act as a natural rack, insulating the meat and imparting an even deeper, juicier flavor to the roast.
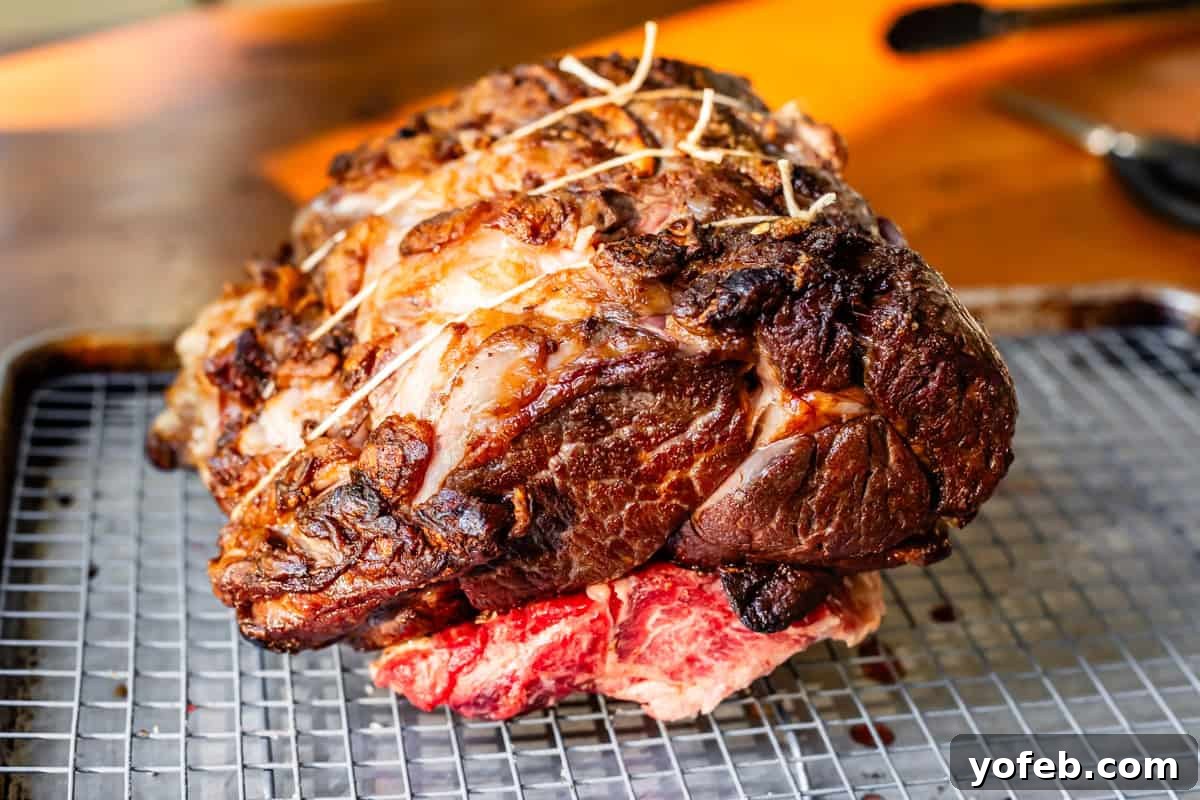
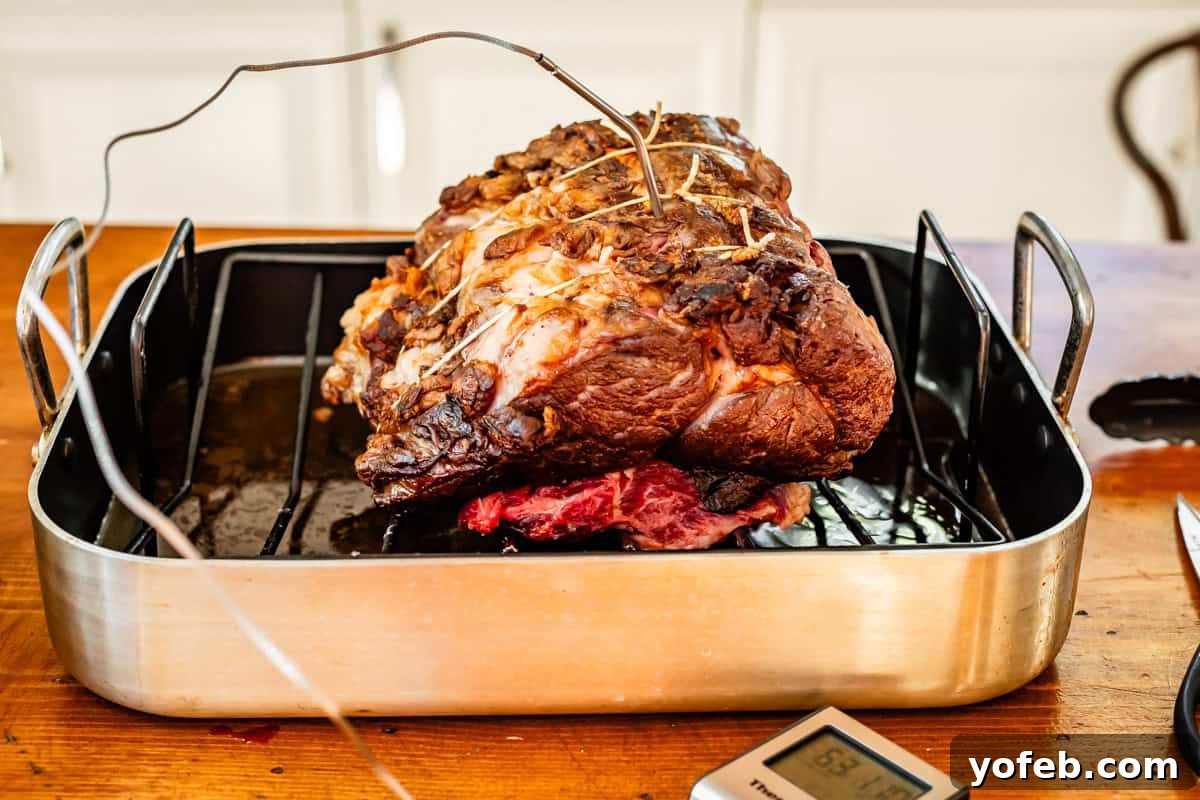
Insert the probe of your meat thermometer directly into the thickest part of the roast, ensuring it doesn’t touch any bone. Set the thermometer’s alarm to trigger when the internal temperature reaches 110°F (43°C). This initial temperature is your cue for the next crucial phase.
9. The Low-and-Slow Roast & Carry-Over Cooking:
Place the roasting pan on a lower rack in your preheated 200°F (93°C) oven. This low-and-slow method is paramount for achieving incredible tenderness and even cooking.
When your meat thermometer registers an internal temperature of 110-115°F (43-46°C), here’s the trick: DO NOT remove the roast from the oven yet. Instead, turn off the oven completely and crack the oven door open slightly (you can wedge a wooden spoon in the door to keep it ajar). This technique allows the roast to slowly “coast” up to its final desired temperature through carry-over cooking, resulting in unparalleled tenderness.
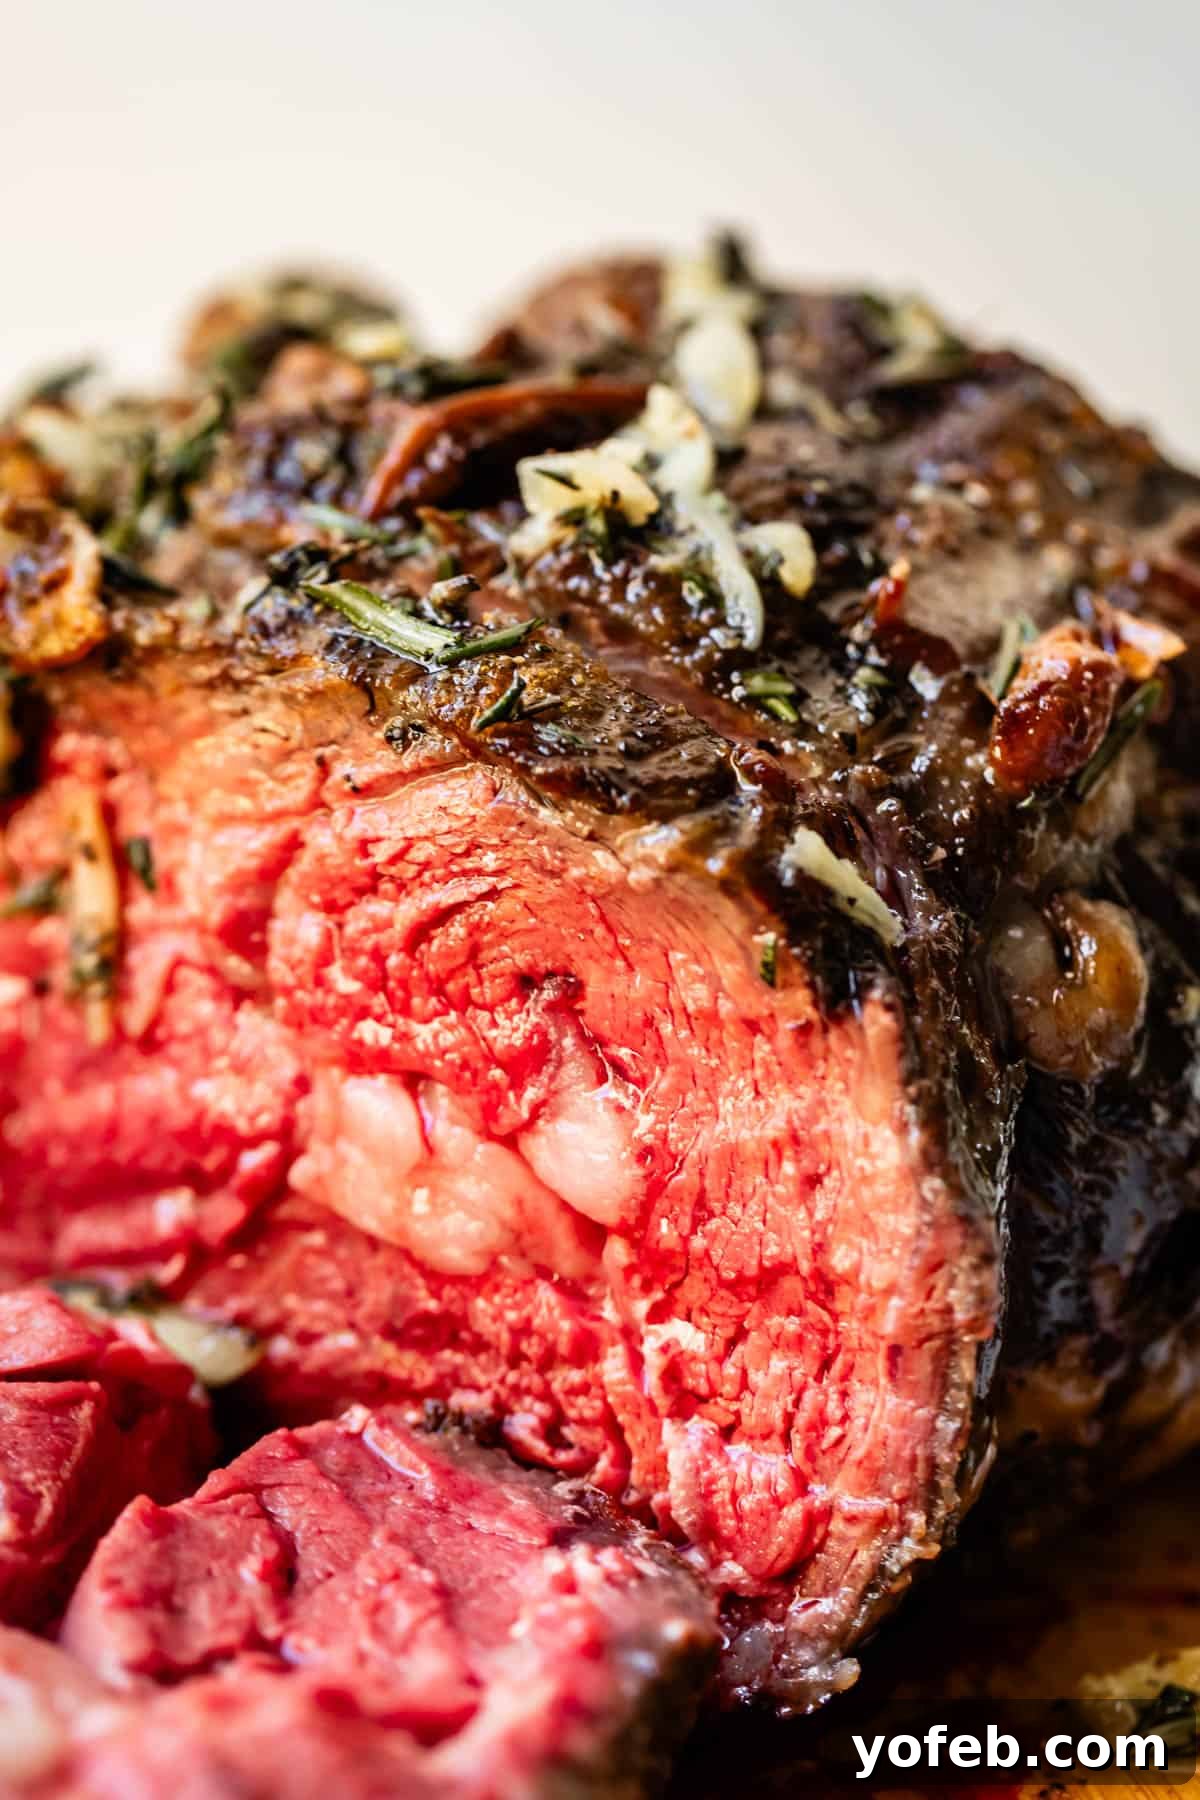
Monitor the internal temperature closely. For a perfect rare prime rib, aim for a final internal temperature of 120-125°F (49-52°C). If you prefer medium-rare, let it climb to 130°F (54°C). For medium, target 135°F (57°C). Remember, these are the *final* eating temperatures, and by turning off the oven earlier, you prevent overshooting.
10. The Critical Resting Period:
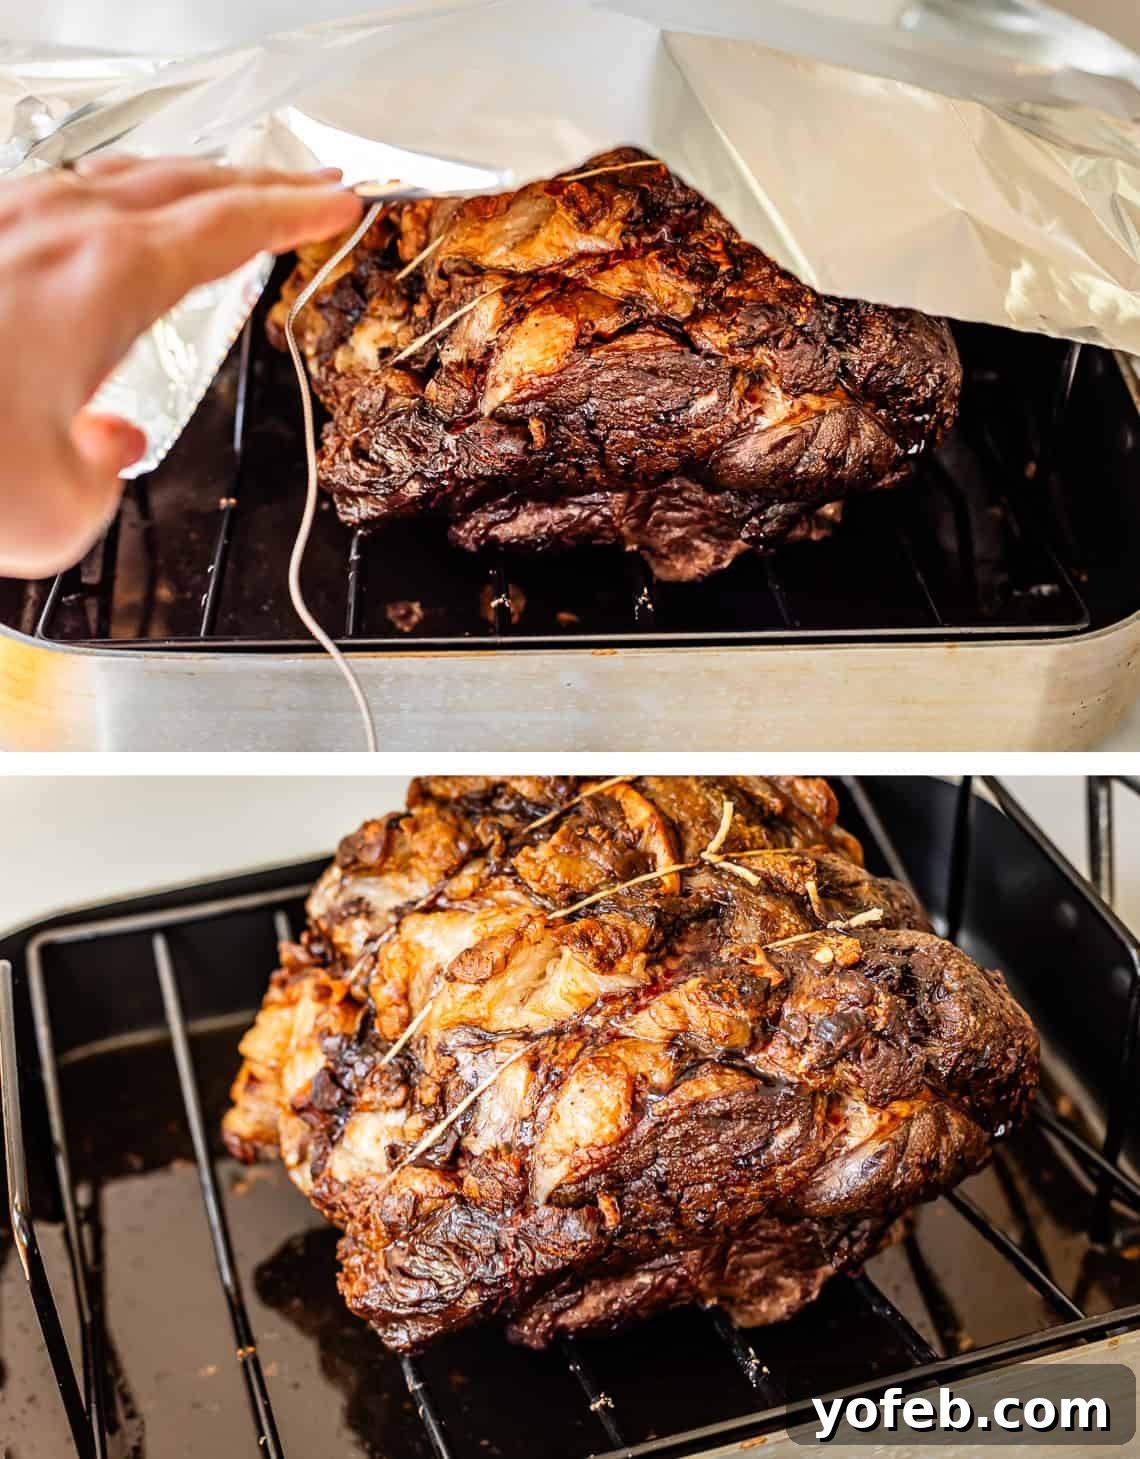
Once the roast reaches your desired internal temperature in the turned-off oven, remove it from the oven. Transfer the entire rack with the prime rib to a cutting board. Immediately tent the roast loosely with aluminum foil, tucking the foil around the edges to retain warmth without trapping too much steam. Let the prime rib rest for a minimum of 30 minutes, and ideally up to 60 minutes. This resting period is crucial: it allows the juices to redistribute throughout the meat, ensuring every slice is incredibly moist and tender. Skipping this step will result in juices running out onto your cutting board, leaving you with a drier roast.
Crafting the Perfect Accompaniments: Rich Gravy and Aromatic Garlic Butter Sauce
While your magnificent prime rib is resting, it’s the perfect time to prepare the delectable accompaniments that will elevate your meal: a rich gravy and a fragrant garlic butter sauce.
Make the Gravy:
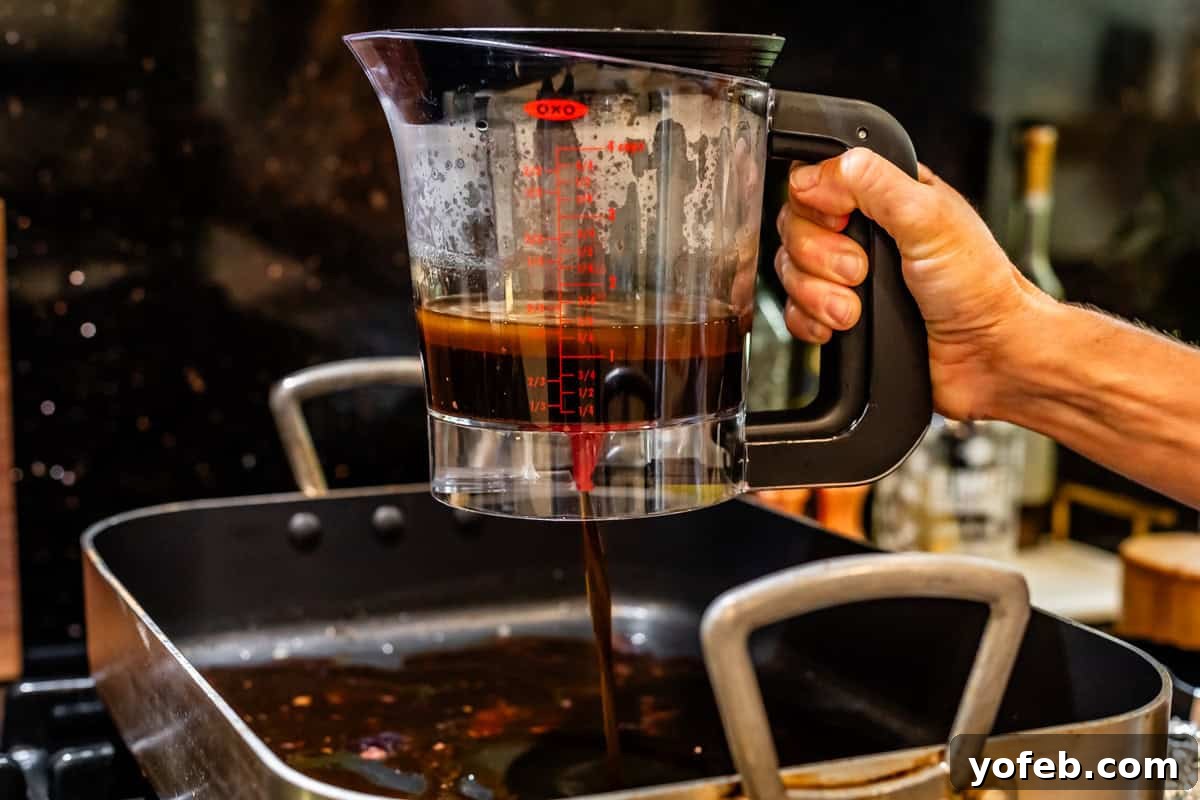
You absolutely want gravy (trust me on this!). While the roast rests, carefully pour all the drippings and broth from the roasting pan into a fat separator. This clever tool allows you to easily separate the flavorful juices from the excess fat, creating a lighter, yet still incredibly rich gravy. (If you don’t mind a little extra richness, you can skip the separator.)
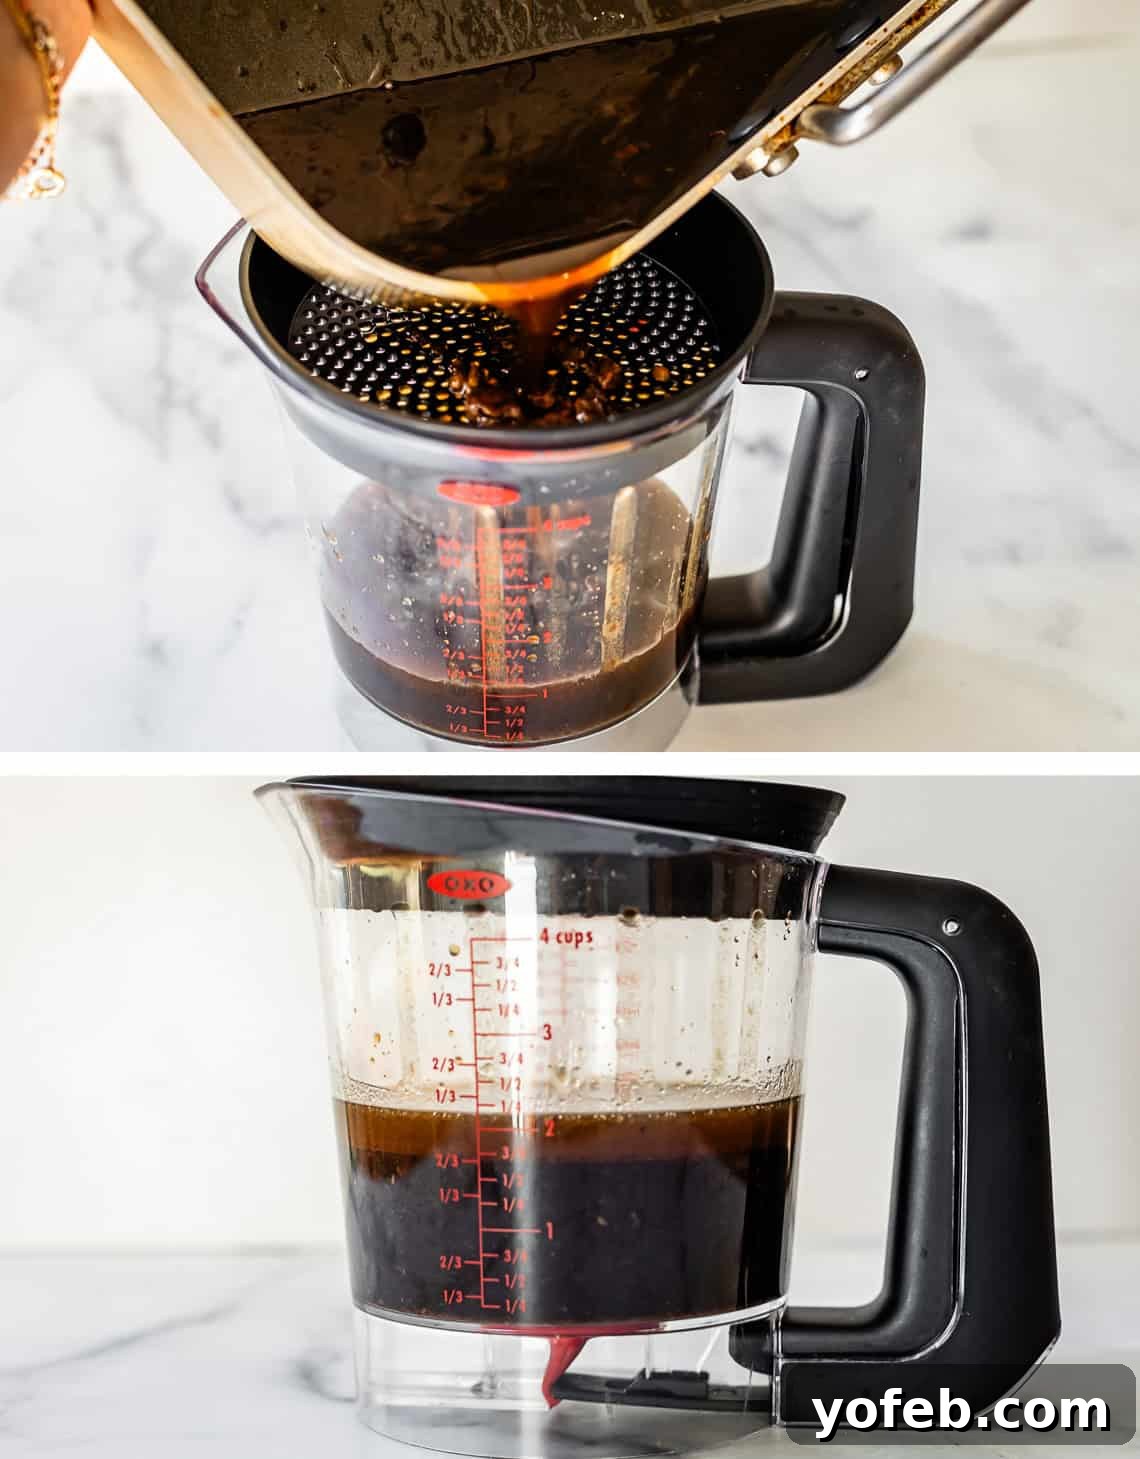
Pour the separated broth back into the roasting pan (or a clean saucepan if you prefer). Bring the liquid to a boil over high heat. In a separate glass measuring cup, whisk together 1 1/2 cups of water with 1/3 cup of all-purpose flour until completely smooth and lump-free. Slowly pour this flour mixture into the boiling drippings, whisking constantly to prevent lumps. Reduce the heat to medium and let the gravy simmer for about 5 minutes, allowing it to thicken. Stir in 2 tablespoons of butter (optional, but highly recommended for extra richness) and 1/2 teaspoon of black pepper. Taste and adjust seasoning with kosher salt if needed, or add 1 teaspoon of Better Than Bouillon Beef Base for an extra flavor boost. Transfer the gravy to a gravy boat and keep warm.
Make the Garlic Butter Sauce:
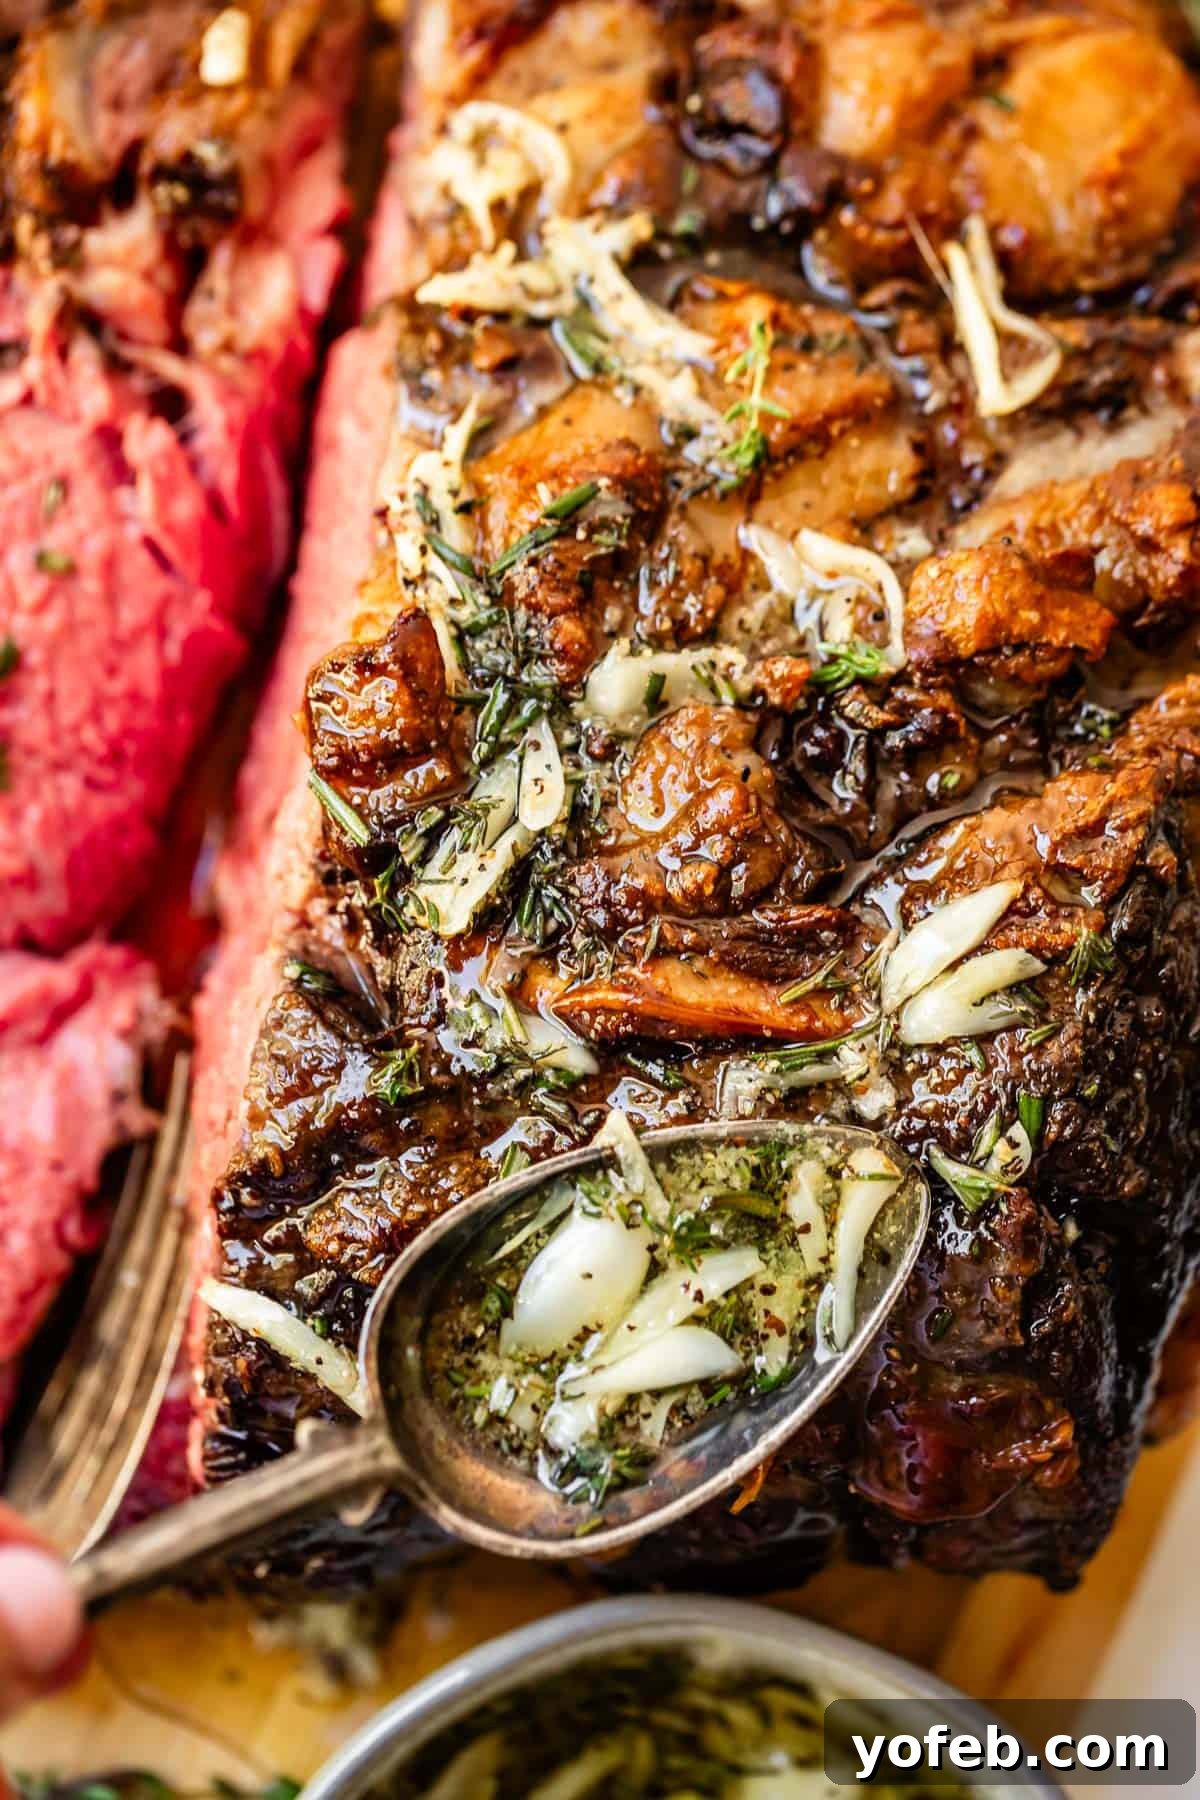
You might wonder why we need a garlic butter sauce when we already have gravy. My friend, because we are here to live our best culinary lives! This quick sauce takes just about 10 minutes to prepare and is pure decadence. I love to spoon a generous amount directly over the prime rib before slicing, allowing it to melt into every crevice. Then, I pass the remaining sauce at the table for an extra flourish. Is it overkill? Perhaps. Has anyone ever complained? Absolutely not!
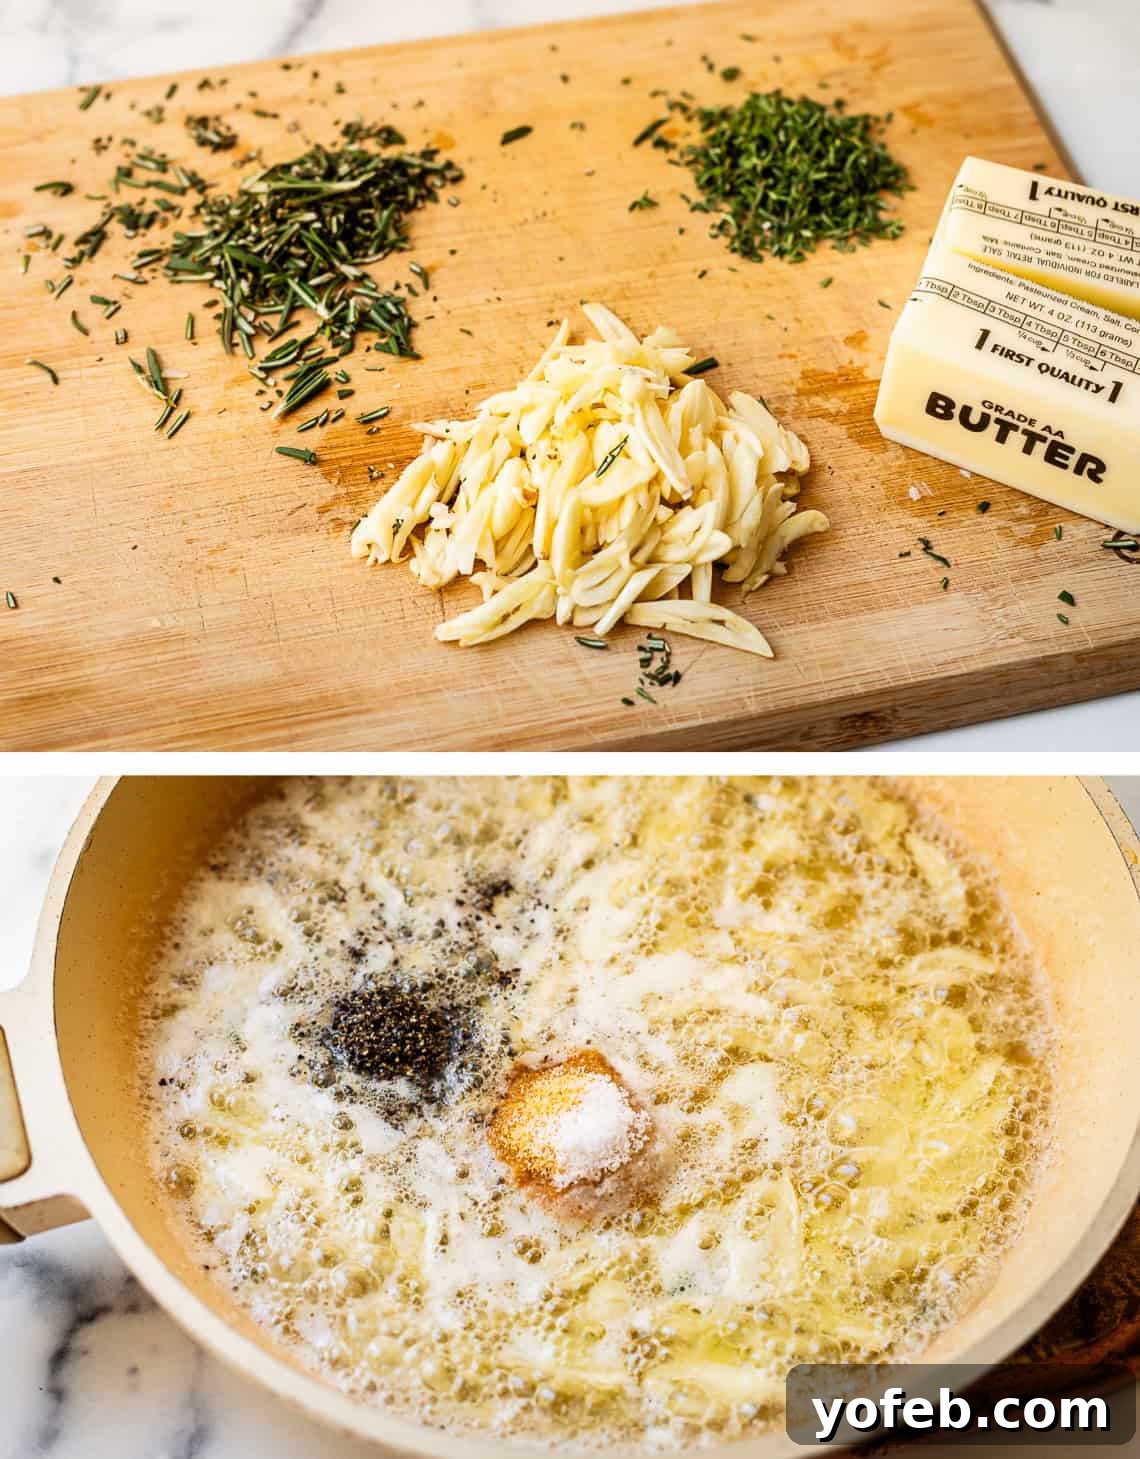
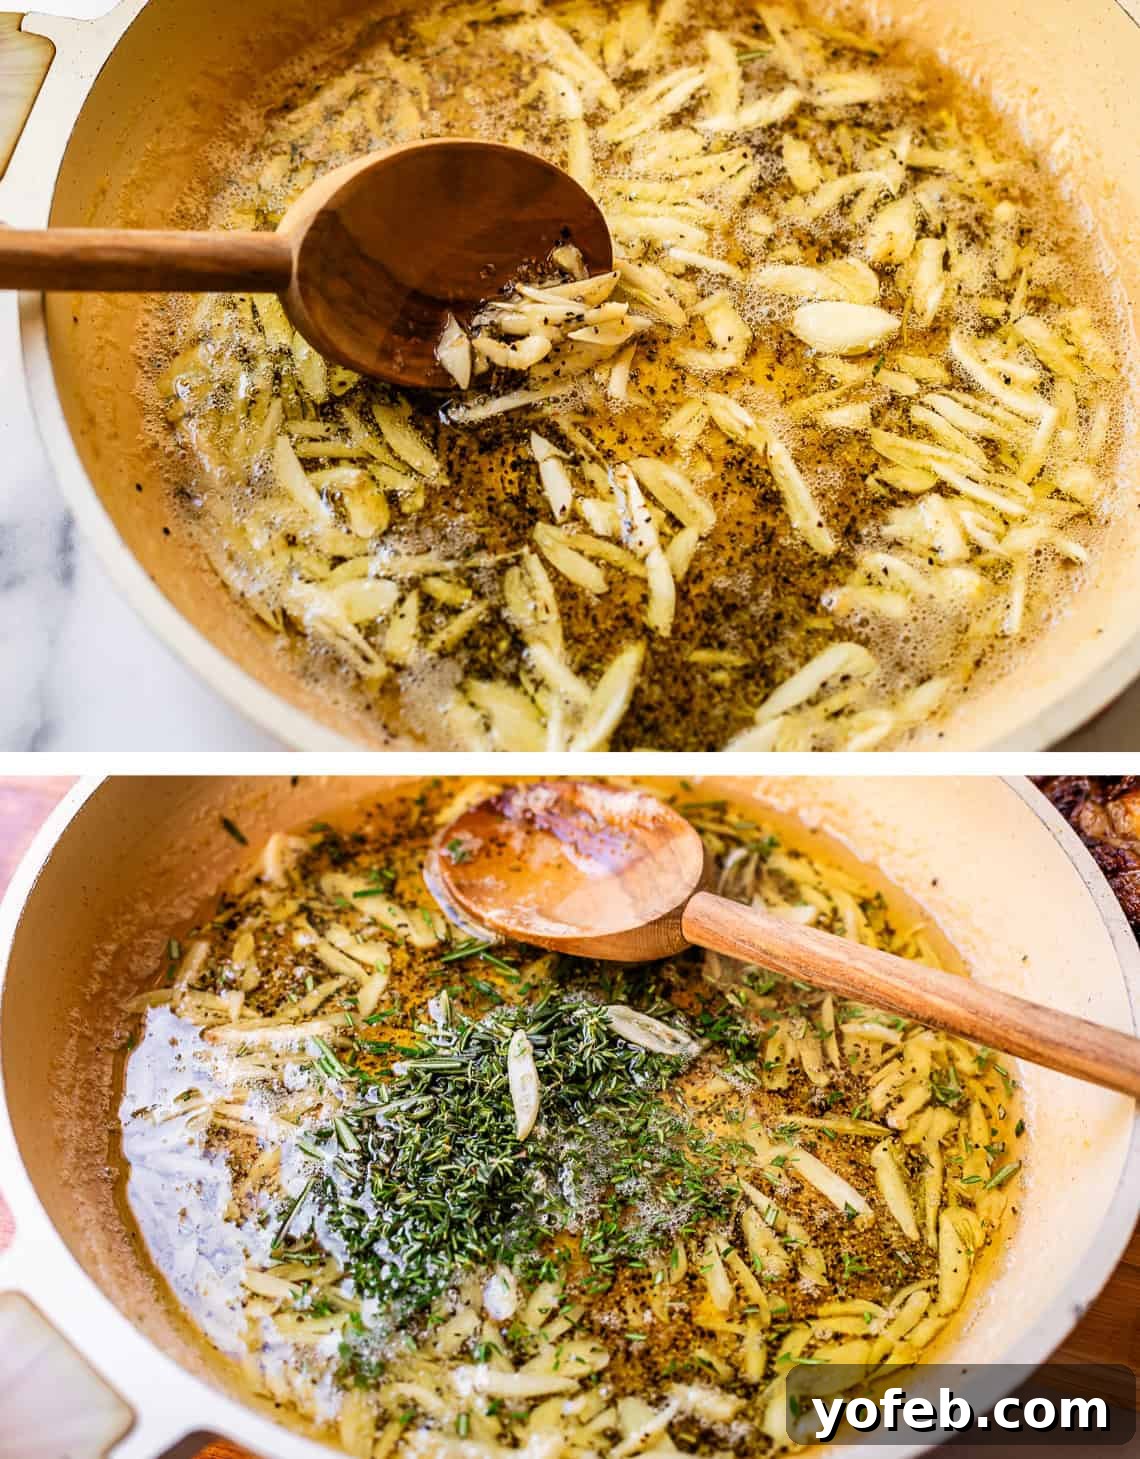
In a small saucepan, melt 1 cup (2 sticks) of unsalted butter over medium heat. Thinly slice 15 cloves of garlic. Once the butter is melted, add the sliced garlic, 2 teaspoons of granulated garlic, 3/4 teaspoon of kosher salt, and 2 teaspoons of freshly cracked black pepper. Stir this mixture over medium heat for 2-5 minutes, just until the garlic becomes fragrant and barely begins to turn golden. Remove from heat immediately to prevent the garlic from burning. Stir in 1 1/2 tablespoons each of finely chopped fresh rosemary and fresh thyme leaves. While prime rib is incredibly flavorful on its own, these fresh herbs truly amplify the aroma and taste, adding an extra layer of sophistication.
The Grand Finale: Broiling and Carving Your Roast
With your roast perfectly rested and your sauces ready, it’s time for the final touches that will ensure your prime rib is not only delicious but also visually spectacular.
Broil the Roast for a Perfect Crust:
Just a few minutes before you’re ready to serve, we’ll give the roast a final blast under the broiler. This quick step achieves two things: it crisps up any remaining fat on the surface, creating an irresistible crackling crust, and it gently reheats the exterior of the roast after its resting period.
Return the rack with the prime rib to your now-empty roasting pan (ensure no gravy is in it). Take the aluminum foil you used for tenting and crumple it into a loose ball. This next tip, borrowed from America’s Test Kitchen, is pure genius: use the foil ball to prop up one narrow end of the roast, tilting it so the top surface is as parallel as possible to the broiler element. This ensures even browning.
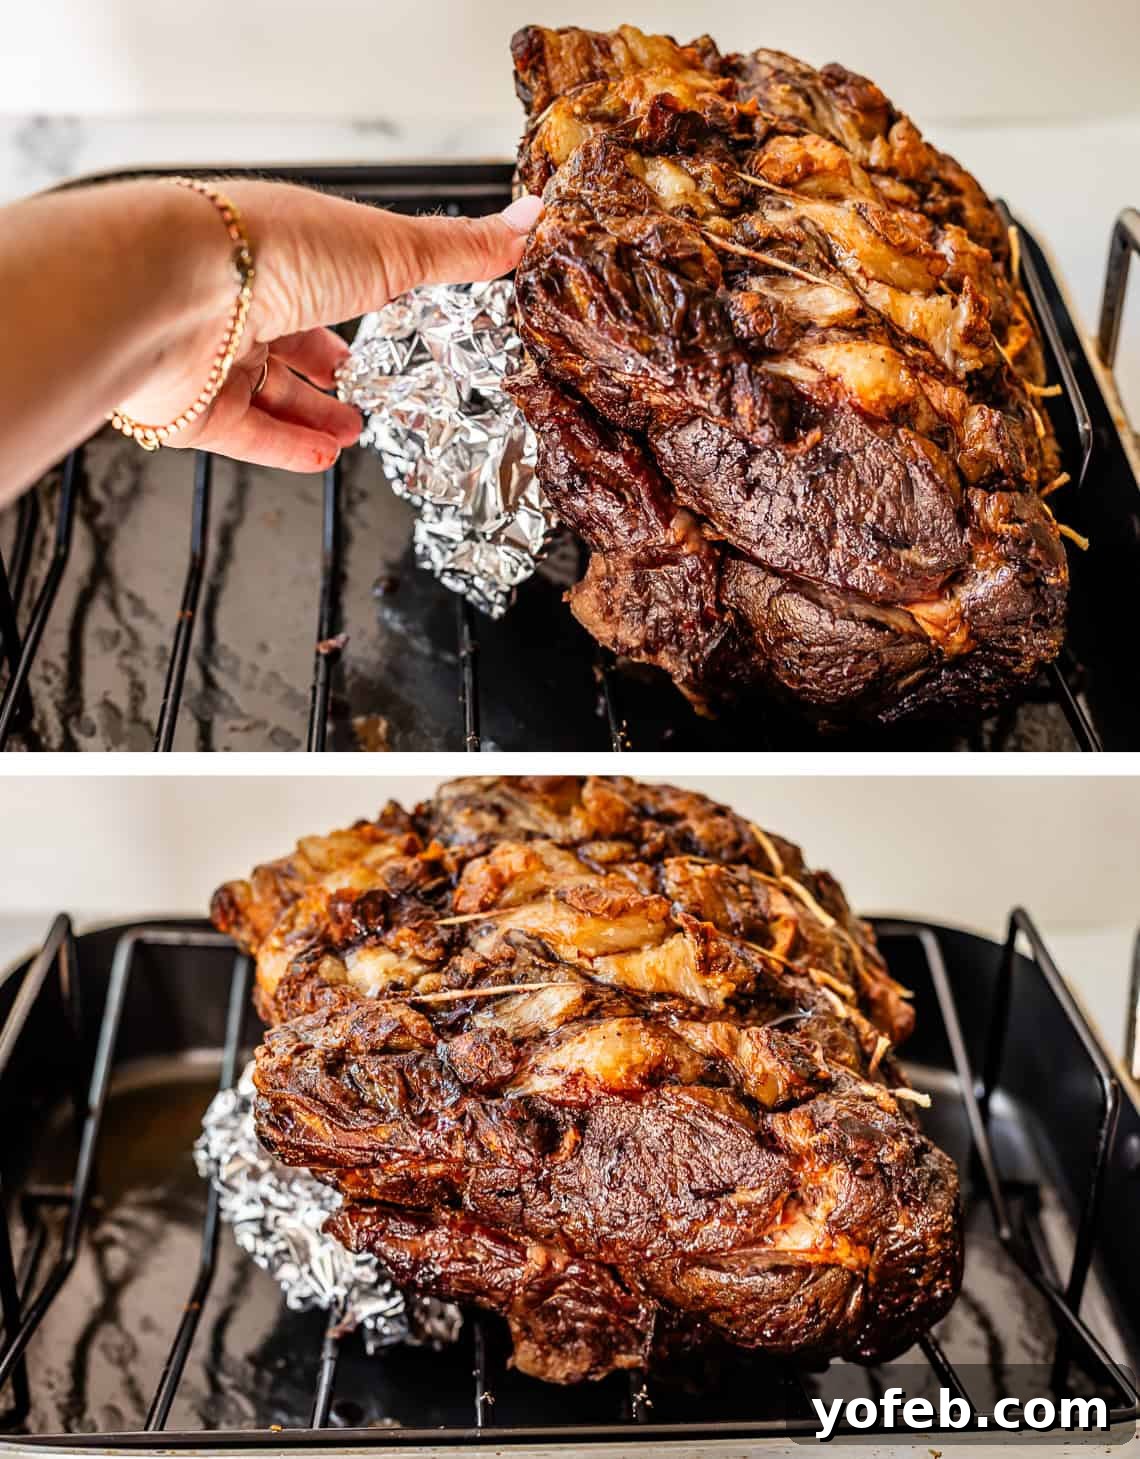
Turn your oven’s broiler to high heat. Place the roasting pan directly under the broiler. Watch it like a hawk – broiling happens very quickly! Broil for 2 to 5 minutes, checking every minute, until the top is beautifully browned and crispy. Do not walk away!
Serve the Roast with Panache:
Once the roast is perfectly broiled, carefully cut away and remove the kitchen twine holding the meat to the bones.
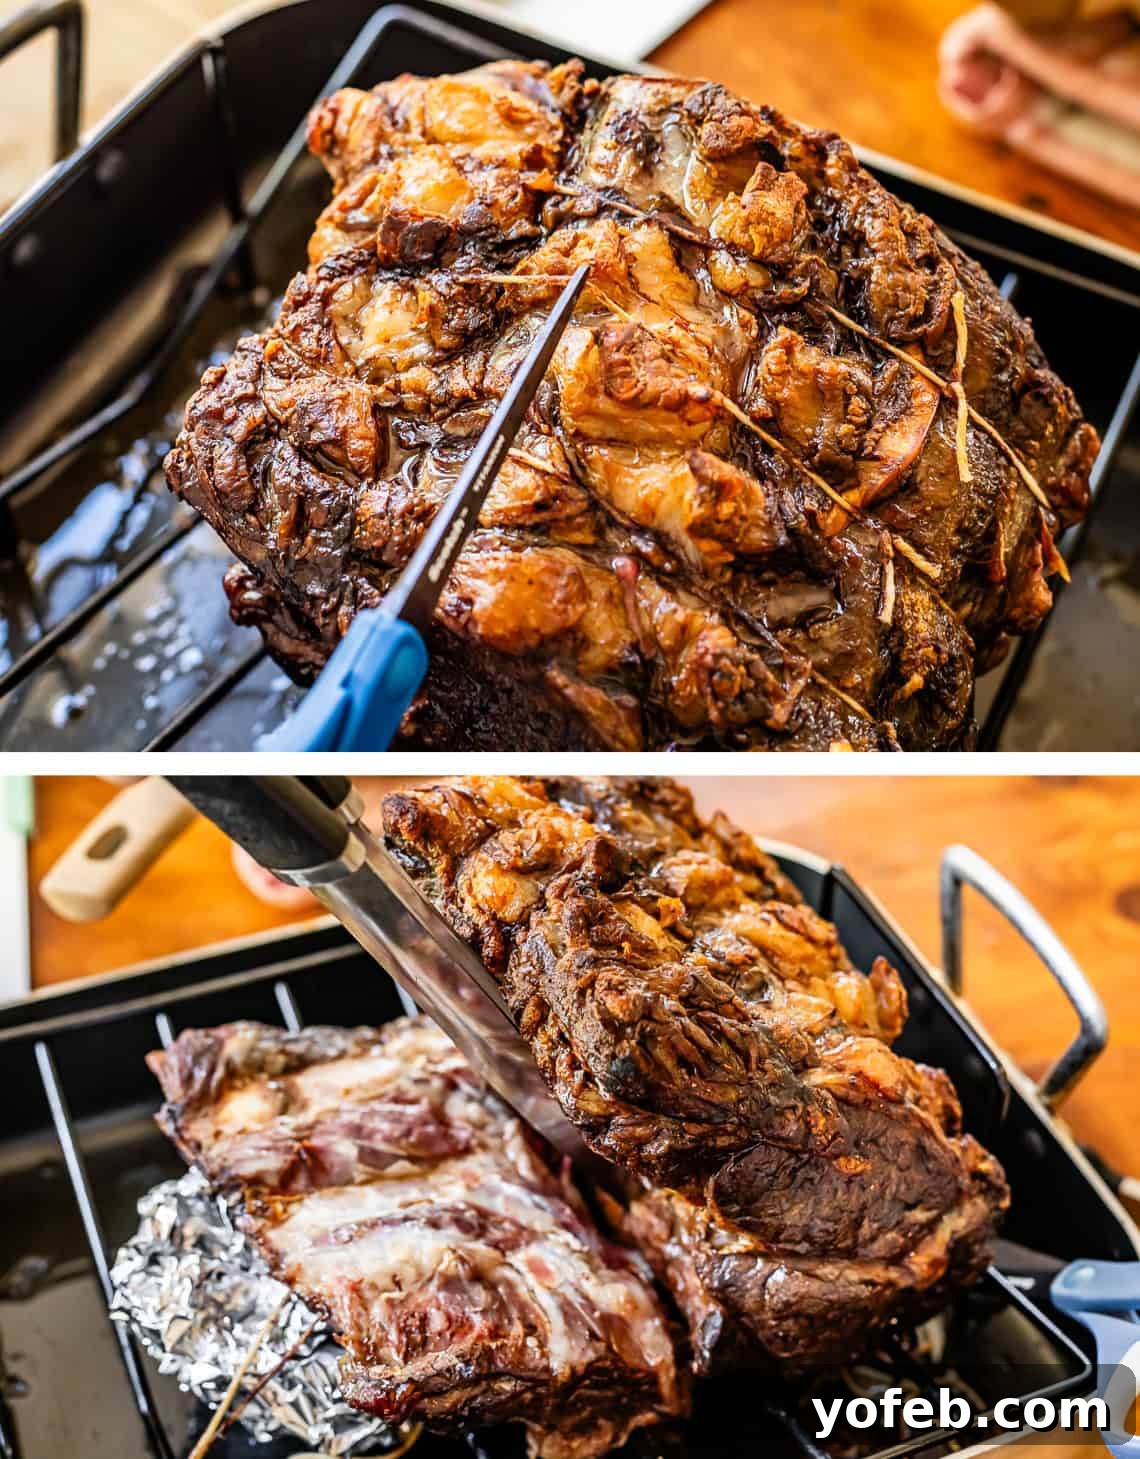
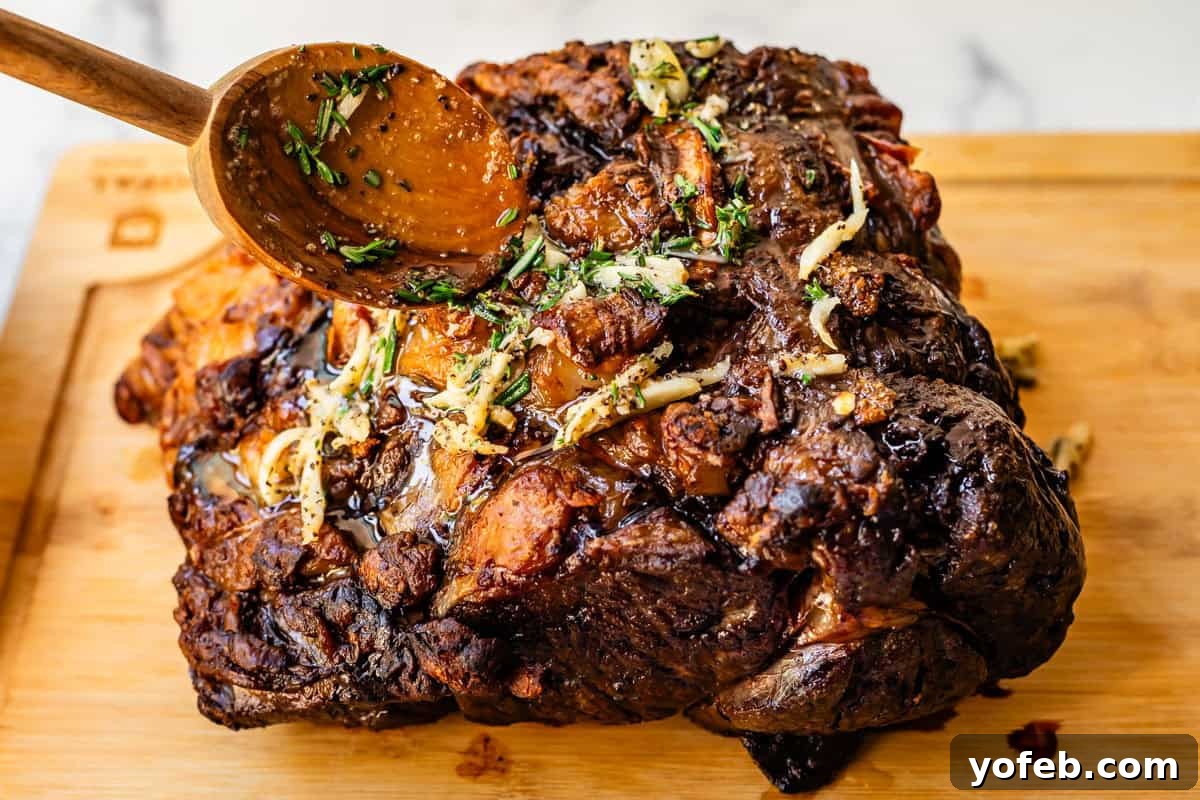
Gently lift the roast away from the rib bones and transfer it to a carving board. Ideally, use a carving board with a juice groove to catch any precious drippings, preventing them from spilling onto your counter. If you plan to carve directly at the table, a large serving platter will also work.
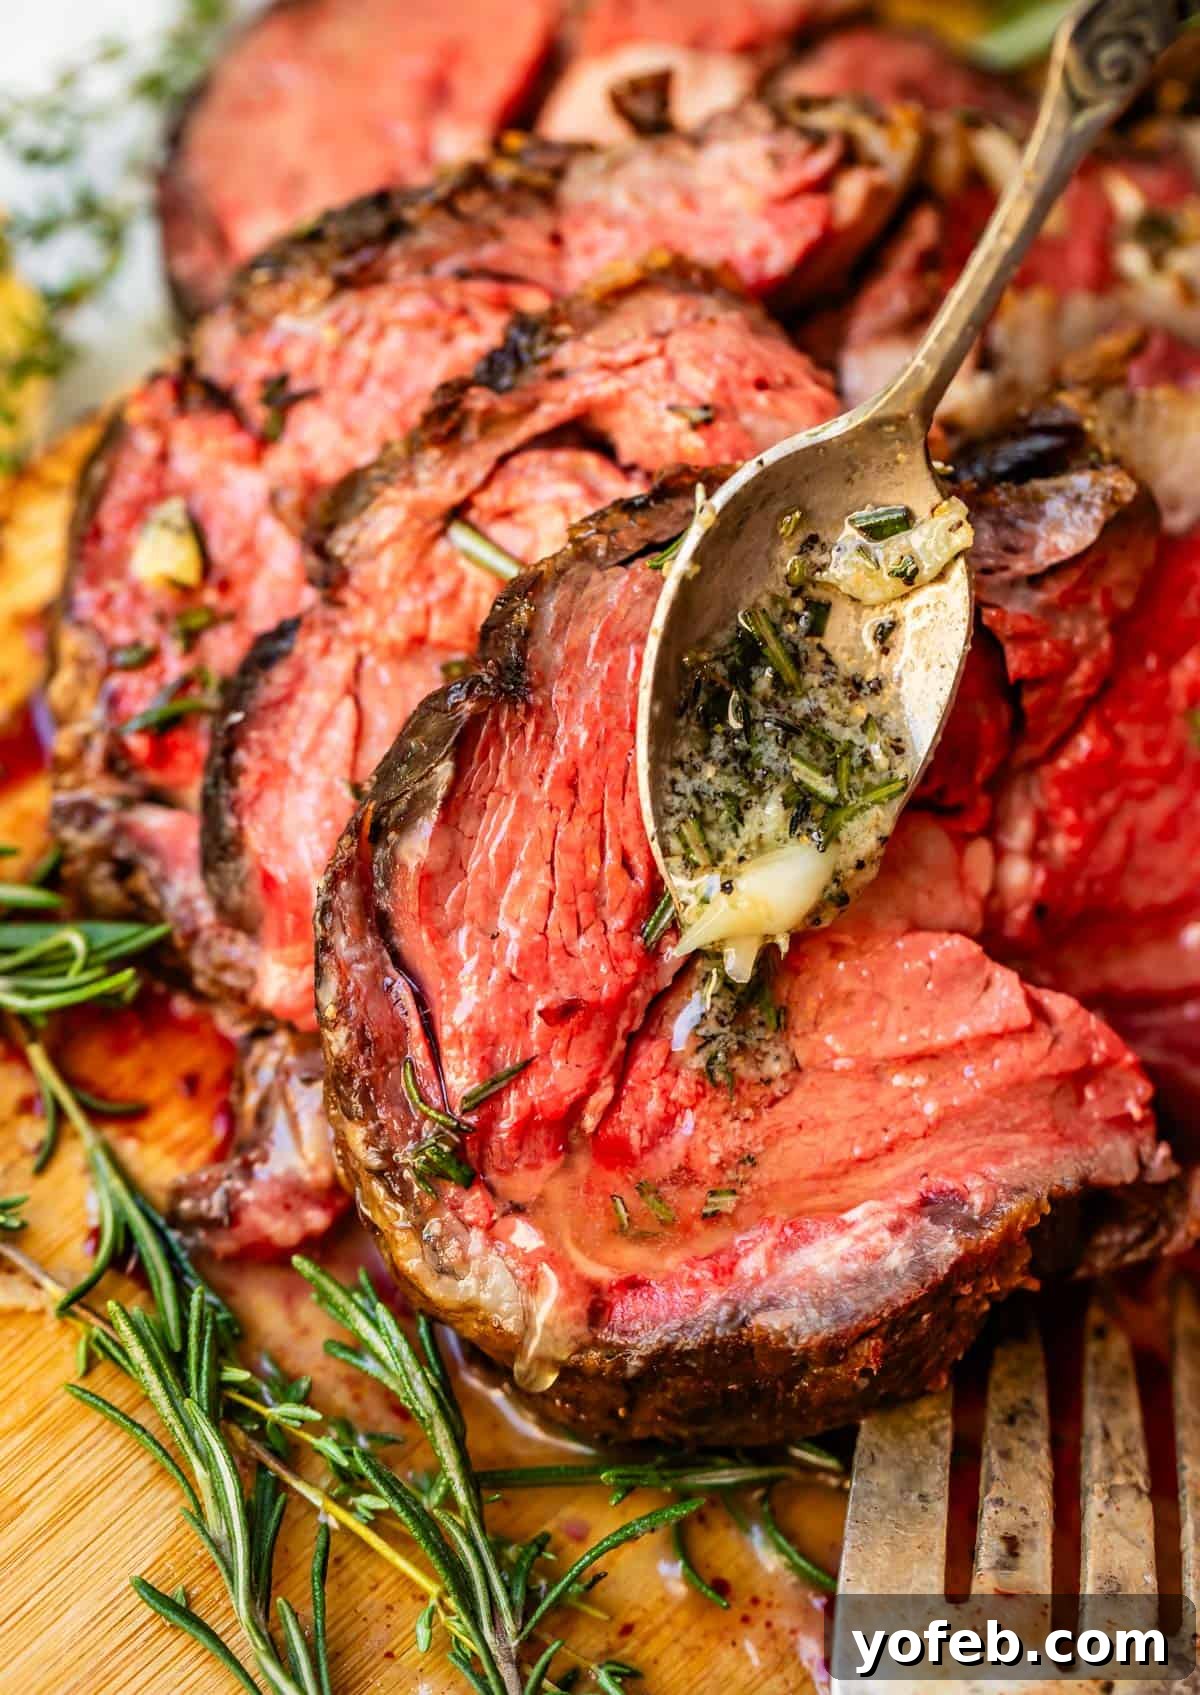
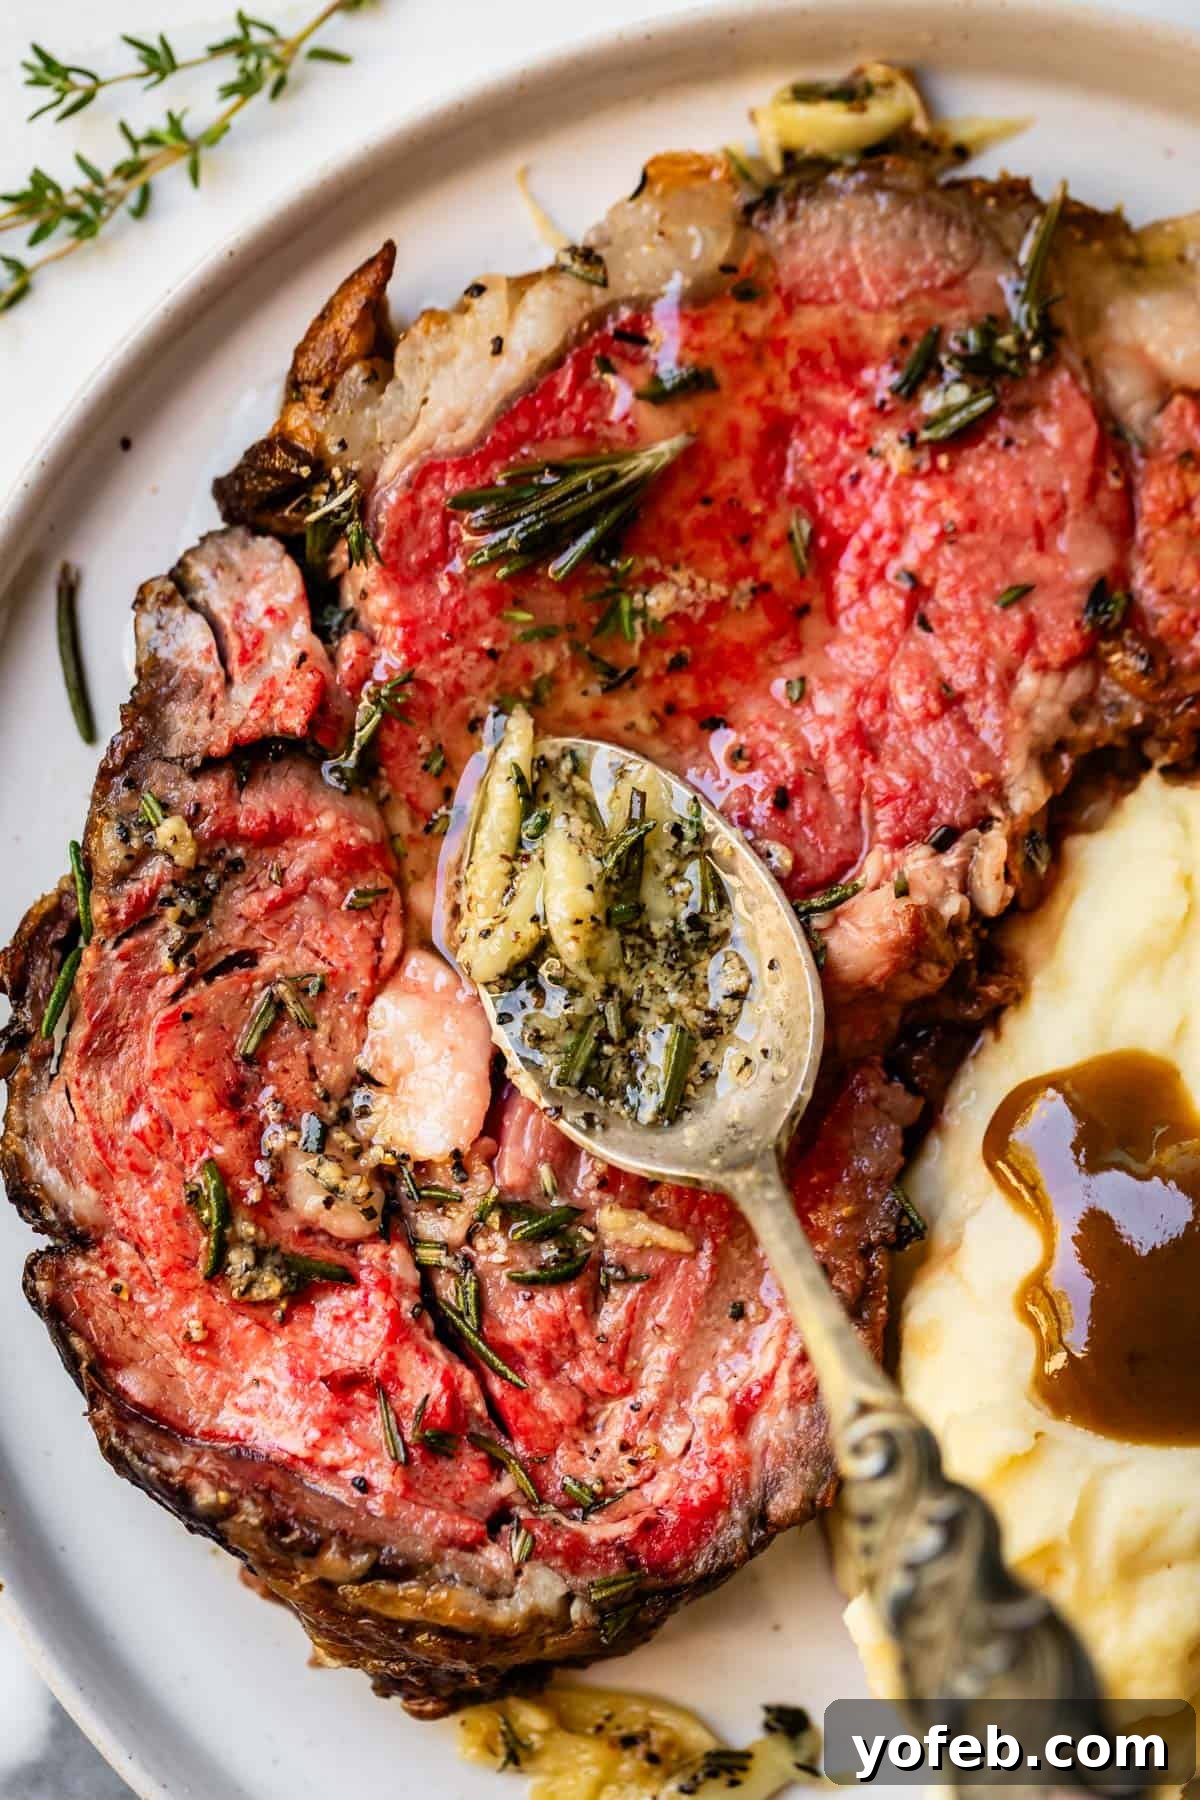
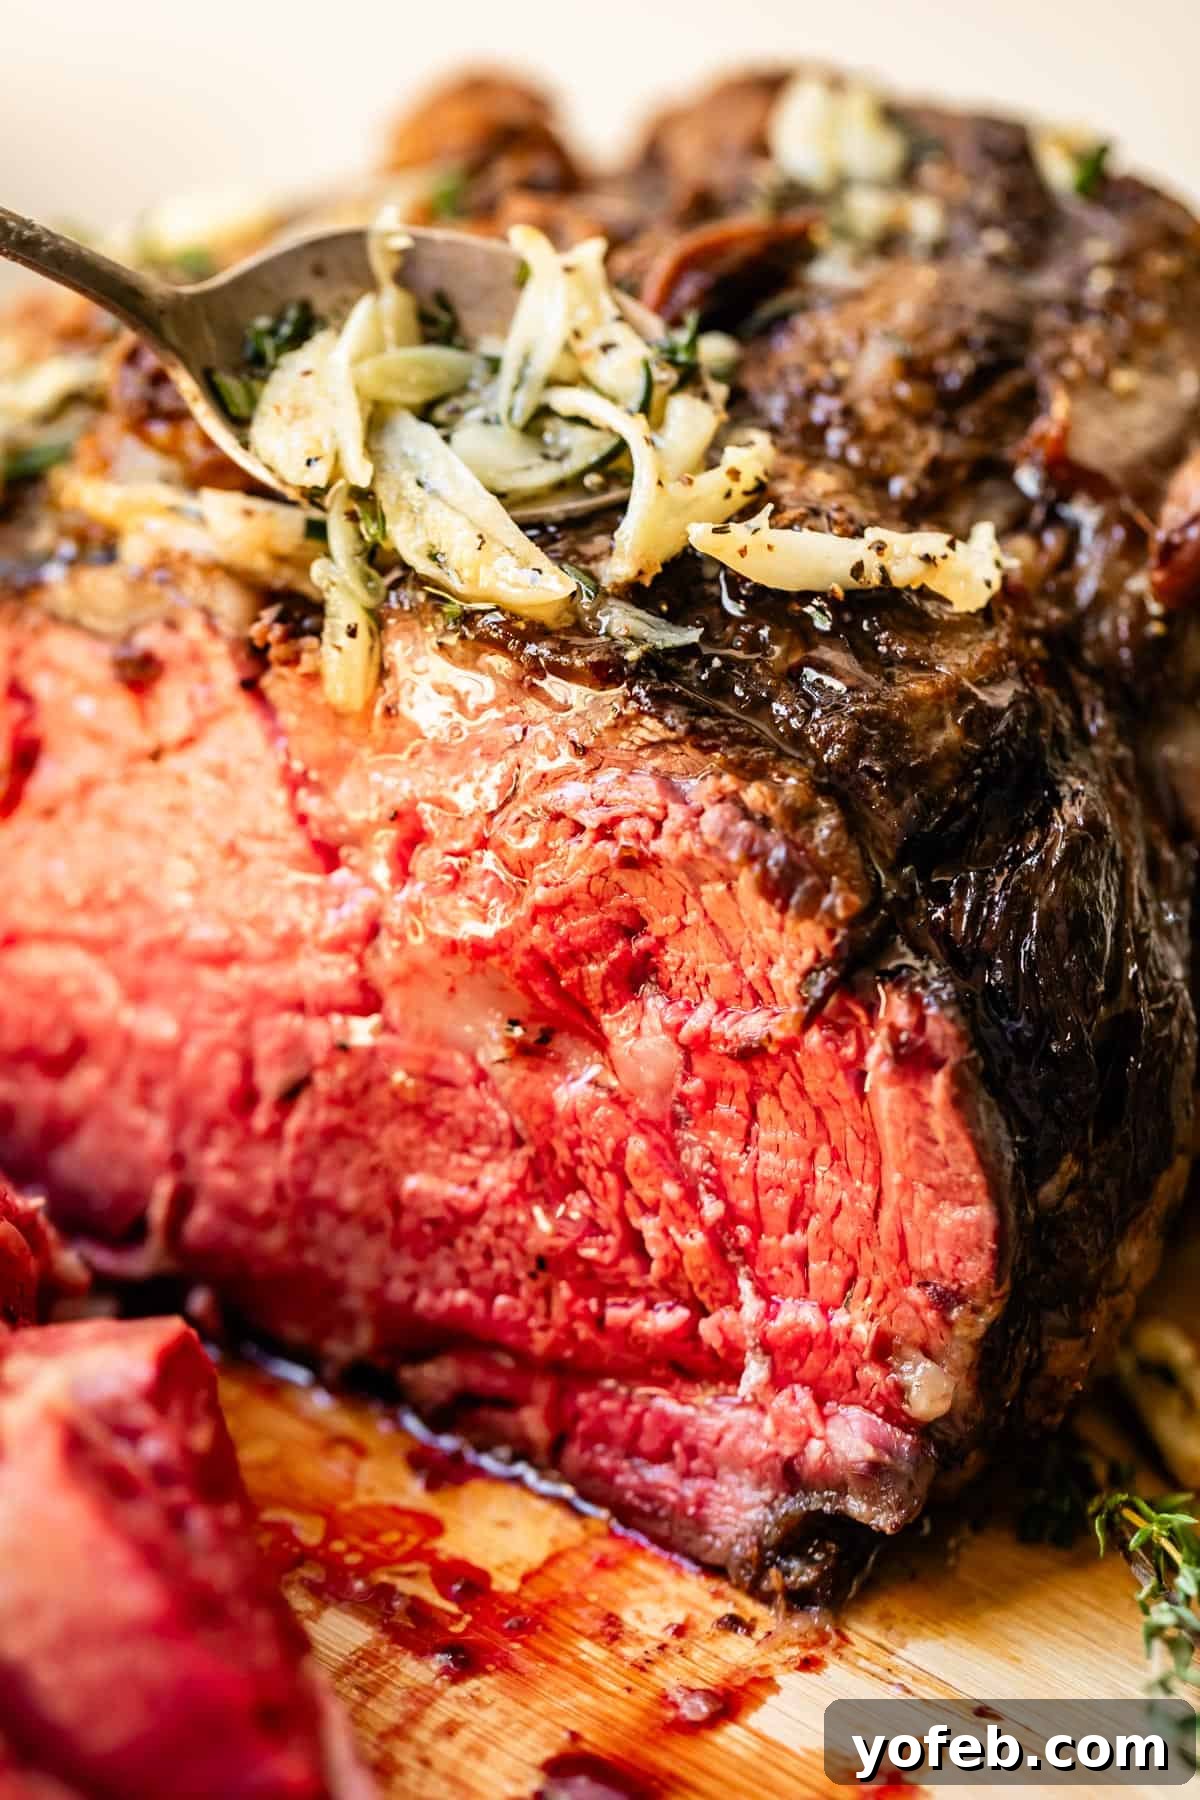
Now for the finishing touch: generously spoon the prepared garlic butter sauce all over the top of the roast. Let it melt into all the beautiful nooks and crannies, adding another layer of aromatic richness.
Finally, with a sharp carving knife, slice the prime rib against the grain into 1/2-inch thick portions. Arrange the slices artfully on a platter, ready to be served with the remaining garlic butter sauce and hot gravy.
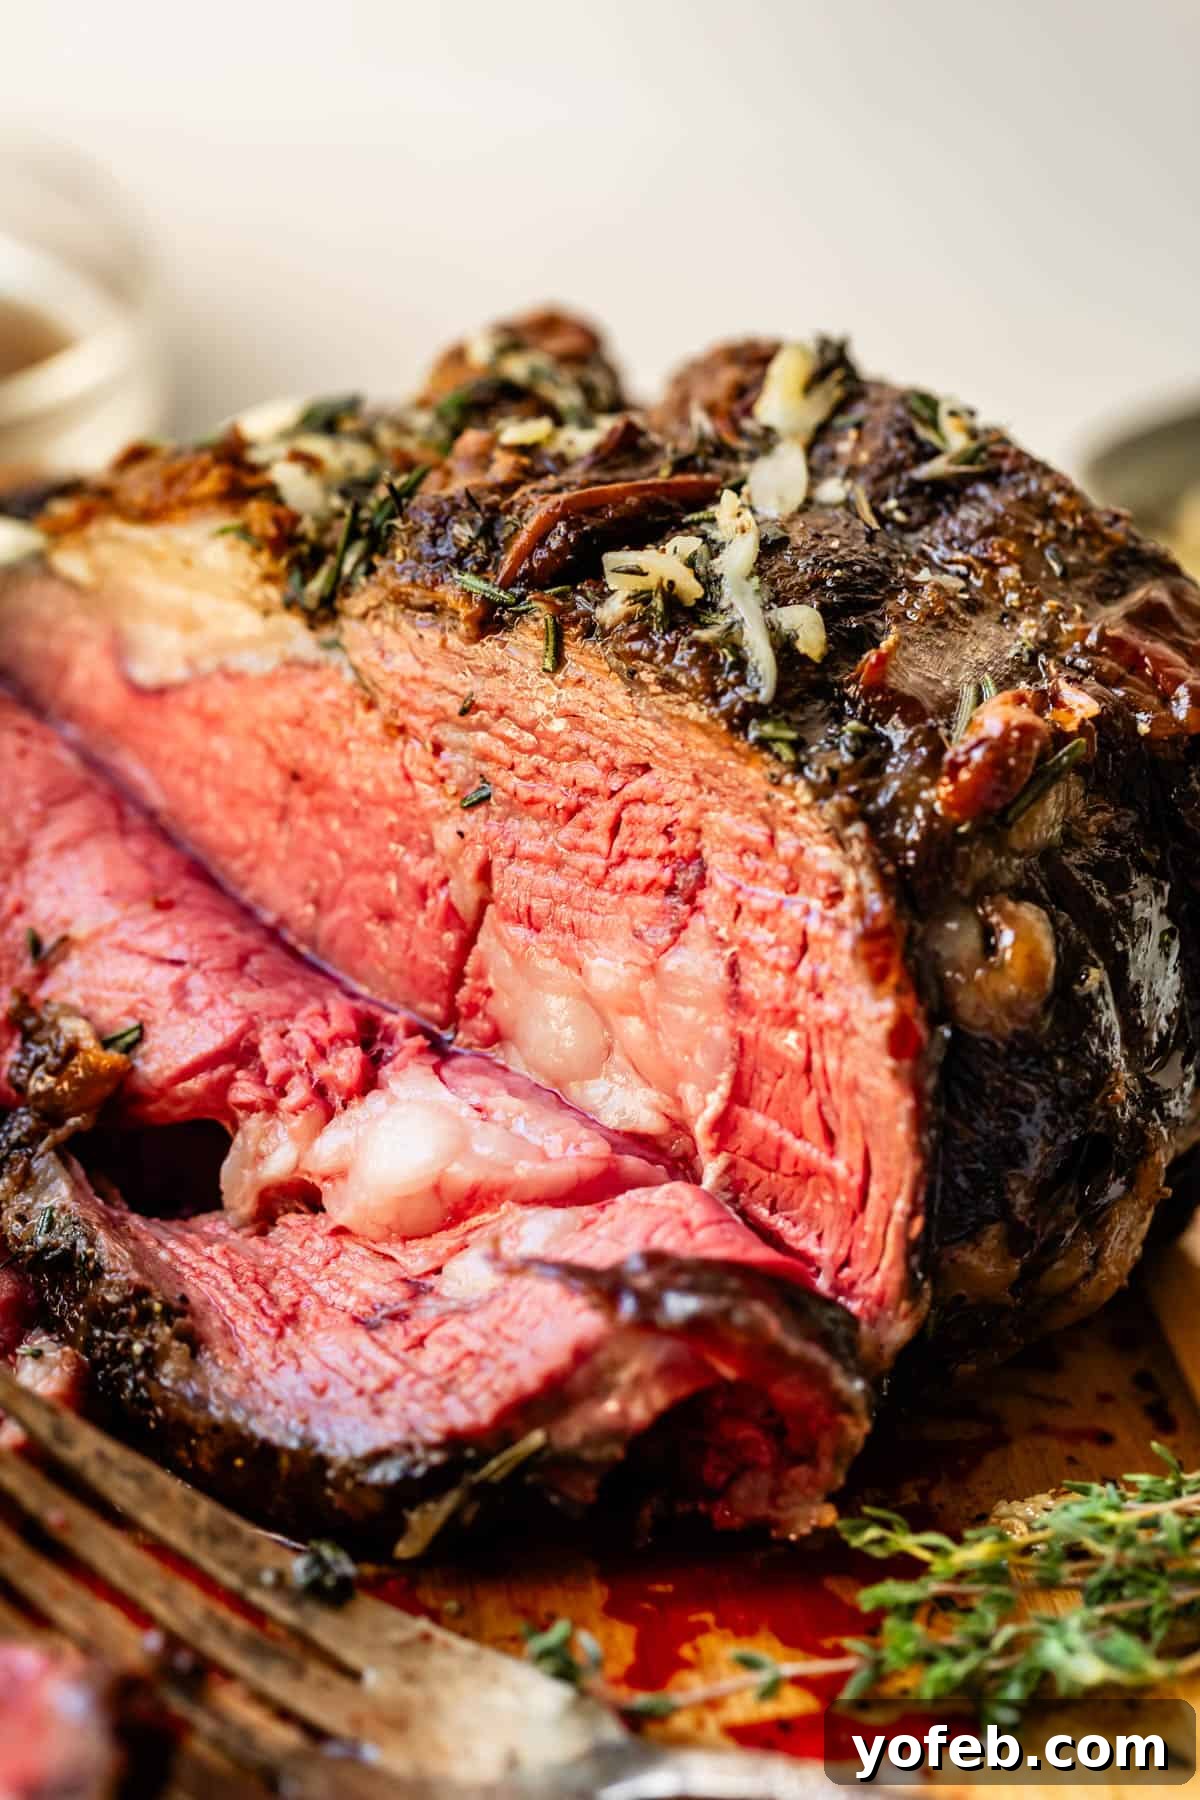
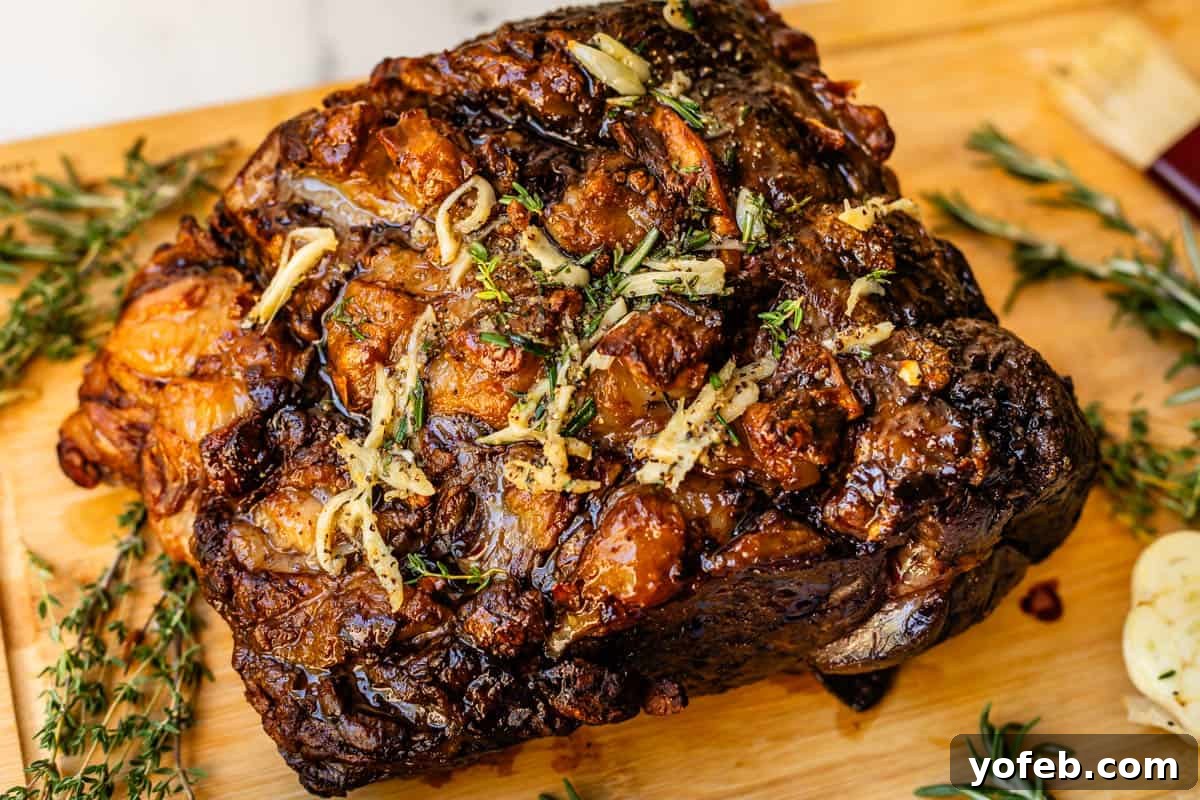
Isn’t she a beauty? Prepare for an enthusiastic chorus of “oohs” and “aahs”! 🤩
What to Serve with Your Magnificent Prime Rib
Prime rib commands the spotlight, so its accompanying side dishes should be equally stellar. Opt for classic, comforting sides that complement its rich flavor without overpowering it. Here are some of my absolute top choices for a truly memorable meal:
- Aunt Shirley’s Mashed Potatoes Recipe with Cream Cheese >> Incredibly creamy and flavorful, these are my all-time favorite mashed potatoes, perfect for any special occasion.
- Ina Garten Make Ahead Mashed Potatoes >> For convenience without sacrificing taste, Ina Garten’s make-ahead option is a lifesaver, and anything from the “Barefoot Contessa” is pure gold.
- Best Cranberry Sauce Recipe (Orange Cranberry Sauce) >> The bright, tart-sweet notes of this cranberry sauce provide a wonderful contrast to the rich beef, excellent for fall and winter holidays.
- Best Roasted Brussel Sprouts and Roasted Sweet Potatoes Recipe >> A fantastic combination of savory and slightly sweet, this vegetable dish is a personal favorite and always a hit.
- Easy Roasted Broccoli Recipe >> Simple, universally loved, and incredibly versatile, roasted broccoli is a reliable choice that even kids adore.
- Cornbread Casserole Recipe >> This easy, comforting casserole offers a sweet and savory balance that pairs beautifully with prime rib.
- Easy French Onion Soup >> If you’re planning an impressive multi-course meal, this deeply flavorful soup makes for an elegant and unforgettable starter.
- Rolls: No grand meal is complete without warm, fluffy bread. My top picks include Soft and Fluffy Parker House Rolls, Aunt Shirley’s Famous Homemade Dinner Rolls, or the wonderfully substantial Big Fat Crescent Rolls.
- Dessert! To conclude your feast, the options are endless. Explore all the delightful categories on the Dessert Recipes page. Some tried-and-true favorites include Classic Cheesecake, the timeless Best Apple Pie, or a rustic Homemade Peach Cobbler.
- Yorkshire Pudding from Simple and Savory >> A traditional and perfect pairing for any roast beef.
Leftovers: Storing and Reheating Prime Rib Like a Pro
Leftover prime rib is a treasure, but knowing how to properly store and reheat it is key to preserving its exquisite tenderness and flavor.
How to Store Leftover Prime Rib:
First, allow the prime rib to cool completely to room temperature. Once cooled, wrap it tightly in plastic wrap, place it in an airtight container, or seal it in a gallon or two-gallon freezer bag. If you have any remaining pan drippings, pour them over the roast before sealing; this extra moisture will be invaluable when reheating. Properly stored, prime rib will remain delicious in the refrigerator for 5-7 days.
How to Reheat Leftover Prime Rib (Don’t Screw This Up!):
This is crucial: do NOT make the mistake of microwaving your precious, buttery, tender prime rib on high heat. That is a guaranteed way to turn it into dry, chewy shoe leather. The ultimate goal when reheating is to maintain as much of its beautiful pinkness and tenderness as possible. The absolute BEST method for reheating is the same “low and slow” approach you used for cooking it initially.
Oven Reheat (Recommended):
Place the leftover roast (or individual slices) in a 9×13 inch baking dish or a roasting pan. Add a splash of beef drippings, beef broth, or even just a little water to the bottom of the pan to create a moist environment. Cover the pan tightly with aluminum foil to prevent drying. Reheat in a preheated oven at a low temperature of 200°F (93°C) or 225°F (107°C) until it is heated through. Depending on the size of the roast, this can take 60-90 minutes. Patience is a virtue here!
Microwave Reheat (Use with Extreme Caution):
I genuinely do not recommend the microwave for prime rib. It typically yields dry and chewy results, which is incredibly disheartening for such a fine cut of meat.
However, if it’s your only option: Place the prime rib on a plate by itself (never next to other sides like mashed potatoes, which reheat at a different rate). Cover the plate with a microwave-safe lid or plastic wrap, leaving a small vent. Crucially, set your microwave to a low power level – at least half power (level 5), or ideally, even lower (level 2 or 3). Microwave in short bursts, starting with 1 minute, then checking and adding more time as needed. All microwaves vary, so you must stay by it to prevent overcooking.
Stove Top Reheat (Requires Vigilance):
This method can also work but demands careful attention, as it can brown (or burn) the meat very quickly. Heat a skillet over very low heat. Add a small amount of beef broth or water, and then place your prime rib slices in the pan. Cover and gently warm, flipping occasionally. Again, use only low, low heat. The wait is worth it for tender results.
Freezing Prime Rib for Future Indulgence
Yes, you absolutely can freeze prime rib! It’s a fantastic way to enjoy this luxurious roast long after your holiday feast. I often have some in my freezer from testing recipes, and it’s a wonderful treat to pull out later.
Ensure the roast is completely cooled to room temperature. Then, wrap it exceptionally well in several layers of plastic wrap, pressing out any air. Next, place the wrapped roast inside a heavy-duty freezer-safe ziplock bag, ensuring it’s large enough to hold the entire piece. For smaller leftovers, a gallon-size bag will suffice, but for larger pieces, I highly recommend these spacious two-gallon bags. Label the bag with the date.
Prime rib can be safely stored in the freezer for up to 6 months without significant loss of quality. To enjoy, transfer the frozen prime rib to the refrigerator and allow it to thaw overnight, or for approximately 24 hours per pound, until completely defrosted. Once thawed, follow the “Oven Reheat” instructions provided above for the best results.
Frequently Asked Questions About Prime Rib
The short answer is, plan for several hours, typically between 2.5 to 4 hours. The precise cooking time for a prime rib depends on several variables: the weight and shape of the roast, its initial temperature when it goes into the oven, and the specific quirks of your oven’s temperament. Because prime rib is such an expensive and special dish, investing in a good probe meat thermometer is non-negotiable. It’s the only way to guarantee your roast reaches your desired degree of doneness without guesswork. For rare meat, you’re aiming for a final internal temperature of 120-125°F (49-52°C), and for medium-rare, 130°F (54°C). As a general estimate, allow about 11 to 12 minutes per pound for rare, and 13 to 15 minutes per pound for medium-rare. However, these are just estimates; the actual cooking time will vary, making a reliable meat thermometer your ultimate guide.
Neither! For the most tender, melt-in-your-mouth prime rib, a “low and slow” cooking method is paramount. My preferred cooking temperature is 200°F (93°C). In a pinch, if you need to shave off a little time, you can go up to 225°F (107°C), but I strongly advise against exceeding 300°F (149°C). Cooking at higher temperatures will cause the meat to cook too quickly and unevenly, resulting in a significantly tougher, drier roast and sacrificing that coveted buttery softness. Don’t fall into the trap of rushing; patience truly pays off with prime rib!
Restaurants achieve that signature melt-in-your-mouth tenderness in prime rib using the exact same principles we’re applying today: cooking the roast at a very low temperature for an extended period. This method allows the tough connective tissues (collagen) in the meat to slowly break down into gelatin, retaining the natural juices and developing an incredibly rich flavor. It’s not a secret technique reserved for professional chefs; anyone can achieve this at home with a bit of patience and a reliable meat thermometer. You’ve got this!
Beyond Prime Rib: More Impressive Main Dishes
The holidays are the perfect occasion to dazzle your family and friends with a spectacular main course. While prime rib is an unparalleled choice, there are many other impressive options if you’re looking for something different or if prime rib isn’t quite right for your occasion. Here are some other centerpiece main dishes sure to impress:
- Cuban Roasted Mojo Pork >> If you’re seeking a showstopper that’s outside the traditional holiday box, this incredibly flavorful and tender pork roast is a must-try!
- Easy Fall-Apart Crock Pot Roast with Carrots (Slow Cooker) >> Incredibly simple to prepare, yet consistently delivers tender, flavorful results that will delight everyone at the table.
- Honey Baked Ham Recipe (Copycat) >> A glazed and roasted ham with irresistible crispy edges that will have everyone fighting for the last piece.
- Sage Butter Roasted Turkey >> The quintessential holiday bird, made easy and exceptionally flavorful with aromatic sage butter.
- Tri Tip Steak (Grilled or Oven-Roasted) >> A beloved classic that brings back fond childhood memories of Christmas Day dinners in my family.
- Roast Leg of Lamb with Blackened Honey Dijon Crust >> Another elegantly impressive main dish that is sure to leave a lasting impression.
- Oven-Roasted Cranberry-Dijon Glazed Ham >> The perfect sweet and tangy holiday ham, especially delightful during the winter months.
- Beef Wellington from Fifteen Spatulas >> For the ultimate culinary challenge and an absolutely stunning presentation, Beef Wellington is a top-tier choice.
- Stuffed Cornish Game Hens from Zestful Kitchen >> A beautiful individual serving option that feels incredibly special and gourmet.
Facebook | Pinterest | Instagram

The Best Prime Rib Recipe
★
★
★
★
30 minutes
3 hours
1 day
2 hours
1 day
5 hours
30 minutes
8
I once believed that prime rib was merely an extravagant indulgence, often hyped beyond its true worth. Yet, after perfecting this recipe, I can confidently say it not only lives up to but surpasses all expectations! There’s an undeniable magic to this majestic roast that transforms any meal into an unforgettable celebration. While the thought of preparing such a showstopping dish might seem daunting, fear not! I’m here to guide you through every single step with clear, concise instructions and a wealth of helpful tips and photographs. With the right techniques—especially a generous amount of time and the power of salt—you will achieve the MOST succulent, tender, and uniquely melt-in-your-mouth prime rib imaginable. This isn’t just a meal; it’s an event. Prepare this ultimate centerpiece for your Christmas, Easter, or Thanksgiving feast, and watch your guests be utterly amazed!
Equipment
-
Probe meat thermometer
-
kitchen twine
-
cutting board with juice groove
Ingredients
-
1
8-pound
prime rib roast ,
(3 ribs) -
2 and 1/2
tablespoons
kosher salt,
see note for subs -
1/4
cup
vegetable oil,
divided for searing (I used light olive oil)
For the gravy
-
2
cups
water -
1
tablespoon
Better than bouillon Beef Base -
2
cups
drippings -
1 and 1/2
cups
water -
1/3
cup
flour -
1/2
teaspoon
black pepper -
2
tablespoons
butter,
optional
For the Garlic Butter Sauce:
-
1
cup
butter,
(2 sticks) -
15
cloves
garlic -
2
teaspoons
granulated garlic -
3/4
teaspoon
kosher salt -
2
teaspoons
fresh black pepper -
1 and 1/2
tablespoons
fresh rosemary -
1 and 1/2
tablespoon
fresh thyme
Instructions
-
Gather your tools: Do not attempt this recipe without a reliable meat thermometer. It is a crucial investment for such an expensive cut of meat. I highly recommend a probe meat thermometer that remains inserted in the roast throughout cooking.
-
Choose your prime rib: For the best results, ask your butcher for a prime-grade “first cut” prime rib, which corresponds to ribs 10, 11, and 12.
-
Talk to your butcher: Request your butcher to remove the rib bones from the roast and then tie them back on with kitchen twine. This is a common service that simplifies carving and enhances flavor.
-
Prep your roast: Gather all necessary ingredients and equipment: a roasting pan (a cooling rack over a half baking sheet can work), kitchen twine, and kosher salt.
-
Cut off the bones (if necessary): If your butcher did not pre-cut the bones, use a sharp serrated knife to carefully run along the length of the bones, following their natural curve to detach them. Refer to the photos for guidance.
-
If bones are already cut: Your roast will be tied to the bones. Cut the twine and separate the roast from the bones, noting their original orientation. Set the bones aside.
-
Score the fat: Place the roast fat-cap-side-up. Using a sharp serrated knife, score the fat cap in a crosshatch pattern, being careful not to cut into the muscle meat. This helps salt penetrate and creates a crispier crust.
-
Salt the roast: Generously rub 2 and 1/2 tablespoons of kosher salt over all surfaces of the roast, ensuring it gets into the scored fat cap and any crevices. Also, rub the separated bones with a little salt.
-
Place the roast on a rack: Position the bones on a cooling rack set over a rimmed baking sheet, or directly in your roasting pan if it fits in the fridge. Place the salted roast on top of the bones. Do not tie them together at this point.
-
Refrigerate: Leave the salted roast, completely uncovered, in the refrigerator for 24-48 hours. This dry brining is essential for flavor and texture.
-
Bring to room temperature: About 2 hours before cooking, remove the roast from the fridge and let it sit on the counter. This helps ensure even cooking.
-
Preheat your oven to 200°F (93°C).*
-
Sear the roast: Heat a high-sided 12-inch stainless steel pan over medium-high heat for about 3 minutes until very hot. Add about 1/4 cup vegetable oil. Place the roast (meat portion only) in the pan and sear each side for 2-3 minutes until crispy brown. Use tongs to sear the edges. Remove the roast to the rack.
-
Sear the bones (optional): You can quickly sear the bones as well, then remove them from the pan.
-
Make a broth: To the searing pan, add 2 cups of water and 1 tablespoon of Better Than Beef Bouillon paste. Bring to a boil over high heat, scraping up browned bits. Pour this flavorful broth into your roasting pan.
-
Reassemble and tie the roast: Place the bones on the rack of your roasting pan. Position the seared roast back on top of the bones, then use kitchen twine to tie them securely together. This insulation from the bones adds deep flavor.
-
Insert your probe meat thermometer: Insert the probe into the thickest part of the roast, ensuring it doesn’t touch any bone. Set the alarm for 110°F (43°C).
-
Cook your roast: Place the roast on a lower rack in the 200°F (93°C) oven. (See notes for estimated cook times if you don’t have a probe thermometer, but it’s highly recommended.)
-
When the thermometer registers 115°F (46°C), turn off the oven but leave the roast inside. Crack the oven door open (use a wooden spoon if needed). The internal temperature will continue to rise.
-
If you prefer your prime rib very rare, remove it when the internal temperature reaches 120°F (49°C).
-
For a perfect rare, remove the roast from the turned-off oven when it reaches 125°F (52°C).
-
For medium-rare, wait until it reaches 130°F (54°C).
-
Remove the roasting pan from the oven. Transfer the rack with the prime rib to a cutting board with a juice groove. Tent the roast loosely with foil and let it rest for 30-60 minutes. This resting period is critical for juicy meat.
-
Make the gravy: Pour the pan juices into a fat separator (if desired) to remove excess fat. Pour the separated broth back into the roasting pan (or a saucepan). Bring to a boil over high heat.
-
In a separate cup, whisk 1 1/2 cups water with 1/3 cup flour until smooth. Slowly pour into the boiling drippings while whisking constantly. Reduce heat to medium and simmer for 5 minutes. Stir in 2 tablespoons butter (optional) and 1/2 teaspoon black pepper. Taste and adjust seasoning; add kosher salt or 1 teaspoon Better Than Bouillon Beef Base if more flavor is desired. Pour into a gravy boat and keep warm.
-
Make the garlic butter sauce: Melt 1 cup butter in a small saucepan over medium heat. Thinly slice 15 cloves of garlic. Add sliced garlic, 2 teaspoons granulated garlic, 3/4 teaspoon kosher salt, and 2 teaspoons fresh black pepper to the melted butter.
-
Stir over medium heat for 2-5 minutes until the garlic is fragrant and barely golden. Remove from heat. Stir in 1 1/2 tablespoons each of finely chopped fresh rosemary and fresh thyme leaves. Set aside.
-
Broil the prime rib: After the roast has rested for 30-60 minutes, return the rack with the prime rib to the empty roasting pan. Crumple the foil into a loose ball and use it to prop up one end of the roast so its top surface is horizontal to the broiler element. See photos.
-
Turn the broiler to high heat. Place the pan directly under the broiler for 2-5 minutes, checking every minute, until the top is beautifully browned and crispy.
-
Cut away the kitchen twine: Use tongs to lift the roast away from the rib bones and transfer it to a carving board. Drizzle generously with the garlic butter sauce.
-
Carve and serve: Slice the prime rib against the grain into 1/2-inch thick slices. Serve immediately with the remaining garlic butter sauce, gravy, and Mashed Potatoes.
-
Storage: Allow the prime rib to cool completely to room temperature. Store it in an airtight container in the refrigerator for 5-7 days.
-
Reheating: For best results, place remaining roast/slices in a pan with some drippings/broth, cover with foil, and reheat at 200-225°F (93-107°C) for 60-90 minutes until warmed through. Avoid microwaving on high heat to prevent drying. If microwaving, use low power and reheat in short bursts, checking frequently.
Notes
Kosher salt: I highly recommend Diamond Crystal kosher salt for this recipe. If you must use regular table salt, reduce the initial salt rub to about 1 tablespoon + 2.5 teaspoons.
My guests don’t like rare meat: To accommodate varying preferences, cook the entire roast to the temperature preferred by the person who likes it rarest (e.g., medium-rare). Then, slice individual portions and arrange them on a baking sheet. Move your oven rack to the top position and broil these slices for 30-60 seconds, or longer, to reach desired doneness. Remember, overcooked prime rib will be tough; it’s not meant to fall apart like pot roast. For tenderness, it needs to remain at least a little pink.
Another option is to heat a pot of high-quality beef broth on the stove. Briefly dip individual slices of prime rib into the simmering broth for 30-60 seconds until they reach the desired doneness, then remove and serve immediately.
*Oven temperature: I prefer roasting at 200°F (93°C). If you are pressed for time, you can increase the temperature to 225°F (107°C) or even 250°F (121°C) to speed things up, but do not exceed that. Higher temperatures will compromise the buttery softness of the prime rib!
Cook times: If you don’t have a probe meat thermometer that can stay in the oven, you’ll need to use an instant-read thermometer. Start checking the internal temperature after 2 1/2 hours, being mindful to open and close the oven door as quickly as possible to retain heat. Cooking can take up to 4 hours, so regular checking is essential.
Final Internal temperatures: Always remember that the roast’s internal temperature will continue to rise by 5-10 degrees during the resting period after you turn off and crack open the oven door. The temperatures below are your target final eating temperatures:
Rare: 120-125°F (49-52°C)
Medium rare: 130°F (54°C)
Medium: 135°F (57°C)
Nutrition facts: The nutrition facts provided include both the gravy and the garlic butter sauce, which accounts for the higher calorie count.
Nutrition
Calories:
851
kcal
|
Carbohydrates:
7
g
|
Protein:
1
g
|
Fat:
92
g
|
Saturated Fat:
41
g
|
Polyunsaturated Fat:
12
g
|
Monounsaturated Fat:
35
g
|
Trans Fat:
1
g
|
Cholesterol:
125
mg
|
Potassium:
59
mg
|
Fiber:
1
g
|
Sugar:
0.1
g
|
Vitamin A:
874
IU
|
Vitamin C:
4
mg
|
Calcium:
33
mg
|
Iron:
1
mg
Main Course
American
851
Beef, prime rib, roast, Steak
Did you make this? I’d love to see it!
Mention @thefoodcharlatan or tag #thefoodcharlatan!