
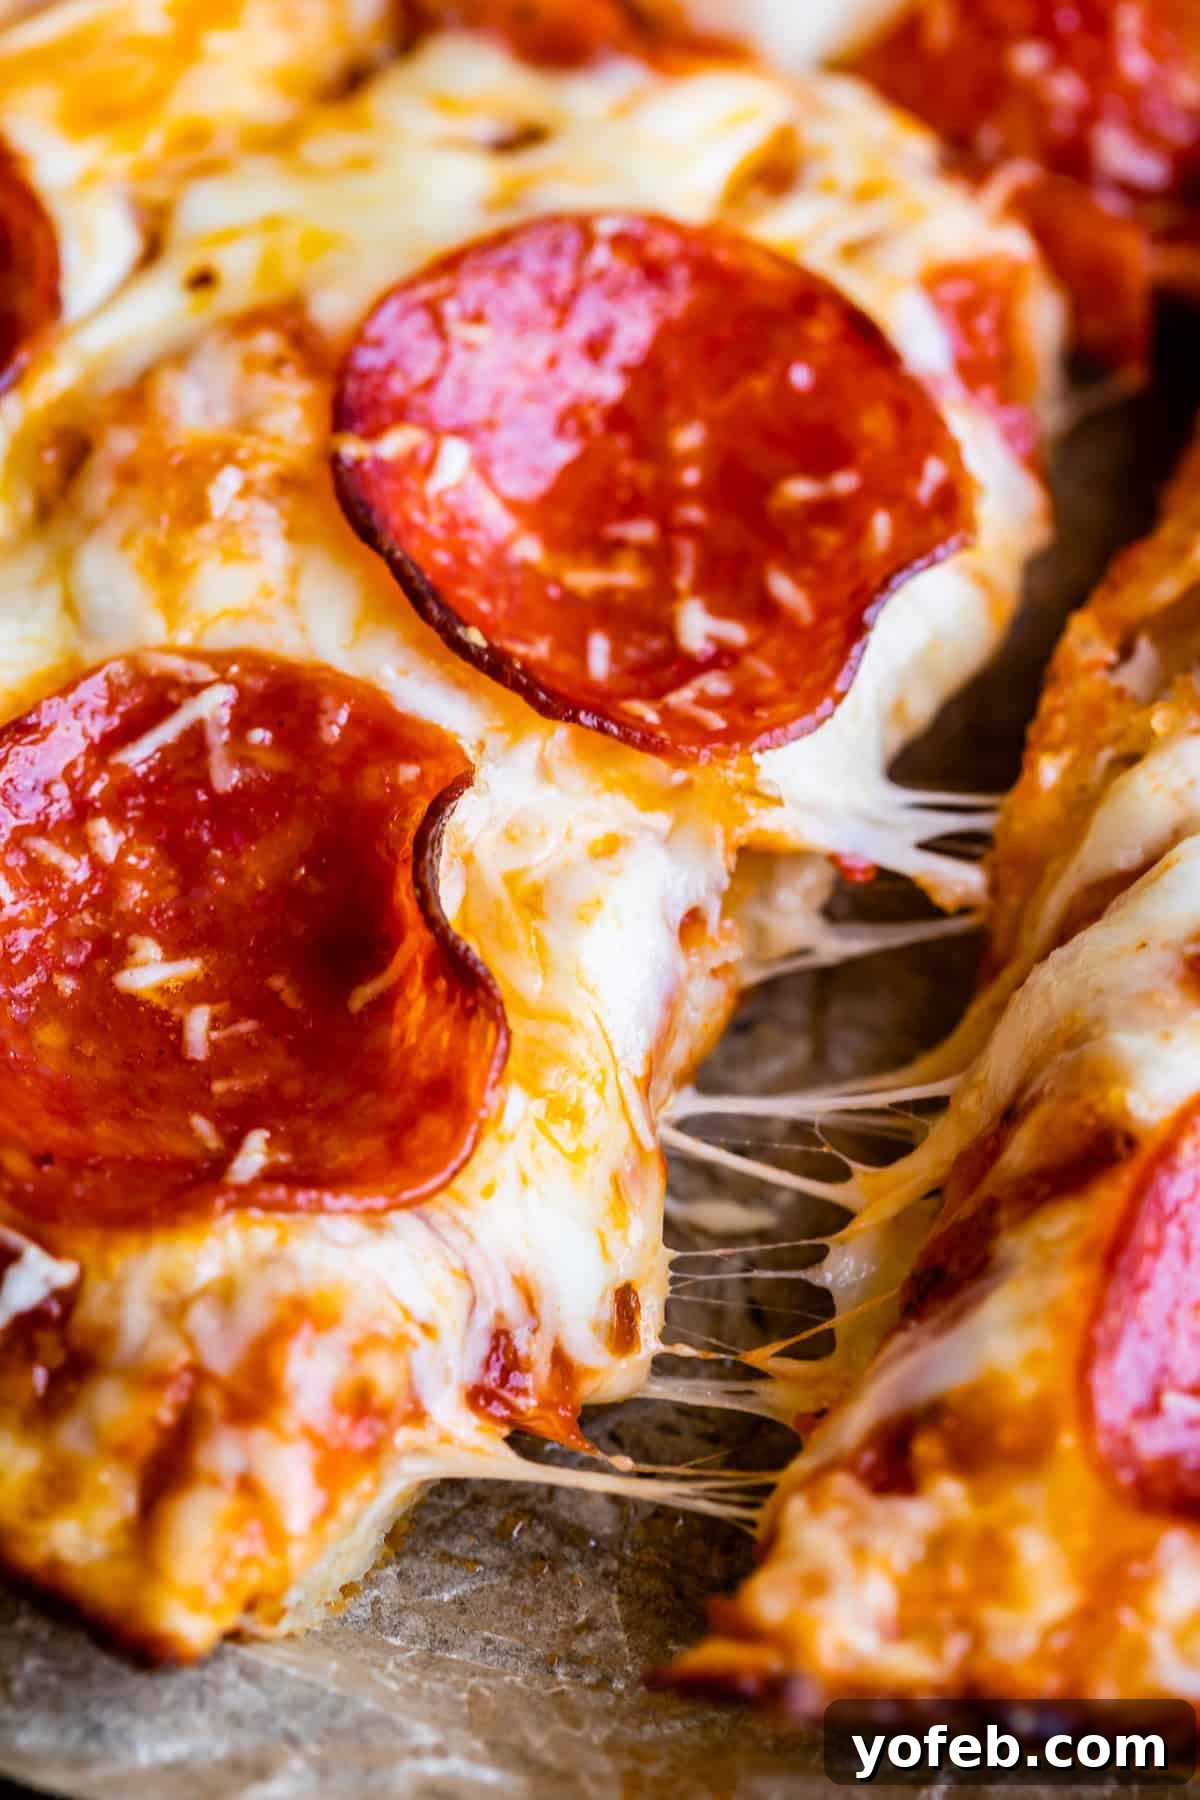
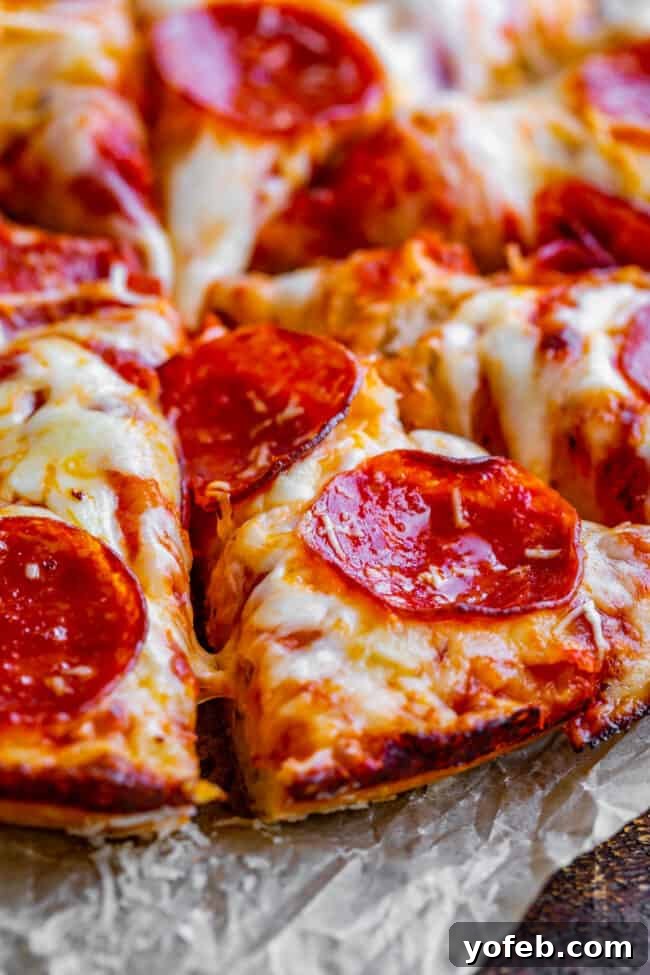
Craving the legendary taste of Pizza Hut pan pizza but prefer the comfort of your own kitchen? Look no further! This incredible homemade pan pizza recipe is a true game-changer, promising a culinary experience that rivals your favorite takeout. Imagine a super thick, ciabatta-like crust, boasting gloriously crispy, golden-brown edges, while its interior remains irresistibly soft and pillowy. The secret to achieving this restaurant-quality perfection at home lies in two crucial elements: a generous, slow rise time for the dough and the indispensable use of a heavy cast iron pan. Once your magnificent crust is ready, simply crown it with rich pizza sauce, a generous layer of gooey mozzarella, and savory pepperoni for an authentic pan pizza paradise right on your plate. This timeless recipe, originally shared in April 2020, continues to deliver unparalleled flavor and texture, making it a staple for pizza lovers everywhere.
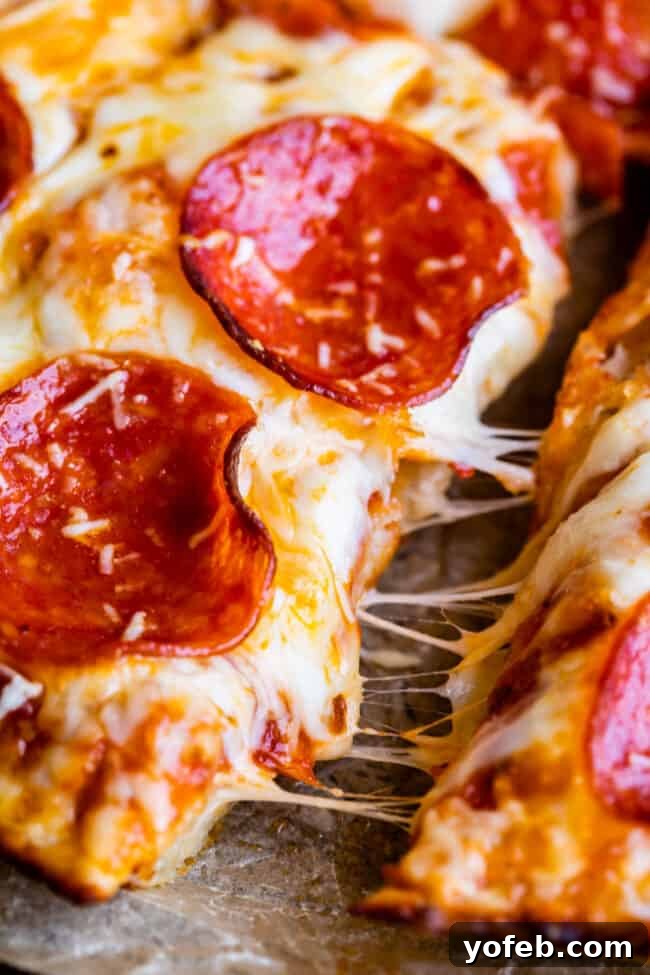
Table of Contents
- What is homemade pan pizza?
- Ingredients for the Perfect Pan Pizza
- Crafting Your Homemade Pan Pizza
- Cast Iron: The Secret to Irresistibly Crispy Edges
- Delicious Sides to Complement Your Pan Pizza
- How to Store Leftover Pan Pizza
- Can This Pan Pizza Be Frozen?
- The Best Way to Reheat Pan Pizza
- Pizza Hut Style Pan Pizza Recipe
There’s a saying, “Pizza is like sex. Even when it’s bad, it’s good!” While this witty analogy often rings true for many culinary experiences, I can assure you that there is absolutely nothing “bad” about this homemade pan pizza recipe. In fact, it’s nothing short of phenomenal. If we were to continue the analogy, this pizza would be the supermodel of the pizza world – stunningly beautiful and utterly captivating in every bite.

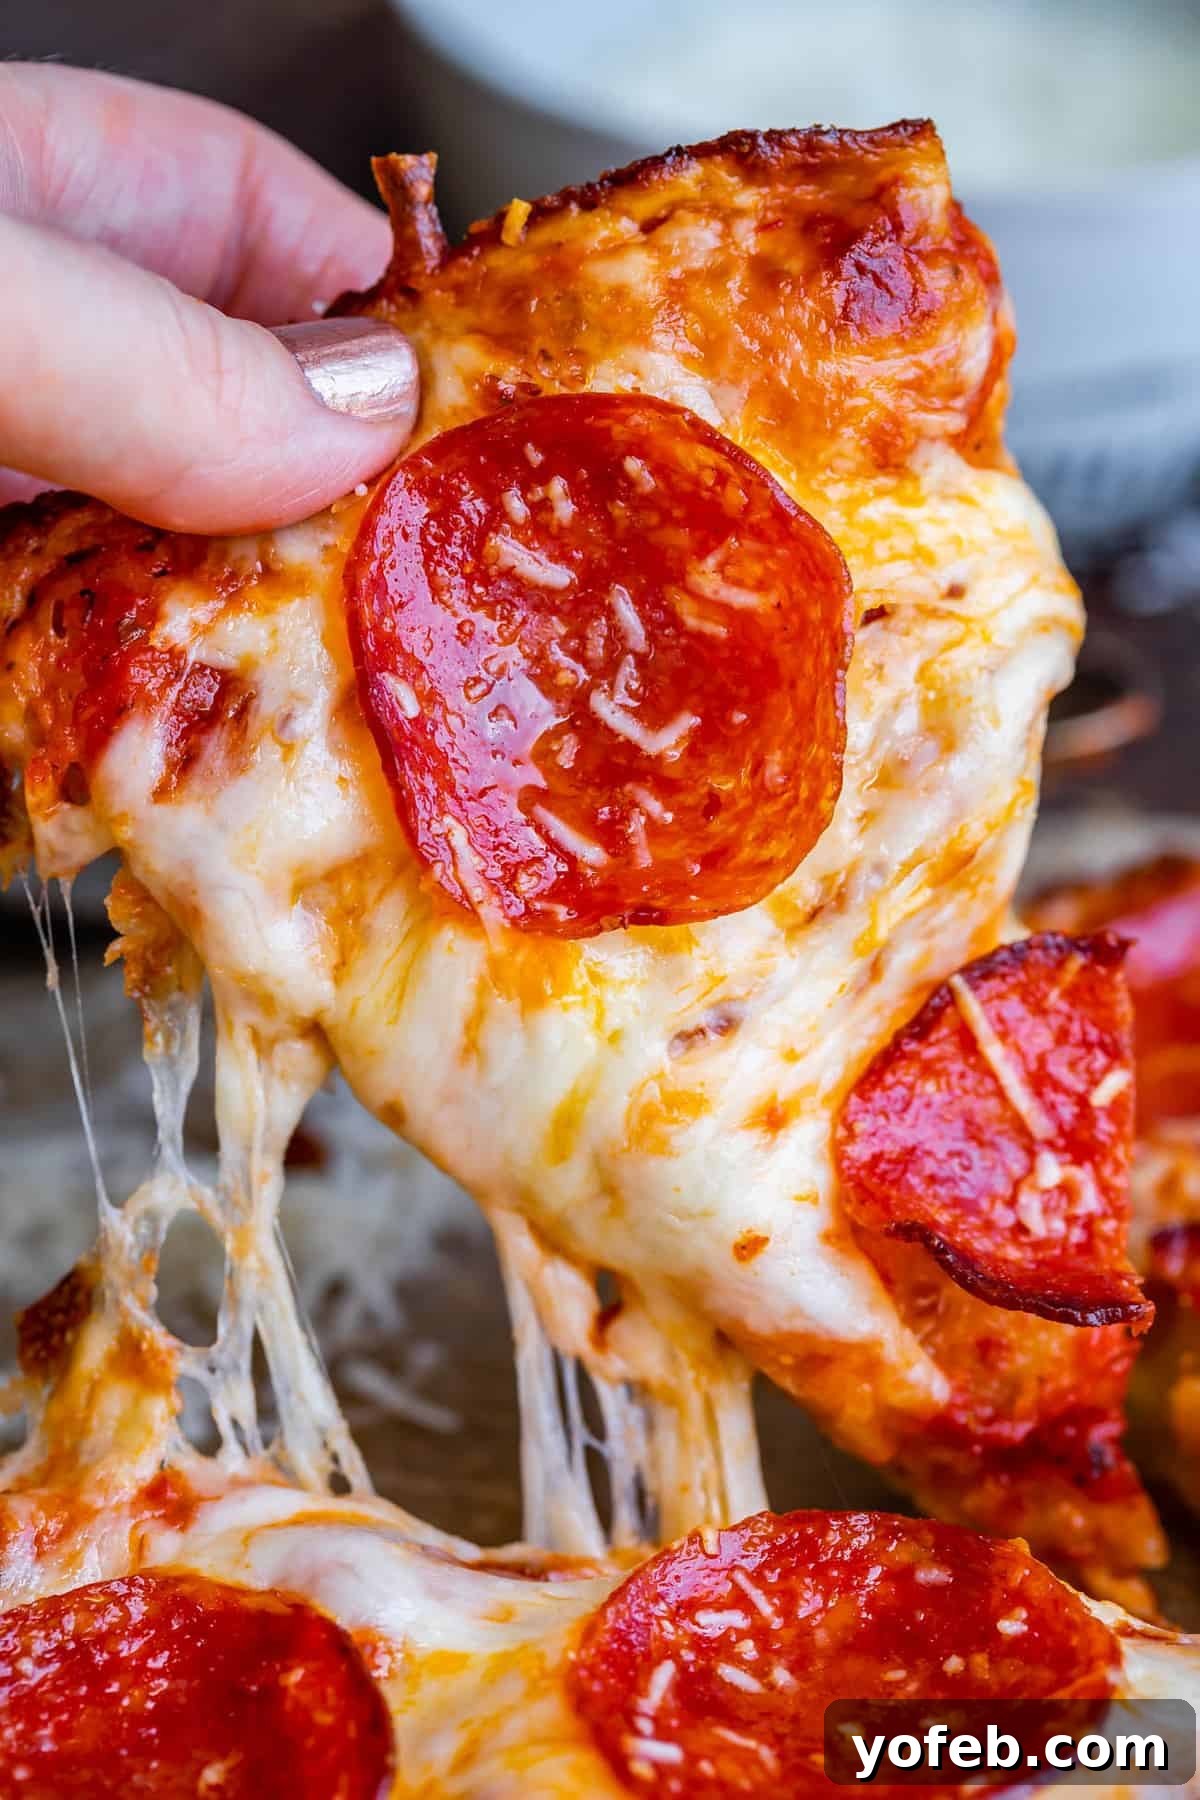
This recipe achieves a flavor profile that genuinely tastes like it came straight from Pizza Hut. For all the pan pizza enthusiasts out there, this is a dream come true! I’ve always been a pan pizza loyalist; it’s simply the best. That perfect balance of crispy, almost fried edges, contrasting with a fluffy, chewy interior, smothered in abundant, melted cheese – it’s an unparalleled experience. It’s the kind of pizza that truly satisfies every craving and solidifies its place as the ultimate comfort food.
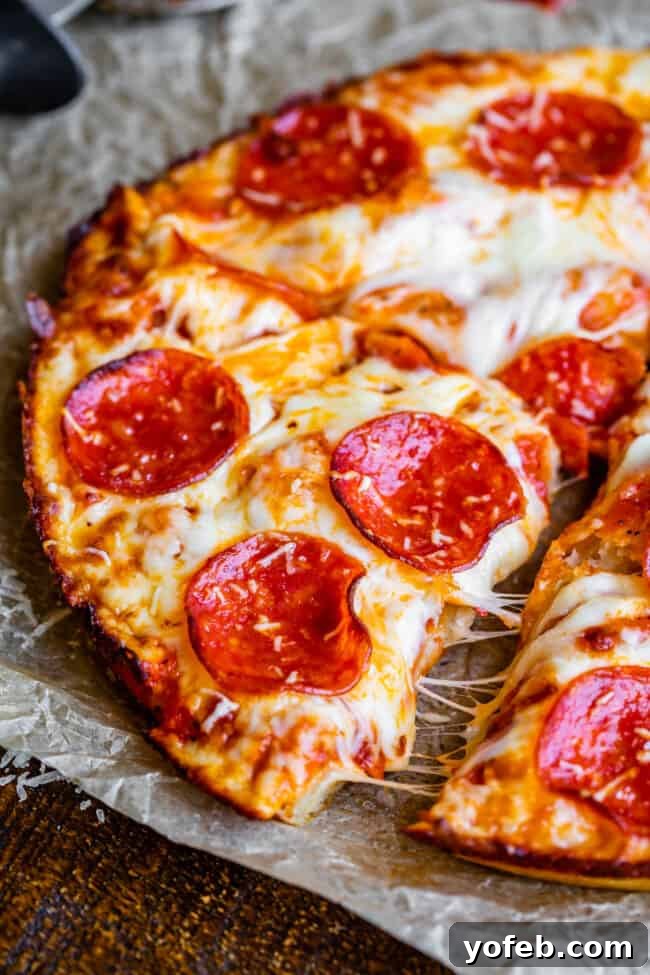
While traditional thin-crust pizza certainly has its moments, especially for quick weeknight meals or casual gatherings, I firmly believe that pan crust reigns supreme. The unique texture and rich flavor profile of a pan pizza make it truly stand out. It’s a culinary indulgence that is undeniably worth every single calorie, which means it’s also worth investing the time and effort to prepare it perfectly. This recipe ensures that your homemade pan pizza will be a triumphant culinary achievement, delivering maximum flavor and satisfaction that far surpasses any last-minute alternative.
What is homemade pan pizza?
Today’s exceptional pan pizza recipe comes from the brilliant pages of my friend Rebecca’s new cookbook! Rebecca, the culinary talent behind the blog Foodie with Family, has been a source of inspiration for me for nearly a decade. Her blog was actually one of the key motivators that encouraged me to embark on my own food blogging journey. Her recipes are consistently outstanding, always delivering delicious and reliable results.
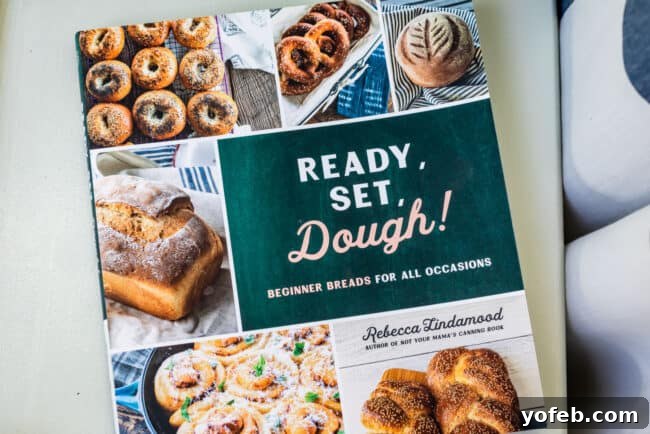
Rebecca recently authored her second cookbook, Ready, Set, Dough! This delightful guide serves as an invaluable resource for anyone looking to master bread making for all sorts of occasions. It’s an incredibly fun and accessible book, perfect for both novice bakers taking their first steps with yeast and seasoned bread makers seeking fresh inspiration and new techniques. The book covers a wide range of bread types, making it a versatile addition to any kitchen. You can purchase your own copy here to dive into the wonderful world of homemade bread.
Upon flipping through her cookbook, my eyes landed almost immediately on this pan pizza recipe, and I knew instantly that I had to give it a try. To my absolute delight, it surpassed all my expectations – seriously, no exaggeration! It’s even better than I could have imagined. For more visual inspiration and details, Rebecca also features The Best Pan Pizza recipe on her blog, where you can find additional photos and insights into crafting this perfect pizza.
Featured Comment
“SO SO SO much better than Pizza Hut!!”
– Nathan
See All Comments
Ingredients for the Perfect Pan Pizza
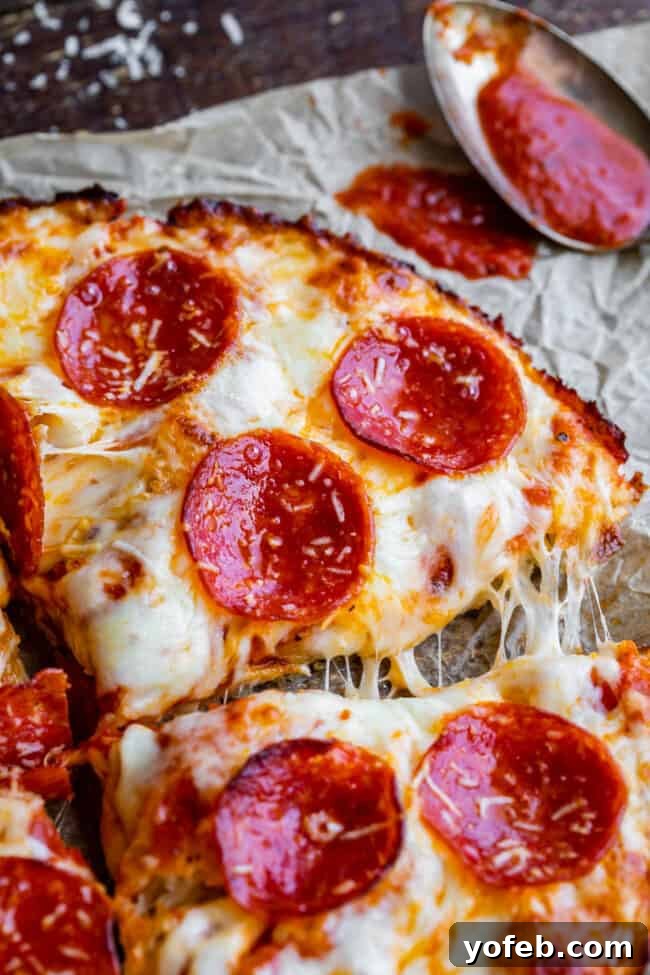
While I’m preparing a classic pepperoni pizza today, the beauty of this recipe lies in its versatility. Feel free to customize your toppings to suit your palate. Whether you prefer savory sausage, a Hawaiian-inspired pineapple and ham combination, or simply a glorious cheese pizza, the choice is entirely yours. However, in my humble opinion, pepperoni truly elevates the experience to another level!
Here’s a concise shopping list to help you gather the essential ingredients for your homemade pan pizza. You’ll find the complete, detailed ingredient list with precise measurements and comprehensive instructions in the recipe card further down this page. Make sure to have everything ready for a seamless cooking process!
- Active dry yeast
- Bread flour
- Kosher salt
- Light olive oil
- Pizza sauce (14 oz., store-bought or homemade)
- Sliced mozzarella cheese (string cheese is a fantastic hack!)
- Shredded mozzarella cheese
- Pepperoni
- Parmesan cheese
Crafting Your Homemade Pan Pizza
Creating a homemade Pizza Hut-style pan pizza is surprisingly straightforward, and you’ll be amazed at how easily you can achieve it. The main requirement is a bit of foresight and planning. Rebecca’s original recipe suggests an initial dough rise time of 8-24 hours, followed by an additional 2-hour rise before baking. While the long rise time contributes significantly to the flavor and texture, I’ve developed a convenient shortcut for those times when you can’t plan that far ahead.
Like many home cooks, I often find myself thinking about dinner when it’s already approaching mealtime, rather than a full day in advance! My tested hack allows you to shorten the overall process without compromising on quality. This revised recipe can be completed in approximately 6 hours from start to finish. This makes it perfect for beginning the dough around noon and enjoying a delicious, piping hot pan pizza by 6 PM – a fantastic solution for those busy days when you crave authentic homemade pizza!
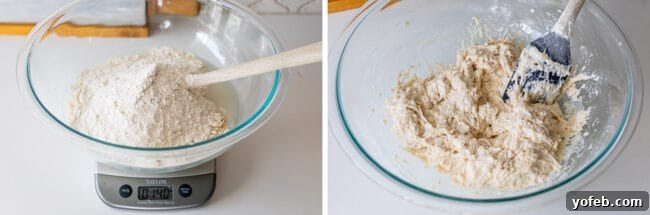
To begin, prepare the dough. You’ll need warm water and a small amount of yeast, followed by bread flour and salt. The best part? There’s no arduous kneading required! Simply mix the ingredients together until they are well combined. If you’re using active dry yeast, be sure to dissolve it in warm water first to activate it. Instant yeast can also be used directly without prior dissolution, though ensuring it’s properly mixed with warm water is always a good practice to kickstart the process.
Precision in measuring flour is key for this recipe, calling for 14 ounces of bread flour. Bread flour is specifically chosen for its higher gluten content compared to all-purpose flour, which is essential for developing that desirable chewy, airy, and “holy” (full of internal pockets) crust characteristic of authentic pan pizza. If you own a kitchen scale, using it for this measurement is highly recommended for accuracy. Too much flour can result in a tougher, less tender dough. However, if a scale isn’t available, an approximate measurement of 3 cups plus 1 tablespoon of bread flour will work, just ensure you measure carefully by spooning and leveling.
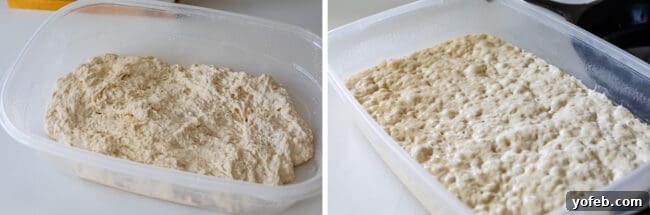
Observe the dough before and after its initial rise in the image provided. It’s crucial to cover the dough loosely, allowing any gases produced during fermentation to escape, which promotes a proper rise. For those aiming to expedite the rising process, here’s a clever trick: preheat your oven briefly to create a warm environment, then turn it off. The oven should be warm to the touch, but not hot enough to cook the dough. At typical room temperature, this dough requires at least 8 hours to rise adequately. However, within a gently warmed oven, you can achieve a sufficient rise in approximately 4 hours. While a longer initial rise (up to 24 hours) will develop deeper flavors, 4 hours is perfectly acceptable if you’re working with a tighter schedule. The key is consistent warmth without excessive heat.
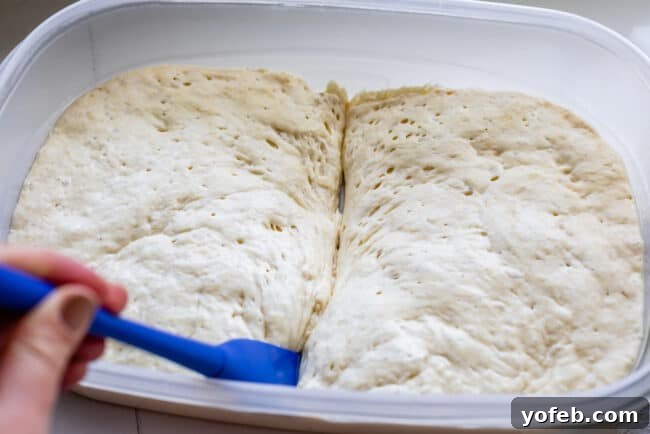
Once your dough has completed its initial rise and is beautifully airy, it’s time to prepare it for baking. Using a well-oiled spatula, carefully divide the dough into two equal portions. These portions will then be placed into two separate, generously oiled cast iron pans. The oil is essential for developing that signature crispy crust and preventing sticking, ensuring your pizza lifts out easily after baking. This step is critical for achieving the pan pizza’s characteristic texture and flavor.
Cast Iron: The Secret to Irresistibly Crispy Edges
For this recipe, utilizing two cast iron pans is highly recommended, as the dough undergoes its final rise directly within them. This allows the cast iron to gradually heat with the dough, creating an ideal environment for a superior crust. If you only have one cast iron pan, don’t worry; you have a couple of options. You can either halve the recipe to make one pizza, or bake the second half of the dough in an 8- or 9-inch round cake pan. While the texture might be slightly different in a cake pan, you’ll still end up with a delicious pizza.
A properly seasoned cast iron skillet naturally boasts nonstick properties, making it an excellent choice for this recipe. Preparing it is straightforward: simply swirl a generous amount of light olive oil around the pan, ensuring the bottom and sides are thoroughly coated. It’s important to use light olive oil rather than extra virgin olive oil for this step, as extra virgin varieties have a lower smoke point and can cause excessive smoke at the high oven temperatures required for pan pizza. Other suitable oils with high smoke points include canola, peanut, vegetable, avocado, or grapeseed oil.
To guarantee the dough won’t stick and to develop that perfect crispy, almost fried crust, you’ll need about two tablespoons of oil per pan. While a well-seasoned cast iron skillet offers some inherent nonstick benefits, this additional oil is crucial for an easy release and the distinctive texture that defines this Pizza Hut copycat. This generous coating of oil also contributes significantly to the golden-brown, flavorful edges everyone loves.
This recipe is ideally designed for 10-12-inch cast iron pans. If your pan is larger or smaller, use the accompanying process photos as a guide to gauge the appropriate dough thickness. It’s more about the visual cue of thickness than precise dimensions in these cases. If the amount of dough appears excessive for your pan, it likely is; remove a small portion to avoid a dense or doughy center, which is the biggest risk with an overly thick crust. Adjusting the dough to fit your pan correctly ensures an evenly baked, perfectly textured pizza.
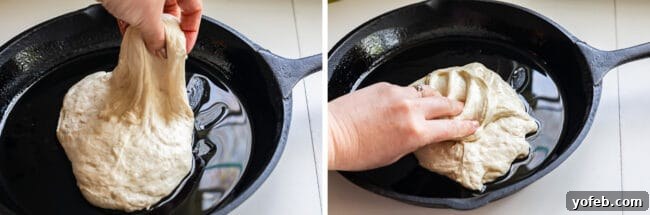
Once the dough is in the oiled pans, it’s time to begin shaping it. Dip your hands in a bit of the oil from the pan to prevent sticking, then gently lift one edge of the dough and tuck it towards the center. This technique helps to build a more rounded, cohesive shape. Repeat this process a few times, working your way around the dough, until it naturally forms a loose ball. Don’t be alarmed if the dough feels incredibly sticky – this is perfectly normal and indicates a well-hydrated, tender dough.
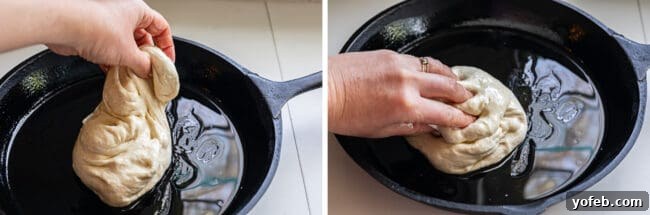
The dough, as mentioned, is designed to be quite sticky, so embrace its texture! Continue gently folding and shaping it until you have a somewhat rounded form. This process helps to develop the gluten structure further, contributing to the airy interior of the finished crust. Once a loose ball is formed, flip it over to ensure all sides are coated in the oil from the pan. This coating is crucial for both flavor and preventing the dough from drying out during the next rise, as well as for that coveted crispy crust.
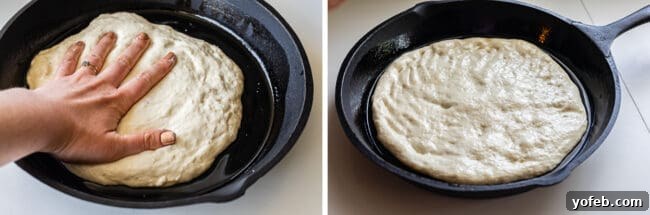
With your oiled hands, gently spread the dough out evenly, pressing it toward the edges of the cast iron pan. Aim to get it as close to the rim as possible, or at least covering most of the pan’s surface. This gentle spreading allows the dough to fill the pan without tearing, and sets the stage for a uniform crust. Remember to be patient; the dough may resist a little, but continue to gently coax it outwards until it’s spread to your desired thickness and coverage.
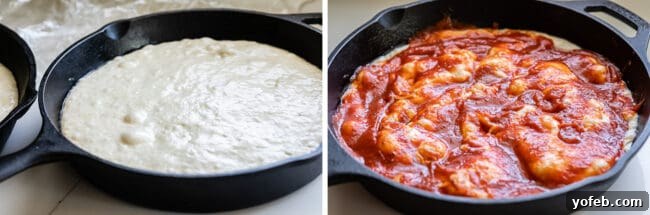
Next, allow the dough to undergo its second rise in a warm oven for approximately an hour and a half, or up to two hours if your schedule permits. During this time, the dough should expand beautifully, reaching and filling the edges of the pan, becoming visibly bubbly and airy. Once fully risen, it’s time to add your toppings. Begin by spreading a moderate amount of pizza sauce over the dough, being careful not to overdo it. Using too much sauce can weigh down the delicate risen dough, preventing it from achieving its optimal fluffy texture during baking. A thin, even layer is perfect for a balanced flavor and crust.
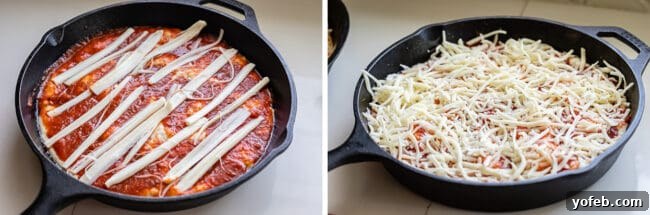
Following the sauce, it’s time for the cheese – and I have a secret weapon for ultimate cheesiness! I love to combine both sliced mozzarella cheese with shredded mozzarella. The sliced mozzarella, strategically placed, melts into glorious pools of rich, creamy cheese that you simply don’t achieve with shredded cheese alone. On the day I made this particular pizza, I found myself without sliced mozzarella, but I employed my favorite hack: using my kids’ string cheese! Simply tear it into strips and lay it on the pizza. It works like an absolute charm, delivering that extra layer of cheesy goodness and creating a beautiful texture.
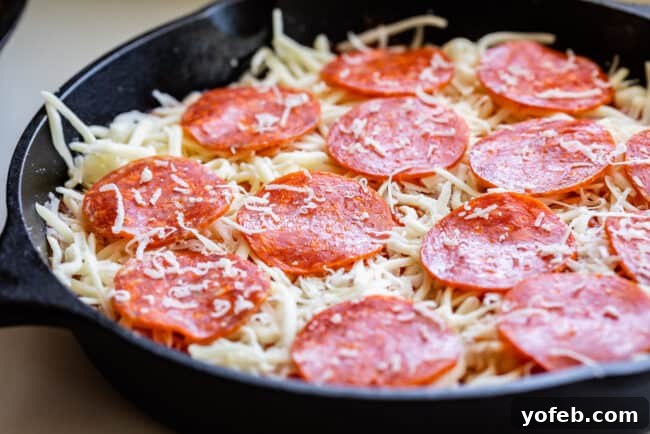
Finally, complete your masterpiece by topping the pizza with pepperoni and a light sprinkle of Parmesan cheese. Once again, be mindful not to overload the pizza with too many toppings, as excess weight can compress the dough and affect its airy texture. The goal is a perfect balance of flavors and textures, allowing each component to shine without overwhelming the delicate crust. A thoughtful distribution of pepperoni ensures every bite is flavorful, while the Parmesan adds a lovely depth of savory taste.
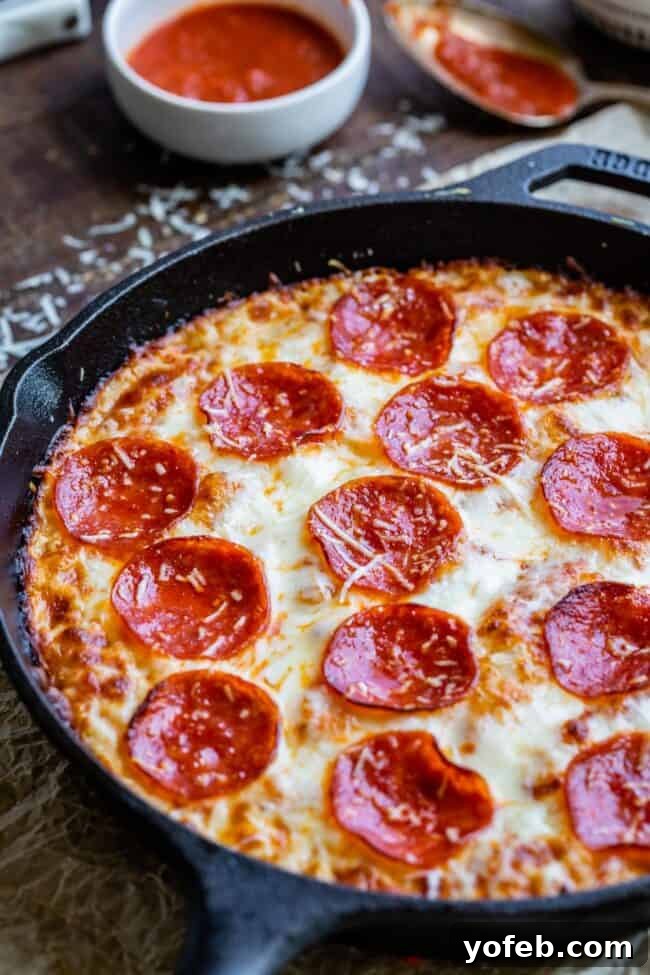
Now, for the grand finale: baking your pizzas in an intensely hot oven! Crank your oven up to its maximum temperature, ideally 550 degrees F (290 degrees C), if possible. This screaming hot environment is crucial for achieving that desirable contrast: a wonderfully crisp and crunchy crust on the outside, while the interior of the dough develops that airy, holey, and delightfully chewy texture that makes pan pizza so utterly amazing. The high heat ensures a rapid bake, preventing the crust from drying out and promoting a beautiful golden-brown finish.
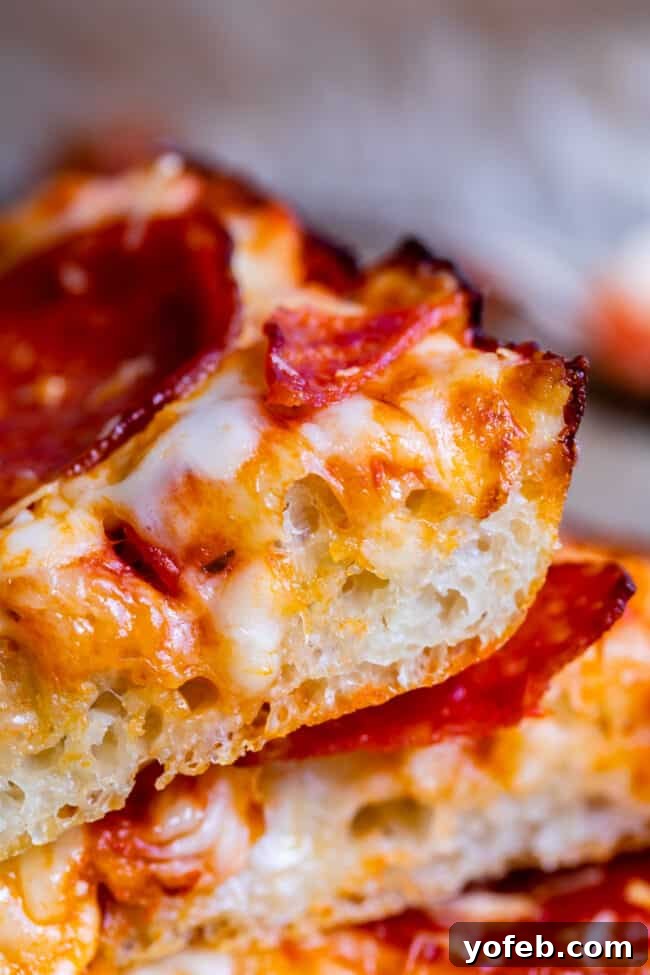
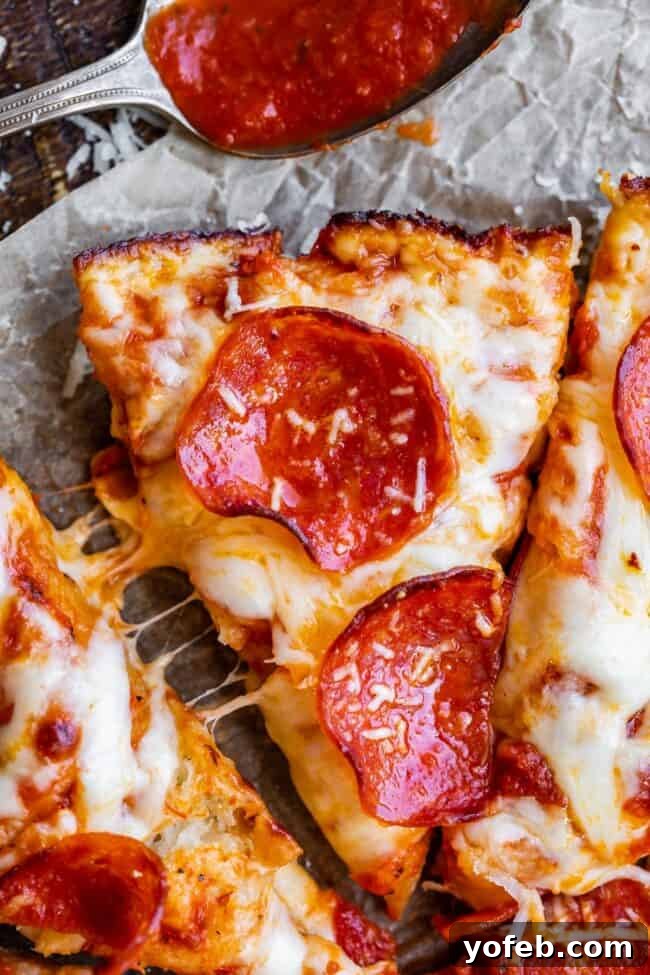
To ensure your crust remains incredibly crispy even after baking, I highly recommend sliding your pizza onto a cooling rack within a couple of minutes of removing it from the oven. This allows air to circulate around the bottom of the crust, preventing steam buildup and maintaining that satisfying crunch. After a few minutes of cooling on the rack, transfer your pizzas to a cutting board, slice them into generous portions, and serve immediately. While these are technically not “personal pan pizzas” in the traditional Pizza Hut sense, remember that any pizza can be a personal one if you approach it with enough enthusiasm and belief. Go ahead, indulge yourself!
Delicious Sides to Complement Your Pan Pizza
For me, a perfect pizza often needs no elaborate accompaniment – perhaps just a simple paper plate and a napkin, as I tend to eat it with enthusiastic abandon! However, if you’re serving a group that appreciates a little something fresh and green to balance out the glorious richness of cheese and dough, I’ve got some fantastic light and refreshing options. These salads offer a crisp counterpoint to the indulgent pizza, ensuring a well-rounded and satisfying meal for everyone at the table.
- Green Salad with Feta and Beets >> This salad is a godsend for those who dislike extensive chopping – wonderfully simple and quick to prepare!
- Strawberry Cucumber Salad with Honey Balsamic Dressing >> The dressing for this salad is incredibly refreshing, offering a bright and zesty flavor.
- Pineapple Spinach Salad >> A clever compromise for pineapple pizza debates: serve the pineapple in a delicious side salad instead!
- Spinach Bleu Cheese Salad (with Copycat Zupas Poppyseed Dressing) >> Featuring cinnamon candied almonds, fresh berries, and a homemade dressing, this salad is an absolute delight.
- Tomato and Fresh Basil Salad from Hip Hip Gourmet >> A classic, simple salad that celebrates fresh, vibrant flavors.
- Caesar Salad from Little Ferraro Kitchen >> A timeless and universally loved choice that adds a touch of elegance to any meal.
- Italian Chopped Saladfrom Borrowed Bites >> A hearty and flavorful salad, perfect for feeding a crowd or simply enjoying on your own.
How to Store Leftover Pan Pizza
Properly storing leftover pizza is key to enjoying it again, preventing both dryness and sogginess. Here’s an effective strategy: choose an airtight container that comfortably fits your remaining pizza slices. Stack the slices with layers of paper towels, parchment paper, or waxed paper in between each one. This layering helps to absorb excess moisture and prevents the slices from sticking together. Once stacked, ensure the lid is sealed tightly to maintain freshness. If you don’t have a container large enough, you can arrange the layered slices on a plate and then wrap the entire stack tightly with plastic wrap to create an effective seal.
Can This Pan Pizza Be Frozen?
Absolutely, this pan pizza freezes beautifully, making it an excellent option for meal prep or quick future dinners. To freeze, wrap individual slices tightly in plastic wrap. Then, lay the wrapped slices in a single layer on a baking sheet and place them in the freezer until completely solid. Once frozen, you can transfer them to a freezer-safe Ziploc bag or an airtight container. For the best quality and flavor, it’s ideal to consume the frozen pizza within 1-2 months, although it will remain safe to eat for 3-6 months. Freezing allows you to extend the life of your delicious homemade pizza significantly.
The Best Way to Reheat Pan Pizza
While the microwave certainly works for a quick reheat, if you truly want to revive your leftover pan pizza to a “freshly baked” state, the oven is your best friend. For a crispy crust and perfectly melted cheese, place your slices directly on an oven rack or a baking sheet in a preheated oven. For an even quicker and crispier finish, utilize the broiler for just a couple of minutes. Be sure to watch it extremely carefully, as the broiler can quickly go from perfect to tragically burnt! The goal is a golden-brown crust and bubbling cheese, replicating the delicious experience of the first bite.
More Pizza Ideas You Will Love!
- Blackberry Ricotta Pizza with Basil >> A uniquely delightful pizza, perfect for summer entertaining!
- Leftover Hot Dog Pizza with Caramelized Onions >> Don’t dismiss this one – it’s surprisingly good and incredibly flavorful.
- Easy No Cook Pizza Sauce >> The simplest recipe for a fresh, homemade pizza sauce, ready in minutes.
- Thai Pizza with Zucchini and Pickled Onions >> Inspired by a memorable California Pizza Kitchen dish, offering a unique flavor twist.
- Zucchini Pizza Bites >> A fantastic low-carb alternative for when you’re craving pizza flavors without the heavy crust.
- French Bread Pizza, 3 Ways >> When you have a loaf of French bread on hand, dinner becomes incredibly easy and versatile.
- BBQ Chicken Pizza from Tastes Better From Scratch >> A beloved classic with tangy BBQ sauce and tender chicken.
- How to Grill Pizza from Ambitious Kitchen >> Take your pizza-making outdoors with this guide to grilling.
- Chicago Style Deep Dish Pizza from Brown Eyed Baker >> For those who love a hearty, cheesy, and truly substantial pizza experience.
Don’t forget to explore all my best copycat recipes collected in one convenient place for even more restaurant-quality dishes made at home!
Facebook | Pinterest | Instagram

Pizza Hut Style Pan Pizza Recipe
Rate this Recipe
Print Recipe
Ingredients
For the dough
- 1 & 1/2 cups warm water
- 3/4 teaspoon active dry yeast
- 14 ounces bread flour, 3 cups + 1 tablespoon*
- 2 teaspoons kosher salt
To assemble the pizza
- 4 tablespoons light olive oil, to coat cast iron pans**
- 14 ounce jar of pizza sauce, or homemade
- 4 ounces sliced mozzarella cheese
- 3 cups mozzarella cheese, shredded
- 3 ounces pepperoni
- 2 tablespoon parmesan cheese, shredded
Instructions
-
In a large bowl, combine 1 and 1/2 cups warm water and 3/4 teaspoon active dry yeast. (Instant yeast can also be used.) Ensure the water is warm but not hot, ideally between 105-110 degrees F (40-43 degrees C). Stir in the yeast and let it sit for 5 minutes until it is fully dissolved. While it may not become visibly bubbly, stir out any lumps to ensure a uniform mixture before proceeding.
-
Using a kitchen scale, accurately add 14 ounces of bread flour* to the bowl. If a scale is unavailable, carefully measure out 3 cups plus 1 tablespoon of bread flour by spooning the flour into the measuring cup and leveling off the top. Precise flour measurement is crucial for this recipe’s success; avoid adding extra.
-
Stir in 2 teaspoons of kosher salt. Mix the ingredients together with a spoon until just combined; do not knead the dough. Stop mixing once all ingredients are fully incorporated.
-
Lightly grease a large bowl or a plastic container with oil or nonstick spray. Transfer the dough into the greased container and spread it out as much as possible. Cover the container loosely with a lid or plastic wrap, ensuring there is enough space for gases to escape during the rise.
-
To create a warm environment for rising, turn your oven on to 350 degrees F (175 degrees C) for approximately 1 minute, then turn it off. Open the oven door and test the rack temperature. If it’s too hot to touch comfortably, leave the door ajar until it cools slightly. The oven should feel pleasantly warm, not hot.
-
Place the dough in the warmed oven and close the door. Allow it to rise for 4 hours. After 2 hours, briefly remove the dough, warm the oven again for about a minute (ensuring it’s not too hot), then return the dough to continue rising. After 4 hours, the dough should have at least doubled in size, appearing airy and bubbly.
-
Divide the 4 tablespoons of oil** evenly between two cast iron skillets (10 or 12 inches are ideal) and swirl to thoroughly coat the bottom and sides. You will need two skillets as the dough completes its final rise in them. If you only have one, you can halve the recipe or refer to the recipe notes for instructions on using round cake pans.
-
Dip your hands and the tip of a rubber spatula into the oiled pans to coat them well. Use the oiled spatula to divide the risen dough into two equal portions. Scrape one half of the dough into each oiled pan.
-
With your oiled fingers, gently lift an edge of the dough and fold it towards the center. Repeat this process a few times until the dough begins to form a loose ball (refer to photos for visual guidance). Flip the dough ball over so the smooth side is on top and it’s completely coated in oil. Gently press your hand down on the dough and spread it out as much as possible, working towards the edges of the pan. Repeat with the second half of the dough.
-
Loosely cover each pan with plastic wrap, ensuring the plastic does not directly touch the dough, allowing it room to rise.
-
Repeat the oven-warming process for the second rise: turn the oven on for about a minute, then turn it off. Place the pans into the oven once it’s warm but not hot to the touch.
-
Allow the dough to rise in the warm oven for approximately an hour and a half. By this point, it should have fully spread to the edges of the pan and appear beautifully bubbly.
-
Remove the pans from the oven and keep them in a warm spot. Preheat your oven to its highest possible temperature, ideally 550 degrees F (290 degrees C). Allow the oven to preheat for at least 20 minutes to ensure it is thoroughly hot. Position the oven rack in the lower third of the oven. If you have a pizza stone, place it on the rack during preheating.
-
While the oven preheats, begin topping your pizzas. Spread about 3/4 cup of pizza sauce (half of a 14-ounce jar) evenly over the top of each pizza, extending all the way to the edges of the dough.
-
Evenly distribute a few thin slices of mozzarella cheese over each pizza, using approximately 4 ounces in total. (As a handy hack, string cheese can be used if sliced mozzarella is unavailable). Avoid adding too much cheese at this stage, as excessive weight can hinder the dough’s rise and texture.
-
Sprinkle about 1 and 1/2 cups of shredded mozzarella cheese over each pizza, ensuring good coverage.
-
Divide the pepperoni evenly between the two pizzas. Remember not to add an excessive amount, as it can weigh down the dough and affect the crust’s texture.
-
Finish each pizza with a tablespoon of shredded Parmesan cheese for an extra layer of flavor.
-
Once the oven is incredibly hot, carefully place the pizzas into the oven, ideally onto your preheated pizza stone if using one. Bake the pizzas for approximately 9-12 minutes. The pizza is done when the edges of the crust are golden brown and the cheese on top is melted, bubbly, and slightly golden. For the surest test of doneness, lift the edge of the pizza with a metal spatula to confirm that the bottom of the crust has achieved a deep golden-brown color.****
-
Carefully remove the pizzas from the oven and allow them to rest for 2 minutes in their pans. Then, use a spatula to slide the pizzas out onto cooling racks. This crucial step allows air to circulate underneath, helping to maintain the crispiness of the crust. Let the pizzas cool on the racks for a few more minutes, then transfer them to cutting boards, slice, and serve immediately for optimal enjoyment.
Notes
**Light olive oil is highly recommended for frying and baking due to its elevated smoke point, which prevents it from burning or smoking at high temperatures. Extra Virgin Olive Oil, on the other hand, has a significantly lower smoke point, and using it in a 550-degree oven will likely result in a smoky kitchen. Other excellent oil options with high smoke points that are suitable for this recipe include canola oil, peanut oil, vegetable oil, avocado oil, grapeseed oil, or regular (non-virgin) olive oil.
***If you do not own a cast iron skillet, you can still make this pizza using three heavy 8-inch round cake pans. However, please note that the results may not be quite as exceptional as with cast iron, which is uniquely suited for creating a crispy crust. To adapt the recipe, line each cake pan with parchment paper to prevent sticking and ensure easy release. Divide the 4 tablespoons of oil evenly among the three pans and thoroughly coat the parchment paper. Then, divide the risen dough into three equal portions and distribute it among the pans. Finally, evenly spread the sauce, cheese, and pepperoni over all three pizzas before baking.
****If the top of your pizza has achieved your desired golden color and doneness, but the bottom crust still appears light, remove the pizza from the oven and carefully place the skillet directly onto a stovetop burner. Turn the heat to medium and continue cooking the bottom of the pizza until it becomes a rich golden brown and crisps up perfectly. This method is particularly effective for ovens that may not reach very high temperatures (450 degrees F or less) and is often the best way to ensure a delightfully crispy bottom crust.
Source: This exceptional recipe is thoughtfully adapted from my dear friend Rebecca’s brilliant cookbook, Ready Set Dough! Rebecca, the creative mind behind Foodie with Family, has been a culinary inspiration for me for almost a decade. Her blog was instrumental in encouraging me to start my own food blogging journey, and her recipes consistently deliver phenomenal results. For even more detailed instructions and stunning photography, you can also find The Best Pan Pizza recipe on her blog.