
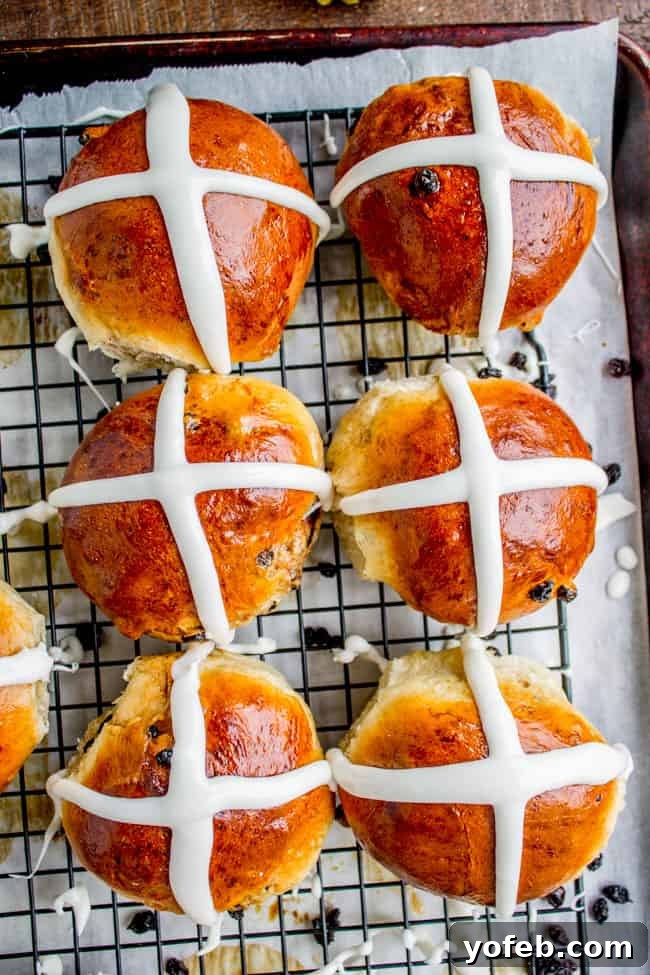
Delicious Homemade Hot Cross Buns: An Irresistible Easter Tradition
There’s something truly magical about the aroma of freshly baked Hot Cross Buns wafting through your home. These delightful, lightly sweetened rolls are a quintessential Easter classic, cherished for their tender texture, comforting spices, and the iconic white cross that crowns each bun. Studded with plump dried currants and infused with the warm notes of cinnamon, allspice, and a hint of nutmeg, they embody the spirit of spring and celebration. While traditionally enjoyed on Good Friday, their inviting flavor makes them a perfect treat for any time you crave a touch of homemade warmth.
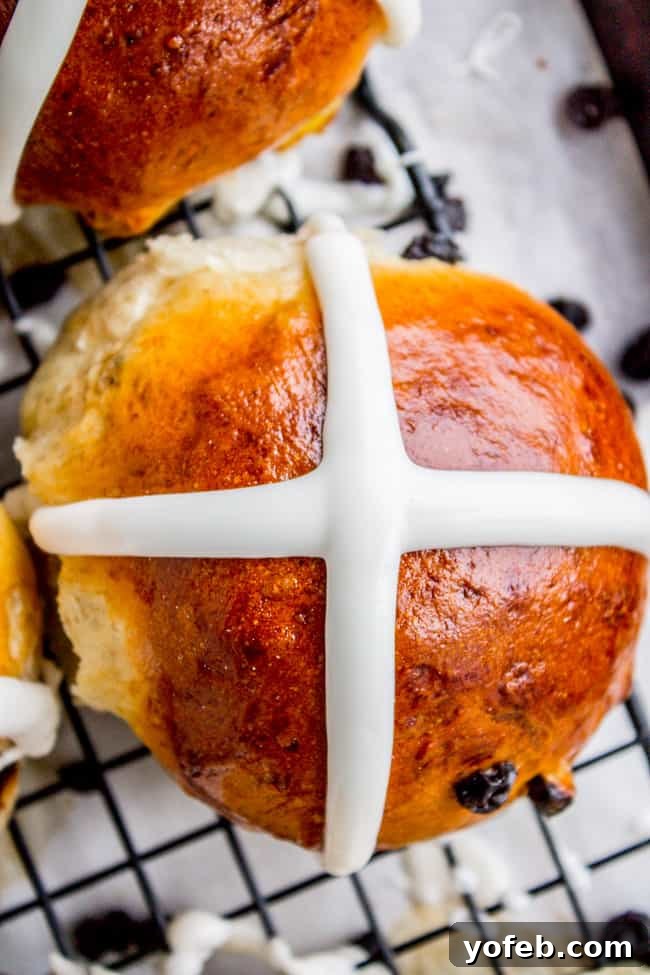
Table of Contents
- What are Hot Cross Buns? A Sweet History and Symbolism
- The Essential Ingredients for Perfect Hot Cross Buns
- Step-by-Step Guide: How to Bake Hot Cross Buns from Scratch
- Tips for Hot Cross Bun Success
- Creative Variations for Your Hot Cross Buns
- Serving Suggestions for Your Homemade Hot Cross Buns
- Explore More Delicious Carb-Loaded Recipes
- Hot Cross Buns Recipe
Baking homemade Hot Cross Buns is a rewarding experience that fills your kitchen with an intoxicating aroma and your heart with satisfaction. These soft, fluffy rolls are not only a delicious indulgence but also a beloved part of Easter traditions worldwide. Let’s delve into the history, ingredients, and step-by-step process to create your own batch of these iconic treats.
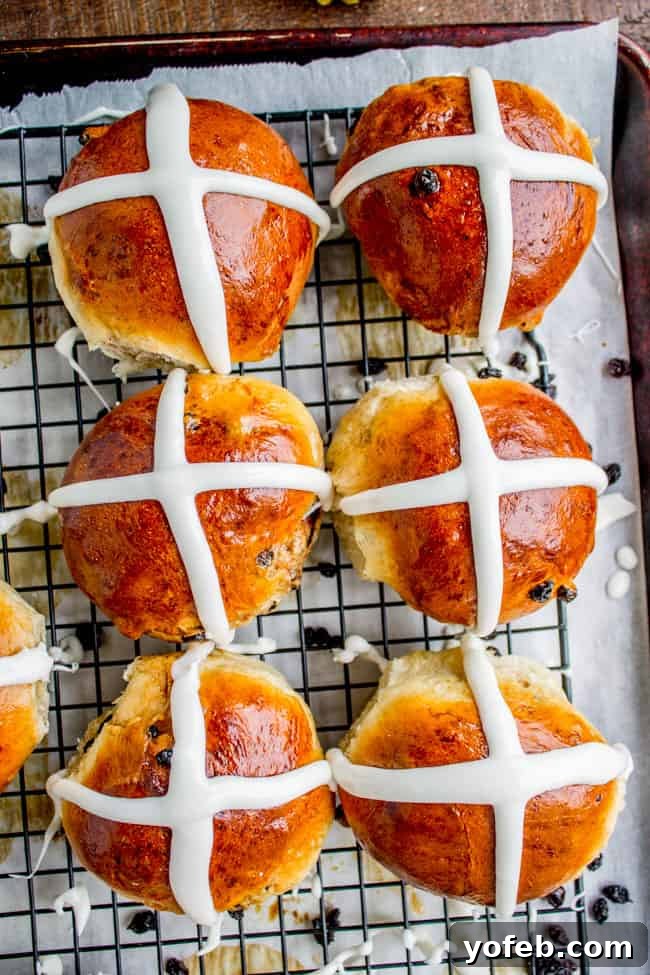
Making bread can sometimes feel intimidating, especially when working with yeast. However, this recipe for Hot Cross Buns is designed to be approachable for bakers of all skill levels. With a little patience and attention to detail, you’ll be able to create rolls that are not just beautiful, but also incredibly tender, moist, and bursting with flavor. Forget store-bought versions – nothing compares to the taste and texture of homemade.
What are Hot Cross Buns? A Sweet History and Symbolism
Hot Cross Buns are much more than just a sweet roll; they are a centuries-old tradition, particularly prevalent during the Easter season. These spiced sweet buns, typically made with fruit like currants or raisins, are characterized by a cross on top, which is either made from a paste before baking or piped on with icing after baking.
Historical Significance: The tradition of eating spiced buns dates back to pagan times, where buns marked with a cross symbolized the four quarters of the moon or the changing seasons. However, the modern Hot Cross Bun, particularly associated with Good Friday, is widely believed to have originated in the Christian tradition. The cross represents the crucifixion of Jesus Christ, making it a poignant symbol for Easter. The spices used in the buns are often said to represent the spices used to embalm Christ after his death.
Cultural Traditions: While most commonly eaten on Good Friday, these buns are now enjoyed throughout the entire Lenten season and Easter weekend. In some cultures, there’s a superstition that buns baked on Good Friday will not spoil for a year, and some even believe they have medicinal properties or can ward off evil spirits when hung in the kitchen. Sharing them with friends and family is a common practice, symbolizing friendship and goodwill.
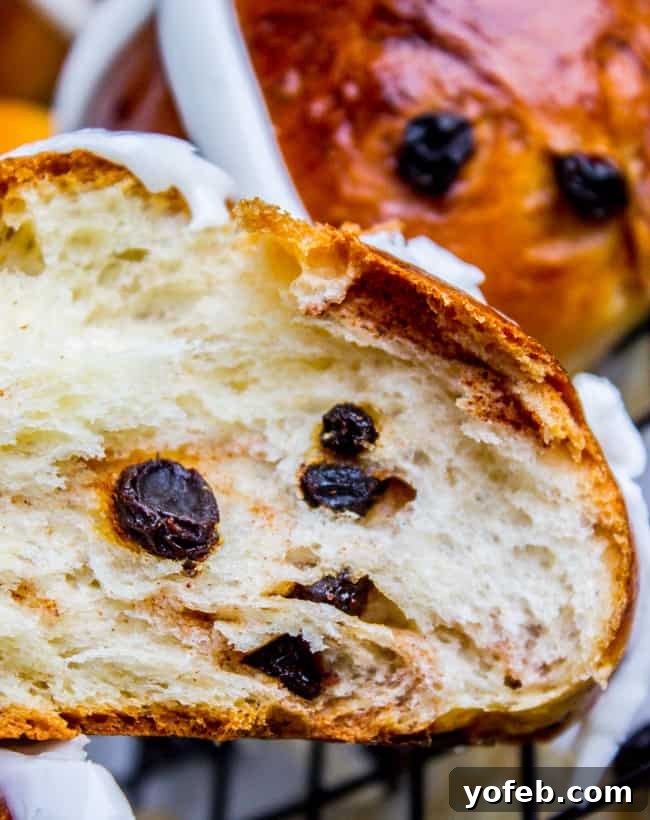
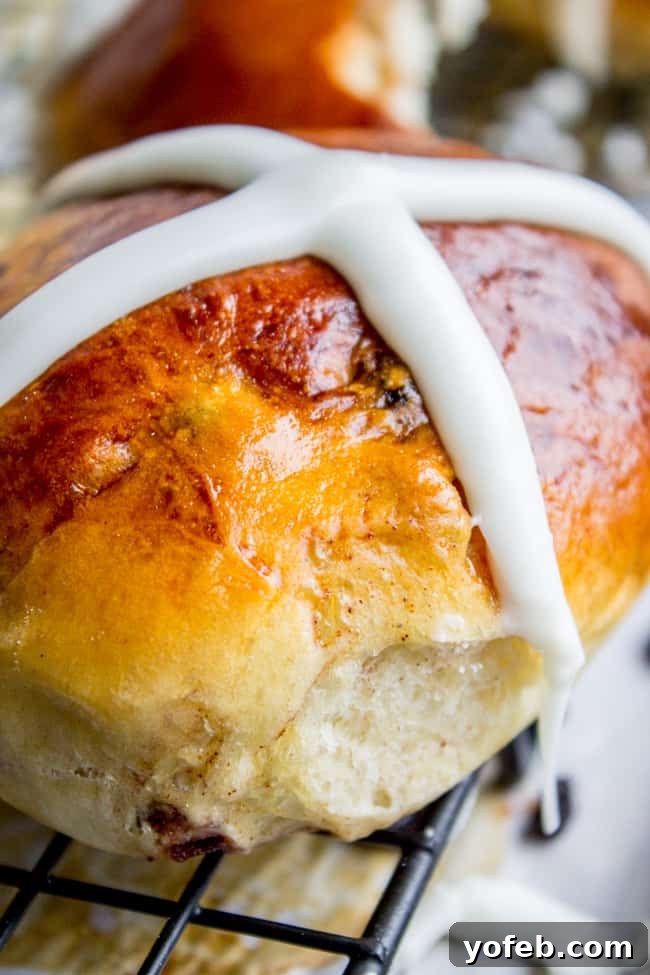
Flavor Profile: Our Hot Cross Buns offer a delightful blend of flavors and textures. The dough is enriched with eggs and butter, giving it a wonderfully tender crumb. Warm spices such as cinnamon, allspice, nutmeg, and sometimes cardamom, infuse the rolls with a fragrant, cozy essence. Dried currants add bursts of fruity sweetness, providing a pleasant contrast to the spiced dough. Finally, the glossy white icing cross adds a touch of sweetness and visual appeal, completing this classic Easter treat. They are sweet, but never overly so, making them perfect for breakfast, brunch, or a snack.
The Essential Ingredients for Perfect Hot Cross Buns
Creating these delicious Hot Cross Buns requires a handful of common baking ingredients, each playing a crucial role in the final product. Below is a comprehensive list, with a quick note on why each element is important. For precise measurements, please refer to the detailed recipe card at the bottom of this post!
- Active Dry Yeast: The leavening agent that makes your buns light and fluffy. Ensure it’s active for a good rise.
- Sugar: Provides sweetness, aids yeast activation, and contributes to browning and tenderness.
- Dry Instant Milk: Adds richness, helps with browning, and contributes to a softer crumb. You can substitute with regular milk if preferred (see notes in recipe card).
- Kosher Salt: Balances sweetness, enhances flavor, and regulates yeast activity.
- Butter: For a rich flavor, moist texture, and improved tenderness in the dough.
- Eggs: Add richness, color, and structure to the buns, making them incredibly tender.
- All-Purpose Flour: The primary structural component of the dough. You may need a little more or less depending on humidity.
- Cinnamon: The star spice, providing warmth and a classic aroma.
- Allspice: Contributes a complex, warm, and slightly peppery note, enhancing the overall spice blend.
- Nutmeg (optional): Adds a subtle sweet and woody spice. Freshly grated is always best!
- Cardamom (optional): For an elevated, floral, and citrusy spice note that truly makes these buns special. Consider a high-quality organic cardamom.
- Dried Currants (or Raisins): Traditional fruit additions that provide bursts of sweet chewiness.
- Powdered Sugar: The base for the sweet, glossy cross icing.
- Vanilla Extract: Adds a touch of aromatic sweetness to the icing.
- Milk (for icing): Adjusts the icing consistency to be perfectly pipeable.
Step-by-Step Guide: How to Bake Hot Cross Buns from Scratch
Making Hot Cross Buns involves a few stages, but each step is straightforward and contributes to their delicious outcome. Follow these instructions carefully, and you’ll be enjoying warm, spiced buns in no time!
1. Activating the Yeast for a Perfect Rise
Start by combining warm water, yeast, and a small amount of sugar in a large bowl or the bowl of your stand mixer. The water should feel like a warm bath, not too hot (which kills the yeast) and not too cold (which slows it down). Let this mixture sit for about 5 minutes until it becomes foamy and bubbly. This indicates your yeast is alive and ready to work its magic, ensuring your buns will rise beautifully.
2. Preparing the Dough: Richness and Texture
Once your yeast is activated, add the dry instant milk, salt, melted butter (it’s okay if there are still a few small lumps), and two large eggs to the mixture. Gradually add the flour, one cup at a time. If using a stand mixer, switch to the dough hook attachment. Continue kneading the dough, adding flour as needed, until it is mostly smooth and elastic, but still slightly sticky to the touch. This kneading process develops the gluten, giving the buns their characteristic chewiness and structure. Knead for 7-8 minutes by machine, or 10-12 minutes by hand, until the dough is smooth and springs back when gently poked.
3. The First Rise: Patience is Key
Lightly spray a large bowl with non-stick cooking spray. Form the kneaded dough into a ball and place it in the prepared bowl, turning it once to coat all sides with oil. Cover the bowl with a clean tea towel or plastic wrap and let it rise in a warm place until it has doubled in size. This usually takes 1-2 hours, depending on the warmth of your kitchen. A trick for a warm spot is to briefly heat your oven to its lowest setting (or just turn it on for a minute and then off), then place the covered bowl inside. Just make sure the oven is warm, not hot!
4. Incorporating Fruit and Spices for Bursting Flavor
While the dough is rising, prepare your spice mixture: combine 3 tablespoons of sugar with cinnamon, allspice, and optional nutmeg and cardamom in a small bowl. These warm spices are what give Hot Cross Buns their distinctive festive flavor.
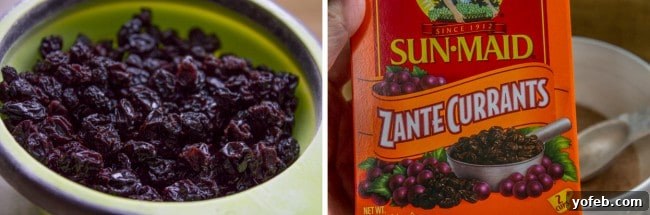
Once the dough has doubled, gently punch it down to release the air. Transfer the dough to a lightly floured work surface. Pat it out into a flat rectangle with your hands. Sprinkle about 1 tablespoon of the cinnamon-sugar mixture evenly over the dough, followed by 1/3 of the dried currants or raisins. For those unfamiliar, dried currants (often labeled “Zante currants” in the US) are simply small, dried grapes, much like tiny raisins. Real currants are small berries, but the dried variety commonly used in baking here are very similar to raisins, just smaller and often more tart.
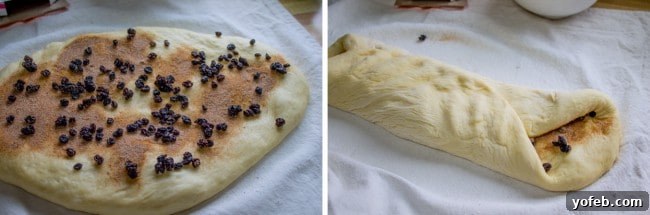
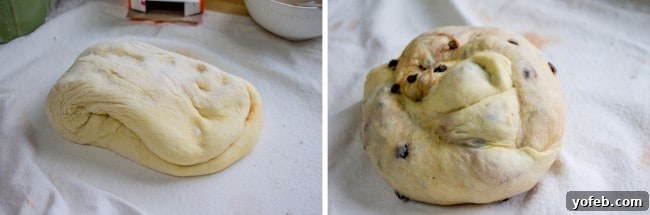
Fold the dough over itself, then pat it out again. Repeat this process two more times, distributing the remaining spice mixture and currants in two equal portions. This folding technique ensures that the currants and spices are evenly incorporated throughout the dough, guaranteeing every bite is flavorful and fruity.
5. Shaping the Buns and Second Rise
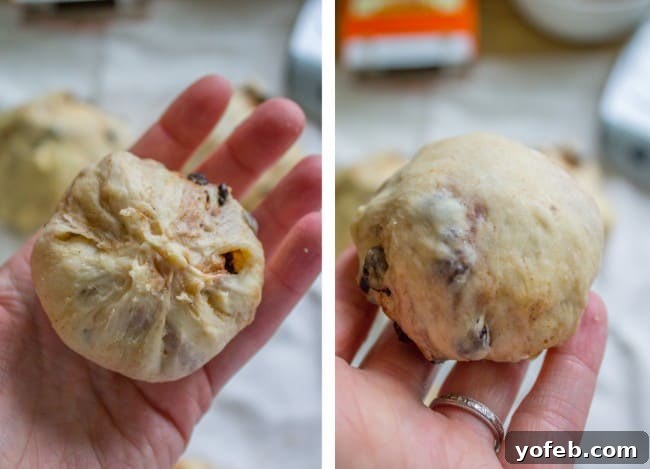
Line a large baking sheet with parchment paper or a silicone baking mat (like a Silpat). Divide the dough into 12 equal pieces. For each piece, gently pull the edges of the dough towards the bottom and pinch them together to form a smooth, taut ball. Place each shaped bun onto the prepared baking sheet, pinched side down. Arrange them with a little space in between, as they will expand. Cover the baking sheet with a tea towel and let the shaped buns rise again for about 30-45 minutes, or until visibly doubled in size and puffy.
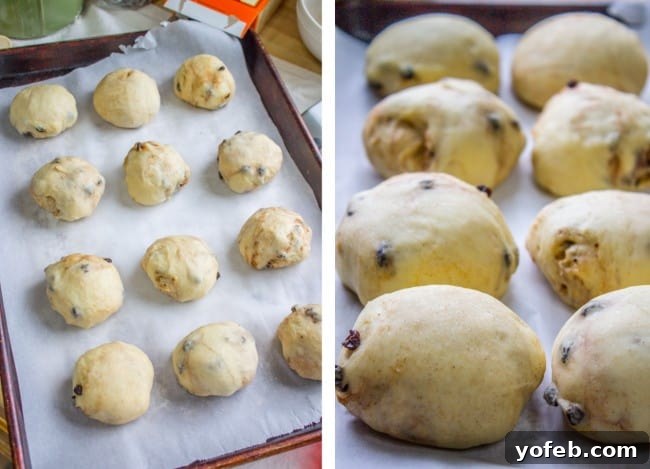
6. The Golden Egg Wash and Baking
Preheat your oven to 400°F (200°C) during the last 15 minutes of the second rise. In a small bowl, whisk together the egg yolk (reserving the egg white for the icing) with 1 tablespoon of water. This egg wash is crucial for achieving that beautiful, glossy, golden-brown exterior on your buns. Generously brush the tops and sides of each risen bun with the egg wash. If you have any leftover, give them a second coat for extra shine.
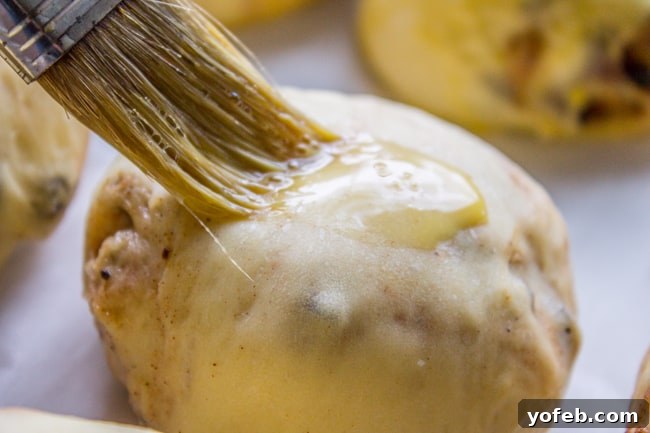
Bake the buns for approximately 19-20 minutes, or until the tops are a deep golden brown and the bottoms also show good color. The internal temperature should reach about 200-205°F (93-96°C) if you’re using a thermometer. Transfer the baked buns to a wire cooling rack immediately and allow them to cool completely before applying the frosting. While they are called “Hot Cross Buns,” applying icing to warm buns will just cause it to melt!
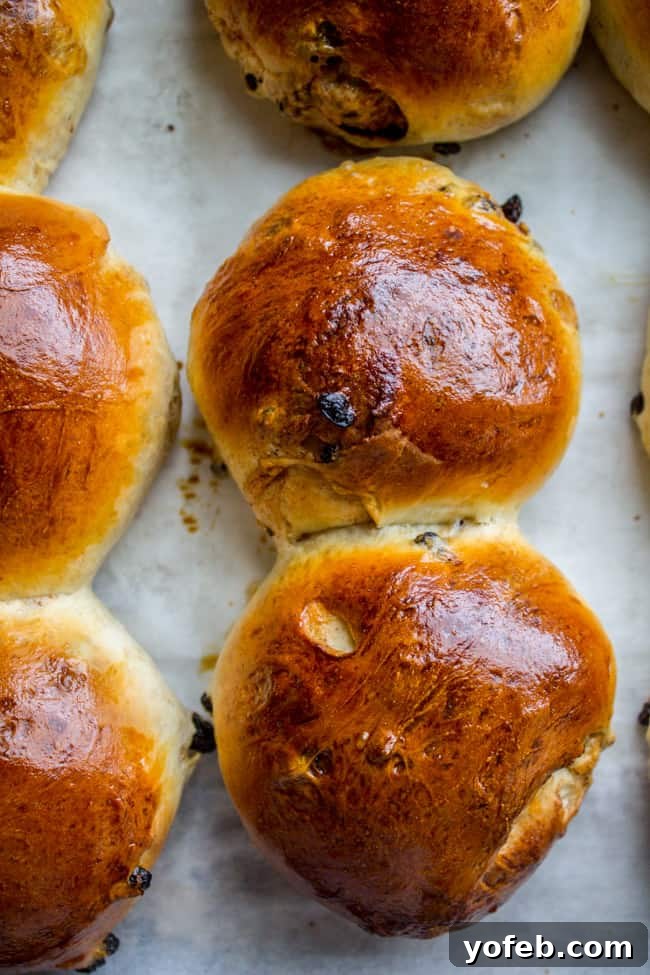
7. Crafting the Signature Cross Icing
While the buns cool, prepare the icing. In a clean stand mixer bowl (or a large bowl with a hand mixer), beat the reserved egg white until slightly frothy. Gradually add the powdered sugar, about 1/2 cup at a time, beating well after each addition until smooth. Mix in the vanilla extract, and then add milk a tablespoon at a time until you reach a thick, pipeable consistency. The icing should be firm enough to hold its shape but still flow smoothly. If it’s too thin, add more powdered sugar; if it’s too thick, add a few drops more milk. Beat on high for a minute or two at the end to make it extra glossy.
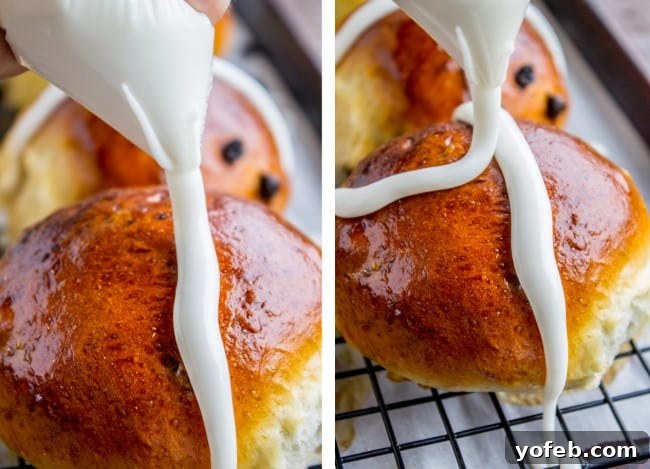
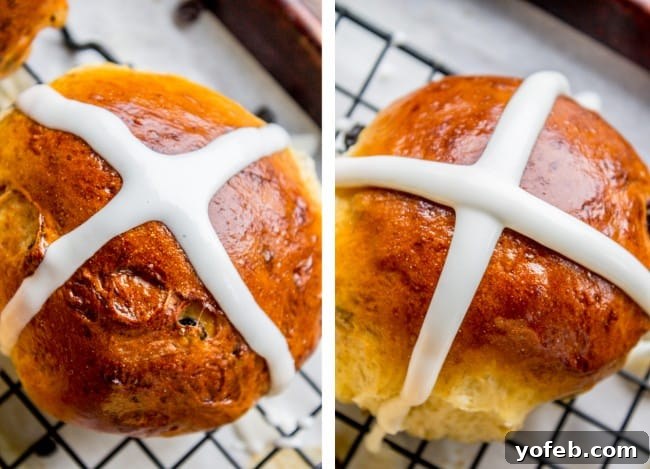
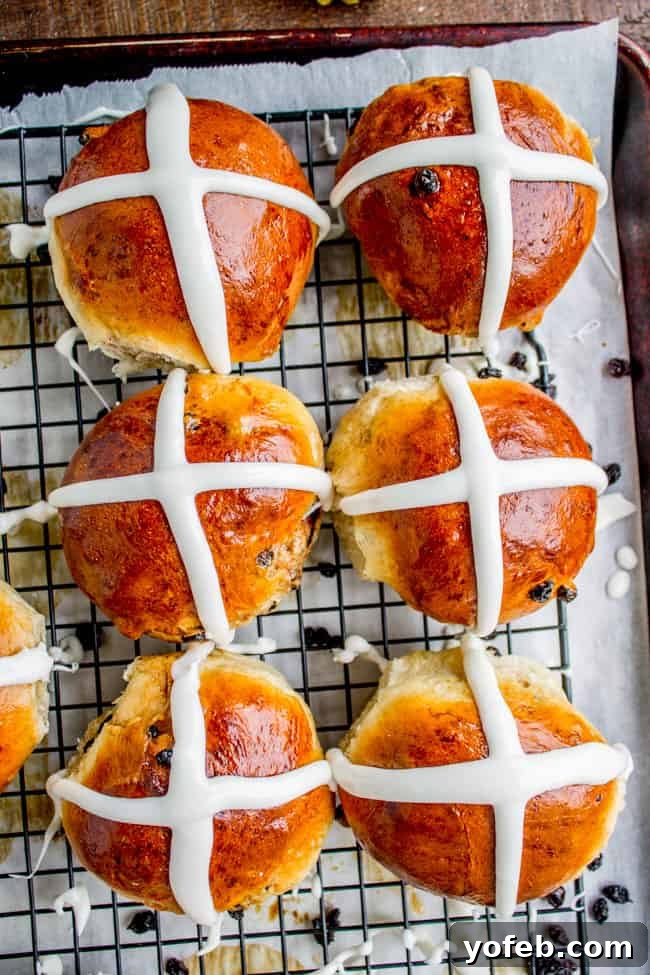
Transfer the frosting to a piping bag fitted with a small round tip, or simply use a strong zip-top bag with one corner snipped off. Pipe a cross onto the top of each cooled bun. Let the icing set slightly before serving. If you prefer to avoid raw egg white, you can make the icing with just powdered sugar, vanilla, and milk, omitting the egg white entirely.
Tips for Hot Cross Bun Success
Achieving the perfect Hot Cross Buns is simpler than you might think, especially with a few helpful tips:
- Check Your Yeast: Always ensure your active dry yeast is fresh. If it doesn’t foam up with warm water and sugar, it’s likely dead, and your dough won’t rise. Start with new yeast to save yourself disappointment.
- Dough Consistency: The dough should be soft, elastic, and slightly sticky. Avoid adding too much flour, as this will result in dry, dense buns. A little stickiness means tenderness!
- Warm Rising Environment: Yeast loves warmth. A draft-free, warm spot (like a slightly warmed-and-then-turned-off oven) is ideal for consistent rising.
- Don’t Skip the Egg Wash: The egg wash not only gives the buns a beautiful golden color but also a lovely sheen that makes them look professionally baked.
- Cool Completely Before Icing: Resist the urge to ice warm buns! The heat will melt the delicate cross, turning it into a sugary puddle. Patience is key for that iconic look.
- Icing Consistency is Key: For a neat and defined cross, your icing should be thick enough to hold its shape. If it’s too runny, add more powdered sugar. If it’s too stiff, a tiny drop of milk will loosen it.
- Use Good Quality Spices: Fresh, aromatic spices will make a significant difference in the flavor of your buns. Ground spices lose potency over time, so check their freshness.
Creative Variations for Your Hot Cross Buns
While the classic Hot Cross Bun recipe is perfect as is, you can easily customize them to suit your taste or experiment with new flavors:
- Alternative Dried Fruits: Instead of currants, try golden raisins, chopped dried cranberries, or a mix of candied citrus peel for different textures and flavors.
- Enhanced Spice Blend: Amp up the ginger, add a pinch of ground cloves, or increase the cardamom for a bolder spice profile.
- Citrus Zest: Incorporate the zest of an orange or lemon into the dough for a bright, fragrant lift that complements the spices beautifully.
- Chocolate Chips: For a modern twist, fold in some mini chocolate chips along with (or instead of) the dried fruit.
- Maple Glaze: Instead of the traditional white icing cross, you could opt for a simple maple syrup glaze brushed over the warm buns for a different kind of sweetness.
- Nutty Addition: Add finely chopped pecans or walnuts for an extra crunch and nutty flavor dimension.
Serving Suggestions for Your Homemade Hot Cross Buns
These delightful Hot Cross Buns are versatile and can be enjoyed in many ways. While fantastic on their own, especially when gently warmed, they also pair wonderfully with a variety of beverages and breakfast or brunch dishes:
- Classic Pairings: Serve them with a steaming cup of coffee or tea for a traditional treat. Children (and adults!) will also love them alongside a cold glass of milk or a mug of rich hot chocolate.
- Breakfast Spread: Elevate your Easter breakfast or brunch by pairing these sweet rolls with savory dishes. Here are some of my favorite accompaniments:
- Easy Quiche Recipe with Bacon and Spinach: A rich and savory quiche provides a wonderful counterpoint to the sweetness of the buns.
- Cheesy Hashbrown Breakfast Casserole with Ham: A hearty and satisfying casserole that’s perfect for feeding a crowd during the holidays.
- Chile Rellenos Casserole: For those who enjoy a little kick, this cheesy, eggy casserole offers a delightful flavor contrast.
- Freshness and Fruit: Don’t forget to add some fresh elements to your meal:
- Best Fruit Salad: A vibrant fruit salad is always a welcome addition, offering freshness and a light, healthy balance.
- Green Orange Julius Smoothie: A refreshing and healthy smoothie that’s sweet, citrusy, and packed with goodness.
- Crispy Bacon: No breakfast is complete without bacon!
- Bake Bacon in the Oven in 10 Minutes: The easiest way to get perfectly crispy bacon with minimal mess.
- Storage: Store leftover Hot Cross Buns in an airtight container at room temperature for up to 3 days, or freeze for longer storage. Reheat gently in the microwave or oven for that fresh-baked taste.
Explore More Delicious Carb-Loaded Recipes
If you’re a fan of these soft, sweet Hot Cross Buns, you’ll love exploring other delightful baked goods and rolls. There’s a whole world of comforting carbs to discover!
- Easter Bunny Dinner Rolls: These adorable, soft dinner rolls are shaped like little bunnies and are perfect for adding a touch of whimsy to your holiday table.
- One Hour Honey Almond Crunch Rolls: A truly unique and satisfying experience, these rolls offer a delightful crunch and sweet honey-almond flavor, reminiscent of your favorite breakfast cereal.
- The Fastest (No Yeast) Cinnamon Rolls Ever!: Craving warm cinnamon rolls but short on time? This recipe delivers deliciousness in about an hour, without the need for yeast!
And for those who believe there’s always room for a little extra indulgence, I won’t judge if you decide to split your Hot Cross Buns and slather them with this incredible Cinnamon Honey Butter. It’s a match made in heaven!
Looking for other Hot Cross Bun inspired recipes from around the web?
- Whole Wheat Hot Cross Buns from Bless This Mess
- Hot Cross Cinnamon Buns from All Roads Lead to The Kitchen (Don’t miss this fascinating article on the history of Hot Cross Buns linked in their post!)
If you’re looking for even more inspiration for your holiday feast, be sure to check out all my Easter-themed recipes here on the blog. You can also find a curated collection of ideas on my Easter Pinterest board!
Facebook | Pinterest | Instagram

Hot Cross Buns Recipe
Ingredients
- 3/4 cup warm water
- 1 tablespoon active dry yeast
- 1/4 cup sugar
- 2 tablespoons dry instant milk
- 1 teaspoon salt
- 1/4 cup butter, mostly melted (half stick)
- 2 large eggs
- 3 & 1/2 cups flour, or more
- 3 tablespoons sugar
- 1 teaspoon cinnamon
- 1/4 teaspoon allspice, optional
- 1/4 teaspoon nutmeg, optional
- 1/4 teaspoon cardamom, optional
- 3/4 cup dried currents
- 1 egg, divided (reserve both yolk and white)
- 1 tablespoon water
- 2 & 1/2 to 3/4 cups powdered sugar
- 1/2 teaspoon vanilla
- 1 tablespoon milk, or more
Instructions
-
Add warm water to a large bowl or stand mixer. (You want it to be warm but not hot, just like nice bathwater.)
-
Sprinkle with 1 tablespoon yeast and 1/4 cup sugar. Stir together and wait 5 minutes to make sure it’s looking bubbly. (This ensures your yeast is active and alive!)
-
Add dry milk powder and salt to the yeast mixture.
-
In a small bowl, melt the butter most of the way, leaving a few lumps. Add the butter to the wet ingredients.
-
Add the 2 eggs to the mixture.
-
Add the flour 1 cup at a time. If using a mixer, switch to the dough hook attachment as the dough comes together.
-
Continue kneading and adding flour gradually until the dough is workable, soft, and elastic, but still a little sticky. Knead with the dough hook or by hand for 7-8 minutes until it is smooth and springs back when touched.
-
Spray a large bowl with nonstick spray. Form the bread dough into a ball and place it in the bowl, turning it to ensure all sides are lightly coated with oil. Cover with a tea towel or plastic wrap and let rise in a warm, draft-free place until doubled in size, typically 1-2 hours. A good tip is to briefly warm your oven and then turn it off, allowing the dough to rise inside.
-
In a small bowl, combine 3 tablespoons sugar, cinnamon, allspice, and the optional nutmeg and cardamom for your spice mixture.
-
Once the dough has risen, gently punch it down. On a lightly floured work surface, pat out the dough into a rectangular shape. Sprinkle about 1 tablespoon of the cinnamon mixture over the dough, then scatter 1/3 of the dried currants or raisins on top.
-
Fold the dough in on itself (refer to the photos above for visual guidance if needed), then pat out the dough again.
-
Repeat this folding and sprinkling process 2 more times with the remaining spice mixture and currants, ensuring they are evenly distributed throughout the dough.
-
Line a large baking sheet with a Silpat baking mat or parchment paper.
-
Divide the dough into 12 equal pieces. Use your fingers to gently pinch and roll each piece into a smooth, round ball. Place these shaped buns on the prepared baking sheet, pinched side down.
-
Cover the shaped dough again and let it rise for a second time, for about 30-45 minutes, or until the buns have visibly doubled in size and are puffy.
-
Preheat the oven to 400 degrees F (200°C) during the last 15 minutes of the second rise.
-
In a small bowl, add the egg yolk (set aside the egg white in a clean stand mixer bowl or large bowl for the icing).
-
Add 1 tablespoon water to the egg yolk and whisk together thoroughly to create the egg wash.
-
Use a pastry brush to generously coat the top and sides of all the risen rolls with the egg wash. If there’s leftover egg wash, apply a second coat for an even richer brown and shine.
-
Bake at 400 degrees F (200°C) for approximately 19-20 minutes, or until the tops are a beautiful deep golden brown and the bottoms are also browned.
-
Carefully remove the buns from the oven and transfer them to a cooling rack. Allow them to cool completely before applying the icing. (I know, it’s hard to wait for “HOT” Cross Buns, but the icing will melt if applied too soon!)
-
To make the icing: Using a mixer, beat the reserved egg white until it’s slightly frothy. Gradually add the powdered sugar, about 1/2 cup at a time, beating well after each addition. Mix in the vanilla. Add milk one tablespoon at a time as needed to reach a thick, pipeable consistency that holds its shape. Once all the powdered sugar is incorporated, beat on high for a minute or two to achieve a nice glossy finish. Test the frosting on a plate to ensure it holds its shape (refer to photos above for desired consistency). If it spreads, add a little more powdered sugar.
-
Transfer the finished frosting to a piping bag with a small round tip, or simply use a sturdy zip-top bag with a small corner snipped off. (The frosting will be thick, so a ladle can help fill the bag.)
-
Pipe a cross onto the top of each cooled bun, then serve and devour!
Notes
Source: This recipe is an adaptation and combination of an Allrecipes.com recipe and The Pioneer Woman’s recipe.