
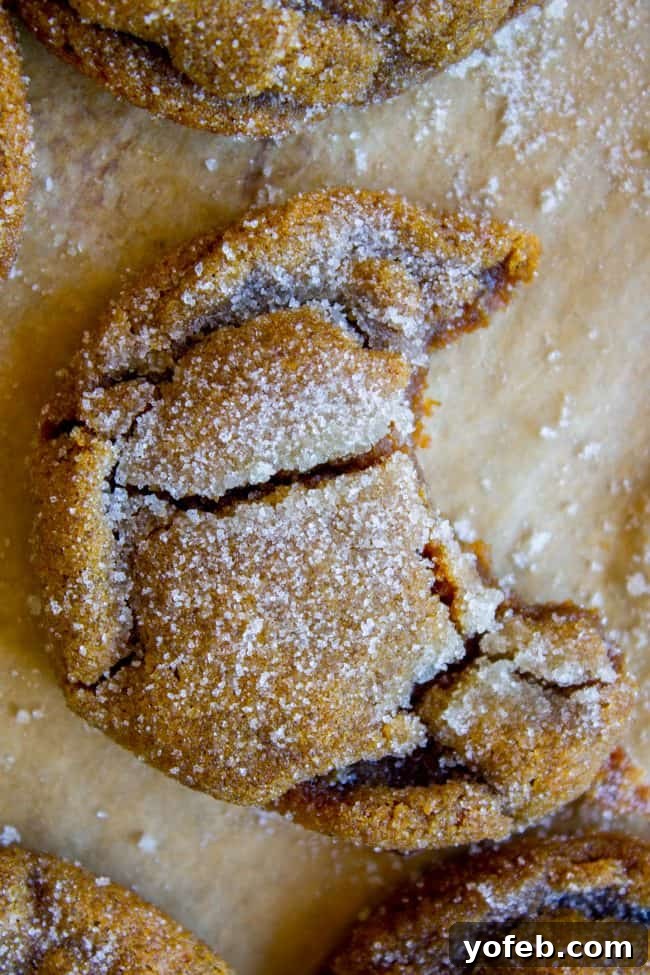
Irresistible Soft and Chewy Molasses Cookies: Your Ultimate Guide to Holiday Baking
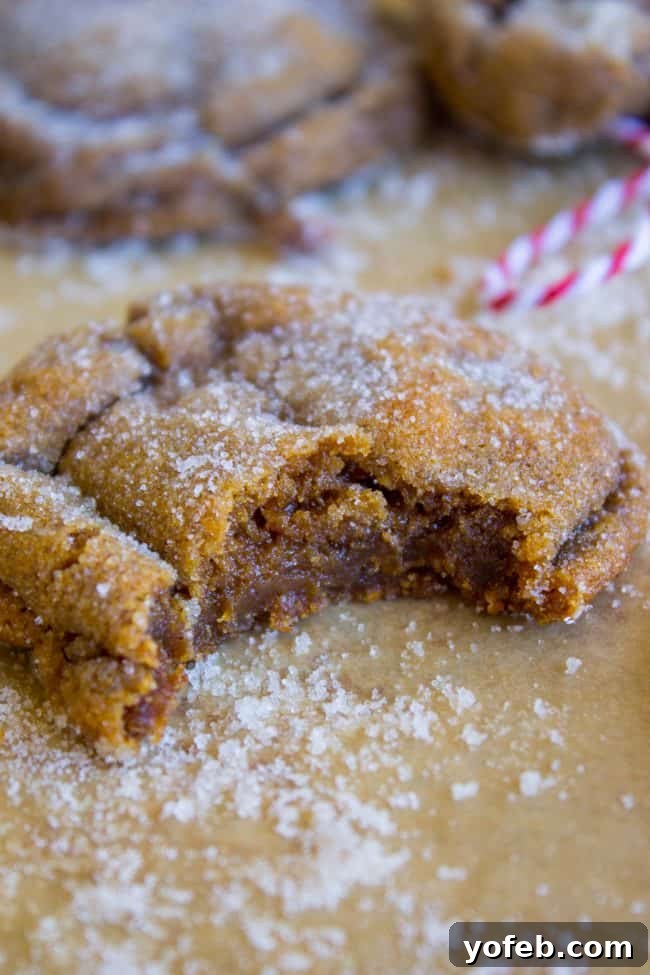
There’s a special kind of magic that happens when the aroma of cinnamon, ginger, and cloves fills your kitchen. For many, that scent is synonymous with the holidays, and at its heart lies the beloved molasses cookie. Soft, chewy, and bursting with warm spices, these cookies are more than just a treat; they’re a comforting embrace, a nostalgic journey, and a testament to the simple joys of homemade baking. I could honestly enjoy these perfectly spicy, tender, and flavorful delights every single day and never tire of them. They truly are a Christmas cookie dream come true! And if you’re looking to elevate them even further, they’re the perfect base for these incredible Ginger Molasses Sandwich Cookies.
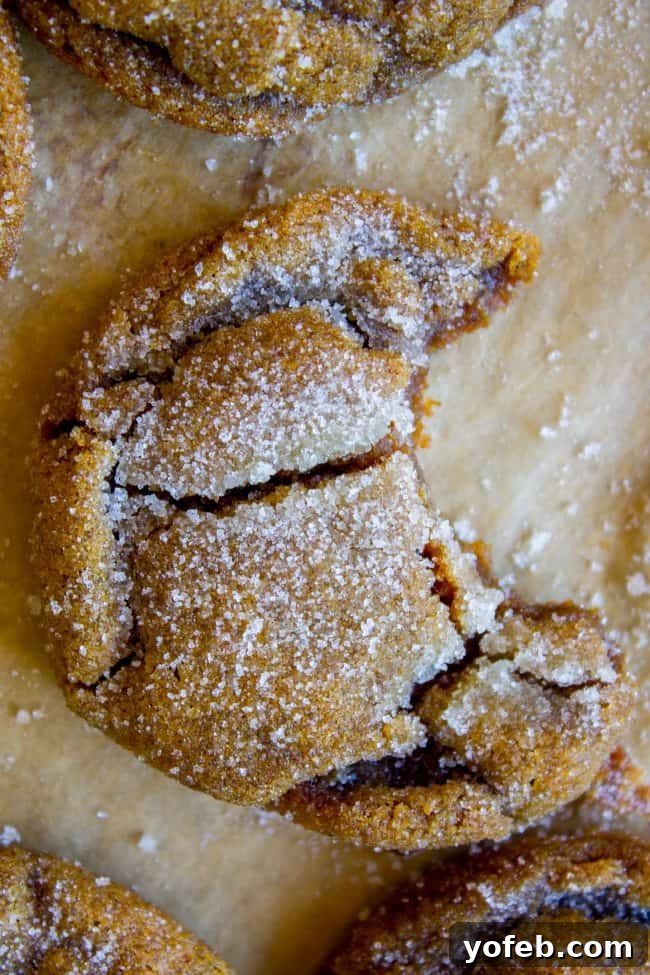
Table of Contents
- The Sweet Escape of Homemade Cookies (Personal Story)
- Unveiling My Go-To Molasses Ginger Cookie Recipe
- Molasses Cookies vs. Gingersnaps: A Flavorful Face-Off
- Essential Ingredients for Perfect Ginger Molasses Cookies
- Crafting Your Chewy Molasses Masterpiece: Step-by-Step Guide
- Storing Your Molasses Cookies for Lasting Freshness
- Your Top Molasses Cookie Questions Answered (FAQ)
- Explore More Irresistible Cookie Recipes!
- Chewy Molasses Ginger Cookies Recipe
The Sweet Escape of Homemade Cookies (Personal Story)
Life as a parent often feels like a constant race against the clock. Just this morning, I had a bit of a “parenting revelation” – my kids no longer wait for my frantic “WE’RE LATE, RUN!!” shout when they spill out of the car at school drop-off. Instead, they hit the ground sprinting, a blur of backpacks and youthful energy, treating the dash to class as if it’s the most natural part of their morning routine. And, for them, it truly is, because punctuality for early school drop-off seems to be a skill I’ve yet to master.
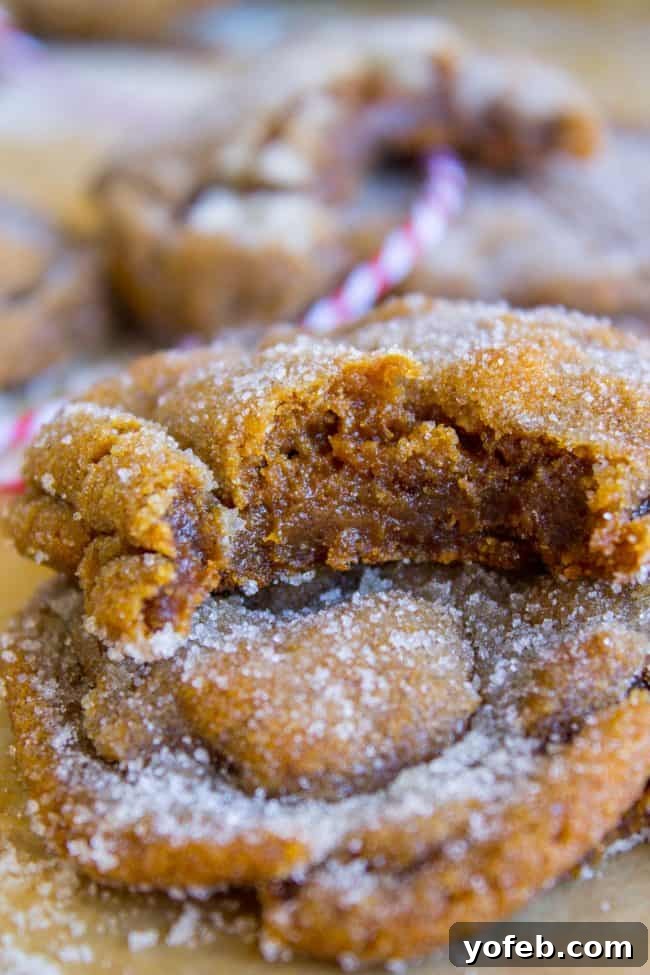
My friend Emily from One Lovely Life recently sparked a conversation on Instagram, asking what parents truly excel at. While I may fall short on punctuality, struggle with elaborate hairstyles for my girls, and sometimes miss the fashion memo (plaids and florals together? Oops!), I do pride myself on one thing: ensuring there are always freshly baked cookies waiting. We all have our unique talents, don’t we? What’s your parenting superpower?

And there you have it, proof! My kids are alive, clothed (mostly coordinated!), and undeniably happy – likely due to a steady supply of cookies. What more could a parent possibly ask for?
Unveiling My Go-To Molasses Ginger Cookie Recipe
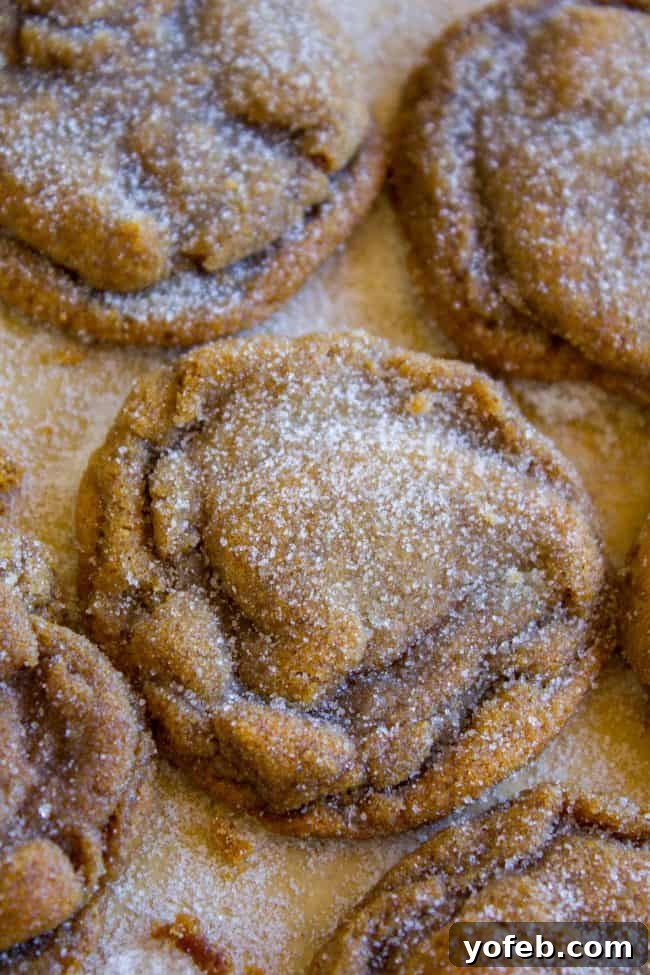
Today, I’m thrilled to share a recipe for soft and chewy ginger molasses cookies that comes straight from my brother-in-law, Spencer. His family affectionately calls them “molasses crinkles,” but I have a slightly different take on the nomenclature. In my baking lexicon, true crinkle cookies are defined by their delightful roll in powdered sugar, creating those distinctive, crackled snowy tops (like the classic chocolate crinkle cookies, which I’ll be sharing a recipe for later this month!). Molasses cookies, however, are traditionally rolled in granulated sugar before baking, which gives them that exquisite, perfectly sugary CRUNCH when you take that first glorious bite. So, molasses cookies it is!
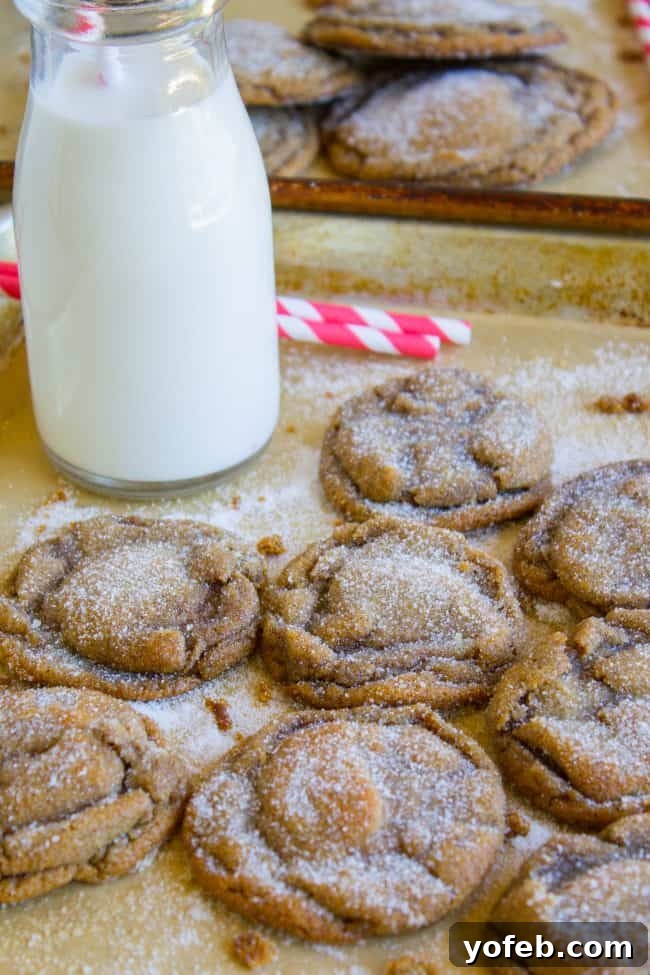
While countless recipes for molasses cookies exist, and many share similarities (I even posted a recipe for Soft Ginger Cookies way back in 2012 that’s quite comparable), I can confidently say that today’s recipe has earned its place as my new permanent go-to. Its unique balance of spices, perfectly soft texture, and that signature sugary exterior make it simply unbeatable.
Featured Comment
“Omg omg omg. These cookies were easy to make and absolutely to die for.” – Nathan
See All Comments
Molasses Cookies vs. Gingersnaps: A Flavorful Face-Off
As I delved into the intricacies of this recipe and explored similar ones, I realized just how closely these molasses cookies resemble Gramma Prudy’s Classic Gingersnaps—a legendary cookie in my husband Eric’s family. While they might seem almost identical at first glance, the subtle differences in their composition lead to distinctly different textures and characteristics.
The key distinctions lie in a few core ingredients and, crucially, the baking method. Gingersnaps often rely on butter, which contributes to a crisper, flatter cookie, along with white sugar for that characteristic snap. These molasses cookies, however, utilize shortening for a softer, puffier texture, and brown sugar for added moisture and depth of flavor. Furthermore, the amount of baking soda can vary, playing a significant role in the rise and spread of the cookie. And of course, bake time is paramount: gingersnaps are baked longer for their signature crispness, while molasses cookies require a shorter bake to maintain their desirable chewiness. Understanding these nuances helps us appreciate what makes each cookie unique and equally delicious in its own right.
Essential Ingredients for Perfect Ginger Molasses Cookies
Gathering your ingredients is the first step towards baking success! Below is a quick shopping list to help you prepare. For detailed measurements and step-by-step instructions, simply jump to the full recipe card at the bottom of this page.
- Butter-flavored Crisco (for superior softness and puff)
- Brown sugar (dark brown is best for chewiness and rich flavor)
- Egg (for binding and moisture)
- Molasses (the star ingredient, providing deep, complex flavor)
- All-purpose flour (the structural base of the cookie)
- Kosher salt (to balance the sweetness and enhance flavors)
- Baking soda (critical for achieving that signature crackle and puff)
- Powdered cinnamon (a classic warming spice)
- Powdered ginger (the essential spicy kick)
- Powdered cloves (for aromatic depth)
- Granulated sugar (for rolling, creating that irresistible sugary crust)
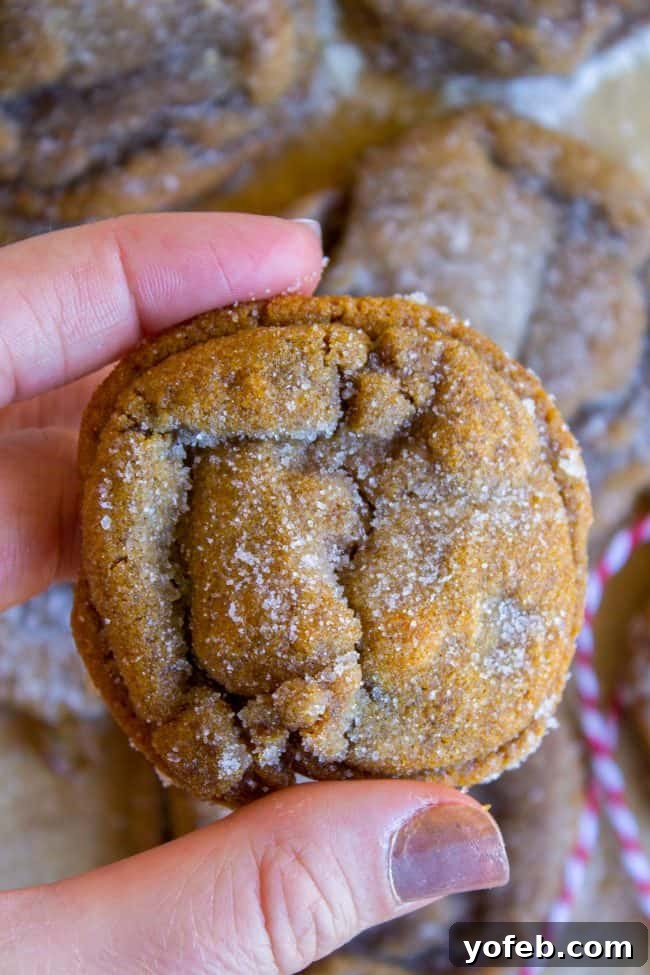
Crafting Your Chewy Molasses Masterpiece: Step-by-Step Guide
Today’s tried-and-true recipe for molasses cookies specifically calls for butter-flavored shortening and no butter. Now, hold on a moment, all you butter enthusiasts! Before you grab your pitchforks, let me explain. While I am a firm believer that butter generally enhances flavor in baking, there are two compelling reasons why shortening is the secret weapon for these particular cookies:
- **Flavor Profile:** These cookies are already packed with intense, warming spices like ginger and cinnamon. The robust spice blend plays such a dominant role that the subtle nuances of butter flavor aren’t as crucial as they might be in, say, a delicate shortbread or a classic chocolate chip cookie.
- **The Perfect Puff:** We are aiming for wonderfully puffed, tall cookies with a dreamily thick, soft center. Shortening is unparalleled in its ability to achieve this effortless rise. It has a higher melting point than butter and contains no water, which means it helps the dough hold its structure longer in the oven, resulting in taller, softer cookies that maintain their shape beautifully. It’s a fail-proof method for achieving that coveted texture!
That said, if you absolutely prefer butter or a half-butter, half-shortening blend, feel free to make the swap! Your cookies will still be delicious. However, they will likely bake up a bit flatter and crisper, leaning more towards a gingersnap texture. But if your goal is that classic, tall, puffy, and impossibly soft molasses cookie with a thick, chewy center, sticking to shortening as written in this recipe is your golden ticket. Now, let’s get baking!
These incredibly soft, gingery molasses cookies are surprisingly simple to make, requiring just about 15 minutes of active prep time. Here’s how to achieve perfection:
- **Creaming the Fats & Sugar:** Begin by combining the shortening and brown sugar in a large bowl or stand mixer. Beat them together until the mixture is light, fluffy, and smooth—about 1 to 2 minutes. Don’t forget to scrape down the sides and bottom of your bowl to ensure everything is thoroughly mixed.
- **Adding Wet Ingredients:** Next, beat in the egg and molasses until fully incorporated. Molasses is key here, contributing both moisture and that distinctive, deep, spiced flavor.
- **Incorporating Dry Ingredients:** In a separate bowl, whisk together your all-purpose flour (spooned and leveled to prevent over-measurement), kosher salt, baking soda, and all those wonderful spices: cinnamon, ginger, and cloves. Then, gently add the dry mixture to the wet ingredients. Mix until just barely combined. Overmixing will develop the gluten in the flour, leading to tough cookies, so mix just until no streaks of flour remain.
- **Crucial Chill Time:** Cover your dough and refrigerate it for 2-3 hours, or until it is completely cold. This step is non-negotiable! Chilling the dough solidifies the fat, preventing the cookies from spreading too much in the oven and ensuring they maintain their thick, chewy texture. It also allows the flavors to meld beautifully.
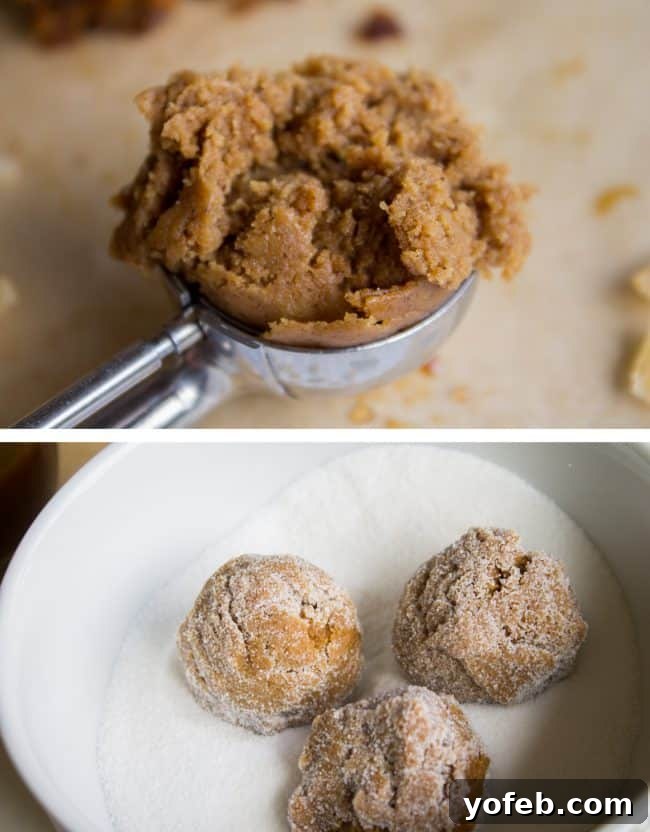
- **Baking to Perfection:** Once chilled, preheat your oven to 350°F (175°C) and line baking sheets with silicone baking mats or parchment paper. Roll walnut-sized balls of dough (about 1.5 inches across) in granulated sugar, ensuring they’re fully coated for that perfect crunchy exterior. Place them on the prepared baking sheets, leaving about 2 inches of space between each.
- **The Magic Moment:** Bake for a precise 8-9 minutes. The trick is to watch for the moment the tops begin to crack—that’s your cue! As soon as you see those cracks forming, remove them from the oven. Baking them even a minute too long will cause them to flatten as they cool, sacrificing that desired soft chewiness. Every oven is different, so trust your eyes!
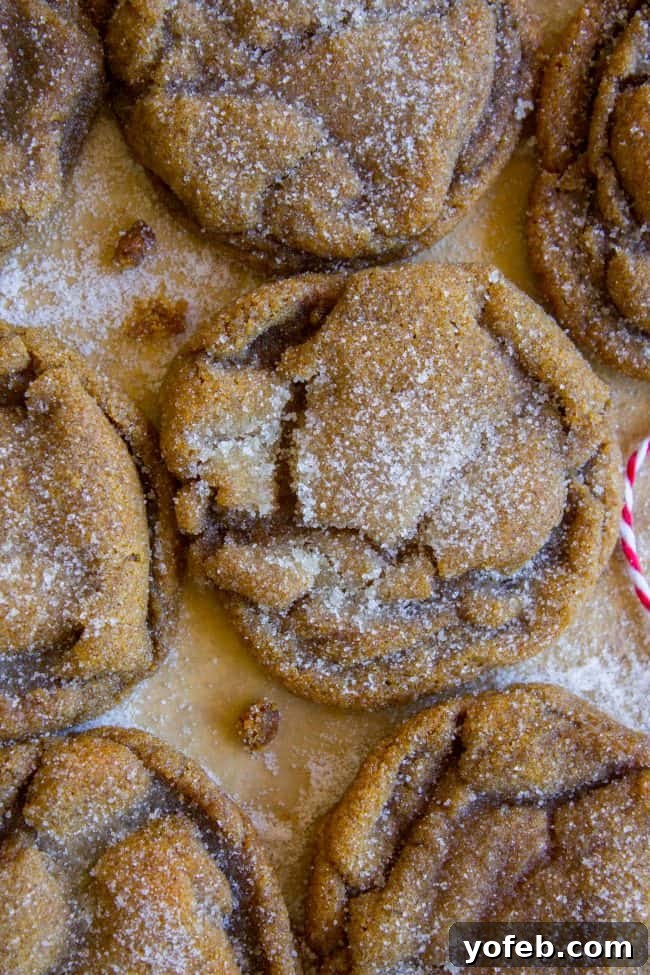
These cookies are not just delicious on their own; they’re also the perfect foundation for an even more decadent treat! I’m so excited because this recipe is the first half of another spectacular Christmas cookie creation coming your way soon. It involves these amazing cookies paired with luscious BUTTERCREAM FROSTING, resulting in what I consider my favorite Christmas cookie of all time. I’ve finally perfected them, and truly, it’s the most wonderful time of the year for baking enthusiasts! Update: The wait is over! Here is the recipe for Ginger Molasses Sandwich Cookies with Buttercream Frosting. They take these incredible cookies to a whole new level of deliciousness, trust me!
Storing Your Molasses Cookies for Lasting Freshness
Found yourself with leftover molasses cookies? Consider yourself incredibly lucky! These delectable treats are fantastic for meal prepping or simply ensuring you always have a sweet indulgence on hand. Proper storage is key to maintaining their delightful soft and chewy texture.
- **Countertop Storage:** For short-term enjoyment, store baked molasses cookies in an airtight container at room temperature for up to a week. In my house, they rarely last that long, but technically, they’ll maintain their freshness and texture beautifully.
- **Refrigerator Storage:** If you need to extend their life a bit further, transfer them to the refrigerator in a sealed container. They’ll stay fresh and chewy for up to two weeks. Just be sure to bring them to room temperature before serving for the best experience.
-
**Freezing for Long-Term Enjoyment:** For savvy long-term cookie planning (a truly brilliant move, might I add!), the freezer is your best friend. Molasses cookies freeze *exceptionally well* for up to 3 months, making them perfect for holiday baking in advance or just stocking up for future cravings.
- **To freeze baked cookies:** Allow them to cool completely to prevent condensation and ice crystals. Then, place them in a freezer-safe bag or airtight container, squeezing out as much air as possible to prevent freezer burn.
- **To freeze cookie dough:** This is a fantastic option for fresh-baked cookies on demand! Roll the dough into individual balls, coating them in granulated sugar now (don’t wait until later!). Arrange them on a baking sheet, making sure they don’t touch, and freeze until solid. Once frozen, transfer the solid dough balls to a freezer-safe bag. You can bake them straight from frozen – just add an extra minute or two to the baking time specified in the recipe.
When you’re ready to enjoy your frozen cookies, you have a few options. You can let them thaw overnight in the refrigerator, or simply leave them on the counter for a couple of hours. For that irresistible fresh-out-of-the-oven warmth, give them a quick few seconds in the microwave or warm them gently in a low oven for a few minutes. Enjoy!
Your Top Molasses Cookie Questions Answered (FAQ)
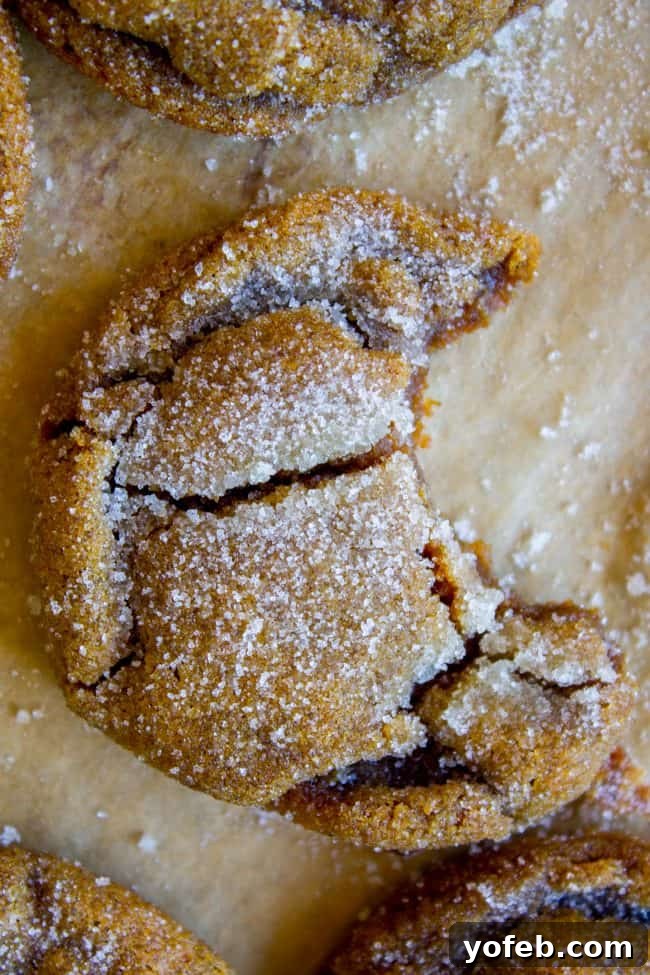
The signature cracked top is one of the most charming characteristics of a perfect molasses cookie. If yours aren’t cracking, here are a few common culprits and how to fix them:
- Insufficient Oven Temperature: Ensure your oven is fully preheated before placing the cookies inside. A hot oven is crucial for the cookies to rise rapidly, then gently deflate and crack as they bake. If the oven isn’t hot enough, they’ll spread slowly without the dramatic rise and fall needed for cracking.
- Expired Baking Soda: Baking soda is a key leavening agent that helps the dough rise quickly. This quick rise, followed by a slight settling, creates the beloved crackled surface. If your baking soda is old (generally past six months, or if you can’t recall its purchase date), it loses its potency. A quick test: mix a teaspoon of baking soda with a tablespoon of vinegar; if it fizzes vigorously, it’s still good!
- Forgetting to Roll in Sugar: This is a simple but critical step. The granulated sugar coating on the surface of the cookie crystallizes in the hot oven. This sugary crust sets faster than the interior of the cookie, and as the cookie expands underneath, the surface cracks beautifully, creating that iconic look and an irresistible textural contrast.
Flat cookies can be disheartening, especially when you’re aiming for that perfectly puffy, chewy center. Here’s how to ensure your molasses cookies maintain their delightful thickness:
- Fresh Baking Soda: Just like with cracking, fresh baking soda is paramount for structural integrity. It provides the lift needed to keep the cookies from spreading too much. Always check the expiration date and replace old baking soda.
- Adequate Dough Chilling: This step cannot be emphasized enough! The dough absolutely needs to chill in the refrigerator for at least 2-3 hours, or until it’s firm and completely cold. Chilling solidifies the shortening, which slows down the spread of the cookies in the oven. If the dough isn’t cold enough, the fat will melt too quickly, causing the cookies to spread excessively and flatten.
- Cool Baking Sheets: Always use cool baking sheets. Placing cookie dough on a warm baking sheet will cause the fat to melt immediately, leading to premature spreading. If you’re baking in batches, it’s a good idea to have two baking sheets so one can cool completely while the other is in the oven. If you only have one, simply cool it down for a couple of minutes and then run it under cold water before patting it dry and reusing.
If, despite your best efforts, a few cookies still spread a bit too much, don’t despair! Immediately after pulling them from the oven while they are still hot and pliable, use the back of a butter knife or two spoons to gently nudge and push the edges back in towards the center. This quick trick can help reshape them into perfectly round, thicker cookies.
Choosing the right type of molasses can significantly impact the flavor and texture of your cookies:
- Light Molasses: This is the most common type found in grocery stores and is what I typically use. It provides a lovely, mild molasses flavor that is sweet and complex without being overwhelming. It’s an excellent choice for a well-balanced cookie.
- Dark Molasses: If you are a true molasses aficionado and desire a more robust, pronounced molasses flavor, dark molasses is a fantastic option. It has a richer, deeper taste, and will give your cookies a more intense spice profile.
- Blackstrap Molasses: This is the one you absolutely want to avoid for cookies! Blackstrap molasses is the darkest and most concentrated form of molasses, a byproduct of the third boiling of sugar syrup. It has a very strong, often bitter and somewhat medicinal flavor that is overpowering and generally not suitable for sweet baked goods like cookies. Save blackstrap for savory applications or nutritional supplements.
The ultimate secret to achieving those wonderfully soft, tender, and perfectly chewy molasses cookies lies primarily in one key ingredient: **brown sugar!** And to be even more precise, **dark brown sugar** is the real star here.
Unlike granulated white sugar, which provides crispness and promotes spreading, brown sugar contains molasses. Dark brown sugar, in particular, boasts nearly twice the molasses content of light brown sugar. This higher molasses concentration brings several benefits to your cookie dough:
- **Increased Moisture:** The molasses in brown sugar adds extra moisture to the dough. This additional moisture keeps the cookies soft and pliable even after baking, preventing them from drying out and becoming crumbly or too crispy.
- **Richer Flavor:** The molasses itself contributes a deeper, more complex, and caramel-like flavor that beautifully complements the ginger and other spices.
- **Chewy Texture:** The hygroscopic nature of molasses (its ability to attract and retain water) is what directly contributes to that desirable chewy texture. It helps create a softer crumb that resists becoming hard.
While light brown sugar will work in a pinch, opting for dark brown sugar truly enhances both the flavor and the exceptionally soft, chewy texture that makes these molasses cookies so irresistible. It’s a simple swap that makes all the difference!
Explore More Irresistible Cookie Recipes!
If you’re anything like me, there’s simply no such thing as having too many cookie recipes in your repertoire. Once you’ve mastered these perfect molasses cookies, why not explore some other delightful options? From classic comfort to unique flavor combinations, there’s always a new cookie adventure waiting!
- The Only Oatmeal Chocolate Chip Cookie Recipe You’ll Ever Need>> Perfectly oaty yet melt-in-your-mouth soft and chewy, these are a true classic redefined.
- The Best Peanut Butter Cookies >> Your search for the ultimate peanut butter cookie ends here. Incredibly soft and bursting with rich peanut flavor.
- The BEST Cinnamon Roll Cookies >> A cinnamon-lover’s dream come true, these capture all the comfort of a cinnamon roll in cookie form.
- Chocolate Chunk Gingerbread Cookies >> Experience the amazing combination of warm ginger spice and rich chocolate chunks.
- Nutella Stuffed Gingerbread Cookies >> Because everything is better when it’s stuffed with creamy Nutella!
- Orange and Ginger Cookies with Chocolate Drizzle from A Family Feast >> A bright and zesty twist on classic ginger cookies.
- Chocolate Ginger Molasses Cookies from Well Plated >> For those who love the deep flavor of molasses with an added chocolatey kick.
- Gingerbread Cookie Rings from In Katrina’s Kitchen >> Fun and festive, perfect for holiday decorating.
Facebook | Pinterest | Instagram

Chewy Molasses Ginger Cookies
Save to Favorites
Rate this Recipe
Print Recipe
Ingredients
- 3/4 cup butter-flavored Crisco*, room temperature
- 1 cup brown sugar, packed
- 1 large egg
- 1/4 cup molasses
- 2 & 1/4 cups all purpose flour, spooned and leveled
- 1/2 teaspoon kosher salt
- 2 teaspoons baking soda
- 1 & 1/2 teaspoons powdered cinnamon
- 1 & 1/2 teaspoons powdered ginger
- 1/2 teaspoon powdered cloves
- 1/2 cup granulated sugar, for rolling
Instructions
-
In a large bowl or stand mixer, add 3/4 cup butter flavored Crisco and 1 cup brown sugar. Beat well until smooth, about 1 or 2 minutes. Scrape the sides and bottom of the bowl.
-
Add 1 egg and 1/4 cup molasses. Beat well, scraping sides, until fully incorporated.
-
Add 2 and 1/4 cups flour, but don’t stir yet. Make sure you spoon the flour into the measuring cup so that it doesn’t get packed.
-
On top of the flour, add 1/2 teaspoon salt, 2 teaspoons baking soda, 1 and 1/2 teaspoons cinnamon and ginger, and 1/2 teaspoon cloves. Use a small spoon to stir all the dry ingredients into the flour.
-
Beat well until just barely combined. Scrape the sides and bottom of the bowl and make sure that all the flour is incorporated, but do not over mix. (or you will get tough cookies.)
-
Cover the bowl and chill in the fridge for about 2-3 hours, until it is completely cold. Do not skip this step or you will get flat cookies!
-
Preheat the oven to 350 degrees F. Line baking sheets with silicone baking mats or parchment paper.
-
Add about a 1/2 cup sugar to a small bowl.
-
Shape the dough into walnut-sized balls, about 1 and 1/2 inches across. Roll the dough in the sugar to coat completely, then place on a lined baking sheet with about 2 inches of space between each one.
-
Bake at 350 for 8-9 minutes, just until the tops start to crack. As soon as you see cracks, take them out! Keep an eye on them, because every oven is different. If you let them bake too long, they will fall flat after you take them out of the oven.
-
Sprinkle with additional granulated sugar if you want, for extra sparkle.
-
Let cool on the pan for about 5 minutes, then transfer to a cooling rack. You have to eat at least one of these while they are warm, it’s mandatory.
Notes
How to store soft molasses cookies
Leftover molasses cookies? Lucky you. These cookies will stay soft and chewy in a covered container on the counter for up to a week. Now, if your house is anything like mine, they’ll be gone long before then, but technically, they’ll last. You can also store them in the fridge for up to two weeks.
If you’re thinking long-term cookie planning (a very smart move, by the way), use the freezer.. Molasses cookies freeze beautifully for up to 3 months. To freeze baked cookies, let them cool completely, then toss them in a freezer bag with as much air squeezed out as possible. You can also freeze the dough itself! Just roll it into balls, coat them in sugar (yes, do it now, not later), and line them up on a baking sheet so they don’t get stuck together. Once they’re solid, pop them into a freezer bag. You can bake straight from frozen by just adding an extra minute or two to the bake time.
When it’s time to enjoy your cookies, you can let your frozen cookies thaw overnight in the fridge, or you can just let them hang out on the counter for a couple of hours. If you want to bring back that fresh-out-of-the-oven taste, give them a few seconds in the microwave or warm them in a low oven for a couple of minutes.