
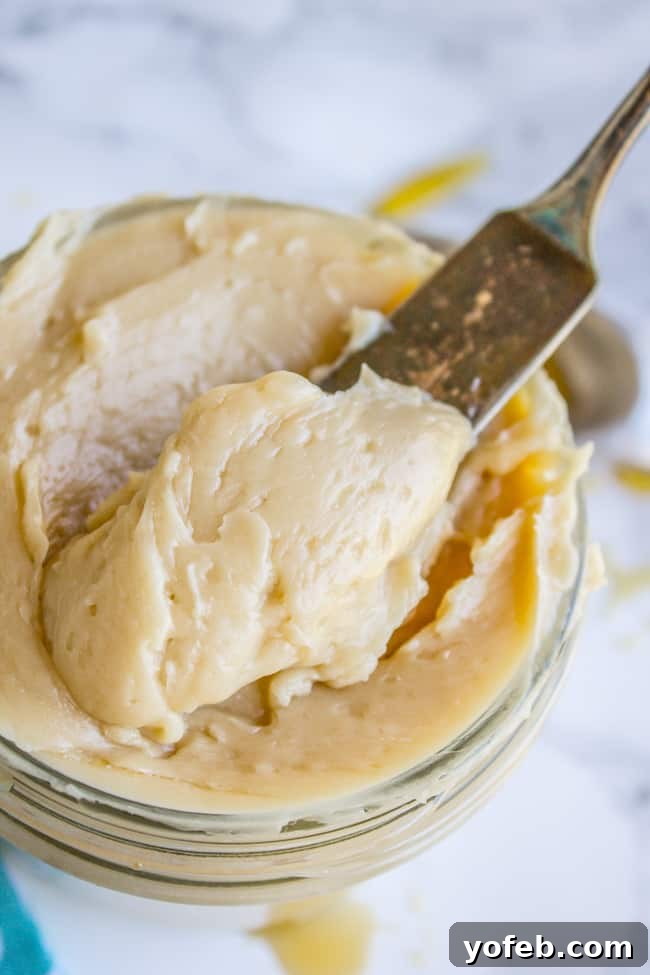
Unlock Sweet Perfection: Your Guide to Homemade 2-Minute Maple Butter
Transform your breakfast, brunch, and holiday spreads with an unbelievably simple yet incredibly decadent creation: Homemade Maple Butter. This luscious, creamy topping is destined to become your toast’s, pancake’s, or dinner roll’s new best friend. Forget complicated recipes and lengthy preparations; this delightful spread whips up in mere minutes, making it an ideal last-minute treat for your family or a thoughtful, impressive gift for friends, neighbors, and holiday hosts. First shared on December 13, 2016, this timeless recipe continues to bring joy with its rich flavor and effortless charm.
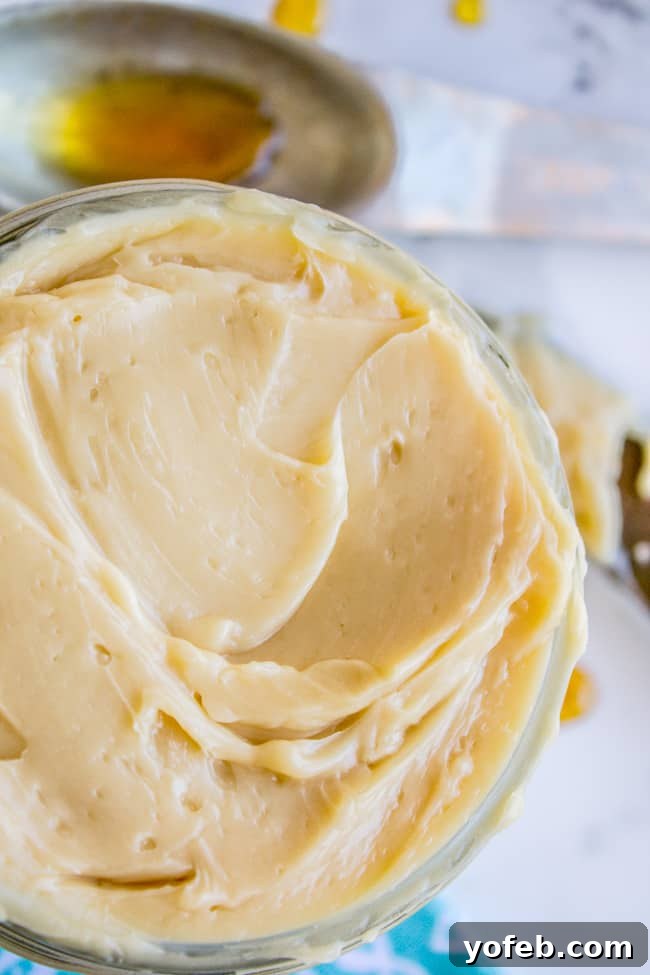
In a world of culinary complexity, there’s immense satisfaction in creating something extraordinary with minimal effort. This maple butter embodies that philosophy perfectly. It’s more than just a topping; it’s an experience, bringing the cozy, comforting essence of maple syrup into a velvety, spreadable form. Whether you’re a seasoned home cook or a kitchen novice, you’ll find this recipe incredibly forgiving and endlessly rewarding. Get ready to elevate your culinary game with just four simple ingredients and two minutes of active preparation time!
Table of Contents
- Why Homemade Maple Butter?
- The Magic of Maple: Choosing Your Syrup
- Essential Ingredients for Maple Butter
- Whipping Up Perfection: Step-by-Step Maple Butter
- Tips for the Best Maple Butter
- Storage Solutions: Keeping Your Maple Butter Fresh
- Beyond Breakfast: Creative Ways to Enjoy Maple Butter
- The Perfect Gift: Share the Sweetness
- More Sweet & Savory Recipes for Gifting or Indulging!
- 2-Minute Maple Butter Recipe
Why Homemade Maple Butter?
Sometimes, life throws a curveball when you least expect it. Like when your significant other (ahem, Eric) responds to your shivering complaints about a freezing nose with the witty suggestion of an “insulated clown nose.” Or, when you find yourself at the post office, in a frantic rush with a baby, a toddler, and a singing five-year-old, resorting to carefully selected “discarded priority envelopes” to cushion a cookie care package. Yes, true story! Desperate times call for creative measures, especially when the goal is intact cookies and surviving parenthood.
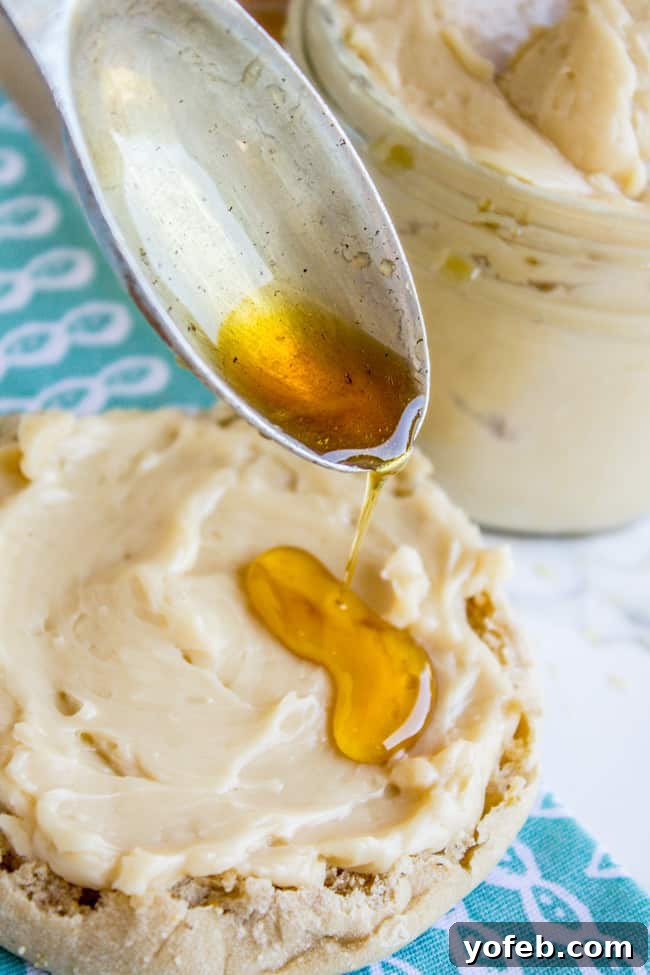
These chaotic moments are precisely why I gravitate towards recipes that deliver maximum impact with minimal fuss. And that, my friends, is the heart and soul of this incredible homemade maple butter. It’s a testament to the fact that even amidst life’s joyful demands and unexpected hurdles, you can still create something wonderfully delicious and effortlessly elegant.
This isn’t just about saving time; it’s about elevating everyday moments. Imagine spreading this creamy, sweet, and slightly salty butter on a warm scone, a fluffy pancake, or even a simple piece of toast. It transforms the mundane into the magnificent, offering a little slice of culinary heaven in just two minutes of active prep time. It’s the kind of recipe that makes you feel like a gourmet chef, even on your busiest days. Forget store-bought spreads laden with unknown ingredients; making your own maple butter ensures freshness, quality, and a flavor profile perfectly tailored to your liking.
The Magic of Maple: Choosing Your Syrup
Before we dive into the simple steps of making this extraordinary spread, let’s talk about the star ingredient: maple syrup. The quality of your maple butter hinges almost entirely on the quality of your maple syrup. This is not the time for artificial pancake syrups, which are often just corn syrup with artificial flavorings. For authentic, rich flavor, you absolutely need to use real maple syrup, preferably Grade A. This commitment to quality ensures a deep, natural maple essence that simply cannot be replicated by imitations.
What’s the difference between Grade A Golden, Amber, or Dark syrups? These classifications refer to the color and flavor intensity, which typically correlate with when the sap is harvested during the sugaring season:
- Grade A Golden Color, Delicate Taste: This is the lightest syrup, typically collected early in the season. It boasts a subtle, delicate maple flavor, perfect if you prefer a milder sweetness that whispers rather than shouts.
- Grade A Amber Color, Rich Taste: The most common grade, harvested mid-season. It offers a balanced, classic maple flavor that is wonderfully versatile and a favorite for many applications. This is often my go-to for maple butter as it provides that iconic maple taste without being overpowering.
- Grade A Dark Color, Robust Taste: Collected later in the season, this syrup boasts a stronger, more pronounced maple flavor. If you want your maple butter to really sing with that deep, earthy maple essence, this is an excellent choice for a bolder taste experience.
Any of these Grade A options will work beautifully, but experiment to find your personal favorite. The key is to ensure your bottle explicitly states “100% Pure Maple Syrup.” You’ll thank yourself for investing in the good stuff; it makes all the difference in the world for your homemade maple butter, transforming it from good to truly exceptional.
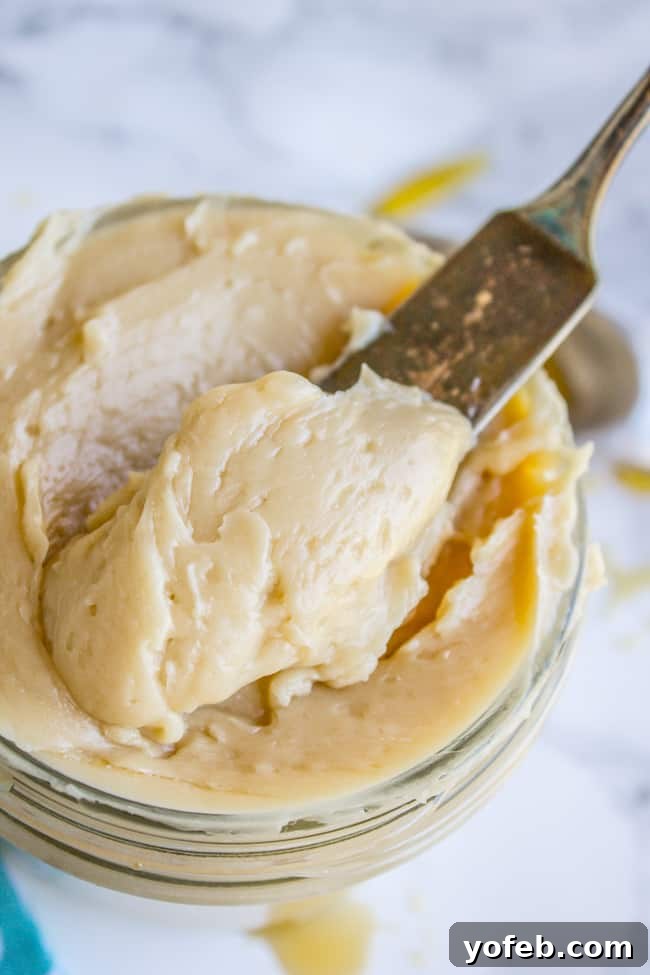
This delightful maple butter recipe draws inspiration from a beloved classic: our equally simple and irresistibly delicious Cinnamon Honey Butter Recipe. Both share the philosophy of transforming basic ingredients into something extraordinary with minimal effort. While Cinnamon Honey Butter offers a warm, spiced sweetness, this maple rendition delivers a pure, unadulterated taste of the forest, reminiscent of crisp autumn mornings and cozy winter evenings.
I originally hoped to share this recipe before Thanksgiving, envisioning it gracing every dinner roll and holiday bread on your festive table. Alas, a new baby arrived, and priorities (and sleep) shifted! But fear not, this recipe is timeless. While it would have been perfect for holiday gatherings, it’s just as phenomenal right now. Whip up a batch for yourself – because you deserve it – or tuck the idea away for next year. Honestly, once you taste it, you won’t want to wait!
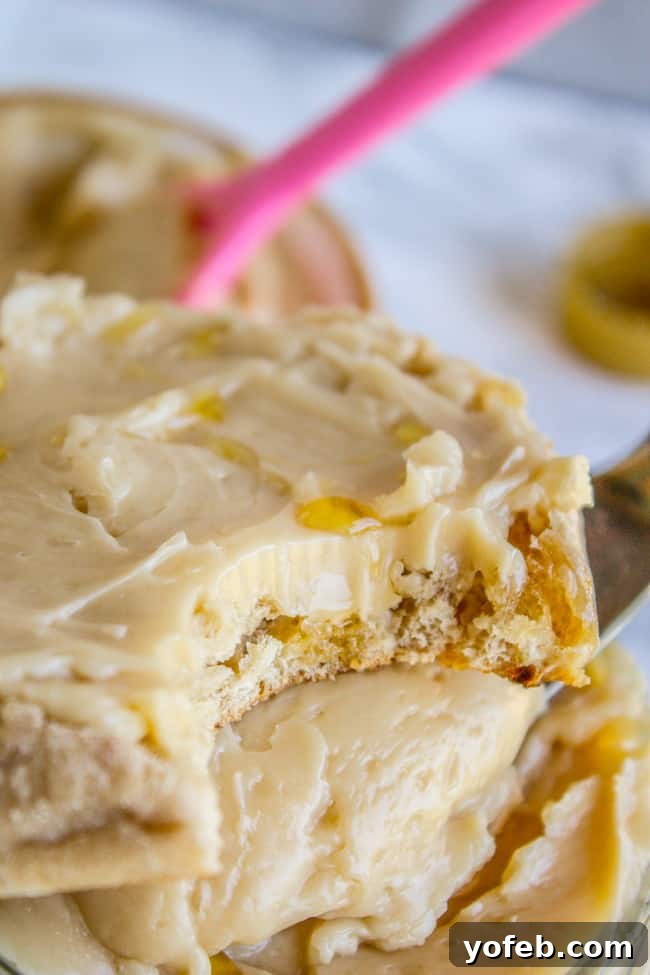
Just imagine this creamy, golden spread melting into the nooks and crannies of a freshly toasted English muffin, a warm croissant, or a stack of fluffy pancakes. It’s a game-changer for breakfast and brunch, but as you’ll soon discover, its versatility extends far beyond the morning meal. It’s truly begging to be spread on everything!
Essential Ingredients for Maple Butter
Gathering your ingredients for this easy maple butter is a straightforward task. You only need a handful of pantry staples to create this luxurious spread. Here’s what you’ll need – remember, quality truly shines through with so few components! The simplicity of the ingredient list allows each flavor to stand out, making your homemade maple butter truly special.
- Butter: Opt for unsalted butter to control the seasoning precisely, or use salted butter and adjust the added kosher salt accordingly. The most critical factor is ensuring your butter is softened to room temperature. This is essential for achieving that light, airy, and fluffy texture when whipped.
- Maple Syrup, Grade A: As previously emphasized, this is non-negotiable for authentic, deep maple flavor. Any Grade A syrup (Golden, Amber, or Dark) will work beautifully, offering slightly different flavor intensities. Choose the one that best suits your palate for a truly personalized butter.
- Powdered Sugar (Confectioners’ Sugar): This ingredient is vital for creating that wonderfully smooth, lump-free texture. Unlike granulated sugar, powdered sugar dissolves effortlessly into the butter, contributing to a silky, spreadable consistency without any grittiness. It also adds a touch of sweetness.
- Kosher Salt: A pinch (or more!) of salt is crucial for balancing the sweetness of the maple syrup and enhancing all the other flavors. Salt truly makes the maple notes pop and prevents the butter from tasting one-dimensionally sweet. Start with a small amount and adjust to your taste preferences for that perfect salty-sweet balance.
That’s it! Just four simple ingredients stand between you and a jar of homemade maple butter perfection. This minimal ingredient list highlights the natural deliciousness of each component, especially the star, pure maple syrup.
Whipping Up Perfection: Step-by-Step Maple Butter
Making maple butter is incredibly simple, requiring minimal effort for maximum deliciousness. Follow these easy steps, and you’ll have a beautifully fluffy, flavorful spread in no time. The entire process is designed for ease and speed, ensuring a gourmet result without the fuss:
- Soften Your Butter: This is the crucial first step for that light, airy texture. If you’re planning ahead, simply leave your butter out on the counter for a couple of hours until it’s perfectly pliable, yielding easily to a gentle press. If you’re in a hurry (and let’s be honest, who isn’t?), gently microwave it in 10-20 second bursts on low power. Be vigilant – you want it soft, not melted! Melted butter will prevent you from achieving that coveted fluffy consistency, resulting in a greasy, separated mixture.
- Whip the Butter: In a medium mixing bowl, using an electric mixer (handheld or stand mixer fitted with the paddle attachment), beat the softened butter until it becomes visibly lighter in color and fluffy. This aeration process is key to the butter’s delightful texture, incorporating air to make it light and spreadable. Continue whipping for 1-2 minutes until it looks truly pillowy.
- Gradually Add Maple Syrup and Powdered Sugar: Maple syrup has a wonderful, distinct flavor, but it can be subtle. I tend to use a generous amount to ensure the maple truly shines. Begin by very gradually incorporating about half of your pure maple syrup along with all the powdered sugar into the whipped butter. Beat well after each addition, ensuring everything is fully combined and the mixture remains fluffy. The powdered sugar isn’t just for sweetness; it plays a vital role in stabilizing the mixture and creating that smooth, spreadable consistency, preventing the butter from becoming grainy.
- Continue Adding Maple Syrup: Next, add the remaining maple syrup in small increments, continuing to beat thoroughly after each addition. Towards the end, start tasting the butter frequently. Maple preferences vary, so you might prefer a little less or even a touch more syrup to hit your sweet spot. The goal is a balanced flavor where the maple is prominent but not overwhelming, perfectly complementing the rich butter.
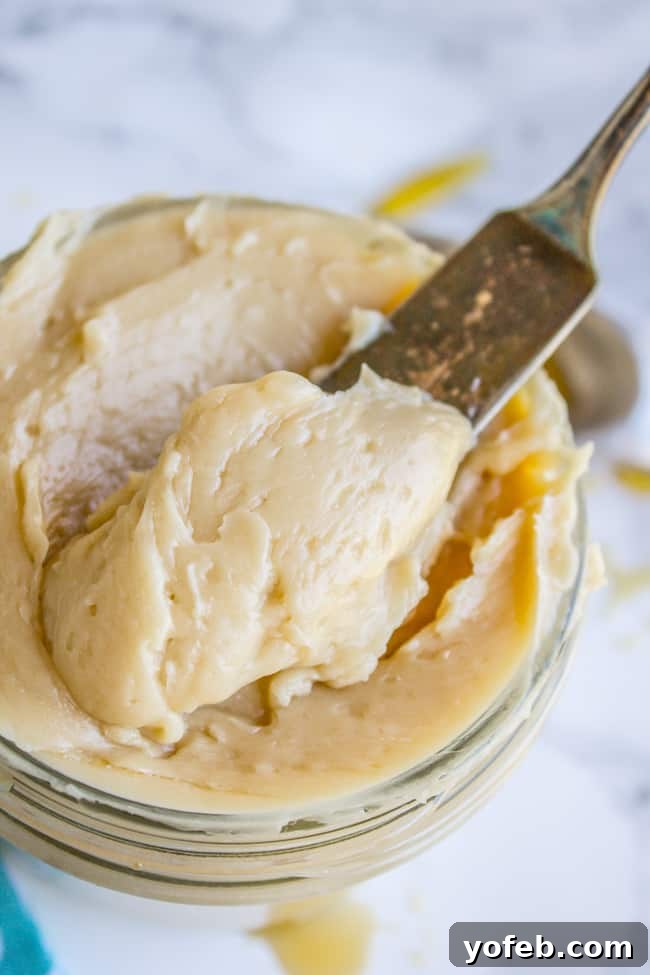
- Season with Salt: Finally, add your kosher salt. I personally love a pronounced salty-sweet balance, so I’m often quite liberal with the salt. Start with a smaller amount (e.g., 1/8 teaspoon for table salt or 1/4 teaspoon for kosher salt) and gradually add more to taste. Beat again until the salt is evenly distributed throughout the maple butter. This final touch enhances all the flavors, making the butter truly irresistible.
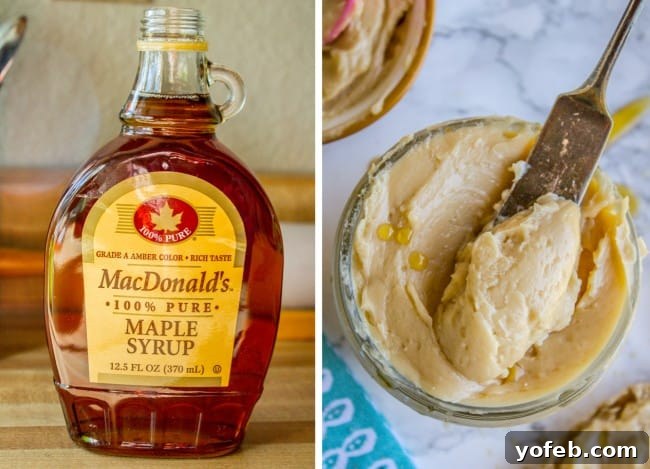
The entire process takes literally minutes, making it one of the quickest and most rewarding recipes you’ll ever try. The beauty of this recipe is that you can make it well ahead of time, ensuring you always have a delicious, homemade topping or gift ready whenever the occasion arises. It’s a culinary hack that delivers gourmet results!
Tips for the Best Maple Butter
While this 2-minute maple butter recipe is incredibly straightforward, a few key tips can ensure your batch turns out absolutely perfect every single time. Following these simple guidelines will help you achieve the ideal texture and flavor:
- Butter Temperature is Key: We cannot overstate this. Don’t rush the butter softening process. If the butter is too cold, it won’t whip properly, resulting in a dense, hard spread. If it’s melted, it will lead to a greasy, separated mixture that won’t hold its fluffiness. Aim for a consistency where your finger can easily leave an indent in the butter – about 65-70°F (18-21°C).
- Real Maple Syrup Only: As discussed in detail, insist on 100% pure Grade A maple syrup. Artificial pancake syrup contains corn syrup and additives that will compromise both the flavor and quality of your homemade maple butter. The subtle nuances of real maple are essential here.
- Adjust Sweetness and Saltiness to Taste: The provided measurements are excellent starting points, but your palate is the ultimate guide. Love a bolder maple flavor? Add a touch more syrup. Prefer it less sweet? Reduce the syrup slightly. And always taste and adjust the salt – it truly makes the flavors pop and balances the sweetness beautifully. A small pinch of extra salt can transform the flavor profile.
- Gradual Mixing is Critical: When adding the maple syrup, do it slowly, in a thin stream or small increments. This allows the butter to properly emulsify with the liquid, maintaining its whipped, fluffy texture. Adding the syrup too quickly can cause the butter to “break” or become liquidy and difficult to spread. Patience during this step ensures a smooth, creamy result.
- Whip Until Light and Fluffy: Don’t under-whip the butter. The initial whipping of the butter alone should take a couple of minutes until it’s noticeably lighter in color and airy. This creates the foundation for a truly light and decadent maple butter.
- For Gifting Perfection: If you’re preparing this for gifts, spoon the freshly made maple butter into small, attractive glass jars with tight-fitting lids. Decorate with a festive ribbon, a personalized label, and perhaps a small tag listing serving suggestions. Make sure to include a clear note about refrigeration to ensure proper storage for the recipient!
By keeping these simple tips in mind, you’re well on your way to creating the most delectable homemade maple butter that will impress everyone who tastes it!
Storage Solutions: Keeping Your Maple Butter Fresh
You might be wondering about the shelf life of your delectable homemade maple butter. While it’s so delicious you’ll likely devour it quickly, it’s good to know how to store it properly to maintain its freshness, creamy texture, and exquisite flavor. Here’s what you need to know about keeping your maple butter at its best:
- Room Temperature (Short Term): Like regular butter, maple butter can be kept at cool room temperature for a couple of days (up to 3-4 days), especially if your kitchen isn’t overly warm. This makes it conveniently spreadable at all times. However, because real maple syrup should be refrigerated after opening, it’s generally safer and recommended to store the finished product in the fridge for longer periods to prevent any spoilage and maintain optimal freshness.
- Refrigerator (Longer Term): For extended freshness, store your maple butter in an airtight container or tightly wrapped in plastic wrap in the refrigerator. When properly stored, it will last approximately 1 month. Keeping it airtight is crucial to prevent it from absorbing any unwanted odors or flavors from other foods in your fridge, which butter is notoriously prone to doing. When chilled, the butter will naturally firm up, so remember to let it come to room temperature for about 15-30 minutes before serving to restore its wonderfully soft, spreadable consistency. You can also give it a quick whip with a fork if it needs a little help regaining its fluffiness.
- Freezer (Extended Storage): Yes, you can absolutely freeze maple butter! This is an excellent option if you’ve made a large batch, plan to prepare gifts far in advance, or simply want to have this delicious spread on hand whenever a craving strikes. To freeze, wrap it very well in plastic wrap, then place it in a freezer-safe, airtight container or a heavy-duty freezer bag, ensuring no air can reach it to prevent freezer burn. It will keep beautifully in the freezer for 6 to 9 months. To use, simply transfer it to the refrigerator to thaw overnight, then let it soften at room temperature before serving. Freezing can slightly alter the texture upon thawing, but a quick re-whip with a fork or hand mixer can often restore some of its original light and fluffy consistency.
With these storage tips, you can enjoy your homemade maple butter for weeks or even months, ensuring that sweet maple goodness is always within reach for any meal or occasion!
Beyond Breakfast: Creative Ways to Enjoy Maple Butter
The beauty of homemade maple butter lies in its incredible versatility. While it’s an undeniable star on classic breakfast and brunch items, don’t limit your imagination! This sweet and savory spread can elevate a multitude of dishes, transforming everyday meals into something truly special. Here are some fantastic and creative ideas to get you started:
- Classic Breakfast & Brunch Enhancements:
- Warm Toast & Baked Goods: The most obvious, yet most satisfying. Slather it on freshly baked bread, English muffins, bagels, croissants, or even brioche.
- Pancakes, Waffles, & French Toast: A natural pairing that takes these breakfast staples to a gourmet level. Watch it melt into the nooks and crannies! Try it on this French Toast Bake.
- Biscuits, Scones, & Muffins: Elevate fluffy Buttermilk Biscuits, delicate scones, or any variety of muffins (especially Vanilla Muffins) with a generous dollop.
- Oatmeal & Porridge: Stir a spoonful into hot oatmeal, cream of wheat, or grits for added flavor, richness, and a touch of sweetness.
- Crepes: Truly the Best Crepes I’ve Ever Had become even more irresistible with a generous slather of maple butter.
- Surprisingly Delicious Savory Pairings:
- Crackers and Cheese: Spread on a cracker and top with a slice of sharp cheddar, creamy brie, or a tangy goat cheese for an unexpected, delightful contrast of sweet, salty, and savory.
- Cornbread: Slather it on warm, sweet, and moist Cornbread – it melts beautifully and adds an extra layer of sweetness and moisture. It’s a game-changer!
- Roasted Vegetables: Toss roasted sweet potatoes, carrots, parsnips, or butternut squash with a little maple butter after cooking for a glazed, caramelized, and incredibly flavorful finish.
- Chicken or Pork Glaze: Melted maple butter can be brushed onto grilled or roasted chicken and pork towards the end of cooking for a sticky, glossy, and deeply flavorful glaze that locks in moisture and adds a touch of gourmet flair.
- Sandwiches & Wraps: A thin layer on a turkey or ham sandwich, or even a savory breakfast burrito, adds a surprising and delicious touch of sweetness that balances other flavors.
- Dinner Rolls: Our Soft and Fluffy Parker House Roll Recipe is a must-try with this butter, especially for your holiday table!
- Creative Dessert Enhancements:
- Banana Bread: Elevate your Best Banana Bread by spreading maple butter on a warm slice. The flavors of maple and banana are a match made in heaven and complement each other perfectly.
- Baked Apples or Pears: A spoonful melted over baked fruit (like apples, pears, or even peaches) makes for a simple, comforting, and elegant dessert.
- Sweet Potato Casserole: Use it as a rich, flavorful topping for a holiday sweet potato casserole instead of traditional marshmallows for a sophisticated twist.
- Warm Desserts: A dollop on warm apple pie, bread pudding, or even a simple scoop of vanilla ice cream adds a decadent touch.
Seriously, dream big with this one! Once you have a jar of homemade maple butter, you’ll find endless ways to incorporate its delightful flavor into your culinary adventures. Don’t limit yourself – let your taste buds guide you to new and exciting combinations and elevate every meal with this simple yet luxurious spread!
The Perfect Gift: Share the Sweetness
The holiday season, birthdays, housewarmings, or just a simple “thinking of you” gesture – homemade maple butter is truly the quintessential edible gift. It’s thoughtful, delicious, and incredibly easy to make, even when life is at its most demanding. Forget the stress of frantically searching for store-bought presents; a beautifully packaged jar of this creamy maple goodness speaks volumes about your care and effort.
Why is homemade maple butter such a perfect gift that always delights?
- Quick & Easy to Prepare: As the name suggests, it’s practically a 2-minute wonder. You can whip up several batches in under an hour, making it an ideal solution for gifting multiple people without consuming your entire day. This convenience makes it a lifesaver during busy seasons.
- Budget-Friendly: Made with just a few simple, readily available ingredients, it’s a cost-effective way to give a high-quality, impressive gift that tastes far more expensive than it is.
- Universally Loved: Who doesn’t appreciate a delicious, versatile spread? Maple butter is a crowd-pleaser for all ages and tastes, appealing to sweet and savory palates alike. It’s a safe bet that will be genuinely enjoyed.
- Thoughtful & Personalized: A homemade gift always feels more special and personal. Take it up a notch by adding a pretty ribbon, a personalized label with your heartfelt message, and perhaps a small tag with suggested uses. This level of customization makes the gift truly memorable and cherished.
- Excellent for Make-Ahead Gifting: It stores wonderfully in the refrigerator for weeks or even months in the freezer, allowing you to prepare gifts weeks or even months in advance. This significantly reduces holiday or event stress, allowing you to enjoy the process without the last-minute rush.
Consider pairing a jar of maple butter with a fresh loaf of artisan bread, a package of gourmet biscuits, a selection of specialty crackers, or even a nice bag of coffee for a complete and delightful gift basket. It’s a gift that says “I care about you and your breakfast (and every other meal)!” It’s a simple gesture that leaves a lasting sweet impression.
More Sweet & Savory Recipes for Gifting or Indulging!
If you’re looking for more homemade gift ideas that are sure to impress, or simply more delicious recipes to add to your personal repertoire, here are some favorites that are perfect for sharing or keeping all to yourself:
- Cinnamon Honey Butter: The delightful inspiration for today’s maple butter, this spiced honey butter is equally addictive and incredibly easy to make. A wonderful alternative or complement to maple butter for gifting.
- Sticky Sweet-and-Salty Chex Mix (Christmas Crack): A truly irresistible, crunchy, and addictive snack that’s perfect for holiday parties and easy gifting. It’s a breeze to throw together and always disappears fast!
- Caramel Nougat Pecan Rolls: While these homemade candies require a bit more time and effort, they are absolutely worth every second for a truly luxurious and memorable gift. A fun, rewarding Christmas project to share with neighbors and friends that promises to impress.
- Thick & SOFT Sugar Cookie Recipe: Perfect for holiday cookie exchanges, decorating with the family, or simply enjoying with a cup of tea. These will melt in your mouth and are always a welcome treat.
- Mom’s Easy Fudge Recipe: If you need a last-minute gift that tastes homemade and indulgent, this incredibly easy fudge recipe is your savior. Rich, creamy, and surprisingly simple, it’s a holiday staple.
- White Christmas Slice from Bake Play Smile: A beautiful no-bake, festive treat that combines crunchy biscuits, dried fruit, and a creamy white chocolate coating. Perfect for a holiday platter.
- Peppermint Whoopie Pies from The Happy Flammily: A delightful minty twist on a classic comfort dessert, featuring soft chocolate cakes and a creamy peppermint filling. Ideal for winter festivities and sharing.
Connect with us on social media for more recipes and inspiration!
Facebook |
Pinterest |
Instagram

2-Minute Maple Butter
10 minutes
0 minutes
10 minutes
8
Servings
Print Recipe
This easy maple butter is your toast or dinner roll’s new favorite topping! It is so easy to whip up (seriously, 2 minutes) and can be made ahead of time. It makes a great (easy! fast!) gift for neighbors, coworkers, or your holiday hostess.
Ingredients
- 1 cup salted butter, softened
- 1 & 1/4 cups maple syrup, Grade A
- 1/4 cup powdered sugar
- 1/8 to 1/4 teaspoon kosher salt
Instructions
-
In a mixing bowl, beat the butter until light and fluffy.
-
Very gradually add about half of the maple syrup and all the powdered sugar. Beat well.
-
Add the remaining maple syrup in small increments, beating well. Start to taste it towards the end. You might prefer less maple syrup!
-
Add salt (cautiously) and beat again.
-
Makes about 2 and 2/3 cups. Enough to fill two half-pint jars (or a 1-pint jar) and have enough leftover for you to enjoy with your toast for a few days.
-
You can store this on the counter for a couple of days, but since real maple syrup must be refrigerated after opening, it is recommended to store it in the fridge if you don’t think you’ll use it up in a week or so.
Notes
Nutrition
Serving: 0.3 cup | Calories: 354 kcal | Carbohydrates: 38 g | Protein: 1 g | Fat: 23 g | Saturated Fat: 15 g | Polyunsaturated Fat: 1 g | Monounsaturated Fat: 6 g | Trans Fat: 1 g | Cholesterol: 61 mg | Potassium: 120 mg | Sugar: 34 g | Vitamin A: 709 IU | Calcium: 62 mg | Iron: 1 mg
Did you make this? I’d love to see it!
Mention @thefoodcharlatan or tag #thefoodcharlatan!