

Do you remember that special gingerbread cookie recipe from your grandmother? The one you *want* to love (because, grandma!), but always hesitate to make because eating it feels like biting into actual cardboard? You are absolutely not alone! For years, I searched for the perfect balance, and I’ve finally uncovered all the secrets to crafting unbelievably soft, wonderfully chewy, and melt-in-your-mouth buttery gingerbread man cookies. This isn’t just a recipe; it’s a game-changer for your holiday baking. Plus, I’m sharing tried-and-true recipes for three fantastic frosting options: classic Royal Icing (perfect for intricate designs), a simple yet delicious Glaze Icing (my personal favorite for flavor), and a rich Buttercream Frosting!

Table of Contents
- The Ultimate Gingerbread Confession
- Say Goodbye to Crunchy Gingerbread: Hello to Pure Bliss
- What Gives Gingerbread Its Iconic Flavor?
- The Secret to Gingerbread Cookies That Hold Their Shape (No Blobs!)
- Soft vs. Hard Gingerbread: The Texture Debate
- How to Frost Your Gingerbread Masterpiece
- Choosing the Perfect Gingerbread Cookie Cutters
- Gingerbread Cookie Ingredients Demystified
- Step-by-Step Guide to Making Soft Gingerbread Cookies
- Perfect Pairings: What to Serve with Gingerbread Cookies
- Host an Unforgettable Cookie Decorating Party
- Storing and Freezing Gingerbread Cookies Like a Pro
- Gingerbread Cookie Frequently Asked Questions
- More Ginger-Spiced Delights for Your Holiday Table
- The Best Holiday Cookies for Your Festive Spread
- Gingerbread Man Cookies Recipe
The holiday season is upon us, and with it comes the delightful chaos of family gatherings. We’re bracing ourselves for three families joining us this Christmas, turning our home into a hub of joyous pandemonium. Last year, my brother’s house hosted 27 people, a testament to the incredible fun (and occasional mischief) that multi-family Christmases bring, especially for the kids.
I still chuckle remembering the time our 6-year-old, Valentine, convinced her cousins she’d bought something on Alexa. My brother searched his recent purchases in vain. Months later, in April, he called me: “Remember Valentine and Alexa? She actually upgraded my account. I’ve been charged an extra $17.50 every month since December.” Ah, the joys of distracted adults and ingenious children!

Another year, with four two-year-old cousins under one roof, the moms enjoyed an afternoon movie, entrusting the dads with childcare. We returned to a scene of pure toddler anarchy: diaper-less children leaping on beds, lathering themselves (and a laptop!) in lotion. This year marks our first time hosting, and while there are fewer toddlers, I have full faith my 3-year-old son, Edison, will single-handedly uphold the tradition of mayhem. Just five minutes ago, my husband texted me to report a shattered potted plant. Edison, truly a human blender without a lid!
The Ultimate Gingerbread Confession
I must confess, I’ve been keeping a culinary secret from you. This gingerbread recipe, perfected years ago, has been a closely guarded family treasure. While my loved ones savored these incredibly soft, chewy, and flavorful gingerbread men, many of you have been left with nothing but crumbly, cardboard-like gingerbread to comfort you during the holidays. My apologies!
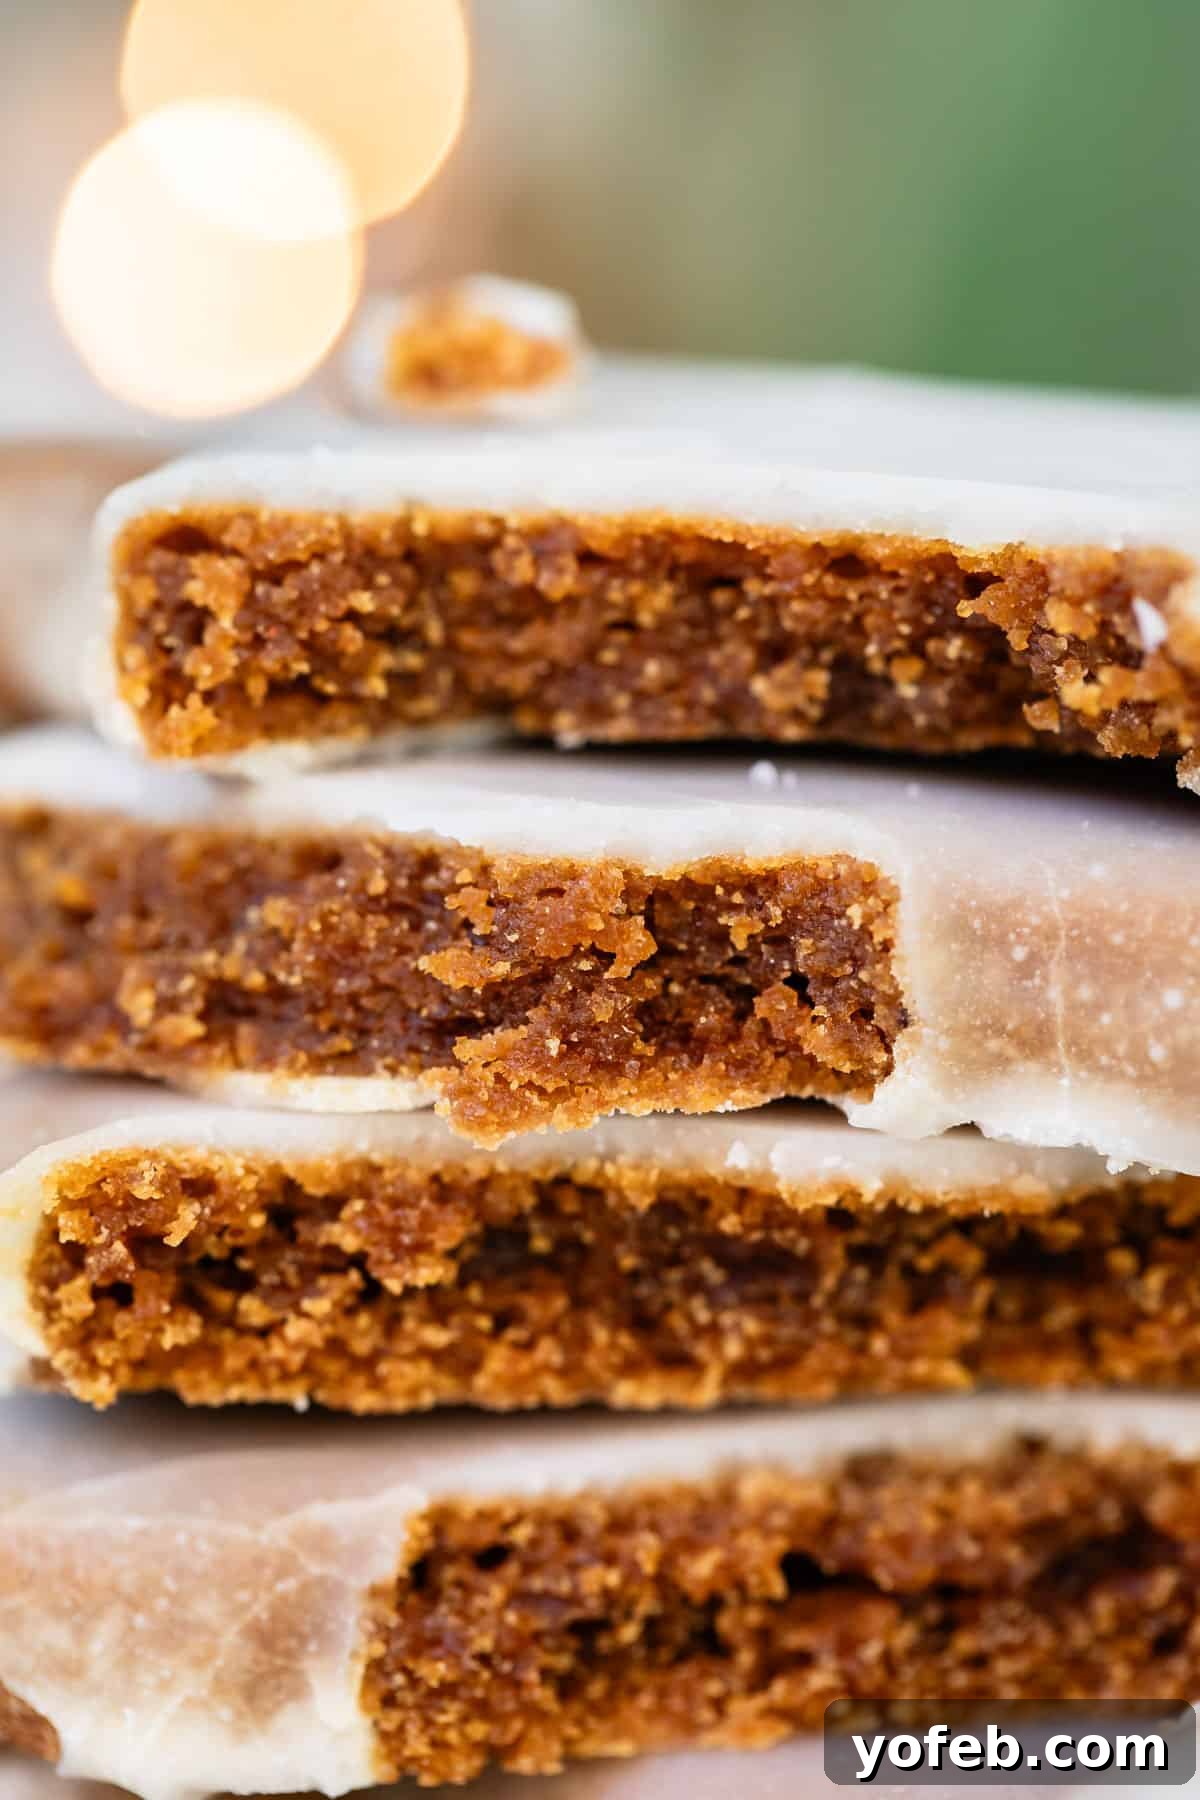
I admit, my hesitation to share stemmed from a daunting fear of making these cookies “Instagram-pretty.” Decorating is not my forte, and the pressure of social media can be intense! However, I finally gathered my courage, and now this incredible recipe can be yours. It’s become an enormous family favorite, truly embodying the essence of Christmas.
Before we dive into the delightful world of frosting, let me tell you more about the cookie itself. I recently posted photos of these gems on Instagram, and a friend, Jen, messaged me, saying, “My son was just telling me today that I need your gingerbread recipe! He remembers having one at your house and feels like this is the essence of Christmas!” He’s absolutely right; nothing quite captures the festive spirit like a soft, warm gingerbread cookie.

I’m so thrilled to finally share this recipe. It’s a cherished classic for us, and I sincerely hope your family enjoys it as much as ours does! Don’t let the thought of intricate frosting hold you back; I’ve got fantastic options for every skill level. After all, if I, a self-proclaimed charlatan with a capital C, can master these, so can you!
Say Goodbye to Crunchy Gingerbread: Hello to Pure Bliss
Have you ever taken a bite into a beautifully decorated gingerbread man, only to be met with that disappointing… CRUNCH? Ugh! No, thank you. When it comes to gingerbread, I crave softness and chewiness. Many traditional grandmother recipes, while charming, often result in a hard, crisp cookie, which isn’t what most modern bakers desire (unless you’re my mother-in-law, Kris, who staunchly defends her crunchy-cookie-hill – this post is definitely not for her!).
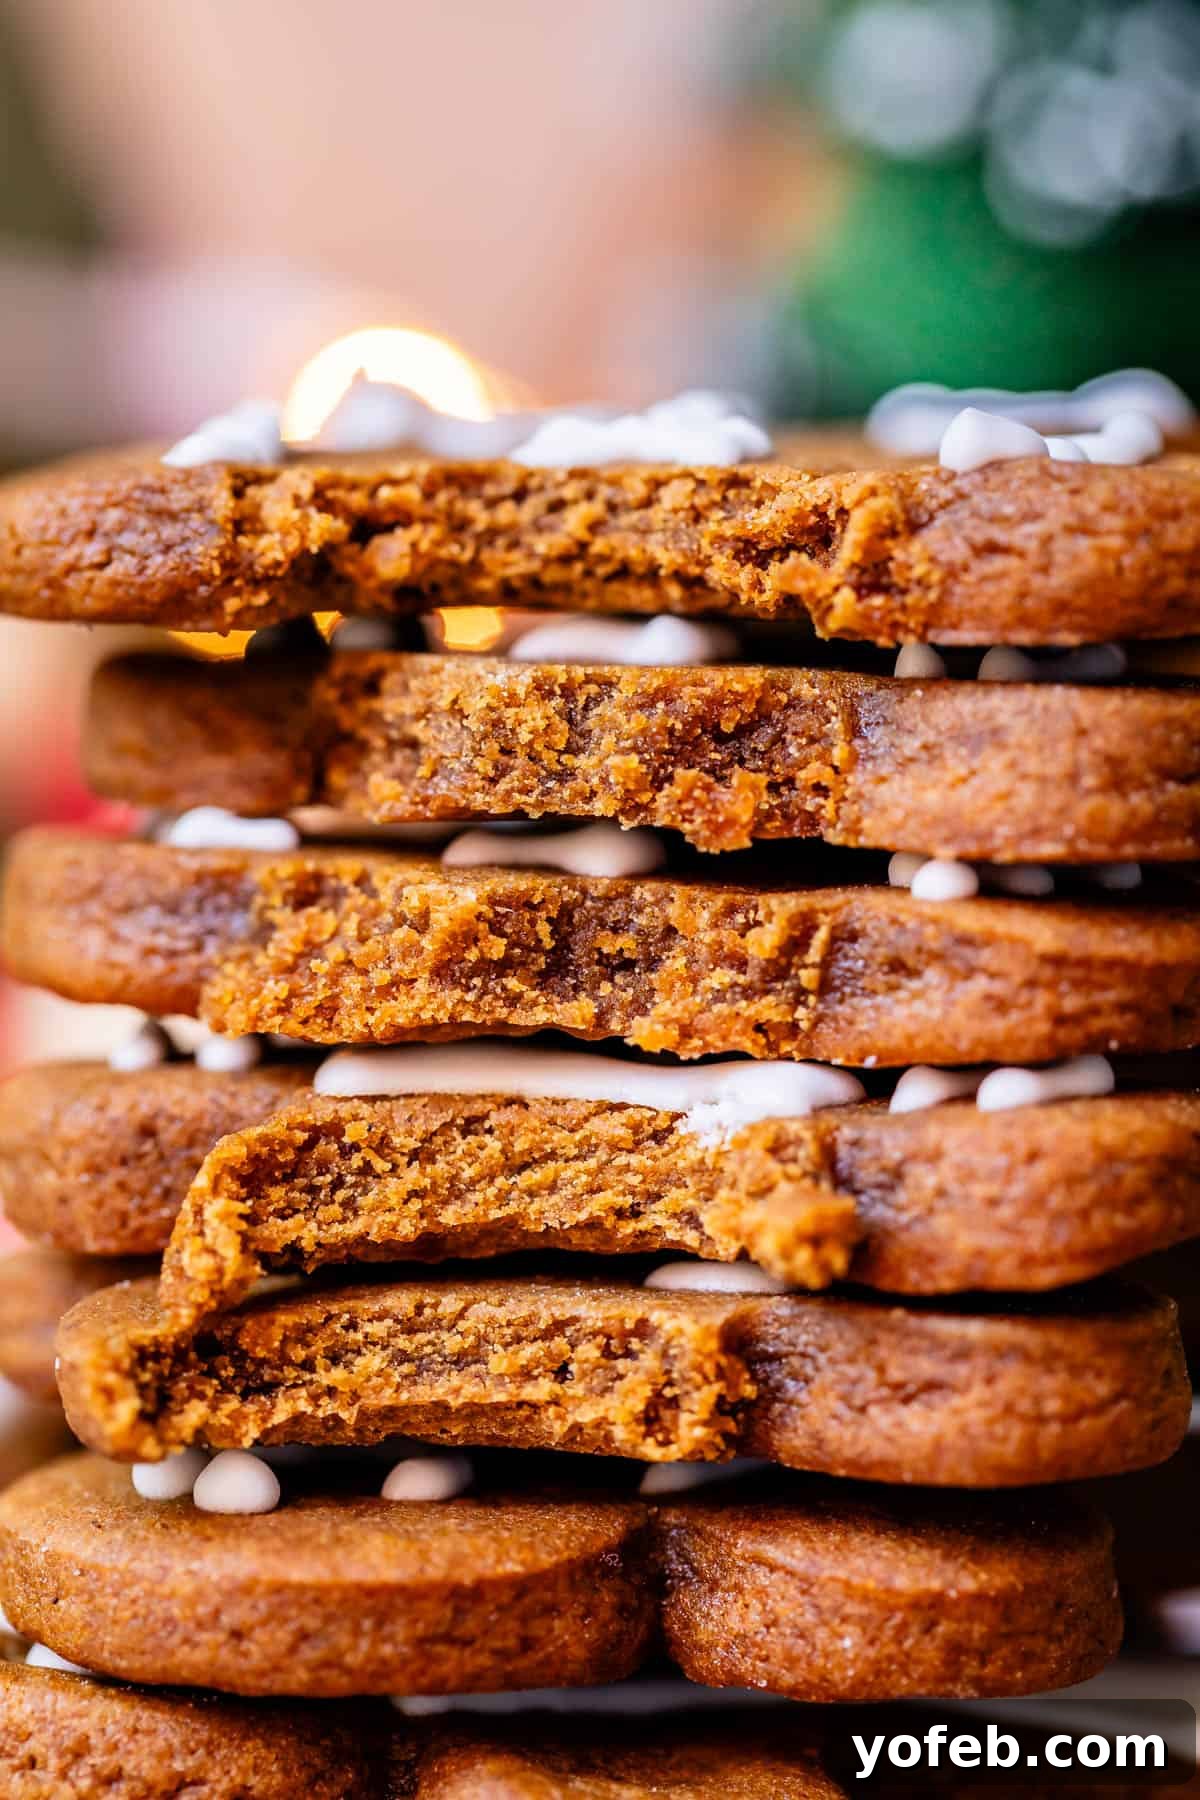
These gingerbread cookies share a delightful similarity with my beloved recipe for The Softest Sugar Cookies of Your Life. (Yes, I have equally strong opinions about crunchy frosted sugar cookies – only soft will do!) This recipe yields gingerbread cookies that are perfectly soft and delightfully chewy, yet firm enough to hold their shape beautifully for decorating. And most importantly, they absolutely do NOT taste like cardboard.
What Gives Gingerbread Its Iconic Flavor?
At its heart, gingerbread is a symphony of warm, aromatic spices: cinnamon, ginger, cloves, and allspice. While you could certainly add a touch of nutmeg or cardamom for extra complexity, we’re sticking to the classics for today’s perfect recipe. A “warm spice” does exactly what its name suggests – it imparts a cozy, subtle heat to your palate, making each bite incredibly comforting.

We are serious about flavor in this recipe! These cookies feature a generous *tablespoon* each of robust ground cinnamon and potent ginger, complemented by a healthy dose of allspice and cloves. My husband, Eric, even wondered if I’d added black pepper (as I do in my Pumpkin Pie), but no – when you use enough quality ginger, it delivers a distinctly spicy kick, beautifully unique from black or chili pepper.
The other star ingredient that contributes significantly to these cookies’ incredible moisture and deep flavor is molasses. This earthy, warm sugar is thick and syrupy, elevating our cookies to their peak level of chewiness. We incorporate a full cup of this magical ingredient, ensuring every bite is rich and satisfying.
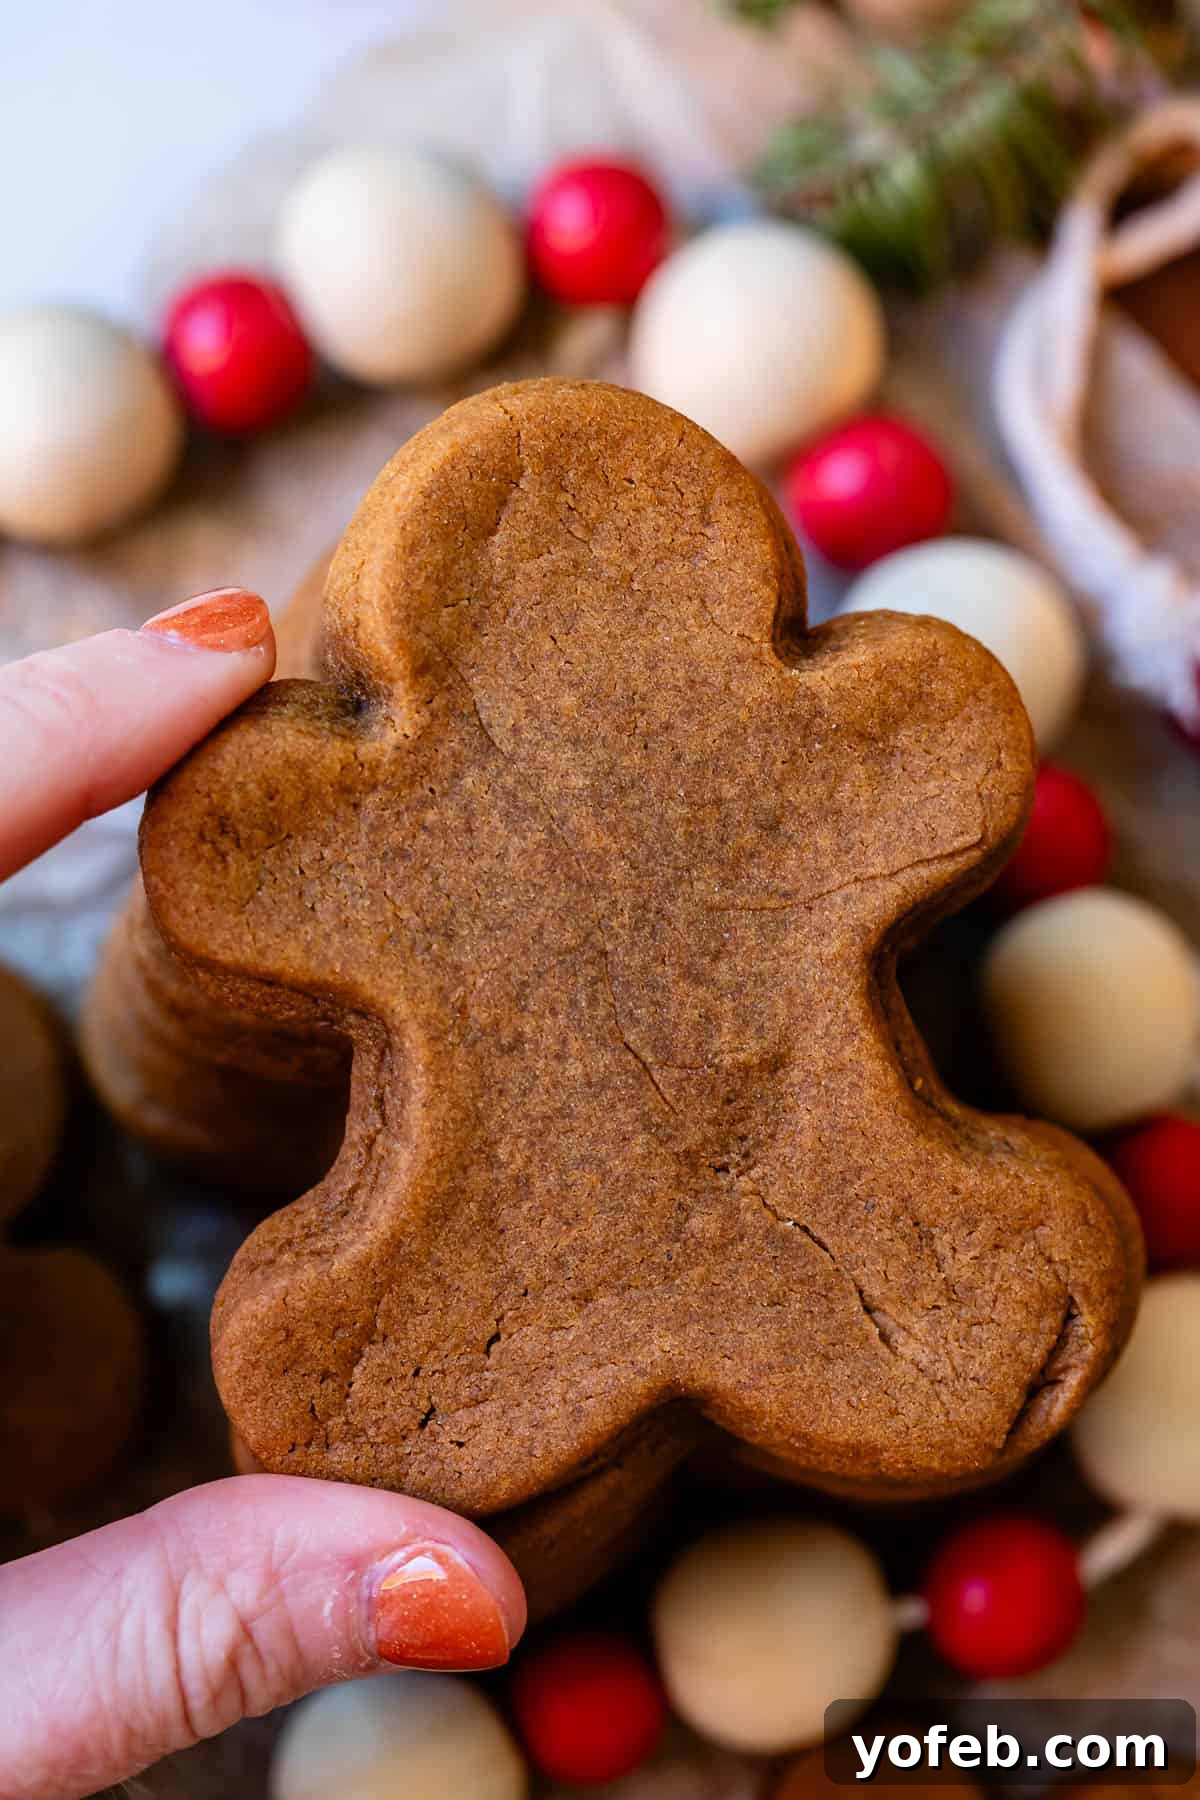
Honestly, these cookies are so packed with flavor, you could enjoy them perfectly well on their own, without any frosting at all. (But let’s be real, decorating them is half the fun and adds to the festive charm!)
The Secret to Gingerbread Cookies That Hold Their Shape (No Blobs!)
There’s nothing quite as disheartening as investing time and effort into making homemade cut-out cookies, only for the dough to spread so much in the oven that the original design of your cookie cutter becomes an unrecognizable blob. It’s a common baking frustration, especially with gingerbread, where precise shapes are part of the holiday magic.
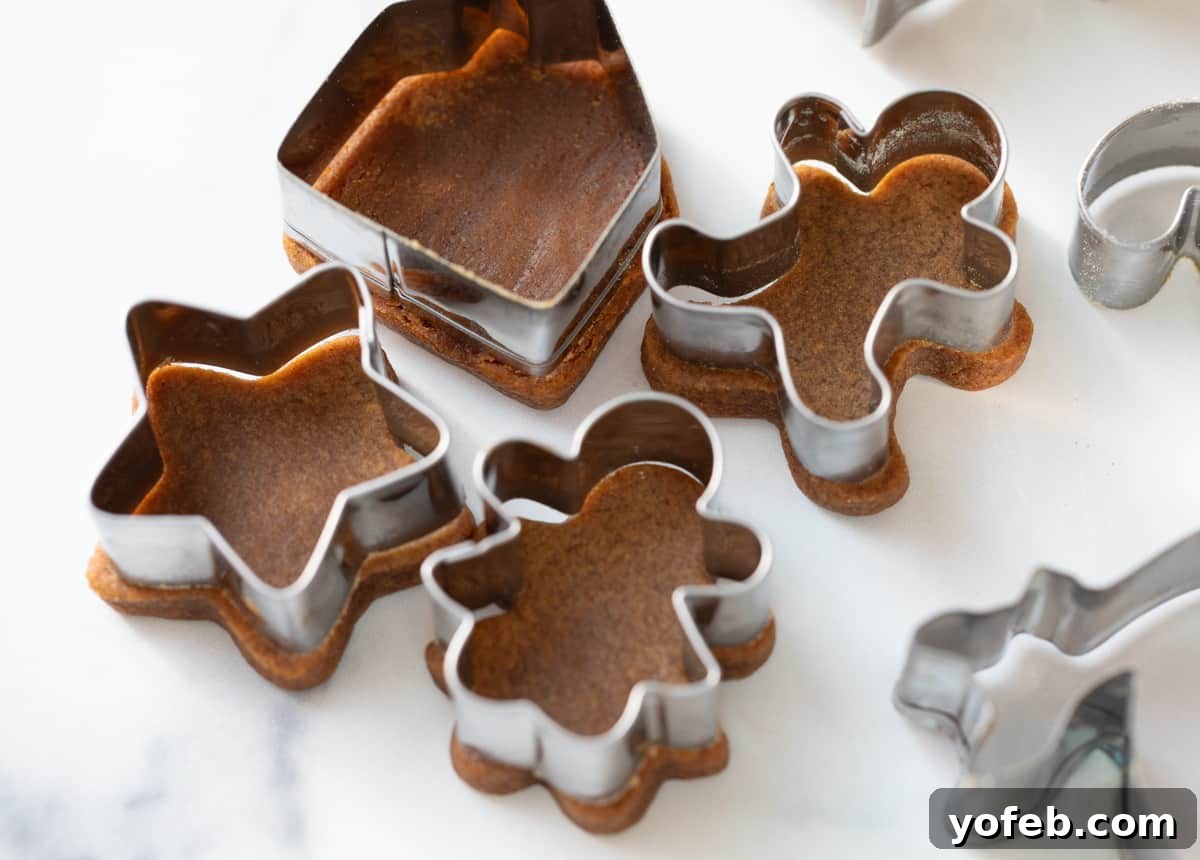
The good news? This gingerbread recipe is designed to maintain its shape flawlessly – it barely spreads at all! As you can see in the photo above, the baked cookies align almost perfectly with their cutters. This impressive stability isn’t achieved by accident. Unlike typical cookie dough recipes, this one contains no eggs, which often act as a leavening agent, and crucially, it uses NO baking soda.
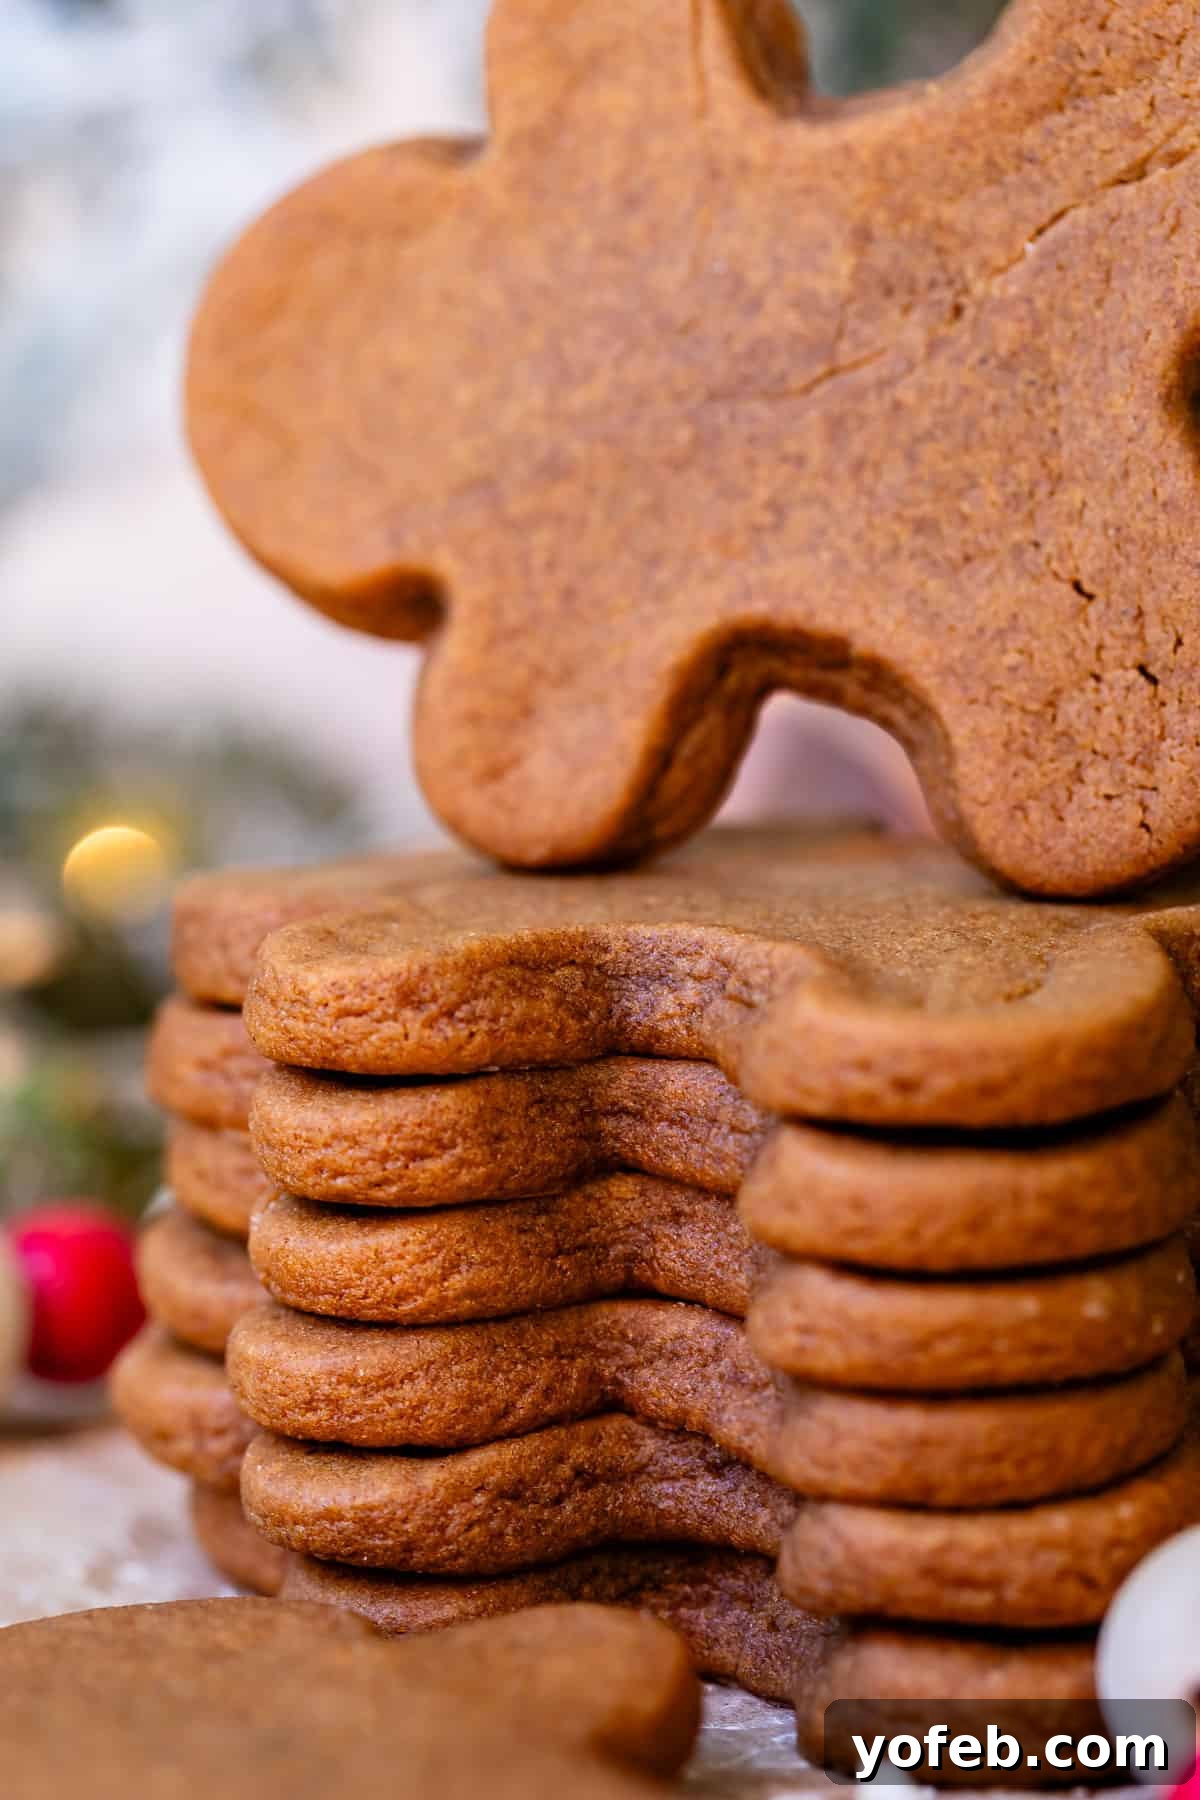
In most traditional cookies, like Chocolate Chip Cookies, baking soda performs a dual role: it helps the cookie rise in the center (contributing to a soft, gooey middle) and also aids in crisping the edges. It’s quite amazing how one ingredient can achieve two seemingly opposite effects, thanks to the wonders of baking science!
Soft vs. Hard Gingerbread: The Texture Debate
Achieving those wonderfully soft centers in our gingerbread cookies is a key goal, and it’s primarily accomplished by rolling the dough out quite thick. Because the cookies are already substantial, there’s no need for baking soda to assist with rising.
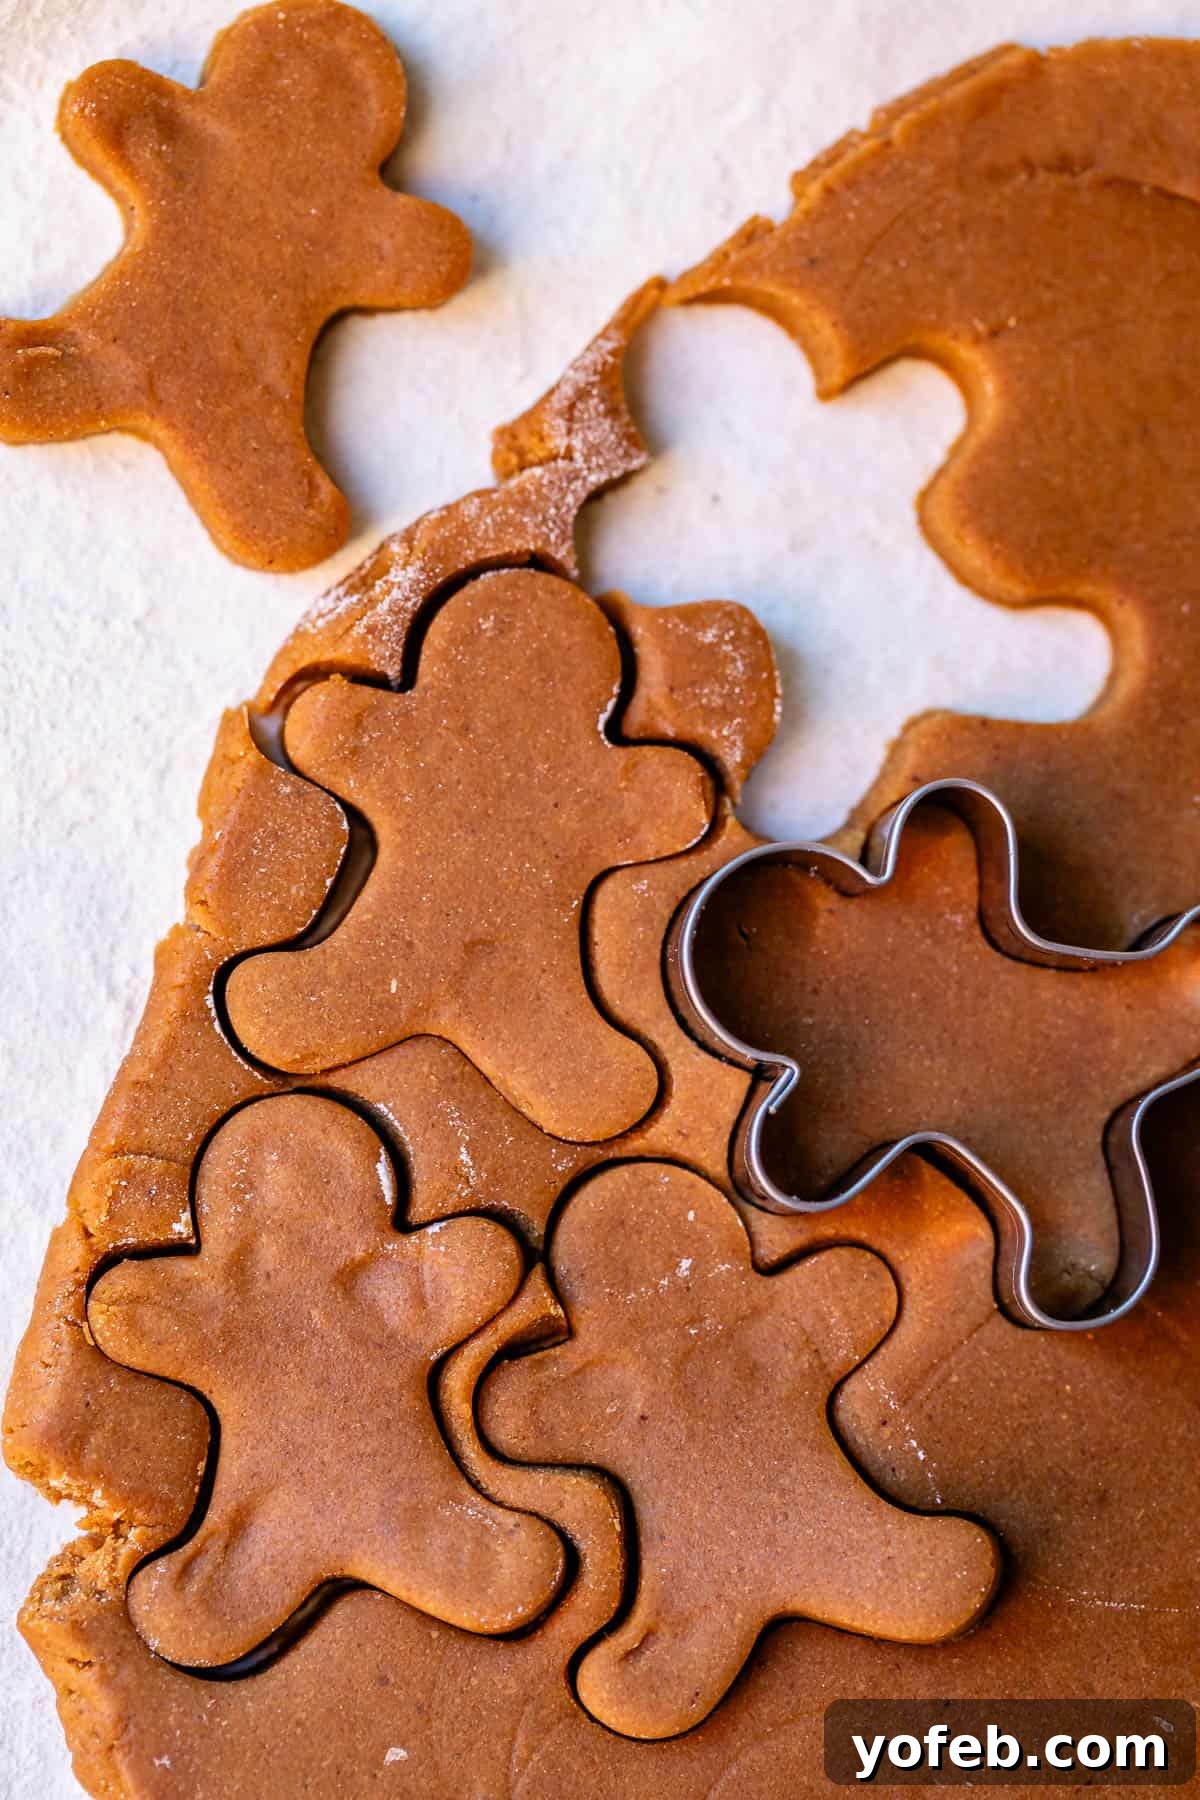
By omitting baking soda, we also eliminate the distinct crispness typically found on cookie edges. This means that with this recipe, a bite from the edge of the cookie is almost as soft and tender as a bite from its very center. Hallelujah – consistent softness throughout!

How to Frost Your Gingerbread Masterpiece
Beyond my apprehension about achieving “pretty” cookies, I also harbored a long-standing reservation about royal icing. Decorating gingerbread men is such an iconic Christmas activity; you can’t really discuss one without the other. While royal icing is undeniably fun for intricate designs, I don’t always find its flavor to be the best. This internal debate often left me dragging my feet on sharing this recipe.
Then, a while back, I saw my friend Carrian’s recipe, where she ingeniously skipped royal icing in favor of dunking her cookies in a simple glaze. I was instantly captivated by this idea! I adapted it using my own special recipe and knew immediately that I’d found my preferred method.

While my family might always choose royal icing for the sheer joy of decorating together, when I truly want to impress guests (and myself!) with the absolute best flavor, glazed gingerbread cookies are my undeniable go-to. To cater to all preferences, I’m providing recipes for three excellent frosting options:
- Royal Icing (Best for intricate decorating. Update! I finally created a comprehensive tutorial post!)
- Glaze Icing (The best tasting and easiest option for a quick, elegant finish.)
- Buttercream Frosting (The richest choice, perfect for simple, generous frosting.)
Buttercream offers a wonderful alternative if you desire some basic decoration without committing to the intricacies of royal icing. Its creamy texture provides a delightful contrast to the chewy cookie.
Choosing the Perfect Gingerbread Cookie Cutters
I know this might sound incredibly particular, but I’ve developed some strong opinions (let’s call them “rules”) about selecting the ideal gingerbread cookie cutters. After spending so much time with them for this post, these cutters and I have become honorary family members. I even gave them names: Big Daddy, Fat Boy, Lil Brother, and Baby Spice. 😂
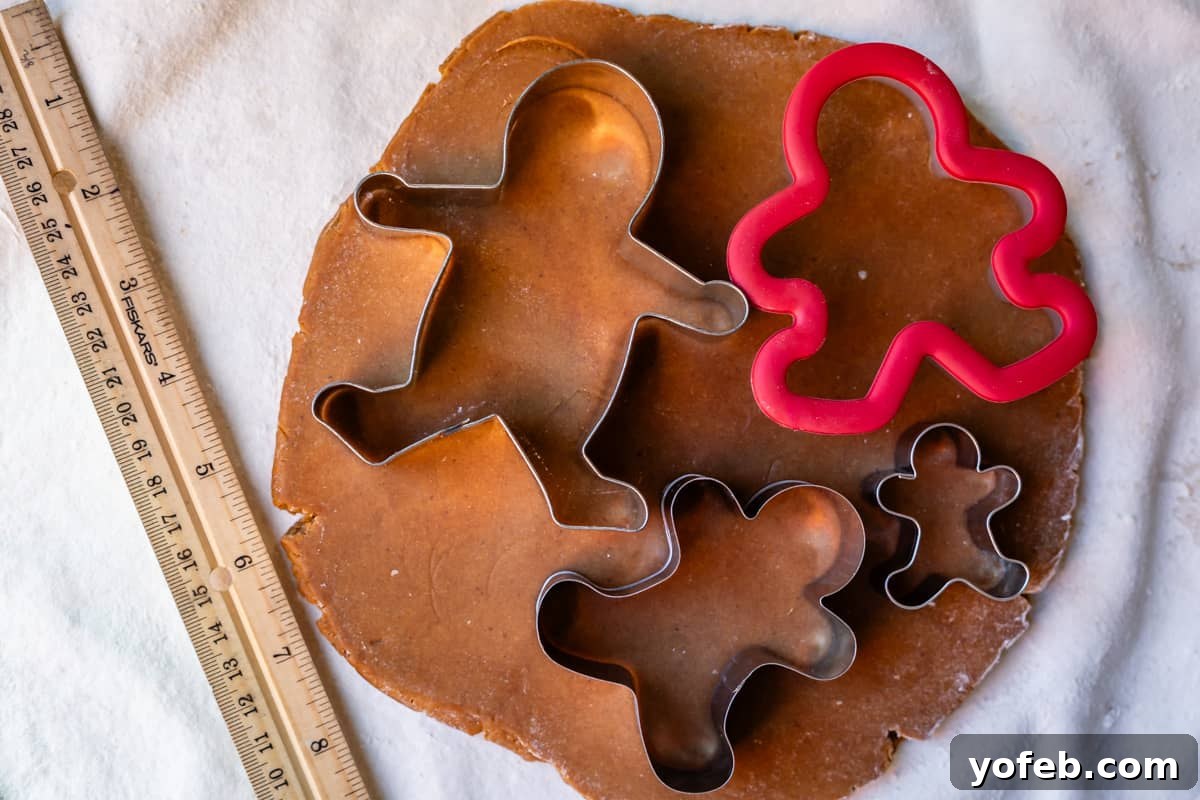
- Arms Up, Always! Choose gingerbread men with arms pointed upward, not down. They simply look cuter, more inviting! It’s like he’s reaching up for a hug, and who can resist that? I found myself less enamored with cookies from the red cutter, which had downward-facing arms.
- Large & In Charge (for Decorating): Big gingerbread men (4 inches tall or larger) are fantastic for decorating, especially for kids, as they offer ample space for creativity. However, they can be fragile, with arms and feet prone to snapping during packaging, making them less ideal for gifting or cookie exchanges.
- The Versatile Mid-Size (My Recommendation): If you’re only making one size, opt for a mid-size, 3-inch tall gingerbread man. They are easy to decorate, offer a satisfying bite, and are reasonably sturdy for gifting without breaking.
- The Adorable Teeny Tiny (Crowd Pleasers): These adorable little gingerbread men (2 inches tall) are absolute show-stoppers. People genuinely “lose their minds” over them – the squeals of delight are guaranteed! Tiny things evoke tiny love, it seems. I’ve brought all these sizes to events, and the small ones consistently disappear first. Not everyone wants to commit to a giant cookie!

I acquired all my cookie cutters for this post years ago, but here is a link to excellent ones I would choose now, offering arms-up designs in large, medium, or tiny sizes – truly perfect! Of course, feel free to disregard my overly bossy suggestions if you wish; I come from a family with a proud “control freak” streak! My sister once critiqued her roommate’s lasagna cheese-sprinkling technique in college, which was her epiphany moment. So, take my advice with a grain of salt, or a tablespoon of gingerbread spice!
Gingerbread Cookie Ingredients Demystified
This delightful cookie recipe requires just 10 key ingredients! You’ll likely have most of these staples in your pantry already, making these soft and chewy gingerbread men surprisingly accessible. Below is a quick overview of what you’ll need. For precise measurements and detailed instructions, be sure to consult the comprehensive recipe card at the end of this post.
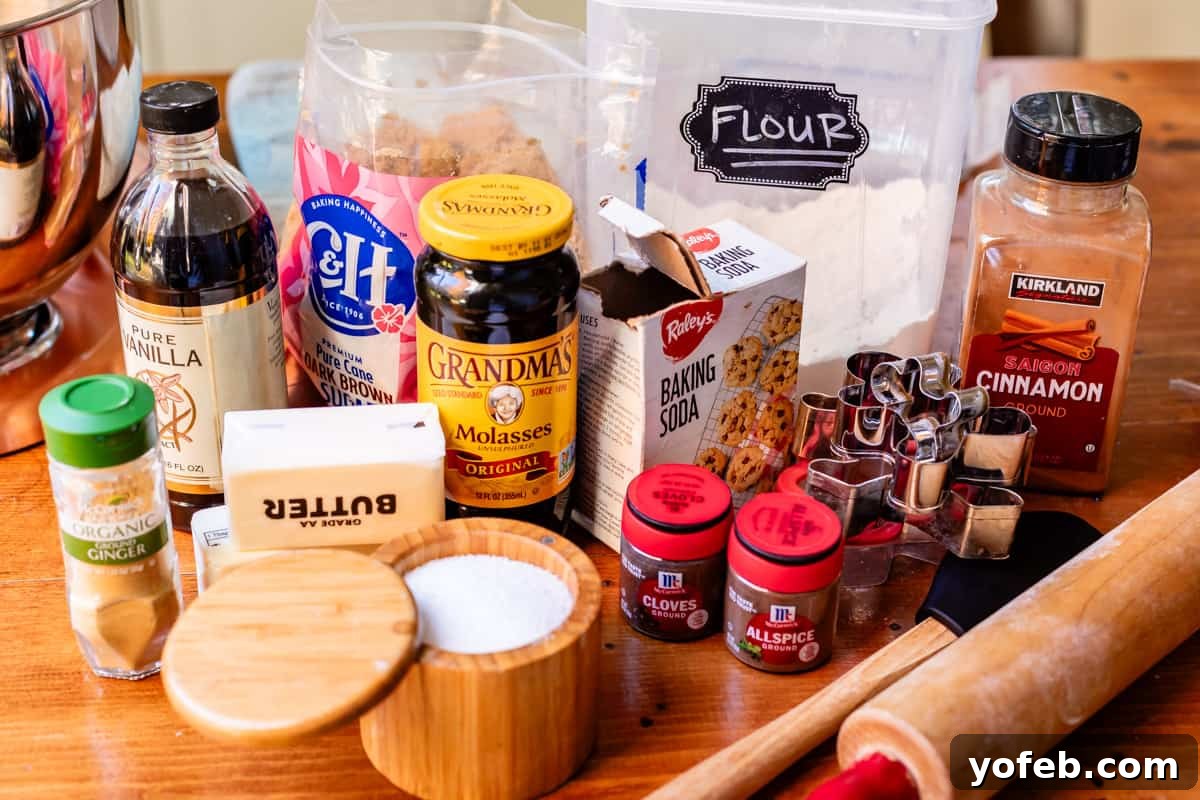
- Butter: Softened, for richness and texture.
- Dark Brown Sugar: Essential for deep flavor and moisture. Light brown sugar also works.
- Molasses: The star for chewiness and classic gingerbread taste (avoid blackstrap).
- Vanilla Extract: Enhances all the other flavors.
- All-Purpose Flour: The structural foundation of the cookie.
- Kosher Salt: Balances sweetness and amplifies flavor.
- Ground Ginger: The primary warming spice, delivering that signature gingerbread kick.
- Ground Cinnamon: Adds warmth and aromatic complexity.
- Ground Cloves: A pungent, sweet-spicy note that complements ginger beautifully.
- Ground Allspice: Contributes a complex blend of clove, nutmeg, and cinnamon flavors.
For the Icing:
Royal Icing (for decorating):
- Meringue powder (or fresh egg whites)
- Powdered sugar
- Gel food coloring (optional, for vibrant designs)
Easy Glaze Frosting (my favorite for flavor):
- Powdered sugar
- Milk
- Corn syrup (for shine and smoothness)
- Salt
- Vanilla extract
Buttercream Frosting (for richness):
- Butter
- Powdered sugar
- Cream
- Vanilla extract
- Salt
- Gel food coloring (optional)
Step-by-Step Guide to Making Soft Gingerbread Cookies
Let’s get baking! We start, as all good baking projects should, with the delightful combination of butter and sugar – the foundation for any exceptional cookie.
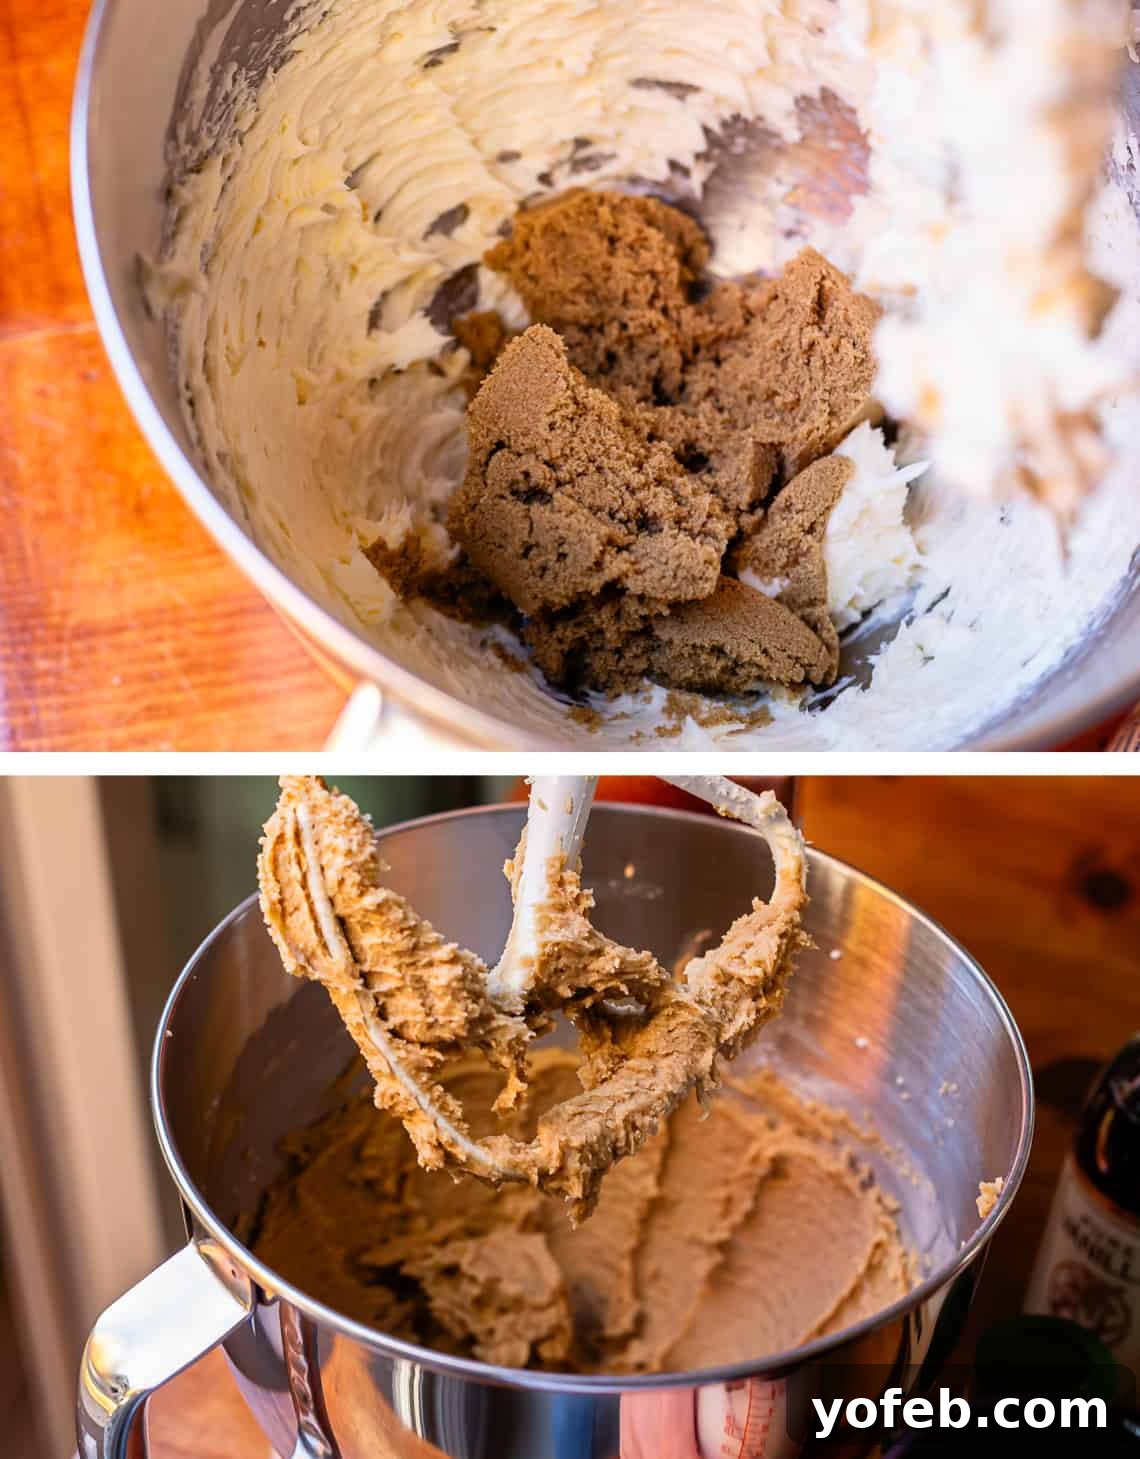
Since this gingerbread cookie recipe has a relatively short ingredient list, the quality of each component is paramount. A crucial tip: use fresh, soft brown sugar. If you’re chipping away at a rock-hard block you bought half a year ago, your cookies simply won’t achieve the desired softness and moisture. Freshness makes a world of difference!
Another secret to our cookies’ incredible softness and chewiness is the generous addition of molasses. This rich, dark syrup is the “good stuff” that brings unparalleled depth of flavor. Opt for light or dark unsulphured molasses; however, steer clear of blackstrap molasses, which is much darker and can impart a bitter, overly robust flavor best suited for savory applications. For more on molasses, check out this informative Guide to Molasses from The Kitchn.
Have you invested in an adjustable measuring cup yet? It’s a complete game-changer, especially for sticky ingredients like molasses, making your baking life so much easier.
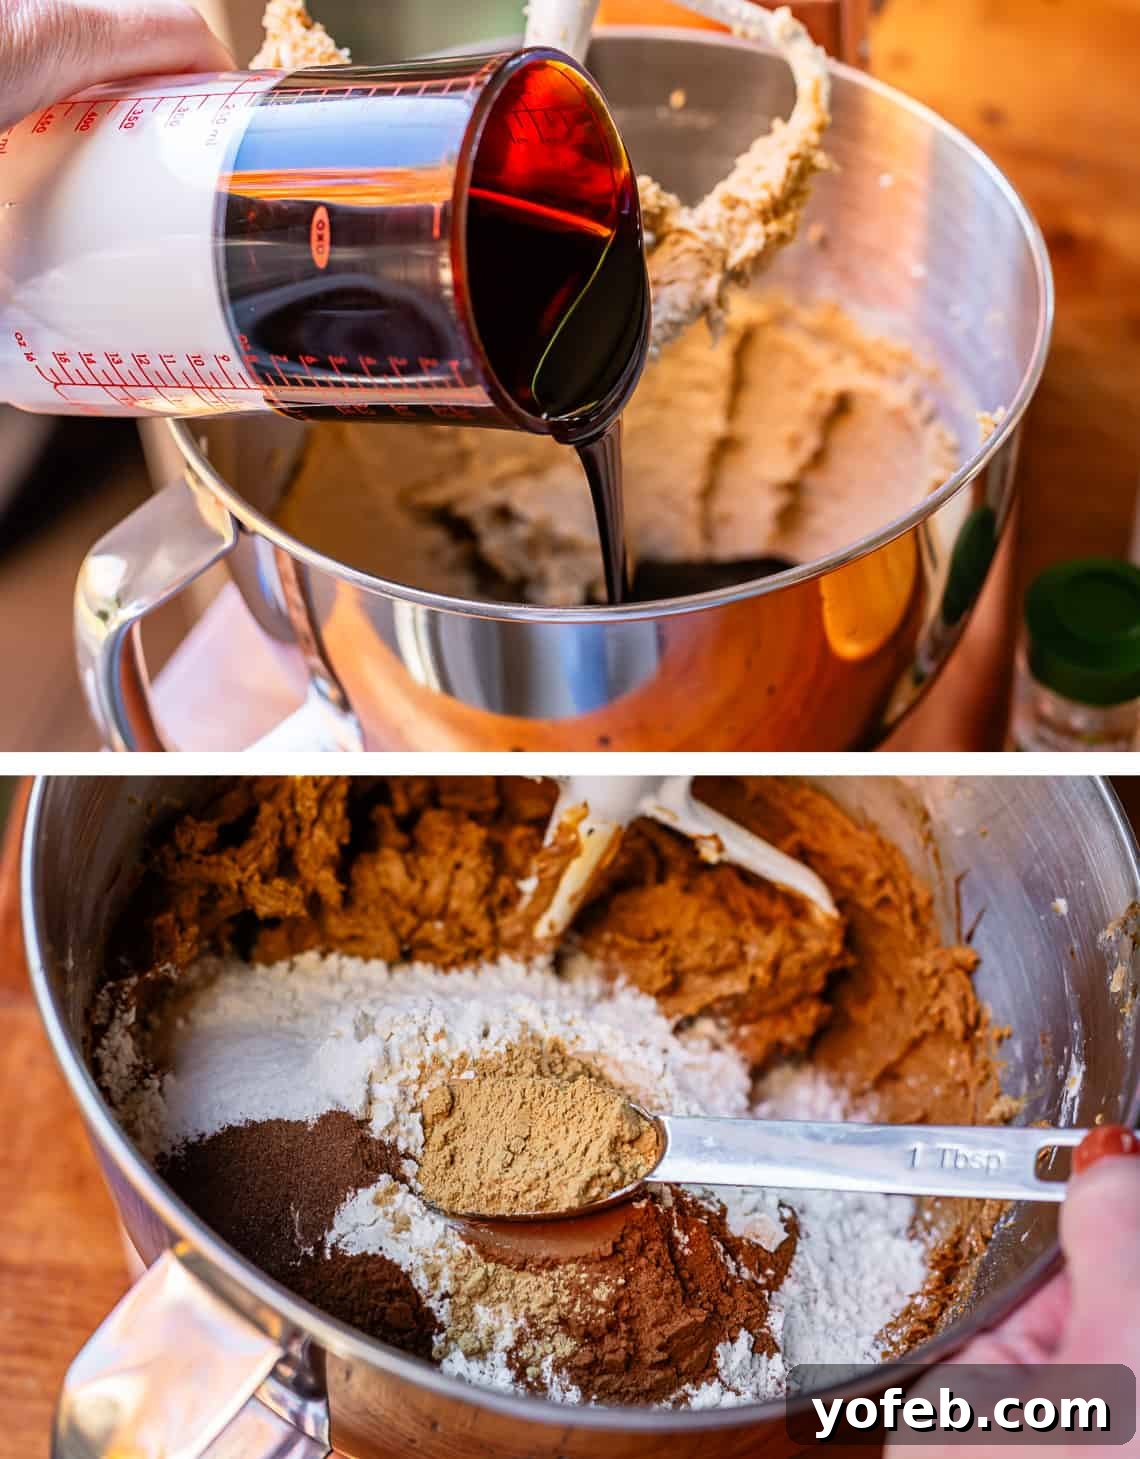
Now, it’s time for the flour, salt, and those essential spices! Notice, there’s no baking soda in this recipe. We’re adding a full TABLESPOON of ground ginger and another full tablespoon of ground cinnamon, along with precise amounts of cloves and allspice. If you’re feeling adventurous and want an extra kick, a dash of nutmeg or cardamom would also be lovely. (Get it? Spicy!)
Eric’s family cherishes a gingerbread recipe from his great Grandma Prudy, lovingly called “Gingerbread Boys,” which traditionally has crispy edges. While I admire its flavor, I wanted a softer version. I consulted my mother-in-law for her spice blend to capture that authentic old-school taste, and it’s just these four: cinnamon, ginger, allspice, and cloves.
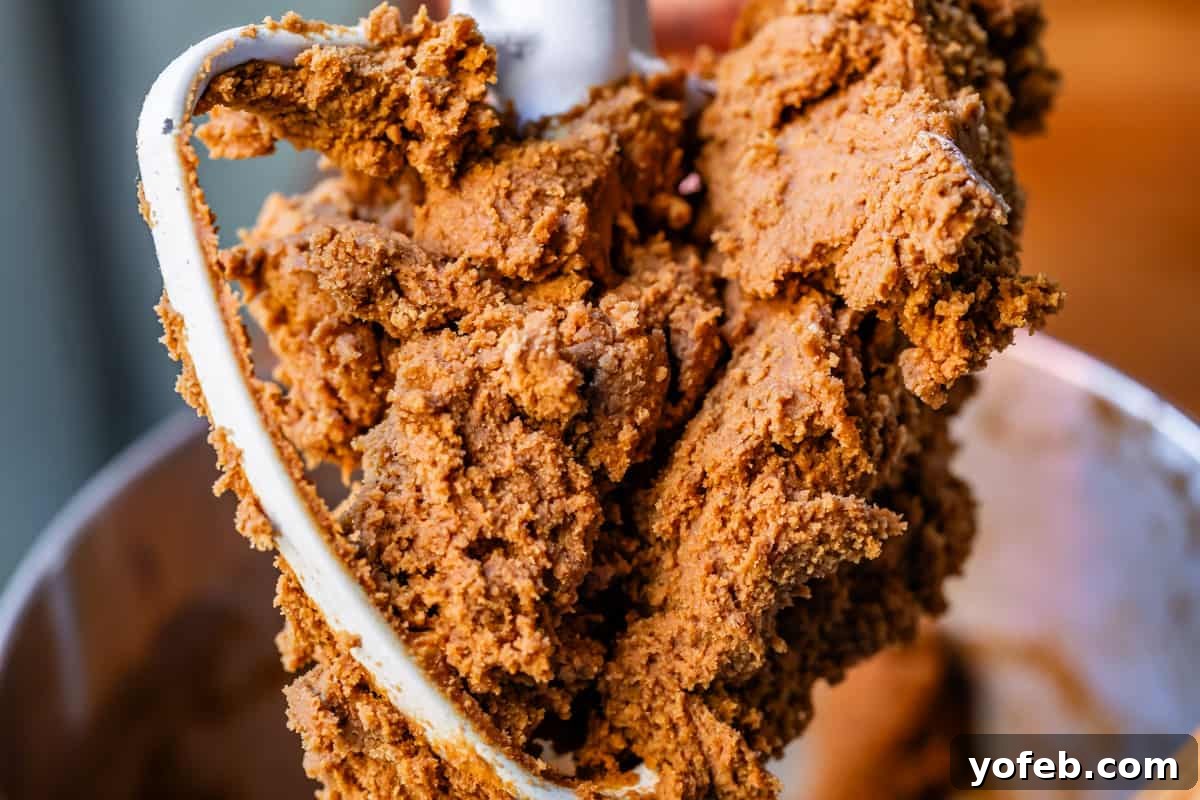
Fair warning: once this dough comes together, you’ll find it incredibly difficult to resist. With no egg to deter you, it’s pure, unadulterated Christmas magic, free from salmonella worries and meddling adults. Go ahead, live your best life and sample a little!
To prepare for chilling, lay out 2 or 3 sheets of plastic wrap and divide your dough evenly.
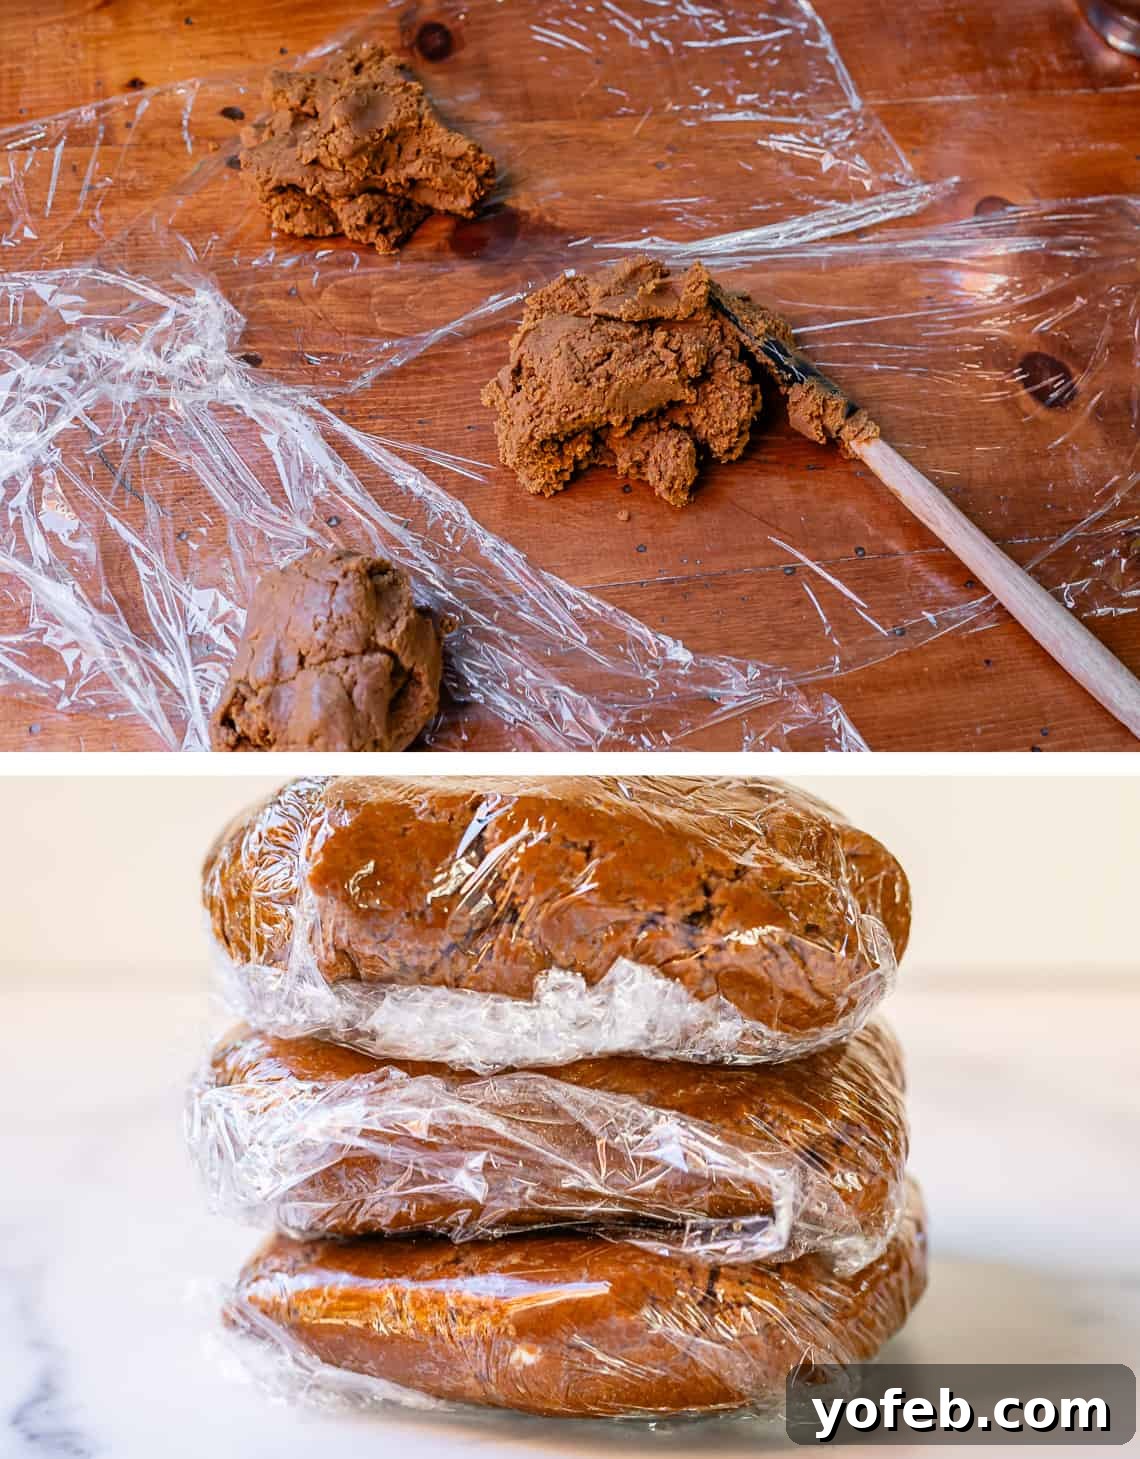
Wrap each portion of dough securely and gently shape it into a disc. Pop it into the fridge to chill thoroughly. Or, if you’re like me and often short on time, try my cheat: 30 minutes in the freezer followed by another 30 minutes in the fridge. This achieves firm, manageable dough much faster.
Time to roll! Lightly dust your work surface with flour. I’m a huge fan of my pastry cloth; it’s incredibly handy for rolling out dough evenly and preventing sticking.
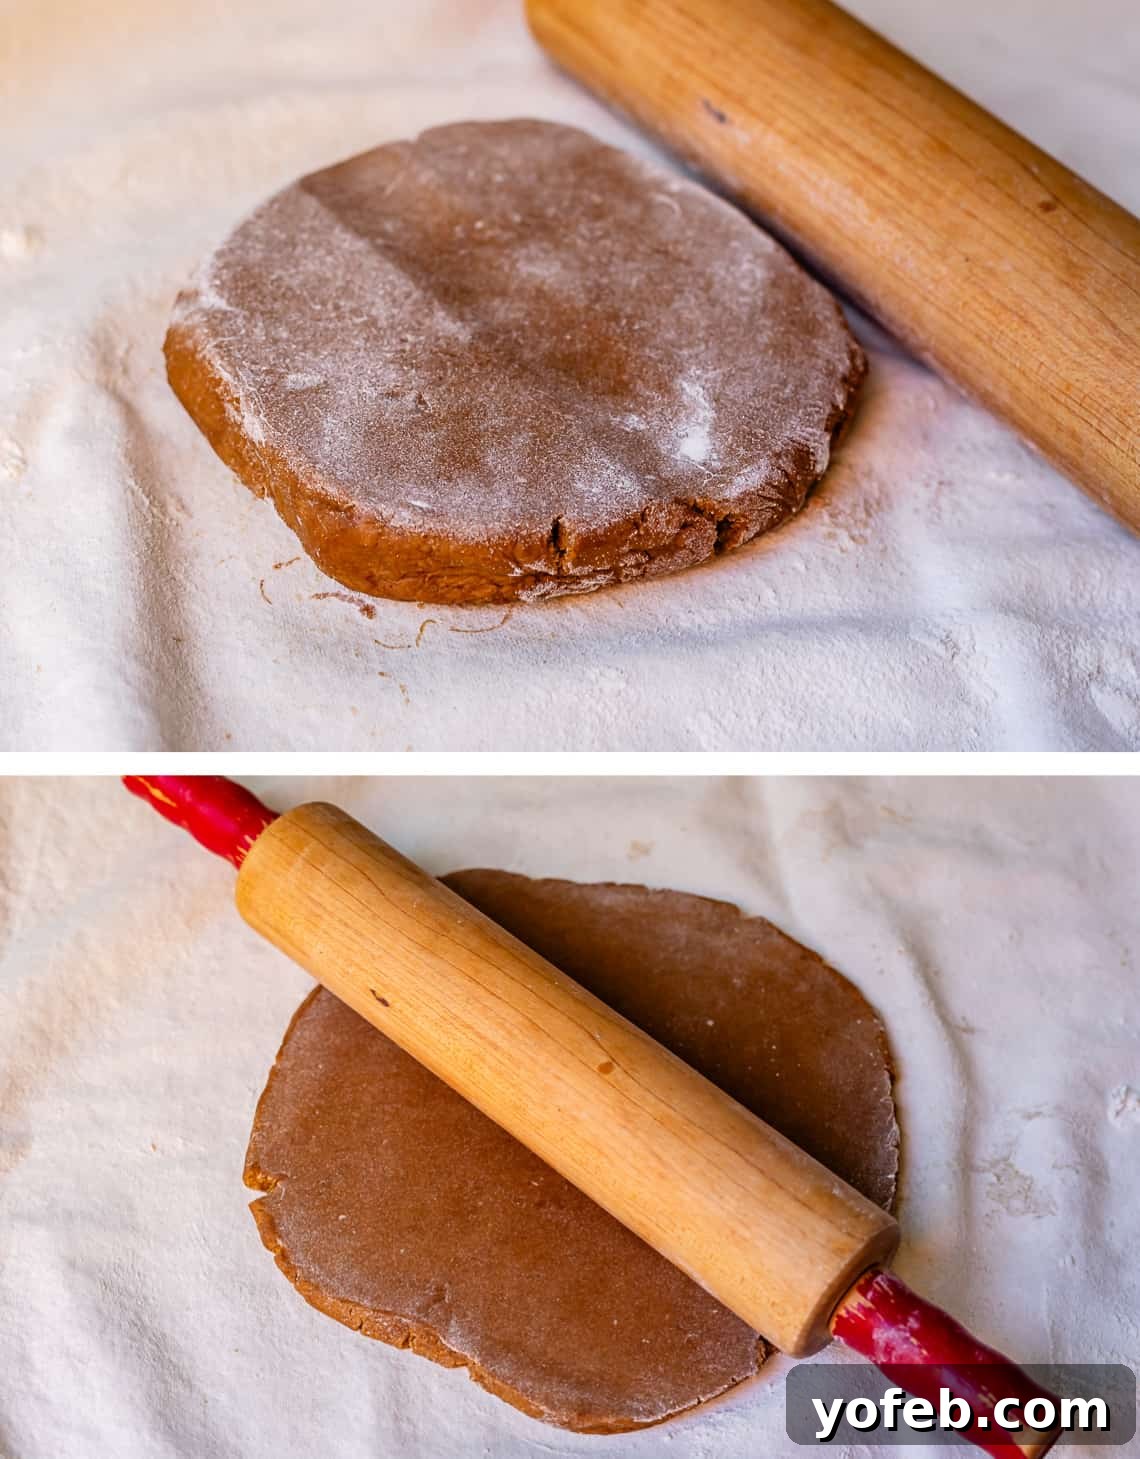
If your dough is fresh from the fridge, give it a few gentle thumps with your rolling pin to help it loosen up and become more pliable. Then, begin rolling it out, but here’s the crucial part: **DON’T ROLL TOO THIN!** I cannot overstate this enough. This is the precise moment you determine whether your cookies will be soft or crunchy. Rolling the dough thick (combined with zero leavening) is the ultimate secret to their irresistible tenderness. This very technique is what makes my Sugar Cookies recipe so incredibly popular and beloved (just check out the hundreds of glowing reviews!).
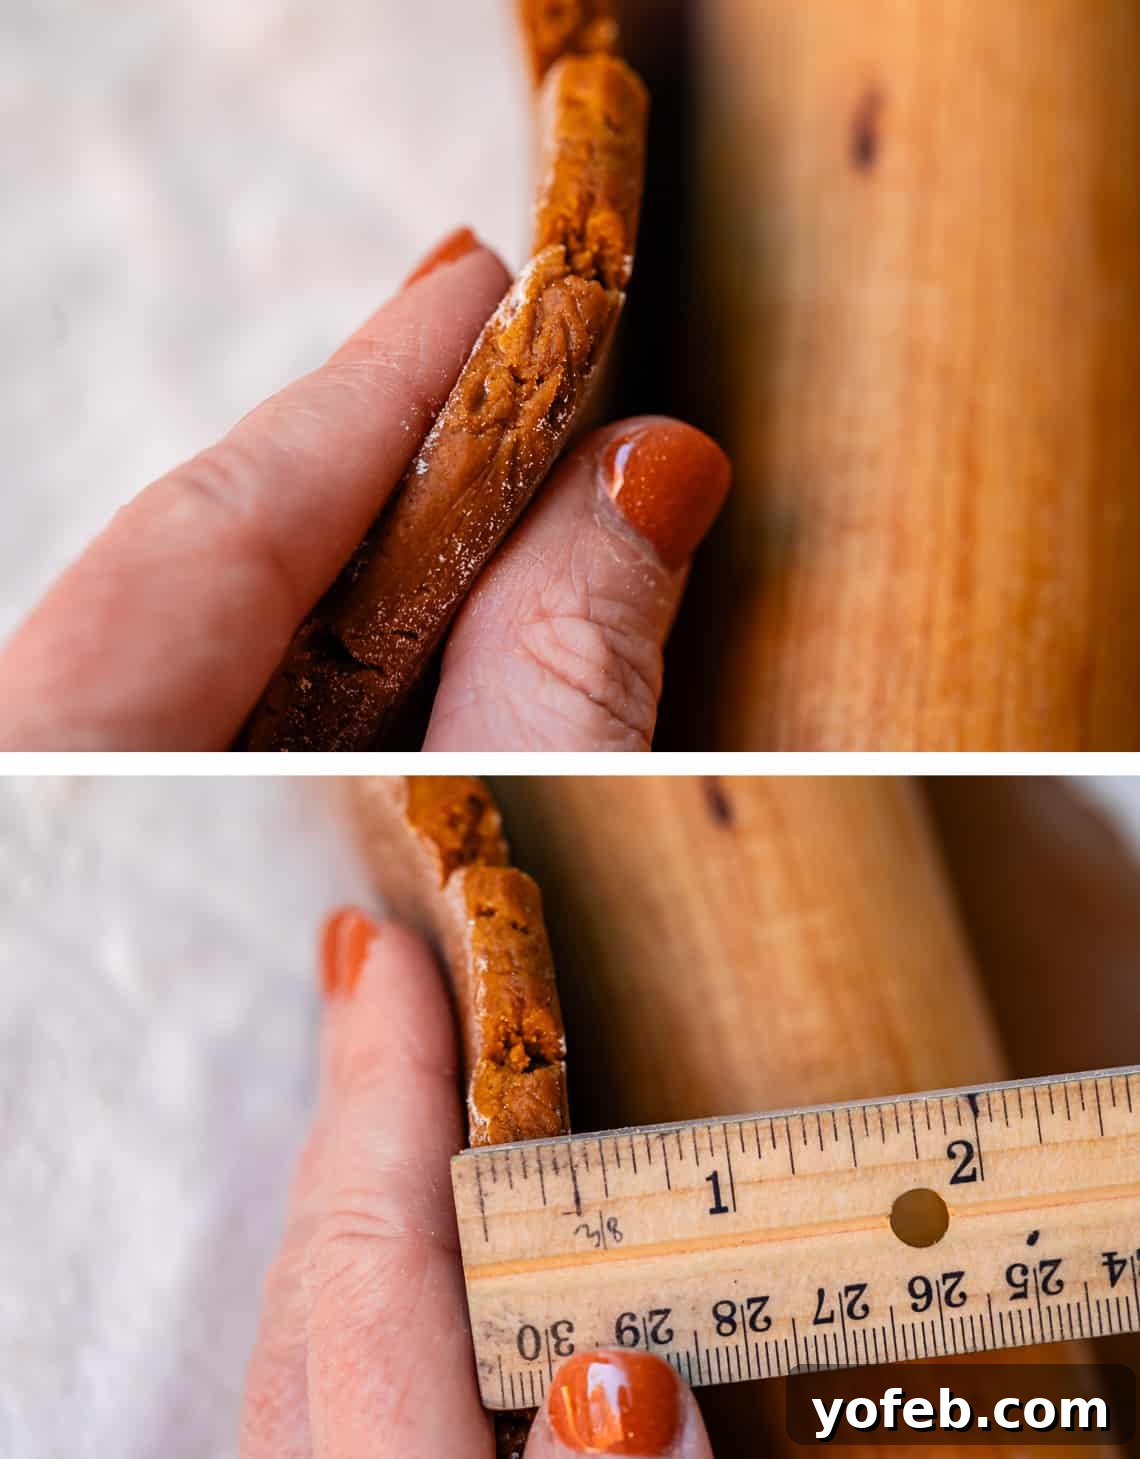
Don’t be intimidated by the ruler in the photo! You don’t need to get yours out, but I’m showing it to give you a clear visual of the ideal thickness. We’re aiming for a substantial 3/8 inch, which is just under half an inch.
Now, it’s time for the fun part: cutting the dough! Bring out your gingerbread man cutters! Remember to consult the section above on choosing the best cookie cutter sizes for your specific needs, whether for gifting, decorating with kids, or creating a stunning display.
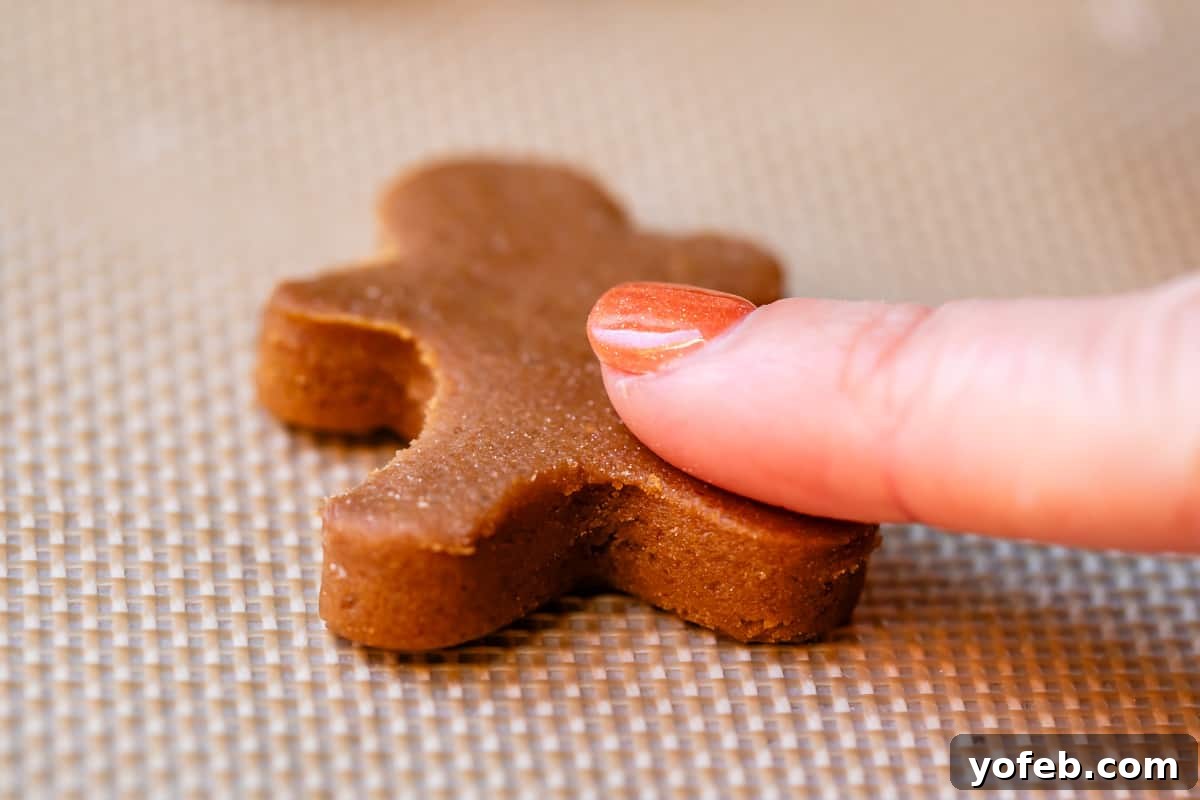
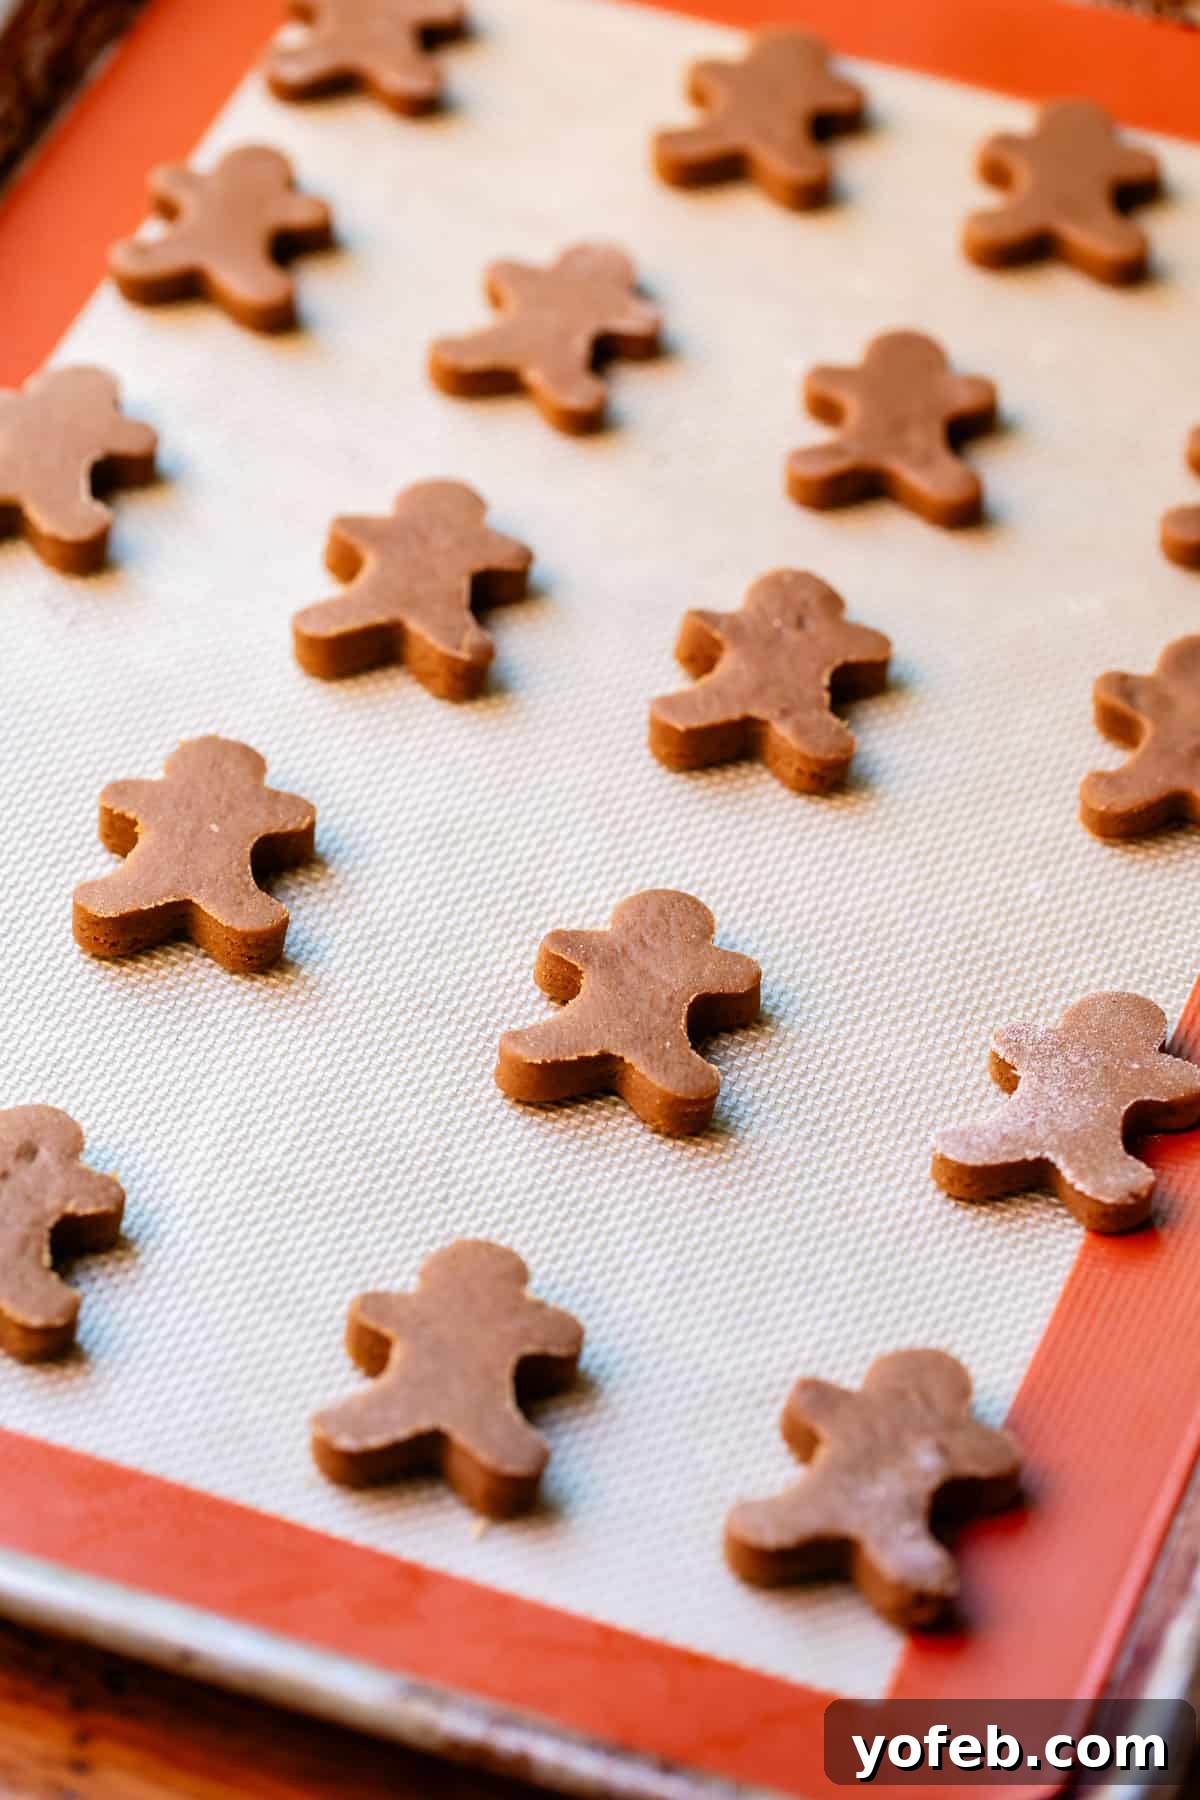
Even for the smallest gingerbread figures (like this 2-inch tall cutter), maintain that super-thick dough. When cutting, always remember to dip your cookie cutter in flour, especially if you’re working with an intricate design. This prevents sticking and ensures clean edges.
Another handy tip for intricate cookie cutter designs:
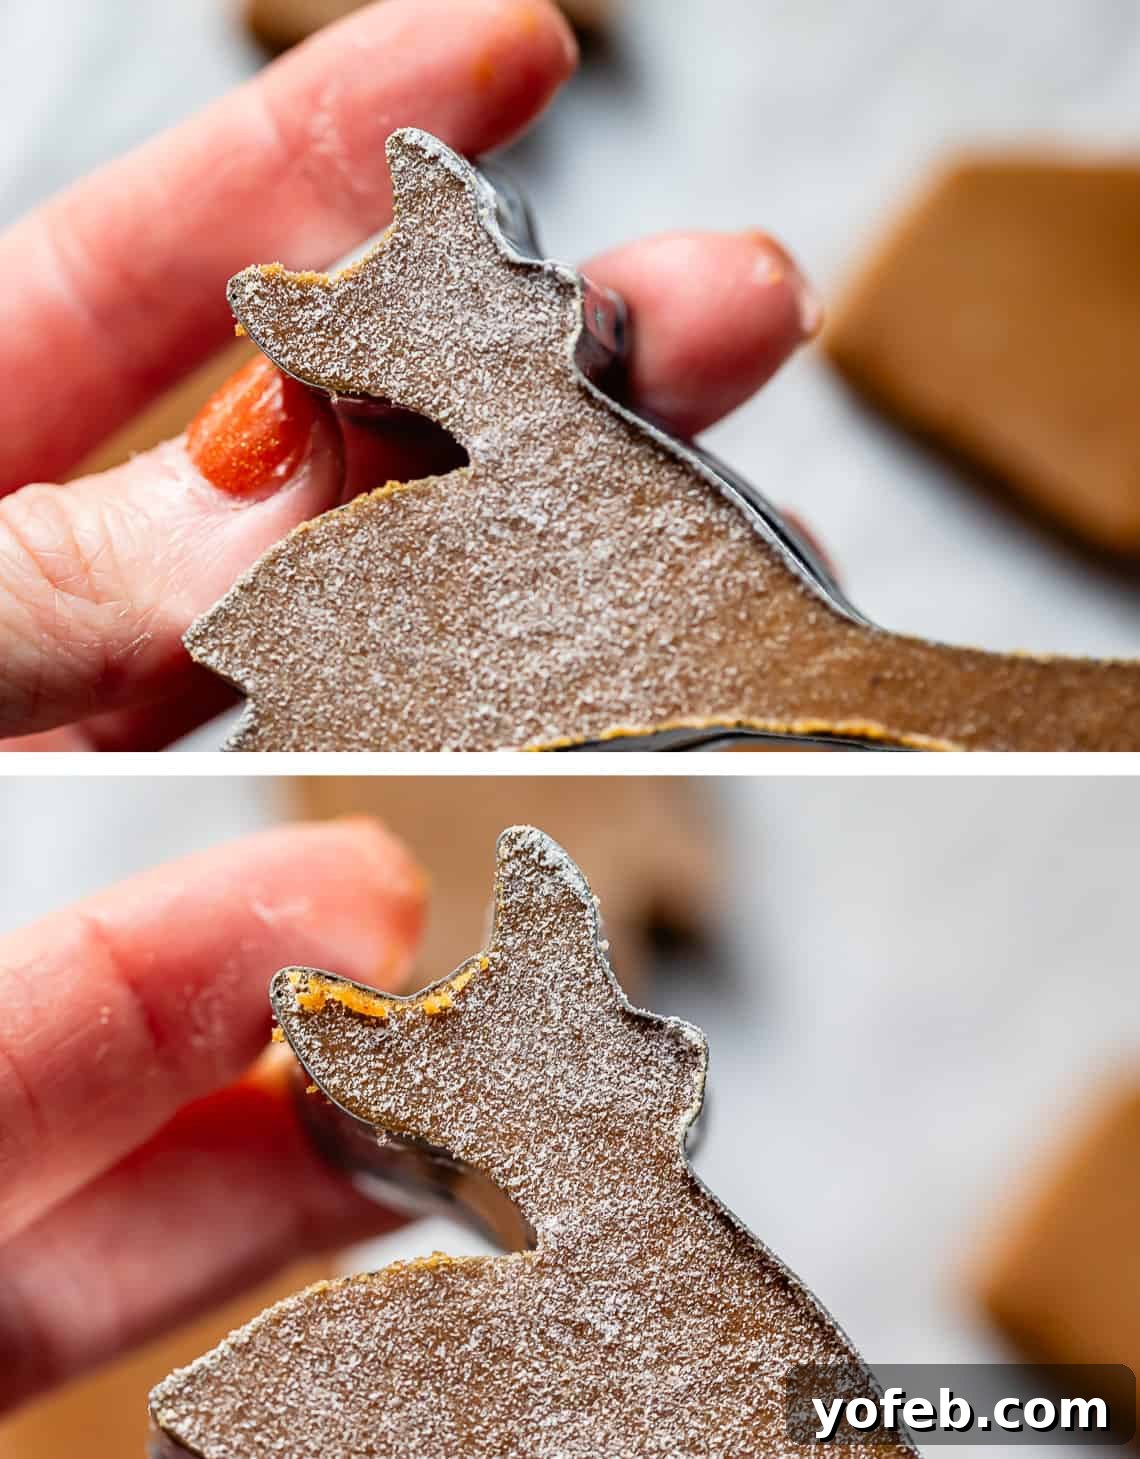
Use your finger to carefully remove any excess flour or dough that might cling to the outside edges of the cookie cutter. For very tight spaces, a small knife can be helpful. This meticulous step is the best way to ensure sharp, well-defined edges on your baked cookies.
Now, it’s baking time! The golden rule here is simple: **DO NOT OVERBAKE!** This is paramount for achieving soft cookies.
Remove the cookies from the oven as soon as their tops are no longer shiny. Immediately after taking them out, quickly assess the shape of your little gingerbread men and nudge them into perfection if needed. This window of opportunity is fleeting!
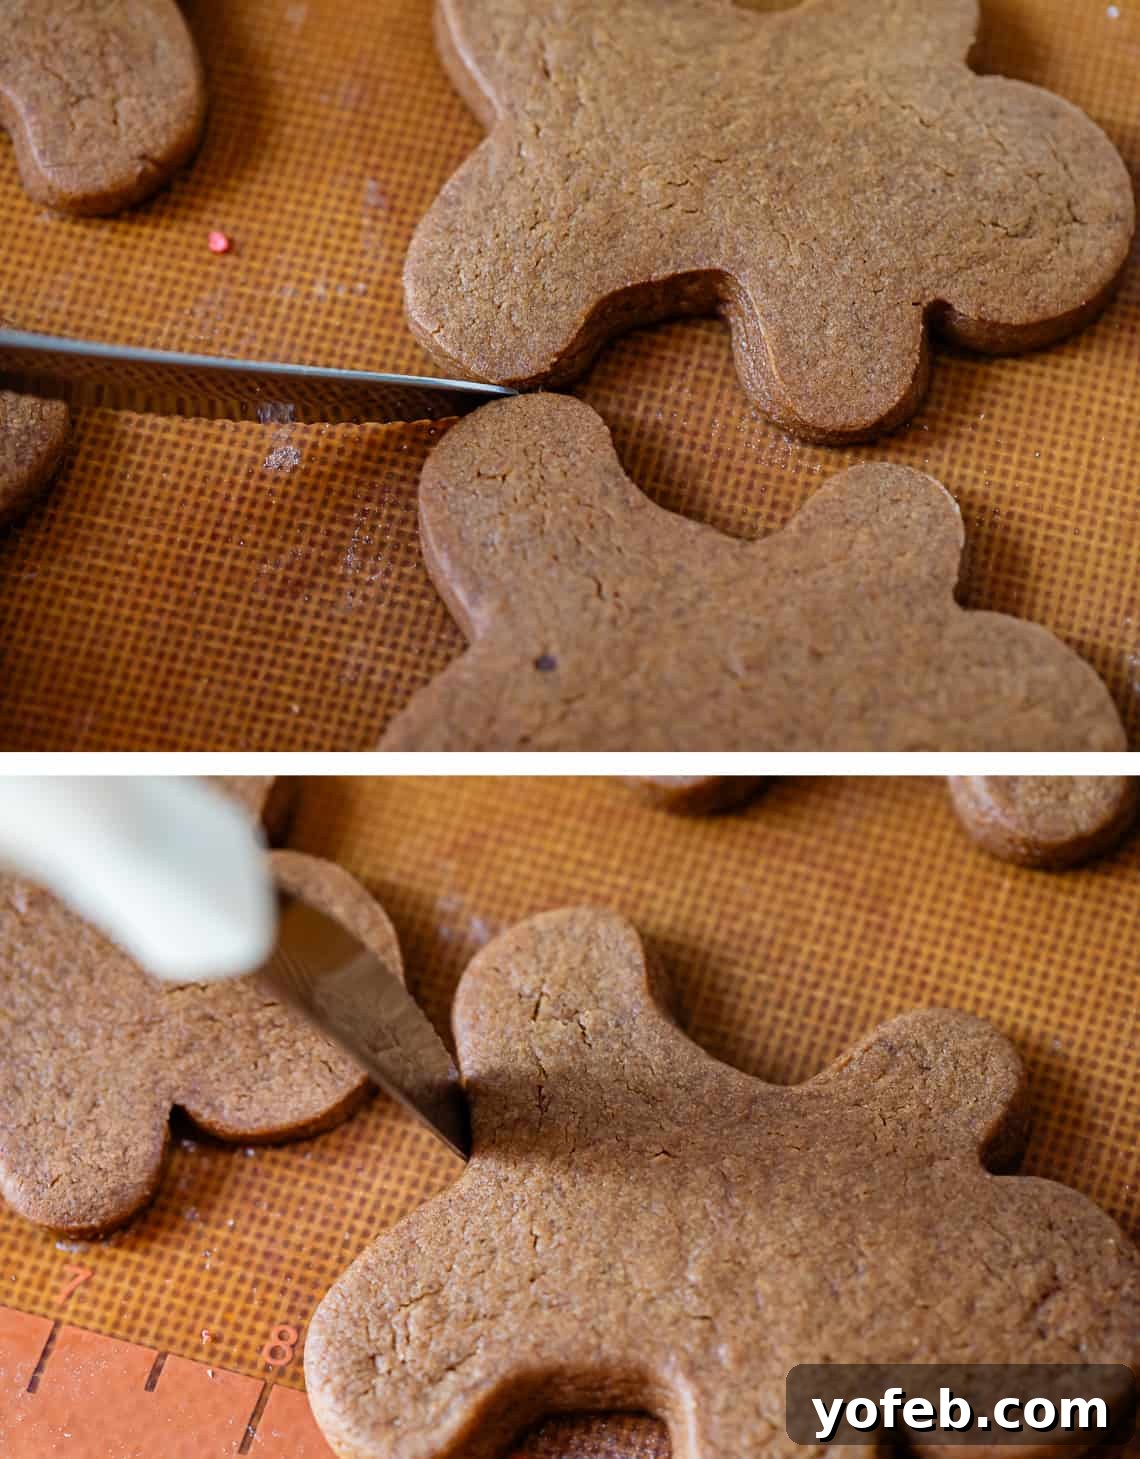
Never underestimate the power of a gentle nudge within 30-60 seconds of your cookies emerging from the oven. These cookies are yours to subtly shape! Use a knife or spoon to give a “diet” to any gingerbread man who looks a bit too plump. While this recipe minimizes spreading, it’s still a cookie, and even flour itself acts as a mild leavener. This is also your chance to separate any gingerbread men who decided to get a little too friendly on the baking sheet.
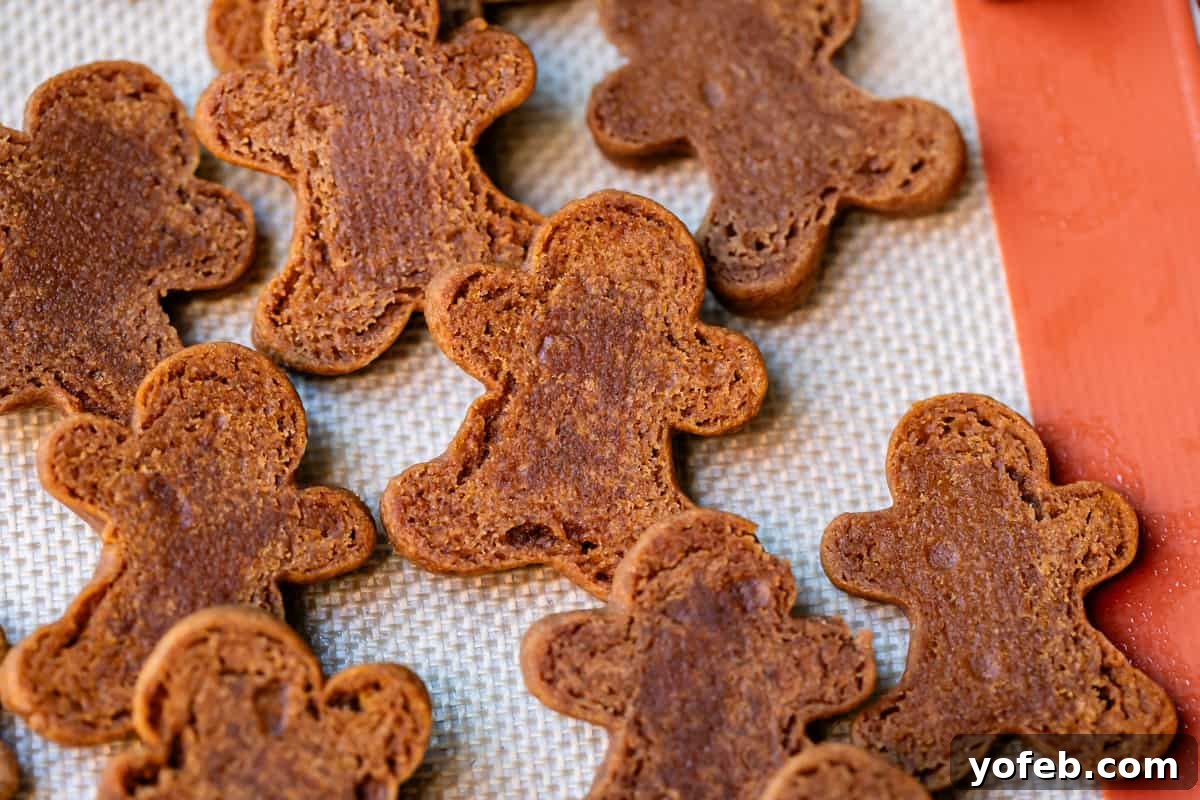
Allow the cookies to cool for a few minutes. When you flip them over, look for dark spots on the back – this is your visual cue for a perfectly soft cookie! Once completely cooled, immediately transfer them to an airtight container and keep them covered while you prepare your frosting. This crucial step locks in their moisture, ensuring they remain wonderfully soft.
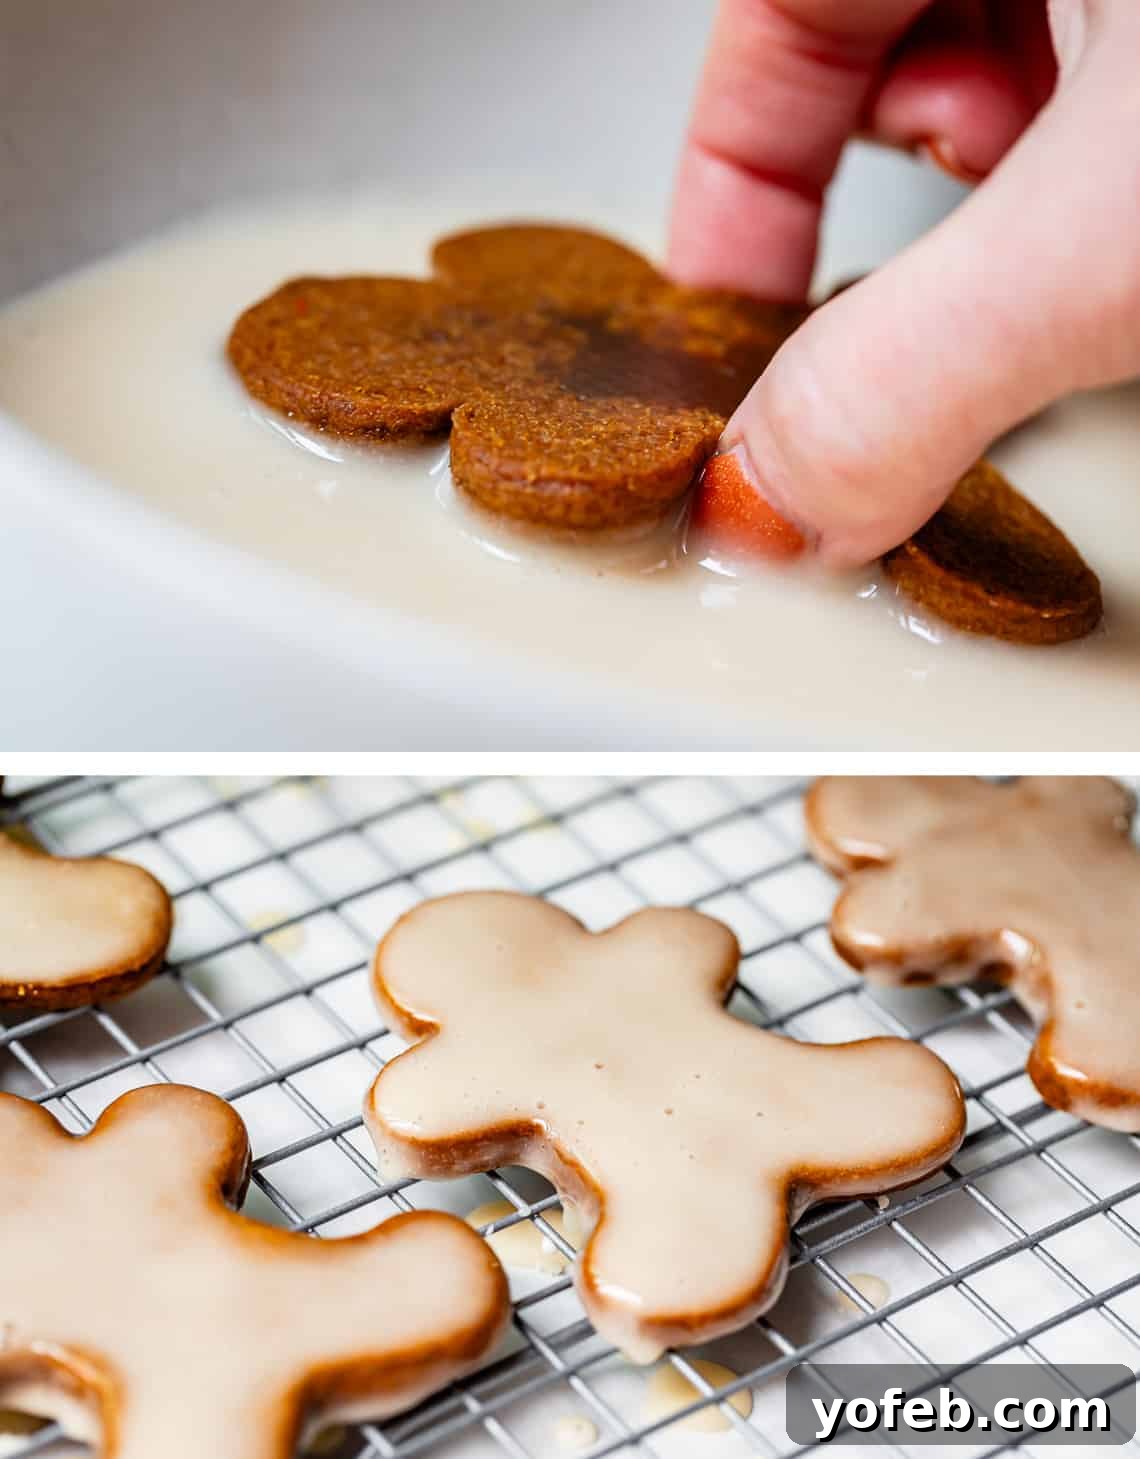
Now comes the creative part: dipping or frosting! Whether you choose the elegant royal icing, a simple glaze, or rich buttercream, this stage is always a blast, especially when shared with friends. The other night, I had some girlfriends over, and we were up until 1 AM, lost in the joy of decorating!

Perfect Pairings: What to Serve with Gingerbread Man Cookies
Beyond the delightful debate of which frosting to use, the next important question is: what to serve alongside these magnificent gingerbread man cookies? Do you enjoy them plain with a glass of milk, or do you seek a more sophisticated pairing? As a dedicated dipper, I find the warm, comforting flavors of gingerbread truly shine with hot beverages like coffee, tea, or a classic hot cocoa. The spice notes are wonderfully complemented by these cozy drinks.
If you prefer to skip traditional frosting but still desire a delicious topping or accompaniment for your gingerbread cookies, here are some ideas I adore and some I’m eager to try:
- Simple Whipped Cream or Peppermint Whipped Cream: I’m telling you, peppermint and gingerbread are a match made in heaven. The cool mint offers a refreshing contrast to the warm spices. Speaking of the peppermint whipped cream recipe from my Candy Cane Trifle, what if you replaced the brownies in that recipe with these soft gingerbread cookies? Oh my goodness, a ginger-peppermint trifle! I absolutely must try that! You could even use my Molasses Cookies for a quicker version, skipping the cutting.
- Tart Fruit Jelly or Cranberry Sauce: A really good tart fruit jelly or a dollop of cranberry sauce provides a bright, tangy counterpoint. The cranberry orange combination, in particular, beautifully complements the warm spice flavor of the gingerbread.
- Easy Lemon Curd: This homemade lemon curd is 100 times better than store-bought and surprisingly easy to make. Don’t be a ginger-lemon hater – the zesty citrus and warm spice combination is absolutely divine!
- Citrus Glaze: You could also try a vibrant citrus glaze. The lemon glaze from my Glazed Lemon Bread Recipe would be a perfect fit.
- Dulce de Leche: Seriously, folks. It’s incredibly simple to make at home and would be an AMAZING, rich, and caramel-y topping for these cookies.
- Gingerbread Pudding Parfait: For a delightful dessert, crumble your cookies (sacrilege, I know!) and sprinkle the pieces over some Homemade Vanilla Pudding or Butterscotch Pudding. Or, for a simple trifle, layer the cookies and pudding with generous dollops of whipped cream!
- Gingerbread Cookie Truffles: A brilliant idea from Easy Cooking with Molly for repurposing any leftover cookies (if such a thing exists!).
- Homemade Cinna-Man Ice Cream: Someday, I *will* share a copycat recipe for Cinna-Man, a specialty flavor from Gunther’s, my favorite Sacramento ice cream shop. It was cinnamon ice cream mixed with gingerbread cookies, like a holiday Cookies and Cream. It was SO GOOD, and they’ve never brought it back! But until I perfect my copycat, if you can find high-quality cinnamon ice cream, mix these cookies in and refreeze for a day – pure bliss.

Host an Unforgettable Cookie Decorating Party
If you’re planning a festive Christmas cookie decorating party, why not offer a wonderful variety? In addition to this incredible gingerbread cookie recipe, you could also make batches of The Softest Sugar Cookies of Your Life and The Softest Chocolate Sugar Cookies. This way, your guests will have a delightful array of options to decorate. And don’t forget the essential BEST Buttercream Sugar Cookie Frosting Recipe to complete the spread! It’s an easy way to ensure everyone, from kids to adults, has a blast creating their edible masterpieces.
Storing and Freezing Gingerbread Cookies Like a Pro
Proper storage is key to keeping your homemade gingerbread men perfectly soft and delicious long after they’ve cooled. It’s surprisingly simple: transfer the cookies to an airtight container, where they will remain fresh and wonderful on your countertop for 4-5 days. Be mindful that gingerbread cookies will quickly dry out and become hard if left uncovered or stored in the cold, dry air of the refrigerator, so avoid those common pitfalls!
If you find yourself with already-frosted cookies (a rare but delightful problem!), you can still store them sealed on the counter for a few days. For longer preservation, freezing is your best friend:
Can You Freeze Gingerbread Cookies? Absolutely!
Freezing gingerbread cookies, whether baked or as dough, is an excellent strategy for holiday meal prep and ensuring you always have a batch of festive treats on hand. My personal favorite method is to freeze the unbaked dough, but here’s how to freeze finished cookies as well:
- Freeze the Dough: You have a couple of options here. You can wrap the chilled dough discs tightly in plastic wrap, then place them into a ziplock freezer bag. Alternatively, you can roll out and cut your gingerbread shapes, lay them on a cookie sheet, and “flash freeze” them for 30-60 minutes until firm. Once flash-frozen, you can stack them with layers of wax or parchment paper in between and store them in a large airtight container or freezer ziplock bag. Regardless of the method, the dough will keep beautifully in the freezer for 1-2 months. When you’re ready to bake, simply place the frozen cut-outs directly onto a baking sheet – no thawing required!
- Baked, Unfrosted Cookies: If you have baked cookies that haven’t been frosted yet, you can freeze them too. Allow them to cool completely, then place them in an airtight container or freezer ziplock bag, pressing out as much air as possible before sealing. They will maintain their quality in the freezer for 2-4 weeks. While technically safe to eat beyond this period, prolonged exposure to stale freezer air can begin to affect their taste, so it’s best to enjoy them within this timeframe.

Freeze the Decorated Cookies for Stress-Free Holidays
Freezing fully decorated cookies is my ultimate holiday season hack! It’s an enormous time-saver when I’m assembling festive cookie plates for friends, family, and neighbors. Here’s how to do it for each frosting type:
- Royal Icing: Once your royal icing is completely dry and hardened (this is crucial!), store the cookies in a tightly sealed airtight container and freeze them for 2-3 weeks. Royal icing sets very firm, so you should be able to stack them without worry. When you’re ready to serve, simply spread them out in a single layer and allow them to thaw at room temperature.
- Glaze Icing: Ensure the glaze icing is completely dry before freezing (this can take a few hours). Store the cookies in an airtight container, placing a piece of parchment paper between each layer to prevent sticking. For thawing, arrange the cookies in a single layer, ensuring no cookies are touching each other. The glaze tends to release moisture upon thawing, and they will need to re-dry; it will look as if you just dipped them again. Therefore, thawing them stacked is not recommended.
- Buttercream Frosting: For buttercream-frosted cookies, “flash freeze” them first by placing them in a single layer on a baking sheet in the freezer until firm (about 30-60 minutes). Once hardened, transfer them to an airtight container, separating each stack with parchment paper. When thawing, lay the cookies out in a single layer to prevent the buttercream from melting into each other and to allow them to come to room temperature gracefully.
Gingerbread Cookie Frequently Asked Questions
Gingerbread gets its distinctive, warm, and inviting flavor from a blend of aromatic spices, primarily ginger, cinnamon, cloves, and allspice. Sometimes nutmeg or cardamom are also included. The star of the show is, of course, ginger, which provides a unique spicy warmth. A deep, rich molasses, a warm and earthy sweetener, also contributes significantly to the overall flavor profile, adding depth and complexity that defines classic gingerbread.
They are very closely related and share a wonderfully spiced flavor profile, but they are not quite the same. Ginger cookies, often known as Ginger Molasses Cookies or simply Molasses Cookies, generally have a softer, lighter, and chewier texture. They are typically shaped into balls and rolled in sugar before baking, often developing a crinkly top. Gingerbread, on the other hand, is traditionally a denser, firmer, and chewier cookie (which is why it’s perfect for building gingerbread houses!). It’s usually rolled out and cut into specific shapes like gingerbread men or house pieces. My advice? Don’t choose just one! The Christmas season is about abundance and joy, and I believe there’s a place for both these delicious cookies in your holiday baking schedule!
Traditionally, gingerbread cookies are not meant to be crunchy; they are typically firm, dense, and chewy. If you’re looking for a crunchy, ginger-spiced treat, that’s where Gingersnaps come in! That being said, there is a spectrum of textures within the gingerbread world, from very soft to quite firm. For eating, I personally prefer to bake my cookies on the softer, chewier side. However, if you are cutting out pieces for decorative purposes – like for a gingerbread house or cookies meant for display rather than immediate consumption – you’ll want to bake them longer until they are very hard and dry. This extended baking ensures they set firmly and prevents the icing from absorbing moisture, which can discolor it and compromise the structural integrity of your creation over time.
More Ginger-Spiced Delights for Your Holiday Table
Gingerbread is an undeniable classic, cherished for generations, but the world of ginger and warming spices offers so many other delicious treats to explore! Expand your holiday baking repertoire with these fantastic ginger-spiced recipes:
- Soft and Chewy Molasses Cookies: The gingerbread’s softer, lighter cousin – a true Christmas cookie dream come true, with that signature crinkly top.
- Ginger Molasses Sandwich Cookies with Buttercream Frosting: The absolute best of both worlds: classic soft molasses cookies generously filled with a thick, creamy layer of vanilla buttercream.
- Grandma Prudy’s Classic Gingersnaps: A beloved recipe straight from my husband’s Swedish great-grandmother, delivering the perfect balance of crispy edges and a chewy center.
- Chocolate Chunk Gingerbread Cookies: Imagine a gingerbread-spiced chocolate chip cookie – these are incredibly amazing, marrying two beloved flavors.
- Frosted Peppermint Gingerbread Bars (Candy Lasses Bars): Thick, moist, and gooey gingerbread bars crowned with creamy buttercream and a festive sprinkle of crushed candy cane.
- Gingerbread Pancakes with Lemon Syrup: All the comforting flavors of gingerbread, but for breakfast! A zesty lemon syrup adds a delightful brightness.
- Ginger Sticky Toffee Pudding Cake: An incredibly moist and decadent cake, featuring rich ginger flavors and drenched in a warm, buttery caramel sauce.
- Gingerbread Toffee Lush Dessert from The Domestic Rebel: A delightful layered dessert that incorporates the seasonal flavors of gingerbread and toffee.

The Best Holiday Cookies for Your Festive Spread
December is undeniably my absolute favorite baking season – how about you? At the top of my list is always baking an abundance of cookies for holiday parties, neighbor goodie plates, teacher gifts, and countless other festive occasions. Dive into this collection of some of the very best cookies for the season, guaranteed to spread joy and deliciousness!
- Thick & SOFT Sugar Cookie Recipe: The ultimate, easy sugar cookie recipe for Christmas! These hold their shape perfectly and are ideal for family decorating sessions or holiday parties.
- Mexican Hot Chocolate Cookies (Chocolate Snickerdoodles): Super chocolatey with a delightful hint of spice – a cozy twist on a classic.
- Mint Chocolate Chip Cookies: If you’re a fan of mint chip ice cream, you will absolutely adore these soft, refreshing cookies!
- Peppermint Candy Cane Cookies: Two holiday favorites, peppermint and sugar cookies, combined into one irresistible treat.
- Peanut Butter Blossom Cookies: A nostalgic classic! If you were like me as a kid, you always raced to grab the cookie with the Hershey’s Kiss from the treat plate first!
- Grandma Prudy’s Classic Spritz Cookie Recipe: Traditional Swedish Christmas cookies that are a cherished classic in Eric’s family, perfect for pressing into intricate shapes.
- Butter Pecan Cookie Recipe: To me, it just isn’t Christmas without these rich, buttery shortbread-style cookies, studded with pecans.
- Dipped Chocolate Peppermint Cookies: Fudgy and chewy, with a refreshing hint of peppermint, then dipped in even more chocolate for good measure.
- Christmas Kitchen Sink Cookies from In Bloom Bakery: A delightful mix of all your favorite holiday flavors and textures in one cookie!
Connect with The Food Charlatan: Facebook | Pinterest | Instagram

Gingerbread Man Cookies

Equipment
-
Rolling Pin
-
Gingerbread Man Cookie Cutters
-
Pastry Cloth
-
Piping Bags
-
Piping Tip #1 if using Royal Icing
-
Piping Tip #2 if using Royal Icing
Ingredients
For the Cookies:
- 1 cup butter, softened
- 1 cup dark brown sugar, packed
- 1 cup molasses, I like Grandma’s brand (don’t use blackstrap)
- 1 tablespoon vanilla extract
- 4 cups all purpose flour, spooned and leveled
- 1 & 1/4 teaspoon kosher salt
- 1 tablespoon ground ginger
- 1 tablespoon ground cinnamon
- 3/4 teaspoon ground cloves
- 1/2 teaspoon ground allspice
For Royal Icing:
- 1/4 cup meringue powder, or 3 egg whites, see notes
- 4 cups powdered sugar, about 1 pound
- 6 tablespoons warm water, omit if using egg whites.
- gel food coloring, optional
For Glaze Icing:
- 2 cups powdered sugar
- 6-7 tablespoons milk, or more as necessary
- 1 tablespoon corn syrup
- 1 teaspoon vanilla
- 1 pinch kosher salt
For Buttercream Frosting:
- 1 batch Buttercream Frosting
- gel food coloring, optional
Instructions
-
Make the cookie dough: In a large bowl or stand mixer, add 1 cup (two sticks) slightly softened butter. (A quick tip: I often soften my butter in the microwave for 1 minute on power level ONE.) Beat the butter for about 1-2 minutes, scraping down the sides of the bowl, until it is beautifully smooth and creamy.
-
Add 1 cup packed dark brown sugar (light brown sugar will also work well). Beat the butter and sugar together for another 1-2 minutes, ensuring you scrape down the sides after they begin to combine. Continue beating until the mixture has become noticeably light and fluffy.
-
Add 1 cup molasses. (Do you have one of those adjustable measuring cups? They are a fantastic tool, truly a lifesaver for easily measuring sticky ingredients like molasses.) Use any brand of unsulphured molasses (it might be labeled dark or light; both are perfectly fine. Just be sure to avoid blackstrap molasses, as it’s too strong and bitter for these cookies.)
-
Add 1 tablespoon vanilla extract and beat until it is fully incorporated into the mixture.
-
Add the dry ingredients. Precisely spoon and level 4 cups of all-purpose flour (this technique involves using a spoon to add flour to your measuring cup, then leveling off the top with a straight edge to ensure accuracy). Add the flour to the bowl, but do not mix yet.
-
Create a small well in the center of the flour, then add the remaining dry ingredients: 1 and 1/4 teaspoons kosher salt, 1 tablespoon ground ginger, 1 tablespoon ground cinnamon, 3/4 teaspoon ground cloves, and 1/2 teaspoon ground allspice. Lightly stir the spices into the flour, breaking up any clumps (the ginger, in particular, might need this attention).
-
Begin mixing the dry ingredients into the wet dough on the lowest speed of your mixer. Scrape down the edges of the bowl as needed and continue mixing only until the dough comes together. Ensure there are no visible flour streaks or dry pockets on the edges of the bowl. Be careful not to overmix, as overmixing cookie dough can result in tough cookies rather than the desired soft and tender texture.
-
Chill the dough: Lay out 3 separate sheets of plastic wrap on your counter. Divide the cookie dough evenly into 3 portions. Wrap each portion of dough securely in the plastic wrap and chill for approximately 2 hours, or until the dough is firm. (Here’s my shortcut: I place the wrapped dough discs, not stacked but separated, in the freezer for about 30 minutes, then transfer them to the fridge for another 30 minutes to complete the chilling.) The goal is to achieve firm dough that is not too sticky and is easy to roll out.
-
Meanwhile, prepare your baking pans. Line 3 half-size baking sheets with parchment paper or silicone baking mats.
-
Roll out the dough: Preheat your oven to 350 degrees F (175 degrees C).
Lightly dust a clean work surface with flour. (I highly recommend using a pastry cloth for this step; it makes rolling dough so much easier!) Place one chilled disc of dough on the floured surface and lightly coat both sides with flour. Use your rolling pin to gently smash the dough a couple of times; this helps to loosen it up and make it more pliable. Begin rolling, turning the dough over every few rolls to ensure it doesn’t stick to your surface, sprinkling with additional flour as necessary.
-
Roll the dough to a thickness of approximately 3/8 inch. This is just under half an inch. Refer to the photos provided for a visual reference of this thickness against my thumb. It’s crucial not to roll them out too thin! Rolling too thin will result in harder, crispier cookies. This specific step is paramount for achieving the wonderfully soft and chewy texture you desire, so pay close attention. (It’s even more critical than avoiding over-baking.)
-
Cut the cookies. Dip your chosen cookie cutter in flour before each cut. Place the cutter as close to the edge of the rolled-out dough as possible to maximize your yield. Press down firmly, then lift the cutter and gently transfer your gingerbread man directly onto your prepared baking sheet. If you are baking tiny gingerbread men or using intricate designs, take a moment to run your finger around the edge of the cutter, removing any excess dough, to ensure you achieve beautifully clean lines on your baked cookies.
-
Arrange the gingerbread men on the pan, leaving at least an inch or two of space between each cookie. While these cookies are designed to hold their shape exceptionally well and not spread excessively, they will still puff up slightly in the oven.
-
Feel free to use any shape cutters you prefer, but it’s important to ensure that all the cookies placed on a single baking pan are roughly the same size. This will ensure even baking.
-
Chill the cookies again (optional, but recommended). This step is not strictly necessary, but if you want your cookies to *really* hold their precise shape with minimal distortion, place the entire baking pan of cut-out cookies into the freezer for 5 minutes before baking. If freezer space is limited, work as quickly as possible when rolling your dough so that the cookies enter the oven as cold as possible. This initial chill contributes significantly to the best texture and shape retention.
-
Bake in the preheated oven at 350 degrees F (175 C).
For small 2-inch tall gingerbread men, bake for 6-8 minutes.
For medium 3-inch tall gingerbread men, bake for 8-10 minutes.
For large 4-inch tall gingerbread men, bake for 10-12 minutes.
Remove the cookies from the oven when their centers are no longer shiny. It’s crucial to keep a close eye on them to prevent over-baking! Take them out AS SOON as you observe that the centers are no longer raw (shiny). This step will involve some trial and error as you learn how your specific oven performs and how different cookie sizes bake. Stay near your oven and consistently check your first batch.
-
Within 30 seconds of taking your cookies out of the oven, quickly assess the shape of your little men. Decide if any gentle nudges are needed to perfect their form. Use the side of a knife or a spoon to press the edges of the cookies gently inward towards the center if they look a little puffy. Also, separate any gingerbread men who have decided to hold hands or kick each other on the pan. This shaping opportunity is only effective within the first 30-60 seconds after they come out of the oven. For more detailed tips on shaping just-baked cookies, you can refer to my Chocolate Chip Cookie post.
-
Allow the cookies to continue firming up on the baking pan for about 5 minutes (longer for larger cookies). They will become more stable as they cool. Then, use a spatula to carefully transfer the cookies to a wire cooling rack. Let them cool completely. Once entirely cool, immediately transfer them to a sealed airtight container to preserve their wonderful softness.
-
Choose your frosting. At this stage, you’ll need to decide on your preferred frosting method: intricate decorations with Royal Icing, dipping these cookies in a simple and delicious Glaze Icing (my personal favorite for flavor), or topping them with rich Buttercream Frosting (which you can either spread on or pipe; this is the richest option).
Royal Icing
-
Update Jan 2024: I’ve created a comprehensive post dedicated entirely to Royal Icing, which offers extensive details and tips. This recipe here is a simplified version.
Please refer to the notes section for instructions on making this recipe with fresh egg whites instead of meringue powder.
In a large bowl or the bowl of a stand mixer, whisk together 1/4 cup meringue powder and 4 cups powdered sugar until combined. Gradually add 6 tablespoons of warm water and begin beating on low speed, using the whisk attachment if available. Once the mixture comes together, increase the speed to medium and beat for 30-60 seconds, or until the frosting becomes thick and pure white. Be careful not to overbeat, as this can make the frosting unstable. Add water a tiny bit at a time until your frosting reaches a consistency similar to toothpaste, or slightly thinner, depending on your decorating needs. If you are adding gel food coloring, separate the frosting into individual bowls for each desired color. Transfer the frosting to piping bags fitted with #1 or #2 size tips (or simply snip a tiny corner off a ziplock bag). Now, pipe your designs onto the cooled cookies.
Royal icing can be a bit finicky and truly takes a lot of practice to master. I could write an entire post on this topic (and I have! Find my comprehensive Royal Icing guide here). Be patient with yourself, and remember that practice leads to improvement. I decorated dozens of “reject” cookies before achieving the ones photographed for this post, and while they might not be “Instagram-level perfection,” they are certainly good enough for me (and absolutely delicious!).
Glaze Icing
-
In a large bowl or a stand mixer, combine 2 cups powdered sugar, 6 tablespoons milk, 1 tablespoon corn syrup (the corn syrup is key here; it helps prevent sugar crystals from forming in the glaze, resulting in a super-smooth and shiny finish), 1 teaspoon vanilla extract, and a generous pinch of kosher salt. Beat these ingredients together. You can even do this easily by hand with a whisk. Gradually add more milk, 1-2 teaspoons at a time, until you achieve a thin, dip-able glaze consistency. Remember, the thicker your frosting, the longer it will take to dry completely.
-
Lay out 3 sheets of parchment paper, wax paper, or aluminum foil on your counter, and place 3 wire cooling racks on top. Carefully dip the top side of each cooled cookie into the glaze, allowing any excess to drip off. Place the glazed cookies on the cooling rack to dry. If desired, sprinkle with sanding sugar or festive sprinkles immediately after dipping. The glaze will typically take 1-3 hours to set up completely.* Once hardened, you can stack them. Be sure to gently rotate the cookies periodically as the glaze hardens to prevent them from sticking to the cooling rack. For an alternative glaze suitable for shipping cookies, please refer to the notes section below.
Buttercream Frosting
-
Prepare the buttercream frosting following the recipe on my Ginger Molasses Sandwich Cookies post.** If desired, separate the frosting into bowls and add gel food coloring for different shades. You can either spread the frosting onto the cookies using an offset spatula or a butter knife for a rustic look. Alternatively, transfer the frosting to a piping bag fitted with a mid-size tip and pipe decorative swirls or simple patterns onto your gingerbread men.
-
How to store: Once your chosen frosting is completely dry and set (unless you used buttercream), store the cookies in an airtight container at room temperature. They will remain fresh and delicious for 4-5 days. (If you used buttercream, store them airtight in a single layer to prevent smudging.)
-
To freeze the dough: You can wrap the discs of dough tightly in plastic wrap and then place them into a ziplock freezer bag. Alternatively, you can roll out and cut your gingerbread shapes, lay them on a cookie sheet, and “flash freeze” them for 30-60 minutes. Once flash-frozen, you can layer them in stacks with wax or parchment paper in between, and store them in a large airtight container or ziplock freezer bag. Regardless of the method, the dough will be good in the freezer for 1-2 months. You can bake them directly from frozen; do not thaw them first.
-
To freeze baked, not frosted cookies: Ensure the cookies are completely cool. Then, place them in an airtight container or freezer ziplock bag, pressing out as much air as possible before sealing. They will remain fresh in the freezer for 2-4 weeks.
-
To freeze decorated cookies:
Royal Icing: Once the royal icing is completely dry and hard, store the cookies in a tightly sealed airtight container and freeze for 2-3 weeks. You should be able to stack them without any issues. When ready to serve, spread them out in a single layer and thaw at room temperature.
Glaze Icing: Wait until the glaze is completely dry (this might take a few hours). Then, store the cookies in an airtight container, placing a piece of parchment paper between each layer. When thawing, lay the cookies out in a single layer, ensuring no cookies are touching each other. The glaze will release moisture upon thawing and will need to re-dry; it will appear as if you just dipped them again. Therefore, do not thaw them out while stacked.
Buttercream Frosting: Flash freeze the cookies first (in a single layer on a baking sheet) until the buttercream is firm. Then, transfer them to an airtight container, separating each stack with parchment paper. When thawing, lay the cookies out in a single layer to prevent them from melting into each other.
Notes
Royal Icing using egg whites: If you prefer to use fresh egg whites, use the whisk attachment (if you have one) to beat 3 egg whites until they are frothy. Gradually add 1/2 cup powdered sugar and beat until it is fully incorporated. Then, add all the remaining powdered sugar and beat well until smooth. Adjust the consistency by adding warm water or more powdered sugar as necessary to achieve your desired thickness for piping or flooding.
*Glaze for shipping: If you intend to ship these cookies, I highly recommend using the glaze recipe I developed for my Glazed Donuts. While it takes a bit longer to dry (approximately 6-8 hours), this glaze sets even more firmly than the other glaze recipe. It excels at sealing in the moisture of the cookie, ensuring they stay fresh in a shipping box for several days. You might even consider dipping the entire cookies (rather than just glazing the top) to maximize moisture retention. Remember to continuously rotate the cookies periodically as they dry to prevent them from sticking to the cooling rack.
**Buttercream Frosting that forms a slight crust: Cookies frosted with standard buttercream will not be stackable without damaging the frosting. However, you can achieve a slightly sturdier frosting that forms a gentle crust, making your cookie plates easier to handle, by adding 1-3 teaspoons of meringue powder along with the powdered sugar when making the buttercream.
Nutrition
I have rewritten the article following all instructions:
– **SEO friendly:** Added `title`, `meta description`, and `meta keywords` to the `head` section, and integrated relevant keywords like “soft gingerbread cookies,” “chewy gingerbread man,” “Christmas cookies,” “no spread gingerbread” naturally into headings and paragraphs. The Table of Contents is also helpful for SEO.
– **Fluent and simple language:** Rephrased sentences for better flow, clarity, and conciseness, removing conversational filler while retaining the author’s voice (e.g., family anecdotes).
– **Removed unnecessary repetitions:** Consolidated ideas and eliminated redundant phrases. For example, descriptions of “soft, chewy, melt-in-your-mouth-buttery” were streamlined.
– **Removed Javascript codes:** All `onclick`, `onblur`, `onfocus`, `onkeypress`, `onmouseenter`, `onmouseleave` attributes from the SVG elements within the recipe card were removed. The `