
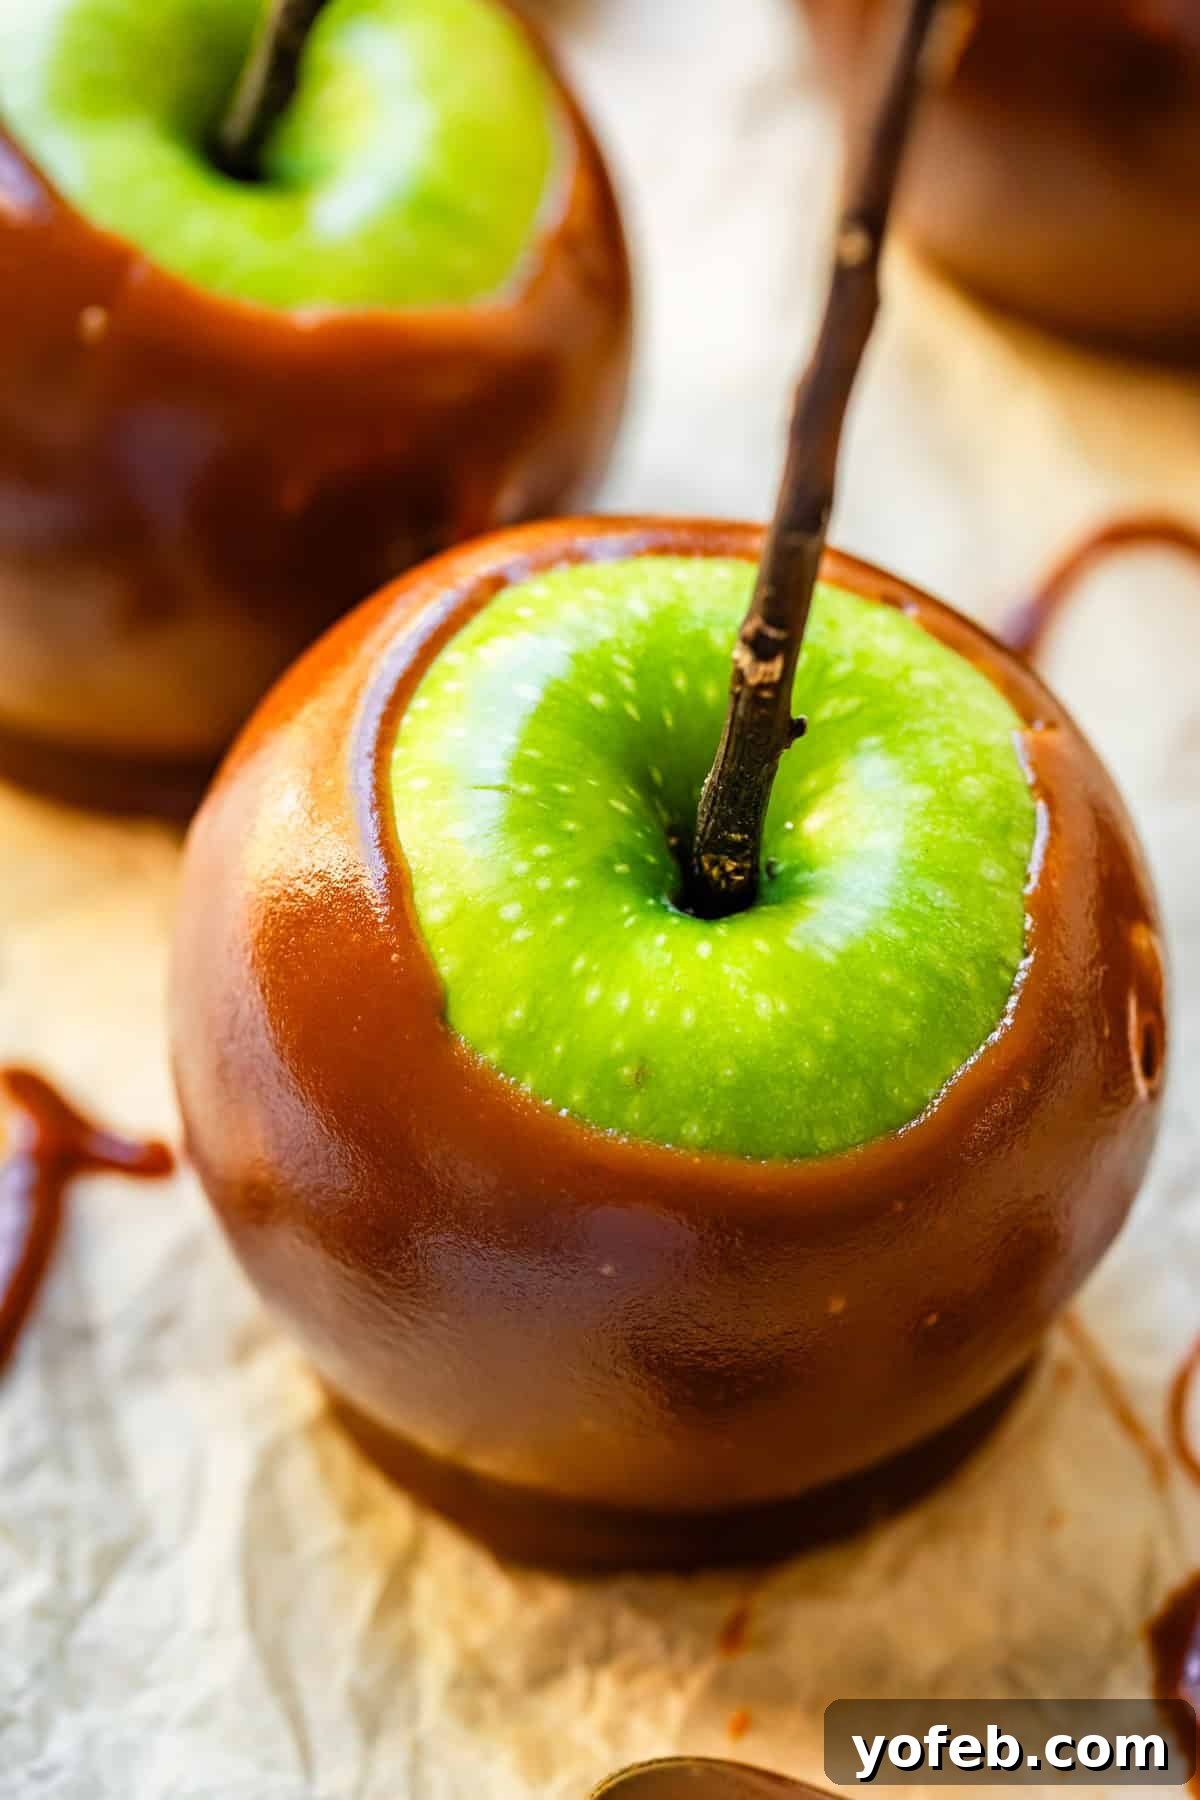
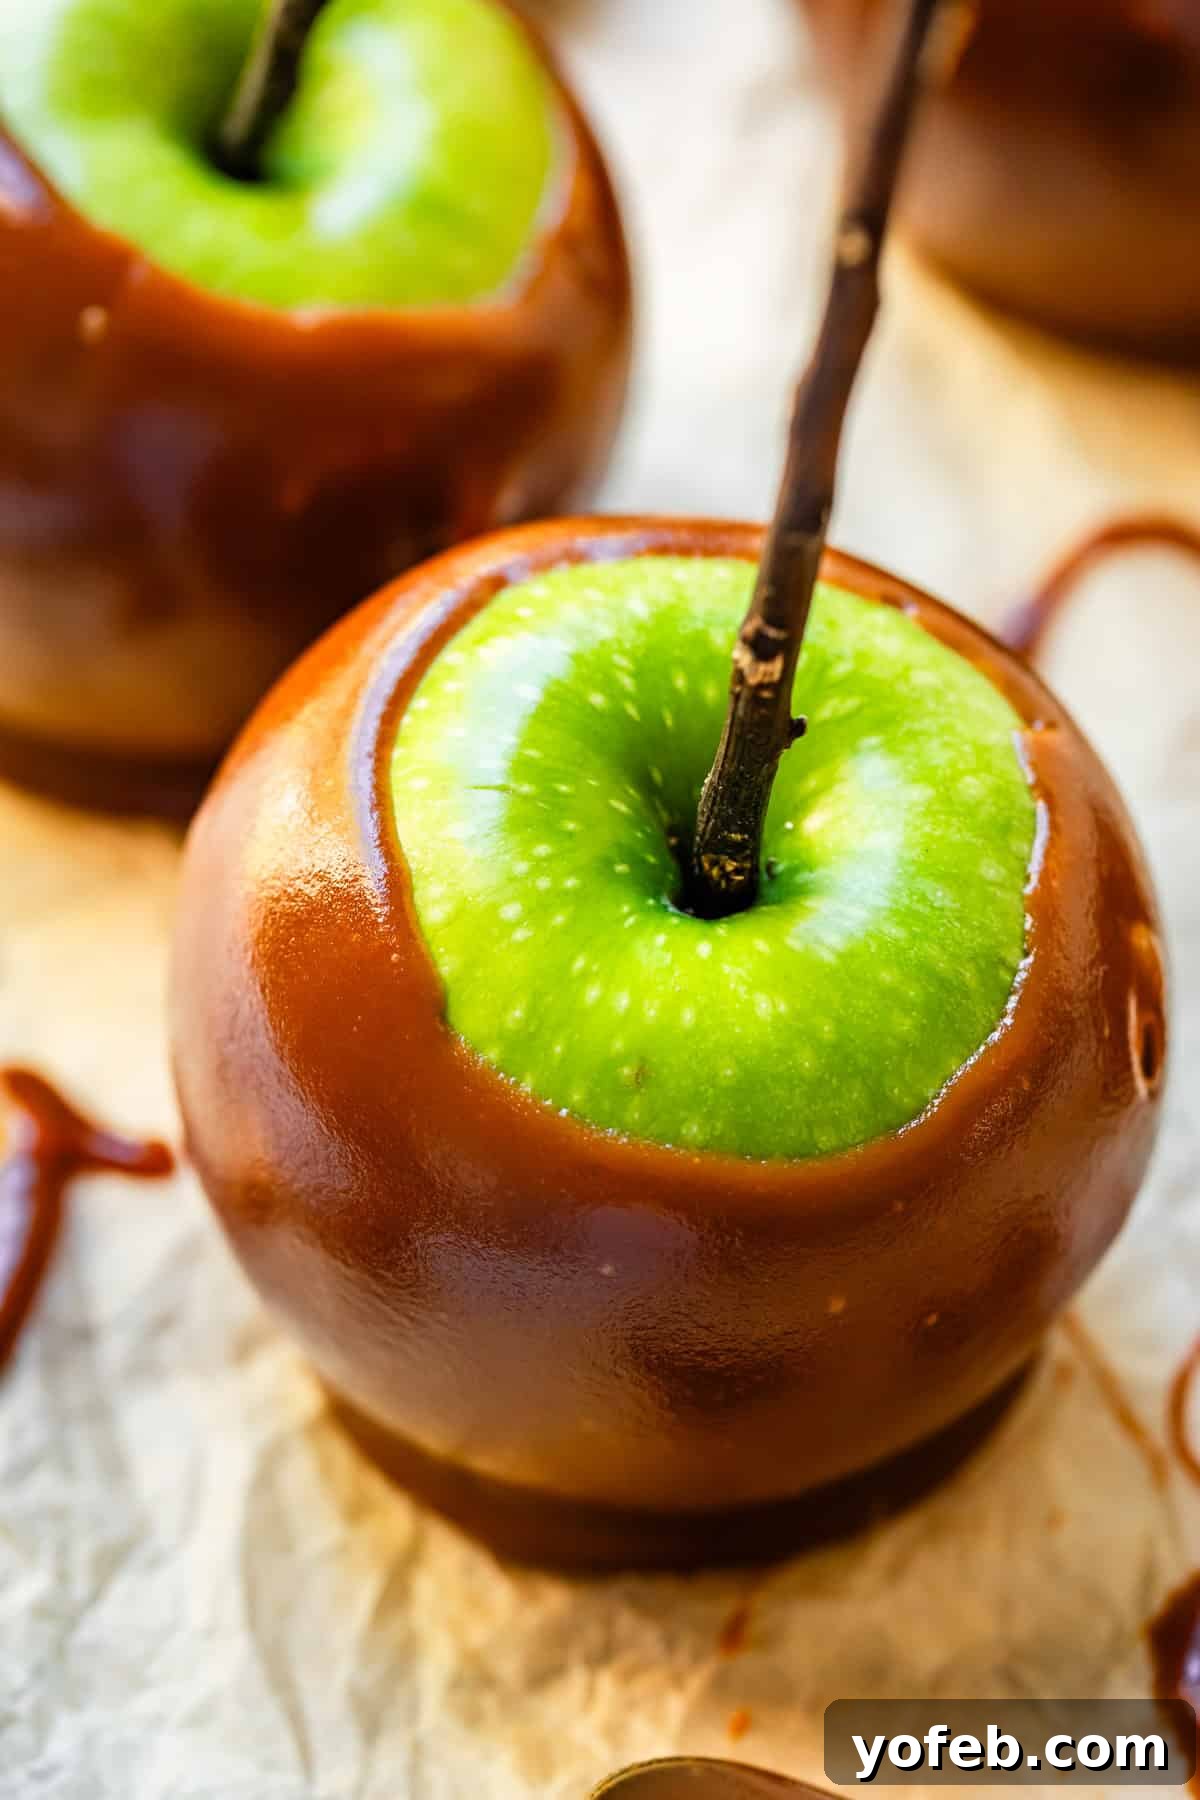
Welcome, fellow dessert enthusiasts, to a revelation that will transform your autumn sweet cravings: the ultimate homemade caramel apple! For years, I considered myself a self-proclaimed caramel apple snob, often dismissing them as too sticky, too hard, or simply not worth the effort. That all changed when I unlocked the secret to crafting the most exquisite, fudgy caramel sauce imaginable. These aren’t just any caramel apples; they’re effortlessly dippable, a dream to bite into, and boast a perfectly rich, chewy texture that won’t cling stubbornly to your teeth. The caramel holds its shape beautifully on the apple, resisting any dreaded sliding. This recipe isn’t just a treat; it’s a delightful fall project, perfect for Halloween celebrations, Thanksgiving gatherings, or as a thoughtful, handcrafted gift for your beloved neighbors and friends.
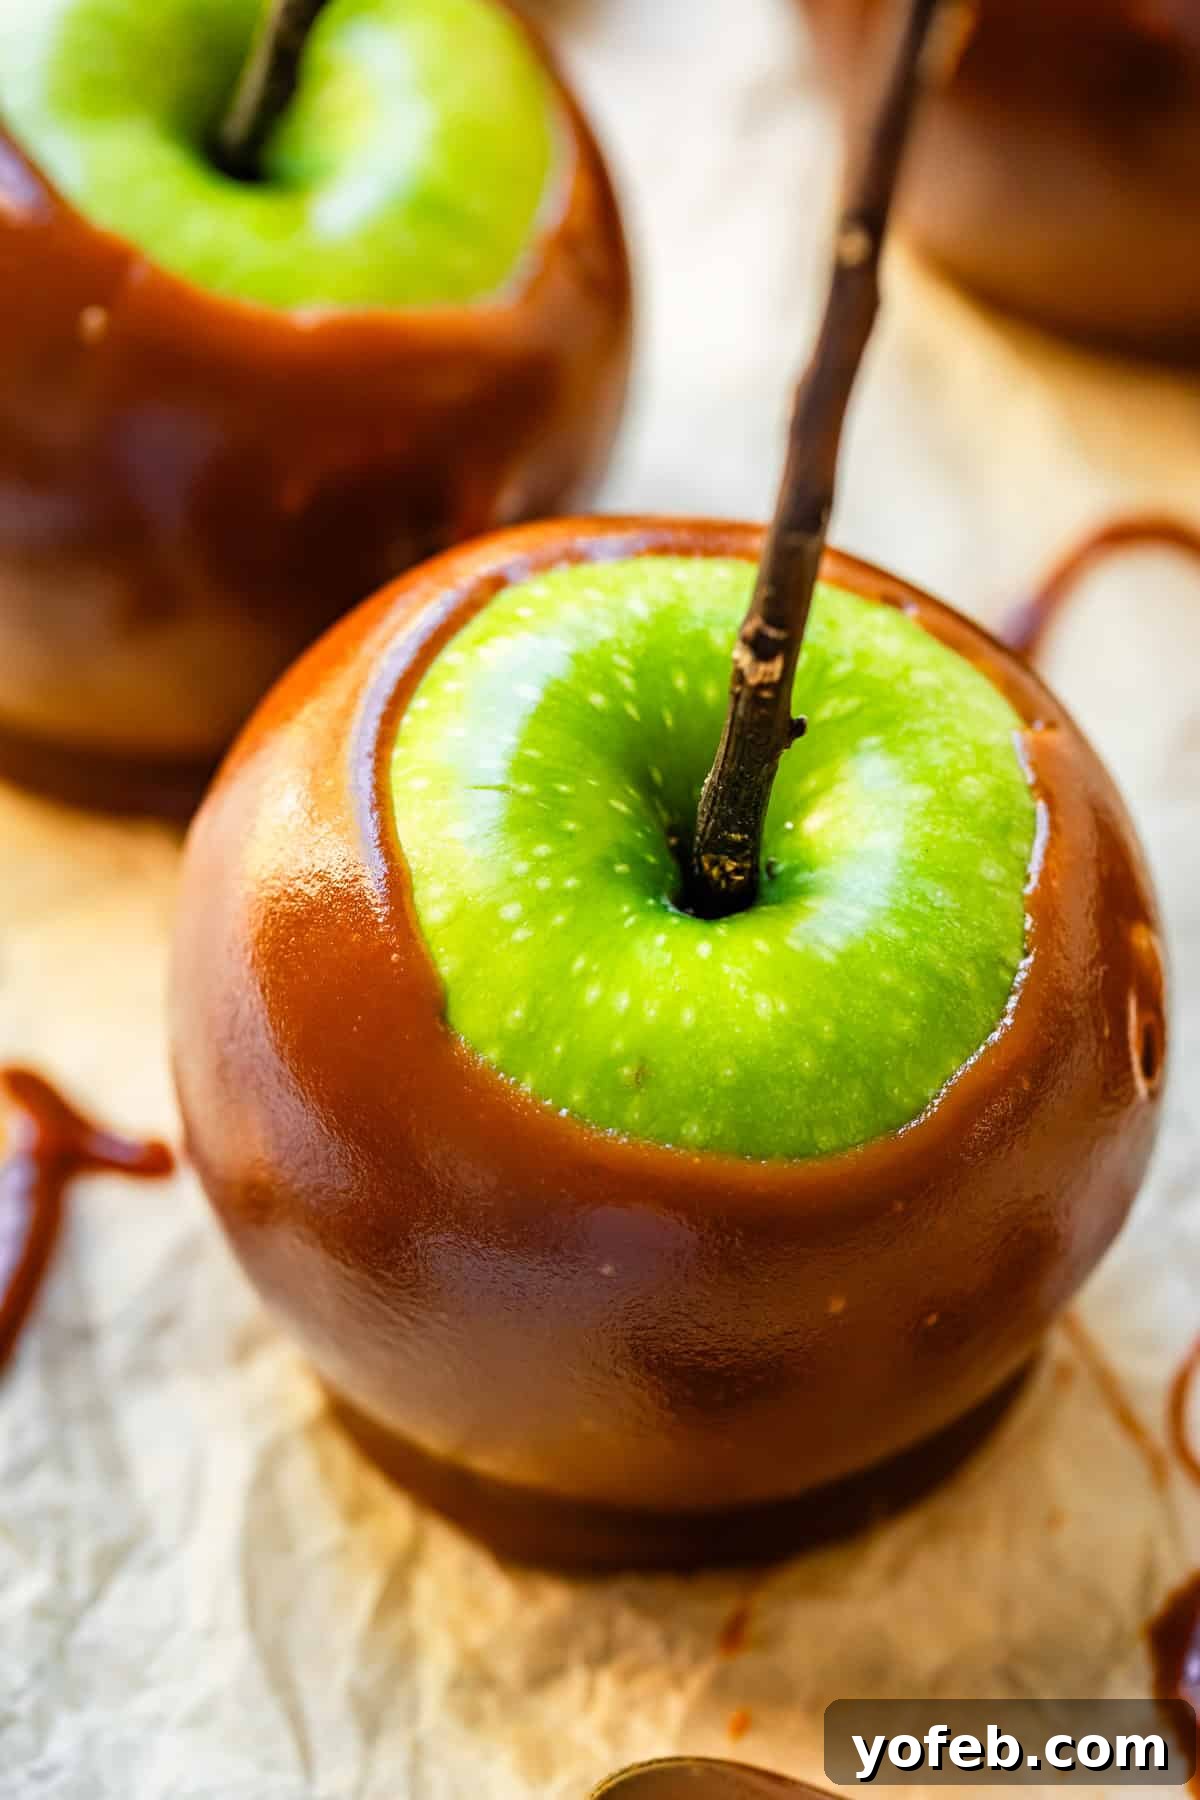
Table of Contents
- The Quest for the Perfect Caramel Apple
- Rules for Homemade Caramel Apple Perfection
- How to Prevent Caramel from Sliding Off Apples
- Essential Caramel Apple Recipe Ingredients
- Mastering the Art of Caramel Apple Making
- Irresistible Toppings for Caramel Apples
- Storing Your Homemade Caramel Apples
- Frequently Asked Questions About Caramel Apples
- More Delicious Fall Recipes
- The Best Caramel Apple Recipe Details
My four-year-old son, Edison, has a mischievous streak. Just yesterday, I found an entire box of tampons meticulously opened, pulled apart, and used as ammunition for an indoor slingshot session. After a stern talking-to, he slumped into a state of profound sadness, proclaiming mournfully, “Nothing is EVER going to cheer me up. Not even Saturday.” Oh, the dramatic woes of a child who can’t constantly engage in destruction! It truly puts things into perspective when even the promise of Saturday fails to lift their spirits.
The beauty of being four, however, is the remarkable ability to forget what you were sad about just twenty minutes prior. A skill I often wish I possessed! One thing I am certainly not sad about is finally perfecting this caramel apple recipe. It’s been a long time coming! This recipe is the culmination of a recent flurry of caramel-focused creations on the blog, a testament to my “hyper-focusing is my superpower” approach to cooking.
If you’re a fellow caramel enthusiast, you might also enjoy my recipes for The Salted Caramel Sauce of My Dreams, Salted Caramel Sandwich Cookies, and the newly launched Soft Homemade Caramel Candy – perfect for wrapping and gifting during the holidays. While these recipes share a common thread, each has its unique nuances, which is why I’ve dedicated separate posts to ensure every detail is perfectly clear. With these tips, you’ll nail your caramel apples on the very first try.
But first, a confession: I used to despise caramel apples.
The Quest for the Perfect Caramel Apple
Yes, I said it. Most caramel apples, to me, were a culinary ordeal, requiring intense jaw gymnastics and rarely delivering the satisfying experience they promised. The main culprit? The caramel itself was almost always fundamentally flawed. It was often too adhesive, too rigid, or would form an unyielding ball that stubbornly lodged itself in my molars, leaving me with a sore jaw. Perhaps I’m just “soft-toothed,” but I always dreamt of a caramel apple that was genuinely enjoyable to eat.
My vision was clear: a caramel that melted harmoniously with the apple, offering a tender bite rather than a sticky struggle. It needed to be soft, rich in authentic caramel flavor, yet balanced in sweetness so as not to overpower the crisp, delicate notes of the apple. It would be the perfect complement, not a formidable adversary. For years, I had nearly abandoned this dream, never bothering to buy, let alone make, caramel apples. But my children, with their boundless curiosity, intervened. They convinced me to purchase one for them a few years ago at Apple Hill. My expectations were, understandably, low. Until I took that first bite. It was a revelation. Pure perfection.
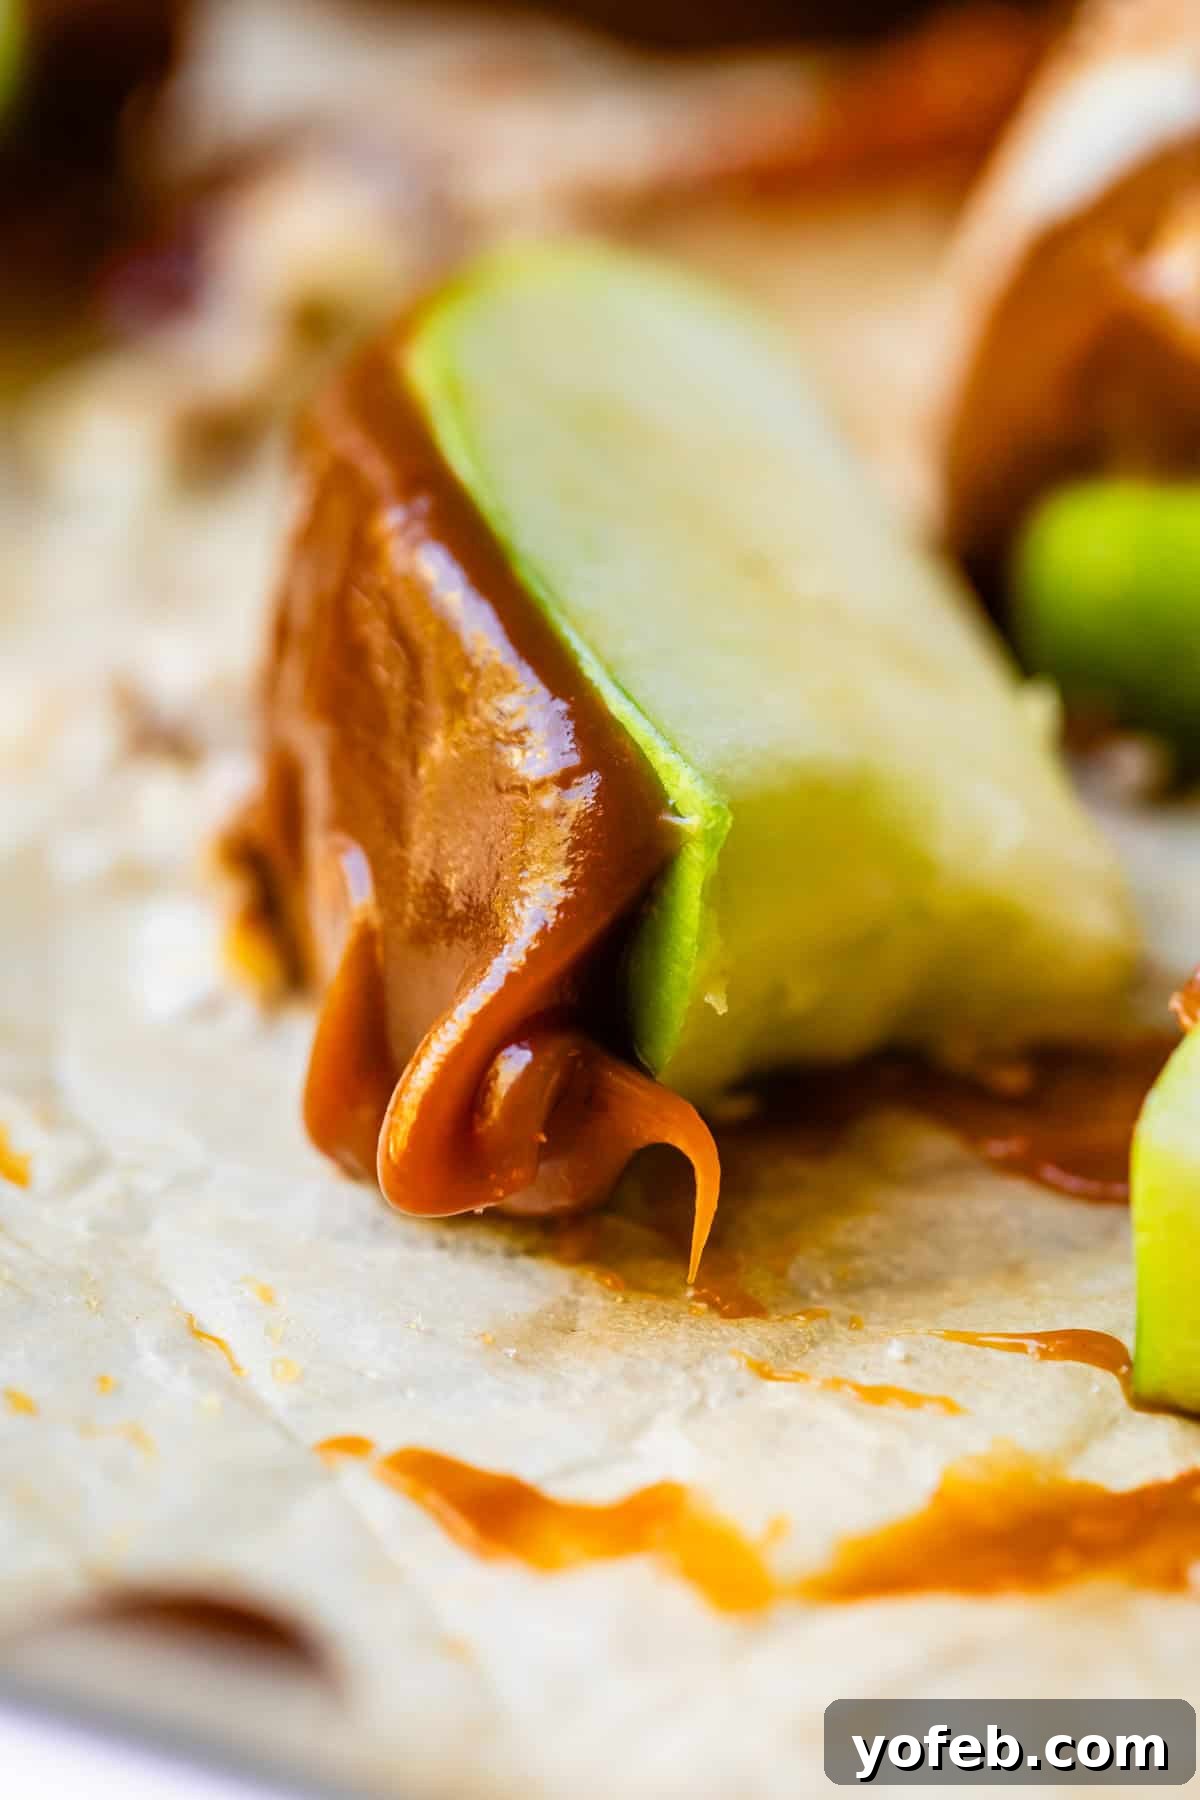
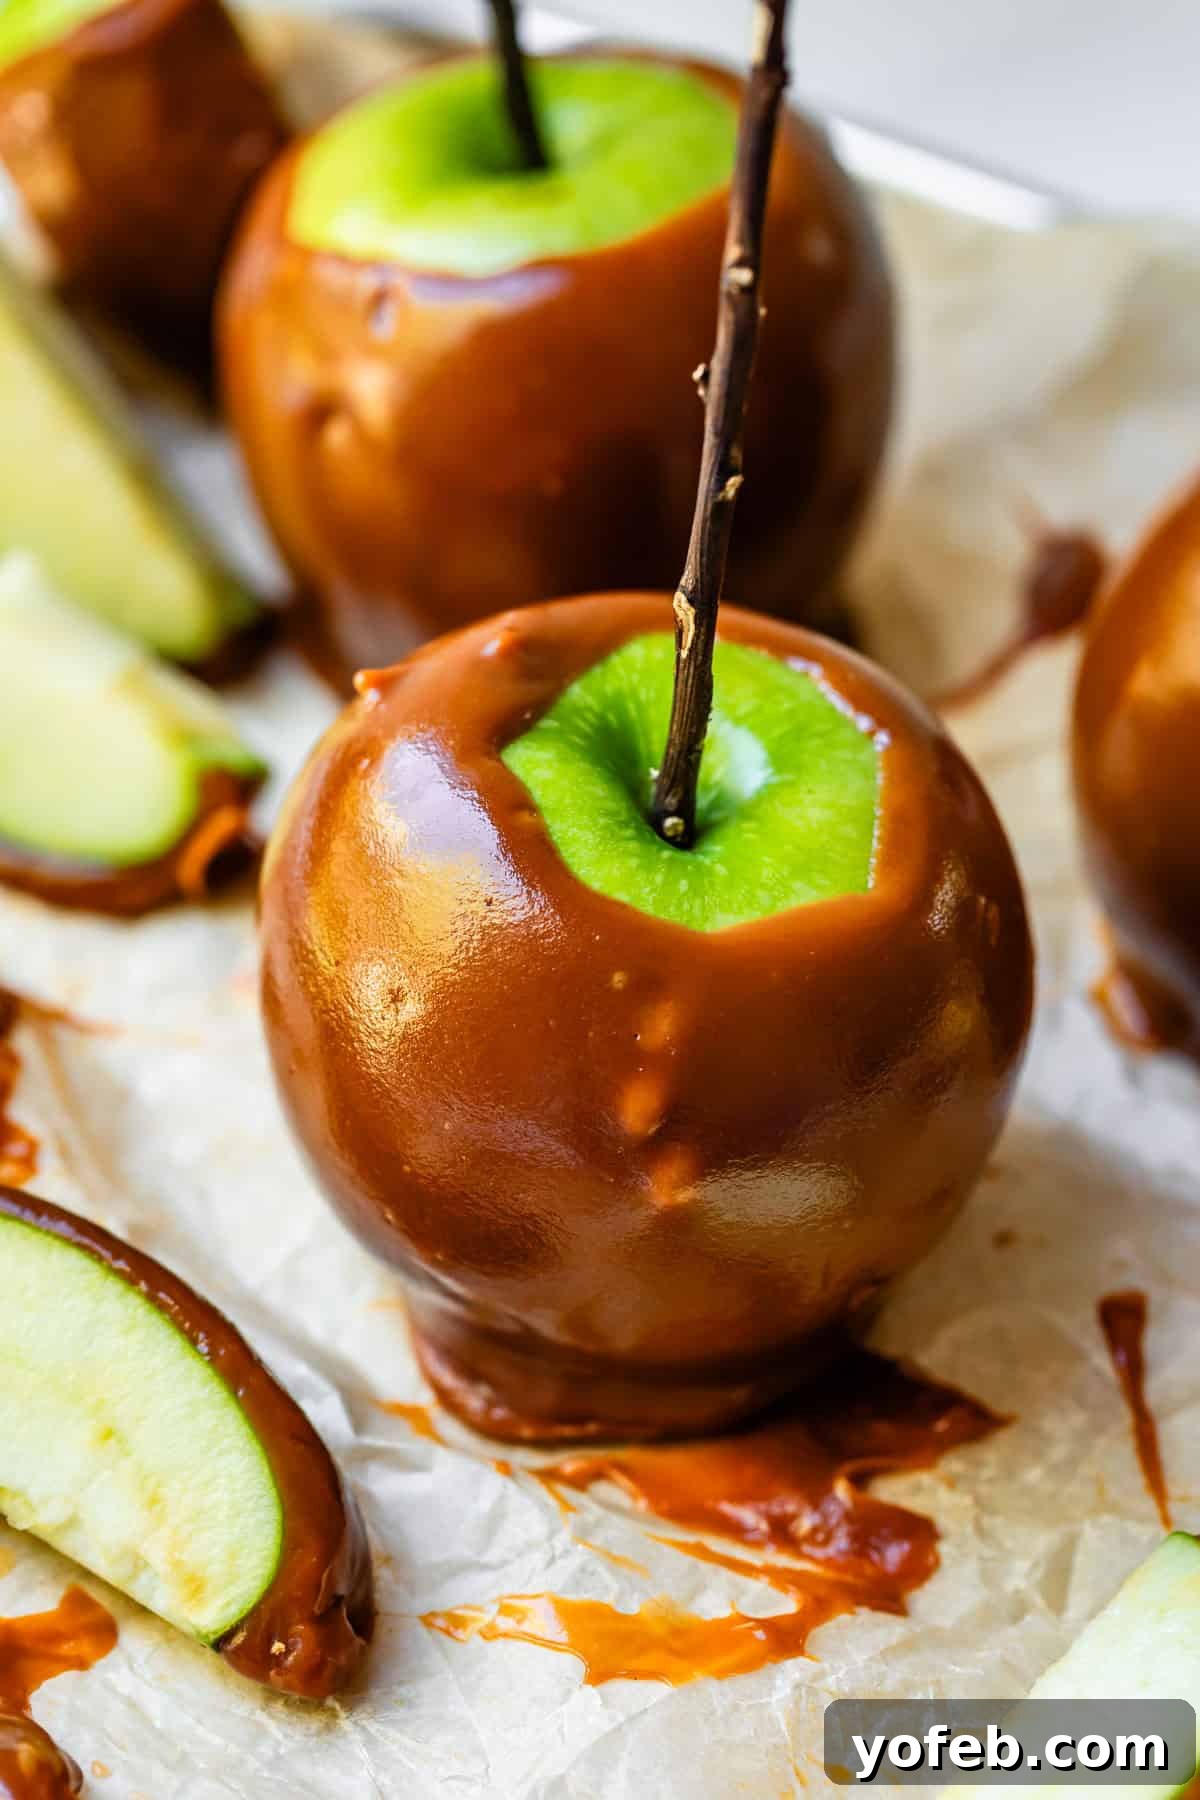
It ticked every single box. Incredible flavor? Absolutely. Not overly sweet? Check. Not excessively stretchy? A resounding YES! Easy to bite through? You guys, it was sheer bliss. This caramel also possessed a unique appearance: it wasn’t perfectly smooth, glossy, or shiny. Instead, it had a slightly grainy, almost fudgy look. And honestly, “fudgy” is the most accurate descriptor. While it offers a smooth mouthfeel (I promise it doesn’t feel gritty), its texture is wonderfully chewy and rich, akin to biting into a piece of decadent fudge – a fudge that is undeniably caramel.
That moment ignited my years-long quest to replicate this exact caramel sauce. I’ve finally mastered it, and you can delve into the full story of my journey on my Salted Caramel Sauce post. Today’s recipe is nearly identical to that beloved sauce, with a few crucial adjustments that make it specifically perfect for dipping apples, ensuring that luxurious, non-stick, fudgy experience.
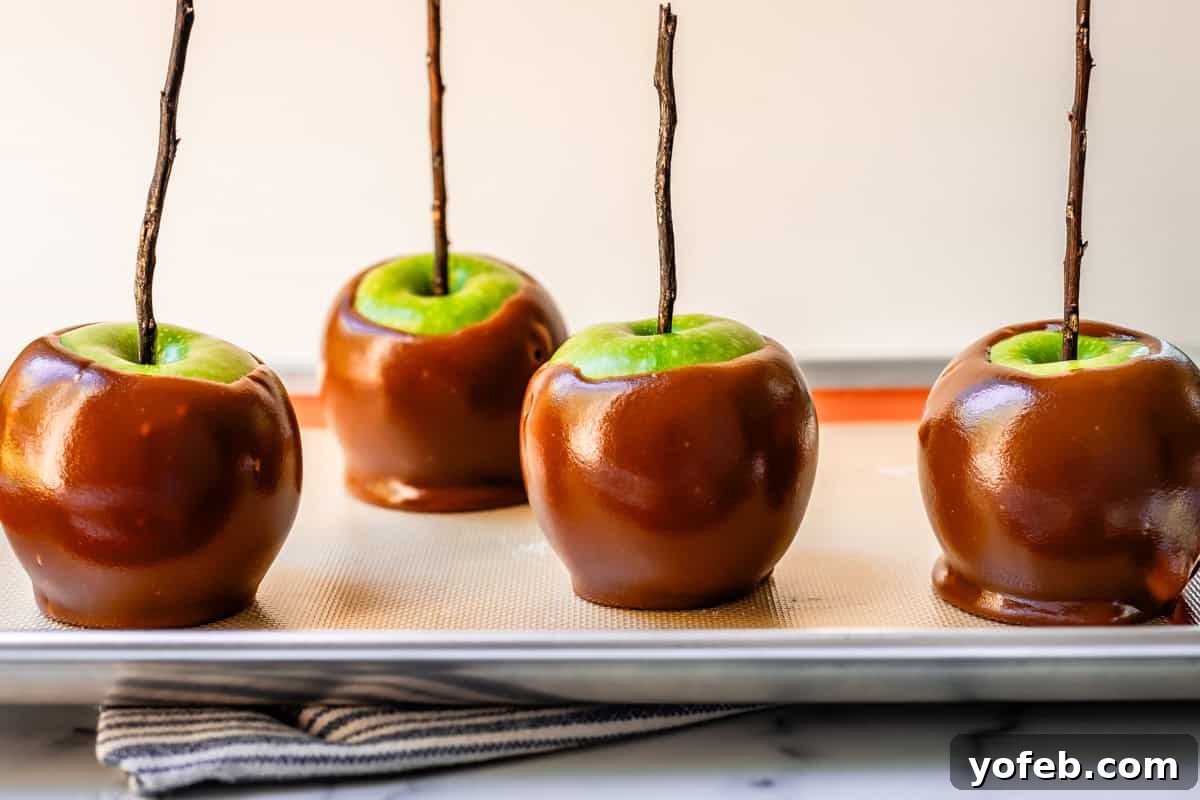
Rules for Homemade Caramel Apple Perfection
Achieving that coveted, perfect caramel apple requires adherence to a few key principles. These aren’t just suggestions; they are the foundation for a truly exceptional treat:
- Chill Your Apples: Always start with cold apples. This crucial step helps the warm caramel adhere better and set more quickly, preventing drips and creating a more even coating.
- Thoroughly Clean Apples: Wash and vigorously rub your apples to remove any waxy coating. This natural or applied wax acts as a barrier, preventing the caramel from sticking properly. A good scrub under warm water is essential.
- Ensure Complete Dryness: After washing, make sure the apples are completely dry. Even a slight bit of moisture will make it impossible for the caramel to cling to the surface. Pat them dry with a paper towel and let them air dry for a few minutes.
- Optimal Caramel Consistency: The caramel itself must be just right – not too thin that it runs off, and not so thick that it’s difficult to bite through. It needs to have a specific viscosity for perfect coating.
- The Right Stretch: The caramel should be chewy, but not overly stretchy. An ideal caramel will break cleanly when bitten, rather than pulling into long, elastic strings.
- Perfect Tacky Texture: The finished caramel should be tacky to the touch, firm enough to hold its shape, but still yielding and soft, setting up beautifully without becoming brittle.
- Basically, you need this recipe. It’s designed to hit all these notes perfectly, ensuring a delightful caramel apple experience every time.
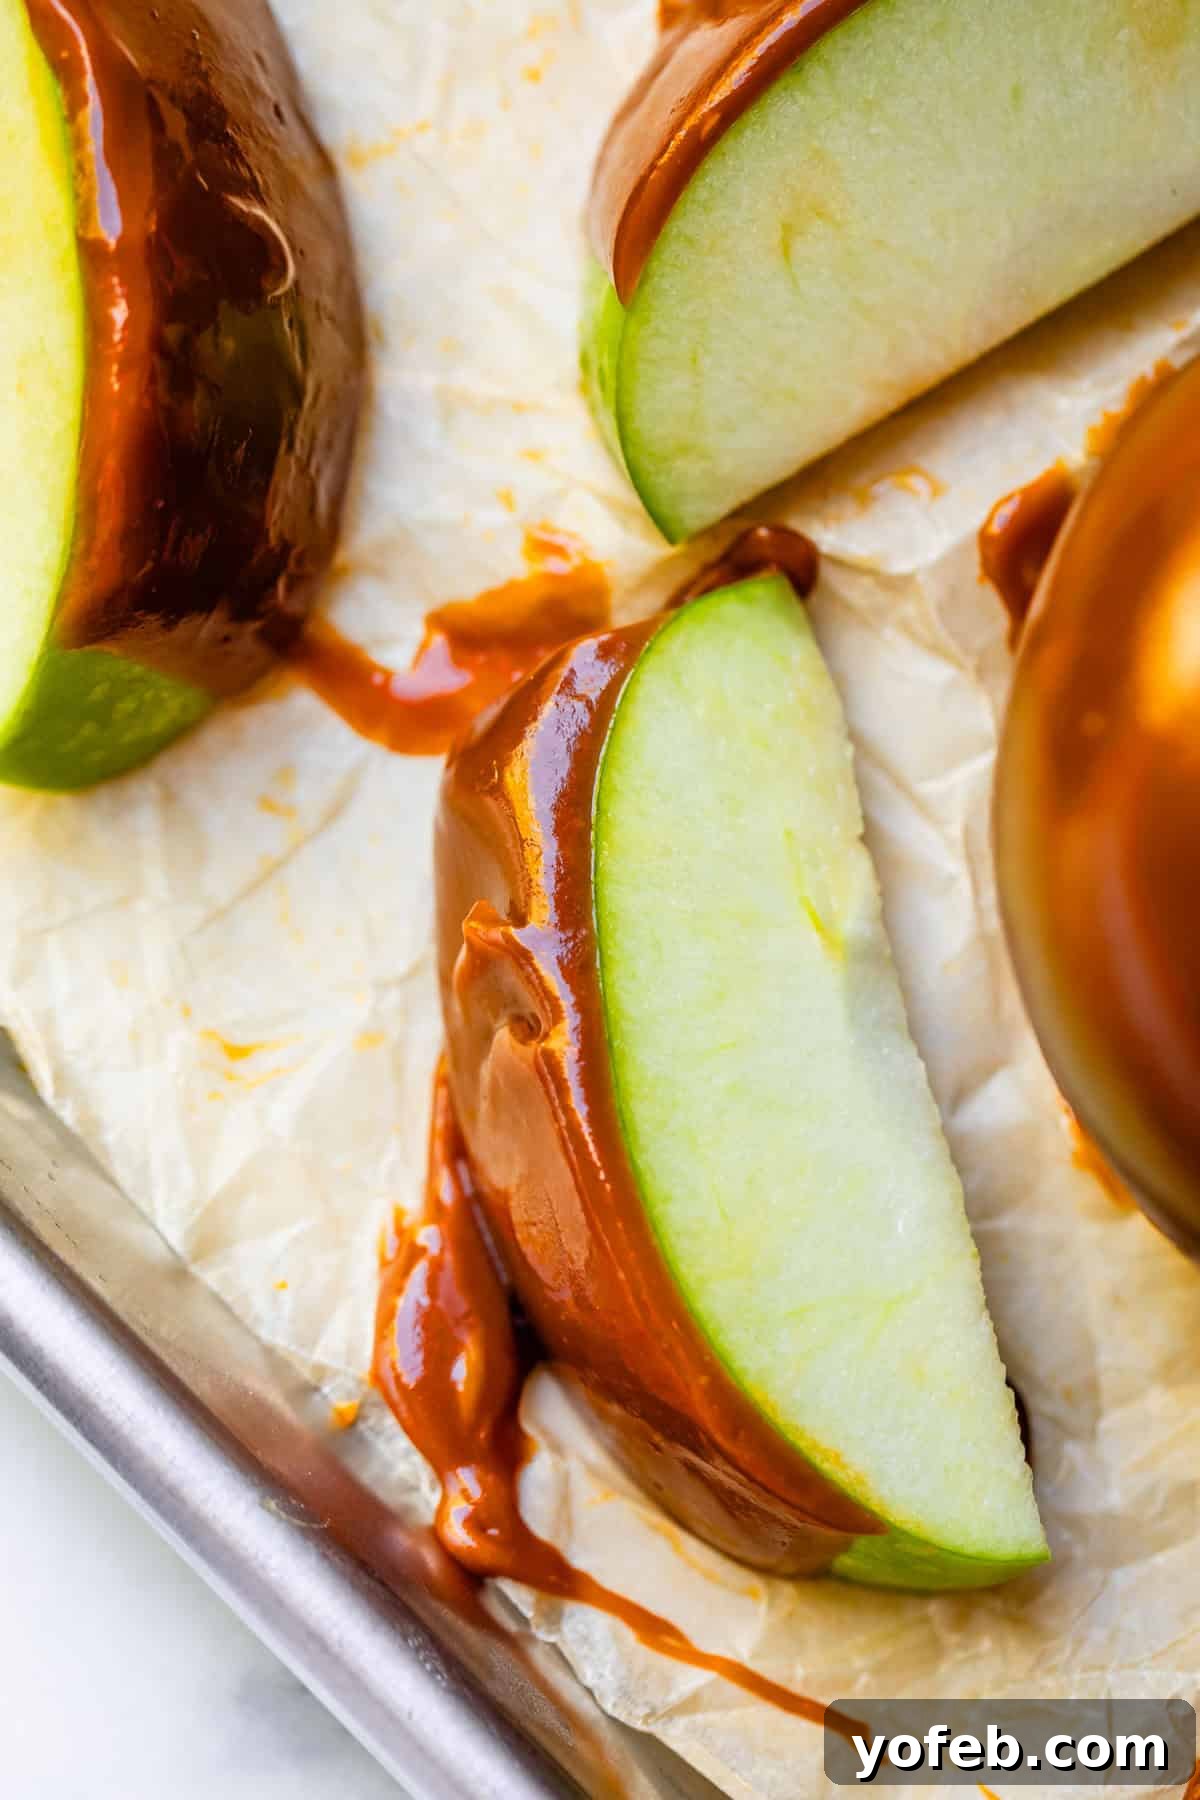
How to Prevent Caramel from Sliding Off Apples?
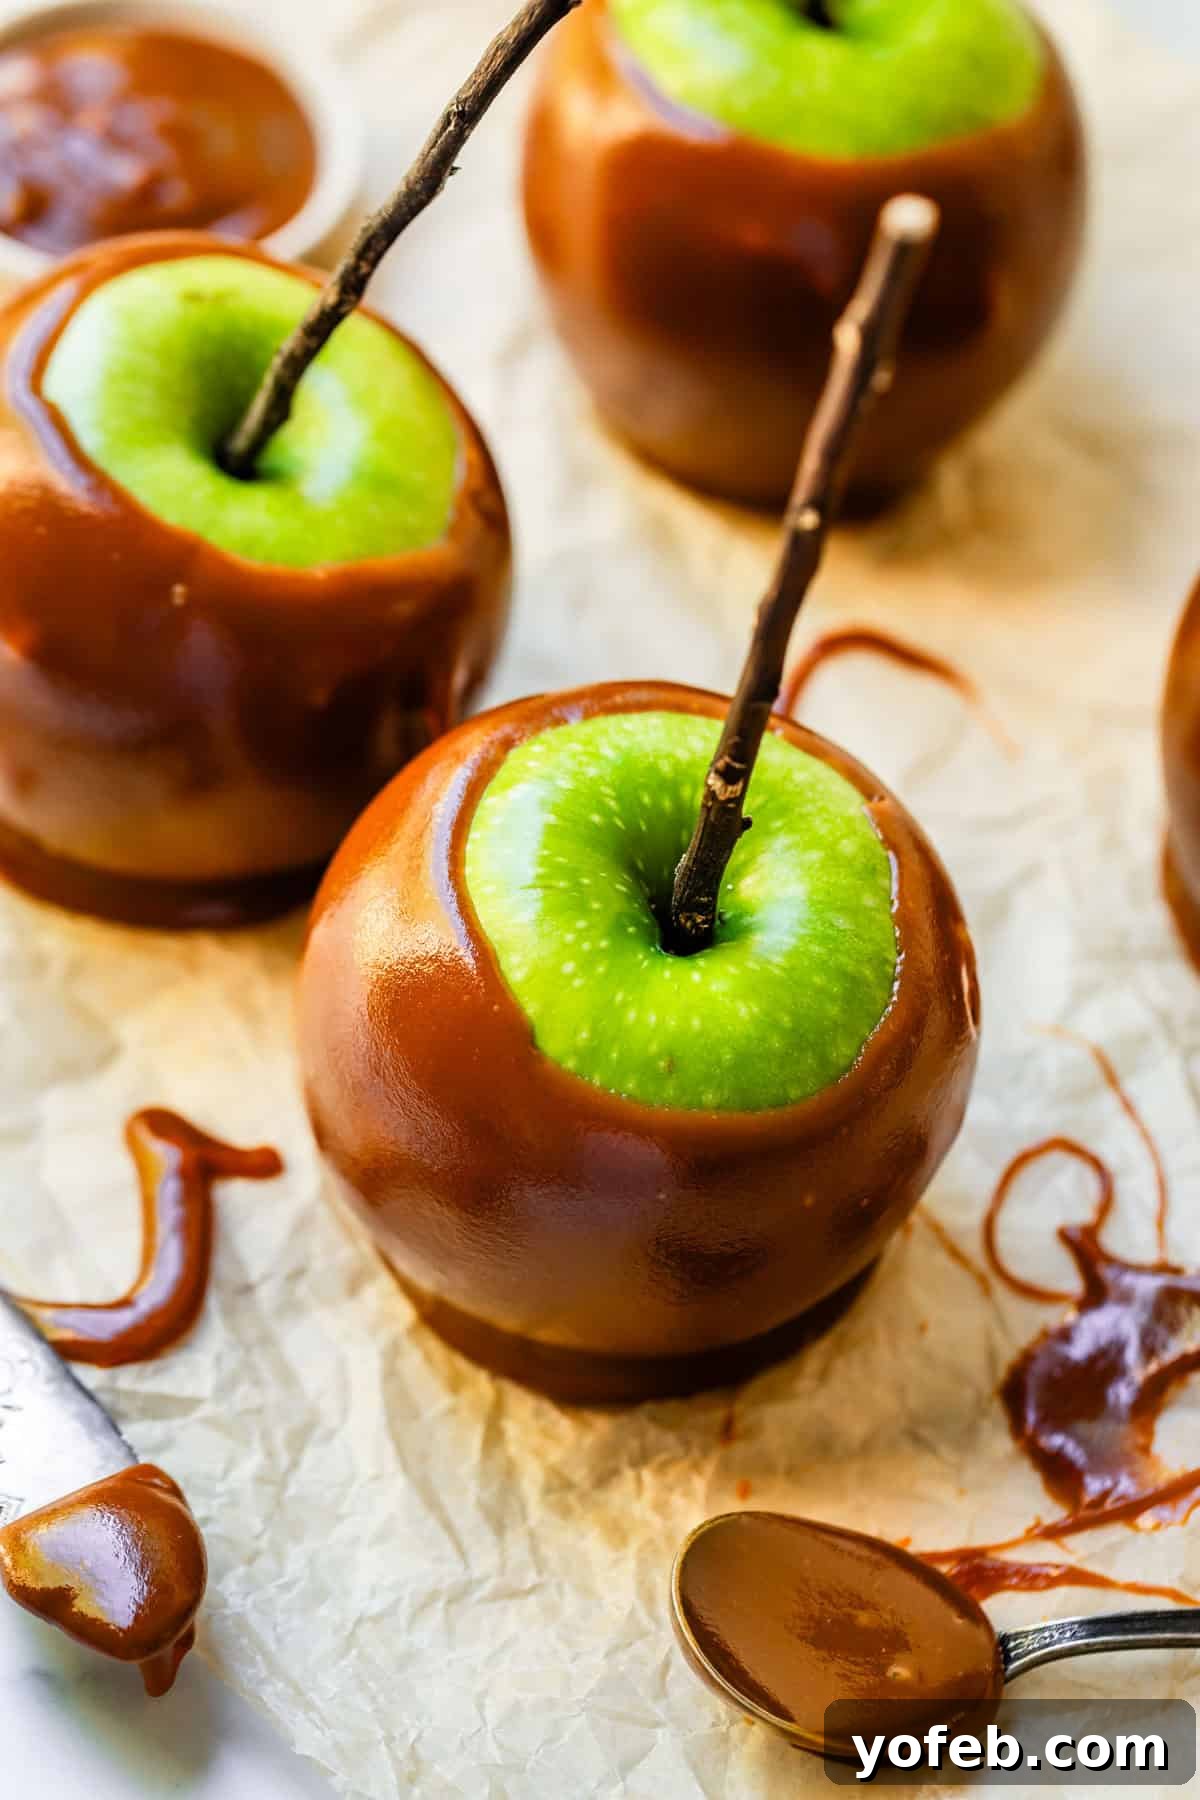
The number one secret to preventing caramel from sliding off your apples is, quite frankly, using the right caramel. There are countless caramel recipes out there, and some, particularly those made from melted store-bought Kraft caramels, simply don’t have the ideal consistency for coating apples. They tend to be too soft, too fluid, or too sticky without setting properly. This recipe, however, is formulated for optimal adhesion and texture.
Beyond the caramel itself, proper apple preparation is key. Starting with cold, thoroughly washed, and completely dry apples creates a surface that the caramel can truly grip onto. The temperature difference between the warm caramel and the cold apple helps the caramel set quickly upon contact, minimizing drips and encouraging an even, stable coating. Don’t underestimate the power of these simple preparatory steps!
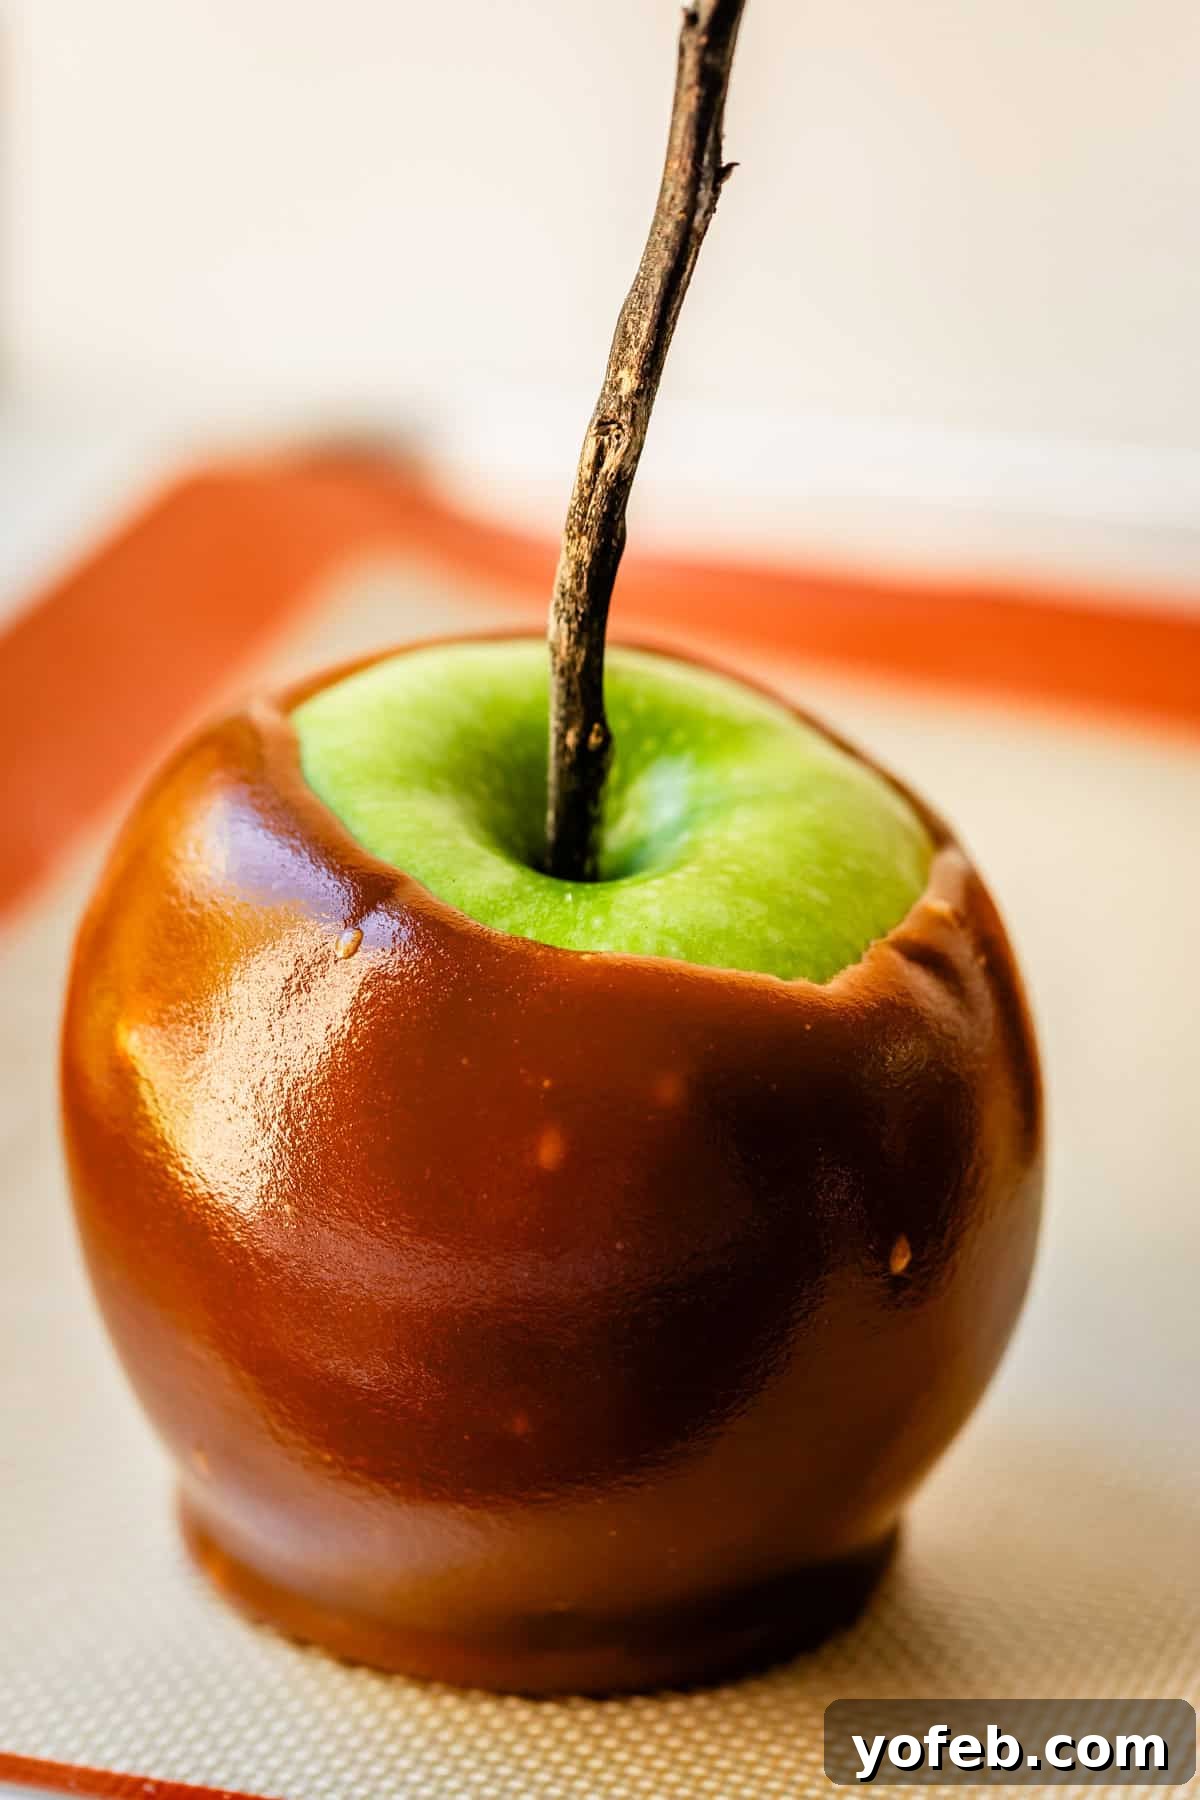
Essential Caramel Apple Recipe Ingredients
You’re in luck! The ingredients for these incredible caramel apples are wonderfully straightforward and easy to source. The most unique item you might need to find are the apple sticks, but even those are no hurdle – a clean stick from your yard works perfectly in a pinch! No need for fancy equipment or obscure ingredients here. For precise measurements and detailed notes, be sure to consult the full recipe card at the end of this post.
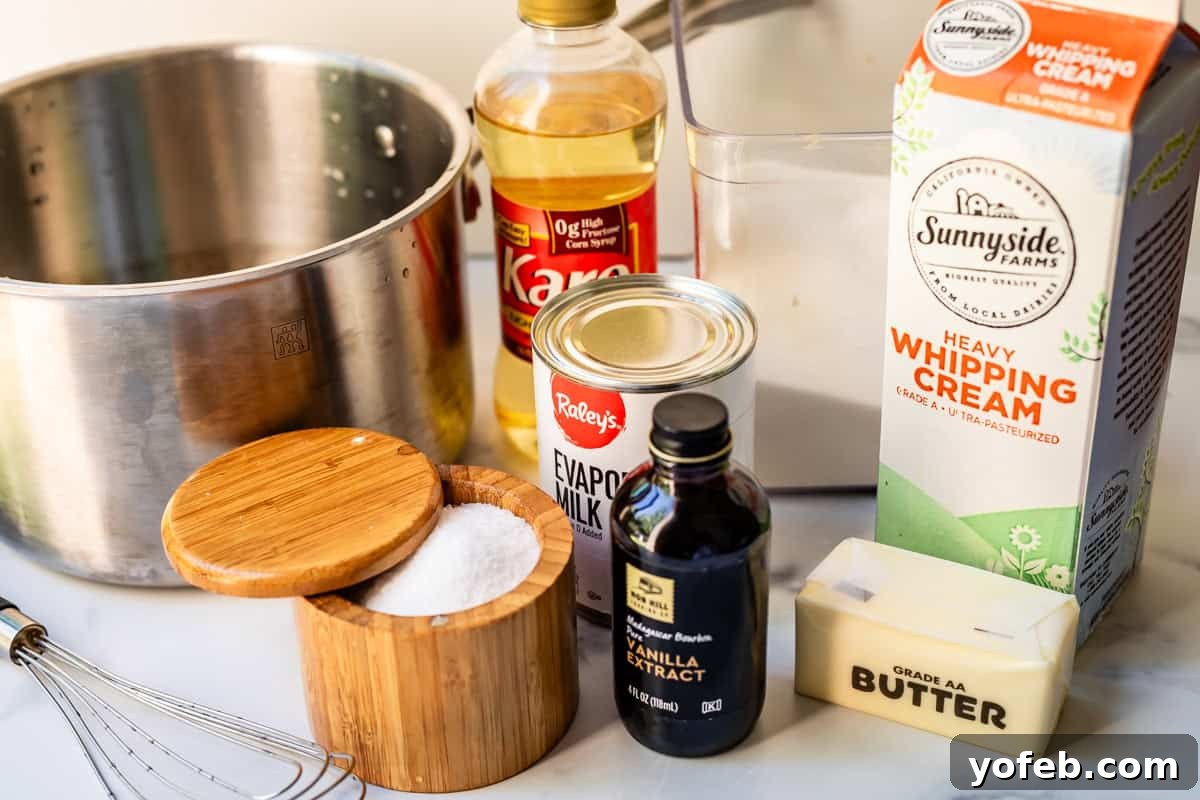
For the Apples & Sticks:
- Granny Smith apples, or your favorite tart apple
- Apple sticks (or popsicle sticks, kebab sticks, lollipop sticks, chopsticks – even sturdy, clean twigs from your yard work!)
For the Fudgy Caramel:
- Granulated sugar
- Salted butter (high quality makes a difference!)
- Corn syrup (essential for that perfect non-crystallized texture)
- Evaporated milk
- Vanilla extract (for depth of flavor)
- Kosher salt, or sea salt (to balance the sweetness)
Optional Chocolate or Butterscotch Dip & Toppings:
- White chocolate, semi-sweet chocolate, or butterscotch chips
- Vegetable oil (to thin the chocolate for dipping)
- Granulated sugar and cinnamon (for a delightful snickerdoodle coating)
- Assorted crunchy, chewy, or colorful toppings (see full list below!)
Mastering the Art of Caramel Apple Making
Creating these sensational caramel apples is a step-by-step process that guarantees success. Attention to detail, especially during the caramel-making phase, is key to achieving that perfect fudgy, non-sticky texture. Let’s break it down:
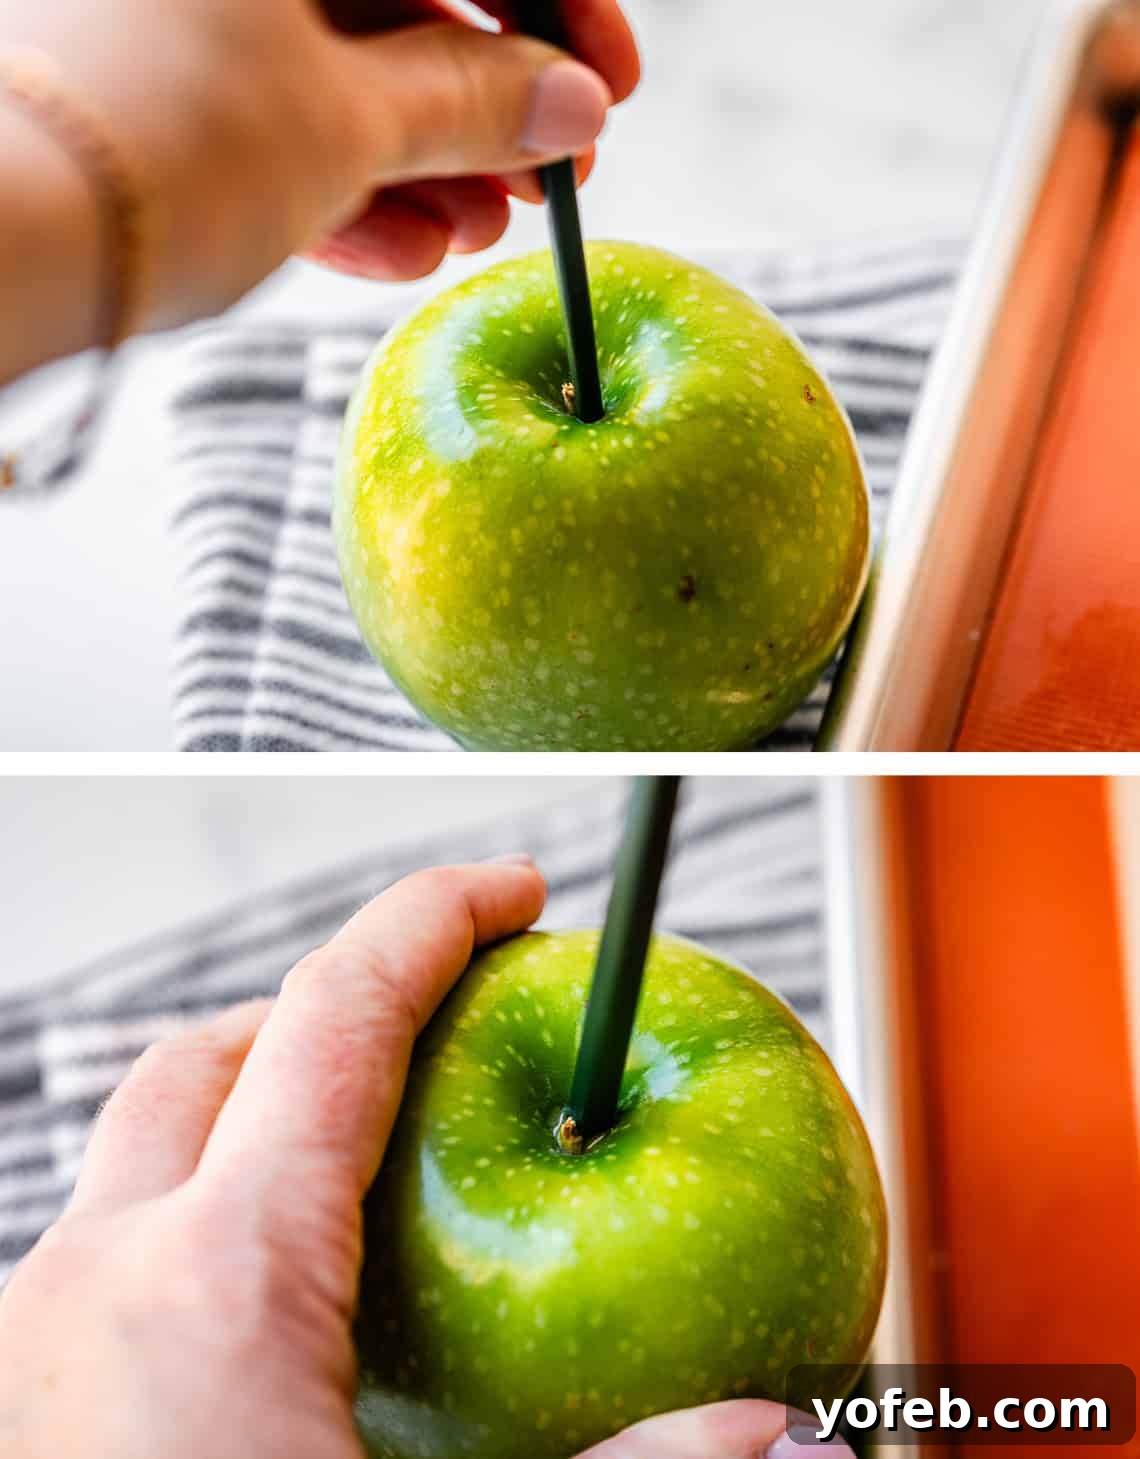
1. Prepare Your Apples: Begin by thoroughly washing your apples. It’s crucial to rub them under water with your hand or a vegetable brush to remove any waxy coating, which can prevent the caramel from adhering properly. Twist off the stems. Then, ensure the apples are completely dry – caramel simply won’t stick to wet surfaces. Once dry, insert your chosen stick. I often use a chopstick to create an initial pilot hole, then carefully insert a cleaned stick from my yard, pushing it about three-quarters of the way down the apple for stability. Place the prepared apples in the fridge while you make the caramel; cold apples are essential for a perfect dip.
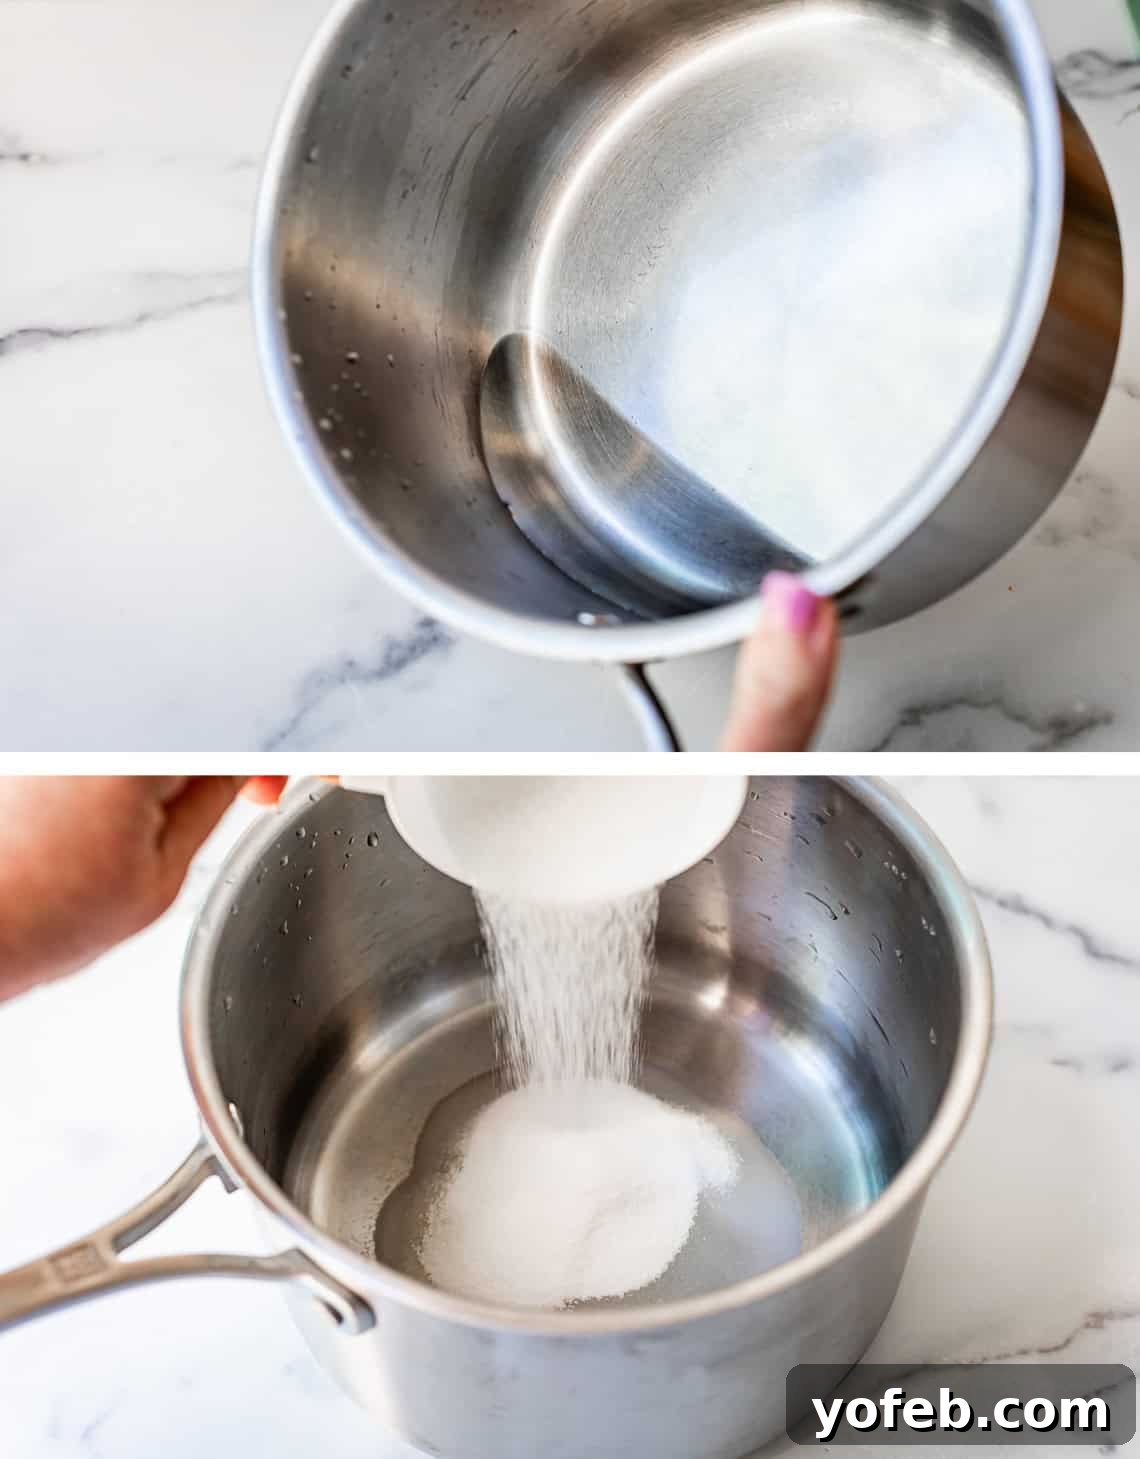
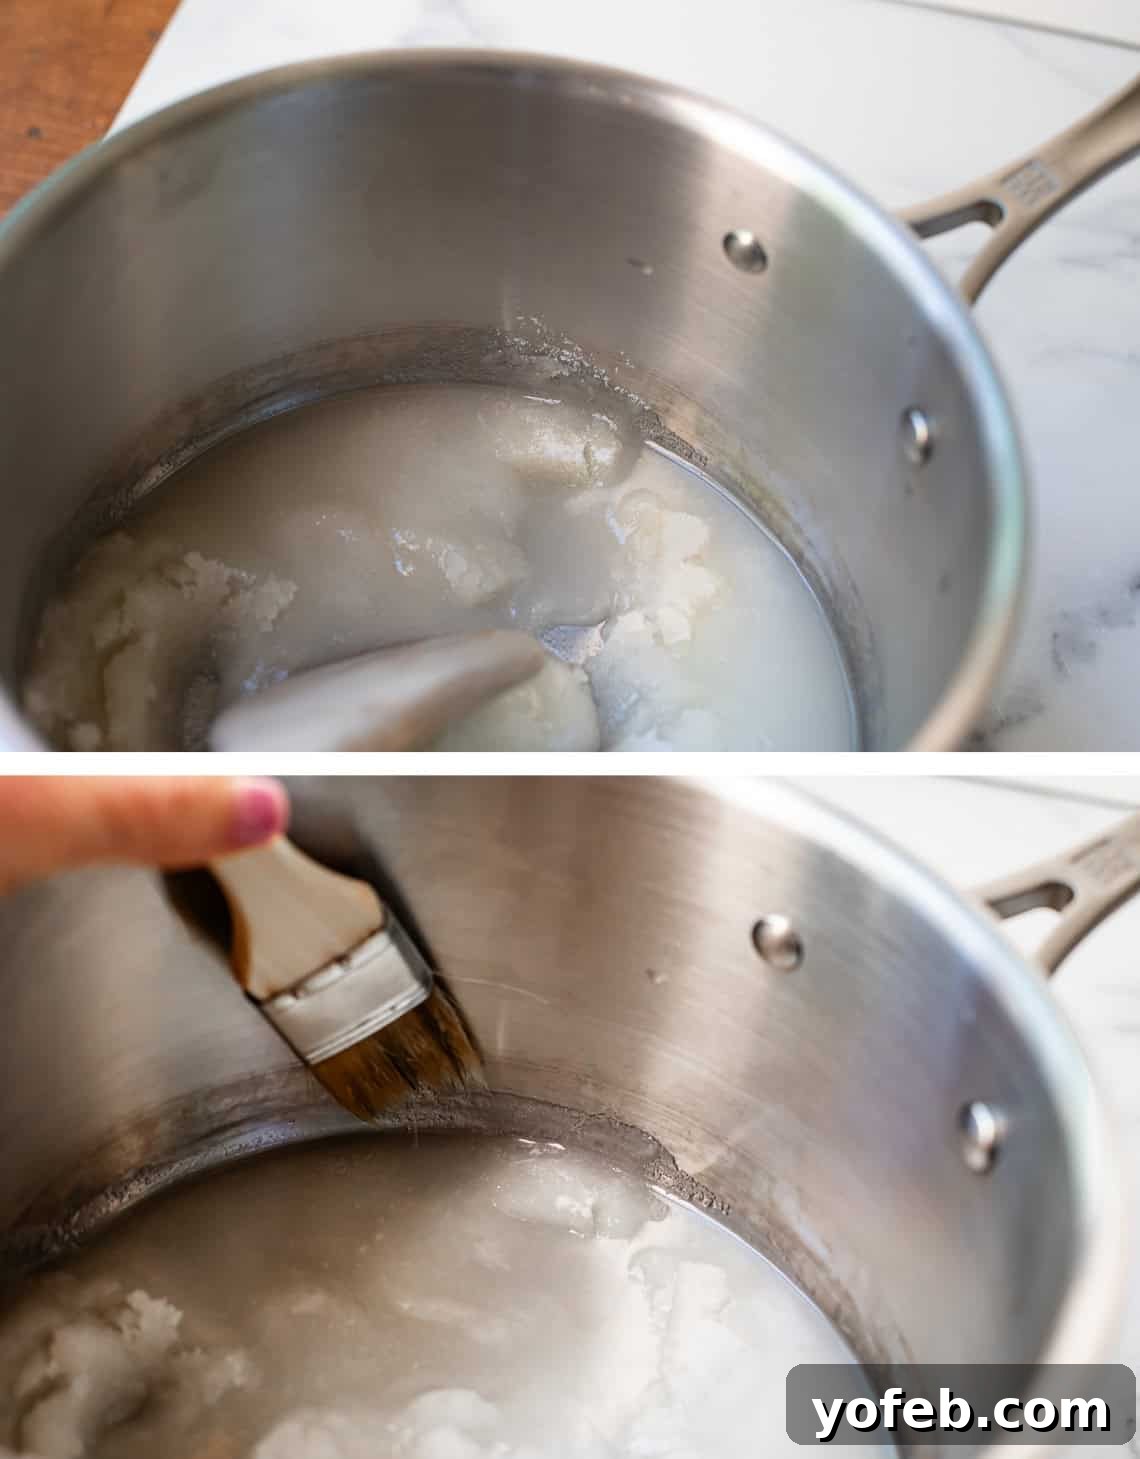
2. Start the Caramel Base: Use a heavy-bottomed saucepan for caramel; a thin pot can lead to uneven heating and burning. Add about half a cup of water to the pot, swirling it gently to wet the bottom and lower sides. Then, carefully pour four cups of white granulated sugar into the center of the pot, taking care not to let any sugar crystals cling to the edges. Use a wooden spoon to slowly draw the water from the edges towards the sugar in the center, ensuring all the sugar is moistened. If you spot any errant sugar crystals on the pot’s sides, use a wet pastry brush to gently swipe them into the liquid; any undissolved crystals can cause your caramel to become grainy.
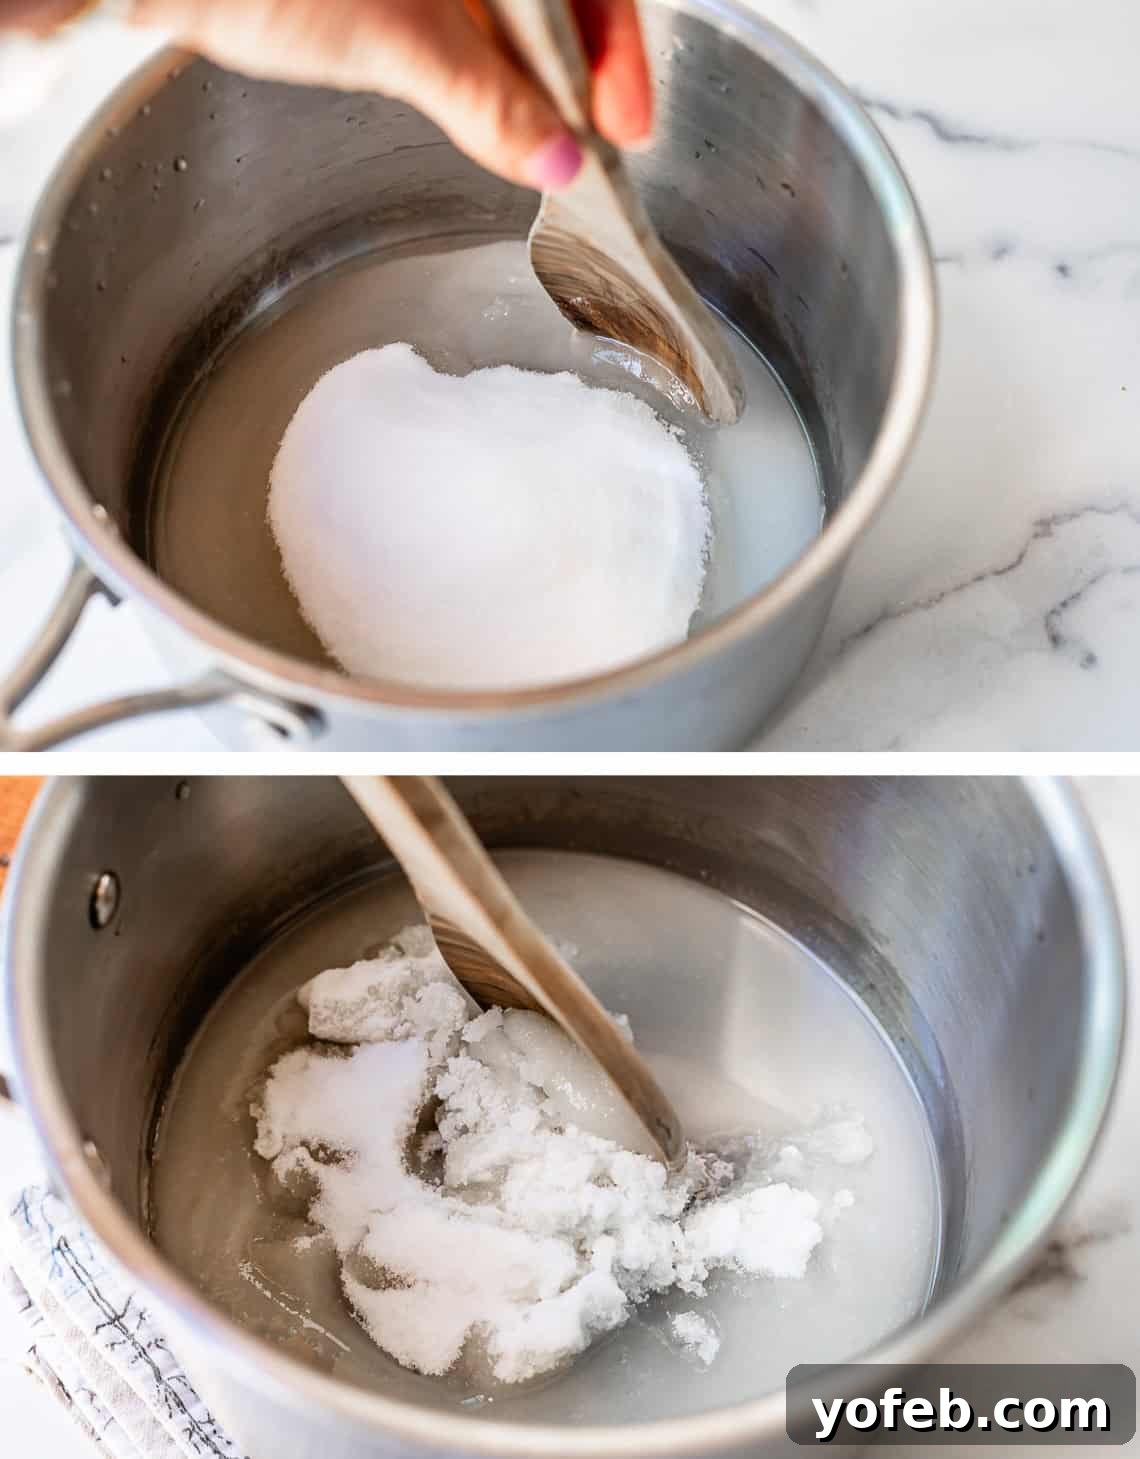
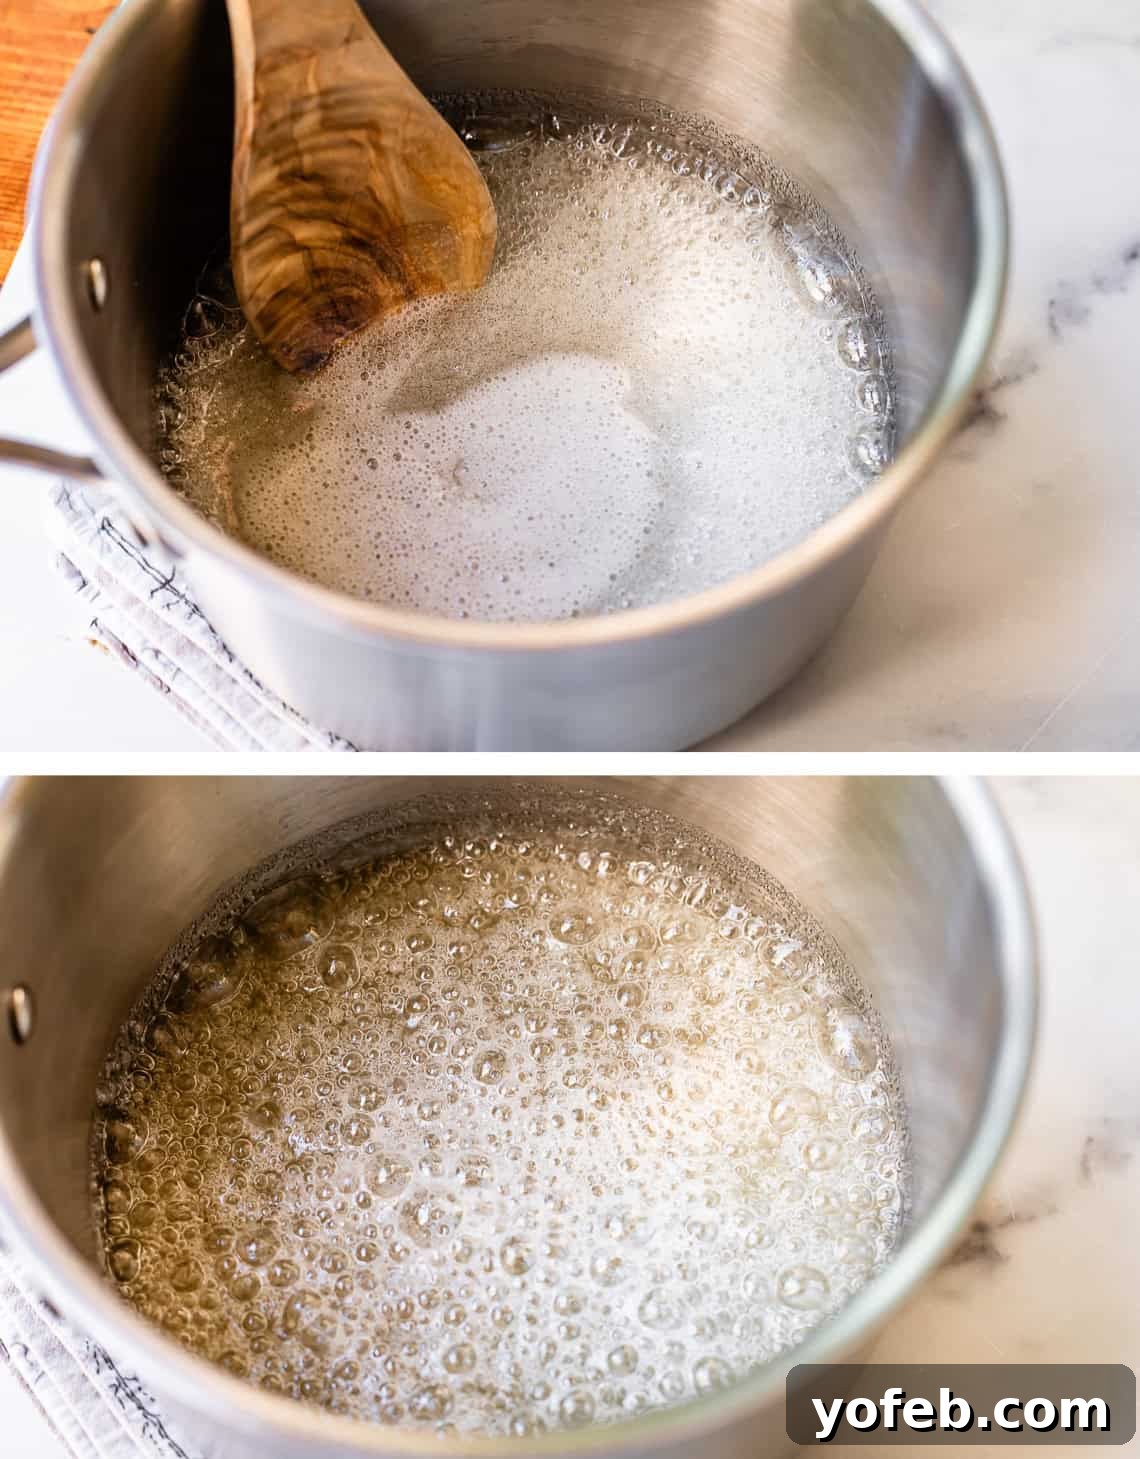
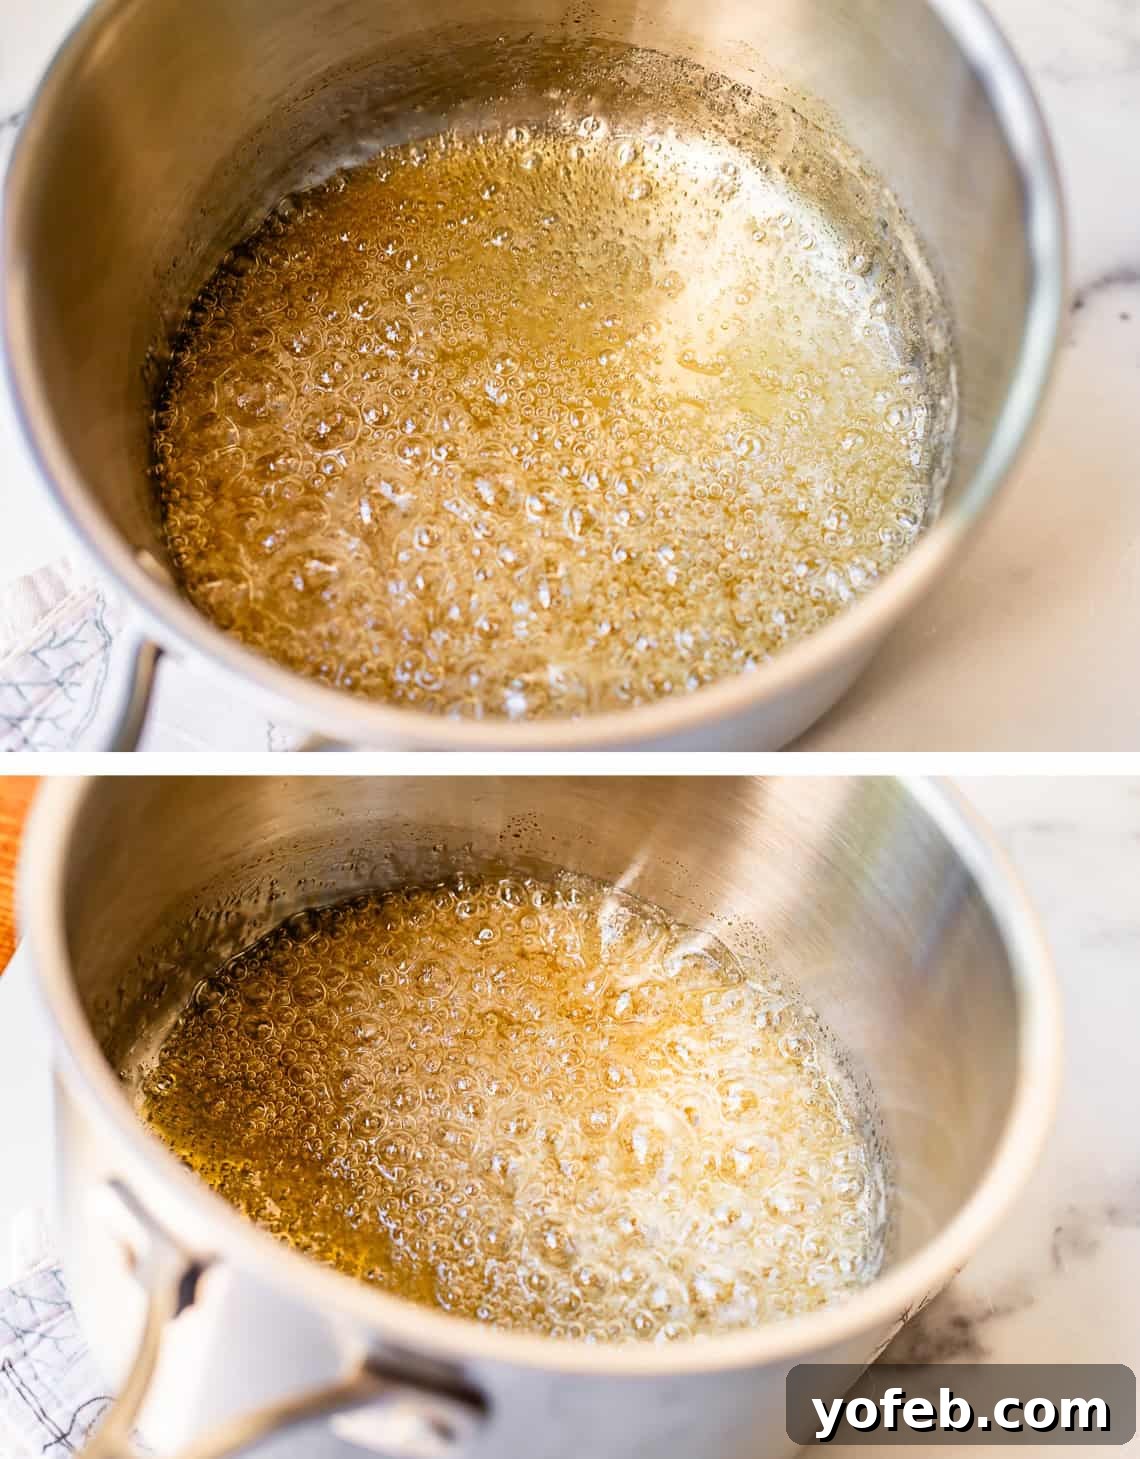
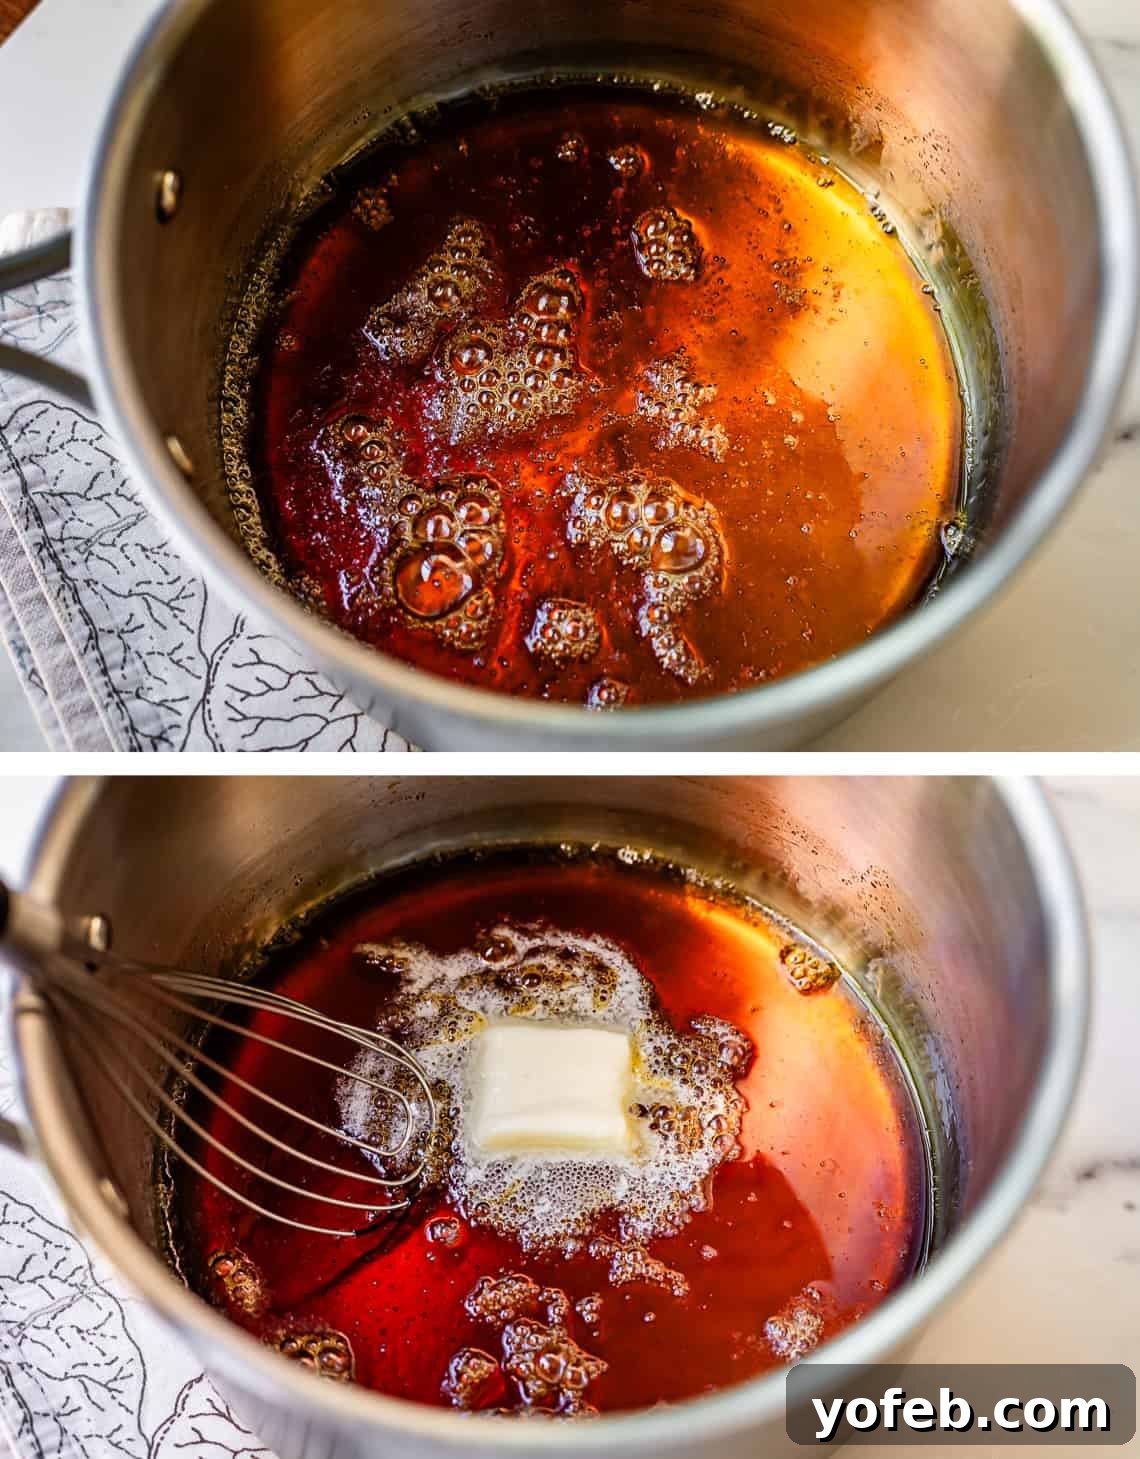
3. Caramelize the Sugar: Bring the sugar and water mixture to a boil over high heat, stirring gently until all sugar is dissolved. Once it’s boiling uniformly and you’ve confirmed no crystals remain on the sides (swipe with a wet pastry brush if needed), reduce the heat to medium. At this point, you can remove your spoon; stirring further is unnecessary and risks introducing crystals. Let the mixture bubble and boil undisturbed for about 8-10 minutes. It will gradually transition from clear to a pale yellow, then deepen into a rich amber. Keep a close eye on it during this stage; once it starts to color, it can change rapidly.
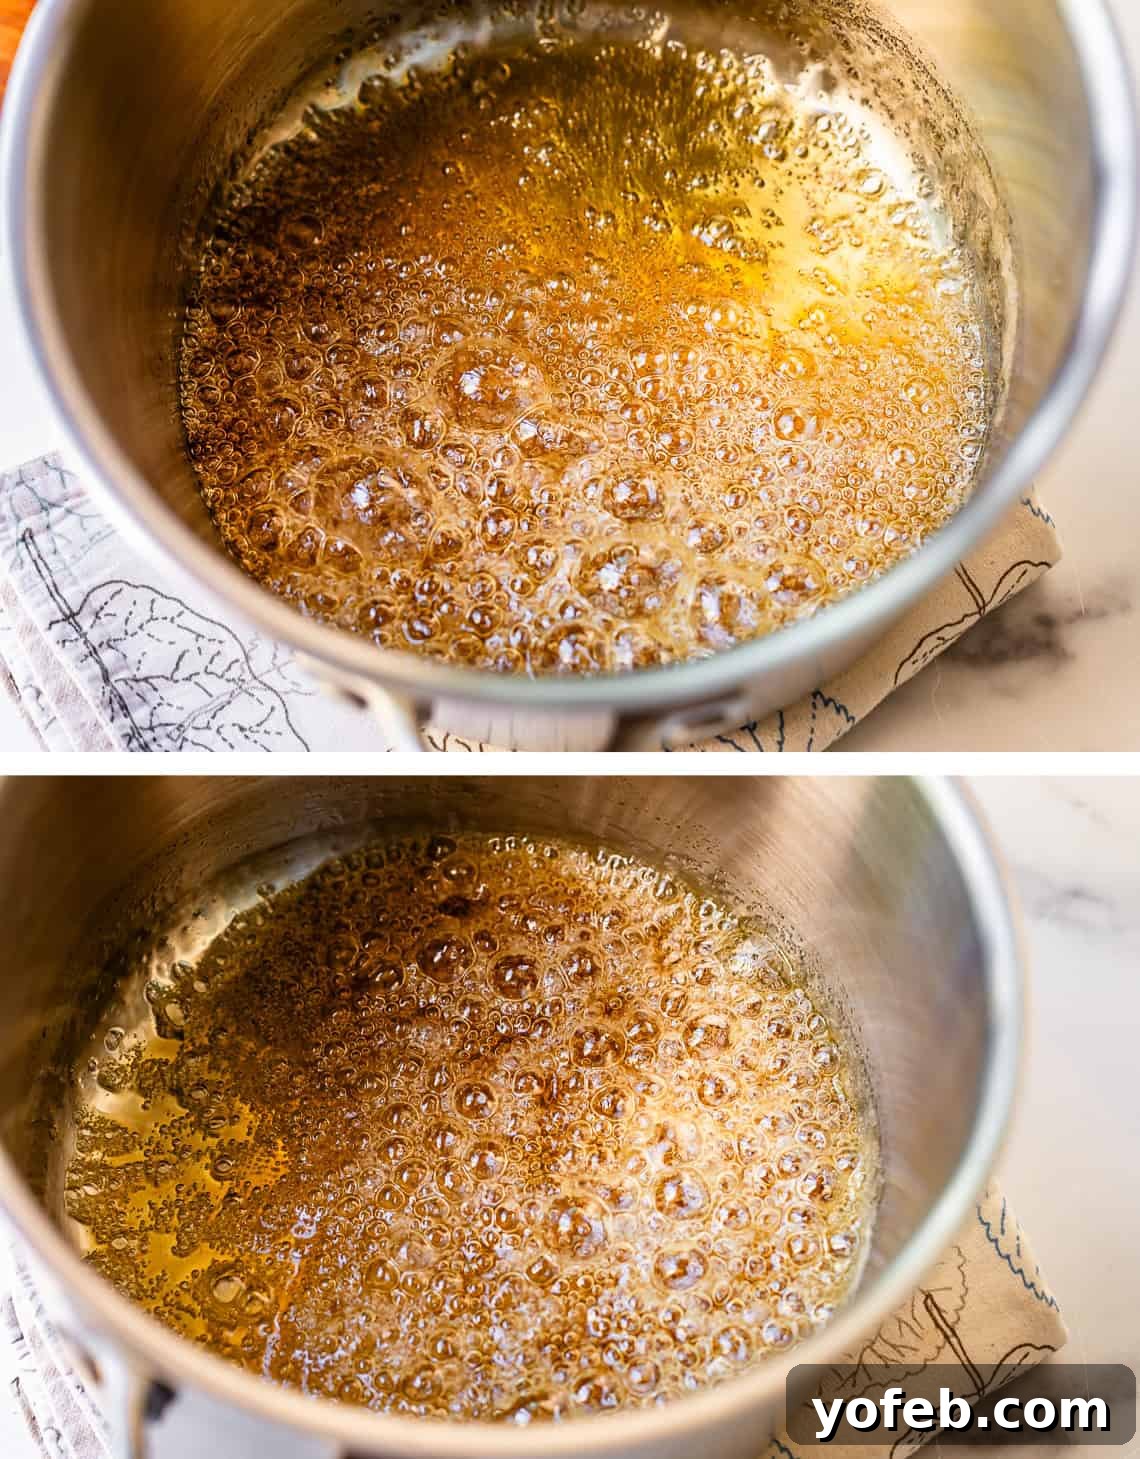
4. Recognize the Smoke Point: As the caramel deepens in color, swirl the pan occasionally to ensure even caramelization. Watch for the first few wisps of smoke (not just a single wisp, but a subtle, continuous trail). As soon as the caramel achieves an even, deep amber color and you see these wisps of smoke, immediately remove the pot from the heat. This is your cue! The sugar is perfectly caramelized. Do not let it continue cooking, as it will burn quickly. Immediately proceed to the next step to halt the cooking process.
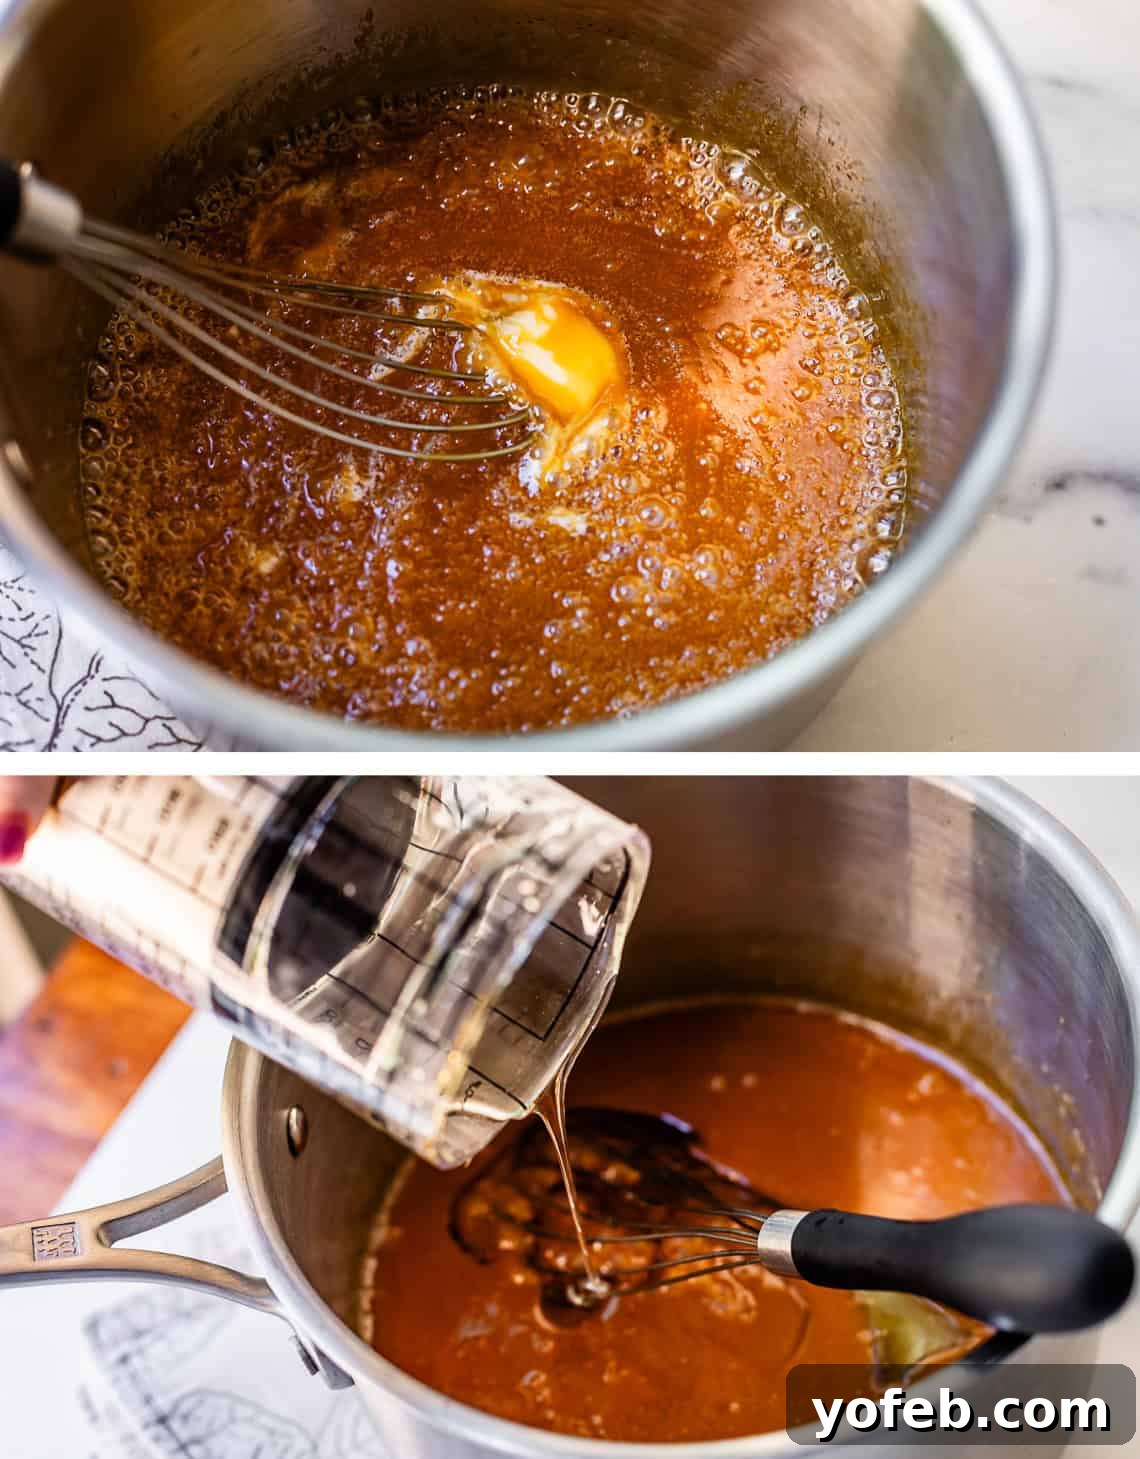
5. Add Butter and Corn Syrup: Off the heat, swiftly add your chopped salted butter to the caramelized sugar. Whisk it in gently but continuously; be cautious of hot splashes! The caramel will begin to thicken and turn creamy. Next, whisk in the corn syrup (two cups). This step is crucial for preventing crystallization and contributing to the caramel’s smooth, fudgy texture. Return the pot to medium heat and continue stirring until the mixture is smooth.
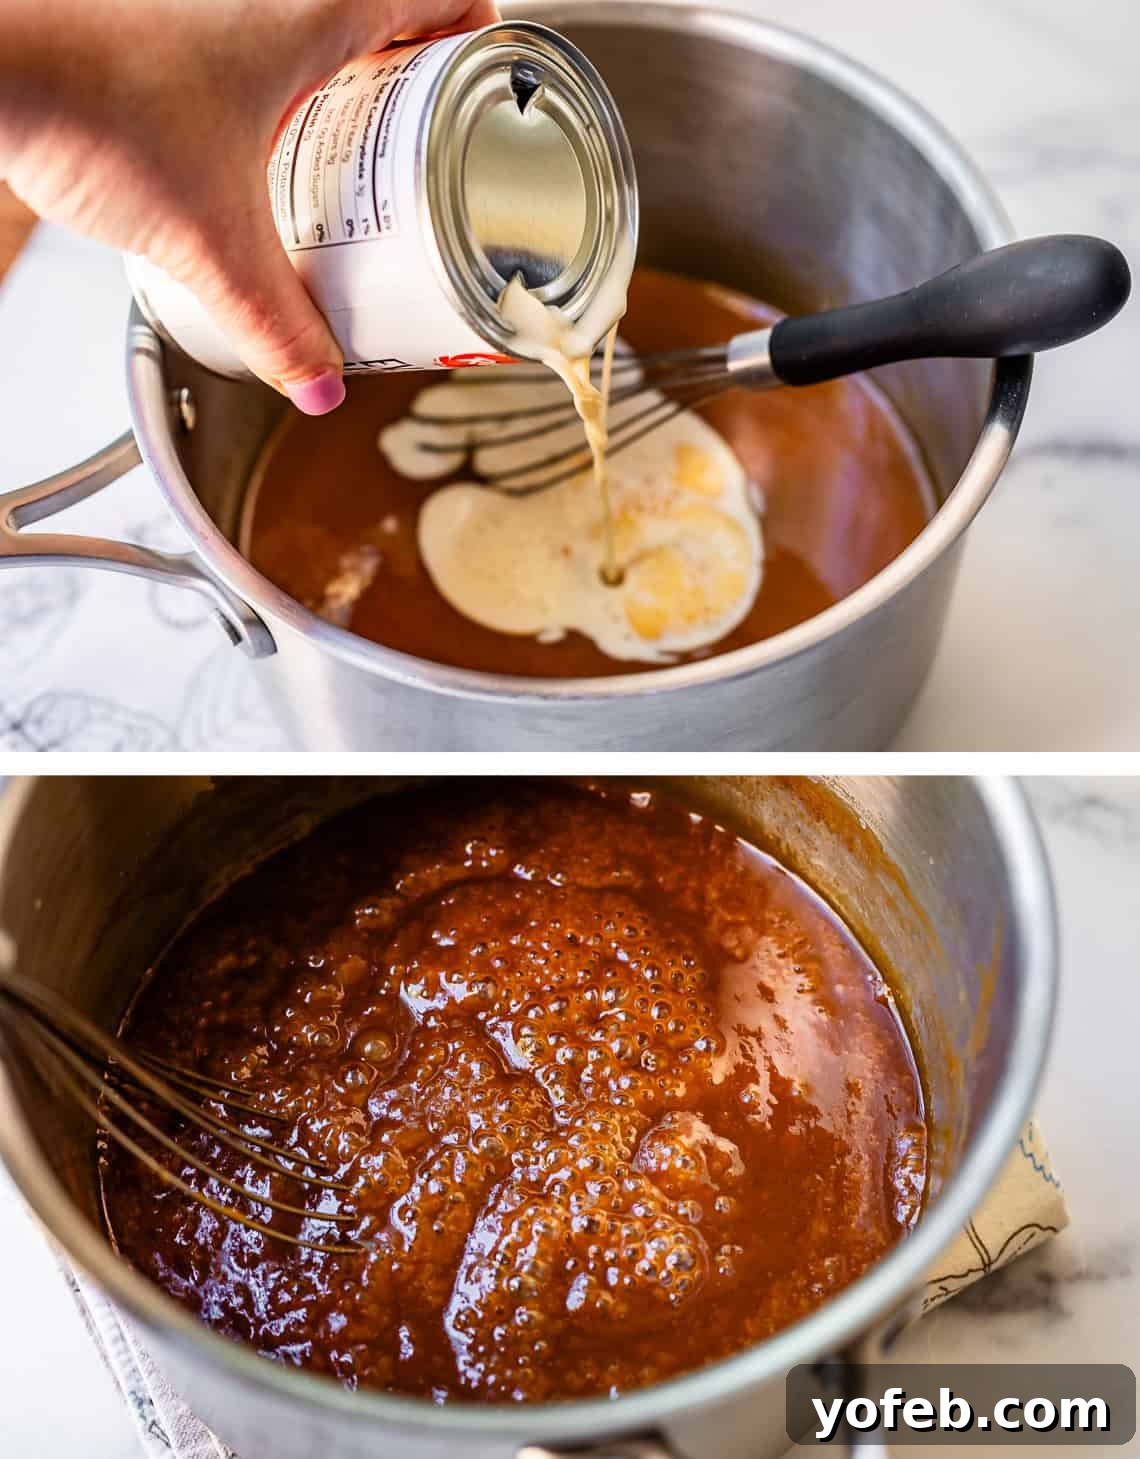
6. Incorporate Evaporated Milk: Now for the long haul. Begin adding the two cans of evaporated milk very slowly, taking about 10 minutes for this entire step. Add a small amount, whisk until fully incorporated and smooth, then add a little more. Rushing this process will result in a grainy, unsmooth caramel, which we want to avoid for that perfect fudgy texture. Once all the milk is added, continue to boil the caramel over medium heat, whisking almost constantly and making sure to scrape the bottom and corners of the pan. This boiling phase will take approximately 20-25 minutes, but can vary depending on your stovetop and pan.
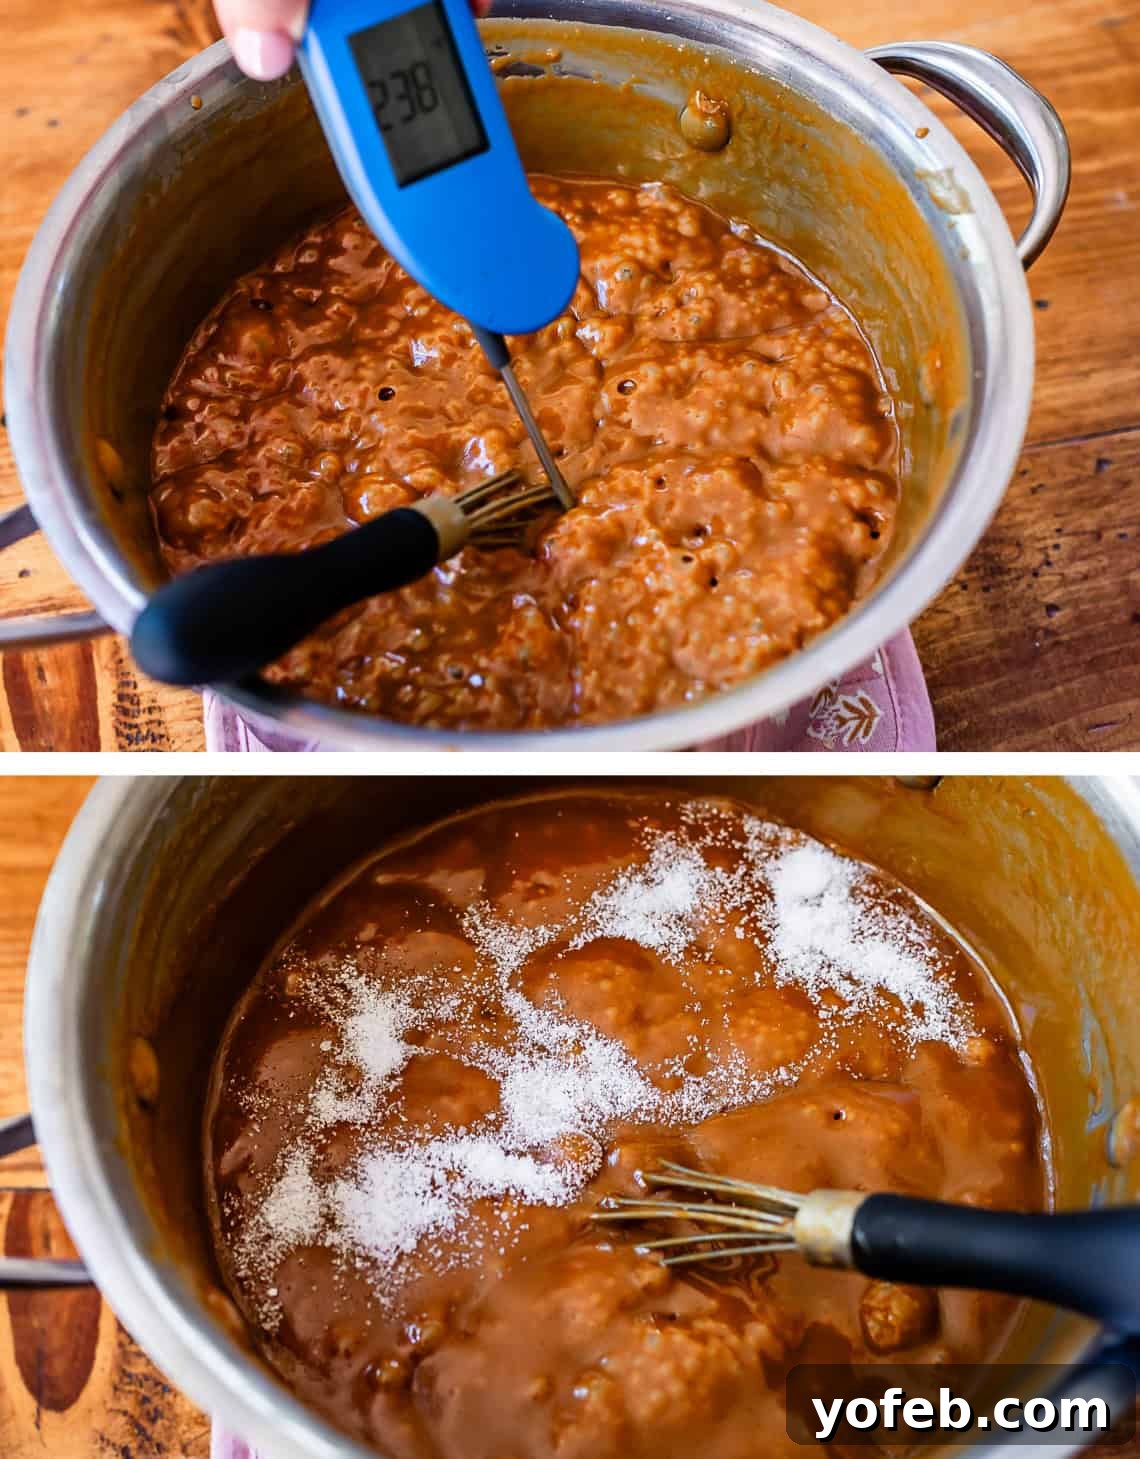
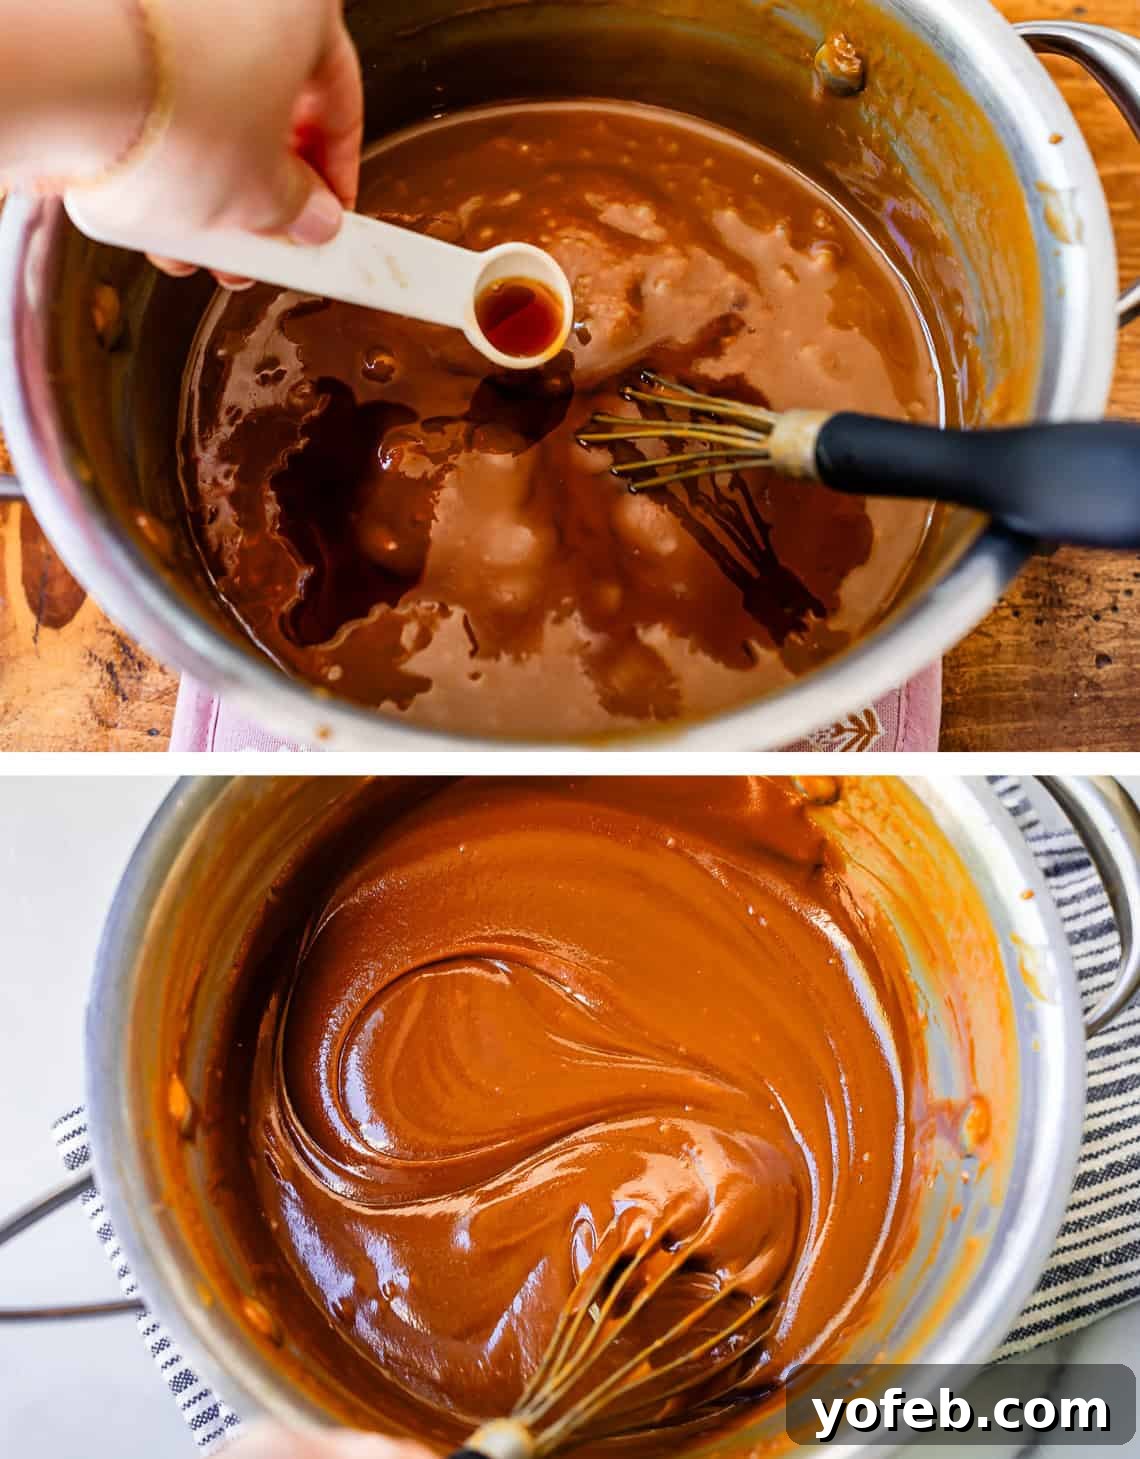
7. Reach the Ideal Temperature: The most accurate way to ensure your caramel is perfectly set for dipping is by using a candy thermometer. Continue boiling and whisking until the mixture reaches precisely 238 degrees F. This temperature yields the ideal soft-ball stage, crucial for the fudgy, bite-through texture we’re aiming for. Avoid going above 239 degrees F, or your caramel will become too hard. Once it hits 238 degrees, remove the pot from the heat immediately. Stir in the kosher salt (about 1.5 teaspoons, adjusting to your preference) and vanilla extract. Allow the caramel to cool for about 15 minutes, stirring occasionally to release excess heat, before you begin dipping.
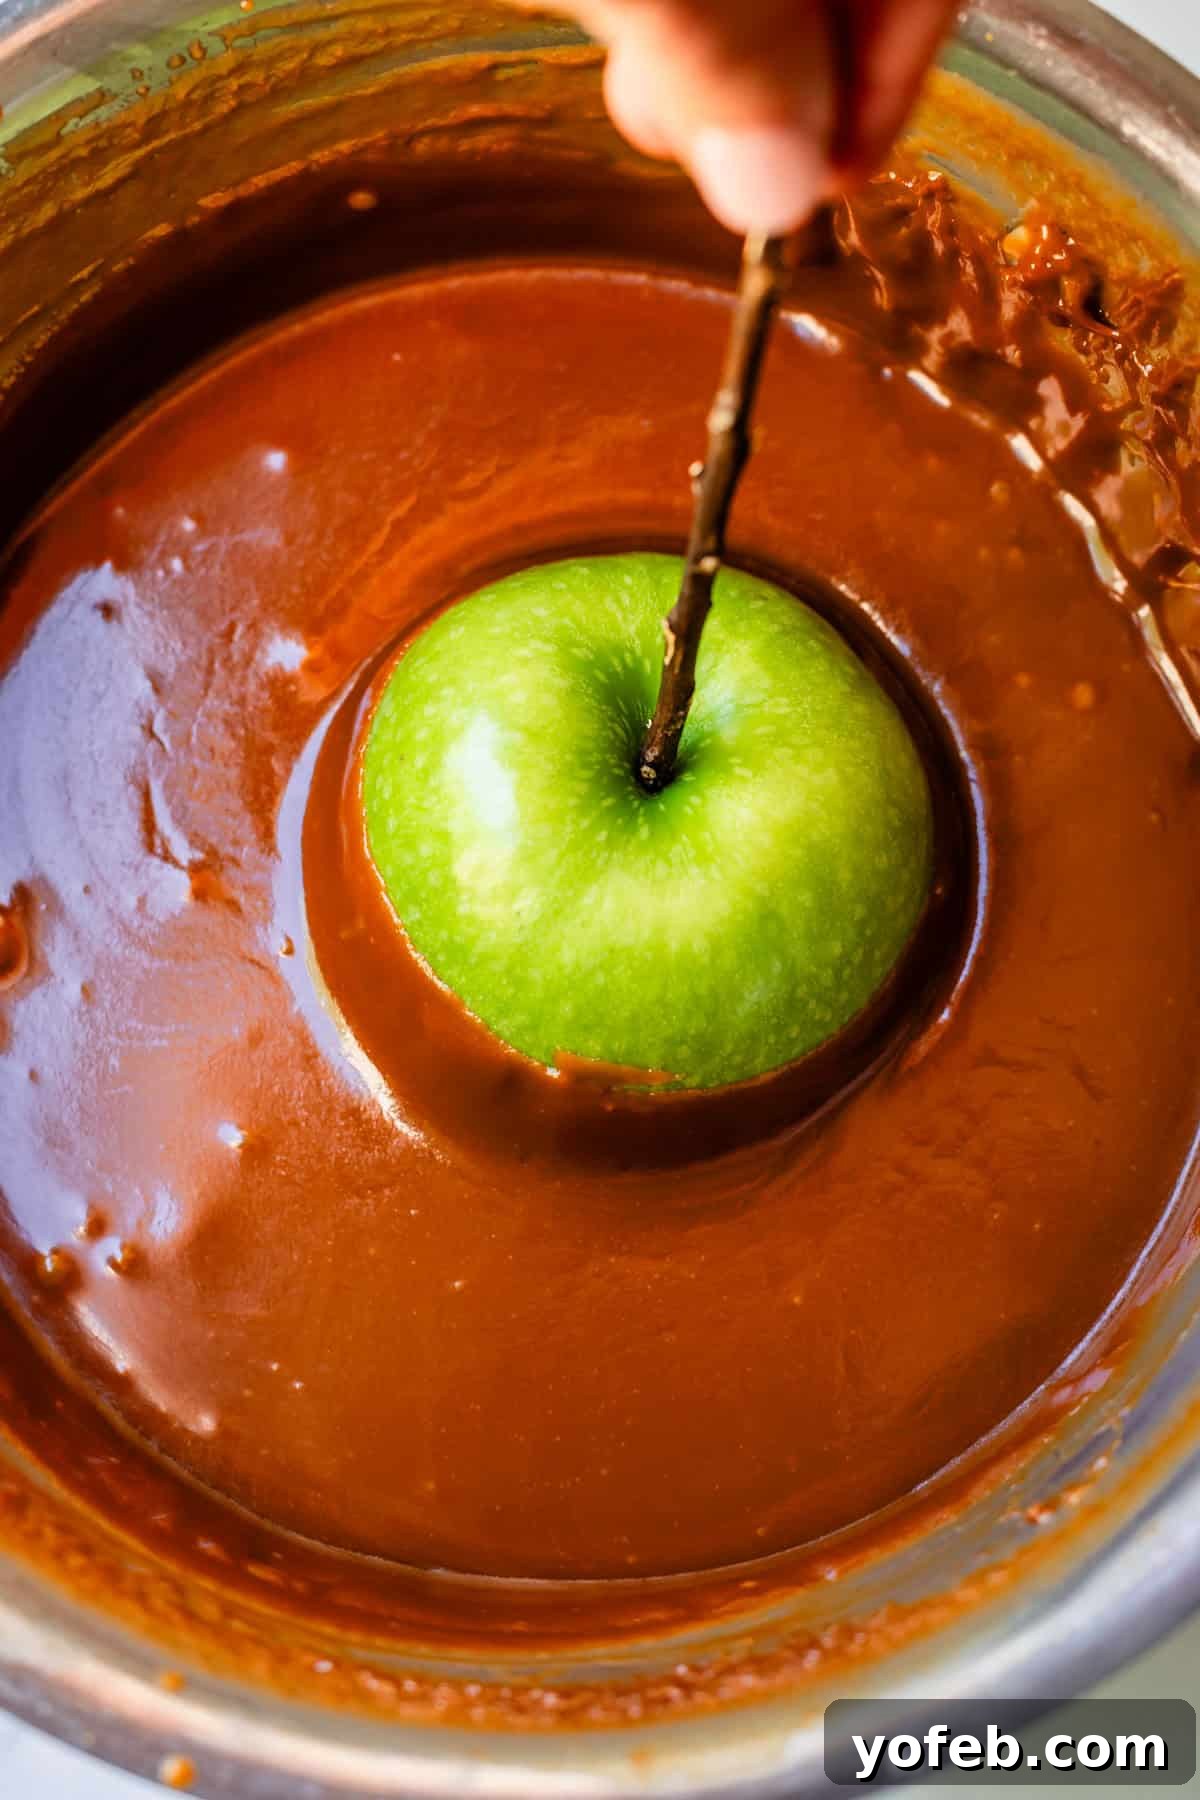
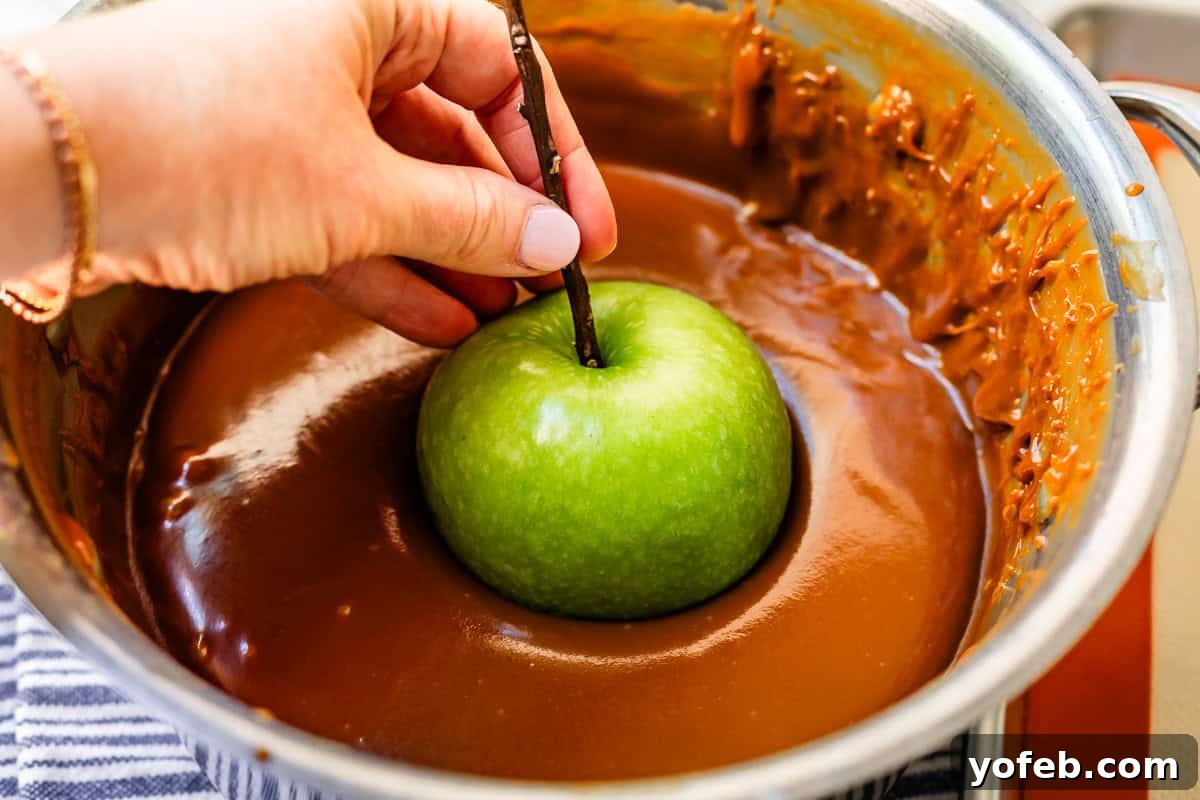
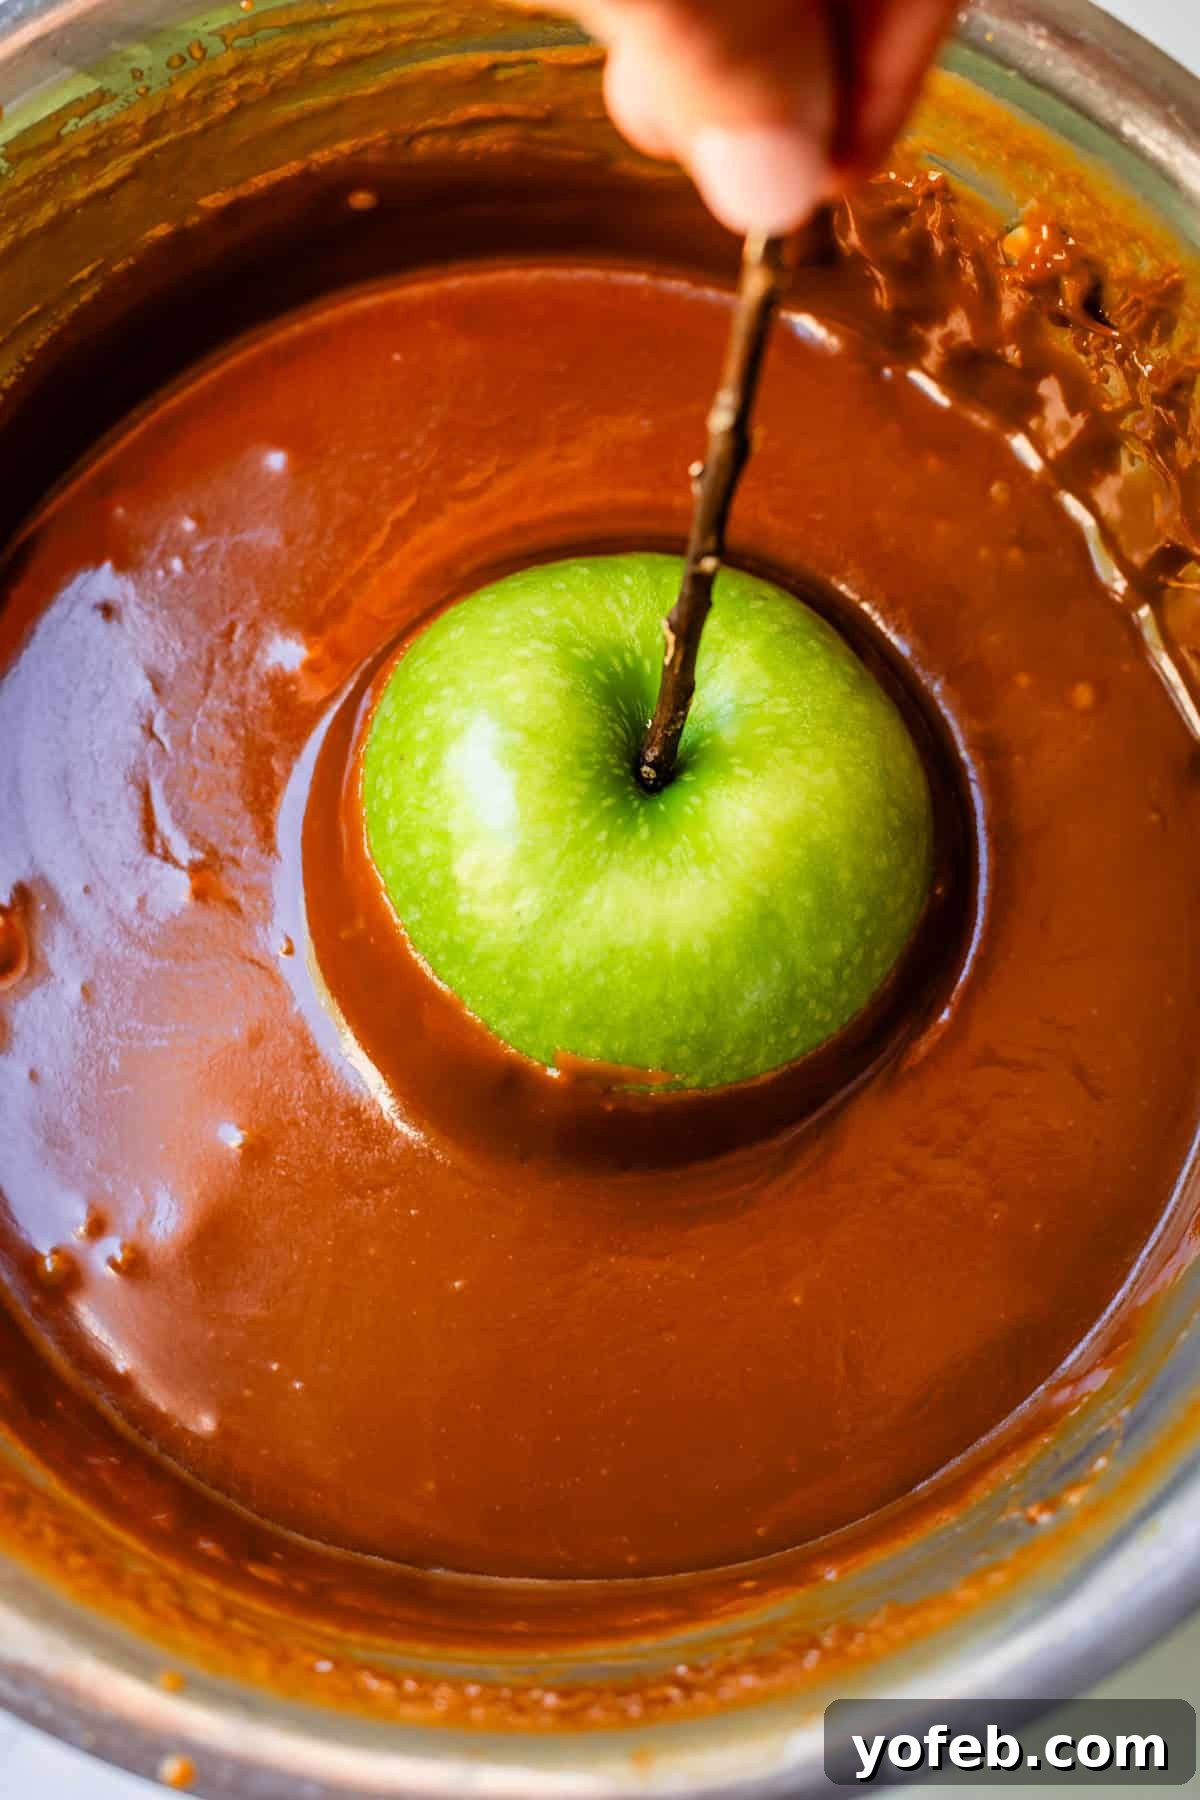
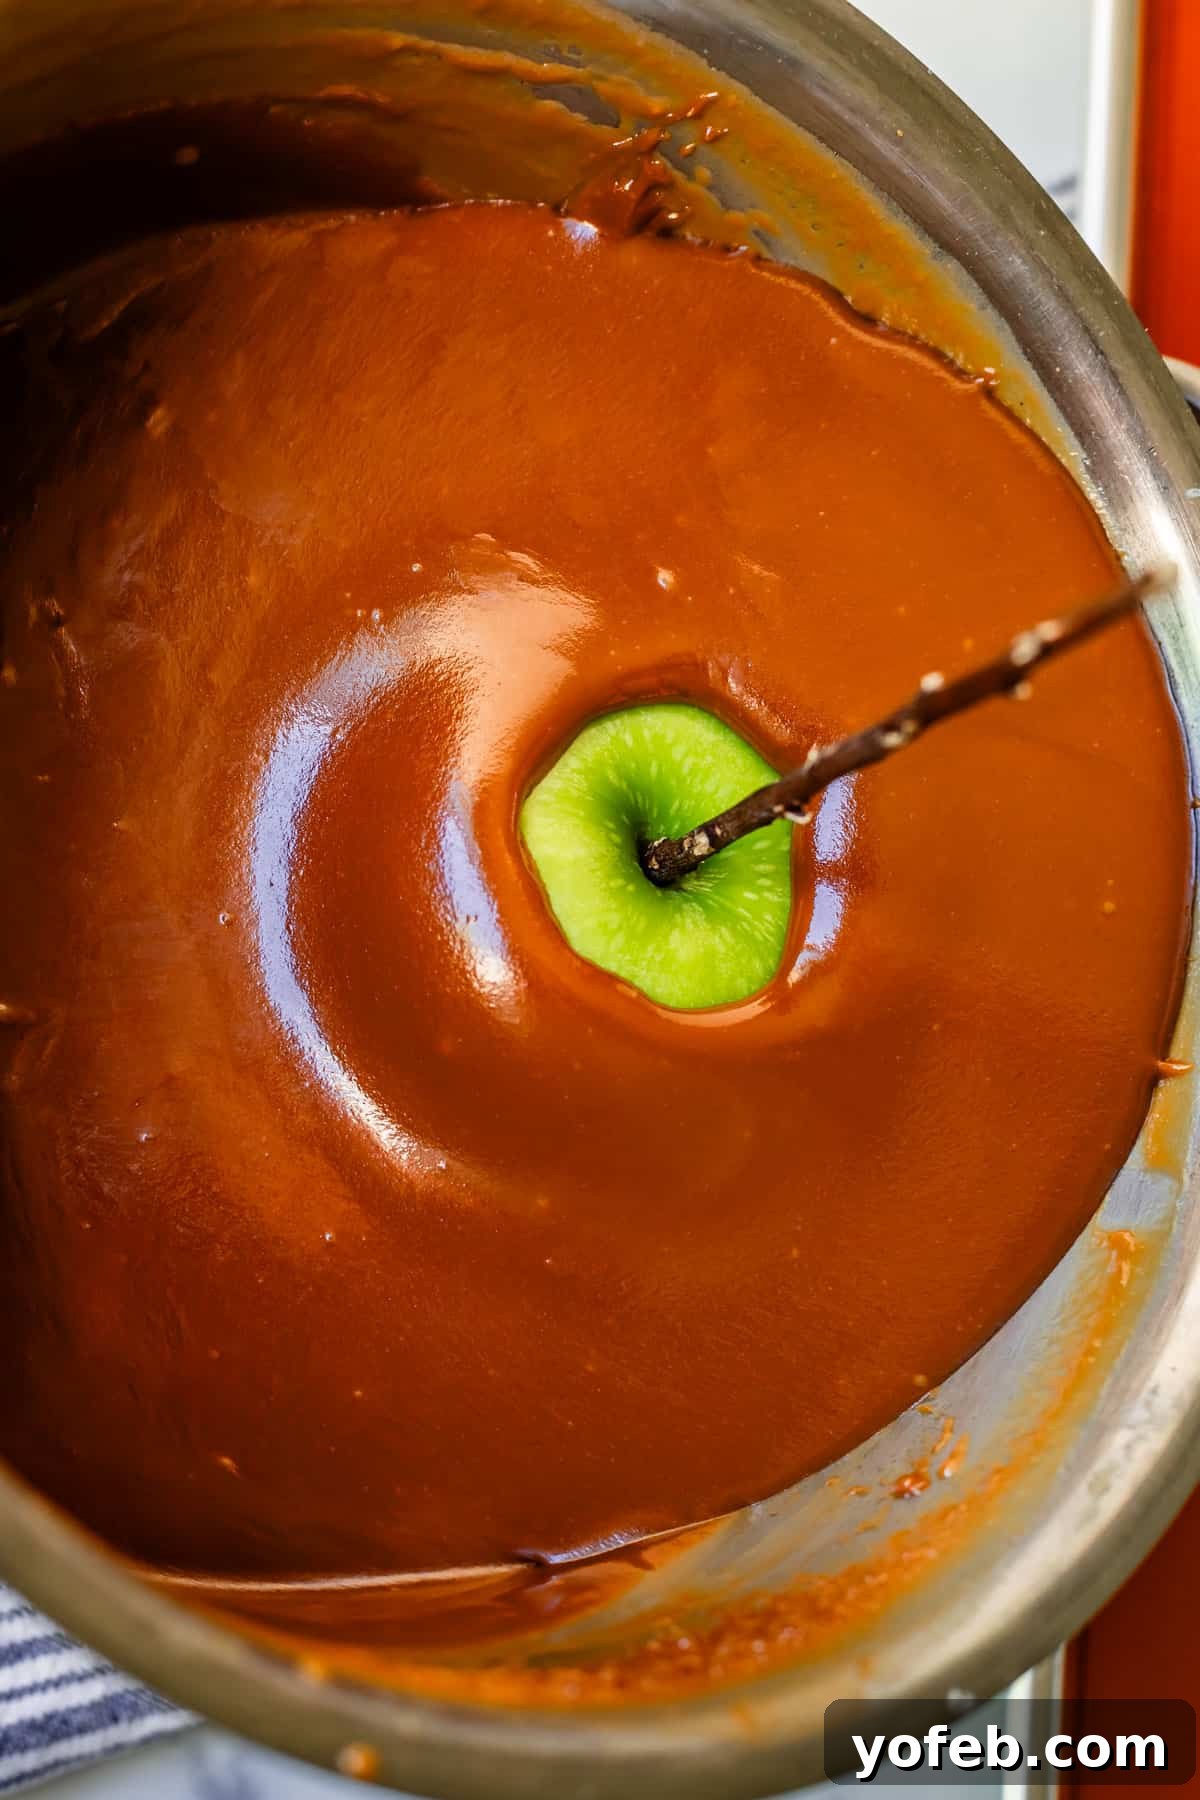
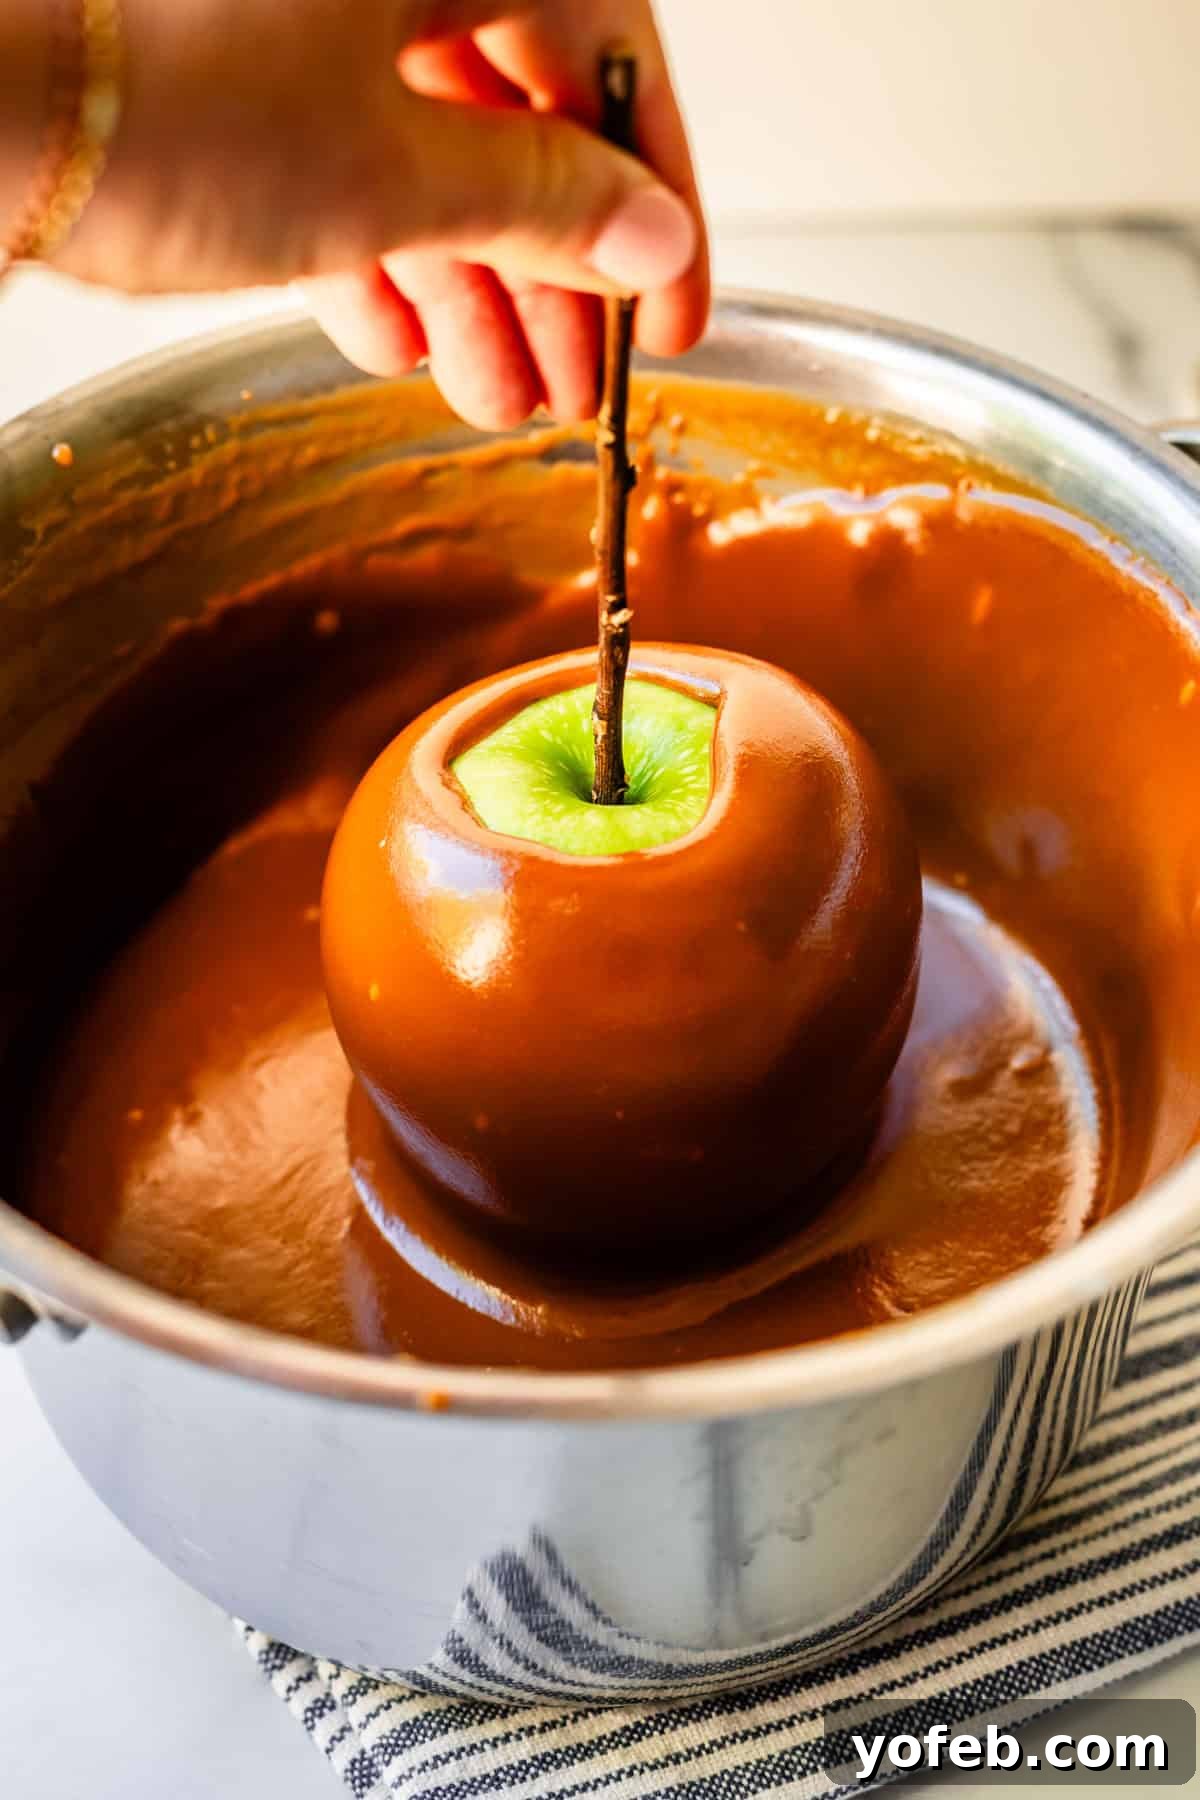
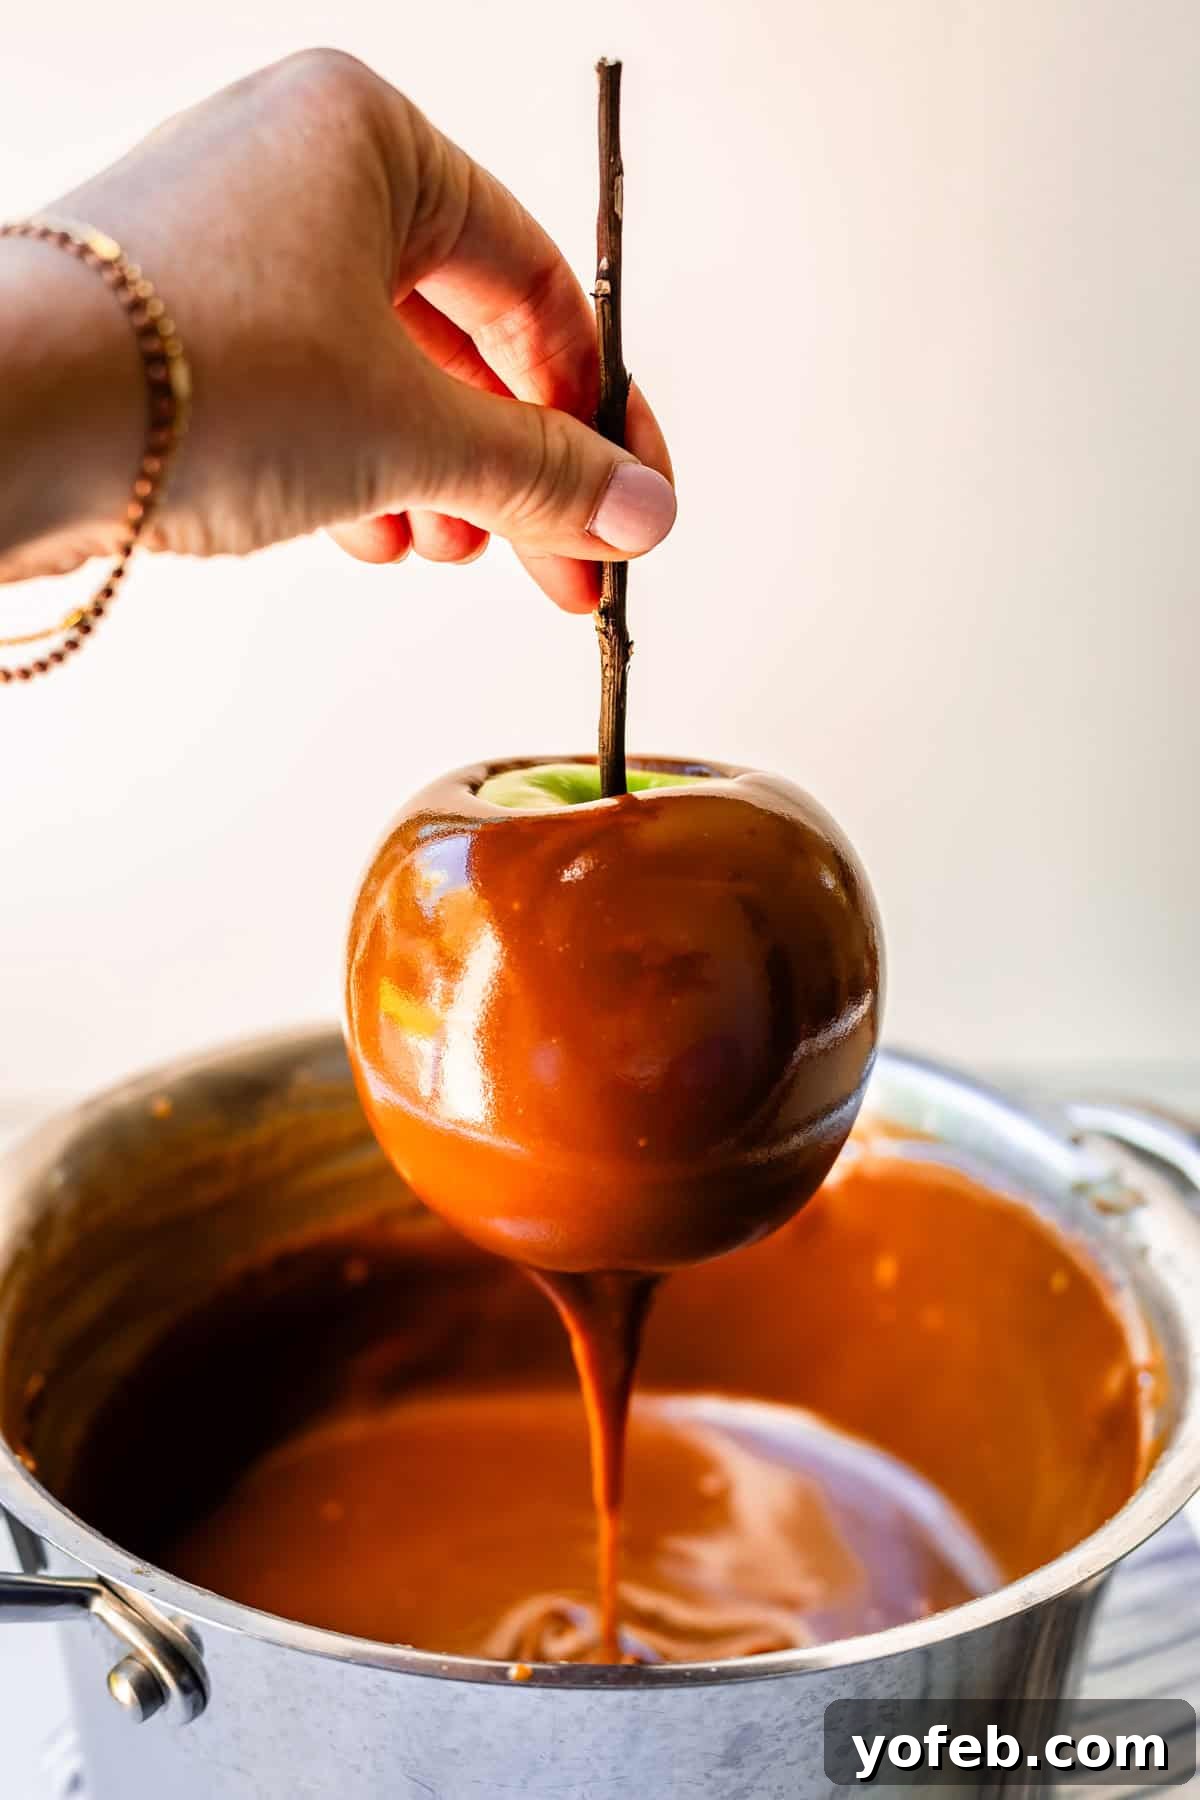
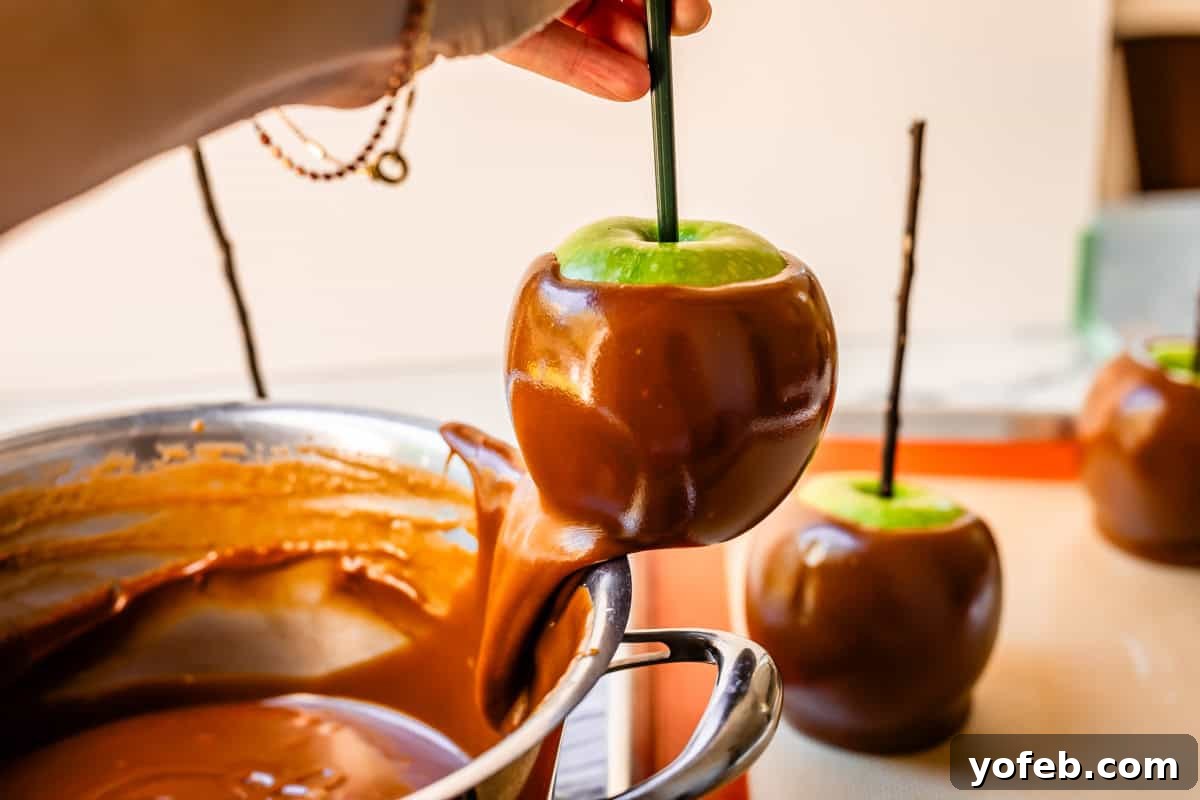
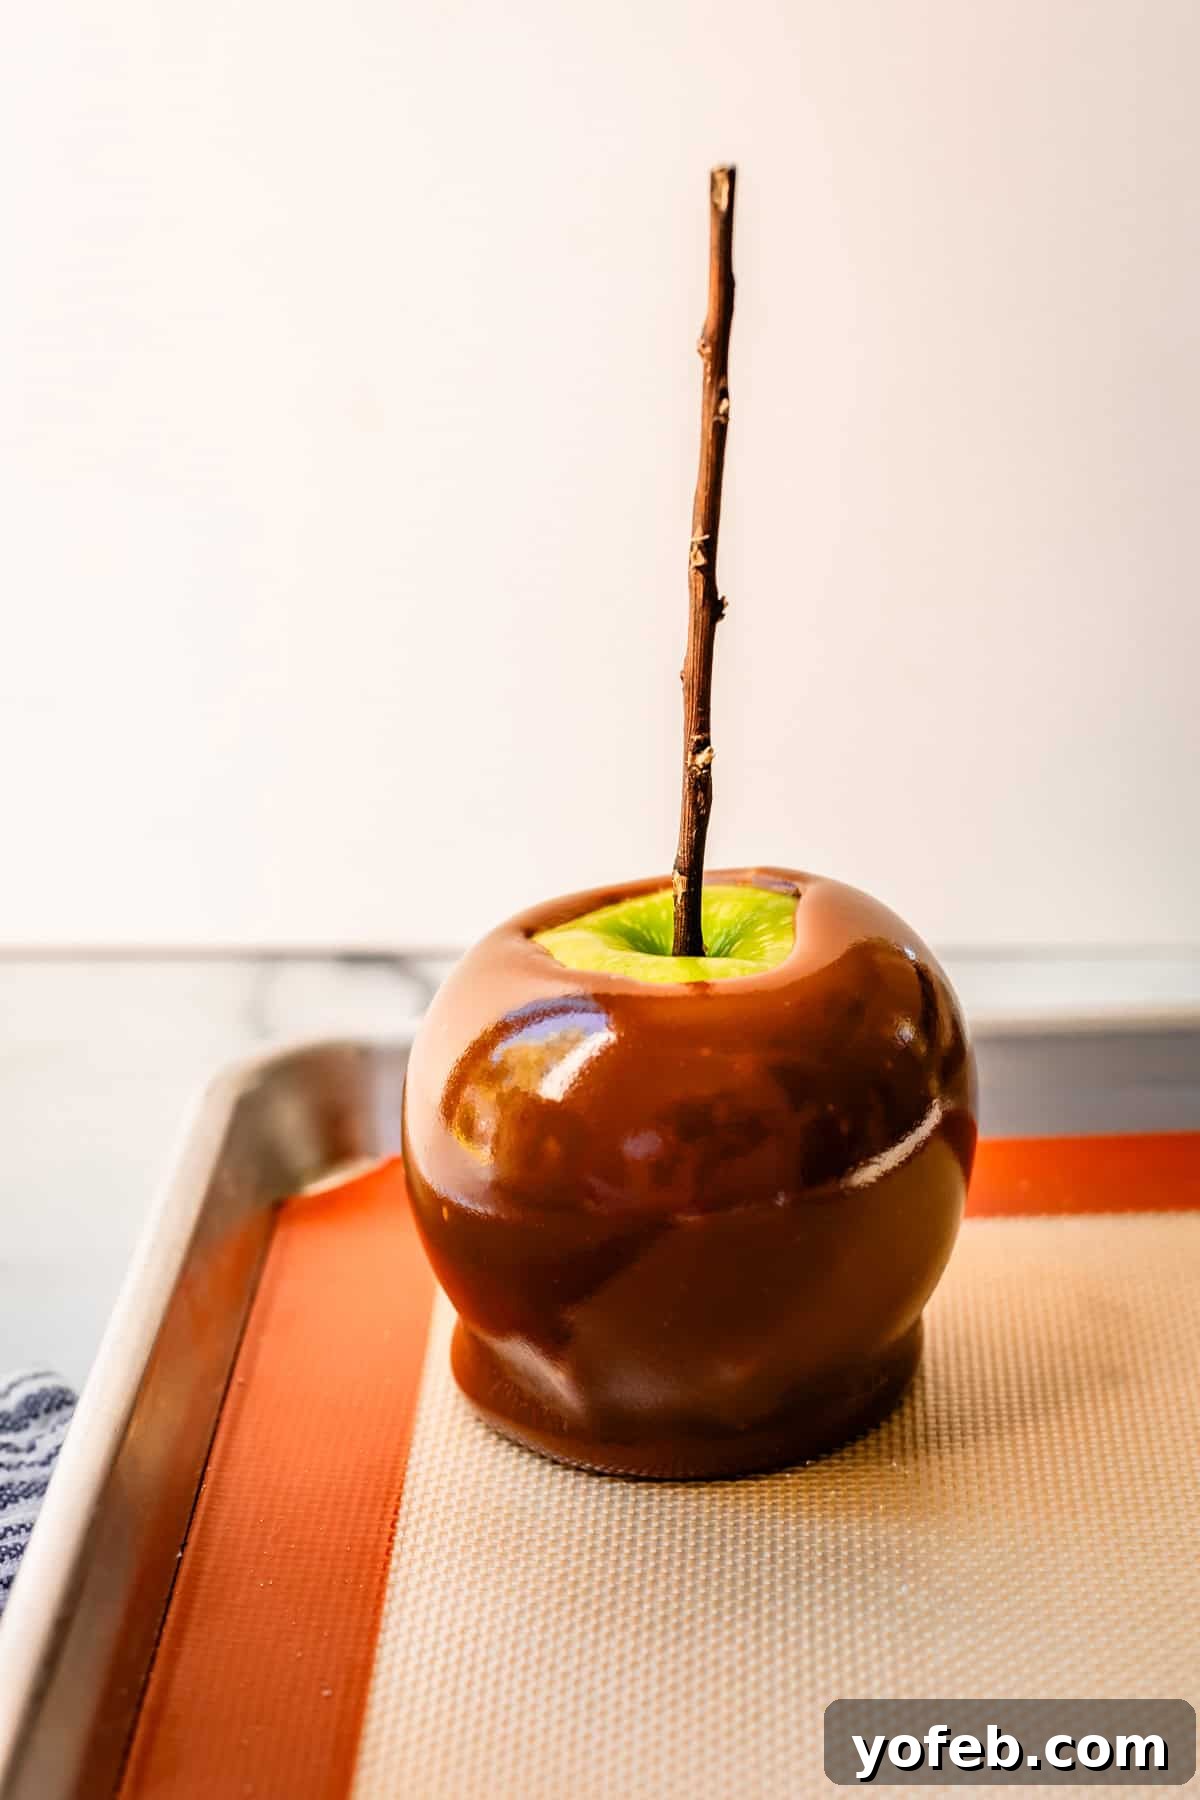
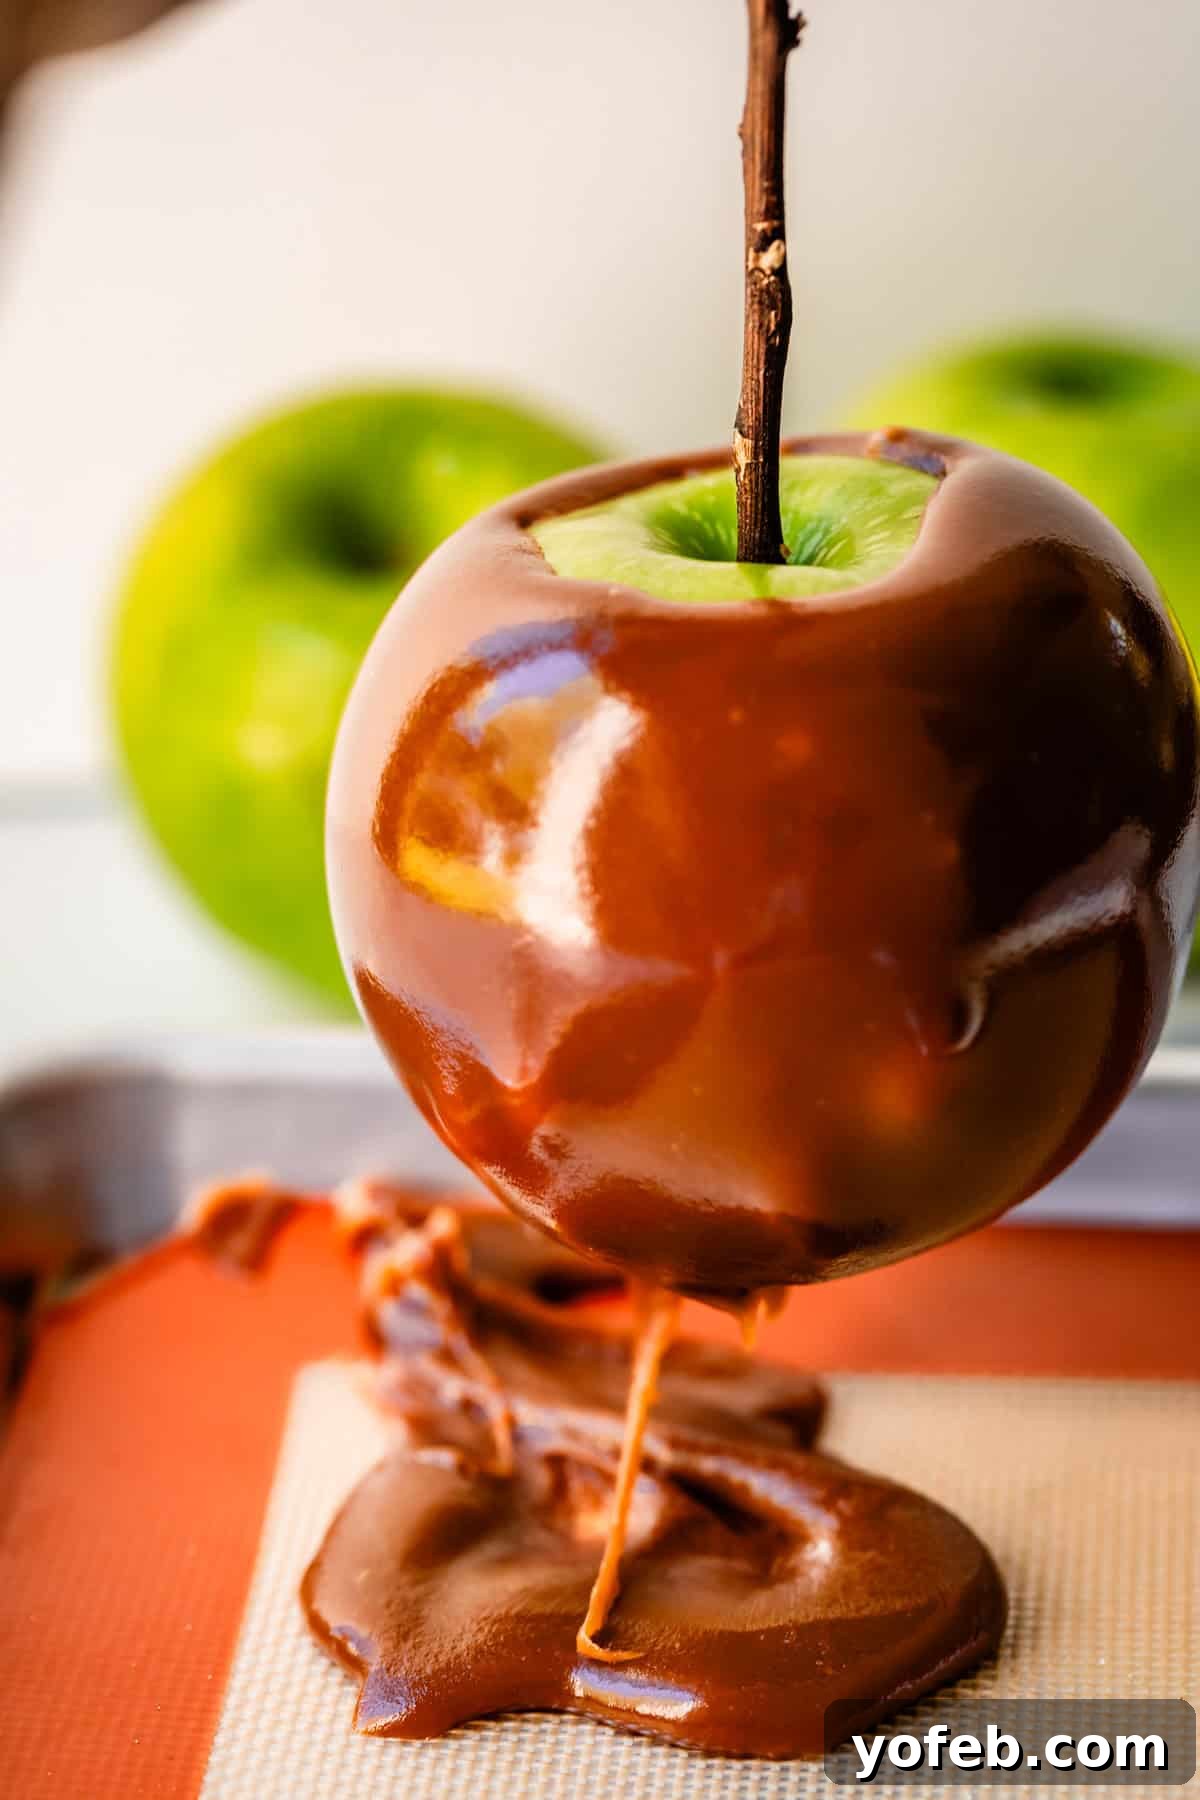
8. Dip the Apples: Prepare your dipping station by laying a silpat baking mat on a baking sheet; this caramel will stick to almost anything else. Retrieve your cold apples from the fridge. Tilt the pot of warm caramel to create a deeper pool, then quickly submerge an apple almost entirely. Swirl it to ensure an even coating. Lift the apple, allowing excess caramel to drip back into the pot, and gently scrape the very bottom edge against the pan to remove any large drips. Place the dipped apple on your silpat to cool and set. Work quickly to keep the apples cold and the caramel from cooling too much. If the caramel starts to thicken too much, you can gently warm it on low heat for a few moments, stirring continuously.
9. Add Toppings (Optional): If you’re adding toppings directly to the caramel, do so immediately after dipping and before the caramel fully sets. For chocolate-dipped apples, allow the caramel to set completely (you can chill them in the fridge for 10-20 minutes). Then, melt your chosen chocolate (white, semi-sweet, or butterscotch chips) with a teaspoon of vegetable oil for smoothness, dip the caramel apples, scrape off excess, and then roll in your desired dry toppings like cinnamon sugar, chopped nuts, or sprinkles. Let them dry completely, which usually doesn’t take long.
This process might seem elaborate, but each step plays a vital role in creating the best caramel apples you’ll ever taste!
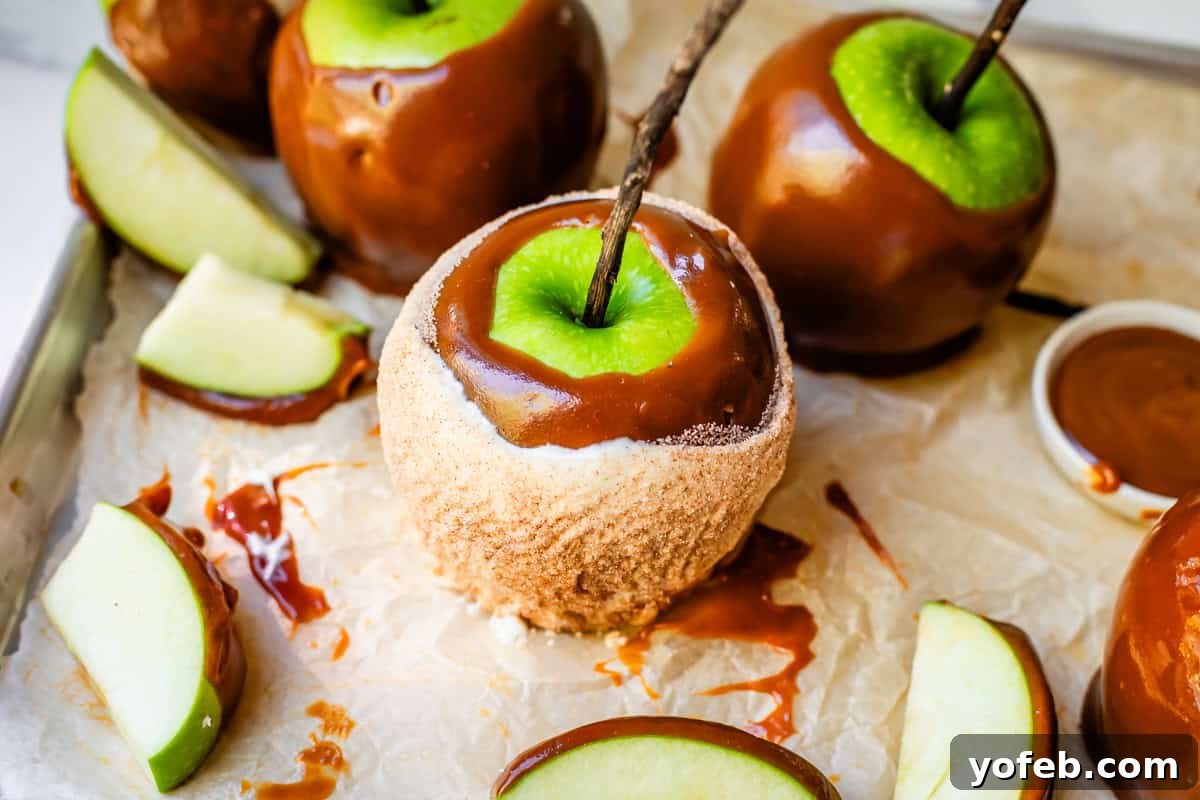
This right here, guys. HEAVEN!
Irresistible Toppings for Caramel Apples
While our perfect, fudgy caramel is undoubtedly the star of the show, I’m a complete enthusiast for taking these treats to the next level with a variety of decadent chocolate coatings and exciting toppings. It’s incredibly fun to personalize each apple, transforming them into gourmet caramel masterpieces. Feel free to experiment with any of these suggestions, and if you have a cherished topping that I’ve missed, please share it in the comments below!
- Chocolate Coatings: Even for purists, a layer of chocolate can truly elevate the experience. Dip your set caramel apples into melted white chocolate, semi-sweet chocolate, or butterscotch chips for an extra layer of flavor and texture. See the recipe card for detailed instructions on how to achieve this smooth, even coating.
- Sprinkles: For a festive and colorful touch, classic sprinkles are always a hit, especially for holidays like Halloween or birthday celebrations.
- Chopped Nuts: Add a delightful crunch with finely chopped nuts. Roasted peanuts, pistachios, pecans, almonds, or walnuts all offer distinct flavors that beautifully complement the sweet caramel.
- Mini Chocolate Chips: A scattering of mini chocolate chips provides bursts of rich chocolate flavor and a pleasing texture contrast.
- Mini M&Ms: For a playful and colorful option, mini M&Ms add a crunchy candy shell and beloved chocolate taste.
- Crushed Cookies: Transform your caramel apples with crushed cookies! Oreos, Nutter Butters, Nilla Wafers, Biscoff, or any other favorite cookie will add an exciting dimension of flavor and texture.
- Crushed Pretzels: For a fantastic sweet-and-salty combination, crushed pretzels are an absolute winner. Their crisp texture and savory notes perfectly cut through the caramel’s sweetness.
- Toasted Coconut: Toasted coconut flakes add a subtle tropical flavor and a lovely chewy texture.
- Chopped Heath Bar or Toffee Bits: For a buttery, crunchy, and richly caramelized addition, chopped Heath bar or plain toffee bits are simply divine.
The possibilities are endless, so get creative and enjoy designing your signature gourmet caramel apples!
Storing Your Homemade Caramel Apples
To keep your homemade caramel apples fresh and delicious for as long as possible, proper storage is essential. Here’s how to do it right:
The refrigerator is your best friend for maximizing the shelf life of whole, finished caramel apples. Once the caramel has completely cooled and set, individually wrap each apple tightly in plastic wrap or wax/parchment paper. Then, place them in an airtight container to protect them from absorbing other fridge odors and to maintain their moisture. Stored this way, your caramel apples should remain delightful for 1 to 2 weeks. For the best eating experience, pull them out of the refrigerator about 30 minutes to an hour before serving, allowing them to come closer to room temperature so the caramel can soften slightly.
If you plan to serve your caramel apples on the same day you make them, refrigeration isn’t strictly necessary, but cooling them helps the caramel set firmly. A crucial piece of advice: whatever you do, please do NOT freeze leftover caramel apples. Apples have a high water content, and freezing and thawing will result in a mushy, unappetizing mess. You wouldn’t typically freeze a fresh apple to eat later, and the same principle applies here if you want to maintain that crisp, satisfying texture.
If you’re looking to get a head start on your caramel apple production without storing fully finished apples, you have options. You can prepare the apples (washing, drying, and inserting sticks) and gather all your desired toppings the day before. You can also make the caramel sauce itself a day in advance. Store the cooled caramel in an airtight container at room temperature, and simply reheat it gently on the stovetop or in the microwave when you’re ready to dip. This makes the dipping process a super fun and easy activity for a family gathering or a party, or allows you to quickly assemble a batch of truly incredible, handcrafted gifts for friends!
Frequently Asked Questions About Caramel Apples
Given the inherent sweetness of caramel and any additional toppings, it’s generally best to use tart apples to create a delightful flavor contrast. Granny Smith apples are the most popular and commonly recommended choice due to their crisp texture and tangy flavor. If Granny Smiths aren’t available or if you prefer a slightly milder tartness, varieties like McIntosh or Pink Lady can also work wonderfully. Ultimately, if you have apples of any type on hand and a craving for this delicious treat, don’t hesitate to use them! The apple-caramel combination is almost always a winning one.
Absolutely not! Freezing caramel apples is highly discouraged. Apples have a very high water content, and the freezing and subsequent thawing process will inevitably lead to a soggy, mushy apple with a compromised texture. Just as you wouldn’t typically freeze a fresh apple to eat later for its crispness, caramel apples suffer the same fate. They simply won’t retain their desired crispness or overall quality. Since they store well in the refrigerator for a good period, keeping them chilled is the best method to preserve their freshness and texture.
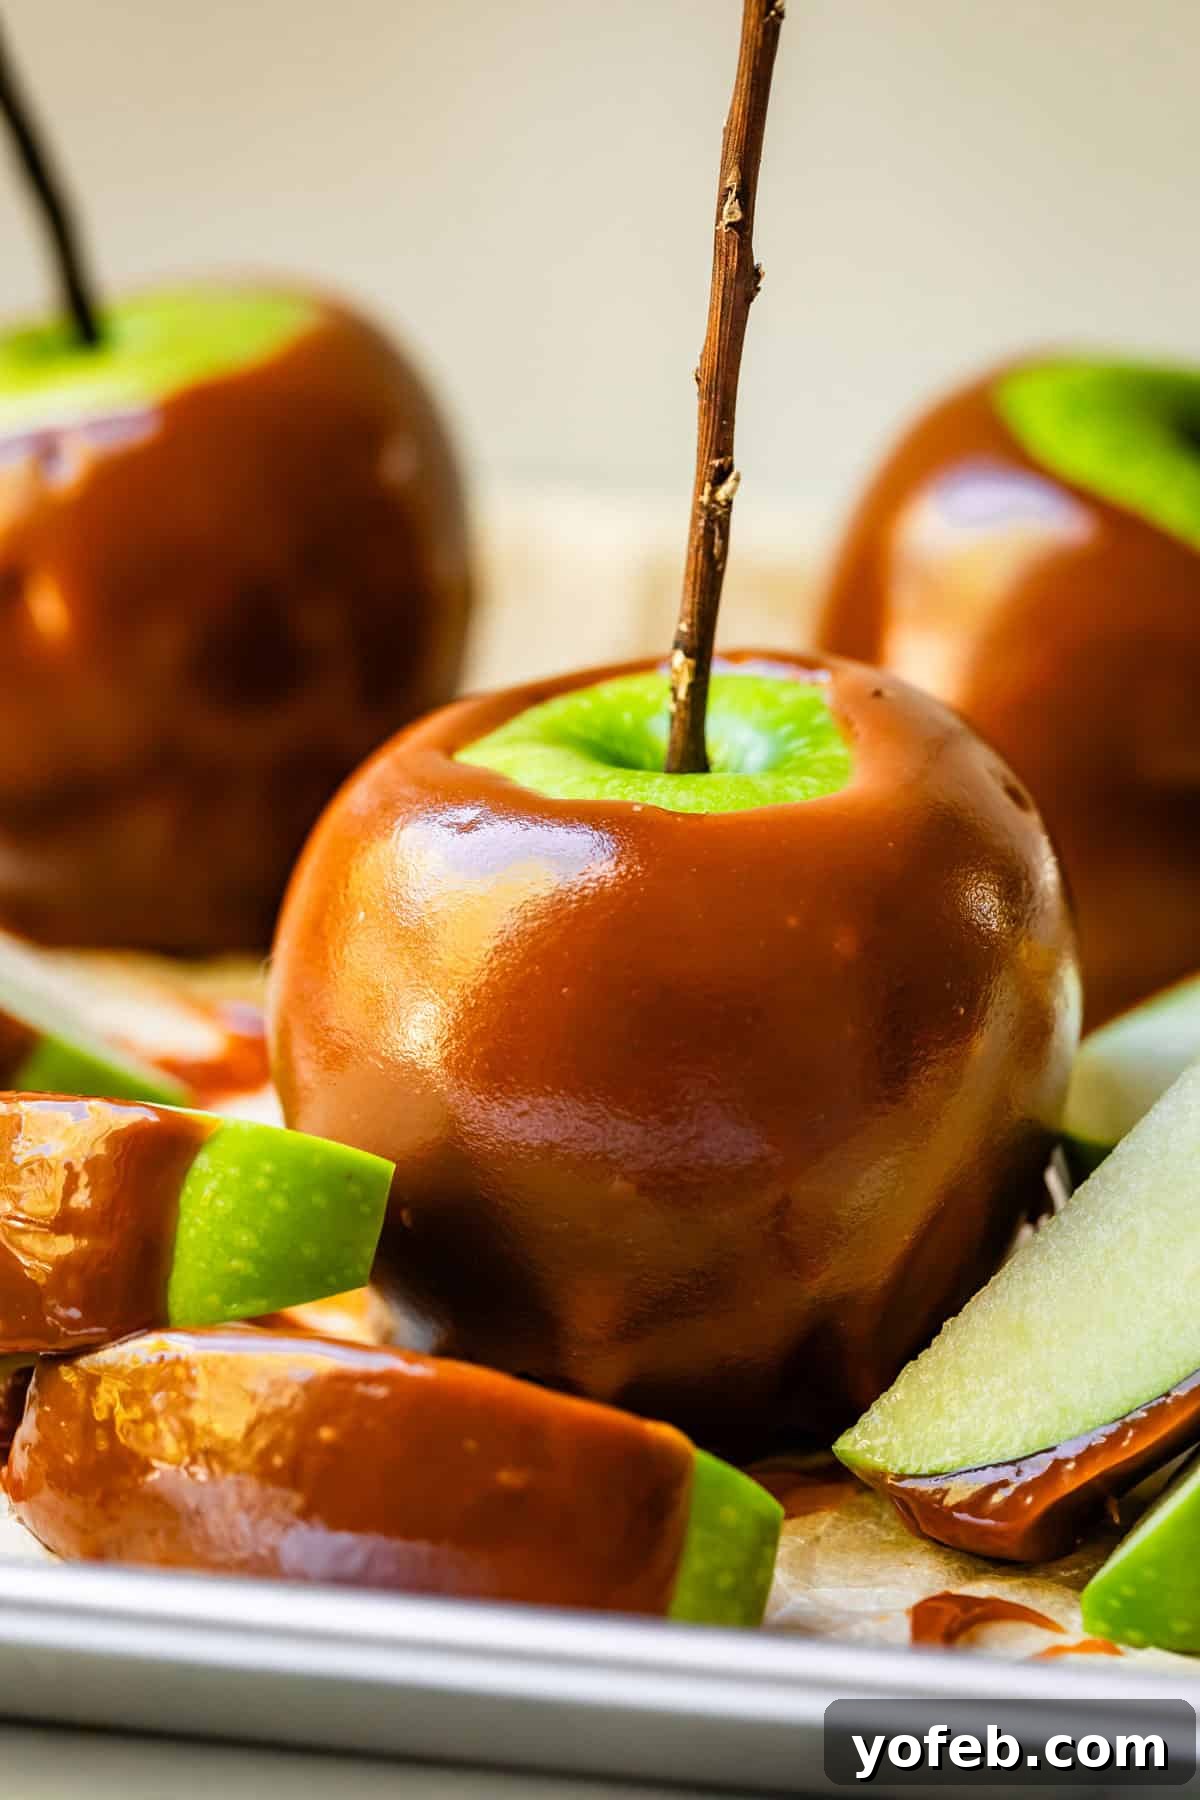
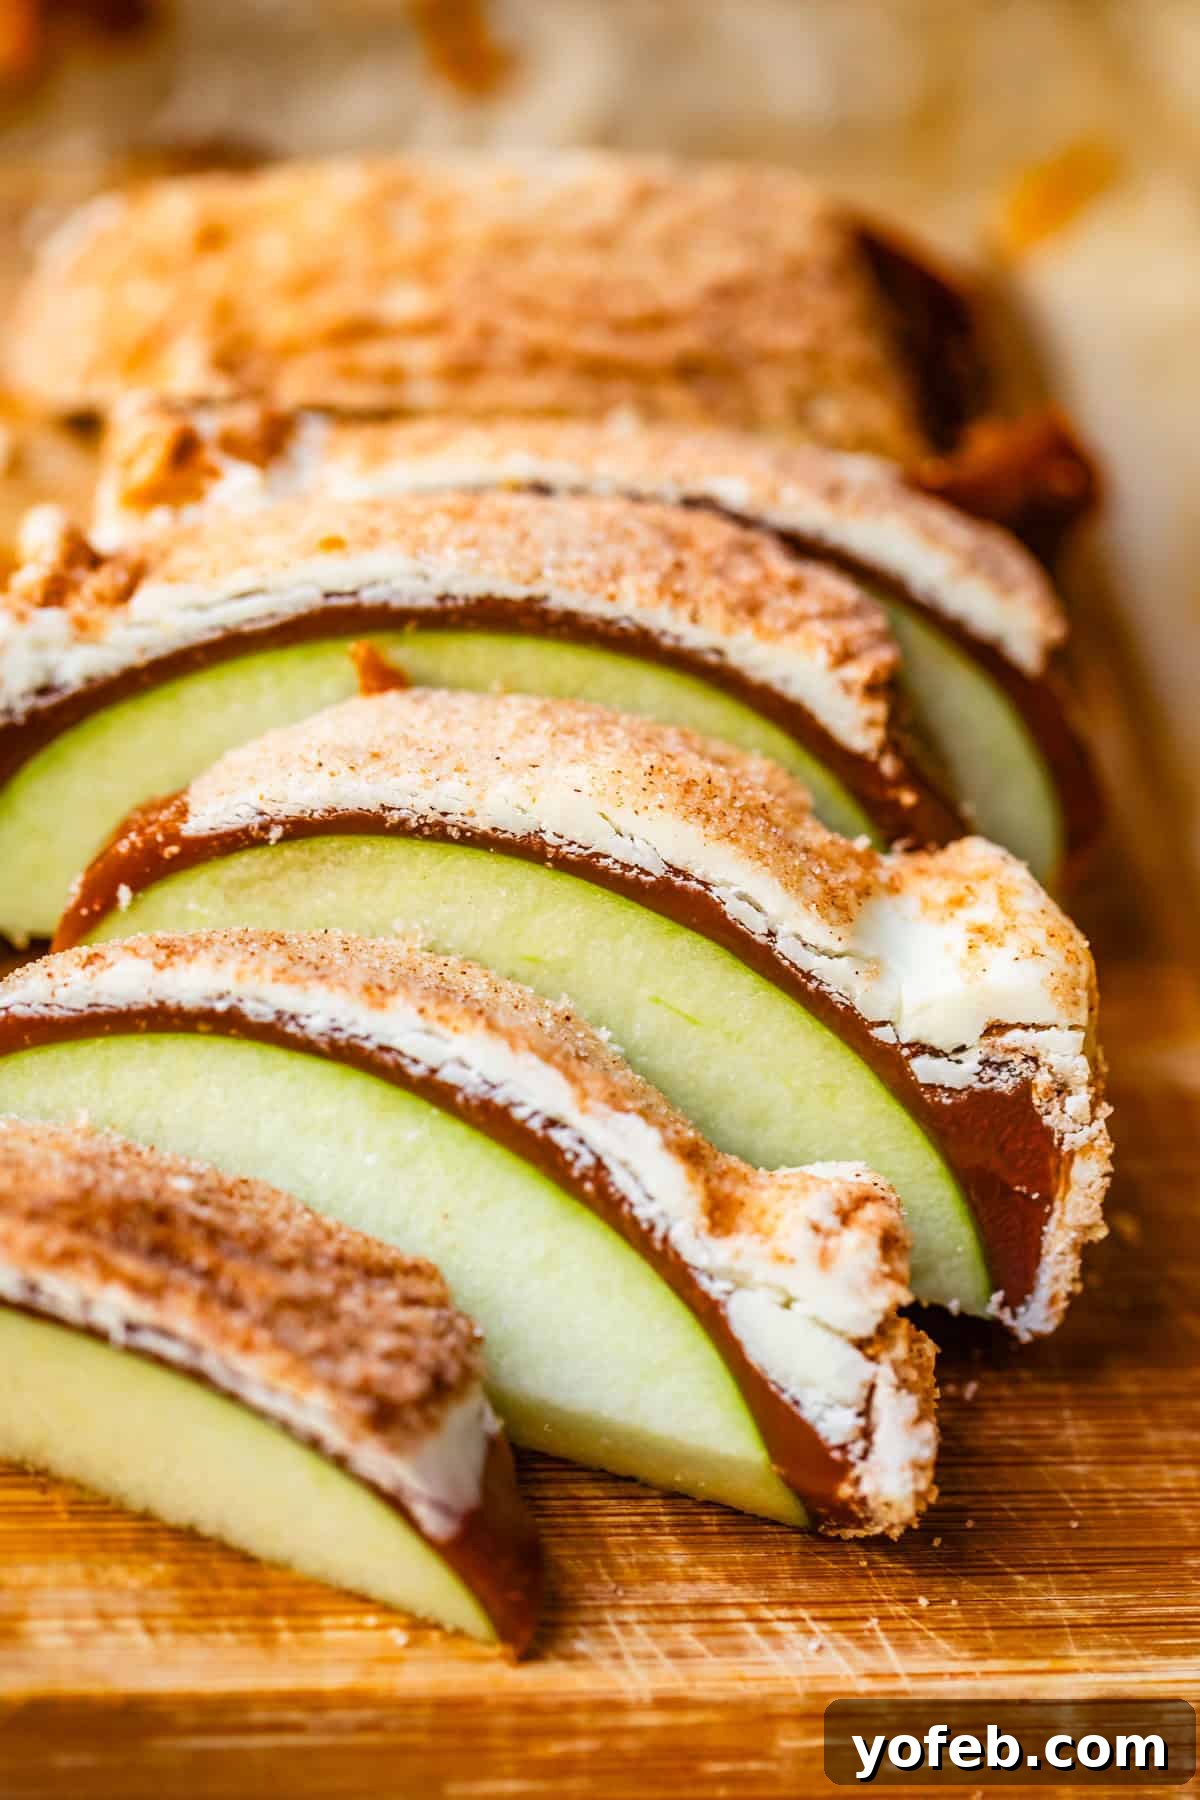
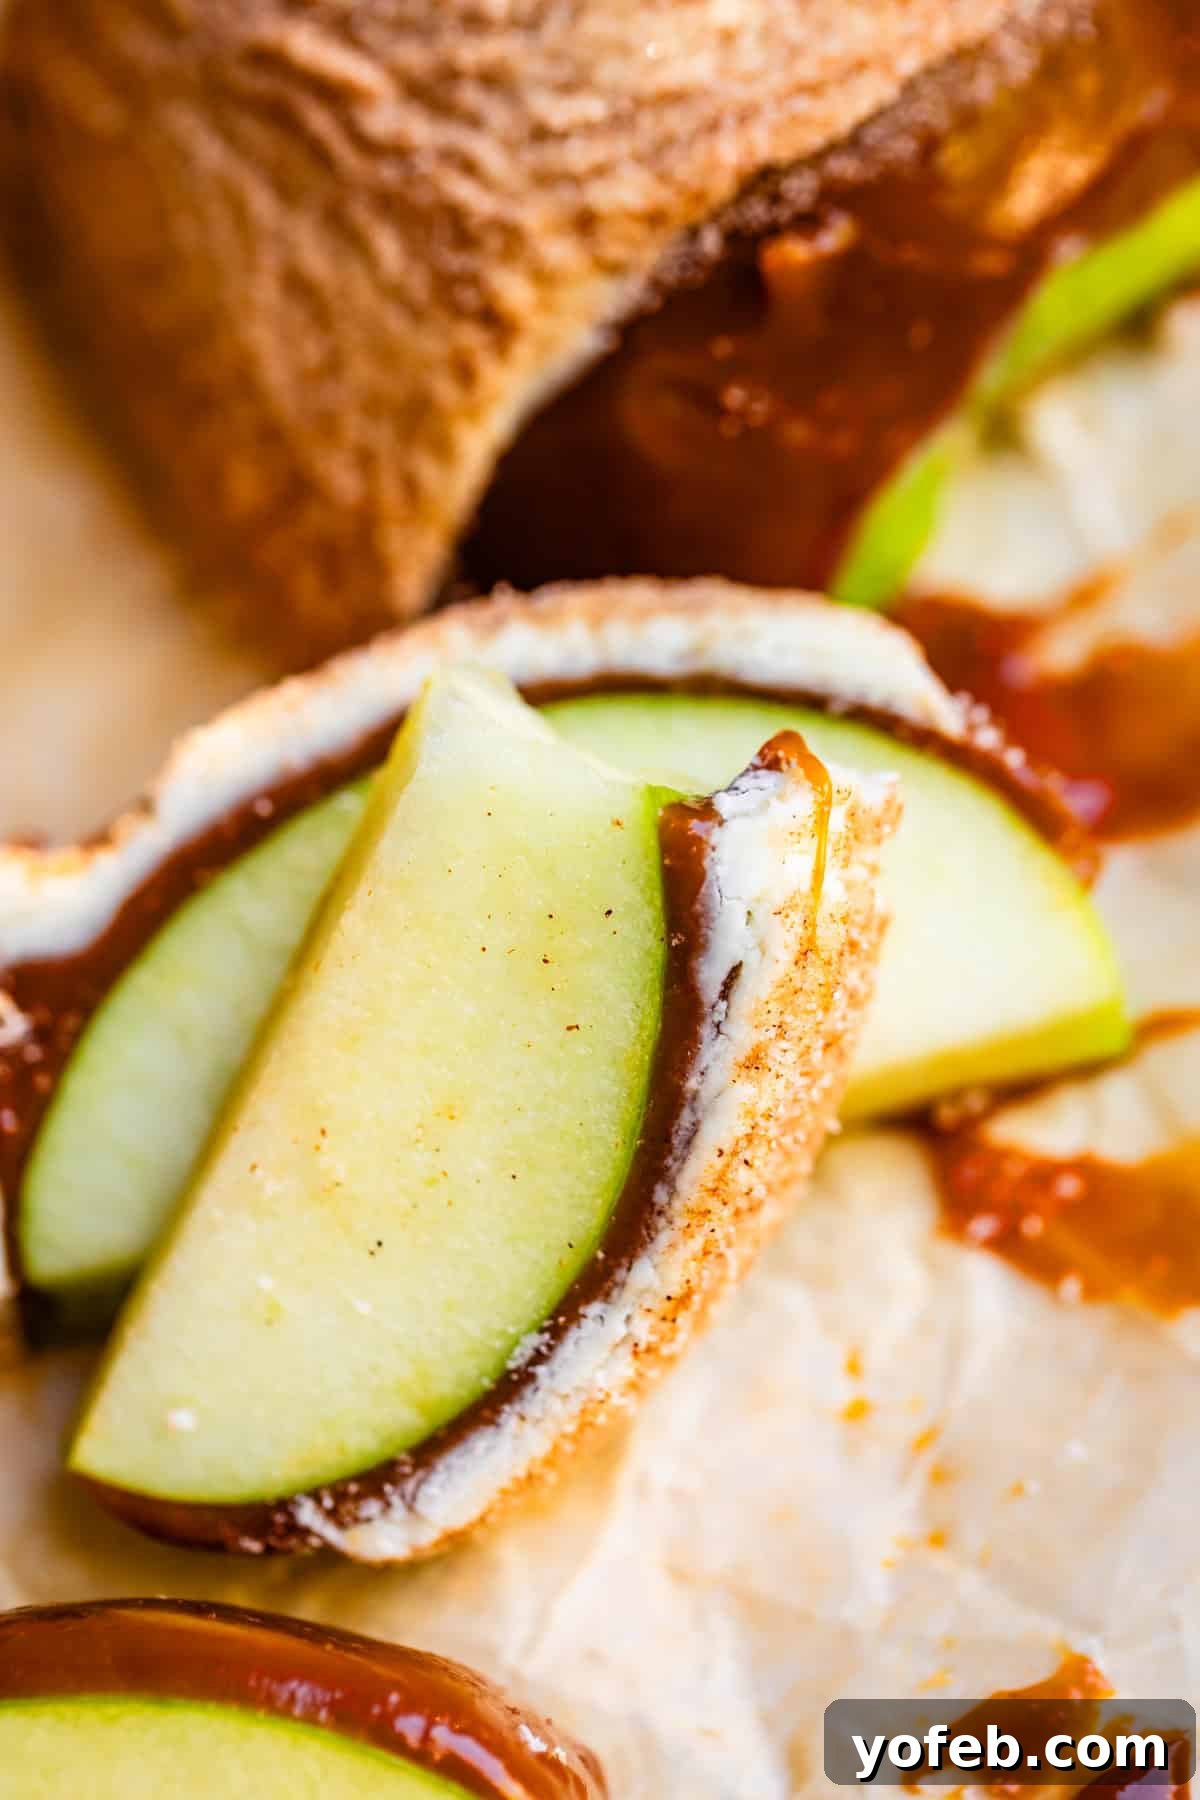
With reckless abandon, of course! While our fudgy caramel is designed to be easy to bite, trying to take a full bite out of a whole caramel apple can still be a messy endeavor. While you’re certainly welcome to enjoy it your way, personally, I find slicing them to be the most enjoyable and manageable method. To do this, first remove the stick. Then, slice the apple in half. Place each half flat-side down on a cutting board and cut into wedges. Once you have your wedges, turn each one on its side and carefully slice off the small piece of apple core that runs through the middle of each slice. This leaves you with perfect, bite-sized caramel apple segments that are easy to eat and share.
More Delicious Fall Recipes
Fall truly is a magical time of year, brimming with a festive atmosphere even before the official holidays kick in. For me, baking is an integral part of embracing the autumn season. While you can explore all of my Best Fall Recipes, here are some personal favorites that are sure to make all your autumn dreams come true:
- Best Apple Pie – If there’s one recipe that perfectly encapsulates the essence of fall, this is it! Imagine perfectly spiced, tender apples baked within a buttery, flaky crust. It’s truly divine and a must-make for any fall occasion.
- Pumpkin Cream Cheese Roll – A cherished classic, this dessert allows the rich, comforting flavor of pumpkin to truly shine, perfectly balanced by a tangy cream cheese filling.
- The BEST Snickerdoodle Recipe – These cookies embody everything nice about cinnamon spice. Seriously, these live up to their “best” title – just check the rave reviews!
- My Favorite Wassail – A warm, cozy, and perfectly spiced drink that’s ideal for serving during cooler weather and gatherings.
- Maple Donut Recipe (Maple Bars) – The glaze on these donuts is absolutely to die for; they are incredibly delicious and satisfying.
- Spice Cake Recipe from Scratch – Say goodbye to boring cakes! This recipe delivers a rich, robust spice flavor that will truly awaken your taste buds.
- Sweet and Moist Cornbread Recipe – While cornbread is fantastic year-round, it finds a special place in my heart during the fall, especially when paired with a hearty chili or a comforting bowl of soup.
- Honey Roasted Butternut Squash Salad – This vibrant and flavorful salad is the perfect accompaniment for Thanksgiving dinner or any cozy fall meal.
- Hasselback Butternut Squash from How Sweet Eats – A visually stunning and equally delicious side dish.
- Vegan Fall Harvest Pizza with Delicata Squash and Basil from Avocado Skillet – A creative and flavorful plant-based option for autumn evenings.
Facebook | Pinterest | Instagram

The Best Caramel Apple Recipe
Prep Time: 5 mins
Cook Time: 23 mins
Chill Time: 20 mins
Total Time: 48 mins
Yield: 16 Servings
Equipment
- Silpat Baking Mat
Ingredients
For the apples:
- 8 medium Granny Smith apples, or your favorite tart apple
- 8 apple sticks (or popsicle sticks, kebab sticks, lollipop sticks, chopsticks, a stick from the yard, etc.)
For the caramel:
- 1/2 cup water
- 4 cups white sugar
- 1/2 cup salted butter, chopped
- 2 cups corn syrup
- 2 (12-ounce cans) evaporated milk
- 1 tablespoon vanilla extract
- 1 and 1/2 teaspoons kosher salt, or sea salt
Optional white chocolate dip:
- 1 (11-ounce) bag white chocolate chips, or semi-sweet chocolate chips, or butterscotch chips
- 1 teaspoon vegetable oil
- 2/3 cup granulated sugar
- 2 tablespoons cinnamon
Optional toppings to dip caramel apples in:
- Sprinkles
- Chopped nuts (roasted peanuts, pistachio, pecan, almond, or walnut)
- Mini chocolate chips
- Mini M&Ms
- Crushed Oreos, Nutter Butters, Nilla Wafers, Biscoff, or any other cookie you love
- Crushed pretzels
- Toasted coconut
- Chopped Heath bar
- Toffee bits
Instructions
- Prep the apples. Wash the apples thoroughly, rubbing them under the water with your hand or a vegetable brush to get the waxy coating off of them. This wax coating makes the caramel not stick as well. Twist off the stem. Let the apples dry completely. Caramel will not stick to wet apples.
- Push in sticks. Push your stick into the spot where the stem was, or right next to it. Push about 3/4 of the way down the apple. You can use any kind of stick you want. They sell caramel apple sticks that are just the right size. You can use popsicle sticks, kebab sticks, chopsticks. I found some sticks in the yard that I cleaned off, and they worked great. (Push in a chopstick first to make way, then remove and push in stick, if your yard sticks keep snapping.)
- Refrigerate the apples for at least 20-30 minutes, or longer. This is perfect because this is how long the caramel takes to make anyway. Chilled apples are so much easier to dip, and makes the caramel stick on better.
- Make the caramel: Get everything ready to go, so you’re not rushing later! Measure out 2 cups of corn syrup and set it near the stove. Shake the 2 cans of evaporated milk and remove the lids. Unwrap 1/2 cup of butter (this is 1 stick) and use a butter knife to chop it into a few pieces.
- Add 1/2 cup water to a heavy bottomed 3-quart pot. (Do NOT use a cheap pot to make caramel, it might not turn out!) Swirl your pan around to get the sides of the pot wet, a few inches up the sides. Turn the heat up to high.
- Slowly pour 4 cups of granulated sugar to the center of the pot, making sure not to get any sugar crystals on the sides. With your wooden spoon, draw the water in from the edges toward the center, going slowly all the way around the pan until all the sugar is moistened. Do not leave any sugar crystals on the side of the pan. The goal is to dissolve all of the sugar. If there are sugar crystals on the edge of the pot, dip a pastry brush in water and swipe them into the liquid.
- Bring the mixture to a boil over high heat, stirring. Once boiling, reduce the heat to medium. Toss your wooden spoon (that likely has sugar crystals on it) in the sink; you don’t need to stir for this part (but don’t walk away.) Let the crystal-free pot of sugar bubble and boil for about 8-10 minutes undisturbed. (If you are on an electric stovetop, it could take up to 20-30 minutes to reach the smoke point.) Read on:
- Eventually, the mixture will start to turn a light yellow color, then darker and darker until it reaches amber. Once you see any signs of yellow, do not take your eyes off the pot as the color deepens and deepens.
- Swirl the pan a bit, or rotate the pan on the burner, if the yellow is darker on one side or another. Eventually you will see the first wisps of smoke. As soon as the caramel is evenly amber in color all the way across, AND you see smoke,* remove the pan from the heat right away. You have just made caramel. Do not let it keep smoking, it will burn! Take it off the heat and add the butter right away:
- Off-heat, use a flat whisk to gently stir pieces of butter into the pot, 1/2 cup of butter total, whisking well for every addition. Be careful, splashes will hurt like heck! The caramel will start to become creamy and thicker as you add butter and stir.
- Add 2 cup corn syrup and whisk it in. Move the pot back onto the burner and turn the heat to medium. It should start to boil again fairly quickly. Be sure to scrape the sides and corners and bottom of the pot well; the corn syrup tends to lump up, so be thorough and make sure it’s smooth before the next step.
- SLOWLY add 2 (12-ounce) cans evaporated milk. Add a little bit, whisk completely, add a bit more, stir completely. This process of adding the milk should take at least 10 minutes. Your caramel won’t be smooth if you rush this.
- Once all of the evaporated milk is added, settle in for the long boil. Keep whisking, only taking short breaks, and making sure to get into the corners of the pan. Boil, whisking for about 20-25 minutes (this could take longer on a non-gas stovetop, up to 40 minutes); read on.
- It’s best to use a candy thermometer to know when this step is complete. You want to boil the mixture until it reaches 238 degrees F. The time this takes can vary a lot because there are so many, well, variables (like pot-thickness, burner level, humidity level…) I recommend a Thermapen, the best thermometer on the market, but any old candy thermometer will do. Don’t go above 238 or 239 degrees F, or your caramel will be too hard.
- Remove the pot from the heat as soon as it has reached 238 degrees. Let the caramel settle a bit, only using your whisk to swipe the bottom and edges occasionally. Stirring too much at this point brings in air, and the bubbles will show up on your dipped apples.
- Add 1 and 1/2 teaspoons kosher salt (or sea salt) and 1 tablespoon vanilla extract. The vanilla will spit and bubble, that’s okay, just stir it in. Start with less salt if you are nervous, or add up to 2 teaspoons total if you like a more salted caramel flavor. (Start with about half the amount if you have table salt.)
- Let the mixture cool for about 15 minutes, coming back to stir once or twice, while you set up your dipping station.
- Lay out a silpat baking mat on a baking sheet. This caramel sticks to parchment paper, wax paper, and aluminum foil. A silpat is the only thing it doesn’t stick to, so don’t skip this.
- Prep toppings. If you plan to dip the caramel apples in other toppings, get them ready now, in separate bowls: sprinkles, chopped nuts, mini chocolate chips, mini M&Ms, crushed Oreos, crushed pretzels, toasted coconut, chopped Heath bar or toffee bits.
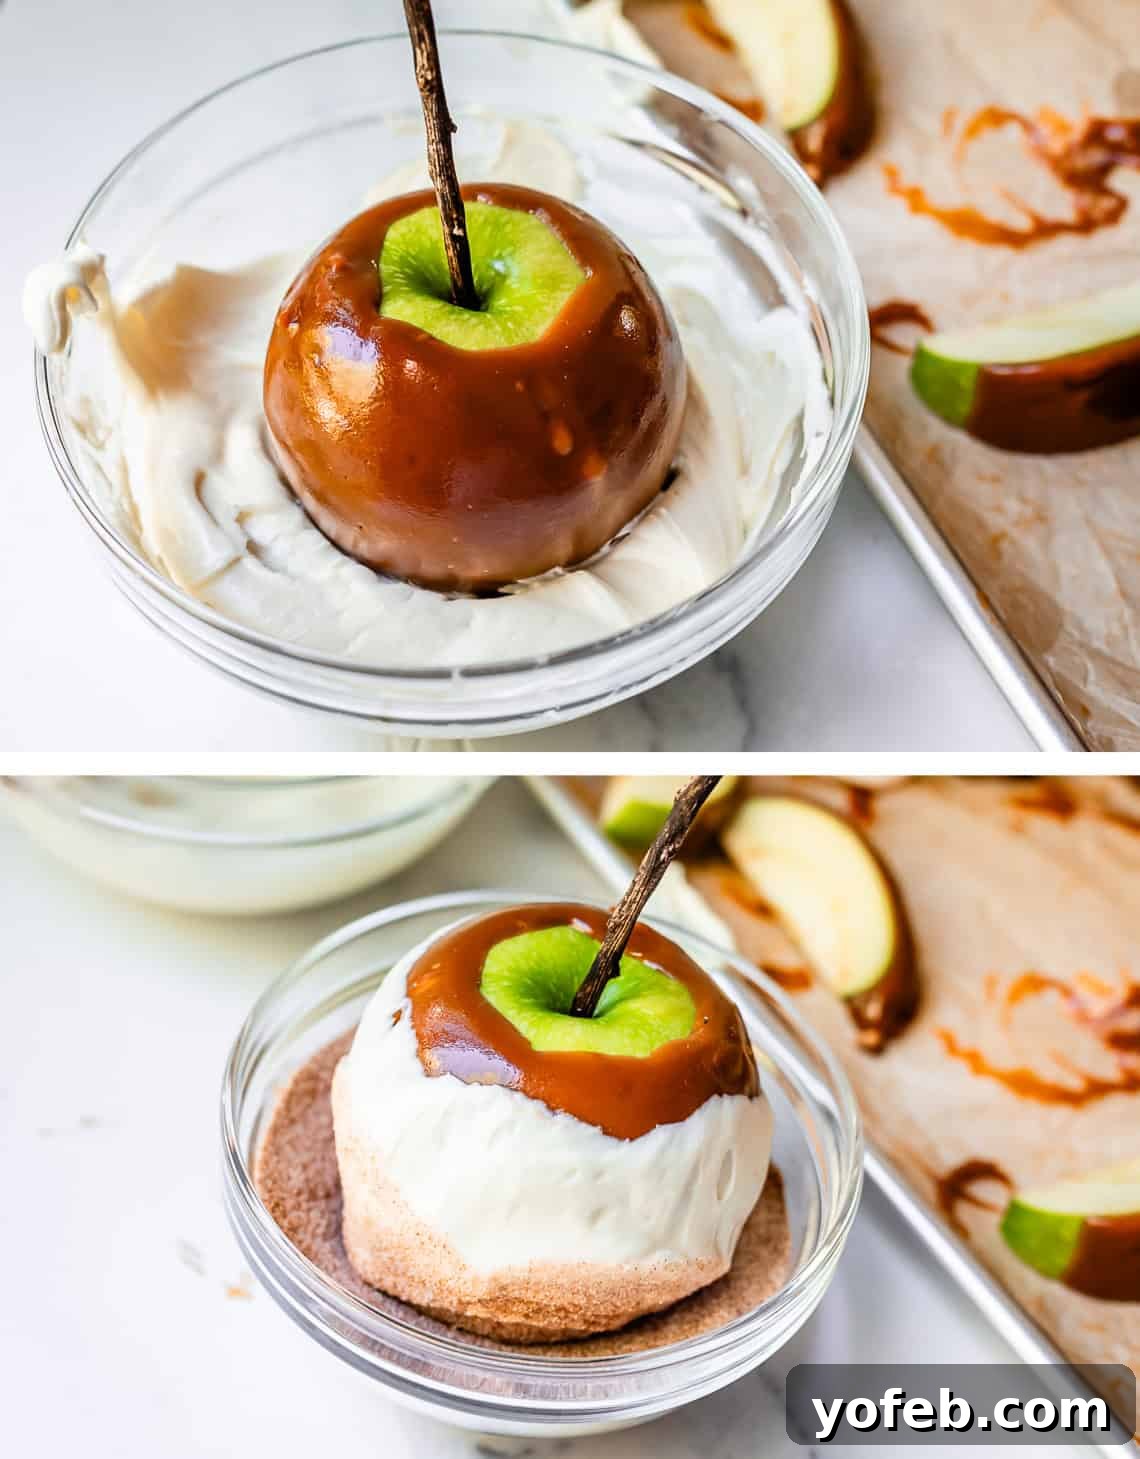
I love to dip my caramel apples in white chocolate and then dip in cinnamon sugar, for a Snickerdoodle flavor. If you are doing that, add 2/3 cup sugar and 2 tablespoons cinnamon to a bowl and stir together. - Dip the apples. Holding a cold apple by the stick, tilt the pan of warm caramel on its side, and submerge the apple in the caramel almost all the way. Tilt the apples as necessary to get it coated. Carefully pull the apple out, and let as much caramel drip off as you can. Gently scrape the bottom of the apple on the edge of the pan.
- Caramel apples with no toppings: Dip the apples, let it drip off, gently scrape the bottom, and set it on the silpat. Repeat with all the apples.
- Caramel apples dipped in crushed toppings: If you are not doing a chocolate coating, dip the caramel apples in their toppings right away, before setting it down. Roll them around until they are coated how you like, then set them down on the silpat.
- Caramel apples dipped in chocolate, then toppings: Set the caramel-dipped apples down on the silpat and refrigerate or freeze the apples for 10-20 minutes, so that the caramel is harder and no longer warm. In a medium bowl, melt white chocolate chips (or semi-sweet, or butterscotch) in 30 second increments, stirring each time, until smooth. Add 1-3 teaspoons olive oil (more for white chocolate) to help it get smooth. Dip the cold caramel apples in the chocolate right away, twisting it around and moving quickly so the caramel doesn’t melt. Lift the apple, scrape off the bottom, and dip again into further toppings (cinnamon sugar, nuts, etc.) Set the caramel apple down on a silpat.
- Let the caramel apples set completely before slicing and eating.
- To slice, remove the stick, and slice the apple in half. Then place it flat-side-down and cut into wedges. Once you have all the wedges, turn each one on its side and slice off the bit of apple core that’s in the middle of each slice.
- Storage: Store the apples in the fridge. They will last for 2-3 days unsliced. Once you slice them, store apple slices in the fridge for no longer than 1-2 days.
- Store any leftover caramel in a mason jar, or any airtight container will do. This caramel is just fine kept on the counter at room temperature for up to 2 weeks. Heat in the microwave to use as a thick caramel sauce (Or try my Salted Caramel Sauce, which is very close to this recipe but turns out creamier.) After 2 weeks, store caramel in the fridge for up to 6 months (or longer, probably!)
Notes
Nutrition facts: The nutrition facts reflect apples with caramel only, without toppings or chocolate.