
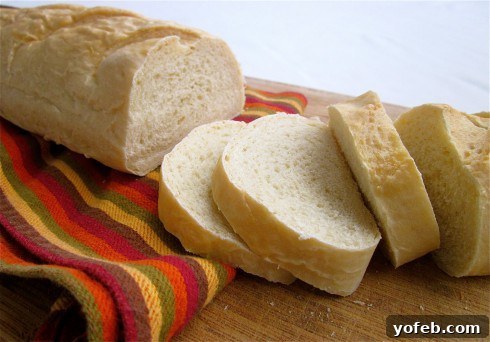
Easy Homemade French Bread Recipe: A Journey from Family Humor to Baking Passion
Embark on a delightful culinary adventure that traces the heartwarming path from cherished family anecdotes to the satisfying art of baking your own perfect French bread. This comprehensive guide will not only share an incredibly easy and delicious recipe but also delve into the joys of homemade baking, proving that a stand mixer can truly transform your kitchen into a bread-making haven.
The Enduring Charm of Family Recipes and Comfort Food
Every family holds a unique collection of recipes, each dish infused with memories, laughter, and the unmistakable taste of home. For me, these culinary legacies began with my mother, a phenomenal cook whose kitchen was always the heart of our home, bustling with activity and tantalizing aromas. As my siblings and I prepared to leave for college, embarking on our first steps into independent adulthood, she thoughtfully assembled a small, spiral-bound folder for each of us. Its title, “Some of my Favorite (and Easy) Stuff to Make and Eat,” perfectly captured her pragmatic yet profoundly loving approach to feeding her brood.
This folder was far more than a simple compilation of ingredients and instructions; it was a survival kit, a culinary roadmap designed to navigate the notoriously tight budgets and limited cooking skills of college students. The recipe names themselves were legendary, often echoing a child’s directness and my parents’ playful humor: “Meat and Potato Stuff” (a hearty, no-fuss meal that delivered exactly what it promised), “Chicken Patties and Mashed Potatoes” (a foundational staple of our childhood dinners, always comforting and reliable), and the unforgettable “Tuna Pia: Food of the Gods.” My dad adamantly refused to call this tuna casserole anything else, and looking back, I can’t help but wonder if this grandiose title was a brilliant psychological ploy to ensure his kids ate their fish without complaint!
Despite what those endearing, albeit unconventional, recipe titles might suggest about my mother’s culinary style, she genuinely crafted delicious food. Her intention was always to provide us with cheap, easy-to-prepare meals that would sustain us during our student years. This foundational understanding of simple, accessible cooking became an invaluable lesson that I carry into my own kitchen today, shaping my appreciation for recipes that deliver maximum flavor with minimal fuss.
My Mom’s Unique Philosophy on Homemade Bread
Among the various sections of that treasured recipe book—categorized neatly into main dishes, side dishes, and desserts—one particular entry always elicited a chuckle: the “Bread” section. While other categories featured detailed instructions, the guidance for bread was surprisingly succinct and wonderfully candid. It read, verbatim, a testament to her charming pragmatism:
BREADS: Go to the bread aisle of the grocery store or day-old bread store. Pick out something that looks good, like garlic or French bread for Italian dishes, whole wheat or cracked wheat for toast and sandwiches, soft rolls for most everything else, though sourdough is also good. (Sorry–I don’t do yeast. If you want recipes for actual homemade bread and rolls, I suggest calling your aunt Shirley.)
This humorous declaration perfectly encapsulated my mom’s approach, particularly her deep-seated aversion to kneading. It’s entirely understandable, especially considering she never owned a stand mixer. In kitchens of her generation, baking bread from scratch meant hours of manual labor, a task that could feel daunting and exhausting without mechanical assistance. Why bother with the endless kneading and unpredictable nature of yeast when delicious bread was readily available at the grocery store? Her advice was both practical and endearing, a concession to the realities of a busy life, and a gentle nudge towards Aunt Shirley for those daring enough to tackle yeast.
Embracing the Art of Homemade Bread: A Stand Mixer Revolution
While my mom wisely delegated bread duties, my own culinary journey took a different turn, largely thanks to a crucial piece of modern kitchen equipment: the stand mixer. This indispensable appliance completely transformed my perspective on baking bread. What once seemed like an intimidating, labor-intensive chore has become a genuinely enjoyable and therapeutic activity. The rhythmic hum of the dough hook, effortlessly transforming a sticky mess of flour and water into a smooth, elastic dough, feels like a minor miracle every time.
There’s an unparalleled magic in pulling a warm, fragrant loaf of bread from your own oven. The satisfying crackle of the crust, the soft, airy interior, and the intoxicating aroma filling the entire house – these are sensory delights that grocery store bread simply cannot replicate. Who could possibly resist a slice of hot bread, fresh out of the oven, steaming gently and begging to be buttered? This newfound ease and joy in baking have opened up a world of possibilities, leading me to explore various bread types, but one recipe, in particular, has become a consistent favorite and a testament to the simplicity of homemade goodness: my go-to French Bread recipe. It’s incredibly simple, undeniably delicious, and incredibly versatile, freezing beautifully for future enjoyment. Yes, please!
Mastering the Easy Homemade French Bread Recipe
This French bread recipe is a true revelation for anyone looking to bring the warmth and aroma of a bakery into their home. It’s designed for simplicity without sacrificing flavor or texture, yielding two beautiful, rustic loaves that are perfect for any occasion. Whether you’re a seasoned baker or just dipping your toes into the world of yeast, this recipe, especially with the aid of a stand mixer, will have you feeling like a master baker in no time. Prepare to fill your home with an irresistible aroma and delight your taste buds with truly exceptional homemade French bread.
Source: Allrecipes.com
Makes 2 large loaves
Ingredients:
- 6 cups all-purpose flour (plus extra for dusting)
- 5 teaspoons active dry yeast
- 2 teaspoons salt
- 2 cups warm water (ideally 105-115 degrees F / 40-46 degrees C)
- 1-2 tablespoons softened unsalted butter (for dough)
- 1 large egg white (for egg wash)
- 1 tablespoon cold water (for egg wash)
Step-by-Step Instructions for Perfect French Bread:
- Combine Dry Ingredients: In the large bowl of your stand mixer, combine 2 cups of the all-purpose flour, the active dry yeast, and the salt. Use a whisk or spoon to mix these ingredients thoroughly, ensuring the yeast and salt are evenly distributed.
- Activate Yeast and Add Butter: Pour the 2 cups of warm water (ensure its temperature is within the optimal range of 105-115°F to properly activate the yeast without killing it) into the dry mixture. Using the dough hook attachment, beat on low speed until the mixture is well blended and resembles a loose batter. Add the softened butter at this point; a generous scoop from your butter dish (roughly 1-2 tablespoons) will do the trick.
- Gradually Incorporate Flour and Knead: Begin adding the remaining flour, one cup at a time, allowing the dough hook to fully incorporate each addition before adding the next. The exact amount of flour needed can vary based on factors like humidity and the specific brand of flour. Continue adding flour until the dough transforms from sticky to stiff, smooth, and elastic. It should begin to pull away cleanly from the sides of the bowl and feel only slightly tacky, not sticky, to the touch. Periodically, you might need to stop the mixer and scrape down the sides or rearrange the dough to ensure even kneading throughout.
- Develop Gluten with Extended Kneading: Once the dough has reached the desired consistency (no longer sticking excessively to the bowl or your fingers), continue kneading with the dough hook for an additional 5 to 6 minutes. This crucial step is vital for developing the gluten structure, which gives French bread its characteristic chewiness and open crumb texture.
- First Rise (Bulk Fermentation): Gently remove the dough from the mixer and shape it into a smooth ball. Lightly grease a clean, large bowl with a little oil or cooking spray. Place the dough ball into the greased bowl, then turn it over once to ensure the entire surface is lightly coated, which prevents it from drying out during the rise. Cover the bowl loosely with a clean, dry kitchen towel. Place it in a warm, draft-free environment to rise until it has visibly doubled in size, a process that typically takes about one hour. A convenient trick I often employ is to turn my oven on to its lowest setting (around 170°F or 75°C) for just about 30 seconds, then immediately turn it off. The residual warmth creates a perfect, cozy spot for the dough to rise inside the oven.
- Punch Down and Divide: After the dough has successfully doubled, gently punch it down to release the trapped gases. Turn the dough out onto a lightly floured surface and divide it cleanly in half.
- Shape the Loaves: Take one half of the dough and, using your hands or a rolling pin, shape it into a large rectangle. It’s important to ensure the long side of your rectangle is not longer than your baking sheet to avoid overhang. Starting from one of the long sides, carefully and tightly roll up the dough. Once rolled, moisten the opposite long edge with a little water using your finger, then firmly pinch the seam to seal it completely. Gently taper the ends of the loaf by rolling and pinching them to achieve that classic French bread silhouette. Repeat this shaping process with the second half of the dough.
- Second Rise (Proofing) and Scoring: Lightly grease a large baking sheet (or line it with parchment paper for easy cleanup). Carefully transfer the shaped loaves, seam-side down, onto the prepared baking sheet, ensuring they have ample space between them to expand. Using a very sharp knife, a razor blade, or a specialized baker’s lame, make 3 or 4 diagonal cuts, approximately 1/4 inch deep, across the top of each loaf. These cuts are not just decorative; they allow the bread to expand properly in the oven, creating a beautiful “ear” and a traditional appearance. Cover the loaves again with a clean cloth and let them rise in a warm spot until they are nearly doubled in size, which should take approximately 35 to 40 minutes.
- Prepare Egg Wash and Preheat Oven: While the loaves are proofing for their second rise, preheat your oven to 375°F (190°C). In a small bowl, whisk together the egg white with 1 tablespoon of cold water until the mixture is lightly frothy. This egg wash will give your bread a beautiful golden crust and a subtle sheen.
- First Bake and Egg Wash Application: Once the loaves have nearly doubled, very carefully and gently brush the entire surface of each loaf with the prepared egg white mixture. Be mindful not to deflate the delicate dough. Place the baking sheet into the preheated oven and bake for 15 minutes.
- Second Bake and Final Touch: After 15 minutes, carefully remove the baking sheet from the oven. Brush the loaves once more with the remaining egg white mixture. Return them to the oven and continue baking for an additional 15 to 20 minutes, or until the bread achieves a deep golden-brown color and sounds hollow when tapped on the bottom. If you notice the crust browning too quickly, you can loosely tent the loaves with aluminum foil to prevent over-browning.
- Cooling: As soon as the bread is done, immediately remove the loaves from the baking sheet and transfer them to a wire rack to cool completely. Cooling on a rack is crucial as it prevents the bottom of the bread from becoming soggy and allows the crust to crisp up beautifully.
Pro Tips for Your Best French Bread:
- Customizing Your Crust: The recipe suggests a baking time that yields a classic, crunchy French bread crust. However, personal preference varies. I often take mine out when the bottom just begins to turn golden brown (a spatula is handy for checking this). This results in a slightly softer crust, which I prefer. Feel free to experiment with baking times to find your ideal texture.
- Precision in Water Temperature: The temperature of your water is paramount for yeast activation. Always aim for 105-115°F (40-46°C). Water that is too hot will kill the yeast, preventing your dough from rising, while water that is too cold will inhibit proper activation, leading to a sluggish or failed rise. A kitchen thermometer is an invaluable tool here.
- Accurate Flour Measurement: For consistent results, consider measuring your flour by weight using a kitchen scale (approximately 720-750g for 6 cups) rather than volume. If measuring by cups, spoon the flour into your measuring cup and level it off, instead of scooping directly from the bag, which can compact the flour and lead to an excess amount.
- Adjust for Environmental Factors: Humidity levels can significantly affect the amount of flour your dough needs. On more humid days, you might require a touch more flour, while on drier days, slightly less. Always trust the feel and consistency of your dough over strict measurements for the last cup of flour.
- Optimizing Your Rise Environment: If your kitchen is cool, finding a warm spot for your dough to rise can be a challenge. Beyond the oven trick mentioned above, you can also place the covered dough bowl in a microwave (turned off) alongside a cup of hot water, or near a sunny window for gentle warmth.
- The Art of Scoring: For clean, professional-looking cuts on your loaves, a very sharp knife, a fresh razor blade, or a specialized baker’s lame is essential. Dull blades tend to drag and tear the dough, which can hinder proper expansion and affect the final appearance of your bread.
Serving Suggestions: Enjoying Your Homemade Masterpiece
There’s an undeniable pleasure in serving warm, freshly baked French bread. Its subtle flavor and delightful texture make it an incredibly versatile accompaniment to a wide array of dishes. Slice it generously and serve it alongside a steaming bowl of soup or a rich, hearty stew for an ultimate comfort meal. It’s also perfect for soaking up savory sauces from pasta dishes, pan-fried chicken, or a rustic Coq au Vin, ensuring not a single drop of flavor goes to waste.
For simpler enjoyment, spread it with a pat of good butter, drizzle it with your finest olive oil and a sprinkle of sea salt, or pair it with a vibrant bruschetta. French bread also makes an excellent foundation for a beautiful cheese board, complementing a variety of cheeses and charcuterie. Its robust structure holds up wonderfully for open-faced sandwiches, and any leftover slices can be transformed into incredible morning toast, perfect with jam, cream cheese, or smashed avocado. This bread truly elevates any meal, making it a beloved staple for both everyday dining and special occasions.
Pairing with Soup:
A crusty homemade French bread is the quintessential partner for classic creamy tomato soup, a rich and savory French onion soup with melted Gruyère, or a nourishing lentil soup. Its sturdy crust and tender crumb provide the perfect contrast to the liquid warmth of a good soup.
Accompaniment to Stews:
Whether you’re serving a slow-cooked beef bourguignon, a flavorful chicken fricassee, or a hearty vegetarian stew, French bread is ideal for ensuring you savor every last drop of the exquisite broth. It transforms a simple stew into an incredibly satisfying and complete meal, adding texture and substance.
Storage and Reheating Homemade French Bread
One of the many appealing qualities of this French bread recipe is its excellent keeping quality, allowing you to extend the enjoyment of your fresh-baked loaves for days, or even months! Proper storage is crucial to maintaining its beautiful texture and vibrant flavor.
Short-Term Storage (1-2 Days):
For bread you plan to consume within a day or two, once the loaves are completely cool, store them in a paper bag at room temperature. A paper bag allows the crust to breathe, helping it to remain crisp. Avoid using plastic bags for short-term storage, as they can trap moisture, causing the crust to soften and become chewy.
Longer-Term Storage (Freezing for Freshness):
Homemade French bread freezes exceptionally well, making it perfect for meal prep or ensuring you always have a delicious loaf on hand. Once the loaves are thoroughly cooled, wrap each one tightly in plastic wrap, followed by an additional layer of aluminum foil. For maximum protection, you can then place the wrapped loaves into a large freezer-safe bag. Properly frozen bread will maintain its quality for up to 2-3 months. To enjoy, simply remove a loaf from the freezer, unwrap it, and allow it to thaw at room temperature for an hour or two before reheating.
Reheating Tips for Bakery-Fresh Taste:
To revive your French bread and bring it back to its bakery-fresh glory, especially after freezing or refrigeration, preheat your oven to 350°F (175°C). Lightly sprinkle the thawed (or even still frozen) loaf with a little water; this helps to create a wonderfully crisp crust during reheating. Place the loaf directly on the oven rack. Bake for 10-15 minutes if thawed, or 20-30 minutes if starting from frozen, until the crust is delightfully crisp and the interior is warm and soft. It will taste almost as incredible as if it were just pulled from the oven!
Conclusion: The Enduring Joy of Baking and Sharing
From the charming simplicity of my mom’s “no yeast” policy to my own delightful discoveries and triumphs with a stand mixer, the journey of making homemade French bread has been incredibly rewarding. This easy recipe not only consistently yields two beautiful, rustic, and utterly delicious loaves but also brings an immense sense of satisfaction that only comes from creating something truly special from scratch. More than just a simple bread, it represents a continuation of family culinary traditions, a simple yet profound pleasure, and a testament to the undeniable truth that some of the very best things in life are indeed homemade.
So, gather your ingredients, embrace the joy of your stand mixer, and prepare to immerse your home in the irresistible, comforting aroma of freshly baked French bread. This straightforward recipe is destined to become a cherished, frequently requested addition to your own growing collection of “favorite stuff to make and eat.” Happy baking, and enjoy every delicious bite!