
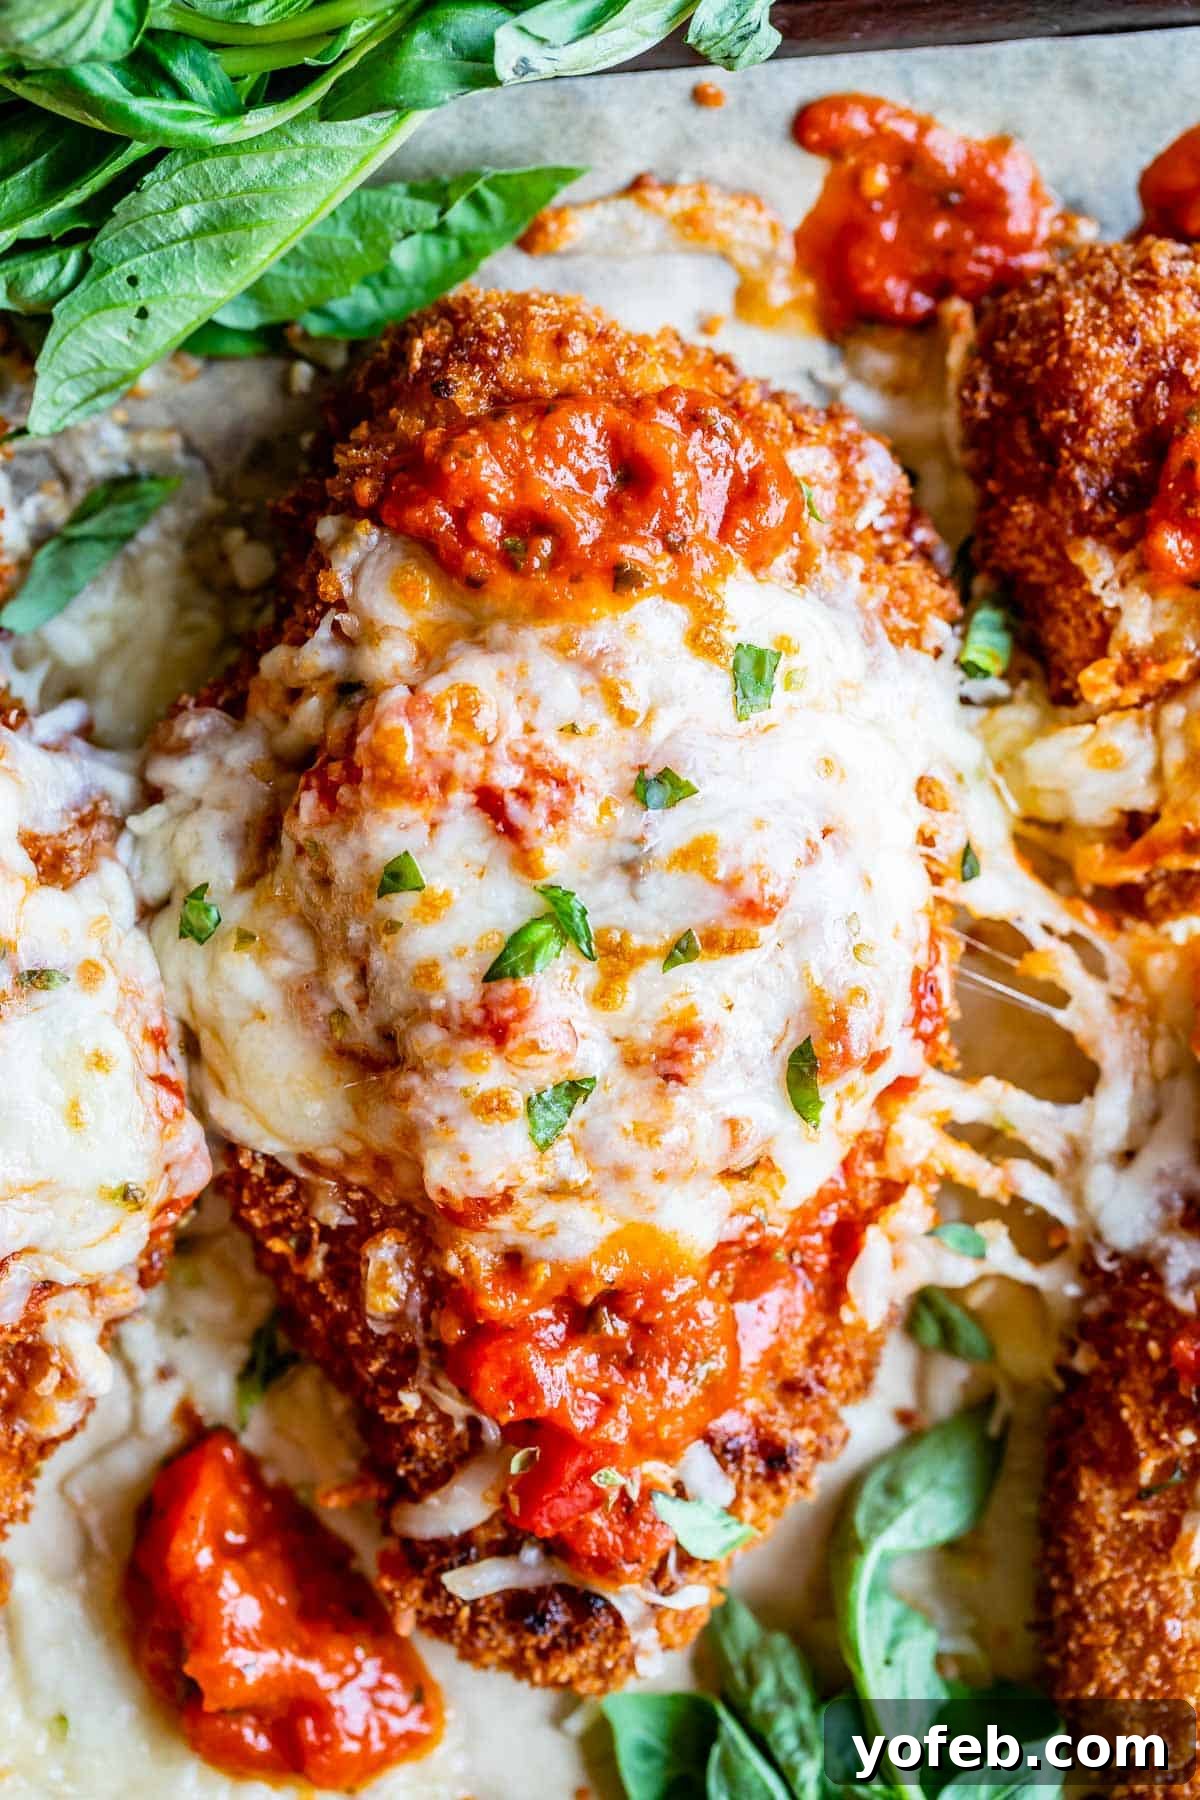
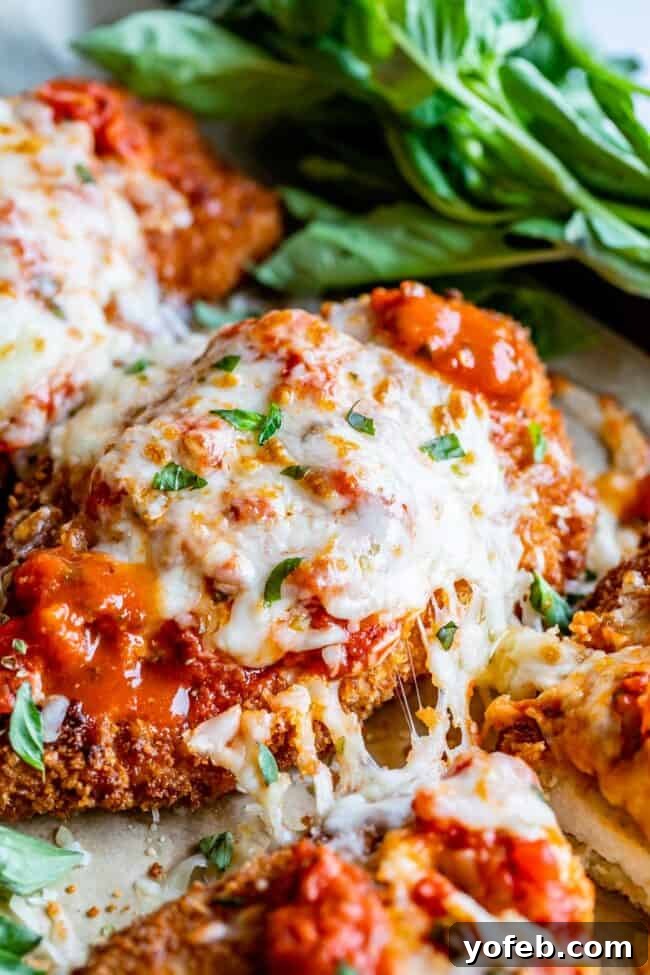
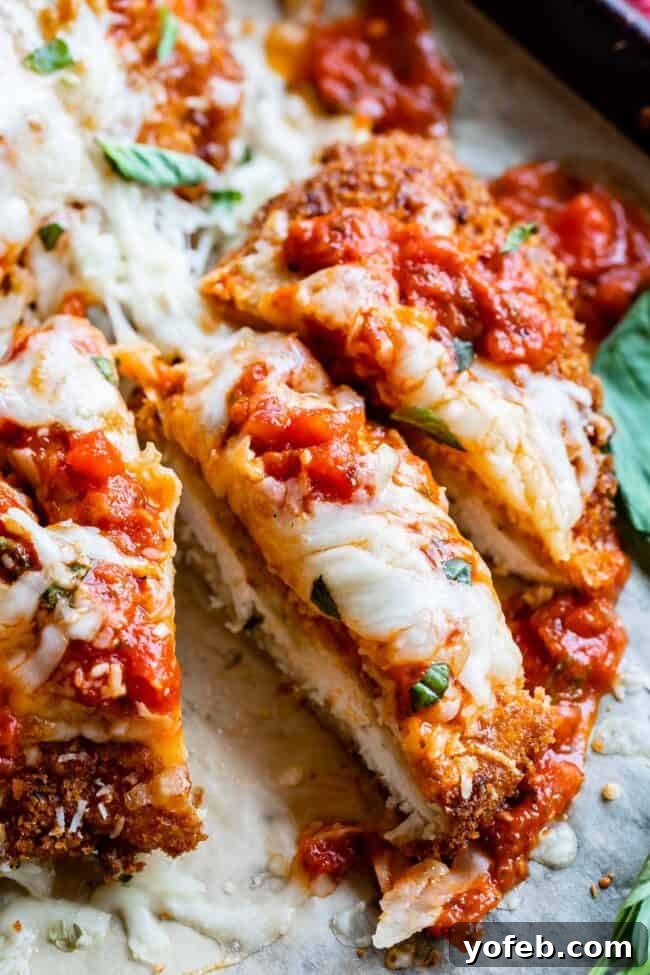
Welcome to the definitive guide for crafting the ultimate Crispy Chicken Parmesan! If you’ve ever been served a sad, soggy rendition of this beloved Italian-American classic at a chain restaurant, prepare to have your expectations redefined. This easy-to-follow recipe empowers you to create an ultra-crispy chicken parmesan right in your own kitchen – a dish so perfectly crunchy and tender, it will rival any restaurant’s best. We’ll bread succulent chicken cutlets with Panko, fry them to a golden crisp, then top them with rich marinara and melted cheese before a final broil to golden perfection. Get ready to impress your family and friends with a chicken parm that truly sings!
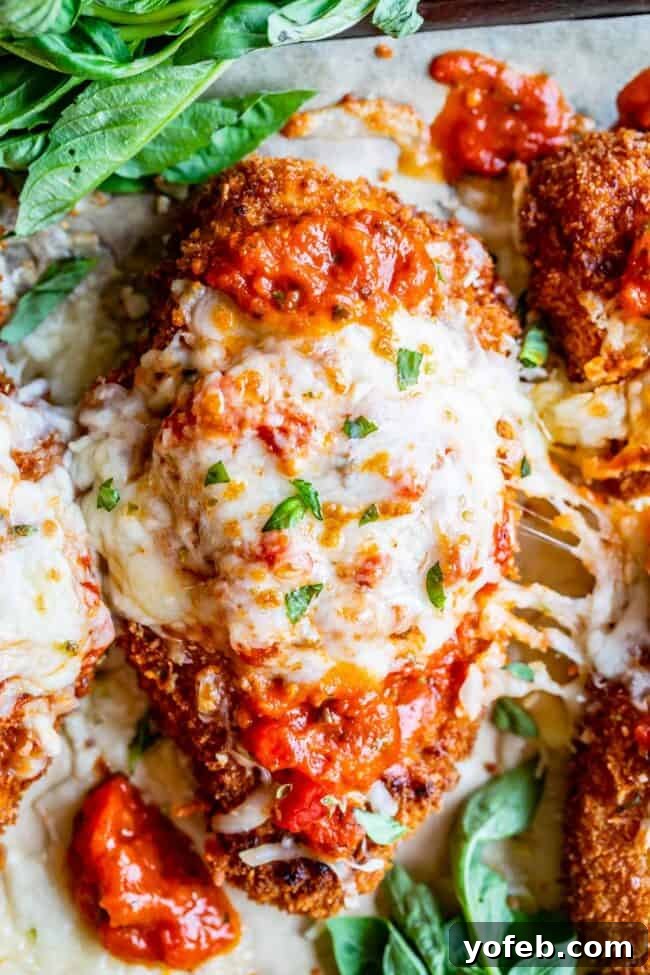
Table of Contents
- The BEST Chicken Parm! Crispy & Tender!
- What is the difference between Chicken Parmesan and Chicken Parmigiana?
- Best Chicken Parm Ingredients for Unmatched Flavor and Texture
- How to Make Ultra Crispy Chicken Parmesan: A Step-by-Step Guide
- How to Prevent Soggy Chicken Parmesan
- Keeping the Breading on Chicken Parmesan: The Double-Dredge Secret
- Storing and Reheating Chicken Parmesan
- What to Serve with Crispy Chicken Parm
- Crispy Chicken Parm Recipe FAQs
- More Easy Chicken Dinners You Will Love!
- Crispy Chicken Parmesan Recipe
The BEST Chicken Parm! Crispy & Tender!
Sometimes, life throws you a curveball, or you simply misread the situation entirely. Like the time my husband Eric and I watched the original Transformers movie at the drive-in. There was a military guy with a shirt that boldly read “USAF.” For a split second, my millennial brain translated it as “US, af” – a cheeky, patriotic slang. I was instantly amused, imagining myself finding and wearing such a shirt.
Then, the penny dropped: USAF stands for US Air Force. A classic moment of misinterpretation! My best friend Sarah, whose husband actually *is* in the Air Force, even sent me such a shirt for my birthday, arriving as I started writing this very post. It goes to show how easily we can get things wrong, even when the answer is right in front of us!
And speaking of getting things right, lately I’ve found myself completely absorbed in recreating comfort food classics at home, particularly those satisfying Italian-American dishes often found at places like Olive Garden. It started with perfecting Chicken Fettuccine Alfredo, then mastering those irresistible Olive Garden breadsticks. Now, my latest obsession (and success!) is crafting the ultimate homemade chicken parmesan. There’s truly nothing quite like the warmth and indulgence of these Americanized Italian dishes, especially when they’re made with care and a secret touch for maximum crispiness!

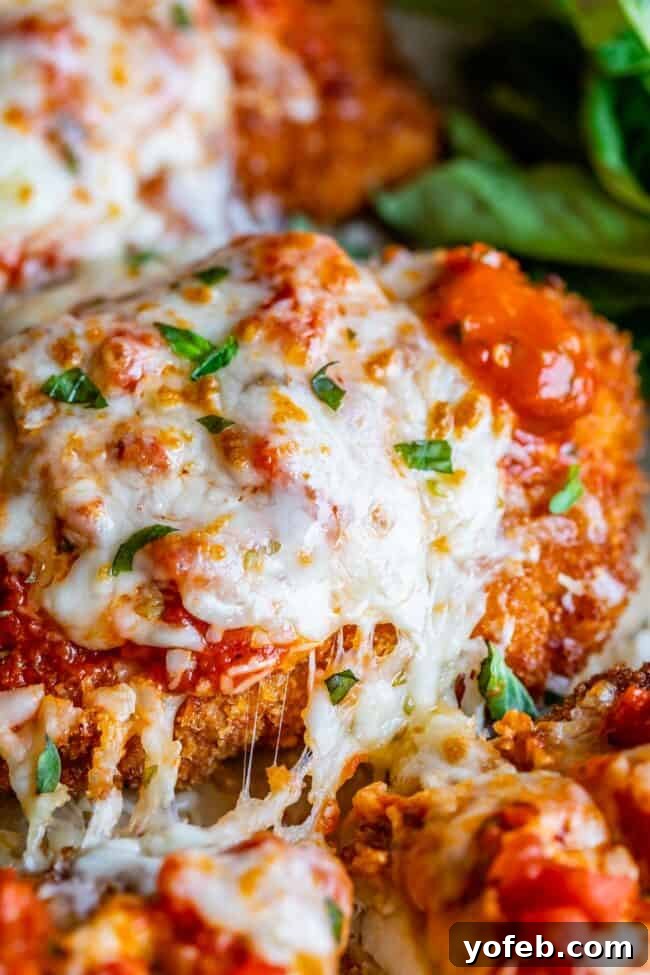
What is the difference between Chicken Parmesan and Chicken Parmigiana?
Many people wonder if there’s a significant difference between “Chicken Parmesan” and “Chicken Parmigiana.” The good news is, for all intents and purposes, these two terms refer to the exact same delectable dish! “Parmesan” is simply the anglicized version of “Parmigiana.” While “Parmigiana” might sound a bit more sophisticated and authentic, especially if you’re trying to impress dinner guests, both names proudly describe the breaded, fried chicken cutlets topped with rich tomato sauce and melted cheese. So, feel free to use whichever name rolls off your tongue more easily!
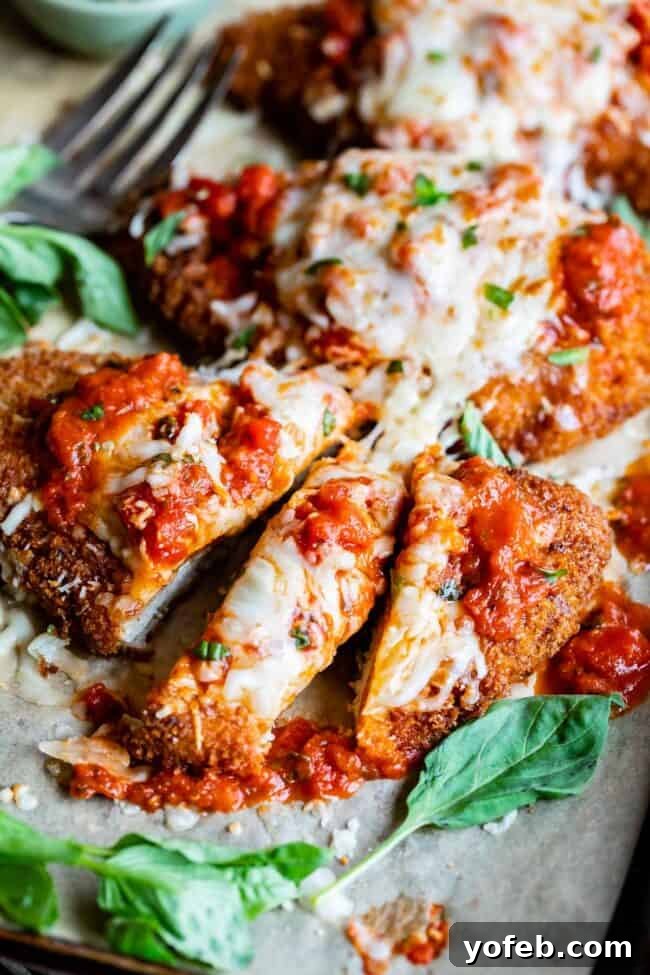
Why is it called Chicken Parm if it’s made with mozzarella?
This is a fantastic question that often puzzles home cooks. Given that the dish is predominantly crowned with gooey mozzarella cheese, why isn’t it called “Chicken Mozzarelliana” or something similar? The answer likely lies in the origins of the name itself. The term “Parmigiana” is believed to derive from the city of Parma in Italy, or perhaps from the local dialect word for shutters (referring to the way the eggplant slices are layered in traditional eggplant parmigiana). While “parmigiano” in Italian refers to Parmesan cheese, the “a” at the end of “parmigiana” likely signifies “from Parma.” So, the dish’s title could simply translate to “Chicken from Parma,” indicating a regional style or origin, rather than directly referencing the cheese used for topping. Over time, the distinction between the city’s name and the cheese’s name likely blurred for English speakers, leading to the widely accepted “Chicken Parmesan.” It’s a charming linguistic quirk for a truly delicious meal!
Best Chicken Parm Ingredients for Unmatched Flavor and Texture
Creating an exceptionally crispy chicken parmesan starts with a carefully selected grocery list. You’ll find these ingredients are straightforward and widely available, focusing on freshness and quality to build layers of flavor and texture that make this dish truly special. Pay particular attention to the chicken and the breading for the best results!
For the Chicken & Breading
- Chicken Breasts: Boneless, skinless, sliced thinly into cutlets for even cooking.
- Eggs: The essential binder for the breading.
- Buttermilk: Adds incredible moisture and tenderness to the chicken. A “cheater” buttermilk (milk + lemon juice/vinegar) works perfectly.
- All-Purpose Flour: Forms the initial coating.
- Cornstarch: The secret ingredient for unparalleled crispiness in the breading.
- Panko Bread Crumbs: Japanese-style breadcrumbs, vital for that light, airy, and ultra-crispy crust.
- Vegetable Oil: Or any high smoke point oil suitable for frying.
For the Sauce & Toppings
- Good-Quality Marinara Sauce: A jarred sauce can be elevated with a few extra ingredients.
- Petite Diced Tomatoes: Adds texture and freshness to the marinara.
- Parmesan Cheese: Freshly grated for sharp, nutty flavor.
- Mozzarella Cheese: Shredded, for that signature gooey, melty top.
Seasonings & Aromatics
- Kosher Salt & Freshly Ground Black Pepper: Crucial for seasoning at every layer.
- Garlic Powder: Infuses the chicken and sauce with aromatic depth.
- Dried Oregano & Dried Basil: Classic Italian herbs for authentic flavor.
- Cayenne Pepper: A subtle touch for warmth and flavor, not excessive heat.
- Fresh Basil: Optional, but highly recommended for a vibrant garnish and fresh aroma.
For Serving
- Spaghetti or Other Long Pasta: The traditional accompaniment to soak up all that delicious sauce.
Best Breadcrumbs for Chicken Parm
When it comes to achieving that coveted ultra-crispy chicken parmesan, your choice of breadcrumbs makes all the difference. While standard breadcrumbs will do in a pinch, Panko breadcrumbs are the undisputed champion. Here’s why:
Panko, a variety of Japanese breadcrumb, is made from crustless white bread that is processed into large, airy, and flaky flakes. Unlike traditional breadcrumbs, Panko is specifically designed to absorb less oil during frying, resulting in a lighter, crispier, and less greasy coating. Its unique texture creates an irresistible crunch that beautifully contrasts with the tender chicken and gooey melted cheese. There’s nothing more disappointing than a pale, soft crust on a chicken parm, and Panko ensures this never happens to your dish! You can typically find Panko in the Asian section of your grocery store, or alongside other breadcrumbs.
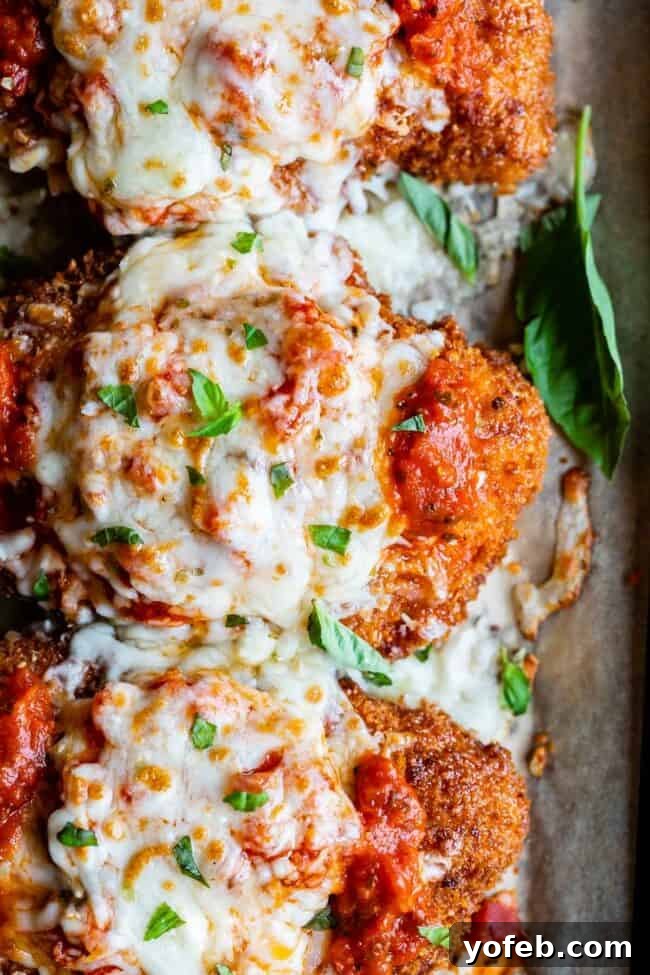
How to Make Ultra Crispy Chicken Parmesan: A Step-by-Step Guide
Let’s face it, many chicken parmesan recipes out there lead to disappointing results. You might end up with lightly breaded chicken that’s then baked in a pool of sauce, leaving it rubbery and soggy. We’re here to say goodbye to that! This recipe is the real deal, focusing on a method that guarantees an ultra-crispy chicken parmesan every single time. The secret? We’re going to properly fry our chicken cutlets, ensuring that glorious crunch that chain restaurants often fail to deliver.
How to Prevent Soggy Chicken Parmesan
The key to a truly magnificent chicken parmesan is to avoid any hint of sogginess. This recipe employs a dedicated frying method for the chicken cutlets, which is the only reliable way to achieve that sought-after ULTRA CRISPY texture. Forget baking sad, flaccid chicken in sauce; we are building layers of flavor and texture that stand up to the challenge. Think of chicken parmesan not as baked chicken with sauce, but as Italian-spiced fried chicken, elevated with marinara and cheese. This fundamental shift in approach is what makes all the difference.
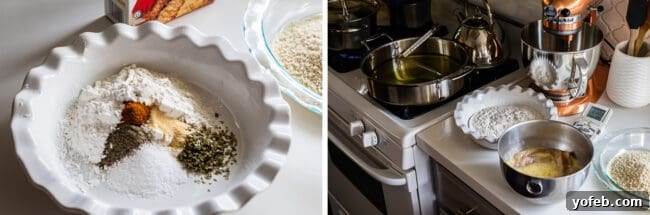
When preparing your chicken parmesan, you’ll set up a “dredging station” with shallow bowls or pie plates for each step. One will hold your seasoned flour mixture, and another for the Panko breadcrumbs. This organized approach makes the breading process smooth and efficient, ensuring each cutlet is perfectly coated and ready for frying. Don’t worry about the pie plates being confused for actual pies – a friendly reminder for any curious onlookers!
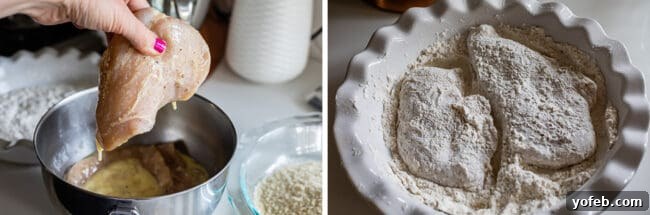
Keeping the Breading on Chicken Parmesan: The Double-Dredge Secret
The secret to ensuring your chicken parmesan boasts an ultra-crispy crust that adheres beautifully is in the breading technique. This method, often referred to as the “double dredge,” is foolproof for preventing the dreaded breading-slip. Here’s how it works:
- Marinate in Egg/Buttermilk: First, the chicken cutlets soak in a mixture of buttermilk and eggs. This not only tenderizes the chicken but also provides the perfect sticky surface for the initial flour coating.
- Seasoned Flour & Cornstarch: Next, the chicken is thoroughly coated in a *heavily seasoned* flour mixture that includes cornstarch. The cornstarch is a game-changer; it inhibits gluten development, leading to an incredibly crispier crust and helps the breading stay put.
- Second Egg Dip: After the flour, the chicken goes back into the egg mixture. This second dip is crucial for securing the flour layer and providing a fresh adhesive surface for the final breading.
- Panko Power: Finally, the chicken is generously pressed into a bed of Panko breadcrumbs. Be sure to press firmly to ensure maximum adhesion and an even, crunchy coating.
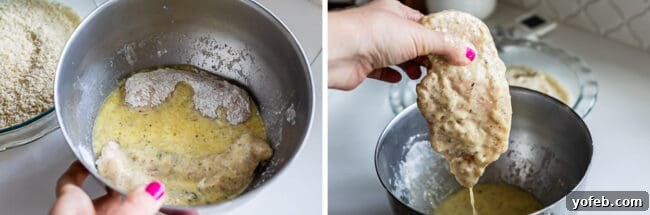
Many recipes suggest adding seasoning directly to the Panko or including Parmesan cheese in the breading mixture. However, this often leads to scorched, bitter edges during frying. Our method relies on ample seasoning in the initial buttermilk marinade and the flour mixture, ensuring your chicken is flavorful from the inside out, while the Panko achieves that perfect golden, unburnt crisp. This technique guarantees your fried chicken cutlets will be juicy, flavorful, and exquisitely crispy.
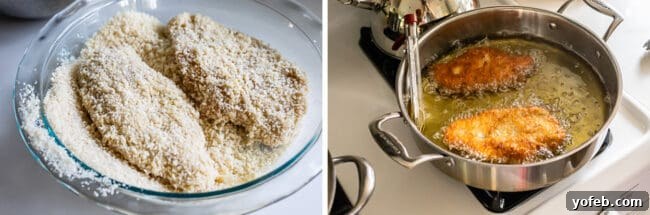
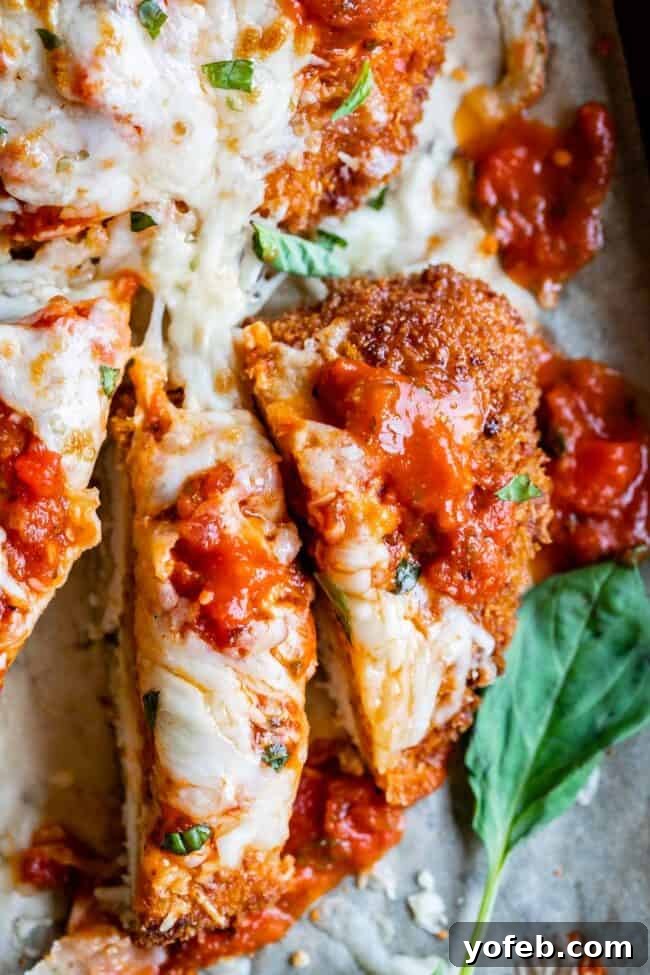
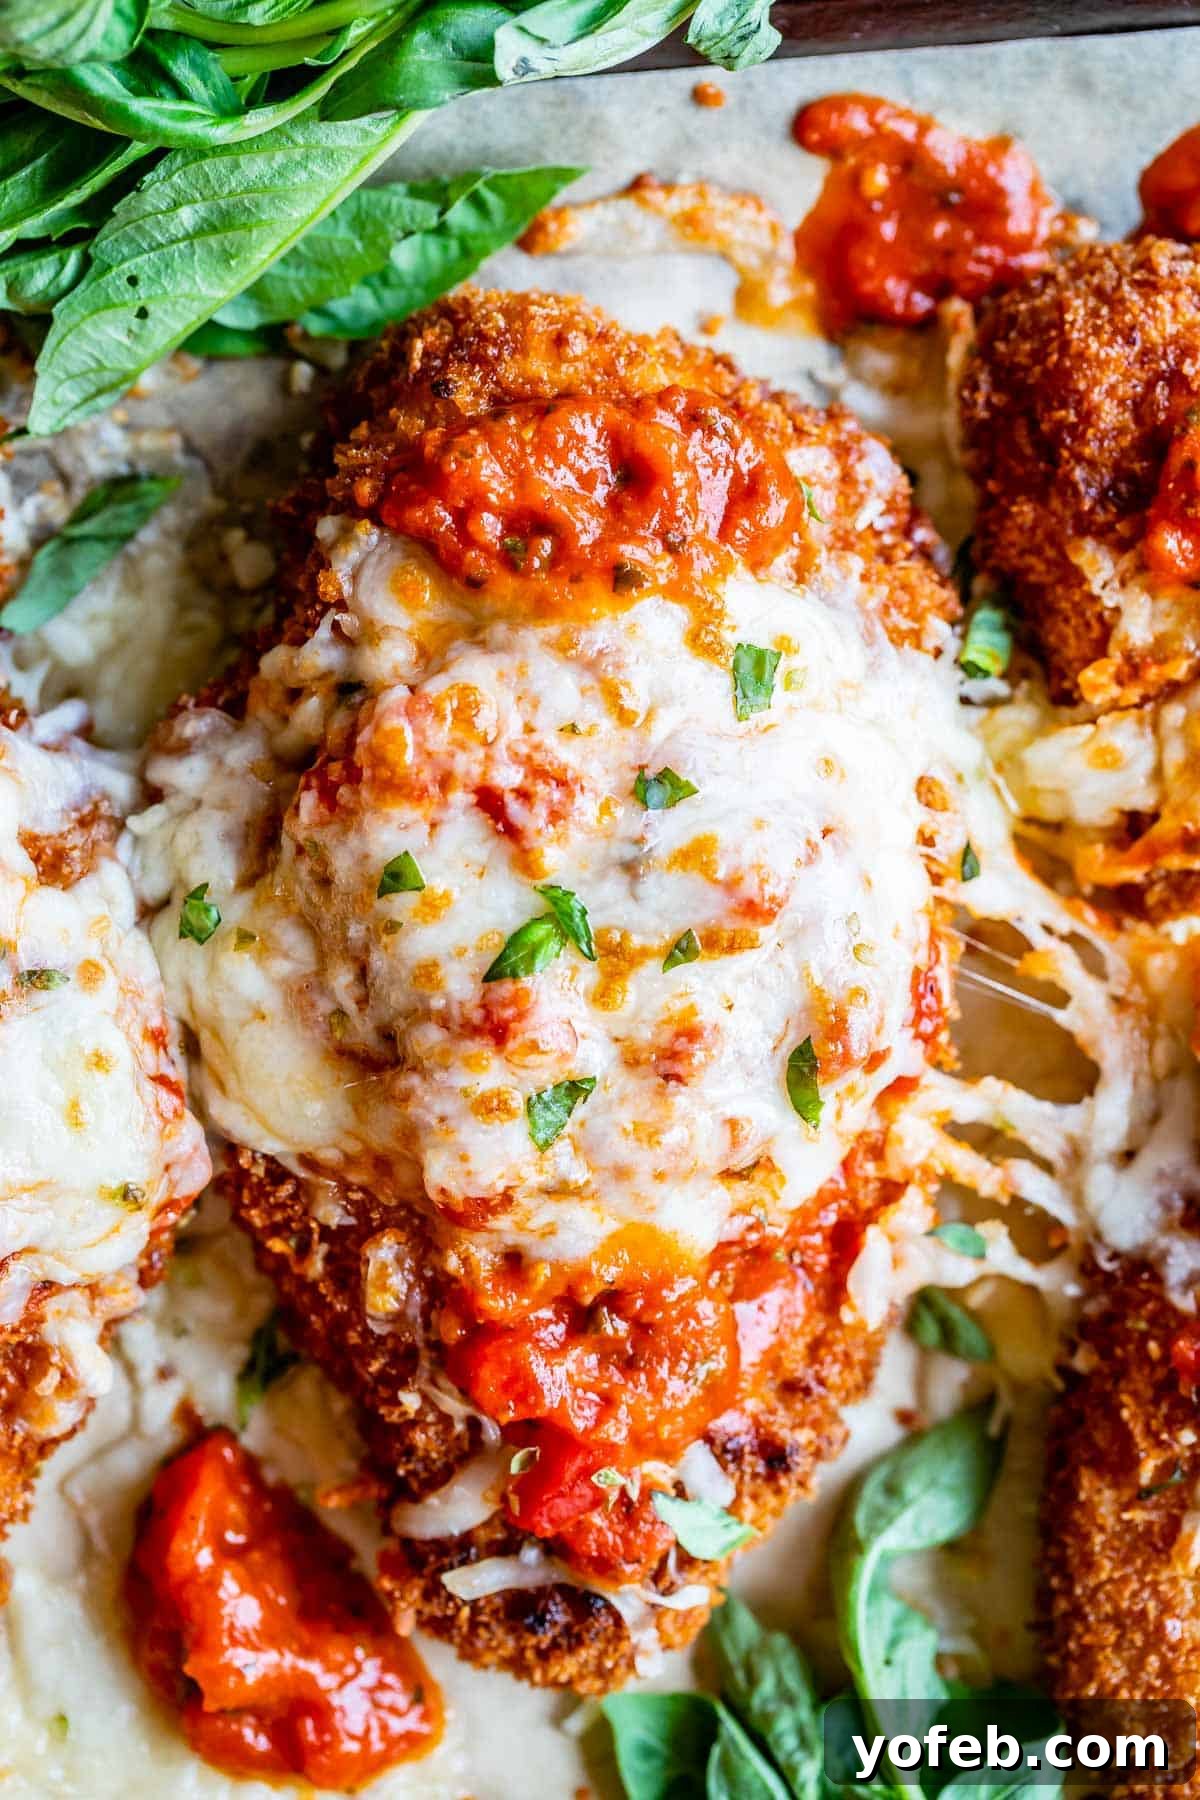
Once your chicken is perfectly fried to a golden-brown, crispy exterior, it’s ready for its delicious transformation. A generous spoon of rich marinara sauce and a blanket of melted cheese, followed by a quick broil in the oven, will bring all the elements together into a harmonious, comforting dish. Remember to monitor the broiler closely – cheese melts quickly, and you don’t want to overcook your masterpiece!
Storing and Reheating Chicken Parmesan
One of the many joys of homemade chicken parmesan is that it makes for fantastic leftovers! To ensure your chicken stays as crispy as possible for subsequent meals, it’s best to store the chicken and sauce separately. Once cooled, place the cooked chicken cutlets in an airtight container and refrigerate for up to 3-4 days. Store any leftover marinara sauce in a separate container.
When you’re ready to enjoy your leftovers, reheating correctly is key to maintaining that desirable crispness. Avoid the microwave, as it will inevitably steam the breading, turning it soft. Instead, preheat your oven to 350 degrees F (175 degrees C). Place the chicken cutlets on a wire rack set over a baking sheet and heat for 10-20 minutes, or until thoroughly warmed through and crispy again. Heat the sauce gently on the stovetop or in the microwave separately. Assemble your plate with freshly heated sauce and crispy chicken, and you’ll hardly know it’s a leftover! For an extra treat, slice the reheated chicken and pile it into an Italian hoagie roll for a divine sandwich experience.
What to Serve with Crispy Chicken Parm
Crispy chicken parmesan simply isn’t complete without its classic accompaniments. The star of the show deserves a supporting cast that complements its rich flavors and textures.
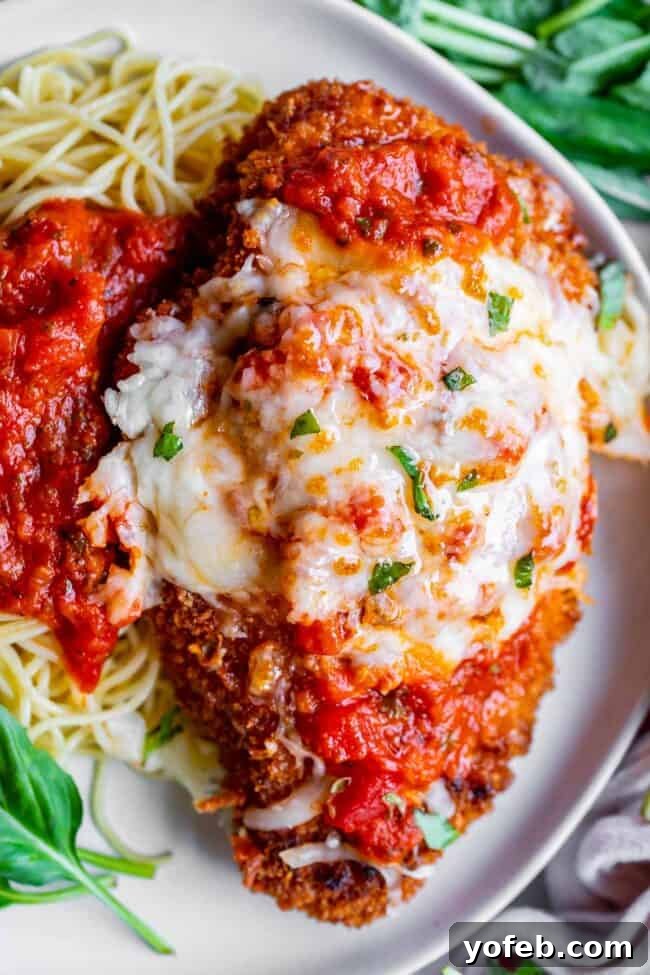
Pasta & Sauce: The quintessential pairing is a generous bed of pasta tossed with marinara sauce. Whether you prefer spaghetti, angel hair, linguine, or fettuccine, any long pasta will work beautifully to soak up the delicious sauce. For convenience without sacrificing flavor, consider using a good-quality jarred marinara sauce that you can easily “doctor up” with a few extra ingredients like diced tomatoes, oregano, garlic powder, and fresh basil. This saves time, allowing the perfectly fried chicken to remain the highlight of the meal. Remember to serve the sauce separately from the chicken on the plate to maintain the precious crispness of your hard-earned breading.
Perfect Side Dishes:
While the chicken and pasta are hearty enough, a few simple sides can round out the meal beautifully.
- Fresh Green Salad: A light, refreshing big green salad with a zesty vinaigrette provides a welcome contrast to the richness of the chicken parm.
- Roasted Vegetables: Perfectly Roasted Cauliflower or broccoli offers a healthy and flavorful accompaniment.
- Garlic Bread: You can never go wrong with a side of The Best Garlic Bread of Your Life, or even some quick and easy Olive Garden breadsticks or One Hour French Bread. These are perfect for mopping up any leftover sauce on your plate.
With these thoughtful pairings, your crispy chicken parmesan dinner will be an unforgettable experience.
Crispy Chicken Parm Recipe FAQs
Keeping the breading attached to your chicken parmesan is crucial for crispiness! The main culprits for detached breading are often moisture and insufficient adhesion. First, ensure your chicken cutlets are thoroughly patted dry with paper towels before you begin breading. Any excess moisture will prevent the breading from sticking properly. Second, make sure your egg wash is well-whisked to a uniform consistency. When applying the Panko, press it firmly onto the chicken on all sides. Finally, and perhaps most importantly, ensure your frying oil is at the correct temperature (around 400 degrees F). If the oil isn’t hot enough, the breading will absorb too much oil, become soggy, and likely separate from the chicken. Proper oil temperature ensures a quick, even cook and a crisp, adherent crust.
Rubbery chicken parm is usually a sign of overcooked chicken or improperly prepared cutlets. Chicken breasts are lean and cook quickly. If they are too thick or cooked for too long, they will dry out and become tough and chewy. To prevent this, slice your chicken breasts horizontally into thinner cutlets (about 1/2 to 3/4 inch thick). This ensures more even and faster cooking. Also, use a meat thermometer to check for doneness; chicken is safely cooked at 165 degrees F (74 degrees C), but for optimal juiciness, remove it from the oil when it reaches 160 degrees F (71 degrees C), as it will continue to cook slightly during the resting and broiling stages.
For frying breaded chicken cutlets, you need an oil with a high smoke point that can withstand high temperatures without burning or imparting off-flavors. Vegetable oil is an excellent choice due to its neutral flavor and high smoke point. Other suitable options include canola oil, peanut oil, or sunflower oil. Avoid oils with lower smoke points like olive oil (especially extra virgin) or coconut oil, as they will break down at high frying temperatures, smoke excessively, and can give your chicken an unpleasant burnt taste.
When frying chicken parmesan, you should definitely use vegetable oil or another high smoke point oil, not olive oil. While olive oil is fantastic for sautéing and dressing, its smoke point is generally too low for deep or pan-frying. Frying with olive oil will cause it to smoke and burn, leading to a bitter taste in your chicken and filling your kitchen with an unpleasant odor. Stick to vegetable, canola, or peanut oil for the best frying results – a crispy, golden crust without any burnt flavors.
While you *can* bake chicken parmesan, it will not achieve the same ultra-crispy texture that frying provides. Baking tends to produce a softer, less uniformly crisp crust, and if baked in sauce, it can become quite soggy. If you must bake, try pre-baking the breaded chicken on a wire rack at a higher temperature (around 400°F/200°C) until golden and mostly cooked through, then adding the sauce and cheese for a final short broil. This method helps reduce sogginess but won’t replicate the deep-fried crunch.
Cheater buttermilk is a convenient substitute when you don’t have buttermilk on hand. It’s incredibly easy to make! For every 1 cup of milk, simply add 1 tablespoon of lemon juice or white vinegar. Stir it gently and let it sit for about 5-10 minutes. During this time, the milk will curdle slightly and thicken, mimicking the acidity and texture of real buttermilk. This acidity is essential for tenderizing the chicken and providing a tangy base for the marinade.
More Easy Chicken Dinners You Will Love!
- Homemade Chicken Fettuccine Alfredo << Another Olive Garden classic, significantly better when made fresh at home!
- Crispy Fish Parmesan << Just like our chicken parm, but featuring flaky, crispy fish! A delightful seafood twist.
- Greek Pasta with Chicken << A vibrant and fresh pasta dish, also delicious when made with zucchini noodles (zoodles).
- Pan Seared Chicken in Lemon Basil Cream Sauce << An incredibly easy and elegant dish, bursting with bright, herbaceous flavors.
- Slow Cooker Basil Chicken in Coconut Cream Sauce << One of our most popular recipes, perfect for a comforting, hands-off meal.
- Sheet Pan Rosemary Lime Chicken and Veggies << A simple one-pan wonder with unique and zesty flavors for a quick weeknight dinner.
- Crispy Chicken Salad with Buttermilk Ranch << All the deliciousness of a fast-food chicken sandwich, transformed into a satisfying salad!
- Simple Amazing Grilled Chicken Marinade << Your go-to marinade for perfectly flavored, juicy grilled chicken every time.
- Asian Seared Chicken with Stir Fried Green Beans << This recipe also utilizes cornstarch to achieve an incredibly crispy crust on the chicken.
- Super Crispy Fried Chicken from Dinner Then Dessert
- Baked Chicken Thighs from Shugary Sweets
- Chicken Marsala from House of Nash Eats
Facebook | Pinterest | Instagram

Crispy Chicken Parmesan Recipe
Rate this Recipe
Print Recipe
Learn how to make ULTRA crispy chicken parmesan! We’ve all been to a chain restaurant that served us a soggy excuse for this classic dish. Now you can make this easy recipe at home! Fried chicken cutlets are breaded with panko and topped with marinara and cheese, then broiled to perfection.
Ingredients
For the egg mixture
- 2 large chicken breasts, sliced thinly in half
- 2 large eggs
- 1/2 cup buttermilk*
- 1/2 teaspoon garlic powder
- 1 teaspoon kosher salt
- 1/2 teaspoon pepper
For the flour dredge
- 3/4 cup flour
- 1/4 cup cornstarch
- 1 tablespoon kosher salt (yes really)
- 1/2 teaspoon pepper
- 2 teaspoons oregano
- 1/2 teaspoon garlic powder
- 1/4 teaspoon cayenne pepper
For the breading
- 1 & 1/2 cups Panko bread crumbs
For frying
- 1 inch of vegetable oil, or any high smoke point oil
For the sauce
- 1 (24-oz) jar good quality marinara sauce
- 1 (14-oz can) petite diced tomatoes
- 1 teaspoon kosher salt
- 2 teaspoons oregano
- 1/2 teaspoon garlic powder
- 1 teaspoon dried basil
- 2-4 tablespoons fresh basil, chopped (optional)
For the pasta
- large pot of water
- 1 tablespoon salt
- 12 ounces spaghetti or other long pasta
To top chicken
- 1/4 cup parmesan cheese, shredded
- 1/2 cup mozzarella cheese, shredded
Instructions
- Prepare the chicken. Use a sharp knife to slice each chicken breast in half horizontally, to create a thin cutlet. Start at the thick edge of the chicken breast. You should end up with 4 thin pieces of chicken that are the same shape as a chicken breast, just thinner.
- In a small bowl, combine 1/2 teaspoon garlic powder, 1 teaspoon salt, and 1/2 teaspoon pepper. Sprinkle it over the chicken and rub it onto all the edges.
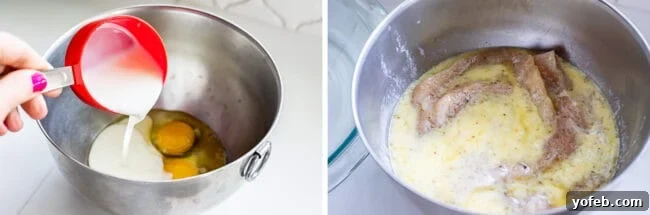
- In a medium bowl, whisk together 2 eggs and 1/2 cup buttermilk.*
- Add the chicken to the egg mixture and let marinate for about 15-30 minutes, or up to 24 hours. If you are in a hurry, at least let it marinate while you prep everything.
- While the chicken is getting all juicy in the marinade, prepare your dredging station. Get two shallow bowls or pie plates. In one bowl, add 3/4 cup flour, 1/4 cup cornstarch, 1 tablespoon kosher salt (it sounds like a lot but trust me), 1/2 teaspoon pepper, 2 teaspoons oregano, 1/2 teaspoon garlic powder, and 1/4 teaspoon cayenne pepper (this adds flavor, not heat). In the other bowl, add 1 and 1/2 cups panko bread crumbs.
- Meanwhile, heat the oil over medium heat in a high sided skillet. How much you need depends on how large your pan is. I used a 12-inch high sided skillet, and 1 inch of oil was at least 4-5 cups. You will need less oil in a smaller pan. Heat the oil over medium heat until a thermometer reads 400 degrees F. It will take at least 15 minutes.
- Bread the chicken. The basic order is egg, flour, egg, panko. Pick up one piece of chicken from the egg mixture and let it drip off. Place it in the bowl with the seasoned flour and turn it over several times to make sure it’s entirely coated. Then place the floured chicken BACK into the egg mixture and coat thoroughly. Lift it out to drip, then add to the plate with the panko bread crumbs. Press the breadcrumbs into the chicken and make sure it’s really well coated.
- Repeat with the remaining cutlets. You can begin frying right away if your oil is at 400 degrees, or if you are still waiting, let the breaded chicken sit in the fridge or freezer while you wait. This will help the breading adhere to the chicken.
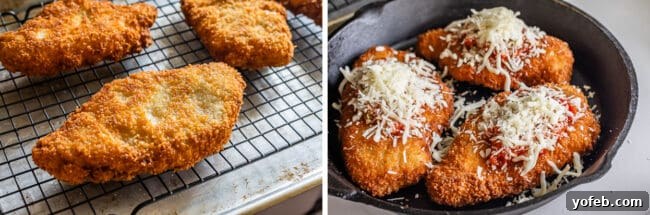
- Fry the chicken cutlets. When your thermometer reaches 400 degrees F, it’s ready. Carefully place the breaded chicken in the oil. (You need at least an inch or two of space in between chicken pieces, so you may have to do this in batches.) Set a timer for 2 minutes, until the bottom is a light golden brown. Use tongs to flip the chicken and fry for another 2 minutes. When the other side is golden brown, and a meat thermometer reads 160 degrees F, remove the chicken to a wire rack set over a baking sheet so that it stays crispy. Wait a few minutes in between batches to make sure your oil temperature gets back up to 400 degrees. If you are still finishing up the sauce, place the fried chicken in the oven on the “keep warm” setting (170 degrees F) while you finish.
- Meanwhile, make the sauce.** In a medium pot add a 24-ounce jar of marinara sauce (I love the Rao’s brand). Add a can of petite diced tomatoes, 1 teaspoon kosher salt, 2 teaspoons oregano, 1/2 teaspoon garlic powder, 1 teaspoon dried basil, and 2-4 tablespoons chopped fresh basil, if you have it. Heat this mixture over medium heat until bubbly. Keep warm.
- Make the pasta. Bring a large pot of water to a boil over high heat. Add 1 tablespoon salt. When it is boiling, add 12 ounces of spaghetti or other pasta. Boil and stir according to package directions, usually about 8-10 minutes, until al dente. Drain, drizzle with oil, and stir to coat so that the noodles don’t stick to each other. Keep warm until ready to serve.
- To broil the chicken and cheese: Place the fried chicken in a broil-safe casserole dish or a baking sheet. Top with a generous spoonful of the sauce, but not so much that it covers all the edges. You want the edges to stay crispy. We worked so hard for it!
- In a small bowl combine 1/4 cup Parmesan cheese and 1/2 cup mozzarella cheese. Top each spoonful of sauce with the cheese. Add extra cheese if you like!
- Place your oven rack as high as it will go. Broil the chicken under high heat for 2-5 minutes, checking the chicken every 1 minute. DO NOT WALK AWAY. You don’t want to light your masterpiece on fire! Broilers are no joke, so be careful.
- Remove from the broiler and garnish with fresh basil. Serve with pasta and sauce. If I’m plating each serving, I like to put the pasta on the plate first, then top with sauce, then place the chicken on top. Then pass the remaining sauce at the table in case people want more.
Notes
*Cheater buttermilk is okay. Add about 1 teaspoon lemon juice or vinegar to 1/2 cup milk, stir and let sit 5 minutes. Then use in recipe like normal.
**If you are short on time, just use 2 of your favorite jars of marinara sauce. You will probably have a little leftover.
Nutrition
Did you make this? I’d love to see it!
Mention @thefoodcharlatan or tag #thefoodcharlatan!