
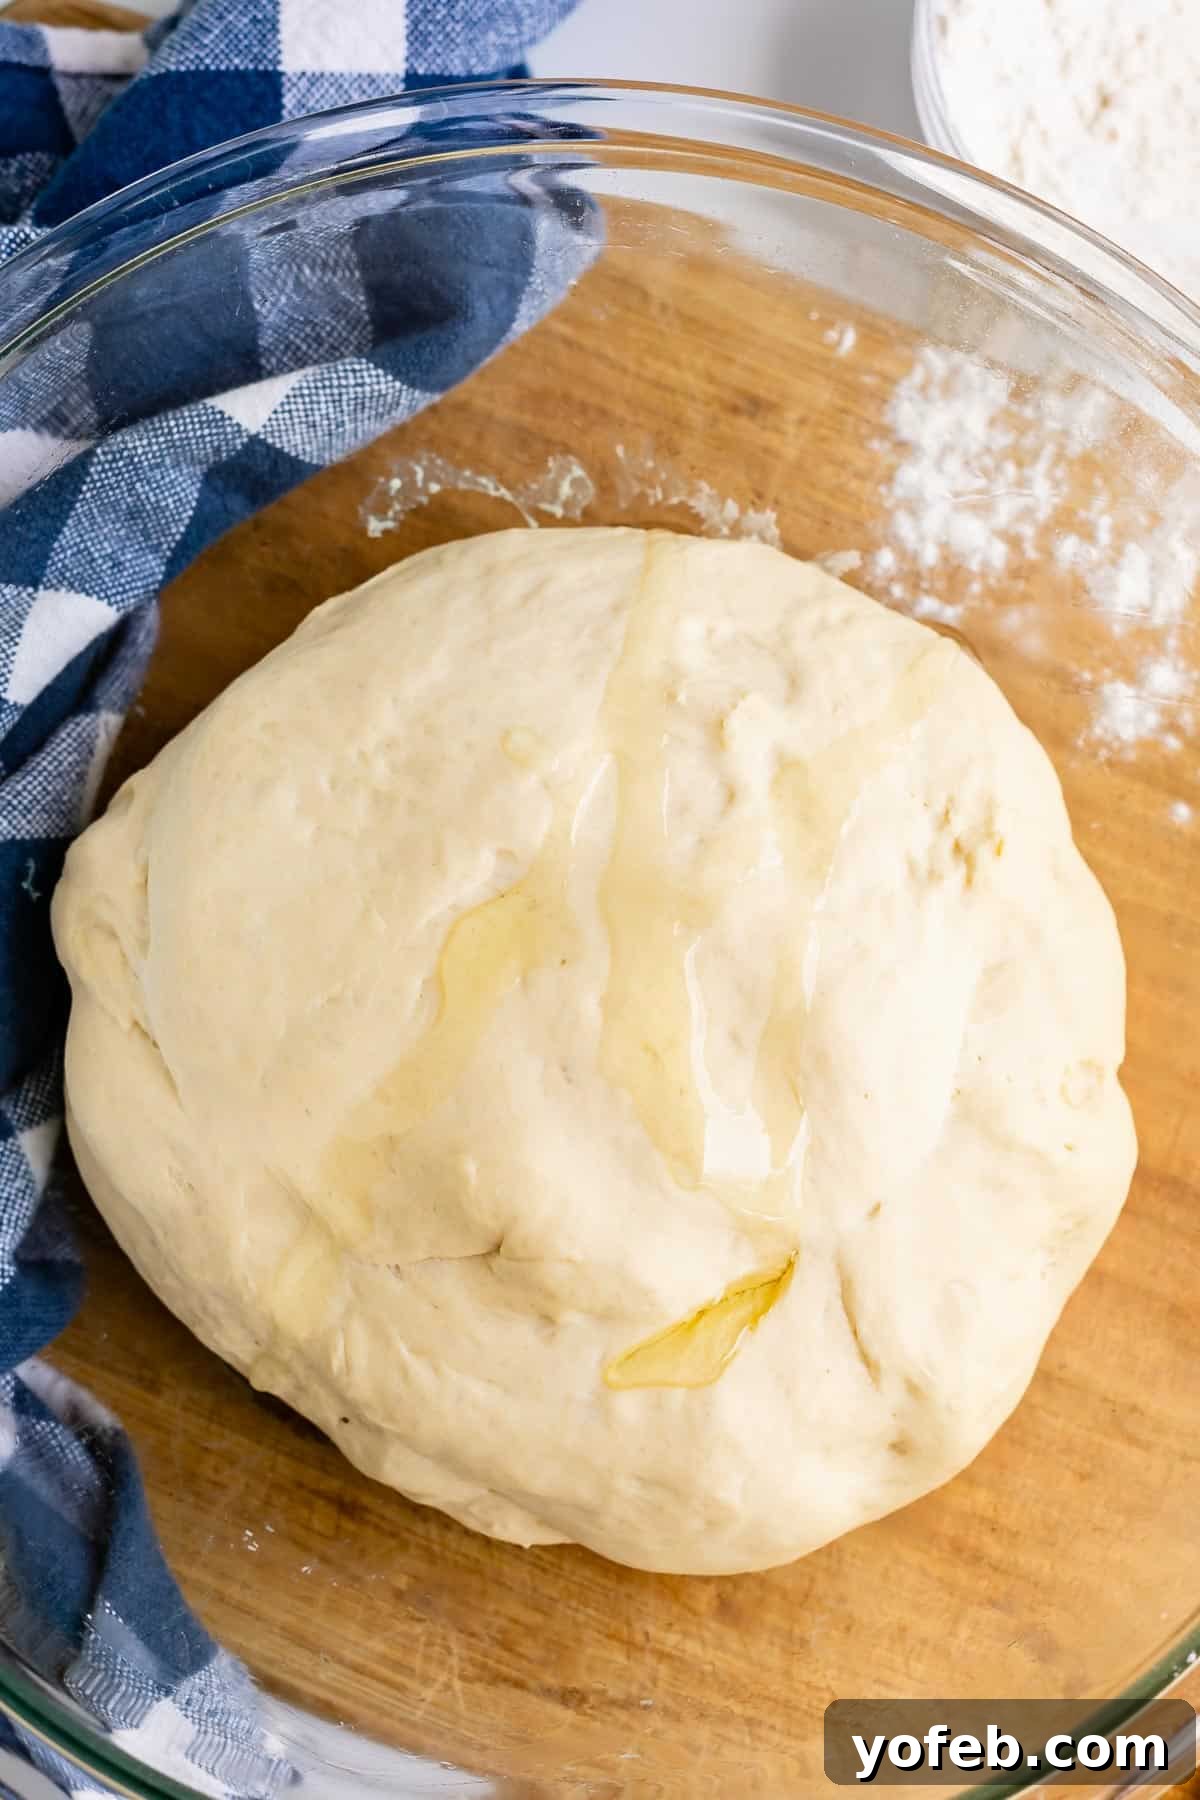
Welcome to the ultimate guide for crafting the most incredible homemade pizza dough! Forget store-bought bases; with this super easy recipe, you’re about to unlock the secret to a seriously flavorful, perfectly textured pizza crust right in your own kitchen. Whether you’re a complete beginner or a seasoned home cook, our step-by-step instructions, combined with essential tips and tricks, guarantee a delicious result every time. This versatile recipe offers flexibility, allowing for a quick 20-minute rise when time is short, or an optional longer fermentation for an even deeper flavor profile. Get ready to transform your pizza nights and impress everyone with your culinary prowess!
Table of Contents
- Mastering Homemade Pizza Dough: The Ultimate Guide to a Flavorful, Crispy Crust
- Why This Is The Best Pizza Dough For Beginners (And Enthusiasts Alike!)
- Essential Ingredients for Perfect Pizza Dough
- The Secret to Superior Crust: Choosing Your Flour
- Bread Flour vs. All-Purpose Flour: The Gluten Story
- Exploring 00 Flour for an Authentic Italian Touch
- Step-by-Step: How to Make Pizza Dough at Home
- The Flavor Enhancer: Homemade Pizza Dough with the Sponge Method
- Kneading Your Way to the Perfect Pizza Dough Texture
- The Rise Time Dilemma: Flavor vs. Speed for Pizza Dough
- Shaping Your Pizza Dough for a Restaurant-Quality Crust
- Baking Your Homemade Pizza Crust for Crispy Perfection
- The Crucial Step: Par-Baking Your Pizza Dough (Optional, but Recommended)
- Achieving Golden Perfection: Final Bake of Your Pizza
- Expert Tips for the Most Flavorful Pizza Dough
- Storing and Freezing Pizza Dough for Future Use
- Can You Freeze Homemade Pizza Dough? Yes, and Here’s How!
- How to Defrost Pizza Dough Properly
- Prepping Ahead: How to Par-Bake Dough for Quick Frozen Pizzas
- Homemade Pizza Dough: Frequently Asked Questions
- Your Complete Pizza Journey: Dough, Sauce, and Assembly
- Explore More Pizza Recipes You’ll Love
- Homemade Pizza Dough Recipe Card
Mastering Homemade Pizza Dough: The Ultimate Guide to a Flavorful, Crispy Crust
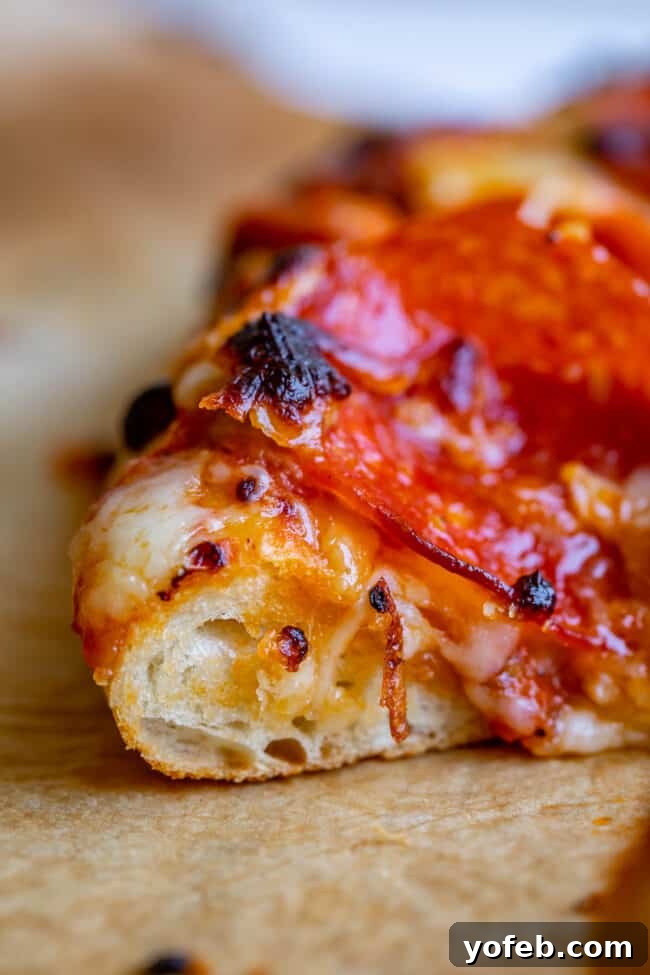
There’s something uniquely satisfying about biting into a slice of homemade pizza, especially when you’ve crafted the crust from scratch. It’s an experience that transcends mere eating, becoming a moment of culinary triumph. This recipe isn’t just about mixing flour and water; it’s about unlocking profound flavors and textures that elevate your pizza from good to absolutely glorious. We’ve honed this recipe over countless batches, ensuring every tip and trick is designed to give you a seriously flavorful, perfectly crispy crust – whether you need it ready in an hour or prefer to let the flavors develop overnight.
Why This Is The Best Pizza Dough For Beginners (And Enthusiasts Alike!)
You might think making pizza dough from scratch is complicated, reserved only for seasoned bakers. But I’m here to tell you that this recipe is incredibly forgiving and designed for success, even if it’s your very first time. I’ve spent months perfecting this recipe, ensuring it’s straightforward, yields consistently delicious results, and offers flexibility to fit your schedule. My dedication to achieving the perfect pizza has meant a lot of taste-testing (a glorious endeavor, as even “bad” pizza is good pizza!), resulting in a foolproof method that I’m thrilled to share.
This pizza dough recipe is not an island! It pairs perfectly with our Homemade Pizza Sauce Recipe and our comprehensive Homemade Pizza guide. Together, these resources provide everything you need to create a pizza experience that rivals your favorite pizzeria, all from the comfort of your home. You’ll be amazed at how easily you can achieve a professional-quality crust with just a few simple ingredients and techniques.
Essential Ingredients for Perfect Pizza Dough
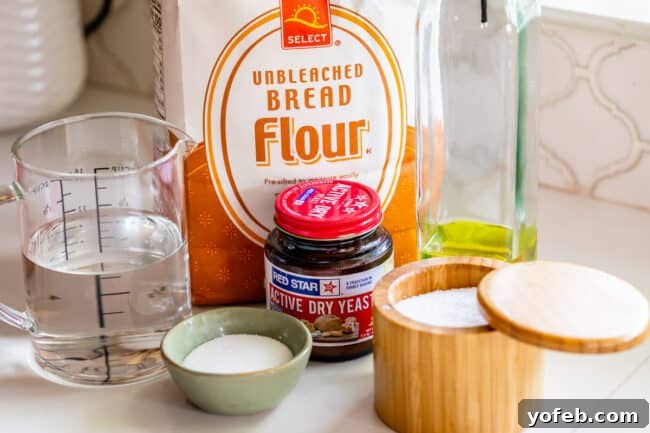
Crafting delicious pizza dough starts with understanding the role each ingredient plays. While seemingly simple, the quality and combination of these few items are crucial for the texture and flavor of your crust. You’ll want to bake your pizza between 475 and 550 degrees F for the best results, so having the right dough is key.
- Water: The foundation of your dough, warm water is essential for activating the yeast, allowing it to bloom and create the necessary gases for rise.
- Active Dry Yeast: This magical ingredient is what gives your dough its lift and airy texture. Ensuring your yeast is active is the first step to successful pizza dough.
- Granulated Sugar: A small amount of sugar acts as food for the yeast, encouraging fermentation and contributing to the beautiful golden-brown color and slight crispness of the baked crust.
- Olive Oil: More than just a lubricant, olive oil adds richness, tenderness, and a hint of Mediterranean flavor to your dough. It also aids in achieving a crispy exterior during baking by conducting heat efficiently.
- Kosher Salt: Beyond just seasoning, salt plays a vital role in controlling yeast activity, enhancing flavor, and strengthening the gluten structure in the dough.
- Flour: The most significant ingredient! The type of flour you choose will profoundly impact the final texture and taste of your pizza crust. We’ll dive into this in detail next, exploring why some flours are better than others for that ideal chewy-crispy balance.
The secret to a truly outstanding pizza crust often lies in your flour choice. Let’s explore the nuances that make all the difference.
The Secret to Superior Crust: Choosing Your Flour
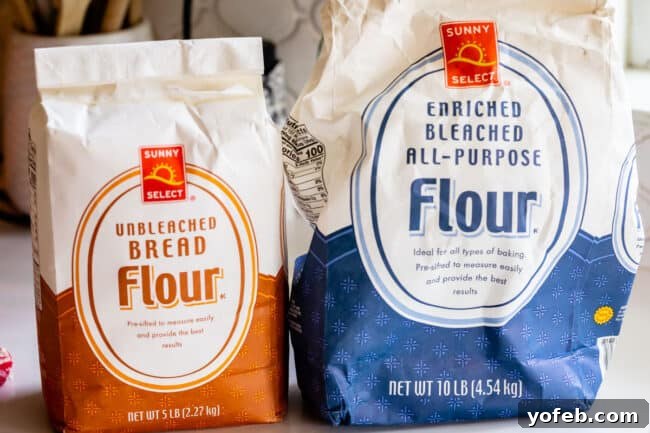
When it comes to pizza dough, not all flours are created equal. While all-purpose flour will certainly work in a pinch, if you’re aiming for that truly authentic, flavorful, and perfectly chewy crust, you’ll want to reach for bread flour. Here’s why this choice makes such a significant impact.
Bread Flour vs. All-Purpose Flour: The Gluten Story
For those eager to understand the science behind baking, this section is for you! The key difference between bread flour and all-purpose flour lies in their protein content. Bread flour boasts a higher protein level than all-purpose flour, and protein is what forms gluten—the “magic” network that develops when flour and water are kneaded together. Gluten is crucial because it creates elastic strands that trap gases produced by yeast, allowing your dough to rise and giving it structure. Without a robust gluten framework, these gases would escape, resulting in a flat, dense dough (which is why gluten-free baking presents unique challenges!).
Now, you might be thinking, “But pizza crust is relatively flat, why do I need high-protein flour?” There are two main reasons:
- Flavor Development: Gluten development is directly linked to flavor development. The longer and more effectively gluten forms, the more complex and delicious your crust will taste. Even a slightly risen pizza crust benefits immensely from this.
- Structural Strength: Beyond rise, protein provides strength. Imagine a pizza crust with the delicate texture of cake; it would crumble under the weight of sauce and toppings! Gluten is robust, providing the necessary elasticity and chewiness to hold everything together. We need a sturdy crust that can handle generous toppings, not a flimsy base.
Let’s look at the protein content in common flours:
- Cake flour has the lowest protein content (around 9%), making it ideal for light, tender cakes.
- All-purpose flour has a moderate protein content (around 11%), making it versatile for many baking projects, including acceptable cakes and breads.
- Bread flour has the highest protein content (around 13%), which allows it to form the most gluten. This results in a chewier, sturdier texture, perfect for breads that need to rise high and, critically, for pizza crusts that need to support heavy toppings and offer satisfying chew.
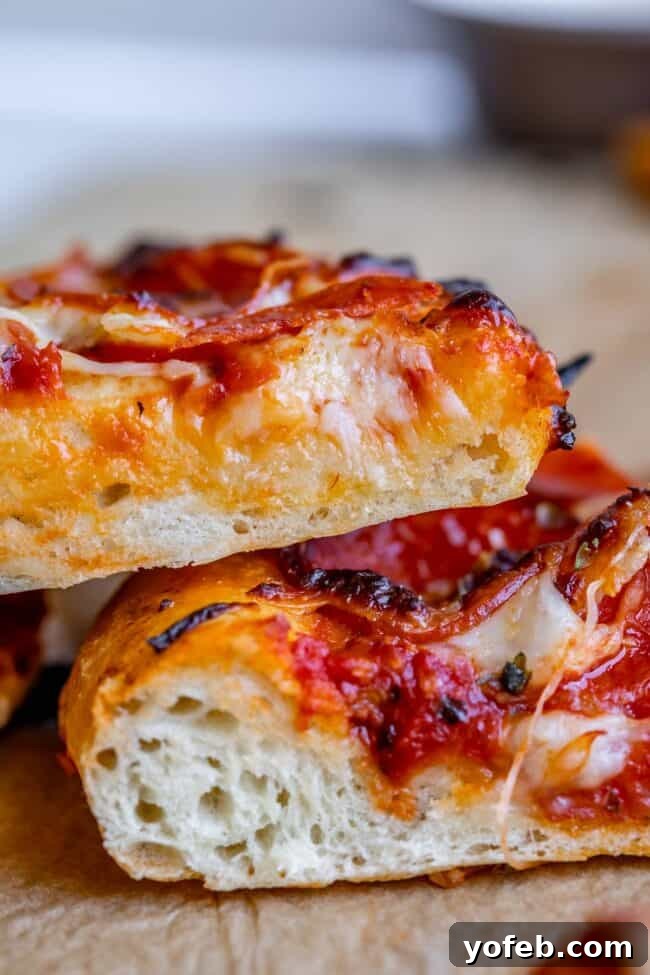
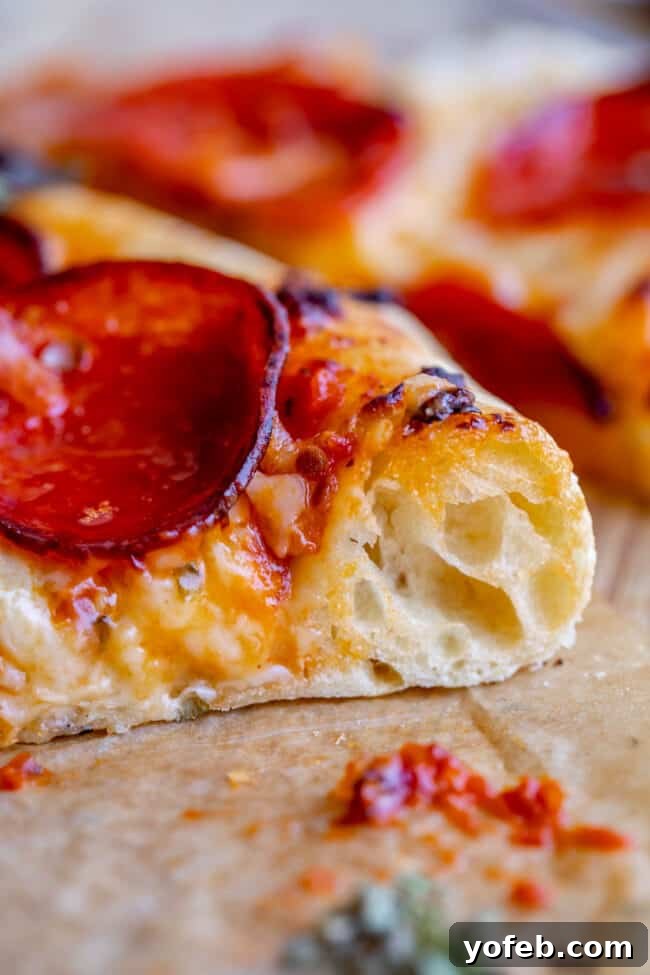
Observe the difference: The crust at the top, made with all-purpose flour, appears uniformly flat. In contrast, the bottom crust, made with bread flour, shows a significantly puffier edge with a chewy, thinner center. This visual difference translates into a distinct taste and texture experience that you truly need to savor to appreciate!
If you opt for all-purpose flour, you’ll still get a perfectly acceptable pizza crust, but it might be a bit fluffier and more “bread-like” than the classic pizza texture you expect. The ideal pizza crust should be a delightful combination of chewy, crisp on the edges and bottom, yet tender and relatively thin in the middle. This glorious texture is achievable through the higher protein content of bread flour. So, for the best possible homemade pizza, make bread flour your go-to choice.
Exploring 00 Flour for an Authentic Italian Touch
Ready to elevate your pizza game even further? Enter “Double Zero” flour, often referred to as 00 flour. This specialty Italian flour is ground to an incredibly fine consistency, much finer than typical American flours. While in the US we categorize flours by protein content, in Italy, the classification refers to the coarseness of the grind. Interestingly, 00 flour generally has a protein level similar to American bread flour, but its unique finely-milled texture is what sets it apart.
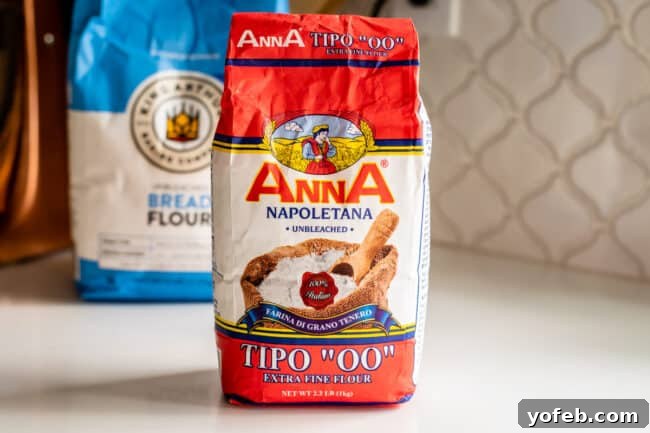
Using 00 flour allows you to create an amazingly delicious “Neapolitan” style pizza crust, characterized by its incredibly tender interior and beautifully blistered, slightly charred exterior. This is the kind of crust you’d typically find at an artisanal pizza restaurant, quite distinct from the pan pizzas of commercial chains (no offense, I love all pizza!).
For an extra special crust, I sometimes use a blend of half bread flour and half 00 flour in this recipe. The combination truly delivers a superior texture and flavor profile. While 00 flour isn’t as common in standard American supermarkets, it’s readily available at specialty food stores or can be ordered online. If you’re serious about taking your homemade pizza to the next level, it’s a worthwhile investment. Check the recipe notes for specific details on how to incorporate 00 flour.
Step-by-Step: How to Make Pizza Dough at Home
Making homemade pizza dough is a straightforward process once you understand the basic steps. Below, we’ll walk through each stage, from activating your yeast to kneading the perfect dough. For the full, detailed instructions and measurements, refer to the complete recipe card at the end of this post.
First, we begin by combining warm water and yeast in a large bowl. The temperature of the water is critical: it should be warm to the touch, similar to a comfortable bath, but not so hot that it would scald your finger. Water that’s too hot will kill the yeast, rendering it inactive. After a few minutes, you should observe small bubbles forming on the surface, indicating the yeast is active and alive. If you don’t see any foaming, it’s best to discard and start over with fresh yeast and properly tempered water.
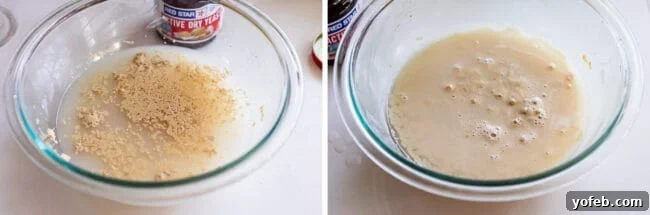
The image above illustrates the yeast just added to the warm water on the left, and then the same mixture approximately 5 minutes later on the right, displaying a healthy, foamy layer. This visual cue confirms your yeast is active and ready to work its magic!
The Flavor Enhancer: Homemade Pizza Dough with the Sponge Method
Have you ever heard of the “Sponge Method” in bread baking? It’s a fantastic technique that significantly enhances the flavor and texture of your final crust. Instead of mixing all ingredients at once, the sponge method involves combining a portion of the flour, water, yeast, and sugar and allowing this “sponge” to ferment for a period before incorporating the remaining ingredients. For this pizza dough recipe, you’ll mix the warm water, yeast, sugar, and just one cup of flour, then let it rest for 30 minutes up to 3 hours.
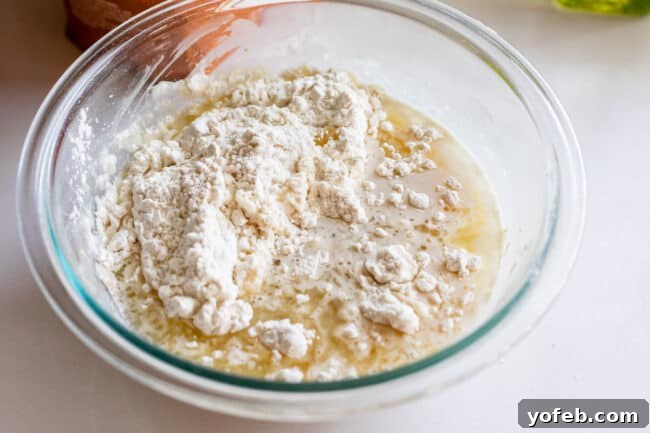
This approach differs from the “Straight Method,” which is more common and involves mixing all ingredients simultaneously before kneading. The primary advantage of the sponge method is its ability to build a richer, more complex flavor profile. By giving the yeast ample time to ferment with the initial flour and sugar, it produces more natural sugars and yeast cells, resulting in a deeper, more nuanced taste and a more interesting texture in your baked pizza.
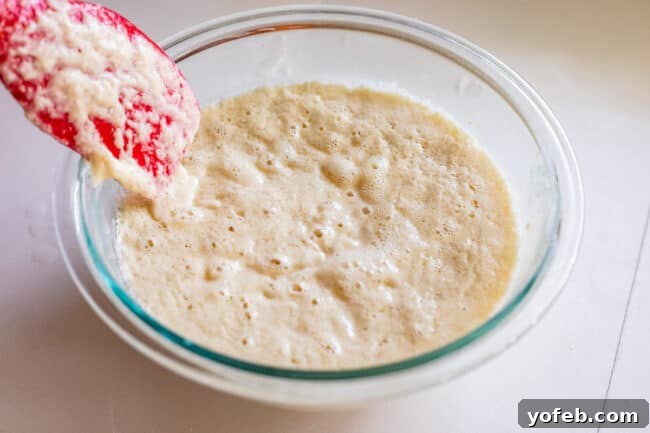
It’s important to keep your sponge at room temperature during this resting phase; refrigeration would slow down the fermentation process, which is exactly what we’re trying to encourage. While the sponge method is highly recommended for superior flavor, it is entirely optional. For those truly pressed for time, the recipe card includes instructions for the quicker “Straight Method” which still yields excellent results. Don’t feel obligated to use the sponge if your schedule doesn’t permit, but if you have the time, it’s a worthwhile step!
Kneading Your Way to the Perfect Pizza Dough Texture
Once your yeast is active (or your sponge has rested), it’s time to bring the dough together. If you’re skipping the optional sponge step, simply add the remaining ingredients – salt, olive oil, and the rest of the flour (one cup at a time) – to your foamy yeast mixture. Stir until mostly combined, then prepare for kneading.
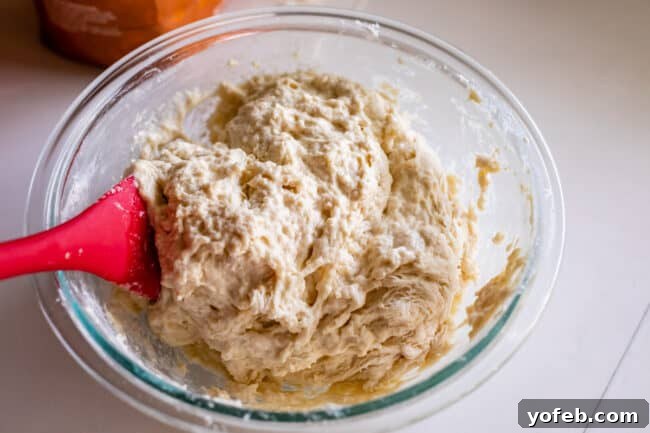
As you can see, the dough will initially be quite sticky and shaggy before all the flour is fully incorporated. At this stage, if using a stand mixer, switch to the dough hook attachment. If kneading by hand, generously flour your work surface to prevent sticking as you work. Knead the dough for approximately 5 minutes in a stand mixer, or about 7 minutes by hand. The continuous motion and folding action are crucial for developing the gluten structure. This process strengthens the dough, making it elastic and capable of trapping those wonderful gases from the yeast, which in turn contributes to a more flavorful and structured crust.
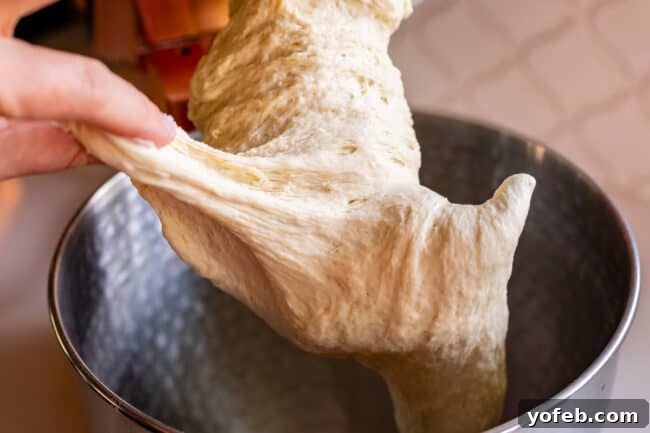
The goal is to achieve a dough that is smooth, elastic, and soft, with a slight stickiness to the touch. It should feel pliable, not tough. To test for proper gluten development, gently pull a piece of the dough: it should stretch without immediately tearing, demonstrating its elasticity. If your dough feels dry and breaks easily after a short pull, it indicates you’ve likely added too much flour. A perfectly kneaded dough is fundamental to a chewy and delicious pizza crust.
The Rise Time Dilemma: Flavor vs. Speed for Pizza Dough
One of the most common questions about pizza dough is how long to let it rise. The answer, delightfully, is “it depends!” You can let it rise for a mere 20 minutes, or you can stretch it out for an optional 12 days (I’m mostly kidding, but some artisanal recipes do involve very long fermentation!). The beauty of this recipe is its versatility. You can achieve a perfectly passable, delicious pizza crust even with a quick rise, but generally speaking, the longer you allow the dough to ferment (through the sponge method and extended rise times), the more profoundly flavorful and textured your crust will become.
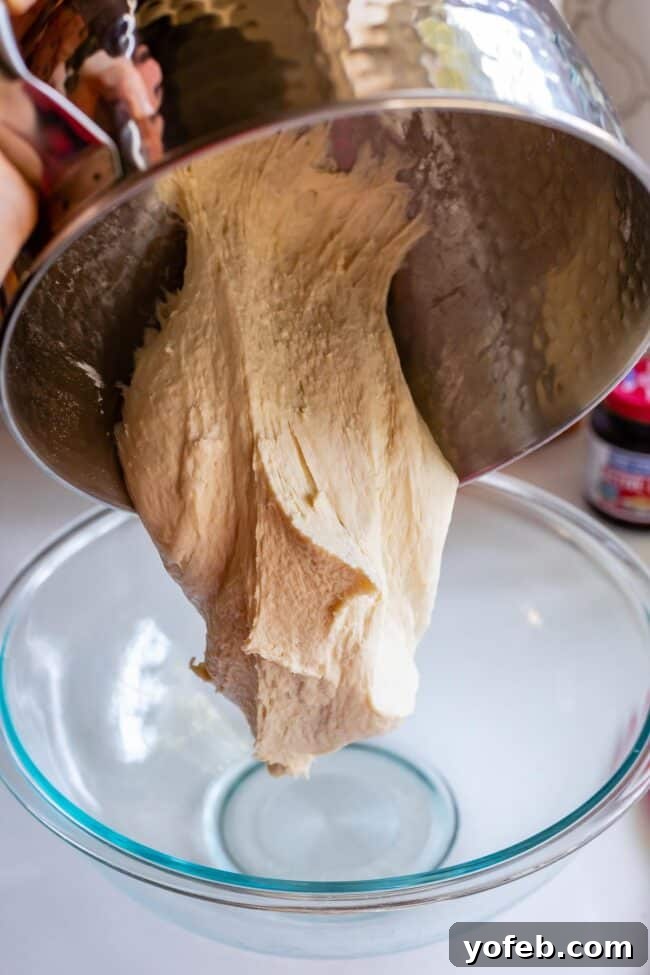
This recipe is designed to be adaptable to your schedule. You can go from zero to a piping hot, delicious pizza in just one hour by opting for the straight method and a single 20-minute rise. And I promise, it will still be incredibly tasty, even if it hasn’t reached its absolute peak flavor potential. For comparison, take a look at our 4-hour Cast Iron Pizza recipe – the extended fermentation truly makes it taste remarkably like Pizza Hut’s famous pan pizza!
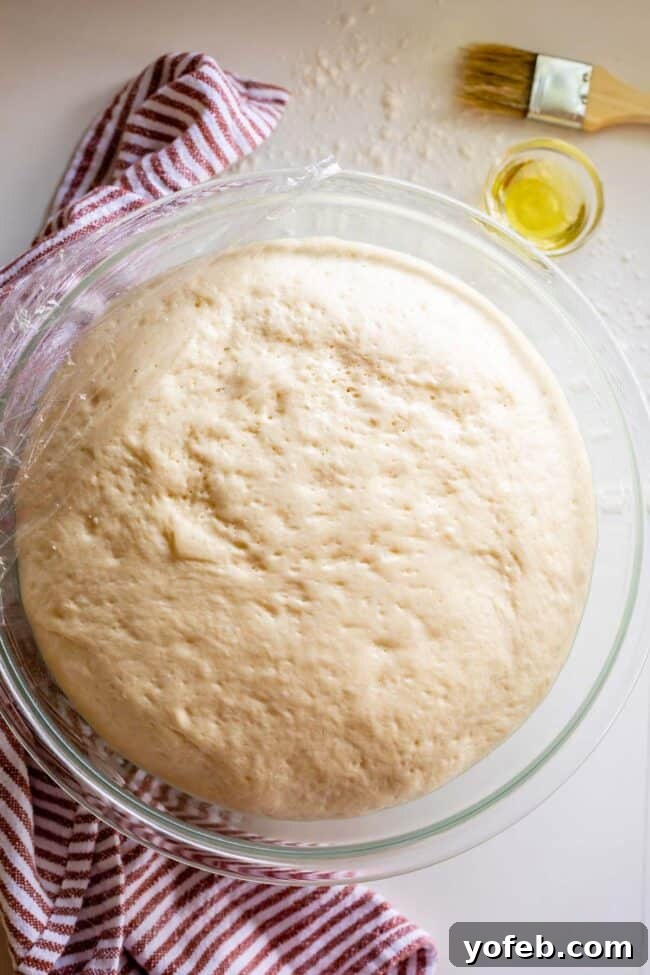
Conversely, if you have the luxury of time, you can embark on a longer fermentation journey. Utilize the sponge method for 3 hours, then allow the dough to rise for an additional 2 hours (or even longer, punching it down periodically). You can even let it rest overnight in the refrigerator for an extra depth of flavor. This same recipe is incredibly forgiving and adaptable to all these scenarios. Don’t let anyone tell you there’s only one “right” way to make pizza dough – find what works best for you and your taste preferences!
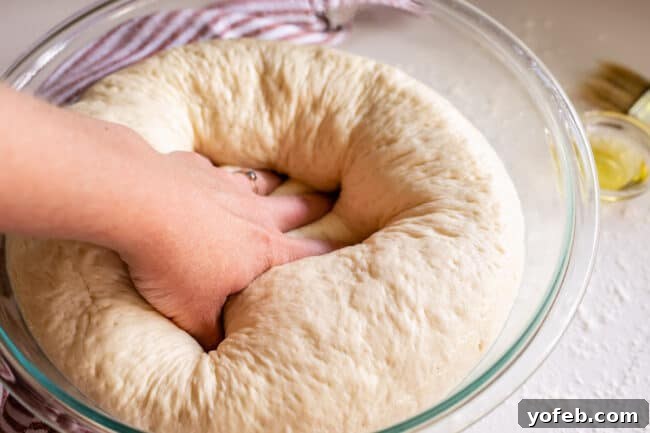
As a busy parent, I often find myself opting for the quicker 20-minute rise when hunger strikes quickly. However, when I’m more organized, I love starting the process in the morning, incorporating the sponge, and letting the dough slowly ferment throughout the day, punching it down every couple of hours. This extended process undoubtedly yields a more complex and satisfying flavor, proving that patience truly is a virtue in pizza making!
Shaping Your Pizza Dough for a Restaurant-Quality Crust
Once your pizza dough has completed its rise, it’s time for the exciting part: shaping it into your perfect pizza base. I personally prefer to shape the dough by hand, as it allows for greater control over the crust’s edge, creating that desirable puffy rim. However, if you’re more comfortable, a rolling pin can certainly be used. For detailed visual instructions on how to expertly stretch and shape your dough, be sure to visit our companion Homemade Pizza post.
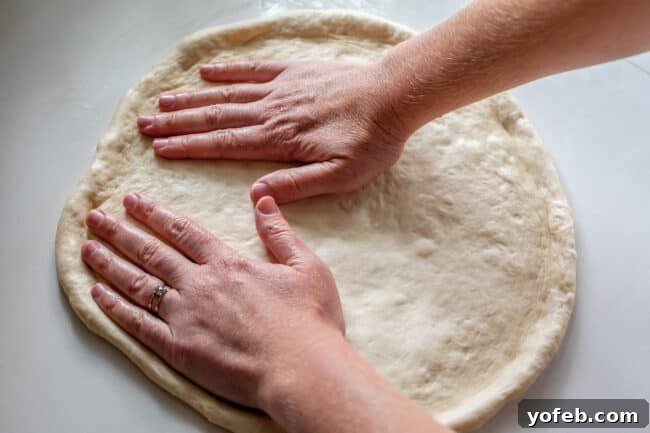
A crucial tip for shaping: use only a minimal amount of flour on your work surface. Excess flour can be absorbed into the dough, leading to a tougher crust. I often prefer to lightly oil my work surface instead, which helps prevent sticking without adding unnecessary flour. Either method works, but the key is moderation.
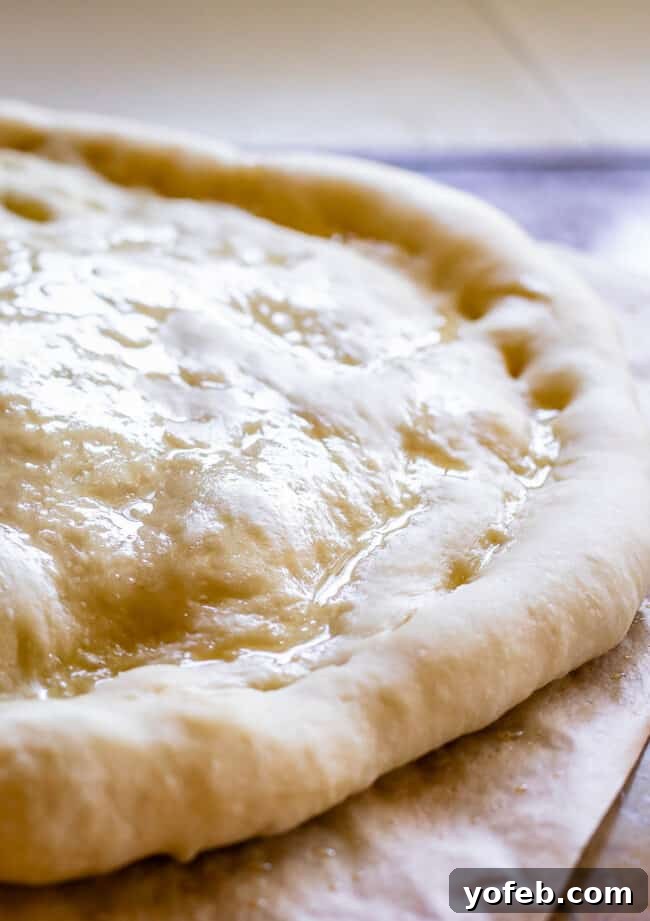
Another game-changing tip for the crispiest crust: partially bake (or par-bake) your dough before adding any toppings. This simple step makes an enormous difference, ensuring a perfectly cooked, beautifully crisp base that stands up to your favorite ingredients. For all the specifics on how to par-bake and achieve maximum crispiness, refer to our comprehensive Homemade Pizza Recipe.

Baking Your Homemade Pizza Crust for Crispy Perfection
Achieving a perfectly crispy and thoroughly cooked pizza crust in a home oven is entirely possible with a few strategic steps. High heat and careful timing are your allies. Follow these instructions for baking your homemade pizza dough to golden perfection.
The Crucial Step: Par-Baking Your Pizza Dough (Optional, but Recommended)
Once your oven is preheated to its highest temperature (ideally 475-550°F), we’re going to introduce a crucial step: a short par-bake. This step is technically optional, but I highly recommend it for guaranteed crispiness and to prevent a soggy, undercooked center. Nobody wants a doughy pizza!
- Carefully slide your shaped pizza dough, still on its parchment paper, onto your pizza peel or a flat baking sheet.
- Open the hot oven and gently transfer the pizza dough and parchment paper onto your preheated pizza stone or baking steel. (If you don’t have one, a hot pizza pan will also work). Exercise extreme caution during this step, as the oven interior will be very hot. Keep small children and pets away from the open oven.
- Quickly shut the oven door to retain heat and par-bake the dough for just 1 to 2 minutes. Keep a close eye on it; you’re looking for the dough to slightly puff up. Do not walk away!
- After the short par-bake, use the parchment paper to slide the partially baked crust back onto your pizza peel. Keep the oven door closed as much as possible to maintain the high temperature. Gently poke down any large air bubbles that may have formed on the crust, then add your desired sauce, cheese, and toppings.
Achieving Golden Perfection: Final Bake of Your Pizza
- Now, transfer your topped pizza directly onto the hot pizza stone (or pan), this time removing the parchment paper. Baking directly on the stone is essential for a truly crispy crust, as the porous surface absorbs moisture from the dough. Thanks to the par-bake, your crust will be sturdy enough to slide onto the stone without the paper.
- Bake for approximately 8 to 12 minutes. The exact timing will depend on your oven’s temperature consistency and the thickness of your pizza. Look for golden-brown edges on the crust and bubbly, lightly browned cheese. If you’re not using a pizza stone, use a spatula to lift the edge of the pizza and check the bottom crust; it should be golden and crisp across the entire base. A pale or white bottom indicates an undercooked, doughy pizza – leave it in for a few more minutes. If the toppings are browning too quickly but the crust isn’t done, you can loosely tent the top of the pizza with aluminum foil to slow down the browning of the cheese and toppings.
Enjoy your perfectly baked homemade pizza with a delightfully crispy and flavorful crust!

Expert Tips for the Most Flavorful Pizza Dough
Beyond the basic steps, a few expert tips can truly elevate your homemade pizza dough from good to outstanding. The overarching principle is to maximize fermentation and gluten development, as these are the primary drivers of flavor and texture in your crust.
- Embrace the Sponge Method: As discussed, initiating your dough with a sponge and allowing it to ferment for up to 3 hours dramatically increases yeast activity and flavor complexity. This extra time translates directly into a more robust and delicious crust.
- Knead Thoroughly: Don’t skimp on kneading! Proper kneading is essential for developing a strong gluten network. The more developed the gluten, the better the dough’s structure, elasticity, and ultimately, its flavor and chewiness. Aim for a smooth, elastic, and slightly tacky dough.
- Allow Ample Rise Time: While a quick 20-minute rise works, longer fermentation periods (1-8 hours, or even overnight in the fridge) allow the yeast to produce more complex flavors. Punching down the dough periodically during extended rises helps redistribute nutrients and gas, further enhancing flavor and texture.
- Add Herbs for Instant Flavor: If you’re genuinely short on time and can’t allow for a longer fermentation, you can infuse flavor directly into the dough. Knead in dried herbs such as oregano, basil, or thyme. A small amount of grated Parmesan cheese can also add a savory boost.
- Garlic Herb Oil Brush: For an extra layer of deliciousness, brush your pizza crust with a mixture of olive oil, garlic powder, oregano, and basil before and after par-baking. This creates a wonderfully aromatic and crispy edge that will have everyone reaching for another slice.
- High Heat is Key: Ensure your oven is preheated to its maximum temperature (ideally 500-550°F / 260-290°C) for at least 30 minutes. This creates a hot environment that quickly cooks the crust, promoting crispiness and a delicious char.
- Use a Pizza Stone or Steel: Investing in a pizza stone or steel is a game-changer for homemade pizza. These surfaces retain and transfer heat efficiently, giving your crust that desirable crispy bottom that’s hard to achieve on a regular baking sheet.
By incorporating these tips, you’ll consistently create pizza dough that’s not just a base, but a star component of your homemade pizzas.
Storing and Freezing Pizza Dough for Future Use
One of the many advantages of making your own pizza dough is the ability to prepare it in advance, saving you time on busy weeknights. Here’s how to properly store and freeze your homemade pizza dough to ensure fresh, delicious pizzas whenever the craving strikes.
Can You Freeze Homemade Pizza Dough? Yes, and Here’s How!
Absolutely! Freezing homemade pizza dough is a fantastic way to have a head start on pizza night. It works like a charm and retains its quality beautifully. Here’s the process:
- Divide the Dough: After kneading, separate the dough into 2 balls (or more, depending on your desired pizza size) for quicker thawing later.
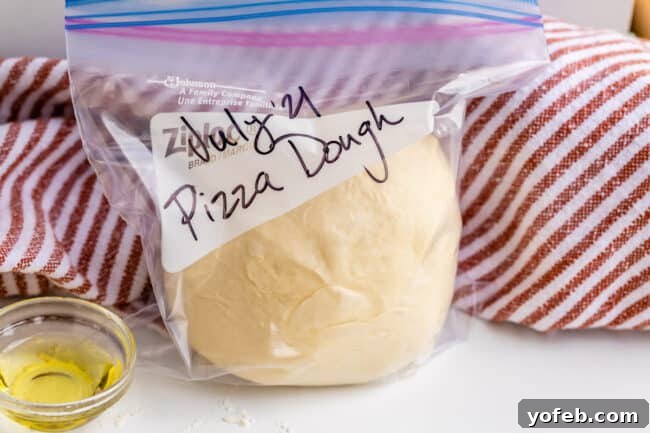
- Prepare for Freezing: Place each kneaded dough ball (there’s no need to let it rise first if you’re freezing it immediately) into a labeled, airtight freezer-safe bag, such as a sturdy ziplock bag. Squeeze out as much air as possible to prevent freezer burn.
- Freeze: Store the sealed bags in the freezer for up to 3 months.
How to Defrost Pizza Dough Properly
When you’re ready to make pizza, proper thawing is crucial to bringing your dough back to life:
- Thaw Slowly: Transfer the frozen dough from the freezer to the refrigerator the night before you plan to use it, or let it thaw on the kitchen counter for several hours.
- Rest and Rise: Once the dough is completely thawed, remove it from the bag and place it in a lightly greased bowl. Cover it and let it rest at room temperature for at least 1-2 hours (or longer, up to 4 hours) before rolling it out. This allows the yeast to reactivate and the dough to become pliable.
- Quick Thaw Hack: If you’re in a hurry, you can place the well-sealed bag of frozen dough into a bowl of warm water. This can significantly speed up the thawing process. Just ensure it’s fully thawed and then allow it ample time to rest and rise at room temperature before shaping.
Prepping Ahead: How to Par-Bake Dough for Quick Frozen Pizzas
For ultimate convenience, you can even prepare and par-bake your pizza dough in advance to create your own grab-and-go frozen pizzas. This method is a game-changer for super quick meals!
Here’s how to do it:
- Roll and Par-Bake: Follow the recipe instructions to roll out your dough into desired pizza shapes and then par-bake them in the oven until lightly puffed and set.
- Cool Completely: Allow the par-baked pizza crusts to cool down entirely on a wire rack. This is crucial to prevent condensation and ice crystals from forming during freezing.
- Initial Freeze: For best shape retention, place the cooled, par-baked crusts on a sheet pan and freeze them uncovered for about an hour or until firm.
- Wrap and Store: Once firm, wrap each par-baked crust tightly with plastic wrap, ensuring no air is trapped. Then, seal them in an airtight container or a large (e.g., 2-gallon) freezer bag.
- Freeze: Store in the freezer for up to 2 months.
- Bake from Frozen: To bake a pizza from a frozen par-baked crust, simply add your toppings directly to the frozen crust and bake as described in the main recipe. There’s no need to thaw! You may need to add a few extra minutes to the baking time compared to fresh dough. Easy peasy, delicious pizza awaits!

Homemade Pizza Dough: Frequently Asked Questions
Achieving a crispy pizza crust often depends on specific ingredients, especially since most home ovens can’t reach the extreme temperatures (like 900°F or 480°C) of traditional pizza ovens. To compensate for lower home oven temperatures (typically maxing out around 550°F or 290°C), we rely on two key ingredients:
- Oil: Olive oil in the dough acts as a heat conductor. When baked at high temperatures in a home oven, the oil helps the crust crisp up beautifully. (In incredibly hot ovens, oil would cause burning, but at 500°F, it’s perfect for crisping.)
- Sugar: A small amount of granulated sugar helps with the Maillard reaction, promoting browning and contributing to a crispy texture. Just as sugar helps chocolate chip cookies achieve that perfect golden-brown crispness, it does wonders for pizza dough too.
Additionally, for a super crispy crust, try rolling out your dough extra thin. This recipe yields two 12-inch pizzas, but you can divide the dough into three balls to create three thinner, crispier crusts.
Yes, absolutely! Buying pre-made pizza dough from the grocery store is a fantastic, time-saving option, especially on busy days. Many stores, like Trader Joe’s, offer excellent quality dough. Even if you don’t make the dough from scratch, you can still significantly improve its flavor and texture by following the rising, shaping, and par-baking steps described in this recipe. Think of it as giving your store-bought dough a gourmet upgrade!
However, I strongly encourage you to try making your own dough at least once. The difference in taste and quality is truly incomparable, and you’ll find it’s a deeply rewarding experience that’s worth the effort.
The debate between shortening and oil in pizza dough is similar to the classic “shortening vs. butter” discussion in cookies. While shortening can offer certain textural benefits, it’s often lacking in flavor. For pizza dough, I firmly believe that the rich, nuanced flavor that high-quality olive oil imparts is indispensable. It brings an authentic taste that shortening simply cannot replicate.
If your goal is to evoke the taste and spirit of traditional Italian pizza, olive oil is undoubtedly the superior choice. Its contribution to both flavor and the desirable crispy-chewy texture makes it the clear winner for homemade pizza dough.
There isn’t just one secret to making the best pizza; rather, it’s a combination of smart techniques and quality ingredients. Here are my top tips to achieve pizzeria-quality pizza at home:
- Homemade Dough: This is non-negotiable for true pizza greatness. It’s surprisingly easy, incredibly economical, and the flavor is unmatched by store-bought alternatives.
- Quality Sauce: Use a good pizza sauce. Whether homemade or a high-quality jarred option, the sauce forms the backbone of your pizza’s flavor.
- Thorough Oven Preheat: Preheat your oven to its highest temperature (500-550°F / 260-290°C) for at least 30 minutes, even after it signals it’s ready. This ensures the stone or pan is scorching hot, mimicking a commercial pizza oven.
- Par-Bake the Crust: Partially baking your crust before adding toppings prevents a soggy bottom and guarantees a crisp, cooked-through base.
- Utilize a Pizza Stone or Steel: A pizza stone or steel is essential. Your regular oven often struggles to create a crispy bottom crust; a hot stone or steel provides the intense, direct heat needed.
- Follow a Comprehensive Guide: For more in-depth tips on shaping the crust, choosing toppings, and troubleshooting, refer to my detailed Best Homemade Pizza post.
From a purely financial standpoint, store-bought prepared pizza dough typically costs around $2-3 (as of 2023). Purchasing the individual ingredients for homemade dough – flour, yeast, sugar, salt, olive oil – might seem slightly more expensive initially, especially if you don’t already have some staples at home. While you might need to buy a bag of bread flour and a packet of yeast, chances are you already have sugar and olive oil in your pantry.
However, the real value comes into play with volume and quality. You’re not just going to make one pizza with homemade dough; you’ll make many! The quality and flavor of homemade pizza dough are vastly superior to pre-made options – a difference you’ll immediately appreciate once you try it. You’ll likely break even on costs by your third homemade pizza, and the continuous financial savings on ingredients, combined with the unparalleled taste, make it a truly sound and rewarding decision. I promise, you won’t regret it!
Your Complete Pizza Journey: Dough, Sauce, and Assembly
I hope this comprehensive guide has demystified the art of homemade pizza dough and answered all your burning questions! Mastering the dough is truly the first and most critical step towards making exceptional pizza at home. However, the journey doesn’t end here!
To complete your homemade pizza experience, be sure to explore the two companion posts that build directly upon this recipe:
- Our Easy Pizza Sauce recipe, where we walk you through creating a flavorful sauce that perfectly complements your homemade crust.
- Our definitive Homemade Pizza guide, which picks up right where this post leaves off. This guide covers everything you need to know about rolling out the dough, choosing between pizza stones versus regular pans, selecting and arranging toppings, and all the crucial baking instructions to ensure your pizza emerges from the oven perfectly crisp and delicious.
Pizza is serious business, and we’ve packed these posts with all the information, tips, and tricks you need to ensure every homemade pizza is a resounding success!
Explore More Pizza Recipes You’ll Love
- Cast Iron Pan Pizza << This tastes exactly like a Pizza Hut Pan Pizza. No lie!
- Blackberry Ricotta Pizza with Basil << It might sound unconventional, but I’m telling you, this pizza is legitimately delicious.
- Easy No Cook Pizza Sauce << A super fast and easy pizza sauce recipe that requires no cooking or blending! Just dump and stir.
- Easy Pizza Casserole << All the flavors you love…in a convenient casserole!
- Hot Dog Pizza with Caramelized Onions << This recipe might sound a little out there, but I’M TELLING YOU it’s incredibly good!
- Thai Pizza with Zucchini and Pickled Onions << Just like the one from California Pizza Kitchen!
- Classic Stromboli Recipe << All the goodness of pizza, perfectly rolled up and baked.
- Hawaiian BBQ Chicken Pizza from Pitchfork Foodie
- Cheesy Pepperoni Pizza Sticks from I Wash You Dry
- Pizza Quesadilla Recipe from The Girl Who Ate Everything
Facebook | Pinterest | Instagram
Homemade Pizza Dough
A super easy recipe for Homemade Pizza Dough, with all the tips and tricks you need to get a seriously flavorful crust on your pizza! This recipe is quick to make, with just a 20 minute rise (or an optional longer rise). I’ll show you how to make it step by step!
Ingredients
- 1 & 1/2 cups warm water, between 105-110 degrees F (40-43°C)
- 2 & 1/4 teaspoons active dry yeast, this is one 1/4 ounce (7g) packet
- 1 tablespoon granulated sugar
- 2 teaspoons kosher salt
- 3 tablespoons olive oil
- 3 & 3/4 cups Bread flour, OR All-Purpose Flour, OR half Bread Flour and half “00” flour*, spooned and leveled, plus more for dusting/kneading, see notes
Instructions
-
Add 1 and 1/2 cups warm water to a large bowl or stand mixer. The temperature should feel like nice bath water: not so hot that you can’t comfortably hold your finger in it. I like to check with my wrist, as it’s often more sensitive to temperature than fingertips.
-
Add 2 and 1/4 teaspoons active dry yeast and 1 tablespoon sugar to the water. Gently stir and wait about 3-5 minutes until you see bubbles forming on the surface. It should look slightly foamy, indicating the yeast is active. If no change occurs, your yeast may be inactive; discard and start over with fresh yeast.
-
OPTIONAL SPONGE STEP: You can skip this if you’re in a hurry. However, allowing your yeast to ferment a little while in a sponge greatly enhances the flavor. To do this: Add 1 cup of flour to your bowl of water, yeast, and sugar, and stir lightly until combined (lumps are fine). Let this mixture rest, uncovered, on the countertop for 30 minutes, or up to 3 hours. It will become foamy and sponge-like, developing rich, fermenty flavors.
After the sponge has rested, continue by adding the remaining ingredients: 2 teaspoons kosher salt, 3 tablespoons olive oil, and the remaining 2 and 3/4 cups of flour, adding it one cup at a time. Because the flour in the sponge had a longer time to absorb water, you may need an extra few tablespoons of flour during kneading. Remember, avoid over-flouring; stiff dough leads to tough pizza crust. Aim for a nice, soft, and slightly sticky dough. Proceed to Step 5.
-
STRAIGHT METHOD (for skipping the Sponge step): Follow these instructions if you are omitting the Sponge step. Once you’ve confirmed your yeast is active (bubbly) in the warm water and sugar mixture, add 2 teaspoons kosher salt, 3 tablespoons olive oil, and 3 and 3/4 cups of flour, incorporating it one cup at a time and stirring after each addition.
-
Once all your flour is incorporated into your dough**, it’s time to knead. Knead for about 5 minutes using the dough hook on a stand mixer, or for about 7 minutes by hand on a lightly floured countertop. Ensure the dough is constantly moving and folding back on itself to develop gluten. The finished dough should be smooth, elastic, slightly sticky, and soft – not tough. If, after a couple of minutes of kneading, the dough hasn’t come together into a cohesive ball (still sticking excessively to the sides of the bowl), gradually add a bit more flour, a tablespoon at a time, until the desired consistency is achieved. See notes for more details.
-
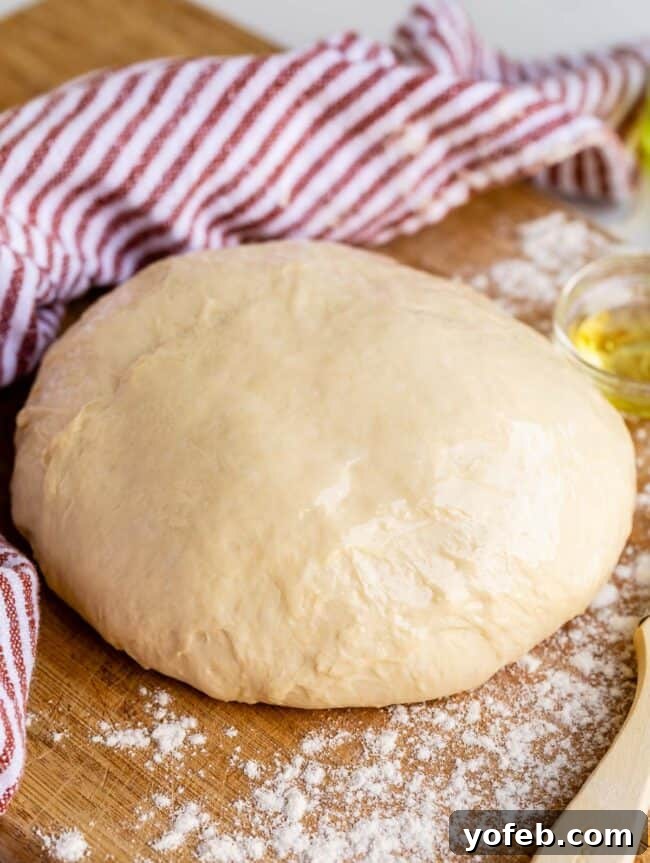
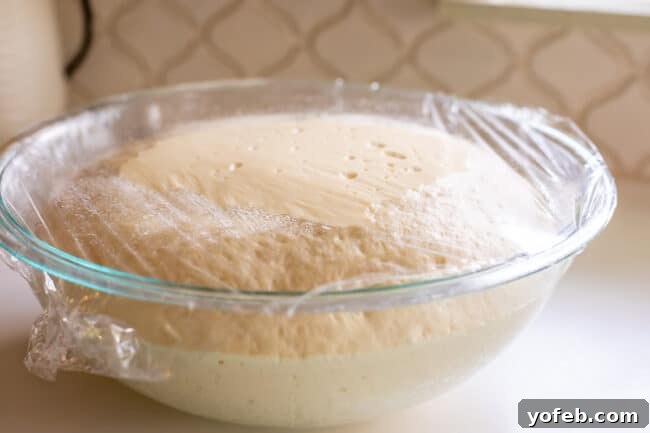
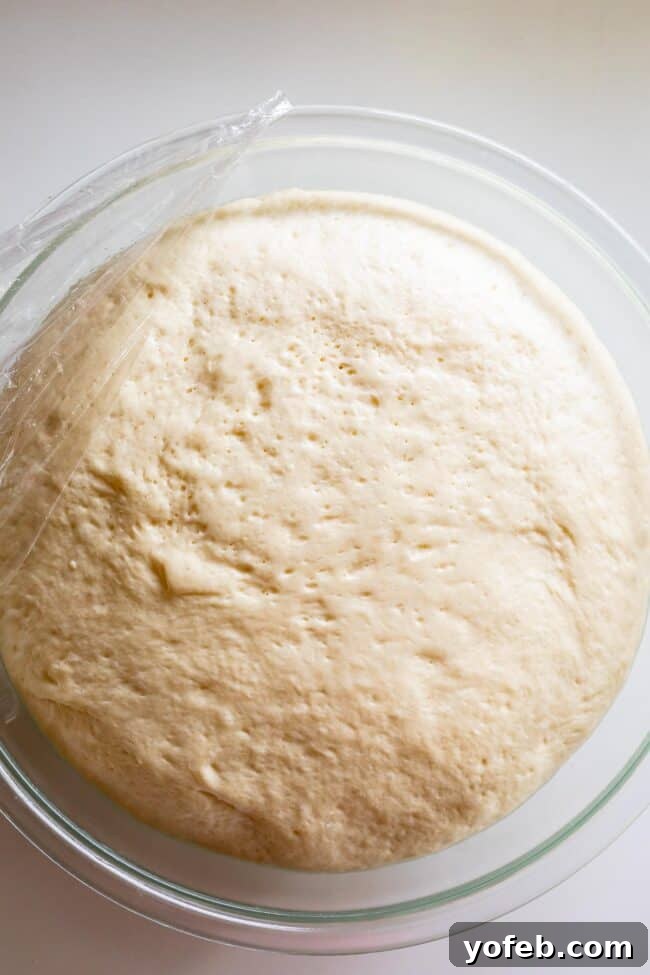
Shape your kneaded dough into a ball and place it in a large, lightly greased bowl, turning it over once to ensure the top is also greased. You can often use the same bowl you kneaded in; just lift the dough, spray the bowl with nonstick spray, and return the dough. Greasing the top prevents it from drying out during rising.
-
Cover the bowl with a clean tea towel or plastic wrap and let the dough rise in a warm place. A good trick is to turn your oven on to 350°F (175°C) for about 45 seconds, then turn it off. This creates a gently warm environment. Ensure the oven racks are not too hot to touch before placing your covered dough inside. (Crucially, remember to remove the dough before preheating your oven for actual pizza baking!)
-
Rising time: This is flexible. A minimum rise of 20-30 minutes works if you are in a rush (a method I frequently use). For enhanced flavor and texture, you can let it rise for 1 to 2 hours, or even 4 to 8 hours, periodically punching it down every couple of hours. The longer the rise, the more flavorful and textured your crust will become. Refer to the overnight instructions below for extended fermentation.
-
Once your dough has risen to your liking, gently punch it down to release the air. Divide the dough into two equal balls for two 12-inch pizzas. (If you prefer a super thin crust, you can divide it into three balls.) Place each dough ball on a lightly greased or floured surface and let it rest, covered with a tea towel or plastic wrap, for another 5-20 minutes. This resting period helps the gluten relax, making the dough easier to roll out.
-
Gently deflate each ball with your hands. Your pizza dough is now ready to be shaped and baked! For detailed instructions on rolling out the dough and baking your pizza, including tips on pizza stones and toppings, please refer to my companion Easy Pizza Sauce Recipe and Homemade Pizza Recipe posts. These guides pick up precisely where this one leaves off, offering comprehensive advice for a perfect pizza.
-
Overnight instructions: For a deeper flavor, place the kneaded dough (no need for an initial rise) in a large, covered bowl or a well-sealed gallon ziplock bag. Refrigerate overnight (8-12 hours). The next day, punch down the dough and let it rest at room temperature for at least 1-2 hours before rolling out.
-
Freezer instructions: To freeze, separate the kneaded dough into 2 balls for quicker thawing. Place each dough ball (without an initial rise) into separate, labeled freezer-safe ziplock bags and freeze for up to 3 months. To use, let the dough thaw on the counter or in the refrigerator until completely soft. Once thawed, allow it to rest at room temperature for at least 1-2 hours to activate the yeast and become pliable before rolling out. (A quick hack: place the well-sealed bag of frozen dough in a bowl of warm water to speed thawing. Just ensure it’s fully thawed and then allow it plenty of time to rest/rise at room temperature.)
Notes
*A note about the type of flour you use in your pizza dough: Flour is the most critical ingredient for achieving your desired crust flavor and texture. While all-purpose flour will work perfectly fine in this recipe (use the exact amount of 3 and 3/4 cups), I highly recommend bread flour for a superior, chewier crust that holds its shape and develops more complex flavors.
00 Flour: For an even more authentic, artisanal pizza crust (the kind you find at specialty pizzerias), consider using a blend of half Bread flour and half Double Zero (00) flour in this recipe. I typically use about 2 cups of bread flour and 1 and 3/4 cups of 00 flour. You can purchase 00 flour online here. You can use either type of flour (or the blend) when preparing your sponge, if you choose that method.
**A note about how much flour to add: This recipe specifies 3 and 3/4 cups of flour as a starting point. However, the precise amount can vary based on several factors, including the type of flour you’re using, the region it comes from, and local humidity levels. If you opted for the Sponge method, you’ll likely need an extra couple of tablespoons of flour. Even without the sponge, you might find a bit more flour is necessary. Begin by adding just a tablespoon or two at a time during kneading. Your finished dough (after kneading for 5-7 minutes) should be smooth, elastic, slightly sticky, and soft. It should not feel tough or dry. When you pull a piece and stretch it, it should resist tearing and retain some elasticity. If it feels dry and breaks easily, you’ve added too much flour.