
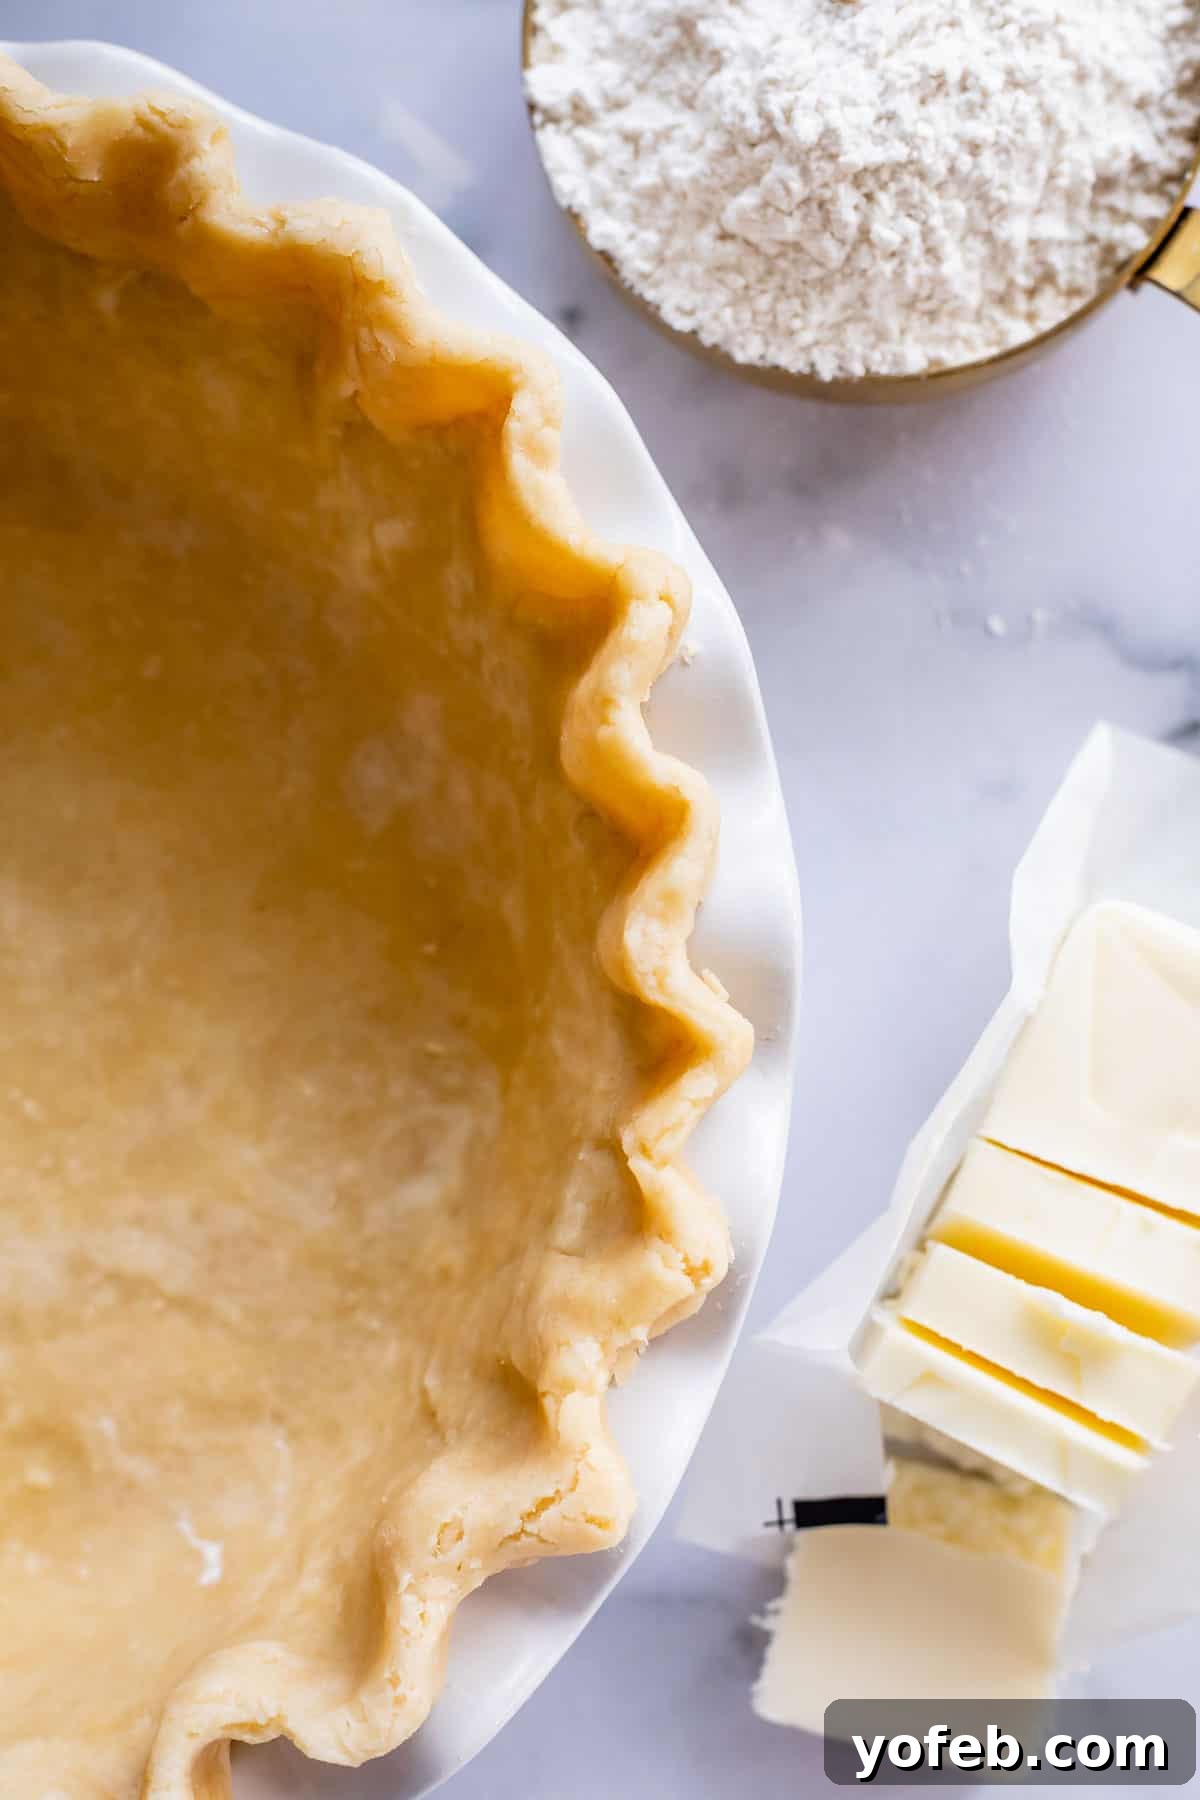
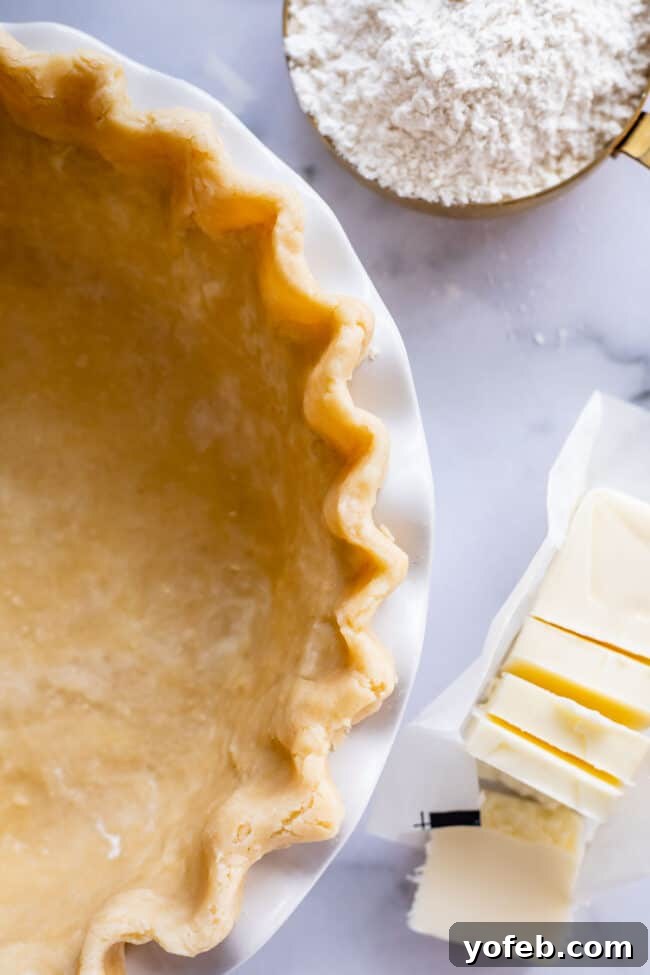
Welcome to the ultimate guide for crafting the most incredible homemade flaky pie crust you’ve ever tasted! Forget those store-bought versions; this recipe will revolutionize your baking. Prepare yourself for a crust so buttery, tender, and perfectly flaky it simply melts in your mouth with every bite. I know many bakers find pie crust intimidating, but I promise it’s not as difficult as it seems. With detailed, step-by-step instructions and essential tips (like keeping all ingredients wonderfully cold!), you’ll achieve perfect results every time. This never-fail recipe, originally shared on October 7, 2020, has been perfected over years and is now ready to become your go-to for all your pie-making adventures.
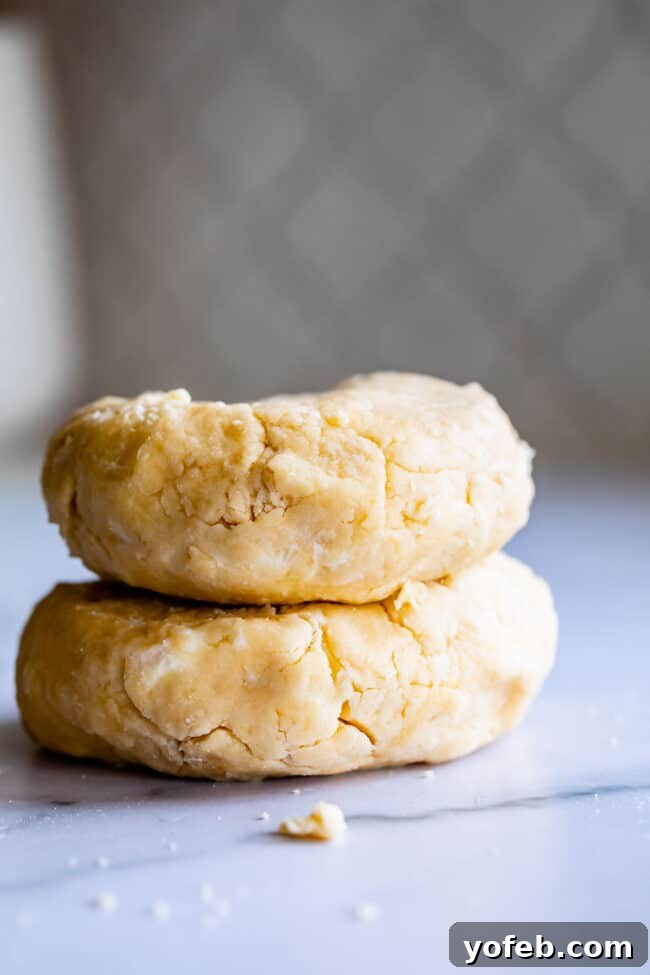
Table of Contents
- The Ultimate Secret to Flaky Pie Crust
- Essential Ingredients for a Flaky Pie Crust
- Step-by-Step: How to Make Pie Crust from Scratch
- Cutting Fats into the Flour Mixture for Optimal Flakiness
- The Magic of Egg in Pie Crust Liquid
- Gently Kneading Your Flaky Pie Crust Dough
- The Golden Rule: Keep Everything Chilled, Including Your Baker Self!
- Mastering the Art of Rolling Out Homemade Pie Crust
- Expert Tips for Transferring Pie Dough to the Pan
- How to Flute a Flaky Pie Crust Like a Pro
- Preparing Your Homemade Pie Crust for Baking
- Baking Your Pie to Golden Perfection
- Homemade Flaky Pie Crust FAQ
- Recommended Tools for Perfect Flaky Pie Crust
- Delicious Double Crust Pies to Inspire You!
- Single Crust Pies that Require No Pre-baking:
- Single Crust Pies that Require Blind Baking:
- Savory Pies Made with a Buttery Flaky Crust!
- Homemade Flaky Pie Crust Recipe
Just the other day, my brother, ever the eager helper with dishes, was quite dismayed to find two pie plates in the sink. “How could you possibly make two pies and I didn’t get a single slice?!” he exclaimed. I quickly clarified that those plates had merely been assisting in the dredging process for my Ultra Crispy Chicken Parmesan. His indignation quickly subsided. However, I completely understood his initial reaction. There’s a special kind of disappointment that only missing out on pie can evoke – a true “missing-out-on-pie-rage.”
Those two innocent pie plates were nothing compared to the veritable mountain of dishes I’ve accumulated this past week. I’ve officially declared it “Pie Week.” Every single pie plate I own has been pressed into service, meticulously making and testing batch after batch of glorious pies. I’ve baked pies only to immediately transfer them to other containers, simply because I desperately needed that particular pie plate for the next creation. Yes, it’s been a week filled with an abundance of pie!
But the dedication has paid off. After nine incredible years of blogging (can you believe it, nine years, y’all! A special anniversary post is on its way, featuring my traditional Food Charlatan birthday cake – this year, it’s a truly legitimate spice cake!). Over these years, I’ve finally meticulously documented every single step, complete with countless photos, for my cherished pie crust recipe. While I’ve included basic instructions for this crust in nearly every pie recipe on my site, it’s high time we dive deep. This post is dedicated to unraveling all the intricate details, the insider tips, and the essential techniques to achieve truly perfect pie crust. It undeniably deserves its own dedicated spotlight. So, let’s get baking!
The Ultimate Secret to Flaky Pie Crust
Achieving that coveted flaky texture in a pie crust often comes down to the type of fat you use. The secret lies in a strategic blend of shortening and butter. Shortening, particularly lard, boasts a lower melting point than butter. This means that as your pie bakes, the shortening melts and releases steam at a faster rate, creating more air pockets within the dough. These tiny pockets are what expand and separate the layers, resulting in an exceptionally flaky crust – precisely the texture we’re aiming for!
So, if shortening is the key to flakiness, why even bother with butter? The answer is simple: flavor. Nothing imparts that rich, irresistible, creamy taste quite like butter. It brings a depth of flavor that shortening alone cannot match. Therefore, the optimal solution is to embrace both! My preferred ratio is 8 tablespoons of shortening paired with 12 tablespoons of cold, high-quality butter. This combination delivers the best of both worlds: superior flakiness and unparalleled flavor.
Why I Don’t Make My Flaky Pie Crust with Only Butter
The short, somewhat cheeky answer is: because I appreciate sanity in my baking endeavors! All joking aside, there’s been a trend in the food world to exclusively use butter in baked goods, often demonizing shortening. While I advocate for moderation in all things (and let’s be real, I’m never giving up my Oreos, which rely on shortening!), there’s a practical reason for my preference.
Butter melts at a relatively low temperature. Imagine holding a pat of butter in your hand – it would completely melt in just a couple of minutes. The same rapid melting can occur with butter in your pie crust as you handle and roll it out. Melty butter leads to a greasy, tough crust rather than a flaky one, and inevitably, an exasperated baker. Shortening, with its higher melting point, provides more stability and workability, especially during the rolling process, helping to maintain those crucial pockets of fat that translate into flakiness.
Essential Ingredients for a Flaky Pie Crust
Creating a truly magnificent pie crust starts with a handful of basic, readily available ingredients. Don’t let the simplicity fool you; each component plays a vital role in achieving that perfect texture and flavor. Here’s a quick overview of what you’ll need:
- **All-Purpose Flour:** The foundation of our crust. Its moderate protein content is key to a tender, not tough, result.
- **Granulated Sugar:** Just a touch to balance the flavors. The amount varies slightly depending on whether your pie is sweet or savory.
- **Kosher Salt:** Essential for enhancing all the other flavors in the crust.
- **Butter-Flavored Shortening:** Contributes significantly to the flakiness and ease of handling.
- **Cold Butter:** Provides unparalleled rich flavor and also plays a role in flakiness. Keep it very cold!
- **Egg:** A secret ingredient that adds richness, tenderizes the crust, and acts as a binder.
- **Ice Water:** Crucial for bringing the dough together without melting the fats, ensuring those flaky layers.
Step-by-Step: How to Make Pie Crust from Scratch
Our journey to the perfect pie crust begins by combining the dry ingredients. In a large mixing bowl, gently whisk together your flour, sugar, and salt. For sweet pies, I typically use 2 tablespoons of granulated sugar. However, if you’re venturing into savory territory, like my hearty Classic Double Crust Chicken Pot Pie, reduce the sugar to just 1 tablespoon to ensure the crust complements the savory filling beautifully.
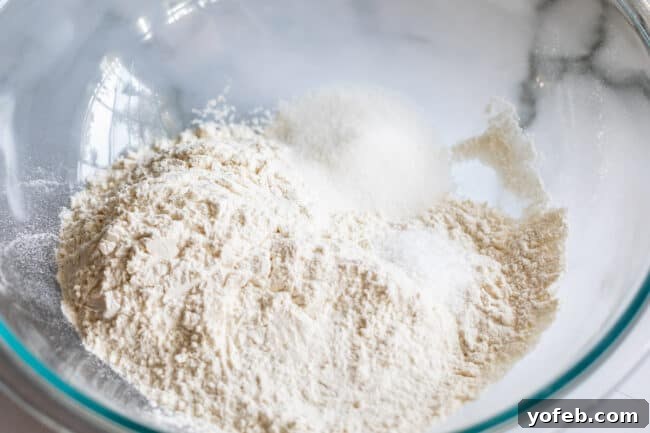
Once your dry ingredients are well combined, it’s time for the stars of our show: the fats. Carefully add your pre-measured shortening and cold butter to the flour mixture. Before we delve into the technique, let’s take a moment to truly appreciate these glorious lipids and understand their individual contributions to our magnificent pie crust.
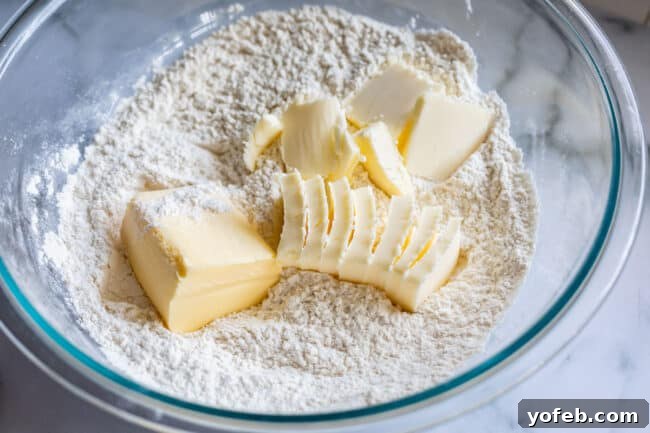
In the world of fats, there are some key differences to understand. American butter typically contains about 80% fat, with the remaining percentage being water. Lard and shortening, on the other hand, are 100% fat. Lard, derived from animal fat, is renowned for its ability to create an incredibly flaky and flavorful crust (though I personally haven’t experimented with it yet). Shortening, like Crisco, is a solid vegetable oil, and it contributes significantly to the crust’s structure and flakiness.
Cutting Fats into the Flour Mixture for Optimal Flakiness
Now that we understand the unique properties of our chosen fats, it’s time for the crucial step of incorporating them into the flour mixture. This process is called “cutting in” – and it’s vital to remember that we are *cutting*, not creaming or mixing vigorously. The goal is to create varying sizes of fat pieces within the flour, not a homogenous blend. Use a sturdy pastry cutter to work the cold butter and shortening into the dry ingredients. Apply firm pressure, and regularly scrape the accumulated flour and fat from the pastry cutter with a butter knife to ensure even distribution.
Continue this cutting motion until your mixture resembles a coarse meal with visible pieces of fat. You’re looking for fragments ranging from the size of small peas to slightly larger bits. These little pockets of cold fat are the true magic behind a tender, flaky pie crust. During baking, these fat pockets will melt and release steam, creating distinct layers that separate and puff up, giving your crust that desirable airy, delicate texture. If you overmix at this stage, the fat will fully combine with the flour, resulting in a tough, dense crust instead of a flaky one. Patience and precision here will be richly rewarded.
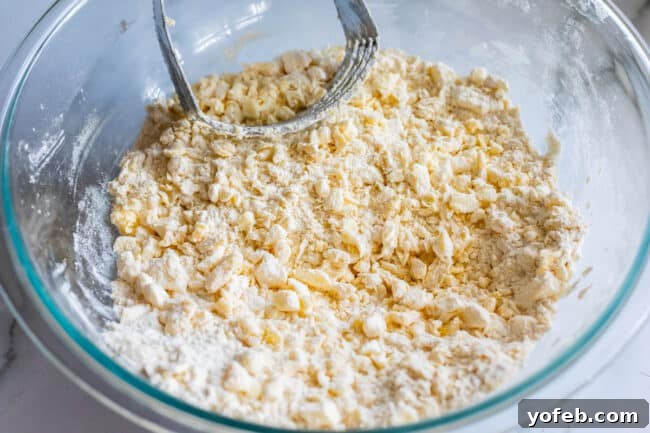
As you can see in the photo, the mixture should not be uniform. You want those distinct pieces of fat, roughly the size of a pea, or even slightly larger. These pockets are what will create the beautiful, tender, and flaky layers in your baked pie crust.
The Magic of Egg in Pie Crust Liquid
With our fats perfectly cut into the flour, it’s time to bring everything together with a touch of liquid. Many recipes opt solely for ice water (and indeed, cold water is non-negotiable to keep those precious butter pieces from melting). Some even suggest vodka for extra tenderness. However, my preferred method introduces a secret ingredient for unparalleled richness and tenderness: a mixture of egg and ice water.
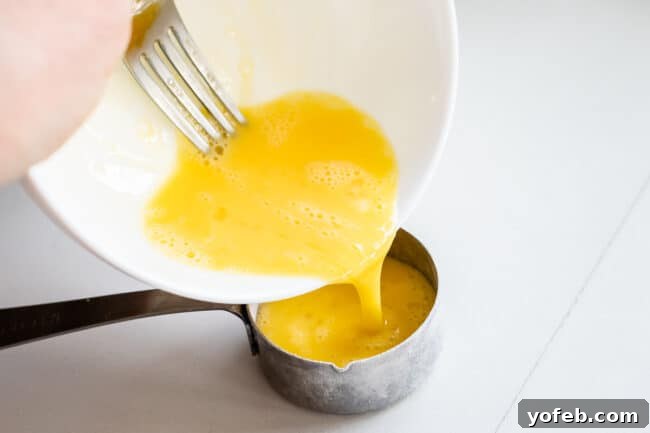
Why include egg? Beyond their incredible flavor, eggs contribute a luxurious richness that simply cannot be achieved with water alone, resulting in a remarkably tender crust. Furthermore, eggs are natural binders. Just as they hold together a meatloaf, eggs help to bind the pie dough, providing structure without making it tough. This added binding power makes the dough a little more forgiving to work with, especially when rolling it out.
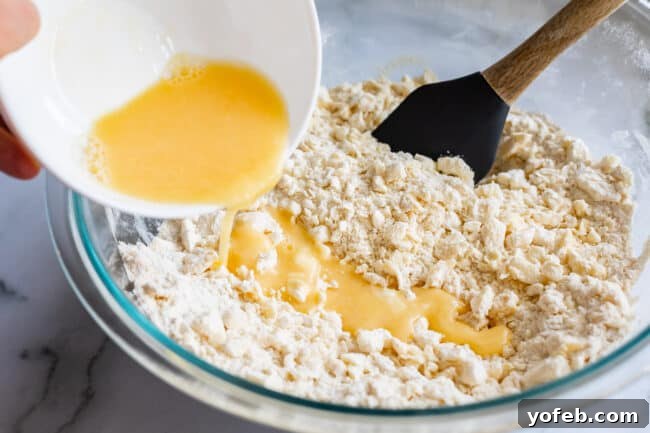
You don’t need a lot of egg. A large egg typically yields about 4 tablespoons of liquid. For this recipe, I only use 2 tablespoons of beaten egg in the crust itself. The remaining half of the beaten egg can be saved for a wonderful egg wash, brushed over the top of your pie just before baking to give it that beautiful golden sheen.
Gently Kneading Your Flaky Pie Crust Dough
Now that the liquid has been added, it’s time to bring the dough together. Start by using a rubber spatula to gently mix the flour and wet ingredients. This initial mixing helps to hydrate the flour without overworking the dough. You’ll quickly reach a point where the spatula alone isn’t enough, and you’ll need to get your hands in there.
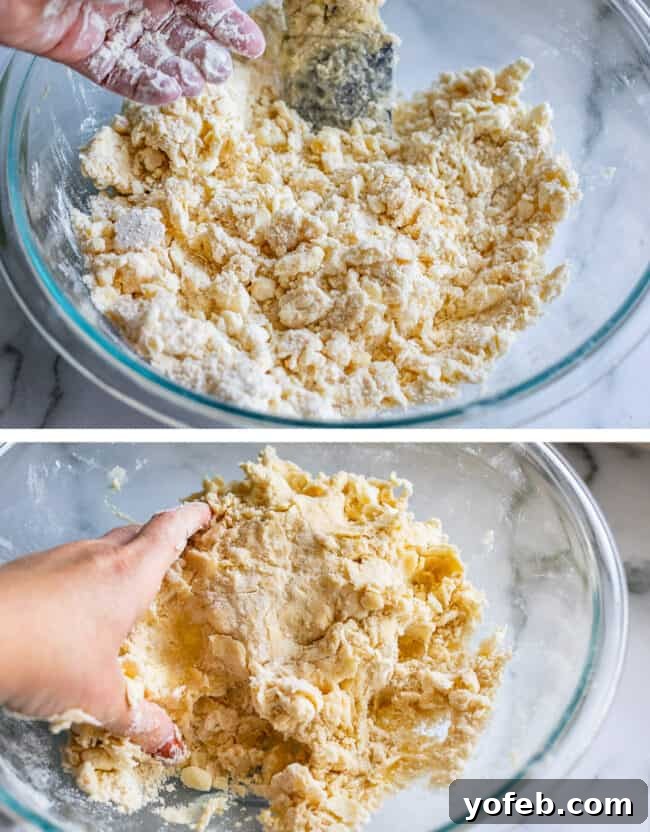
I find it easiest to perform this step directly in the bowl. Lightly coat your hands with flour to prevent sticking, and then begin pressing and gathering the dough. The key here is gentle kneading. You’re not developing gluten like in bread dough; you’re simply coaxing the dry bits of flour and butter into a cohesive mass. Continue to work the dough, incorporating any loose pieces from the bottom of the bowl, until it just comes together into a shaggy ball. This usually takes about 8-10 gentle presses or folds.
If, after several gentle kneads, the dough still feels too dry and crumbly to form a ball, you can add a little more ice water, but be very cautious. Add it one to two teaspoons at a time, mixing gently after each addition, until the dough reaches the right consistency. I rarely need to add extra water, but humidity and flour absorption can vary. The critical point is to avoid adding too much water, which will result in a sticky, unmanageable dough and a tough crust. The moment the dough comes together and can be shaped, stop kneading. Overworking the dough is the enemy of flakiness and tenderness.
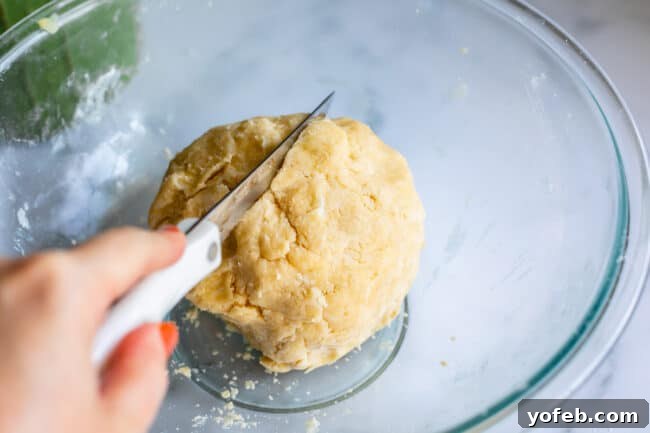
Once your dough has formed a cohesive ball, use a knife to divide it in half. Then, with lightly floured hands, gently shape each half into a flat disc. These two discs are what you’ll need to make one glorious double-crust pie. If your recipe only calls for a single crust, simply wrap one of the discs tightly in plastic wrap and place it in a freezer-safe ziplock bag. It will happily keep in the freezer for up to three months, ready for your next spontaneous pie craving. Remember to thaw it in the refrigerator or on the counter (still in its sealed bag to retain moisture) before rolling. For more in-depth guidance on preparing a single crust, including pre-baking and fluting, be sure to check out my comprehensive post on How to Blind Bake a Pie Crust.
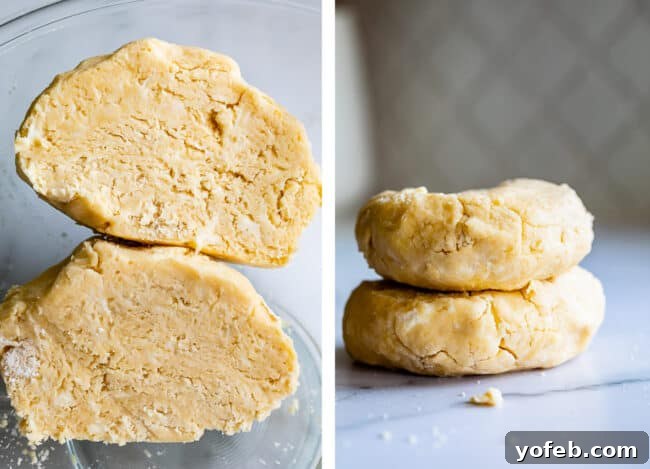
The Golden Rule: Keep Everything Chilled, Especially Yourself!
After all that meticulous work, it’s time for the dough to relax and firm up. This crucial chilling period, typically about 30 minutes, is absolutely non-negotiable for success. As the legendary Kate from Art of the Pie wisely advises, “Keep Everything Chilled, Especially Yourself!” This sentiment perfectly captures the essence of pie making. It’s a craft, a learning process, and you’ll undoubtedly enjoy it more if you maintain a calm, ‘chilled out’ demeanor.
The importance of chilling your dough cannot be overstated. Cold dough is significantly easier to roll out and shape. The cold keeps the butter and shortening solid, preventing them from melting and making the dough greasy or sticky. This solid fat is what creates those distinct pockets that lead to a wonderfully flaky crust. If you find your dough becoming difficult to handle, tearing, or if your decorative elements like lattice strips begin to fall apart, don’t hesitate. Clear some space in your refrigerator or even the freezer and pop the entire thing in for a quick chill. Even a 10-15 minute chill can make a world of difference, firming up the fats and making your dough much more manageable. Embrace the chill – both for your dough and your peace of mind!
Mastering the Art of Rolling Out Homemade Pie Crust
Rolling out pie crust can feel like a daunting task, but with the right technique and a bit of patience, you’ll soon be doing it like a seasoned pro. First, prepare your work surface by dusting it generously with all-purpose flour. You can roll directly on a clean countertop, but I highly recommend using a pastry cloth for a non-stick experience, or even a large sheet of parchment paper, which makes transferring the dough incredibly easy.
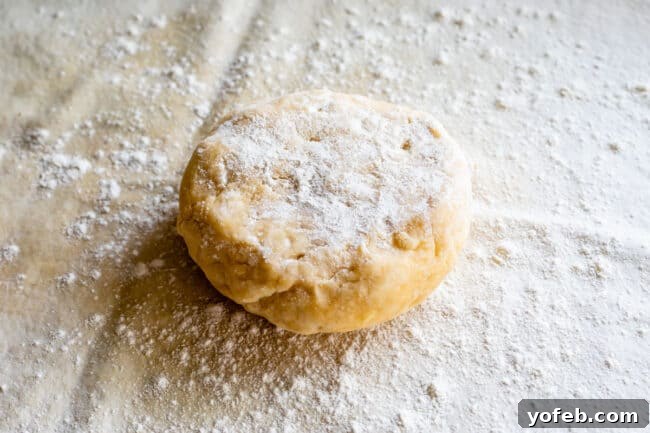
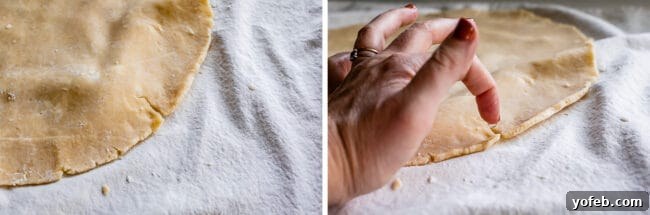
Allow your chilled dough disc to sit at room temperature for just two to three minutes. This slight warming takes the extreme chill off, making it more pliable without allowing the butter to melt. Begin rolling from the center of the disc outwards, applying even pressure. If you notice any small cracks forming along the edges, gently pinch them back together with your fingers. A tiny drop of ice water can help seal more stubborn cracks, followed by a light dusting of flour.
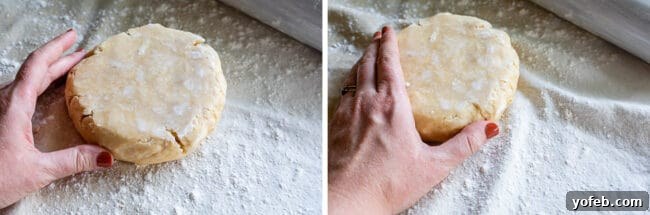
To ensure your dough rolls out into a beautiful, even circle rather than a lopsided shape, rotate your rolling pin a quarter turn after every few rolls. This consistent rotation helps maintain a symmetrical round. Be diligent about dusting your pie dough and the work surface with flour whenever you feel any stickiness developing. Before the circle becomes too large and unwieldy, gently flip the dough over and re-dust your work surface. Repeating this a couple of times throughout the rolling process is crucial – there’s nothing more disheartening than a perfectly rolled circle that’s firmly stuck to your counter!
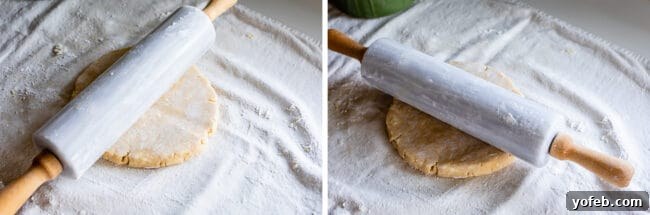
Another common issue that can lead to tears is a sticky rolling pin. Make it a habit to use your fingers to rub off any excess butter and flour that accumulates on your rolling pin. A clean rolling pin ensures smooth, effortless rolling and prevents the dough from clinging and tearing. Remember this general rule: if the dough is too sticky, add a little flour. If it’s cracking and dry or refusing to come together, introduce a tiny bit of ice water. As you can see in the photo above, I’m gently patching a crack with a drop of ice water. Always follow up with a light dusting of flour on the repaired area to prevent it from sticking.
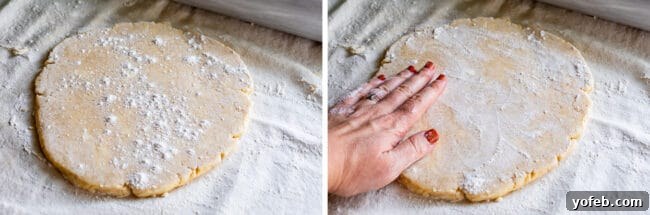
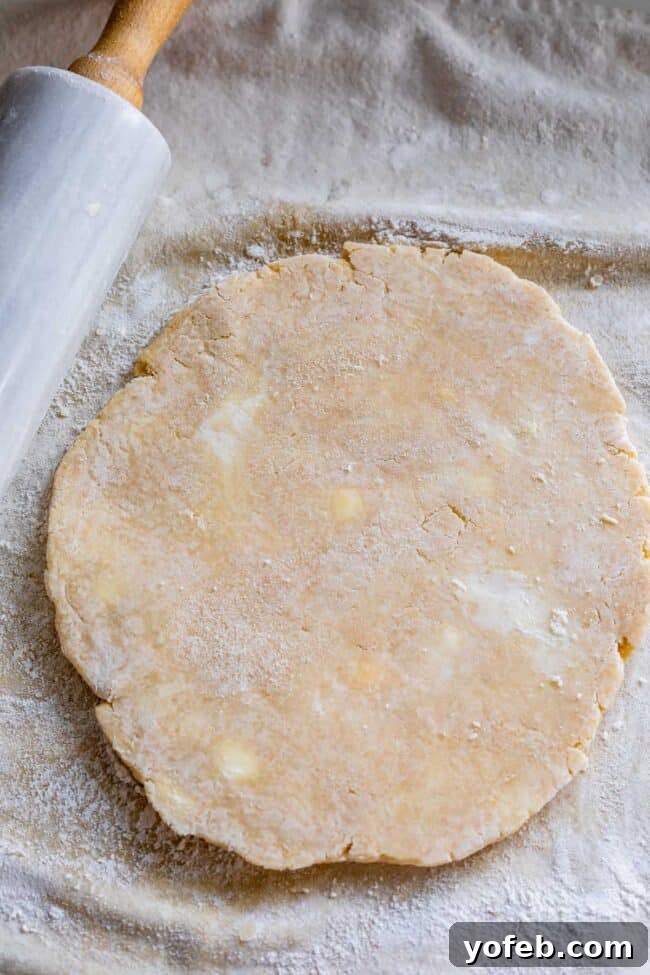
As you continue to roll, you should be able to clearly see visible pieces of butter and shortening embedded throughout your pie crust dough. These are the magical pockets responsible for the incredible flakiness you’ll achieve. Continue rolling until your dough reaches approximately 13 inches in diameter, which is the ideal size for a standard 9-inch pie plate. This generous size ensures enough overhang to create beautiful fluted edges or to accommodate a double-crust pie.
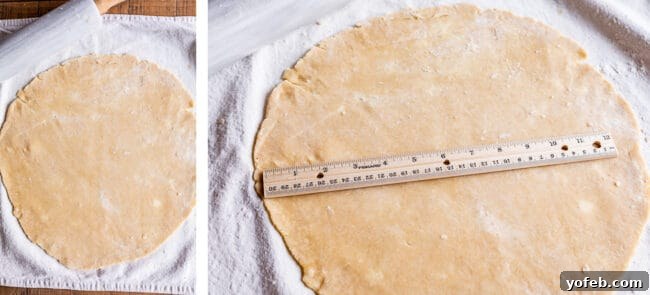
For a standard 9-inch pie plate, aim to roll your pie dough out to roughly 13 inches in diameter. This allows for a good overhang, essential for fluting or attaching a top crust.
Expert Tips for Transferring Pie Dough to the Pan
Transferring the delicate, freshly rolled pie dough into its pan can be a moment of truth for many bakers. But don’t fret; with a simple technique, it becomes much less intimidating. My preferred method involves using the rolling pin as your trusty assistant.
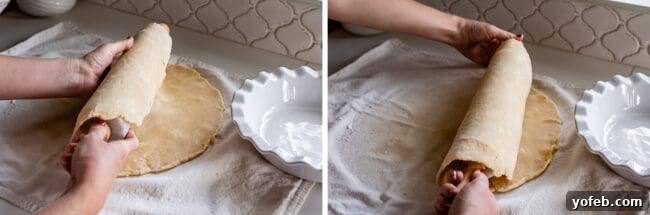
- To use this method, position your rolling pin near one edge of your rolled-out dough. Gently lift that edge and begin rolling the dough onto the pin, wrapping it loosely around.
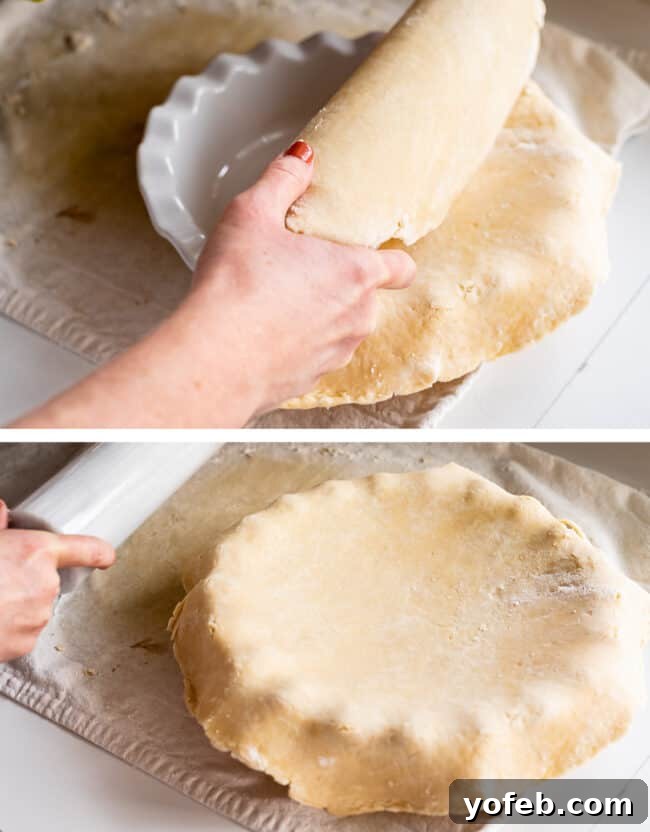
- Once the dough is wrapped around the pin, carefully center the rolling pin over your pie plate. Then, gently unroll the dough, letting it gracefully fall into the pan. If you have a helpful assistant nearby, this is an excellent moment to recruit them for moral support or to stabilize the pie plate beneath your rolled crust. I’ve baked over a hundred pies, and this step still gets my nerves a little jangling! But remember, if it tears – and sometimes it does – it’s not the end of the world. You can easily “heal” those cracks by gently pressing them together, perhaps with a tiny drop of ice water, and a sprinkle of flour. It will be perfectly fine, I promise!
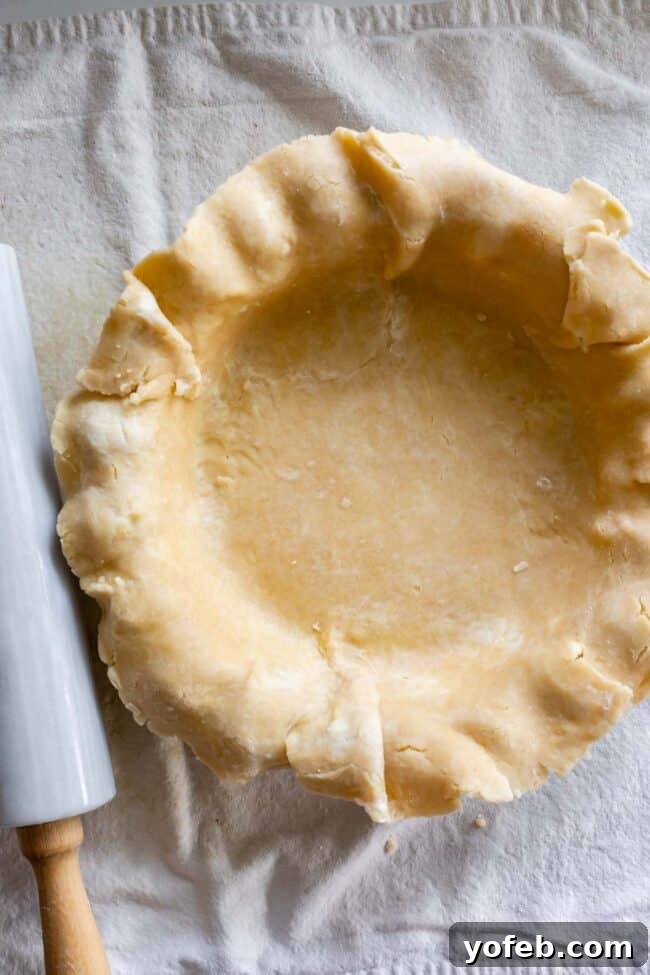
- Once the dough is in the pan, gently ease it into the corners and along the bottom edges, ensuring there are no air pockets. If you find any overlapping dough or thicker sections, carefully press and fold them together to create a smooth, even base for your pie.
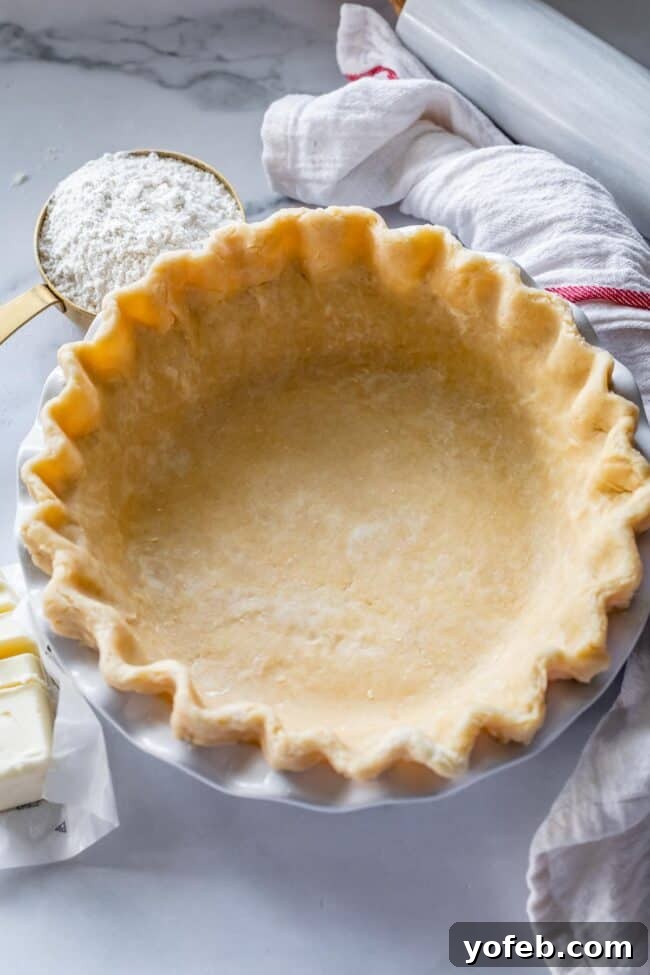
At this stage, for a single-crust pie, you would proceed to flute the edges. For detailed instructions on how to create beautiful fluted edges and how to pre-bake (or blind bake) a pie crust for fillings like cream or fresh fruit, make sure to consult my dedicated post on How to Blind Bake a Pie Crust. That guide will walk you through preventing bubbling in the middle and slumping on the edges, ensuring a perfect foundation for your fillings.
Fill Your Pie
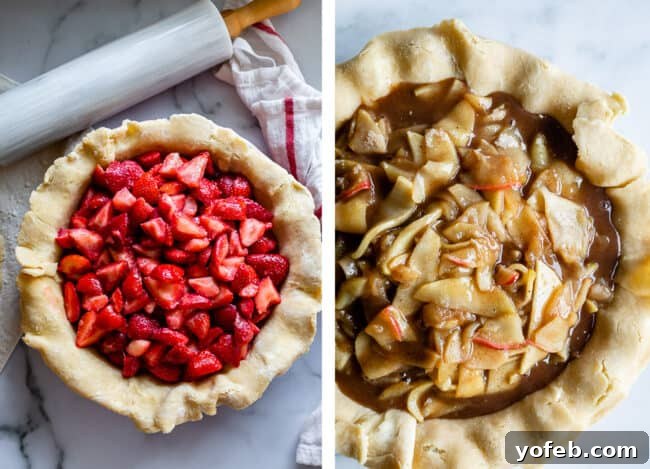
If you’re making a glorious double-crust pie, now is the exciting moment to fill your beautifully prepared bottom crust. For now, simply let the excess dough hang over the edge of the pie pan. If the edges are particularly long and seem prone to tearing, you can gently tuck them over or under to reinforce them. It’s always best practice to fill your pie with a chilled or at least cooled filling – never hot, as hot filling can quickly melt the butter in your crust and lead to sogginess. If your filling isn’t quite ready yet, place the entire pie pan into the refrigerator or freezer to keep the crust nice and cold.
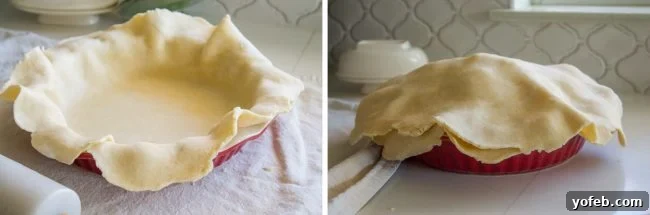
Once your delectable filling is securely nestled in the bottom crust, retrieve your second chilled dough disc. Roll this one out to a slightly smaller diameter, around 10-11 inches. Then, using your rolling pin, carefully transfer this slightly smaller crust to rest gently atop your filled pie. Alternatively, if you’re feeling adventurous and want to elevate your pie’s visual appeal, follow these detailed instructions for How to Make a Lattice Pie Crust! It’s a surprisingly fun and rewarding technique that adds a beautiful, professional touch to any pie.
How to Flute a Flaky Pie Crust Like a Pro
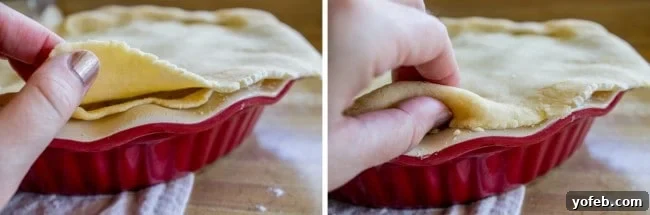
- Once both your bottom and top crusts are in place (or if you’re working with a single crust), it’s time to create those beautiful, decorative edges. Start by folding the two edges of your pie dough underneath themselves, creating a neat, slightly thicker border. While the photos above might show pies with slightly less overhang, the principle remains the same. The goal is to create a substantial edge that will hold its shape during baking. (Note: For a lattice pie crust, I often prefer to fold the edges upwards and over, rather than underneath. Refer to the full lattice post for specific guidance on that technique.) Many recipes will instruct you to trim away excess pie crust with scissors, suggesting you simply discard these precious scraps. My philosophy is a firm “heck no!” Every bit of that buttery dough is valuable. Instead of trimming, meticulously fold the excess dough under itself. This not only prevents waste but also creates a sturdier, more beautiful edge.
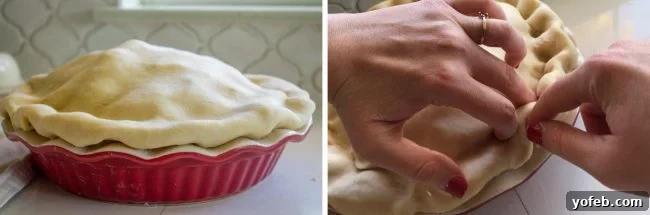
- After folding, gently press the edges together firmly to seal them. This prevents them from separating during baking.
- Now comes the fun part: fluting! There are many ways to create a beautiful edge. You can use the tines of a fork to press a simple pattern around the perimeter. My favorite method involves a three-finger technique, gently pinching the dough between your thumb and index fingers, using the index finger of your other hand to push the dough outwards, creating a scalloped design. Some bakers achieve a similar effect using their knuckles.
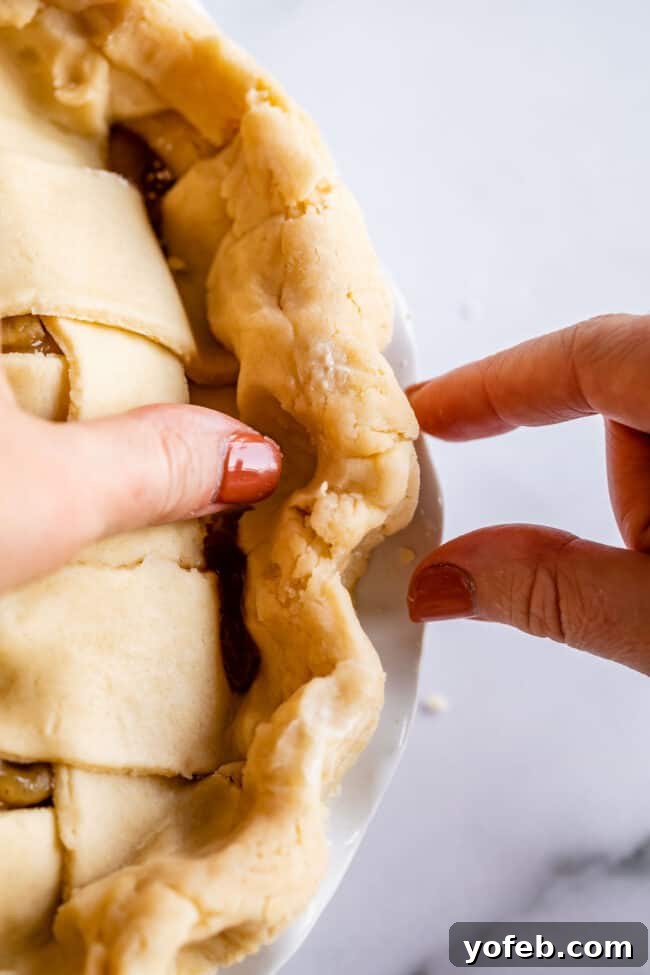
Don’t put too much pressure on yourself to make it absolutely perfect the first time. Pie fluting is an art that improves with practice. Even if it looks a little rustic, remember that it still has to go into the oven! Once baked, a golden, bubbly pie crust will always look good, regardless of minor imperfections in the fluting. Focus on sealing the edges well, and the beauty will naturally follow.
Preparing Your Homemade Pie Crust for Baking
After all the rolling, filling, and fluting, one final crucial step remains before your pie enters the oven: ensure it’s properly chilled. If your pie dough has become warm or overly soft during the assembly process, take a moment – typically 15 to 30 minutes – to place the entire pie in the refrigerator or even the freezer. The importance of this cannot be overstated: a cold, firm pie dough entering a hot, hot oven is the secret to achieving that coveted flaky, tender crust. The sudden temperature change causes the cold fat pockets to “shock” and release steam rapidly, creating distinct, separated layers.
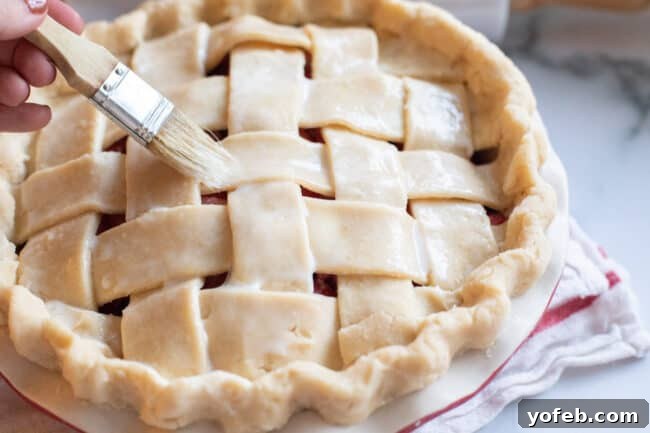
Just before your pie goes into the oven, it’s a good practice to brush the top crust with a liquid wash. This step contributes to a beautiful, golden-brown finish and can add a subtle sheen. You have several options for this wash: plain milk, buttermilk, cream, a beaten egg white (for a crispier, shinier finish), a beaten egg yolk (for a deep golden color), or a whole beaten egg (for a balanced golden hue). My personal preference is to use the leftover beaten egg (both yolk and white) from the initial pie crust recipe, mixed with an equal part of milk. I typically do a 1:1 ratio, such as 1 tablespoon of beaten egg to 1 tablespoon of milk. Whisk this mixture well and then generously brush it all over the top of the pie and around the fluted edges of the crust.
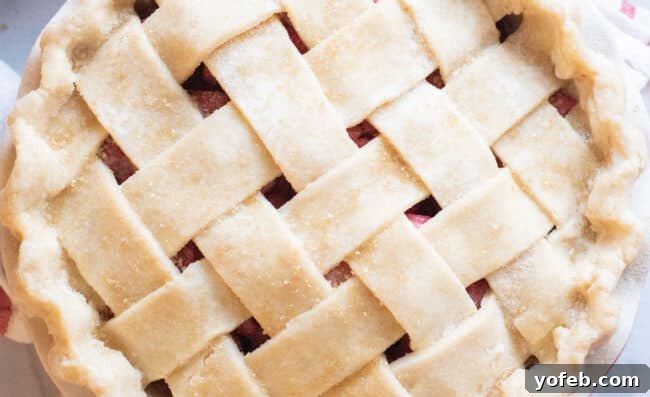
For sweet pies, I love to go a step further and sprinkle a bit of sugar over the top of the crust immediately after brushing on the egg wash. Raw sugar is my absolute favorite for this because its larger crystals create a delightful sparkle and a pleasant crunch once baked. Regular granulated white sugar also works wonderfully, adding a lovely crispness to the crust.
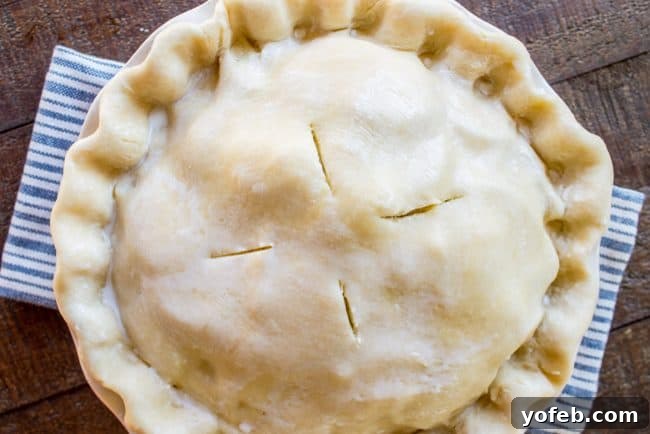
Finally, if you opted for a solid top crust rather than a lattice design, you must create vents. Using a sharp knife, make several slits or decorative cutouts on the top of your pie. These vents are essential, allowing steam to escape from the filling as the pie bakes. Without them, pressure can build up, potentially causing the crust to crack or become uneven. Feel free to get creative with your designs – from simple slits to more intricate patterns!
Baking Your Pie to Golden Perfection
The baking process is where all your hard work comes to fruition, transforming that raw dough into a golden, flaky masterpiece. Most full-sized pies typically require about 45 to 60 minutes to bake, though this can vary depending on your specific pie recipe and oven. The goal is to achieve a beautifully browned and cooked-through crust, both on top and underneath.
I highly recommend employing a two-stage baking temperature strategy. Begin with an initial high temperature (I prefer 425°F) for the first 15-20 minutes. This high heat provides an excellent “oven spring,” helping the crust to set quickly and develop a rich, golden color. After this initial burst, reduce the oven temperature to 350°F and continue baking for the remaining 25-50 minutes, or until the pie is fully cooked and the filling is bubbly and set. This lower temperature ensures the interior of the pie cooks thoroughly without the crust becoming overly dark.
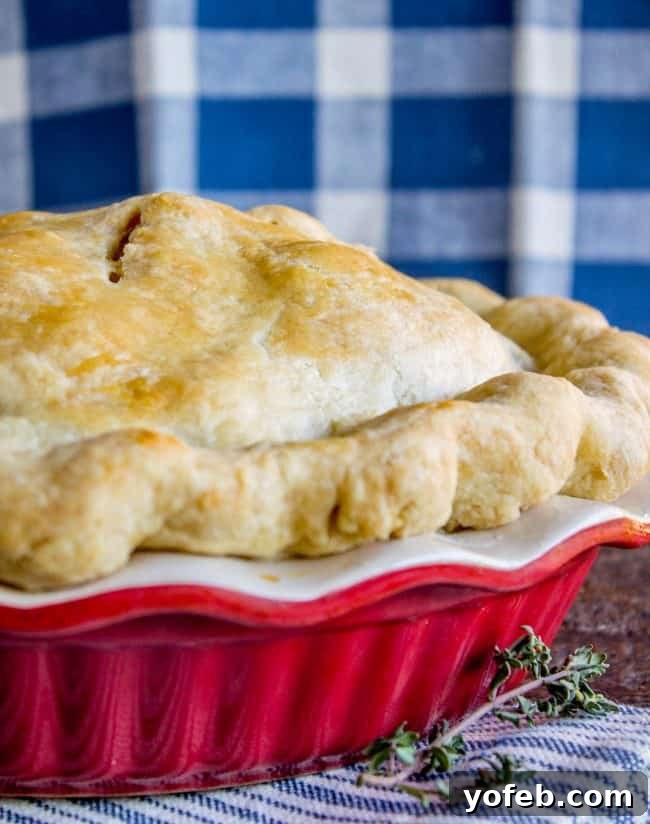
Cover Your Buttery Flaky Pie Crust Partway Through the Bake Time
To prevent the edges of your beautiful crust from over-browning or even burning while the center of the pie continues to cook and brown, you’ll need a pie crust shield. You can purchase commercial pie crust shields, but I actually don’t recommend them. Often made of silicone, they can sometimes be heavy enough to compress and damage your meticulously fluted edges. Instead, I find that simple tin foil is the superior choice: it’s incredibly lightweight, easily moldable to any pie shape, and wonderfully inexpensive!
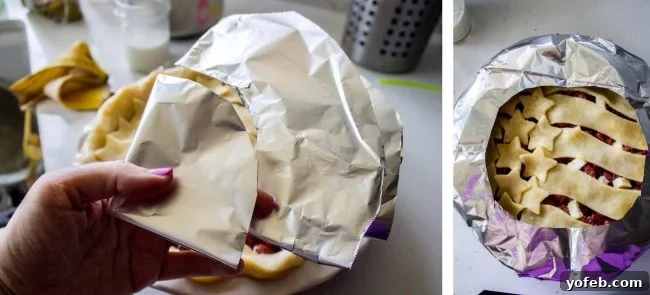
To create your own custom tin foil pie shield, grab a square of aluminum foil that is slightly larger than your pie. Fold it in half, then fold it in half again, creating a quarter-sized square. Using scissors, carefully cut out the middle section, creating a circular opening. When you unfold the foil, you’ll have a square with a perfect circle cut out from its center. This ingenious shape allows you to mold the foil snugly around the edges of your pie crust, leaving the center exposed. I typically add this tin foil shield around halfway through the bake time, often coinciding with when I lower the oven temperature to 350°F. This ensures your crust remains perfectly golden and never burnt!
Homemade Flaky Pie Crust FAQ
How do I keep my bottom pie crust flaky?
A soggy bottom pie is a baker’s nemesis! My absolute favorite, never-fail trick to prevent this is to always bake your pie on a screaming hot sheet pan. Before you even put your pie in, place a baking sheet in the oven when you start preheating it. This ensures the sheet pan is intensely hot when your pie goes in. The direct, intense heat from the metal bottom will cook your pie crust from underneath, resulting in a beautifully cooked and delightfully flaky bottom. As an added bonus, this hot sheet pan will also catch any delicious juices that might bubble over during baking, saving you from a messy oven cleanup.
Can you use a food processor to make pie crust?
While technically possible, I generally don’t recommend using a food processor for pie crust. My main concern is that it’s incredibly challenging to achieve those crucial varying sizes of fat pieces within the flour – the food processor tends to blend everything too uniformly. And if you then add the liquid to the processor, you risk overmixing and developing the gluten too much, resulting in a dense, cookie-dough-like texture rather than a light, flaky pie dough.
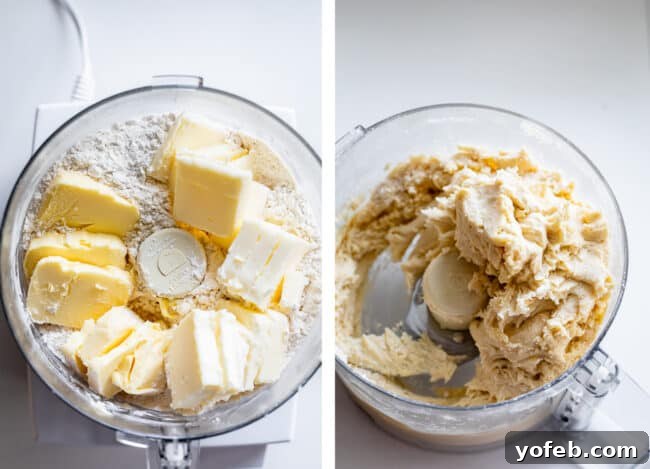
As you can see, the mixture often appears quite homogenous when made in a food processor. Many famous chefs claim it’s doable, so perhaps I just need more practice. For now, I’m sticking to my trusty pastry cutter for consistent, superior results.
What is the best flour to use in Flaky Pie Crust?
All-purpose flour is hands down the best choice for a flaky pie crust. Its medium protein content (typically around 10-12%) strikes the perfect balance, allowing for just enough gluten development to create a cohesive dough, but not so much that it results in a tough, chewy crust. Using a high-protein flour like bread flour would lead to excessive gluten formation, making your crust elastic and difficult to roll, and ultimately, unpleasantly tough. Conversely, using a very low-protein flour like cake flour might make the crust too tender to handle. Stick with all-purpose for that ideal light, tender, and flaky texture.
What is blind baking method?
Blind baking refers to the technique of pre-baking a pie crust before adding any filling. This method is crucial for certain types of pies where the filling might not require extensive baking, such as custard pies, quiches, or fresh fruit pies. Baking the crust first ensures it becomes fully cooked and crisp, preventing it from turning soggy once a wet filling is added. I have an entire dedicated post explaining How to Blind Bake a Pie Crust, which covers everything from preventing shrinkage to using pie weights for a perfectly shaped shell.
Can you freeze leftover pie dough?
Absolutely! Pie dough freezes beautifully, making it an excellent candidate for meal prep. You can easily whip up a double or triple batch of crust, then freeze the excess for future use. This means you’ll always have a ready-made, homemade crust on hand for any sudden pie cravings or last-minute baking projects. To freeze your pie dough, follow all the steps until you have two formed discs of dough. Wrap each disc tightly in several layers of plastic wrap, ensuring it’s completely airtight, then place them in a freezer-safe ziplock bag. They can be stored in the freezer for up to 6 months without any loss of quality. When you’re ready to use a frozen disc, simply transfer it to the refrigerator and allow it to thaw overnight, or for a few hours on the counter, still in its sealed bag to prevent moisture loss. Once thawed, you can pick up directly with the rolling out process as described in this guide.
Recommended Tools for Perfect Flaky Pie Crust
- Pastry cutter: This essential tool is designed specifically for cutting cold butter and shortening into flour without overworking the dough. It ensures those crucial pea-sized chunks of fat remain intact, which are vital for a flaky crust. I use mine constantly for a variety of baking tasks, including making streusel toppings, flaky biscuits, and delicate scones.
- Pastry cloth: While not strictly necessary, a pastry cloth can be a game-changer for rolling out dough. You dust flour directly onto its surface, which creates a non-stick environment. The key benefit is that any excess flour is absorbed by the cloth rather than being incorporated into your dough, preventing a tough crust. It makes the rolling process much smoother and less prone to sticking.
- Rolling pin: A good rolling pin is, of course, indispensable. I personally adore my marble rolling pin because its weight helps with even rolling and its cool surface helps keep the dough chilled. However, any type of rolling pin you’re comfortable with will work perfectly fine.
- Pie plate: A standard 9-inch pie plate is ideal for this recipe. You can use ceramic, glass, or metal – each has its own benefits, but all will work to create a beautiful pie.
- Tin foil: Essential for creating a custom pie crust shield to prevent the edges from burning during the latter half of the bake time. It’s lightweight, moldable, and superior to rigid silicone shields.
And there you have it! The foundational skills for truly satisfying pie making. Having these techniques in your baking repertoire opens up a world of delicious possibilities. Remember to revisit my How to Blind Bake a Pie Crust tutorial for all your pudding and fresh fruit pies, and don’t forget the fun and decorative guide on How to Make a Lattice Pie Crust. Now, let’s explore some delightful recipes where your homemade flaky crust will truly shine!
Facebook | Pinterest | Instagram
Delicious Double Crust Pies to Inspire You!
Once you’ve mastered this flaky pie crust, a world of double-crust delights awaits. Here are some of my all-time favorites that perfectly showcase the beauty of a top and bottom crust:
- Cranberry Custard Pie: A festive and flavorful choice, this is one of my most beloved pies to bake during the holiday season.
- Rhubarb Custard Pie: Without exaggeration, this is quite possibly my favorite pie of all time. Rhubarb, you truly are a precious ingredient!
- Cranberry Cherry Pie: A harmonious blend of sweet cherry pie filling with the tart brightness of cranberries. What could be a better sweet-tart combination?
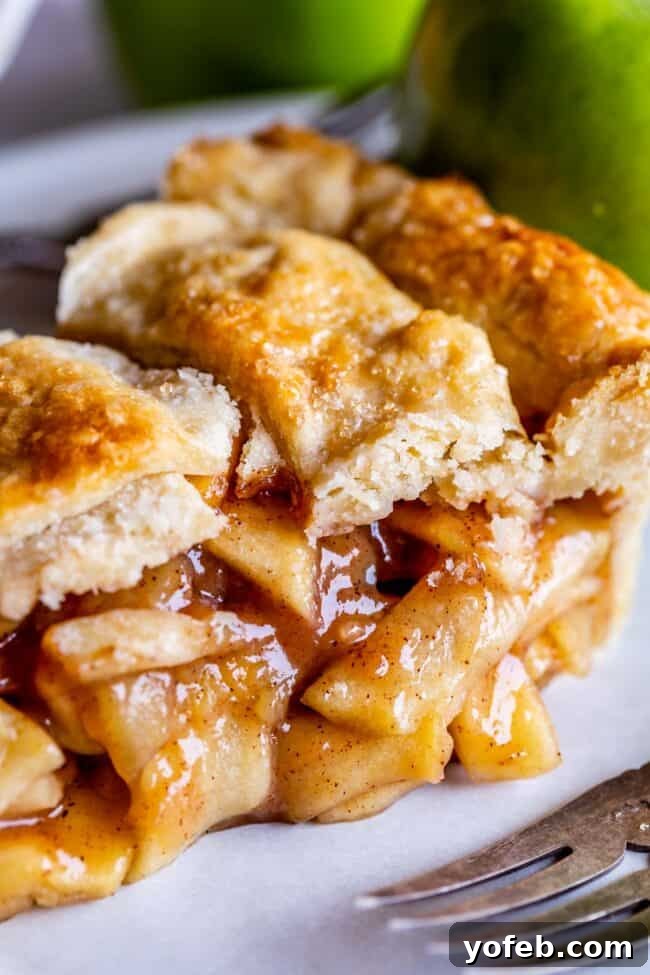
- Apple Pie: This is the only double-crust apple pie recipe I will ever use. It’s simply that good!
- Cherry Pie for 4th of July!: This pie isn’t just delicious; its lattice top can be styled to look like a festive flag!
- Blackberry Pie: A nostalgic recipe from my mom, this was probably the pie I ate more than any other while growing up!
- Peach Pie from Lil Luna: Juicy peaches nestled in a tender, flaky crust.
- Fresh Pear Pie from Garnish and Glaze: A delightful twist on classic fruit pies.
Single Crust Pies that Require No Pre-baking:
For these pies, simply pour the delicious filling directly into your raw, shaped pie crust, then bake. The other half of your pie dough can be wrapped and frozen for another delightful baking day!
- THE Chocolate Chip Pie: Imagine a warm chocolate chip cookie, but in decadent pie form. Absolutely incredible with a scoop of ice cream.
- Pecan Pie Recipe with Buttery Streusel Topping: This isn’t just any pecan pie; it’s baked with toffee bits and browned butter for an extra layer of amazing flavor!
- Crème Brulée Pumpkin Pie: Once you torch the top of your pumpkin pie, you’ll never go back. Seriously, never!
Single Crust Pies that Require Blind Baking:
These pies require you to bake the empty crust first, and then add your filling afterward. Don’t worry, I have a complete guide that shows you How to Blind Bake a Pie Crust perfectly. As always, save the other half of your pie dough in the freezer for when inspiration strikes!
- Butterscotch Pie with Meringue Topping: Rich, creamy pudding pies are an absolute dream, especially on a warm day.
- Lemon Meringue Pie: A beloved family favorite! (I’m planning to update these photos soon, but the recipe is gold.)
- Fresh Strawberry Glace Pie: Hands down, one of the best summer pies you can make!
- Fresh Blackberry Glace Pie: Just like its strawberry cousin, but bursting with the wonderful flavor of fresh blackberries!
Savory Pies Made with a Buttery Flaky Crust!
Don’t limit your magnificent flaky pie crust to just sweet treats! It’s equally (if not more!) impressive in savory applications. Here are some hearty and satisfying savory pies:
- Classic Double Crust Chicken Pot Pie: I dare say this is the ultimate comfort food, especially with a golden, flaky top.
- Roast Beef, Carrot, and Creamy Potato Pie: It’s like a complete roast beef dinner, elegantly wrapped up in a tender, buttery pie crust. Utterly delicious!
- Easy Italian Savory Rustic Pie from An Italian in My Kitchen: A wonderful savory option for something different and delightful.

Homemade Flaky Pie Crust Recipe
Rate this Recipe
Print Recipe
Ingredients
- 2 & 1/2 cups all purpose flour, spooned and leveled*
- 2 tablespoons granulated sugar for sweet pies**
- 1 teaspoon kosher salt
- 8 tablespoons butter-flavored shortening***, (1/2 cup)
- 12 tablespoons butter****, cold (1 and 1/2 sticks)
- 2 tablespoons beaten egg, half a large egg
- 1/4 cup ice water, plus more if necessary.
Instructions
-
Make the pie dough. Get a small bowl of ice water ready so that it’s nice and cold when you need it.
-
In a large bowl, whisk together 2 and 1/2 cups flour* (measured correctly; see note), 2 tablespoons sugar (1 tablespoon for savory pies), and 1 teaspoon kosher salt.
-
Add 1/2 cup butter-flavored shortening or fat of your choice. You can use lard or butter for this step if you want.
-
Chop up 12 tablespoons (1 and 1/2 sticks) cold butter into chunks. Add the butter to the bowl.
-
Use a pastry cutter to cut the butter and shortening into the flour, pressing down firmly with the pastry cutter. Scrape out the pastry cutter with a butter knife and continue until the flour is mostly incorporated, but don’t go overboard. There should be pea-sized bits of butter or even bigger chunks are okay. Various sizes of butter is what you are looking for. See photos!
-
Crack an egg in a small bowl and whisk it together until it’s a little frothy. Poor half of it into another small bowl, leaving about 2 tablespoons. (Save the other half of the beaten egg for brushing the finished pie.)
-
Add 1/4 cup ice water to 2 tablespoons beaten egg. Beat it together.
-
Add the mixture to the bowl with the flour. Use a rubber spatula to mix it together, hydrating the flour as much as you can.
-
Cover your hands with flour. Use your hands to knead the dough right in the bowl. Press the dough together and keep gathering up the dry bits to incorporate it into the mass. If the dough is not coming together, add ice water sparingly, 1-3 teaspoons at a time to moisten it. (I hardly ever add more water, but this does depend on climate.) Use extra water sparingly, you don’t want to make your dough too wet. Stop kneading the moment that it has come together and is able to be shaped into a ball. Over working your dough results in a tough pie crust.
-
Use a knife or your hands to divide the dough in half. Use your hands to shape each half into a disc. Cover or wrap in plastic, and chill for at least 30 minutes.
-
Roll out the pie dough. Dust a work surface with plenty of flour. I love to use my pastry cloth for rolling out dough. (Another trick is to roll out the dough on a square of parchment paper; then you can invert the dough directly into the pie pan instead of having to lift the fragile dough.) Get out one of the discs of pie dough, leaving the other one to keep chilling.
-
Let the dough sit on the floured surface for 5 minutes or so, to warm up a bit.
-
Dust the pie dough with flour. Use your rolling pin to gently press the dough in the center, rolling outward. Rotate the rolling pin a quarter turn and gently press outward again. Check for cracks on the edges, and use your hands to press them and heal them a bit, adding a drop of ice water if necessary.
-
Dust with flour and continue rolling, rotating a quarter turn every time. Dust with flour again, and before it gets too large, lift the dough and turn it over (you can do this multiple times), dusting your surface with flour as you go. This is to make sure the pie dough is not sticking to your work surface. Continue dusting, rotating, and rolling.
-
Take the time to press together cracks at the edges, moistening with a drop of water and then dusting with flour as necessary. Continue rolling until the pie dough is about 13 inches across, making sure that it is not sticking on the bottom.
-
Place your rolling pin along the edge of the pie dough. Lift the edge of the pie dough and place it on top of the rolling pin. Roll the dough onto the rolling pin and carefully transfer it to a 9 inch pie plate. See photos. (If you rolled out your dough on parchment paper, you can invert the pie dough into the pie plate.)
-
Gently press the dough into the corners of the pie plate, fixing any cracks or tears as you go. There should be an overhang of dough along the edge. Leave it as is for a double crust pie.
-
If you are baking a single pie crust, fold the overhang underneath itself and flute the edges using your knuckles or fingers (see photos). If you are baking the crust before filling, follow this tutorial on How to Blind Bake a Pie Crust.
-
Place your pie plate in the fridge while you roll out the second pie disc. Roll the dough out to about 11-12 inches, a little smaller than the first one.
-
Fill your pie. Don’t forget to dot with butter if your recipe calls for it. I always forget to do that!
-
Follow this tutorial for How to Lattice a Pie Crust if you want. It’s so pretty!
-
For a traditional double crust, roll out the second pie crust, wrap it onto the rolling pin, and transfer to the top of your filled pie.
-
Now you should have two pie crusts overhanging the edge of your pie pan. Use your fingers to gently press the dough together on the edges. Fold both crusts underneath themselves so they are nicely lined up with the edge of the pie pan.
-
Use your thumbs or knuckles to flute the pie crust however you like. See photos.
-
Chill your pie in the fridge for another 30 minutes if the dough has gotten soft.
-
Just before putting your pie in the oven, remember to brush with milk or egg. I like to beat together 1 tablespoon beaten egg with 1 tablespoon milk. Sprinkle your pie with granulated or raw sugar, if it is a sweet pie.
-
Follow your pie recipe for instructions on how to bake. I like to bake my pies at a high temperature (425 degrees F) for about 15-20 minutes, them lower the temperature to 350 and bake for another 25-50 minutes. I always bake my pies on a baking sheet that has been preheated in the oven, to help bake the bottom of the crust and make it super flaky.
-
Don’t forget to use a tin foil pie shield to cover your crust for the last half of the bake time. See photos. This will keep your crust from burning.
-
I know it’s difficult, but for most sweet pies (especially fruit pies), it’s important to let your pie cool to room temperature (2-4 hours) before cutting into them, so that the juices have a chance to set up.
How to make pie crust in a food processor
I will be honest, I do not like making pie dough in the food processor. I feel like I can’t ever get the texture right. But it is doable with practice (apparently I need to practice more!), here are the instructions if you want to try it:
-
Whir flour, sugar, and salt together, then add shortening and chopped butter. Pulse in one second intervals until a shaggy dough forms.
-
Scrape the mixture into a bowl and continue with step 6 above. (Adding the mixture of 2 tablespoons egg and 1/4 cup ice water.) If you are determined, you can try adding the wet ingredients to the food processor and pulse. But be careful! Do not over mix! Turn out onto a floured surface and finish kneading by hand. Split in half and continue with the rolling process.
Notes
**Use 1 tablespoon sugar for savory pies, like this Chicken Pot Pie.
***You can replace all the shortening in this recipe with lard. It makes a super flaky, crispy crust!
****I always use salted butter in my baking. I know, I know, all the Real Bakers say don’t do this. But whatever. I really like salt. If you don’t, use unsalted butter!