
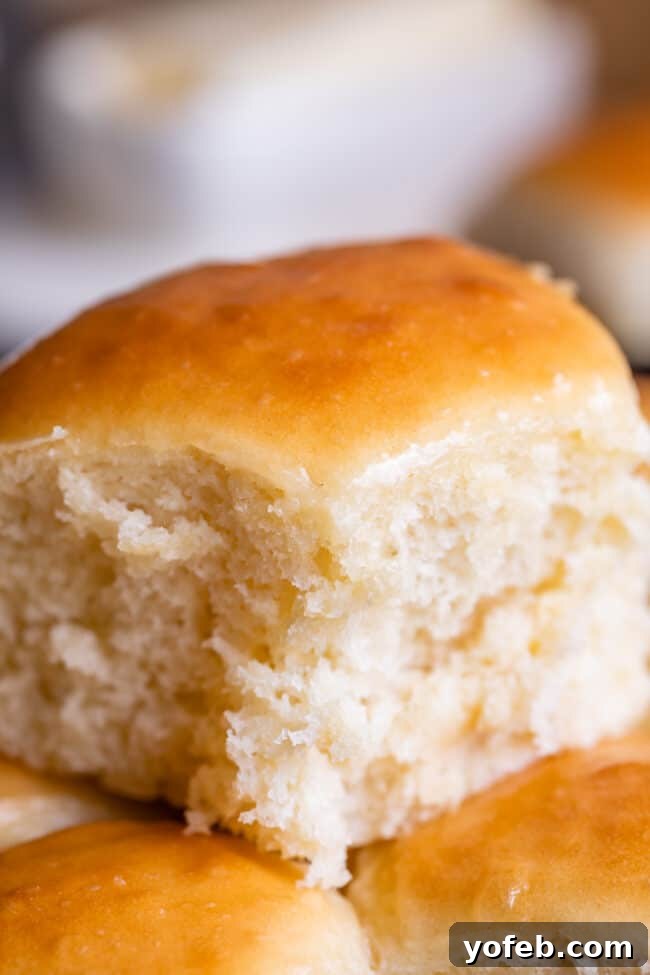
Imagine the aroma of freshly baked bread filling your home, but instead of hours, it only takes one. That’s the magic of these incredibly easy, wonderfully fluffy dinner rolls! Perfect for weeknight dinners or last-minute gatherings, this recipe delivers soft, pillowy rolls bursting with buttery flavor. What’s even better? You don’t need special instant yeast; regular active dry yeast works perfectly. Get ready to impress your family and friends with warm, homemade rolls in record time. Originally published April 9, 2020, this timeless recipe continues to be a favorite for its simplicity and delicious results.
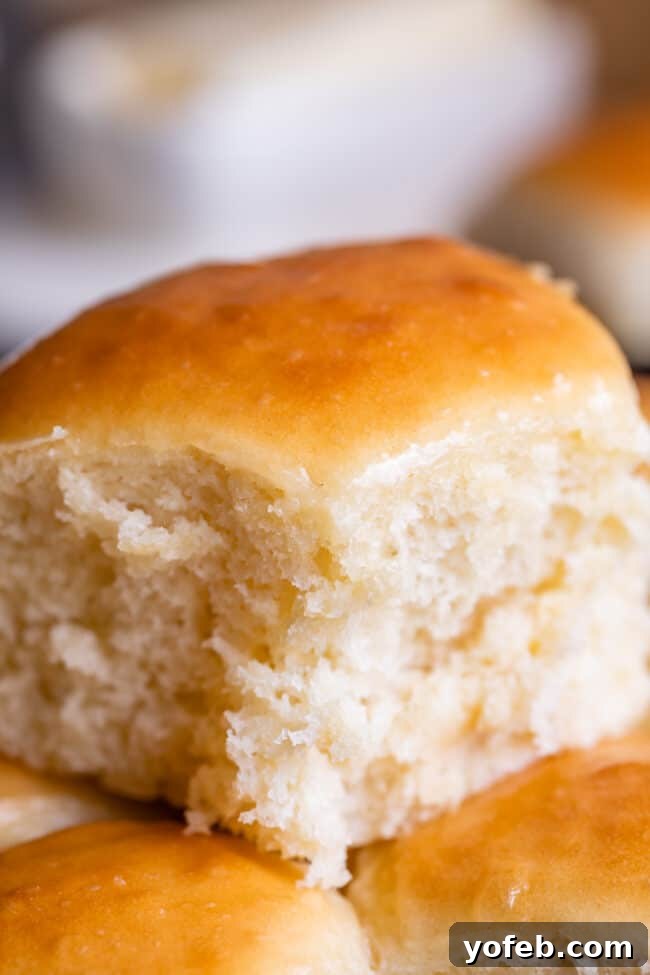
Table of Contents
- The Magic of Quick One-Hour Dinner Rolls
- Essential Ingredients for Speedy Dinner Rolls
- Active Dry vs. Instant Yeast: Which is Best for Quick Rolls?
- Step-by-Step: Crafting Your Quick Dinner Rolls
- Pro Tips for Perfect One-Hour Dinner Rolls
- Storing and Making Your Quick Rolls Ahead
- Frequently Asked Questions About Quick Yeast Rolls
- More Delicious Dinner Roll Recipes to Explore!
- One Hour Quick Dinner Rolls Recipe
Baking, for me, isn’t just about the food; it’s about the stories, the comfort, and the connection to tradition. Just last night, a small incident reminded me of this, almost quite literally heating things up in my kitchen! I was pulling my whistling teakettle off the burner with a trusty old tea towel, and it momentarily caught fire. After a brief moment of alarm, a quick toss into the sink saved the day, and I’m here to tell the tale. Here’s what my poor tea towel looks like now:
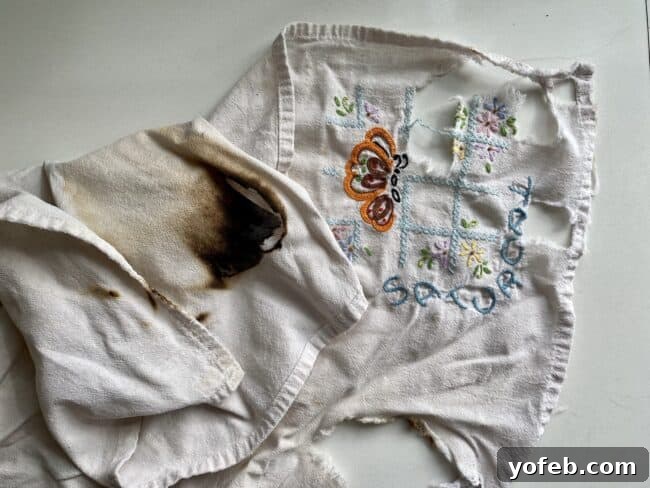
It certainly looks a bit worse for wear, doesn’t it? Yet, the holes and frayed edges aren’t solely from my recent fire incident. This isn’t just any towel; it’s an heirloom, at least 80 or 90 years old, a testament to enduring craftsmanship and family history. I use it constantly, a tangible link to my past.
This particular tea towel was lovingly embroidered by my grandma Georgia when she was just 10 years old. It was 1930, and she had contracted tuberculosis, necessitating her quarantine away from her family. For a year and a half, she endured this isolation, and her condition showed no signs of improvement. Finally, her sister Pauline, only 11 months her junior, was sent to be with her. Remarkably, once Pauline arrived, Georgia’s health rapidly improved. The power of companionship, even in the face of grave illness, is truly profound.
While we might grumble about modern quarantines – and I certainly do! – it offers perspective to consider my grandma’s experience. Imagine being a frightened 10-year-old, battling a deadly disease, sent away to a facility where you know no one, for a year and a half. It’s truly unimaginable. During her time in quarantine, Grandma Georgia meticulously embroidered dozens of these exquisite tea towels, crafted from the softest flour-sack material you could ever feel. I am fortunate to own a complete set, as do all my siblings, each one a tangible piece of her incredible story and resilience.
When I shared with my family that I had inadvertently burned one of these cherished tea towels, a flood of shared memories ensued. Everyone fondly recalled how these were “the best towels ever” and expressed a collective sadness that they were beginning to fray. I voiced my personal philosophy about heirlooms – that they should be used and enjoyed, not simply preserved. My sister Nikki then illuminated the origins of this sentiment, a wisdom passed down directly from Grandma Georgia herself:
“While moving grandpa to a nursing home, Grandma found 50-year-old towels that she had gotten brand new for her wedding and had saved for a special occasion. They had rotted. That’s why she told us all to use the towels she made for us right away. She didn’t want us to never use them. I loved mine until their deaths.”
It’s quite amusing to realize I had so deeply internalized the message of using heirlooms rather than hoarding them for a “special occasion,” yet I never knew the specific, poignant story of my Grandma and her fifty-year-old rotted wedding towels. It just goes to show how wisdom, once truly embraced, can become ingrained and passed down through generations, almost like a cherished legend.
My brother shared a practical approach, noting that when his towels become too frayed for kitchen use, they are repurposed for tasks in the garage. He believes he’s never actually thrown one away. After I captured the photograph of my recently burned tea towel, my initial thought was to discard it. However, his words resonated, and I noticed the towel still sitting on my counter. It seems I, too, am finding it difficult to part with. Perhaps it’s destined for a second life in the garage? What are your thoughts on using heirlooms versus carefully preserving them away?
The Magic of Quick One-Hour Dinner Rolls
Who doesn’t adore warm, fresh-from-the-oven homemade dinner rolls? There’s truly nothing quite like a hot, buttery roll, right? That melt-in-your-mouth experience is pure culinary bliss, and for many, it’s a staple comfort food.
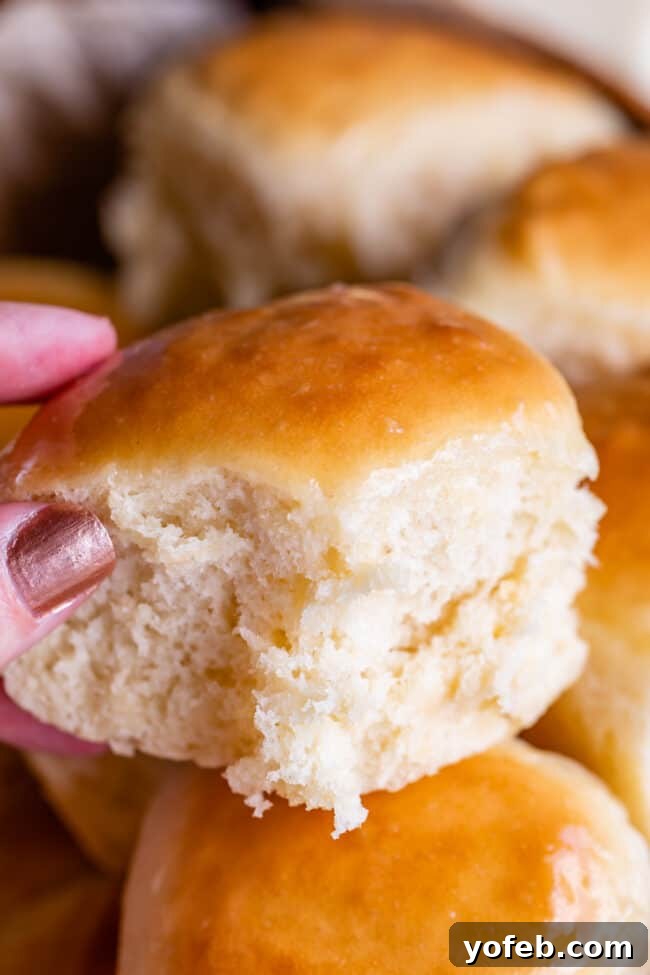
This exceptional recipe is a clever adaptation of my beloved Aunt Shirley’s Famous Buttery Dinner Rolls – a recipe truly renowned for producing the most amazing rolls of your life. While Aunt Shirley’s classic requires a bit more time for its two generous rises, today’s version achieves similar phenomenal results in half the time. The secret to these incredibly quick and fluffy dinner rolls lies in strategically streamlining the rising process. We bypass the traditional first long bulk rise, moving directly to shaping the rolls after a brief, essential rest, dramatically cutting down the overall preparation time. This makes them an absolute game-changer for busy weeknights when you crave homemade goodness without the long wait.
Featured Comment
“These. Are. The. Best! They were soft, fluffy, fast, and easy. I will definitely be making these again.” –Sarah
See All Comments
Essential Ingredients for Speedy Dinner Rolls
Gathering your ingredients efficiently is the first step to successful one-hour dinner rolls. Here’s a concise shopping list to get you started, but remember to jump to the full recipe card below for precise measurements and detailed instructions!
- Active dry yeast (or instant – see notes!)
- Granulated sugar
- Shortening
- Kosher salt
- Milk
- Large egg
- All-purpose flour
- Unsalted butter
Is it better to use milk or water for yeast rolls?
When it comes to crafting truly exceptional yeast rolls, I firmly believe that milk is the superior choice over water, and for several compelling reasons. Firstly, milk significantly contributes to a softer, more tender crumb. The proteins and fats in milk enrich the dough, resulting in that irresistible fluffy, melt-in-your-mouth texture that everyone craves in a dinner roll. Secondly, milk enhances the flavor profile. Its natural sugars and fats add a subtle richness and depth that plain water simply cannot replicate, giving your rolls an incredible, complex taste. Finally, milk aids in achieving that beautiful golden-brown crust. The lactose (milk sugar) caramelizes during baking, ensuring your rolls develop an appealing, evenly browned exterior that looks as good as it tastes. For texture, flavor, and appearance, milk consistently wins out, making your homemade dinner rolls truly stand out.
Active Dry vs. Instant Yeast: Which is Best for Quick Rolls?
The choice between active dry yeast and instant yeast often puzzles home bakers, especially when time is of the essence. Let’s demystify which one is ideal for achieving those fluffy, one-hour dinner rolls.
Active Dry Yeast
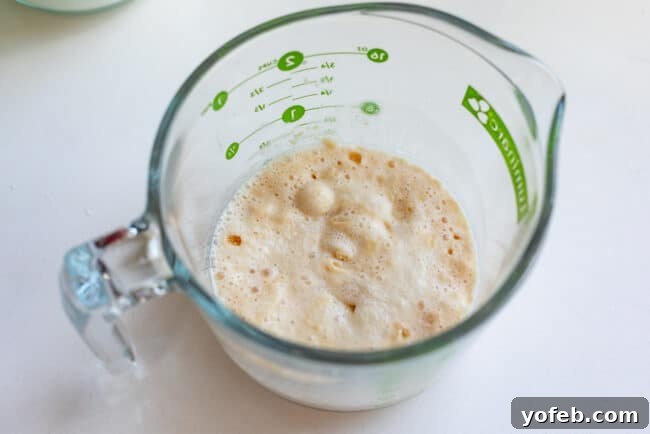
Active dry yeast is the most traditional and widely available type of yeast found in grocery stores. Its defining characteristic is that it requires “proofing” – a crucial step where the yeast is dissolved in a small amount of warm (not hot!) water, typically with a pinch of sugar. This process reactivates the dormant yeast granules, allowing them to bloom and become visibly foamy, confirming their vitality. While this adds a few minutes to the process (usually less than 5 minutes), I find it to be a worthwhile step for peace of mind. Mixing yeast directly into dry ingredients carries the risk of killing it if your liquid is too hot, or using inactive yeast unknowingly. Proofing eliminates this uncertainty, ensuring your dough will rise beautifully and preventing the disappointment of flat rolls hours later. For me, the minor added step of proofing active dry yeast is a small price to pay for consistent, reliable baking results every time.
Instant Yeast
Instant yeast, sometimes labeled as bread machine yeast, rapid rise yeast, or quick yeast, is processed to have finer granules than active dry yeast. This structural difference allows it to dissolve more rapidly and activate faster, leading to a slightly quicker rise time. A significant advantage of instant yeast is that it can be directly mixed into your dry ingredients without prior proofing in liquid, simplifying the initial steps. While I personally tend to keep active dry yeast on hand, instant yeast is a perfectly viable and convenient option for these quick dinner rolls if it’s what you have available, if it’s more economical, or if you simply prefer its no-proof convenience. Regardless of the type, ensure your yeast is fresh and not expired for optimal results. Even though instant yeast doesn’t technically require proofing, a quick test in warm water can still provide reassurance that your yeast is active before you commit to the full recipe.
For this specific recipe, you can confidently use either active dry yeast or instant yeast. Both will yield delicious, fluffy rolls. The key difference lies in the initial activation step; active dry yeast benefits from being proofed in warm water to ensure it’s alive and ready to work, while instant yeast can typically be mixed directly with dry ingredients, thanks to its finer grind and quicker dissolving properties. Ultimately, your choice depends on personal preference and what you have in your pantry.
Step-by-Step: Crafting Your Quick Dinner Rolls
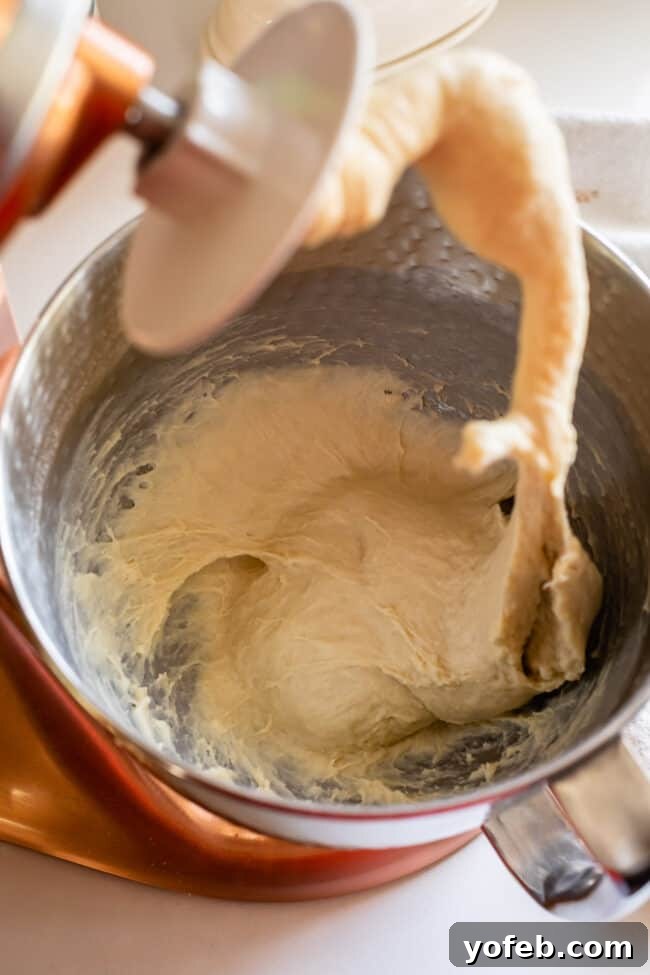
Let’s dive into making these incredible dinner rolls! You’ll be surprised at just how straightforward and rewarding the process is. After a crucial 5-minute knead, your dough will be wonderfully soft but quite sticky. Don’t be alarmed by this; it’s a sign of a tender dough! Your judgment will be key here in determining the precise amount of flour needed. Remember, the less flour you incorporate, the more incredibly tender your finished rolls will be. In my experience, about 2 and a half cups usually hits that perfect balance.
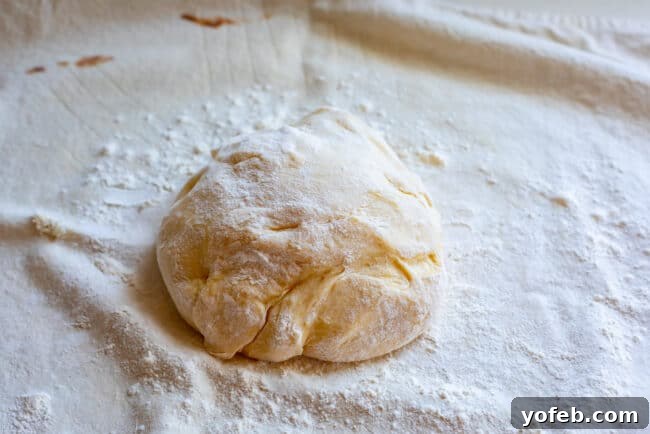
Carefully scrape the soft, sticky dough onto a generously floured work surface. With floured hands, gently shape it into a cohesive ball. Cover this beautiful dough ball with your grandma’s beloved (and now slightly singed) tea towel – or, of course, any clean kitchen towel will work just as well! Allow the dough to rest for a brief 5 to 10 minutes. This short rest is vital for gluten relaxation, making the dough easier to handle and shape.
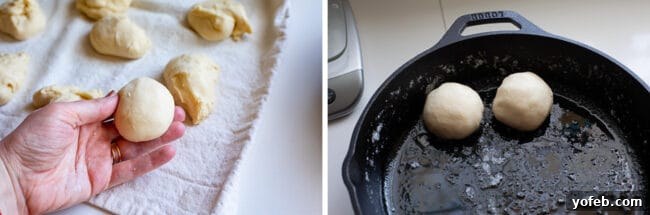
Once rested, divide the dough into 12 equal pieces. For precision, each piece should be roughly 2 ounces. To shape each piece into a perfect roll, gently round one end with your fingers, then bring the edges together underneath, pinching them firmly to create a smooth top surface and a sealed bottom. And voilà – a cute little roll! Arrange them in your prepared pan, ensuring a small amount of space between each one to allow for expansion during rising and baking.
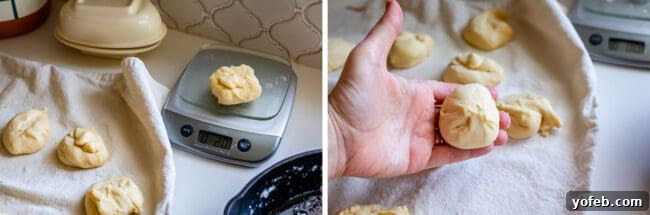
And voila. A cute little roll. Place them in the pan with a bit of space in between.
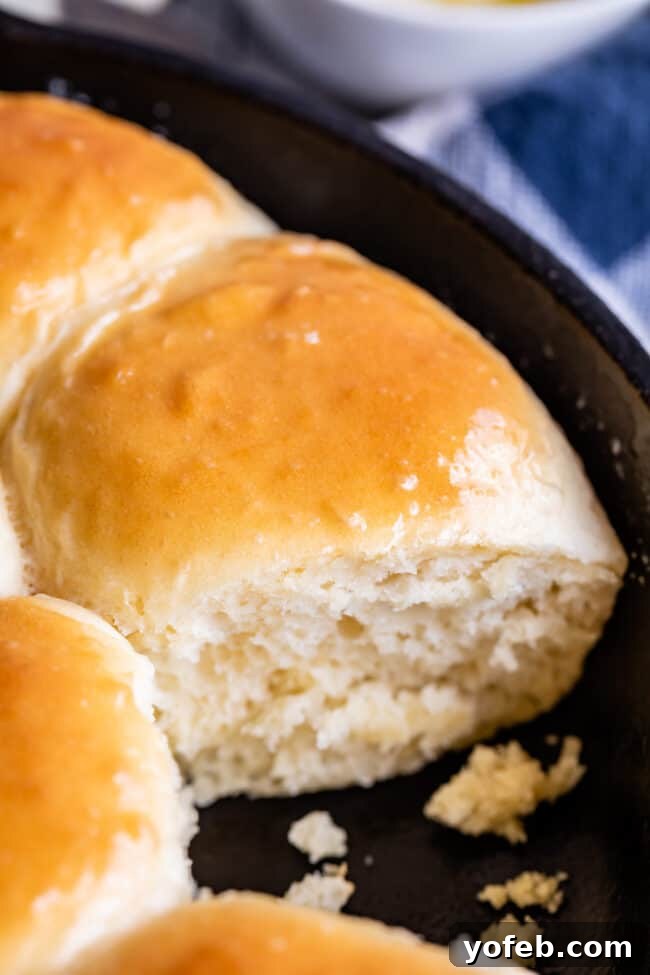
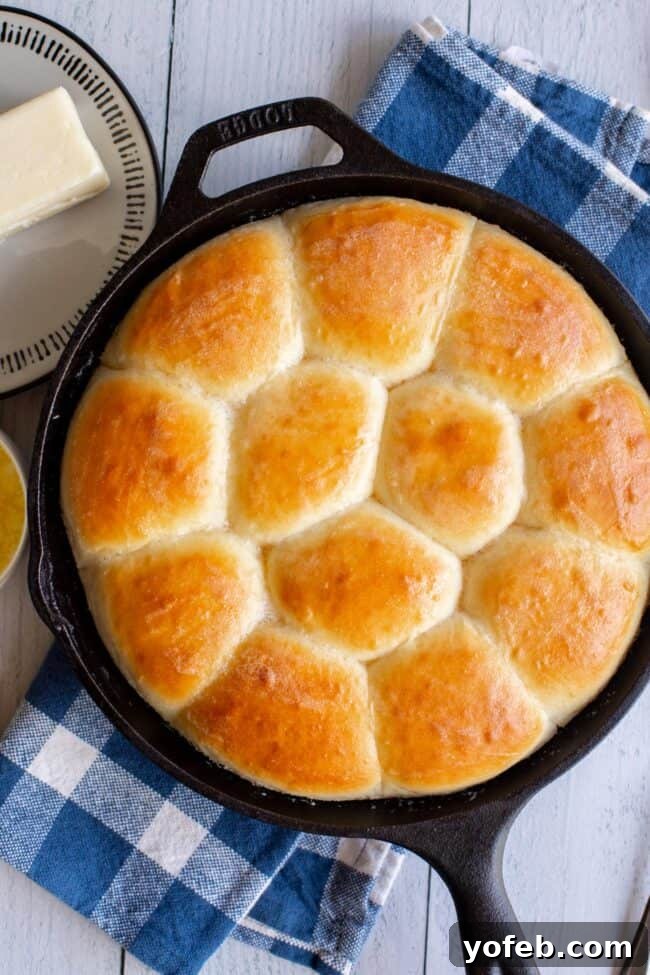
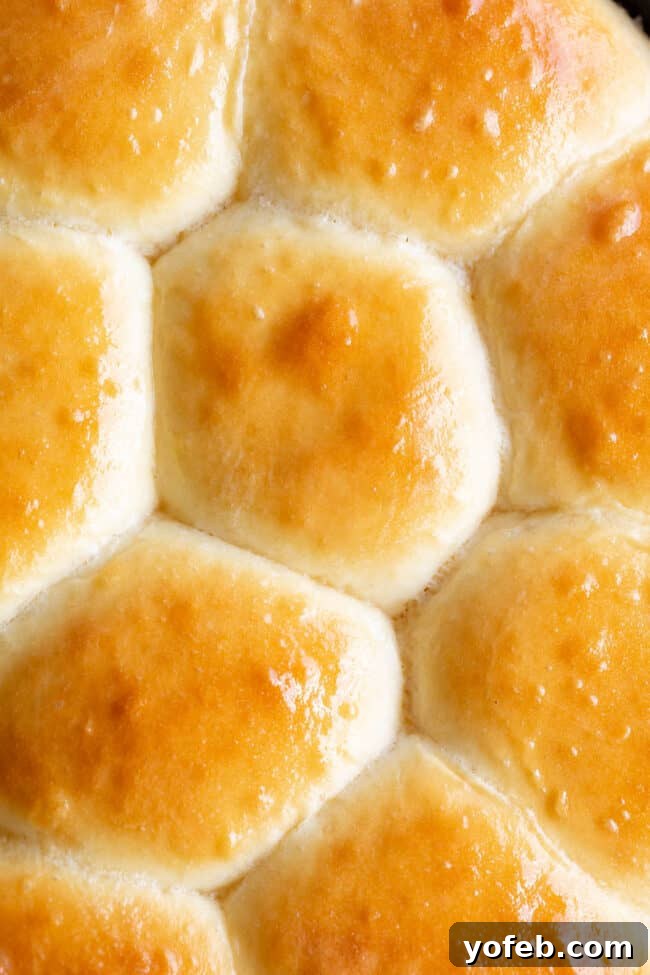
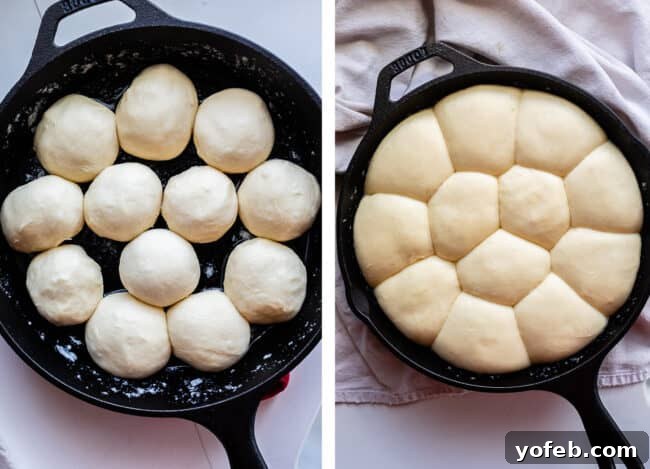
Here’s what these beauties look like after their impressive rise. Notice how they’ve expanded to fill the pan, becoming wonderfully puffy and ready for baking. While a cast iron skillet offers a delightful rustic touch and excellent heat retention, you can absolutely achieve fantastic results using a standard 9×13-inch baking pan if that’s what you have on hand. The key is to ensure the pan is adequately greased to prevent sticking and promote even browning.
Should you brush rolls with butter before baking?
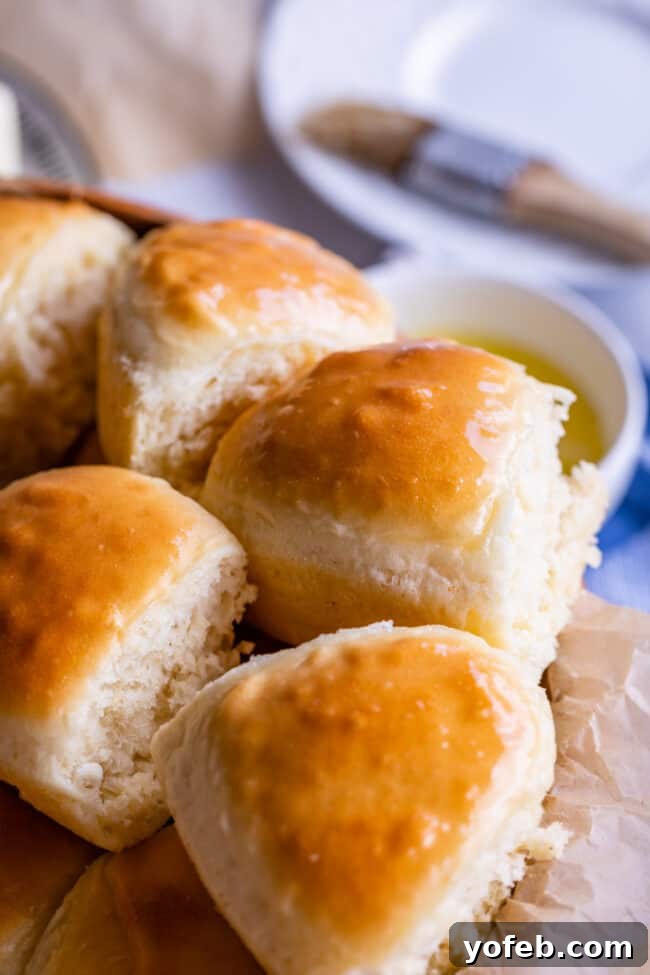
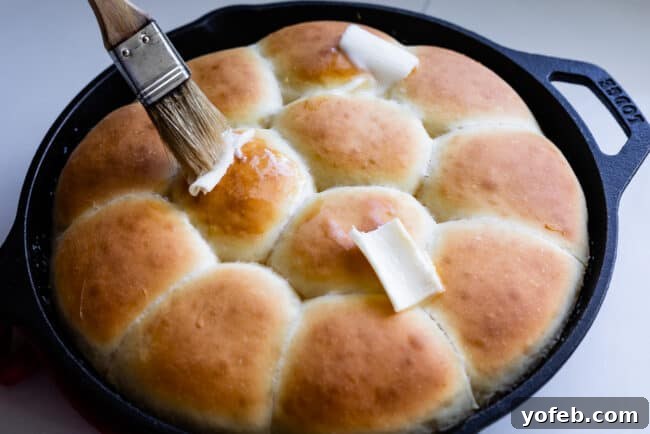
This is a common question among home bakers! While some prefer to brush their rolls with butter before baking, I personally advocate for brushing them with melted butter immediately after they come out of the oven. This technique creates a beautifully soft, glistening top crust and infuses the rolls with an extra layer of rich, buttery flavor as the warm bread absorbs it. If you choose to brush them before baking, it won’t yield the same intense browning effect as an egg wash would, but it will still contribute to a lovely flavor. Ultimately, brushing after baking is my preferred method for achieving that irresistible soft, shiny, and deeply flavorful finish that truly elevates these quick dinner rolls.
Pro Tips for Perfect One-Hour Dinner Rolls
To ensure your quick dinner rolls are the most delectable, light, and fluffy rolls you’ve ever made, follow these essential tips every single time:
- Master the “Fluff and Scoop” Method for Flour: Accurate flour measurement is critical for tender rolls. To do this, first gently aerate the flour in its bag or container with a spoon. Then, lightly scoop the fluffed flour into your measuring cup without packing it down, and level off the top with a straight edge. Never compress the flour by scooping directly from the bag with the measuring cup!
- Always Use Fresh, Active Yeast: The success of any yeast bread hinges on active yeast. If your yeast is expired or simply no longer active, your rolls will sadly fail to rise. A clever trick to extend yeast shelf life is to store it in the freezer. Always double-check the expiration date, and if you don’t bake frequently, consider buying yeast in smaller quantities to maintain freshness.
- Select the Right Flour for Softness: While bread flour is excellent for chewy pizzas and crusty artisan loaves, it contains a higher protein content that develops more gluten, making it too tough for soft dinner rolls. For that desired tender, delicate crumb, all-purpose flour is your absolute best friend.
- Utilize a Warm Oven for an Accelerated Rise: One of the key shortcuts to achieving these rolls in an hour is creating an optimal rising environment. Allowing your shaped rolls to rise in a turned-off, slightly warm oven significantly speeds up the fermentation process. This method transforms the recipe into the ultimate last-minute dinner savior, delivering beautifully risen rolls without the long wait.
Storing and Making Your Quick Rolls Ahead
Once these delicious rolls emerge from the oven, they tend to disappear remarkably fast – often directly into eager mouths! Since these rolls are made with a good amount of yeast, butter, and milk, they are at their absolute best when fresh. They typically won’t stay fresh for much longer than a day or two at room temperature. I generally don’t recommend refrigerating them, as it can dry them out and affect their texture. However, if you wish to savor them for another occasion, freezing is your best option. Allow the baked rolls to cool completely, then place them in an airtight freezer bag or container. They will maintain their quality in the freezer for 2-3 months. Simply thaw and gently reheat when ready to enjoy.
For those who love to plan ahead, you can prepare these rolls and bake them fresh later. Follow the recipe to shape the rolls as described in step 13, but instead of placing them into a hot pan, use a room-temperature pan (still greased, of course). Cover the pan tightly with plastic wrap, ensuring no air can dry out the dough. These prepped rolls can be stored in the refrigerator for anywhere from 2 to 24 hours. They will undergo a slow rise in the cold, but will require an additional 30-60 minutes at room temperature on the counter to puff up further while your oven preheats, ensuring they are perfectly light and airy when baked.
Can you refrigerate dinner rolls before baking?
Absolutely! Refrigerating dinner rolls before baking is an excellent strategy for meal prep and convenience. After shaping your rolls, arrange them in a greased pan that is at cool or room temperature. Cover the pan very tightly with plastic wrap to prevent the dough from drying out, then place it in the refrigerator. When you’re ready to bake, remove the pan from the fridge and let the rolls sit on the counter for 30-60 minutes. This allows them to come to room temperature and get a little puffier before they go into the preheating oven, ensuring a proper rise and beautiful texture.
How long can yeast rolls be refrigerated before baking?
Once shaped, your yeast rolls can typically be refrigerated for a comfortable window of 2 hours up to a full 24 hours. This extended cold proofing allows for flavor development and flexibility in your baking schedule. While you might be tempted to push it a bit longer, be cautious; beyond 24 hours, the yeast may lose too much of its activity, leading to rolls that might deflate or not rise as effectively. For the absolute best light and fluffy results, aiming for a refrigeration period of no more than 24 hours is highly recommended.
Frequently Asked Questions About Quick Yeast Rolls
Keeping rolls warm and fresh throughout a meal can be a challenge. Many people wrap rolls in aluminum foil and place them in a low-temperature oven (around 200°F/95°C) until serving. However, this method usually only maintains warmth until the start of the meal. For a truly magical solution that keeps rolls warm through the entire meal, try this: Take a clean cloth napkin, an unused sock, or even a tea towel, and fill it with dry beans or uncooked rice. Microwave this pouch for about a minute or so until it’s comfortably warm. Place this warm pouch at the bottom of your serving basket, then lay another clean tea towel over it. Arrange your freshly baked rolls on top, wrapping them snugly. The heat from the pouch will gently warm the rolls, keeping them delightfully soft and ready to enjoy throughout your gathering!
The optimal baking temperature for bread is entirely dependent on the type of bread you are making. There isn’t a single universal answer. For instance, a rustic, crusty loaf of sourdough bread thrives at very high temperatures, often exceeding 475°F (245°C), to develop that characteristic chewy interior and crisp, golden crust. However, when it comes to delicate, tender dinner rolls like these, a significantly different approach is required. Our goal for these rolls is a light, fluffy texture with a soft, golden exterior – definitely not a crusty one. That’s why we bake these rolls at 375°F (190°C). This moderate temperature is perfect for achieving that sought-after tender and soft crumb without drying them out or creating an overly firm crust, making it ideal for buttery dinner rolls.
Achieving light and fluffy yeast rolls can sometimes feel like a delicate art, but common pitfalls can often be identified and corrected. Here are the primary reasons your rolls might not be turning out as tender and airy as you’d hoped:
Too Much Flour: This is perhaps the most common culprit. It’s incredibly easy to inadvertently pack too much flour into your measuring cup, resulting in a dense dough. Always use the “fluff and scoop” method: gently aerate your flour with a spoon, then lightly scoop it into the measuring cup and level it off. Never press or compact the flour.
Expired or Inactive Yeast: Yeast is a living organism, and if it’s past its prime or has been exposed to extreme temperatures, it won’t be able to do its job. Always check the expiration date, store yeast properly (the freezer is excellent for extending shelf life!), and proof your active dry yeast to confirm its vitality before proceeding with the recipe.
Incorrect Flour Type: While bread flour is fantastic for developing strong gluten structures in crusty breads and pizza dough, its high protein content is detrimental to the softness of rolls. Always opt for all-purpose flour for light and tender dinner rolls.
Insufficient Rising Time: While this specific recipe is designed for speed, it still relies on optimal rising conditions. The key here is the warm, not hot, environment provided by a briefly heated oven, which accelerates the rise. For most roll recipes, diligently following the recommended rising times (which can often be an hour or even 90 minutes) is crucial. Skipping this critical step or rushing it without proper warmth will almost always result in dense, heavy, or gummy rolls.
If you’ve ended up with hard dinner rolls instead of the soft, pillowy ones you envisioned, it’s definitely a disappointing outcome, and it’s a common issue that many home bakers face! Hard rolls are typically a symptom of one or more fundamental mistakes in the baking process. The main culprits are usually adding too much flour (which creates an overly stiff dough), using the wrong type of flour (like bread flour instead of all-purpose, leading to excessive gluten development), using expired or inactive yeast (which prevents proper leavening and causes a dense texture), or not allowing sufficient time for the dough to rise adequately (even in a quick recipe, proper rising is essential for airiness). For a more detailed breakdown and solutions to these issues, please refer to the explanations provided in the previous question, “Why aren’t my yeast rolls light and fluffy?” Rest assured, this is a common learning experience in baking, and with a few adjustments, you’ll be on your way to perfectly soft rolls!
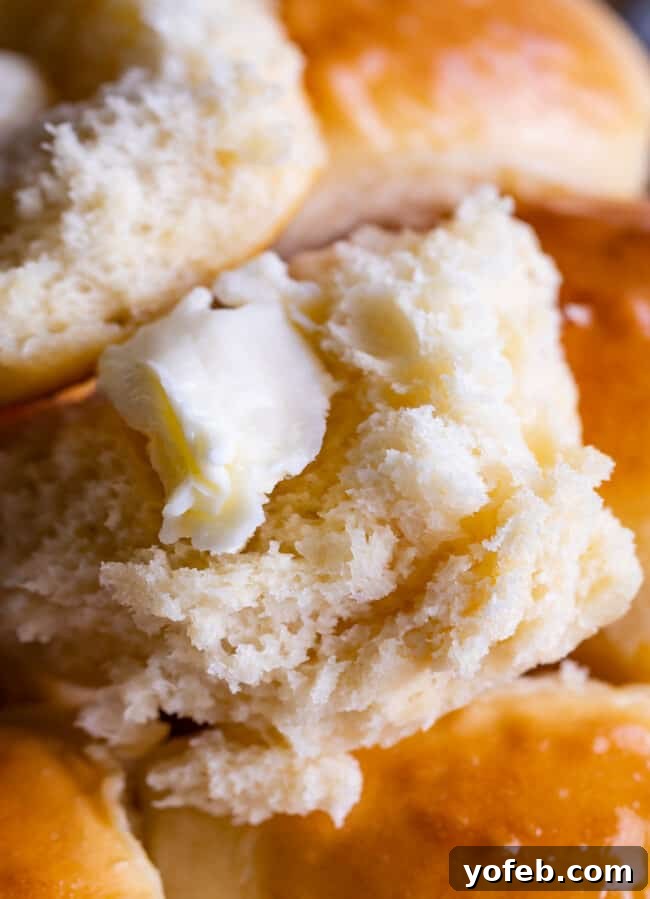
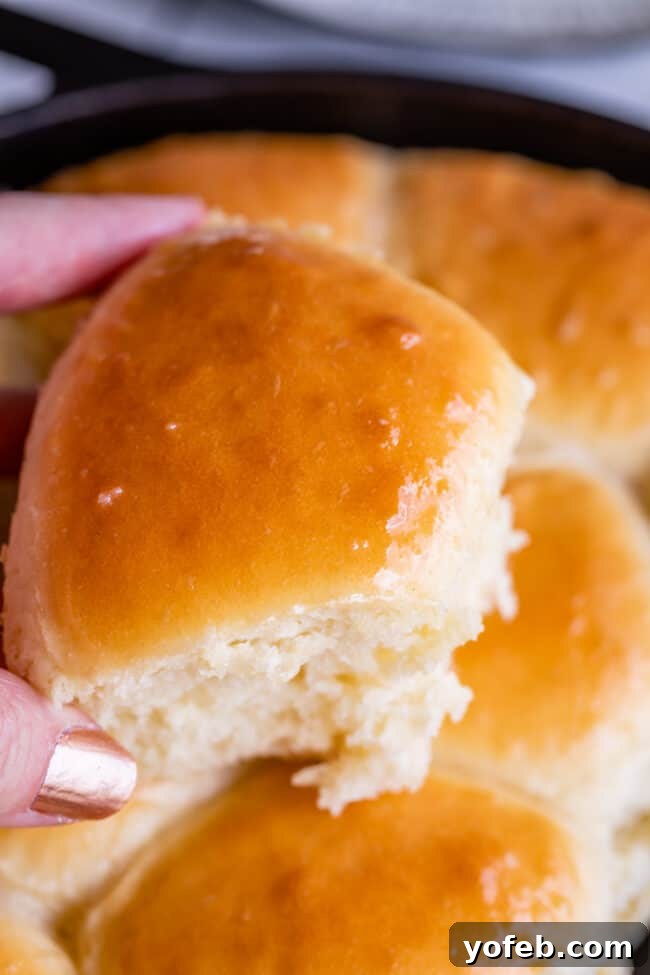
Just look at the center of that roll! It’s utterly tender and incredibly fluffy, like biting into a buttery cloud. This is the stuff that culinary dreams are made of, truly a delightful experience. As Easter approaches, or any time you want to add something special to your meal, enjoy feasting on these wonderful rolls and remember the joy of simple, homemade pleasures. If you’re looking for further spiritual enrichment, consider taking a moment to celebrate the resurrection of Christ!
More Delicious Dinner Roll Recipes to Explore!
If you’ve fallen in love with homemade rolls, there are plenty more delicious variations to discover and enjoy. Here are some other fantastic recipes you’ll undoubtedly adore:
- Aunt Shirley’s Famous Dinner Rolls >> Trust Aunt Shirley; her classic rolls are truly unmatched.
- Big Fat Crescent Rolls >> These are effortlessly easy, remarkably soft, and wonderfully buttery!
- Buttery Sweet Potato Rolls >> A unique and festive addition, especially perfect for Thanksgiving.
- Cinnamon Honey Butter >> The absolute best topping for any warm, homemade dinner roll. Pure bliss!
- Samoan Coconut Rolls (Pani Popo) >> A tropical twist; if you haven’t tried these, you’re missing out!
- Garlic Knots Recipe >> These savory delights are made for dipping in aromatic garlic butter. Yes, please!
- Garlic and Rosemary Skillet Bread >> A rich, flavorful bread that’s sure to become a new favorite.
- Olive Oil and Rosemary Rolls from Recipe Girl
- Sea Salt and Herb Skillet Rolls from Sally’s Baking Addiction
- Easy Skillet Rolls from Crunchy Creamy Sweet
Facebook | Pinterest | Instagram

One Hour Quick Dinner Rolls
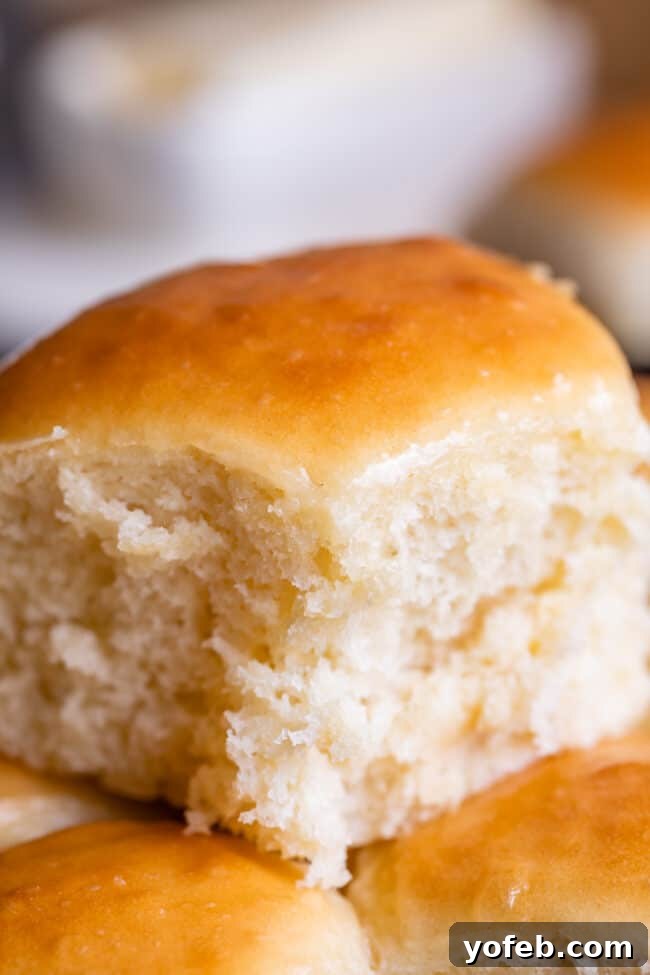
Ingredients
- 3 tablespoons warm water
- 1 tablespoon active dry yeast*
- 1 teaspoon sugar, to activate yeast
- 3 tablespoons sugar
- 1 teaspoon kosher salt
- 3 tablespoons shortening
- 3/4 cup milk
- 1 large egg
- 2 & 1/2 cups all purpose flour, spooned and leveled
- 1 tablespoon butter, to grease pan
- 1 tablespoon butter, to top finished rolls
Instructions
-
To proof the yeast: In a small bowl or coffee mug, add 3 tablespoons warm water. The temperature is crucial here; it should feel pleasantly lukewarm, similar to bathwater, and certainly not hot enough to sting your finger. For optimal results, aim for a temperature between 105-110 degrees F (40-43 degrees C).
-
To the warm water, add 1 tablespoon of active dry yeast and 1 teaspoon of sugar. Give it a gentle stir to combine, then let this mixture rest undisturbed for 5 minutes. During this time, the yeast should dissolve and begin to bubble actively, forming a foamy layer on top. This foam indicates that your yeast is alive and ready to work!**
-
To make the dough: While the yeast is proofing, prepare your main dough ingredients. In a large mixing bowl, or the bowl of a stand mixer, combine 3 tablespoons of sugar, 1 teaspoon of kosher salt, 3 tablespoons of shortening, and 1 cup of the all-purpose flour specified in the recipe.
-
In a glass measuring cup, gently warm 3/4 cup of milk. You can do this in 30-second increments in the microwave until it reaches a warm, but not hot, temperature – ideally the same pleasant lukewarm temperature as the water used for the yeast. Pour the warmed milk into the flour mixture in your large bowl.
-
Thoroughly combine the ingredients in the large bowl. You can stir them together with a sturdy wooden spoon or use the paddle attachment of your stand mixer. (Confession: I often use my hand with the dough attachment, as it feels more efficient and saves an extra dirty attachment!) Beat until well integrated.
-
By now, your yeast mixture should be beautifully foamy and dissolved. Carefully add this activated yeast mixture to the flour and milk mixture in your large bowl.
-
Crack in 1 large egg and beat the entire mixture thoroughly until all ingredients are well combined and smooth.
-
Gradually add the remaining all-purpose flour, bit by bit, mixing well after each addition. The exact amount of flour can vary based on humidity and other factors, so bread baking often requires a bit of intuition. You might not need all the flour, or you might need a tiny bit more. Continue adding flour until the dough forms a smooth and soft consistency, but remains noticeably sticky – it won’t completely pull away from the sides of the bowl. The less flour you ultimately incorporate, the more tender and delicate your finished rolls will be. Refer to the accompanying photos for visual guidance on the desired dough consistency.
-
Once all the flour is incorporated and the dough reaches the described consistency, attach the dough hook to your stand mixer and knead the dough for 5 minutes. If you are kneading by hand, transfer the dough to a well-floured work surface and knead for approximately 8 minutes, developing the gluten. Even after kneading, the dough will still be quite sticky, which is perfectly normal and contributes to the rolls’ softness. See photos for reference.
-
Carefully scrape the dough from the bowl onto a generously floured work surface. With lightly floured hands, gently shape the sticky dough into a smooth ball. Cover it with a clean tea towel (perhaps a cherished heirloom, or simply your favorite kitchen towel!). Allow the dough to rest for 5-10 minutes. This short rest helps the gluten relax, making the dough easier to handle for shaping.
-
To prepare the pan/skillet: Meanwhile, preheat your oven to 375 degrees F (190 degrees C). You’ll only need it on for a very brief period – typically 2-3 minutes – to heat your pan.
-
Add 1 tablespoon of butter to a 10-inch cast iron skillet or a 9×13-inch baking pan. Place this pan into the preheating oven just long enough for the butter to melt and the pan to become comfortably hot to the touch. Once hot, immediately turn the oven off. Use a pastry brush to swirl the melted butter around, ensuring the entire interior of the pan, including the sides, is well greased. Leave the heated pan in the turned-off oven until you are ready to place your shaped rolls inside.
-
To shape the rolls: Gently press down on the rested dough to release any accumulated air bubbles. Divide the dough into 12 equal pieces. For precise and uniform rolls, each piece should weigh approximately 2 ounces. To shape each piece into a roll, use your fingers to round the dough on one side, then gather and pinch the dough together on the opposite side to create a smooth, taut surface on top. Refer to the photos for visual guidance on this shaping technique. Place each shaped roll into the hot pan/skillet, with the pinched seam facing down. Ensure there’s a small gap between each roll, allowing them space to expand as they rise.
-
Cover the shaped rolls in the hot pan with a clean tea towel. Carefully open your turned-off oven and assess its internal temperature. It should be warm, but not excessively hot. If you can comfortably place your finger on the oven rack without burning yourself, then place your covered rolls inside and close the oven door. If the rack feels too hot to touch, place the rolls in the oven but leave the door slightly ajar to allow it to cool down a bit more. The goal is to create a warm environment for rising, not to bake them yet.
-
Allow the rolls to rise in the warm, turned-off oven for 15 minutes. After this initial rise, carefully remove the pan of rolls from the oven (you can place it on top of the oven or in another warm spot to continue rising). Now, preheat your oven back up to 375 degrees F (190 degrees C).
-
While the oven preheats, allow the rolls to continue their final rise for an additional 10-15 minutes on the countertop. By the end of this period, the rolls should have visibly doubled in size, indicating a successful rise. The total rising time after the rolls have been shaped should be at least 25 minutes to ensure ultimate fluffiness.
-
Once the rolls have fully risen and the oven is preheated, remove the tea towel. Place the pan of rolls into the 375°F (190°C) oven and bake for approximately 12 minutes. The rolls are perfectly baked when their tops achieve a deep, uniform golden-brown color. For an extra measure of doneness, an instant-read thermometer inserted into the center of a roll should register at least 190°F (88°C).
-
As soon as you remove the hot rolls from the oven, immediately melt 1 tablespoon of butter and generously brush it over the tops of all the rolls using a pastry brush. This step adds a beautiful sheen, a soft crust, and an extra burst of buttery flavor.
-
Allow the freshly baked rolls to cool and set for about 5 minutes before eagerly digging in! Serve them warm with plenty of extra melting butter for an indulgent treat, or elevate the experience even further with this delectable Cinnamon Honey Butter!
Notes
**If your yeast mixture does NOT become foamy and bubbly after 5 minutes, it means your yeast is likely inactive (perhaps killed by water that was too hot, or it’s expired). It’s crucial to abandon this batch of yeast and start over with fresh yeast and correctly tempered water, otherwise, you’ll end up with dense, flat rolls.
1 hour quick roll storage
These rolls are truly best enjoyed fresh, as they tend to disappear quickly from the counter! Due to their rich content of yeast, butter, and milk, they’ll remain fresh and soft for about one to two days at room temperature. I generally advise against refrigerating them, as it can cause them to dry out and lose their tender texture. However, if you wish to store them for a longer period, freezing is an excellent option. Once the rolls have completely cooled, transfer them to an airtight freezer bag or container. They can be safely stored in the freezer for 2-3 months. To reheat, simply thaw at room temperature and warm gently in the oven.
For those who prefer to bake ahead and serve fresh, you can prepare the rolls up to the shaping stage. Follow step 13 to shape the dough, but instead of placing them in a hot pan, arrange them in a greased pan that is at room temperature. Cover the pan tightly with plastic wrap, ensuring it’s sealed to prevent the rolls from drying out, and refrigerate for 2 to 24 hours. While refrigerated, the rolls will undergo a slow proof. Before baking, remove them from the fridge and let them sit on the countertop for an additional 30-60 minutes to warm up and continue rising while your oven preheats. This ensures they achieve their desired fluffy texture when baked.