
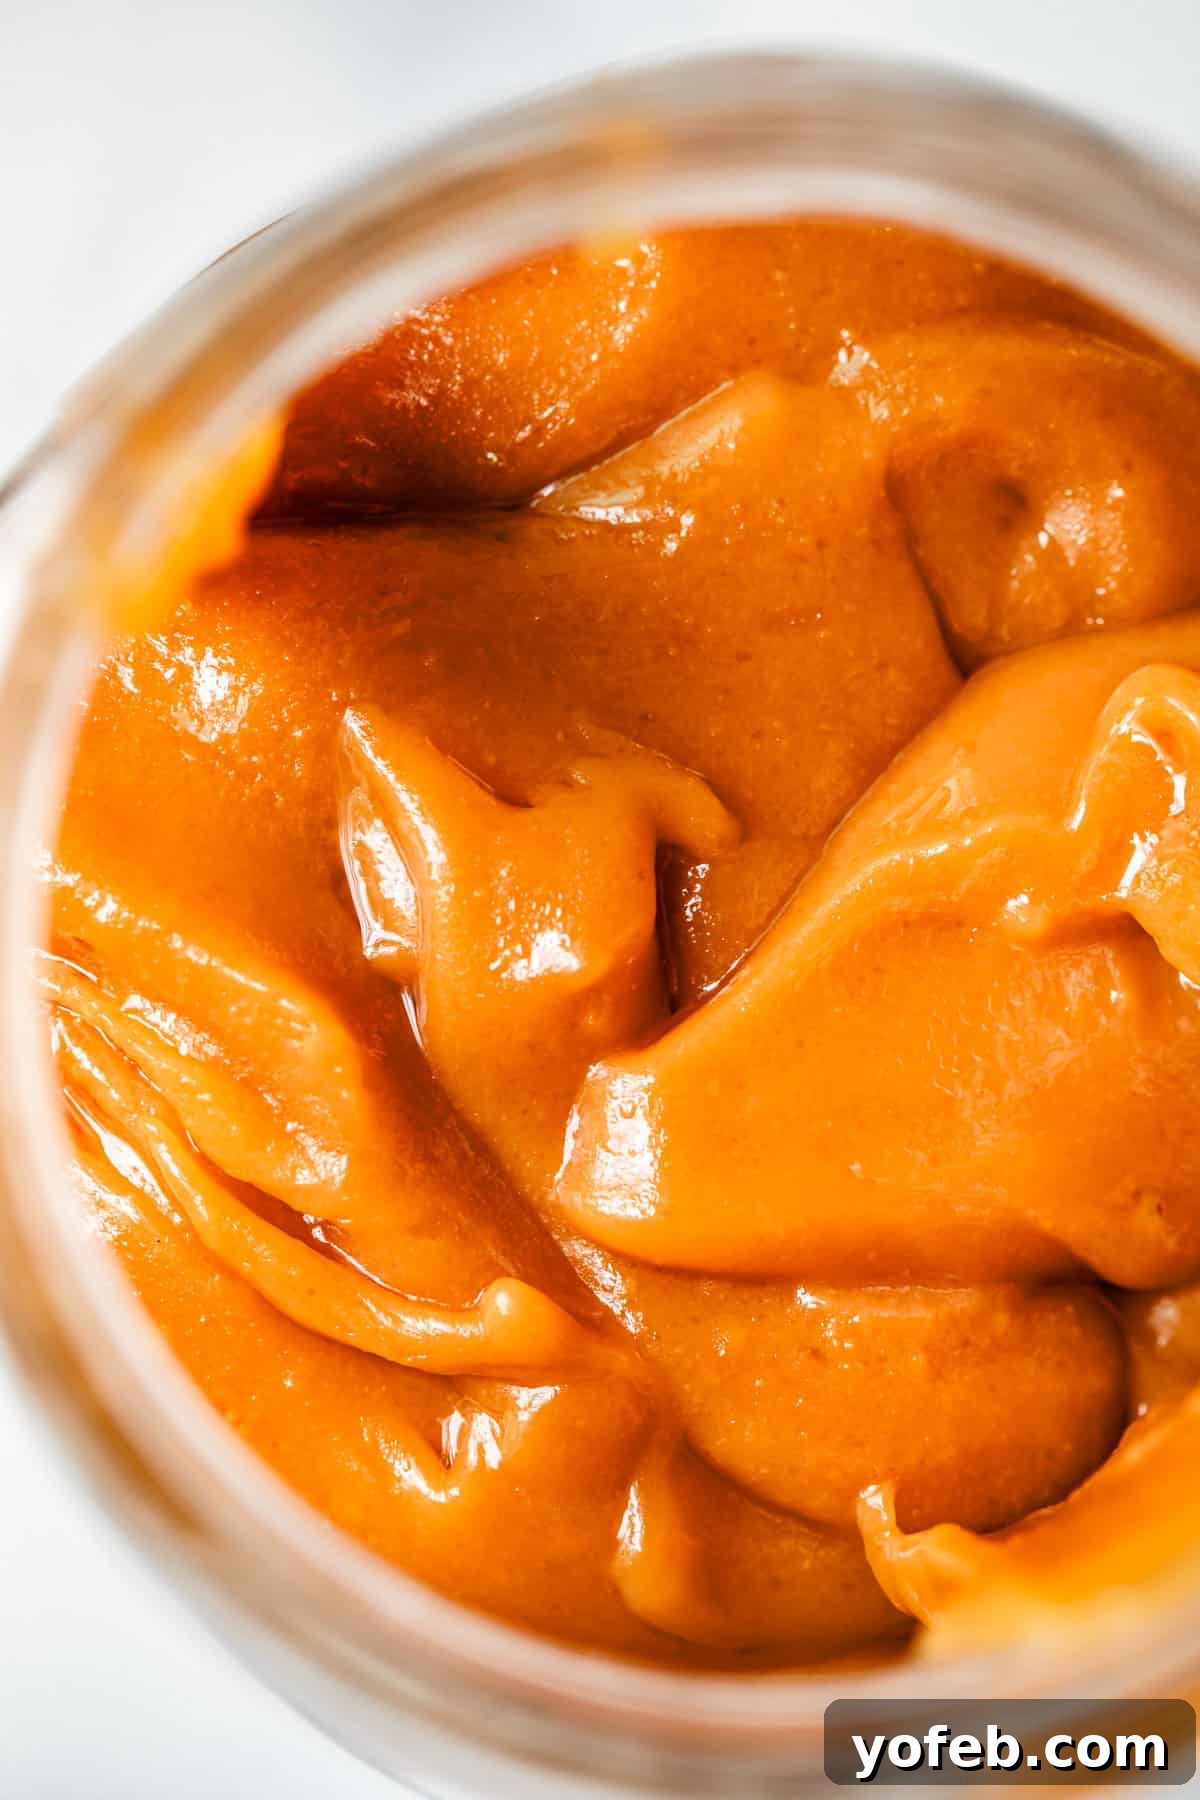
The Ultimate Fudgy Salted Caramel Sauce: A 7-Year Quest Realized
Get ready to experience the salted caramel sauce of your dreams! This isn’t just another caramel recipe; it’s a revelation. Imagine a caramel that’s exceptionally thick, incredibly rich, and boasts a subtly fudgy texture that will absolutely captivate your taste buds. For over seven years, every autumn, I’ve been diligently testing and perfecting this recipe. My goal? To replicate the extraordinary fudgy salted caramel found at Apple Hill near Sacramento – a caramel that has haunted my culinary imagination for years. And the best part? It’s surprisingly easy, coming together in just about 30 minutes. Drizzle this divine creation over creamy ice cream, sandwich it between Salted Caramel Sandwich Cookies, use it as a luxurious dip for fresh apple slices, or simply savor it by the spoonful. Prepare to be amazed!
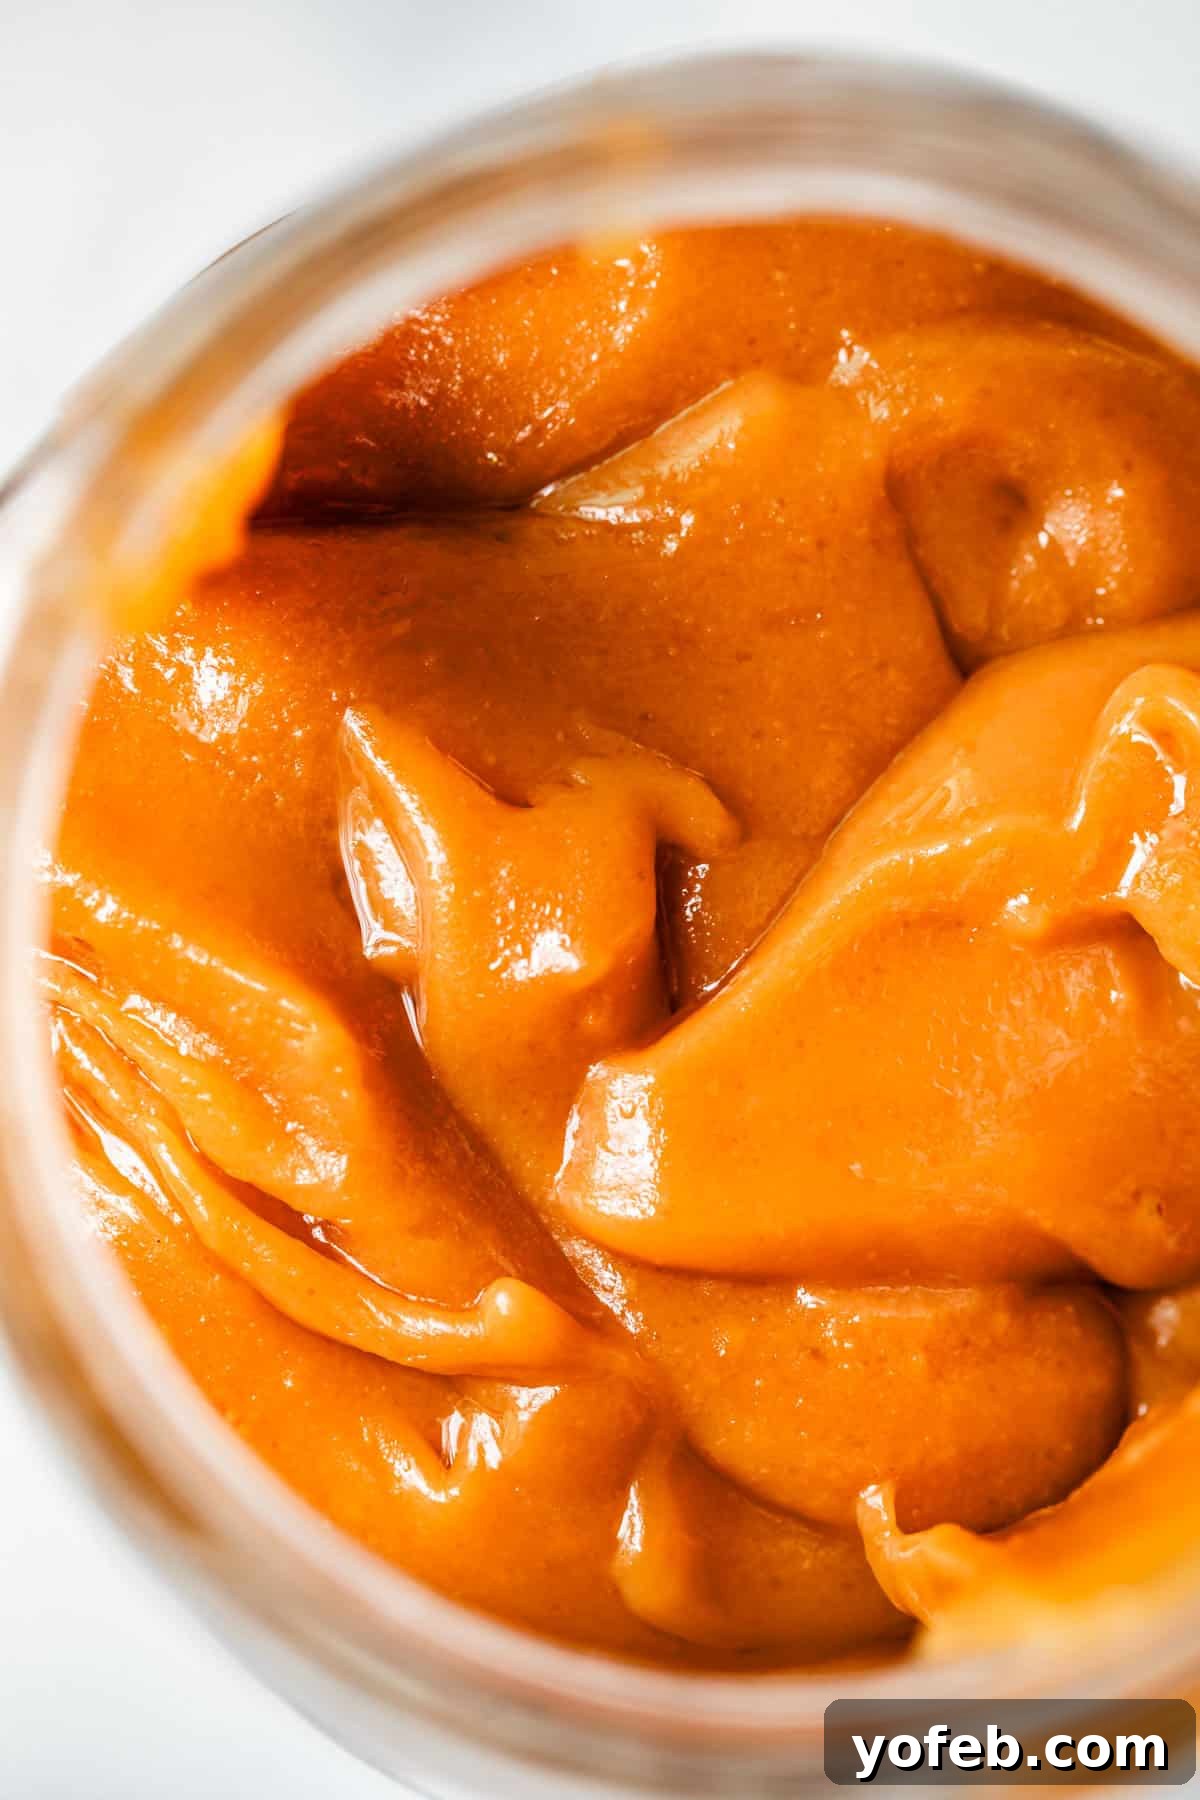
Table of Contents
- The Inspiration Behind the Best Fudgy Caramel Sauce
- My Long Journey to Perfect Caramel
- Understanding Traditional Salted Caramel Sauce
- Unveiling the Secret: The BEST Homemade Salted Caramel Sauce
- The Role of Corn Syrup in Caramel Perfection
- Essential Equipment for Caramel Making: A Heavy-Bottom Pot
- Simple Ingredients for Extraordinary Salted Caramel
- How to Master Homemade Salted Caramel: Step-by-Step
- Delightful Pairings: What to Serve with Your Fudgy Caramel Sauce
- Storage Tips for Your Homemade Salted Caramel
- Can You Freeze Salted Caramel Sauce?
- Frequently Asked Questions About Salted Caramel Sauce
- Indulge Your Caramel Cravings: More Sweet Treats
- Beyond Caramel: Other Amazing Dessert Toppings to Try!
- Easy Salted Caramel Sauce Recipe Card
The Inspiration Behind the Best Fudgy Caramel Sauce
Every autumn, my family and I embark on a cherished tradition: a trip to Apple Hill, a charming collection of orchards nestled near Sacramento. It’s a place where we pick crisp apples, indulge in warm apple cider donuts, and brave the heat in our festive fall sweaters. A few years back, my kids convinced me to try a caramel apple, despite my long-standing aversion to them (seriously, are they not the most awkward things to eat?!). I was hot, tired, and delightfully overstimulated by the sheer joy of my small children. After struggling with three flimsy plastic knives and kneeling on the grass because all the picnic tables were taken, we finally managed to break the apple into chunks. That first bite? It was an immediate “Remy moment” from Ratatouille – pure bliss, a perfect harmony of flavors.
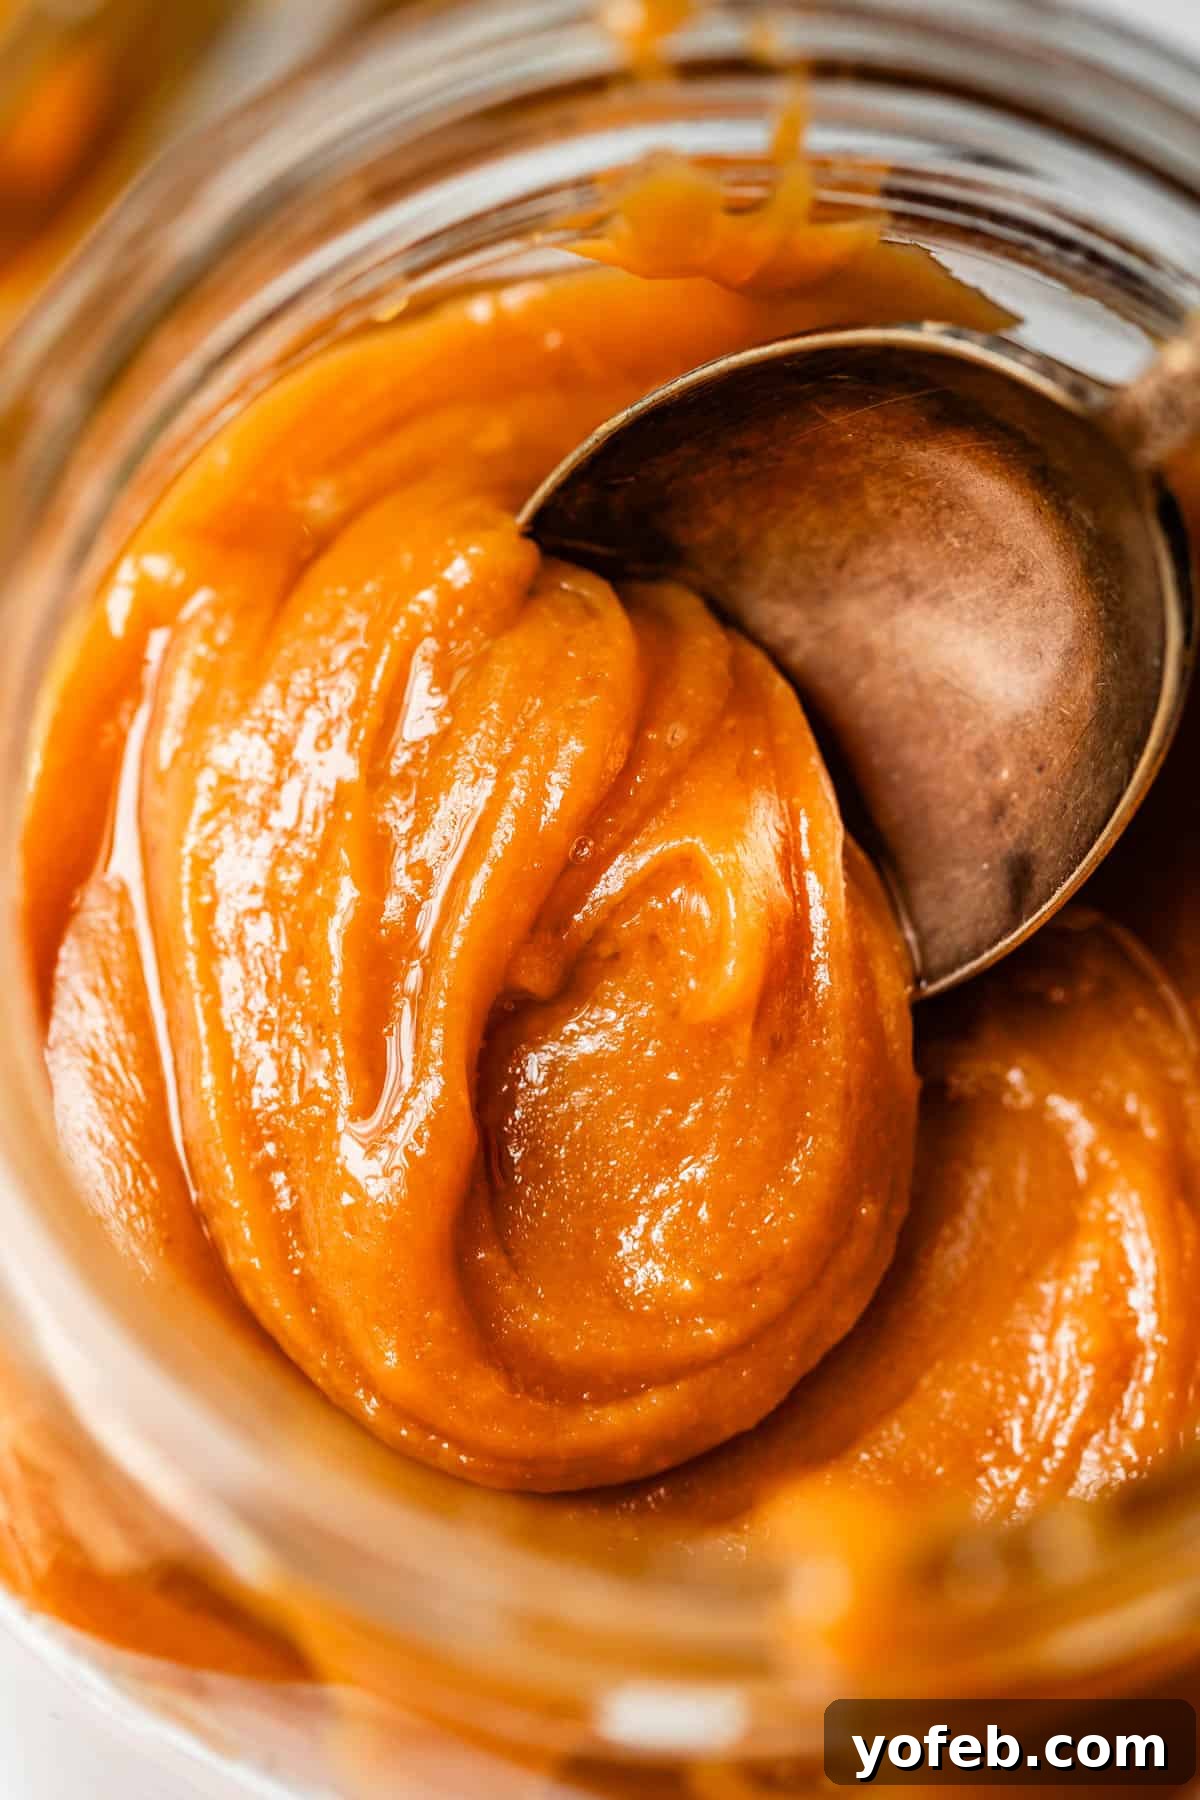
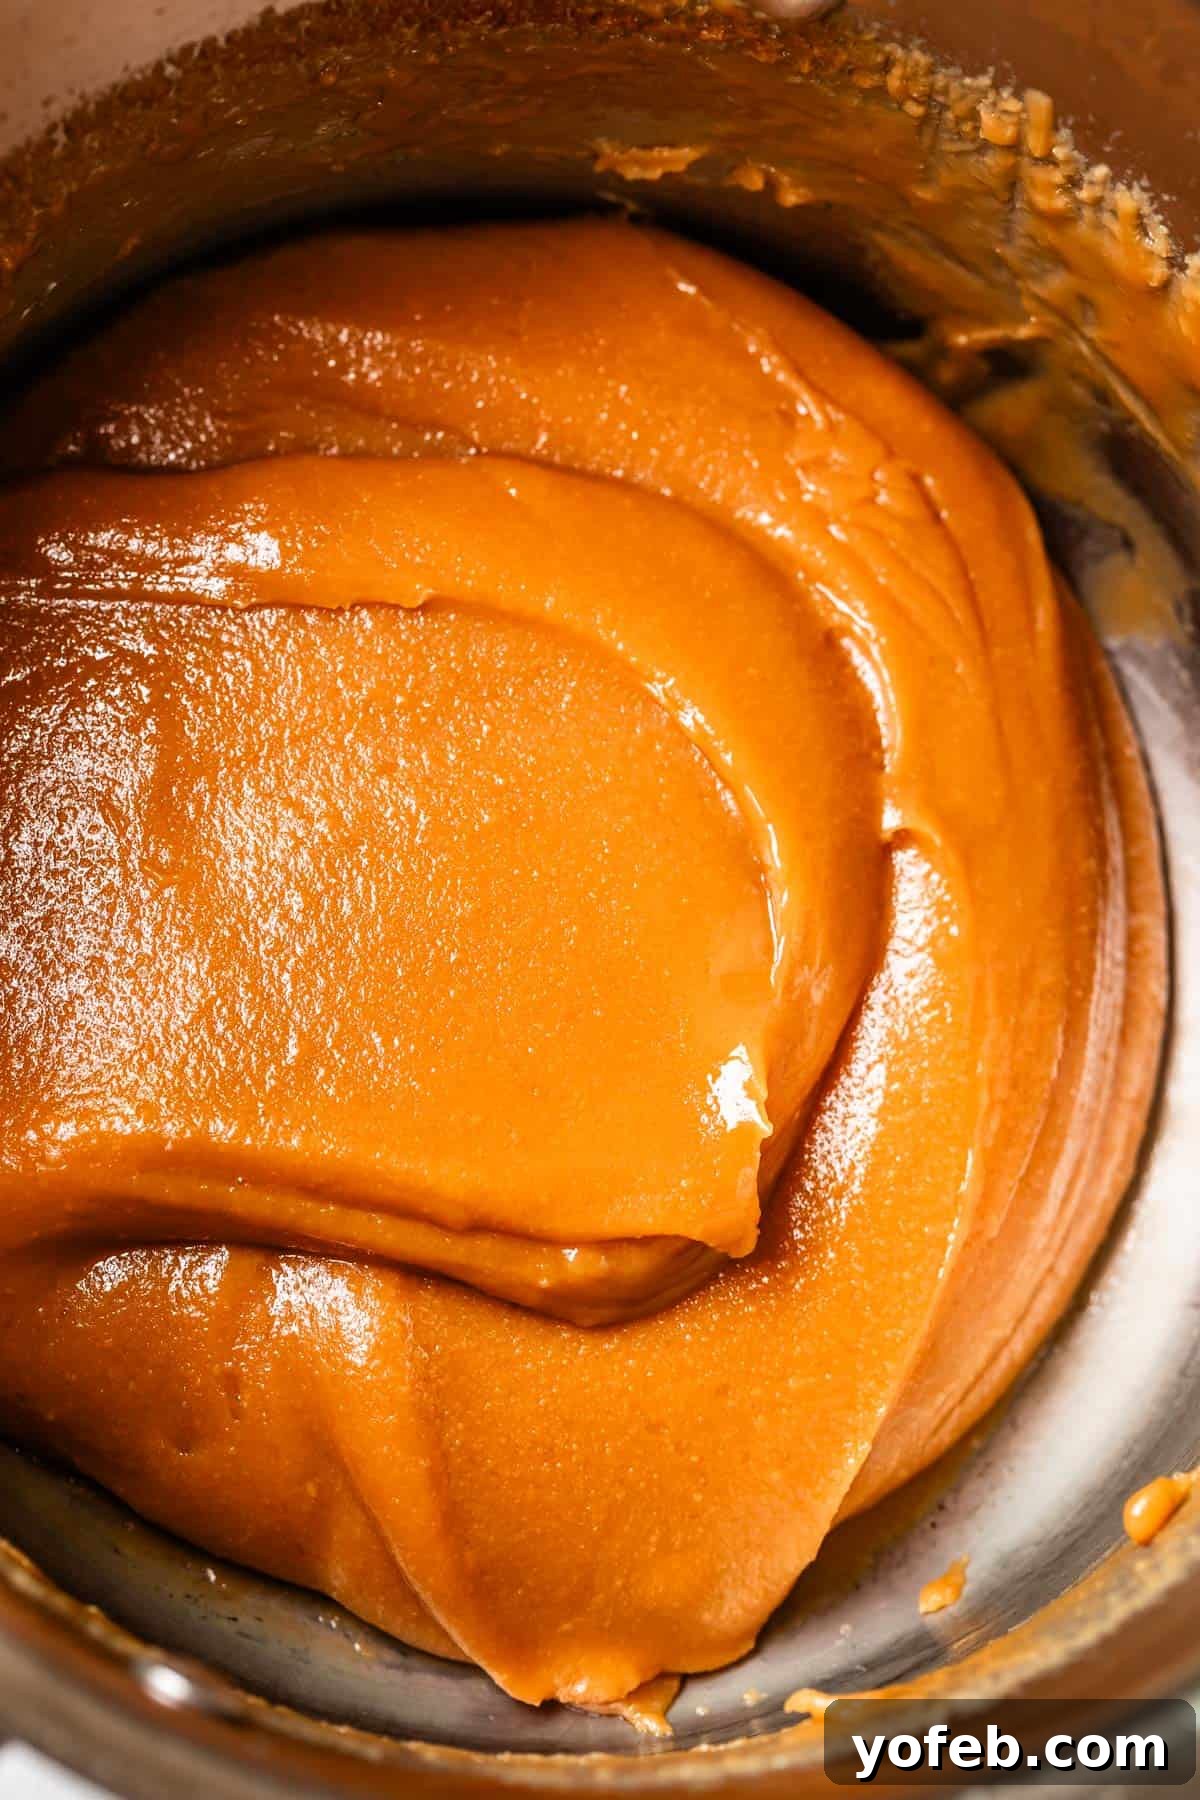
I had discovered it: a caramel apple adorned with perfectly tender caramel that wasn’t overly stretchy and didn’t harden prematurely while eating. This caramel had a distinctly different appearance; it wasn’t perfectly smooth, glossy, or shiny. Instead, it had a slightly grainy, utterly FUDGY look. It was exactly what I never knew I always wanted.

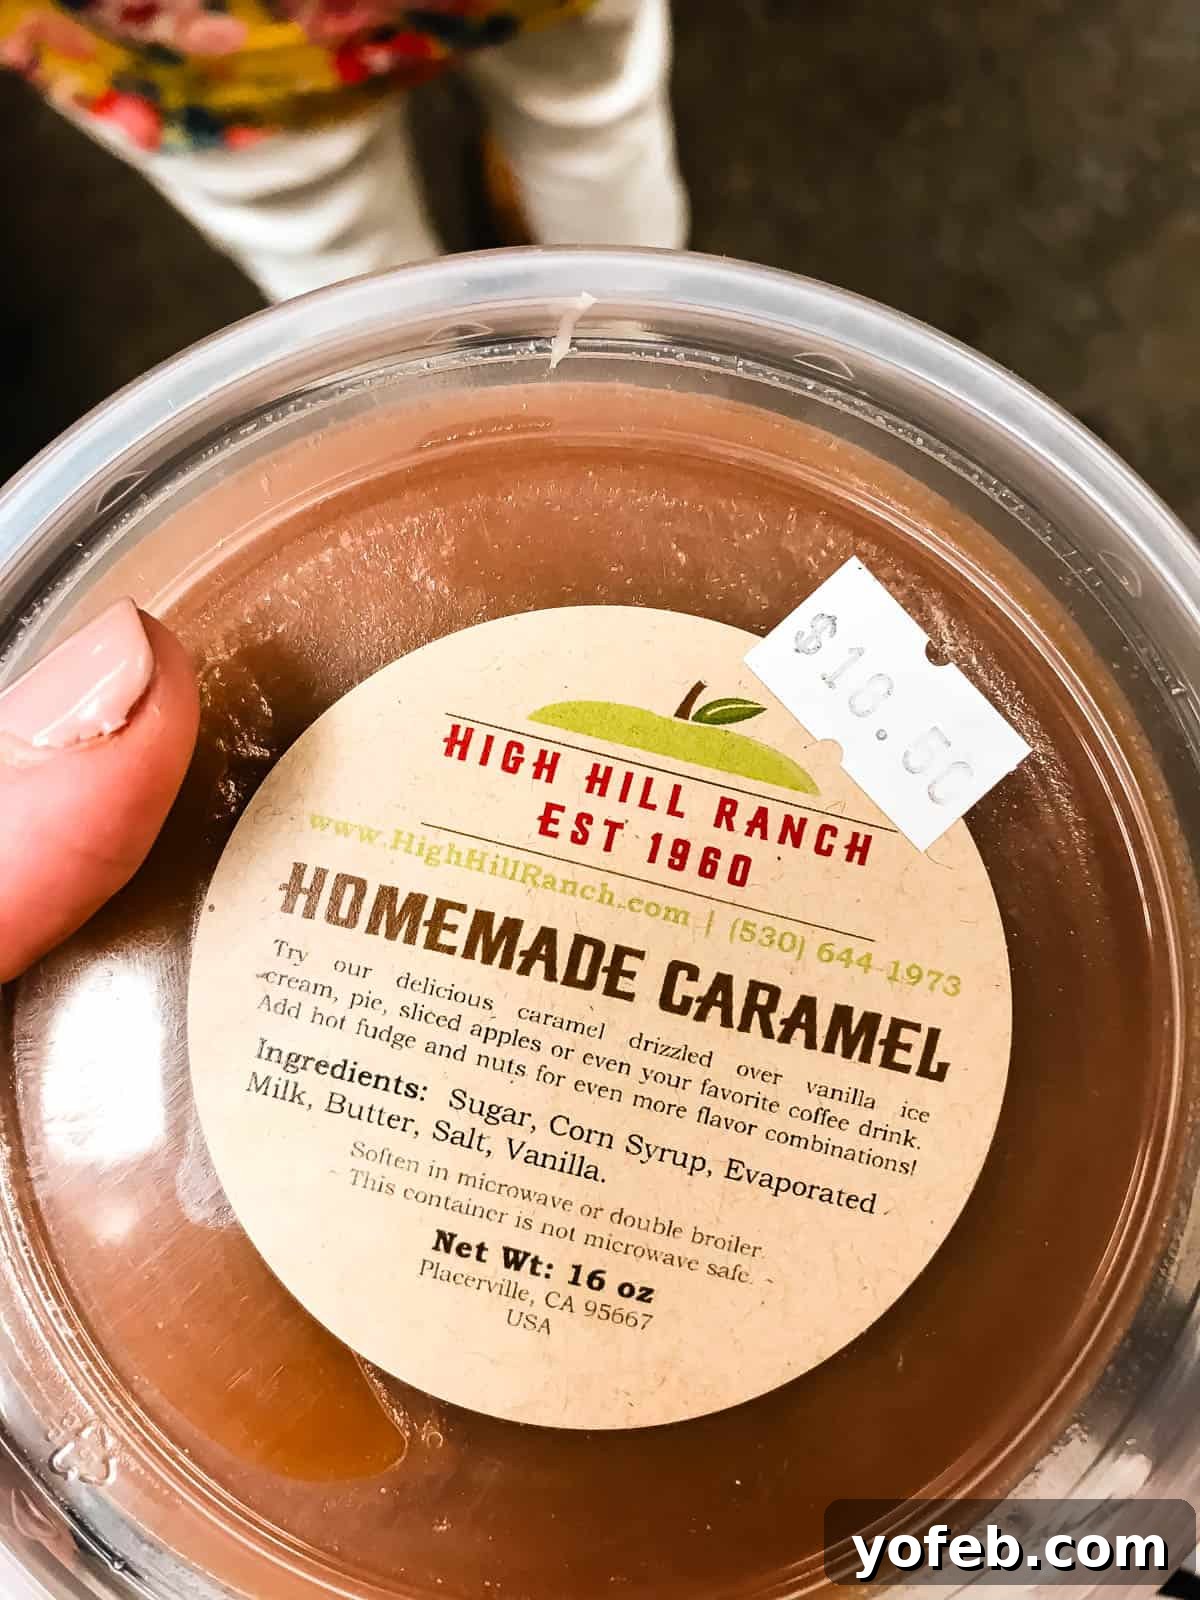
Driven by this extraordinary culinary experience, I practically sprinted back to High Hill, the very spot where I’d purchased that magical caramel apple. I grilled the shopkeeper, determined to uncover the secrets behind this wondrous caramel – who made it, what ingredients they used, what sorcery was at play. She revealed that the caramel was homemade right there on-site and pointed me to tubs available for purchase. I eagerly bought a $20 tub, brought it home, and attempted to recreate it. My efforts were, unfortunately, a miserable failure. Since 2016, I’ve bought a tub of that caramel every single year, trying a new version each fall, yet always falling short… until now.
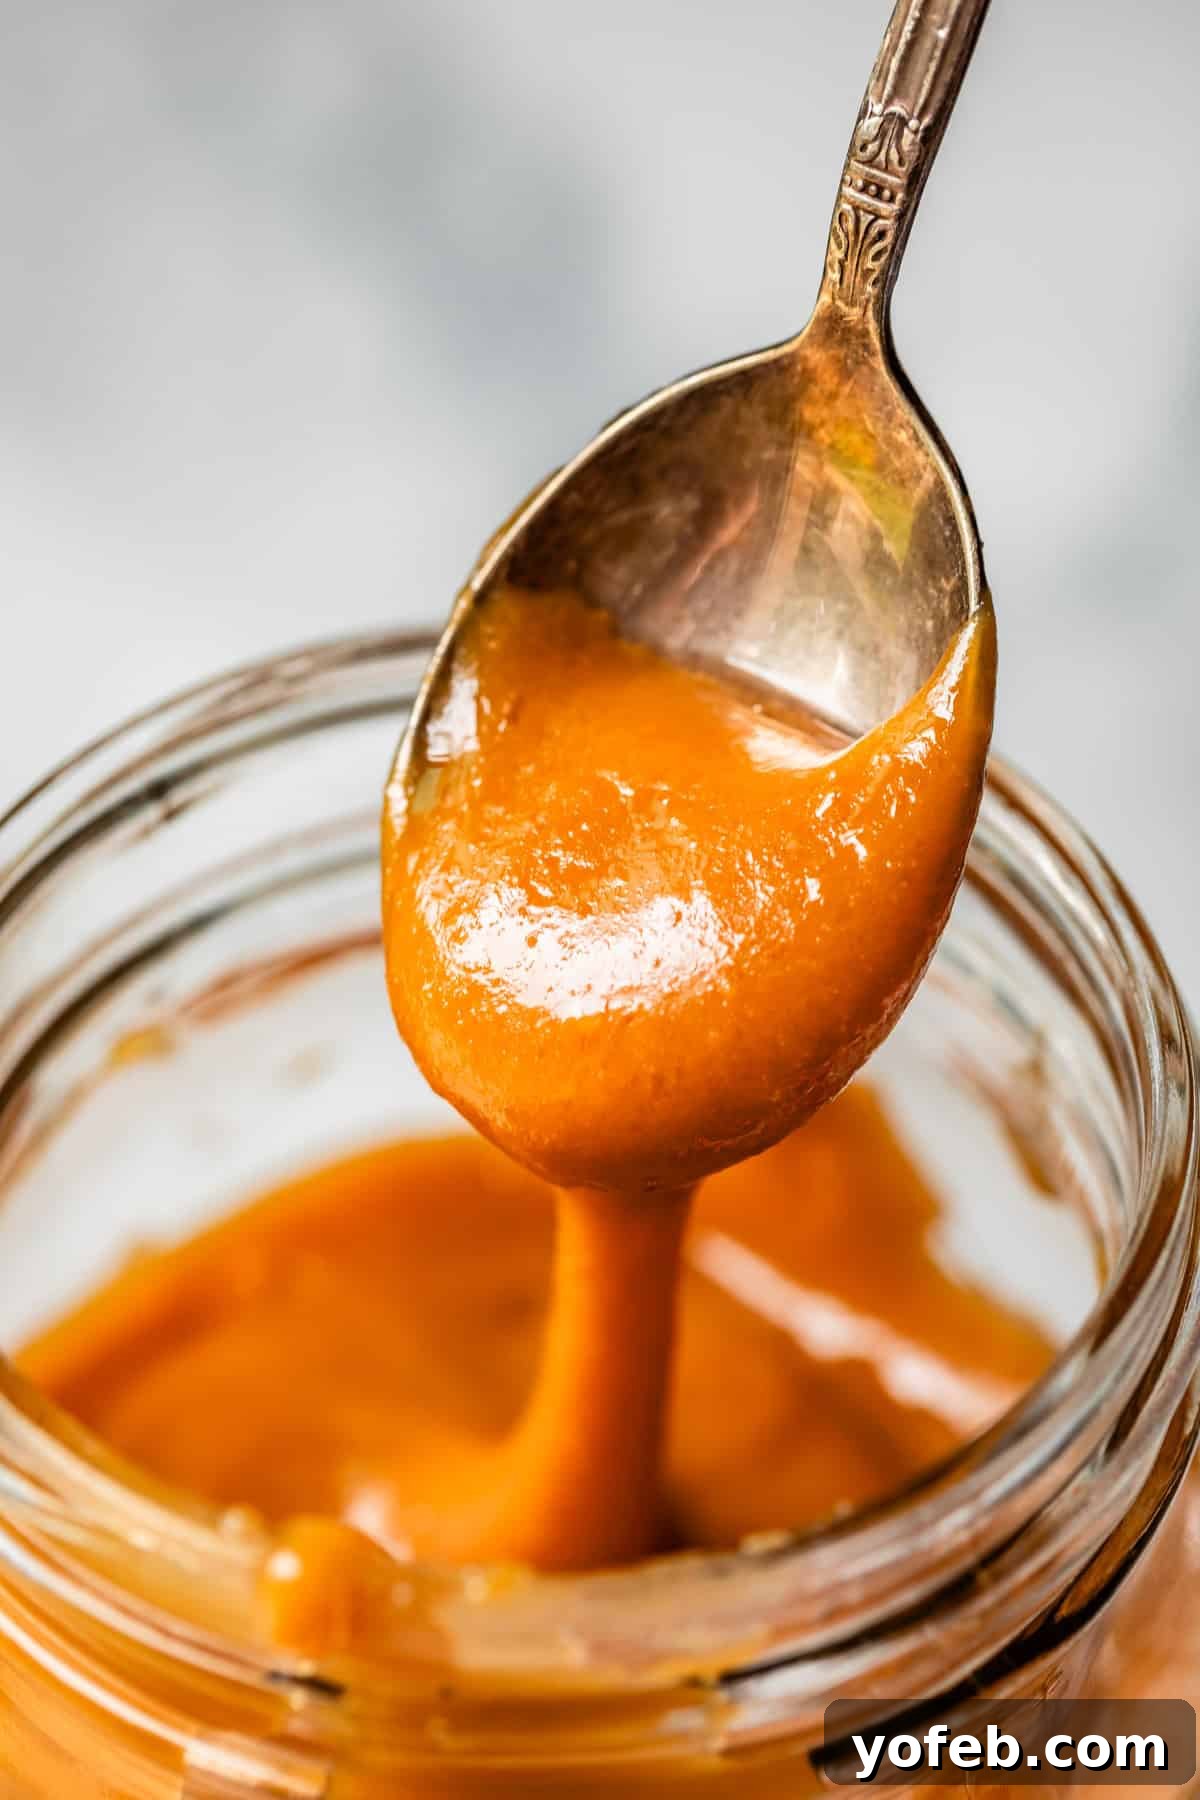
Today, I am thrilled to share with you the culmination of all those years of dedicated testing: the salted caramel sauce of my dreams. This recipe perfectly captures that elusive fudgy texture and deep caramel flavor. While I’ll dedicate an entire future post to the art of making the perfect caramel apples, this sauce is the foundation, and it will be incredibly close to this very recipe. I’ve discovered countless ways to enjoy this caramel, with sandwiching it between Salted Caramel Cookies being one of my absolute favorites, and of course, it’s the key to the BEST. EVER. CARAMEL. APPLES!!
My Long Journey to Perfect Caramel
The ingredients for this caramel are deceptively simple and often listed right on the lid of those commercial tubs. However, the true magic of caramel lies entirely in the method; there are literally a thousand ways to combine these core components. My quest for the perfect caramel involved researching dozens upon dozens of recipes, meticulously studying how and when to combine ingredients, and precisely what temperatures to reach. If you’ve ever ventured into the world of caramel making, you know the endless variables involved: do you heat it to 234°F, 250°F, or 300°F? Do you add all ingredients simultaneously, or incorporate them in stages, reaching different temperatures along the way? It’s enough to make your head spin!
I experimented with every technique imaginable. Nothing quite delivered that elusive FUDGY texture I craved, while still maintaining a distinct CARAMEL flavor – not just a mere brown sugar or butterscotch taste. I vividly recall one year where I tried several top-rated caramel recipes, hoping to stumble upon those magical qualities. None of them hit the mark, so I ended up gifting the jars to whoever was around during school pickup. My friend Jenny still talks about how she devoured an entire jar single-handedly, but even she admitted it wasn’t “the one” for me.
Then there was last summer, when a new method resulted in such rock-hard caramel that we had to soak the pan repeatedly, scraping off layers of hardened caramel for hours. My apologies to Eric’s parents, Kris, for what I did to your pot in Montana; it’s likely never been the same! But here, in my own kitchen, just this past Monday, I finally cracked the code. The secret? We first create a traditional caramel base, and then we incorporate the very same ingredients used for making classic, parchment-wrapped caramel candy squares. It’s a brilliant hybrid recipe, yielding a caramel sauce that transcends expectations. It’s not just a sauce; it’s an experience.
Understanding Traditional Salted Caramel Sauce
Most caramel sauce recipes follow a similar principle, with varying ratios. You begin by combining a bit of water and granulated sugar in a pot, heating it until it transforms into a beautiful amber color and releases a slight smoky aroma. Then, you carefully whisk in some cream, and voilà: caramel sauce. To enhance flavor and texture, many recipes call for adding salt, vanilla, and a touch of butter at the end of this water-sugar-cream process. My personal Favorite Caramel Sauce, for instance, includes a squeeze of lemon juice—a tip I learned from Cook’s Illustrated—which wonderfully brightens the flavors.
However, the recipe I’m sharing today is a departure from this classic rendition. If you’re seeking that traditional, smooth, glossy, and slightly honey-like caramel texture that stretches beautifully, then I recommend my Favorite Caramel Sauce, simply by adding a bit more salt. It’s a delicious, reliable choice. But if you’re ready for something more, something with an unparalleled depth and satisfying chew, keep reading.
Unveiling the Secret: The BEST Homemade Salted Caramel Sauce
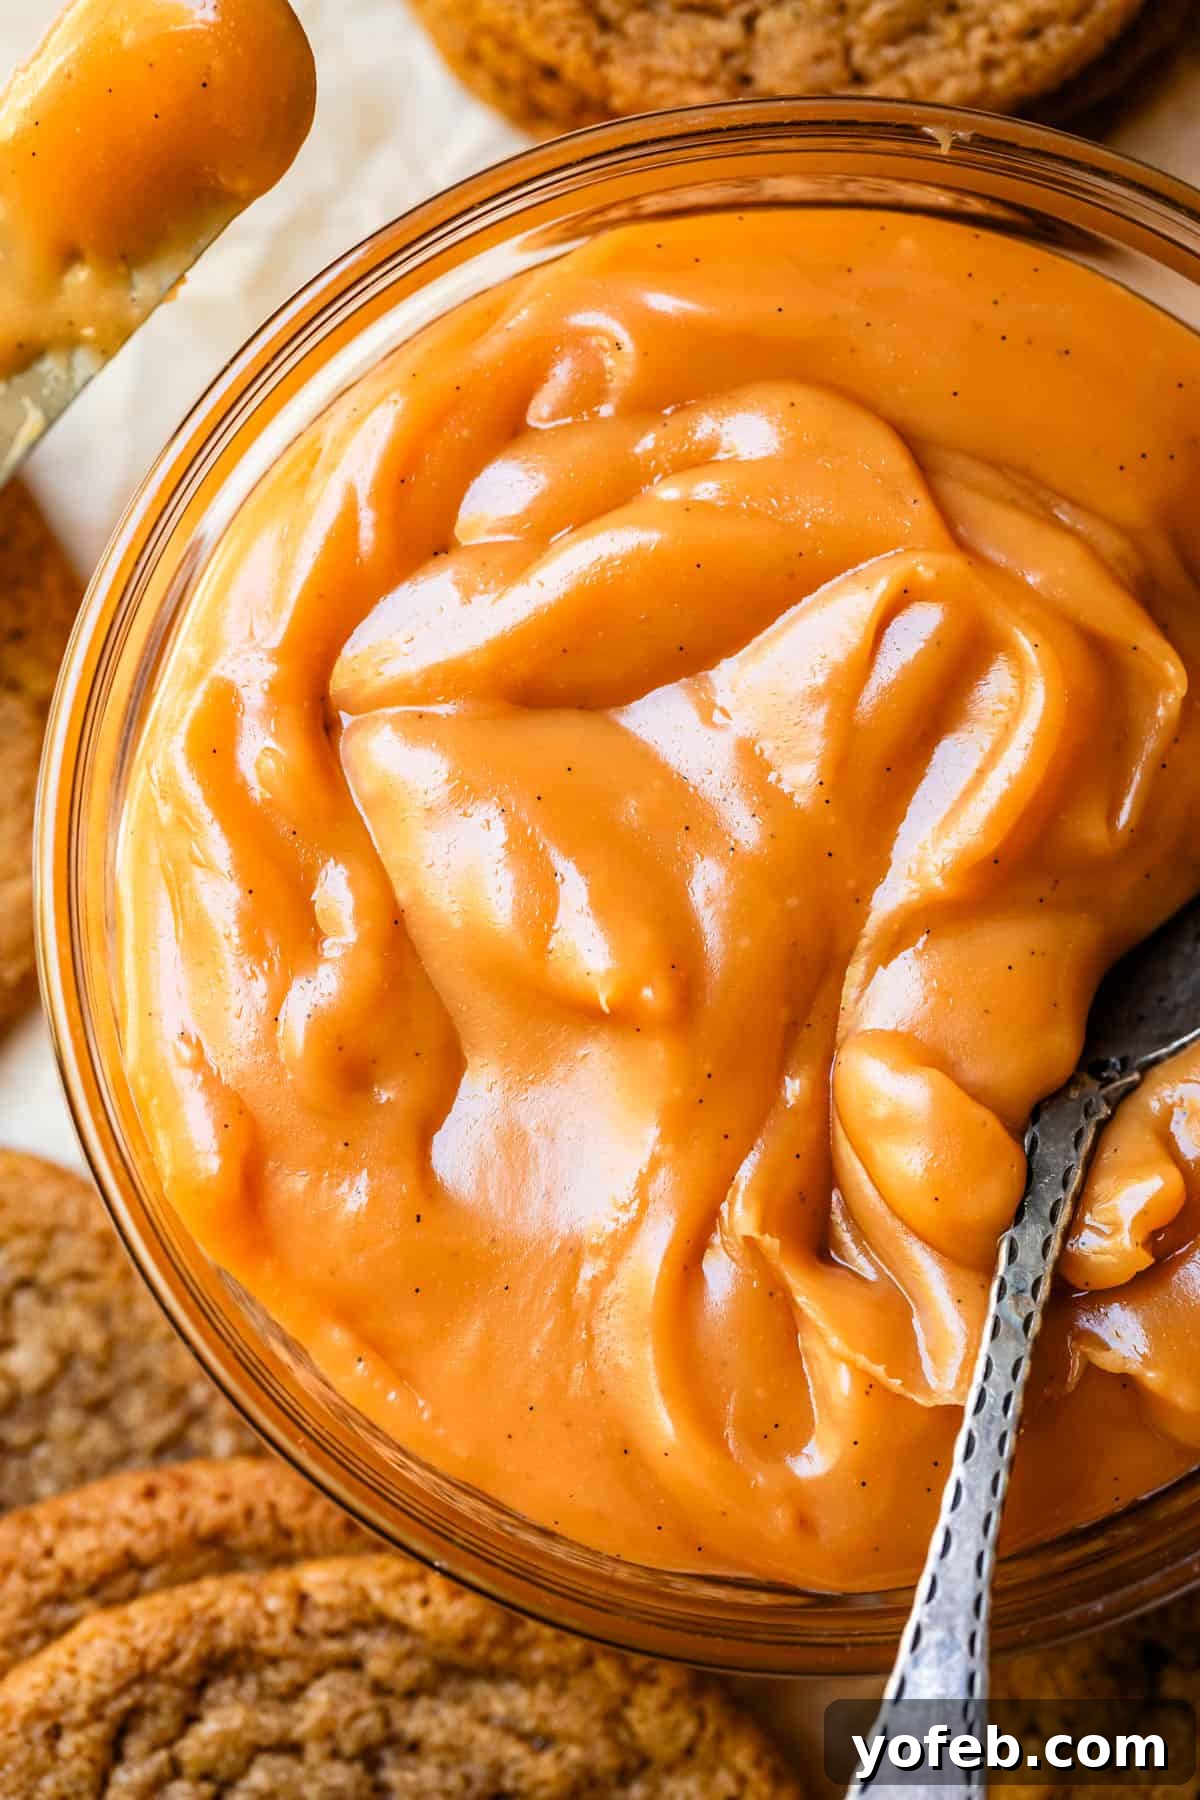
“Fudgy” truly is the best adjective to describe today’s caramel creation. It offers a velvety smooth mouthfeel (I promise, no grainy texture here!), yet delivers a delightfully chewy, rich texture that feels remarkably like biting into a piece of decadent fudge. But rest assured, this is unequivocally CARAMEL. This journey into caramel perfection begins similarly to traditional methods: we combine sugar with a little water in a heavy-bottomed pot and heat it until it transforms into a deep amber hue, accompanied by subtle wisps of smoke.
However, this is where our recipe takes a significant and delicious detour—a turn into the realm of classic, parchment-wrapped caramels, like those beloved holiday candies. Essentially, this recipe is a sauce version of those irresistible chewy caramels. To achieve this unique consistency and flavor, we introduce a whole new set of essential ingredients: corn syrup, evaporated milk, and butter. This is where the true magic unfolds, adding a complete second process beyond the initial caramel-making stage. It’s this thoughtful addition that elevates our salted caramel from merely good to absolutely extraordinary, yielding a sauce that’s both familiar and wonderfully innovative.
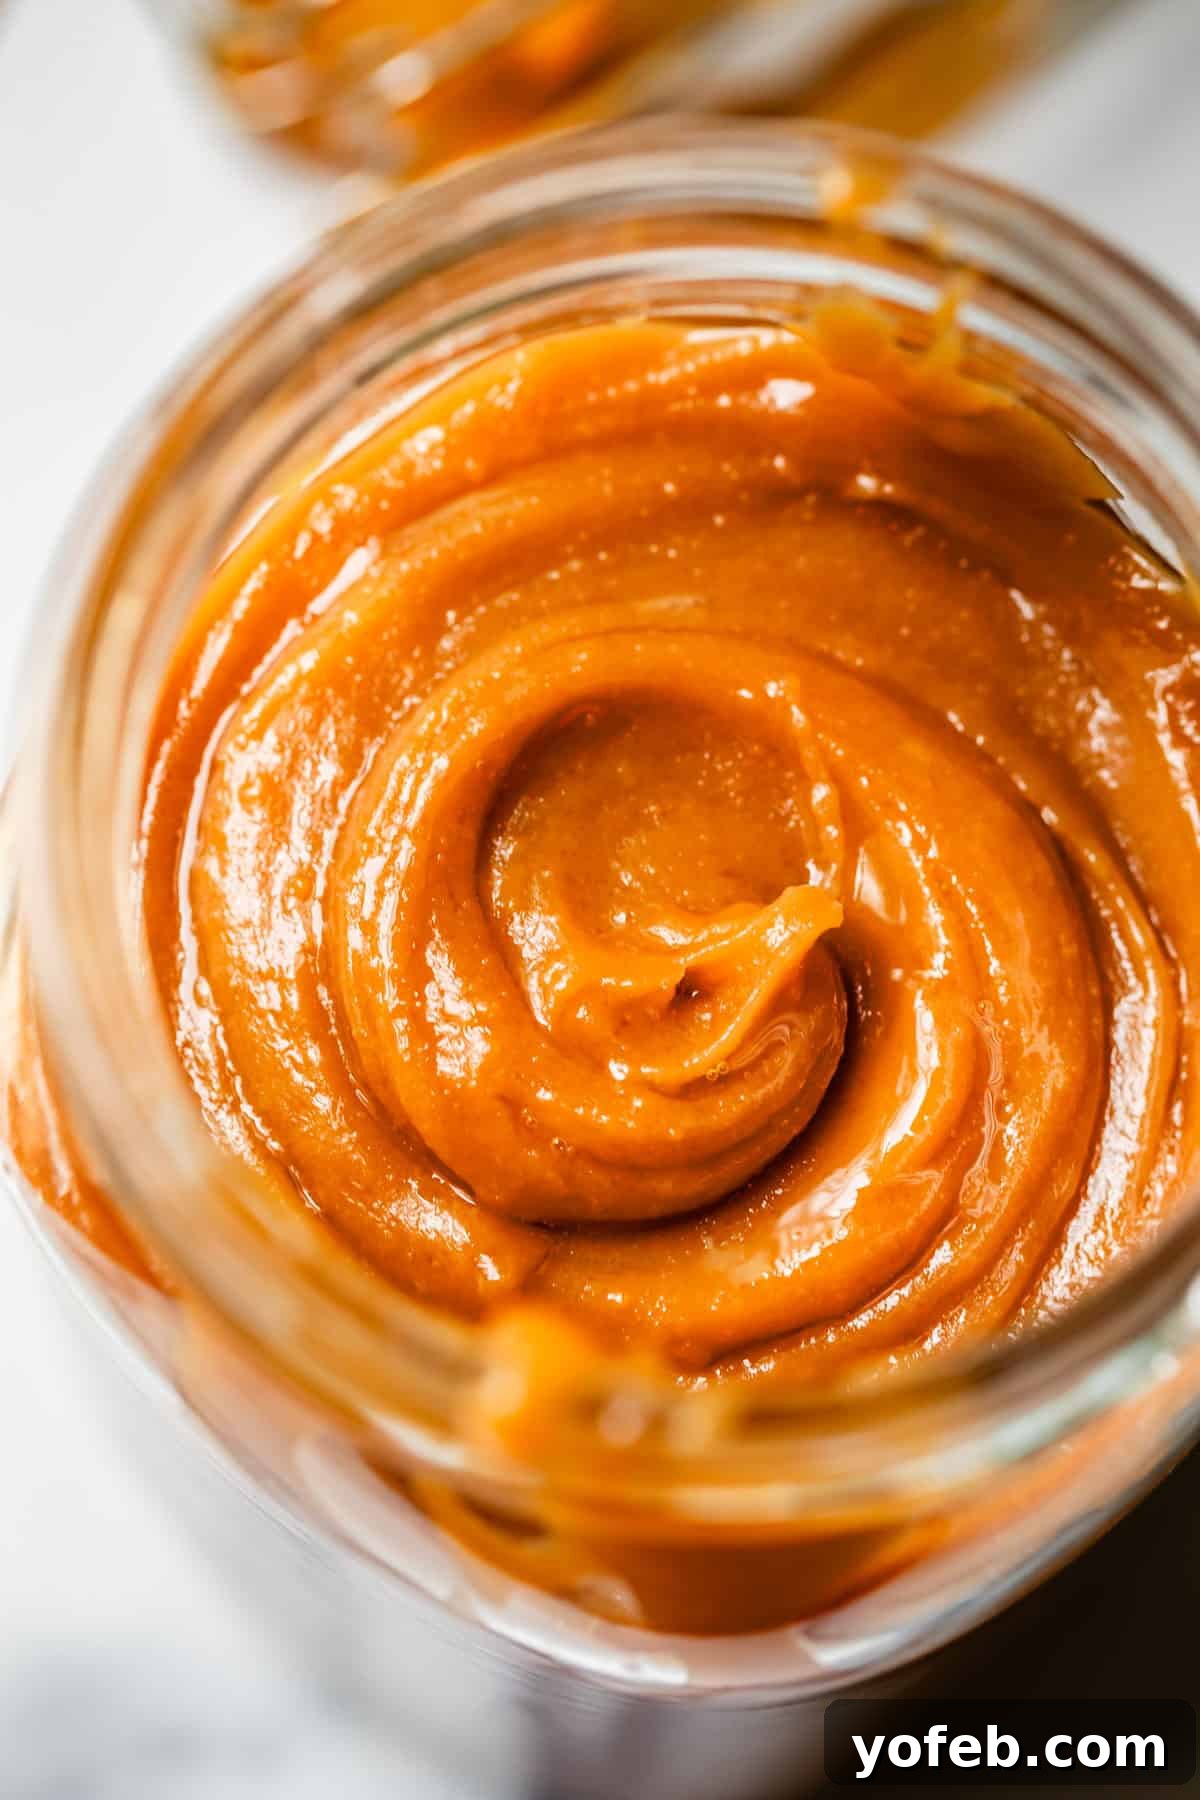
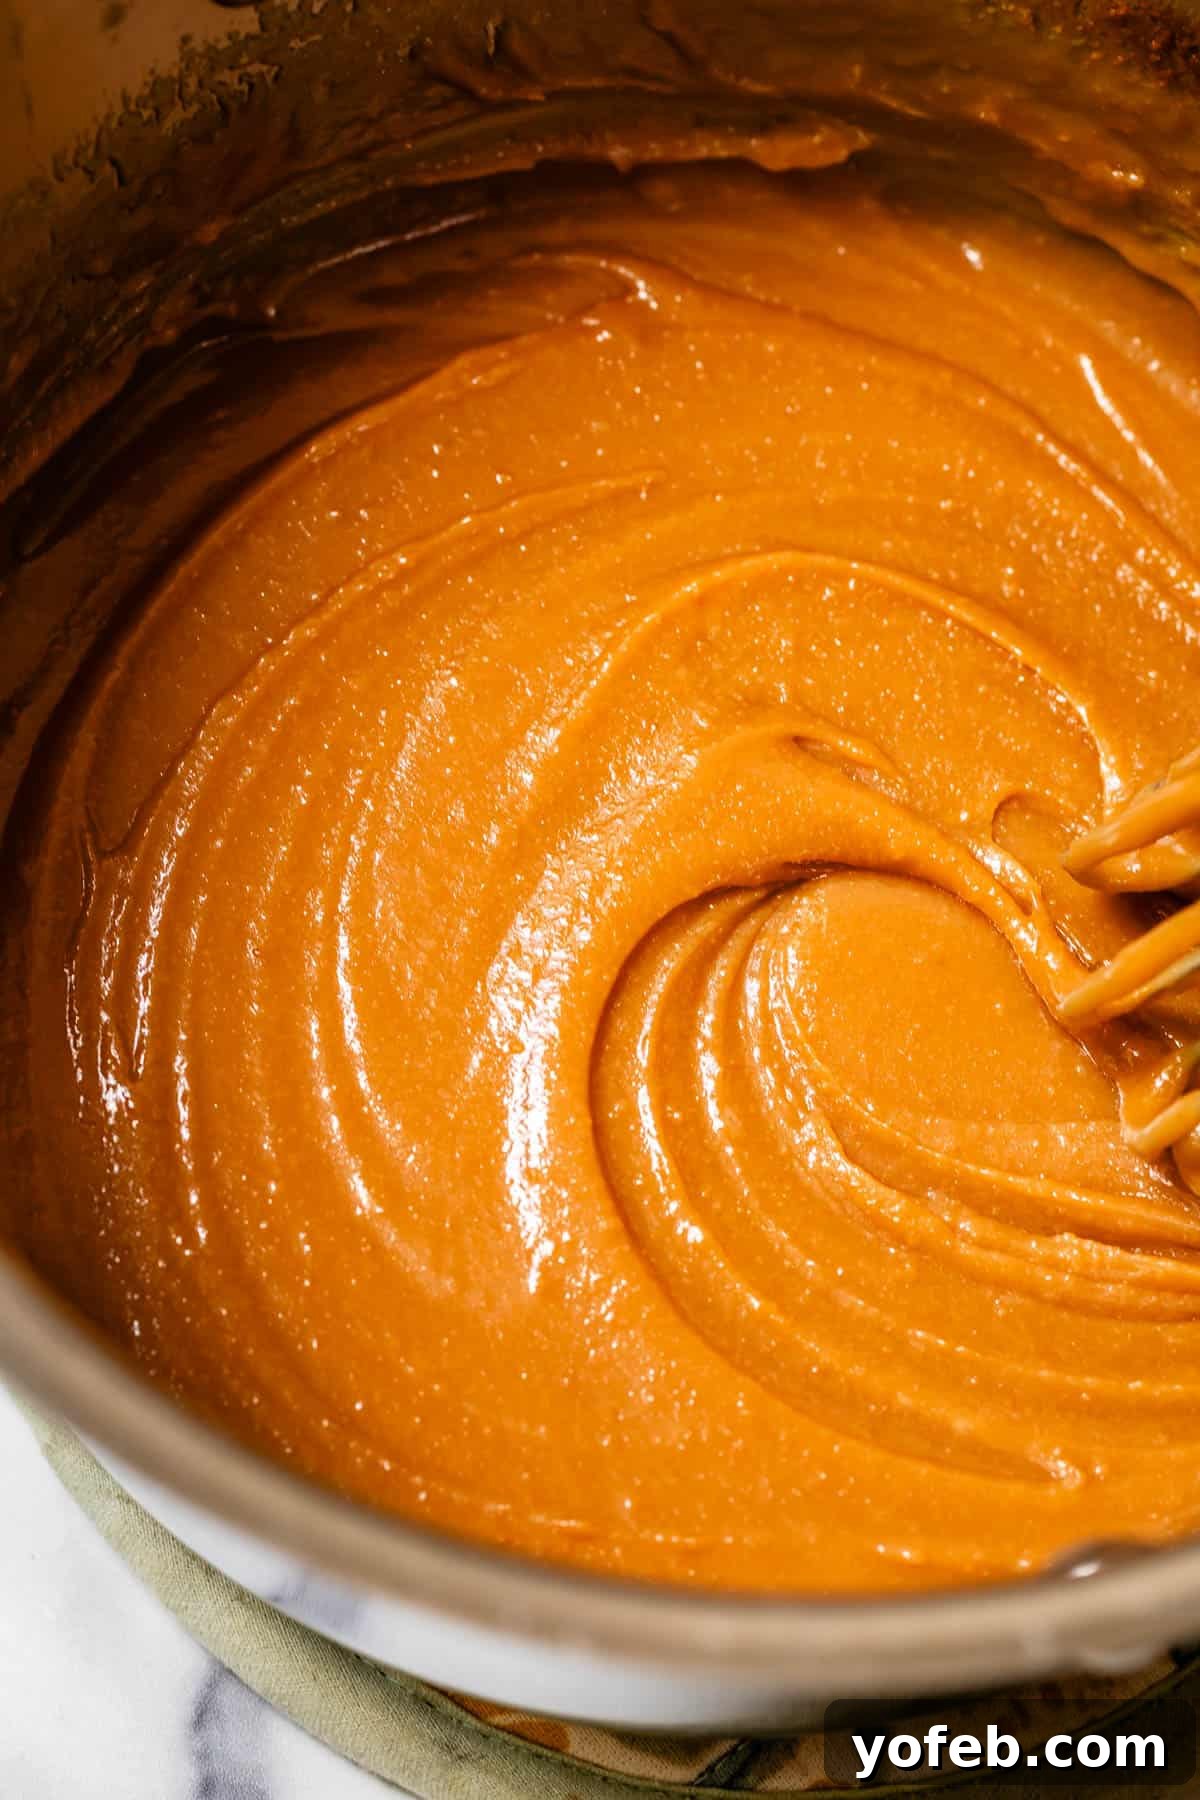
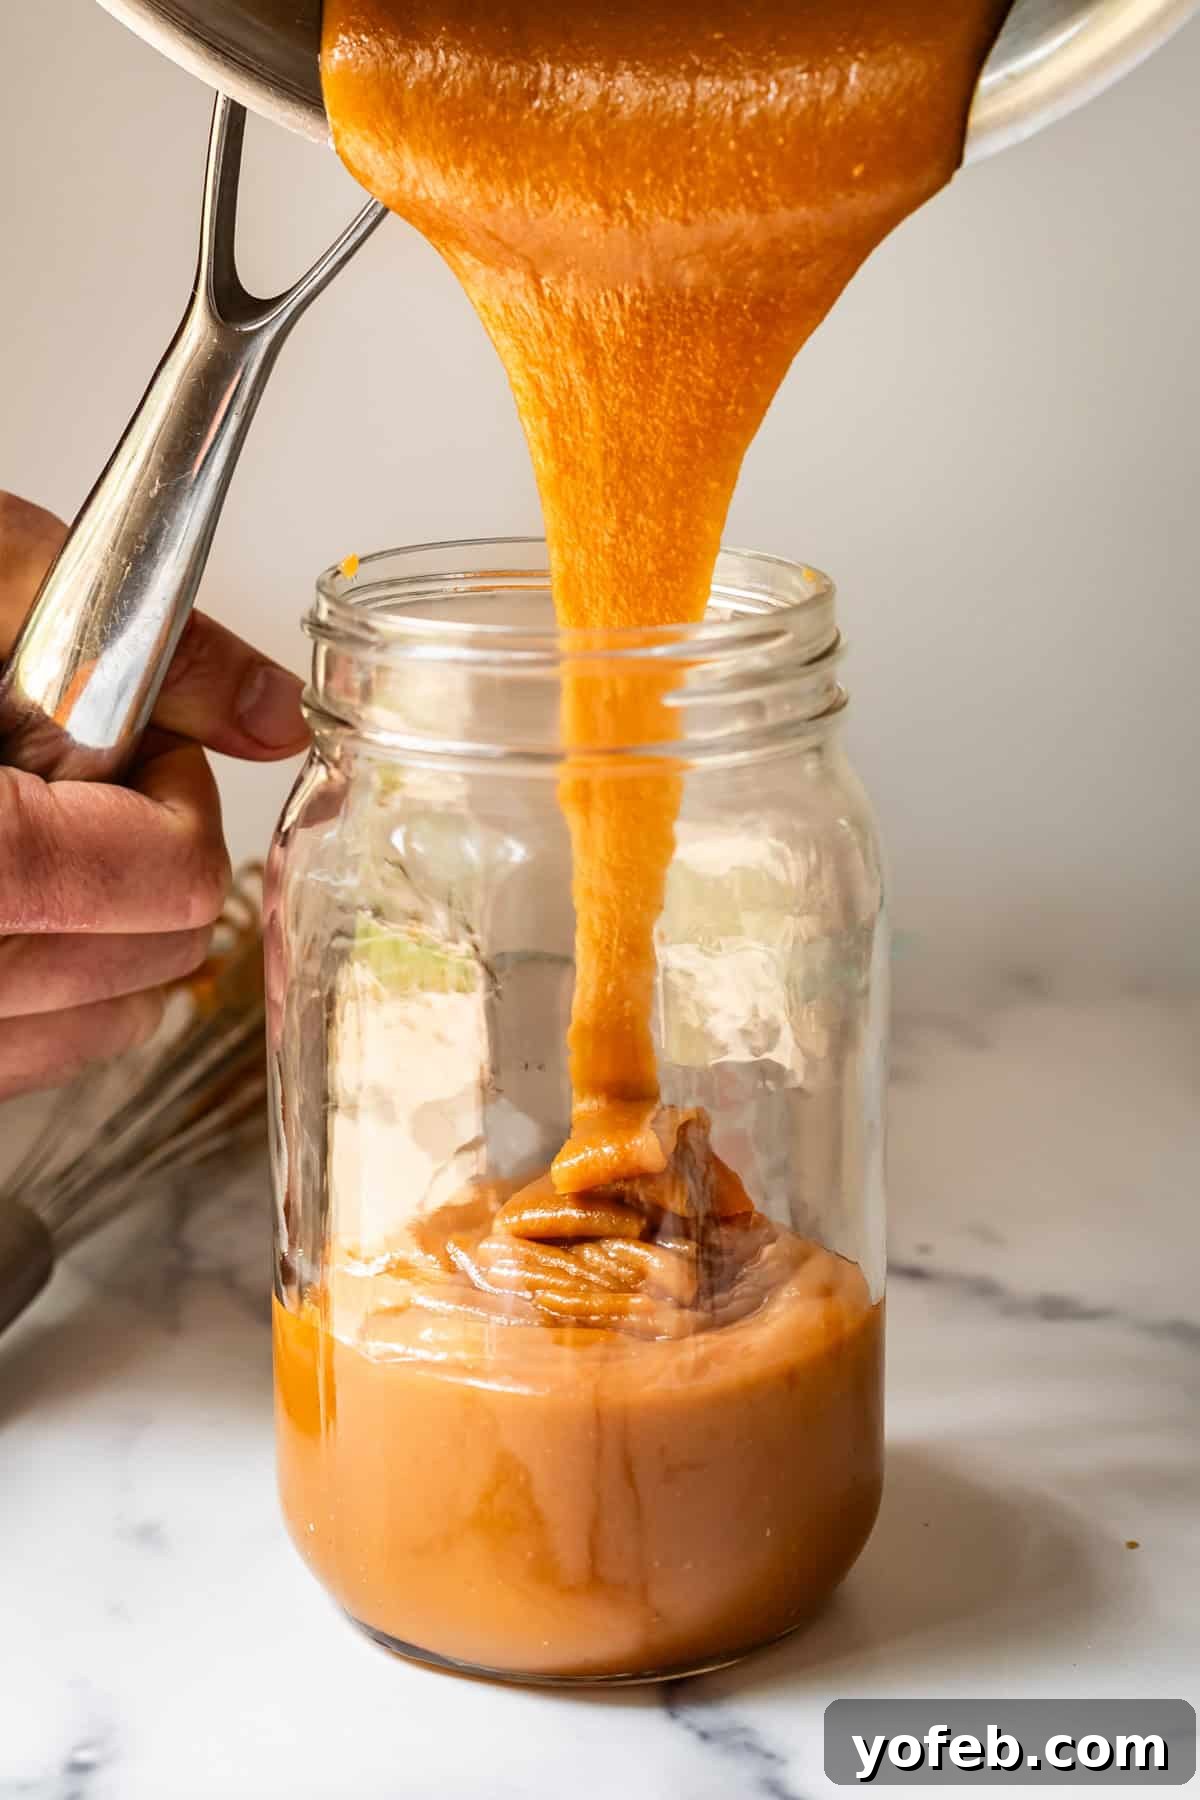
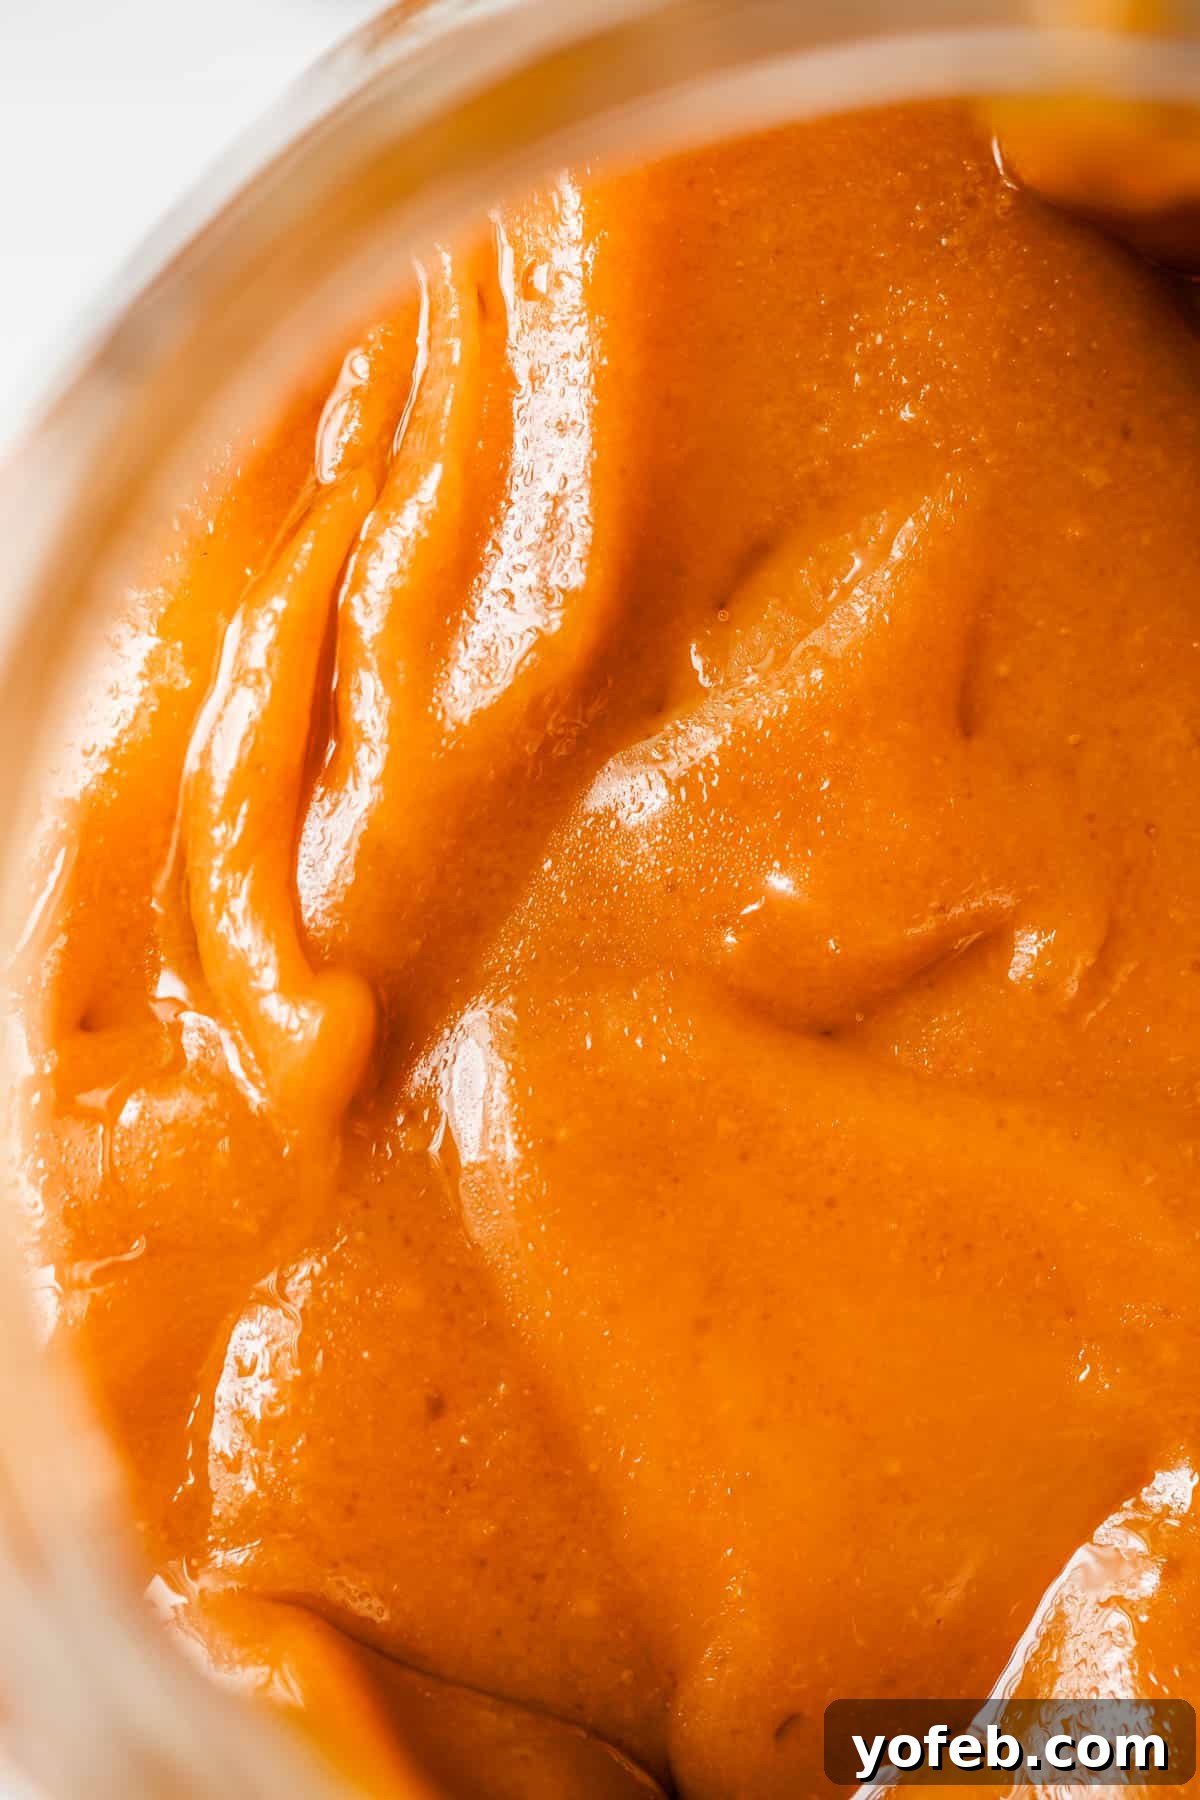
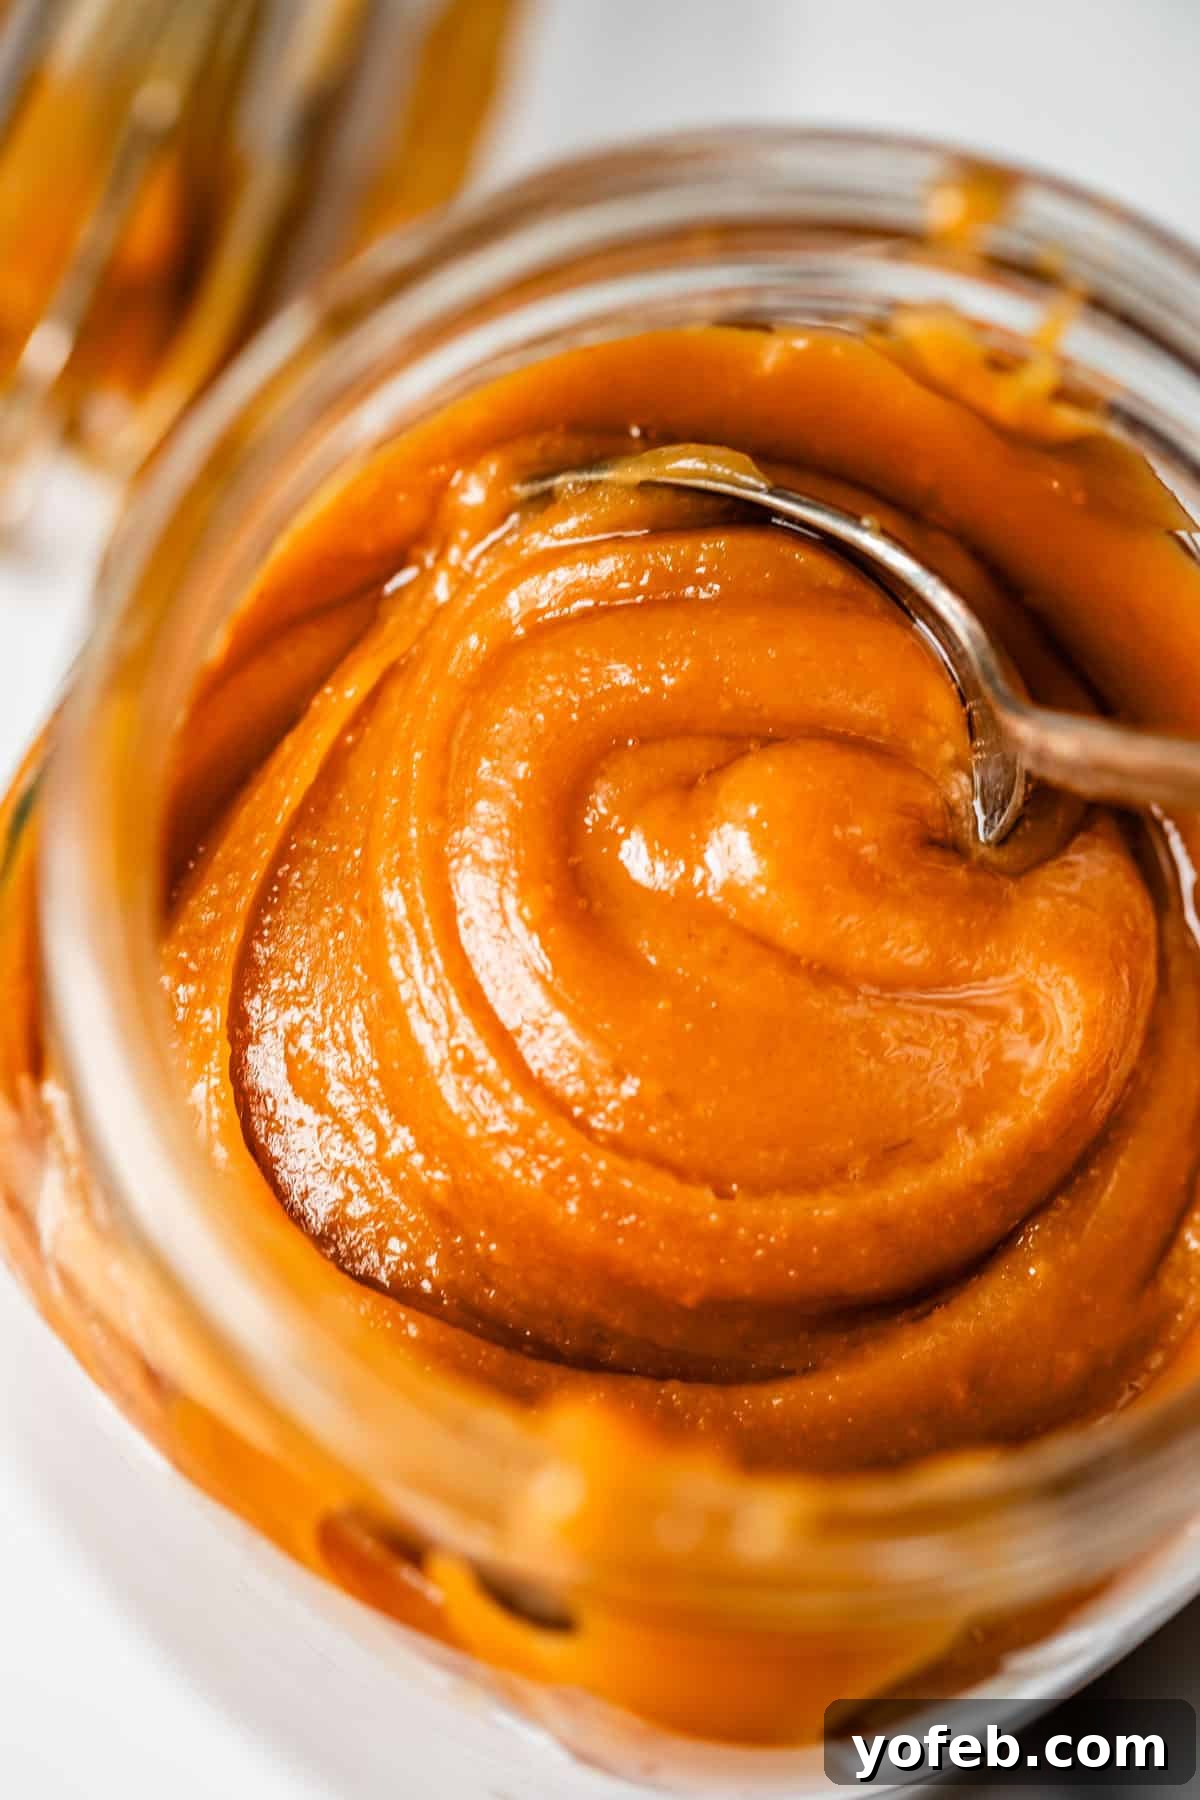
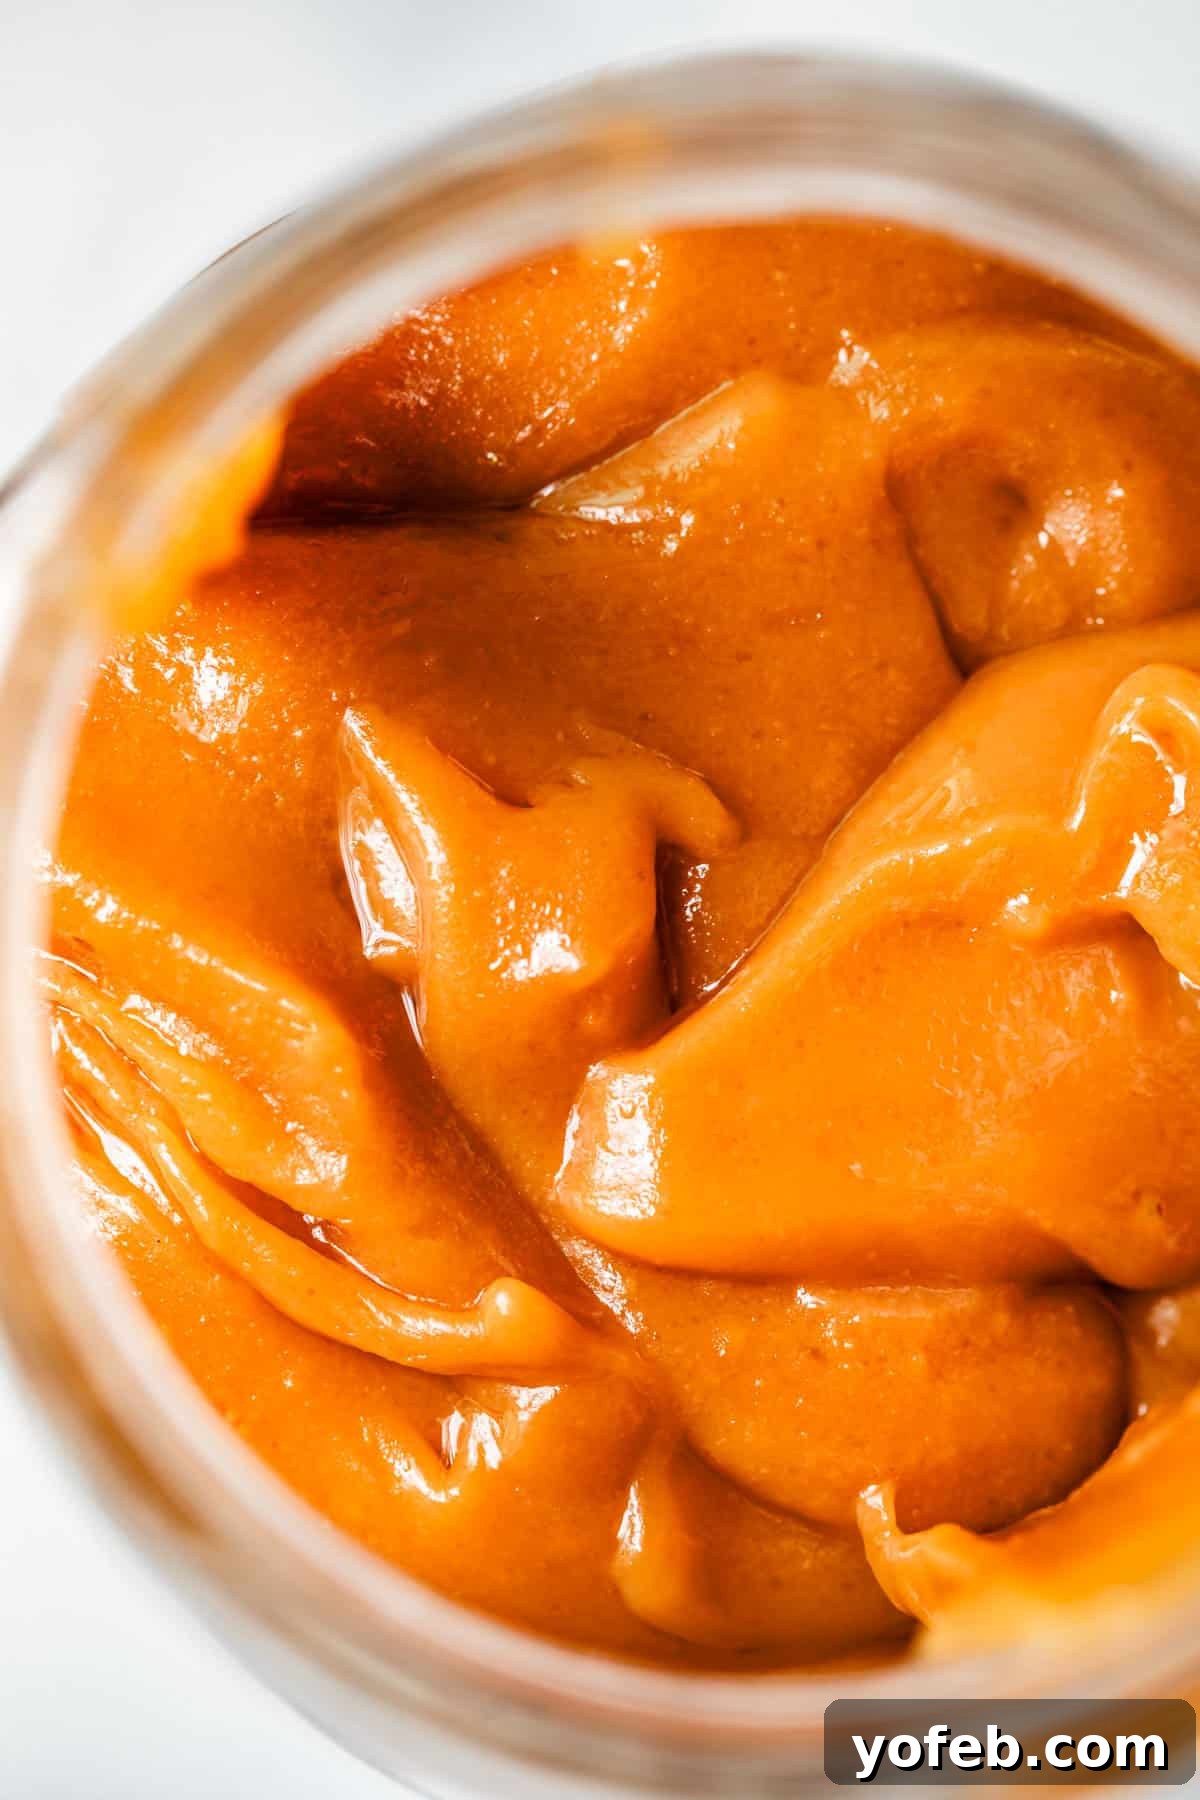
This is precisely the texture I’ve been striving for: incredibly rich, perfectly spoonable, and profoundly fudgy without any graininess. Unlike typical caramels, it isn’t overly stretchy; instead, it’s wonderfully thick and robust. Can you discern the incredible texture in the photos? This caramel doesn’t simply melt into itself the way a standard caramel might. It stands proud—thick, sturdy, and with a slight lean towards the indulgent chewiness of Chocolate Fudge, yet it retains a pure, unadulterated caramel flavor. It truly offers the best of both worlds, a delightful hybrid that promises a more satisfying experience with every bite.
The Role of Corn Syrup in Caramel Perfection
You’ll notice corn syrup as a key ingredient in this recipe, added after the initial caramel-making stage. I understand that past food campaigns have made some people hesitant about using corn syrup, but I urge you to set those concerns aside for this recipe. For a deeper understanding of its culinary benefits, I highly recommend reading this insightful defense of corn syrup. You’ll discover why pastry chefs worldwide adore corn syrup. In our recipe, corn syrup plays a critical role in preventing the sugar from recrystallizing, which is a common issue in caramel making. It ensures your caramel remains beautifully smooth, wonderfully creamy, and achieves that perfect, desirable texture that makes it so irresistible. It’s a secret weapon for consistent caramel success.
Essential Equipment for Caramel Making: A Heavy-Bottom Pot
Now, let’s talk about your pot. Believe me, this detail truly matters! For this recipe, you absolutely need a heavy 3-quart pot. When you pick it up, it should feel substantial – give it a little swing to test its weight! The reason for this specific requirement is crucial: a cheap, thin pan will heat your caramel unevenly, leading to “hot spots” that can cause it to scald or burn rather than caramelize properly. The quality of your pan can genuinely be the difference between achieving a perfect, luscious caramel and ending up with a frustratingly burned, sticky mess. Trust me on this; investing in the right pot makes all the difference for caramel-making success.
Simple Ingredients for Extraordinary Salted Caramel
Making this incredible salted caramel doesn’t require a special trip to the store; it primarily uses pantry staples you likely already have on hand. You can whip up a batch in about half an hour, transforming everyday ingredients into something truly spectacular. Below is a quick overview of what you’ll need. For precise measurements and detailed instructions, be sure to refer to the comprehensive recipe card further down the page.
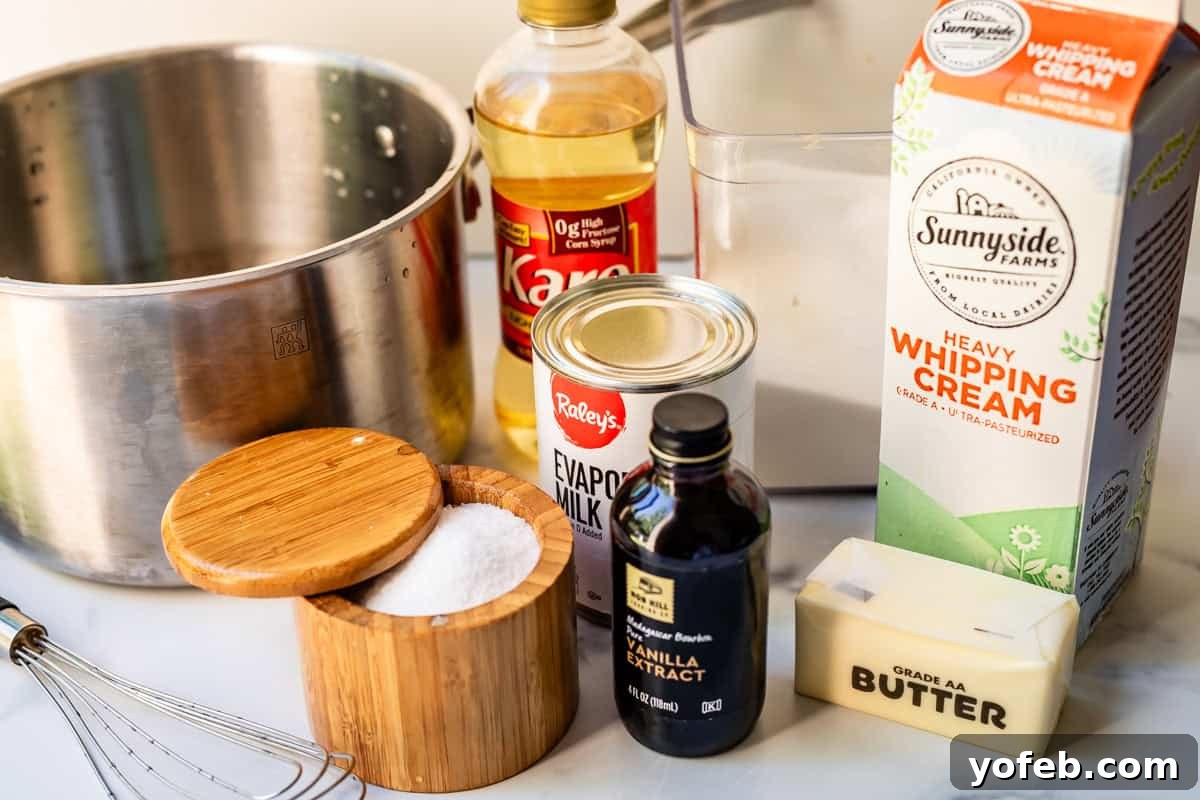
- White granulated sugar
- Dark corn syrup
- Evaporated milk
- Salted butter
- Heavy cream (optional, for thinner sauce)
- Kosher salt or sea salt
- Vanilla extract
How to Master Homemade Salted Caramel: Step-by-Step
Crafting perfect homemade salted caramel is an exciting process that requires a little attention and swift action at key moments. Follow these steps for an irresistible, fudgy caramel sauce.
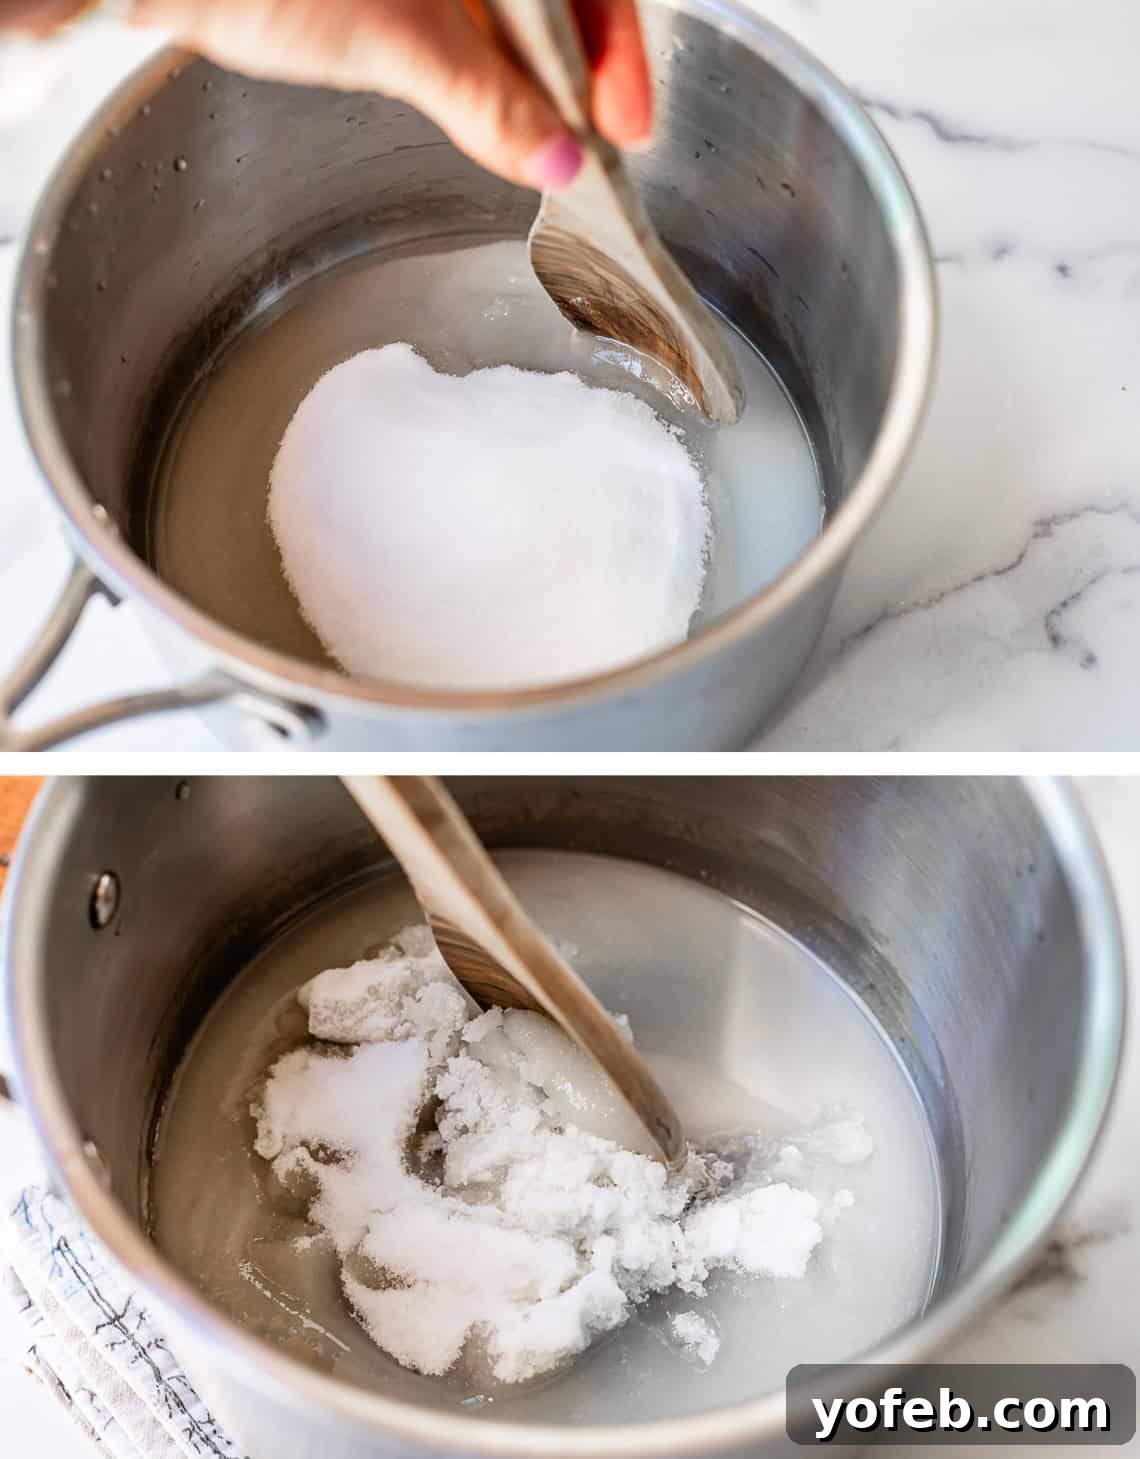
First, grab your HEAVY-bottomed pot. Add a bit of water and gently swirl it around to moisten the bottom and lower sides of the pot.
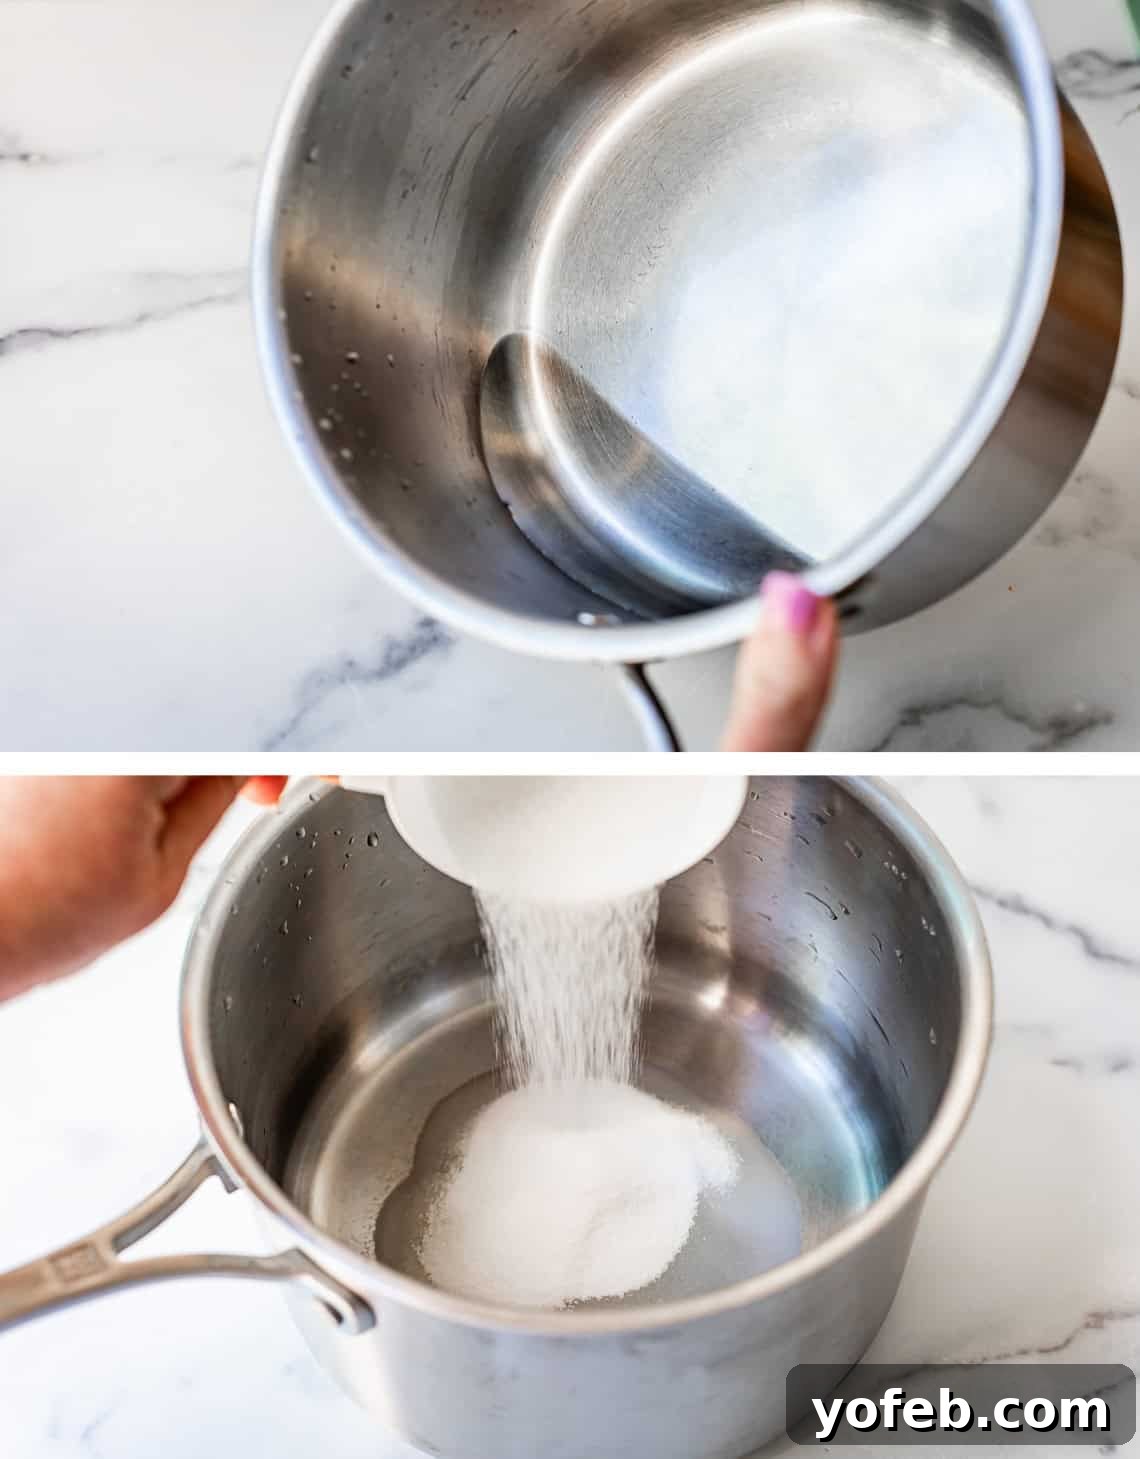
Carefully pour the granulated sugar into the center of the pot, taking care not to let any crystals stick to the sides. Use your spoon to gently draw the moisture from the edges towards the sugar in the center, ensuring all the sugar is moistened. This prevents crystallization later on:
If you happen to get any sugar crystals on the edge of the pot, like this:
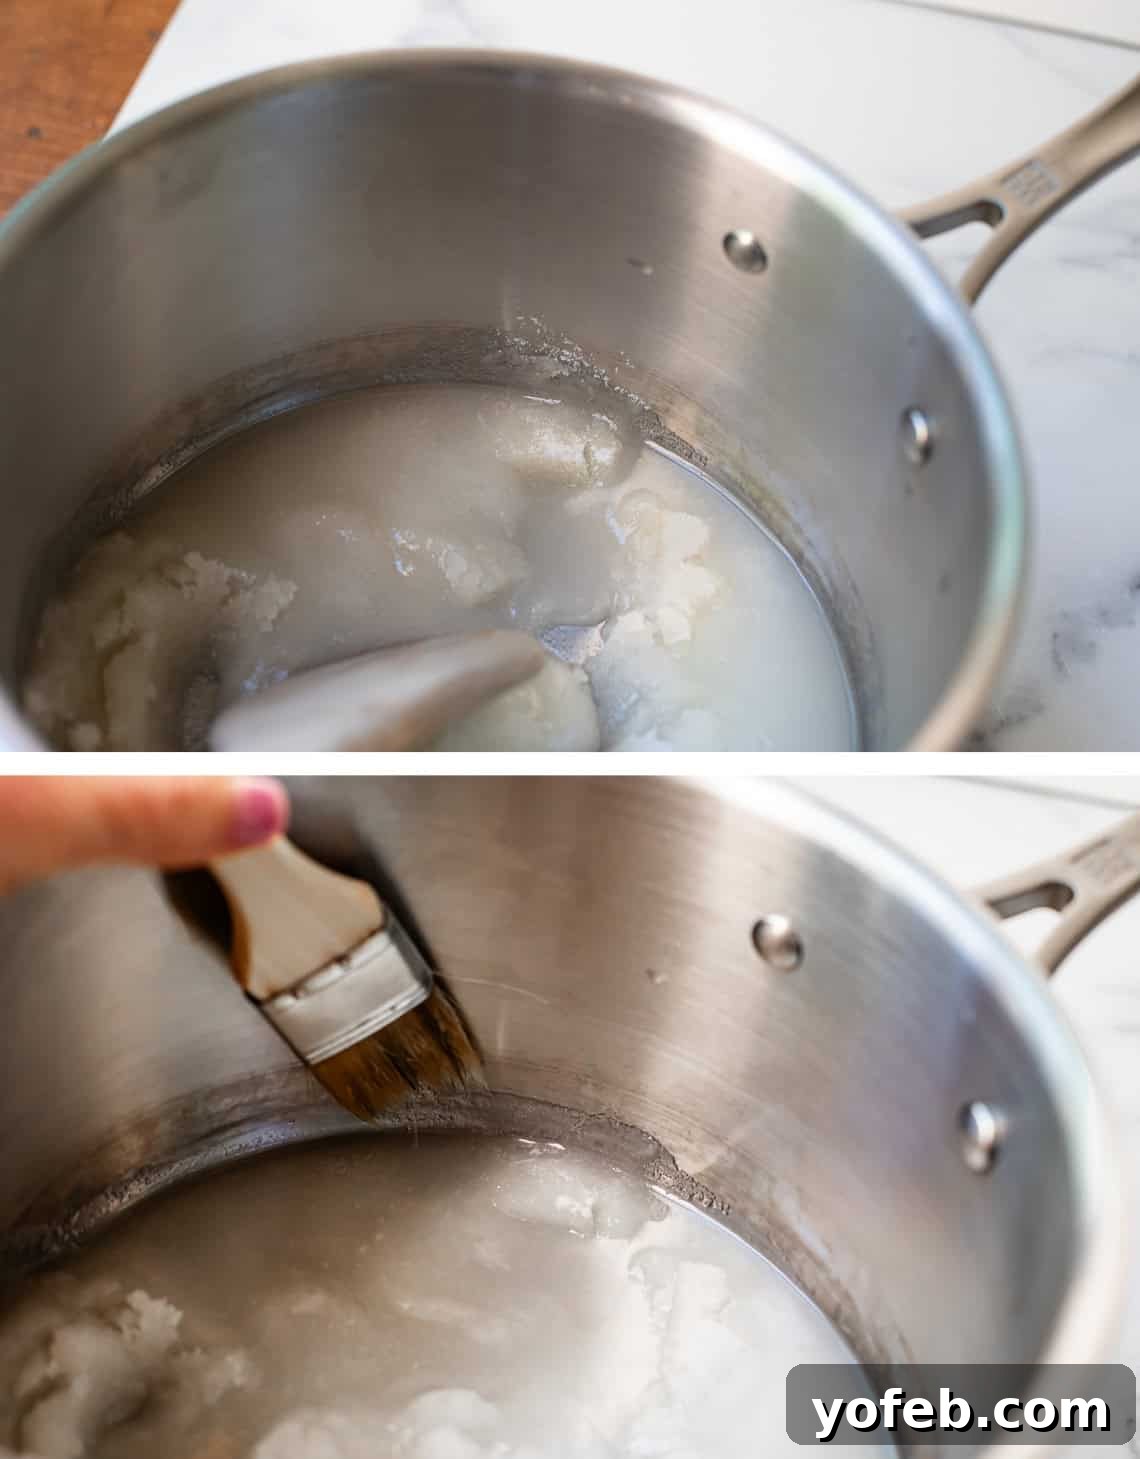
Then, simply use a moistened pastry brush to gently swipe them back into the liquid. This brilliant trick, taught to me by my mother-in-law, is a game-changer for candy making!
Place the pot over high heat and bring the mixture to a full, rolling boil.
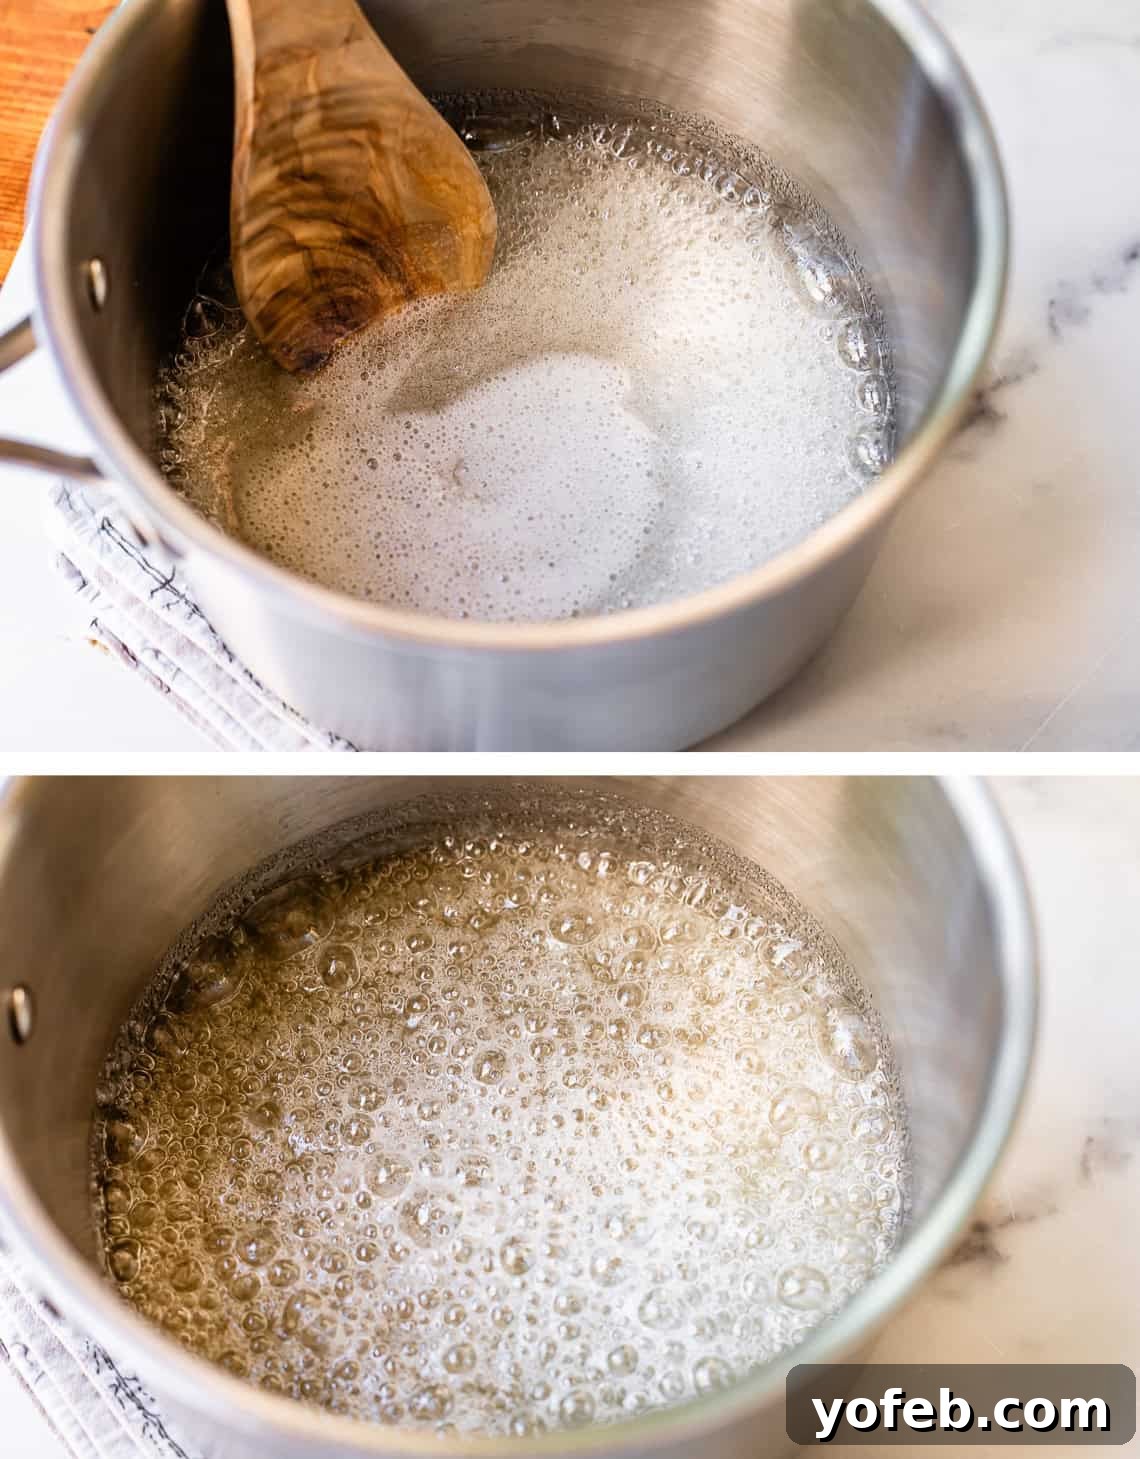
Once you’ve achieved a full boil, reduce the heat to medium and set your spoon aside – you won’t need it for this stage, and you want to avoid any sugar crystals that might be clinging to it. Now, it’s a patient waiting game. Do not walk away from the stove, but resist the urge to stir. Keep a watchful eye on the caramel as it transforms.
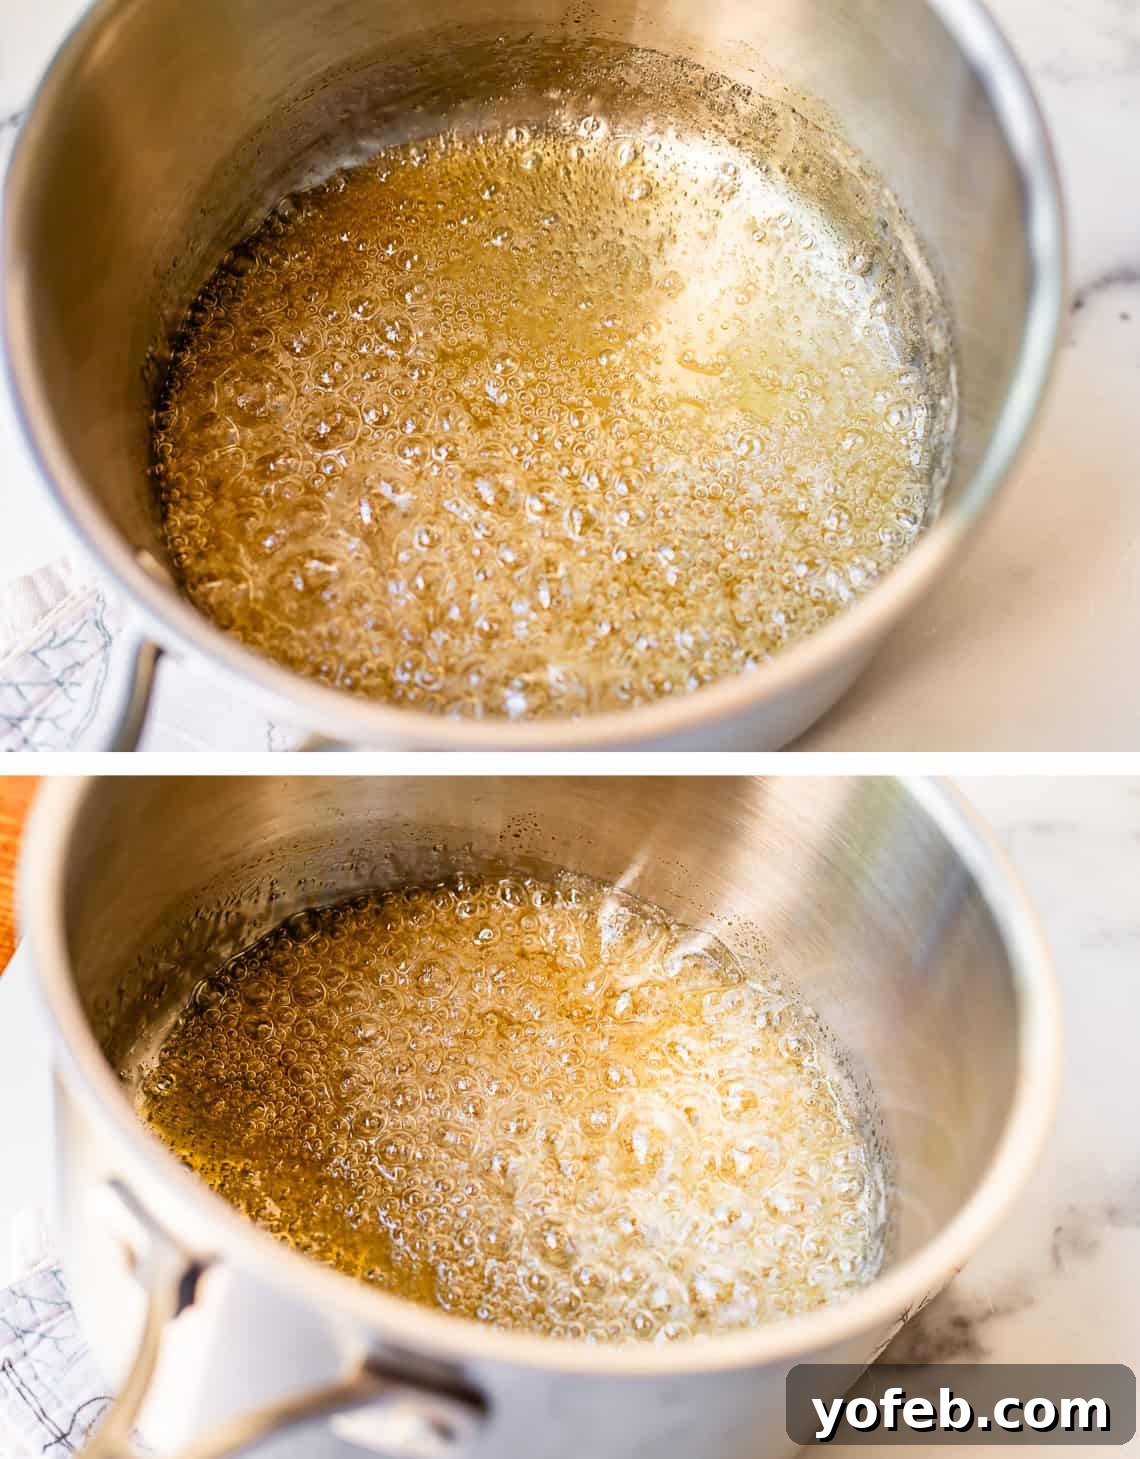
After a few minutes, your sugar syrup will begin to turn a light yellow, gradually deepening to an inviting orange. Observe this gorgeous color transformation:
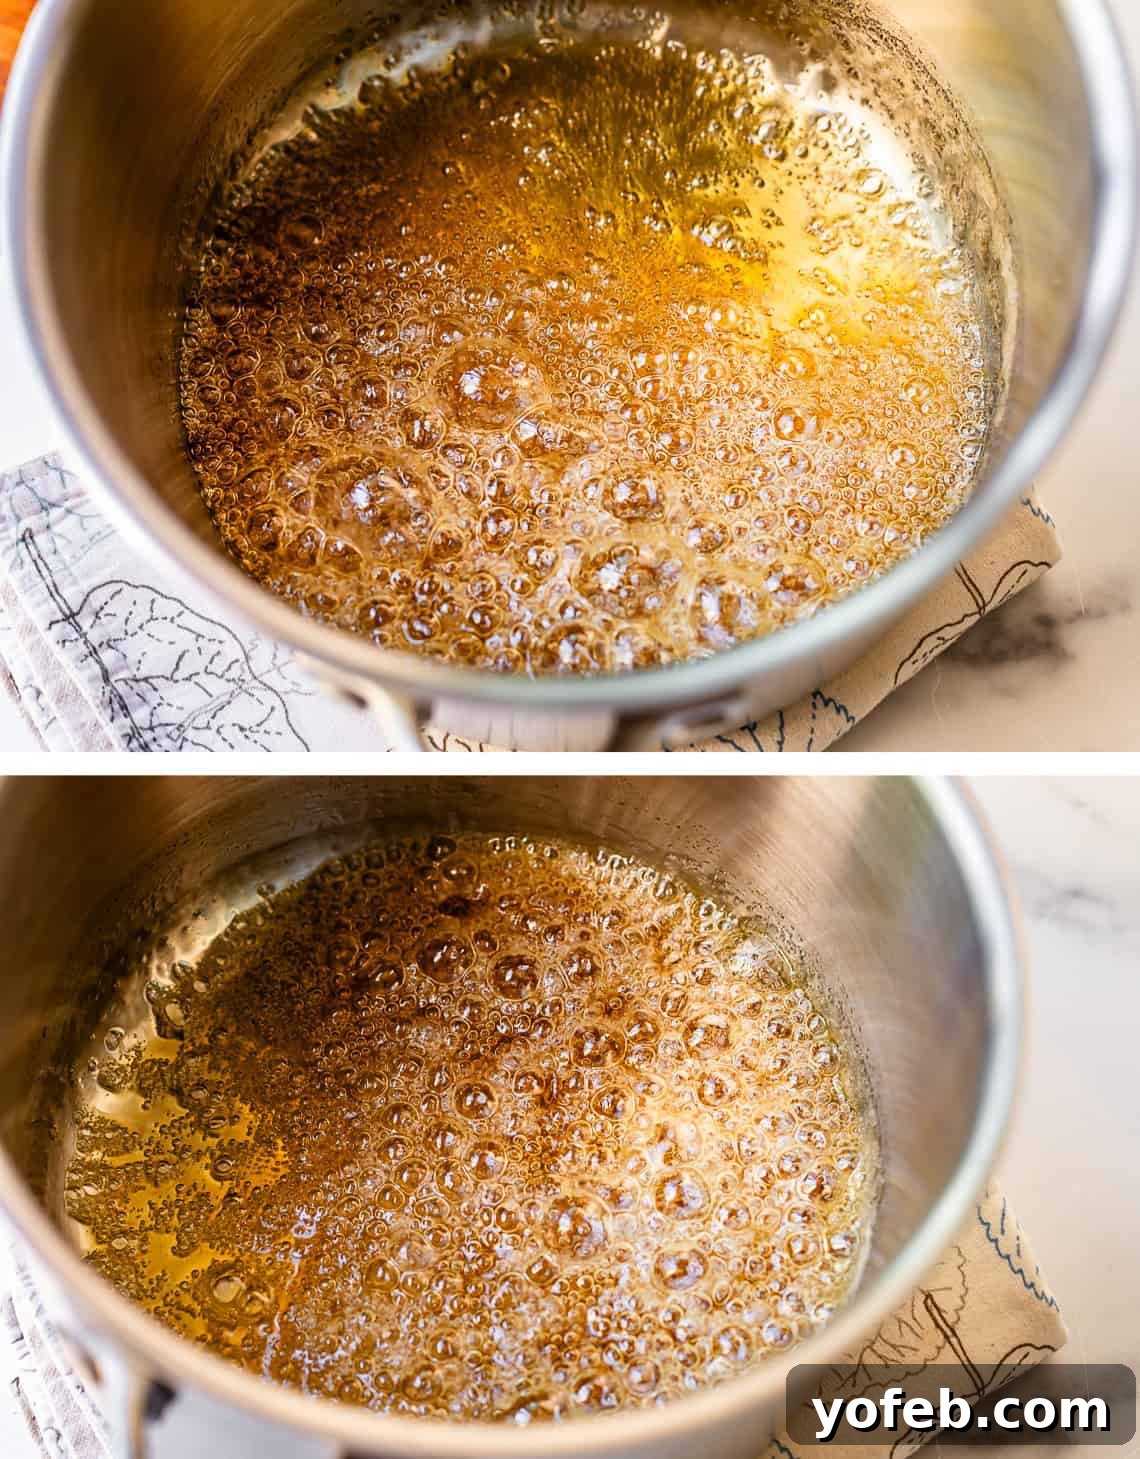
The moment you’re waiting for is a deep amber color, specifically when the caramel looks consistently amber across the entire surface AND you just begin to see faint wisps of smoke rising from it. At this precise point, remove the pot from the heat immediately! This stage progresses very quickly, and you don’t want it to burn. Congratulations, you’ve just made caramel!
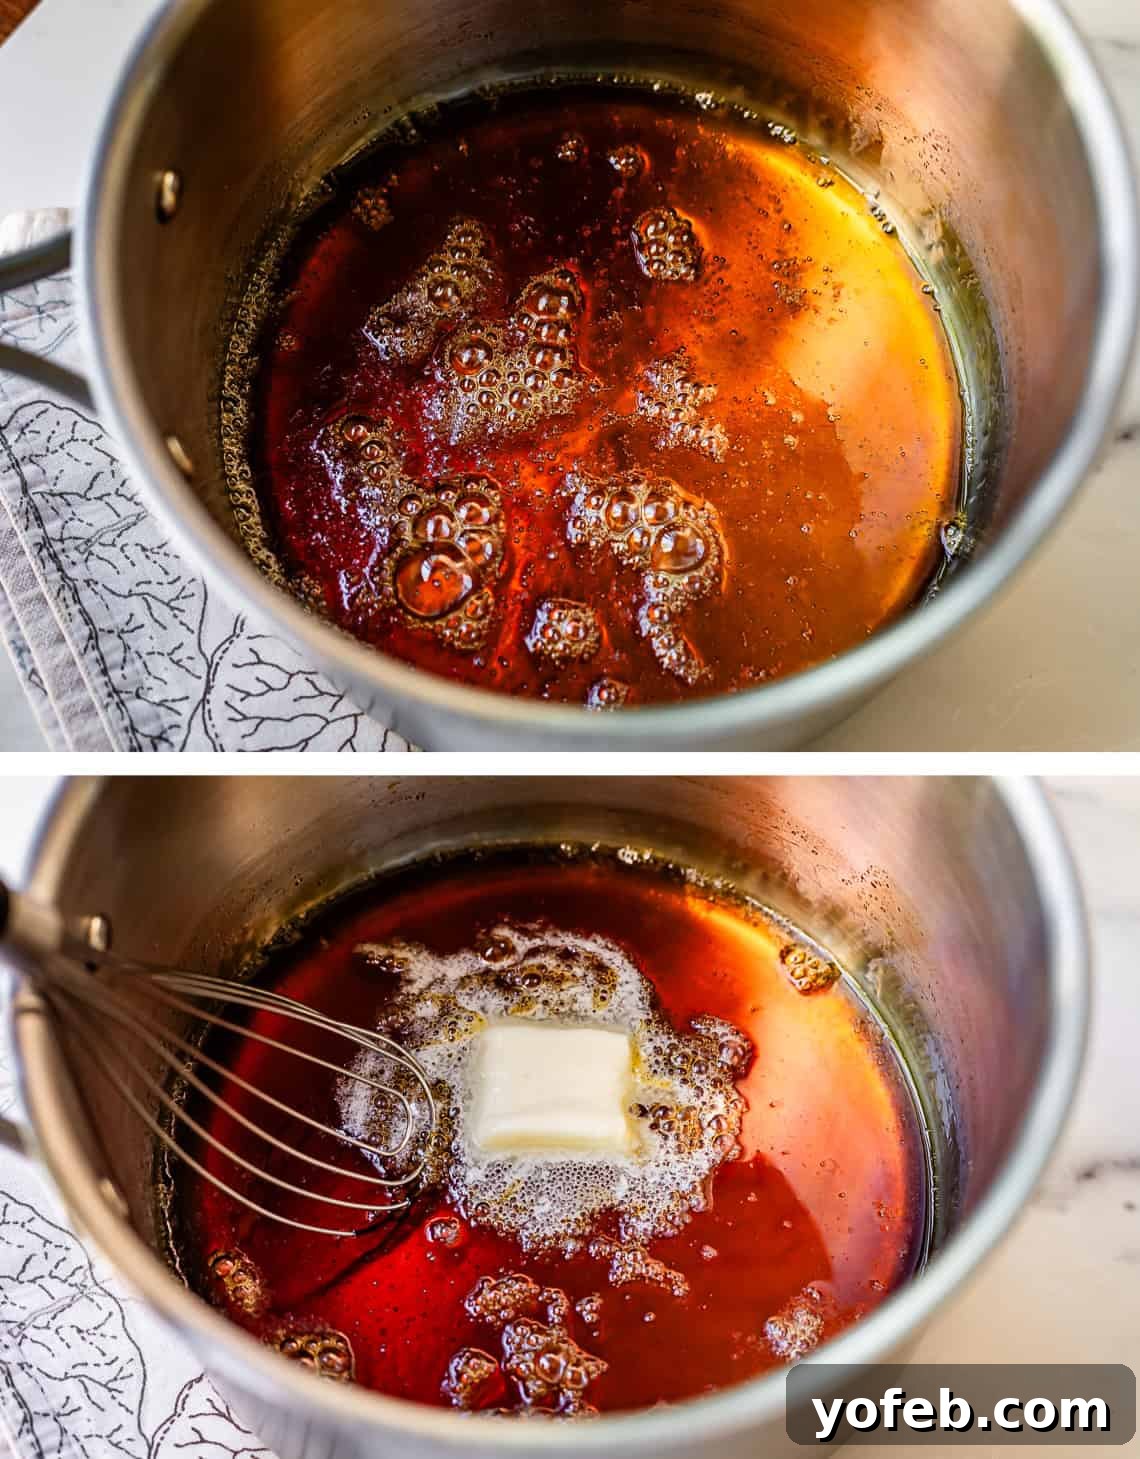
Off the heat, carefully start adding the chopped salted butter to the pot, piece by piece. Use a flat whisk to gently incorporate each addition, whisking thoroughly. Be extremely cautious, as hot caramel splashes can cause severe burns! You’ll notice the caramel beginning to transform, becoming wonderfully creamy and thicker as the butter melts in.
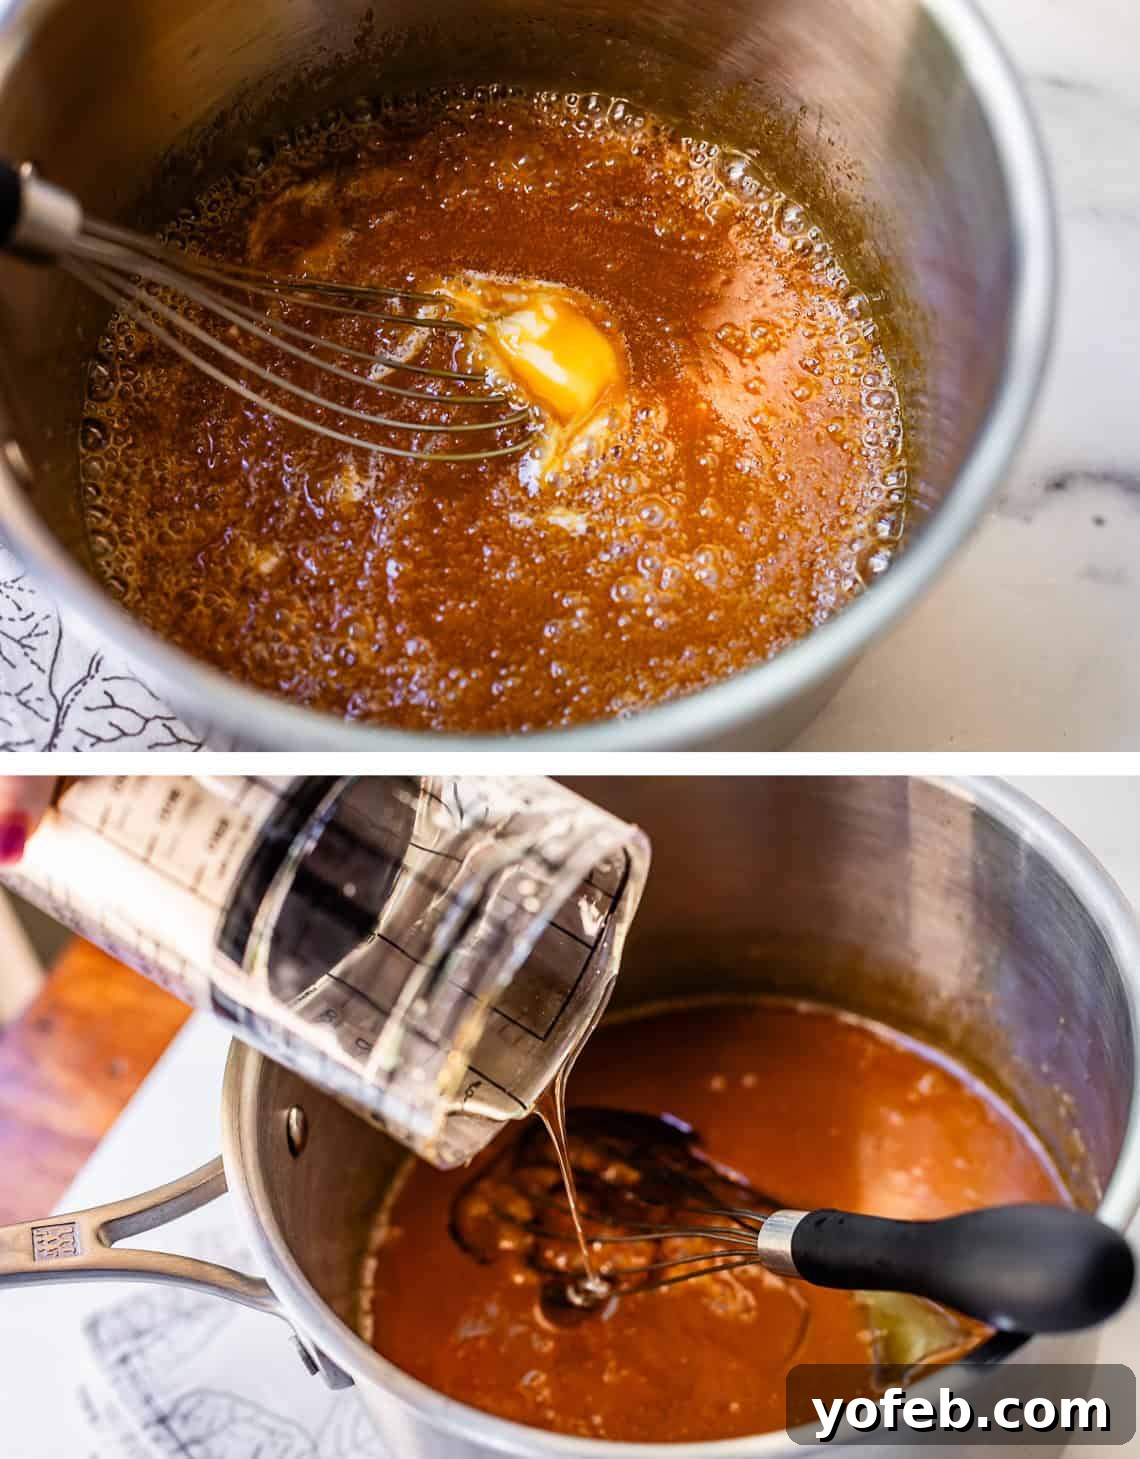
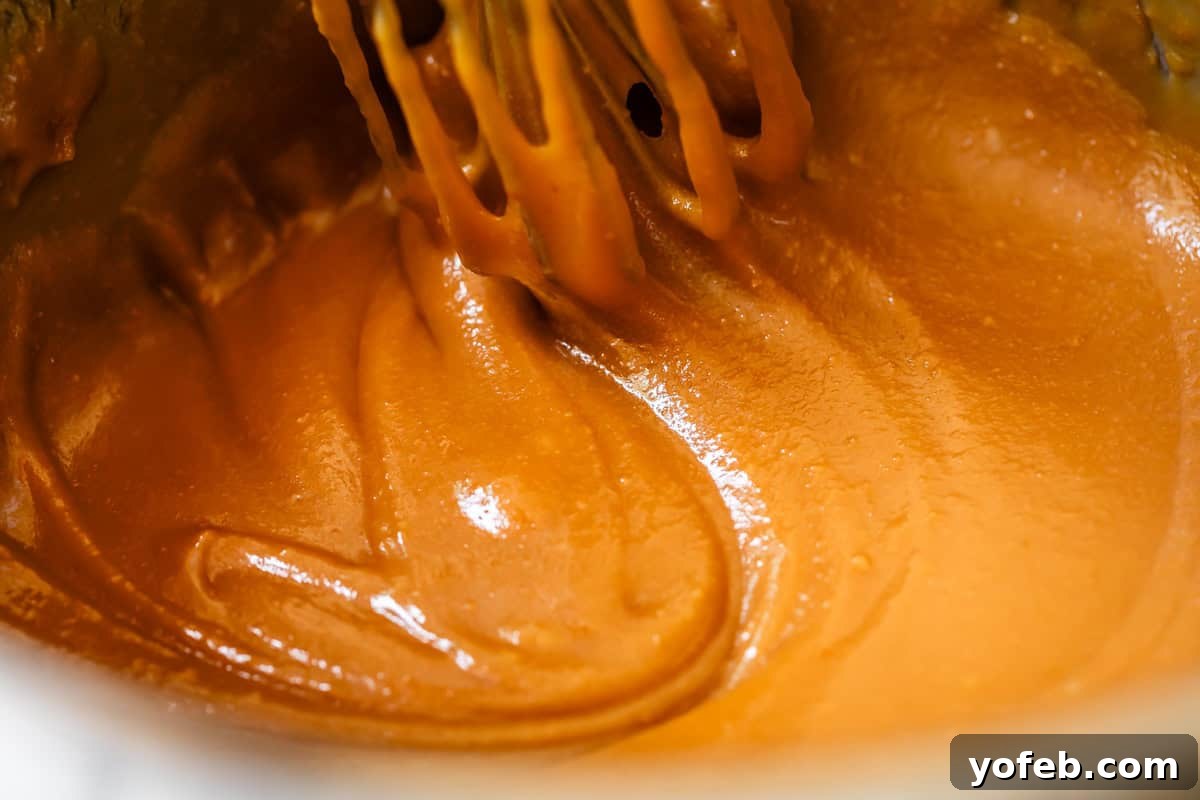
Next, add the corn syrup and whisk until it’s completely incorporated. Make sure to scrape the sides, corners, and bottom of the pot diligently, as corn syrup tends to clump. Thorough whisking is essential here.
Return the pot to the burner and set the heat to medium. The caramel mixture should quickly return to a boil. Now, slowly begin to pour in the evaporated milk. Add a small amount, whisk until fully combined, then add a bit more, continuing to stir thoroughly. Once all the evaporated milk has been added, prepare for a sustained boil. Keep whisking, taking only short breaks, and ensuring you reach into all corners of the pan. Continue to boil and whisk for approximately 14-17 minutes, or until the mixture reaches the magical temperature of 234°F on a candy thermometer.
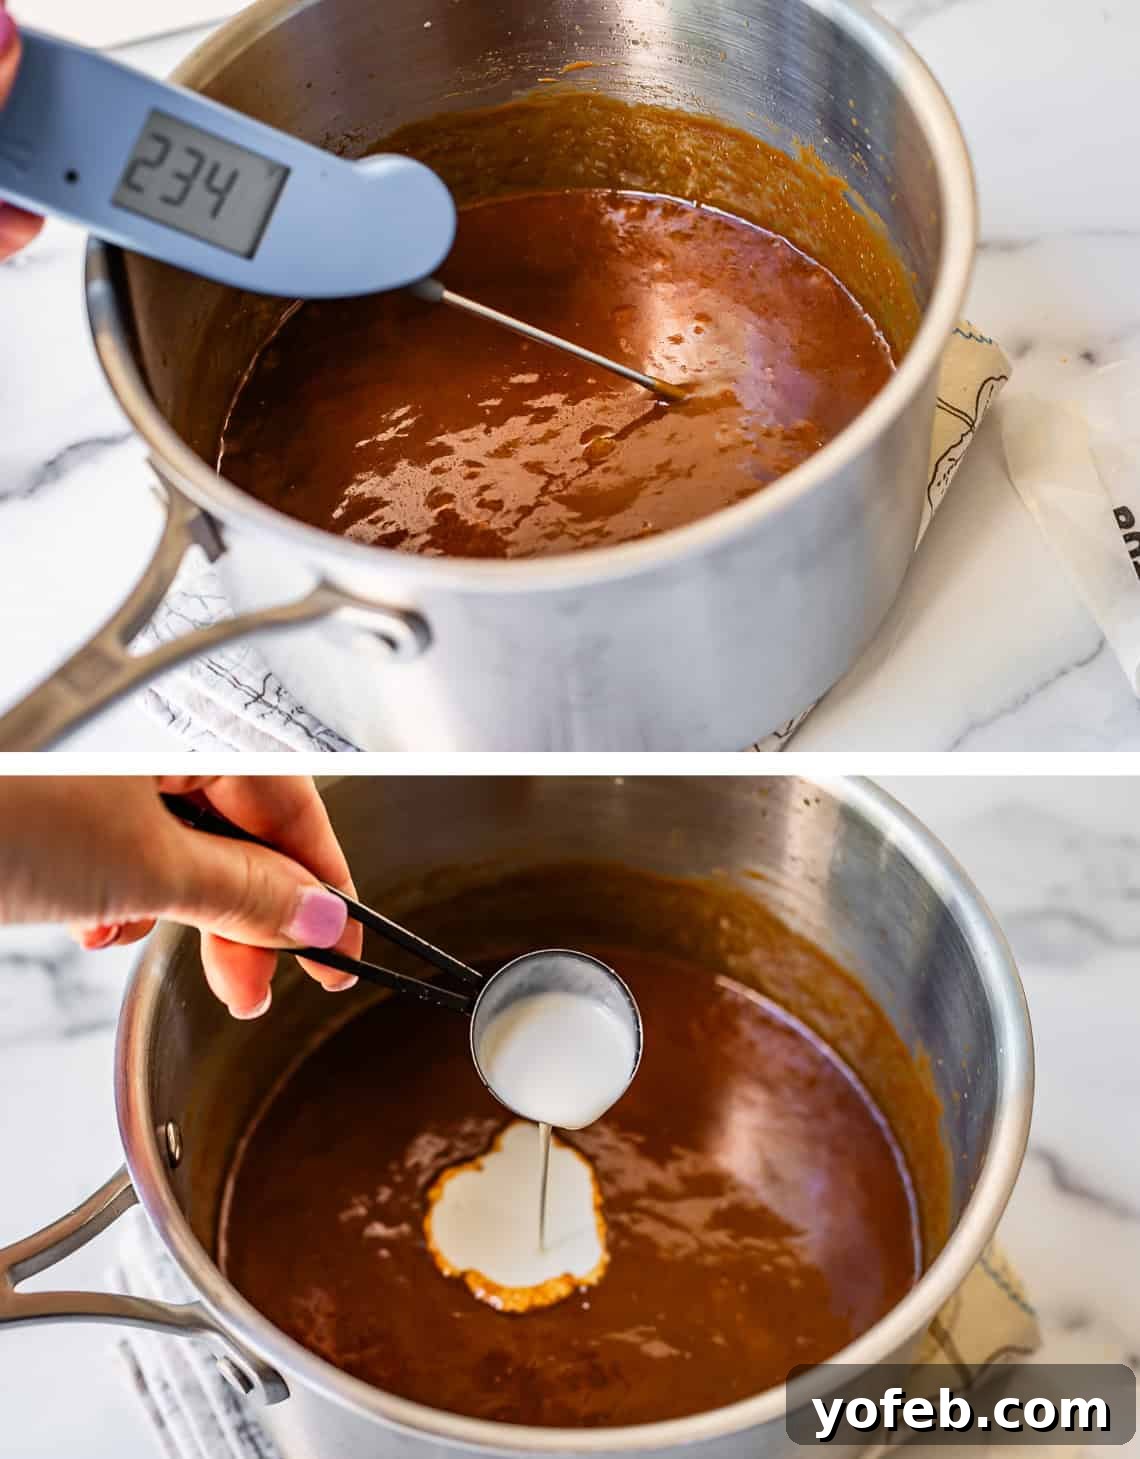
Using a candy thermometer is highly recommended to ensure perfection in this step. Aim for exactly 234°F. The cooking time can vary considerably due to factors like pot thickness, burner intensity, and even humidity levels. I highly recommend a Thermapen, widely considered the best thermometer on the market, but any reliable candy thermometer will work. Do not exceed 234 or 235°F, as this will alter the caramel’s exquisite texture. As soon as it hits 234°F, remove the pot from the heat and continue whisking.
At this point, if you intend to use this recipe as a pourable sauce or dip, whisk in a little extra heavy cream. This will make it ultra-smooth and perfectly stirrable. However, if you’re preparing this caramel for the filling of Salted Caramel Sandwich Cookies or for coating Caramel Apples, omit the extra cream to achieve a firmer, more set caramel.
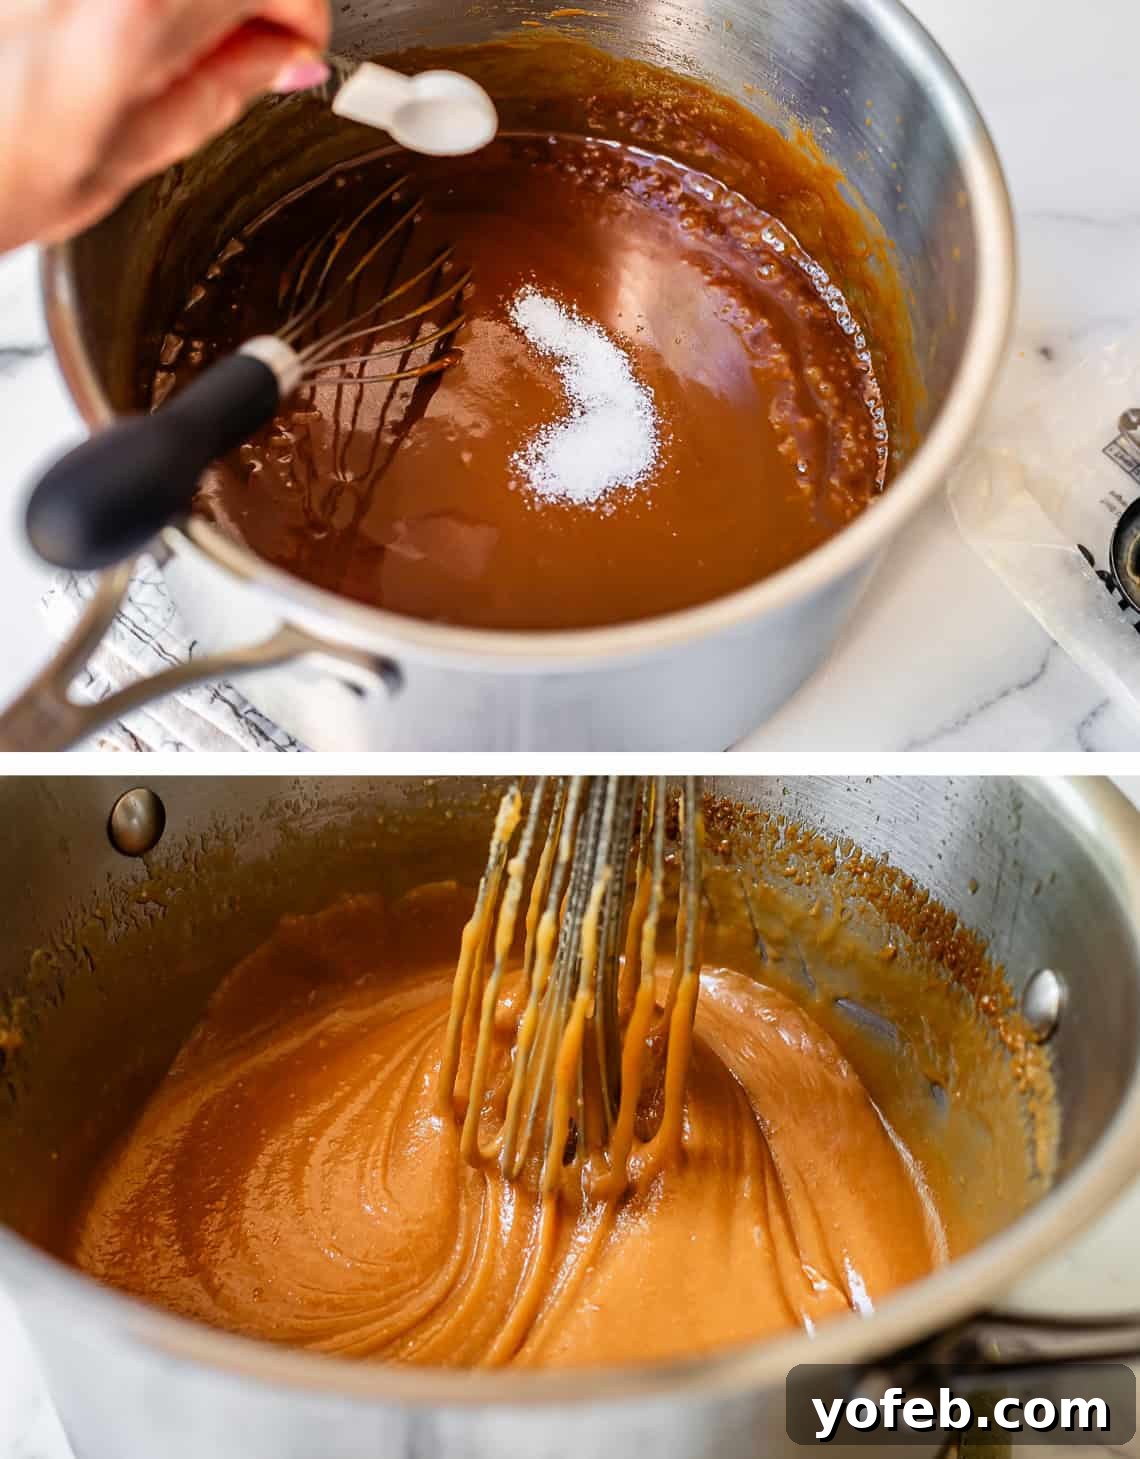
And absolutely do not forget the salt! I found 1 and 1/2 teaspoons to be the perfect balance, but if you’re unsure or using regular table salt, start with less. Salt acts as a powerful flavor amplifier, preventing the caramel from being cloyingly sweet and allowing the nuanced caramel flavors to truly shine. It gives your palate a delightful break from pure sweetness, creating a more complex and satisfying experience.
A quick note on color: you might notice a dramatic color difference in the photos above! This recipe was photographed during early testing, and I later discovered I preferred a deeper, richer caramel flavor achieved by cooking the sugar to a slightly darker amber in the first stage. The process photos provide a more accurate depiction of the desired deep, dark caramel color, while some of the final “glam” shots show a lighter version. Regardless of the final shade, the fudgy texture will be consistently perfect. If your caramel turns out dark, I promise, it’s just right.
Delightful Pairings: What to Serve with Your Fudgy Caramel Sauce
The versatility of this fudgy salted caramel sauce is truly endless! So many desserts can be elevated to extraordinary new heights with just a touch of this golden goodness. While this list could easily stretch for miles, I’ll limit it to a generous selection of my absolute favorites. Prepare for an abundance of caramel bliss!
- As an irresistible dip for any type of fruit, a variety of cookies, or even some rustic breads – imagine crusty baguette slices!
- It’s the star ingredient in the MOST incredible Salted Caramel Sandwich Cookies, adding a chewy, rich layer.
- Drizzled generously over your favorite ice cream, or blended into luscious shakes, like this amazing Caramel Apple-Cider Reduction Shake!
- Speaking of apples, caramel and apple are a match made in culinary heaven. Try it drizzled over a warm bowl of Apple Crisp, a comforting Homemade Apple Cobbler, the very best Apple Pie ever, a rich Dutch Apple Pie, or effortlessly easy Apple Pie Bars. And for those feeling a little indulgent at breakfast, even try it on a decadent Caramel Apple Upside Down French Toast!
- I can effortlessly name a dozen types of pie that would be absolutely phenomenal with a generous topping of this caramel sauce. Beyond the aforementioned Apple Pie, consider a luxurious Cheesecake Pecan Pie, The BEST Banana Cream Pie, delightful Pumpkin Pie Bars, or even a classic Sweet Potato Pie. I’m also eager to try it on top of Snickerdoodle Cookie Pie from Sugar Spice and Glitter. And while I don’t drink coffee, I have a feeling many of you would adore it on this rich Coffee Cream Pie from Dough-Eyed!
- This salted caramel harmonizes perfectly with all of The Best Fall Recipes! Be sure to explore that page for a treasure trove of amazing treats to pair with this versatile sauce, including everything pumpkin, cinnamon, more apple, and so much more for a truly autumnal indulgence!
Storage Tips for Your Homemade Salted Caramel
My preferred method for storing this luscious caramel sauce is in a glass mason jar. However, any heat-resistant container with a securely fitted lid will work beautifully. Keep in mind that the caramel will thicken considerably when refrigerated, so using a heat-resistant container allows you to easily warm it up and restore its pourable consistency. If you don’t have a heat-resistant container, simply use any airtight container for storage and scoop out the desired amount into a separate bowl for warming.
Thanks to its high sugar content, caramel boasts an impressive shelf life. You can safely leave it out at room temperature for up to two weeks, perfect for those spontaneous spoonfuls as you pass through the kitchen (ask me how I know!). When stored in the refrigerator, this caramel can last for an astonishing six months, or even longer (though I doubt it will last that long in your home!). It’s inherently stable and won’t spoil on its own. Just ensure you use a clean spoon each time to prevent contamination, and it will remain delicious for an extended period. After all, they’ve discovered 2,000-year-old honey in Egyptian tombs, so sugar is a fantastic preservative!
To effortlessly restore its smooth, drizzly texture, simply remove the lid from your jar and warm it in the microwave for approximately one to two minutes, stirring every 15-20 seconds until it reaches your desired consistency and temperature.
Can You Freeze Salted Caramel Sauce?
Given its impressive shelf life in the refrigerator—up to six months—and my personal inability to keep it around for very long, I rarely find the need to freeze caramel. However, if you wish to extend its life even further, freezing is indeed an option! To do so, pour the completely cooled caramel into a freezer-safe ziplock bag. Press out as much air as possible before sealing it tightly. The salted caramel will maintain its quality in the freezer for up to three months. When you’re ready to enjoy it, simply thaw the bag of caramel on your countertop at room temperature. Once thawed, transfer it to a glass jar with a lid and follow the same storage and reheating instructions mentioned above. It’s a great way to always have a batch of this delicious sauce on hand!
Frequently Asked Questions About Salted Caramel Sauce
A classic salted caramel typically involves cooking sugar in a small amount of water until it caramelizes to an amber color, then incorporating heavy cream, salt, and vanilla. It’s incredibly delicious! For a traditional salted caramel, I recommend trying My Favorite Caramel Sauce and simply adding an extra teaspoon of kosher salt.
Today’s recipe, however, is a unique twist: it combines the components of traditional salted caramel with the key ingredients used for homemade candy caramels—the soft, chewy kind wrapped in parchment paper you see during the holidays. This hybrid approach gives us a profound caramel flavor alongside the rich, fudgy texture of candy, all in one glorious sauce. I am absolutely obsessed!
The primary distinction, as the name suggests, is the presence of salt! While many traditional caramel recipes do include a pinch of salt to balance the sweetness, salted caramel intentionally features a higher salt-to-sweet ratio. This creates a more pronounced interplay of flavors. Check out the next question to understand why this higher salt content is such a wonderful thing!
To anyone asking this question, I suggest we find you a trusted therapist. Just kidding! (Mostly.)
The serious answer is that our tongues are wired to appreciate a diverse range of flavors: umami, sweet, salty, sour, and bitter. Salted caramel elevates the caramel experience beyond mere sweetness to a beautifully balanced salty-sweet profile. The increased proportion of salt in the recipe not only adds to this complex flavor tapestry but also brilliantly cuts through the sometimes cloying sweetness of regular caramel. This allows the genuine caramel flavor to shine through more distinctly, rather than just tasting “sweet.” Think of salt as a megaphone for flavors, amplifying the existing delicious notes in any dish.
No, they are actually quite different! This salted caramel sauce is an enhanced version of classic salted caramel, which is traditionally made by caramelizing sugar and then adding heavy cream and salt.
Dulce de Leche, on the other hand, is made by slowly cooking sweetened condensed milk over time until it thickens and caramelizes. It’s a super easy, mostly hands-off process that I highly recommend trying. I even have several recipes that feature dulce de leche, including this incredible Dulce de Leche Cream Pie, which is worth making solely for the experience!
Indulge Your Caramel Cravings: More Sweet Treats
Are you, like me, a true caramel fiend? I completely understand; caramel isn’t just a flavor, it’s a whole mood, and sometimes you need the perfect recipes to satisfy that craving. Don’t worry, I’ve got you covered with some of my absolute favorites that celebrate the magic of caramel:
- The Only Caramel Apple I Will Eat >> Revisiting the very treat that sparked this entire caramel saga in my life – truly the best caramel apples ever.
- Soft Homemade Caramel Candy << The quintessential, pure caramel experience in delectably soft, chewy candies.
- Caramel Cake with Caramel Icing Recipe >> It’s hard to get more intensely caramely than this, folks! A true celebration of caramel.
- Homemade Salted Caramel Brownies >> One of my all-time favorite desserts. And that’s saying something!
- Soft Caramel Pecan Sticky Buns Recipe >> Take classic cinnamon rolls and elevate them to a thousand! The sticky caramel sauce and toasted pecans are pure perfection.
- Caramel Nougat Pecan Rolls >> A holiday tradition in my house; these always turn out flawlessly.
- Peach Pull-Apart Bread with Caramel Sauce >> This recipe always reminds me that the world needs more pull-apart bread smothered in caramel sauce.
- Dreamy Coconut Cream Pie with Caramel Layer >> Who knew that the combination of coconut and caramel could be such a heavenly match?
- No Bake Salted Caramel Cheesecake with Caramelized Bananas >> An incredibly easy no-bake filling results in a surprisingly addictive and delicious cheesecake.
- Bananas Foster from Grandbaby Cakes >> A flaming classic that benefits immensely from a good caramel.
Beyond Caramel: Other Amazing Dessert Toppings to Try!
I absolutely adore a good drizzle to perfectly finish a dessert. Ice cream? Or ice cream PLUS Homemade Chocolate Sauce? I think the answer is quite clear, wouldn’t you agree? Here are some other fantastic toppings to elevate your sweet creations:
- The Best Homemade Caramel Sauce >> This is my original, slightly less salty caramel sauce, featuring a delicate tang. It’s thinner, more elastic, and glossier than today’s fudgy recipe, offering a deeper, less butterscotchy flavor. If you’re deciding which sauce to use, try both and discover which complements your desserts best!
- Dulce de Leche from Condensed Milk >> A wonderfully thick, caramel-butterscotch sauce that I confess to eating straight by the spoonful.
- Easy Lemon Curd Recipe >> I am utterly smitten with this bright, tangy curd. It’s fantastic on cookies, cakes, tarts—you name it!
- Fresh Strawberry Topping >> A perennial favorite! I use it generously on Crepes, in Strawberry Shortcake, and countless other delightful treats.
- Buttermilk Syrup >> PLEASE, I implore you, try this on Pancakes or Sour Cream Coffee Cake. You will thank me later!
- Blueberry Ginger Dessert Topping from Sense & Edibility >> A unique and flavorful choice for those seeking something a little different.

Facebook | Pinterest | Instagram

Easy Salted Caramel Sauce
Ingredients
- 1/4 cup water
- 2 cups white sugar
- 1/2 cup salted butter, chopped
- 1 cup corn syrup
- 1 (12-ounce can) evaporated milk
- 3 tablespoons heavy cream, optional
- 1 and 1/2 teaspoons vanilla extract
- 1 teaspoon kosher salt, or sea salt (you can add up to 1 and 1/2 teaspoons)
Instructions
-
Prepare all your ingredients in advance to ensure a smooth caramel-making process! Caramel requires quick action at certain stages. Measure out 1 cup of corn syrup and place it near your stove. Open the can of evaporated milk. Unwrap and chop 1/2 cup (one stick) of salted butter into a few pieces. Keep the heavy cream carton and a tablespoon handy.
-
Pour 1/4 cup water into a heavy-bottomed 3-quart pot. (Using a cheap, thin pot can lead to uneven heating and a ruined caramel, so choose wisely!) Swirl the water around to moisten the bottom and lower sides of the pot, a few inches up. Turn the heat to high.
-
Slowly add 2 cups of granulated sugar to the very center of the pot, being careful to avoid getting any sugar crystals on the sides. Using your wooden spoon, gently draw the water from the edges inward toward the sugar, slowly working your way around the pan until all the sugar is thoroughly moistened. It’s crucial not to leave any dry sugar crystals on the pot’s edges. If any do appear, dip a pastry brush in water and carefully swipe them back into the liquid. This helps prevent crystallization.
-
Bring the mixture to a full boil over high heat. Once vigorously boiling, reduce the heat to medium. Remove your wooden spoon (which may have sugar crystals on it) and place it in the sink; you won’t need to stir during this stage. Let the crystal-free sugar mixture bubble and boil undisturbed for approximately 6-8 minutes, closely observing the cues described below.
-
The mixture will gradually begin to change color, starting with a light yellow, then progressively deepening until it reaches a rich amber. As soon as you see any hint of yellow, do not take your eyes off the pot. The color will intensify rapidly. The key indicator is the appearance of the first faint wisps of smoke. Once the caramel is an even amber color across the entire surface AND you observe smoke*, immediately remove the pan from the heat. You have successfully created caramel.
-
Off the heat, use a flat whisk to gently stir in the chopped pieces of butter, adding them gradually. Incorporate a total of 1/2 cup of butter, whisking well after each addition. Exercise extreme caution, as hot caramel splashes can be very painful! You’ll notice the caramel becoming creamy and thickening as the butter melts in.
-
Add 1 cup of corn syrup** and whisk until it is completely incorporated. Be sure to scrape the sides, corners, and bottom of the pot thoroughly, as corn syrup can sometimes form clumps.
-
Return the pot to the burner and set the heat to medium. The mixture should quickly come back to a gentle boil.
-
Slowly add the 12-ounce can of evaporated milk. Add a small portion, whisk completely, then add a bit more, stirring until fully combined. Once all the evaporated milk has been incorporated, settle in for a longer boiling period. Continue whisking, taking only brief breaks, and ensuring you reach into the corners of the pan. Boil, whisking consistently, for approximately 14-17 minutes; continue reading for the precise cue.
-
For optimal results, it is best to use a candy thermometer to determine when this step is complete. You need to boil the mixture until it precisely reaches 234 degrees F. The time required can vary significantly due to various factors such as pot thickness, burner intensity, and even local humidity levels. I highly recommend a Thermapen, recognized as one of the best thermometers available, though any reliable candy thermometer will suffice. Do not let the temperature climb much above 234 or 235 degrees F, as this will negatively impact the desired texture of your caramel.
-
Remove the pot from the heat immediately once it has reached 234 degrees F. Continue whisking for a moment.
-
If you intend to use this caramel as a sauce or dip, add 3 tablespoons of heavy cream. Be careful not to splash yourself. Whisk completely until fully incorporated. (If you are making Salted Caramel Sandwich Cookies or Caramel Apples, omit the 3 tablespoons of cream for a firmer, setting caramel.)
-
Stir in 1 and 1/2 teaspoons of vanilla extract and 1 teaspoon of kosher salt (or sea salt). If you are uncertain about the saltiness, start with less and add more to taste, up to 1 and 1/2 teaspoons, especially if you enjoy a pronounced salty kick.
-
Allow the mixture to cool completely, or at least cool enough to prevent burning your tongue on hot caramel lava, before attempting to taste it. The flavor and texture develop as it cools.
-
Enjoy this versatile caramel sauce in countless ways: as a luxurious ice cream topping, a delightful dip for apples, the perfect coating for homemade caramel apples (full recipe and instructions coming soon), drizzled over Pumpkin Pie or Apple Pie, enhancing a Pumpkin Dump Cake, or sandwiched between delectable Salted Caramel Sandwich Cookies. The possibilities for indulgence are truly endless!
-
Storage: I prefer to store my homemade caramel in a glass mason jar; one batch conveniently fits into a quart-sized jar. Any airtight container will work equally well. This caramel can safely be kept on the counter at room temperature for up to 2 weeks, making it ideal for those spontaneous spoonfuls as you pass through the kitchen (believe me, I know!). For longer storage, refrigerate it for up to 6 months (and likely even longer!).
-
Reheating: At room temperature, this fudgy caramel will be soft and perfect for dipping, but perhaps not quite for drizzling. To achieve a smooth, pourable consistency, simply heat it in the microwave in 30-second intervals, stirring thoroughly between each interval, until it reaches your desired consistency and warmth before drizzling over desserts or ice cream.
Notes
**Corn Syrup: I experimented with both dark corn syrup and light corn syrup and found both to be excellent. Either option works perfectly. The only notable difference is that dark corn syrup contains molasses, which imparts a slightly deeper, more robust flavor to the caramel.
COLOR: It’s important to note for this recipe that your finished caramel might appear significantly darker than the caramel shown in many of these photos! The final color largely depends on how deeply you caramelize the sugar before adding the butter. I photographed this recipe relatively early in my testing phase and later realized I preferred a slightly deeper flavor, which comes from a darker caramelization. The process photos provide a more accurate representation of the desired, deeper color for this caramel than some of the final “glam” shots. Just be aware of this! If your caramel turns out dark, rest assured, it’s exactly right and will have that rich, fudgy texture.