
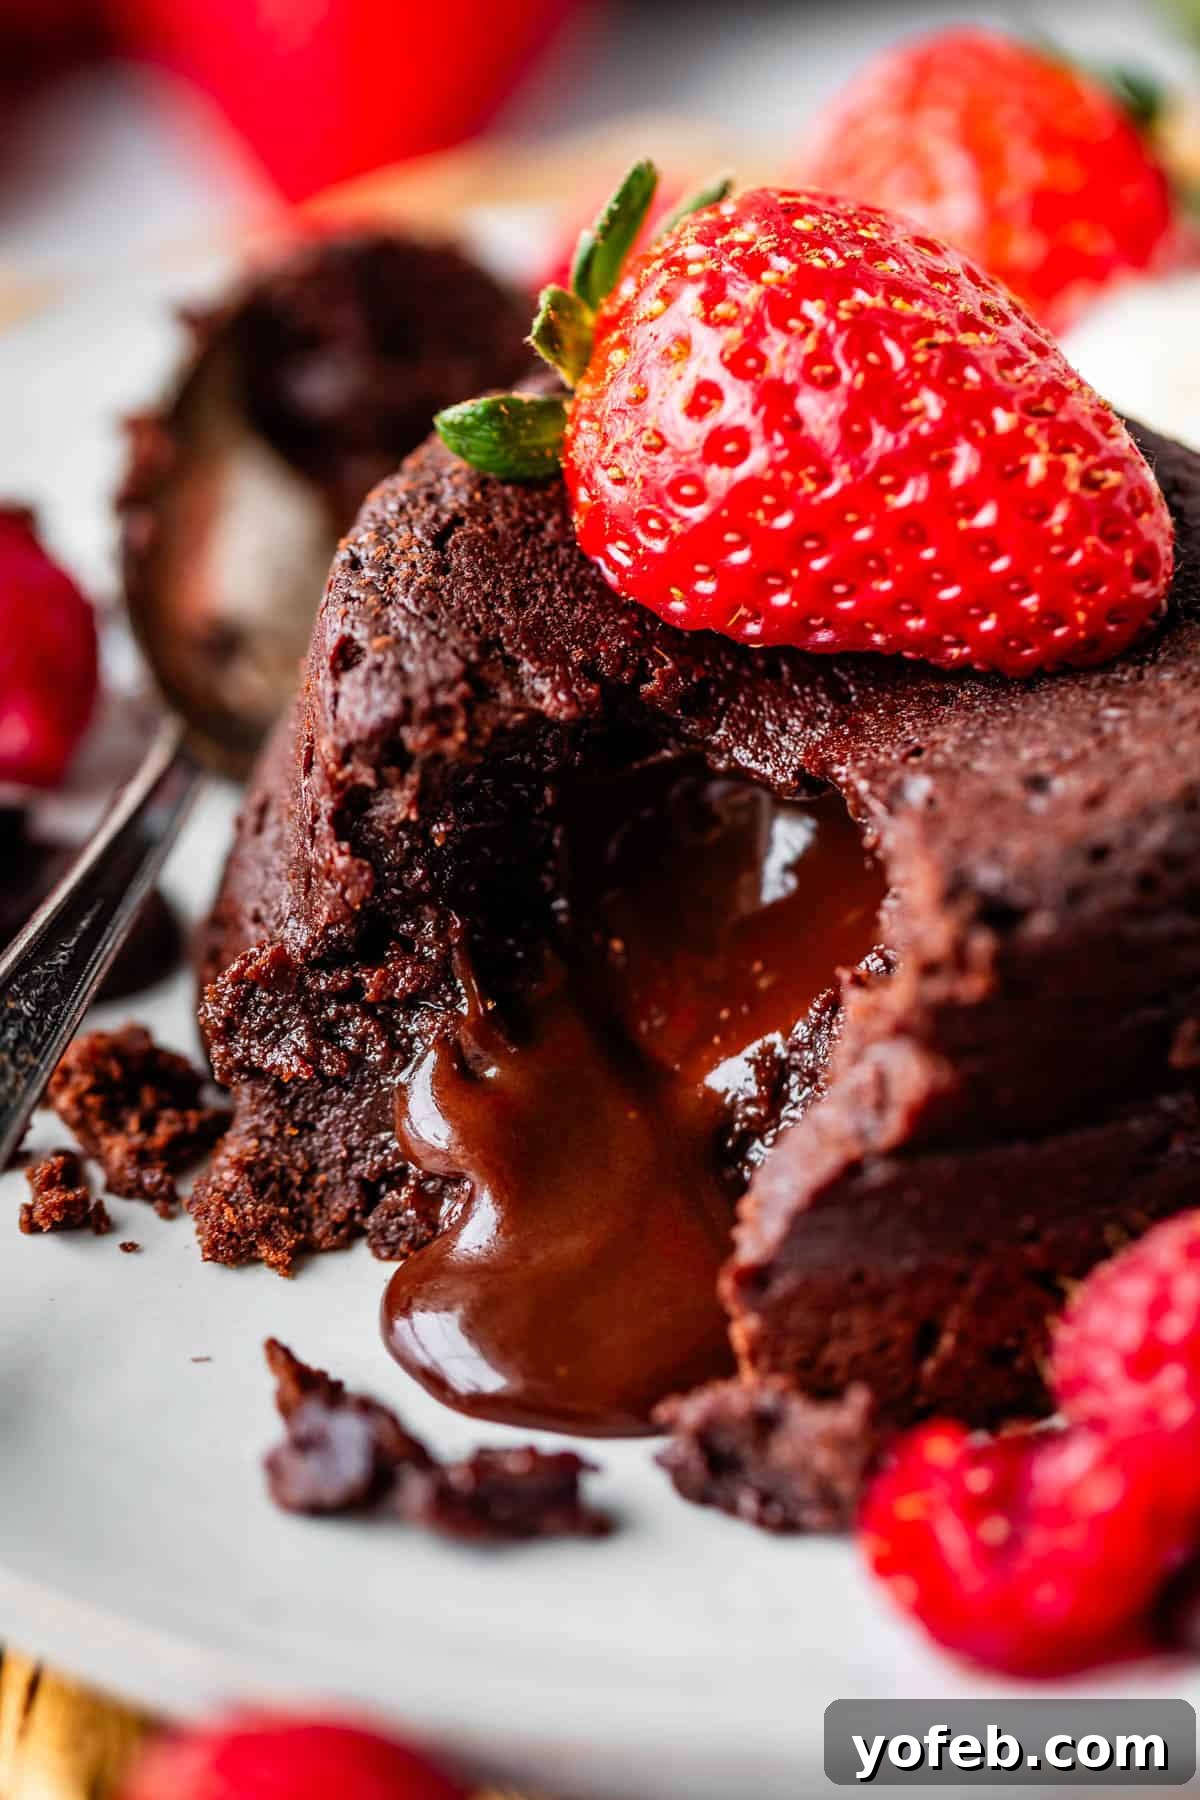
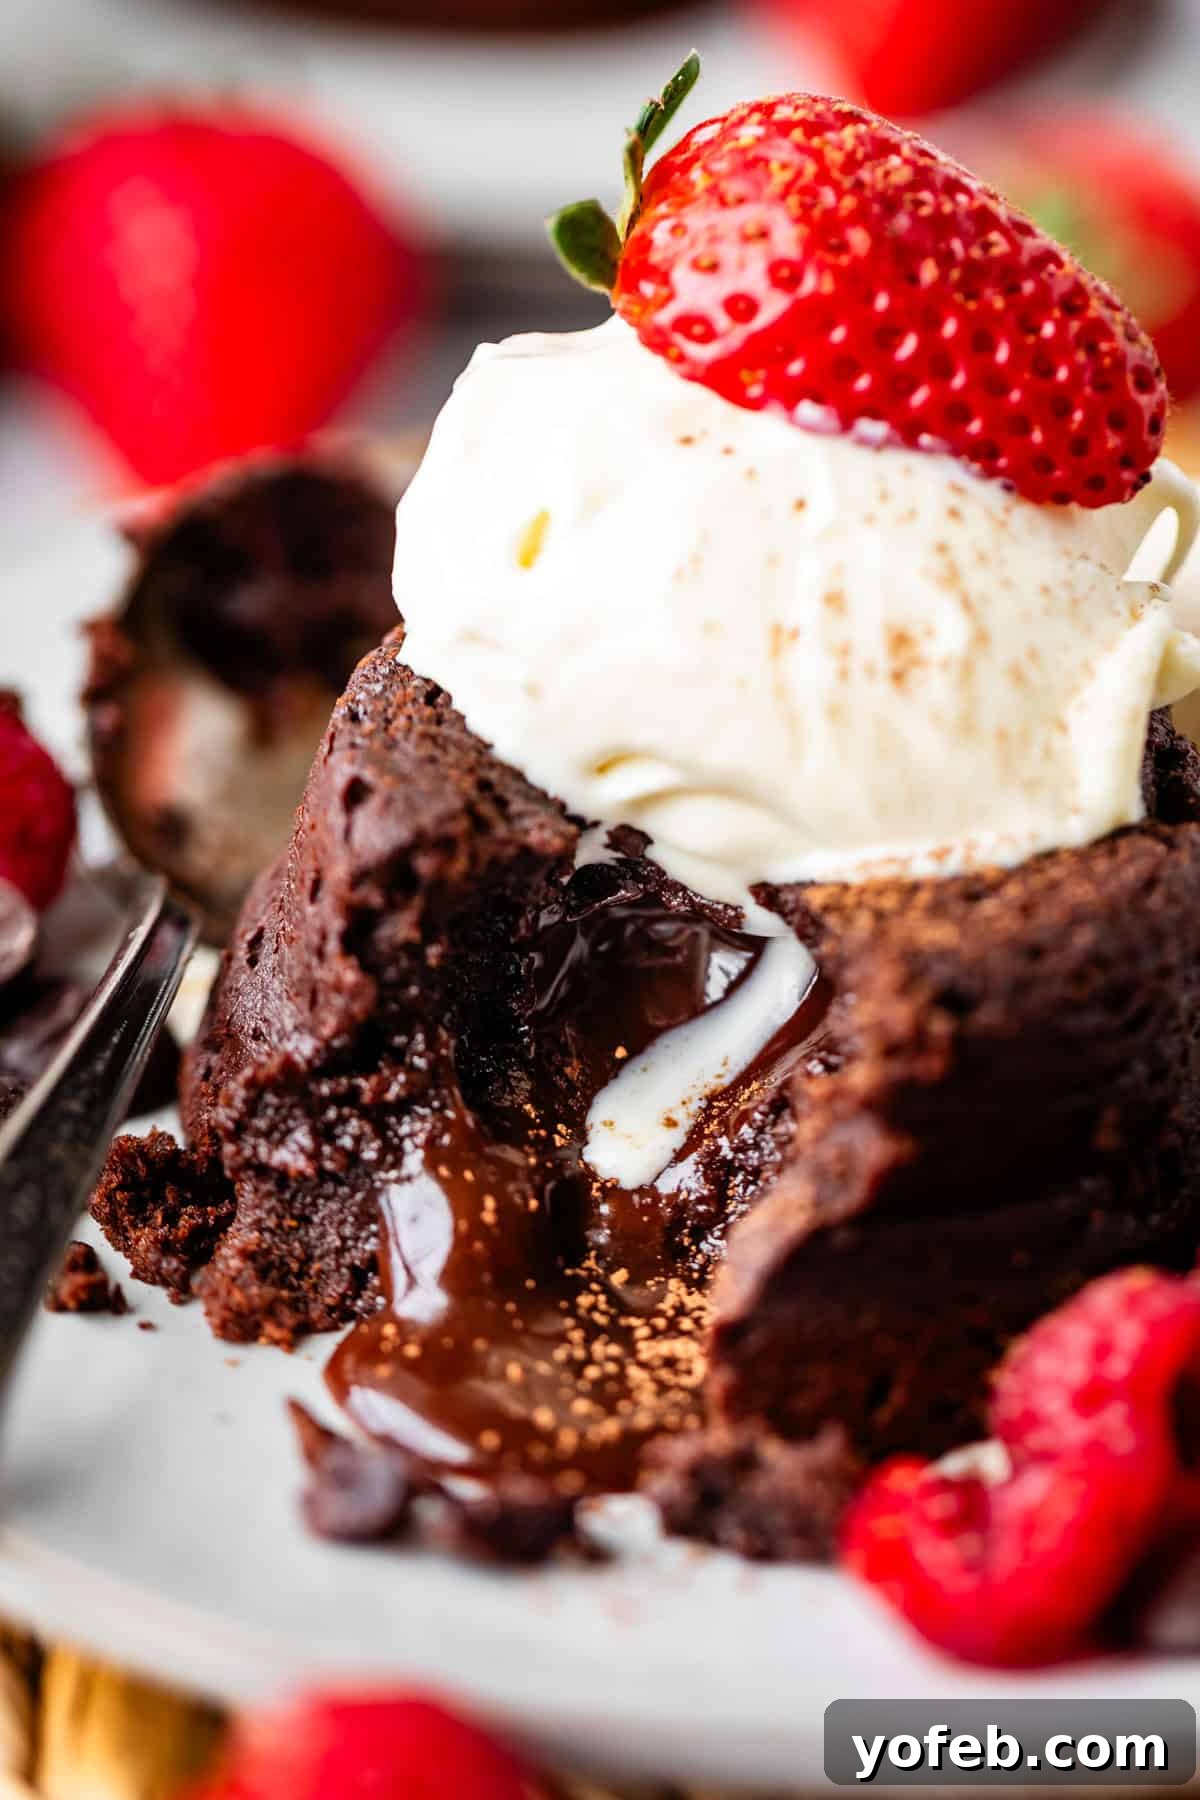
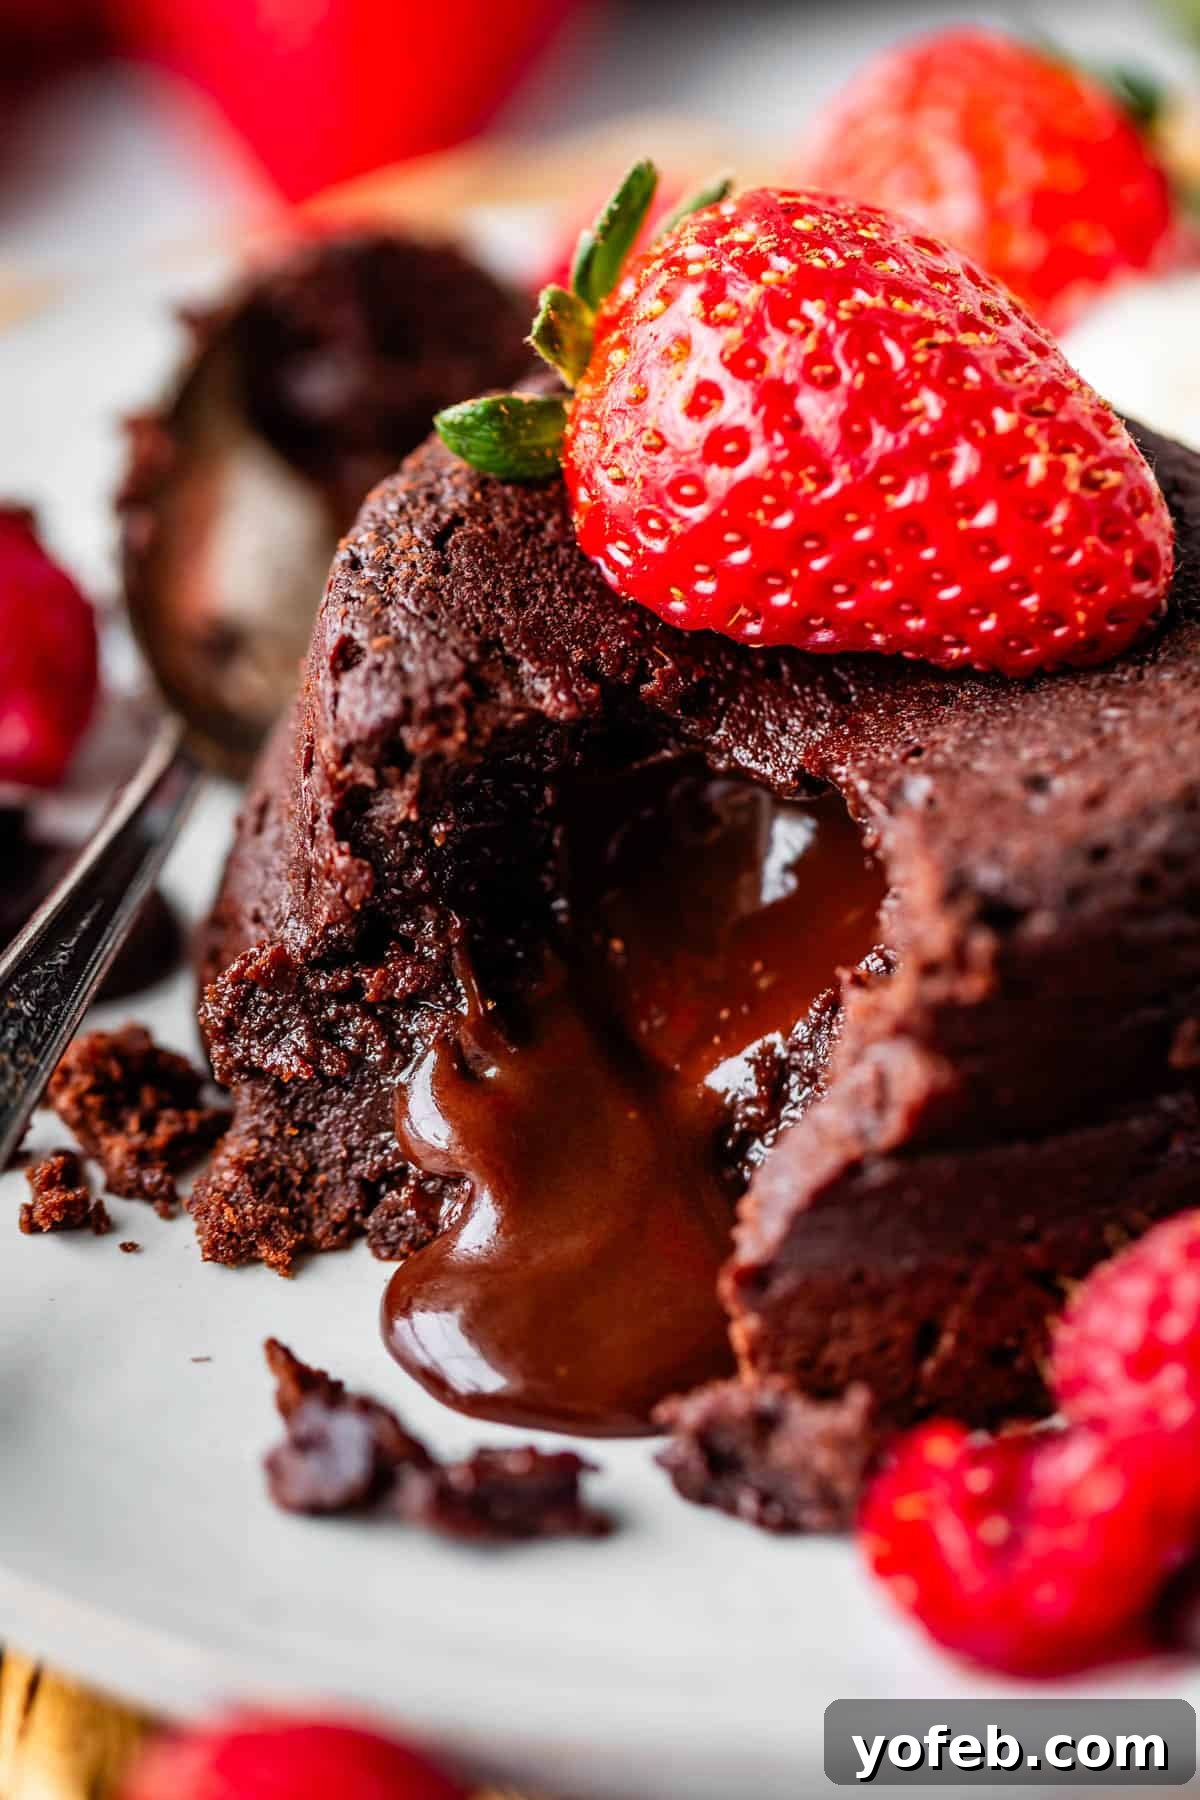
Indulge in the ultimate chocolate experience with these divine Chocolate Lava Cakes. A staple on countless dessert menus, these individual masterpieces feature an intensely rich chocolate cake that, when sliced, reveals a luxurious, molten ganache center. The allure of warm, flowing chocolate is undeniable, tapping into a universal craving for decadent sweetness. This recipe is meticulously crafted to deliver perfection in just 40 minutes, making it ideal for impressing guests or creating a memorable moment for loved ones on special occasions like Valentine’s Day. With simple, accessible ingredients, you can effortlessly bring gourmet dessert magic into your home kitchen. Prepare to fall in love with every spoonful!
The Irresistible Allure of Chocolate Lava Cake
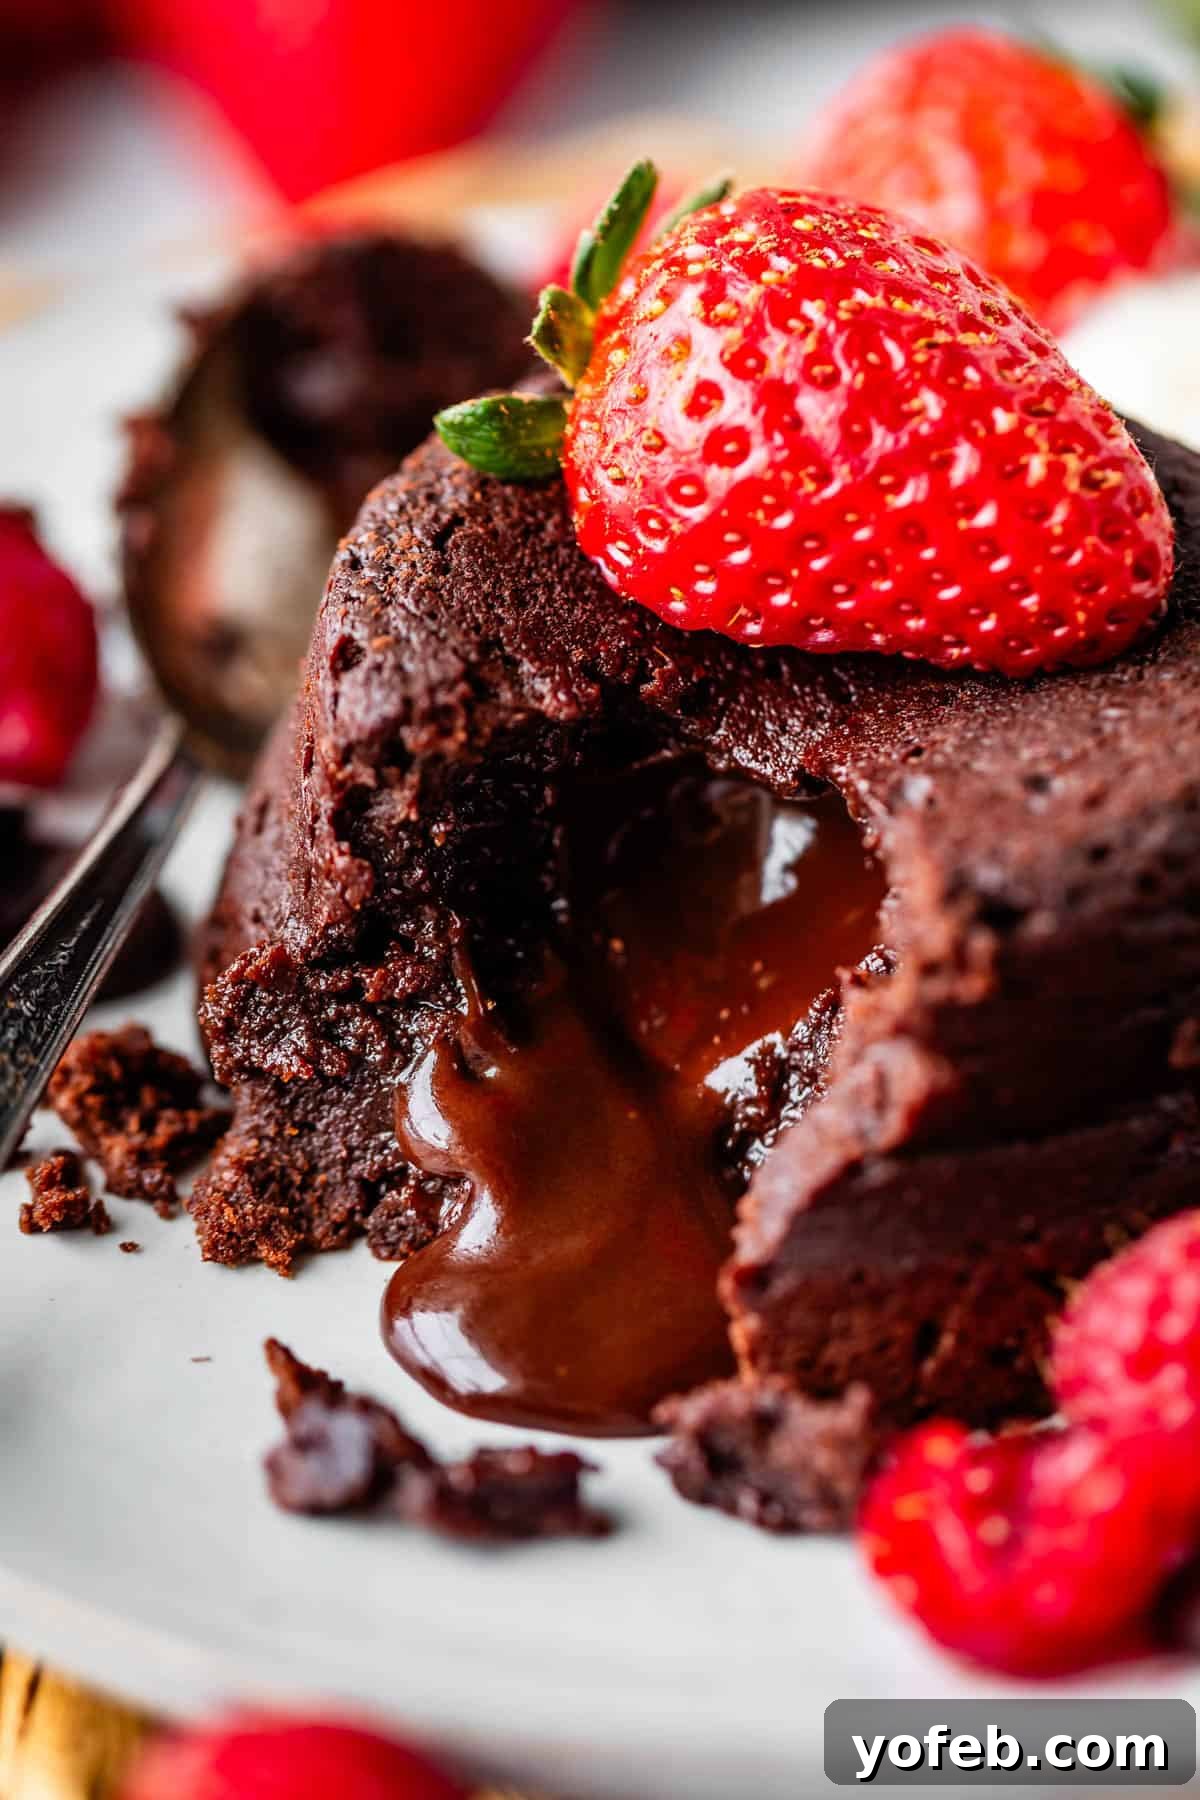
Chocolate lava cakes hold a special place in the hearts of dessert enthusiasts worldwide, and for good reason. Who hasn’t experienced the sheer delight of ordering this iconic dessert at a bustling chain restaurant or an elegant fine-dining establishment? Chefs universally understand the necessity of a chocolate option on any dessert menu, knowing that its absence could lead to widespread disappointment – a sentiment many of us can heartily agree with. These molten marvels don’t just satisfy a chocolate craving; they elevate it to an art form.
A perfectly crafted chocolate lava cake embodies everything we desire in a dessert:
- ✔️ It’s not merely chocolate; it’s an experience of
✔️ intense, profound chocolate flavor.
✔️ Its center is wonderfully gooey and fluid.
✔️ Every bite is incredibly rich and satisfying.
✔️ It feels truly extravagant and over-the-top.
✔️ It leaves you with a feeling of blissful indulgence, completely content.
From the moment your spoon breaks through the delicate crust, revealing that warm, rivers of molten chocolate, the lava cake captivates all your senses. It’s a symphony of textures and flavors – the slightly firm exterior giving way to the liquid gold within, all enveloped in the deep, complex notes of high-quality cocoa. This makes it an unforgettable dessert, perfect for celebrating milestones, romantic evenings, or simply treating yourself to something truly extraordinary.
The Secret to the Best Lava Cakes: A Ganache Center
While many traditional lava cake recipes rely on a simple underbaked batter for their molten core, this recipe takes a different, decidedly more delicious approach. Traditionally, a lava cake is a small cake baked at a very high temperature for a short duration. The goal is to bake the exterior quickly, leaving the interior as raw, liquid batter. However, my experience with this method often resulted in a center that was too “eggy” or lacked sufficient chocolate flavor, despite being safe to consume due to the high baking temperature.
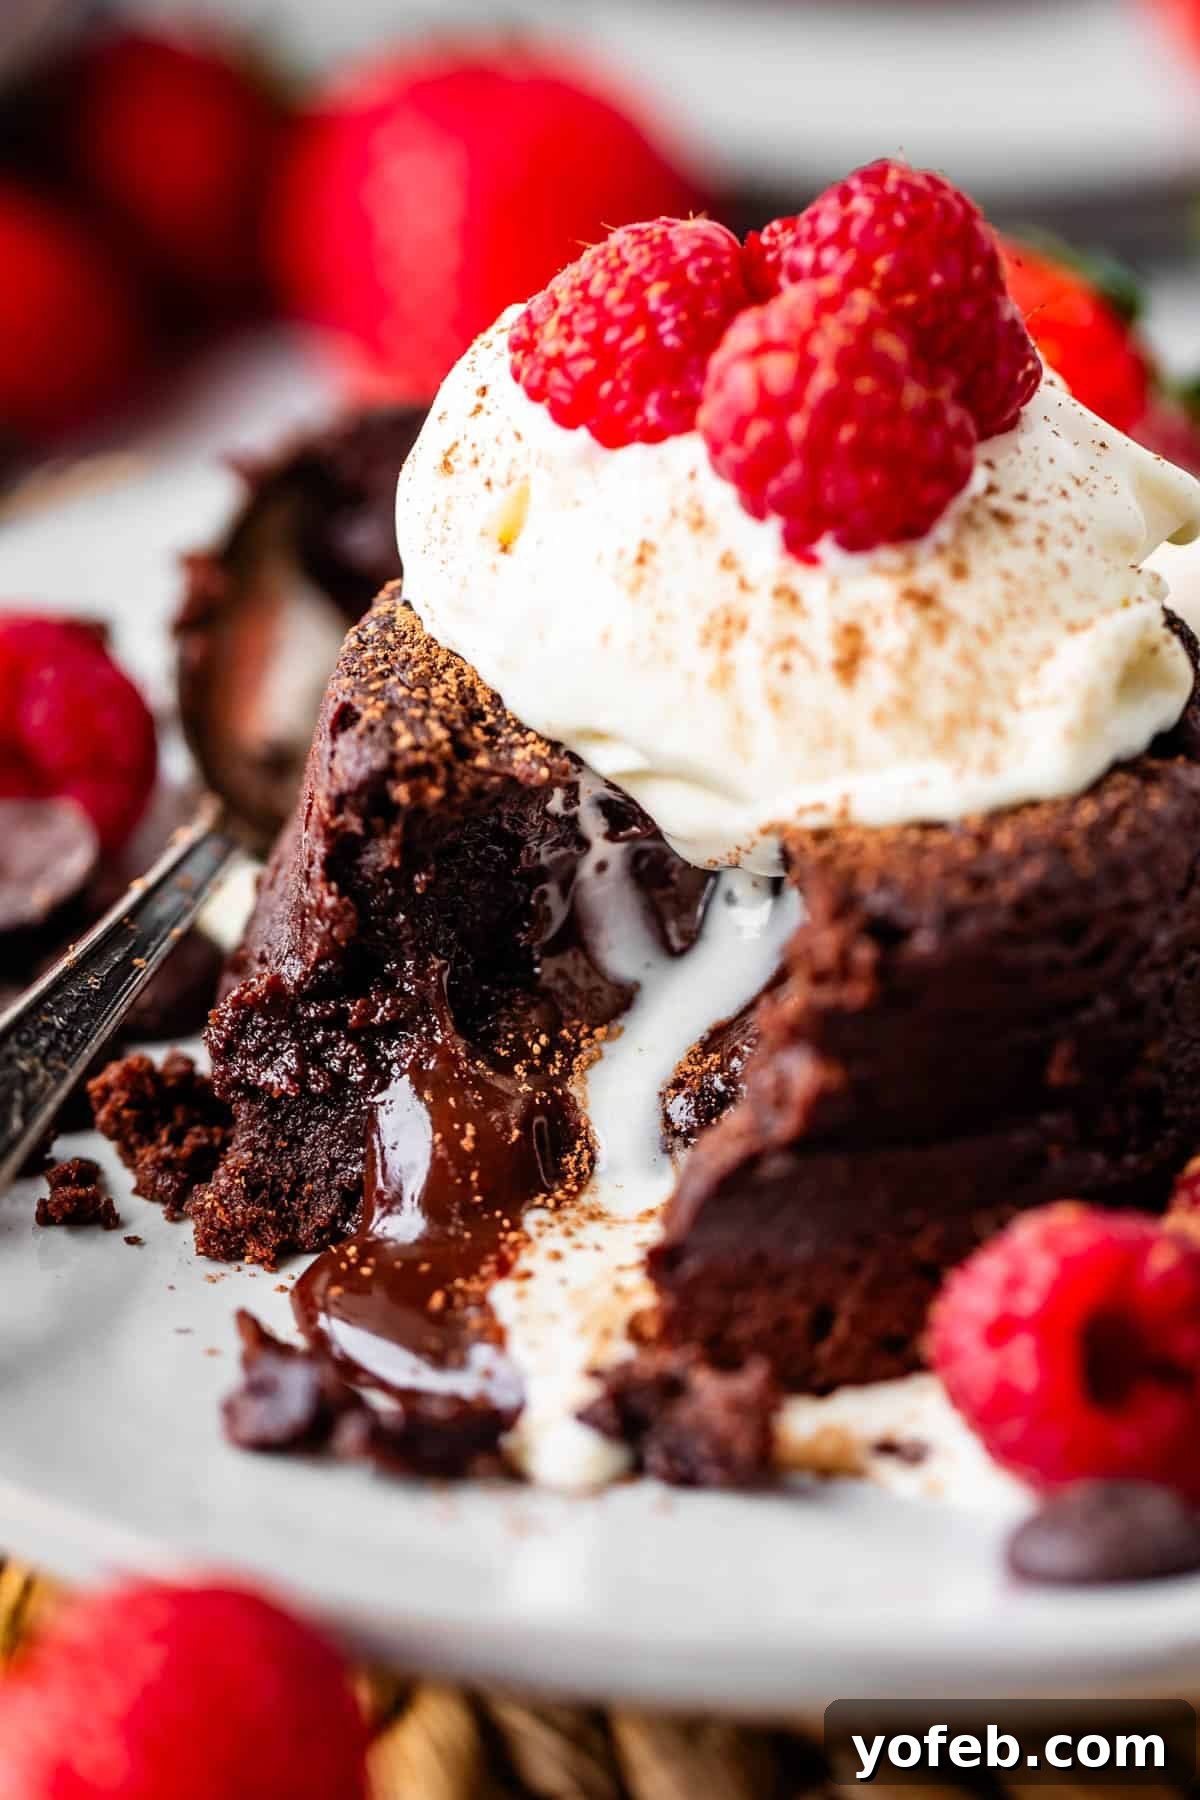
The game-changing solution? Incorporating a rich, velvety ganache center. This innovative technique elevates the flavor profile beyond comparison. Crafting the ganache is a surprisingly quick process, and the resulting taste and texture are truly phenomenal. I still advocate for a slight underbaking of the cake batter itself; this allows for a minimal amount of gooey batter to meld seamlessly with the melted ganache, creating a “Chocolate Lava Level 1000” experience. The combination is incredibly decadent, profoundly rich, and ultimately satisfying. You’re in for an absolute treat!
Achieving Lava Cake Perfection: Expert Tips for Success
After countless trials and delectable experiments, I’ve distilled the key elements that transform a good lava cake into an extraordinary one. These tips are designed to guide you to the pinnacle of chocolate dessert creation:
- Embrace the Ganache Center: This recipe’s signature ganache center is a non-negotiable step. While not traditional, it delivers a flavor depth and molten texture that far surpasses a simple underbaked batter. Trust me, you won’t want to skip this step once you experience the difference it makes.
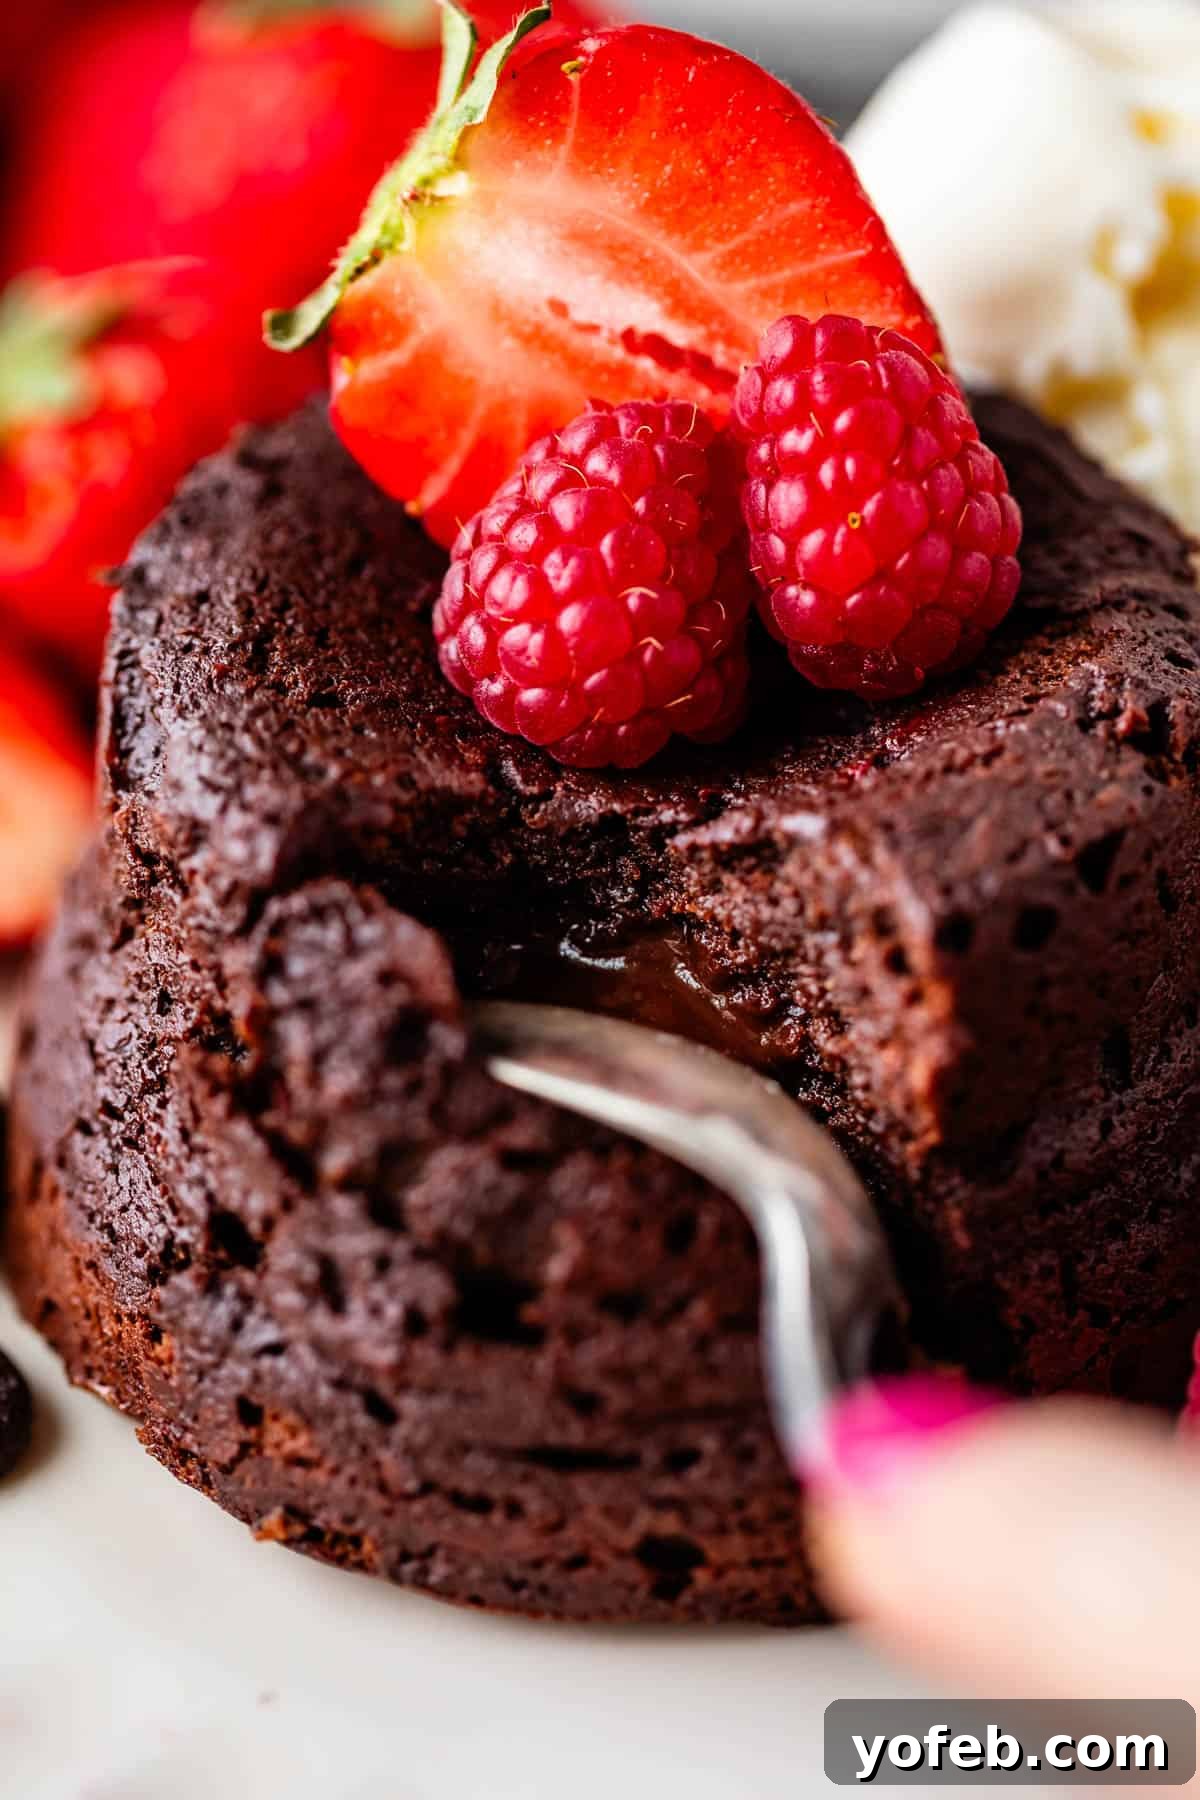
- Master the Baking Time – Avoid Overbaking: This is arguably the most critical factor. Overbaking these cakes will result in a fully solid center, defeating the purpose of a “lava” cake. My strongest recommendation is to bake a single test cake first. This allows you to understand how your specific oven performs and precisely how gooey you prefer your molten center to be. Observe the visual cues carefully to achieve your desired consistency.
- Remarkably Fast Preparation: Despite their gourmet appearance and exquisite taste, these lava cakes are astonishingly quick to prepare. You can have these beauties ready from start to finish in approximately 40 minutes, making them perfect for last-minute cravings or spontaneous entertaining.
- Portion Control for Optimal Enjoyment: My recipe yields small, perfectly sized cakes of about 4.5 ounces. Larger cakes, while tempting, can often be overwhelmingly rich and difficult to finish. This smaller portion ensures every bite is savored without leading to dessert fatigue.
- Garnish for Impact: Presentation and complementary flavors are essential. Serving your lava cakes with thoughtful garnishes makes a world of difference. Consider a scoop of premium vanilla ice cream, a dollop of freshly whipped cream, or a scattering of fresh berries like raspberries and strawberries. These additions enhance both visual appeal and balance the richness of the chocolate.
Important Ingredients for a Superior Chocolate Lava Cake
While this recipe is straightforward, the quality of a few key ingredients is paramount to achieving truly spectacular lava cakes. Opting for the best possible chocolate and dairy will make a noticeable difference in the final taste and texture:
- High-Quality Semi-Sweet Chocolate Chips: These are the star of our ooey-gooey ganache filling, which, of course, is the heart of these molten cakes. Investing in premium semi-sweet chocolate chips (like Ghirardelli 60% cacao or similar high-quality brands) ensures a deeply flavorful and smooth ganache. Avoid generic store brands that often use chocolate liquor instead of real cocoa butter, as this can compromise the texture and richness. You’ll thank yourself later for choosing the good stuff!
- Heavy Cream: An indispensable component of the ganache, heavy cream provides the luxurious richness and necessary thickness. Do not be tempted to substitute with lower-percentage milk or, even worse, coffee creamer. The higher fat content of heavy cream is crucial for achieving the perfect consistency and luscious mouthfeel of the ganache.
- Bittersweet Chocolate: Distinct from semi-sweet, bittersweet chocolate delivers the intense, profound dark chocolate flavor that defines these cakes. Typically found in 4-ounce bars (you’ll need two for this recipe) rather than chips, its deeper cacao content provides a robust foundation. If you prefer the convenience of chips, ensure they are high-quality bittersweet varieties. This chocolate is vital for the intense cake batter that perfectly complements the sweeter ganache core.
How to Make the Perfect Chocolate Lava Cake
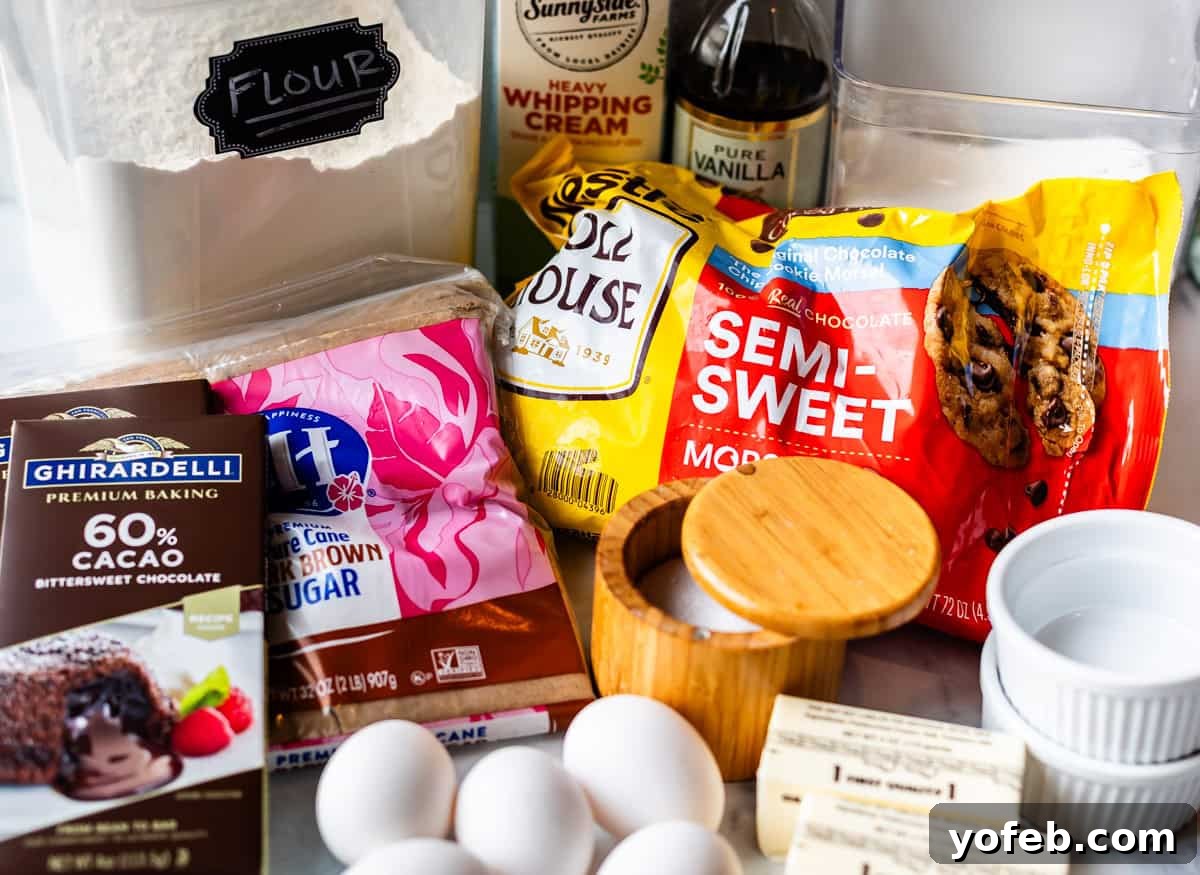
Gather your ingredients! You don’t need exotic items to create these sensational lava cakes, but the quality of your chocolate is key. When I say high-quality, even well-known brands like Nestle or Ghirardelli count. The main thing to avoid are inexpensive store brands (yes, “Great Value,” I’m looking at you!) that use chocolate liquor instead of genuine cocoa butter. For this recipe, real chocolate makes all the difference.
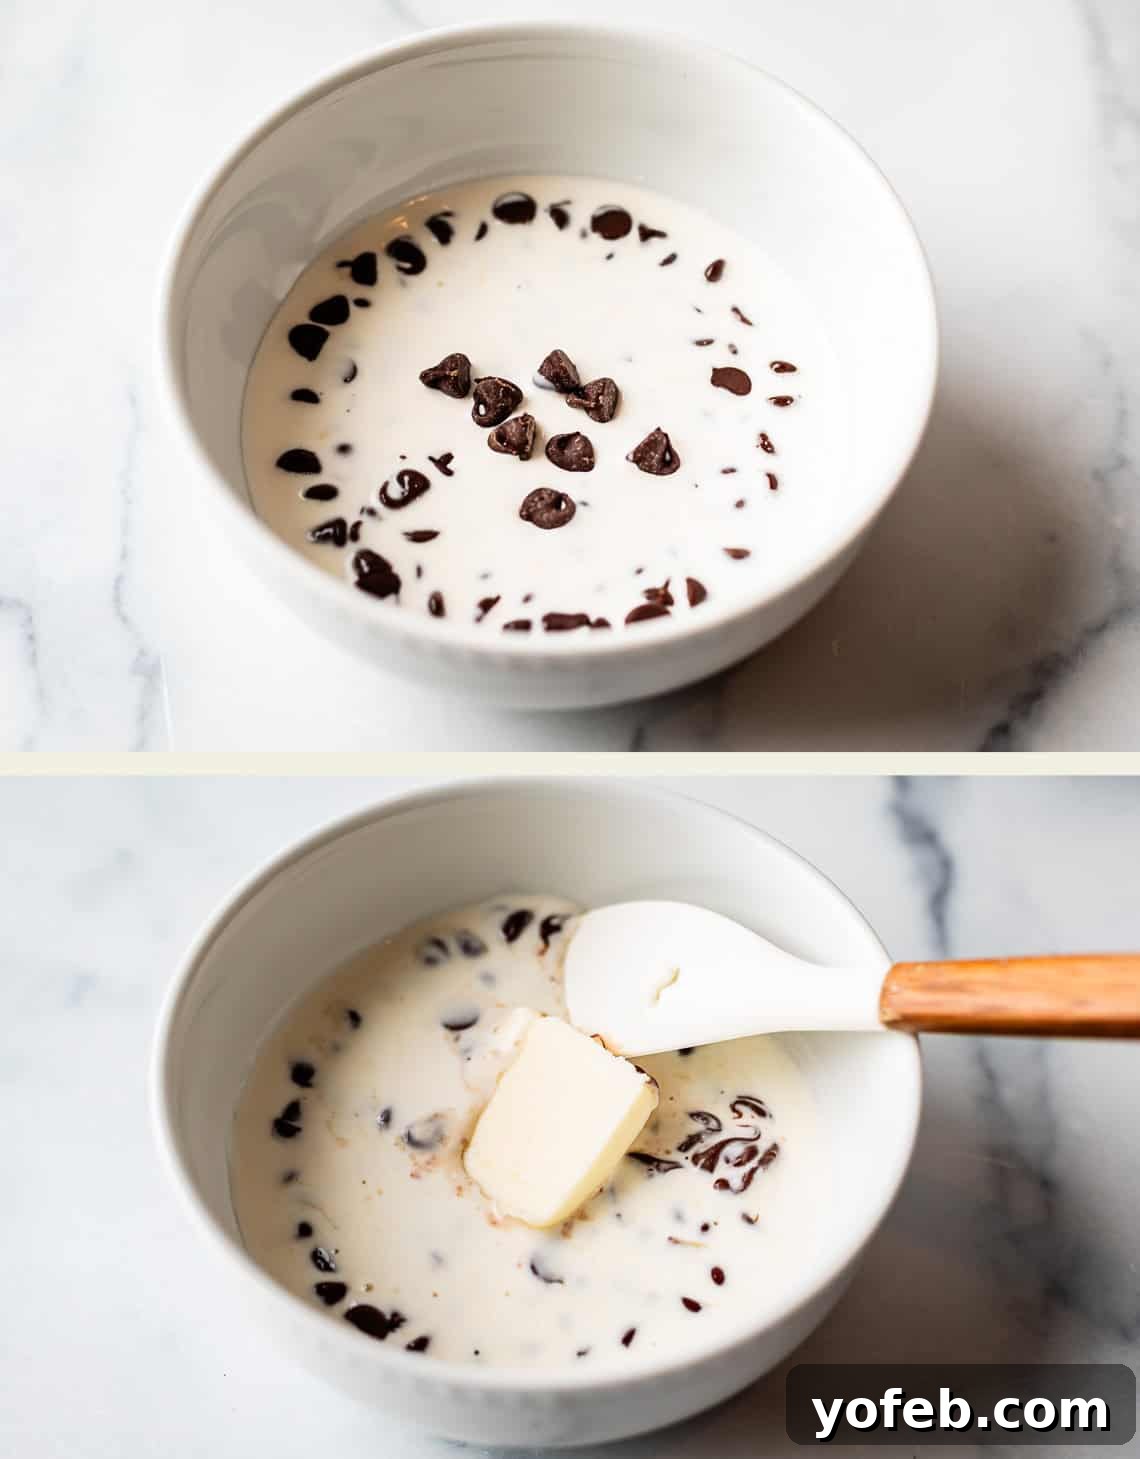
To begin the ganache, place your chosen semi-sweet chocolate chips into a small, microwave-safe bowl. Pour the heavy cream directly over the chips. Microwave this mixture in short bursts of 30 seconds, pausing and checking after each interval. Heat only until you notice tiny bubbles beginning to form around the edges of the cream. This gentle heating ensures the chocolate melts evenly without scorching.
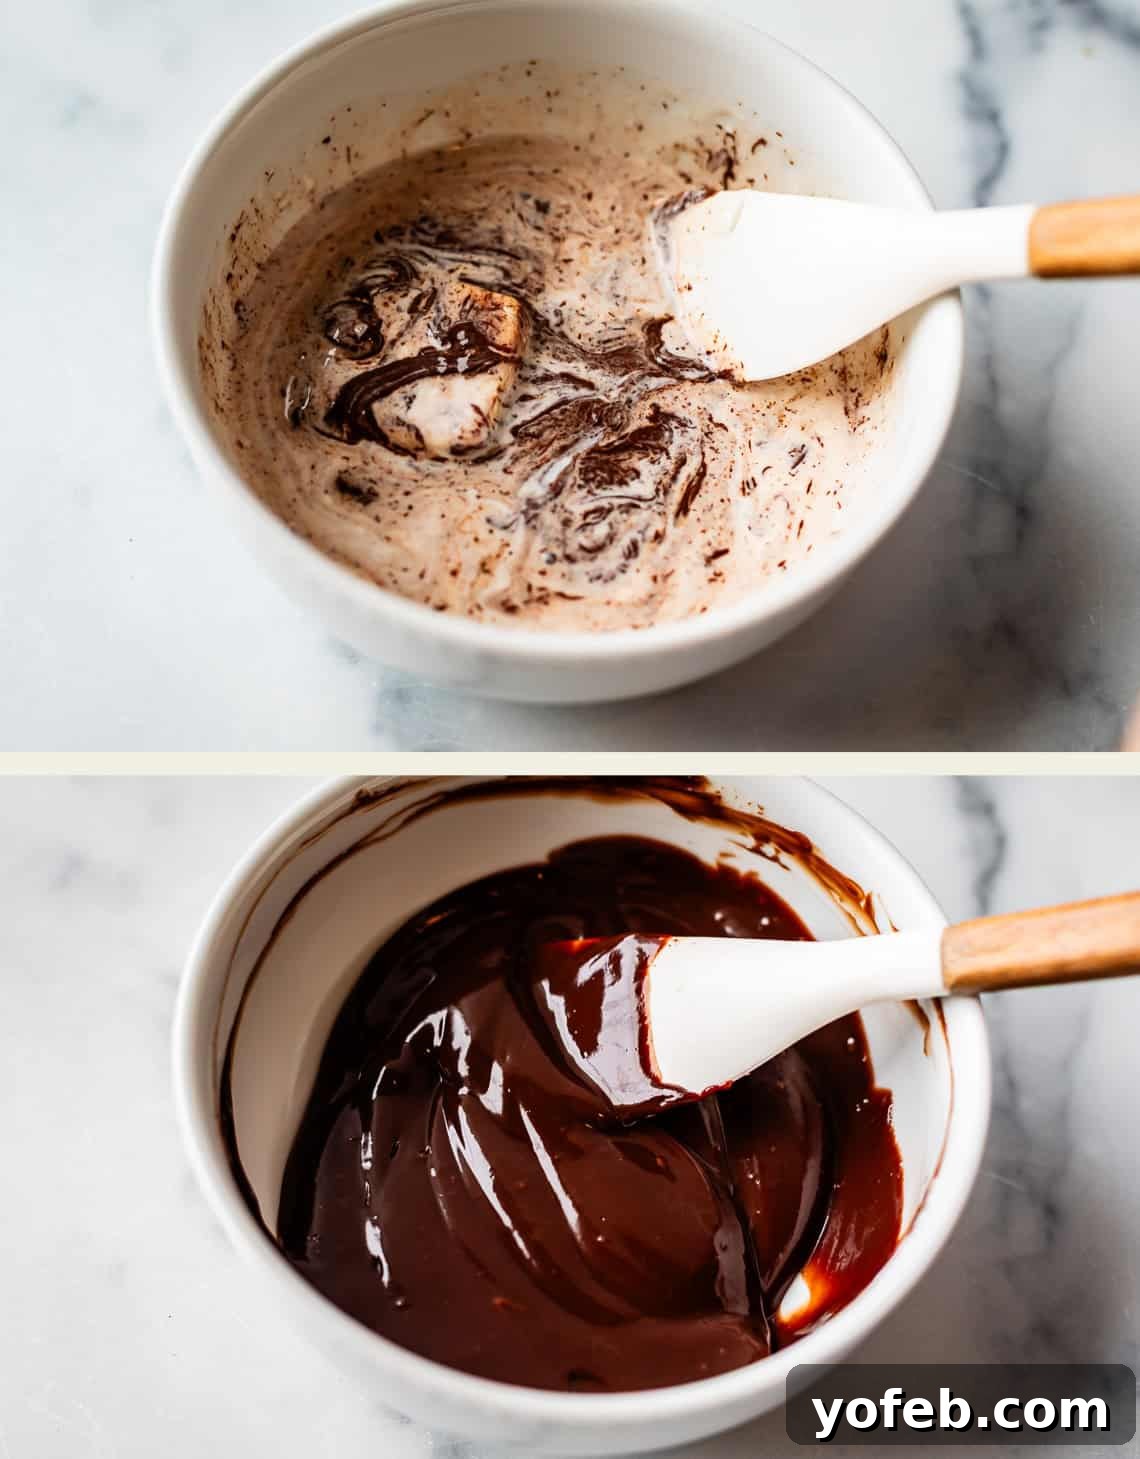
Remove the bowl from the microwave, add a pat of butter, and let it rest for a minute. Then, gently whisk the mixture until it transforms into a smooth, glossy chocolate ganache. Once perfectly smooth, place the bowl into the freezer to chill while you prepare the cake batter. This chilling step is crucial for ensuring the ganache holds its shape during baking.
Now, let’s move on to the rich cake batter. Combine your high-quality bittersweet chocolate, broken into pieces, with the butter in a separate microwave-safe bowl.
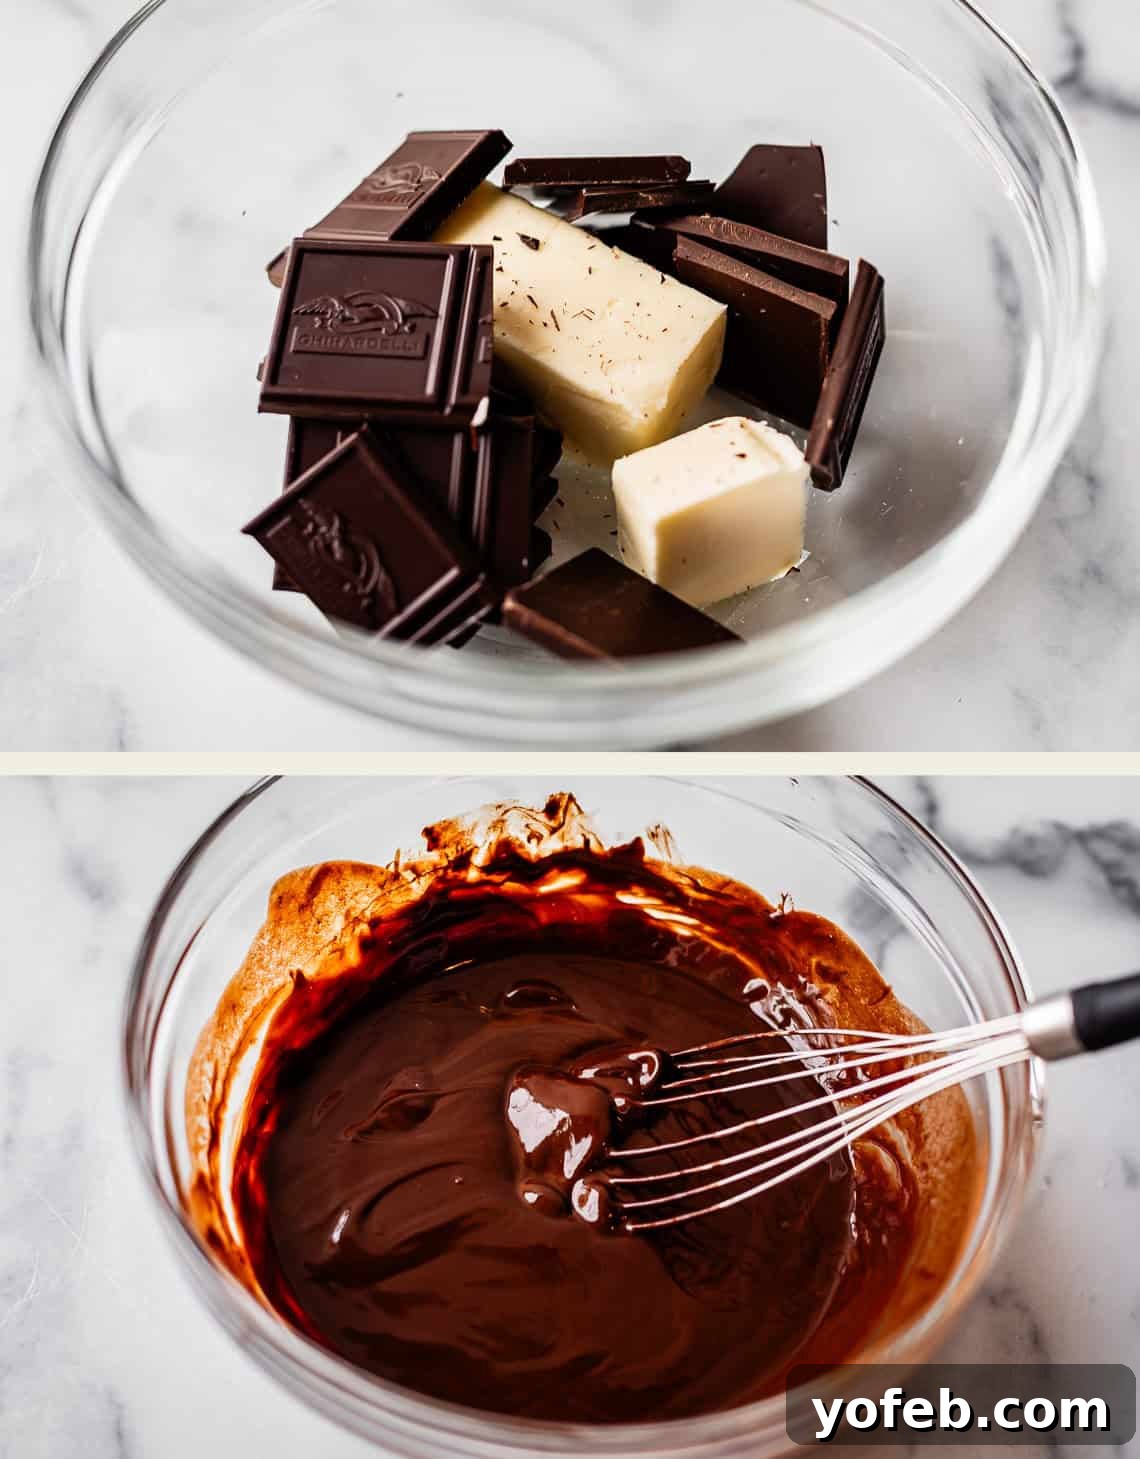
Return this bowl to the microwave and heat in 30-second intervals, stirring thoroughly after each. Stop microwaving when there are still a few small lumps of chocolate remaining. The residual heat will continue to melt the chocolate as you whisk. Whisk gently but consistently until the mixture is entirely smooth and uniform. Overheating can scorch the chocolate, leading to a bitter taste – a tragic outcome! While a double boiler is an option, the microwave method is perfectly effective and convenient for home bakers.
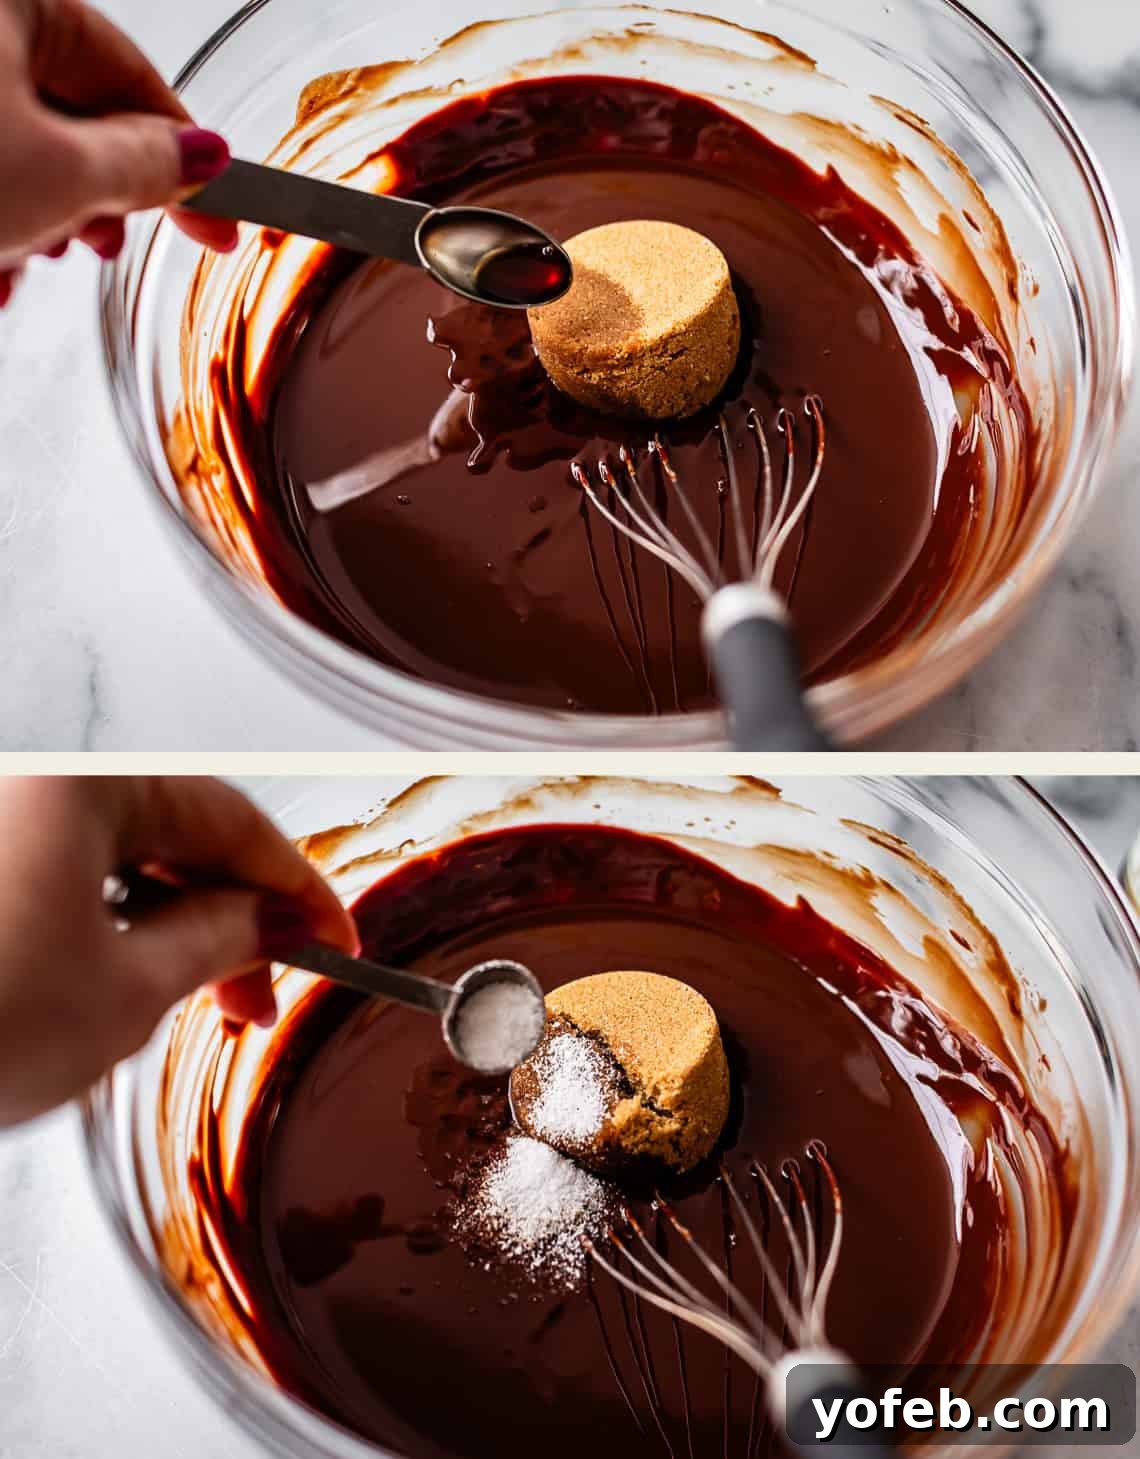
Once the chocolate and butter mixture is smooth, stir in the dark brown sugar, vanilla extract, and a pinch of salt. Whisk these ingredients until they are fully incorporated, ensuring there are no remaining lumps of sugar.
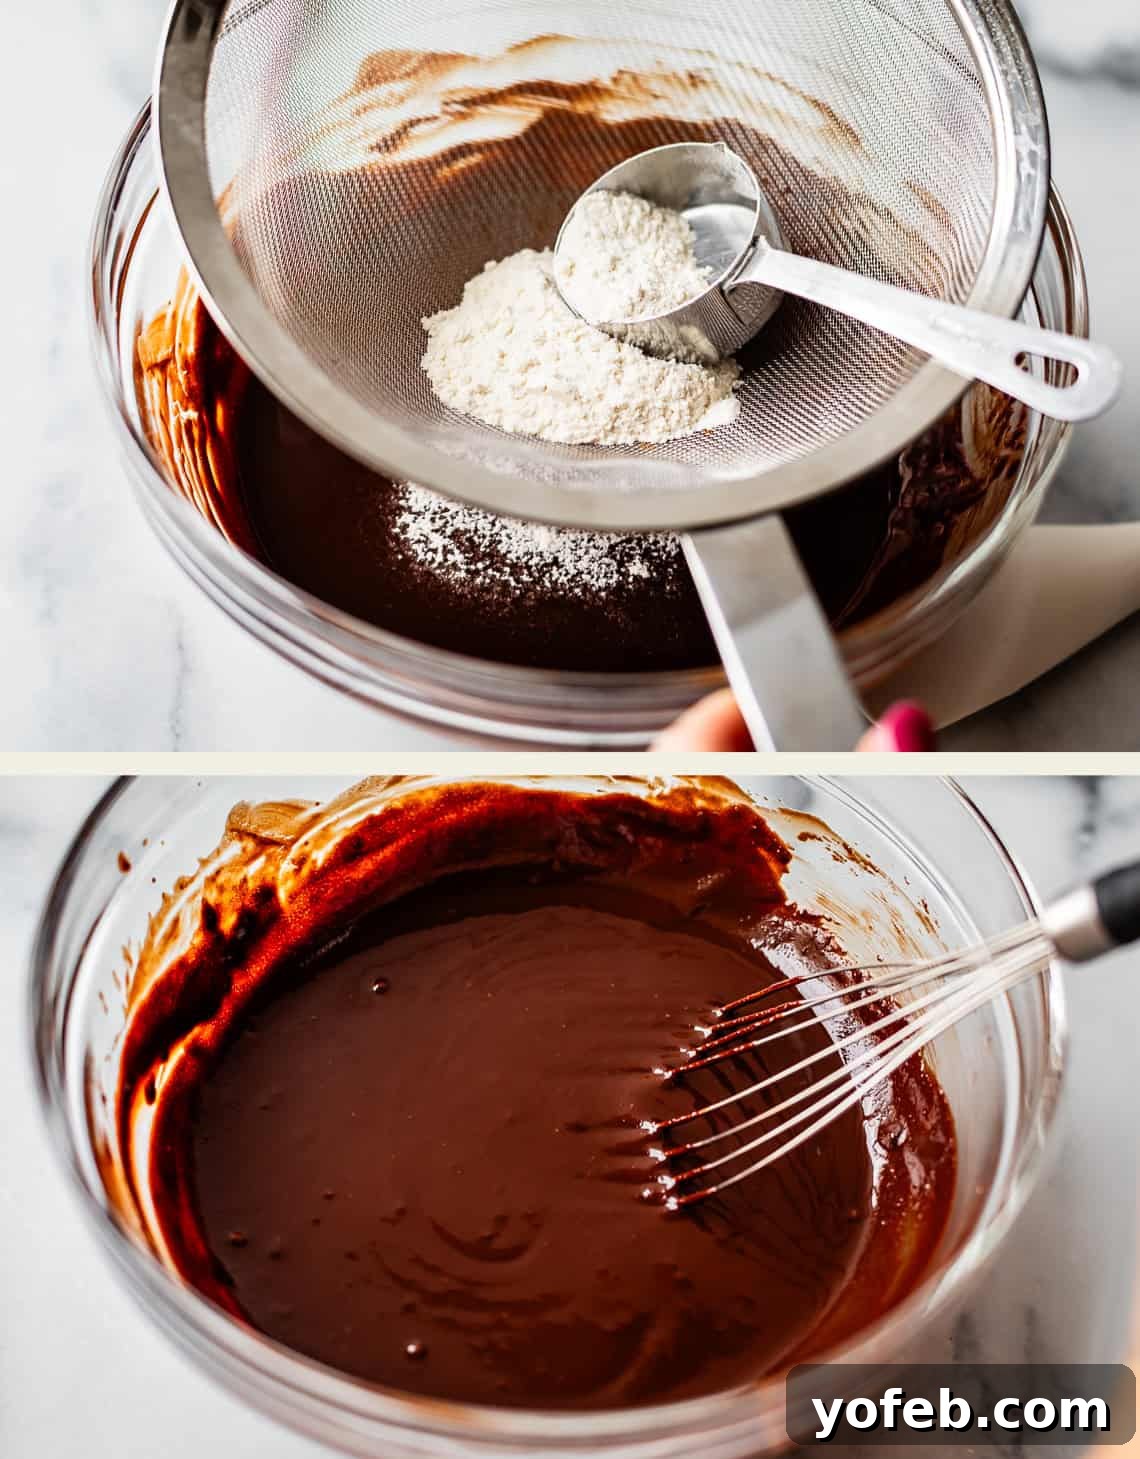
Next, it’s time to add the flour, but with a crucial technique: spoon and level. Use a spoon to gently scoop flour into your 1/4 cup measuring cup, then use the back of a knife or a straight edge to level off the excess, ensuring an accurate measurement without compacting the flour. Then, pass the measured flour through a fine-mesh strainer directly into the chocolate mixture. Sifting prevents any flour lumps and helps create a smoother batter. Once sifted, gently fold the flour into the batter until just combined; avoid overmixing.
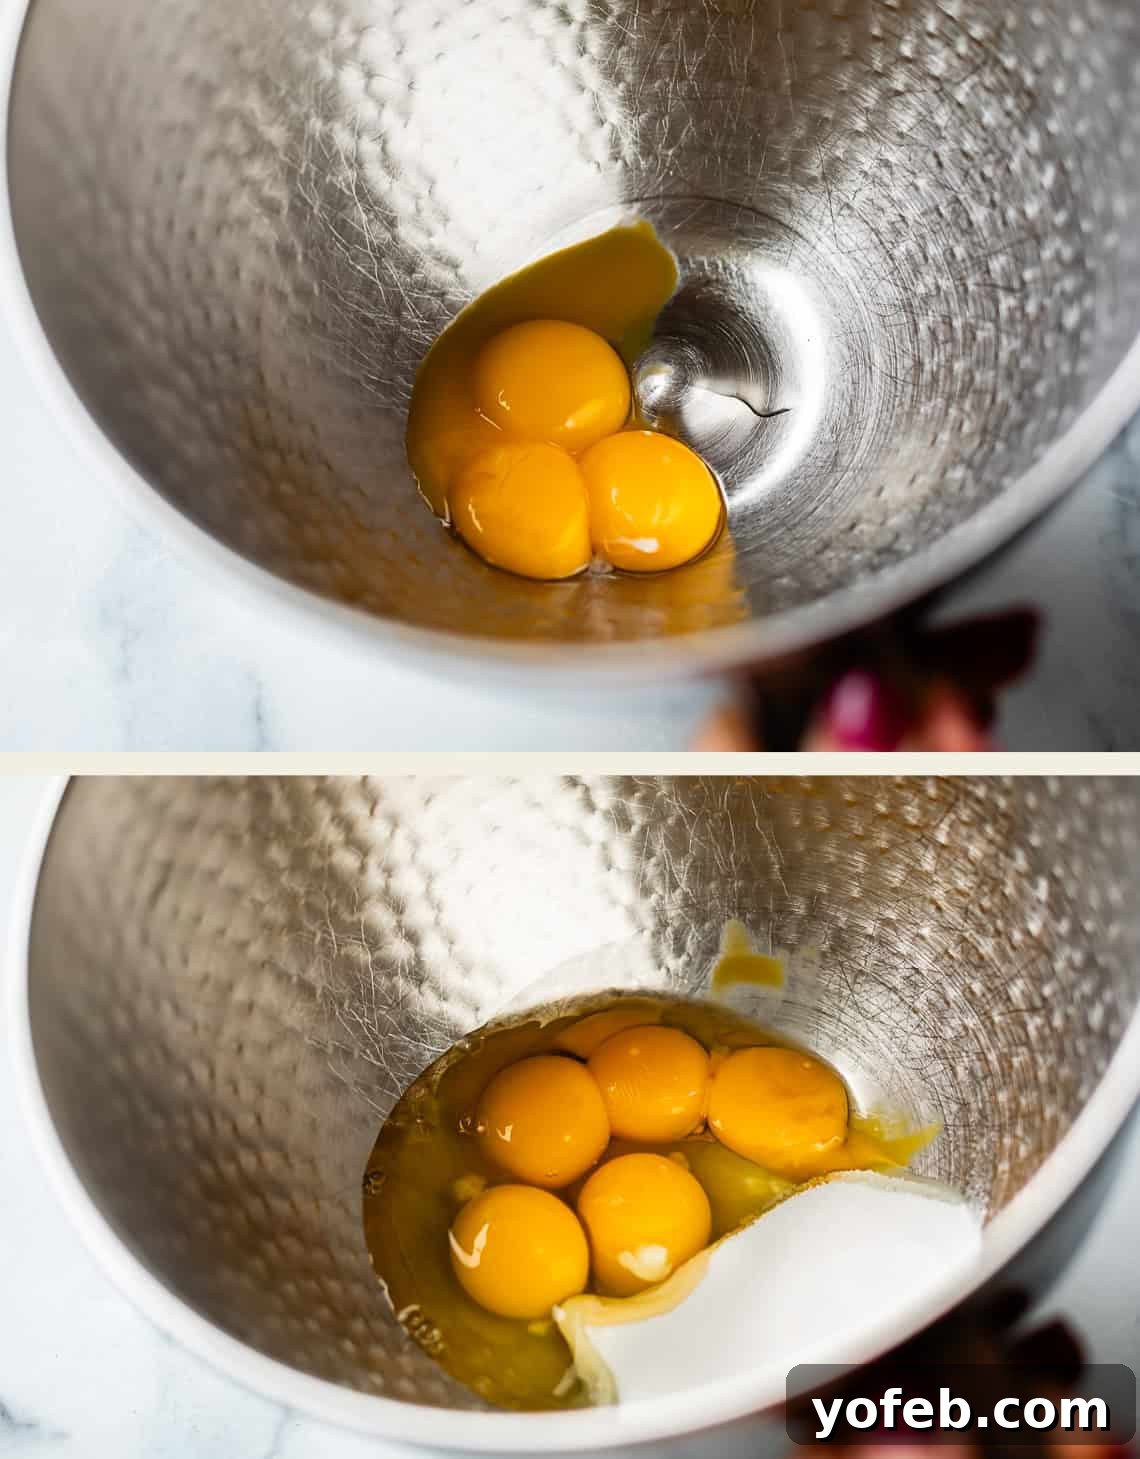
After incorporating the flour, set the chocolate batter aside. Now, we’ll prepare the eggs to add lightness and structure. In a separate mixing bowl, combine the three egg yolks, two whole large eggs, and the granulated sugar.
Using a whisk attachment (or a hand mixer), beat the eggs and sugar vigorously for a full three minutes. Continue until the mixture becomes pale yellow, light, and fluffy, and forms thick ribbons when the whisk is lifted. This aeration is key to the cake’s delicate texture.
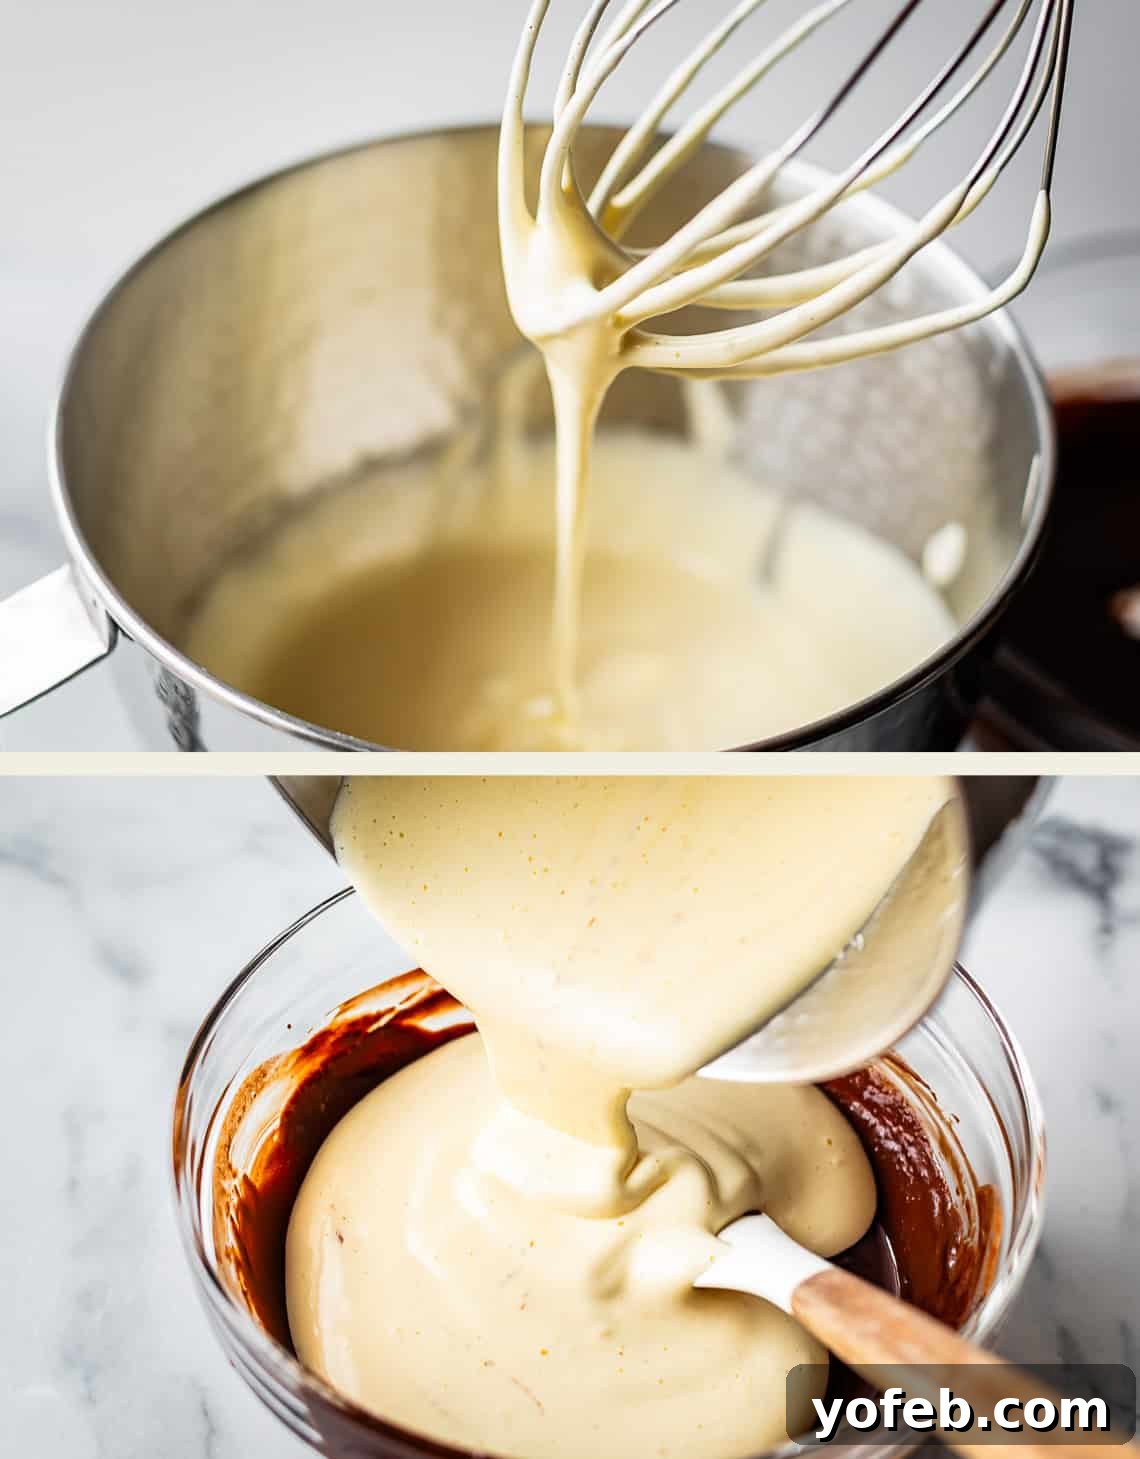
Gently fold the aerated egg mixture into the chocolate and flour batter using a rubber spatula. Mix until no streaks remain, ensuring everything is just combined. Be careful not to overmix or deflate the airy eggs; this maintains the lightness of the cake.
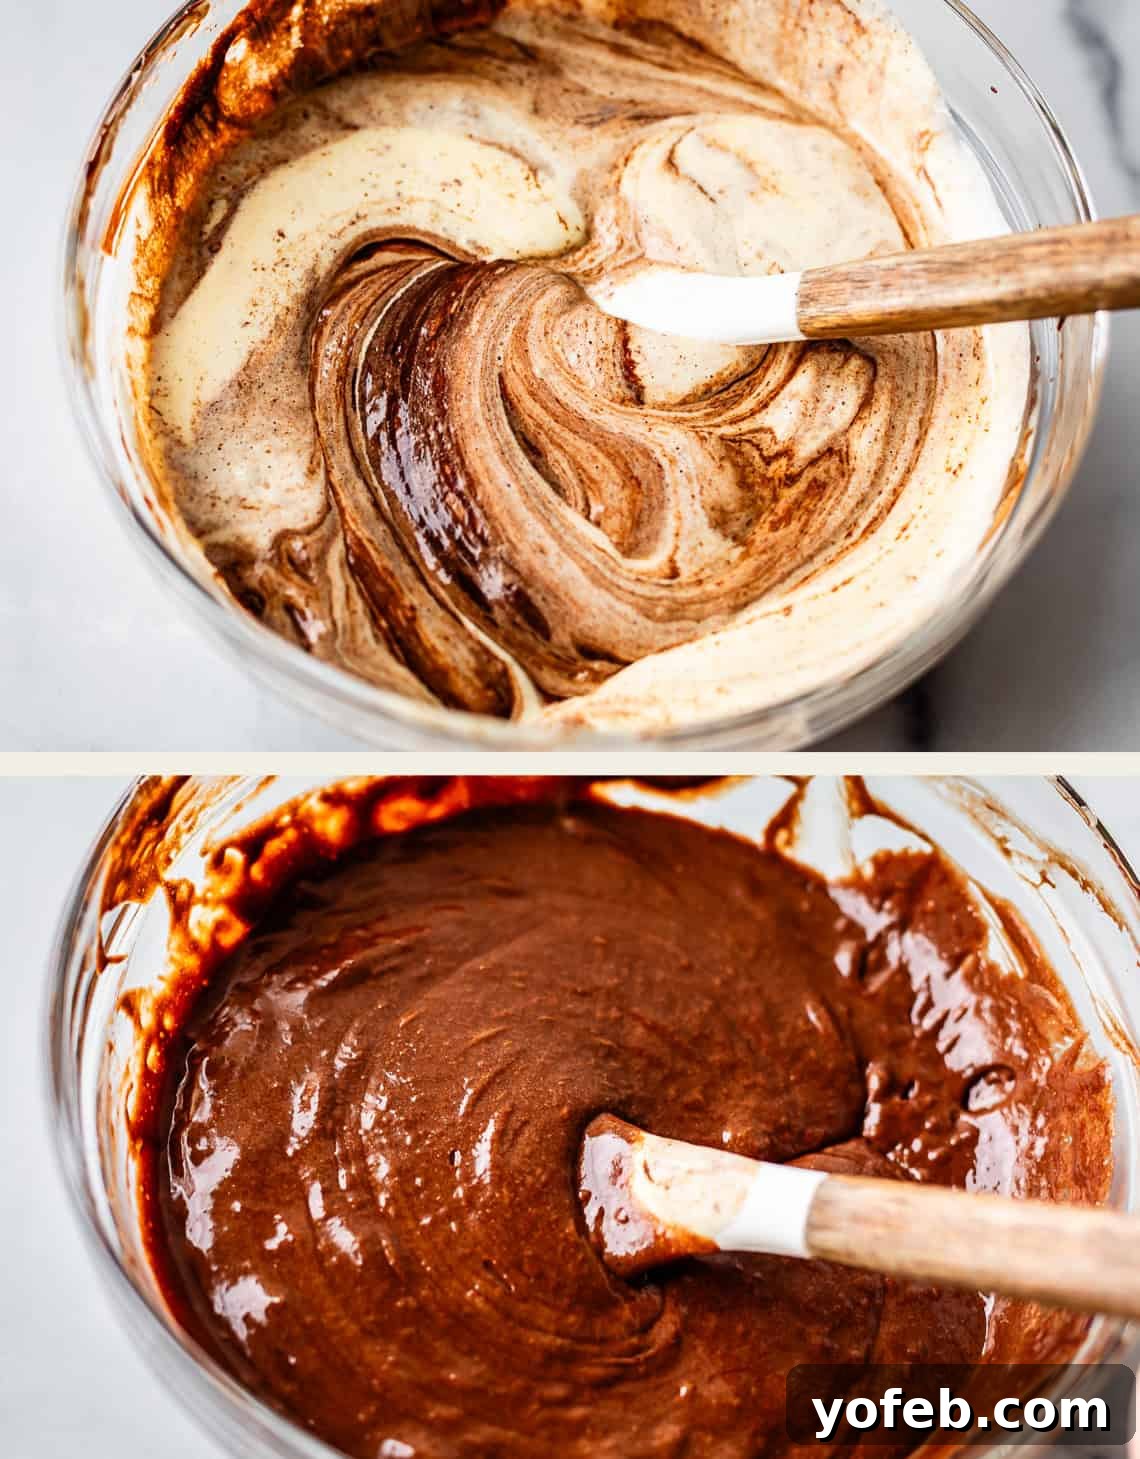
And there it is! The final, luscious cake batter. It will be wonderfully thick. Resist the urge to eat it all! Cover the bowl and transfer the batter to the fridge for a few minutes while you retrieve the ganache and prepare your ramekins. We want the batter to be at room temperature or cooler when it goes into the oven, never warm.
By now, the ganache you placed in the freezer should be firm, almost solid. Use a butter knife to score it into six equal sections, making it easier to portion.
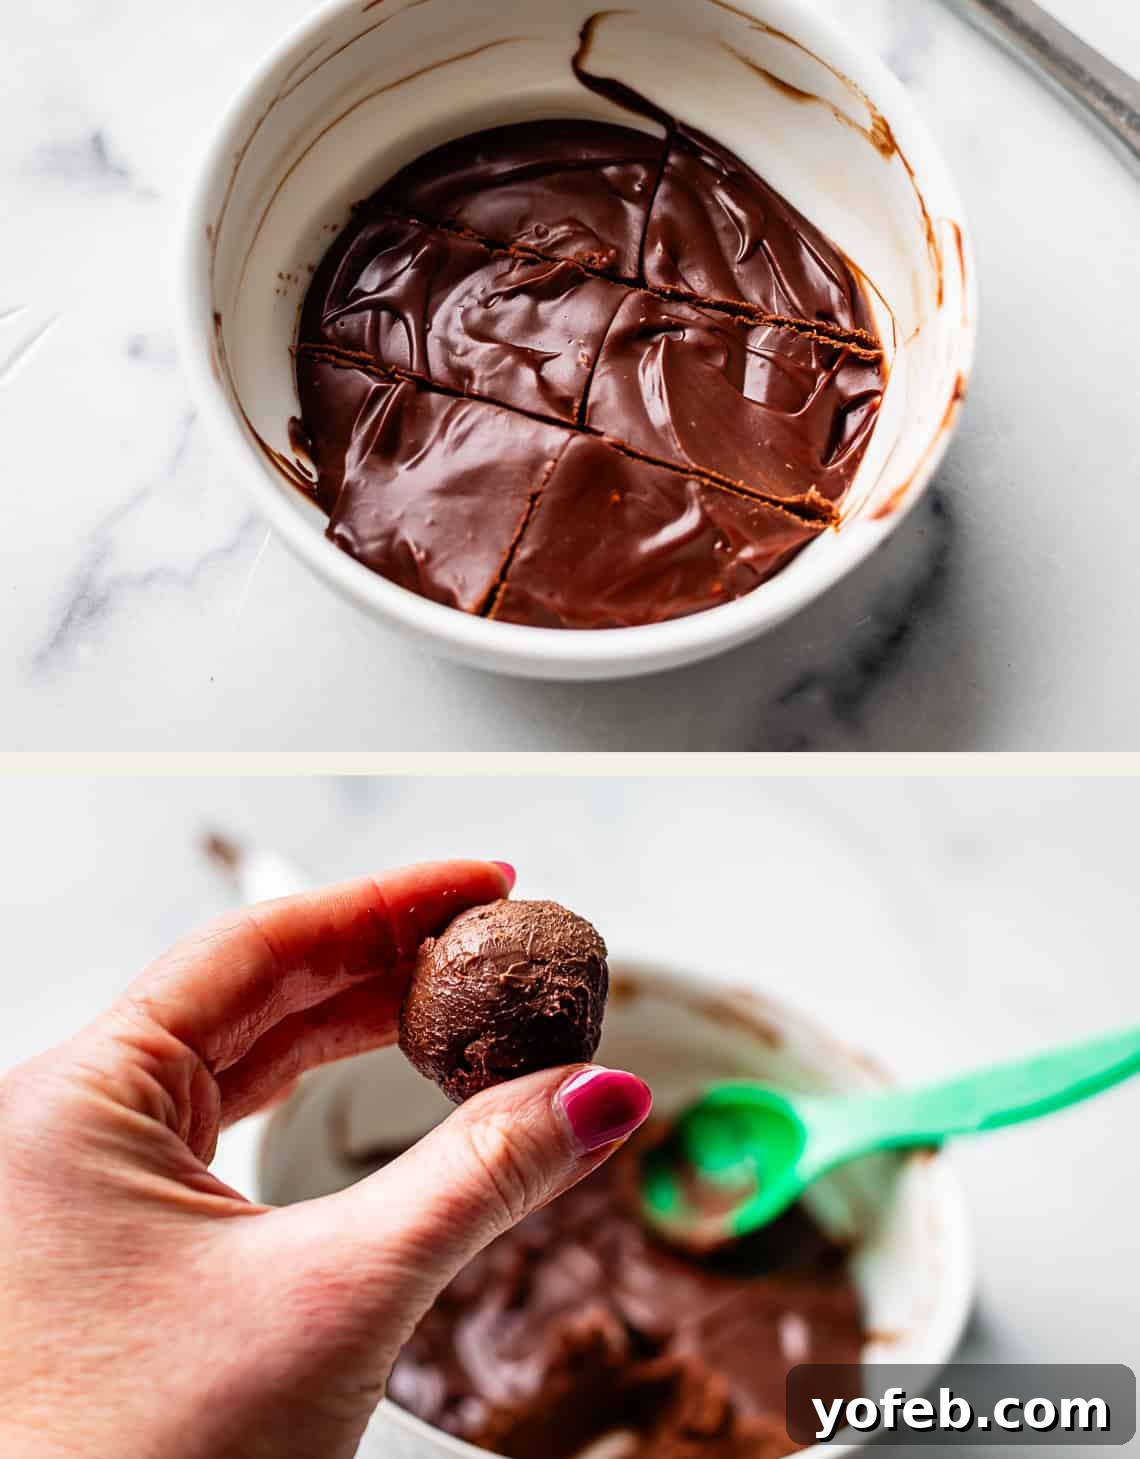
Then, using a small rubber spatula, a spoon, or even your hands, scoop out one-sixth of the ganache and roll it into a neat ball. Each ball should be roughly the size of a walnut. (A walnut is a classic size comparison, though perhaps not everyone regularly encounters whole walnuts!) The goal is six uniform ganache balls. Return these ganache balls to the freezer immediately. The colder they are when they enter the oven, the better they will perform, ensuring a perfectly molten center.
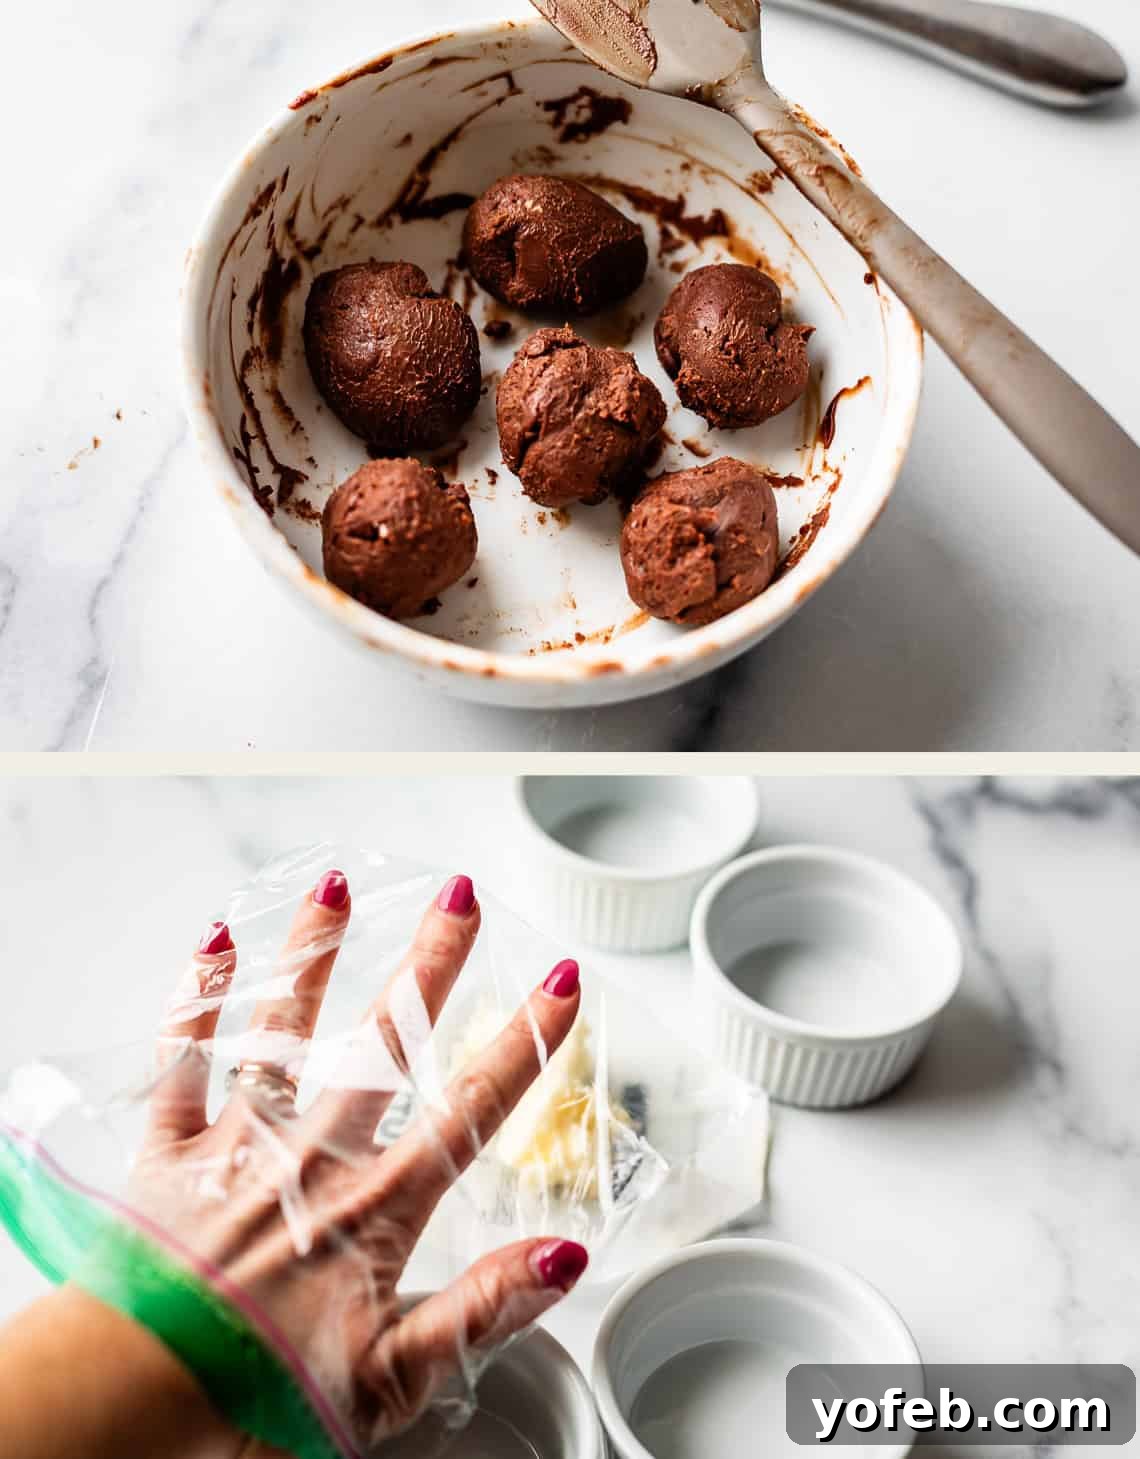
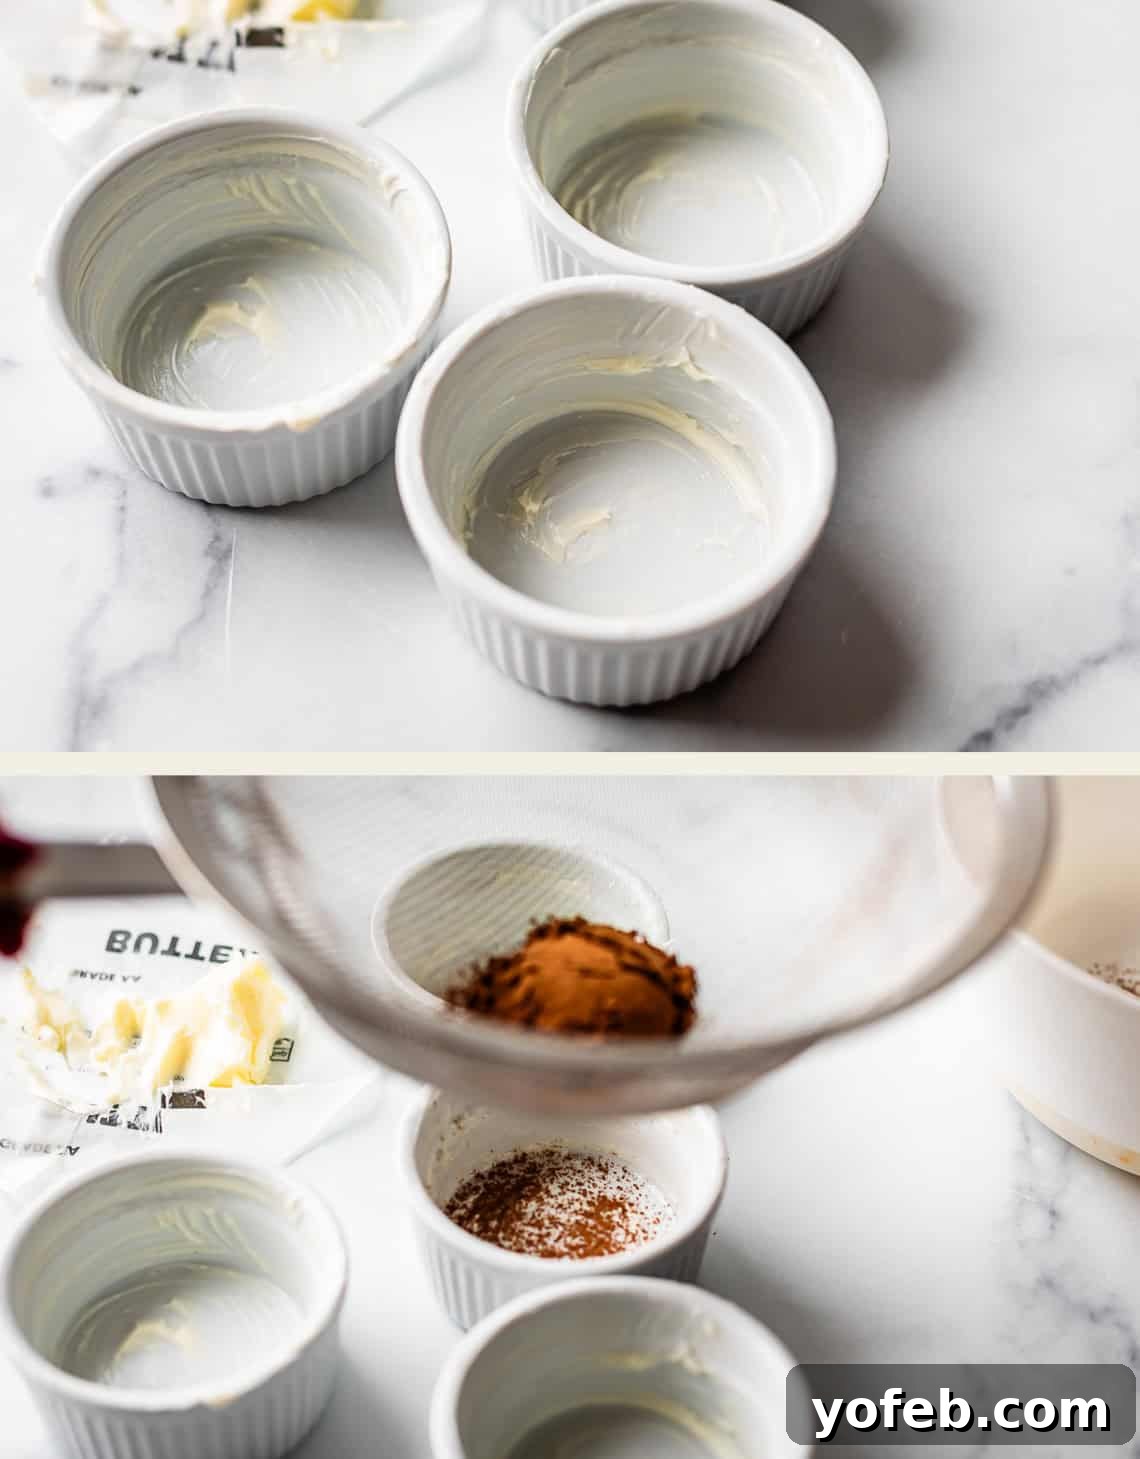
Now, meticulously prepare your ramekins. This step is crucial for effortless unmolding, so don’t skimp on the butter! You need a generous, thick layer of butter coating the entire interior of each dish. You can use a small plastic baggie over your hand for easy application, or simply use your bare hands for a more tactile approach. (It might even moisturize your hands, but let’s not guarantee that!)
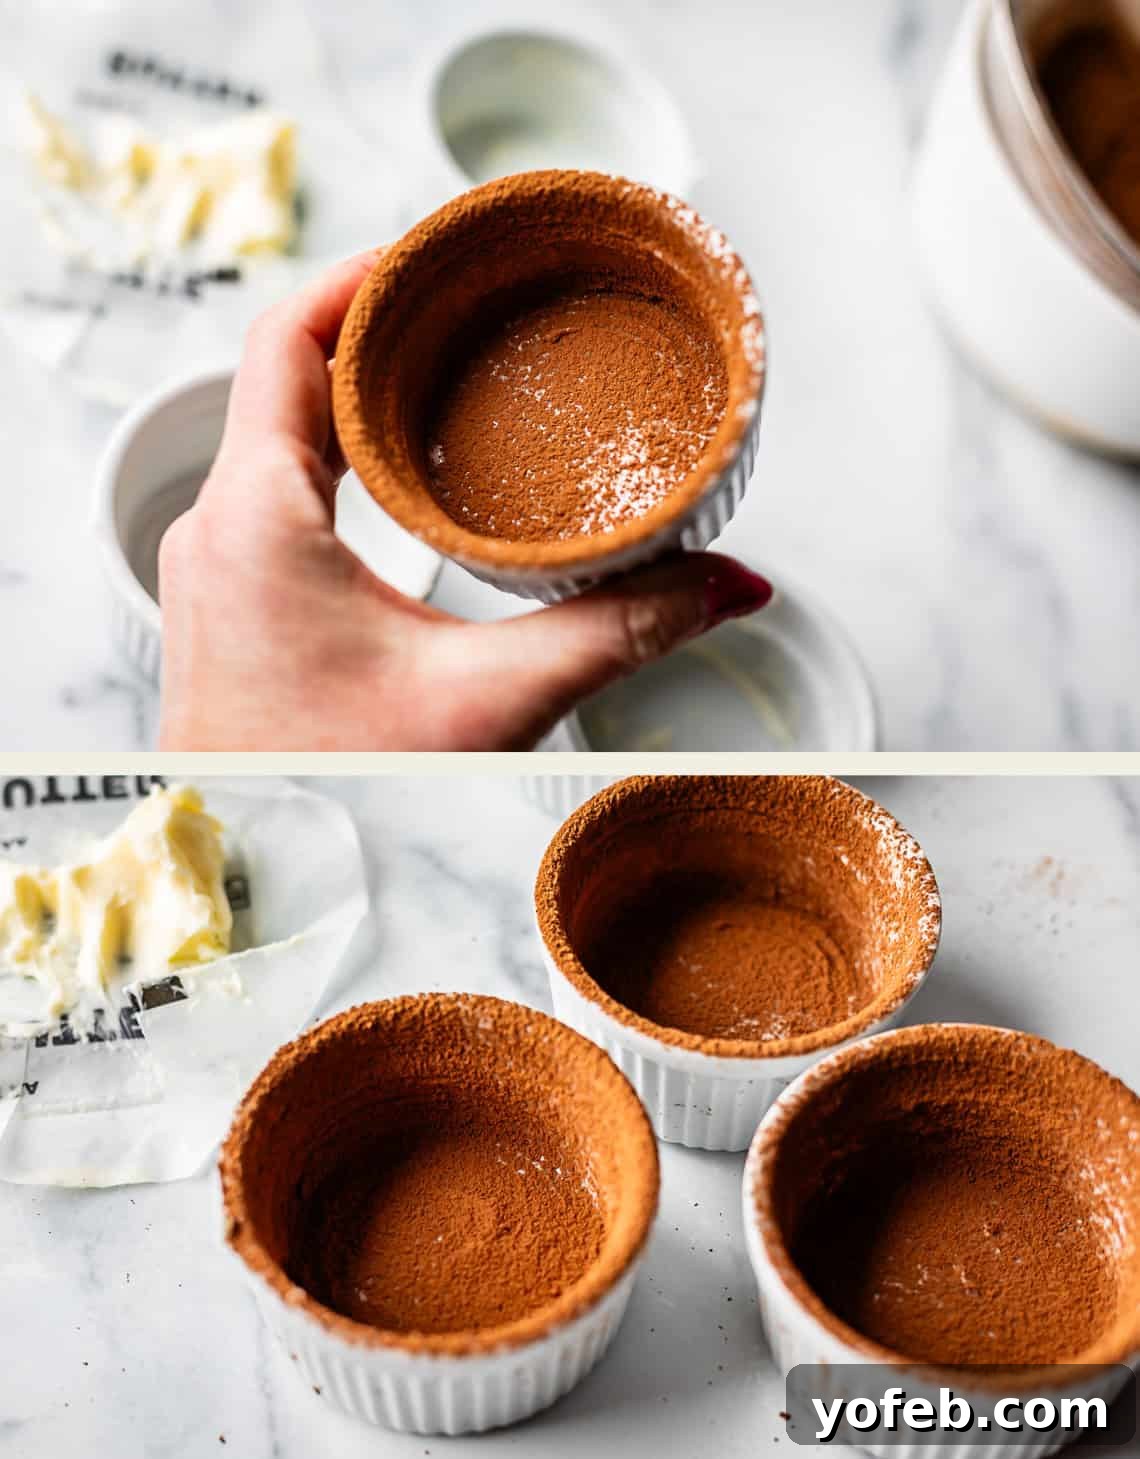
Once buttered, thoroughly dust the ramekins with cocoa powder. While flour can be used, cocoa powder provides a more aesthetically pleasing finish and enhances the chocolate flavor of the final cake. Ensure every part of the buttered surface is completely covered, then tap out any excess powder.
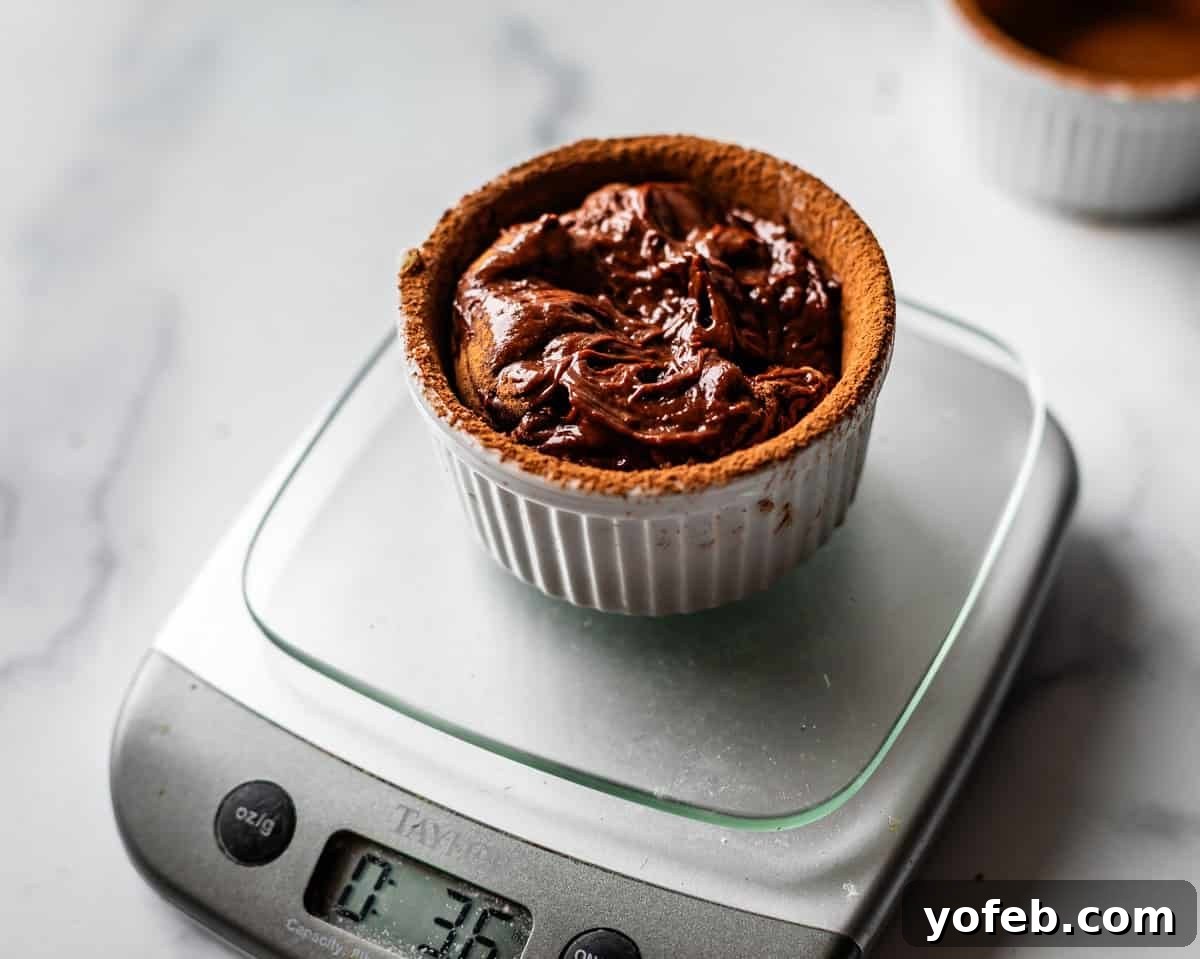
Next, spoon the chilled cake batter into the prepared ramekins. The batter will be quite thick, so pouring won’t be feasible. Aim for approximately 3.5 ounces of batter in each ramekin. This amount is consistent regardless of whether you’re using 4-ounce or larger ramekins, as we’re targeting a specific cake size for richness.
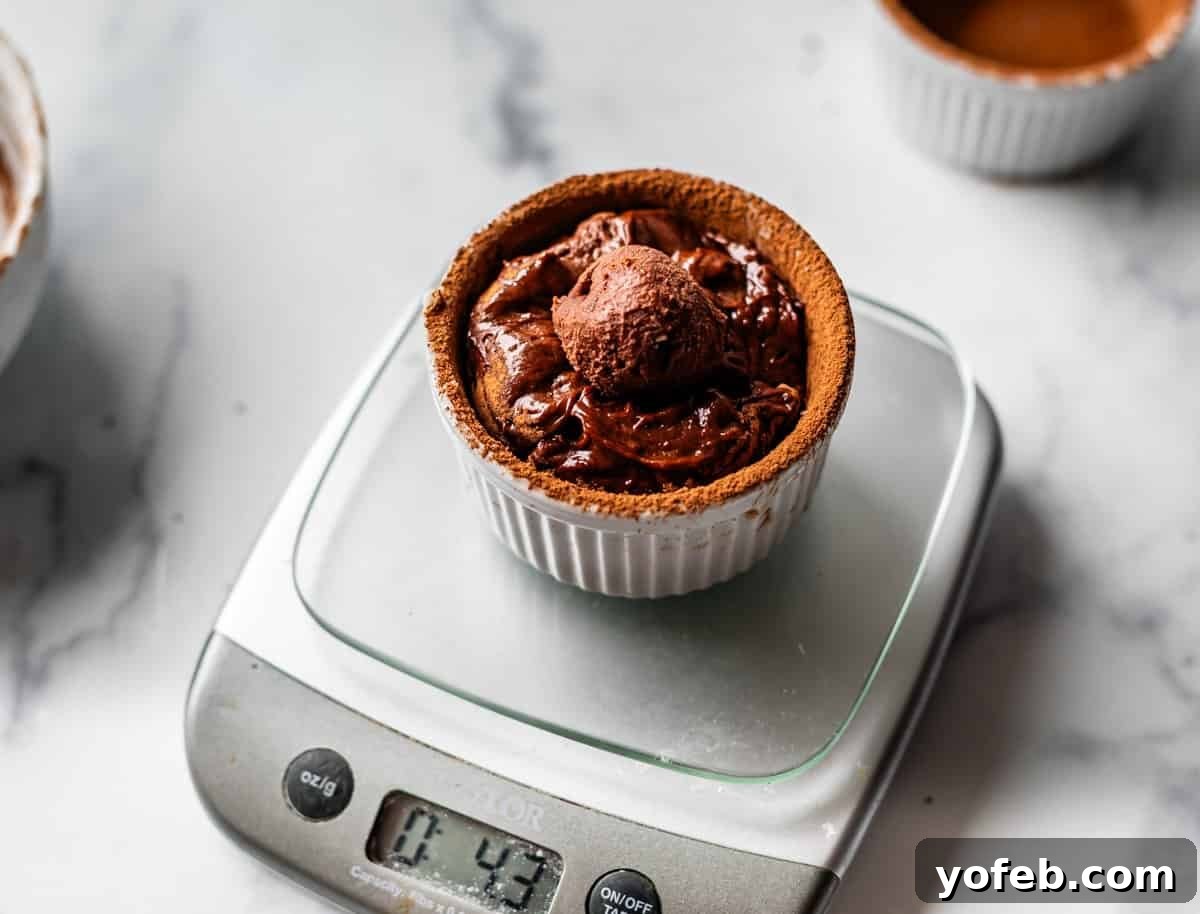
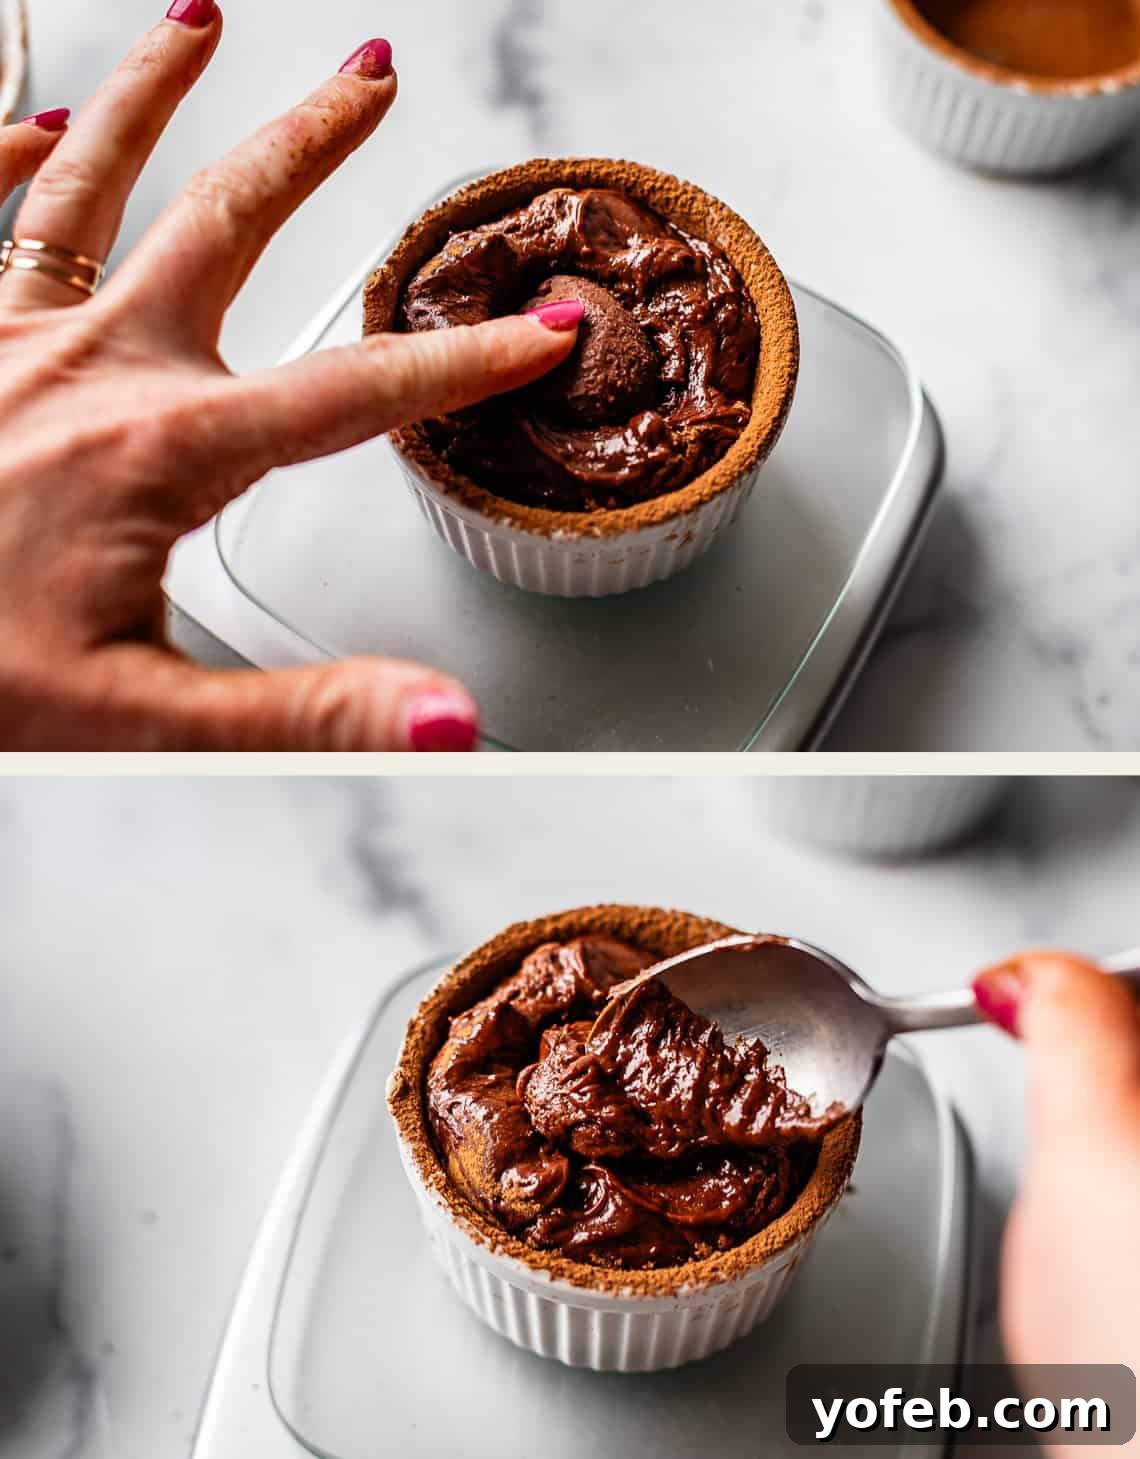
Now, retrieve the chilled ganache balls from the freezer. Gently press one ganache ball into the center of the batter in each ramekin. Be careful not to push it all the way to the bottom; leave at least a quarter-inch of batter between the ganache and the ramekin base. This ensures a consistent molten core. With the ganache in place, each filled ramekin should weigh around 4.3 to 4.5 ounces.
Once the ganache is nestled, use a spoon or an offset spatula to carefully cover it with additional cake batter, smoothing the top to create an even surface. Ensure the ganache is completely concealed by the batter. The final weight of each prepared cake should be approximately 4.5 ounces.
Now, it’s baking time! Interestingly, I baked these specific cakes in my air fryer during a kitchen renovation, as I didn’t have access to a conventional oven. Rest assured, I also tested them in a traditional oven at my neighbor Susie’s house, and the baking times were remarkably similar. Observe how beautifully they rise during baking – it’s part of the fun!
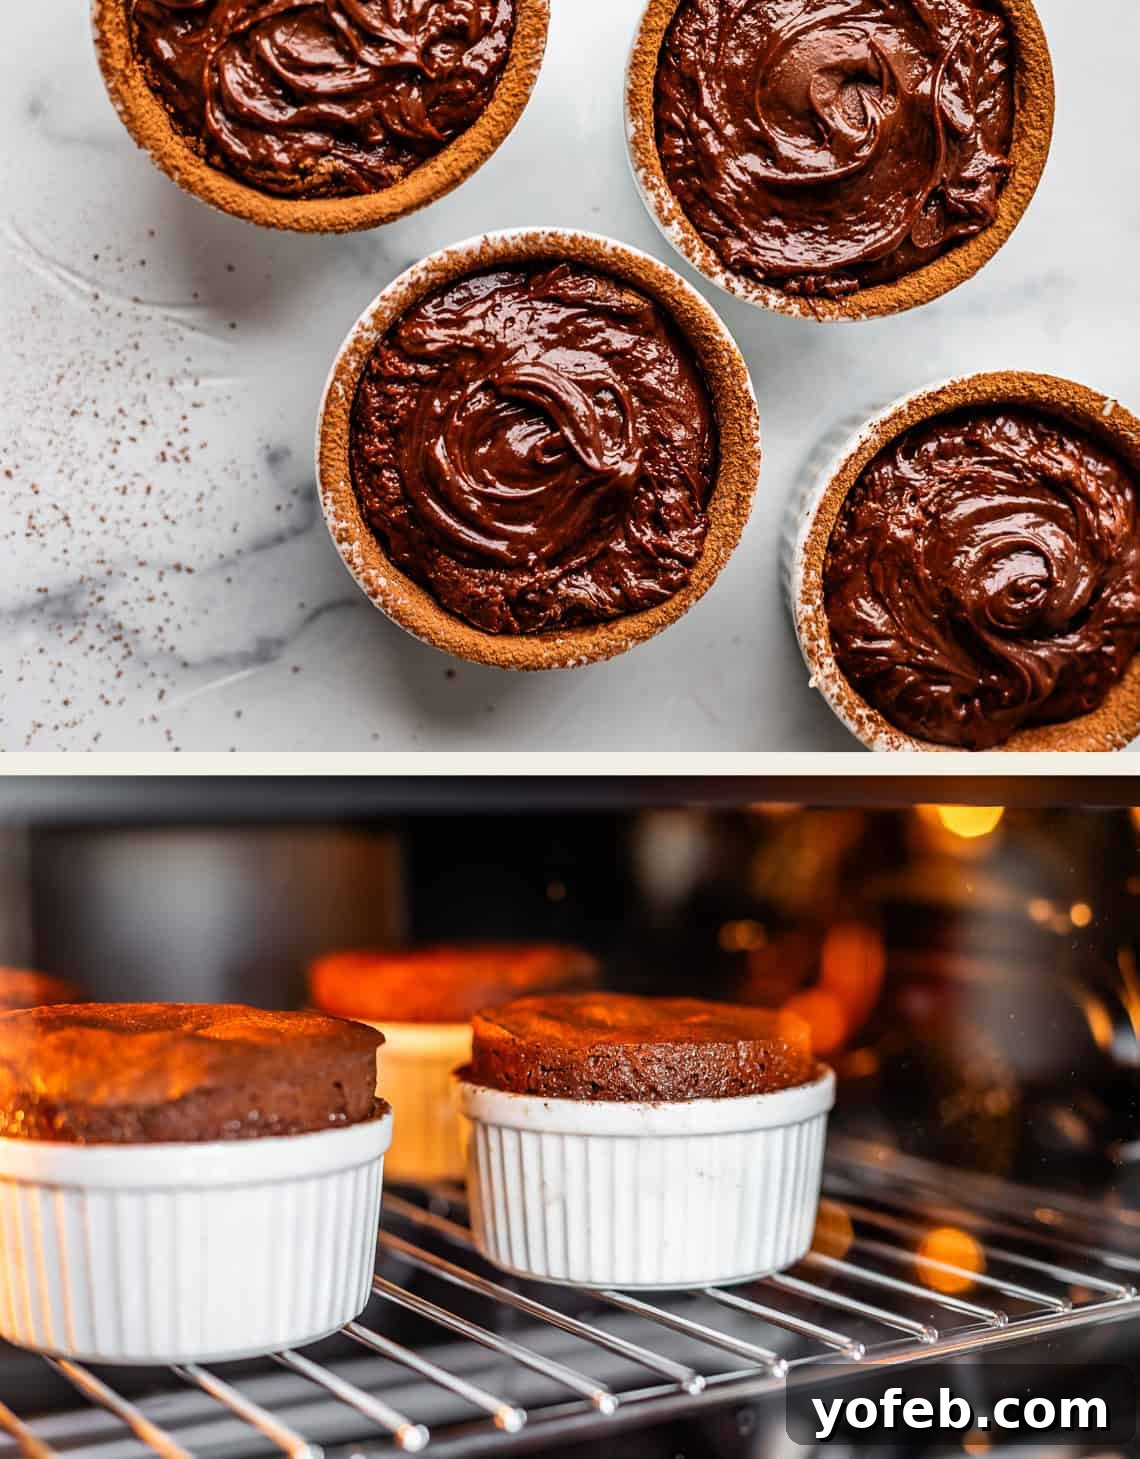
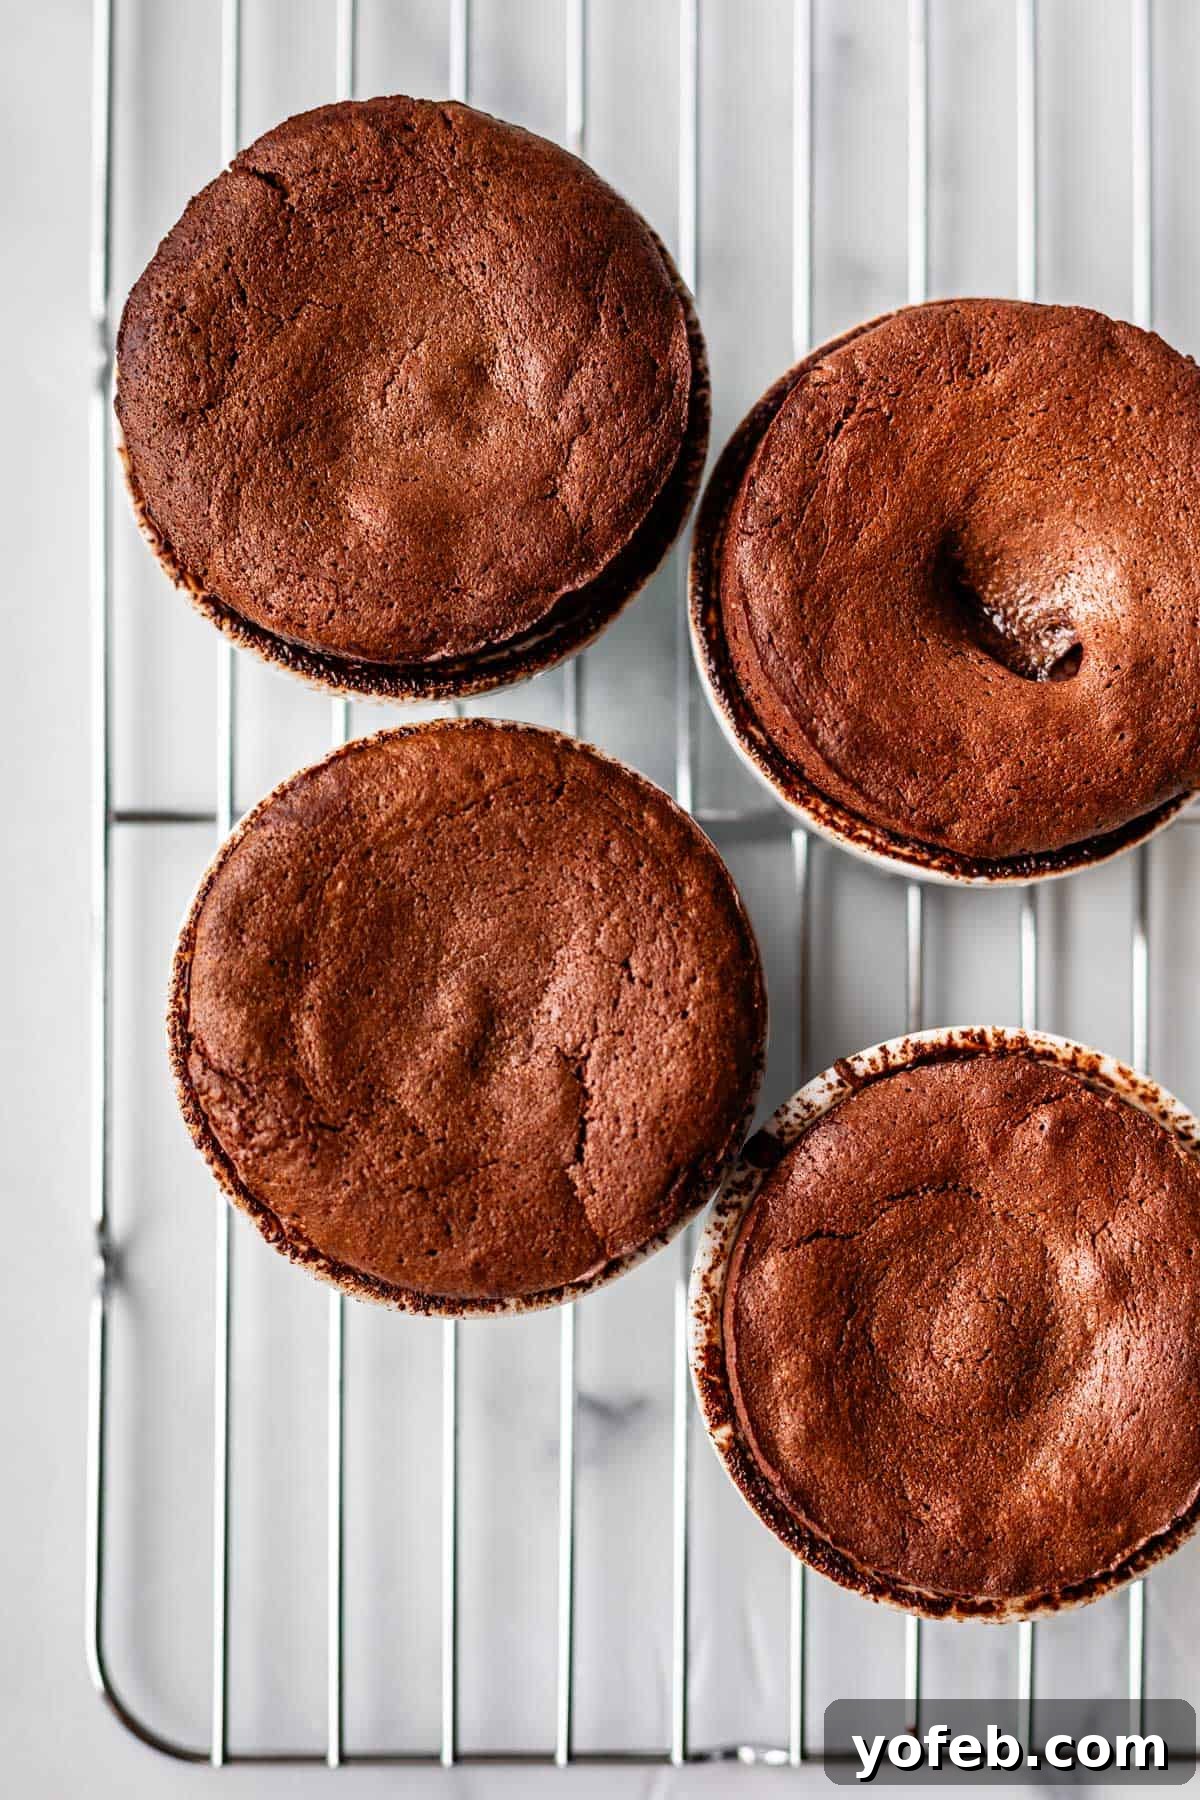
For the ideal molten center, I prefer to bake these cakes until their tops are nearly matte. This means the edges are fully set and no longer shiny, with only a small, quarter-sized shiny spot remaining directly in the center. The cakes pictured above were baked just a couple of minutes too long, resulting in a slightly firmer top. (Note: the small hole in the top right cake was due to the ganache ball not being pushed down far enough.)
Here’s another candid shot of me contemplating the doneness of my baked cakes, taken by Susie after an oven test. You can clearly see that these cakes still exhibit a distinct shiny, slightly indented spot in their centers, indicating they are not quite matte. This is an absolutely perfect stage to remove them from the oven for that classic molten effect.
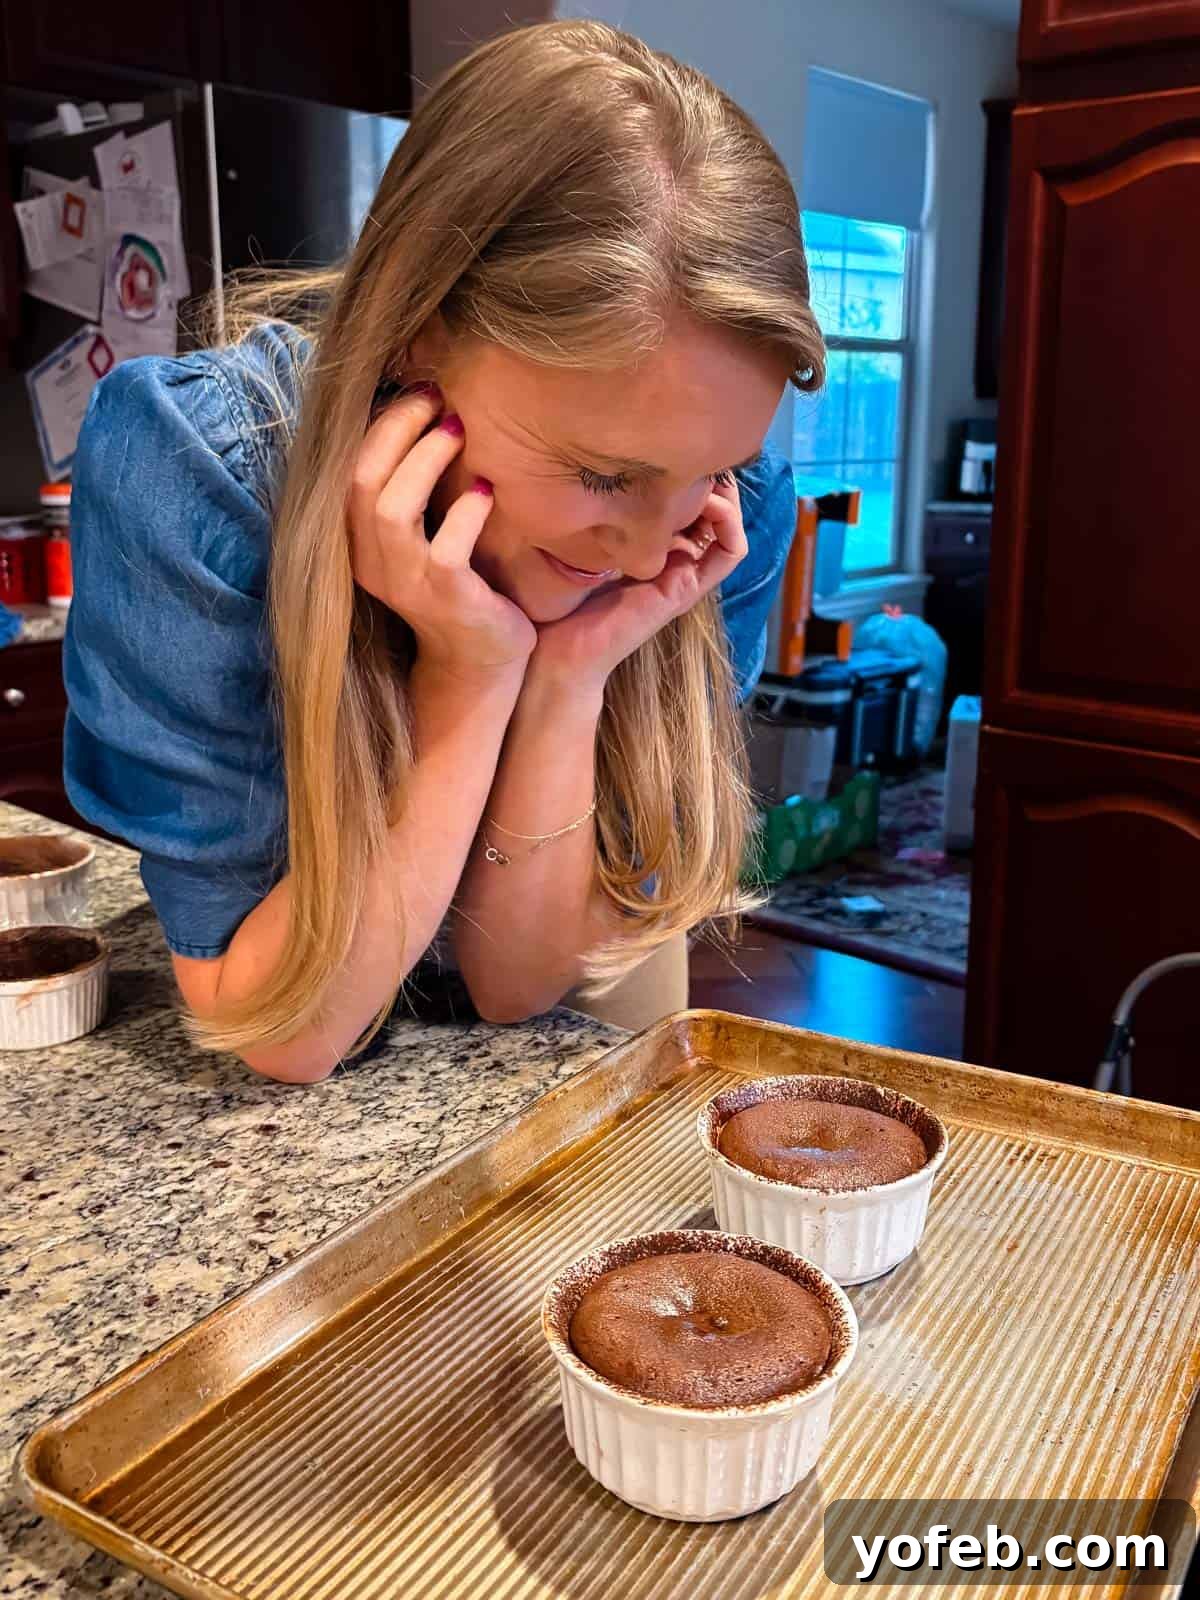
Ultimately, the exact baking time for your lava cakes is a matter of personal preference. I prefer a cake that is mostly baked with a rich, completely melted ganache core, indicated by a nearly matte top. However, if you desire a truly liquid-y center, reminiscent of a more traditional (ganache-less) underbaked lava cake, simply reduce the baking time slightly. This will yield a combination of flowing ganache, a small amount of raw batter, and a perfectly cooked edge. I highly recommend making a note of your preferred baking times based on your oven and desired gooeyness!
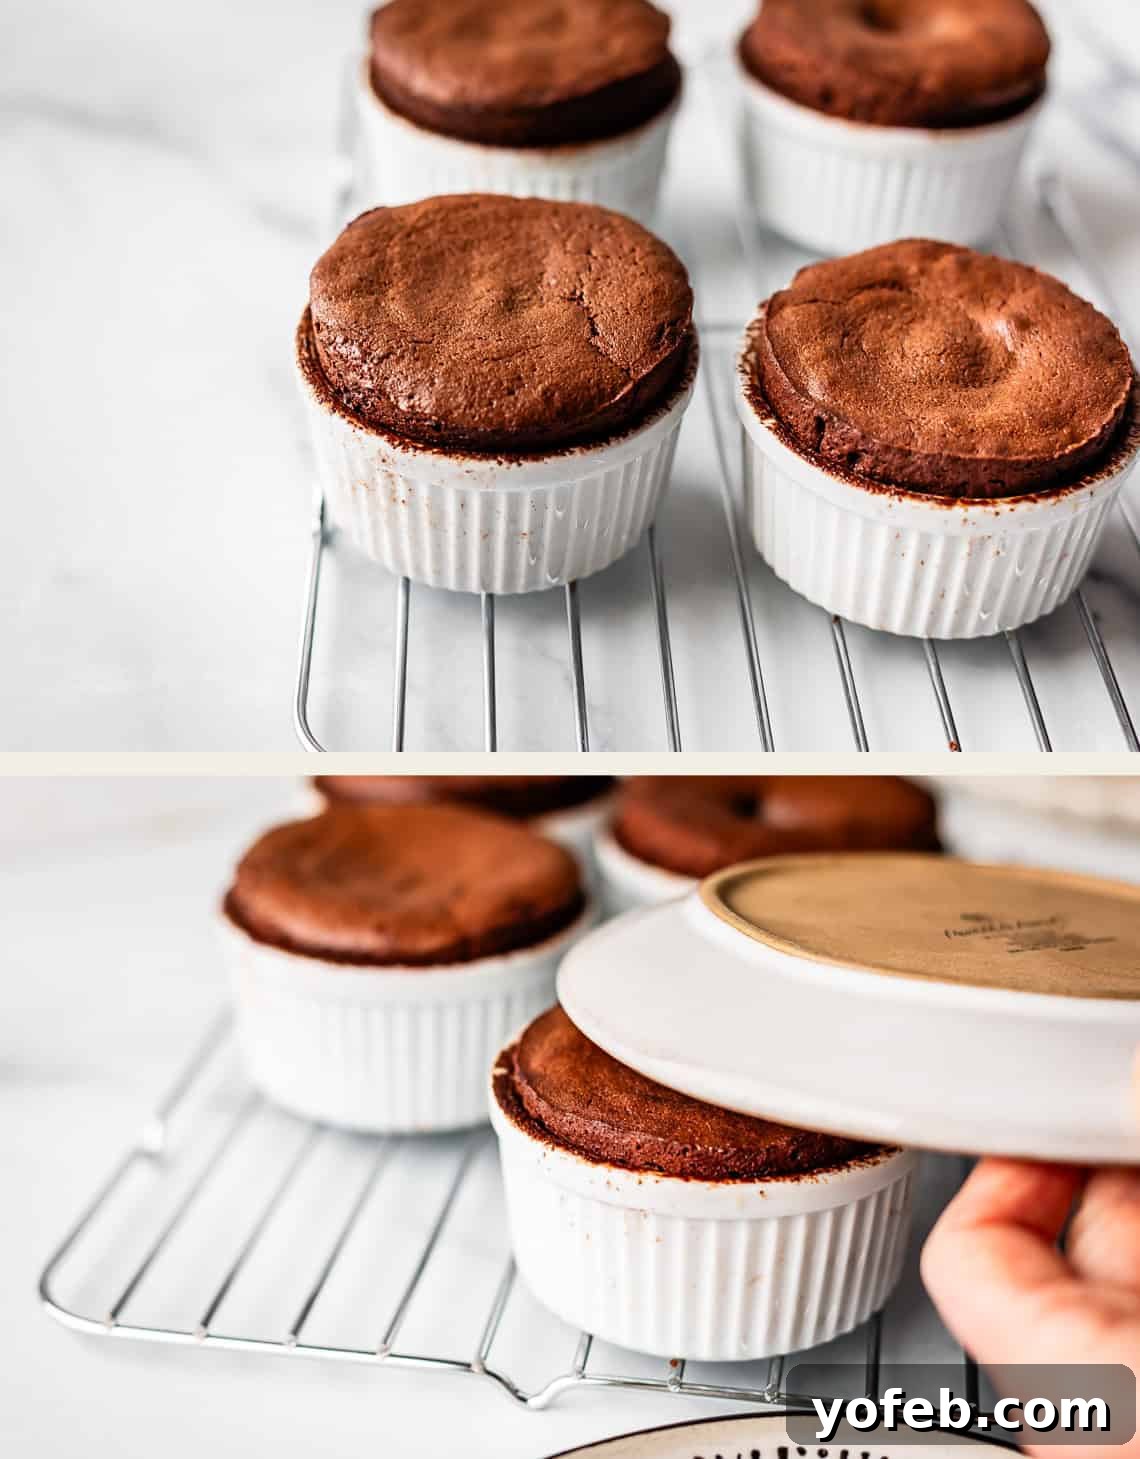
Once you remove the cakes from the oven, set a timer for precisely 3 minutes. This crucial resting period allows the cakes to set slightly. After 3 minutes, place a serving plate upside down over a ramekin. Gripping both the plate and the ramekin firmly with a kitchen towel (a thin towel offers better grip than thick oven mitts), swiftly flip it over. Count to ten, allowing the cake to settle onto the plate, then carefully lift the ramekin to reveal your perfectly formed lava cake. Repeat this process for all remaining cakes.
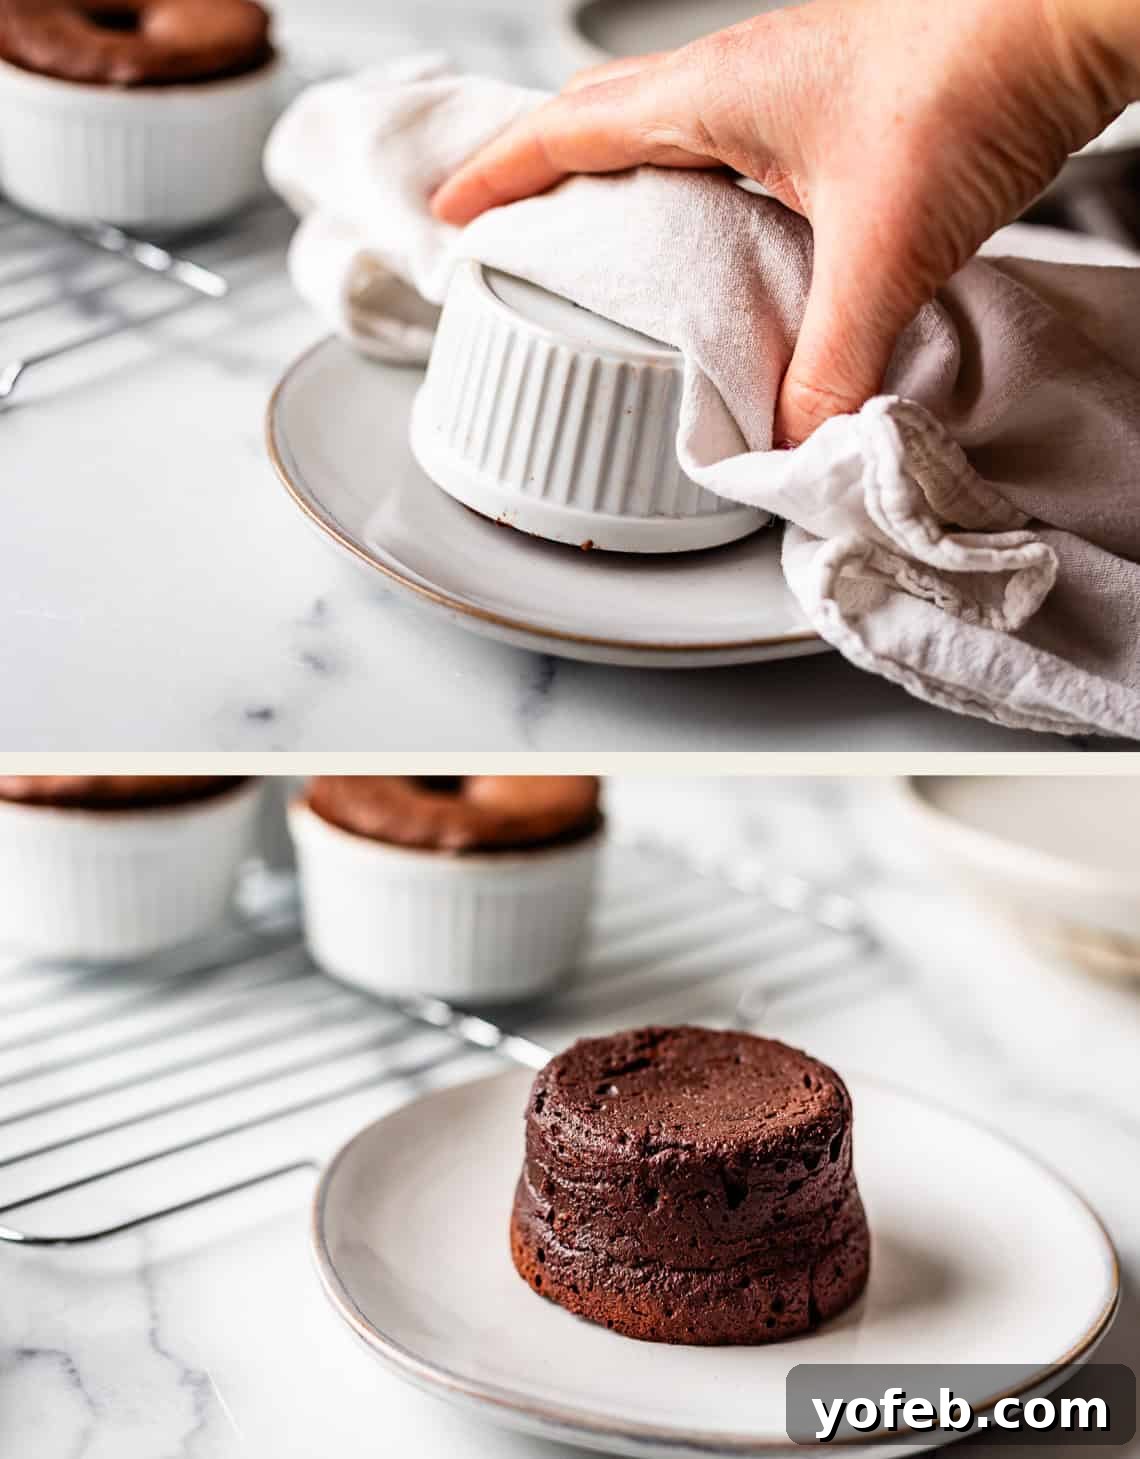
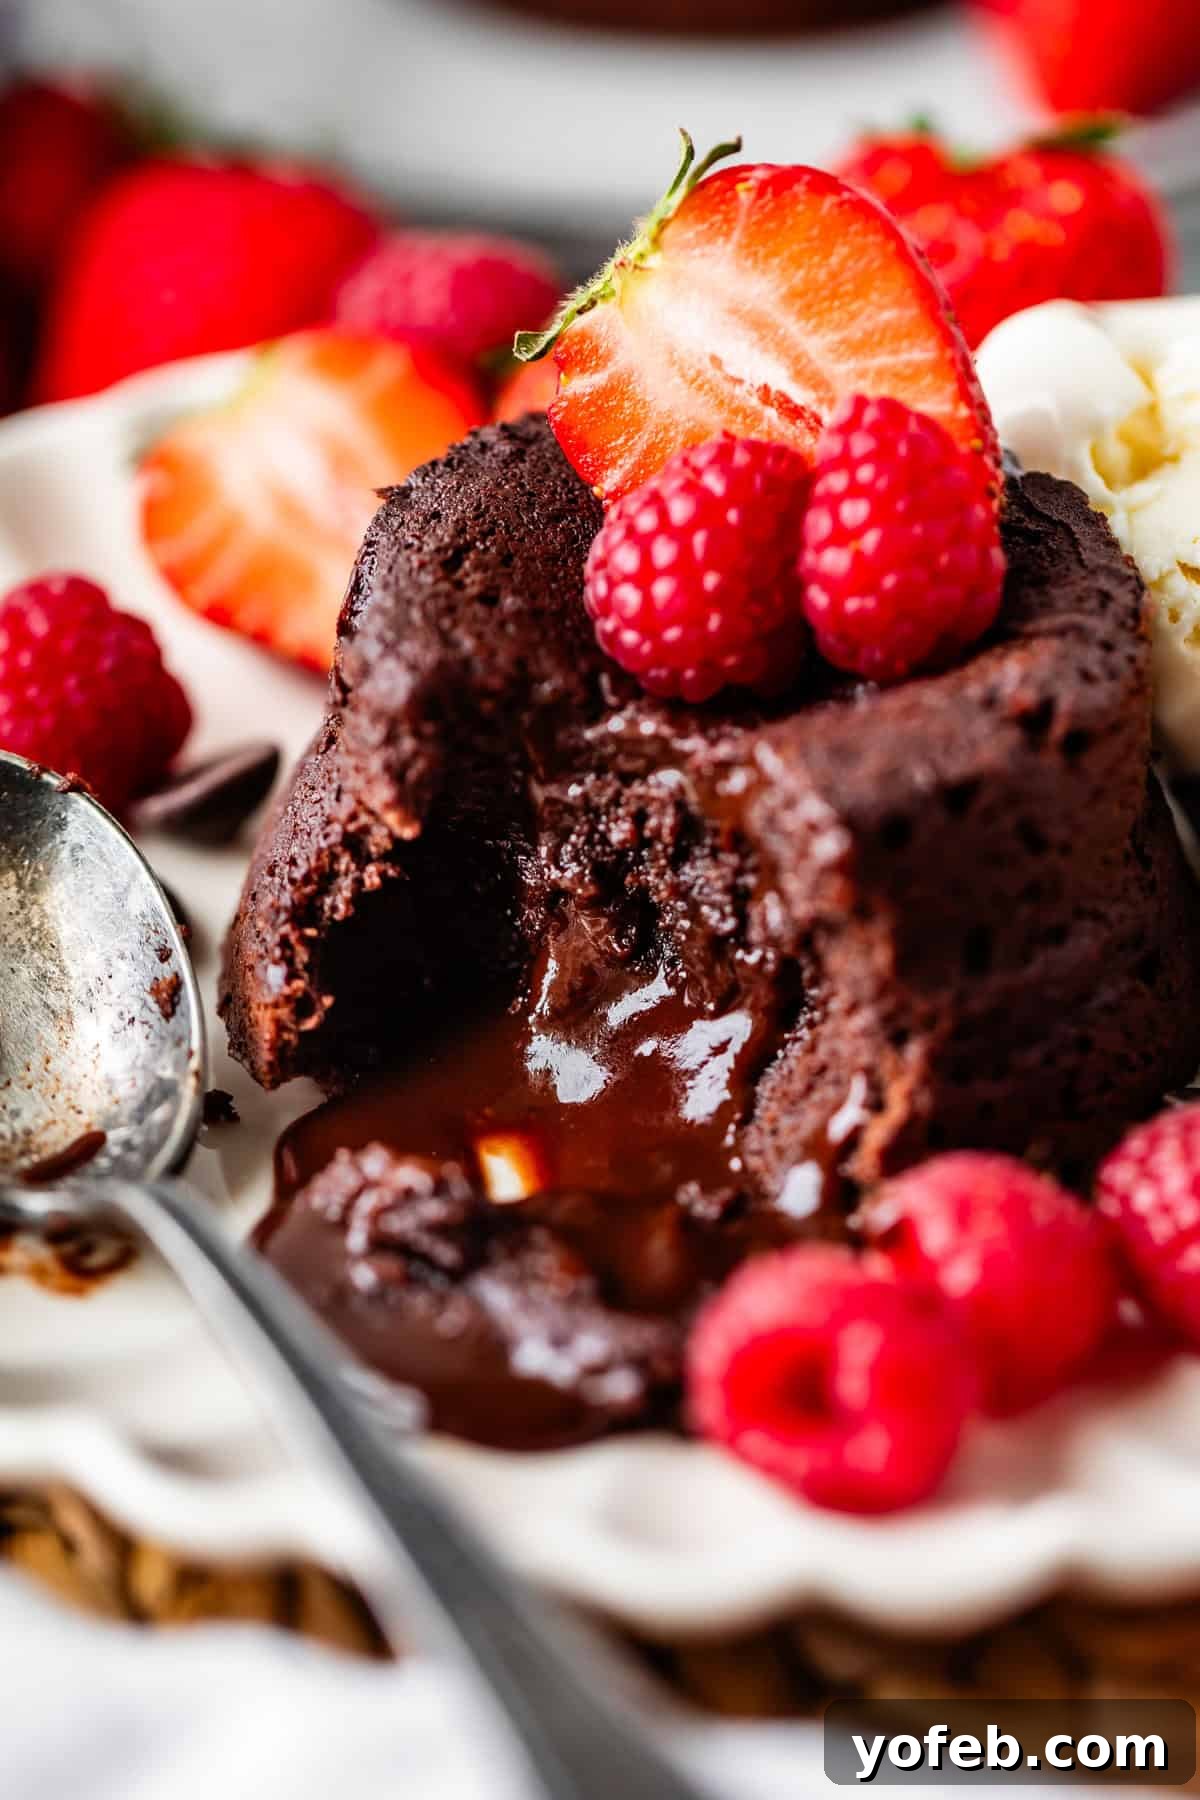
Voila! Behold this exquisite creation! Now, prepare for the moment of truth as you cut into it, revealing that sensational molten center.
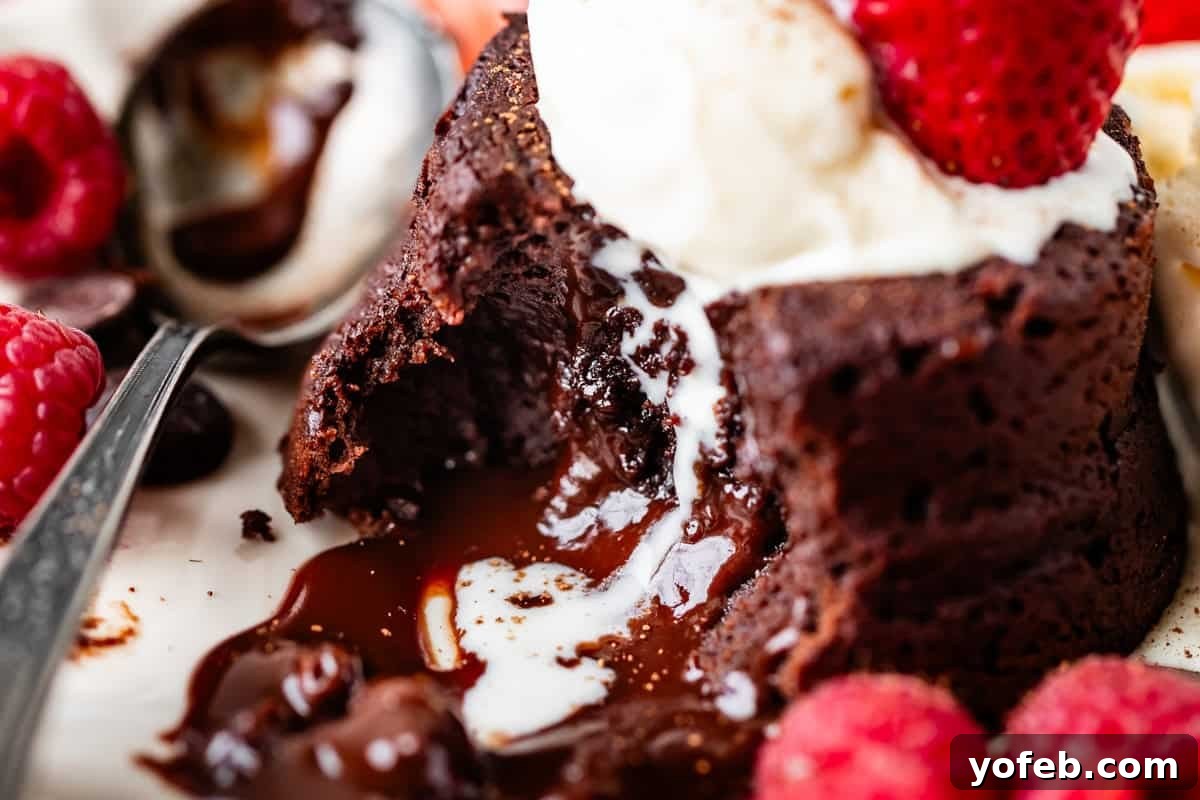
Garnishes are more than just an afterthought for chocolate lava cakes; they are essential for both presentation and flavor balance. A scoop of creamy vanilla ice cream or a generous dollop of homemade whipped cream provides a delightful contrast in temperature and texture. Fresh berries, such as raspberries or strawberries, introduce a welcome tartness that beautifully cuts through the richness of the chocolate. For an elegant touch, dust each cake with a fine layer of powdered sugar or cocoa powder through a strainer. If you’re truly aiming for an indulgent experience, consider drizzling with extra chocolate sauce or luscious salted caramel sauce to elevate your dessert to new heights!
How to Make Lava Cakes Ahead of Time
These chocolate lava cakes are an exceptional make-ahead dessert, perfect for seamless entertaining or simply enjoying a gourmet treat on demand. The best strategy is to prepare and either refrigerate or freeze the unbaked batter in its ramekins, then bake them fresh just before serving. Because this recipe features a ganache center, the cakes are less prone to drying out or becoming “just cake” upon reheating. However, baking them fresh ensures that iconic molten glory every time.
To prepare ahead, follow the recipe instructions for greasing and dusting your ramekins. You can even add a circle of parchment paper to the bottom of each ramekin before buttering and dusting with cocoa powder if you’re particularly concerned about sticking. Once the batter and ganache balls are assembled in the ramekins, cover each tightly with plastic wrap. If you plan to bake within 24 hours, store them in the refrigerator. When ready to bake, simply remove the plastic wrap and follow the original baking instructions.
For longer storage, unbaked batter in ramekins can be frozen for up to 1-2 months. Arrange the wrapped ramekins in a single layer inside a freezer-safe ziplock bag (or use multiple bags if necessary). To bake from frozen, transfer the ramekins to the refrigerator and allow them to thaw for 12-18 hours. Once thawed, follow the standard baking instructions.
How to Store and Reheat Leftover Lava Cakes
Storing leftover lava cake is as easy as pie – or rather, cake! Once your baked lava cakes have cooled completely, transfer them to an airtight container and store them in the refrigerator. They will maintain their deliciousness for a good 2-3 days. If you need to store them for a longer duration, you can freeze them following the instructions below.
To reheat individual refrigerated cakes, place them in the microwave and warm for approximately 1-2 minutes at 50% power. This gentle heating ensures the center becomes molten again without overcooking the cake. If you’re reheating several cakes simultaneously, arrange them on a lined baking sheet and warm them in a preheated 350-degree F (175-degree C) oven for about 7-10 minutes, or until thoroughly warm.
For freezing already baked cakes, carefully place the unmolded cakes on a lined baking sheet and flash freeze them for about 30 minutes until solid. Then, transfer them to a freezer-safe ziplock bag. You can thaw individual cakes or the entire batch in the refrigerator overnight, or simply leave them on the counter for a few hours. Once thawed, use the same reheating instructions as for refrigerated cakes to restore their molten perfection.
Let Them Eat Cake: More Irresistible Cake Recipes
I am notoriously particular about cake; for it to be truly worth indulging in, it simply has to be extraordinary! You can trust that these selected recipes deliver the most exquisite flavors and delightfully moist textures. Discover some of my all-time favorite cake creations that are sure to impress!
Cake & Cupcakes
Moist Red Velvet Cake with Incredible Flavor
Cake & Cupcakes
Best Texas Sheet Cake Recipe
Dessert
Pumpkin Butterscotch Molten Lava Cakes
Dessert
The Best Chocolate Cake I’ve Ever Had
Facebook | Pinterest | Instagram

Chocolate Lava Cakes with Ganache Center
Equipment
-
6 (4-ounce) ramekins (If you have 6-oz ramekins, see note)
Ingredients
For the ganache center:
- 1/3 cup high-quality semi-sweet chocolate chips
- 1/4 cup heavy cream
- 1 tablespoon unsalted butter
For the chocolate lava cakes
- 10 tablespoons unsalted butter, (1 stick + 2 tablespoons)
- 2 (4-ounce bars) bittersweet chocolate, 8 ounces total*
- 1/4 cup dark brown sugar, packed
- 1 teaspoon vanilla extract
- 1/2 teaspoon kosher salt, (use 1/4 teaspoon table salt if that’s all you have)
- 1/4 cup all-purpose flour, spooned, leveled, and sifted
- 2 large eggs
- 3 large egg yolks
- 1/4 cup granulated sugar
For preparing the ramekins
- 1 tablespoon soft butter, for greasing the ramekins
- 1 tablespoon unsweetened cocoa powder, for dusting the ramekins
Topping ideas
- powdered sugar, for dusting
- fresh raspberries
- fresh strawberries
- vanilla ice cream
- Whipped Cream
- Hot Fudge Sauce
- Salted Caramel Sauce
Instructions
-
Prepare the Ganache Center: In a small microwave-safe bowl, combine 1/3 cup high-quality semi-sweet chocolate chips and 1/4 cup heavy cream.
-
Microwave on high for 30-60 seconds, or until you observe small bubbles forming around the edges of the cream. Allow the mixture to sit undisturbed for 1 minute to melt the chocolate, then whisk until it is completely smooth and uniform.
-
Add 1 tablespoon unsalted butter to the warm ganache, let it melt for a minute, then whisk again until fully incorporated and smooth.
-
Chill the Ganache: Place the bowl of ganache in the freezer for approximately 30 minutes, or in the refrigerator for about an hour, until it is firm enough to handle and shape.
-
Shape the Ganache Balls: Once chilled, check the ganache consistency. It should be pliable enough to scoop and mold but not overly frozen. If too hard, let it soften for a few minutes at room temperature. Use a spoon or your hands to form the ganache into 6 equal-sized balls. Return these ganache balls to the freezer or refrigerator to keep them very cold until needed.
-
Preheat Oven: Preheat your oven to 325 degrees F (160 degrees C).
-
Prepare Cake Batter Base: In a large microwaveable bowl, combine 10 tablespoons unsalted butter and 2 (4-ounce) bars bittersweet chocolate*, broken into smaller pieces.
-
Melt Chocolate and Butter: Microwave the chocolate and butter for 30 seconds, then stir thoroughly. Continue heating in additional 30-second increments, stirring after each, until the chocolate is mostly melted with just a few small lumps remaining. Remove from the microwave and whisk continuously for about a minute until all the chocolate has melted and the mixture is completely smooth and glossy. Avoid overheating to prevent scorching.
-
Stir in 1/4 cup packed dark brown sugar into the melted chocolate mixture.
-
Add 1 teaspoon vanilla extract and 1/2 teaspoon kosher salt. Whisk until smooth, ensuring no lumps remain and all ingredients are fully combined.
-
Incorporate Flour: Using the spoon and level method, measure 1/4 cup all-purpose flour. Position a fine-mesh strainer over the chocolate bowl and sift the flour into the mixture. Gently fold the flour into the batter with a whisk until it is just incorporated and no dry streaks remain. Be careful not to overmix, as this can develop gluten and toughen the cakes. Set the chocolate batter aside.
-
Prepare Egg Mixture: In a large stand mixer bowl (or a separate bowl with a hand mixer), combine 2 large eggs and 3 large egg yolks.
-
Add 1/4 cup granulated sugar to the eggs.
-
Using the whisk attachment, beat the eggs and sugar on high speed for at least 3 minutes, scraping down the sides of the bowl halfway through. The mixture should become pale yellow, light, and airy, forming thick ribbons when the whisk is lifted. This aeration adds crucial lift to the cakes.
-
Combine Batters: Gently scrape the beaten egg mixture into the bowl of chocolate batter. Using a rubber spatula, carefully fold the two mixtures together until just combined, ensuring no streaks of egg remain. Work quickly and avoid overmixing to prevent deflating the aerated eggs.
-
Chill Batter: Cover the combined batter and chill it in the refrigerator for about 10-15 minutes. The batter doesn’t need to be cold, but it should not be warm when it goes into the oven. Room temperature or slightly chilled batter is ideal for best results. (The batter can also be refrigerated overnight for convenience.)
-
Prepare Ramekins Thoroughly: Using a paper towel or a small sandwich baggie over your hand, dip your fingers into soft butter. Generously rub about 1/2 teaspoon of butter into the bottom and up the sides of each of the 6 ramekins. Ensure a thick layer of butter, particularly in the bottom corners, to prevent sticking.
-
Dust with Cocoa Powder: Using a sifter, sprinkle unsweetened cocoa powder liberally over the buttered ramekins (this is best done over a sink to catch excess). Ensure the butter is completely covered. Tap out any excess cocoa powder.
-
Fill Ramekins: Divide the chilled cake batter evenly among the prepared ramekins. Since the batter is thick, use a spoon rather than trying to pour it. Each ramekin should contain approximately 3.5 ounces of batter, regardless of the ramekin size, to maintain consistent cake dimensions.
-
Insert Ganache: Retrieve the chilled ganache balls from the fridge or freezer. Gently press one ganache ball into the center of the batter in each ramekin. Do not press it all the way to the bottom; leave at least 1/4 inch of batter between the ganache and the ramekin base.
-
Cover Ganache: Use a spoon or offset spatula to smooth additional cake batter over the ganache ball, ensuring it is completely covered and the top surface is flat. Add a small spoonful of batter if necessary to achieve an even top. The ganache should not be visible.
-
Place the filled ramekins on a baking sheet. (Consider baking a single test cake first to determine optimal timing for your oven and desired gooeyness—see NOTE below.)
-
Bake the Lava Cakes: Bake at 325 degrees F (160 degrees C) for approximately 15 minutes. Look for the following cues to determine when they are perfectly baked:
-
1) The cake’s top should appear ALMOST fully cooked; the edges should be matte (not shiny), while the very center (roughly the size of a quarter) can still have a slight sheen.
2) The edges of the cake will have risen and pulled slightly away from the sides of the ramekin.
3) When you gently jiggle the baking sheet, the center of the cake will wobble more distinctly than the outer edges. If the entire surface appears very wobbly, bake for an additional couple of minutes.
-
Rest Cakes: Remove the cakes from the oven and set a timer for 3 minutes. This resting period allows the cakes to set slightly, making them easier to unmold. While they rest, prepare your serving plates.
-
Loosen Edges: After 3 minutes, carefully run a butter knife along the inner edge of each cake to loosen it from the ramekin.
-
Unmold: Place a serving plate upside down on top of a ramekin. Holding the plate securely with one hand and using a kitchen towel to protect your other hand (a thin towel offers better grip than thick hot pads), swiftly flip the ramekin and plate together. Count to 10 to allow the cake to release and settle, then carefully lift the ramekin off the lava cake with the kitchen towel. Repeat this process for all remaining cakes.
-
Garnish for Presentation: Dust each cake with a light layer of powdered sugar (or unsweetened cocoa powder, if preferred) using a sifter or small strainer.
-
Add Fresh Fruit: Garnish with fresh raspberries or strawberries for a touch of freshness and color.
-
Serve Immediately: Serve your molten chocolate lava cakes immediately with a scoop of vanilla ice cream or a dollop of Whipped Cream. For an extra decadent touch, don’t forget a drizzle of Chocolate Sauce or Salted Caramel Sauce!
-
Storage of Baked Cakes: Store any leftover baked cakes in an airtight container in the refrigerator for up to 3 days. To reheat, microwave individual cakes for 1-2 minutes at 50% power until warm throughout, or warm several cakes in a 325°F (160°C) oven for 7-10 minutes.
-
Make Ahead Option (Unbaked): Prepare the ramekins and fill with batter and ganache as instructed. Wrap each ramekin tightly in plastic wrap and store in the refrigerator for up to 24 hours, or freeze for up to 2 months. Before baking, ensure the batter is thawed and rests on the counter for 30 minutes, then follow the original bake time.
-
Freezing Baked Cakes: To freeze already baked cakes, place the unmolded cakes on a lined baking pan and flash freeze for about 30 minutes until firm. Transfer to a freezer-safe ziplock bag. Thaw individual cakes overnight in the refrigerator or for 3-4 hours on the counter. Once thawed, reheat as per the instructions for baked cakes (microwave for 1-2 minutes at 50% power or oven at 325°F/160°C for 7-10 minutes).
Notes
Ramekin Size: I typically make these delicious cakes in 4-ounce ramekins. With the ganache center, each cake totals about 4.5 ounces, offering a perfectly decadent portion. While you CAN use larger 6-ounce or even 7-ounce ramekins, I advise against filling them completely. These cakes are incredibly rich, and a larger portion often proves too overwhelming to finish. Even when using a 7-ounce ramekin (which I’ve done many times), I still only fill it with approximately 4.5 ounces of batter to ensure optimal enjoyment and avoid waste.
The Importance of a Single Test Cake: If time allows, I highly recommend baking just one test cake before preparing a full batch for guests! This practice is invaluable because oven temperatures can vary significantly, and individual preferences for gooeyness differ. For instance, if you prefer an exceptionally liquid, super gooey center, you might find 12 minutes of baking to be ideal. Conversely, if you prefer a mostly baked cake with just a molten ganache core, a baking time closer to 18 minutes might be perfect. Taking detailed notes on your test cake’s baking time will ensure consistent, personalized results for future batches.