
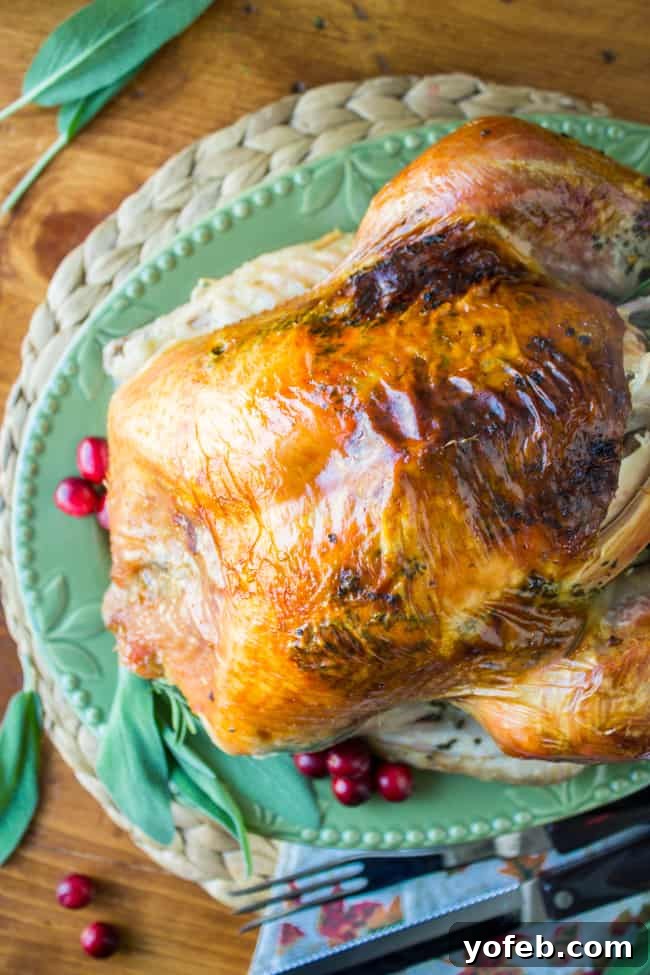
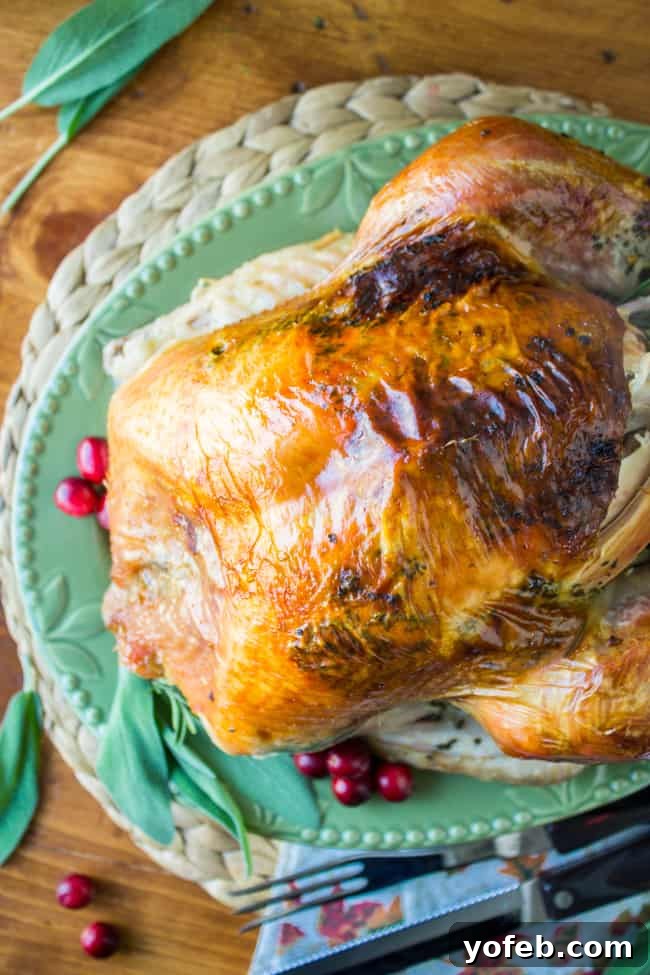
Welcome to the ultimate guide for crafting the most succulent, flavorful, and incredibly moist roasted turkey you’ve ever tasted! Forget dry, bland birds – this recipe, featuring a delectable sage-infused butter mixture, fresh garlic, and a simple yet powerful turkey brine, is your secret weapon for a truly unforgettable holiday meal. Whether it’s Thanksgiving, Christmas, or any special occasion, prepare to impress with a turkey that’s bursting with classic savory flavors and melts in your mouth. This foolproof method is designed for ease and spectacular results, ensuring your holiday cooking is stress-free and delicious. Originally posted November 3, 2014, this timeless recipe continues to be a favorite!
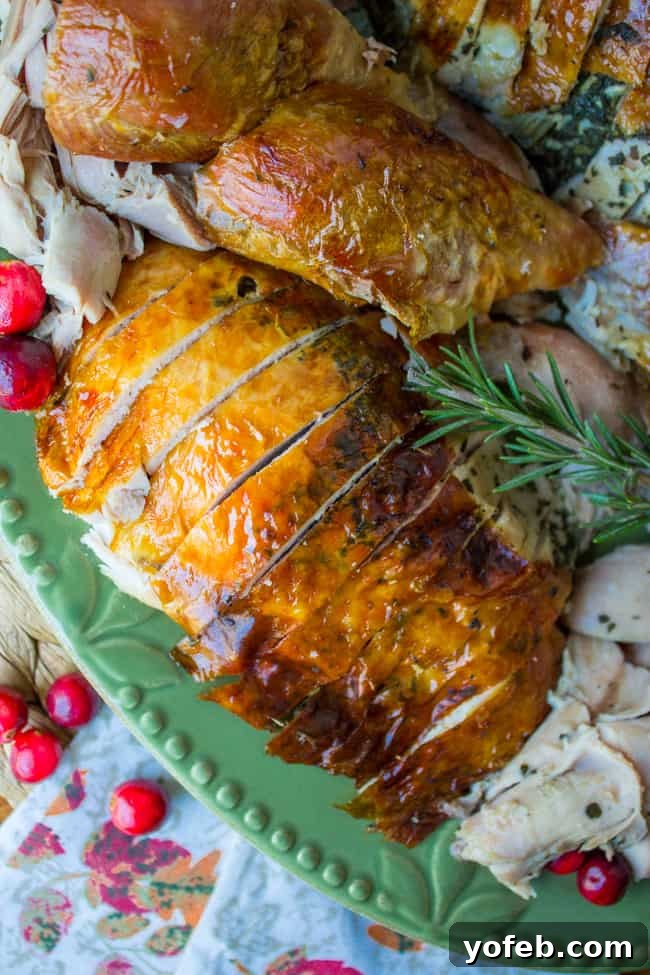
Table of Contents
- The Secret to a Moist Turkey: Sage Garlic Butter
- Mastering the Art of Roasted Turkey
- Essential Herb Roasted Turkey Tips
- Storing Your Delicious Butter-Roasted Turkey
- Perfect Pairings for Herb Butter Turkey
- Herb Butter Turkey Recipe Card
I cherish childhood memories of gathering at my great Aunt Pauline’s house for Thanksgiving each year. The culinary responsibilities were always clearly defined: Aunt Pauline and my Grandma Georgia expertly managed all the savory dishes, while my family (specifically, my mom) was tasked with baking an impressive array of pies. Their teamwork ensured every feast was a delightful success.

Here are Aunt Pauline and Grandma Georgia, captured in a joyful moment during a V-J Day Party in August 1945. Both of their husbands served valiantly in WWII. Their spirit and resilience are truly inspiring!
Although I didn’t grow up as the designated turkey chef, preparing a magnificent roasted turkey has become an essential skill for any home cook looking to host an exceptional holiday meal. After all, a perfectly roasted turkey is undeniably delicious. Just last week, my mom joined me in the kitchen to roast a turkey together. She brought along Grandma Georgia’s inherited roasting pan, a cherished family heirloom we estimate to be nearly 70 years old. It truly is a testament to the enduring quality of craftsmanship from a bygone era – they certainly don’t make them like they used to!
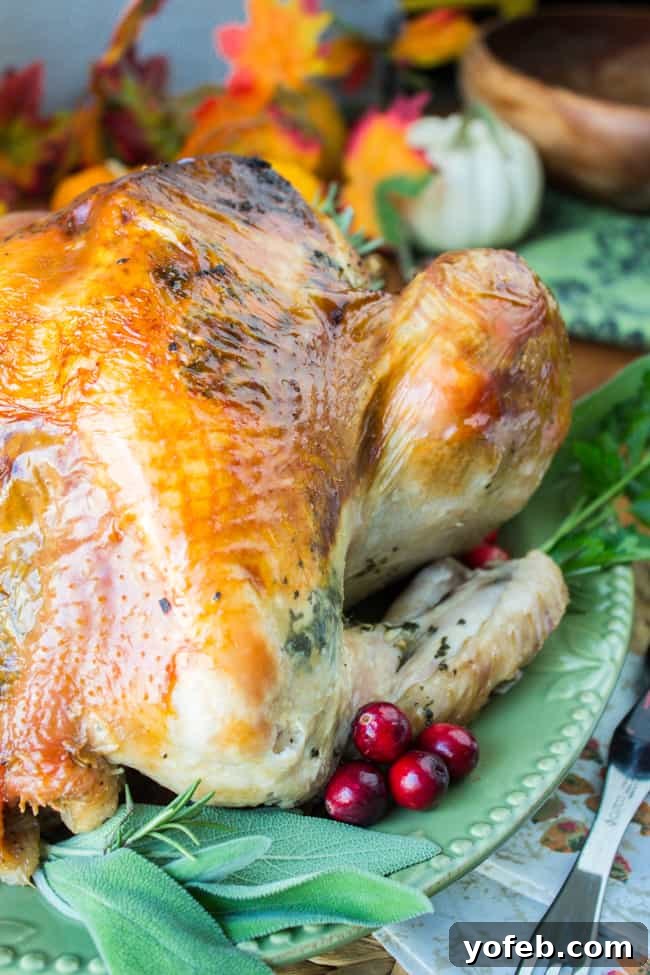
What I adore most about this Sage Butter Roasted Turkey is its remarkable simplicity and incredible flavor. It effortlessly captures all the beloved, classic tastes of Thanksgiving, resulting in a consistently moist and tender bird every single time. My approach to turkey is always to keep it straightforward and fuss-free: a flavorful sage butter rub, a roasting bag for ultimate moisture, and a few aromatic additions. Thanksgiving celebrations are busy enough; why complicate the main event?
The Secret to a Moist Turkey: Sage Garlic Butter
This exceptional roasted turkey recipe comes from my cousin Lani, an incredibly talented and intuitive cook. Her methods are simple, yet yield profound flavors. The star of this recipe is undoubtedly the sage, salt, and garlic butter rub. It was almost a challenge to apply it to the turkey, as its aromatic allure made me want to spread it on a piece of warm bread instead! Don’t be intimidated by the idea of rubbing butter underneath the turkey’s skin. While it might feel a little unusual at first, the succulent results will quickly convince you that it’s an essential step for achieving unparalleled moisture and flavor. This technique creates a protective layer that keeps the meat juicy while ensuring the skin crisps up beautifully.
Mastering the Art of Roasted Turkey
Are you ready to create a turkey so moist, tender, and incredibly flavorful that you’ll astonish even yourself? Let’s dive into the simple steps that guarantee a show-stopping centerpiece for your holiday table.
How to Brine a Turkey for Ultimate Flavor
Brining is my absolute favorite method for infusing a turkey with deep, delicious, herby flavor, and it’s surprisingly low in difficulty. While it requires a bit of foresight and planning, the payoff in taste and texture is immense. If you have a little patience and can plan ahead, you’re well on your way to a perfectly seasoned bird. Brining helps the turkey absorb moisture and flavor before cooking, preventing it from drying out and enhancing its natural taste.
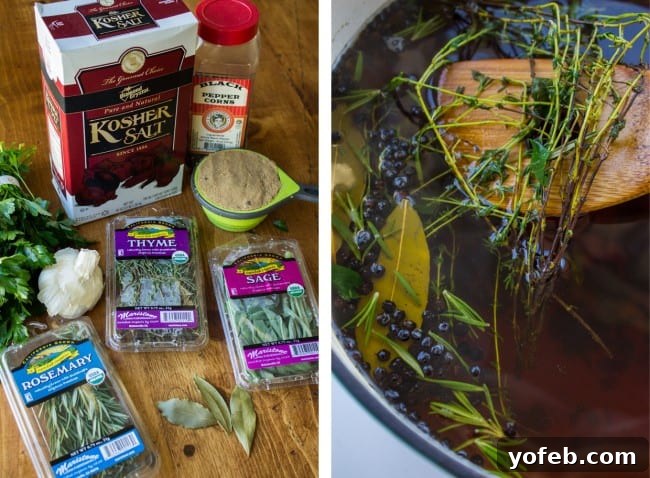
When brining, complete immersion isn’t always necessary. In my experience, even if the turkey isn’t fully submerged, a simple rotation about two-thirds of the way through the brining time ensures even flavoring. Critical to success is proper brining duration: 18 to 24 hours is the sweet spot. Brining for too long can lead to an overly seasoned, mushy texture, which is certainly undesirable. I typically prepare my brine on Tuesday evening, allowing it to cool overnight, then place the turkey in the brine on Wednesday morning. This schedule ensures the turkey is perfectly ready for roasting on Thursday morning, just in time for Thanksgiving.
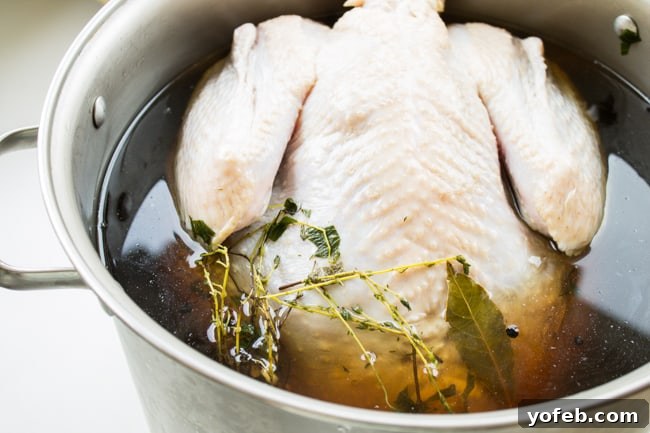
For smaller turkeys, a large stockpot works perfectly for brining, as shown here. However, for larger birds, I often opt for the double oven bag method. Simply place the turkey and the cooled brine into one robust oven bag, seal it tightly, and then enclose that bag within a second oven bag, sealing it equally securely. (By “tightly,” I mean using several rubber bands or even some twisty ties for extra peace of mind.) I then place this double-bagged turkey in my roasting pan in the refrigerator. This precaution is crucial in case a bag unexpectedly leaks – a potential disaster that, thankfully, has never occurred to me! If you choose this method, remember to turn the turkey more frequently to ensure even brining.
Crafting the Perfect Sage Butter for Oven-Roasted Turkey
When it comes to holiday flavors, what herb evokes the spirit of Thanksgiving more than any other? Without a doubt, it’s sage! Its earthy, slightly peppery notes are absolutely essential for a classic roasted turkey.
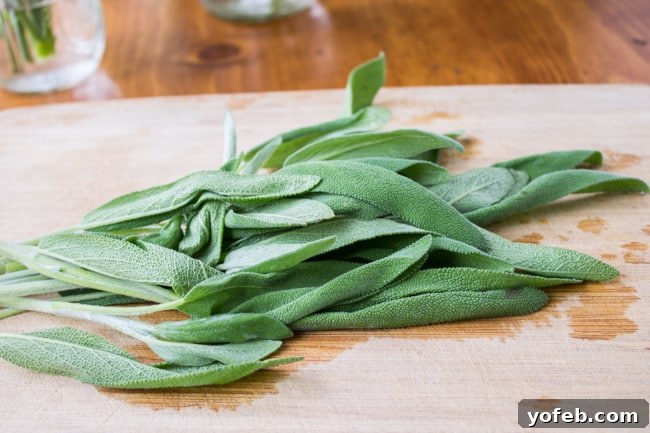
Observe the generous quantity of fresh sage used for this rich butter rub. This amount guarantees a profound, aromatic essence that permeates every bite of the turkey. The visual alone promises a velvety, herb-infused delight.
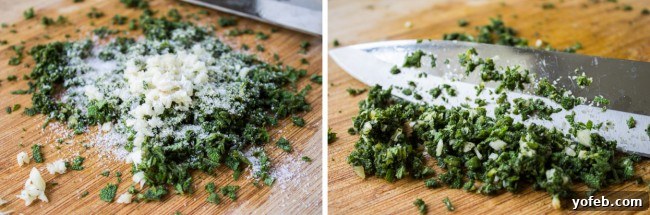
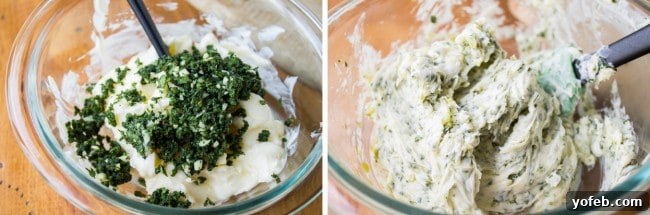
Begin by finely chopping the fresh sage, ensuring every leaf releases its vibrant aroma. Next, add a generous sprinkle of kosher salt and minced garlic. With the side of your chef’s knife, gently smash and grind these ingredients into the sage, transforming them into a fragrant, almost paste-like mixture. This powerful blend is then incorporated into softened, room-temperature butter. Stir it thoroughly until uniformly combined. At this point, feel free to reserve a small dollop to savor on a warm, freshly baked roll – a truly delightful preview of the flavors to come!
The Art of Applying Butter Under the Turkey Skin
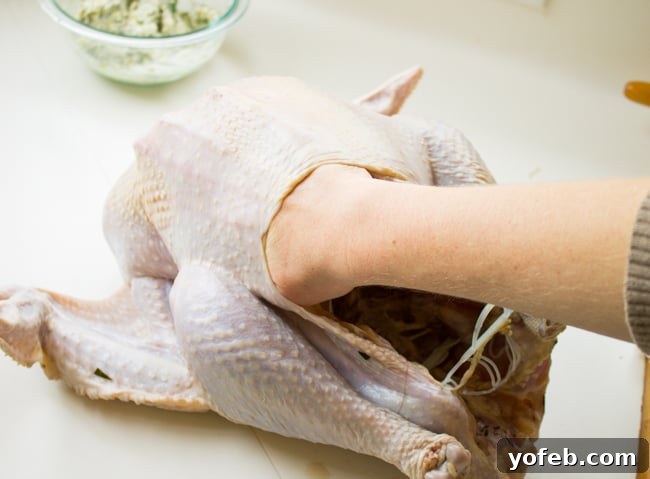
This particular step might feel a bit unusual, but I assure you, the sensational results are absolutely worth it. With gentle hands, carefully separate the delicate membranes between the turkey’s skin and the breast meat. Don’t be shy – really work your hand down into that space. It might seem tricky at first, but you’ll get the hang of it. Be mindful not to tear the skin, though it’s surprisingly more resilient than it appears. Once the pocket is created, liberally rub about half of the prepared sage butter directly under the skin, spreading it evenly over the breast meat. Use the remaining butter to generously coat the entire exterior of the bird, ensuring every surface is infused with this aromatic goodness. This dual application of butter guarantees both a succulent interior and a beautifully golden, crispy skin.
How to Roast a Turkey to Perfection
To further enhance the turkey’s flavor from the inside out, I highly recommend stuffing its cavity with an assortment of aromatics. Simple ingredients like quartered onions, apples, carrots, and any extra fresh herbs you have on hand will infuse the meat with incredible depth and fragrance as it roasts. Most importantly, always use a reliable meat thermometer to ensure your turkey reaches the safe internal temperature of 165 degrees F in the thickest part of the breast. This crucial tool prevents both undercooking and, perhaps even worse, the tragedy of an overcooked, dry turkey.
Here’s a concise overview of the roasting process. For a complete list of ingredients and detailed instructions, please refer to the comprehensive recipe card located at the bottom of this page!
- Thawing a Frozen Turkey: If starting with a frozen turkey, allow ample time for it to thaw completely in the refrigerator. A good rule of thumb is one day of thawing for every 5 pounds of turkey. Never attempt to brine a frozen turkey, as it will not properly absorb the flavorful liquid.
- Preparing the Brine: Several hours, or even the day before you plan to brine, prepare the brine mixture. Combine all brine ingredients in a very large pot and bring to a rolling boil over high heat. Continue to cook until all the sugar and salt have fully dissolved. Remove from heat and allow the brine to cool completely to room temperature. If not using immediately, refrigerate it.
- Brining the Turkey: Unpack your turkey in a clean sink. Carefully remove the neck (usually found in the main cavity) and the giblets (typically in a bag at the other end) – these can be saved for gravy or stock. Rinse the turkey thoroughly with cold water. Place the turkey in a large pot or a dedicated brining bucket, then submerge it in the cooled brine. Alternatively, you can use a sturdy turkey oven bag, well-sealed and placed within a larger container for security. If the turkey isn’t fully covered, add a little more water to the brine, and remember to flip the turkey two-thirds of the way through the brining time to ensure even seasoning. Refrigerate for 18-24 hours. After brining, remove the turkey to a clean sink, discard the brine, and rinse or soak the turkey in cold water for about 15 minutes to remove excess surface salt. Pat the turkey thoroughly dry with paper towels (and sanitize your sink afterward!).
- Preparing for Roasting: Wash your hands thoroughly, then prepare the sage butter as described above. Gently separate the skin over the turkey breast from the meat, and rub approximately half of the sage butter directly under the skin. Apply the remaining butter generously all over the exterior and inside the turkey cavity. Preheat your oven to 350 degrees F (175 degrees C). Stuff the turkey cavity with aromatics: quartered carrots, celery, apple, onion, and sprigs of thyme, rosemary, and sage. Re-truss the turkey legs with the plastic trussing or tie them together with kitchen twine. Add the remaining roughly chopped carrots and 2 cups of water to the bottom of your roasting pan, beneath the roasting rack. Tuck the turkey’s wings underneath its back, like a sunbather on a beach. Carefully place the turkey into a roasting bag, then set it on the rack in the roasting pan, ensuring it sits above the carrots. Seal the roasting bag securely and make a few small slits in the top. Position the roasting pan on the lowest rack of your oven, ensuring your meat thermometer is visible through the oven window.
- Roasting the Turkey: Set a timer for 2 hours and 15 minutes. After this initial period, begin checking your turkey’s internal temperature every 5 minutes with a reliable meat thermometer inserted into the thickest part of the breast. The turkey is perfectly cooked when it reaches 165 degrees F (74 degrees C).
- Resting and Carving: Once the turkey reaches the target temperature, remove it from the oven and allow it to rest, still in its sealed roasting bag, for at least 15-25 minutes. This resting period is vital for the juices to redistribute throughout the meat, ensuring maximum moisture and tenderness. (This is also an excellent time to use the now-free oven for warming other side dishes.) Carefully cut open the roasting bag and, using old oven mitts or sturdy tongs, transfer the hot turkey to a clean cutting board. Discard the cooked aromatics from the cavity. Carve the turkey and serve immediately.
Optimal Roasting Times for a Juicy Turkey
The conventional guideline for roasting turkey suggests approximately 13 minutes per pound at 350 degrees F (175 degrees C). While this calculation provides a good starting point, my personal advice is to perform this initial math and then subtract about 30 minutes from the result. This adjusted time marks when you should *begin* checking the turkey’s internal temperature with a reliable meat thermometer, not when you expect it to be fully cooked.
For instance, for a 12-14 pound turkey, this recipe specifies an initial roasting time of 2 hours and 15 minutes. After this period, you’ll meticulously check the turkey every 5 minutes by inserting a meat thermometer into the thickest part of the breast. The moment it hits that crucial 165 degrees F (74 degrees C), take it out of the oven immediately. The goal is to reach that perfect internal temperature without a moment more, ensuring a wonderfully moist bird and preventing any dreaded dryness!
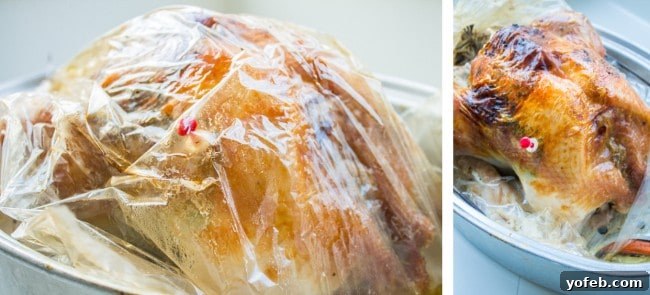
And let’s address the roasting bag: don’t underestimate its power! It truly simplifies the process and is an excellent option, especially for beginners or anyone seeking a stress-free holiday. While you can certainly adapt this sage-butter rub to your preferred roasting method, the roasting bag ensures unparalleled moisture and a fuss-free experience. My initial turkey recipe, which involves breast-down instructions, is a bit more hands-on (requiring you to flip a hot turkey), but it also yields a remarkably delicious bird.
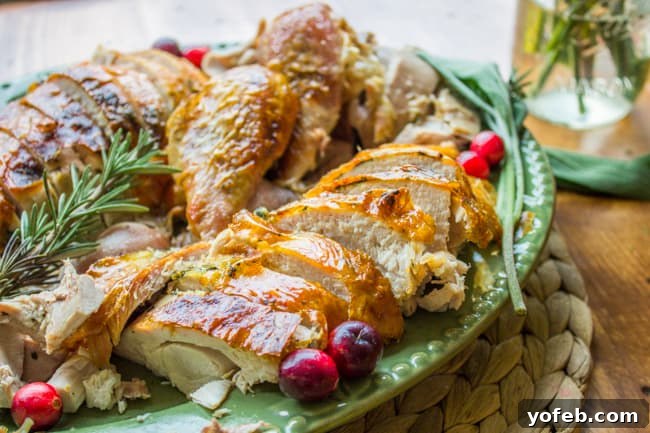
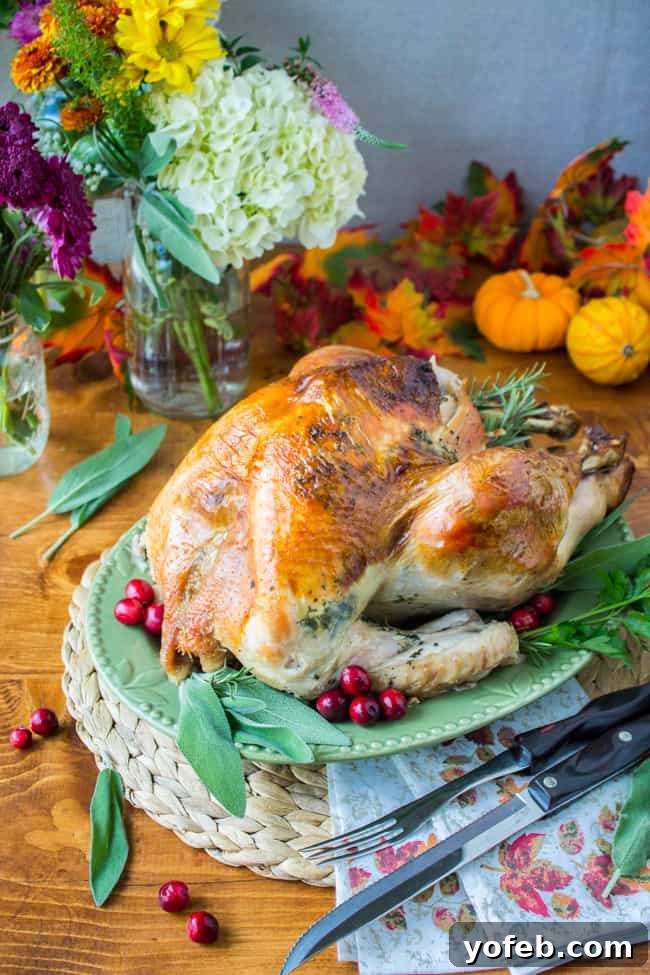
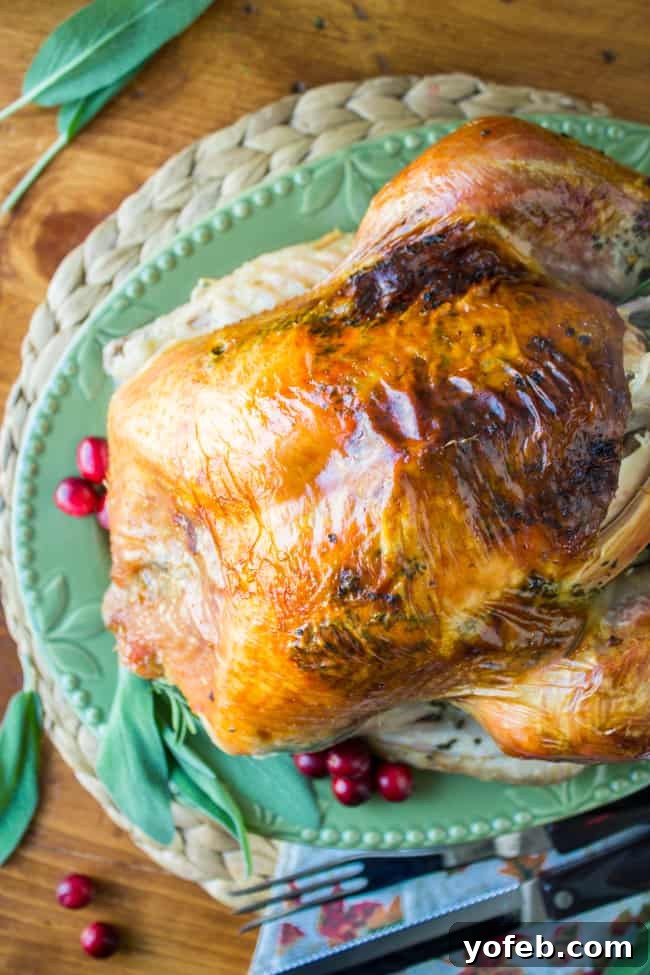
Behold, the grand finale: a perfectly roasted turkey. Its incredible tenderness and juiciness are a direct result of all that luscious sage butter! Despite my recurring nervousness about roasting a turkey, it consistently proves to be far simpler than it sounds. And remember, don’t discard that precious turkey carcass after carving! Save it to prepare this rich and flavorful Homemade Turkey Stock from the Bones. It forms the base for the most comforting and delicious soups, such as this exquisite Creamy Turkey Wild Rice Soup.
Essential Herb Roasted Turkey Tips
Entrusted with roasting the turkey this year? Don’t worry, I’m here to guide you every step of the way. We’ll conquer this together! Here are the most crucial tips to keep in mind for a perfectly cooked, moist, and flavorful bird:
- Allow Ample Defrosting Time: If you’re using a frozen turkey, ensure you factor in sufficient time for it to thaw completely in the refrigerator. A general rule is one full day in the fridge for every 5 pounds of turkey. For example, a 25-pound turkey requires a generous 5 days to defrost. This crucial step must be completed *before* you even consider brining.
- Cool Your Brine Completely: It is absolutely essential that your brine is cooled to room temperature, or even chilled, before you add the turkey. Introducing a turkey to warm brine will cause it to absorb an excessive amount of salt, resulting in an unpleasantly salty bird.
- Avoid Over-Brining: While brining is fantastic for flavor and moisture, there’s a limit. After 18-24 hours, it’s imperative to remove the turkey from the brine. Prolonged brining can lead to an overly salty taste and an undesirable mushy texture.
- Embrace the Roasting Bag: Using a turkey roasting bag is not “cheating”; it’s a brilliant culinary strategy! Roasting bags are invaluable for keeping your turkey incredibly moist, eliminating the need for constant basting, significantly speeding up the cooking time, and even simplifying cleanup.
- Cook to 165°F (74°C) Exactly: The two primary objectives when cooking a turkey are ensuring food safety and preserving moistness. By cooking your turkey until it reaches an internal temperature of precisely 165°F (74°C) in the thickest part of the breast, you achieve both safety and a perfectly juicy, never-dry, culinary triumph!
The Magic of the Turkey Roasting Bag: A Deep Dive
A turkey roasting bag is truly a game-changer for Thanksgiving and any holiday meal. If you’ve ever dismissed them as only for amateurs, prepare to have your mind changed! These bags are for anyone who desires an exceptionally incredible turkey with significantly less effort and stress. Here are the top three compelling reasons I advocate for using a turkey roasting bag:
- They’re Self-Basting Marvels: Remember your aunt diligently opening the oven every 20 minutes to squirt juice over the turkey with a baster? With a roasting bag, that laborious step becomes obsolete. Every time you open the oven door, the internal temperature drops, which inevitably prolongs your turkey’s cooking time. More importantly, who wants to spend their precious Thanksgiving day tethered to the oven, basting? Not me, and certainly not you!
- They Drastically Speed Up Cooking Time: Who doesn’t want dinner on the table sooner, especially during a busy holiday? Roasting bags create a steamy, enclosed environment that cooks the turkey more efficiently and quickly. Your entire guest list will undoubtedly thank you for a more timely and delicious meal.
- They Masterfully Lock in Moisture: The undeniable truth is, a bagged bird is a tender bird. When the turkey is encased within a roasting bag, all the natural juices and moisture are trapped inside. This prevents them from evaporating into the dry oven air, ensuring that your turkey remains incredibly juicy, succulent, and flavorful from the first slice to the very last bite.
Storing Your Delicious Butter-Roasted Turkey
Proper storage of your holiday turkey is essential for both enjoyment and food safety. It is critically important to refrigerate any leftover turkey within two hours of removing it from the oven. To ensure rapid cooling and prevent bacterial growth, avoid packing all your turkey into one massive container. Instead, divide it into several shallow containers, allowing the heat to dissipate quickly in the refrigerator.
Freezing turkey for future meals is another fantastic way to extend its deliciousness. I love to prepare “future-me” gifts by pre-cutting the turkey into the specific sizes I’ll need. For instance, if I plan to make this Creamy Turkey Wild Rice Soup, I’ll carve the turkey into convenient bite-sized pieces before freezing. This thoughtful preparation makes whipping up future meals effortless.
Enjoy every moment of getting ready for the holidays, everyone! This time of year truly is magical!
Perfect Pairings for Herb Butter Turkey
Complement your succulent Herb Butter Turkey with these delightful side dishes and desserts for a complete and unforgettable feast:
- Make-Ahead Turkey Gravy: This is my go-to recipe every year, prepared weeks in advance to save stress. It’s absolutely divine!
- Aunt Shirley’s Famous Mashed Potatoes: Experience the creamiest mashed potatoes you’ll ever taste!
- Easy Homemade Cranberry Sauce Recipe: A fresh and vibrant twist on the traditional classic.
- Cornbread Stuffing with Bacon and Sage: I adore this hearty cornbread version, rich with savory bacon and aromatic sage.
- Sweet Potato Casserole with a Ridiculous Amount of Streusel: This is the recipe that finally converted me into a sweet potato lover!
- Soft and Fluffy Parker House Rolls: A swirl of butter baked inside makes these rolls utterly delectable.
- The Best Homemade Apple Pie: My perfect, beloved double-crust apple pie recipe.
- Balsamic-Browned Butter Asparagus: A fantastic and elegant vegetable side dish.
- Roasted Butternut Squash and Brussels Sprouts with Pecans and Cranberries from Julia’s Album.
- Crock Pot Cream Corn from The Semisweet Sisters.
- Chocolate Crack Pie from The Kitchen Is My Playground.
Facebook | Pinterest | Instagram
Herb Butter Turkey
A butter mixture with fresh sage, garlic, and salt makes this roasted turkey super moist. I’ve got an easy turkey brine that gives it tons of flavor. This is the easiest and best Thanksgiving turkey recipe ever!
Prep Time: 30 minutes | Cook Time: 2 hours 15 minutes | Resting Time: 18 hours | Total Time: 20 hours 45 minutes | Servings: 10 Servings
Ingredients
For the brine:
- 1 & 1/2 gallons water (24 cups)
- 1 cup kosher salt
- 1 cup brown sugar
- 1 & 1/2 tablespoons peppercorns
- 3 bay leaves
- 3 cloves garlic, mashed and roughly chopped
- 3 tablespoons rosemary, fresh, roughly chopped*
- 3 tablespoons parsley, fresh, roughly chopped
- 3 tablespoons sage, fresh, roughly chopped
- 3 tablespoons thyme, fresh, roughly chopped
For the butter rub:
- 1 cup salted butter, softened to room temperature
- 1 large bunch of sage, chopped fine
- 2 cloves garlic, crushed and minced
- 1 & 1/2 teaspoons salt
For the Turkey:
- 12-14 pound turkey, fresh or frozen and thawed
- 5-7 carrots, peeled and roughly chopped
- 1 large stalk celery, roughly chopped
- 1 apple, quartered
- 1 onion, quartered
- 2-3 sprigs thyme
- 2-3 sprigs rosemary
- 2-3 sprigs sage
Materials needed:
- 1 meat thermometer
- A huge pot to boil the brine
- A huge pot/bucket to brine the turkey in
- Paper towels
- Turkey oven bag
- Large roasting pan with roasting rack
- Kitchen twine, if your turkey is not trussed
Instructions
- If you are using a frozen turkey, thaw it in the fridge for a few days before you brine it. Allow one day of thawing for every 5 pounds of meat. Do not brine a frozen turkey. (It won’t absorb the brine).
- Several hours or even the day before you want to brine the turkey, cook the brine. You need time to let it cool down completely; a warm brine will make the turkey absorb too much salt.
- To make the brine, combine all ingredients in a very large pot and bring to a boil over high heat. Cook for 3-5 minutes or until the sugar and salt are dissolved. Turn off the heat. Let cool to room temperature, and refrigerate it if you are not using it right away.
- Unwrap your turkey in a clean sink. Remove the neck, which is usually in the main cavity, and the giblets, which are usually in a bag in the other end. (Save for turkey gravy/turkey stock.) Rinse the turkey with cold water.
- Place the turkey in a large pot or bucket and cover with cooled brine. You can do this in a turkey oven bag that is well sealed (You still need a large bucket or pot for it to sit in though.) If the turkey is not all the way covered, you can add a little more water to the brine. Mine wasn’t completely covered and it was fine. Either way, be sure to flip the turkey 2/3 of the way through brining so that it brines evenly.
- Refrigerate for 18-24 hours. Don’t do it much longer than that or your turkey will get mushy and taste over seasoned.
- Remove the turkey to a clean sink. Discard brine. Wash the turkey with cold water, or soak it in a plugged up sink for 15 minutes. You want to make sure to get all the brine off of it. The brine has already done its work to tenderize the turkey meat, you don’t need the salt on the outside.
- Remove your turkey from the sink and pat dry with paper towels. (Clean your sink with bleach). Do your best patting it dry, you may need to keep grabbing more paper towels.
- Wash your hands and make the sage butter. Add the 2 sticks butter to a medium bowl. Finely chop the sage on a cutting board. Crush and mince the garlic and place it on top of the chopped sage. Sprinkle with 1 1/2 teaspoons salt. Use the side of a chef’s knife to smash the sage, garlic, and salt together until everything is incorporated. (See photos above for reference)
- Add the mixture to the bowl with the butter and combine.
- Use your hands to separate the skin on the turkey breast from the meat. This is easier said than done. You will have to break apart some membrane-y feeling stuff and you have to be pretty forceful. Try not to tear the skin, of course. Try to get your hand as close up to the neck as you can.
- Once you have gotten your hand under the skin, grab a fist full of sage butter and rub it under the skin. Use a lot, maybe close to half. Rub the rest of the outside and inside of the turkey with the sage butter until it is gone. Make sure you turn the turkey over and get the back, wings, legs, etc. The butter doesn’t stick to the skin very well, but do your best.
- Preheat your oven to 350 degrees F.
- Now it’s time to stuff the turkey with aromatics. You won’t be eating the stuffing, it’s just for flavoring. If your turkey is trussed with plastic, carefully remove the turkey legs from the plastic so that you have easier access to the cavity. Stuff in 1 roughly chopped carrot, the celery, apple, onion, thyme, rosemary and sage. Return the turkey legs to the plastic trussing, or tie together with kitchen twine.
- Add the remaining carrots and 2 cups of water to the bottom of the roasting pan, underneath the rack.
- Tuck the wings under the back of the turkey, like it’s got its arms behind its head laying out on the beach. (Here’s a good demonstration.)
- Get someone to hold open the turkey bag for you while you place it in.
- Place the bagged turkey on a rack in a roasting pan, on top of the carrots. Seal the bag and cut a few slits in the top. Place the roasting pan on the lowest rack of your oven. Make sure your thermometer is visible through your oven window.
- Set a timer for 2 hours and 15 minutes. After that, check your turkey every 5 minutes with a meat thermometer. It needs to be 165 degrees in the breast.
- Remove the turkey from the oven and let it sit without opening the bag for at least 15-25 minutes. (This is a good time to use the freed oven for warming other dishes.)
- Cut the bag open and use old oven mitts to transfer the hot turkey to a cutting board. Discard the aromatics. Carve the turkey. I like this tutorial from Alton Brown.
- Save the turkey carcass for homemade turkey stock. Then make this Creamy Turkey Rice Soup!
Notes
*When you are buying your herbs, buy 1 (.75 oz) box thyme, 1 rosemary, and 2 sages.
This recipe can easily be doubled for a 20+ pound turkey.
Nutrition
Serving: 1 cup | Calories: 778 kcal | Protein: 119g | Fat: 31g | Saturated Fat: 8g | Polyunsaturated Fat: 8g | Monounsaturated Fat: 10g | Trans Fat: 1g | Cholesterol: 398mg | Potassium: 1237mg | Sugar: 1g | Vitamin A: 309IU | Calcium: 61mg | Iron: 5mg
Course: Main Course | Cuisine: American | Calories: 778 | Keyword: butter, roasted, sage, Turkey