
Irresistible Buckeye Candy: Your Ultimate Guide to Homemade Peanut Butter Perfection
Welcome to the definitive guide for making the most irresistible Buckeye Candies you’ll ever taste! This recipe is a treasured classic, surprisingly simple yet yielding a treat that’s far greater than the sum of its humble ingredients. Imagine a perfectly creamy, salty-sweet peanut butter ball, partially dipped in a rich, glossy chocolate coating – that’s the magic of Buckeyes. They are incredibly fast and easy to prepare, making them an ideal choice for last-minute cravings or impressive holiday platters. Chances are, you already have most of the ingredients stocked in your pantry! While candy dipping can sometimes feel daunting, fear not; I’ve compiled an abundance of expert tips and tricks to ensure your Buckeyes turn out flawlessly every single time. Get ready to create a batch of these iconic, melt-in-your-mouth delights that will have everyone asking for the recipe.
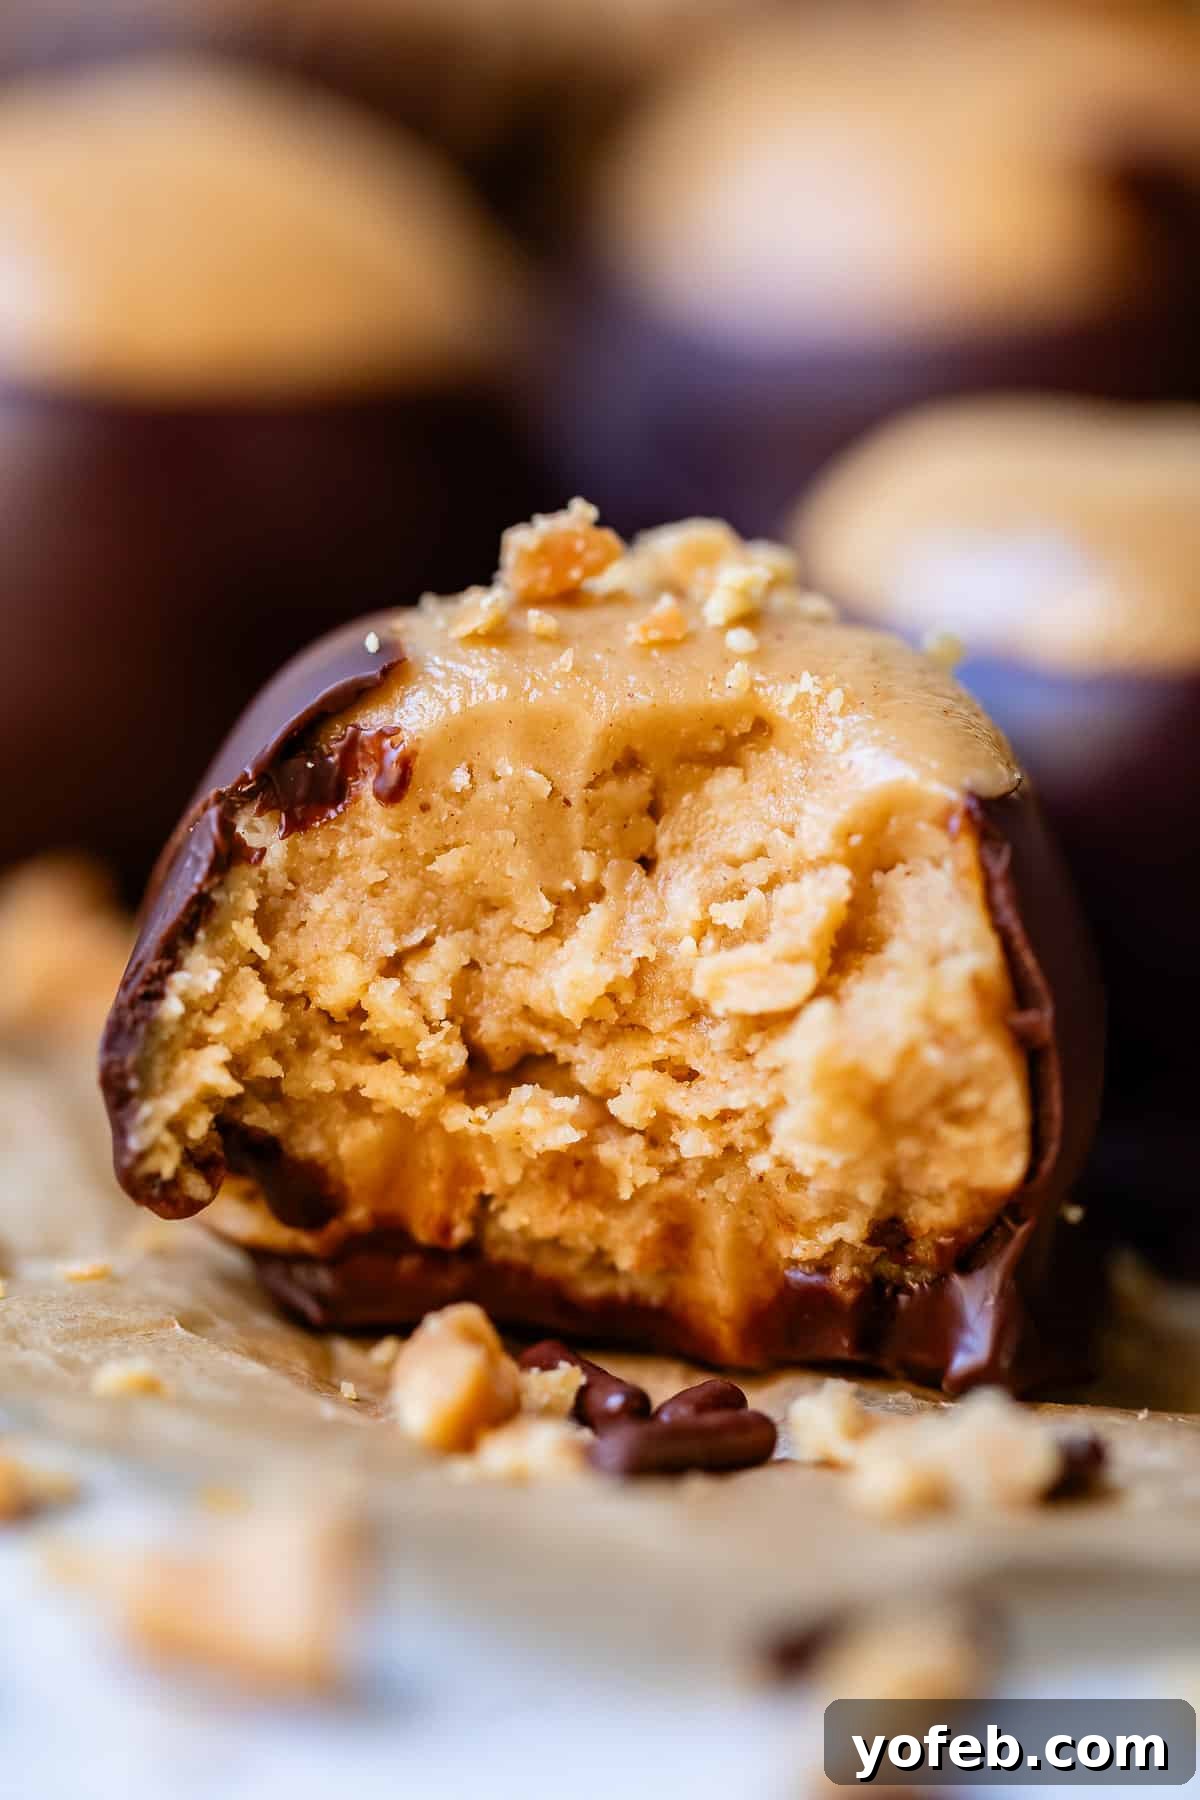
Table of Contents
- The Story Behind the Sweeter Things in Life
- What Makes Buckeye Candy So Irresistible?
- Essential Tips for Making Perfect Buckeyes
- Buckeye: A Cookie or a Candy? Settling the Debate
- Simple Buckeye Recipe Ingredients You Already Have
- Step-by-Step Guide to Making Buckeye Candy
- Preventing Buckeyes from Sweating: Your Guide to Condensation-Free Candies
- Optimal Storage Solutions for Your Buckeye Candies
- How Long Do Buckeye Candies Last? Shelf Life Explained
- Freezing Buckeyes for Future Enjoyment
- Frequently Asked Questions About Buckeye Candy
- More Delectable Candy Recipes to Explore!
- Buckeye Candy Recipe Card
The Story Behind the Sweeter Things in Life
Sometimes, the sweetest treats are born from unexpected moments and cherished family memories. While this particular Buckeye Candy recipe didn’t come from my late Grandma Joanne, the spirit of family tradition and shared joy it brings deeply resonates with her legacy. Grandma Joanne was an extraordinary woman who embraced life with vibrant color, a trailblazer who raised three children while working full-time as a teacher in the 60s. She had a passion for tracing family history and, shall we say, a unique approach to cooking. (One day, I promise to share her legendary Enchilada Loaf recipe, featuring Velveeta and cinnamon – truly an experience!).
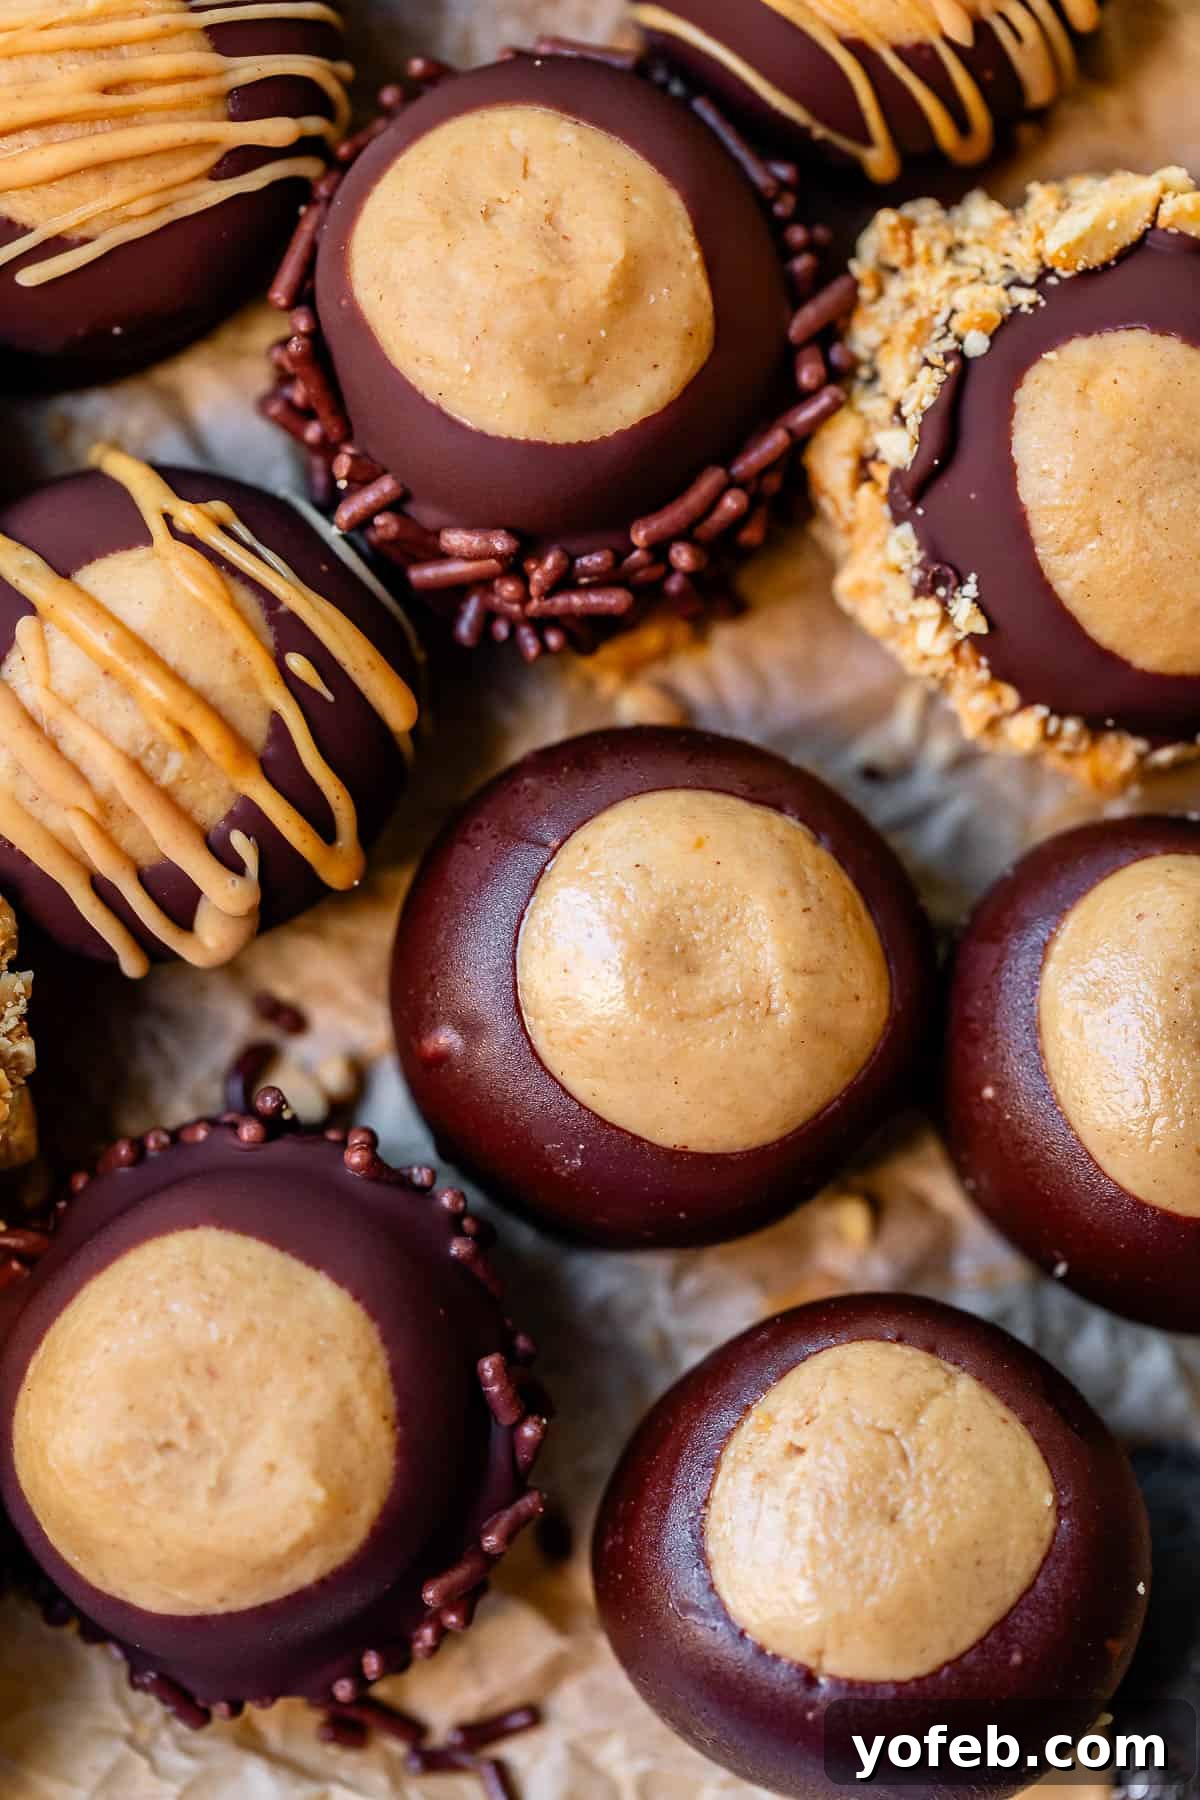
Grandma also had an impeccable, if outlandish, collection of Christmas sweaters and polyester pantsuits from the 70s. Her colorful, expressive style was legendary, and fittingly, we all wore rainbow colors to her funeral to celebrate her vibrant life. I managed to snag one truly magnificent sweater for future ugly Christmas sweater parties, never anticipating its immediate demand. This year, when my kids, Truman and Charlotte, both had “Ugly Christmas Sweater Day” at school, a hilarious sibling rivalry ensued over who would get to wear Grandma’s prized possession.
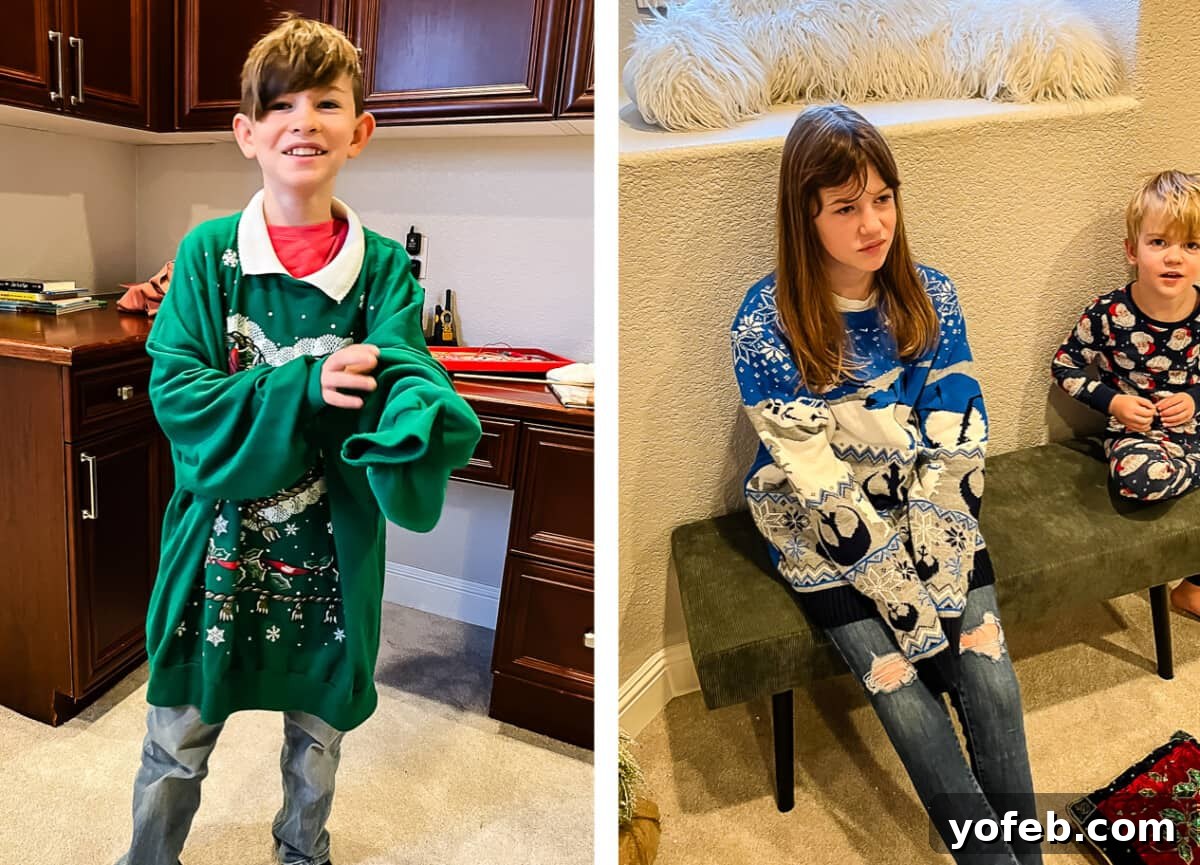
I shared the saga with my family: “Truman and Charlotte got in a huge fight over who gets to wear Grandma’s sweater for Ugly Sweater Day. I’ve never been more proud.” My sister’s response perfectly captured the scene: “Bahahaha. Omg, that explains their faces. Her shame! His glee! Poor Char!” Charlotte, of course, ended up with a consolation prize: a totally awesome Star Wars holiday sweater from her dad’s closet, featuring AT-ATs. So, no need to feel too sorry for her.
After Truman proudly wore Grandma’s sweater all day at school, it was decided that Charlotte could wear it to church youth group that evening. Even after spending a year tucked away in my closet, and Truman wearing it all day, as Charlotte put it on, she paused. “Aw,” she murmured wistfully, “This sweater still smells like Grandma.” In that moment, we all gathered, burying our faces in the soft fabric, breathing in the lingering scent of a beloved memory. It’s these kinds of simple, heartwarming connections that make sharing food and traditions so meaningful.
What Makes Buckeye Candy So Irresistible?
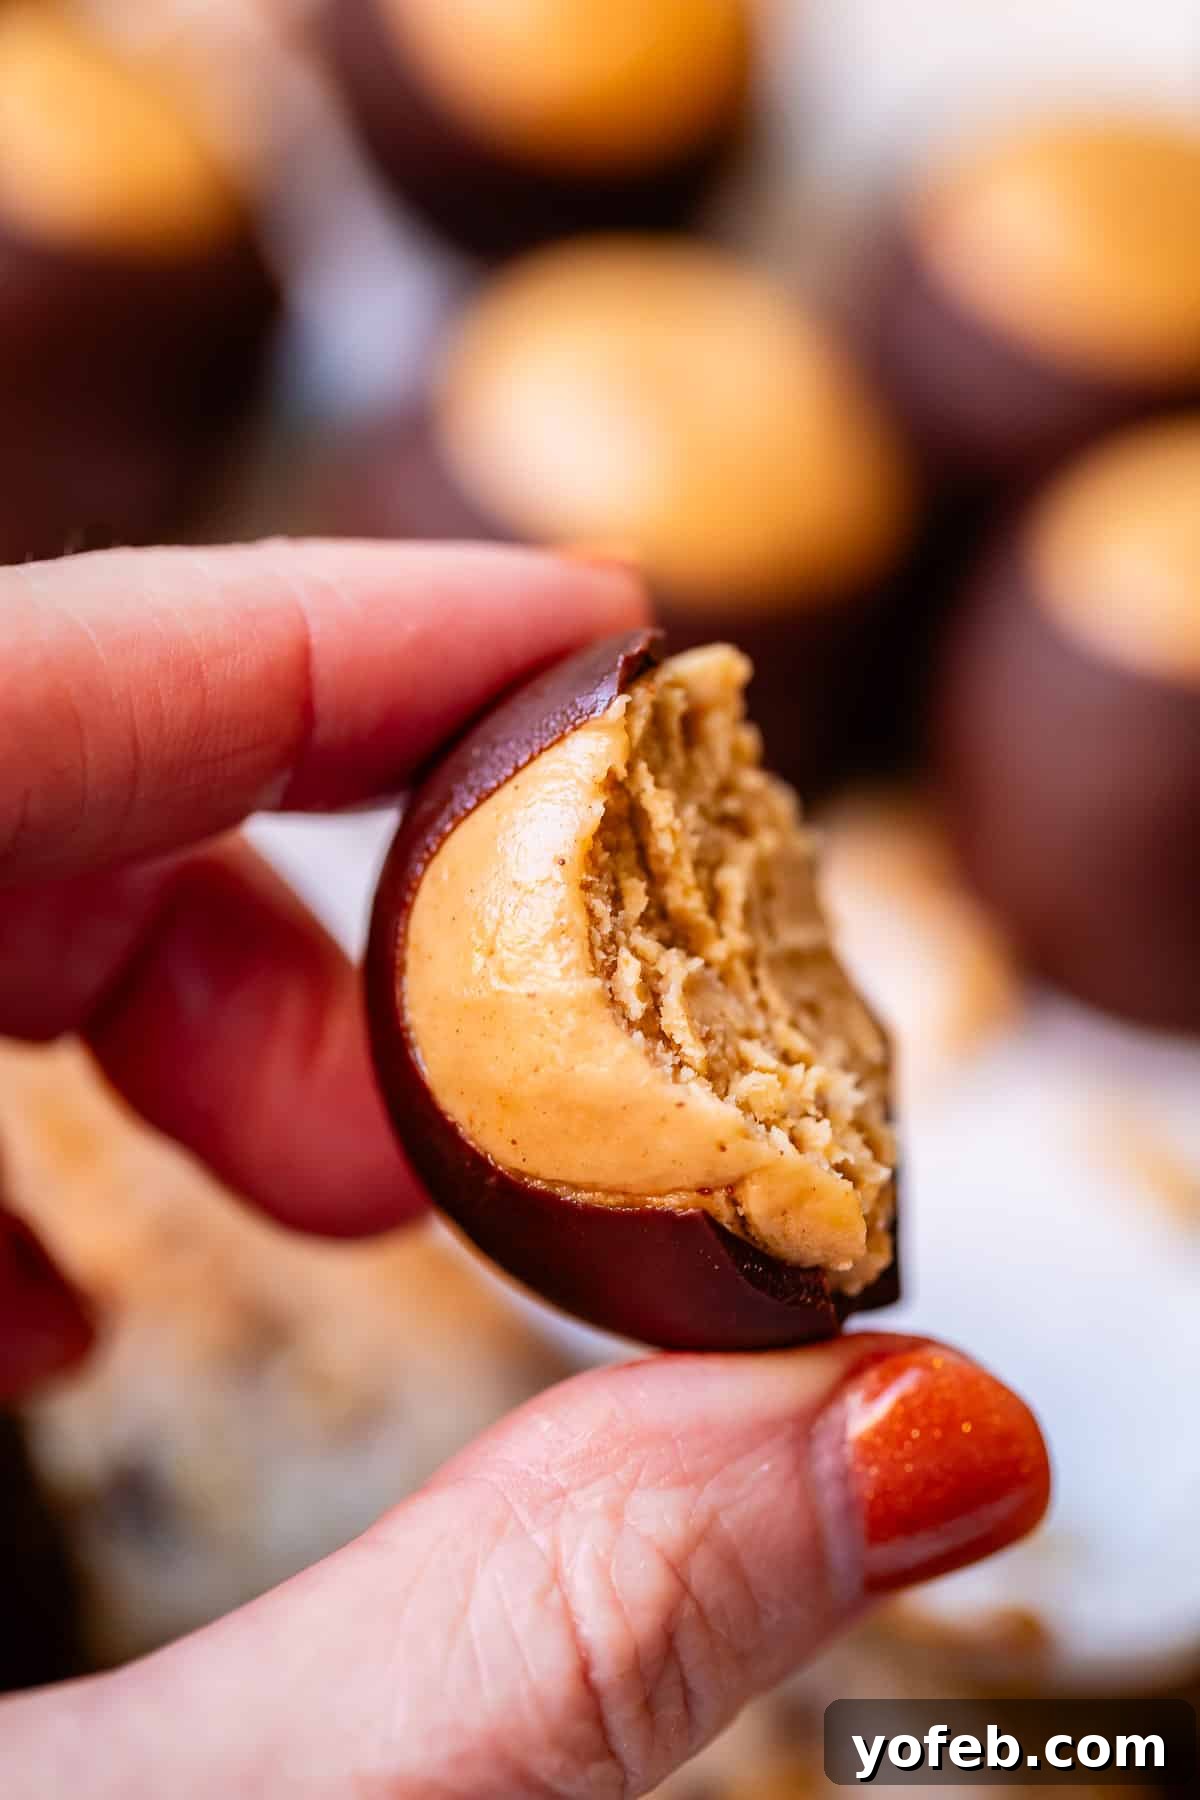
Now, let’s talk about the recipe itself! My grandma never made Buckeyes; they’re a classic Midwestern treat, and we hail from California. It was my best friend, Sarah, originally from West Virginia, who first introduced me to the concept of these magical confections years ago. I finally got the recipe from her mom (huge thanks to Anne!) and decided to give them a try. The result? I’m completely obsessed!
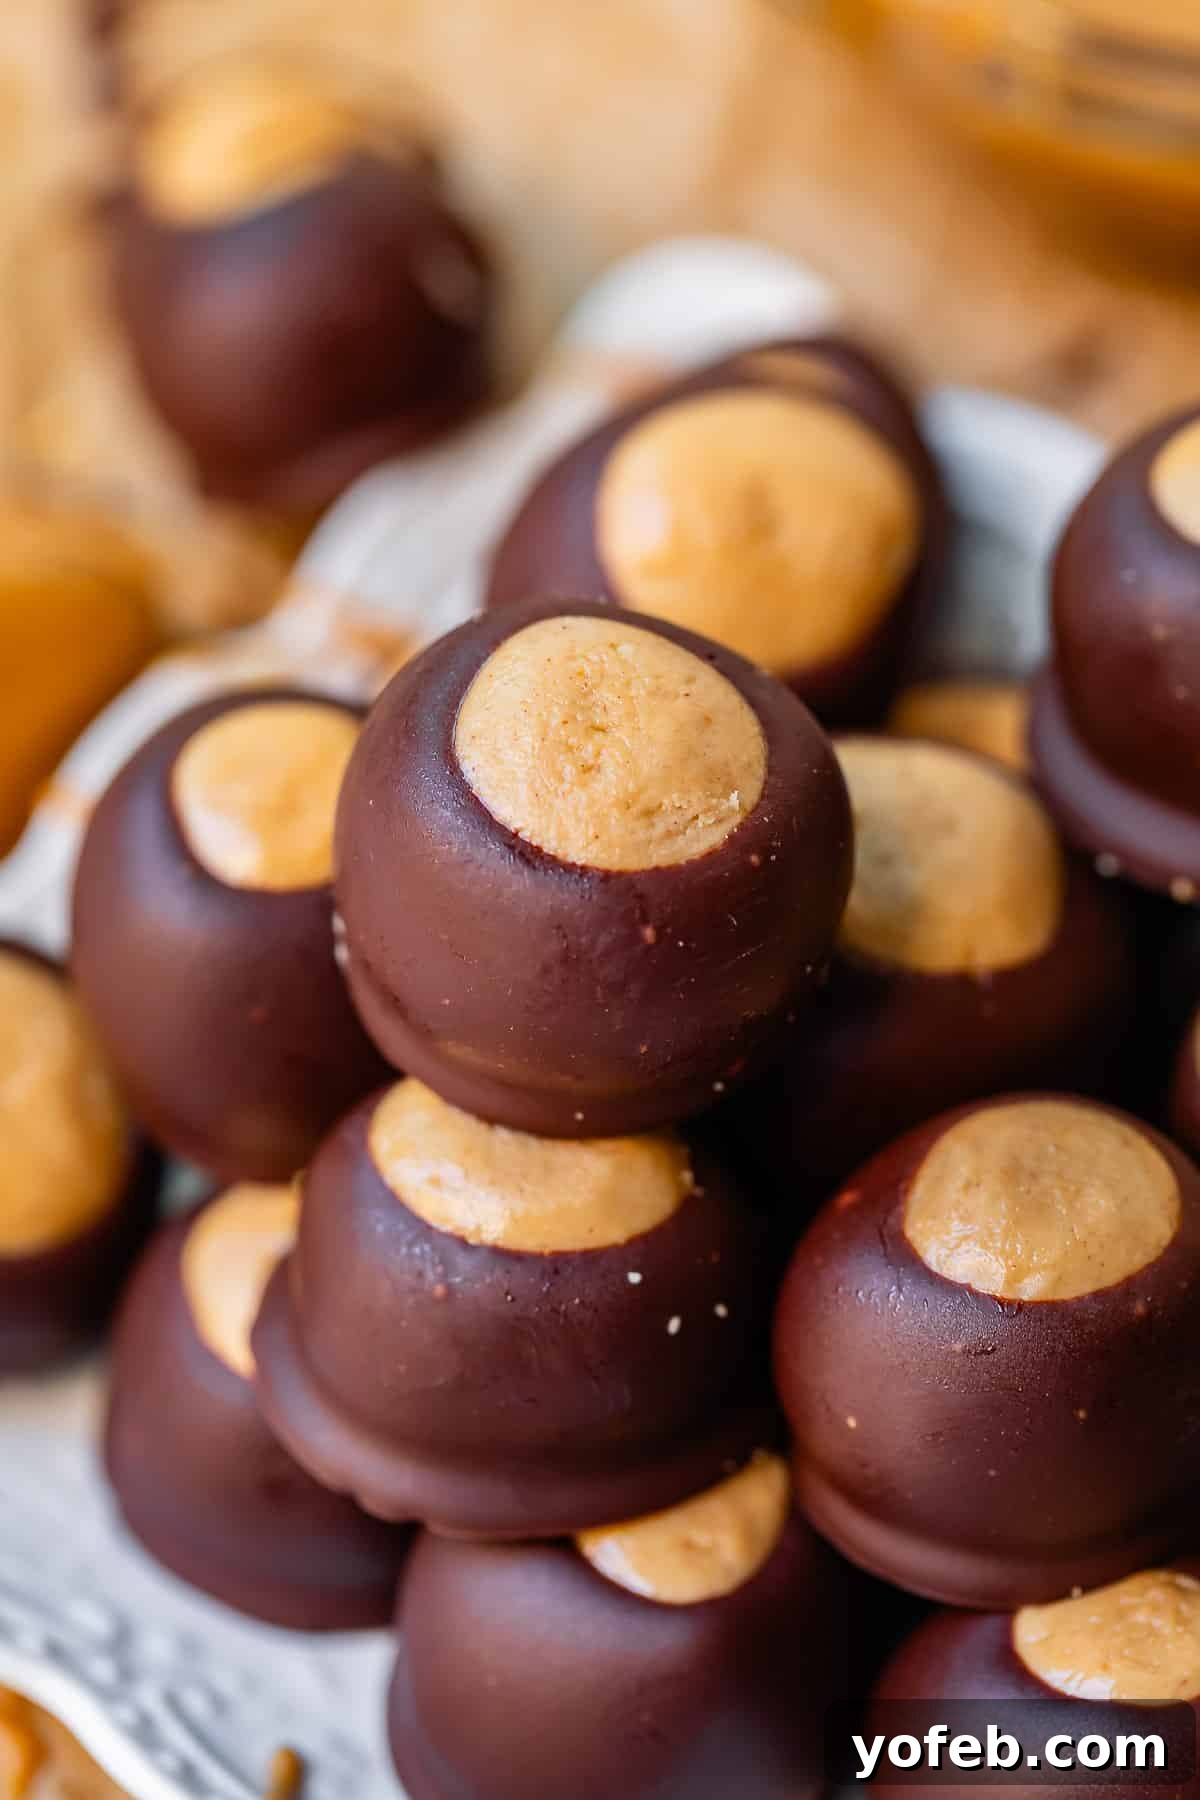
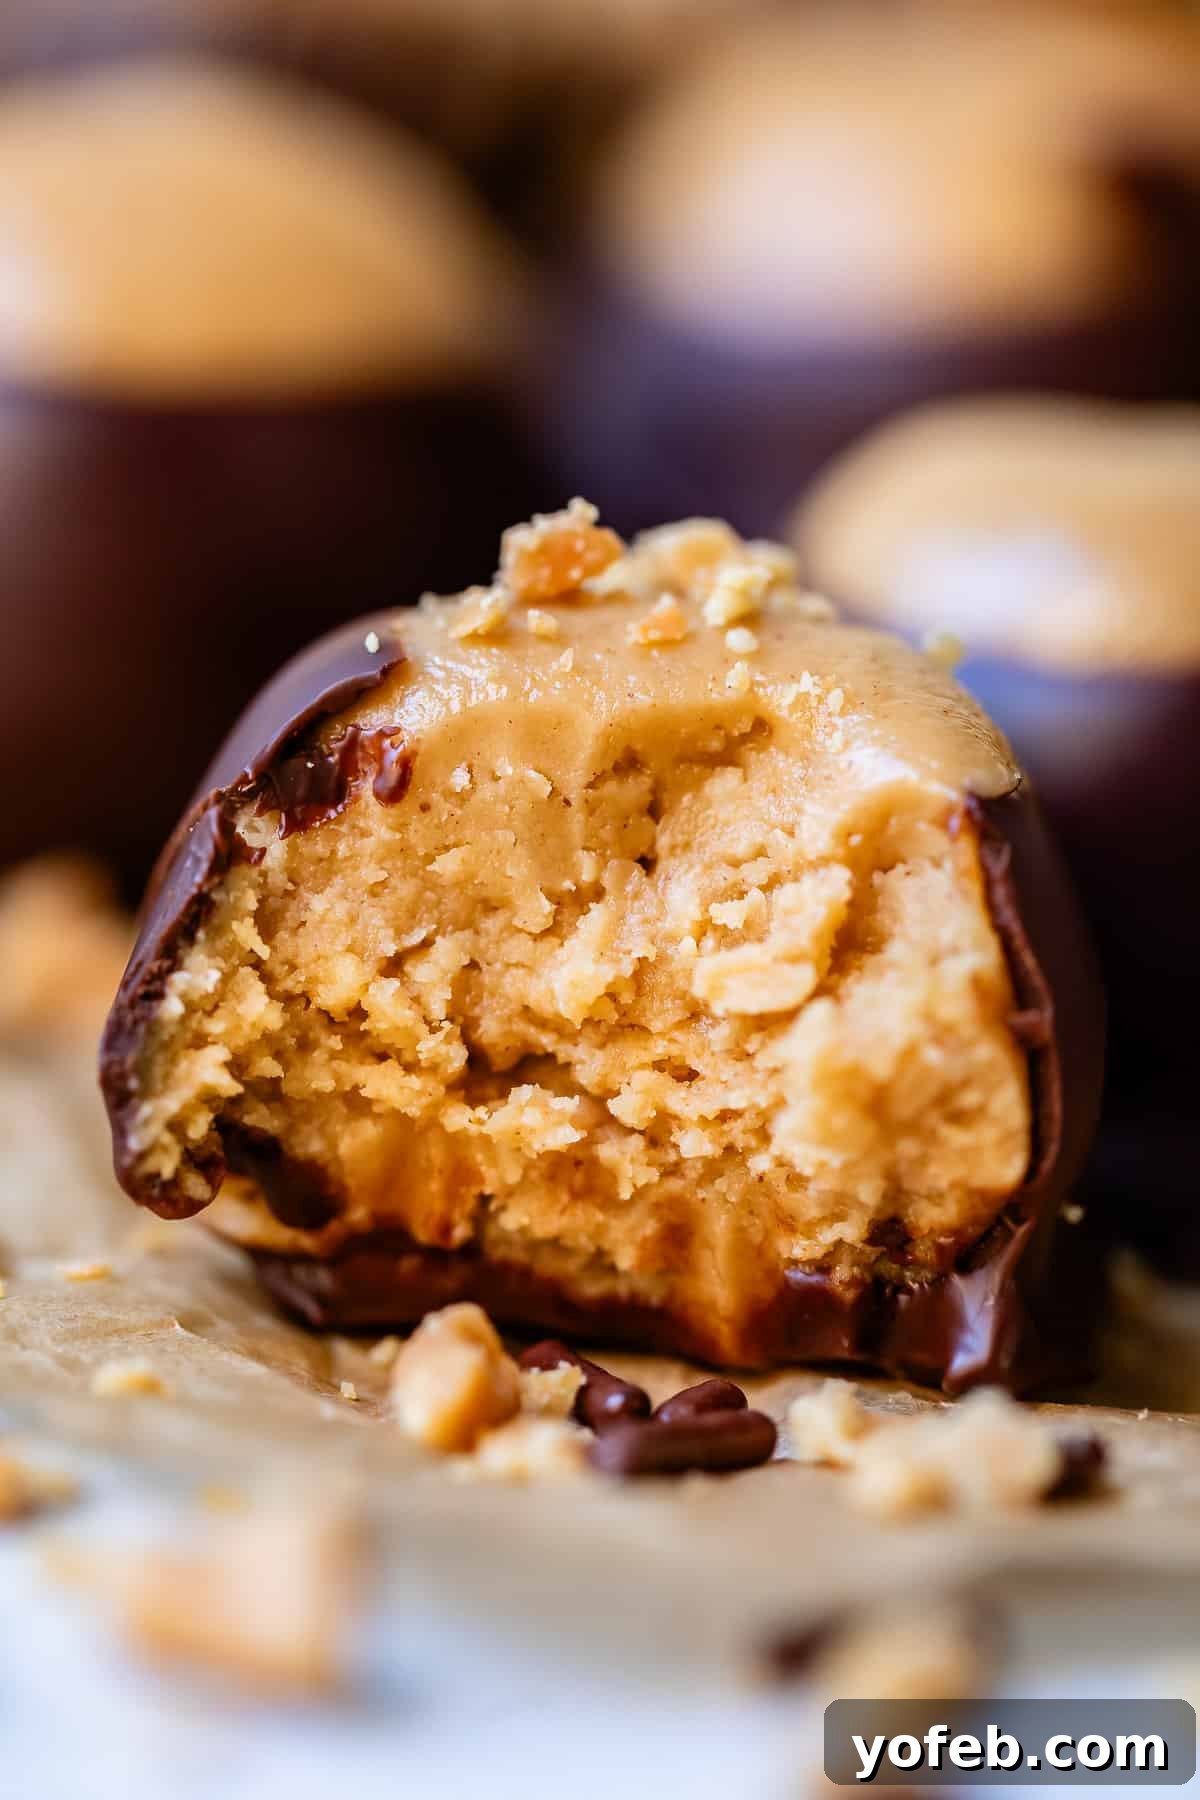
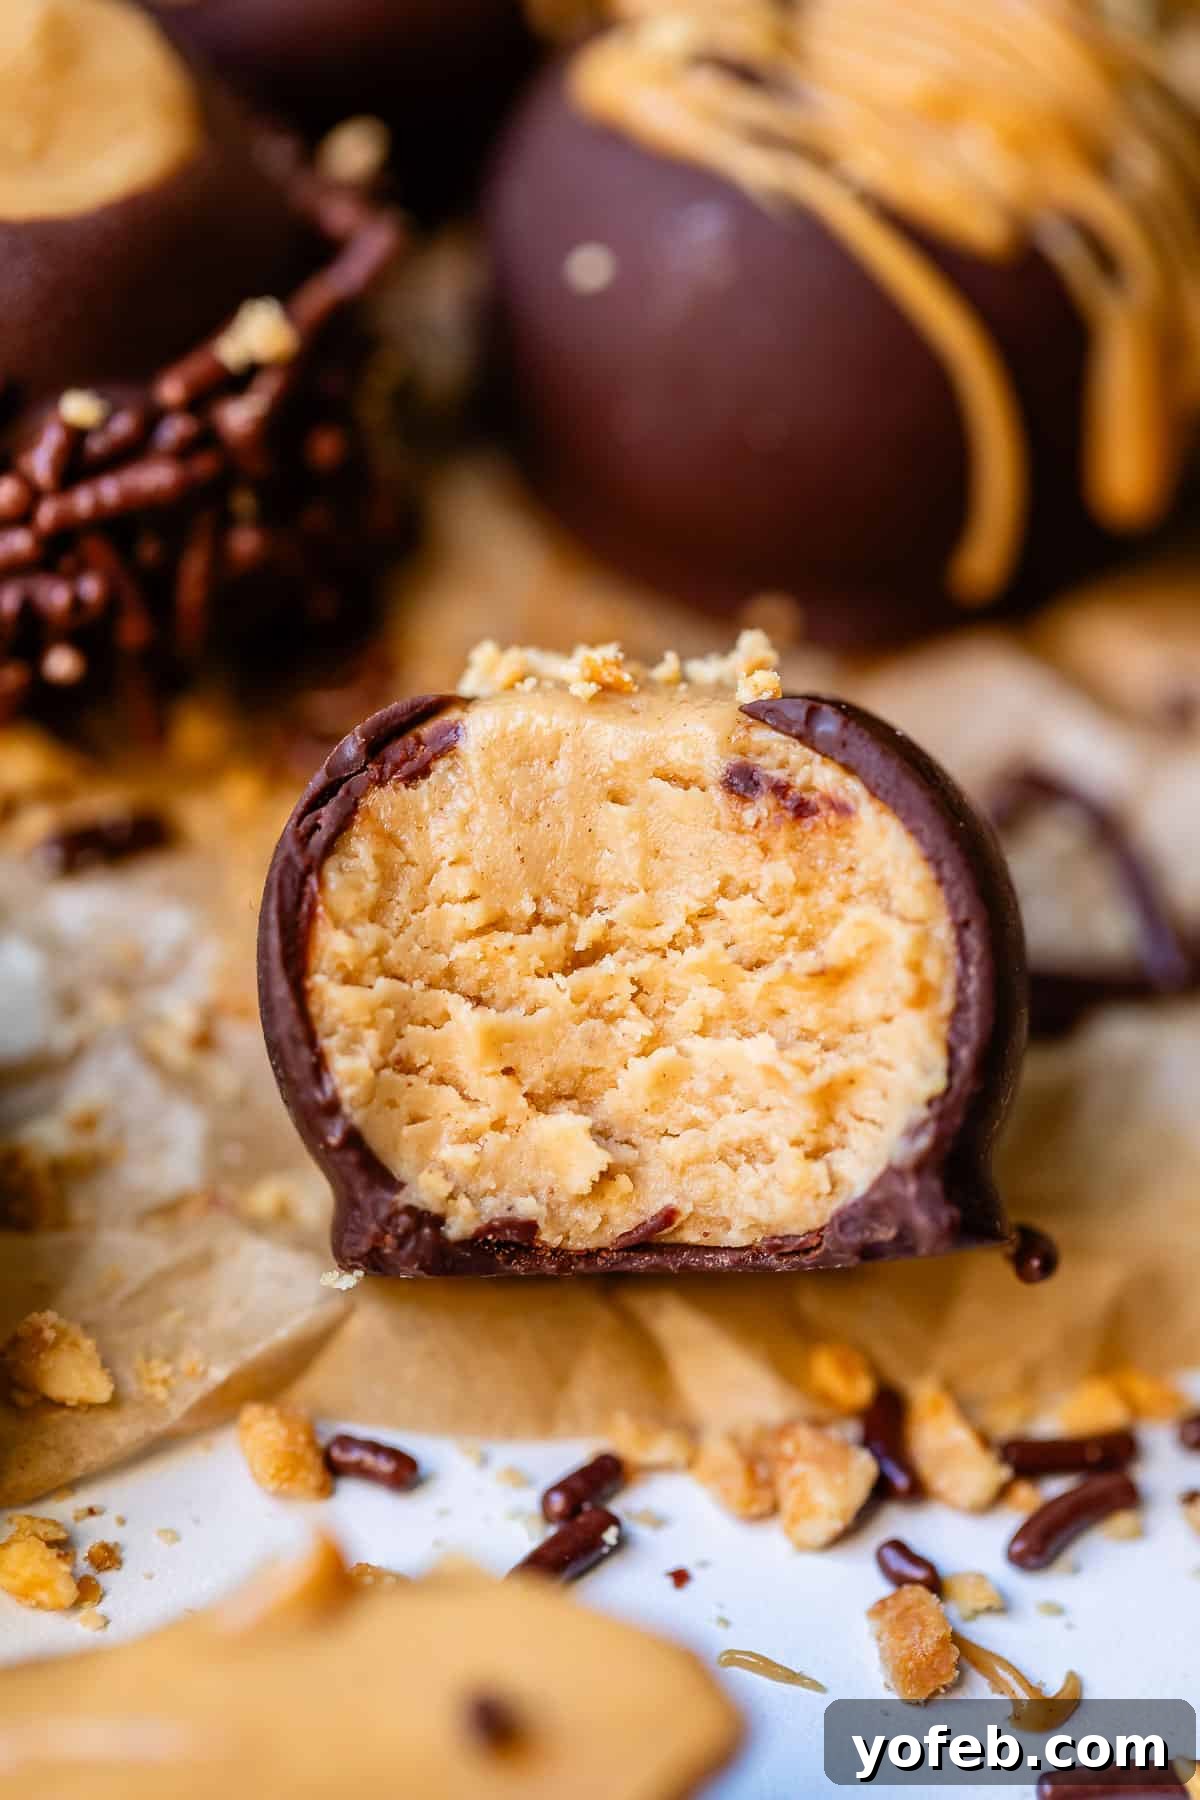
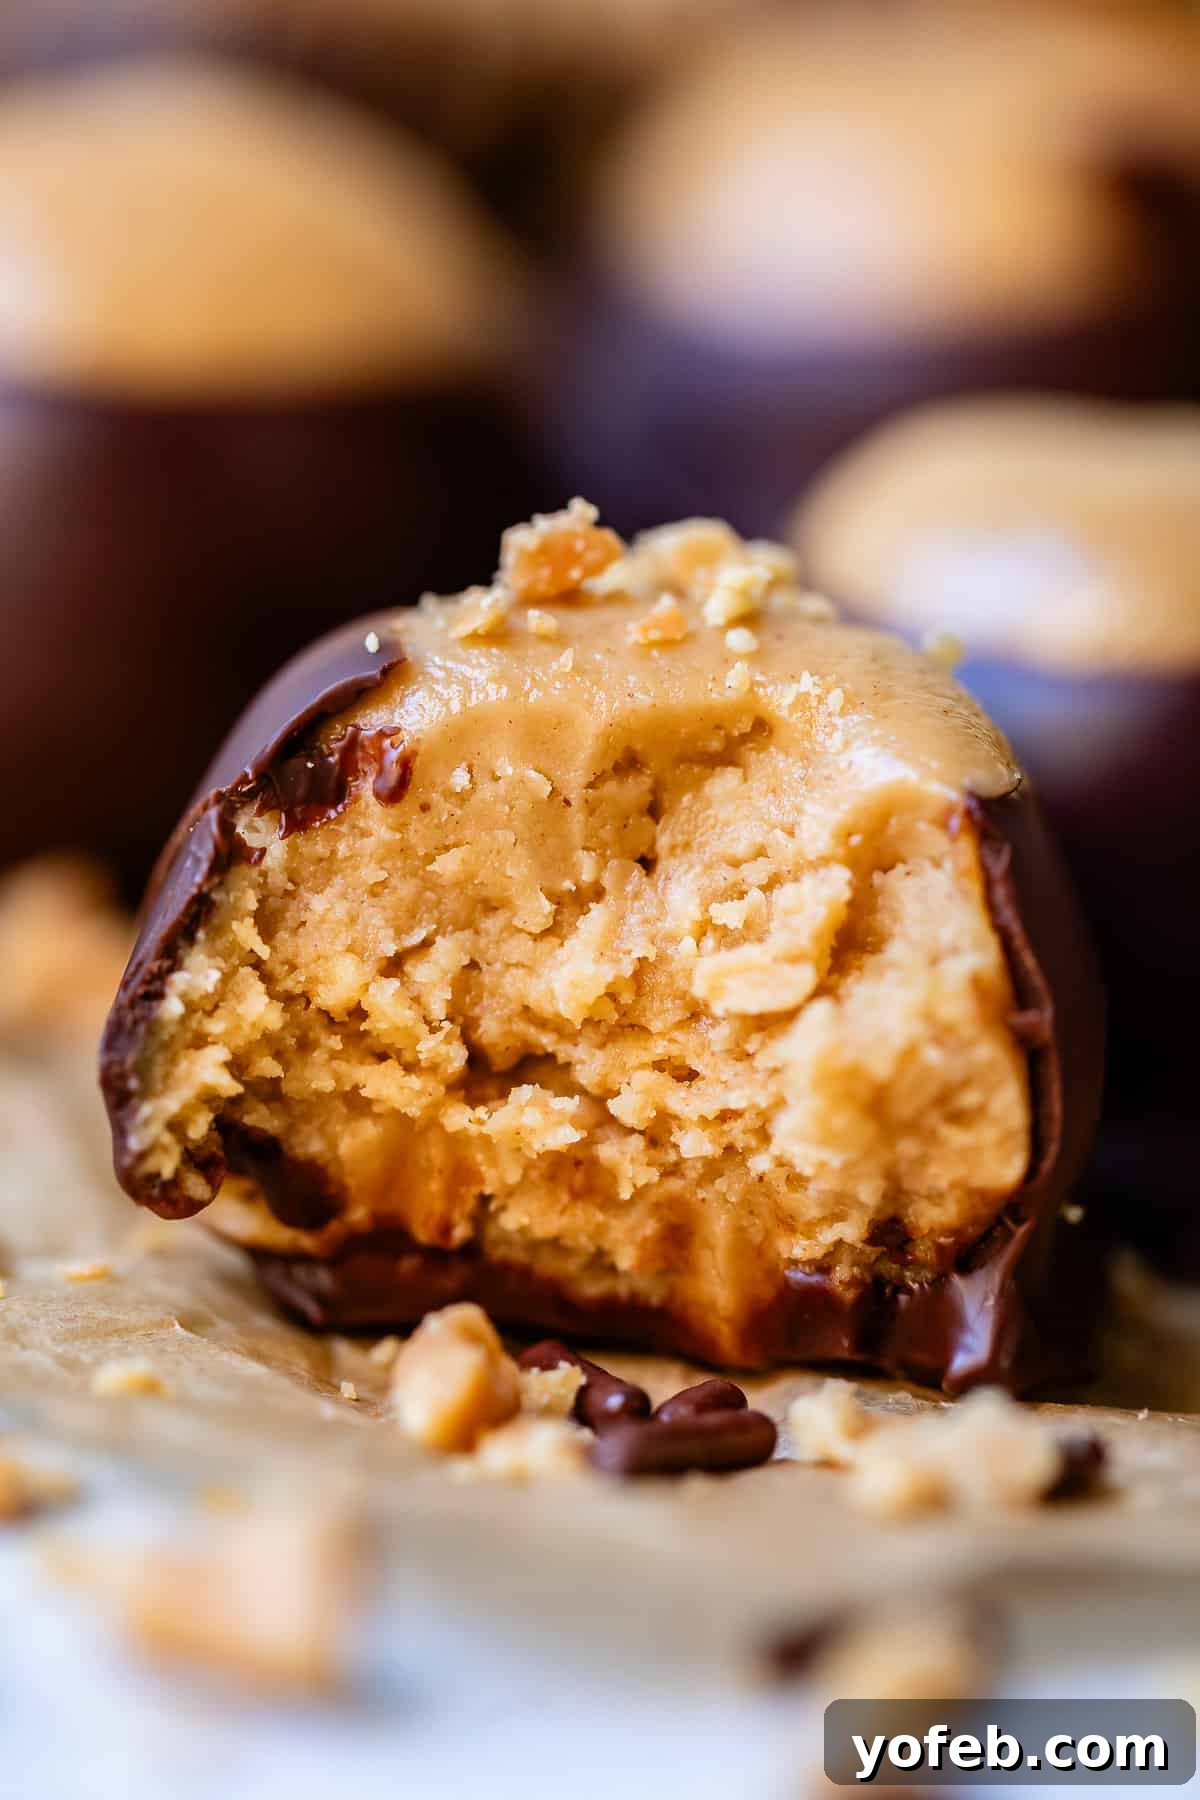
Buckeyes are essentially the homemade version of a Reese’s Peanut Butter Cup, but in an adorable truffle shape and with a significantly higher, more satisfying ratio of peanut butter to chocolate. Pure genius, right? The peanut butter filling is the star here, offering a delightfully nuanced salty-sweet profile that’s truly addictive.
The dough for these Buckeyes is incredibly simple to prepare. After researching many different recipes, I found Anne’s version to be uniquely balanced. Many recipes rely solely on a mixture of peanut butter and powdered sugar, which often results in a cloyingly sweet final product. While I love sweetness, I also appreciate the rich, complex flavors of good peanut butter.
Anne’s recipe brilliantly incorporates a small amount of all-purpose flour in place of some of the powdered sugar. This clever addition serves to stiffen the dough, much like in traditional cookie recipes, without adding excessive sweetness. It allows the natural, savory notes of the peanut butter to truly shine. The recipe calls for only 1/4 cup of flour, so it’s a subtle but impactful touch. If you’re making these for gluten-free friends, or if you prefer to avoid raw flour, you can easily substitute the flour with an equal amount of powdered sugar, though the texture might be slightly softer and the sweetness a bit more pronounced.
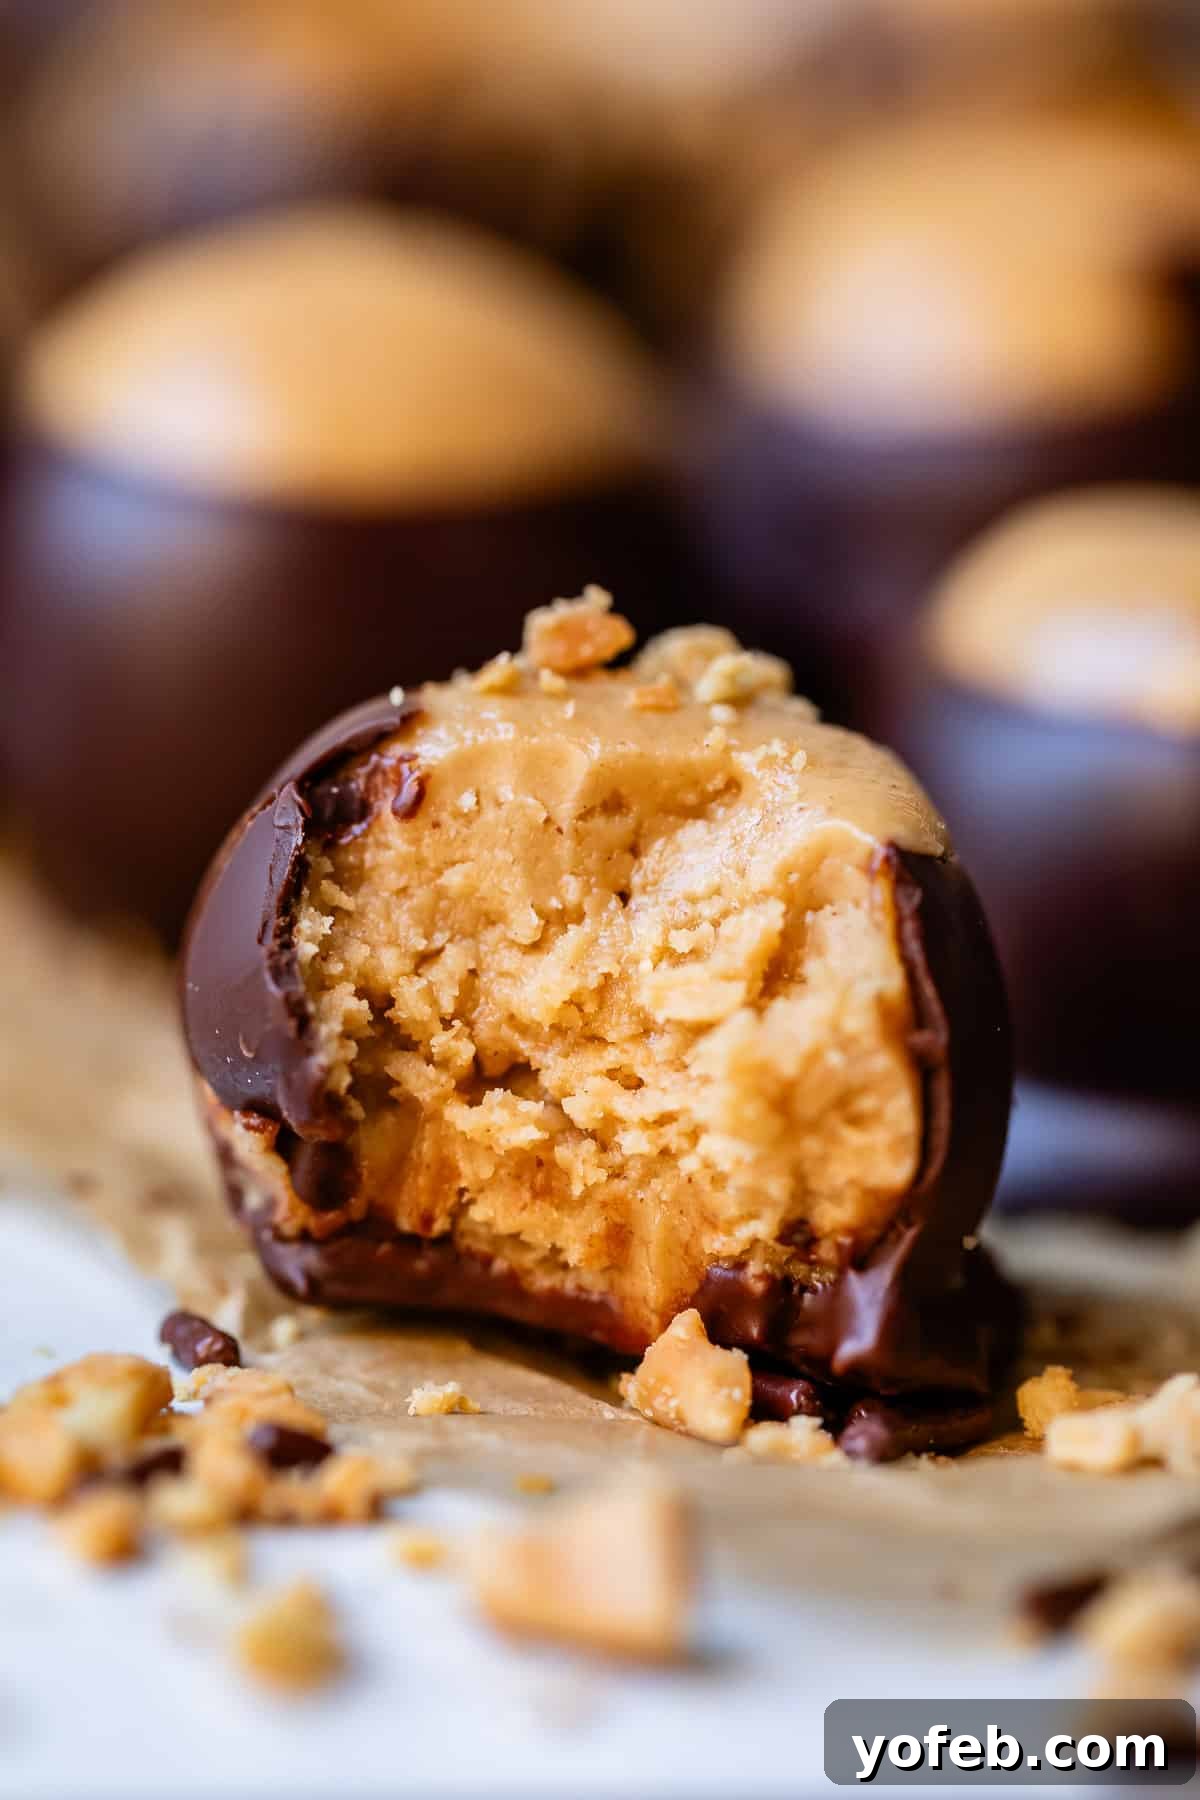
I did introduce one special, non-traditional modification to Anne’s already fantastic recipe: incorporating finely chopped, salty roasted peanuts directly into the peanut butter mixture. This addition provides a delightful, subtle crunch and texture that perfectly mimics the slight grittiness found in a classic Reese’s cup – a detail any true addict would appreciate is not perfectly smooth. It elevates the Buckeye experience, adding another layer of depth and interest to each bite.
Essential Tips for Making Perfect Buckeyes
While this Buckeye recipe is wonderfully straightforward, mastering a few key techniques will significantly enhance your experience and guarantee beautifully finished candies every time. These professional-grade tips will simplify the process and elevate your homemade Buckeyes to new heights.
- Pre-Insert Toothpicks: A seemingly small step, but a game-changer! Always insert your toothpicks into the peanut butter balls *before* chilling or freezing them. This ensures a stable handle for dipping and prevents the balls from crumbling or losing shape when cold.
- Thorough Chilling is Key: It cannot be stressed enough – thoroughly chill or freeze your peanut butter balls before dipping. If they aren’t adequately cold, the chocolate won’t adhere properly, the balls might begin to melt and lose their perfect spherical shape, or, even worse, they could slip off the toothpick and into your chocolate bath. Aim for firm, cold centers.
- Work in Small Batches: To maintain optimal temperature, remove only 10-12 peanut butter balls at a time from the fridge or freezer for dipping. Keeping the remaining balls cold until just before use is crucial for successful, mess-free coating.
- Utilize an Electric Griddle for Warm Chocolate: This is a brilliant hack! Set up your chocolate dipping station on a low-temperature electric griddle. Place your bowl of melted chocolate on a towel on the griddle. This keeps the chocolate at the perfect fluid temperature without the risk of scorching, ensuring a consistently smooth and easy dipping process.
- Prioritize Premium Ingredients: With a recipe featuring so few components, the quality of each ingredient truly matters. Now is the time to splurge on the best peanut butter and chocolate you can find! For peanut butter, I highly recommend using a classic, non-natural creamy peanut butter like Jif or Skippy for the best texture and flavor. My brother once subjected me to a blind taste test, getting peanut butter all in my hair, just to confirm Jif’s superiority – we do the hard work so you don’t have to!
- Choose High-Quality Chocolate and Shortening: Opt for premium dark or semi-sweet chocolate chips (Ghirardelli, Nestle, or Guittard are excellent choices). Cheap chocolate often melts unevenly and results in a dull, thick coating. Incorporating shortening into your melted chocolate is the secret to a smooth, glossy, and beautifully tempered coating that sets perfectly.
- Tap Off Excess Chocolate: For the most professional-looking Buckeyes, gently tap off any excess chocolate after dipping. Hold the Buckeye over the bowl, turning and twirling it to allow the extra chocolate to drip away. You want a thin, even coat, not a thick pool at the bottom. This ensures a clean, round shape.
- Heal the Toothpick Mark: Don’t fret over the small hole left by the toothpick! It’s surprisingly easy to fix. Once the chocolate has set, use the warmth of your fingertip to gently smooth over the indentation, seamlessly blending the peanut butter filling to create a perfect surface. I’ll show you exactly how in the instructions below.
- Smart Storage Practices: Buckeyes are best enjoyed fresh, but proper storage extends their deliciousness. Store them at room temperature for the first 1-2 days if you prefer them softer, then transfer them to the refrigerator to prevent “sweating” and maintain freshness. Detailed storage tips are provided further down!
These techniques, explained in more detail in the step-by-step section, will transform your Buckeye-making experience from good to absolutely perfect!
Buckeye: A Cookie or a Candy? Settling the Debate
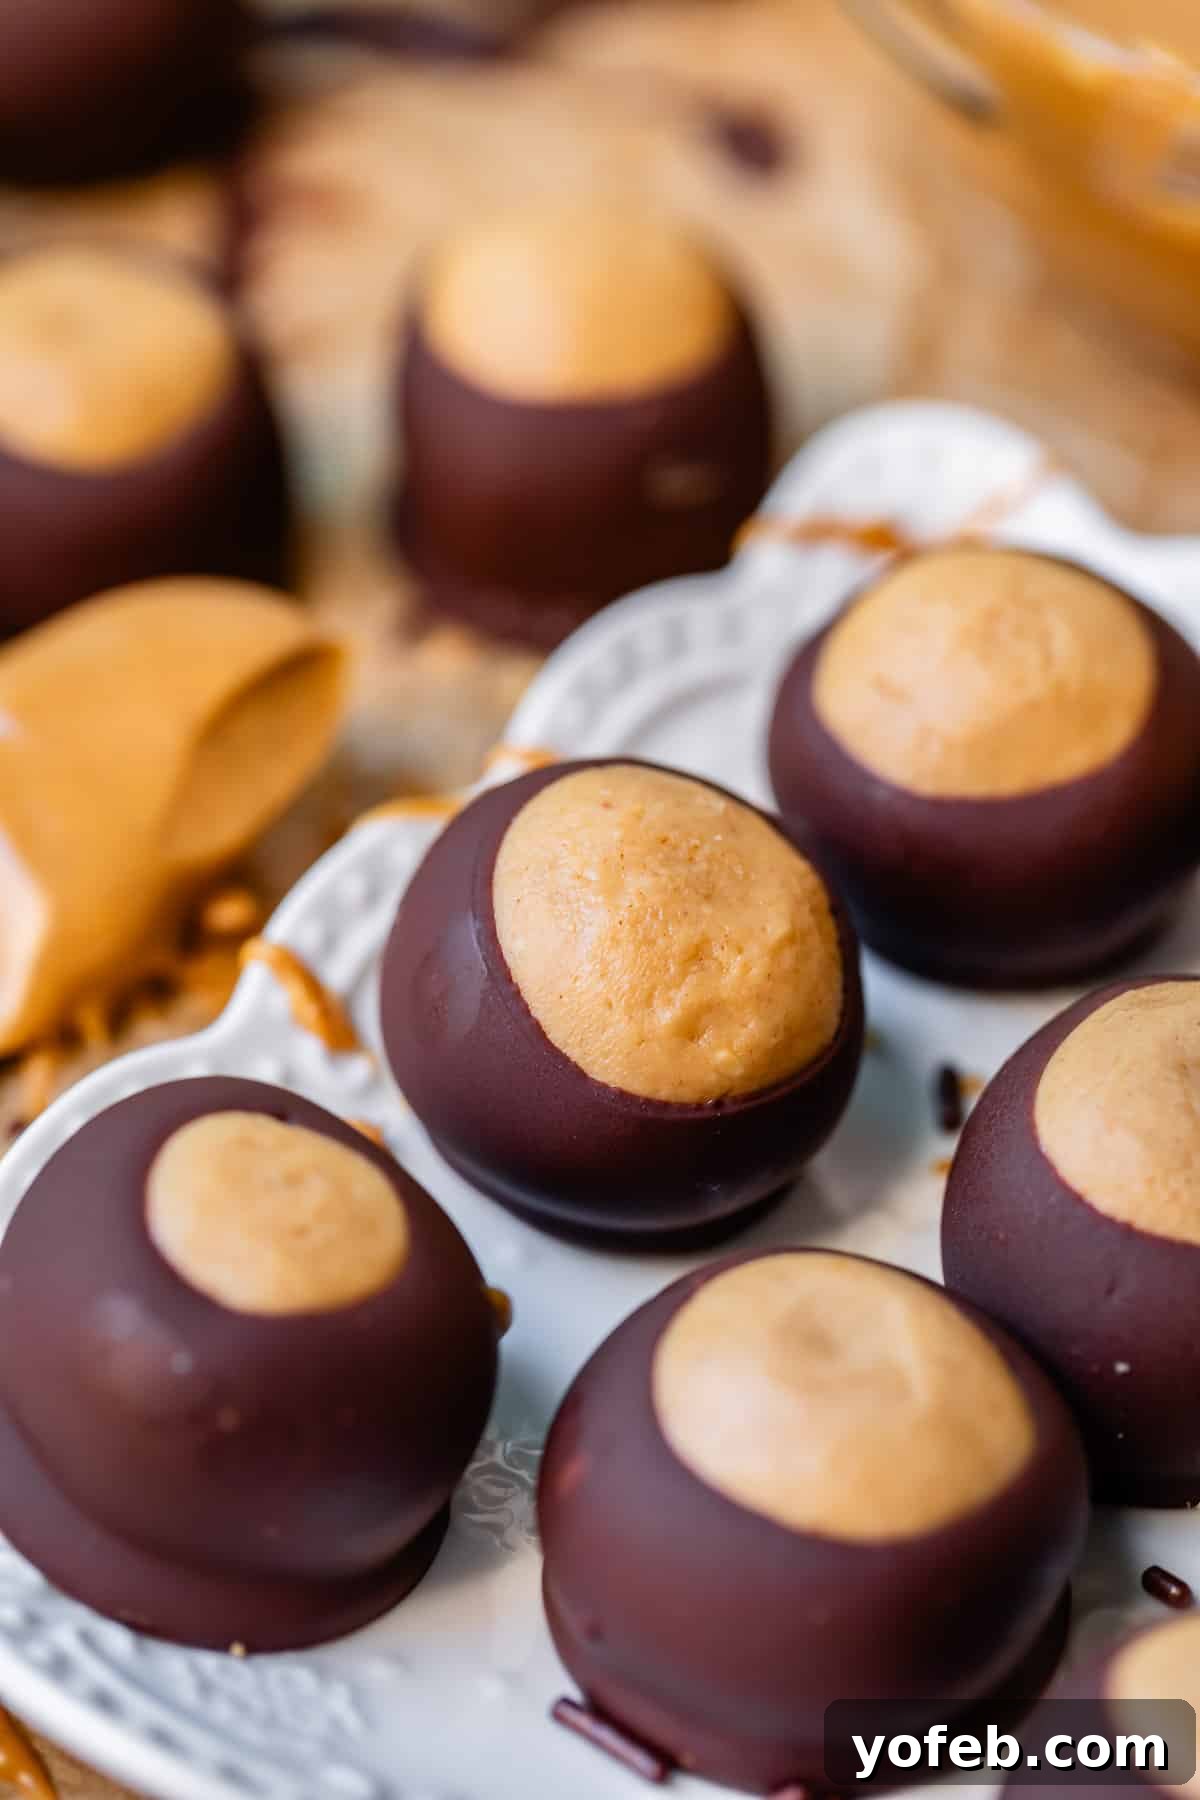
Ah, the age-old holiday question! Is a Buckeye a cookie or a candy? While many lovingly refer to them as “Buckeye cookies,” particularly those who grew up enjoying them during festive seasons, the technical classification firmly places them in the candy category. Think of it this way: much like a beloved Reese’s Peanut Butter Cup, a Buckeye features a sweet, rich peanut butter filling enveloped in a chocolate shell. And Reese’s cups are undeniably candy!
However, Buckeyes elevate the concept. They boast a significantly higher, more decadent ratio of peanut butter to chocolate, offering a profound peanut butter experience with every bite. The filling often has a superior, melt-in-your-mouth texture, and the chocolate coating provides a satisfying “snap.” This unique combination and balance are precisely why Buckeyes have garnered their own passionate cult following. So, while you’re welcome to call them cookies if it’s part of your family tradition (and let’s keep Grandma’s heart rate steady at the dinner table!), know that you are, in fact, indulging in a truly exceptional homemade candy.
Simple Buckeye Recipe Ingredients You Already Have
One of the most appealing aspects of making Buckeye Candy is the incredibly short and accessible ingredient list. You might be surprised to find that you already have everything you need in your kitchen right now! This simplicity is what makes the process so enjoyable and the results so rewarding. For precise measurements and detailed instructions, be sure to refer to the comprehensive recipe card below.
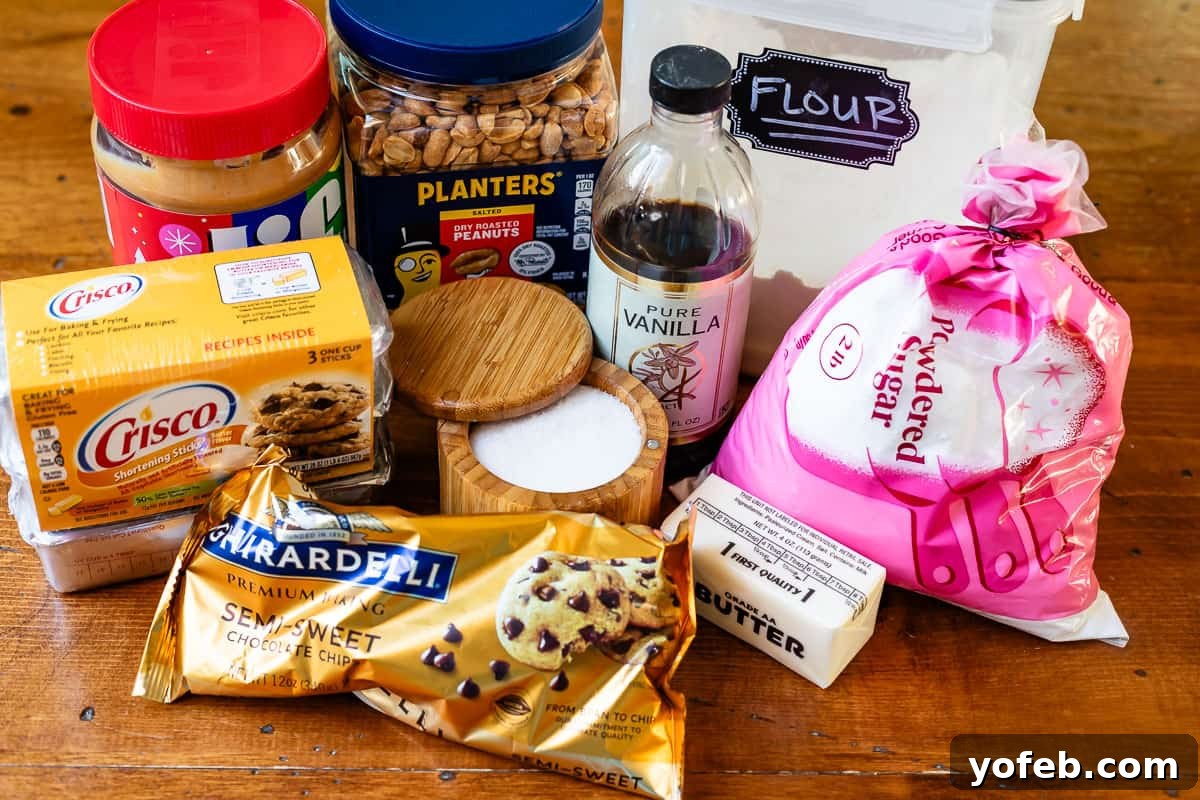
- Softened butter
- Powdered sugar
- Vanilla extract
- Creamy peanut butter (like Jif or Skippy)
- Dry roasted salted peanuts
- All-purpose flour
- Kosher salt
- High-quality semi-sweet chocolate chips
- High-quality dark chocolate chips
- Shortening (or coconut oil)
- Optional toppings: sprinkles, extra chopped peanuts, melted peanut butter
Step-by-Step Guide to Making Buckeye Candy
Crafting perfect Buckeye Candies is a rewarding process, and following these steps will ensure your treats are nothing short of spectacular. Let’s dive into making these delightful peanut butter and chocolate confections.
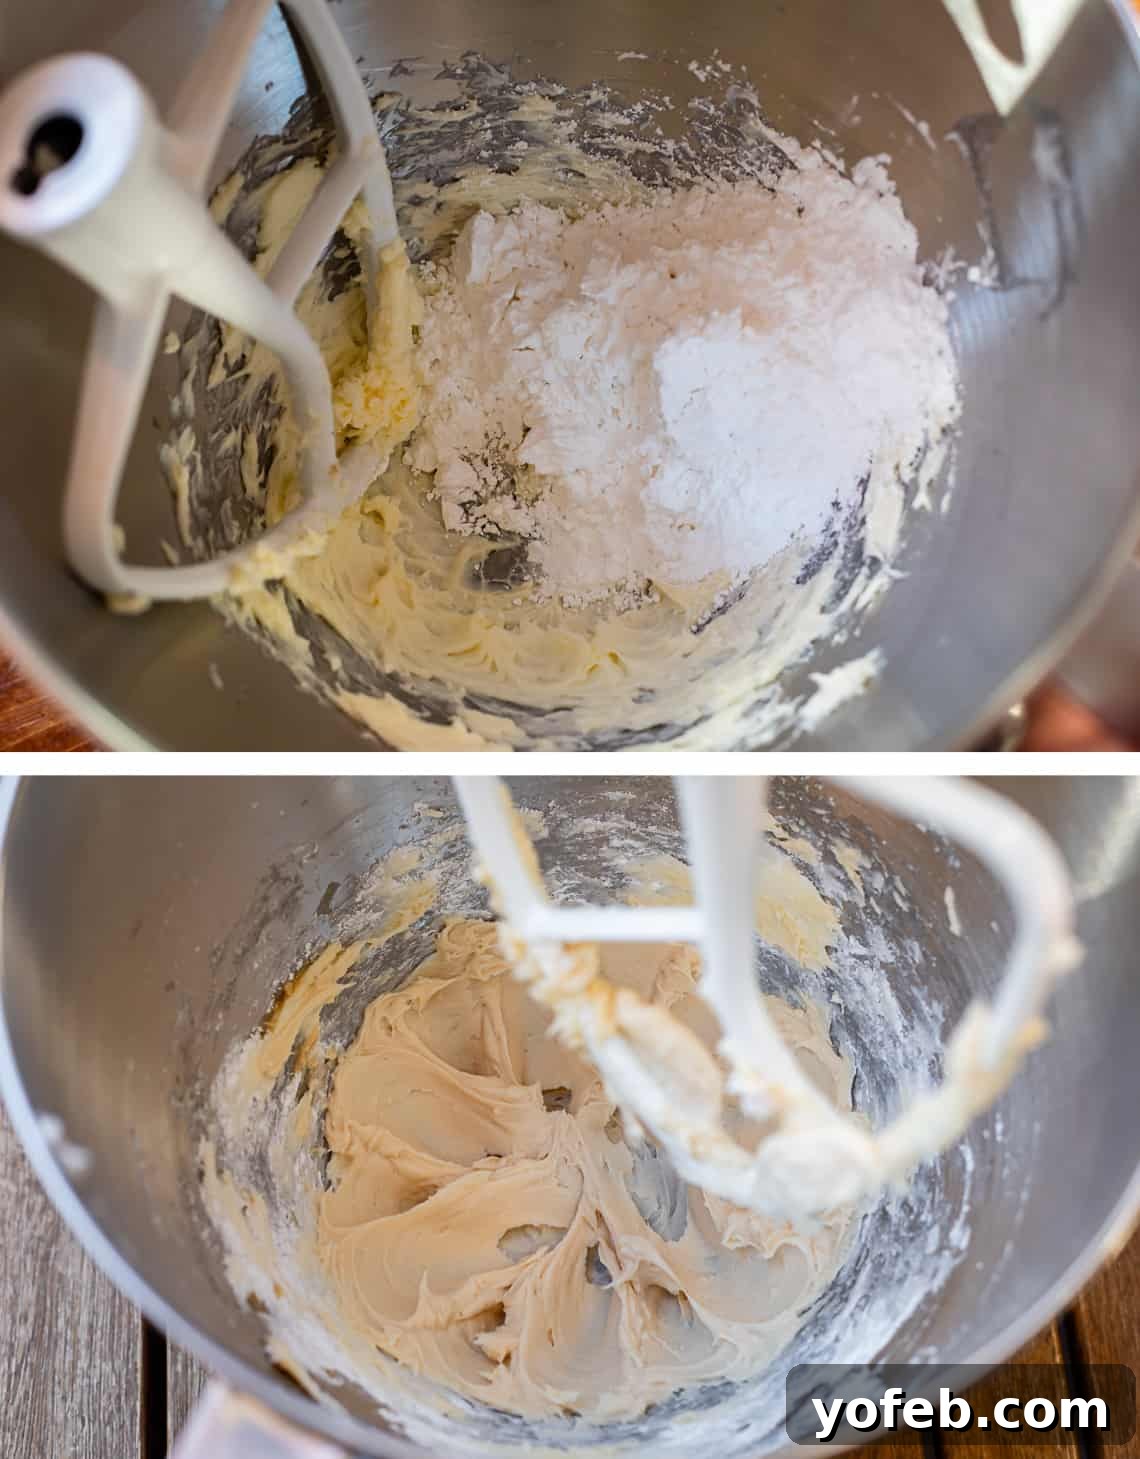
1. Prepare Your Base: Begin by lining a baking sheet with wax paper or parchment paper. This will be crucial for chilling and hardening your Buckeyes later. Next, in a large mixing bowl (preferably using a stand mixer with a paddle attachment), add your softened butter. Beat the butter until it’s smooth and creamy, making sure to scrape down the sides of the bowl. This initial creaming helps eliminate any potential butter chunks before other ingredients are added.
2. Develop the Peanut Butter Mixture: Add half of the powdered sugar (1/2 cup) and the vanilla extract to the creamed butter. Continue beating until this mixture is incredibly smooth and creamy, resembling a thick buttercream frosting. This step ensures a velvety texture for your peanut butter filling. Scrape down the sides of the bowl once more to incorporate everything evenly. Now, add the remaining 1 cup of powdered sugar and the creamy peanut butter. Beat thoroughly until the mixture is completely smooth. Remember, using a regular, non-natural creamy peanut butter like Jif or Skippy will yield the best, smoothest results due to its stable consistency.
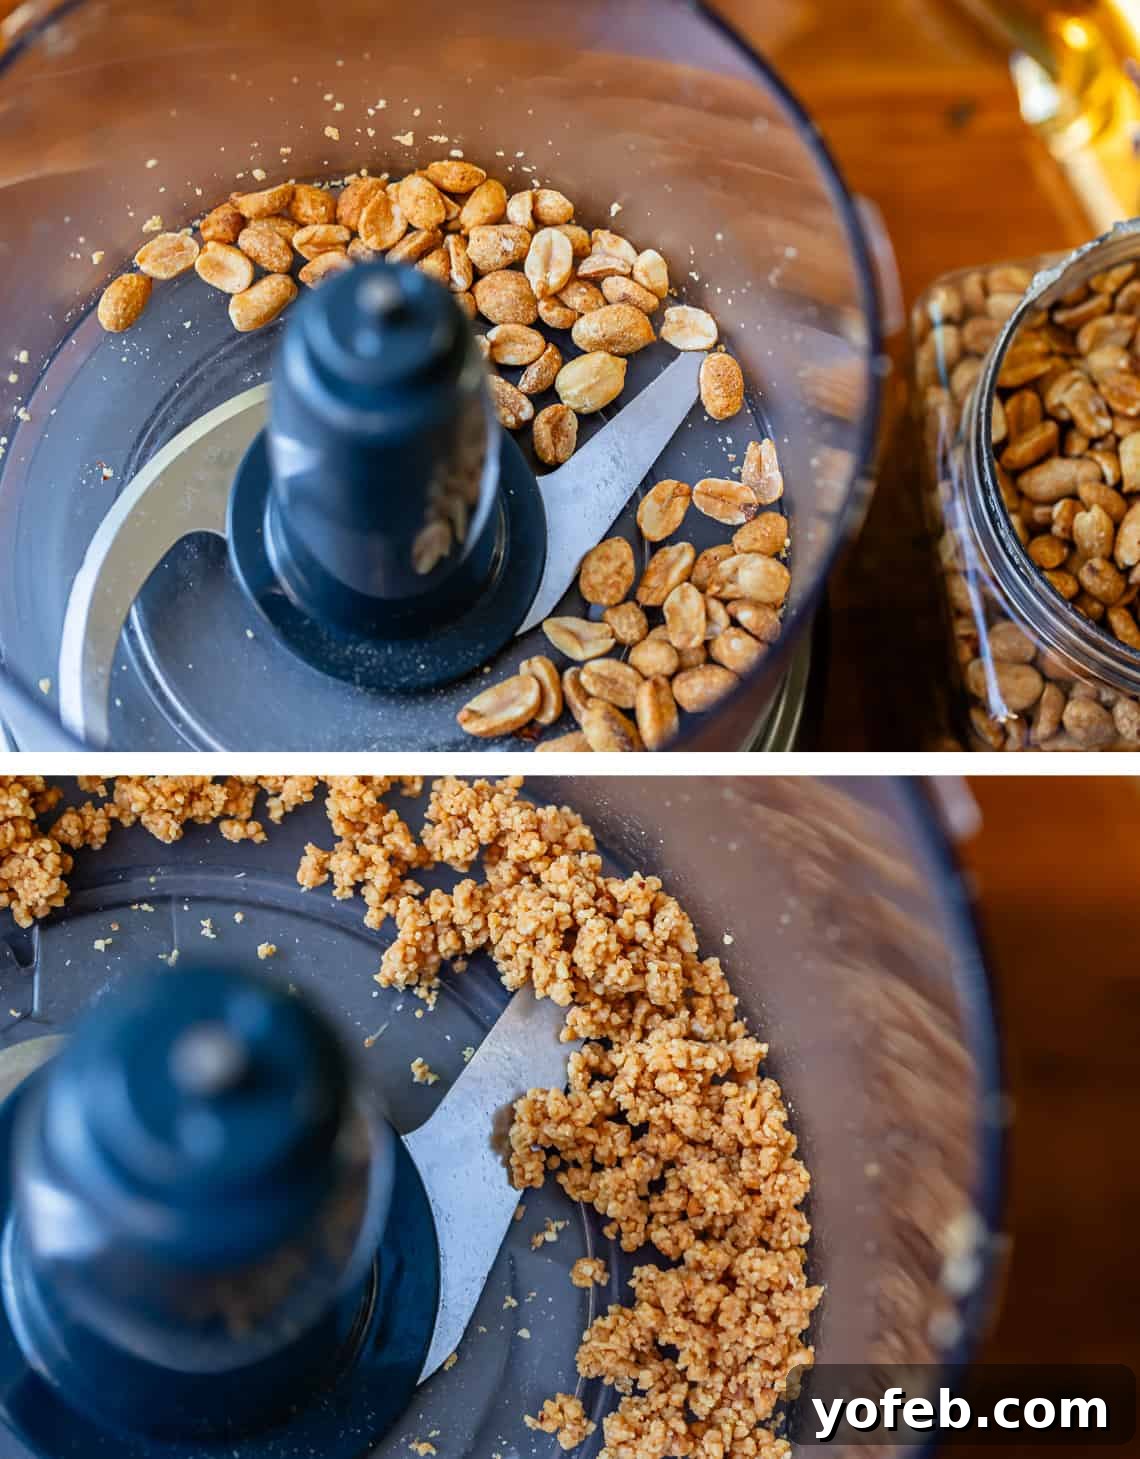
3. Add Texture with Peanuts: In a food processor, add the dry roasted salted peanuts. Pulse them until they form fine crumbs. Continue processing until the crumbs just begin to cling together in small clumps – be careful not to over-process to the point of making peanut butter! This subtle texture is key to mimicking the beloved Reese’s experience. You can absolutely skip this step if you prefer a perfectly smooth filling, but I highly recommend it for that extra depth.
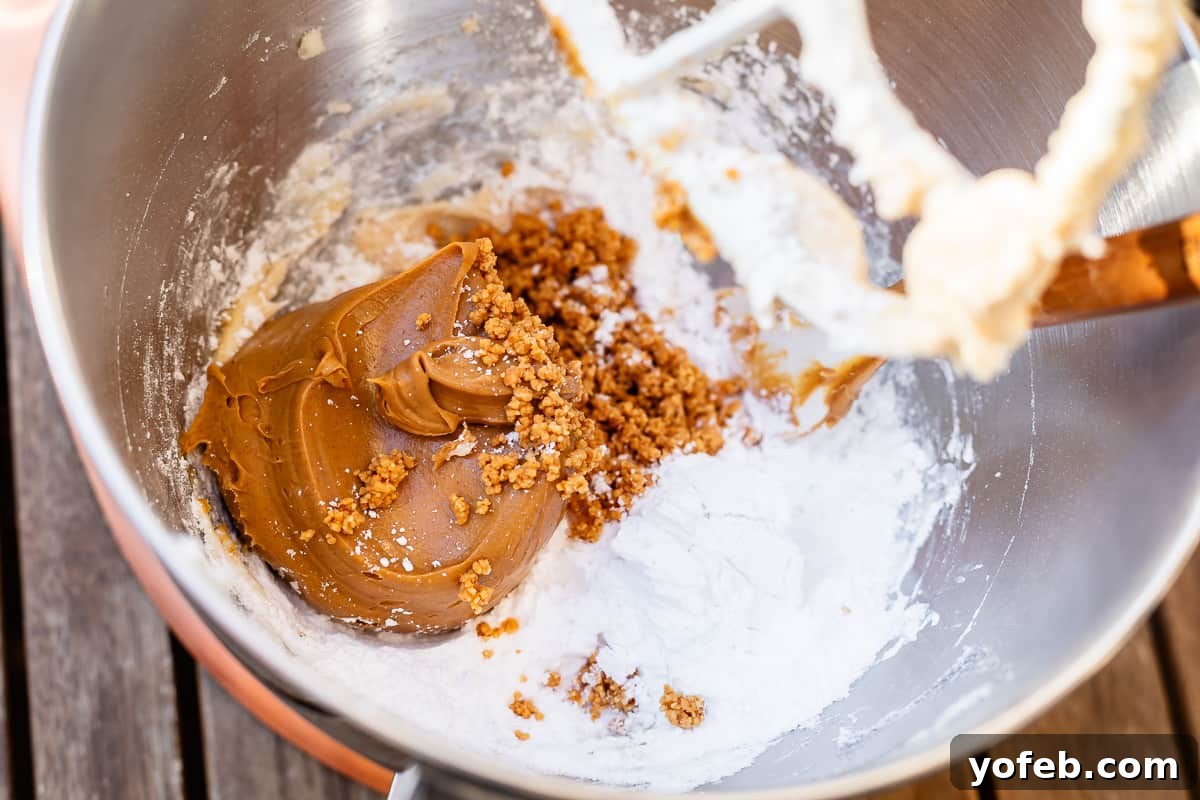
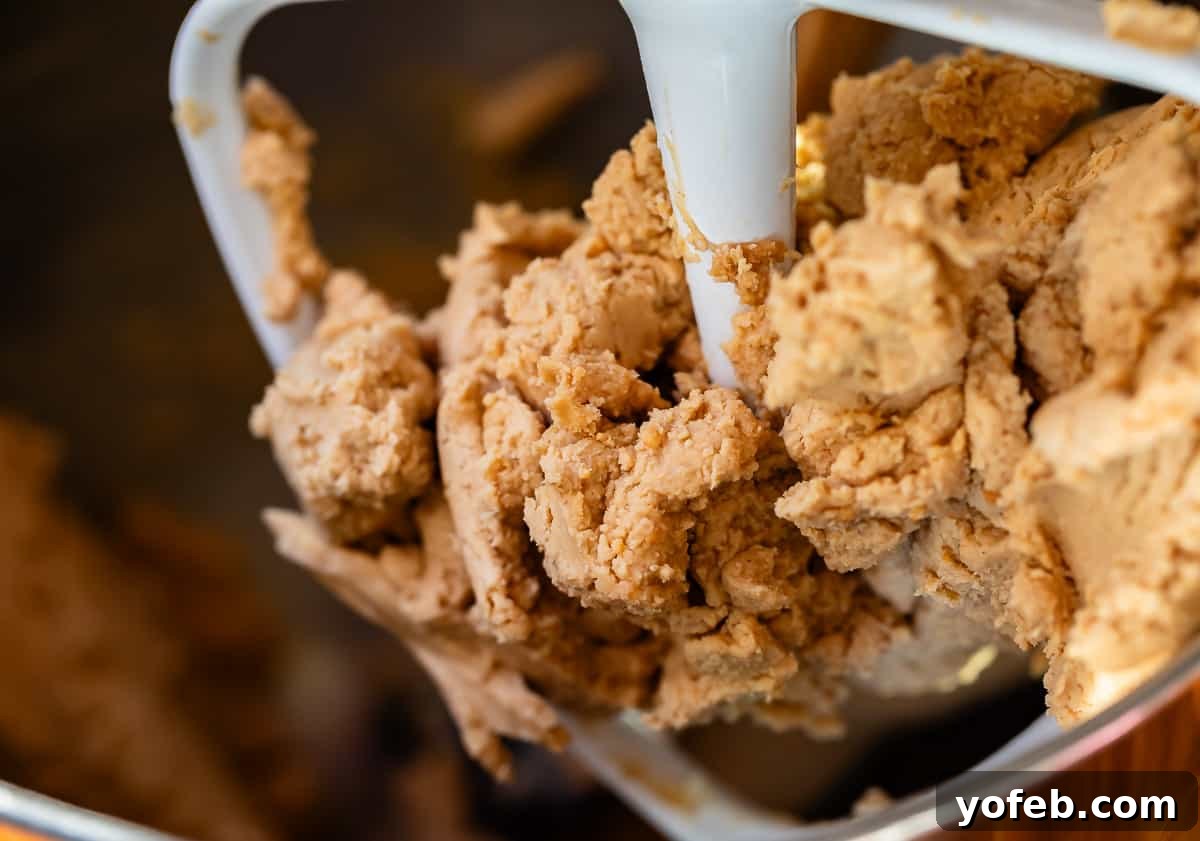
4. Finalize the Dough: Incorporate the finely chopped peanuts, all-purpose flour, and kosher salt into the peanut butter mixture. Beat thoroughly. The dough will become quite stiff and thick at this stage, which is exactly what you want. Don’t skip the salt! It’s crucial for balancing the sweetness. If using kosher salt, use 1/2 teaspoon; for regular table salt, use 1/4 teaspoon. This addition, along with the flour, helps create a perfectly flavored and firm dough without making the Buckeyes overly sweet. Use a sturdy spatula to ensure all ingredients are well combined, scraping down the sides of the bowl.
5. Shape the Buckeye Balls: Set up your rolling station with your lined baking sheet, toothpicks, and a cookie scoop or spoon. Use the scoop to portion out the dough, aiming for balls that are approximately 1 to 1 1/2 inches in diameter, or about 15-20 grams (half an ounce) each. Roll each portion between your palms to form smooth, uniform spheres.
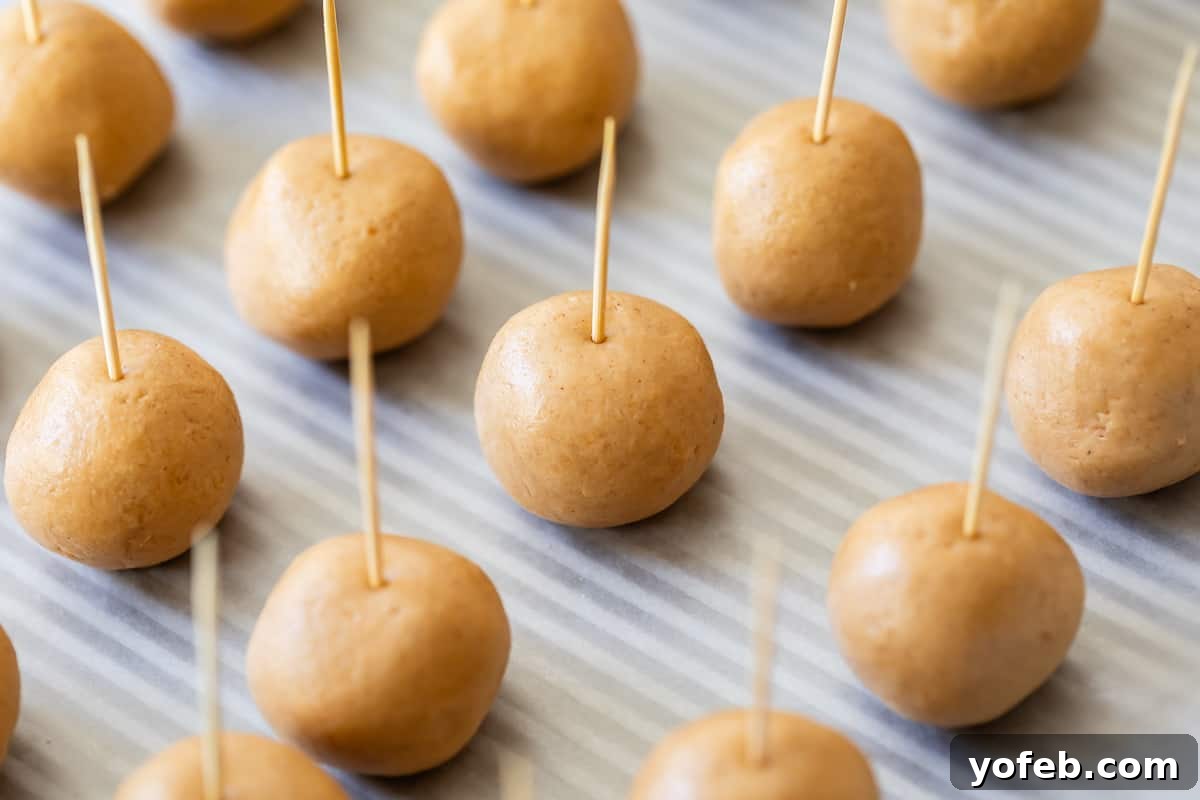
6. Insert Toothpicks and Chill: As soon as the balls are rolled, insert a toothpick into the center of each, pushing it down firmly. It’s crucial to do this *before* chilling, as cold dough can be difficult to pierce without cracking. Arrange the toothpicked balls on your prepared baking sheet.
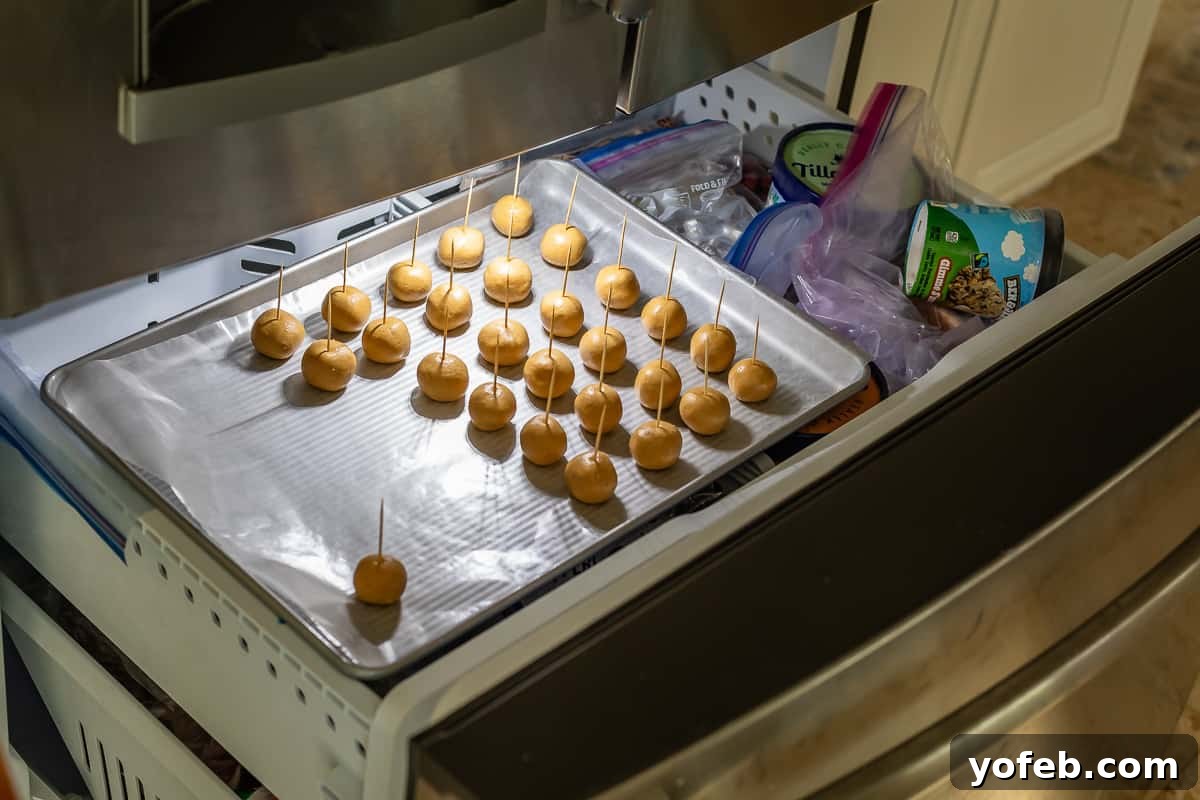
(Buckeyes and Ben and Jerry’s. We are living the good life over here this Christmas 😂)
7. Freeze for Best Results: Transfer the baking sheet of peanut butter balls to the freezer for at least 30 minutes, or until thoroughly chilled and firm. If freezer space is limited, refrigerate for at least 1 hour. This chilling step is non-negotiable for successful dipping!
8. Melt the Chocolate Coating: While your Buckeyes are chilling, prepare your chocolate. In a deep glass measuring cup (a deeper, narrower container is better for dipping than a wide, shallow one), combine the semi-sweet chocolate chips, dark chocolate chips, and shortening. Shortening is your secret ingredient here; it helps stabilize the chocolate, ensuring a smooth, glossy coating and significantly reducing the risk of your Buckeyes “sweating” once hardened.
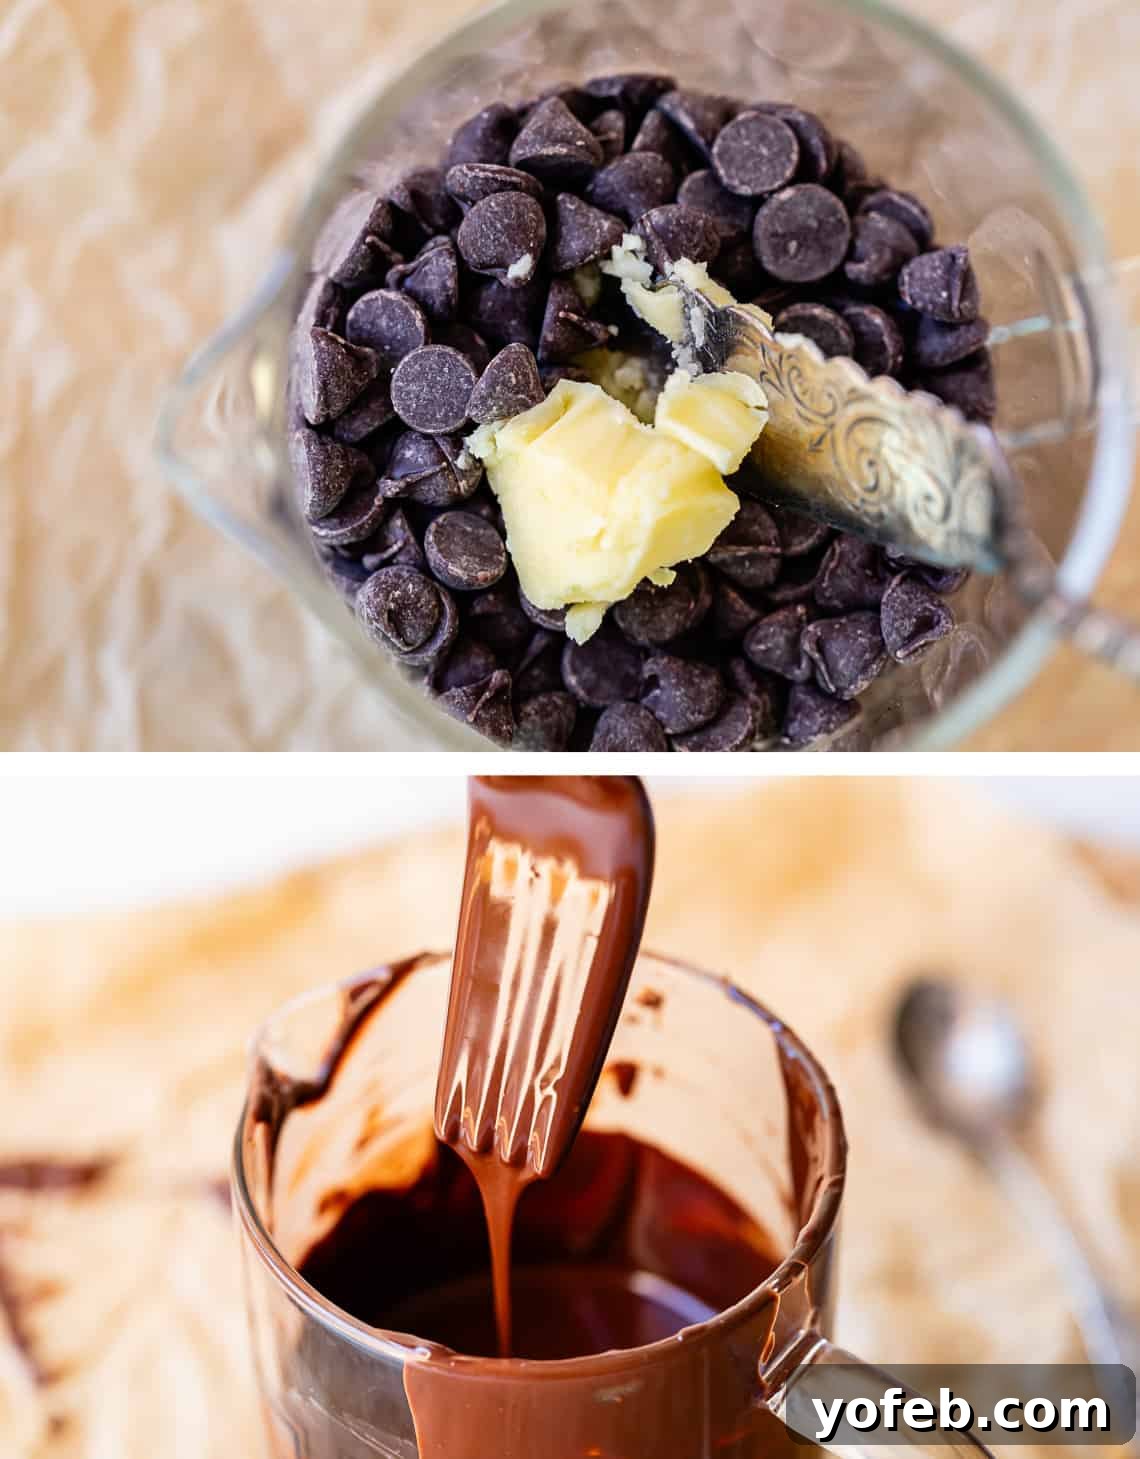
Microwave the chocolate mixture in 30-second intervals, stirring well after each. Continue until there are only a few small lumps remaining. At this point, stop microwaving and simply stir continuously until the residual heat melts the remaining lumps and the chocolate becomes completely smooth. Be cautious, as chocolate scorches easily; if you’re nervous, use 15-second intervals. The melted chocolate should flow off your spatula in a thin, steady stream, not in gloopy clumps. If it’s too thick, add a tiny bit more shortening and stir without further microwaving.
Traditionally, paraffin wax was used to achieve this glossy, stable coating and entirely eliminate weeping. While paraffin is incredibly effective (and something professional chocolatiers might use), shortening works perfectly well for home kitchens and is a more common pantry item.
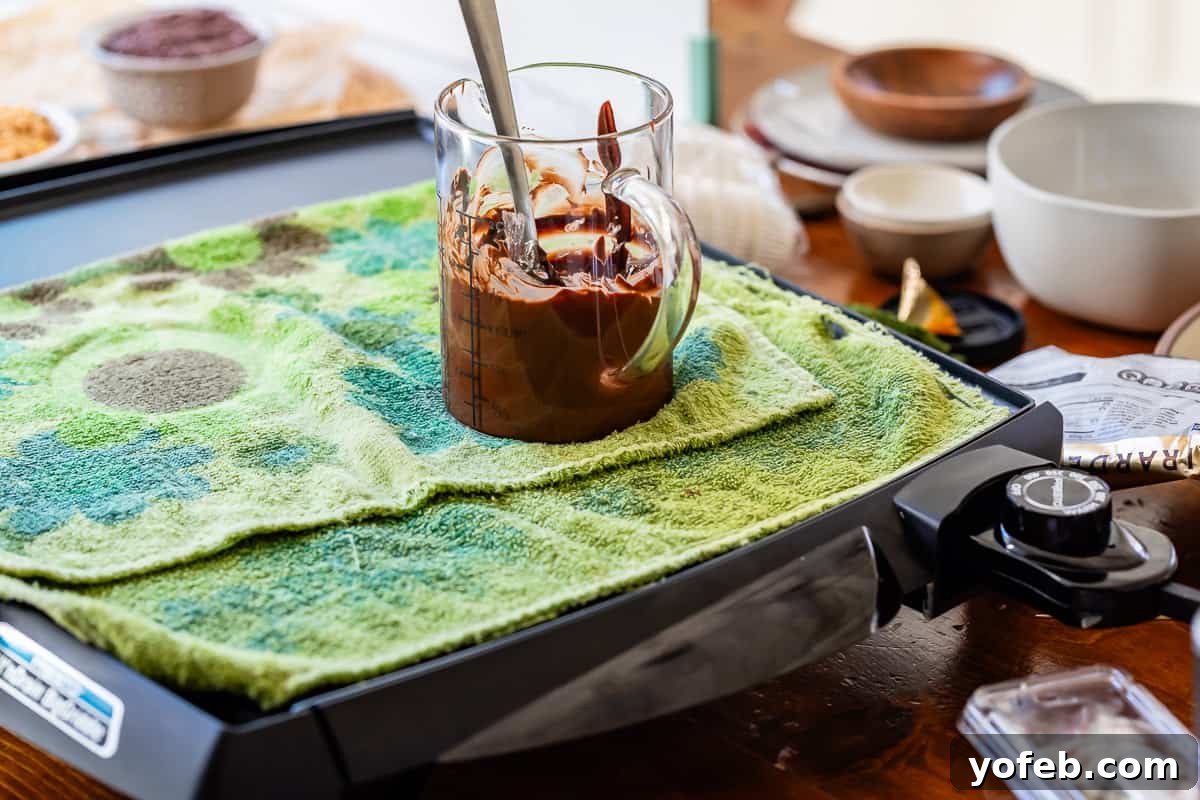
(Do you like my retro towel? Another find from Grandma Joanne’s linen closet! 😆)
9. The Electric Griddle Dipping Hack: For consistent, perfect dipping, set up your station on an electric griddle. Place a towel on the griddle, then set your measuring cup of melted chocolate on top. Keep the griddle on a very low setting (or just use residual heat if it’s hot enough). This ingenious trick, which I learned from my friend Dorothy at Crazy for Crust, keeps your chocolate at the ideal dipping temperature without the risk of scorching, ensuring a smooth coating from the first Buckeye to the last.
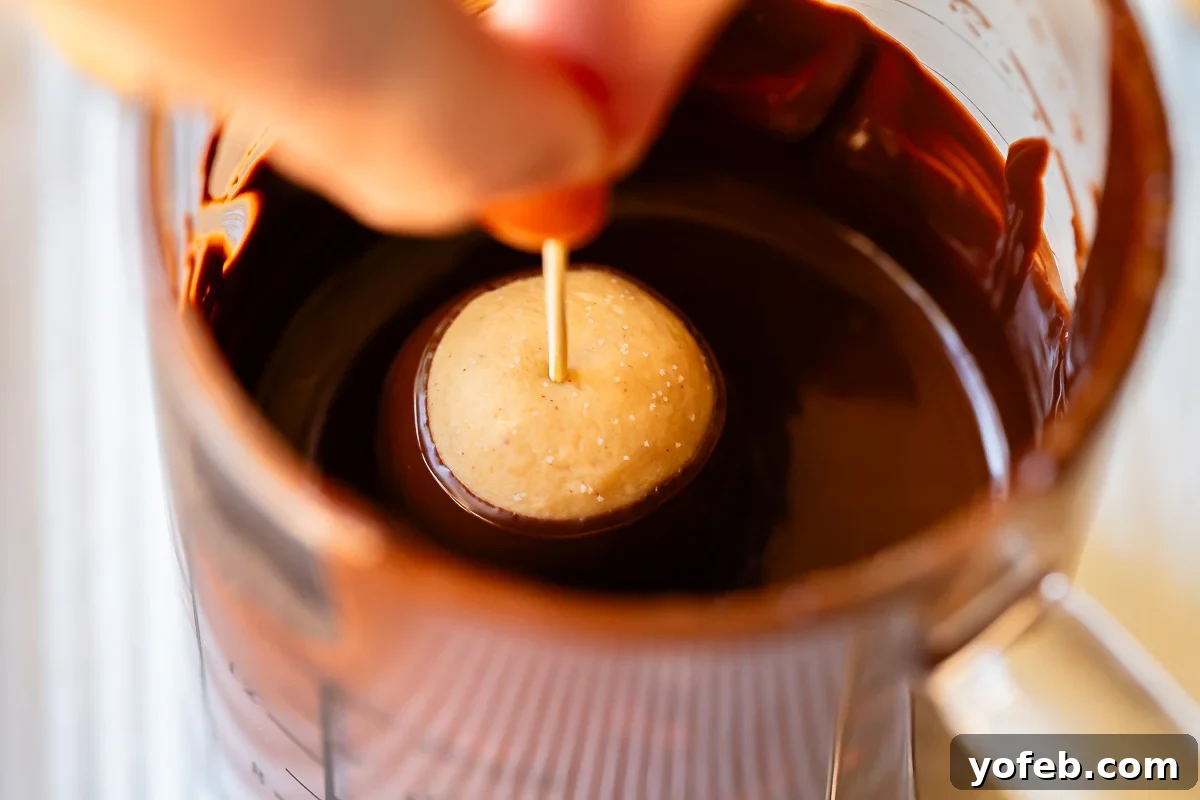
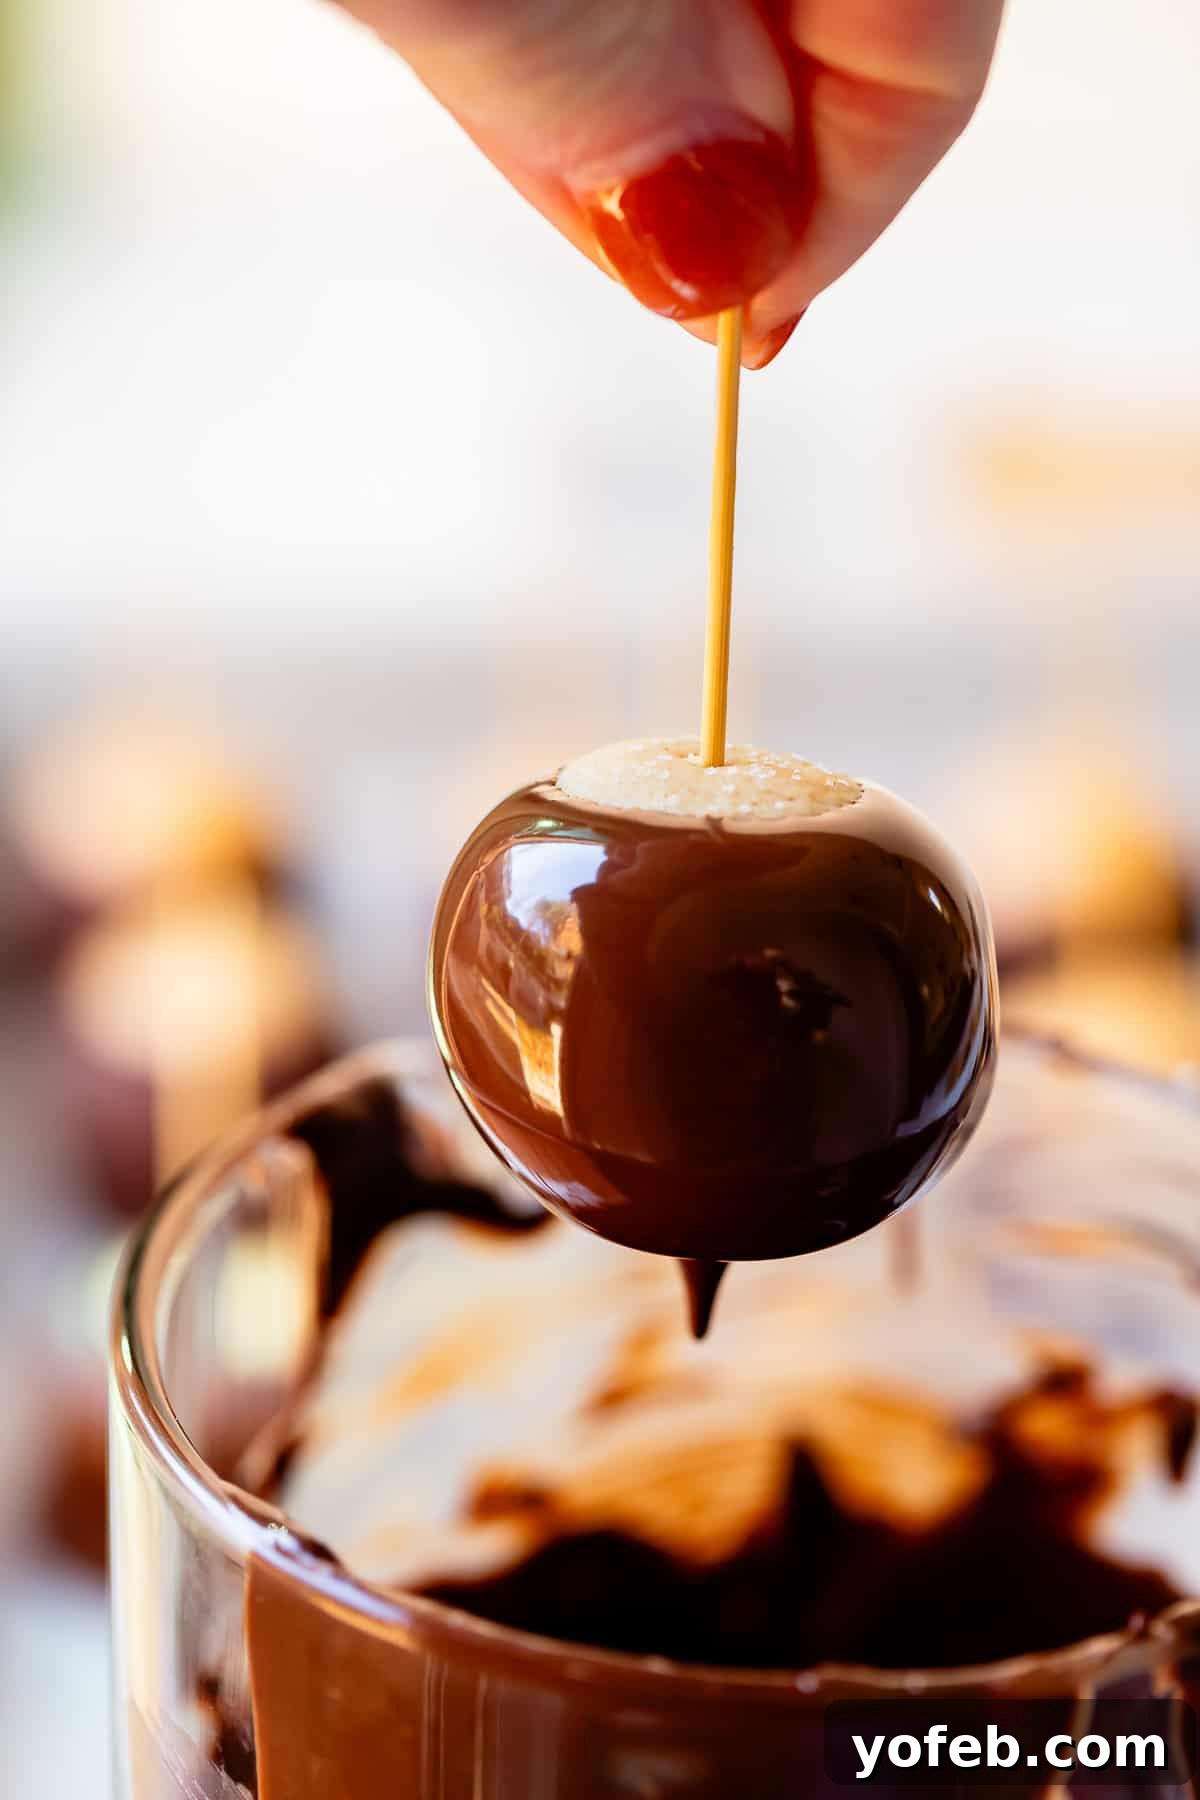
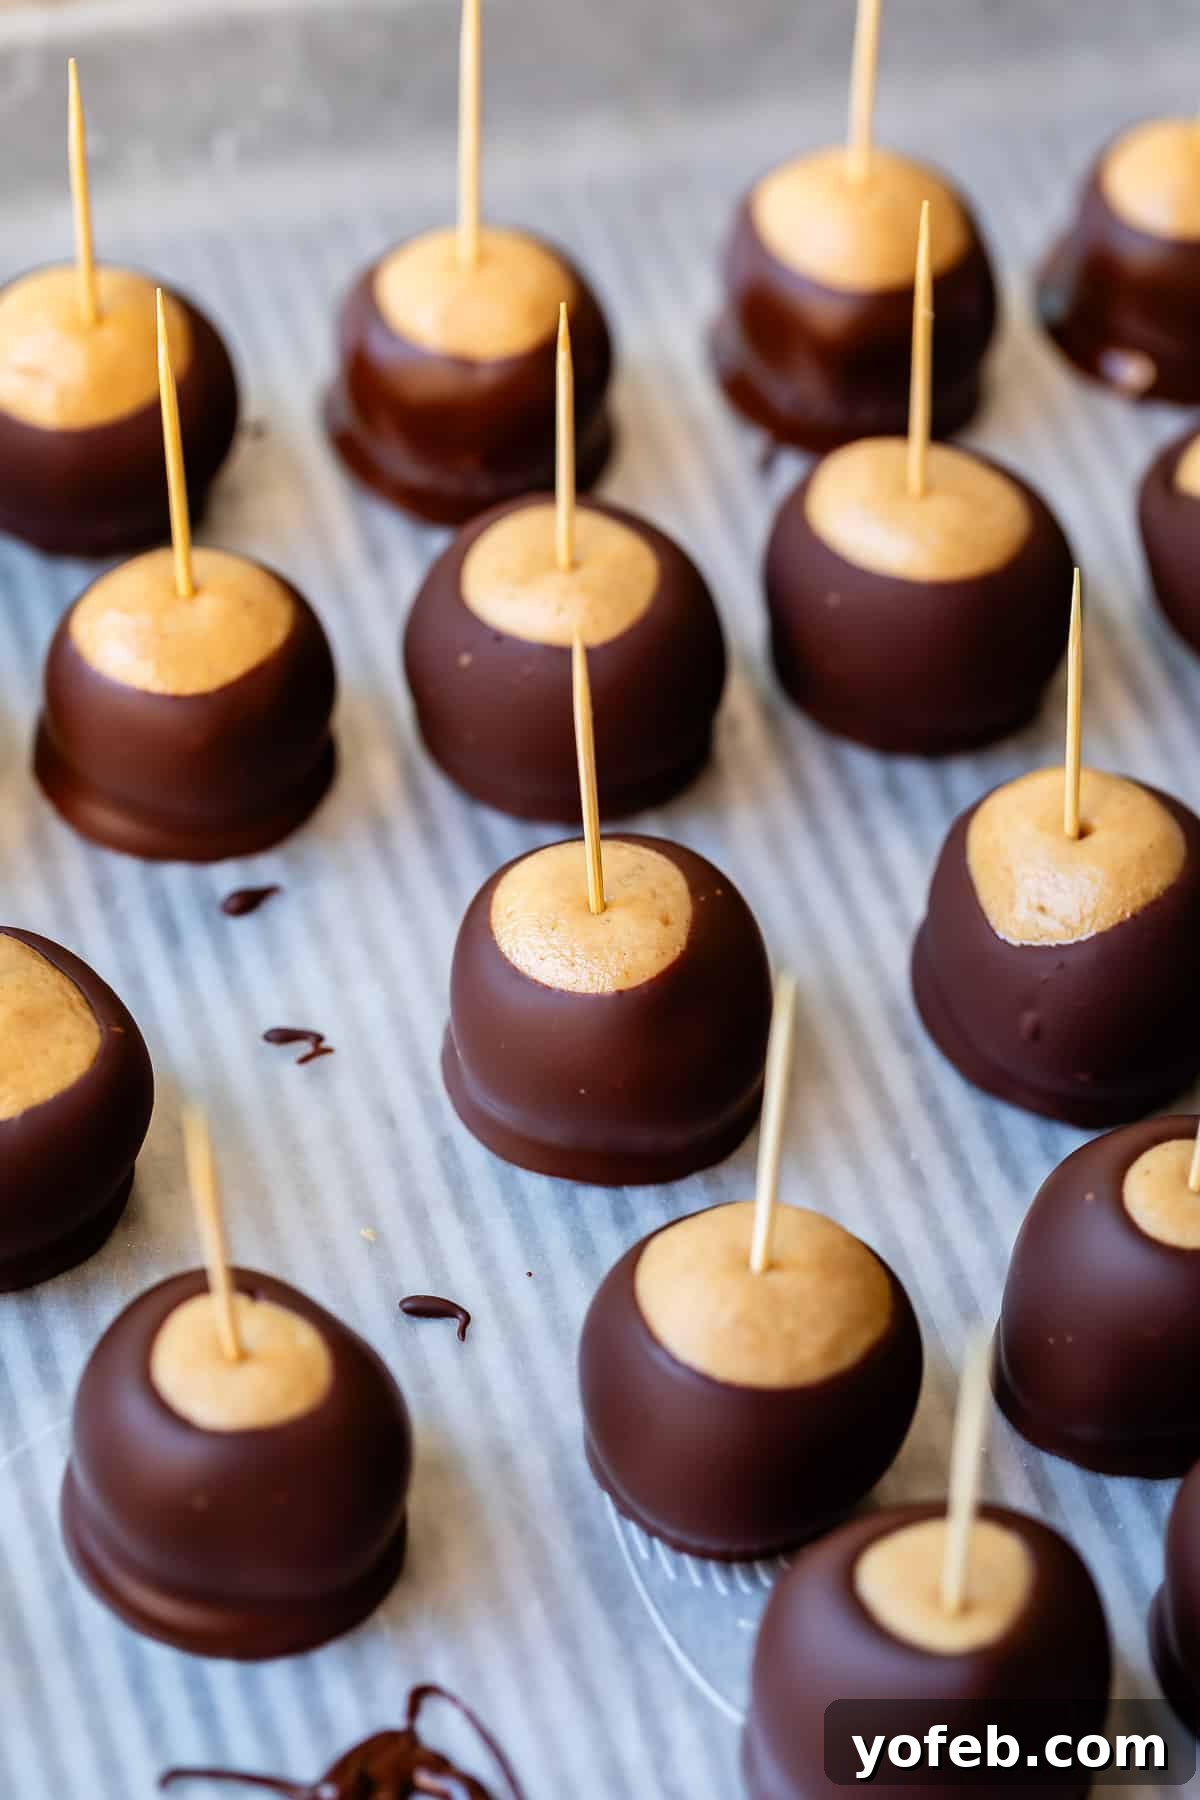
10. Dip with Precision: Remove about half of your chilled peanut butter balls from the freezer (keep the rest cold until ready to dip). Holding a Buckeye by its toothpick, quickly immerse it into the melted chocolate. Dip it about two-thirds of the way, leaving a small “peek-a-boo” circle of peanut butter visible at the top – this is the signature Buckeye look!
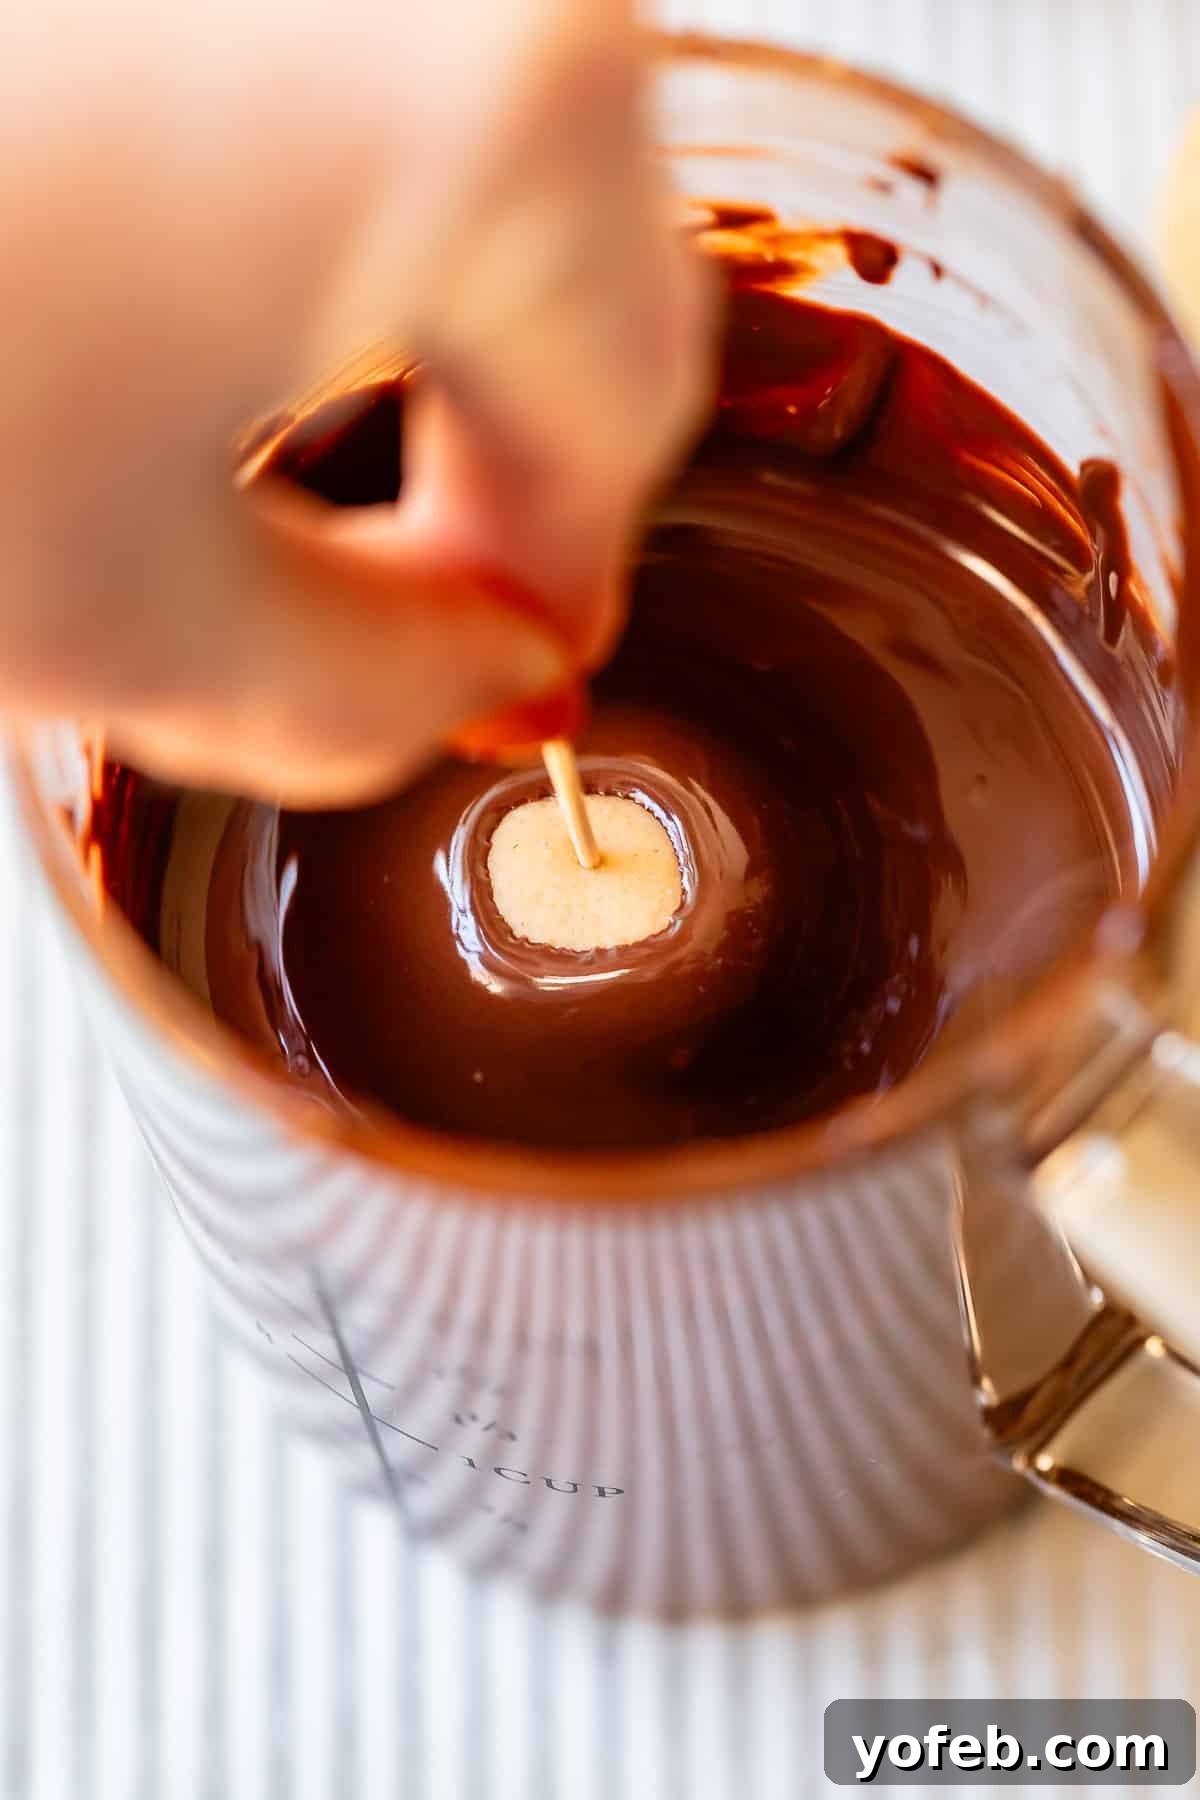
Dip quickly and avoid lingering in the chocolate, as prolonged contact will cause the peanut butter to melt. If your peanut butter balls consistently fall off the toothpicks, they are not cold enough; return them to the freezer for more chilling time. Once dipped, lift the Buckeye, turn it on its side, and twirl it gently to encourage excess chocolate to drip off. Then, carefully swipe the bottom against the rim of your measuring cup to remove any stubborn drips, aiming for a perfectly round bottom. Place the dipped Buckeyes back on your lined baking sheet to harden.
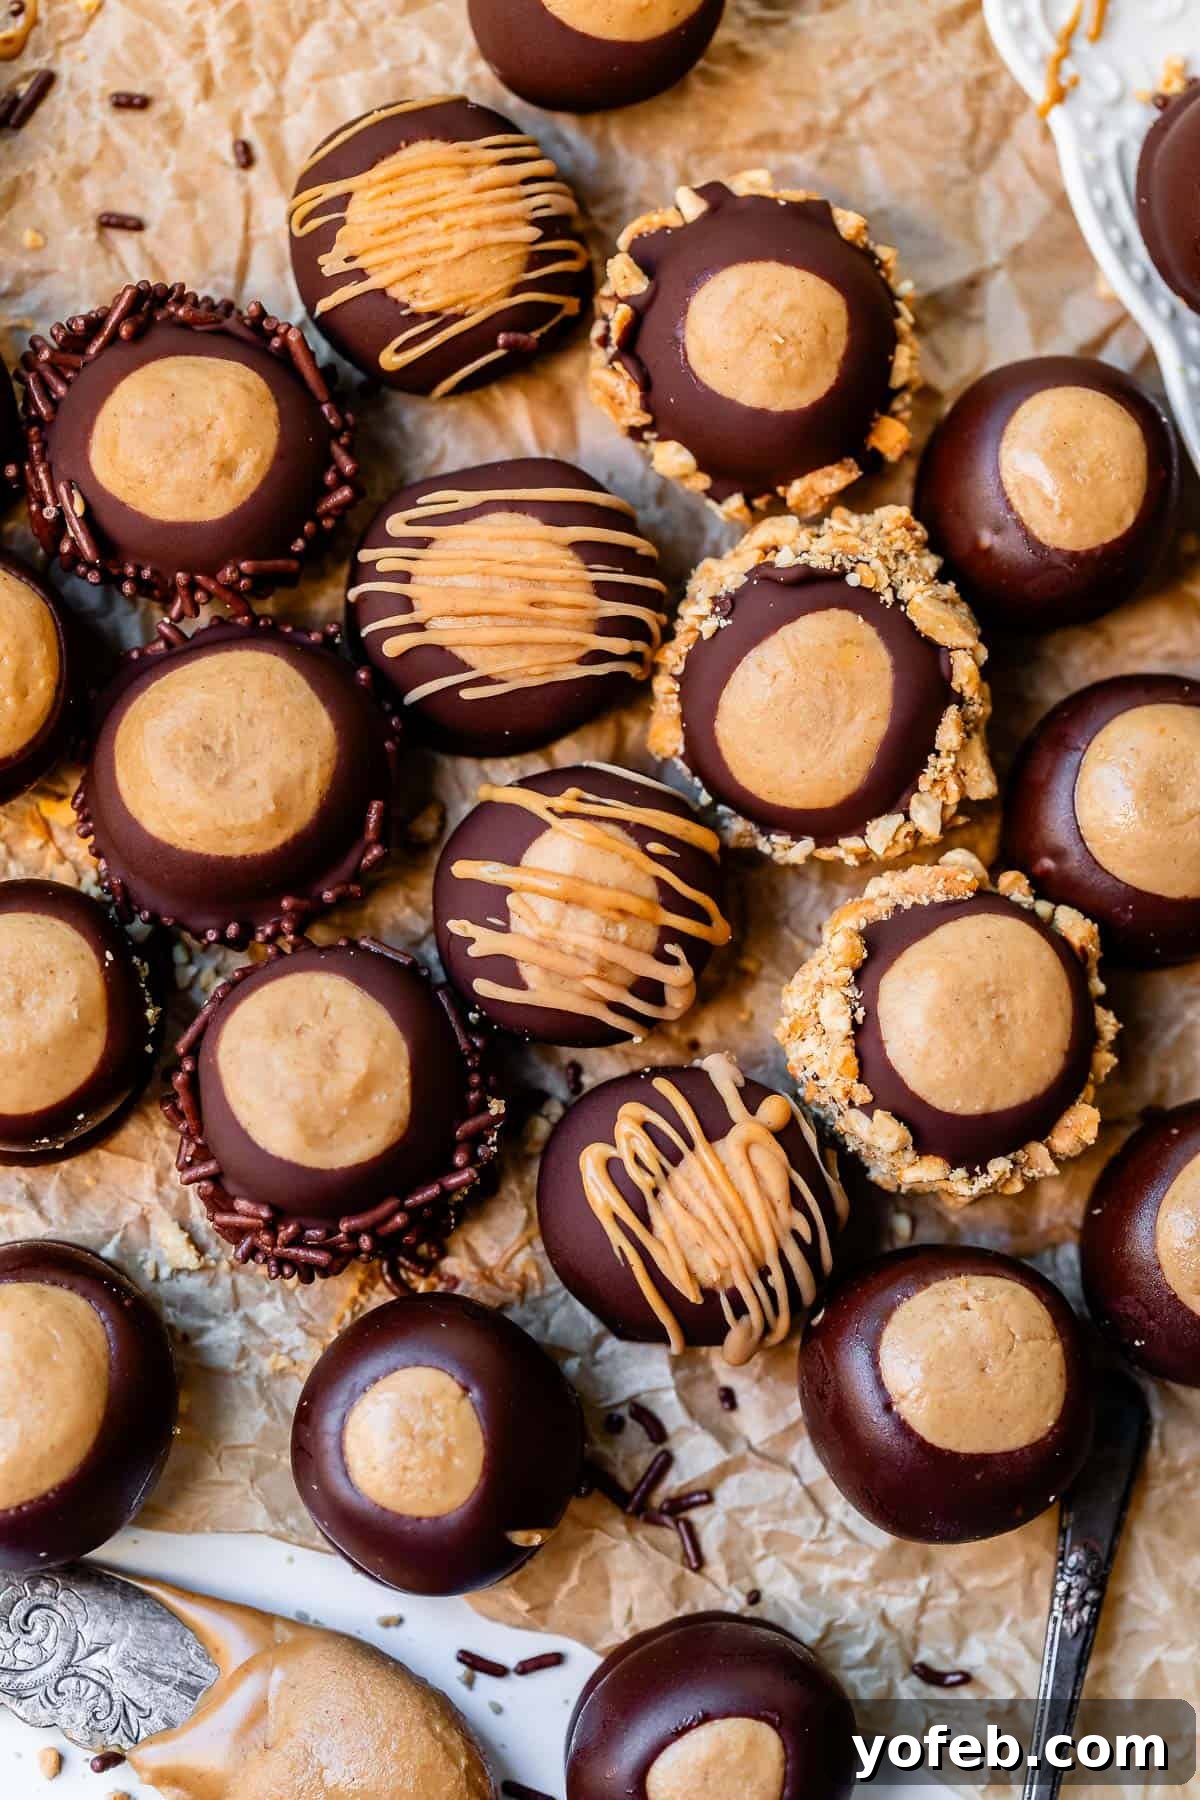
11. Optional Toppings: If you wish to add a creative twist, immediately after dipping (while the chocolate is still wet), gently press the bottom and sides of the Buckeye into a bowl of sprinkles or crushed peanuts. Make a small well in your topping of choice, dip the Buckeye in, and use your fingers to carefully press the sprinkles or nuts onto the chocolate. Line them up on the baking sheet to harden.
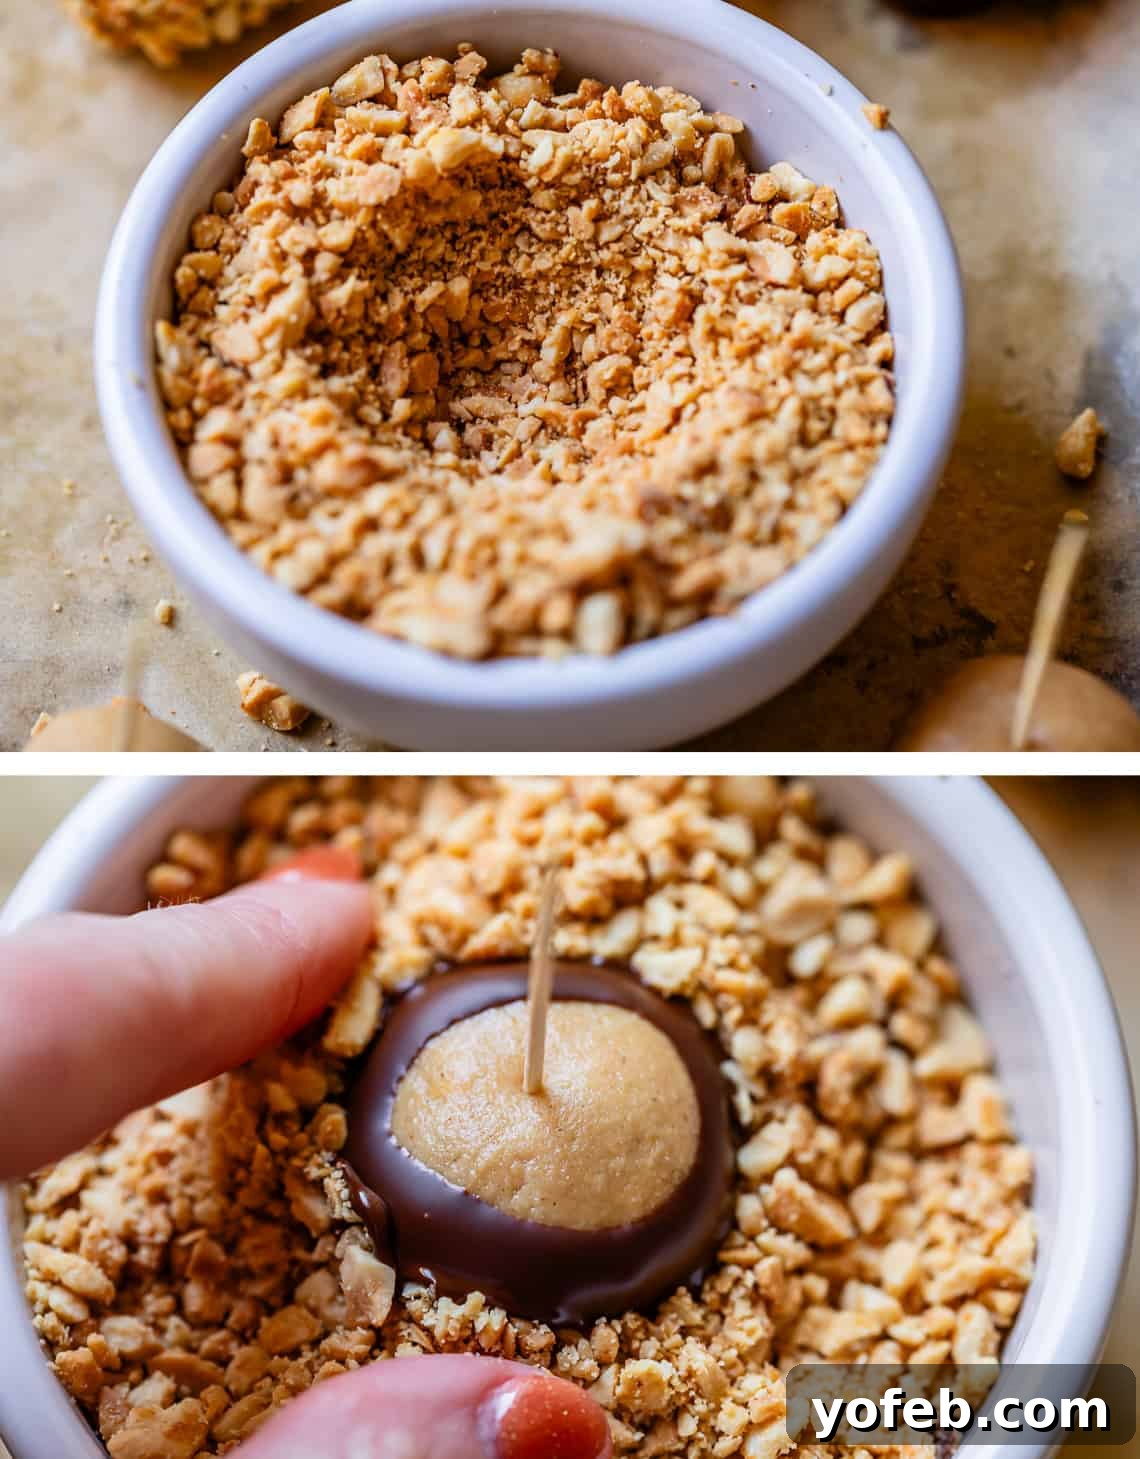
12. Final Chill and Toothpick Removal: Once all your Buckeyes are dipped, place the entire baking sheet back into the fridge or freezer for about 10 minutes to allow the chocolate to firm up completely. Resist the urge to remove the toothpicks while the chocolate is still soft – you will smudge them (trust me on this one!).
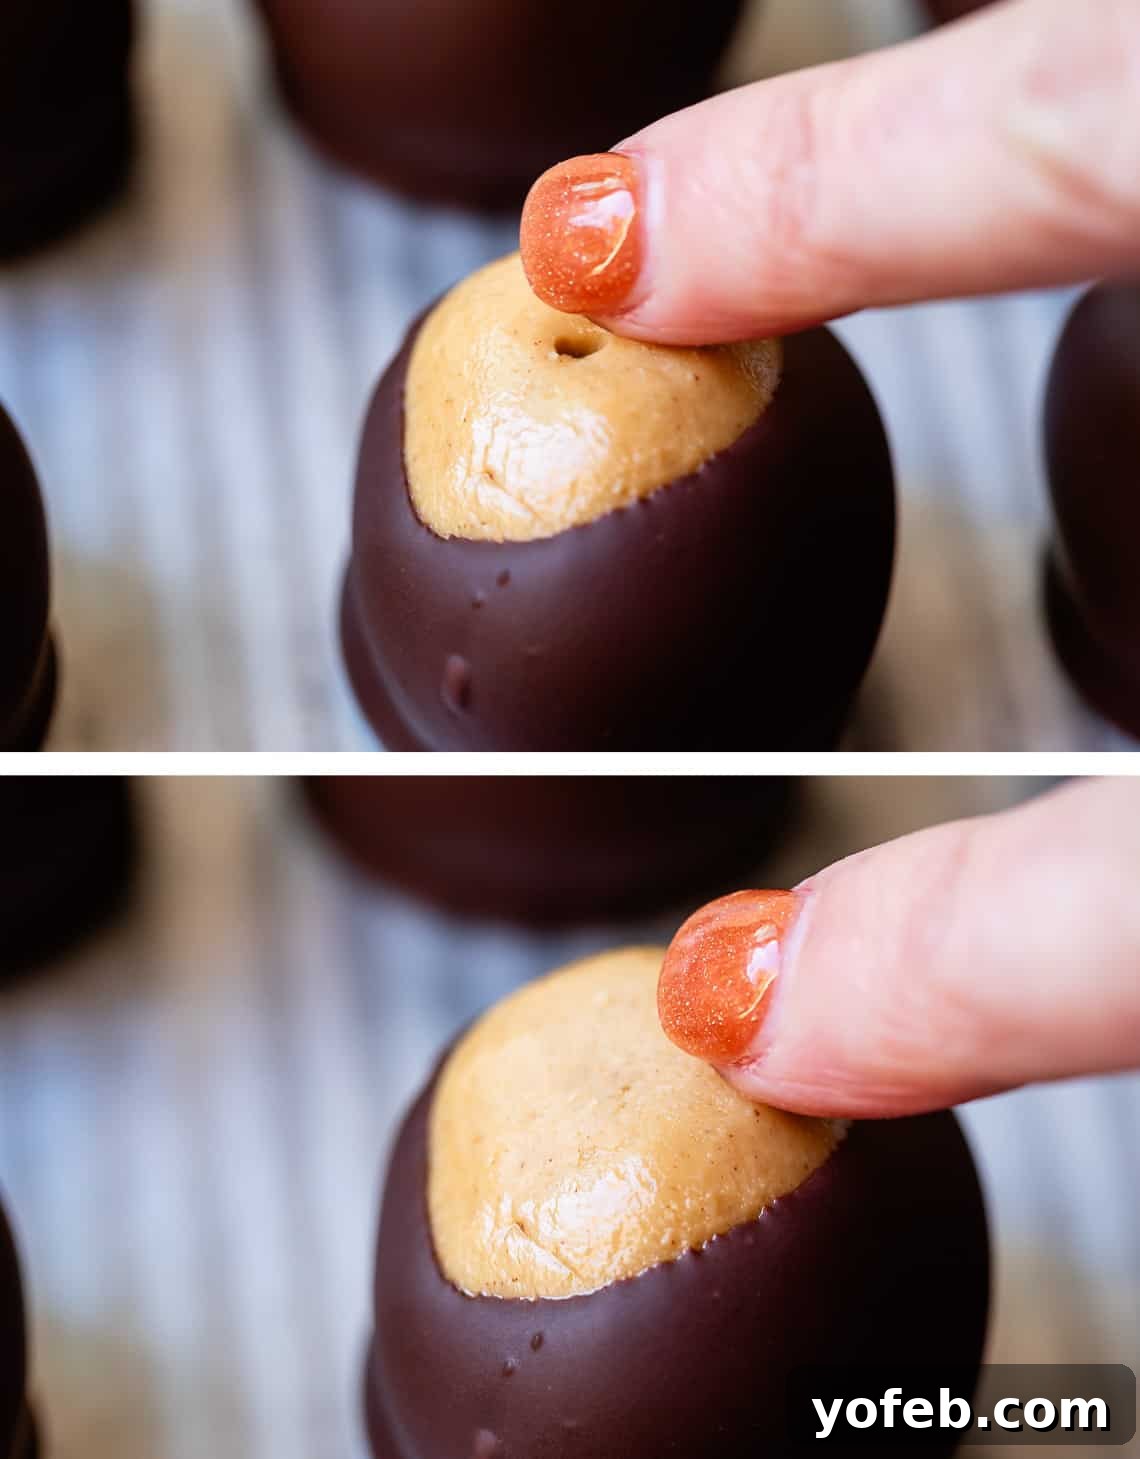
13. Healing the Toothpick Mark: Once the chocolate is firm, carefully remove all the toothpicks. For that perfectly smooth finish seen in professional photos, simply use the pad of your finger to gently rub over the toothpick hole. The warmth from your hand will slightly melt the peanut butter, allowing you to swirl and smooth out the indentation. A small paring knife or spoon can also help.
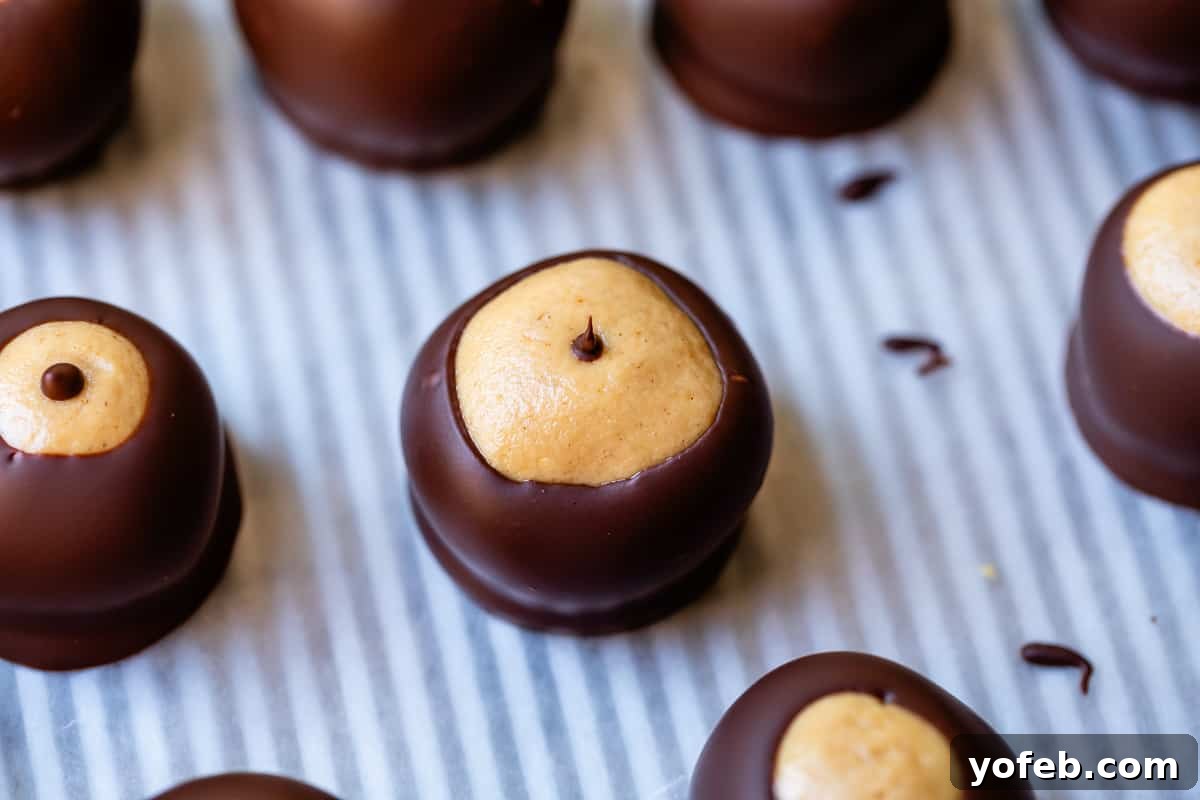
Alternatively, as Sarah’s family charmingly did before the internet offered “healing” hacks, you can dab a tiny dot of melted chocolate over the hole. This creates what they affectionately called a “buckeye boob,” a fun and memorable characteristic!
14. Drizzle (Optional): For an extra decorative touch, melt a small amount of extra peanut butter or chocolate and use a spoon to drizzle it artfully over the tops of the hardened Buckeyes. This creates a beautiful visual contrast, even if it deviates slightly from the traditional Buckeye appearance.
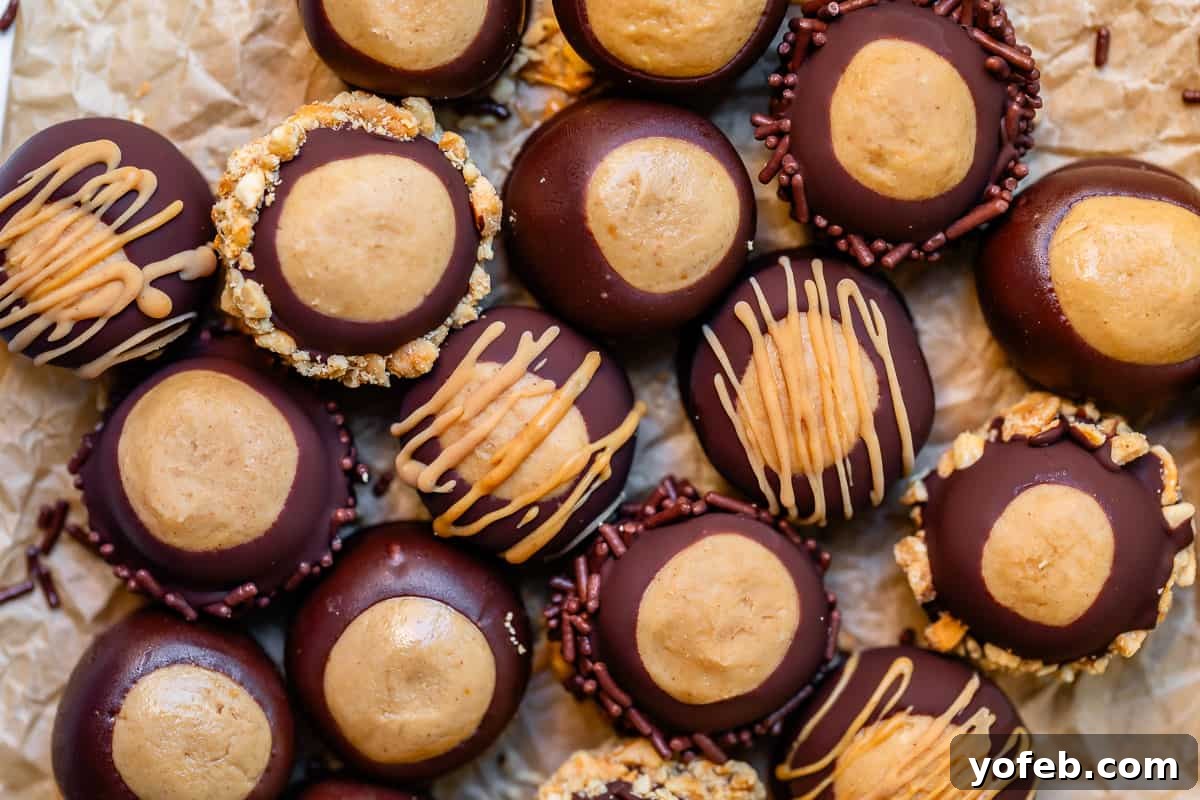
Your homemade Buckeye Candies are now ready to be enjoyed!
Preventing Buckeyes from Sweating: Your Guide to Condensation-Free Candies
One of the most common challenges with Buckeyes, particularly when moving them from cold to warmer environments, is “sweating” or condensation. This phenomenon occurs when the cold chocolate coating, upon encountering warmer, more humid air, attracts moisture from the air, forming tiny water droplets on its surface. While it doesn’t affect the taste, it can certainly impact the appearance.
The gold standard for entirely preventing weeping in chocolates, especially those stored at room temperature, is the use of paraffin wax or other professional-grade preservatives/stabilizers. These ingredients are what commercial chocolatiers often employ to keep their products pristine. While the shortening used in this recipe *helps* by creating a more stable chocolate coating, it won’t completely eliminate the issue, especially if your kitchen is humid or temperatures fluctuate drastically.
Since most home cooks don’t keep paraffin wax on hand, the primary at-home trick to combat sweating revolves around temperature management. The problem arises because you *must* chill the peanut butter balls thoroughly for successful dipping. Even if you allow your finished Buckeyes to harden completely at room temperature, the initial coldness of the peanut butter core can cause some condensation as the chocolate coating adjusts.
So, what’s a Buckeye lover to do? While complete prevention without specialized ingredients is tough, here are the best practices to minimize sweating:
- Gradual Temperature Changes: Avoid abrupt temperature shifts. If your Buckeyes are refrigerated or frozen, don’t immediately bring them into a warm room.
- Airflow is Your Friend: When thawing or bringing Buckeyes to room temperature, arrange them in a single layer on a plate or wire rack, ensuring they don’t touch each other. This allows for even air circulation and helps moisture evaporate more efficiently.
- Airtight Storage: When storing chilled Buckeyes, use an airtight container to protect them from fluctuating humidity. This is especially important during the thawing process.
- Serving Cold: If you prefer your Buckeyes cold, serve them directly from the fridge. They will still start to sweat as they warm up, but they’ll be eaten quickly before it becomes a major issue.
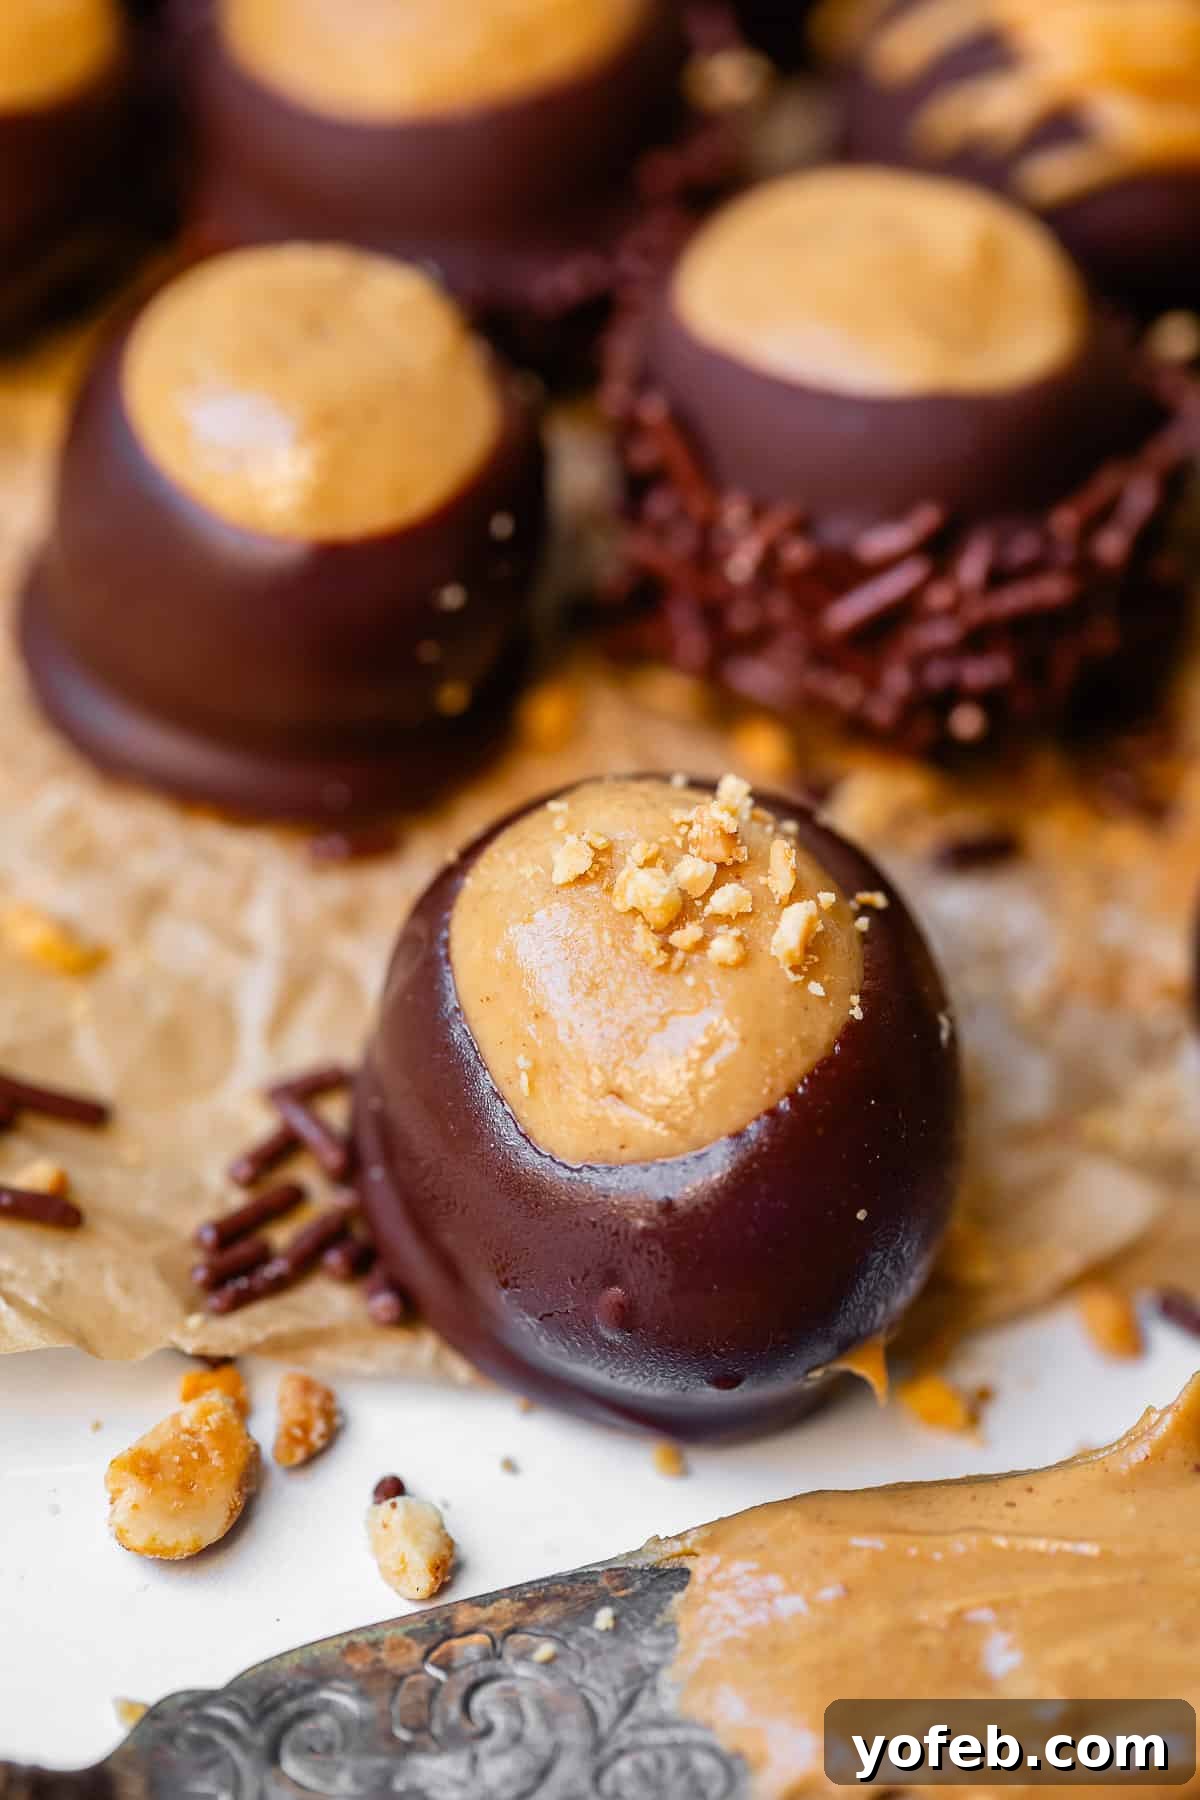
As you can see from my own photos, even with the best intentions, a little sweating can happen if you’re impatient to snap a picture! But with these strategies, you can significantly reduce the effect and enjoy beautiful, delicious Buckeyes.
Optimal Storage Solutions for Your Buckeye Candies
Proper storage is key to preserving the freshness, texture, and appearance of your homemade Buckeye Candies. Depending on when you plan to serve them, you have a few excellent options:
- Room Temperature Storage (Short-Term): If you plan to serve your Buckeyes within 24 hours and prefer them at room temperature, allow the chocolate to harden completely at room temperature after dipping. They might “weep” slightly initially due to the chilled peanut butter core, but this moisture will quickly evaporate, leaving you with perfectly bite-able Buckeyes. Once stable, transfer them to an airtight container, arranging them in a single layer to prevent smudging. Store on the counter for no more than 24 hours. After this period, the peanut butter filling can start to dry out, so it’s best to move them to the refrigerator.
- Refrigerator Storage (Medium-Term): For Buckeyes you intend to enjoy over 2-3 days, refrigeration is the ideal method. Store them in a sealed, airtight container, separating layers with parchment or wax paper to prevent sticking. If you prefer to serve them chilled, take them straight from the fridge (be aware, they will begin to sweat as they warm). If you prefer room temperature Buckeyes, spread them out in a single layer on a plate or wire rack and allow them to come to room temperature. This gradual process will allow any condensation to evaporate without causing significant issues. Let them sit, undisturbed, until they are dry and at your desired temperature before arranging them on a serving platter. While refrigeration is effective, it can sometimes cause the peanut butter mixture to dry out faster than freezing.
-
Freezer Storage (Long-Term): Freezing is an excellent option for making Buckeyes ahead of time, especially for holiday platters or future events. Arrange the Buckeyes in an airtight freezer-safe container, placing parchment or wax paper between layers, or transfer them to a large freezer-safe zip-top bag. They can be frozen for 2-3 months.
Crucially, do NOT thaw frozen Buckeyes at room temperature directly. This drastic temperature change will cause them to “cry” real tears of condensation. Instead, transfer your frozen Buckeyes directly to the refrigerator to thaw overnight or for 5-6 hours. Once they are thoroughly chilled but no longer frozen, you can serve them cold. If you prefer them at room temperature, spread them out in a single layer to allow any remaining moisture to evaporate before transferring them to a platter for serving.
How Long Do Buckeye Candies Last? Shelf Life Explained
Buckeye candies are remarkably shelf-stable, making them fantastic for preparing in advance. This means you can get a head start on your holiday treat plates without worrying about spoilage!
Due to their primary ingredients (peanut butter, powdered sugar, and chocolate), Buckeyes are quite resistant to molding or spoiling in the traditional sense, much like many commercially produced candies. You might even be tempted to save them for next year’s Halloween – though I wouldn’t recommend it for optimal flavor!
That said, while they won’t necessarily “go bad” quickly, they definitely taste best when enjoyed fresh. The textures and flavors are most vibrant shortly after they’re made. The absolute best way to maintain their peak freshness for an extended period is to store them in the freezer.
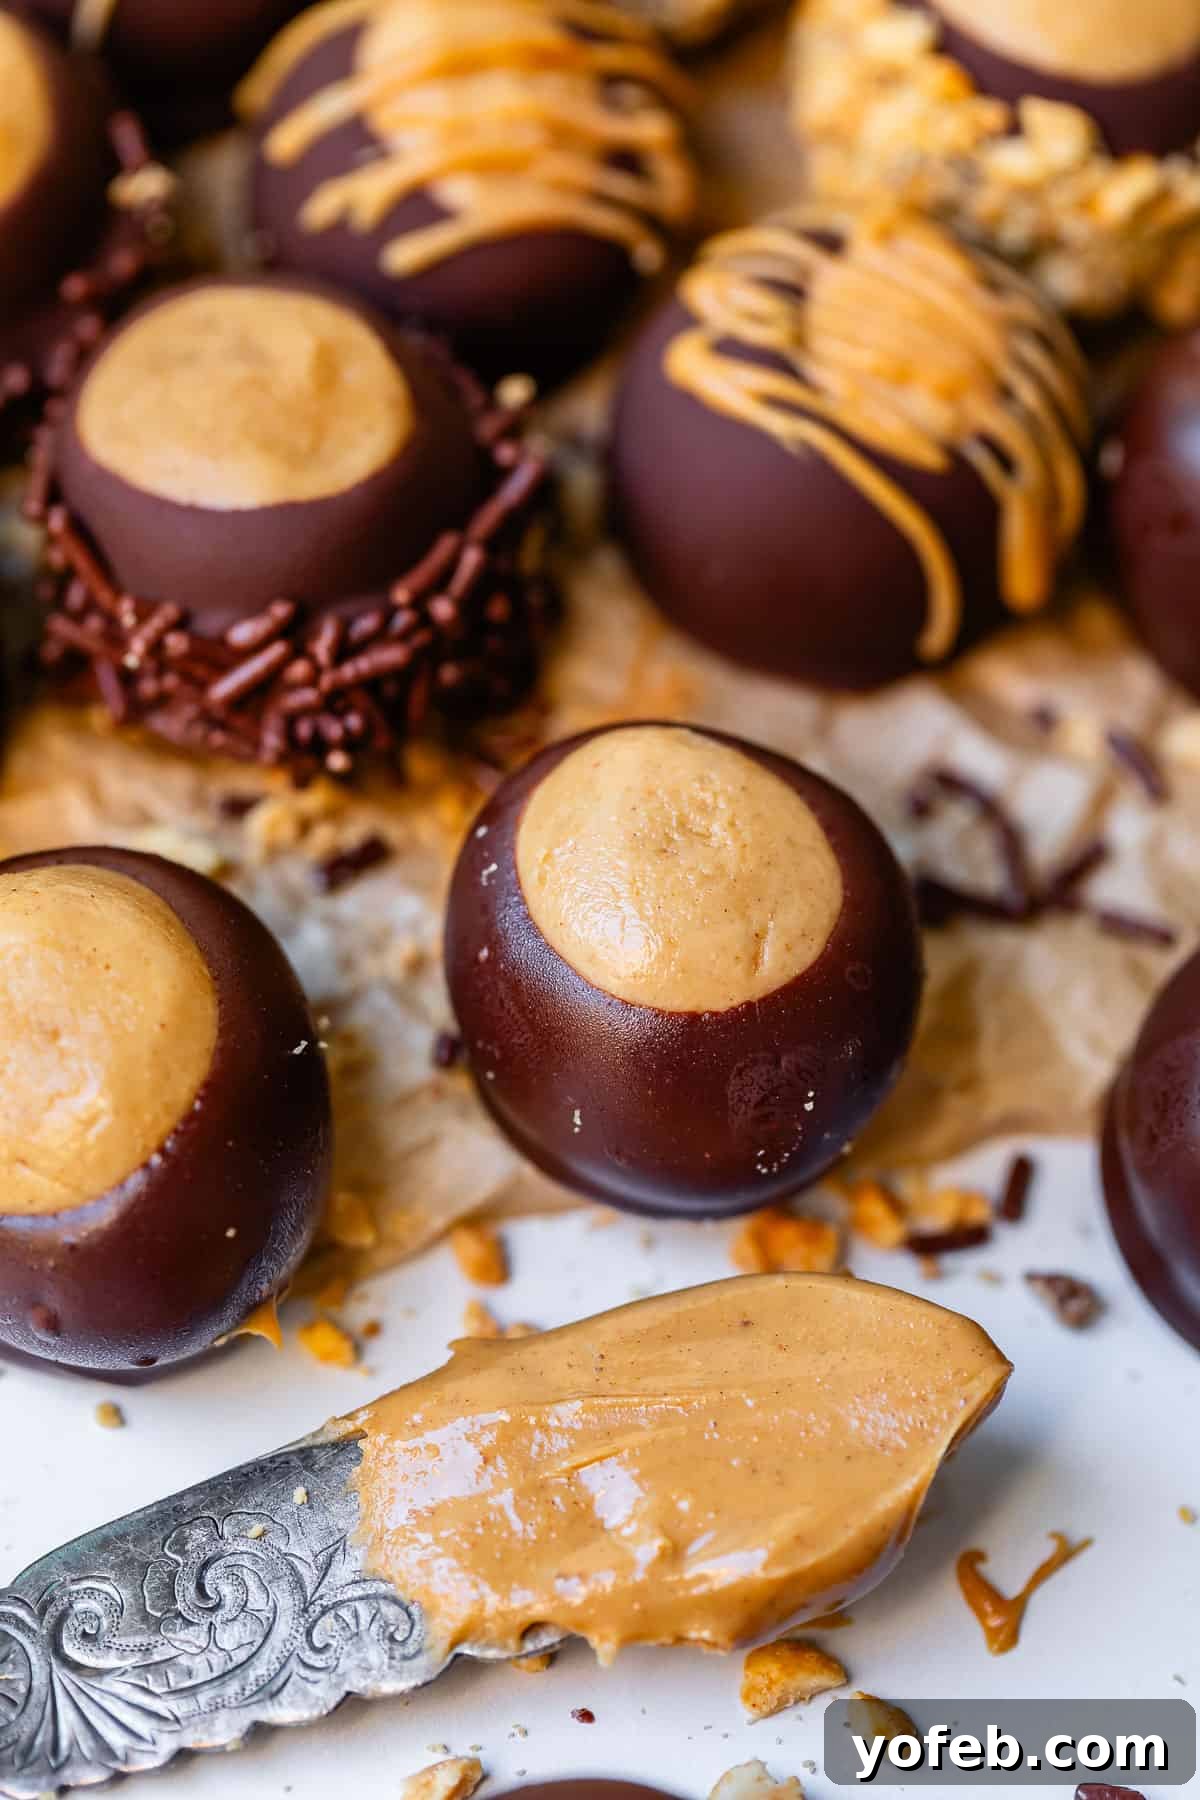
Freezing Buckeyes for Future Enjoyment
Given their excellent freezer-friendliness, Buckeyes are an outstanding make-ahead option for holidays, parties, or any event where you want to minimize last-minute culinary stress!
To freeze them effectively, first arrange the finished Buckeyes in a single layer on a large baking sheet. Place the baking sheet in the freezer and allow the Buckeyes to “flash freeze” for 30-60 minutes, until they are firm. This prevents them from sticking together. Once flash-frozen, transfer them to a freezer-safe zip-top bag or an airtight container, ensuring they are stored in a single layer or separated by parchment paper. Seal the container or bag well to protect them from freezer burn. They will maintain their quality for 1-3 months. While they can last longer, they may start to absorb freezer odors or develop a slightly stale texture after about a month.
When you’re ready to enjoy them, you have a couple of choices. If you’re a fan of cold chocolate, feel free to sneak one directly from the freezer – a delicious, firm bite! However, for optimal texture and to prevent excessive “weeping,” the best method is to thaw them gradually. Transfer the bag or container of Buckeyes from the freezer directly into the refrigerator and let them thaw completely overnight, or for several hours. Once they are thawed but still chilled, you can serve them cold. If you prefer them at room temperature, spread them out in a single layer on a plate or wire rack and allow them to come to room temperature, letting any condensation evaporate before transferring them to a platter for serving.
Frequently Asked Questions About Buckeye Candy
Buckeyes are named after the nut of the Buckeye tree (Aesculus glabra), which is famously abundant in Ohio. The nuts themselves have a distinct appearance: dark brown on the outside with a prominent lighter brown spot, resembling the eye of a buck deer. Native Americans originally coined the term “buckeye” for this resemblance. The candy, with its round peanut butter center partially dipped in chocolate, cleverly mimics this iconic nut.
It’s actually the other way around! Buckeyes, as in the nuts from the tree, are common in Ohio and are the state’s official tree nut. Over time, residents of Ohio also became affectionately known as “Buckeyes.” It is in honor of this deep regional heritage and the iconic tree that Ohio State University adopted the Buckeye as its beloved mascot.
While often colloquially referred to as a “Buckeye cookie,” technically, it’s a candy. Consider its structure: a sweet, creamy peanut butter filling enrobed in a hard chocolate shell. This is the definition of a candy, much like a peanut butter cup. However, Buckeyes differentiate themselves with a much higher peanut butter to chocolate ratio, offering a more intensely peanut-flavored experience. The filling also tends to have a delightful, tender texture, and the chocolate coating provides a satisfying snap when bitten. These unique qualities are precisely why Buckeyes have earned their status as a beloved treat.
Preventing condensation or “sweating” entirely in chilled candies without preservatives is challenging, but several steps can help. When storing completed Buckeyes, keep them in an airtight container with parchment or wax paper separating the layers. If thawing from the freezer, always do so gradually in the refrigerator overnight. Once thawed and chilled, spread them out in a single layer at room temperature, allowing any condensation to evaporate completely before serving. The shortening in the chocolate coating also helps stabilize it and reduce weeping.
For short-term storage (up to 24 hours), Buckeyes can be kept in an airtight container at room temperature. For longer freshness, refrigerate them in an airtight container, separating layers with parchment paper; they will last 2-3 days this way. For the longest storage, Buckeyes freeze exceptionally well for up to 2-3 months. Flash freeze them in a single layer on a baking sheet, then transfer to a freezer-safe zip-top bag or container. Remember to thaw them in the refrigerator, not at room temperature, to minimize sweating.
The nutritional information, including calorie count, will vary depending on the size of your Buckeyes. Following this recipe and rolling them to the recommended traditional Buckeye size (approximately 1 to 1.5 inches across, or 15-20 grams), each candy contains about 190 calories. While a decadent treat, it’s certainly worth it for an occasional indulgence! You can always make them smaller to control portion size if desired.
More Delectable Candy Recipes to Explore!
Candy making doesn’t have to be complicated or stressful! As someone who appreciates easy-to-follow recipes, I’ve curated a collection of simple yet incredibly delicious candies that even a beginner can master and love. Expand your confectionery repertoire with these fantastic treats:
- Mom’s Easy Fudge Recipe >> A smooth, creamy, and wonderfully decadent fudge that brings pure nostalgia.
- Homemade English Toffee Recipe >> A timeless classic that’s always a huge crowd-pleaser with its buttery crunch and chocolate coating.
- Soft Homemade Caramel Candy << Indulge in the ultimate fudgy, soft caramel candies that melt in your mouth.
- Caramel Nougat Pecan Rolls >> Sweet vanilla nougat wrapped in buttery caramel and crunchy pecans – truly candy perfection!
- Easy Penuche Fudge Recipe (Brown Sugar Fudge) >> Discover this incredible brown sugar and white chocolate fudge – it’s surprisingly delicious!
- The Only Caramel Apple I Will Eat >> Ridiculously yummy caramel apples featuring the BEST fudgy caramel.
- Homemade Peppermint Bark >> Incredibly easy to make and far superior to any store-bought version.
- Oreo Truffles >> Another super easy recipe that everyone adores. Who can resist Oreos?
- Dulce de Leche from Condensed Milk >> Thick, creamy, and effortlessly made in either a slow cooker or Instant Pot.
- Chocolate Stuffed Snickerdoodle Truffles >> A delightful treat, much like a cake pop but with the comforting flavors of snickerdoodle bars. Yum!
- Peanut Brittle Recipe from She Wears Many Hats
Facebook | Pinterest | Instagram

Buckeye Candy Recipe
★
★
★
★
20
30
50
27
Print Recipe
This Buckeye Candy recipe is one you are going to want to hang onto! It’s shocking that so few ingredients can turn into something so irresistible. Buckeyes are basically a peanut butter cookie ball dipped in chocolate, but I swear they are more than the sum of their parts. And super fast and easy! You probably have all the ingredients already. Candy dipping can be a tricky technique; I have tons of tips for how to make them perfect every time!
Ingredients
- 1/4 cup butter, softened
- 1/2 cup powdered sugar
- 2 teaspoons vanilla extract
- 1 cup powdered sugar
- 1 cup peanut butter, not natural, use Jif or Skippy
- 3 tablespoons dry roasted salted peanuts
- 1/4 cup all-purpose flour*
- 1/2 teaspoon kosher salt
- 1 cup semi-sweet chocolate chips, high quality
- 1 cup dark chocolate chips, high quality
- 1 & 1/2 tablespoons shortening
- sprinkles, optional
- chopped peanuts, optional
- melted peanut butter, optional
Instructions
- Line a baking sheet with wax paper or parchment paper.
- Make the peanut butter balls. In a large bowl or stand mixer, add 1/4 cup softened butter (this is a half stick). Beat the butter until it is smooth and creamy, scraping down the sides of the bowl.
- Add 1/2 cup powdered sugar and 2 teaspoons vanilla. Beat this mixture until it has become smooth and creamy, like frosting. Scrape the sides.
- Add 1 cup powdered sugar and 1 cup peanut butter. (Regular peanut butter is better than natural peanut butter because it is smoother from added oils.) Beat this mixture until smooth, scraping sides.
- In a food processor, add 3 tablespoons dry roasted salted peanuts. Pulse until they have turned to crumbs, then keep going until the crumbs start to stick together in clumps. (See photos in article for visual.)
- Add the chopped peanuts, 1/4 cup flour, and 1/2 teaspoon kosher salt (use 1/4 teaspoon table salt) to the bowl and beat well. The mixture will be very thick! Use a sturdy spatula to scrape down the sides and bring it all together.
- Use a cookie scoop or spoon to shape the dough into buckeye-size balls, about 1 or 1 1/2 inches across, or between 15-20 grams (about a half ounce). Use your palms to roll the dough into a nice ball shape.
- Place the buckeyes on the baking sheet. Place a toothpick into the center of each ball, pushing it all the way down. (Do this BEFORE freezing!)
- Freeze the buckeyes for about 30 minutes. Or if you don’t have room in the freezer, chill for at least 1 hour.
- Melt the chocolate. In a glass measuring cup, add 1 cup semi-sweet chocolate chips and 1 cup dark chocolate chips.** Add 1 1/2 to 2 tablespoons shortening.***
- Microwave for 30 seconds, then stir. Return to the microwave and heat for another 30 seconds, and stir again. Continue until there are still a few lumps of chocolate chips remaining, then stir until the lumps are smoothed out. Chocolate scorches easily, so be careful. Heat in 15-second increments if you are nervous. The chocolate should run off your spatula in a thin, steady stream. It should not glob. Add a bit more shortening if your chocolate is too thick.
- Dip the buckeyes in chocolate. Take half of your peanut butter balls out of the freezer (leave the rest to continue chilling!). Dip the balls in the chocolate one by one, letting the chocolate drip off, then gently scraping off the bottom of the chocolate on the edge of the measuring cup (so the chocolate doesn’t pool at the bottom). Place back on the lined pan to harden. Dip them about 2/3 of the way, so there is a little peanut butter peek-a-boo at the top. This is the signature Buckeye look! Dip them quickly. Don’t linger in the chocolate, or the peanut butter will start to melt.
- If your peanut butter balls keep falling off their toothpicks as you are dipping, your peanut butter balls are not cold enough. Stick them back in the fridge or freezer until they are firm. Continue dipping the second half of the peanut butter balls, keeping any extra balls in the fridge or freezer until the very last minute before dipping.
- Optional dippers. If you want to jazz up your buckeyes, dip them in chocolate sprinkles or crushed peanuts. Do this just a moment after dipping. Dip your peanut butter ball and hold onto it, letting the chocolate set up for about 5-10 seconds. Then make a well in your bowl of sprinkles or nuts and dip the buckeye into the well. Use your fingers to press the sprinkles into the edges of the candy. Place back on the lined pan and let cool completely.
- Drizzle. If you want a pretty drizzled look, melt peanut butter (or more chocolate) and use a spoon to drizzle it over the top of the buckeyes.
- Place the pan of buckeyes back in the fridge or freezer for about 10 minutes (or longer) to firm up completely.
- Cover the toothpick mark. Once the buckeyes are chilled and the chocolate is nice and hard, remove all the toothpicks. Use the pad of your finger to “heal” the toothpick mark. Move your finger around and use your body heat to melt the peanut butter a bit, then smooth out the hole as best you can. You can smooth with a paring knife or a small spoon too. (Or you can cover the mark with a dot of melted chocolate so you have buckeye boobs, like Sarah’s family does.)
- Serving. Serve these buckeyes chilled, straight from the fridge if that is your preference. I prefer to serve them room temperature, which means they need time to weep and recover. Take them out of the fridge and lay them out in a single layer. The buckeyes will sweat and release condensation. Just keep waiting. Eventually they will come to room temperature and the moisture will evaporate. Serve right away.
-
Storage. You can store these buckeyes at room temperature for about 24 hours, tightly sealed. This way you can skip the whole emotional weeping process. Eventually the peanut butter mixture will get dry and crumbly though, so if you don’t plan to eat right away, refrigerate or freeze them.
Refrigerating: Store in a single layer in a tupperware or ziplock, or separate layers with wax/parchment paper. When ready to serve, spread them out in a single layer to let them weep a little (it’s not much) as they come to room temperature. Refrigerating is my least favorite way to store as it makes the peanut butter dry out faster. If you need to store for a while, it’s best to freeze. - Freezing. Buckeyes are great for freezing. They will last 2-3 months. When completely chilled, place in a ziplock bag and toss in the freezer. Plan time to thaw in the fridge overnight, then lay them out in a single layer so that they can weep and evaporate before serving.
Notes
**You can use any type of chocolate that you like. I prefer a mix, but using all semi-sweet is fine, or all dark chocolate. I wouldn’t use all milk chocolate, it would be too sweet. Use a HIGH QUALITY brand, like Ghirardelli, Nestle, Guittard, etc. Candy making is a little finicky, and you need chocolate that melts very smoothly if you want to dip them successfully.
***OR you can add coconut oil instead of shortening! Shortening or oil is added to smooth the chocolate and make it melt easier. It also makes the final hardened chocolate not-so-hard, meaning your buckeyes are a little fudgier and easier to bite into. This is my preference, but if you want them to be sturdy, just add 1-2 teaspoons of shortening, or omit entirely.
Nutrition
Did you make this? I’d love to see it!
Mention @thefoodcharlatan or tag #thefoodcharlatan!