
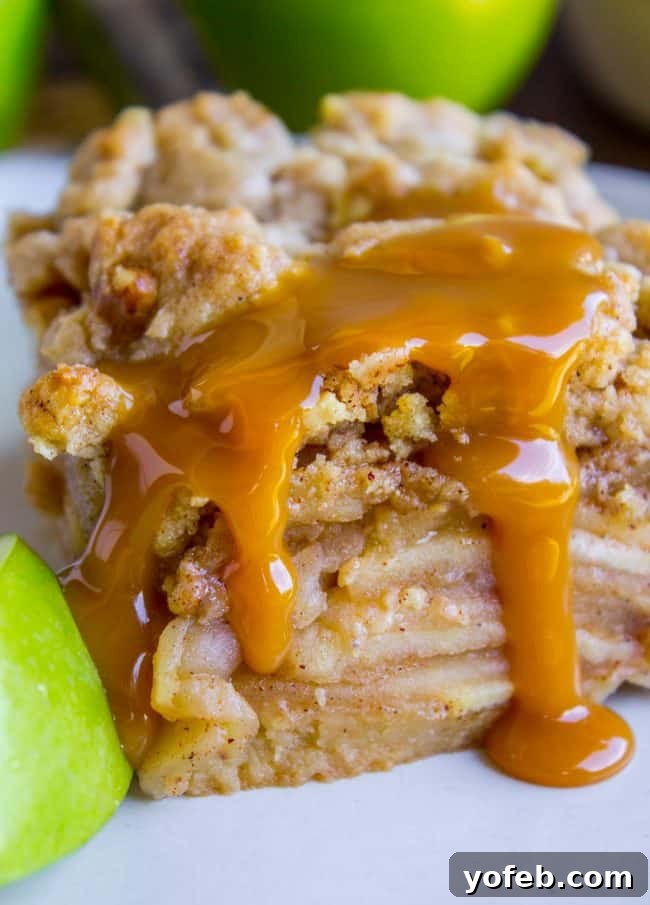
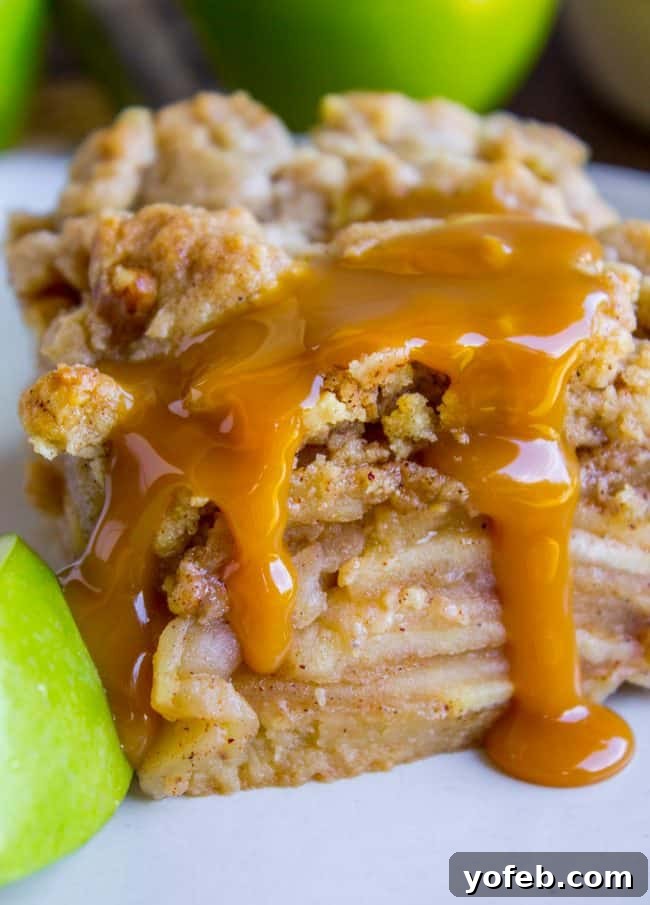
Get ready to indulge in the ultimate comfort food for fall: Apple Pie Bars! These delightful treats offer all the classic flavors of a beloved apple pie, ingeniously packed into a convenient, handheld bar. Forget the fork and embrace the joy of eating pie with your hands! This recipe boasts an exceptionally buttery shortbread crust that perfectly cradles a luscious, spiced apple filling, making it an irresistible choice for apple season.
Life, much like baking, sometimes throws unexpected curveballs. Just recently, my household was hit with a pesky flu bug. I found myself battling chills and body aches in the dead of night, only to wake up later and find my husband, Eric, mirroring my earlier symptoms, clinging to me for warmth like a human hot water bottle. There’s something both endearing and utterly inconvenient about a sick husband, isn’t there? In moments like these, comfort food isn’t just a treat; it’s a necessity. And what could be more comforting than the warm, familiar scent of cinnamon and apples baking in the oven? It’s these simple pleasures, like a slice of homemade apple pie, or even better, a grab-and-go Apple Pie Bar, that truly make everything feel a little bit better.
Why You’ll Fall in Love with These Apple Pie Bars
These Apple Pie Bars are a true triumph, simplifying the classic pie experience without sacrificing any of the deliciousness. The secret to their irresistible charm lies primarily in the generous use of butter in the crust – a technique famously embraced by the culinary queen, Ina Garten. When you start with a pound of butter, you’re pretty much guaranteed something spectacular! These bars are not just easy to make, but they are also incredibly versatile. Perfect for picnics, potlucks, or simply a cozy evening at home, they offer the rich, comforting flavors of apple pie in a convenient, portable format.
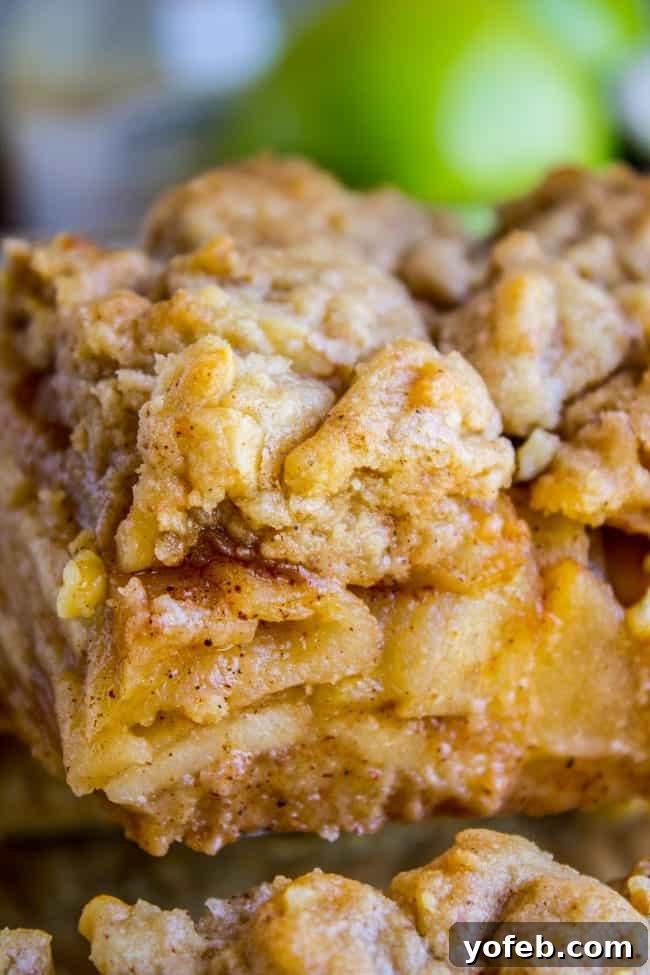
My version takes a cue from Ina’s brilliant foundation, adding my own personal touches, such as a double dose of nutmeg to truly elevate the spice profile. The concept is genius: a robust shortbread crust forms both the sturdy base and a delightful, crumbly topping. This ensures every bite is packed with buttery goodness and the perfect ratio of crust to tender, spiced apple filling.
Crafting the Perfect Buttery Shortbread Crust
The foundation of these incredible Apple Pie Bars is a rich, tender shortbread crust. This isn’t just any crust; it’s a buttery dream that provides the perfect contrast to the sweet apple filling. The process starts by creaming together a full pound of softened butter with both white and brown sugars, along with a touch of vanilla for depth of flavor. Once light and creamy, flour and kosher salt are gently mixed in to form a soft dough.
To create the multi-layered texture that makes these bars so special, the dough is divided. About two-thirds forms the sturdy base, pressed firmly into a parchment-lined 9×13 inch pan. A crucial step here is chilling the crust before its initial bake. This refrigeration period allows the butter to firm up, preventing the crust from spreading too much in the oven and resulting in that coveted tender, crumbly texture. After a quick pre-bake until golden brown, the base is ready for its delicious filling.
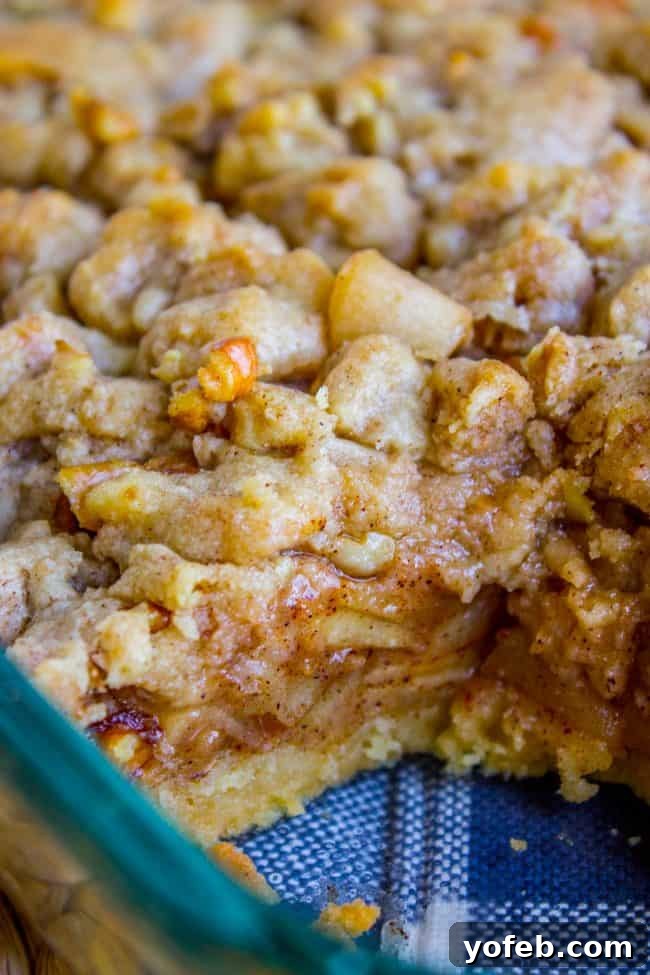
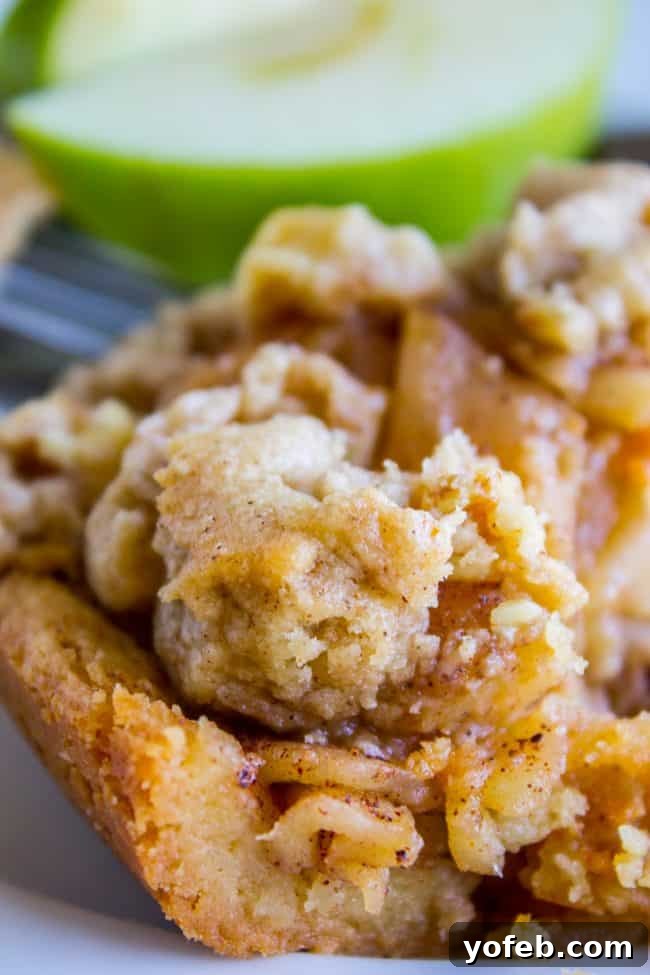
The remaining one-third of the dough is transformed into a delectable crumb topping. Here, I add chopped walnuts (or pecans, if you prefer) and a generous blend of cinnamon and nutmeg. This spiced, nutty topping is then scattered over the apples, adding another layer of flavor and a delightful crunch to every bite. The combination of the sturdy bottom crust and the textured crumb topping creates a harmony that truly sets these Apple Pie Bars apart from traditional pies.
The Luscious Apple Filling: A Game Changer
What truly sets these Apple Pie Bars apart, besides the incredible crust, is the method for preparing the apple filling. Unlike many pie recipes that rely solely on oven baking to soften the apples, we pre-cook our apples on the stovetop. This technique is a game-changer, ensuring your apples are perfectly tender and bursting with flavor, without risking an overbaked crust.
Apples can be a bit finicky in the oven, often requiring a long bake time (45-50 minutes) to reach that melt-in-your-mouth tenderness. This extended baking can sometimes push your pie crust to the brink of being overdone. By sautéing the sliced apples with butter, lemon juice, sugar, cinnamon, and nutmeg beforehand, we guarantee wonderfully soft, caramelized apples every single time. The lemon juice is essential not only for brightness but also to prevent browning as you prepare them. Slicing the apples thinly, about 1/8 inch, is key to achieving that desirable consistency quickly and evenly.
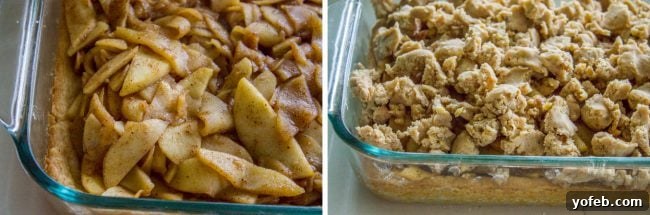
Once the apples are tender and most of the liquid has evaporated, they are spread over the pre-baked shortbread crust. This two-step cooking process ensures a flawless texture: apples that are perfectly spiced and yielding, encased in a crust that is golden, crisp, and never soggy. The aroma alone as these apples simmer on the stove is enough to transport you straight into the heart of autumn.
Tips for the Best Apple Pie Bars
- Choose the Right Apples: A mix of apple varieties works best for balanced flavor and texture. Granny Smith offers tartness, while Golden Delicious, Fuji, or Honeycrisp bring sweetness. Using a combination ensures a complex and delightful filling.
- Don’t Skip the Chill: Refrigerating the crust before baking is not just a suggestion; it’s a vital step for a truly tender shortbread. Cold butter creates steam in the hot oven, leading to a flaky, less dense crust.
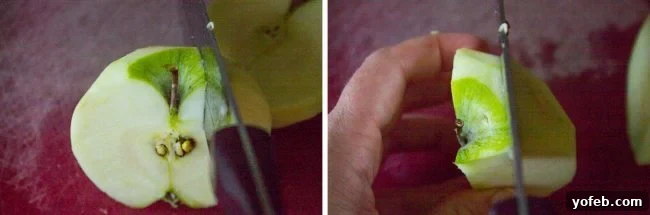
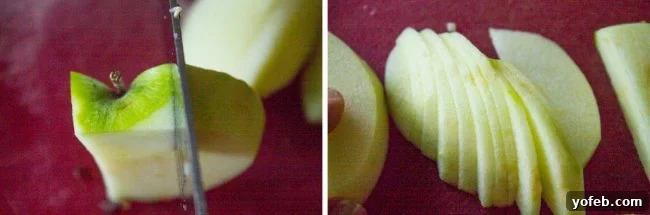
- Thin Slices are Key: For the apple filling, consistently thin slices (1/8 inch) ensure even cooking and a tender, melt-in-your-mouth texture. Thicker slices will take longer to soften and may result in an inconsistent filling.
- Season to Taste: The amount of cinnamon and nutmeg is a personal preference. Feel free to adjust these spices in both the crust topping and the apple filling to suit your taste. For an extra kick, a pinch of allspice or cardamom can be a wonderful addition.
- Nuts for Crunch: While I don’t typically add nuts to all my desserts, walnuts or pecans in the shortbread topping add a fantastic textural contrast and a subtle earthy flavor that complements the apples beautifully. You can lightly toast them for an enhanced nutty flavor, though it’s not strictly necessary.
- Parchment Paper is Your Friend: Lining your baking pan with parchment paper is a simple trick that makes lifting and cutting the bars incredibly easy, ensuring clean slices and preventing sticking.
Serving and Storage Suggestions
One of the best qualities of these Apple Pie Bars is their versatility in serving. While they are sturdy enough to be picked up and enjoyed with your hands once cooled, I confess to having a soft spot for room-temperature pie – perhaps I’m not alone in that! The flavors meld beautifully as they cool, making them an excellent candidate for a grab-and-go snack or a simple dessert.
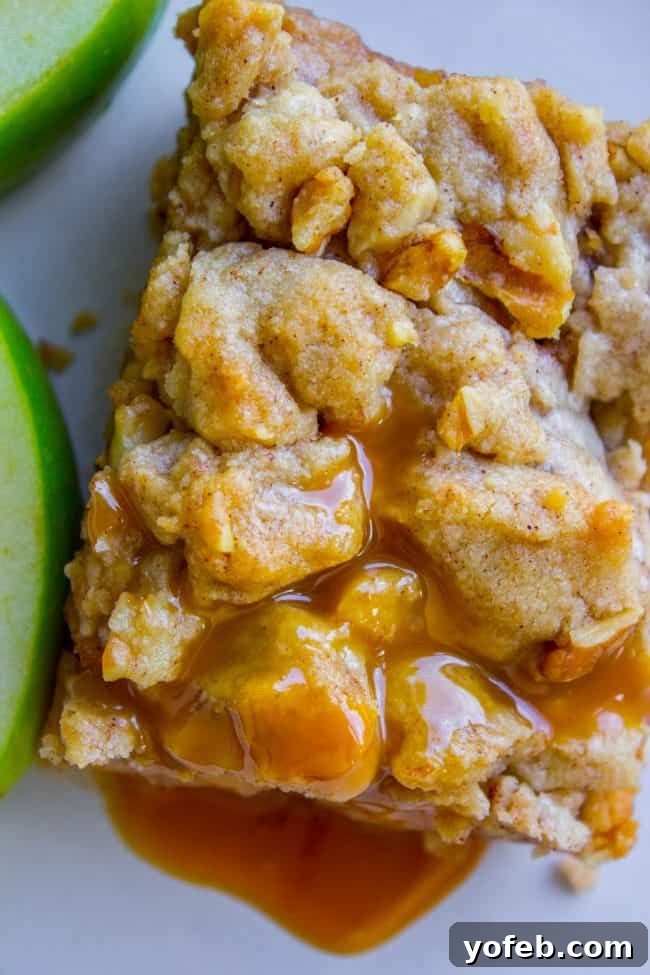
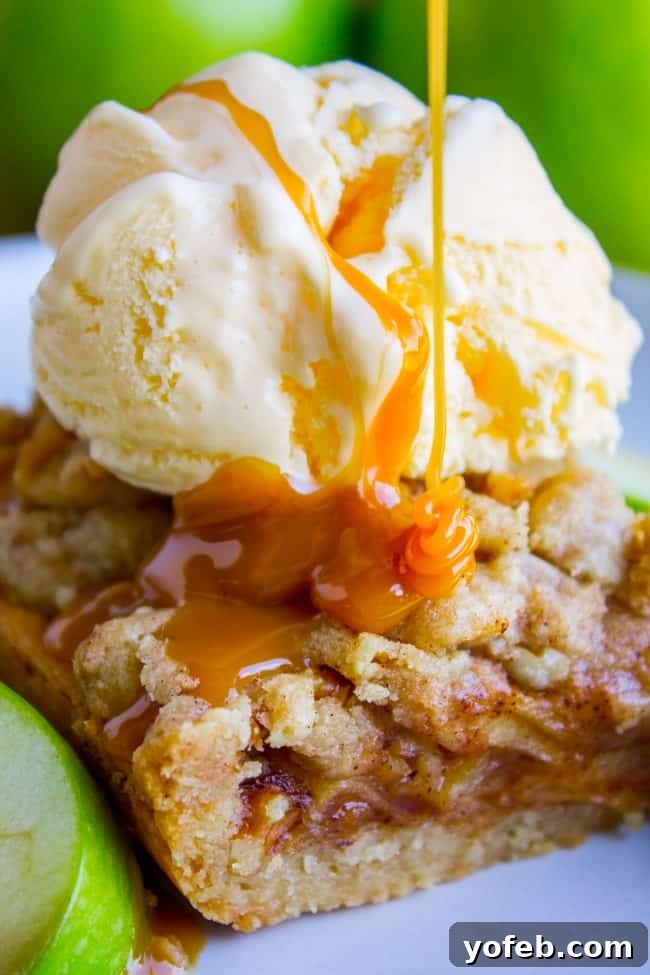
However, if you’re feeling a bit more decadent, these bars are absolutely divine when served warm with a scoop of vanilla ice cream. The cold, creamy ice cream melting into the warm, spiced apples is a heavenly combination. For an extra touch of indulgence, a drizzle of your favorite caramel sauce or even a homemade salted caramel sauce elevates these bars to a gourmet experience. Whether for breakfast with coffee, an afternoon treat, or a grand finale to a dinner party, these bars are sure to impress.
Storage Instructions:
- Room Temperature: Store cooled apple pie bars in an airtight container at room temperature for up to 2-3 days.
- Refrigeration: For longer storage, refrigerate in an airtight container for up to a week.
- Freezing: These bars freeze beautifully! Once completely cooled, cut into individual servings and wrap tightly in plastic wrap, then place in a freezer-safe bag or container for up to 3 months. Thaw at room temperature or reheat gently in the oven.
- Reheating: To enjoy warm, reheat individual bars in the microwave for 15-30 seconds or in a preheated oven at 300°F (150°C) for 10-15 minutes until warmed through.

Apple Pie Bars
20
25
45
12 Servings
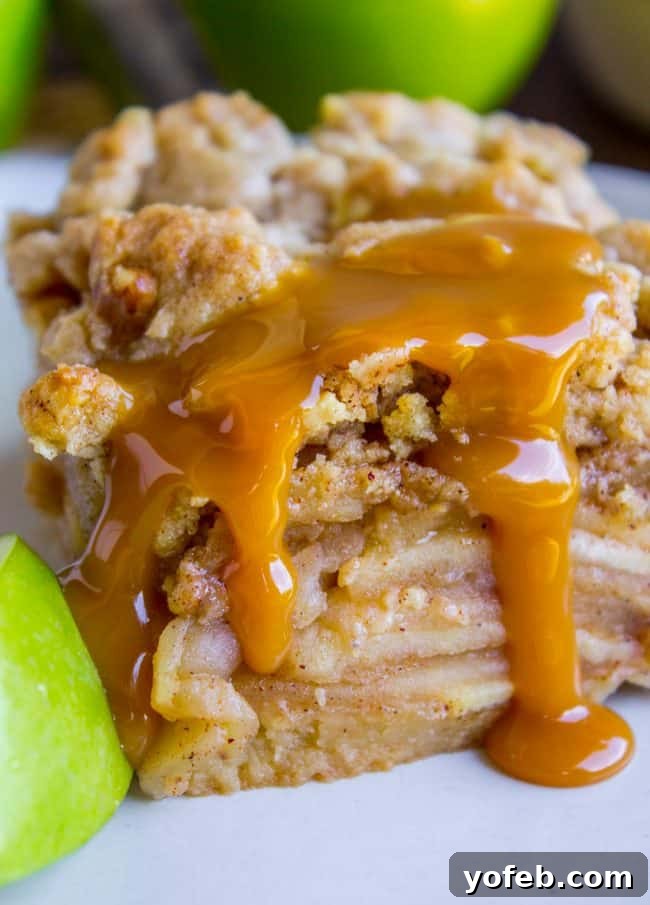
Apple Pie Bars are the best way to eat pie with your hands! There is a crazy amount of buttery crust in this recipe, that we divide between the bottom and top of a luscious apple pie filling. Apple season is upon us my friend! It’s glorious!
Ingredients
For the crust
- 1 pound butter, 4 sticks, softened
- 3/4 cup white sugar
- 1/2 cup brown sugar, packed
- 2 teaspoons vanilla
- 4 cups all-purpose flour
- 1 & 1/2 teaspoons kosher salt
- 1/2 cup chopped walnuts, or pecans
- 1 teaspoon cinnamon, or up to 2 teaspoons
- 1 teaspoon nutmeg
For the apple mixture
- 3 pounds apples, variety of types, peeled (Golden Delicious and Granny Smith are what I used)
- 2 tablespoons lemon juice, fresh
- 1/4 cup white sugar
- 1 teaspoon cinnamon
- 1/2 teaspoon nutmeg
- 4 tablespoons butter, 1/2 stick
Instructions
-
Line a 9×13 inch pan with parchment paper. (This is optional but makes lifting and slicing the bars much easier.)
-
In a large bowl or stand mixer, beat 1 pound of softened butter until smooth and creamy. Add 3/4 cup white sugar, 1/2 cup packed brown sugar, and 2 teaspoons vanilla. Beat for 1-2 minutes, scraping the bottom and sides of the bowl, until the mixture is light and creamy.
-
Add 4 cups of all-purpose flour and 1 and 1/2 teaspoons kosher salt. Beat on low speed until just combined. Be careful not to overmix.
-
Remove about 2/3 of the dough and press it into the bottom and up the sides of the prepared pan. The crust should extend about a half-inch up the sides. Use your floured hands or the flat bottom of a glass to press the dough evenly. Keep the remaining 1/3 of the dough in the bowl for later.
-
Refrigerate the pressed crust for 20 minutes. This chilling step is essential for a tender and flaky shortbread crust.
-
Preheat your oven to 375°F (190°C).
-
Bake the chilled crust for about 18 minutes, or until it’s beautifully golden brown. Once baked, set aside to cool slightly. Reduce the oven temperature to 350°F (175°C).
-
While the crust bakes, add the chopped walnuts (or pecans), 1 teaspoon cinnamon, and 1 teaspoon nutmeg to the reserved 1/3 of the dough in the mixing bowl. Mix on low speed until just combined. Cover the bowl and refrigerate. (Adjust spices according to your preference.)
-
Prepare the apple filling: Start by prepping your apples. A variety of apple flavors is always best for baking (e.g., Granny Smith for tartness, Golden Delicious for sweetness). Peel, core, and slice the apples into 1/8-inch thin slices.
-
As you slice the apples, toss them immediately into a large bowl with 2 tablespoons of fresh lemon juice to prevent browning. Stir periodically to ensure all slices are coated.
-
In a large 10 or 12-inch skillet, melt 4 tablespoons of butter over medium heat. Add the sliced apples (along with any lemon juice from the bowl), 1/4 cup sugar, 1 teaspoon cinnamon, and 1/2 teaspoon nutmeg.
-
Simmer the apples over medium heat, stirring frequently, for about 12-15 minutes. If they seem to be boiling too vigorously, reduce the heat to medium-low. Continue until the apples are tender and most of the liquid has evaporated. Turn off the heat.
-
Pour the cooked apple filling into the pre-baked crust, leaving a small half-inch border around the edge.
-
Retrieve the remaining spiced shortbread dough from the fridge. Use your fingers to pinch off medium-sized pieces of dough and drop them evenly over the apple filling to create a crumbly topping.
-
Bake at 350°F (175°C) for 25-30 minutes, or until the crumb topping is golden brown and the apples are bubbling.
-
Allow the bars to cool completely before cutting into squares for neat slices. Alternatively, for an immediate, comforting treat, cut out a warm, falling-apart piece and top it generously with vanilla ice cream and My Favorite Caramel Sauce. Enjoy!
Notes
This recipe is inspired by Ina Garten’s version, which was published in the October 2017 Food Network magazine and is also available online here. I’ve made a few minor adjustments, but the core genius of Ina’s buttery crust remains. Her recipes are always a delight!
Nutrition
Calories: 651kcal |
Carbohydrates: 74g |
Protein: 6g |
Fat: 38g |
Saturated Fat: 22g |
Polyunsaturated Fat: 4g |
Monounsaturated Fat: 9g |
Trans Fat: 1g |
Cholesterol: 91mg |
Potassium: 216mg |
Fiber: 4g |
Sugar: 38g |
Vitamin A: 1125IU |
Vitamin C: 6mg |
Calcium: 40mg |
Iron: 2mg
Did you make this? I’d love to see it!
Mention @thefoodcharlatan or tag #thefoodcharlatan!
More Apple Dessert Recipes You Are Sure to Love!
If you’ve fallen in love with these Apple Pie Bars, you’ll be thrilled to discover more of my favorite apple desserts. Each recipe brings its unique charm to the glorious apple season!
Apple Crisp, With a Ridiculous Amount of Streusel << because we all know the streusel is the best part!
Apple Custard Pie with Cinnamon Streusel << custard in pie is my absolute favorite!
Caramel Apple Upside Down French Toast Bake << perfect for a special breakfast or brunch!
More Apple Dessert Recipes from Friends!
Expand your apple recipe collection with these fantastic creations from my talented foodie friends:
- Cinnamon Apple Cheesecake Parfaits from Shugary Sweets
- Dulce de Apple Streusel Pie from Wine and Glue
- Crockpot Apple Cobbler from Amanda’s Cookin’
Connect with me on social media:
Facebook | Pinterest | Instagram