
Crafting Christmas Magic: Your Guide to Golden Santa Bread
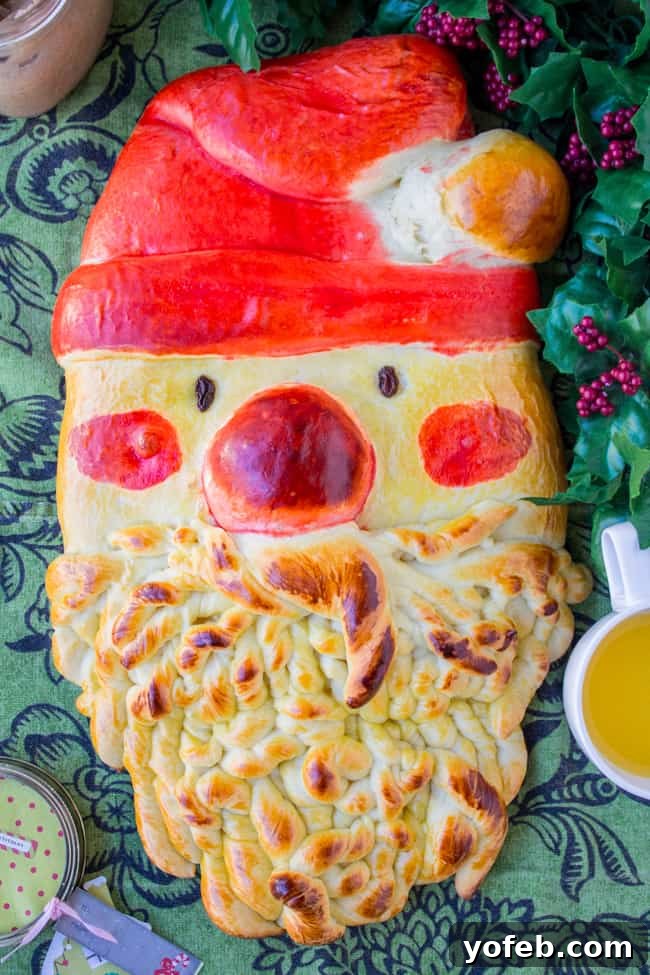
Get ready to infuse your holiday mornings with an extra sprinkle of cheer! This detailed, step-by-step photo tutorial will guide you through creating the most enchanting centerpiece for your Christmas breakfast: Golden Santa Bread. We understand it might look intricate, but rest assured, this festive bread is far easier to master than its charming appearance suggests. It’s not just a recipe; it’s a delightful holiday project, perfect for involving the whole family and making memories. Imagine waking up on Christmas morning to the aroma of freshly baked bread, ready to be enjoyed by kids and adults alike. This incredibly kid-friendly — and truly, everybody-friendly — treat can even be made ahead of time, ensuring a stress-free start to your most anticipated day of the year!

The Tradition of Golden Santa Bread: A Journey of Joy and Learning
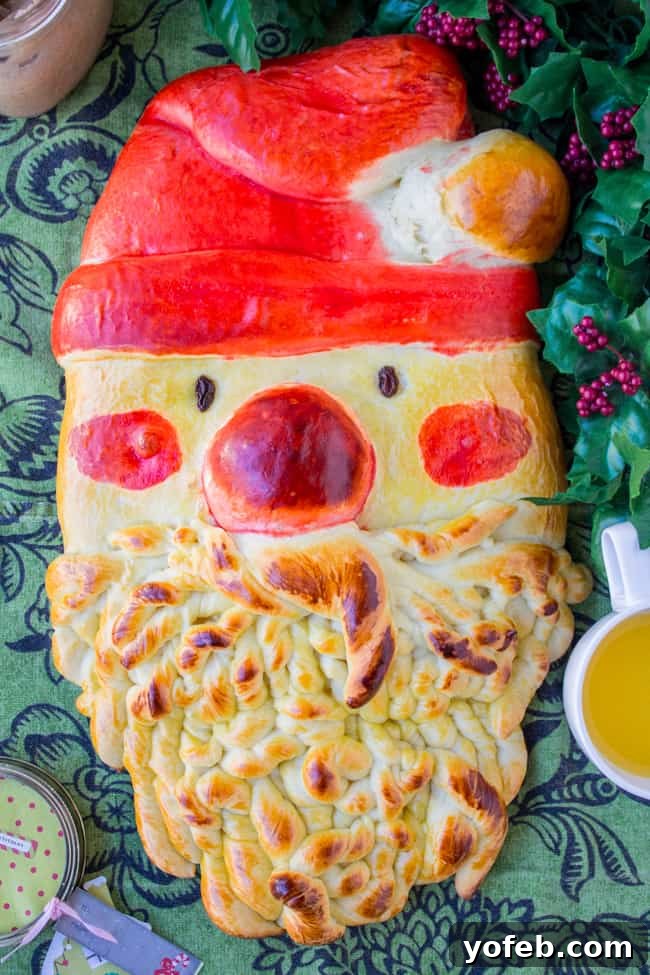
For many years now, this Golden Santa Bread has been a cherished tradition in my home, marking the start of every Christmas with its sweet, comforting presence. Its ease and festive charm make it an instant holiday favorite. However, the path to perfecting its blog-worthy photos hasn’t always been smooth! Like any rewarding culinary endeavor, there have been a few bumps along the way, leading to valuable lessons in bread making.
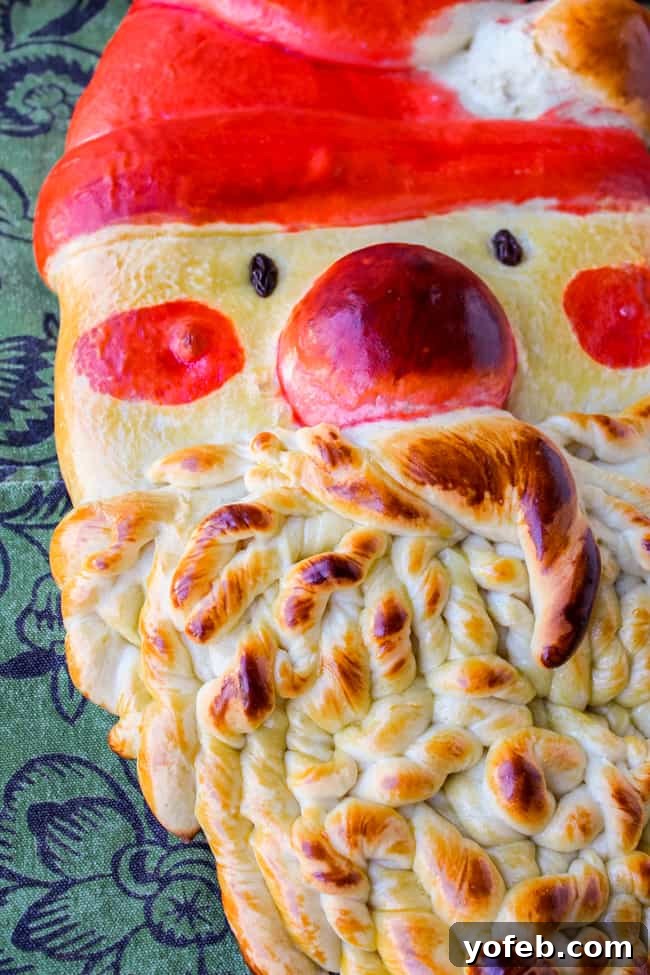
One year, in an attempt to capture its golden perfection for new blog pictures, disaster struck. Not once, but multiple times! The first attempt resulted in a slightly over-baked Santa, a minor setback that was quickly remedied by a stress-induced snack of Santa’s perfectly edible (albeit slightly crispy) nose and the puff ball on his hat. Every baker knows the feeling of nibbling on the evidence!
My subsequent attempts encountered a more fundamental issue: a stubborn refusal of the dough to rise. It turned out I had inadvertently used liquid that was too hot, effectively killing my yeast not once, but twice. There’s a fine line between comfortably warm and yeast-destroying hot! This recurring problem was frustrating, leading to moments where I felt like my bread-making skills had completely vanished. Just as I was about to despair and perhaps take out my frustration on Santa’s (admittedly) smug-looking face, a crucial realization dawned on me: it wasn’t my technique that was flawed, but the yeast itself. All of it was past its prime!
This experience highlighted a critical step often overlooked by even seasoned bakers: proofing your yeast. It’s a simple, yet essential test to ensure your yeast is active and alive. Without vibrant yeast, your dough simply won’t rise, no matter how perfectly you follow the other steps. After this learning curve, I adjusted the recipe to explicitly include a yeast-proofing step. No more chances taken with lifeless yeast! It’s a small addition that guarantees success, ensuring your Santa Bread rises beautifully every time.
Embrace the Holiday Baking Journey
Despite my earlier anecdotes, I truly swear this is an easy and incredibly rewarding recipe! While it might take a bit of time, especially during your first attempt, think of it less as a chore and more as a delightful holiday project. It’s an opportunity to slow down, enjoy the process, and immerse yourself in the festive spirit. Put on some classic holiday tunes from Bing Crosby or Michael Bublé, grab a cup of cocoa, and have yourself a little Santa Claus dance party in the kitchen!
The beauty of homemade bread lies in its tactile nature and the wonderful aromas that fill your home. Don’t be intimidated by the shaping – it’s part of the fun! And trust me, if I can navigate through burned bread and dead yeast to create this beautiful loaf, you absolutely can too. Just remember that one golden rule: always, always check your yeast!
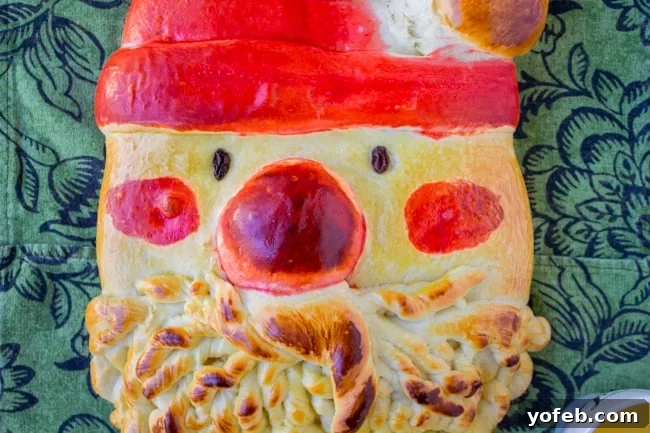
The Perfect Pairing: Cinnamon Honey Butter
Every year, I serve this sweet, golden bread alongside a generous helping of my Cinnamon Honey Butter. This combination is nothing short of mind-blowing, elevating an already awesome bread to an extraordinary, unforgettable treat. The rich, warm notes of cinnamon and the delicate sweetness of honey butter complement the Santa bread beautifully, making each bite a truly magical experience. This pairing is an absolute must-try for your Christmas morning breakfast!
Your Make-Ahead Christmas Morning Solution
One of the best features of this Golden Santa Bread is how wonderfully it lends itself to being made ahead of time. Bread freezes exceptionally well, making it the perfect stress-free solution for a busy Christmas morning. You can bake your Santa bread a few days or even a couple of weeks before the big day. Once cooled, simply wrap it tightly in aluminum foil, followed by a layer of plastic wrap, and if it fits, pop it into a 2-gallon freezer bag for extra protection against freezer burn. This preparation allows you to enjoy the festive holiday season without the last-minute rush.
On Christmas Eve, before you head to bed, simply transfer the frozen Santa bread from the freezer to your counter. Leave it wrapped to thaw slowly overnight. On Christmas morning, once thawed, unwrap the bread and place it in a preheated 350°F (175°C) oven for just a few minutes, typically 5-10, until it’s warmed through. There’s nothing quite like warm, fresh-baked bread to kick off Christmas morning!
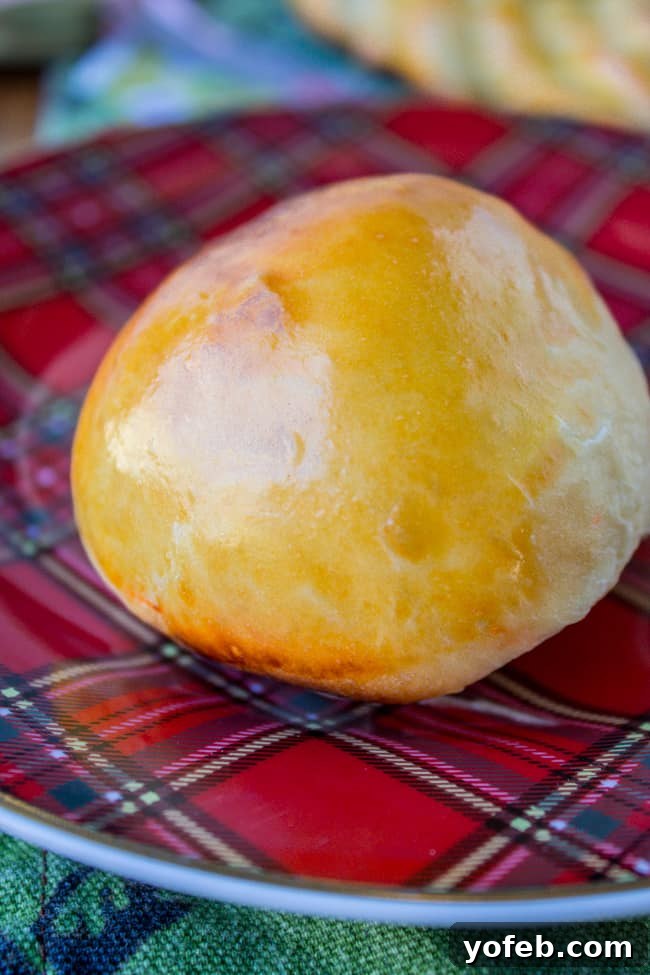
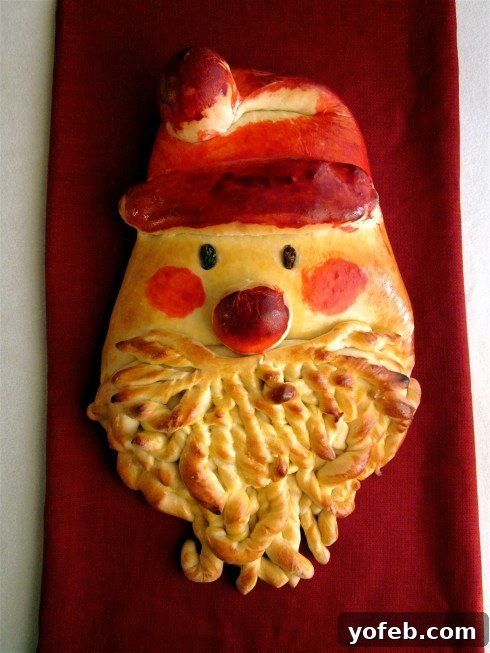
Here’s a little blast from the past: my original photo from 2011, when this cherished recipe first made its debut. Just for fun, see how far we’ve come!
Ready to create your own holiday magic, or are you thirsty for more festive inspiration?
Connect with us for more delicious recipes and baking adventures!
Facebook | Pinterest | Instagram | Twitter
Golden Santa Bread
Rate this Recipe
Print Recipe
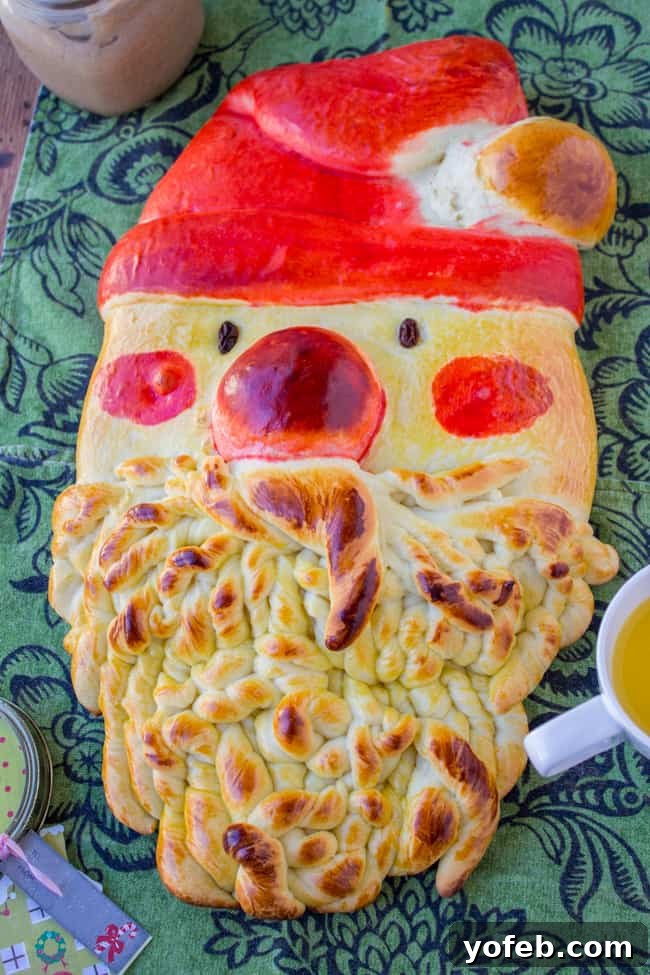
A step-by-step photo tutorial for how to make Golden Santa Bread! I promise it is NOT as hard as it looks. This is such a fun breakfast to make ahead for Christmas morning! Very kid-friendly. Actually it’s pretty much everybody-friendly.
Ingredients
- 3 & 1/2 cups bread flour, spooned and leveled
- 1 & 1/2 teaspoons salt
- 1/2 cup milk
- 1/4 cup water
- 1/4 cup butter, cubed
- 1/2 cup sugar
- 2 tablespoons yeast
- 2 eggs
- 2 raisins
- 2 egg yolks, separated in 2 bowls
- red food coloring
Instructions
- In a large bowl or stand mixer, combine 2 cups of the bread flour and the salt.
- In a glass measuring cup, heat the milk, water, and butter to 120°-130°F (49°-54°C) in the microwave (or in a pot on the stove). Heat the mixture until the butter is partially melted, then stir it to melt it the rest of the way. Ensure the liquid is comfortably warm, but not hot, when you dip your finger in it before adding to the yeast.
- Add the sugar and yeast to the liquid. If you are confident that your yeast is not dead, then move on to the next step. Otherwise, wait 5 minutes to see if it starts to foam. If it foams, your yeast is active and ready to go!
- Add the warm liquid mixture to the dry ingredients; beat just until moistened. Beat in 2 eggs until the mixture is smooth.
- Gradually stir in enough of the remaining flour to form a soft dough. The dough should come together in a ball, but it’s okay if it sticks a little to your hands. Continue adding flour until the dough is manageable and no longer excessively sticky.
- Turn the dough onto a lightly floured surface; knead until it becomes smooth and elastic, approximately 6-8 minutes. Alternatively, if using a stand mixer, beat with the dough hook for 6-8 minutes.
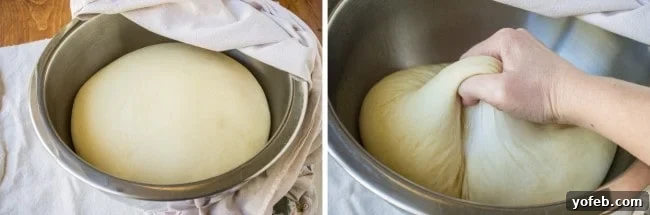
- Place the kneaded dough in a lightly greased bowl, turning it once to ensure the top is also greased. Cover the bowl with plastic wrap or a clean kitchen towel and let it rise in a warm place until it has doubled in size. This typically takes at least an hour and a half; mine often takes about 2 hours, depending on the ambient temperature.
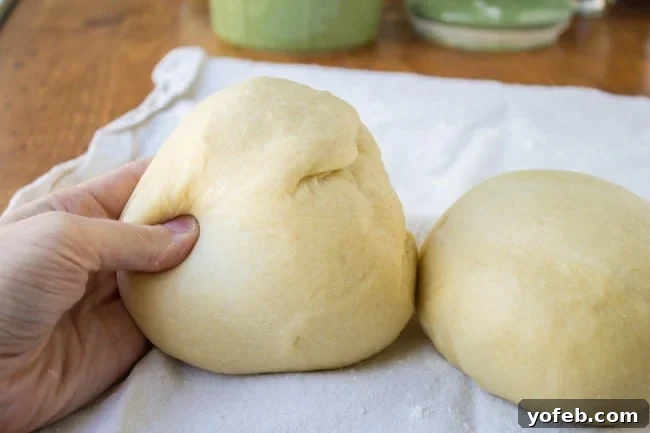
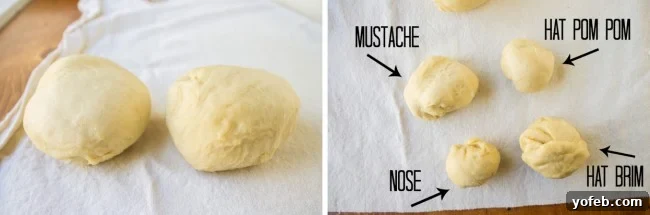
- Once doubled, gently punch the dough down to release the air. Turn the dough onto a lightly floured surface and divide it into two portions, with one portion being slightly larger than the other.
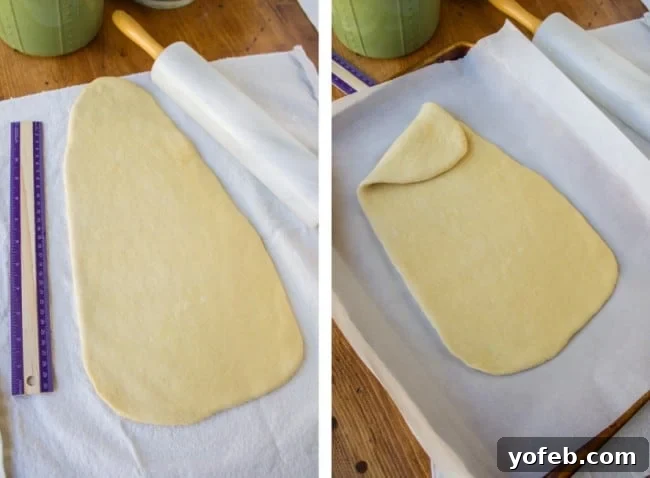
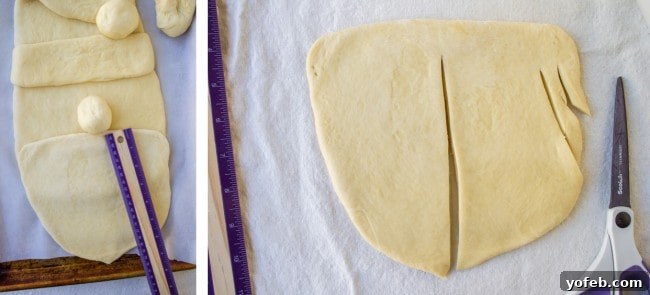
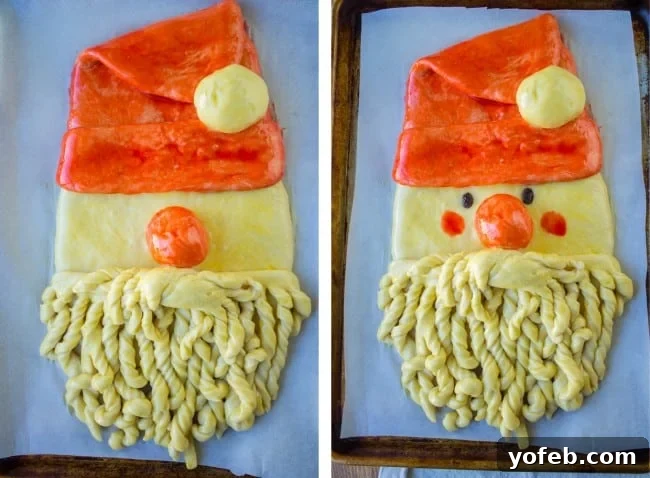
- Shape the larger portion of dough into an elongated triangle with softly rounded corners. This will form Santa’s head and his hat. Carefully transfer this shape to a large, greased cookie sheet.
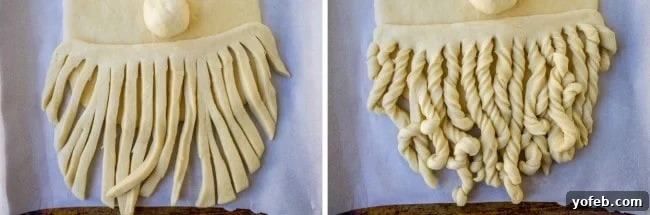
- Divide the smaller portion of dough in half. Take one half and flatten it into a beard shape. Using kitchen scissors or a pizza cutter, cut strips into the beard, stopping about 1 inch from the top edge. Make the strips fairly thin to allow for easy twisting. Position the beard on Santa’s face, then twist and curl the individual strips to create a fluffy beard effect.
- Use the remaining dough for Santa’s mustache, nose, hat pom-pom, and brim. Shape a portion of dough into a mustache; flatten it slightly and use scissors to cut the ends into small strips. Place the mustache above the beard.
- Form a small ball of dough for the nose and place it above the mustache. Fold the tip of Santa’s hat over slightly and add another small ball of dough for the pom-pom at the end of the hat.
- Roll out a narrow piece of dough to create the hat brim. Position it under the hat and carefully tuck the edges underneath the base dough for a neat finish.
- Using kitchen scissors, carefully cut two small slits for Santa’s eyes; gently insert one raisin into each slit.
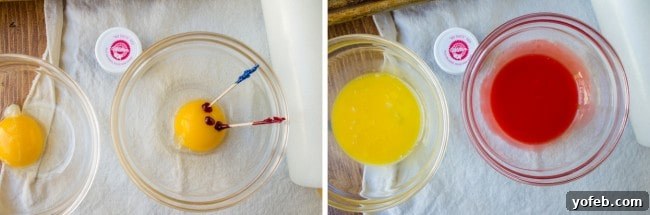
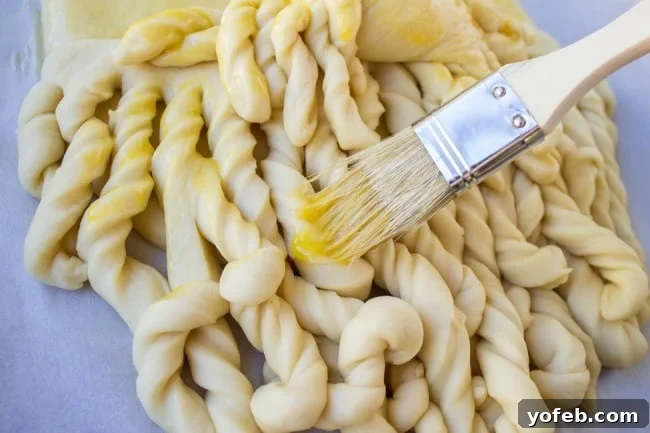
- In two separate small bowls, beat each egg yolk individually. First, brush the plain egg yolk over all portions of the dough that will NOT be red (e.g., the face, beard, mustache, and pom-pom). Then, add red food coloring to the second egg yolk; carefully brush this red mixture over Santa’s hat, nose, and cheeks. Applying the plain yolk first helps prevent the red color from running into the white areas.
- Loosely cover the entire Santa bread with aluminum foil that has been coated with nonstick cooking spray. It’s important to tent the foil so it doesn’t touch the bread, preventing it from tearing when removed.
- Allow the dough to rise for another half hour. Preheat your oven to 350°F (175°C). Bake the Santa bread for 15 minutes with the foil cover. Then, uncover it and bake for an additional 5-10 minutes, or until it reaches a beautiful golden brown. Cool completely on a wire rack before serving. Don’t forget to take plenty of pictures and bask in the admiration of everyone who sees your magnificent creation!
Notes
Make-Ahead & Freezing Instructions: Golden Santa Bread is an excellent make-ahead Christmas breakfast option. Prepare and bake the bread completely a few days or even a couple of weeks before you plan to serve it. Once fully cooled, wrap it tightly first in aluminum foil, then in plastic wrap. For extra protection against freezer burn, you can place the wrapped bread into a 2-gallon freezer bag if it fits. To serve, remove the bread from the freezer and let it thaw on the counter, keeping it wrapped, on Christmas Eve. On Christmas morning, preheat your oven to 350°F (175°C). Once the bread is thawed and the oven is hot, unwrap it and bake for 5-10 minutes, just until it’s heated through. Serve warm for the best experience.
Source: adapted slightly from Taste of Home
Nutrition
Did you make this? I’d love to see it! Mention @thefoodcharlatan or tag #thefoodcharlatan!
Visual Guide: Shaping Your Golden Santa Bread
Creating Santa’s friendly face is the most enjoyable part of this recipe. Follow these visual cues to guide you through shaping and decorating your Golden Santa Bread. Each step is designed to be straightforward, helping you transform simple dough into a festive masterpiece.
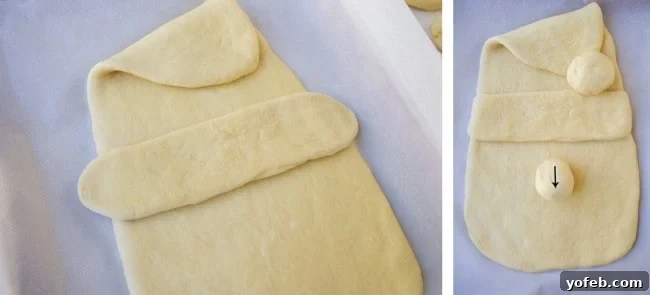
When placing Santa’s nose, ensure it’s positioned slightly lower than what you might instinctively do. If placed too high, Santa’s eyes might end up looking a bit squished, as you can see in this example of my earlier attempts. A bit lower allows for a more open and friendly expression!
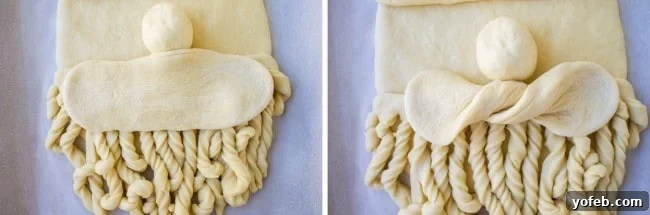
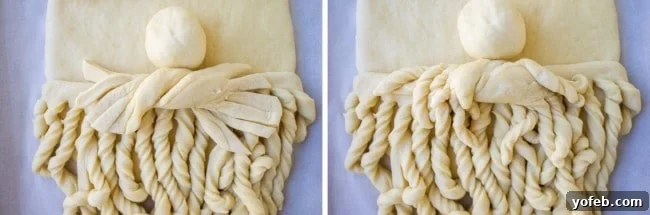
Feel free to get creative with the mustache! The shape shown here is just one suggestion; adapt it to your liking to give Santa his unique character.
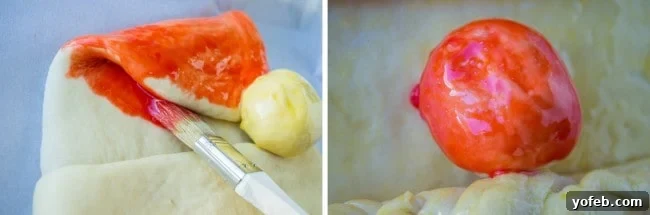
When applying the red egg yolk mixture, try to get into all the crevices. Remember that the bread will puff up significantly during baking. Be mindful to avoid getting red on the parts that are intended to be white. If any red yolk drips onto the white areas (as seen in some photos), a quick dab with the corner of a paper towel can help clean it up.
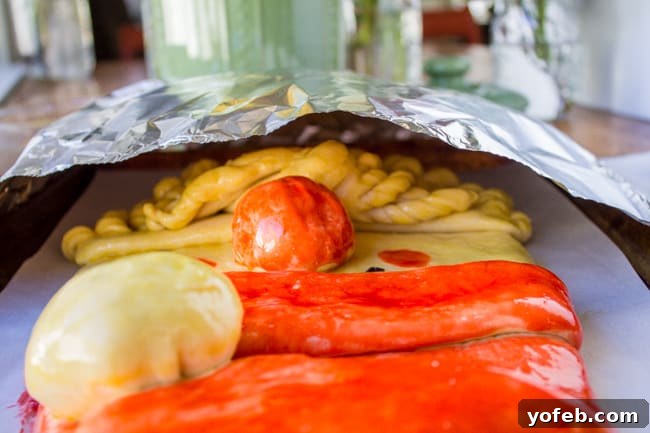 Don’t forget to lightly spray the inside of your aluminum foil with nonstick spray. Also, tent the foil over the bread to create enough space so it doesn’t stick to or tear the delicate dough when you remove it later.
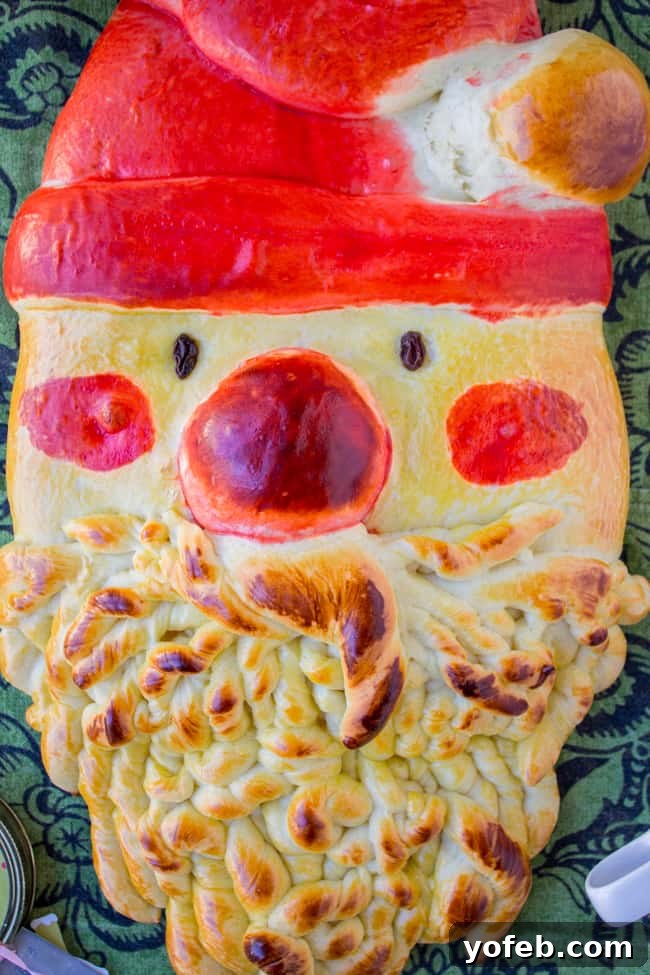
Seriously, you absolutely must serve this delightful Santa bread with my homemade Cinnamon Honey Butter. It’s a match made in heaven, trust me!
More Festive Christmas Morning Breakfast Ideas
If you’re planning a grand Christmas morning feast and want to offer a variety of delicious options alongside your Golden Santa Bread, here are some other fantastic breakfast ideas that complement the festive spread beautifully:
Savory Parmesan French Toast with Hollandaise Sauce: For those who prefer a savory start to their holiday, this elegant French toast is a game-changer. The parmesan adds a delightful umami depth, perfectly balanced by a rich, creamy hollandaise sauce. It’s sophisticated yet comforting, providing a wonderful contrast to the sweet Santa bread.
Easy Breakfast Casserole with Potatoes and Ham: Don’t let the older photos fool you; this casserole is an absolute all-time favorite! It’s hearty, satisfying, and incredibly simple to assemble, making it another ideal make-ahead option. Packed with savory potatoes and tender ham, it’s the perfect comfort food for a chilly Christmas morning, providing robust flavors that are sure to please everyone at your table.
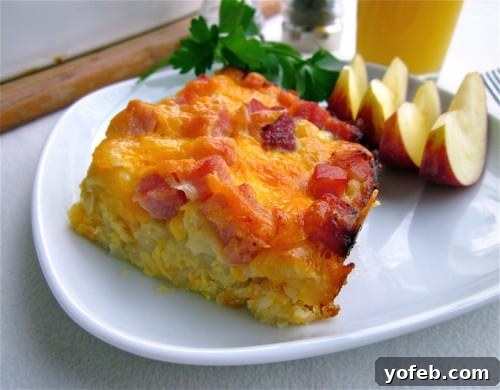
Overnight Eggs Benedict Casserole: A classic breakfast elevated to casserole form, this dish brings all the beloved flavors of Eggs Benedict with none of the morning fuss. Prepare it the night before, and simply bake it off on Christmas morning. The rich flavors of ham, eggs, and a creamy sauce make it a luxurious addition to your holiday spread, perfect for impressing guests with minimal effort.
Asparagus, Tomato, and Goat Cheese Quiche: This vibrant and flavorful quiche is a personal favorite – I could honestly eat it every single day! The fresh asparagus and ripe tomatoes, combined with the tangy goat cheese, create a sophisticated and light option. It’s a wonderful way to incorporate fresh vegetables into your holiday breakfast, offering a refreshing counterpoint to richer dishes.
No matter which delightful dishes you choose, your Golden Santa Bread will undoubtedly be the star of your Christmas morning. Happy baking and happy holidays!