
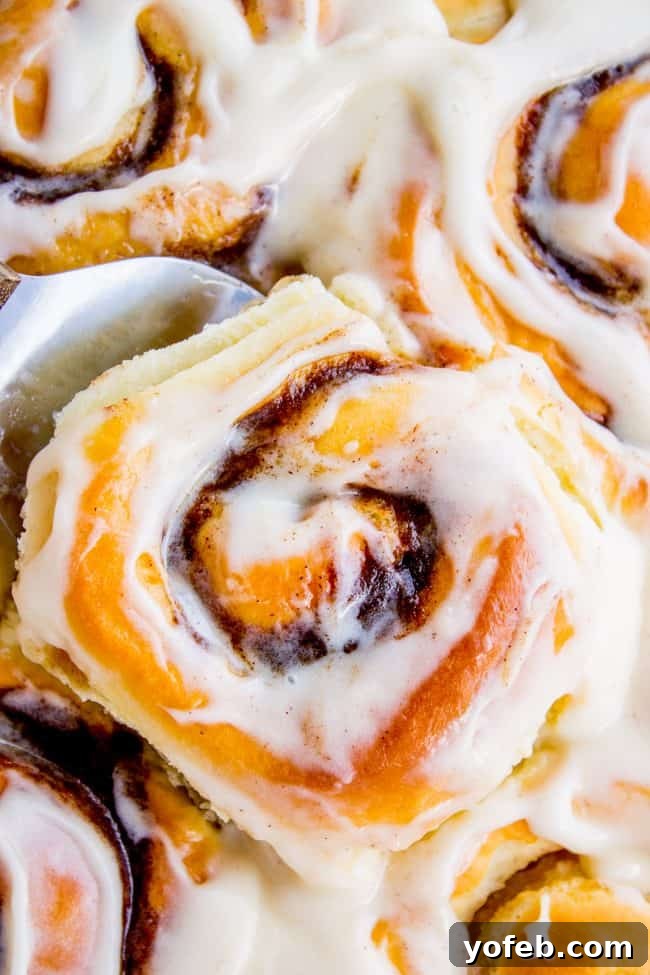
If you’ve ever dreamt of biting into the most incredibly soft, pillowy, and utterly irresistible cinnamon rolls, then prepare to have your dreams come true. Forget everything you thought you knew about homemade cinnamon rolls made with standard bread dough. Our secret lies in a luxurious, simple sweet dough, often referred to as brioche-style, which transforms these classic breakfast treats into an experience unlike any other. These aren’t just fluffy; they are the FLUFFIEST homemade cinnamon rolls you will ever taste, guaranteed to melt in your mouth with every bite. The best part? This recipe is surprisingly easy to follow, and with our convenient overnight option, you can wake up to warm, fresh-baked goodness without any morning rush. Originally published on June 1, 2022, this timeless recipe has been perfected to bring ultimate comfort and joy to your kitchen.
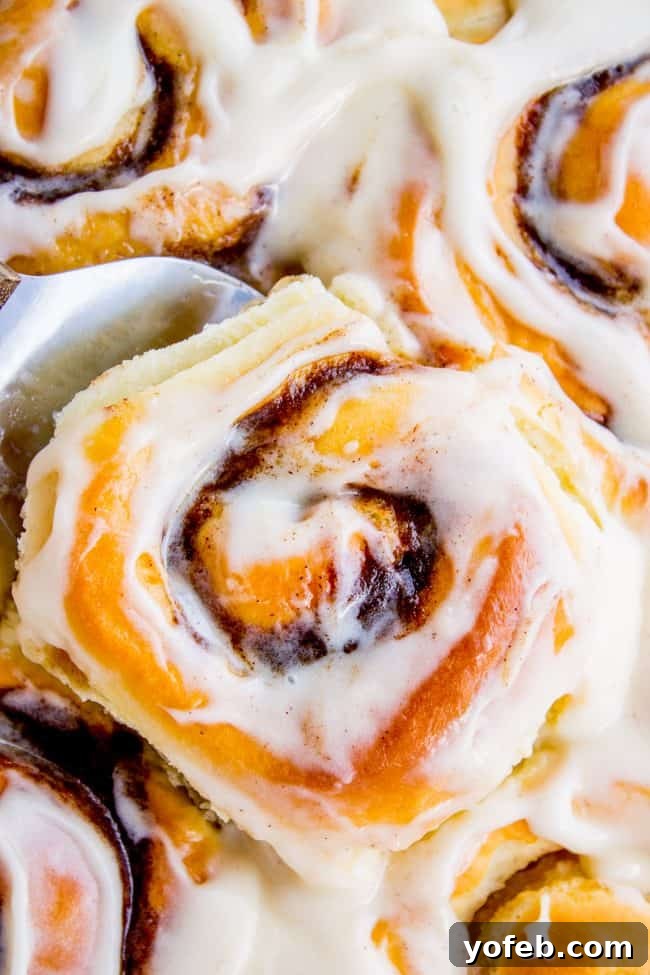
Table of Contents
- The Ultimate Cinnamon Roll Experience
- Why This Cinnamon Roll Recipe Stands Out
- Essential Ingredients for Fluffy Cinnamon Rolls
- Making the Decadent Cream Cheese Frosting
- Step-by-Step Guide to Homemade Cinnamon Rolls
- The Secret to Gooey Perfection
- Overnight Cinnamon Rolls for Stress-Free Mornings
- Storing and Enjoying Leftover Cinnamon Rolls
- Frequently Asked Questions About Cinnamon Rolls
- Our Best Cinnamon Rolls Recipe
- More Sweet Breakfast Delights You’ll Love
Just the other day, my son Truman and I had a classic grocery store adventure after kindergarten. He spotted a toy he absolutely *needed*, and when I said no, the world seemed to stop spinning for him. It went from zero to full-blown meltdown in seconds. At one point, amidst his cries, he passionately declared, “But Mom, Christmas is about GIVING!” I nearly burst out laughing at his dramatic yet surprisingly on-point observation, only for him to immediately follow up with the universal truth: “And besides, I’M HUNGRY!!”
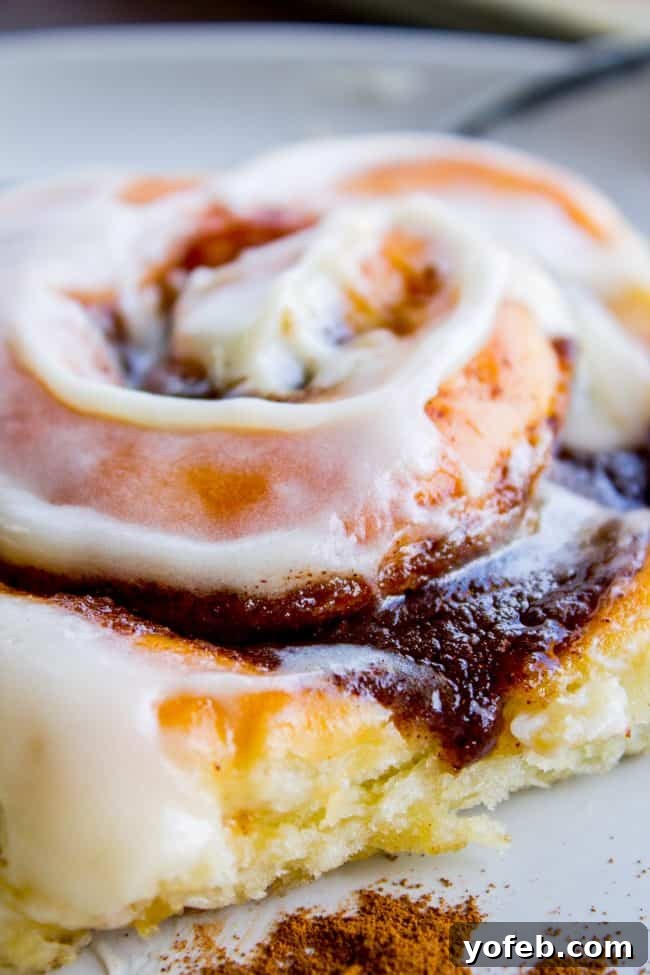
Honestly, I have to give my five-year-old serious credit for being able to pinpoint the true cause of his tantrum. I, on the other hand, rarely realize I’m “hangry” until I’ve already devoured something substantial. This little episode got me thinking about those deep cravings we all experience – the kind that only a truly exceptional treat can satisfy.
The Ultimate Cinnamon Roll Experience
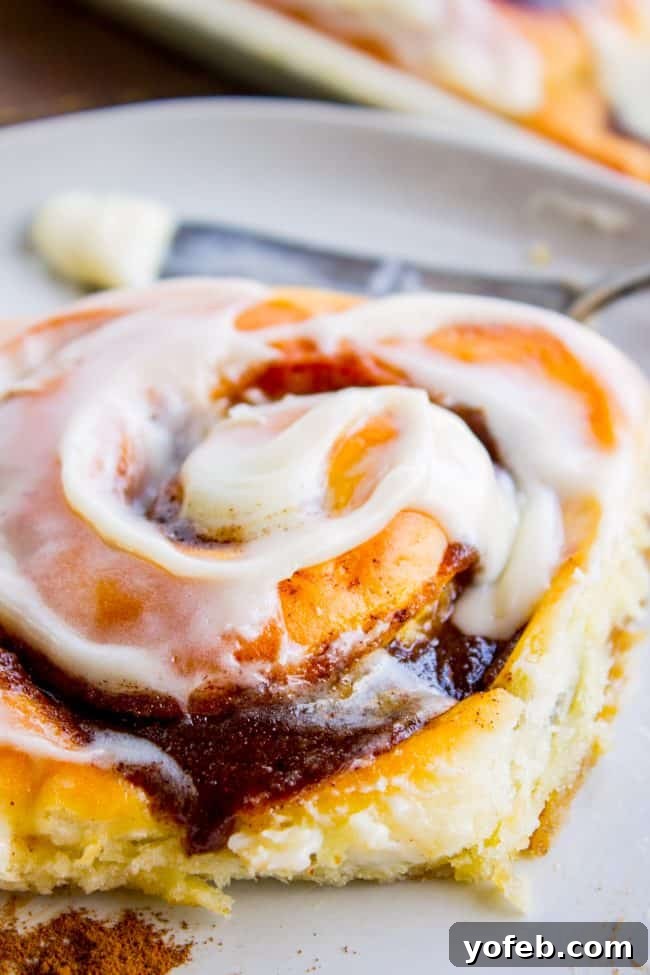
Speaking of those intense cravings… I’ve been on a serious mission, my friends. A culinary quest, if you will, to find and perfect the ultimate cinnamon roll. It’s no small task. I’m talking about a cinnamon roll so incredibly soft, so luxuriously fluffy, and so utterly perfect that it brings tears of pure joy to your eyes with every bite. This isn’t just baking; it’s a pilgrimage to pastry perfection.
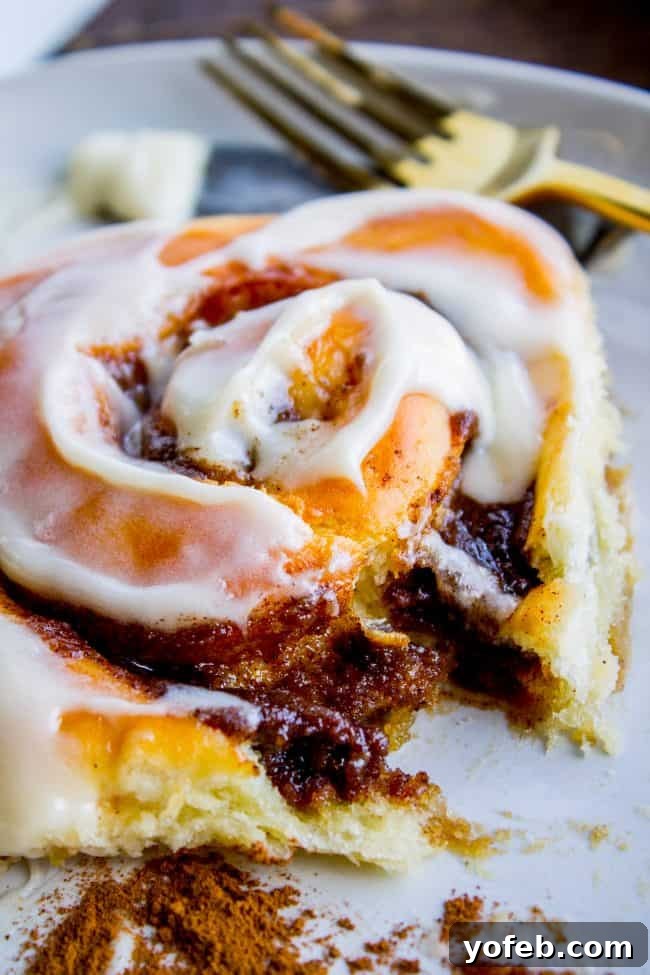
I must confess, I’m a little particular when it comes to cinnamon rolls. Okay, maybe a lot particular. There was a time when any cinnamon roll that came my way was happily accepted, but recently, I’ve found myself somewhat underwhelmed by the standard offerings. (As a wise character once pondered, “I know you can be overwhelmed, and I know you can be underwhelmed, but can you ever just be… whelmed?” I think you can in Europe! – Name that movie!)
Why This Cinnamon Roll Recipe Stands Out
My primary grievance with many cinnamon roll recipes is their tendency to be too dry. Does this resonate with anyone else? While any cinnamon roll fresh out of a hot oven is hard to fault, the true test of quality comes later – when brunch is over, the rolls have cooled, and you’re contemplating a second helping as an afternoon treat. Even on the day they were baked, countless recipes I’ve tried simply resulted in a dry, uninspiring roll.
It often feels as though many recipes attempt to compensate for a less-than-stellar dough by simply overloading on the brown sugar filling and cream cheese icing to achieve that coveted gooey factor. Now, let’s be clear: I am no purist. I adore a thick, luscious filling and a generous slather of decadent frosting (and rest assured, today’s recipe doesn’t skimp on either!). However, I also believe the actual roll itself needs to be incredibly soft, tender, and fluffy – not merely a vehicle for the toppings. This recipe unequivocally delivers on that promise, offering a sublime balance where every component shines. Here’s a closer look at what you’ll need to create this masterpiece!
Essential Ingredients for Fluffy Cinnamon Rolls
Crafting the perfect cinnamon roll begins with selecting the right ingredients. This recipe calls for a balance of richness and lightness to achieve that signature brioche-style dough. Pay attention to the details, and your efforts will be rewarded with incredible flavor and texture.
- Whole milk (for richness and activation of yeast)
- Active dry yeast (the leavening magic for that incredible rise)
- Granulated sugar (sweetness for the dough and to feed the yeast)
- Large eggs (add richness, color, and structure)
- All-purpose flour (the foundation of our tender dough)
- Kosher salt (enhances flavor and controls yeast activity)
- Unsalted butter (the key to a tender, brioche-like texture, used generously!)
- Heavy whipping cream (for the secret gooey pan mixture)
- Brown sugar (for the rich, caramelized filling)
- Ground cinnamon (the star spice of our rolls)
- Ground cardamom (optional, but highly recommended for an aromatic depth)
Making the Decadent Cream Cheese Frosting
No cinnamon roll is complete without a luscious frosting, and our cream cheese version strikes the perfect balance of sweet and tangy.
- 8-oz package cream cheese, softened (for that signature tang and creaminess)
- Unsalted butter, softened (adds richness and smooth texture)
- Powdered sugar (for a smooth, sweet frosting without graininess)
- Kosher salt (a pinch to balance the sweetness)
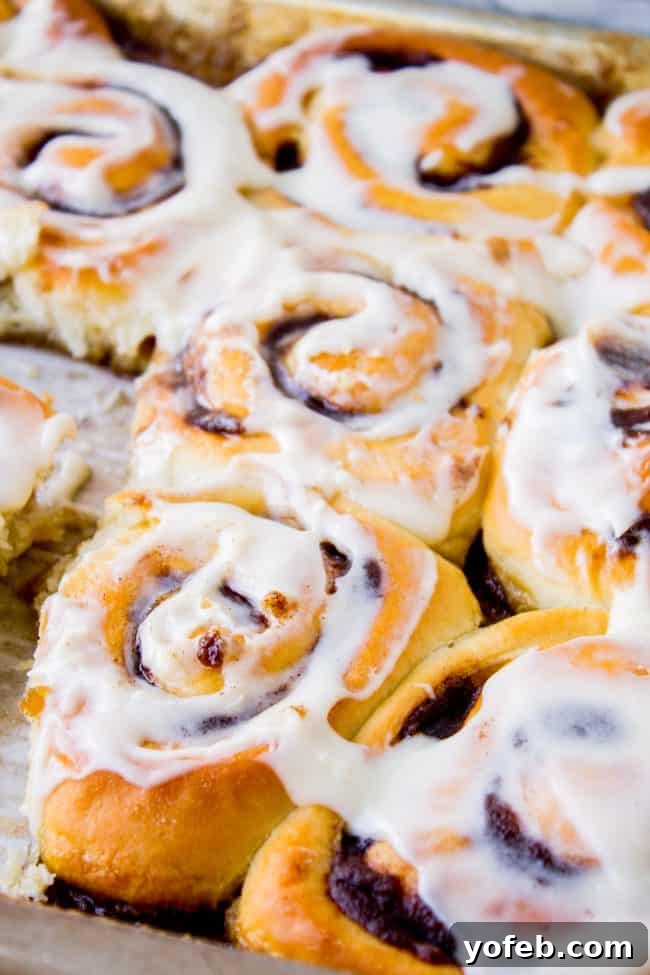
You might notice a common theme here: butter. Yes, there is butter in every stage of this recipe – the dough, the pan preparation, the filling, and the frosting – totaling a glorious four sticks, or a full pound! When I promised the best cinnamon rolls, I meant it. This generous amount of butter is fundamental to achieving that unparalleled richness, tenderness, and moistness that sets these rolls apart.
Step-by-Step Guide to Homemade Cinnamon Rolls
Embarking on the journey to create these heavenly cinnamon rolls might seem like a multi-step process, but don’t be intimidated! Each stage is straightforward, building towards a truly spectacular result. This quick overview will guide you through the basic steps, with all the detailed instructions available in the complete recipe card below. I’ve got you covered every whisk and roll of the way!
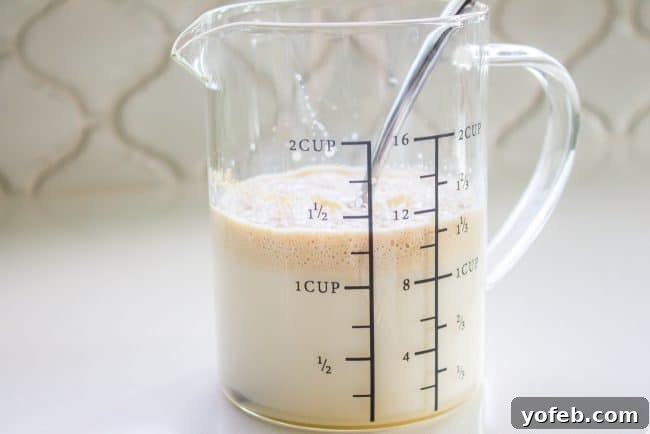
First, we begin by activating our yeast. Gently warm your milk in the microwave until it reaches a comfortable bath-water temperature – ideally between 105-110°F. This warmth is crucial for waking up the active dry yeast. Stir in the yeast and a touch of sugar, then let it proof. You’re looking for a foamy, bubbly surface after about 5 minutes, a sure sign your yeast is alive and ready to perform its magic.
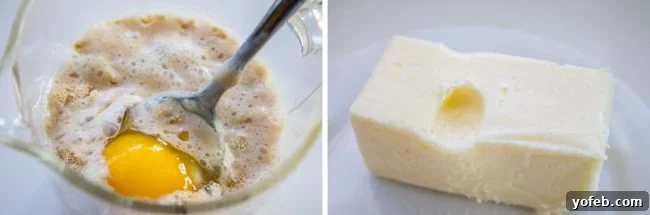
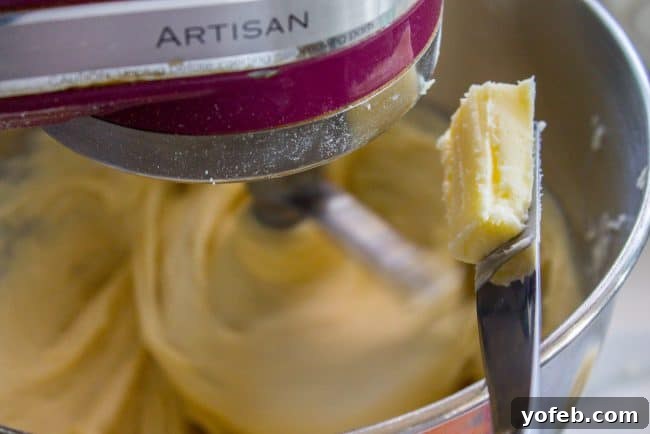
Once your yeast is frothing happily, whisk in the large eggs, incorporating them smoothly into the liquid mixture. In a separate large bowl, combine your all-purpose flour and Kosher salt. Now, gradually add the wet ingredients to the dry, mixing until just combined. The real secret to our brioche-style dough’s incredible tenderness comes next: slowly add in very soft, room-temperature butter, one tablespoon at a time. This methodical incorporation ensures the butter is fully integrated, creating a rich, pliable dough.
Continue to beat the dough until it achieves a beautifully silky, smooth, and slightly shiny texture. It will be quite wet and sticky, not forming a firm ball, which is exactly what we want for this rich, sweet dough.
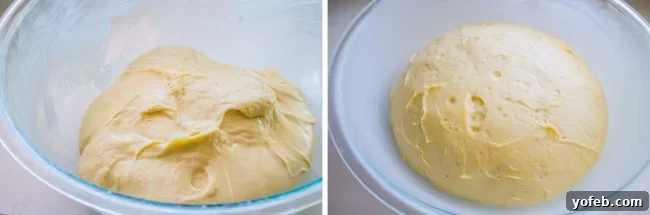
Now, for a crucial step that sets this recipe apart: REFRIGERATE the dough. Yes, really! Unlike traditional bread doughs that rise at room temperature, our brioche-style dough benefits immensely from a good chill. This makes the very wet dough much easier to handle and develops its rich flavor and tender crumb.
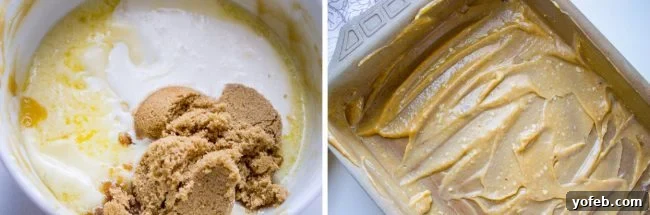
While the dough is chilling, prepare your baking pan with a decadent mixture of melted butter, heavy cream, and brown sugar. This isn’t just for greasing; it’s the first layer of gooey goodness that will infuse into the bottom of your rolls as they bake, creating an irresistible caramelized crust.
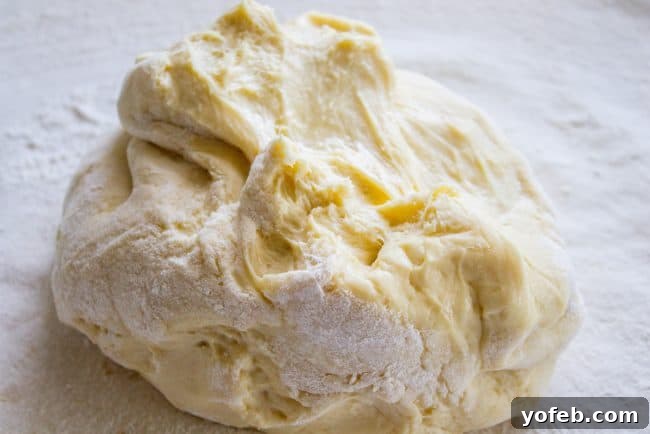
Once your dough is thoroughly chilled, turn it out onto a lightly floured surface. The cold temperature makes it firm and manageable, allowing you to roll it out into a perfect rectangle without fuss.
Next, prepare your rich cinnamon sugar filling. The key here is not just cinnamon and sugar, but also a generous amount of softened butter and a hint of cardamom, which adds an irresistible aromatic complexity. Spread this decadent mixture generously across the rolled-out dough – slather it on, I say!
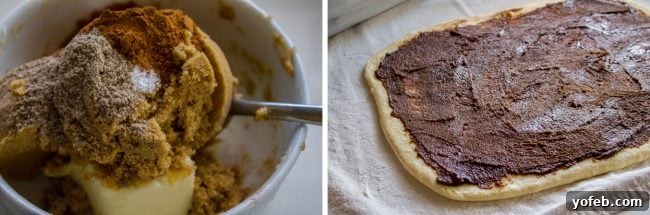
Carefully roll up the dough from the long edge, ensuring a tight spiral. Slice your rolls and place them in the prepared pan, giving them a little space to grow. For their second rise, we’ll create a warm, humid environment in your oven with a pan of boiling water – this promotes a beautiful, tender rise without over-proofing.
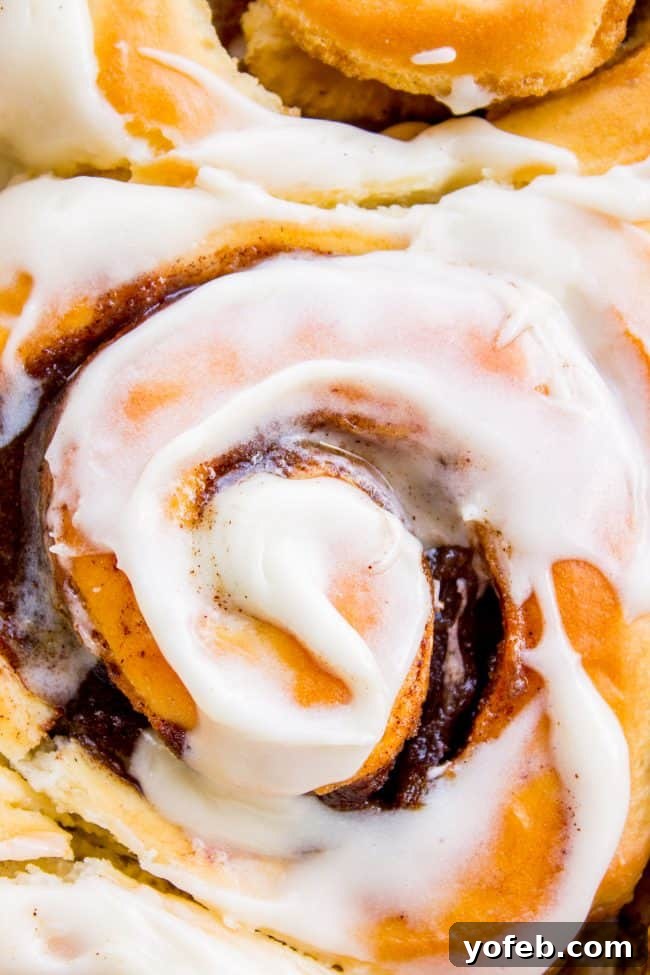
Finally, bake your rolls to golden perfection. As they cool slightly, drizzle them generously with the luscious cream cheese frosting, and then… DEVOUR! Prepare for a truly unforgettable breakfast experience.
Did you notice all that talk about refrigerating the dough and preparing the pan? These aren’t your average cinnamon rolls, and these steps are key to their extraordinary texture and flavor. Let me elaborate on the culinary science behind this brioche-style marvel.
While you *could* take any basic dinner roll recipe and transform it into cinnamon rolls by simply rolling out the dough and adding cinnamon sugar, most recipes you’ll find follow this path. They typically combine warm liquid and yeast with softened butter or shortening, eggs, and sugar, gradually adding flour until the dough is workable. The resulting bread dough is fine, but it simply doesn’t compare to the richness and tenderness we’re aiming for.
Our ingredients are largely similar, but with a crucial difference: significantly less flour than a typical bread dough and a much more generous amount of butter. We’re talking about double the butter you might find in most roll recipes! This combination results in a super sticky, almost unmanageable dough at room temperature. This is precisely why the chilling step is non-negotiable. Instead of a quick, warm rise, we allow our beautiful dough to develop slowly in the refrigerator, transforming it into a firm, easy-to-handle consistency that yields an incredibly tender crumb when baked.
I first discovered the magic of this sweet dough when my mother-in-law, Kris, introduced me to the Ultimate Sticky Buns from Epicurious (which, by the way, are absolutely phenomenal!). While my final recipe has evolved, the core principle remains: proof the yeast, gently mix all ingredients (including a minimal amount of flour), and then gradually incorporate softened butter. This brioche-style dough truly elevates the cinnamon roll, delivering a luxurious texture that regular bread dough simply can’t achieve.
Beyond the brioche, two other elements elevate this homemade cinnamon roll recipe to the next level: a touch of cardamom in the filling and the unique pan-brushing technique. The cardamom introduces a subtle, warm, and sophisticated aroma that perfectly complements the cinnamon without overpowering it. While optional, I wholeheartedly encourage you to try it – it adds a layer of complexity that is truly delightful. And then there’s the pan…
The Secret to Gooey Perfection
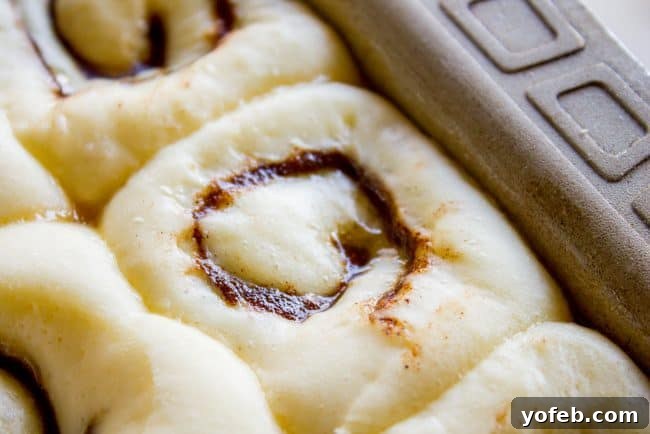
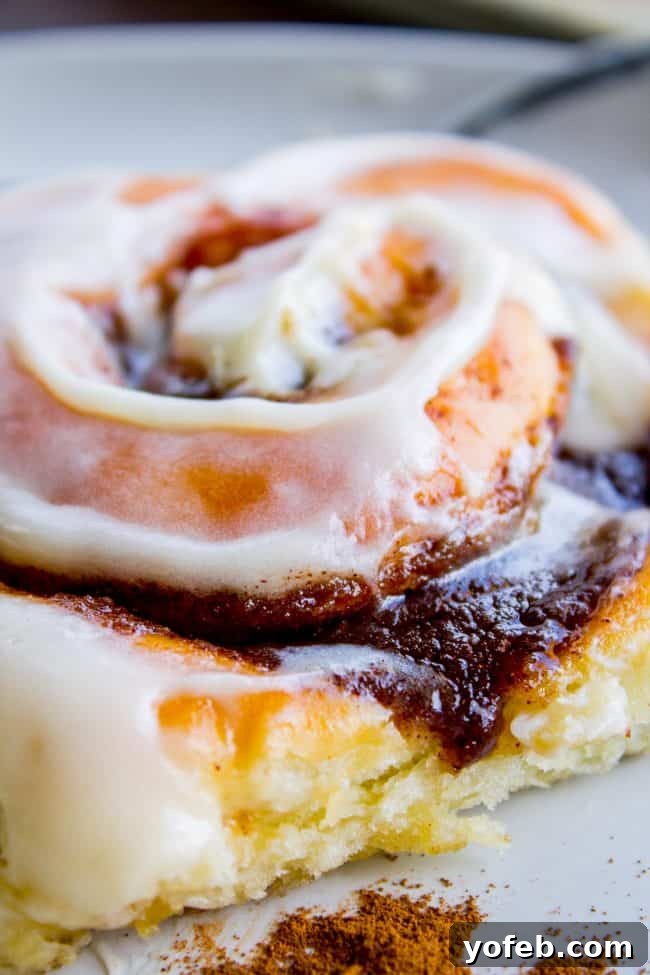
Now, for my ultimate secret to achieving the gooey-est homemade cinnamon rolls you’ve ever encountered: before baking, combine melted butter, heavy cream, and brown sugar, then generously spread this rich mixture over the entire bottom and sides of your baking pan. This isn’t just a minor detail; it’s a game-changer! I am utterly obsessed with this technique and will never revert to baking cinnamon rolls without it. As the rolls bake, this luscious concoction caramelizes and seeps into every inch of the dough, ensuring each bite is incredibly moist, tender, and bathed in a sweet, sticky glaze. It guarantees maximum gooeyness, transforming ordinary rolls into an extraordinary indulgence. I even use a similar principle with my favorite Bran Muffins, brushing the pans with a molasses glaze – pure yum!
Making the Decadent Cream Cheese Frosting
Ah, America! Where a perfectly sweet, cinnamon-filled roll isn’t quite complete without a generous crown of frosting. We embrace the decadence!
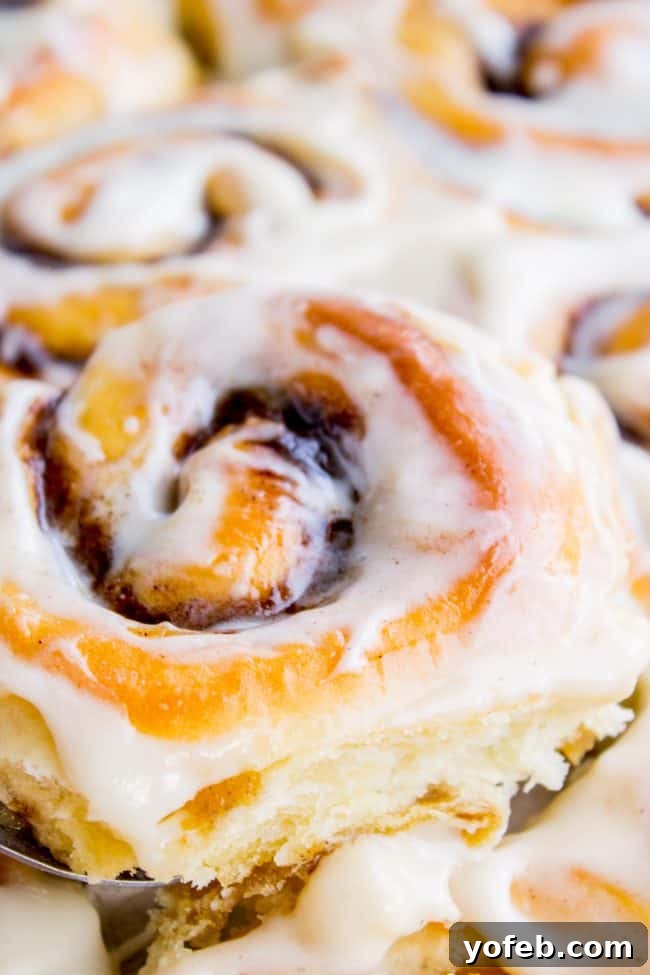
Are you a devoted member of “Team Cream Cheese” or do you lean towards a classic vanilla glaze? For me, a rich cream cheese frosting is the undeniable perfect partner for cinnamon rolls. It offers a wonderful balance of sweetness and a delicate tang that cuts through the richness of the roll, creating a truly harmonious flavor profile. Here’s how to whip up this irresistible topping:
- Beat your softened cream cheese and butter: Combine the softened cream cheese and butter in a large bowl or stand mixer. Beat them together vigorously until the mixture is incredibly smooth, airy, and completely free of any lumps. You want it light and fluffy, almost cloud-like.
- Add powdered sugar and salt, then beat well: Gradually add the powdered sugar and a pinch of Kosher salt. Start on low speed to avoid a sugar cloud, then increase to medium-high and beat until the frosting is fully combined, creamy, and wonderfully spreadable. That’s it – simple, yet utterly divine!
When is the best time to ice homemade cinnamon rolls?
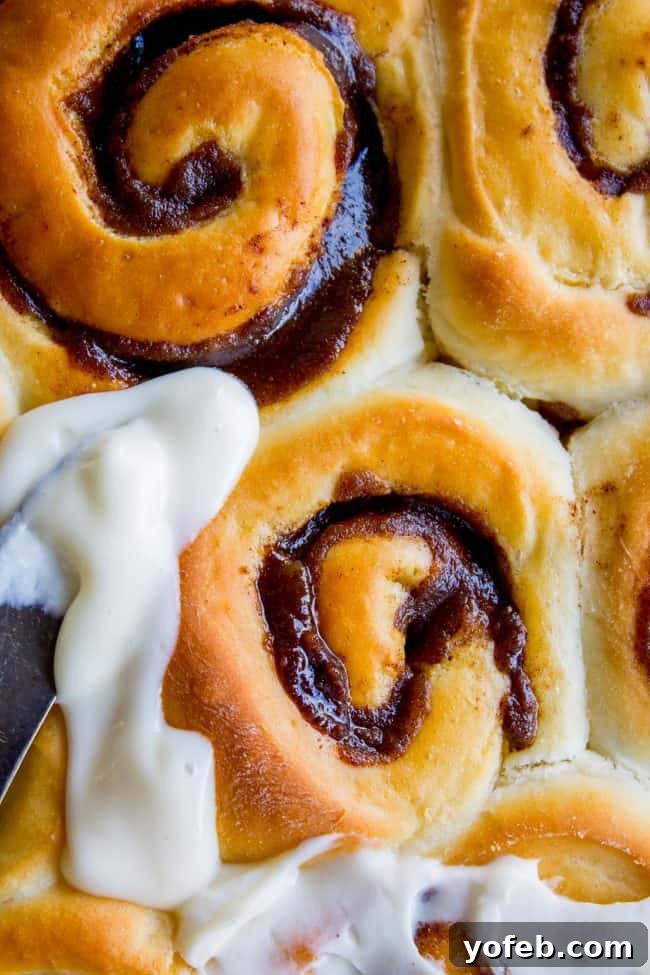
The timing of frosting application is crucial for the perfect experience. Allow your freshly baked homemade cinnamon rolls to cool for at least 10-15 minutes before you even think about adding the icing. If you frost them too soon, the heat from the rolls will cause the beautiful cream cheese frosting to melt rapidly and simply slide off, leaving you with a sticky mess rather than a luscious topping. A slight cooling period allows the rolls to set and the frosting to adhere perfectly, creating a sublime contrast between the warm roll and the cool, creamy icing.
And now, for one of my favorite tips: initially spread only half of the prepared cream cheese frosting on the warm rolls. If you’re serving these to a large, eager crowd who will devour them all immediately, by all means, use the entire amount! However, for smaller gatherings or if you anticipate having leftovers, saving the other half of the frosting is a brilliant strategy. You can then serve the reserved frosting on the side, allowing guests to customize their rolls to their preferred level of sweetness and creaminess. I’ve found that everyone has a unique preference for how much frosting they enjoy, and this method ensures everyone gets their perfect bite. Plus, it keeps any untouched leftovers looking pristine and ready for reheating!
Overnight Cinnamon Rolls for Stress-Free Mornings
Imagine waking up on a special morning – perhaps Christmas, a celebratory brunch, or just a lazy weekend – to the intoxicating aroma of freshly baked cinnamon rolls, without having to lift a finger until it’s time to bake. This overnight cinnamon rolls recipe makes that dream a delicious reality, perfect for those cherished moments. It’s what I plan on baking this Christmas, and it simplifies the holiday morning significantly!
The beauty of this recipe lies in its flexibility. You can prepare the sweet dough and chill it on Christmas Eve (or even up to two days in advance!). In the evening, roll out the dough, shape your beautiful rolls, and then nestle them into your prepared pan. Cover them tightly and refrigerate overnight. The next morning, simply remove them from the fridge, allow them their final warm rise (as detailed in the recipe card), and then bake! This strategy allows you to enjoy a leisurely morning, culminating in warm, gooey, and absolutely perfect cinnamon rolls with minimal fuss. All the specific timings and instructions are carefully laid out in the recipe section for seamless execution.
Storing and Enjoying Leftover Cinnamon Rolls
Once you’ve experienced the sheer delight of these fluffy creations, you might wonder about keeping them fresh. Proper storage ensures your enjoyment extends beyond the initial indulgence.
Do homemade cinnamon rolls need to be refrigerated?
No, surprisingly, they definitely do not! In fact, placing these sweet rolls in the refrigerator can actually have the opposite effect than intended – it can dry them out prematurely, compromising their tender texture. To maintain their optimal fluffiness and moistness, simply leave them on the counter, making sure they are well-sealed in an airtight container or covered tightly with plastic wrap. This preserves their delicate crumb and keeps them wonderfully soft.
How long can homemade cinnamon rolls sit at room temperature?
These glorious homemade cinnamon rolls are best enjoyed within 1-2 days at room temperature. If, by some miracle, you still have cinnamon rolls remaining after two days (and honestly, what kind of superhuman willpower do you possess to not devour them all sooner?!), then it’s advisable to transfer them to the refrigerator. This step will help prevent mold growth and extend their shelf life slightly, though they are truly at their peak in the first couple of days. For reheating, a quick zap in the microwave for 15-30 seconds will bring them back to a wonderfully warm and soft state, ready to be enjoyed again.
Homemade Cinnamon Roll Frequently Asked Questions
Now, let’s address some of your burning questions to ensure your cinnamon roll baking experience is a resounding success!
Yes, absolutely! Bread and rolls are fantastic candidates for freezing, and you truly can’t go wrong with either method – freezing baked or unbaked. For ultimate convenience, completely finished, frosted rolls freeze beautifully. To enjoy, simply transfer them to the fridge overnight to thaw, or let them sit on the counter for a few hours. Once thawed, you can warm individual portions in the microwave for 10-20 seconds to achieve that delightful warm roll experience (and who doesn’t love a warm roll?!). The frosting should largely remain intact, though it might lose a tiny bit of its freshly-made sheen. Will they be absolutely A++ perfect as on the day you baked them? Perhaps not quite. But are they a heck of a lot better than plain cereal for breakfast? YES, unequivocally!
If you prefer to reheat an entire batch or want the freshest frosting experience, I recommend freezing them unfrosted. To reheat thawed, unfrosted rolls, bake them in an oven at 350°F (175°C) for 8-12 minutes, just until they are warmed through. Then, add the cream cheese frosting after they’ve cooled for a few minutes. You can also freeze the rolls *before* baking. After shaping, place them in your prepared baking dish, cover tightly with greased plastic wrap, and then wrap with an additional layer of plastic wrap and foil. Thaw them in the refrigerator overnight. The next morning, proceed with the rising step in the oven with boiling water as detailed in the recipe. Keep in mind, if they are not fully thawed, they will require a longer rising time.
While both active dry yeast and instant yeast are leavening agents that help bread rise, they have a slight procedural difference. Active dry yeast requires rehydration and activation in warm liquid (often called “proofing”) before being added to dry ingredients. This step ensures the yeast is alive and active. Instant yeast, on the other hand, is designed to be added directly to dry ingredients without prior rehydration. However, for this recipe, I always recommend proofing your yeast in warm water regardless of type. It acts as a crucial quality check. By mixing the yeast with warm milk and a touch of sugar, you can observe if it becomes bubbly and foamy after about 5 minutes. If you don’t see this activity, your yeast is likely dead or inactive, and it’s best to discard it and start over. It’s far better to identify inactive yeast at the beginning than to waste hours on dough that won’t rise!
A common misconception is that dry cinnamon rolls are a result of insufficient cinnamon filling. This is generally untrue! The primary culprit behind a dry cinnamon roll is almost always the dough itself. If the bread dough lacks adequate moisture or fat, your rolls will inevitably dry out quickly, even soon after baking. This is precisely why our recipe utilizes a brioche-style dough. Brioche dough is enriched with a higher fat content (lots of butter!) and eggs, which contribute significantly to its tender, moist, and incredibly soft texture. While it involves a few more steps than a basic bread dough, the end result is unequivocally the best (and most moist) cinnamon rolls you’ll ever have. The brioche ensures that even days later, your rolls retain their delightful softness.
The terms “cinnamon rolls” and “cinnamon buns” are often used interchangeably, leading to some confusion. Technically, true cinnamon buns typically involve a method similar to these Caramel Pecan Sticky Buns. In this style, a sticky, gooey filling (often with nuts and caramel) is spread on the bottom of the pan before the rolls are placed in. After baking, the entire pan is inverted, allowing the luscious, caramelized topping to seep down and coat the rolls. “Cinnamon bun” also serves as the direct translation for the beloved Swedish Cinnamon Buns with Cardamom (known as *kanelbullar* in Sweden), which were a key inspiration for incorporating cardamom into today’s recipe. The Swedes truly understand how to craft aromatic and delicious sweet buns!
When it comes to achieving those light and airy fluffy cinnamon rolls, the choice of flour makes a significant difference. Do we opt for all-purpose flour or bread flour? The answer is: all-purpose flour is precisely what you need! Bread flour, while excellent for crusty loaves and sturdy breads, contains a higher protein content. This extra protein develops more gluten, which gives bread its strong structure and chewiness. For cinnamon roll dough, however, we are aiming for a delicate, tender, and melt-in-your-mouth texture. All-purpose flour has a moderate protein content that allows for less gluten development, resulting in a lighter, softer, and more delicate crumb – perfectly suited for creating truly exceptional cinnamon rolls.
To achieve neat, uniform slices without squishing your beautiful dough, I highly recommend using a very long and sharp serrated knife. Employ a gentle sawing motion, letting the blade do the work rather than pushing straight down. Remember, our brioche dough needs to be well-chilled before slicing. If the dough warms up too much, it will become soft and difficult to cut cleanly, potentially turning into a soupy mess. If you find your rolled dough is getting too warm, simply pop it into the fridge or even the freezer for a few minutes until it firms up again, making it sturdy enough for clean cuts. Another popular method is the unflavored dental floss trick! While personally, I sometimes find it more trouble than it’s worth, many bakers swear by it. To try it, take a piece of unflavored dental floss (please, no mint in our cinnamon rolls!) and carefully slide it underneath your rolled dough. Bring the two ends of the floss up and cross them over the top, pinching them together to cut through the roll. This technique can create perfectly round slices and works especially well for very soft doughs.
As this is my final post before the holiday season, I want to extend my deepest gratitude to each and every one of you for following along with my blog this past year. Your engagement and enthusiasm for food mean the world to me. It’s truly a joy to connect with all of you and share our collective passion for delicious creations. I sincerely hope you’ve had the opportunity to try out some of these recipes for your holiday gatherings, adding a touch of homemade warmth to your celebrations. Indeed, it truly is the most wonderful time of the year. Merry Christmas to all, and may your brunches be blessed with an abundance of fluffy homemade cinnamon rolls!
More Sweet Breakfast Delights You’ll Love!
If you’re anything like me and can’t get enough of sweet breakfast pastries, here are a few more beloved recipes that I’m confident you’ll adore:
- One Hour Cinnamon Rolls << These have been my go-to quick rolls for years, a fantastic option when you’re short on time but craving homemade goodness.
- Almost One Hour Pumpkin Cinnamon Rolls with Caramel Cream Cheese Frosting << A seasonal twist with an unbelievably decadent frosting. Yes, it’s a mouthful, but so worth it!
- One Hour Honey Almond Crunch Rolls << Imagine Honey Bunches of Oats in a warm, sweet roll form – an absolute must-try!
- Mint Chocolate Chip Cinnamon Rolls from Lemons for Lulu << An intriguing flavor combination that promises a delightful surprise.
- Chocolate Cinnamon Rolls from Inside Brucrew Life << For the serious chocolate lovers, a rich twist on the classic!
- Apple Cider Cinnamon Rolls from Crazy for Crust << A wonderfully spiced autumnal treat.
Facebook | Pinterest | Instagram

Our Best Cinnamon Rolls Recipe with the Best Cinnamon Roll Icing!
30 mins
17 mins
3 hrs 32 mins
15 Servings
Rate this Recipe
Print Recipe
If you’ve never tried making cinnamon rolls with a simple sweet dough (brioche style) instead of regular bread dough, you are truly missing out. These are the FLUFFIEST homemade cinnamon rolls of your life, I promise! They are very easy, and you can prepare them the night before for a delightful morning treat.
Ingredients
For the sweet dough
- 1 cup whole milk, warm
- 1 tablespoons active dry yeast
- 5 tablespoons granulated sugar
- 2 large eggs
- 3 & 1/4 cups all-purpose flour, spooned and leveled
- 1 teaspoon kosher salt
- 1/2 cup butter, 1 stick, very soft (divided)
For the pan
- 1/4 cup butter, 1/2 stick, barely melted
- 1/4 cup heavy cream
- 5 tablespoons brown sugar
For the filling
- 3/4 cup butter, 1 & 1/2 sticks, very soft
- 1 cup plus 2 tablespoons brown sugar
- 2 tablespoons cinnamon
- 1/4 teaspoon kosher salt
- 1/2-3/4 teaspoon cardamom, optional (but highly recommended!)
For the cream cheese frosting
- 1 (8-oz) package cream cheese, softened
- 1/2 cup butter, 1 stick, softened
- 1 cup powdered sugar
- 1/4 teaspoon kosher salt
Instructions
Make the sweet dough
- In a glass measuring cup, add 1 cup whole milk. Warm the milk in the microwave in 20-second increments until it reaches 105-110°F (the temperature of warm bath water). If it feels hot, let it cool.
- Add 1 tablespoon of active dry yeast and 5 tablespoons granulated sugar, then stir gently. Wait 5 minutes to ensure the yeast becomes bubbly and foamy. If not, discard and start over with fresh yeast.
- Once the yeast is active, add two large eggs to the measuring cup and whisk until smooth.
- Meanwhile, in a large bowl (or a stand mixer bowl), spoon and level 3 & 1/4 cups all-purpose flour. Add 1 teaspoon kosher salt.
- Pour the wet ingredients into the flour mixture. Using the paddle attachment of your mixer (or regular beaters for a hand mixer), beat until just combined, about 1 minute. Scrape down the sides and bottom of the bowl as needed.
- With the mixer running on low to medium-low speed, add 1 tablespoon of very soft butter at a time, until the entire 1/2 cup has been incorporated. Ensure each tablespoon of butter is fully mixed in before adding the next. This process should take at least a couple of minutes.
- Once all the butter is incorporated, beat on medium-low speed for 5 minutes. The dough should appear silky, smooth, and shiny. It will still be very wet and sticky, not cleaning the sides of the bowl, but it should form a loose ball.
- Generously grease a large bowl with butter or oil.
- Use a spatula to scrape the sweet dough into the greased bowl. Cover the bowl tightly and refrigerate for a minimum of 2 hours, or up to 2 days. Chilling is essential for this dough to become workable.
Prepare the pan and filling
- When you are ready to roll out the dough, prepare your baking pan and the filling.
- To prepare the pan: In a small, microwave-safe bowl, melt 1/4 cup (1/2 stick) butter until it is just barely liquid. Stir in 1/4 cup heavy cream and 5 tablespoons brown sugar. Scrape this mixture into the baking pan you plan to use.
- A note on pan choice: I prefer using an 11x17x1 inch half baking sheet for rolls that are not overly tall but boast a beautiful round shape and excellent dough-to-filling ratio. Alternatively, a 9×13 inch pan will yield taller rolls that bake snugly into each other. Both pans work, but the 11×17 is highly recommended.
- Use a spoon or pastry brush to spread the butter, cream, and brown sugar mixture evenly over the entire bottom and up the sides of your chosen pan. This is key for ultimate gooeyness!
- Prepare the filling for the rolls: In a medium bowl, combine 3/4 cup (1 and 1/2 sticks) very soft butter, 1 cup plus 2 tablespoons brown sugar, 2 tablespoons cinnamon, 1/4 teaspoon kosher salt, and 1/2 to 3/4 teaspoon cardamom (if using – and you should!). Stir until well combined and set aside.
Roll, shape, and rise
- Bring a pot of water to a boil on the stove. Place an empty 9×13 inch pan on a bottom rack in your oven, and another rack above it. Turn your oven to 350°F (175°C) for about 3 minutes, then turn it OFF. This creates a warm, humid environment for rising.
- Roll out the dough: Prepare a clean work surface with a generous dusting of flour. Scrape the chilled dough onto the flour and briefly knead it a couple of times with your hands. Press it into a rectangle, then use a rolling pin to roll it into a large rectangle, approximately 1/4 inch thick (or slightly thicker), measuring about 12×16-18 inches. Exact dimensions aren’t critical.
- Use a spatula to spread the cinnamon filling evenly over the entire surface of the dough, all the way to the edges. If the filling seems too firm to spread easily, microwave it for just 5 seconds and stir (avoid melting it, as we want a thick filling).
- Carefully roll up the dough tightly, starting from the long edge. As you roll, gently smooth out the dough from the center outwards to ensure an even thickness across the entire roll.
- Use your fingers to firmly seal the seam of the rolled dough.
- Using a very long and sharp serrated knife, cut the rolled dough into 1 to 1 & 1/2 inch thick rolls. Use a gentle sawing motion, rather than pressing down, and dip your knife in flour between cuts as the inside of the dough can be quite sticky.
- Place each sliced roll into your prepared baking pan, leaving a little space between them as they will expand significantly.
- Once all the rolls are in the pan, generously spray one side of plastic wrap with nonstick spray and cover the rolls with the sprayed side down. It is CRUCIAL not to skip spraying the plastic wrap. If your cover sticks, it will tear the delicate dough and ruin its beautiful rise when you attempt to remove it. (Speaking from personal, slightly bitter experience!)
- Pour the boiling water from your pot into the empty 9×13 inch pan on the lower rack of your oven. Remember to ensure the oven is OFF. It should be warm and humid, but not hot enough to cook the dough. If the oven feels too hot to the touch, leave the door open to cool slightly before placing the rolls inside.
- Let the covered rolls rise in the warm, humid oven for approximately 45 minutes, or until they are noticeably puffy and have nearly doubled in size.
Bake and frost
- About 15 minutes before the rolls are finished rising, carefully remove both the rolls and the pan of water from the oven. Preheat your oven to 350°F (175°C).
- Once the rolls are significantly puffy and have doubled in size, bake them in the preheated oven for about 15-18 minutes.
- The rolls should be golden brown on top when fully baked. For precision, the internal temperature of the rolls should reach 190°F (88°C) at their center. The bottom of the rolls should also be lightly browned – you can gently lift an edge to check, though be cautious.
- While the rolls are baking, prepare your cream cheese frosting. In a large bowl or stand mixer, beat 8 ounces of softened cream cheese with 1/2 cup of softened butter. Scrape down the sides and bottom of the bowl and continue beating for a couple of minutes until the mixture is beautifully light and fluffy. Add 1 cup powdered sugar and 1/4 teaspoon kosher salt, then beat well until completely smooth and creamy.
- Allow the baked rolls to cool in the pan for about 10 minutes before applying the frosting. At this point, spread HALF of the cream cheese frosting evenly over the warm rolls. If you’re serving a large group who will eat them all at once, you can use the entire amount. Otherwise, save the remaining frosting to serve alongside leftovers or to offer guests at the table. This allows everyone to customize their frosting level!
Overnight Instructions for Convenience:
- To prepare these best cinnamon rolls overnight, follow the recipe as written through step 23, with one exception: do not boil the water for the oven rise yet. Once the rolls are shaped and placed in the prepared pan, cover them as directed (with sprayed plastic wrap), then refrigerate them overnight.
- In the morning, prepare your oven by preheating it (and then turning it off), and place a pan of boiling water on the bottom rack (as described in instruction step 15, remembering to turn the oven off after warming). Allow the rolls to rise for the specified amount of time (approx. 45 minutes) and then bake as directed in steps 25-27. This method ensures fresh, warm cinnamon rolls with minimal morning effort!
Nutrition
Serving: 1 roll | Calories: 528kcal | Carbohydrates: 55g | Protein: 5g | Fat: 33g | Saturated Fat: 20g | Polyunsaturated Fat: 1g | Monounsaturated Fat: 8g | Trans Fat: 1g | Cholesterol: 111mg | Potassium: 125mg | Fiber: 1g | Sugar: 33g | Vitamin A: 1079IU | Vitamin C: 1mg | Calcium: 79mg | Iron: 2mg
Did you make this? I’d love to see it!Mention @thefoodcharlatan or tag #thefoodcharlatan!