
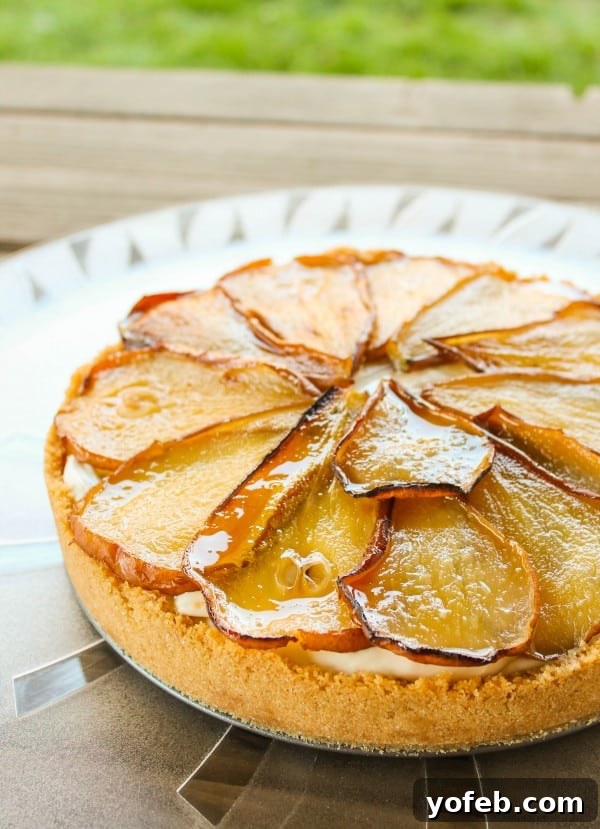
Indulge in the sublime simplicity of this No-Bake Maple Cheesecake with Roasted Pears – a dessert that effortlessly combines elegance with irresistible flavor. Perfect for any autumn gathering or holiday celebration, from Thanksgiving to New Year’s Eve, this recipe promises a delightful experience without the fuss of baking. The harmonious blend of rich maple and tender, caramelized pears creates a masterpiece that will captivate your taste buds and earn you rave reviews. Prepare to be amazed by how easy it is to create such a sophisticated treat!
The Undeniable Charm of No-Bake Cheesecakes: Effortless Elegance
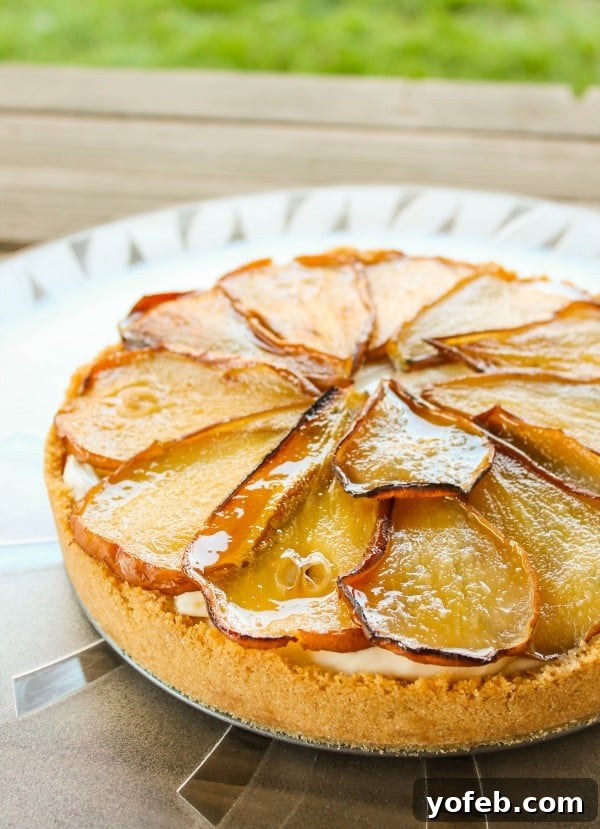
There’s an undeniable magic to a no-bake cheesecake. It’s the kind of dessert that looks incredibly impressive, yet requires minimal effort, leaving you more time to enjoy the festivities (or simply relax!). Forget the stress of water baths, cracked tops, or over-baked fillings. This No-Bake Maple Cheesecake offers a velvety smooth texture that’s lighter than its baked counterparts, making it a refreshing change of pace, especially after a hearty meal. It sets beautifully in the refrigerator, allowing you to prepare it well in advance, taking one more thing off your mind when hosting.
The beauty of no-bake recipes lies in their simplicity without compromising on flavor or presentation. This cheesecake, with its delicate balance of sweet maple and the bright tang of cream cheese, is a testament to that. It’s a sophisticated dessert that comes together in a flash, proving that you don’t need to spend hours in the kitchen to create something truly extraordinary. It’s perfect for those moments when you want to impress without the pressure, delivering a dessert that is both comforting and wonderfully chic.
Why Maple and Pear Are a Match Made in Culinary Heaven
Maple and pear. These two ingredients aren’t just flavors; they’re a symphony of autumn. The rich, caramel-like sweetness of pure maple syrup, with its earthy undertones, pairs exquisitely with the subtle, fragrant sweetness and tender texture of roasted pears. While many fall desserts lean heavily on pumpkin, maple offers a distinct, equally comforting, and perhaps more sophisticated profile. It brings a warmth and depth that is both familiar and exciting, perfectly capturing the essence of the season.
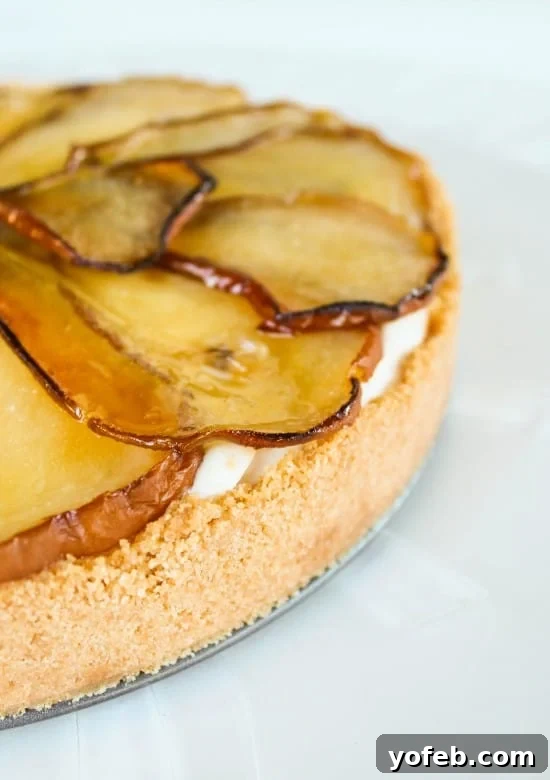
The roasting process transforms ordinary pear slices into something magical. High heat caramelizes their natural sugars, intensifying their sweetness and creating beautifully browned edges that add a delightful textural contrast to the smooth, creamy cheesecake. This nuanced combination elevates the entire dessert, ensuring that each bite delivers a balanced sweetness with a hint of fruity brightness. You’ll find that the maple flavor in the cheesecake is present but not overwhelming, allowing the delicate essence of the pears to truly shine as the star of the show. It’s a pairing that feels both classic and innovative, making it an unforgettable addition to your dessert repertoire.
Beyond Pumpkin: Embracing Fall Flavors
Every fall, my culinary compass seems to guide me towards a new obsession. For a time, pumpkin was my muse, inspiring a flurry of recipes. But this year, maple has stepped into the spotlight, offering a refreshing and equally comforting alternative. While I adore classic pumpkin dishes, there’s something uniquely enchanting about maple syrup, particularly when it’s infused into a creamy dessert like this cheesecake.
The subtle, woodsy sweetness of maple resonates deeply with the cool, crisp air of autumn, evoking images of vibrant foliage and cozy evenings. This Maple Cheesecake, along with my beloved Maple Cinnamon Quick Bread, perfectly encapsulates the rich, inviting spirit of the season. It’s a gentle reminder that while some traditions are timeless, exploring new flavor profiles can bring unexpected joy and delicious discoveries to your fall baking (or in this case, no-baking!).
Crafting the Perfect Maple Cheesecake: My Journey and Tips
Not every recipe journey is without its bumps. I must admit, my first attempt at a maple cheesecake a few weeks ago was a complete disaster—think cheesecake overflowing in the oven, a sticky mess that was anything but pretty. But sometimes, failure paves the way for triumph! Thankfully, good ol’ Martha Stewart proved to be a reliable guide. Her culinary wisdom, as always, came to the rescue, inspiring this phenomenal version of Maple Cheesecake with Roasted Pears.
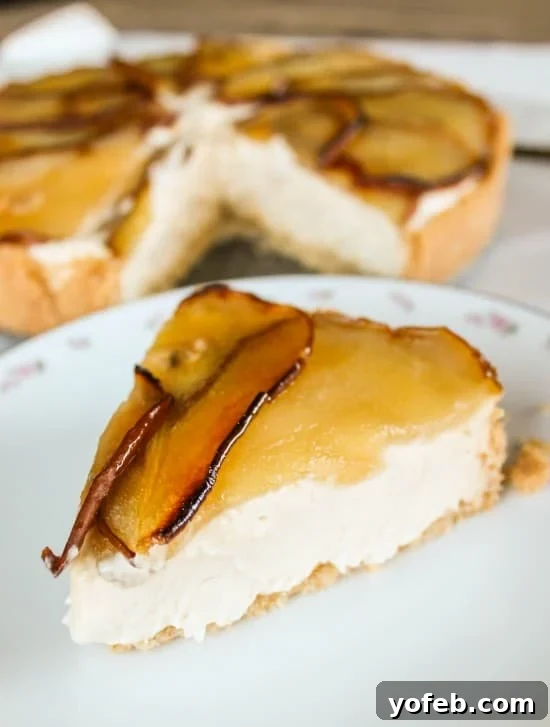
I was initially hesitant about adding pears to cheesecake, but they turned out to be absolutely amazing—truly the unsung heroes of this dessert. The maple flavor is a delightful hint, never overpowering, perfectly complementing the creaminess. This isn’t your dense, heavy, traditional New York style cheesecake. Because it’s a no-bake recipe and incorporates whipped cream, it’s wonderfully light, delicate, and uniquely airy. Don’t let its elegant appearance intimidate you; I swear, it’s incredibly easy to make, coming together in about 15 minutes of active prep time. And trust me, once it’s chilled, it won’t last long—in my house, it disappeared in less than six hours!
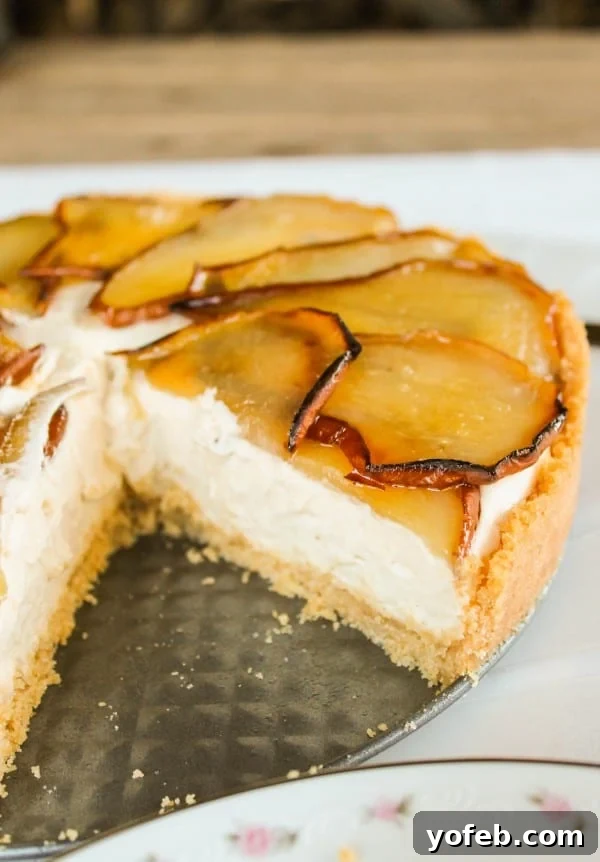
No-Bake Maple Cheesecake with Roasted Pears Recipe

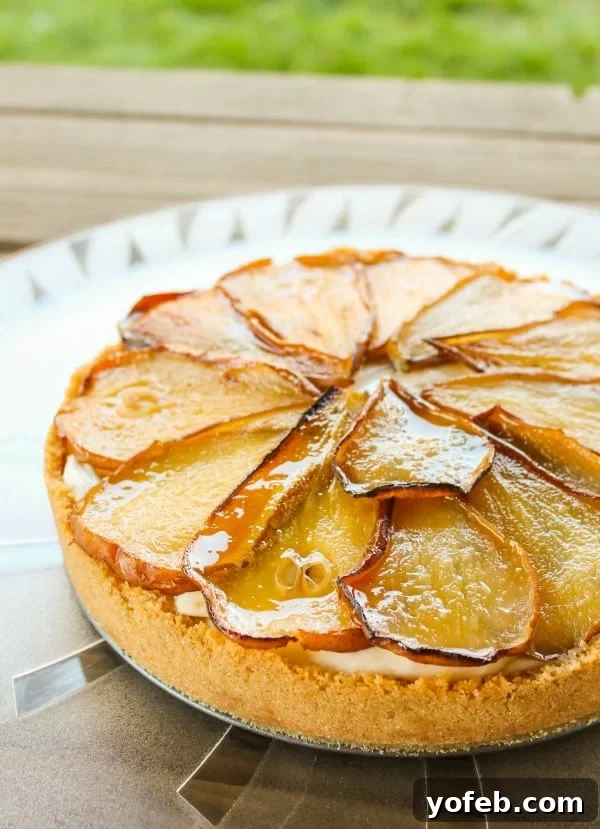
Maple Cheesecake with Roasted Pears
Ingredients
For the crust:
- 46 vanilla wafers, about 6 ounces
- 3 tablespoons sugar
- 1/4 teaspoon salt
- 5 tablespoons butter, melted
For the cheesecake:
- 2 8-oz packages cream cheese, room temperature
- 3/4 cup pure maple syrup, divided
- 1/2 teaspoon maple extract, or up to 1 teaspoon
- 1 cup cold heavy cream
- 2 tablespoons powdered sugar
- Nonstick cooking spray
- 2 medium pears, such as Bosc or Bartlett, sliced lengthwise 1/8 inch thick
Instructions
- Make the crust first. Preheat oven to 350 degrees F (175 C). In a food processor, pulse cookies until finely ground (you should have about 1 1/2 cups). Add sugar, salt, and melted butter and pulse until just combined.
- Firmly press the crumb mixture into the bottom and halfway up the sides of a 9 1/2 inch springform pan. A handy trick is to use the flat bottom of a measuring cup to press it evenly into the corners and sides. Bake until the crust is dry and set, about 10-12 minutes. Let it cool completely. You can stick it in the freezer or fridge to speed up cooling.
- For the cheesecake filling, in a large bowl or stand mixer, beat room temperature cream cheese on high until fluffy, about 3 minutes. Add 1/2 cup pure maple syrup and the 1/2 teaspoon maple extract; beat until the mixture is smooth and thoroughly combined.
- In a separate medium bowl, beat cold heavy cream and powdered sugar on high speed until soft peaks form, approximately 3 minutes. With a rubber spatula, gently stir about one-third of the whipped cream into the cream cheese mixture to lighten it, then carefully fold in the remainder until just combined, being careful not to deflate the whipped cream. Transfer this luscious filling to the cooled crust and refrigerate until firm, which will take at least 3 hours (or up to 1 day for best results).
- To prepare the roasted pears, preheat your oven to 450 degrees F (230 C). Coat a parchment-lined, rimmed baking sheet with nonstick cooking spray, or use a silicone baking mat (silpat). Arrange the pear slices in a single layer on the sheet and brush them evenly with 2 tablespoons of maple syrup. Roast the pears until they are soft and slightly tender, about 20 minutes.
- Remove the pears from the oven and turn on the broiler. Carefully brush the roasted pears with the remaining 2 tablespoons of maple syrup and broil until they are lightly browned in spots, about 4 minutes. Make sure to rotate the baking sheet frequently to ensure even browning and prevent burning. Crucially, never walk away from your broiler as things can brown very quickly! Let the pears cool completely. To serve, artfully arrange the cooled pear slices, overlapping them slightly, on top of the chilled maple cheesecake.
Notes
I found that adding 1/2 teaspoon of maple extract greatly enhanced the maple flavor without making it overly sweet. For an even more pronounced maple taste, you could consider adding up to 1 full teaspoon, but I wouldn’t recommend exceeding that to maintain balance. The goal is a delightful maple essence, not an overpowering one.
Nutrition
Expert Tips for No-Bake Cheesecake Success
Creating a flawless no-bake cheesecake is surprisingly simple, especially with a few key tips:
- Room Temperature Cream Cheese: This is crucial! Ensure your cream cheese is completely at room temperature before beating. This prevents lumps and ensures a smooth, uniform texture for your filling. Cold cream cheese will result in a clumpy mixture.
- Don’t Overmix the Whipped Cream: When beating the heavy cream and powdered sugar, stop as soon as soft peaks form. Overmixing can lead to a grainy texture or even butter.
- Gentle Folding: When incorporating the whipped cream into the cream cheese mixture, fold it in gently with a rubber spatula. This preserves the airiness of the whipped cream, contributing to the cheesecake’s light and delicate texture.
- Ample Chilling Time: The “no-bake” part relies entirely on proper chilling. Allow at least 3 hours for the cheesecake to set firm. For the best results and easiest slicing, chilling overnight is highly recommended.
- Quality Maple Syrup: Use pure maple syrup for the best flavor. Imitation maple syrup won’t deliver the same rich, authentic taste that makes this cheesecake so special.
- Watch the Broiler: When caramelizing the pears, the broiler works quickly. Stay by your oven and rotate the baking sheet frequently to ensure even browning and prevent burning. Pears can go from perfectly golden to burnt in a matter of seconds!
Frequently Asked Questions (FAQs)
- Can I make this cheesecake ahead of time?
- Absolutely! This no-bake cheesecake is an excellent make-ahead dessert. You can prepare the entire cheesecake (without the roasted pears) up to 1-2 days in advance. Store it covered in the refrigerator. Add the roasted pears just before serving for the freshest taste and best presentation.
- What kind of pears should I use for roasting?
- Bosc or Bartlett pears are ideal for roasting as they hold their shape well and develop a lovely tender texture and caramelized flavor. Look for pears that are ripe but still firm to the touch.
- Can I substitute the vanilla wafer crust?
- Yes, you can! Graham cracker crumbs or even digestive biscuits make excellent substitutes for the vanilla wafers. Simply use the same quantities of crumbs, sugar, and melted butter as specified in the recipe for the crust.
- Is maple extract necessary?
- While pure maple syrup provides a lovely subtle flavor, maple extract enhances it significantly, giving the cheesecake a more pronounced and authentic maple profile. If you omit it, the maple flavor will be much milder. I highly recommend using it for the best result.
- How do I store leftover cheesecake?
- Store any leftover cheesecake, covered, in the refrigerator for up to 3-4 days. While the roasted pears are best fresh, they will still be delicious stored with the cheesecake.
More Fall Desserts You’ll Love
If you’ve fallen in love with the comforting flavors of autumn, here are a few more recipes to sweeten your season:
- Maple Cinnamon Quick Bread: A wonderfully moist and fragrant quick bread, perfect for breakfast or an afternoon treat, bursting with maple and cinnamon.
- Pumpkin Cinnamon Rolls with Caramel Frosting: For those days you still crave a touch of pumpkin, these indulgent cinnamon rolls are a must-try.
- Caramel Apple Crisp: A classic fall dessert featuring tender baked apples under a buttery, crunchy oat topping, often drizzled with caramel. (Hypothetical link if available on blog)
- Spiced Pecan Pie: A rich and nutty pie with a hint of warming spices, perfect for holiday tables. (Hypothetical link if available on blog)
Whether you’re hosting a grand holiday feast or simply seeking a comforting treat for a quiet evening, this No-Bake Maple Cheesecake with Roasted Pears is sure to become a cherished favorite. Its blend of ease, elegance, and incredible flavor makes it a true showstopper. Dive into the delightful flavors of autumn and prepare to impress everyone with this exquisite dessert!