
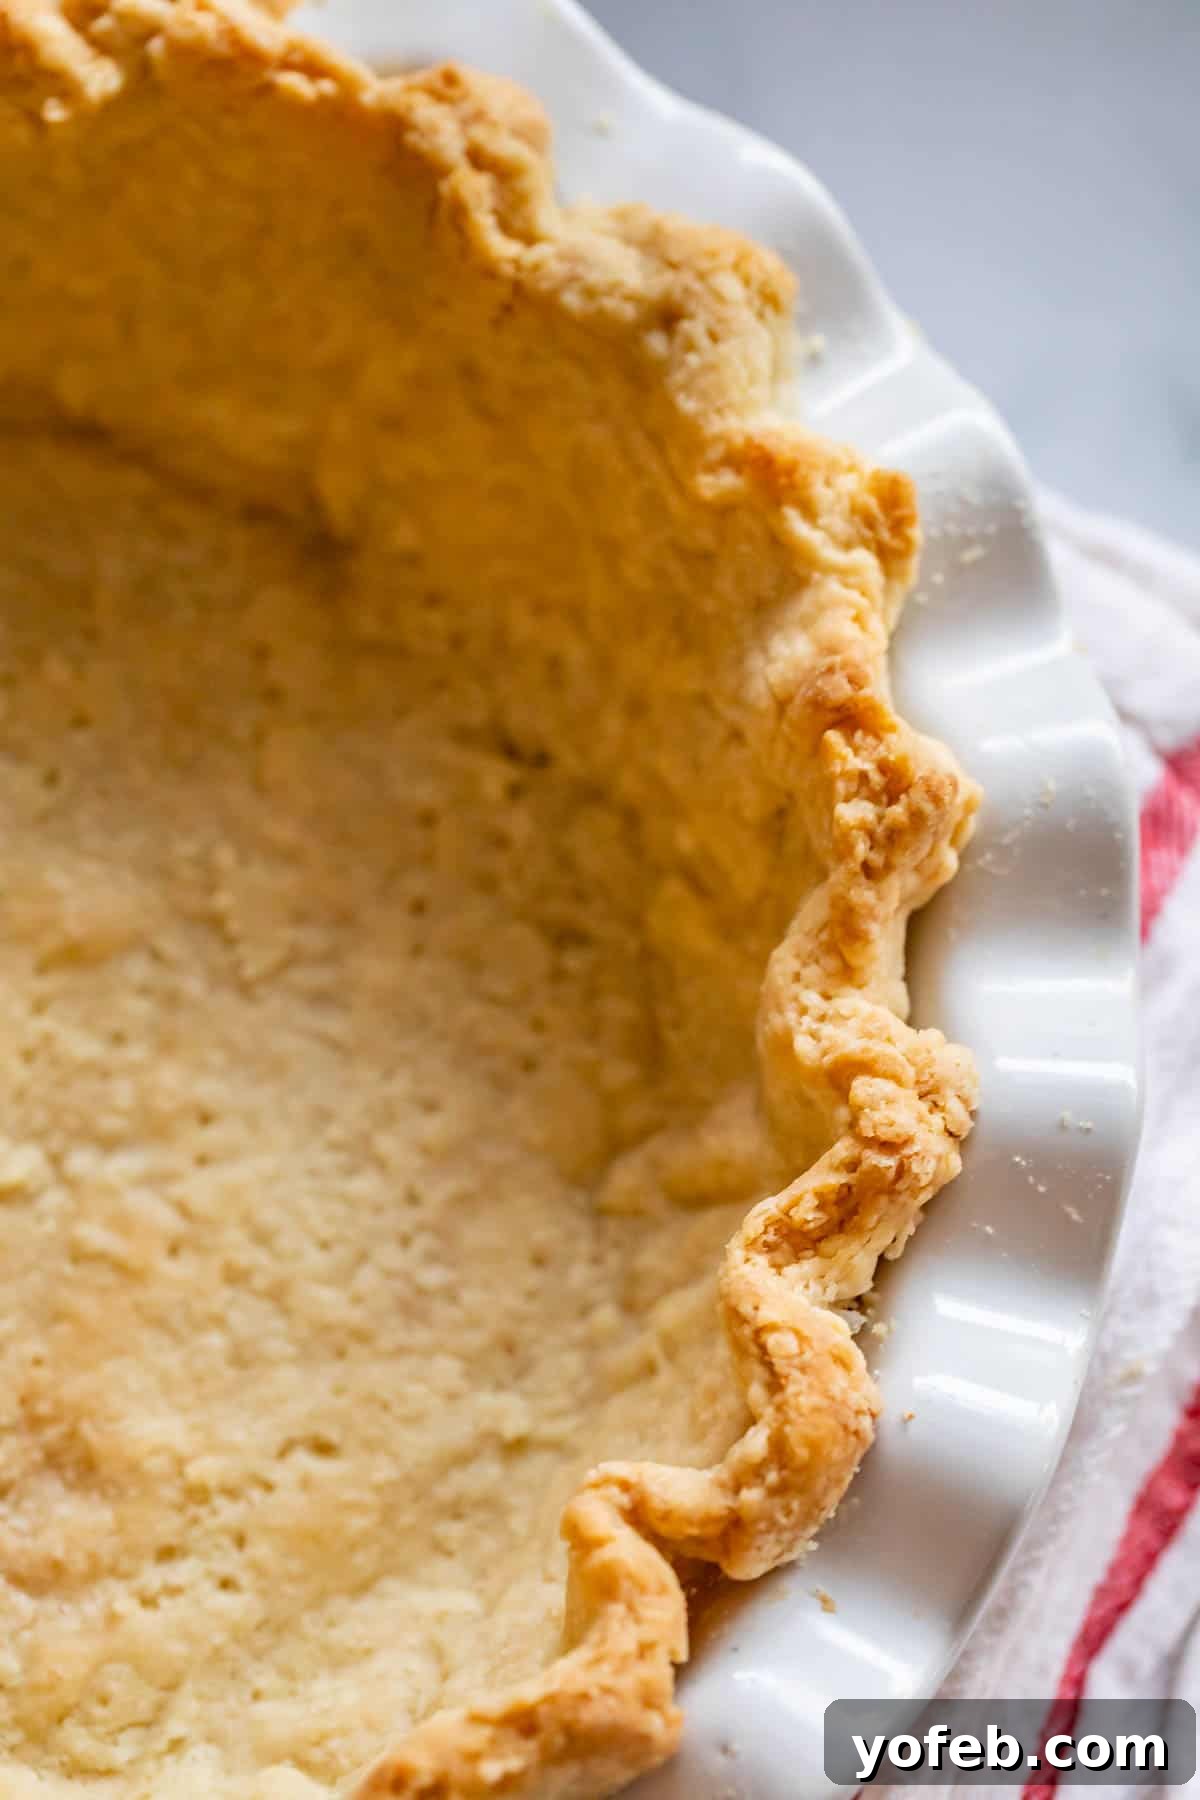
Mastering the art of blind baking a pie crust is a fundamental skill for any aspiring baker. This technique, which involves pre-baking an empty pie shell, is essential for a wide array of delicious desserts, especially those destined for creamy fillings or fresh fruit. The goal is to achieve a perfectly crisp, golden crust that stands tall and firm, free from the dreaded soggy bottom or slumped edges. Achieving this requires attention to a few crucial details, particularly chilling the dough properly and utilizing pie weights effectively. These methods prevent the crust from bubbling up excessively or shrinking into a sad, misshapen mess. This comprehensive guide will demystify the process, ensuring your pie crusts are always picture-perfect and ready for any exquisite filling you dream up.
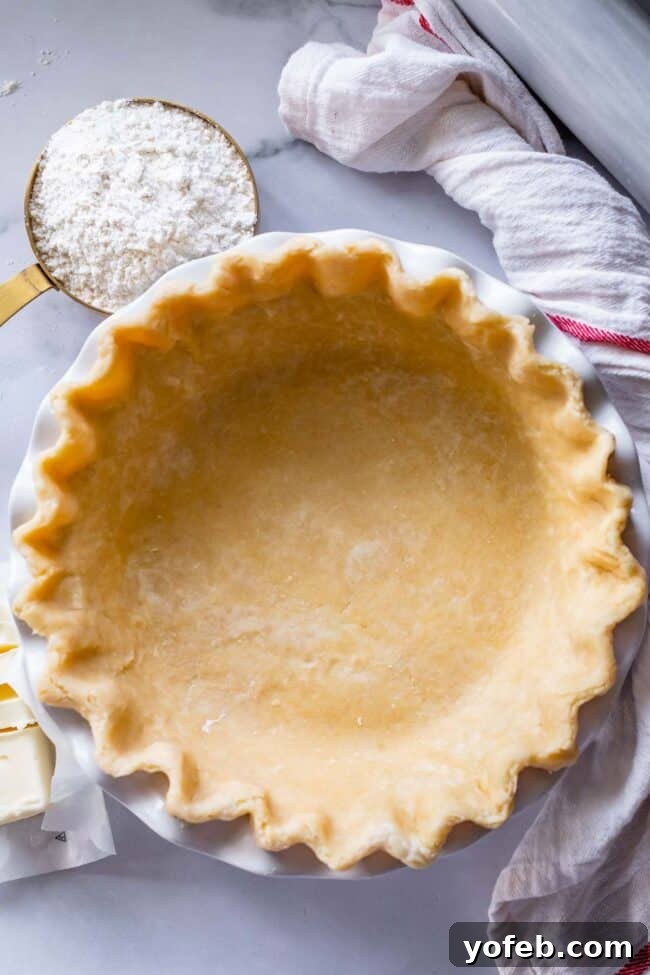
Table of Contents
- The Importance of Blind Baking a Pie Crust
- What is a Blind Baked Pie Crust?
- What is a Par-Baked Pie Crust?
- How to Blind Bake Pie Crust – Step-by-Step Instructions
- Chill the Crust for Perfection
- How to Prevent Pie Crust Shrinking
- What to Use Instead of Pie Weights
- What are the Best Pie Weights to Use?
- Ideal Temperature to Bake a Pie Crust
- How Long to Blind Bake a Pie Crust
- The Double Bake Method for a Perfectly Crisp Crust
- Can You Blind Bake a Pie Crust Without Weights?
- How to Par Bake a Pie Crust for Filled Pies
- Finishing a Par-Baked Crust: Just 2-3 Minutes
- Pies That Require a Blind Baked Pie Crust
- Blind Baking Pie Crust Recipe
The Importance of Blind Baking a Pie Crust
For many years, achieving a beautifully blind-baked pie crust seemed like an elusive dream. The frustration of edges constantly sagging and the bottom bubbling up into an uneven mess was all too familiar. Even with diligent use of pie weights, the results often fell short of the ideal, leading to many “soggy bottom” disasters. This common baking predicament can be incredibly disheartening, especially when you’re aiming for that perfect, structurally sound base for your delicious fillings.
Determined to overcome these persistent pie problems, I embarked on a journey of research and experimentation. After numerous baking sessions, I honed a collection of foolproof techniques that guarantee a perfectly crisp, firm, and tall pie crust every single time. These insights have revolutionized my pie baking, allowing me to confidently create a flawless foundation for any pie, without the worry of slumping or sogginess. Say goodbye to sad, droopy pie edges and hello to beautifully baked pies!
What is a Blind Baked Pie Crust?
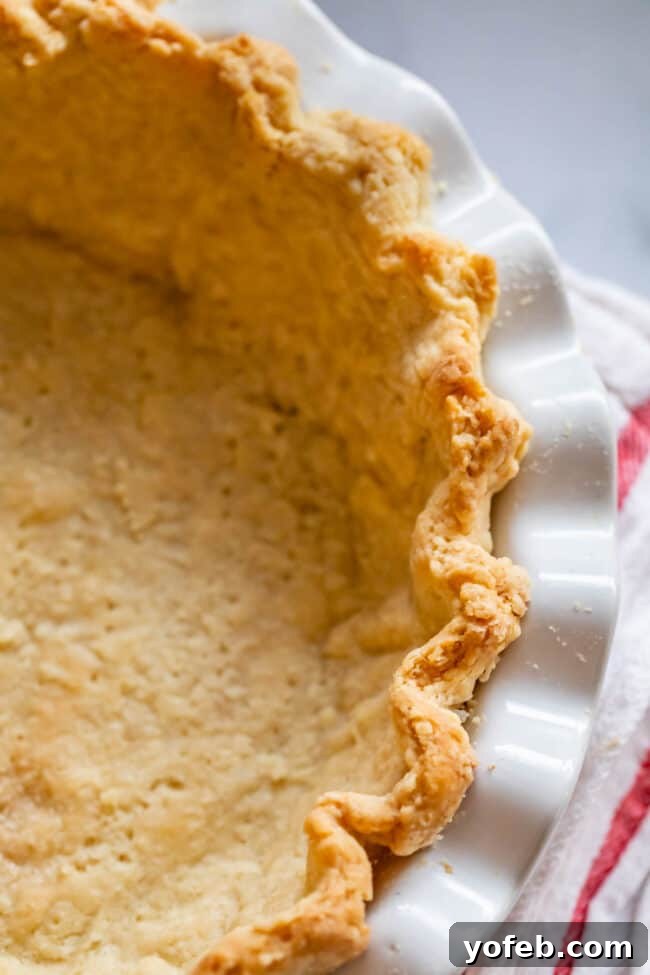
A blind baked pie crust is essentially a pie crust that is fully baked on its own, without any filling. This method is crucial for pies that will not be returned to the oven after their filling is added. The crust is baked until it is completely cooked through, golden brown, and delightfully toasted, ensuring a crisp and firm base that can support rich, moist fillings without becoming soft or soggy. This is the ideal preparation for delicate cream pies, such as a decadent Chocolate Cream Pie, or refreshing glacé pies, which feature fresh fruit fillings like a vibrant Blackberry Glace Pie. In these cases, the pie crust serves as the sole baked component, making its thorough cooking absolutely essential for the pie’s overall texture and success.
What is a Par-Baked Pie Crust?
In contrast to a full blind bake, par-baking a pie crust involves partially baking it. This technique is specifically used for pie recipes where the crust, once filled, will be returned to the oven to finish baking along with its filling. The purpose of par-baking is to give the crust a head start, preventing it from becoming a soggy mess when exposed to a wet filling during the final bake. This method is particularly beneficial for custard-based pies, such as a classic Pumpkin Pie or a comforting Sweet Potato Pie. By par-baking, you ensure that the bottom crust achieves a pleasant texture, providing a sturdy and delicious counterpoint to the soft, flavorful filling. This prevents the all-too-common “soggy bottom” syndrome, a culinary woe we are all keen to avoid.
How to Blind Bake Pie Crust – Step-by-Step Instructions for Success
Blind baking a pie crust might sound intimidating, but it’s a remarkably straightforward process once you understand a few key principles. By following these simple guidelines, you’ll consistently achieve a flawless pie shell:
- **Embrace the Double Bake:** This method involves two distinct baking stages. First, bake the crust with pie weights. Second, remove the weights and continue baking until fully cooked, ensuring an even and thorough bake.
- **Prioritize Chilling:** Always chill your pie dough thoroughly before it enters the oven. This crucial step helps prevent shrinkage and promotes the formation of those coveted flaky layers.
- **Utilize Pie Weights:** Filling your crust with weights is essential. They serve a dual purpose: preventing the bottom from bubbling up unevenly and, perhaps more importantly, supporting the delicate edges of the crust, keeping them tall and firm rather than allowing them to slump downwards.
Let’s dive into the detailed steps to ensure your blind-baked crust is nothing short of perfect.
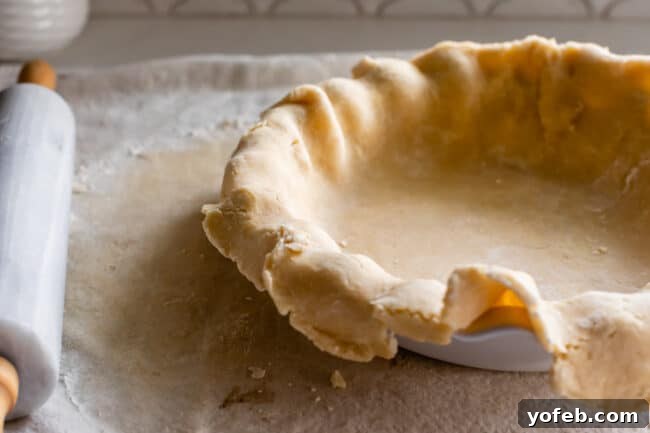
Begin by carefully rolling out your chosen pie dough and gently transferring it into your pie pan. For an unparalleled flaky crust, I highly recommend using my homemade flaky pie crust recipe. This recipe yields enough dough for two standard blind-baked pies, offering you the option to create two delicious treats, halve the recipe, or simply freeze the second crust for future use, ensuring you’re always prepared for a spontaneous baking session. Alternatively, if time is of the essence, a quality store-bought pie crust can also yield excellent results when prepared correctly.
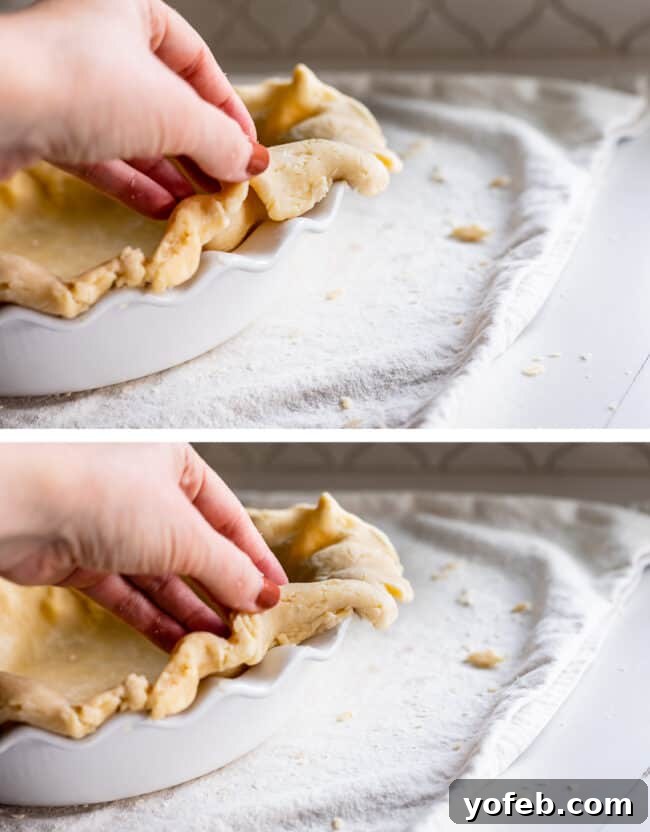
Once the dough is in the pan, carefully tuck any excess dough hanging over the edges underneath itself. This creates a thicker, more stable rim that aligns perfectly with the pie pan’s edge. While some bakers opt to trim the excess, I find folding it under to be a more practical and less wasteful approach, retaining all that delicious crust. If your dough appears crumbly or prone to cracking, don’t worry. Simply use your fingers to gently smooth the dough together, treating it much like modeling clay. For particularly dry spots, a light dip of your fingers in ice water can help bind the dough without making it sticky.
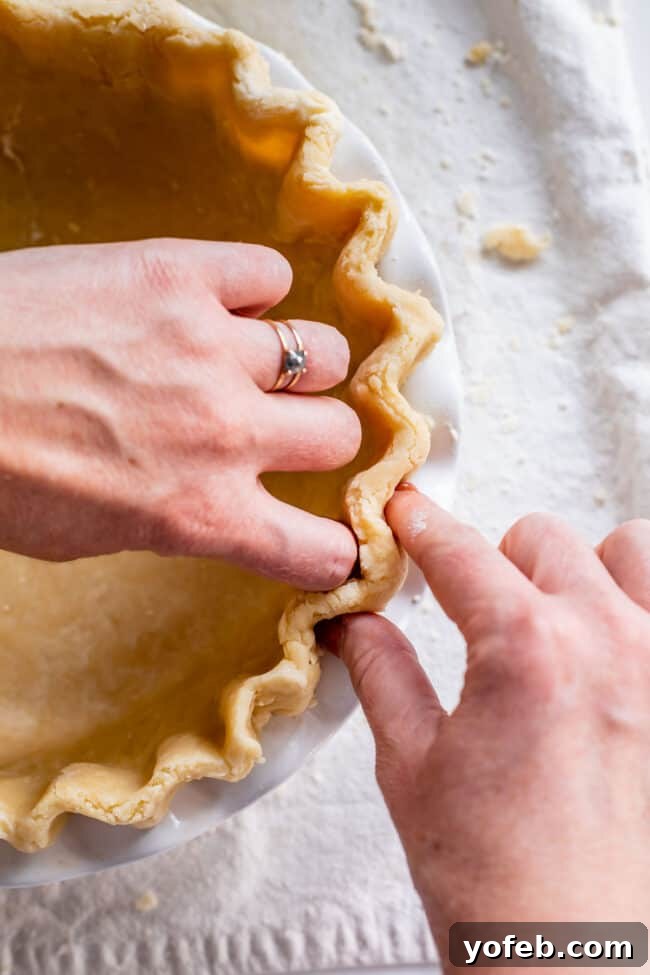
The next step is to add a decorative and functional finish to your pie crust edges. Using your fingers or knuckles, meticulously flute the edges of the pie crust. This not only enhances its visual appeal but also helps the crust maintain its shape during baking. If you prefer an alternative, a simple crimping with a fork can also create an attractive and effective border. The key is to create a consistent and firm edge that will stand up beautifully to the heat of the oven.
Chill the Crust for Perfection
After your pie crust is shaped and fluted, the next critical step is chilling. Place your pie pan, with the prepared crust, into the refrigerator for at least 30 minutes. For optimal results and to maximize flakiness, an hour or even longer is highly recommended. This chilling period is more than just a waiting game; it’s a vital part of the baking process. When cold pie dough, especially with its chilled pockets of fat, enters a hot oven, the sudden temperature change creates steam, which in turn helps separate the layers of dough, resulting in that desirable tender and flaky texture. Furthermore, thoroughly chilled dough is less prone to shrinking and slumping as it bakes, ensuring your meticulously fluted edges remain tall and defined.
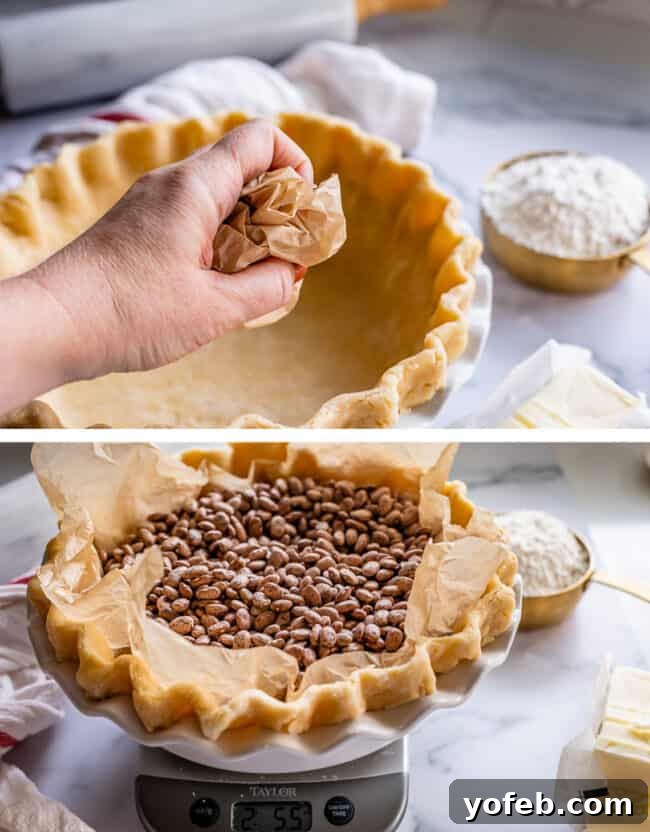
Once your pie crust is sufficiently chilled and firm, it’s time to prepare it for baking with weights. Take a large piece of parchment paper or aluminum foil and crumple it gently. This makes the material more pliable and less likely to create sharp edges that could tear your delicate pie crust. After crumpling, smooth it out and carefully lay it into the chilled pie crust, pressing it gently against the bottom and up the sides. Ensure that there’s enough overhang so you can easily lift the pie weights out later.
How to Prevent Pie Crust Shrinking
A common frustration in pie baking is a crust that shrinks dramatically in the oven, leaving a gap between the filling and the crust or causing the edges to slump. The primary culprits are usually insufficient chilling and inadequate pie weights. Chilling helps the butter (or other fat) in the dough solidify, which in turn holds the gluten structure in place, reducing shrinkage. However, the most effective defense against shrinking and slumping edges is the generous use of pie weights.
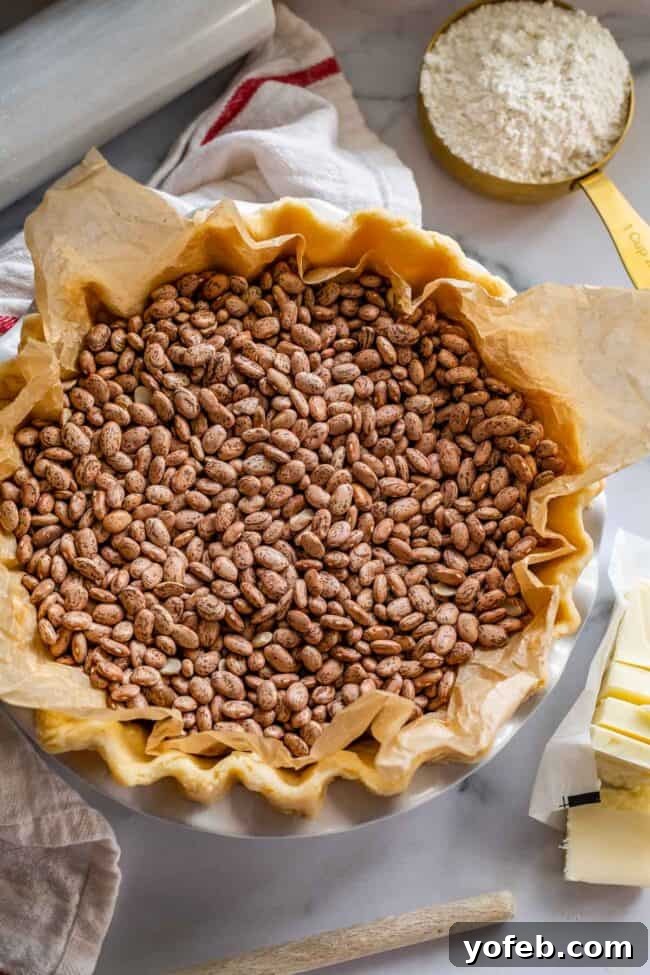
Now, fill the parchment-lined crust with your chosen pie weights. This is where many bakers, including my past self, often fall short. For years, my pie crusts suffered from saggy edges because I simply wasn’t using enough weights. While weights are excellent at preventing the bottom crust from bubbling up, their equally important role is to provide substantial support and structure to the pie’s edges. This firm pressure prevents the edges from slumping downwards as the butter melts and the dough softens in the oven. As a general rule, aim for a generous quantity of weights. For a standard 9-inch pie, I often use a substantial 2 to 2.5 pounds of dry beans, ensuring the weights fill the crust right up to the top of the fluted edges. Don’t be shy; fill ‘er up! This generous application of weights is your best insurance against a sad, droopy pie crust.
What to Use Instead of Pie Weights
While specialized ceramic pie weights are available and certainly effective, they are by no means a necessity. Many common household items can serve as excellent substitutes, proving that you don’t need to purchase dedicated equipment to achieve a perfectly blind-baked crust. The key is to use something heavy, oven-safe, and capable of distributing pressure evenly across the dough. Here are some fantastic alternatives:
- **Marbles:** Clean, heat-safe marbles are an excellent option. Their small, dense nature allows them to conform well to the shape of the crust, providing even weight distribution.
- **Loose Change:** Pennies, dimes, or quarters (ensure they are clean!) can be used. Their weight and size make them effective, though they might be less uniform than other options.
- **Dry Rice:** A staple in most pantries, dry rice works wonderfully. It’s affordable and conforms beautifully to the crust. After baking, the rice will have a slightly toasted, nutty flavor. While you shouldn’t consume it directly after being used as weights (as it cooks unevenly and might absorb some fat), you can repurpose it. Store the baked rice in a sealed container and designate it solely for future pie-weighting tasks.
- **Dry Beans:** Similar to rice, dry beans (like kidney, pinto, or navy beans) are highly effective and reusable. After a few baking cycles, they might develop a slightly chalky texture, making them unsuitable for eating. However, they can be stored indefinitely and reused as dedicated pie weights for years – I’ve been using the same batch for nearly a decade!
- **Granulated Sugar:** This is a surprisingly effective and versatile option. Sugar fills the crust very evenly, providing uniform pressure. During baking, the sugar will lightly caramelize, developing a beautiful light brown hue and a delicate caramel flavor. The best part? You can absolutely reuse this slightly caramelized sugar! It’s perfect for sweetening coffee, tea, or other desserts where a hint of caramel is welcome.
- **Anything Oven-Safe:** In essence, any small, heavy, oven-safe item that won’t melt or release harmful fumes can be used. Just ensure it’s clean and won’t damage your pie dish.
What are the Best Pie Weights to Use?
The “best” pie weights are undeniably the ones you already have on hand. There’s no need for an extra trip to the store or a special purchase. As detailed above, dried beans, rice, loose change, or even granulated sugar are perfectly adequate and incredibly effective. The most important factor, regardless of your chosen material, is using a sufficient quantity. Fill the crust almost to the top of its fluted edges, ensuring the weights are evenly distributed and provide ample pressure. This crucial step is what guarantees your pie crust maintains its exquisite shape and prevents those disheartening slumps and bubbles, resulting in a perfectly structured and beautifully baked shell every time.
Ideal Temperature to Bake a Pie Crust
When it comes to blind baking, we turn up the heat! A high oven temperature is key to achieving a crisp crust quickly and efficiently. We start the process by baking the weighted pie crust at a robust 425°F (220°C). This initial high heat helps to rapidly set the dough, preventing the fats from melting too quickly and the crust from losing its shape. The first baking stage, with the weights in, typically lasts for about 15-18 minutes, or until you observe the edges of the crust just beginning to turn a light golden brown. This color indicates that the edges are sufficiently set. Following this, the weights are removed, and the crust is returned to the oven for a second, shorter bake. For a fully blind-baked crust, this second stage is about 10-12 minutes to ensure the bottom is thoroughly cooked and toasted. If you’re par-baking, the second stage is significantly shorter, lasting only 2-3 minutes.
It’s important to remember that baking times can vary. Factors such as the precise calibration of your oven, the position of the pie within the oven, the specific pie crust recipe you’re using (which can affect moisture content and fat composition), and ultimately, your intended use for the crust (full blind bake vs. par-bake) will all influence the exact duration. Therefore, it’s always wise to pay close attention to visual cues and to consult all the accompanying notes and instructions to achieve your ideal blind-baked crust.
How Long to Blind Bake a Pie Crust: The Two-Stage Process
The blind baking process is most effective when executed in two distinct stages. This ensures an even bake and prevents both bubbling and slumping.
**Stage 1: With Pie Weights (Initial Bake)**
Begin by baking your weighted pie crust in a preheated oven at 425°F (220°C) for approximately 15 to 18 minutes. During this time, keep a close eye on the edges of the crust. You’re looking for them to just start turning a very light golden color. This signifies that the structure is set. Once this initial color appears, carefully remove the pie crust from the oven. Do not turn off your oven; keep the temperature at 425°F. Gently lift out the parchment paper or foil containing the pie weights. You’ll notice that the very center of the pie crust’s bottom will still look somewhat shiny and raw. This is perfectly normal and expected for this stage.
To prevent the bottom of the crust from puffing up or creating large air pockets during the second bake, use a fork to prick the entire bottom surface of the crust several times. These small holes allow steam to escape, ensuring a flat and even base.
The Double Bake Method for a Perfectly Crisp Crust
The secret to a truly outstanding blind-baked pie crust lies in this second baking stage, often referred to as the “double bake.” After removing the weights and pricking the crust, it goes back into the oven to finish cooking, but the exact duration depends on whether you’re aiming for a fully blind-baked or par-baked crust.
**For a Fully Blind-Baked Pie Crust:**
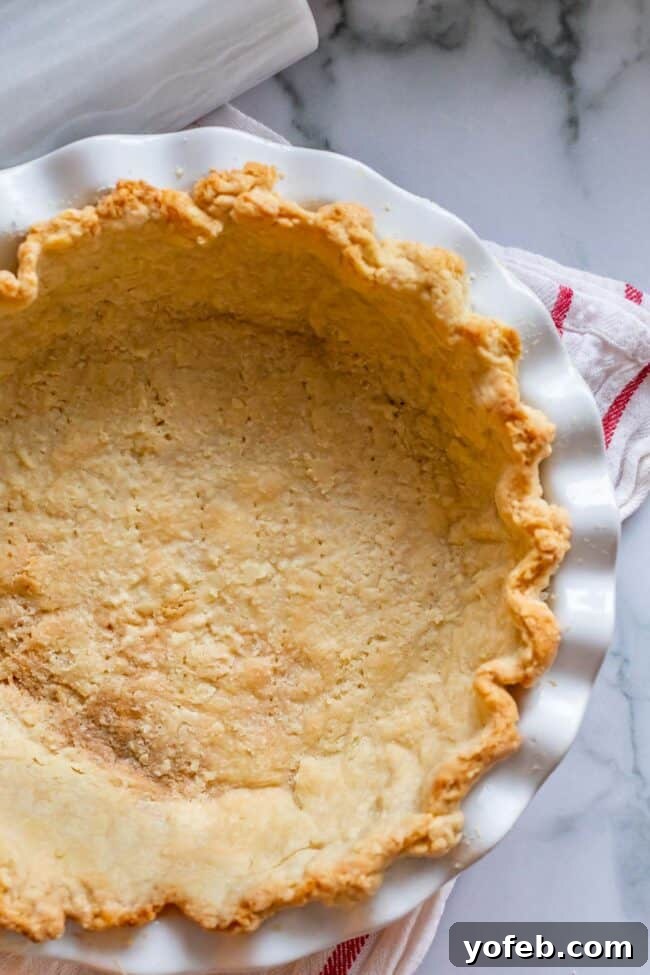
If your pie crust will not be returned to the oven after filling (as is the case with cream pies, fresh fruit glacé pies, or rich desserts like French Silk Pie), you need a crust that is entirely cooked, golden, and exceptionally crispy. Keep your oven temperature at 425°F (220°C) and place the pie crust back inside for another 12 to 18 minutes. The goal here is for the bottom of the pie to achieve a beautiful, even golden-brown color, indicating it’s thoroughly cooked and crisp. This ensures a delightful textural contrast with your unbaked filling.
Here’s what a crust looks like after the initial 15 minutes of baking with weights, immediately after the weights have been removed:
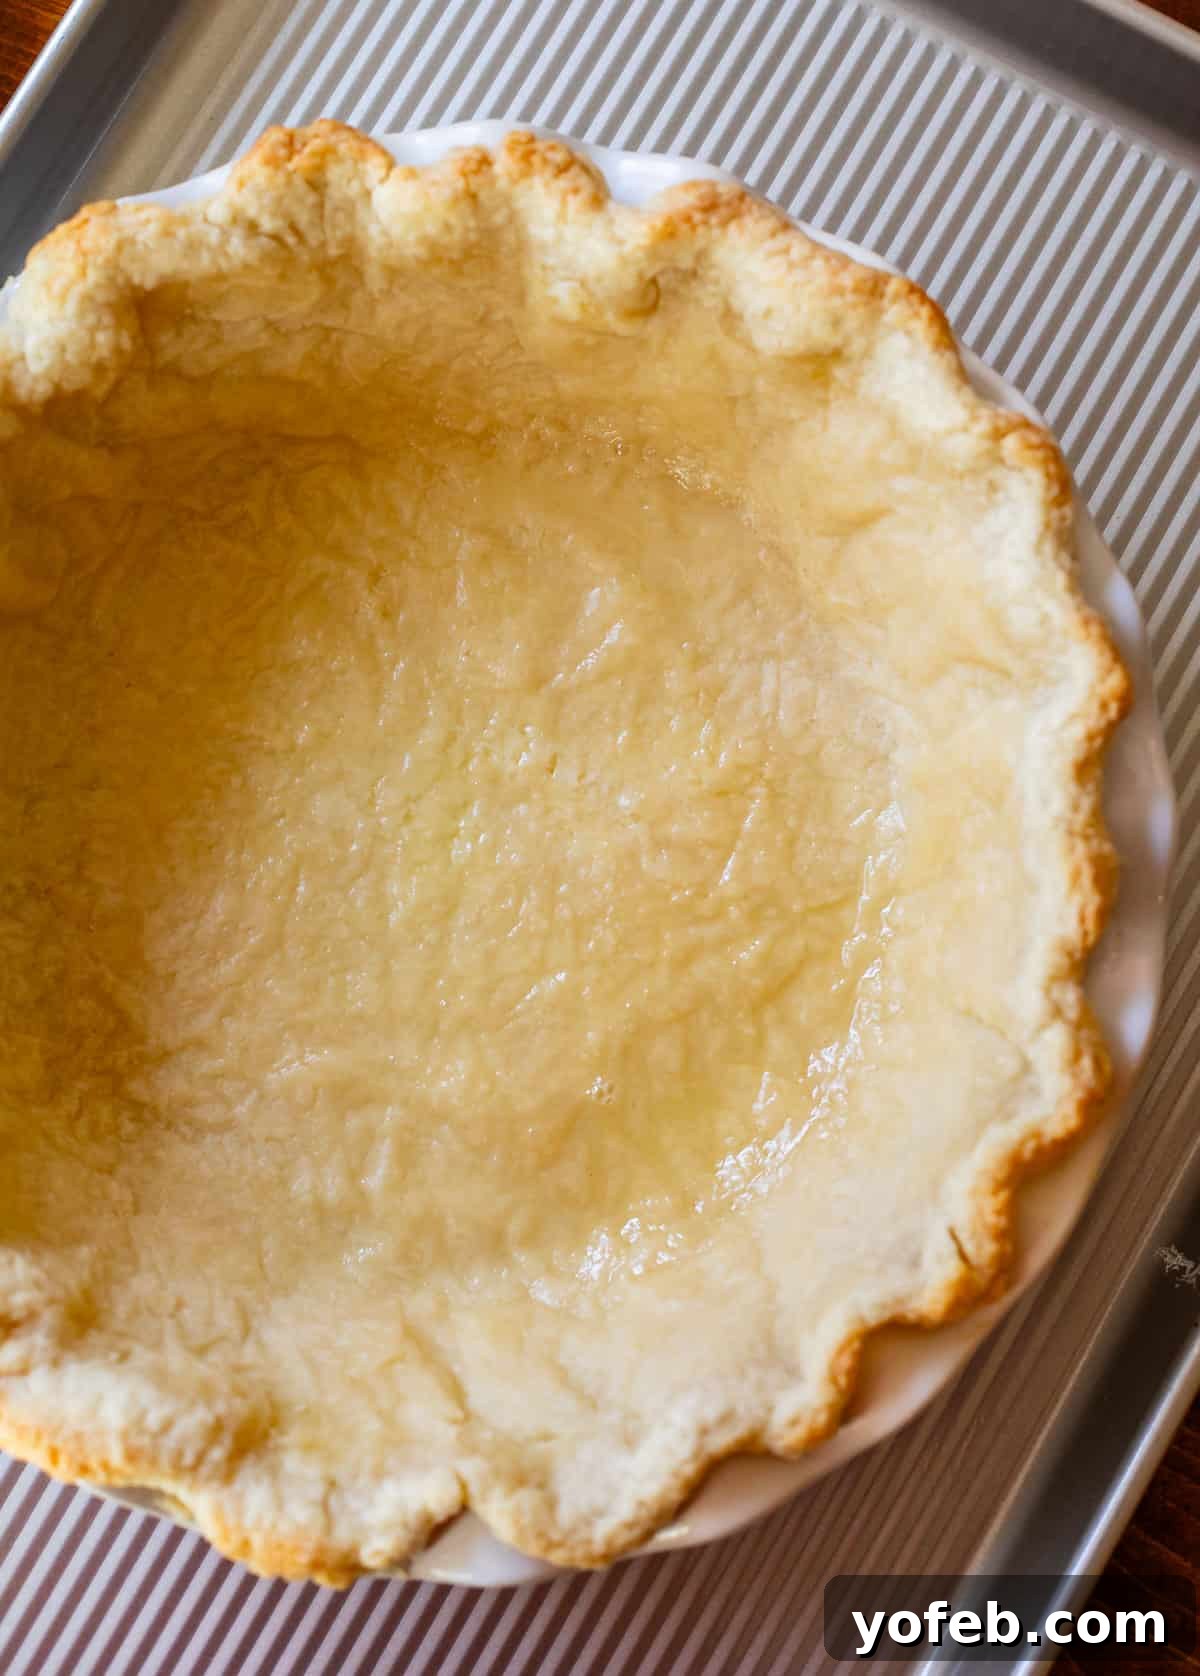
Notice the bottom is still very light and uncooked. For a fully blind-baked crust, this is where you would continue baking for the full 12-18 minutes until it’s golden brown.
**For a Par-Baked Pie Crust:**
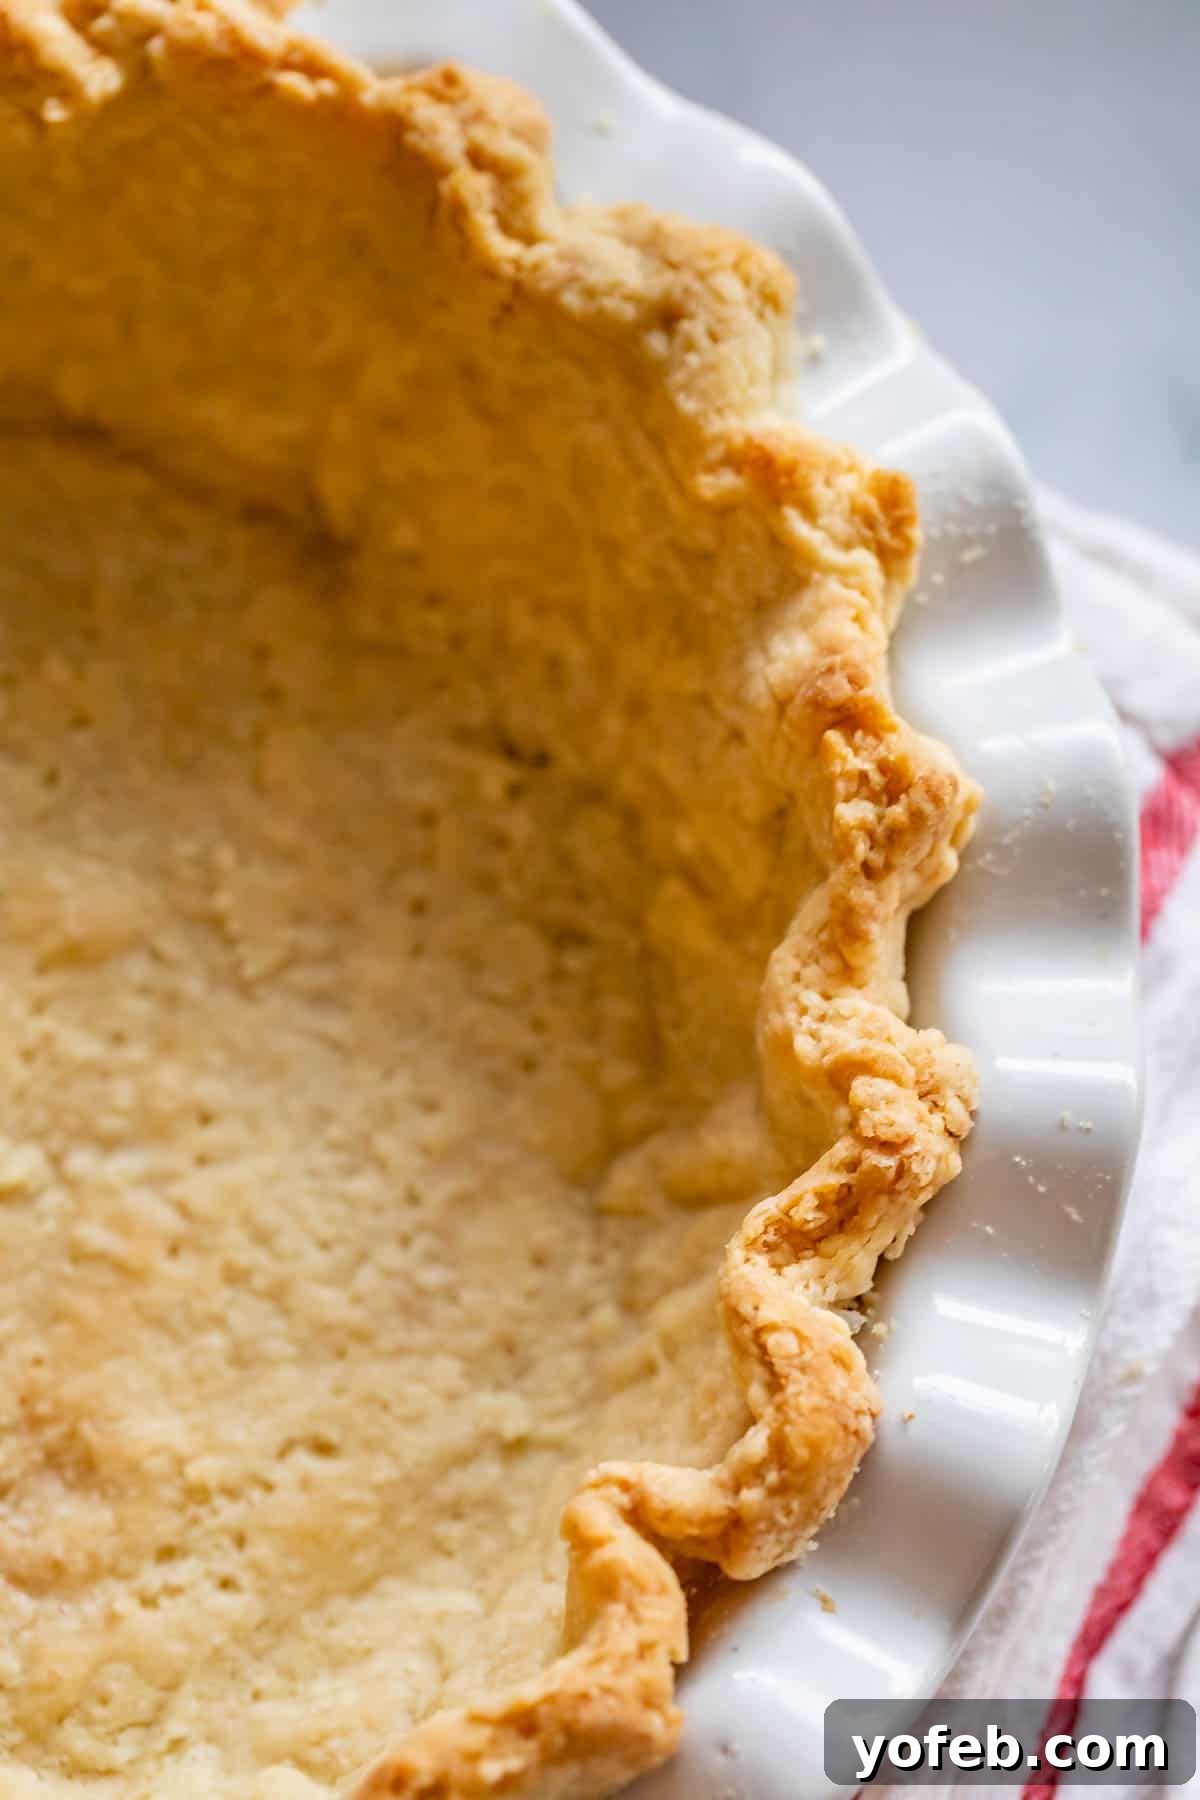
If your pie will be returning to the oven with its filling (like for a custard pie), the second bake is much shorter. Pop the crust back into the 425°F (220°C) oven for just about 3 minutes. The aim here is not a deep golden brown but rather to transform the bottom of the crust from a shiny, raw appearance to a matte, “blonde” color. It will still be light in hue, but no longer appear uncooked. This partial bake strengthens the crust and prevents sogginess without overcooking it before the final bake with the filling.
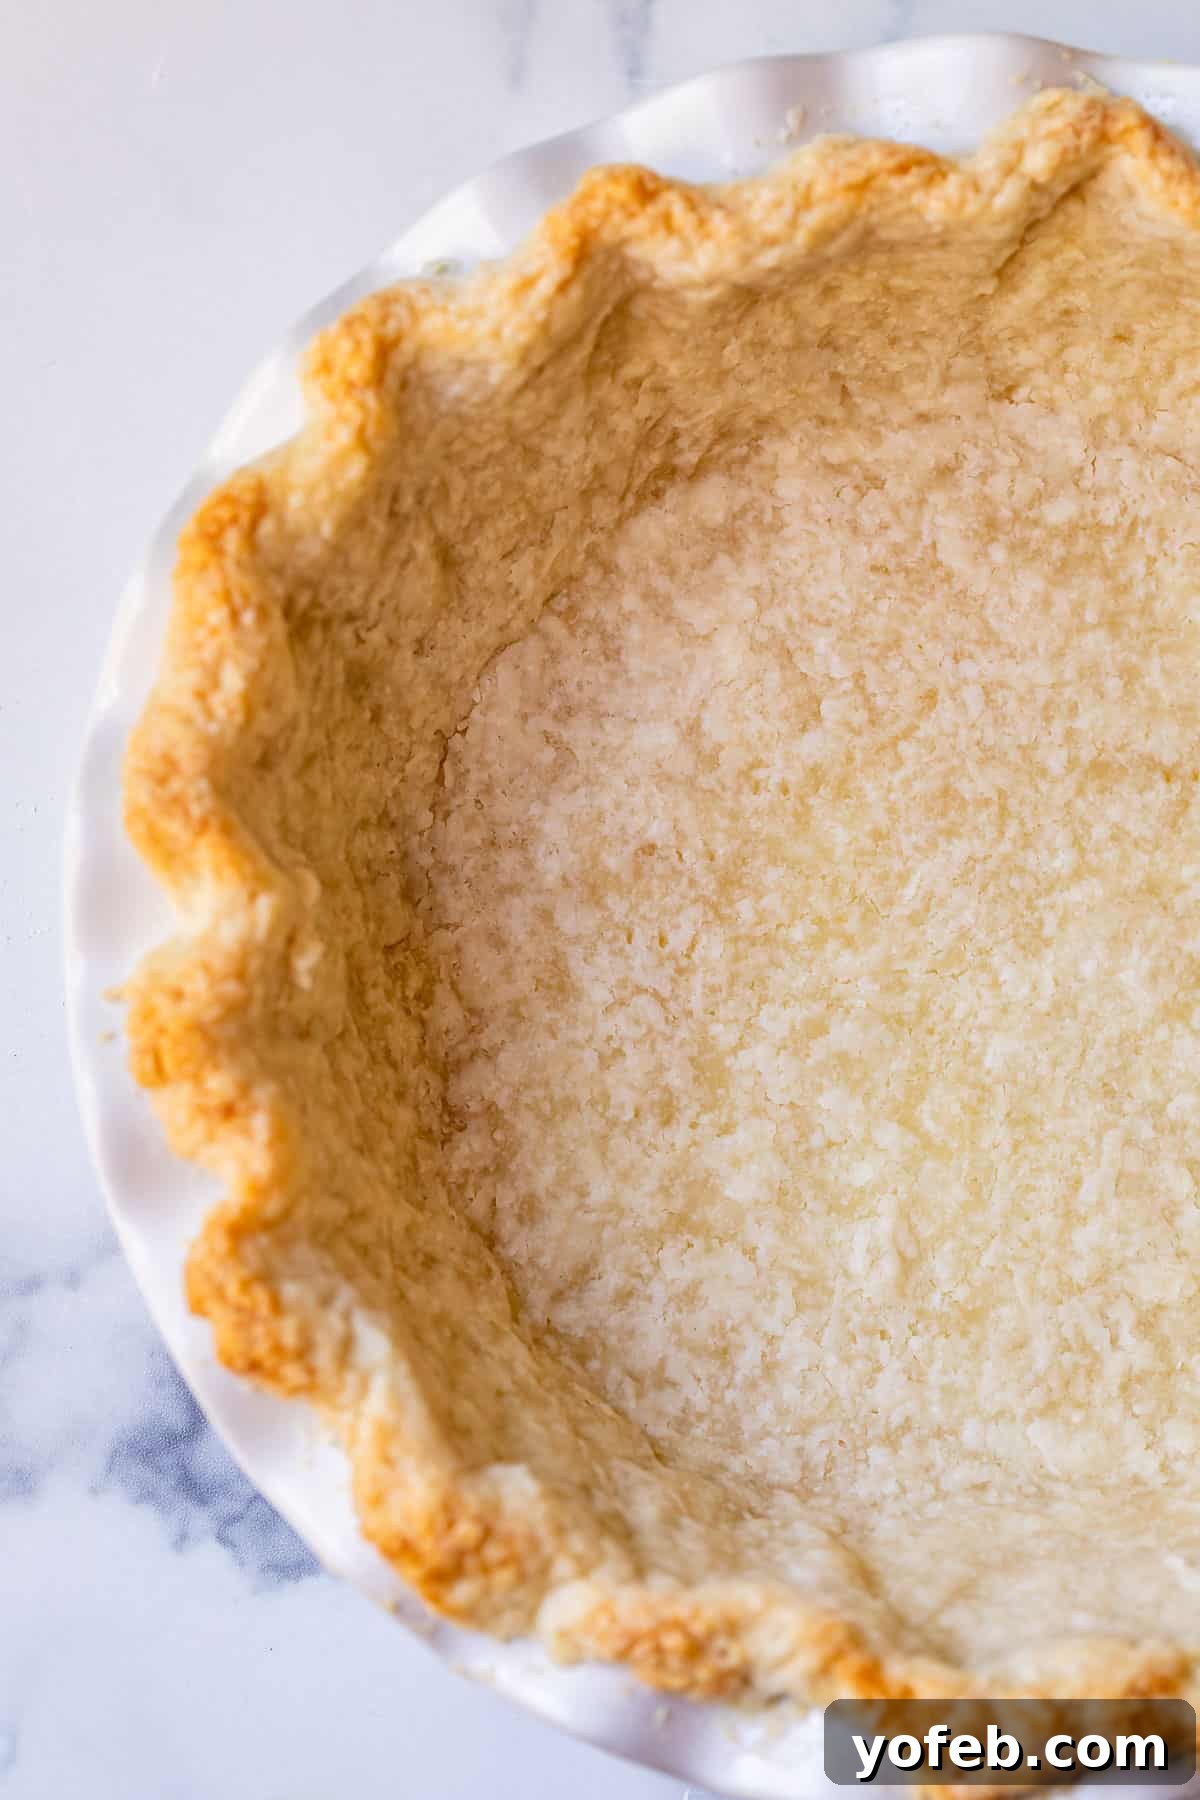
As you can see, the desired outcome for a par-baked crust is a blonde color, distinctly *not* brown, and a matte finish on the bottom, indicating it’s no longer raw or shiny. This provides a solid, pre-cooked foundation for your filling’s final bake.
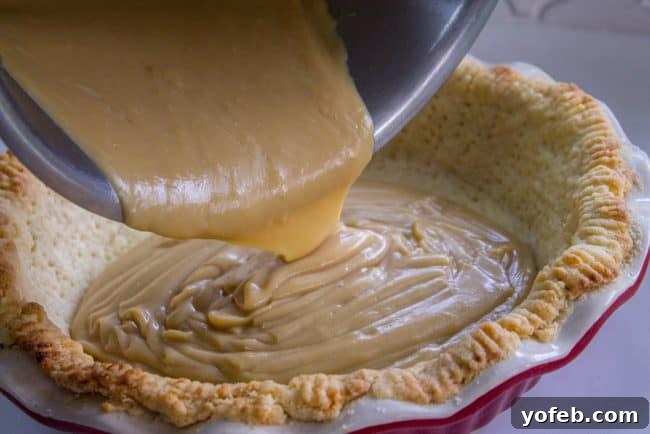
For example, in preparing this delightful Butterscotch Pie with Meringue Topping, the pie goes back into the oven after filling to bake the meringue. Therefore, for the second bake after removing the weights, I only baked the crust for about 3 minutes. The center remained light in color, then it was ready for the luscious filling.
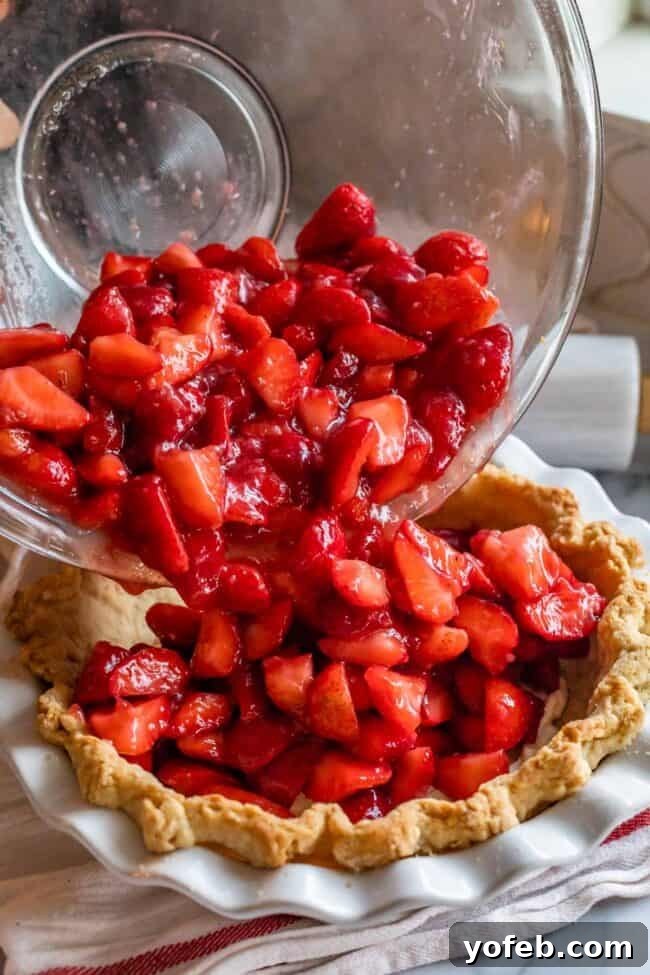
Conversely, for a dessert like this refreshing Fresh Strawberry Glace Pie, where the fresh strawberries are added to a cooked crust and the pie is not baked further, it’s crucial to perform a full blind bake. This means baking the crust until it achieves a beautiful golden brown color throughout the center (requiring 12-18 minutes after the weights are removed), ensuring a crisp, fully cooked foundation that perfectly complements the fresh fruit.
Can You Blind Bake a Pie Crust Without Weights?
The short answer is yes, it is possible to blind bake a pie crust without weights, but it comes with inherent risks. This method is commonly known as “docking” the crust. Docking involves using a fork to prick holes all over the surface of the raw pie dough, including the bottom and up the sides.
Observe how the crust is thoroughly pricked, even along the edges, to facilitate steam release:
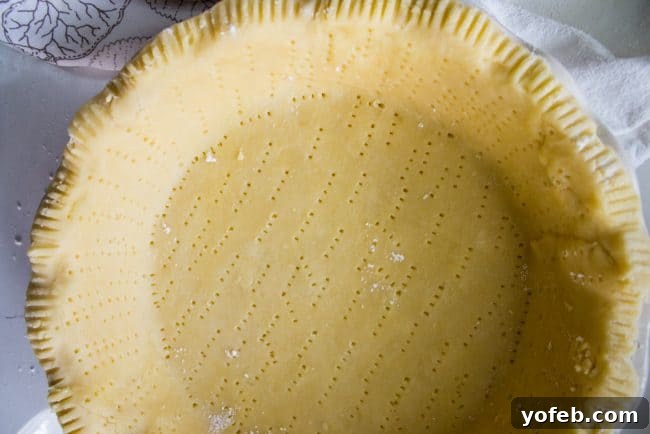
These small perforations serve a critical purpose: they allow steam to escape from underneath the dough as it bakes. Without an escape route, trapped steam can cause the bottom of the crust to puff up unevenly, forming large bubbles and an irregular surface. If you choose to forgo pie weights, it is absolutely essential to chill your crust completely before baking. The colder the dough, the more resistant it will be to shrinking and slumping. However, even with thorough chilling and diligent docking, you always run a higher risk of the pie crust shrinking away from the pan’s edges or the sides slumping downwards, diminishing the structural integrity and aesthetic appeal of your pie. While I personally advocate for the reliability of pie weights, every baker finds their preferred methods. Don’t let anyone dictate your baking choices; experiment and discover what works best for you!
How to Par Bake a Pie Crust for Filled Pies
Par-baking, or partially baking, a pie crust is a fundamental step in certain pie preparations, specifically designed to achieve the best possible texture and structural integrity. This method is particularly vital when you’re crafting pies with liquid-heavy fillings, such as creamy custards, delicate cream pies, or savory egg quiches. If these types of fillings are poured into a raw crust, the moisture can seep into the dough during baking, inevitably leading to a dreaded soggy bottom. And as we’ve established, we are firmly in the anti-soggy-bottom club!
The process for par-baking closely mirrors the initial steps for a full blind bake. You will start by rolling out your pie dough, carefully transferring it to your pie pan, and chilling the dough thoroughly. Crucially, you will also utilize pie weights to prevent bubbling and maintain the shape of your crust. The key difference lies in the baking time. When it’s time to bake, you will significantly reduce the duration compared to a full blind bake. Aim for approximately 10 minutes of baking with the weights in, just enough time for the crust to set and begin to develop a very light color on the edges, without becoming fully golden brown. This initial bake stabilizes the dough, creating a protective barrier against moisture from the filling, while leaving enough baking time for the crust to finish cooking alongside its liquid-rich contents.
Finishing a Par-Baked Crust: Just 2-3 Minutes
Once you’ve completed the initial weighted bake for your par-baked crust (around 10 minutes), and you’ve removed the weights and pricked the bottom, the final step for a par-baked shell is a very brief second bake. This short burst of heat is essential if your pie filling also requires significant oven time, such as for a tangy Lemon Meringue Pie or a comforting Sweet Potato Pie, where the crust will return to the oven to finish cooking with the filling. During this stage, you’re not looking for deep golden brown color. Instead, your objective is to ensure the edges are lightly golden and, most importantly, that the center of the crust’s bottom transitions from a shiny, raw appearance to a matte, opaque finish. This transformation typically takes a mere 2 to 3 minutes in a hot oven (still at 425°F or 220°C). This brief bake sets the surface of the dough, preventing it from absorbing too much moisture from the filling during the longer, final baking cycle, thereby guaranteeing a perfectly firm and non-soggy base for your finished pie.
And there you have it! With these detailed instructions and helpful tips, you are now fully equipped to conquer the art of blind baking and par-baking pie crusts. No more worries about shrinking edges or soggy bottoms – just perfectly crisp, flaky foundations for all your pie creations. Now, let’s get baking and create some truly spectacular pies!
Looking for the perfect dough? Here is my favorite pie crust recipe:
How to Make Flaky Pie Crust
And for an extra touch of elegance, learn how to adorn your double-crust pies:
How to Make a Lattice Pie Crust
Pies That Require a Blind Baked Pie Crust
Many delectable pies rely on a perfectly blind-baked or par-baked crust for optimal texture and flavor. Here’s a selection of pies that benefit greatly from these techniques, with guidance on whether to fully blind bake or par-bake:
- Butterscotch Pie with Meringue Topping: Pudding pies are wonderfully refreshing, especially on a warm day! (Par-bake crust)
- Pumpkin Pie: This holiday classic definitely achieves superior results with a par-baked crust, preventing a watery bottom.
- Sweet Potato Pie: Similar to pumpkin pie, sweet potato pie is an excellent candidate for a par-baked crust to avoid sogginess.
- Lemon Meringue Pie: A family favorite known for its zesty filling and fluffy meringue! (Par-bake that crust to ensure crispness under the lemon curd!)
- Fresh Strawberry Glace Pie: One of the quintessential summer pies, showcasing fresh berries! (Do a full blind bake for this, as it won’t return to the oven after filling.)
- Fresh Blackberry Glace Pie: Just like its strawberry counterpart, this pie demands a fully blind-baked crust to complement the juicy blackberries.
- Chocolate Cream Pie: Rich and indulgent with a perfectly smooth filling! (Requires a full blind bake for that ultimate crisp base.)
- Cream Pie from Preppy Kitchen: Most cream pies benefit from a full blind bake.
- Buttermilk Pie from Lil Luna: Custard pies often need a par-baked crust.
- Maple Cream Pie from Cooking with Carlee: Another cream pie that thrives on a fully blind-baked shell.
While typically made with a graham cracker crust, these recipes are also incredibly delicious and beautifully enhanced by a flaky, blind-baked pie crust:
- French Silk Pie: You can’t beat this classic chocolatey delight in a flaky crust!
- The Best Zesty Key Lime Pie: The vibrant tartness is perfectly balanced by a crisp, buttery crust.
- No Bake Cherry Cream Cheese Pie: This easy-to-make, delightful pie gets an upgrade with a pre-baked pastry shell.
- Dulce de Leche Cream Pie: If you’ve made your own easy dulce de leche, turning it into a pie with a blind-baked crust is pure bliss!
- Coconut Cream Pie with Caramel Layer: Toasting the coconut and pairing it with a rich, nutty crust creates an unforgettable dessert.
Facebook | Pinterest | Instagram

Blind Baking Pie Crust
10 mins
30 mins
1 hr
1 hr 40 mins
1
Rate this Recipe
Print Recipe
Ingredients
- 1 pie crust, half this recipe or a store-bought pie dough
- parchment paper or tin foil
- pie weights, such as dry beans, dry rice, loose change, etc.
Instructions
-
First, prepare your pie crust. I highly recommend making a homemade pie crust for the best flaky texture; check out my post for How to Make Flaky Pie Crust. This recipe yields two crusts; you can either halve the recipe or make both and freeze the second one for later use (it will keep for several months). If short on time, a store-bought pie crust works too!
-
Roll out your pie crust and carefully transfer it to a 9-inch pie plate. Refer to my pie crust post for detailed tips on rolling out the dough.
-
Gently fold any excess dough hanging over the edges underneath itself so that it creates a thicker, cleaner edge aligned with the pie plate. While trimming is an option, folding preserves all that delicious crust. If your dough appears crackly, don’t worry. Use your fingers to gently mold the dough back into a smooth, even edge, dipping your fingers in ice water if necessary to aid in smoothing. Treat it like play dough until you achieve a nice, non-jagged border.
-
Use your fingers or knuckles to flute the edges of the pie, creating a decorative and sturdy rim. See the photos in the article for visual guidance. Alternatively, you can press the edge with a fork for a simpler, yet attractive, crimped finish!
-
Refrigerate your pie crust for at least 1 hour for the best results. If you’re pressed for time, 30 minutes will suffice, but remember: the longer you chill, the colder the fat in your pie crust will be when it enters the hot oven. This extreme temperature contrast is what creates those desirable tender, flaky layers. I recommend draping plastic wrap loosely over the chilling pie to prevent the dough from drying out.
-
Preheat your oven to 425°F (220°C) for at least 20 minutes to ensure it’s thoroughly hot. Place a pizza stone or a sturdy metal baking sheet in the oven while it preheats. Baking the pie on a preheated, very hot surface significantly helps to cook the bottom crust evenly and prevent sogginess.
-
Line the crust with parchment or foil. Get a large square of tin foil or parchment paper. Crumple it up gently, then smooth it out. This makes it more pliable and less likely to tear your pie crust. Lay the smoothed paper or foil into your chilled pie crust. Ensure there’s enough overhang so you can easily lift out the heavy weights later.
-
Fill generously with weights. You can use traditional pie weights, marbles, clean loose change, dry rice, dry beans, or even granulated sugar—anything oven-safe that won’t be affected by the heat. Crucially, make sure your weights fill the crust right up the sides, nearly to the top of the fluted edges. This is essential not just for preventing bubbles on the bottom, but also for providing enough support to keep the pie crust edges from slumping downwards into a sad, droopy mess. Be generous with the weights; I typically use about 2 to 2.5 pounds of dry beans for a standard 9-inch pie.
-
Bake your weighted pie crust in the preheated oven at 425°F (220°C) for 15-18 minutes. Bake until the edges of the crust are just starting to turn a very light golden color. Do not remove it until you see this subtle coloration on the edges, indicating they are set.
-
Remove the pie crust from the oven and carefully shut the oven door to maintain the temperature. Gently lift the parchment paper or foil to remove the weights. You’ll notice the bottom of the crust will still look shiny and uncooked; this is completely normal at this stage.
-
To prevent the bottom of the pie crust from bubbling up during the next baking stage, prick the entire bottom surface of the crust several times with a fork.
-
For a full blind bake pie crust, prepare a tin foil shield: To prevent the delicate edges of your crust from over-browning or burning during the final bake, I recommend using a pie crust shield. Alternatively, you can easily make your own: take a square of aluminum foil slightly larger than your pie dish. Fold it in half, then in half again, creating a quarter-folded square. Using scissors, cut out the middle section, creating a circle in the center. When you unfold it, you’ll have a square of foil with a circular opening. Carefully mold this shield around the fluted edges of your pie crust.
-
For a fully blind-baked pie crust: Place the pie crust (with the optional tin shield around its edges) back into the oven at 425°F (220°C) for another 12-18 minutes. Continue baking until the bottom of the pie turns a beautiful golden light brown, indicating it is fully cooked and crisp. (Follow this longer bake time if your pie crust is NOT going back into the oven at all after filling.)
-
For a par-baked pie crust: There is no need to create a tin foil crust shield for this method. Place the pie crust back in the oven at 425°F (220°C) for just another 3 minutes. The goal is for the bottom of the pie to become matte and no longer shiny, achieving a “blonde” color rather than a golden brown. (Par-bake only if your pie crust WILL be returning to the oven with its filling to finish cooking.)
-
Once baked (either fully or par-baked), remove the crust from the oven. Allow it to cool completely on a wire rack before filling, as most pie recipes require a cooled crust to prevent soggy bottoms. Then, proceed with the filling instructions outlined in your specific pie recipe.
Nutrition
Did you make this? I’d love to see it!
Mention @thefoodcharlatan or tag #thefoodcharlatan!