
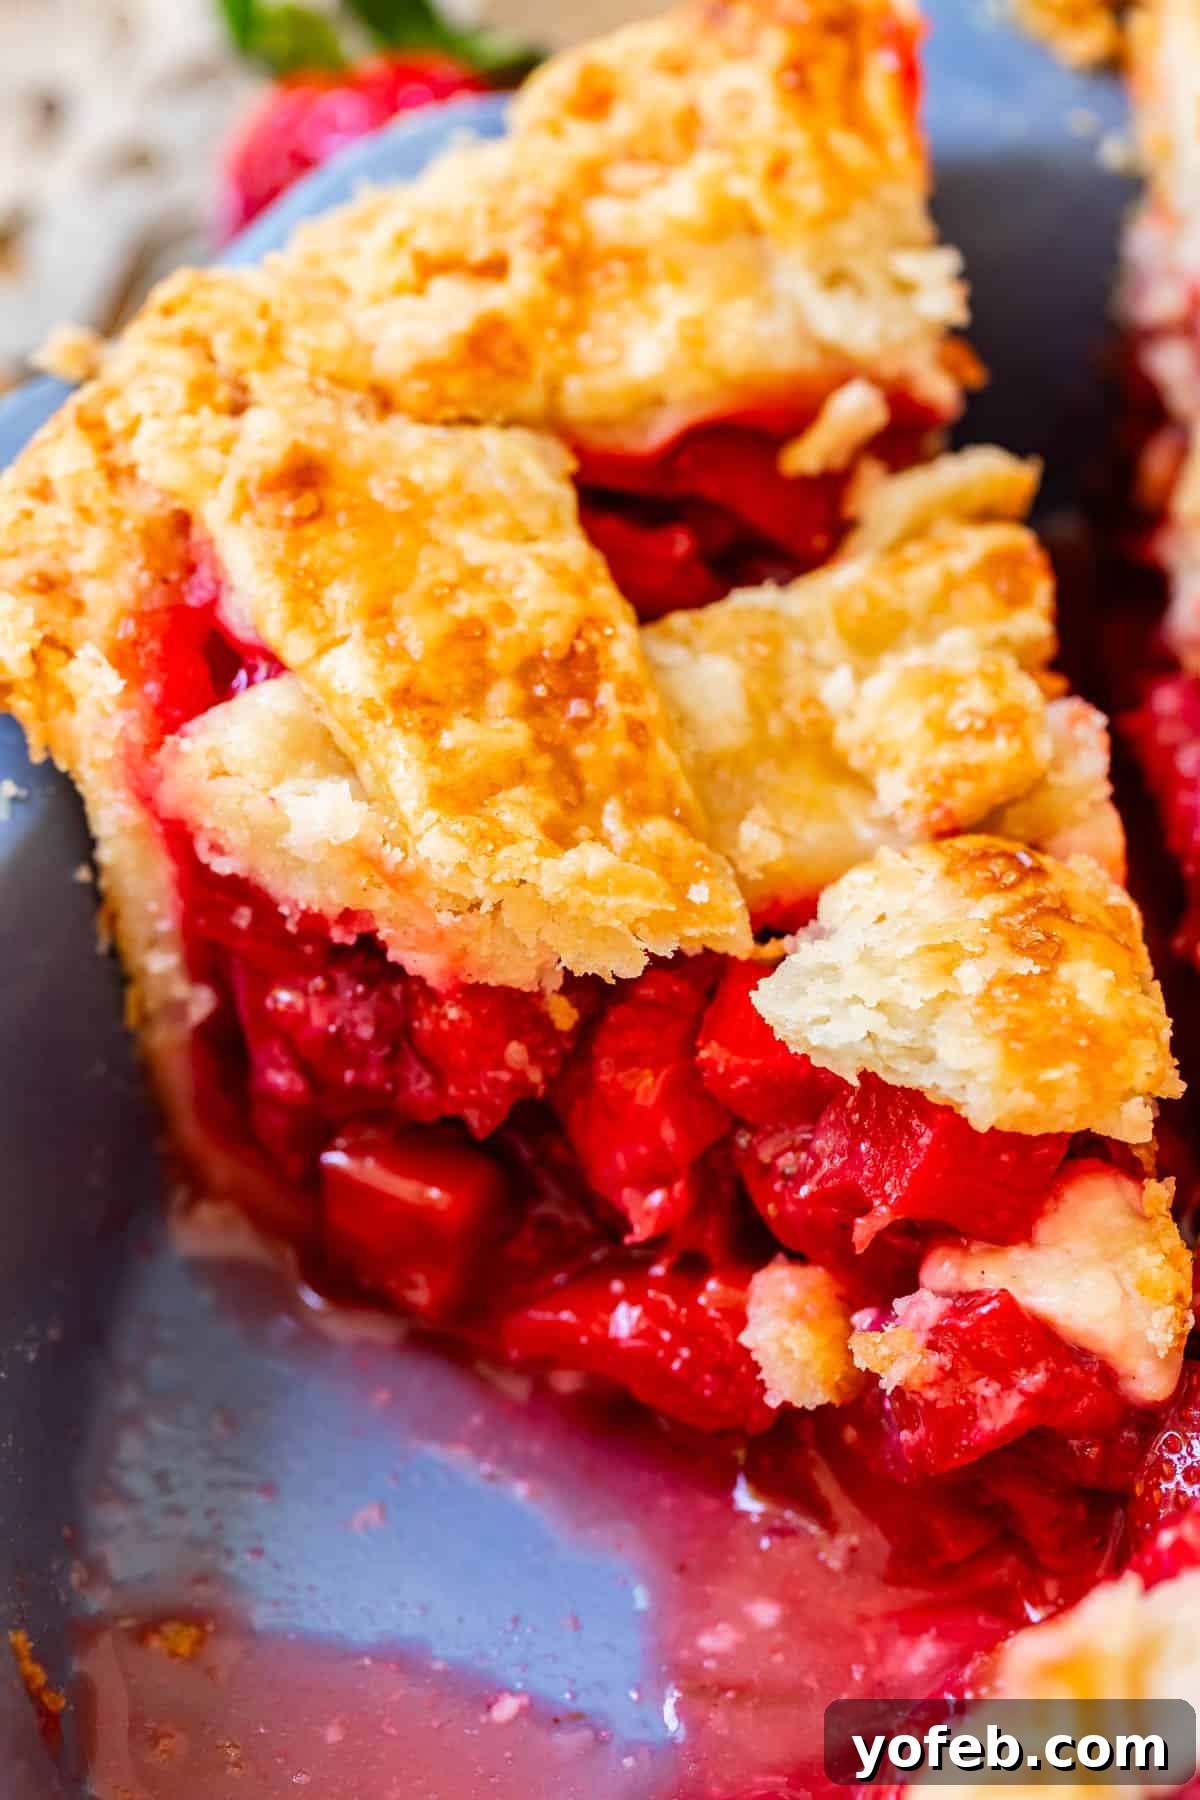
Are you searching for the ultimate spring or summer dessert that perfectly balances sweet and tart flavors? Look no further than this incredible Strawberry Rhubarb Pie! It’s a true classic for a reason, blending the vibrant tang of fresh rhubarb with the juicy sweetness of ripe strawberries, all encased in either a delightfully flaky golden crust or crowned with a truly sensational buttery crumble topping. Honestly, it’s hard to pick a favorite, so we’re diving into both mouthwatering variations in this comprehensive guide.
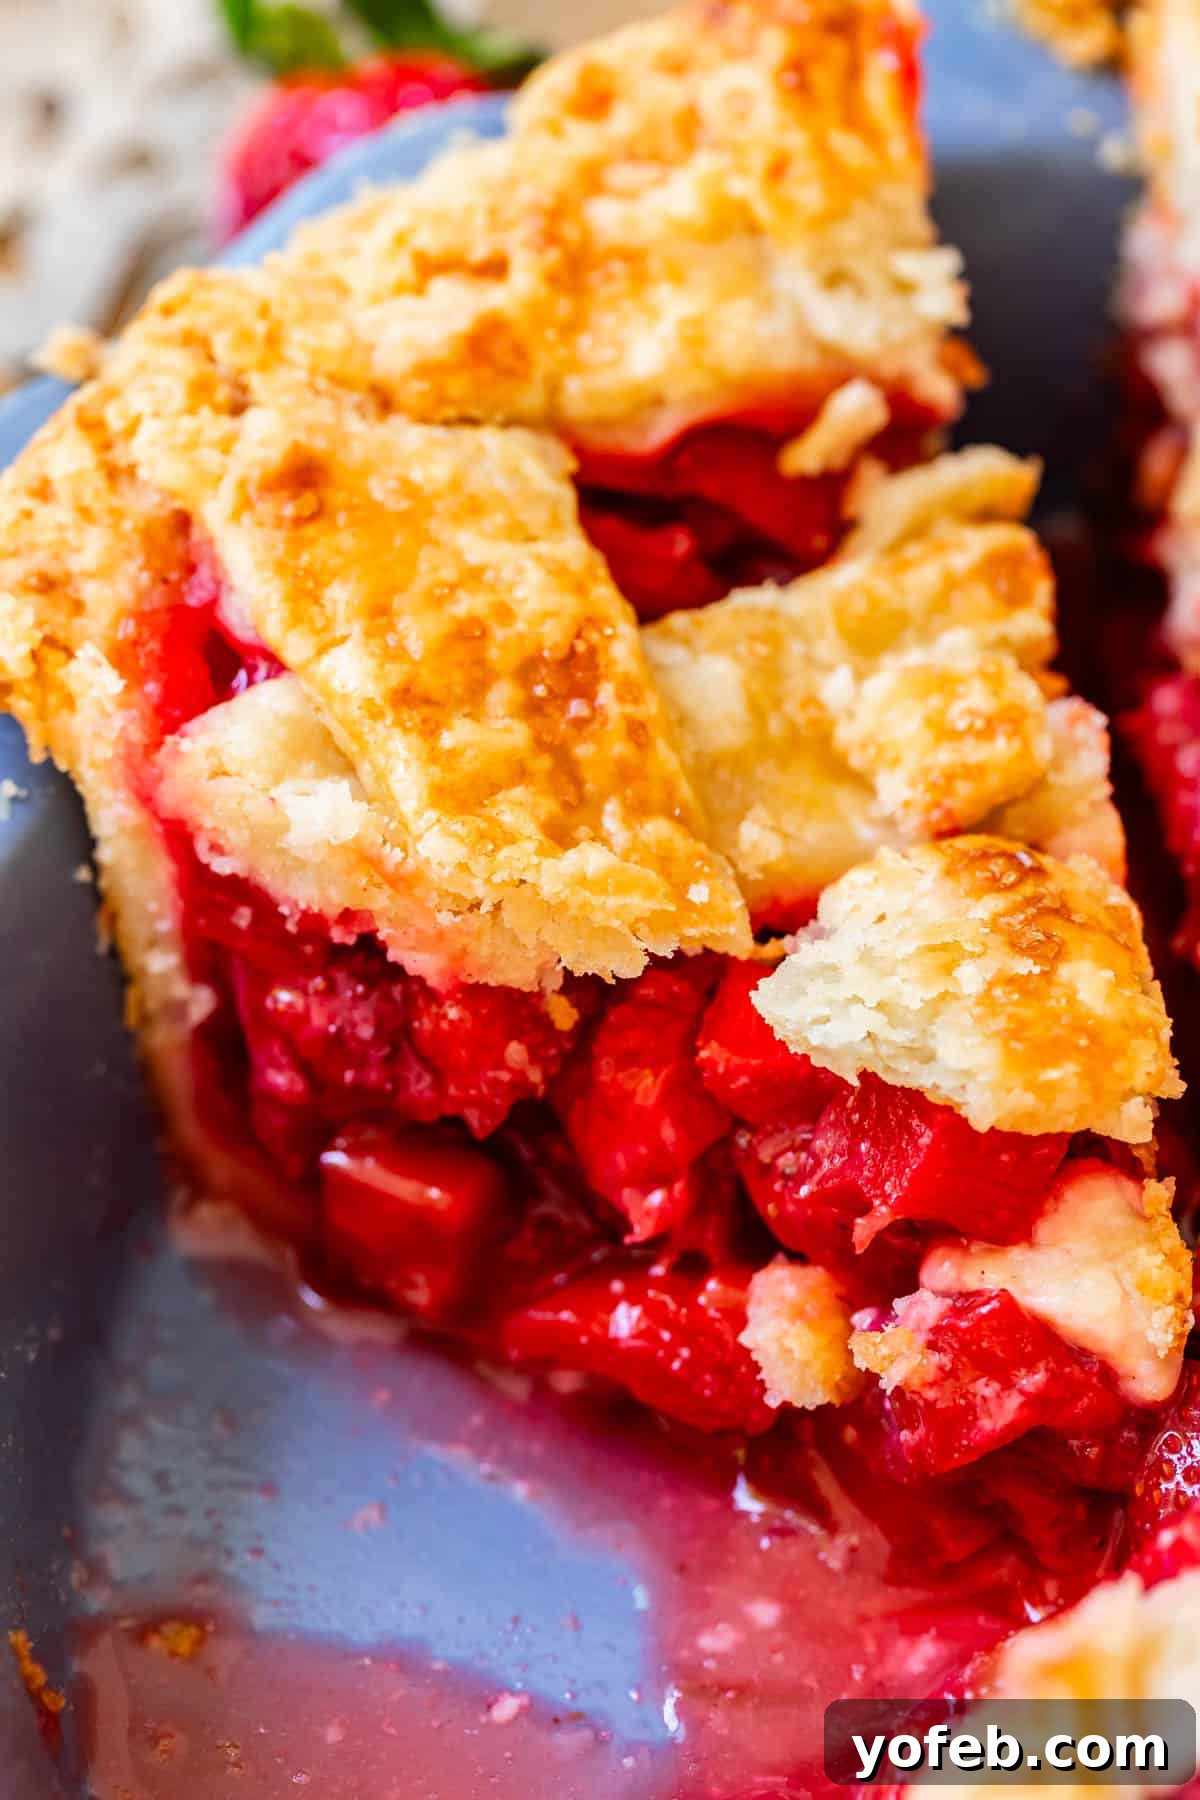
Table of Contents
- The Allure of Rhubarb
- Crafting the Perfect Strawberry Rhubarb Pie
- Essential Ingredients for Strawberry Rhubarb Pie
- Step-by-Step: How to Make Strawberry Rhubarb Pie
- Classic Double Crust Strawberry Rhubarb Pie
- Irresistible Strawberry Rhubarb Crumble Pie
- Serving Suggestions for Your Strawberry Rhubarb Pie
- Storage and Shelf Life of Strawberry Rhubarb Pie
- Can You Freeze Strawberry Rhubarb Pie?
- Frequently Asked Questions About Strawberry Rhubarb Pie
- More Delectable Fruit Desserts to Try
- Strawberry Rhubarb Pie Recipe Card
Last week offered a unique perspective on home organization when I stayed at my friend Mardee’s house to care for her children while she enjoyed a much-deserved getaway. Despite the fun with the kids, my mind was captivated by Mardee’s perfectly organized systems. Friends, bless them, checked in with meals, making sure I wasn’t overwhelmed juggling two families.
I assured everyone the kids were fine, but my real “mental breakdown” was trying to comprehend the sheer perfection of Mardee’s home. It was an inspiring, albeit intimidating, experience.
I found myself obsessively photographing her under-sink cabinets, sending pictures to my husband, Eric. “Look at these clever shelves Mardee uses for her cleaning products! Not a single crumpled grocery bag shoved haphazardly inside!” My own cupboards, in stark contrast, usually eject something when opened.
“And her pantry!” I exclaimed, “She has dedicated bins for every snack: applesauces here, granola bars there! It’s incredible!” In my pantry, a single bin holds *all* the snacks, often filled with stray Cheez-Its and a dozen half-eaten Ritz cracker sleeves, thanks to my kids never checking for an open pack. Not to mention the occasional pretzel with literal bite marks, courtesy of my four-year-old, Edison, who often returns snacks midway through eating.
Mardee even labels all her kitchen cupboard shelves: “Pitchers go here,” “Serving bowls go here.” When guests offer to unload my dishwasher, they inevitably ask, “Where does this serving bowl go?” My standard reply: “Good question! Where would *you* put it in *this* kitchen?” This scenario, I assure you, has played out more times than I can count.
I also discovered her secret weapon for kids’ lunchboxes: ice packs! Why had I never considered this? My kids stopped wanting string cheese in their lunches because it would be warm and floppy by noon. The obvious solution, buying an ice pack, never occurred to me. Instead, we simply stopped buying string cheese. Amazing, right?
It was my first time truly living in someone else’s space, attempting to emulate their routines. Mardee’s house operates like a perfectly oiled machine of functional efficiency, almost intimidatingly so. She even has laminated chore charts, motivational signs, and helpful reminders strategically placed for her kids.

Like this one 🤣
My week was spent searching for similar handy bins and organizers online, adding them all to my Amazon cart. Where they currently reside, because I haven’t quite managed to follow through. My own home, I fear, will remain in its charming state of “body sludge.”
Though, Mardee confessed upon her return, “In transparency, I don’t think anyone has improved their body-sludge wiping since I made this – even though it is laminated.” Well, you can’t win them all, I suppose! 😅
The Allure of Rhubarb
Every single year, around March or April, my quest for rhubarb begins. I’ll obsessively call local grocery stores, chatting up the produce guy: “Is there rhubarb yet??” My group chats light up with urgent messages: “Has anyone seen rhubarb? If you do, buy out the store and I’ll come pick it up!” This isn’t an exaggeration; it’s an annual tradition. My deep love for rhubarb drives me to great lengths to secure this seasonal gem. Creating my beloved Rhubarb Meringue Layers and Rhubarb Shortbread Bars each spring requires considerable coordination. Perhaps it’s finally time I started growing my own!
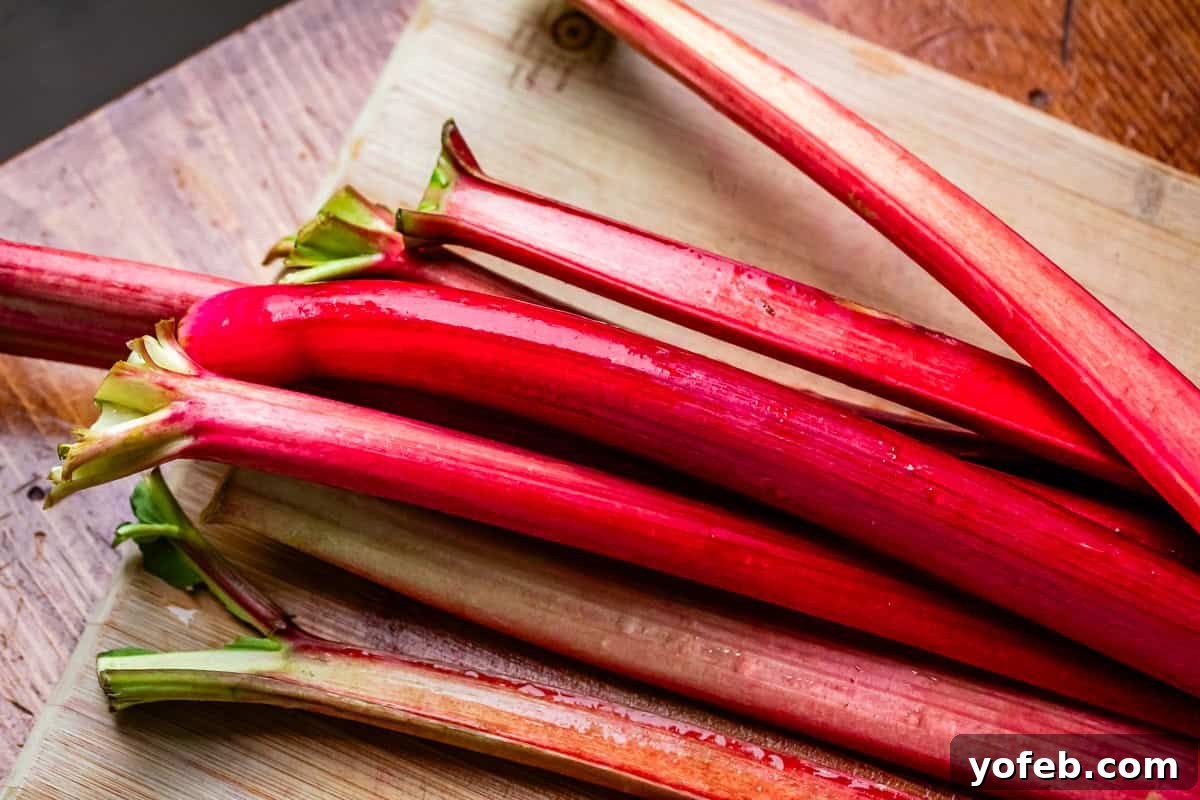
Crafting the Perfect Strawberry Rhubarb Pie
While Strawberry Rhubarb Pie is widely considered the most traditional way to enjoy rhubarb, I had never experienced a slice until just a few weeks ago. Historically, whenever I managed to get my hands on rhubarb, my go-to was always my previous favorite: Rhubarb Custard Pie. That pie was so incredibly delicious that I genuinely believed there was no room in my heart (or my stomach!) to even contemplate America’s beloved Strawberry Rhubarb pairing.
However, after 16 years of unwavering loyalty to Rhubarb Custard Pie (a tradition that began when Eric’s family introduced me to it, and one I celebrate alongside our anniversary), I was finally ready to explore new culinary horizons. You could say I was ready for a few culinary “dates.”
And let me tell you, it was love at first bite! The dynamic duo of strawberries and rhubarb creates an utterly magical synergy. The luscious sweetness of the berries perfectly complements the vibrant, sharp tartness of the rhubarb, resulting in a flavor profile that is exquisitely balanced and incredibly refreshing. And then, we enhance this perfect filling by encasing it in a buttery, flaky pie crust.
But wait, what if we decided to top it with an extravagant amount of buttery, crunchy streusel crumble instead? The dilemma! How does one possibly choose?
My solution? Let’s try both, shall we? You simply can’t go wrong with either of these heavenly options, and experimenting is half the fun!
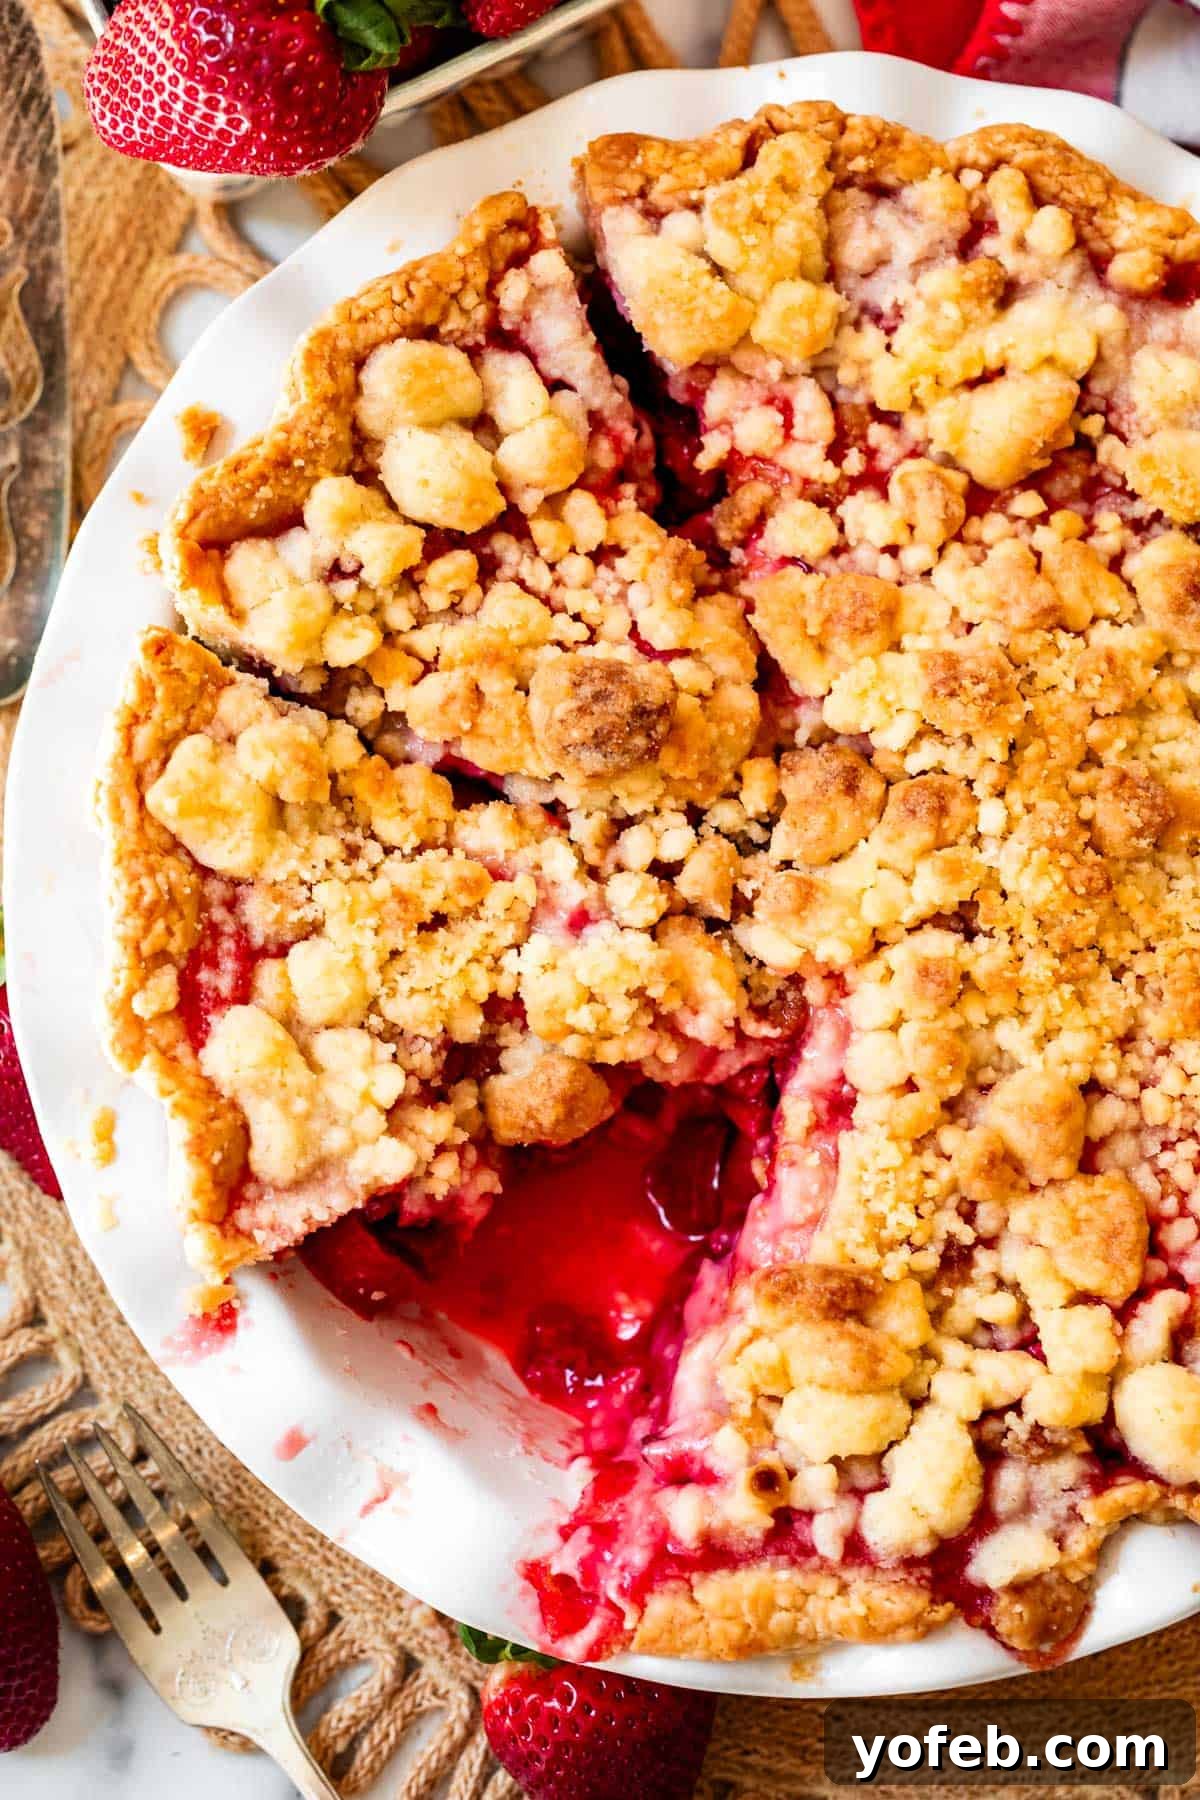
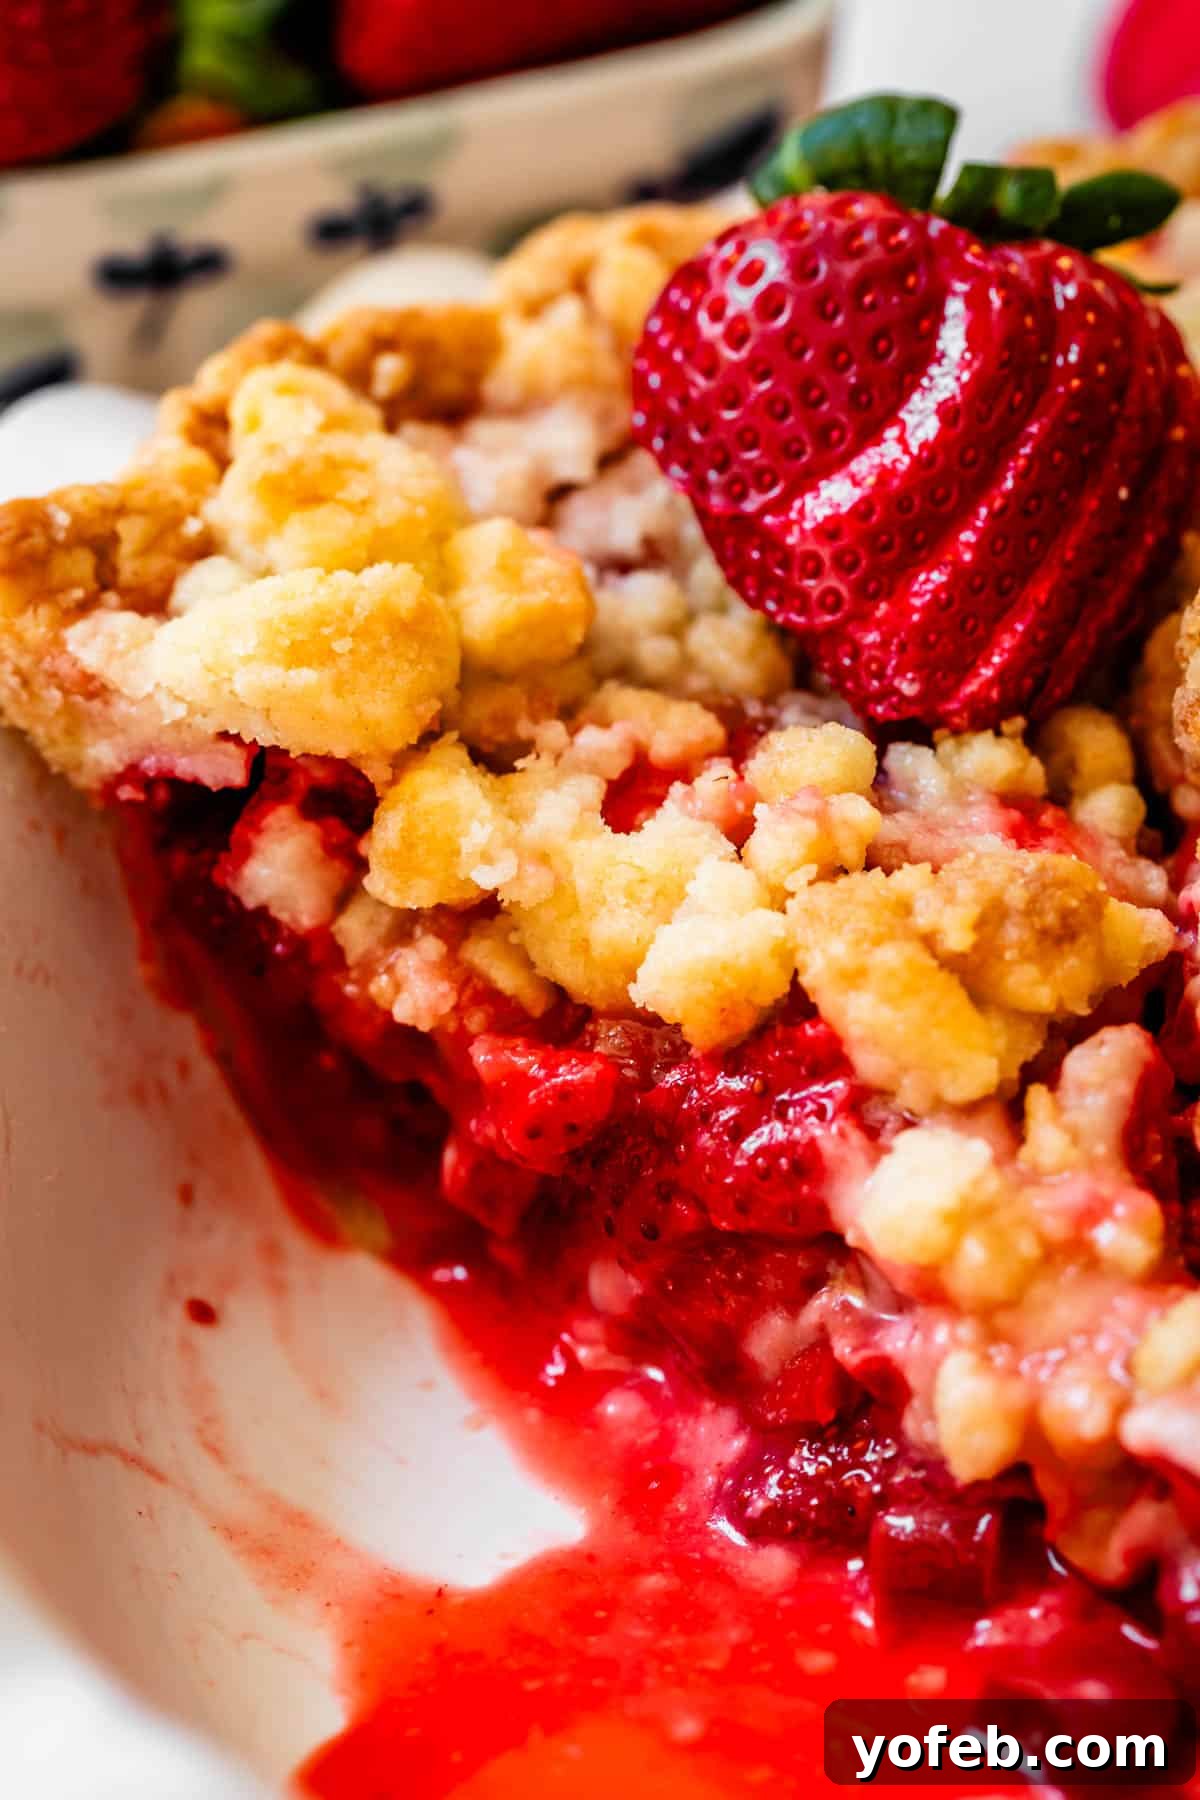
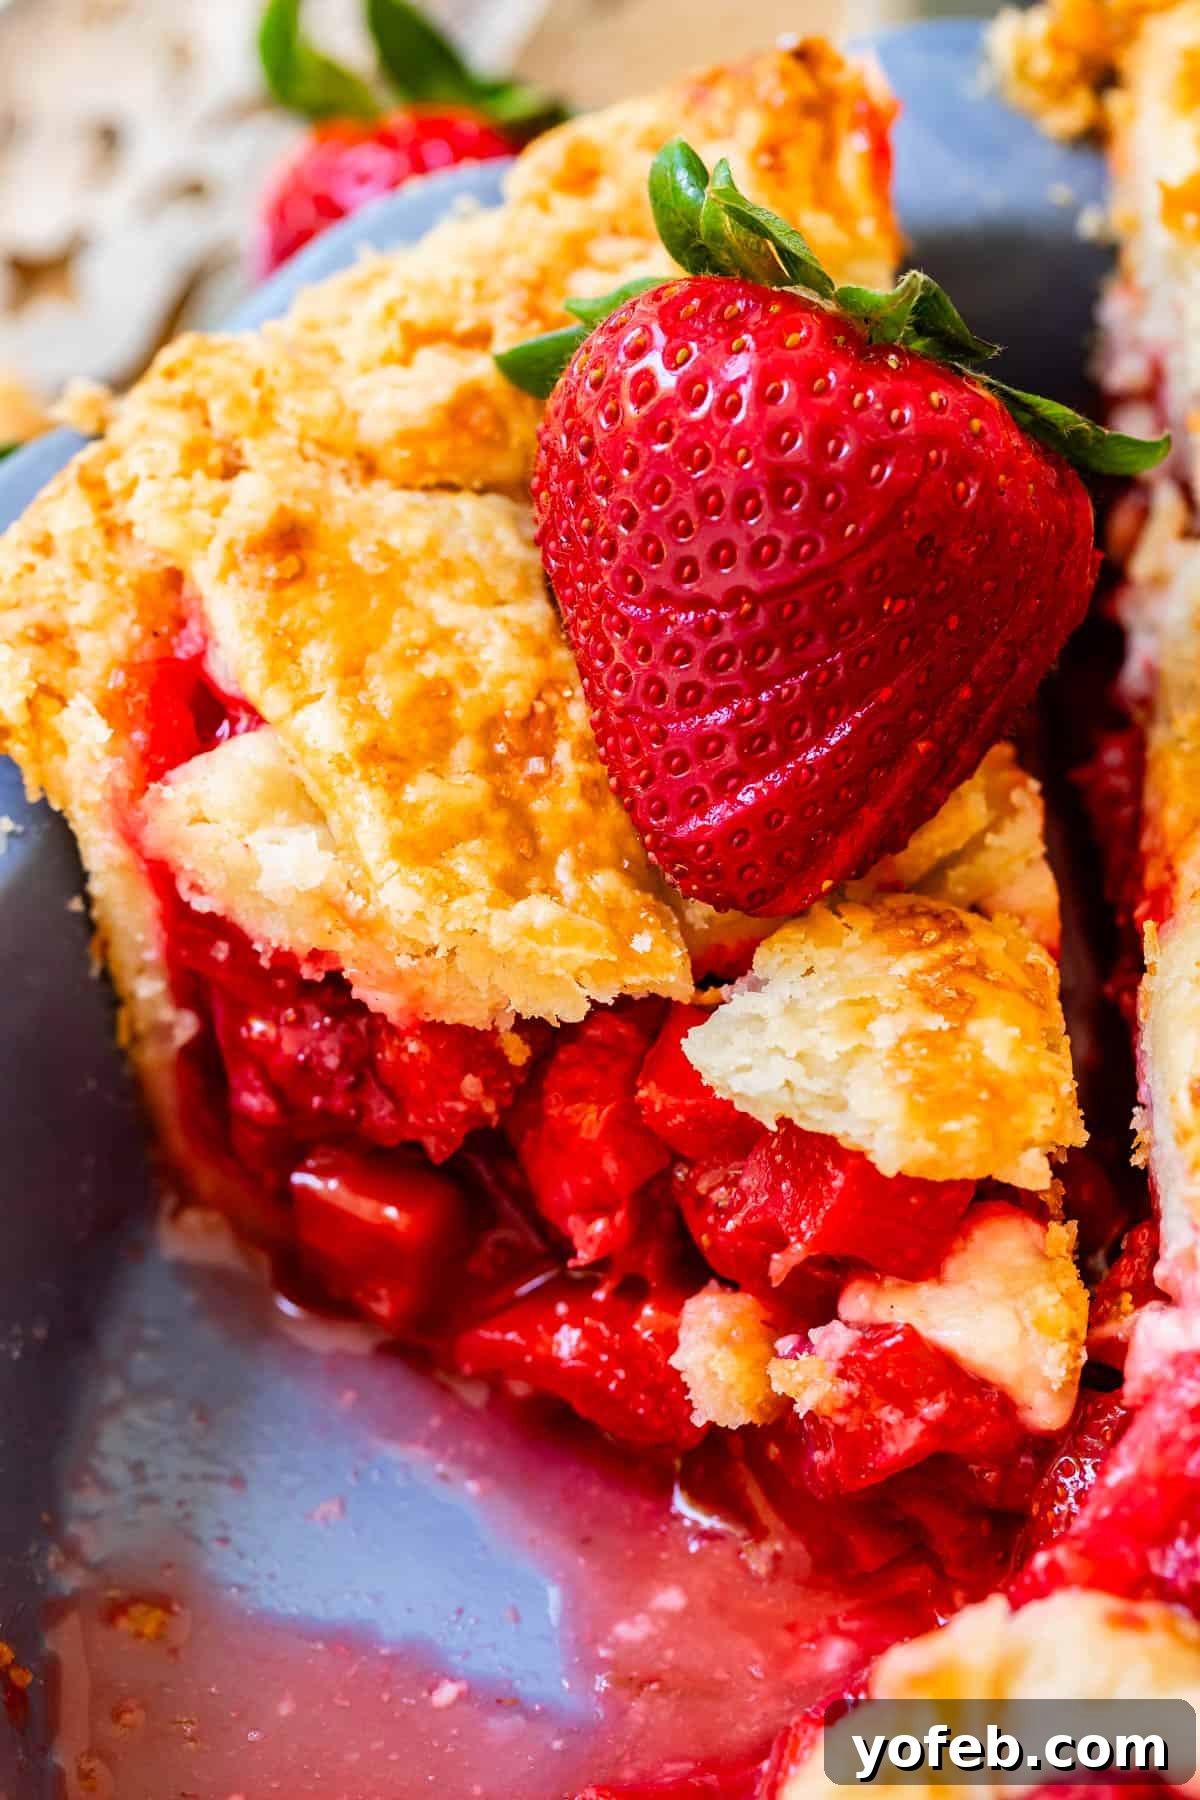
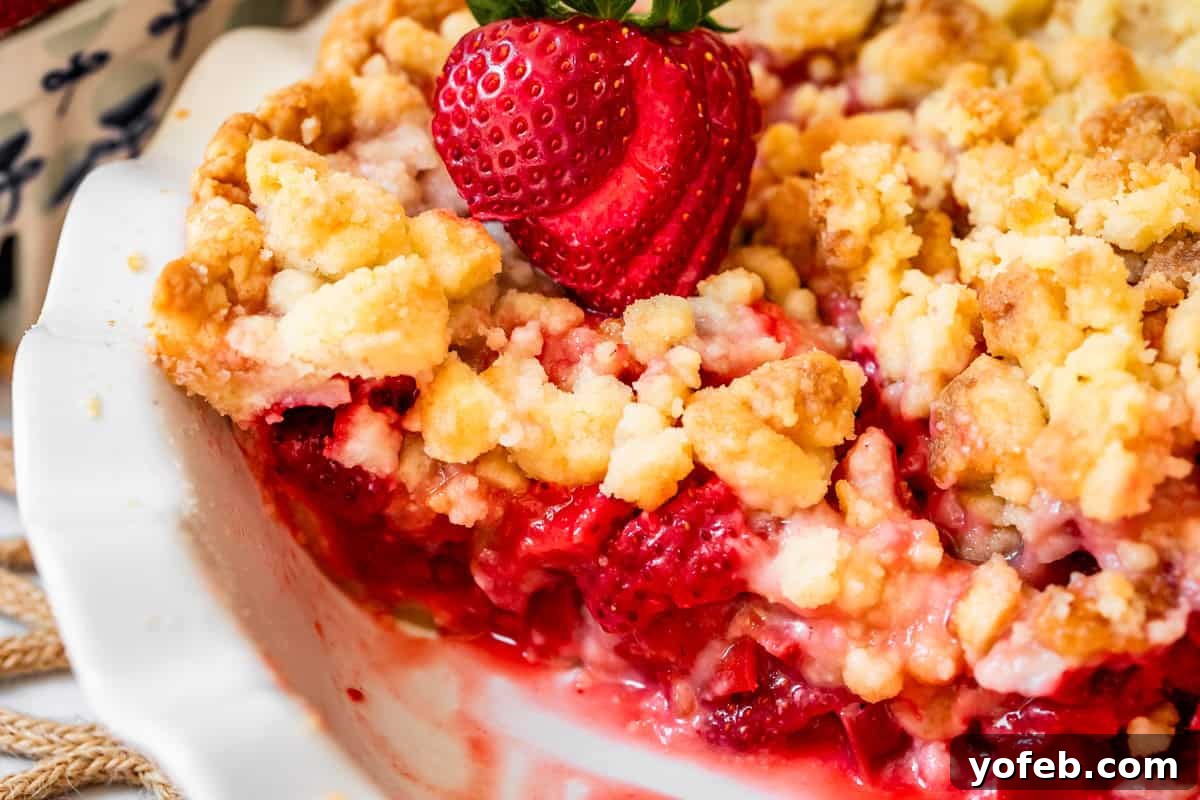
Strawberry Rhubarb Pie with Streusel Crumb Topping (pictured above): This version features a classic, tender pie crust as its base, generously filled with our perfectly balanced strawberry rhubarb mixture. The true showstopper, however, is the “party on top” – a phenomenal streusel crumble made from butter, sugar, and flour. This topping creates an incredible texture and an extra layer of buttery sweetness that had all my taste-testers raving. It’s truly a texture masterpiece!
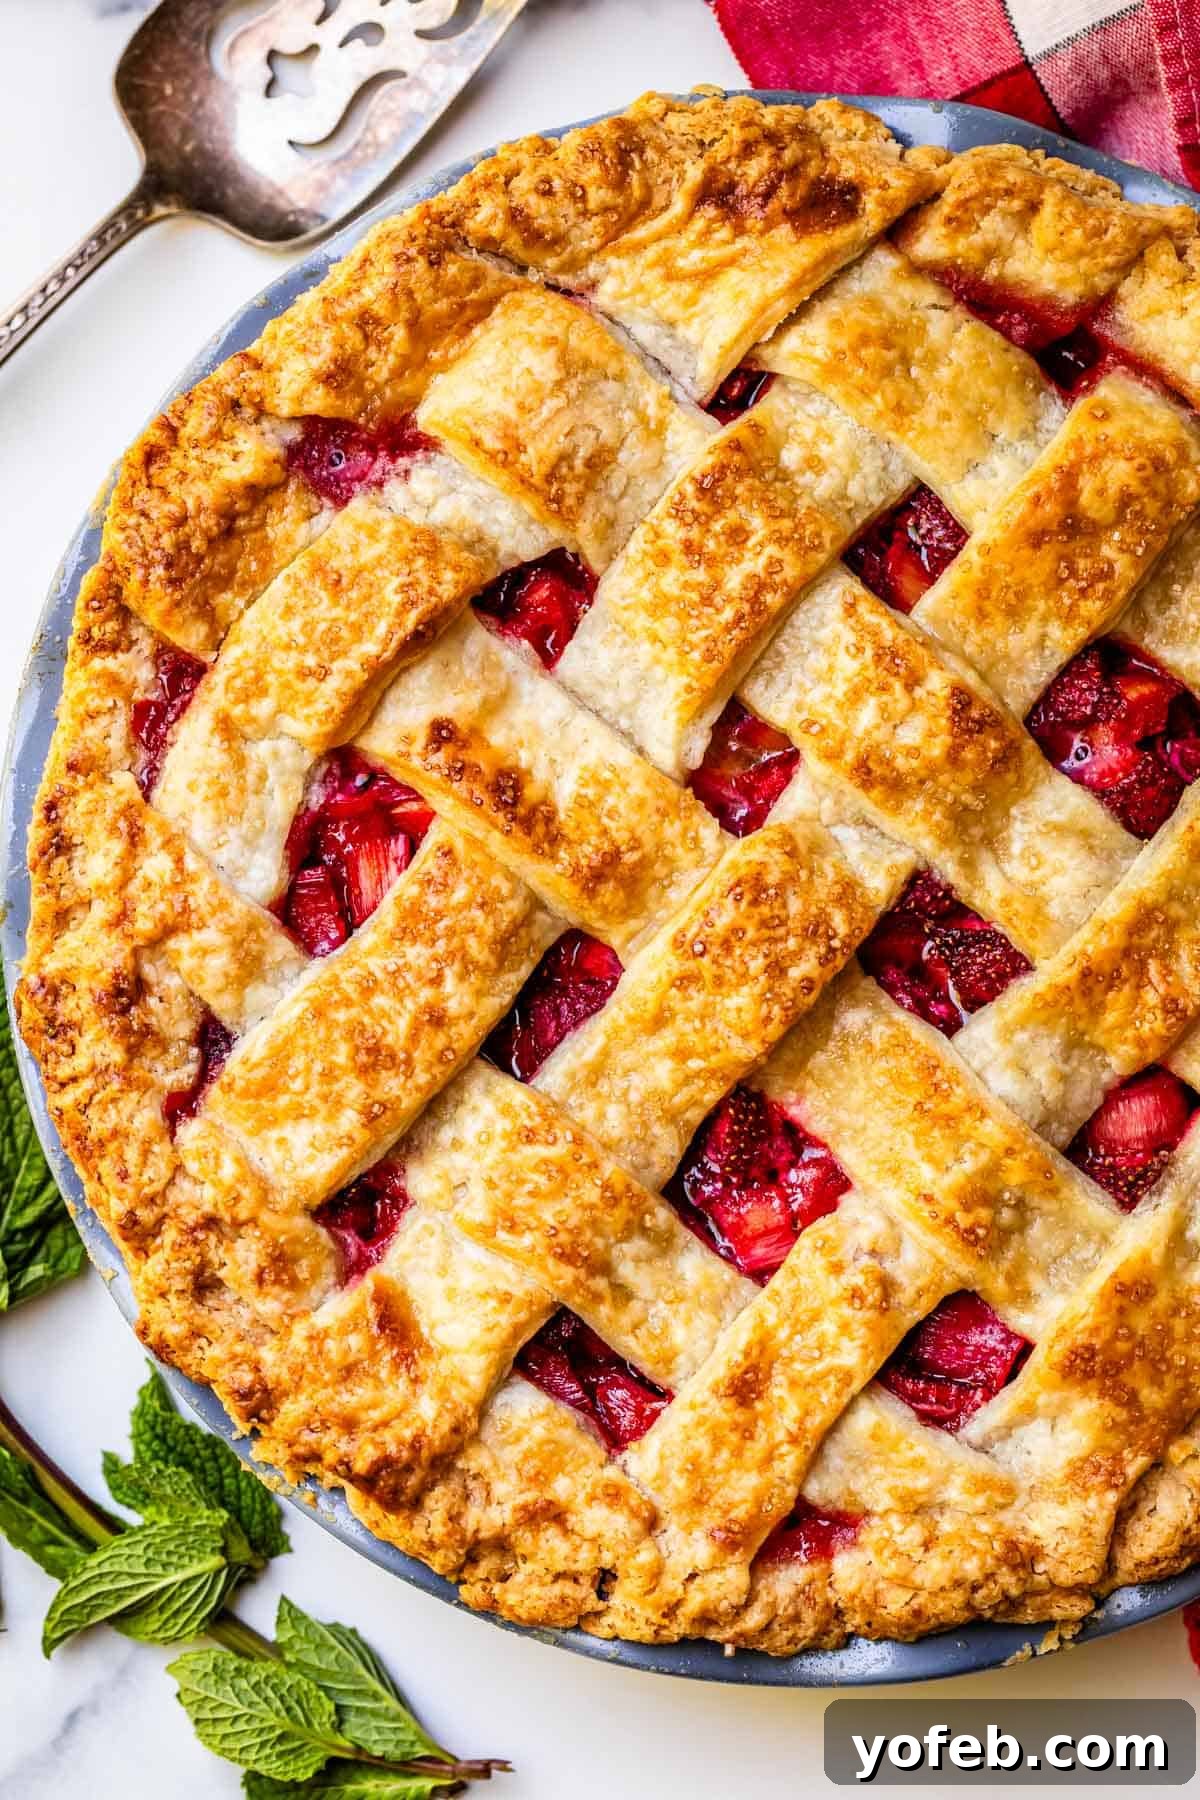
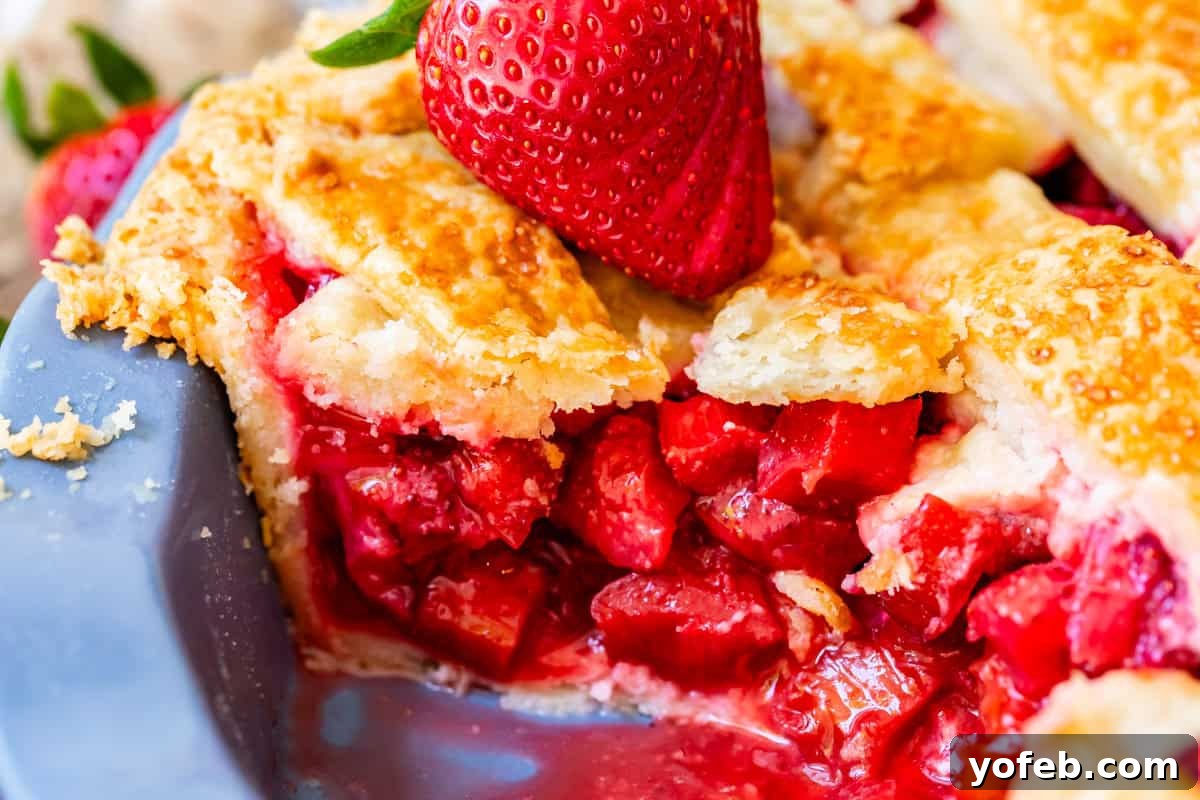
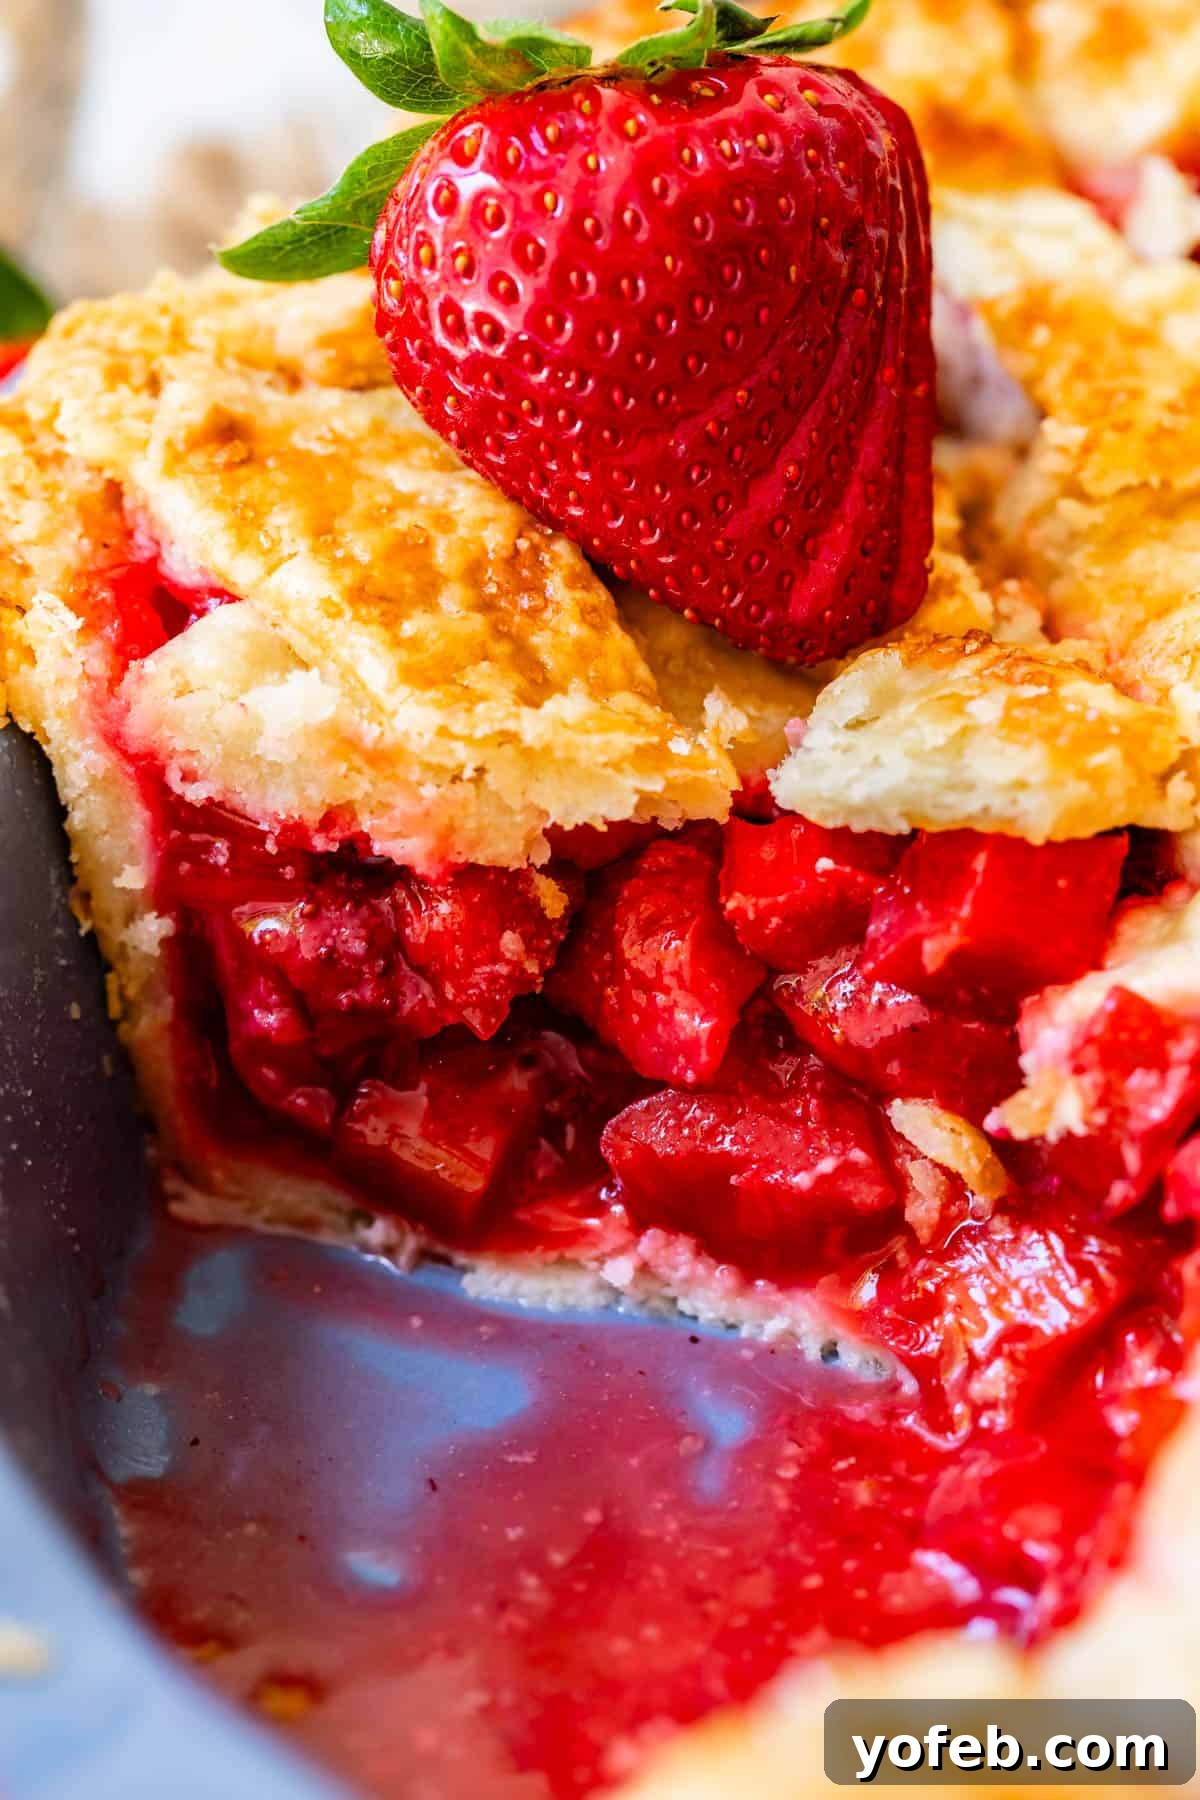
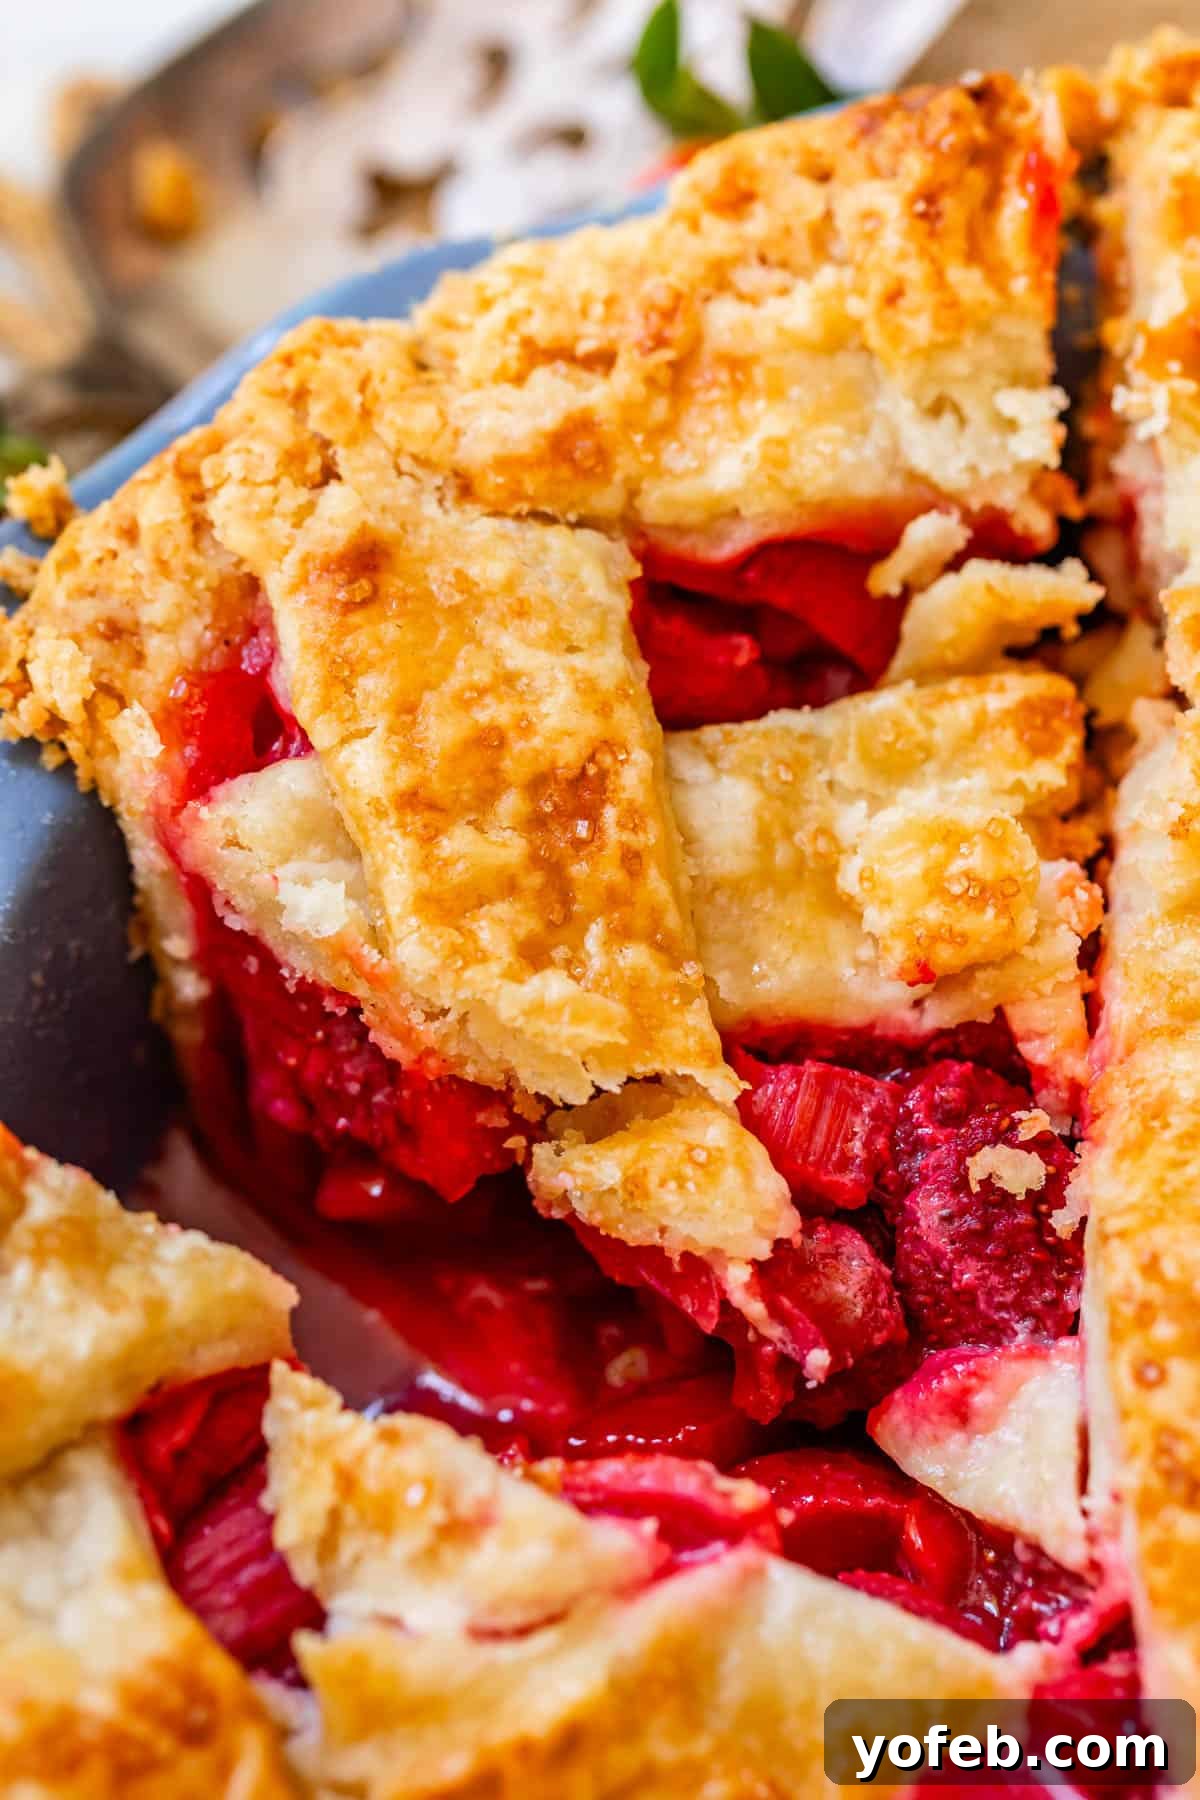
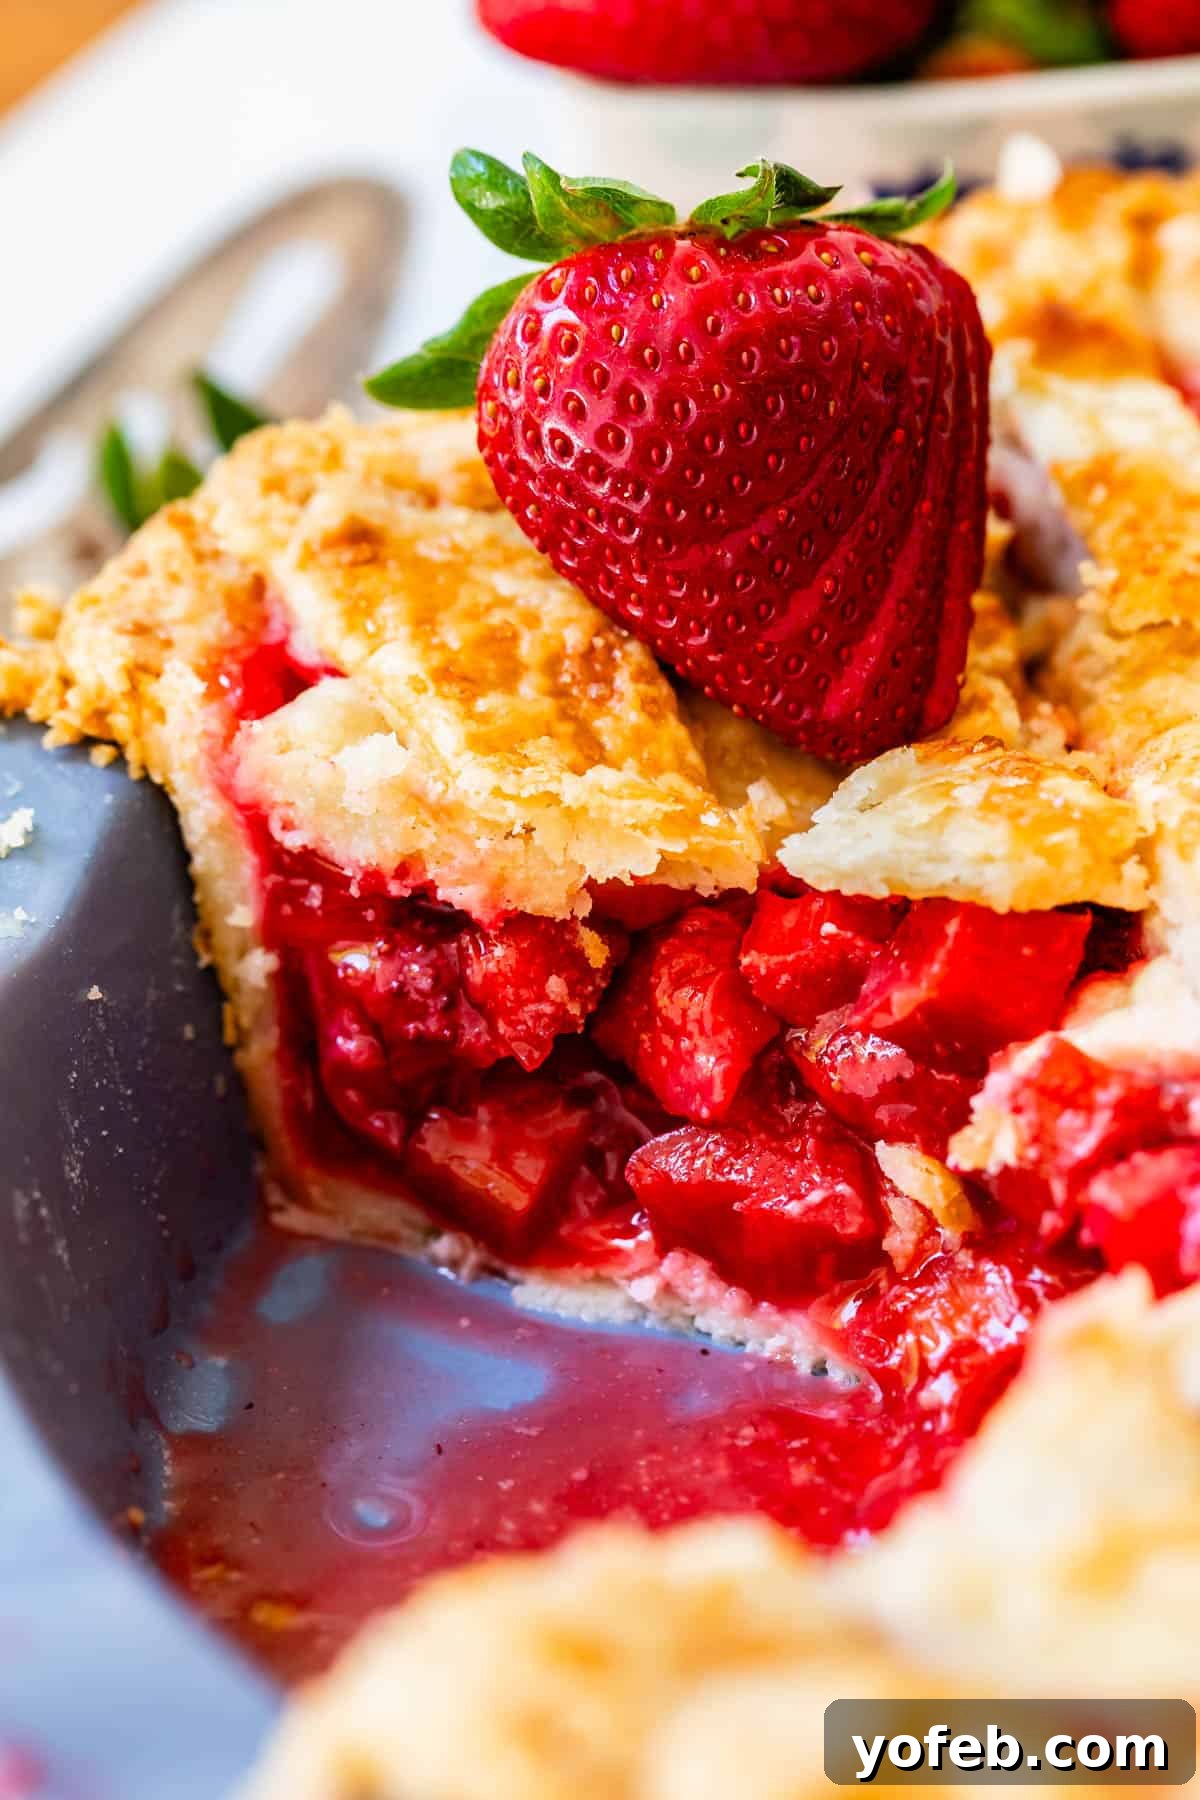
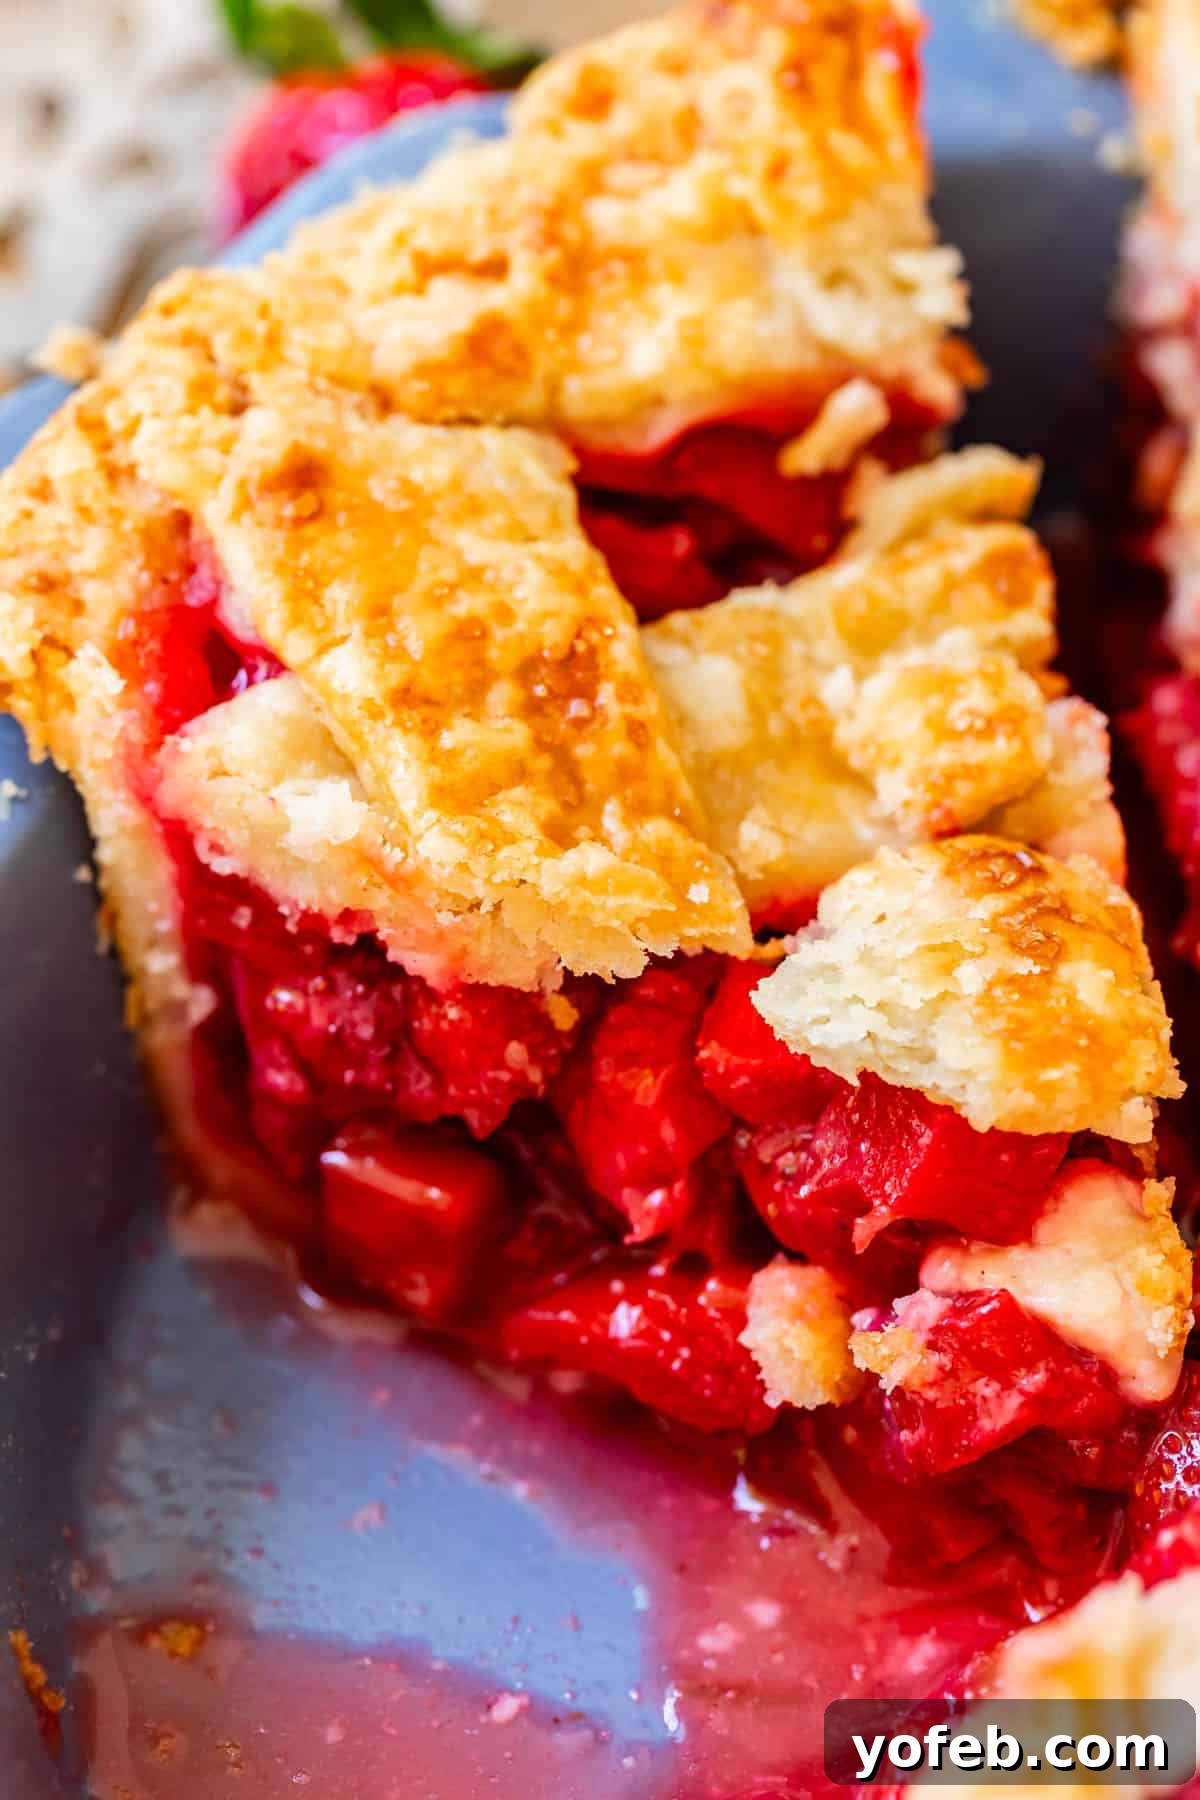
Double Crust Strawberry Rhubarb Pie (pictured below): Here, the spotlight shines brightly on the luscious, vibrant fruit filling. This pie boasts copious amounts of the flakiest, most buttery pastry crust, both on the bottom and as a beautiful, golden top. Its simplicity allows the natural, harmonious flavors of the rhubarb and strawberries to truly sing. If pressed to choose under duress, I might admit a slight, almost imperceptible preference for the elegant double crust. It’s a classic for a reason!
But honestly, both styles are so profoundly good, offering different textural experiences while delivering the same incredible flavor. You absolutely *must* try them both and tell me which one steals your heart! Ready to bake? Let’s get started on this delicious journey!
Essential Ingredients for Strawberry Rhubarb Pie
For a pie that tastes this incredible, you’ll be surprised at how straightforward the ingredient list is. We’re focusing on fresh, high-quality produce and just a few pantry staples. The full recipe with precise measurements is included in the dedicated recipe card below, but here’s a quick overview of what you’ll need to create this amazing strawberry rhubarb pie:
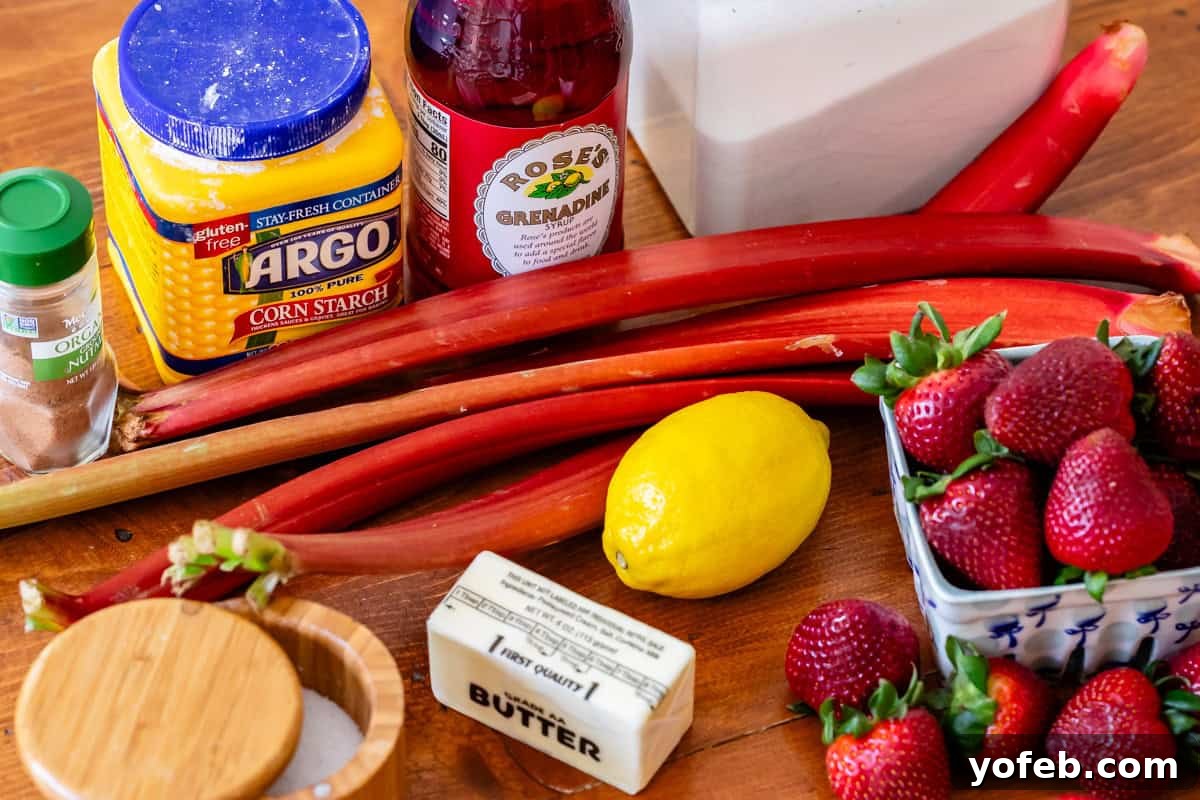
- 1 homemade pie crust (double crust for lattice, single for crumble)
- Grenadine syrup (optional, for enhancing rhubarb color)
- Fresh strawberries
- Fresh rhubarb
- Granulated sugar
- Lemon (for zest and juice, brightens the fruit flavors)
- Kosher salt (to balance sweetness)
- Nutmeg (a subtle hint of warmth)
- Cornstarch (the thickening agent for a perfect pie consistency)
- Butter (adds richness and helps create that flaky crust)
- Milk (for brushing on the crust for a beautiful golden finish)
These simple ingredients, when combined with care, transform into a dessert that’s truly unforgettable. Whether you’re a seasoned baker or new to pie-making, this recipe is designed for success.
Step-by-Step: How to Make Strawberry Rhubarb Pie
Let’s walk through the process of creating this delectable strawberry rhubarb pie, ensuring every step leads to a perfect, flavorful result.
First things first, gather your beautiful rhubarb stalks! For a more appealing texture in the finished pie, I prefer to slice thicker rhubarb stalks lengthwise before chopping them into smaller, uniform pieces. This ensures that each bite has tender bits of rhubarb.
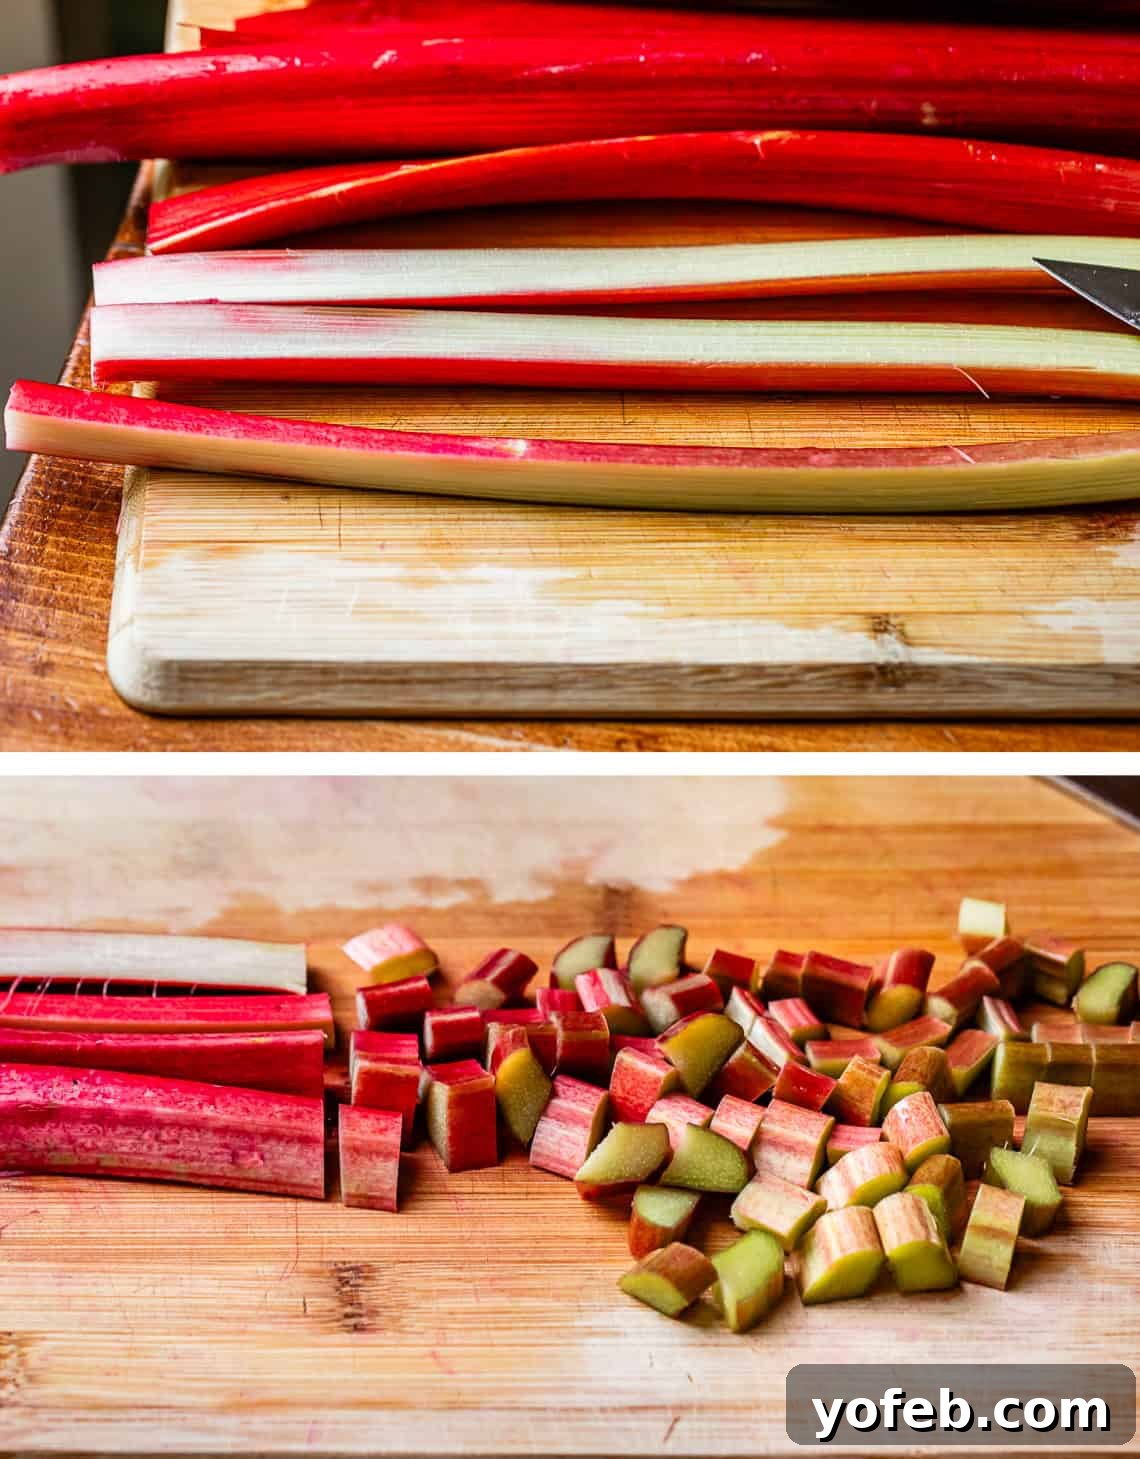
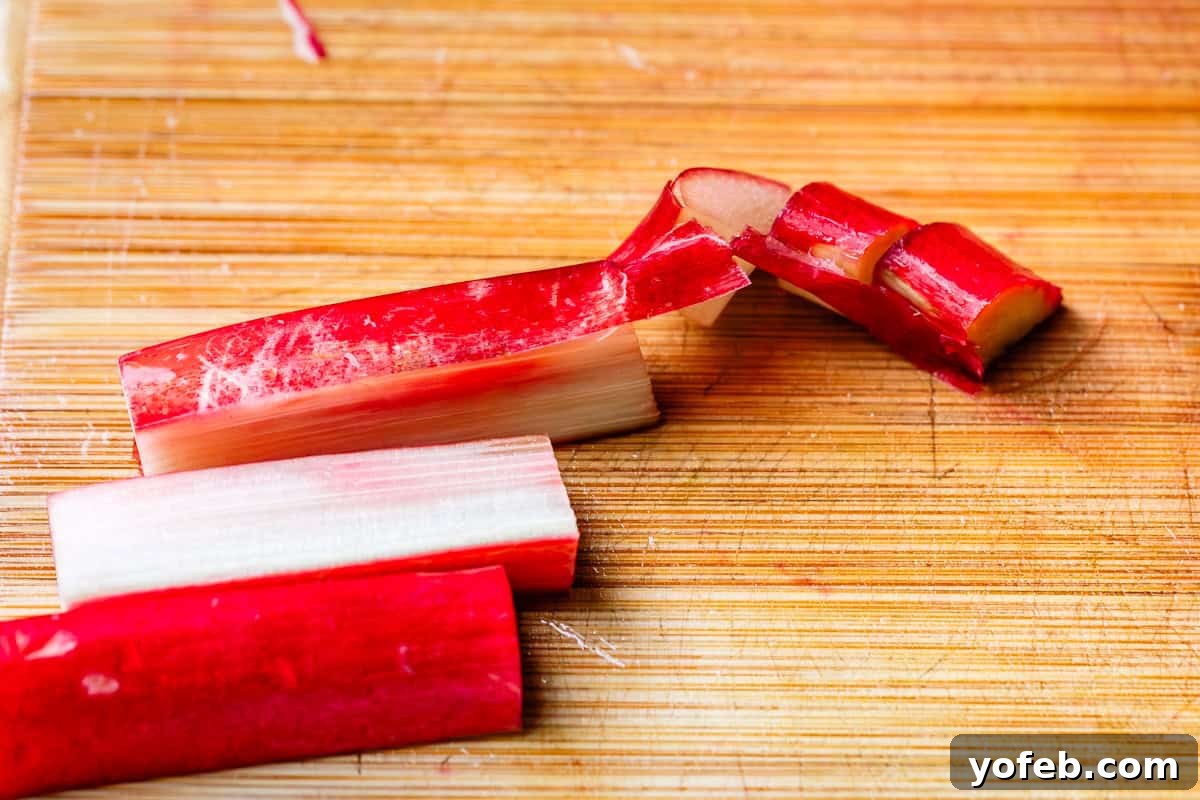
In the photos above, you might notice that rhubarb can be a little tricky to chop. If your knife isn’t perfectly sharp, it sometimes struggles to cut cleanly through the stringy outer edges. While some people choose to peel these off entirely, it’s a bit of a shame as that vibrant outer layer often holds the most beautiful color. Even if it looks a little “stringy” now, I promise that once cooked, the rhubarb breaks down beautifully into the most delicious, tender filling. So, don’t fret over the initial texture! Just use a sharp knife, cut all the way through each piece, and only peel off what’s absolutely necessary, aiming to keep as much of that lovely color as possible.
Another fascinating aspect of rhubarb, visible in the images, is the significant color variation between stalks. You might find some rhubarb that’s a deep, rich red, while others are as green as celery with just a hint of reddish-pink at the edges. Since I adore desserts that boast a vibrant red hue (it’s simply more appetizing!), I often take an extra step: I soak my chopped rhubarb in grenadine syrup for a couple of hours before incorporating it into my pie. This simple trick enhances the rhubarb’s natural sweetness ever so slightly and transforms even the greenest stalks into a beautiful shade of pink or rosy red, making for a visually stunning pie.
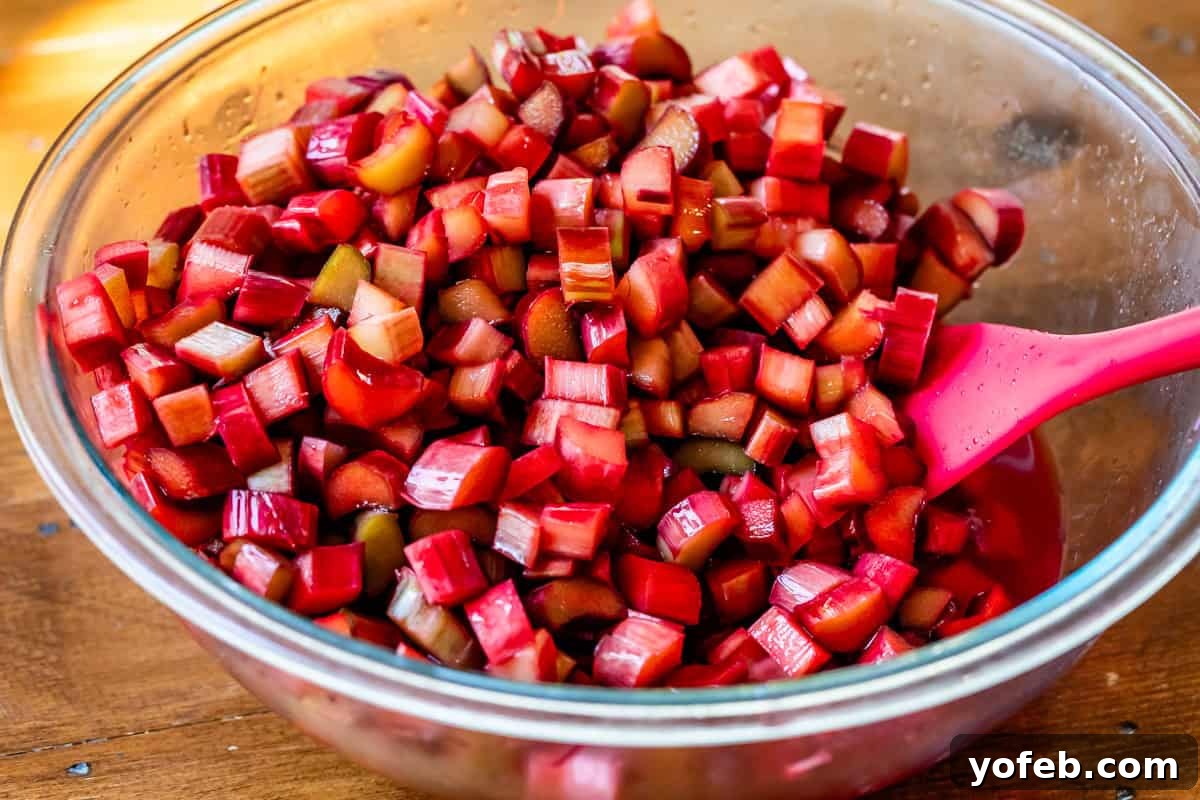
This soaking step is entirely optional, of course! Your pie will still taste absolutely incredible without it, but if you’re aiming for that picture-perfect pink filling, it’s a delightful little secret to have in your baking arsenal.
Once your rhubarb has soaked, or if you’re skipping that step, drain it thoroughly in a colander. Return the drained rhubarb to the same (now empty) large bowl – no need for extra dishes! Then, add the rest of your filling ingredients to the bowl.
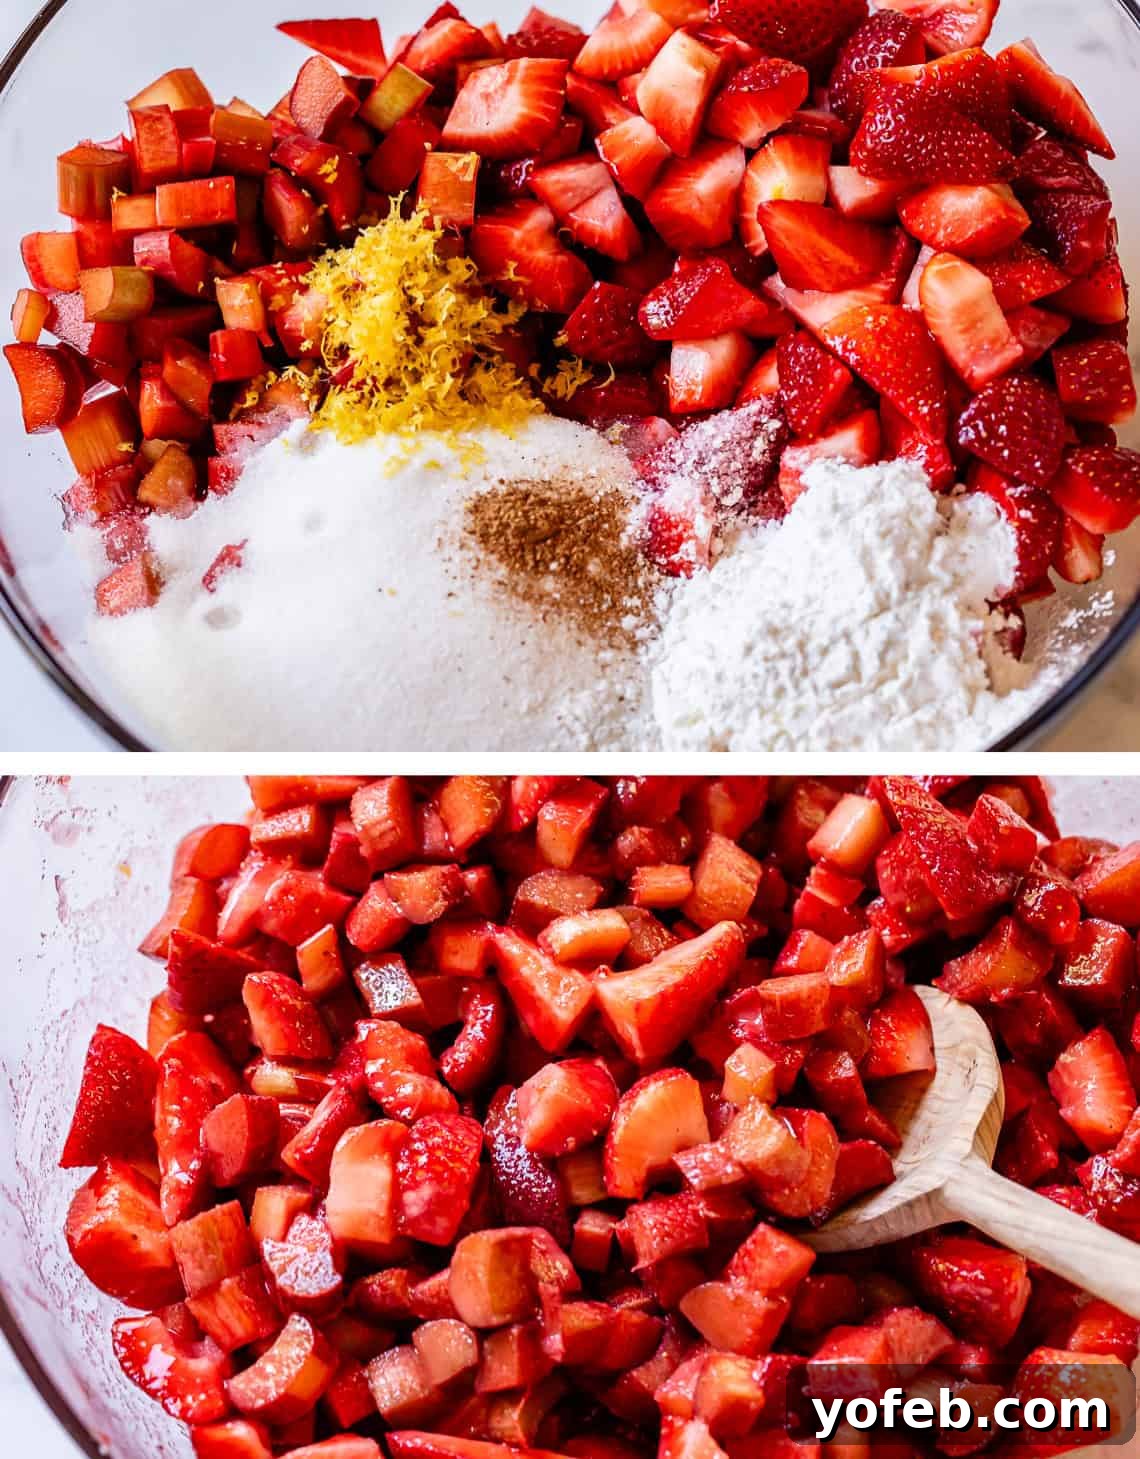
Gently mix all the filling ingredients together until they are well combined. If your pie crust isn’t quite ready yet, simply cover the bowl and pop the filling into the fridge to chill. This prevents the fruit from becoming too juicy while you prepare the crust.
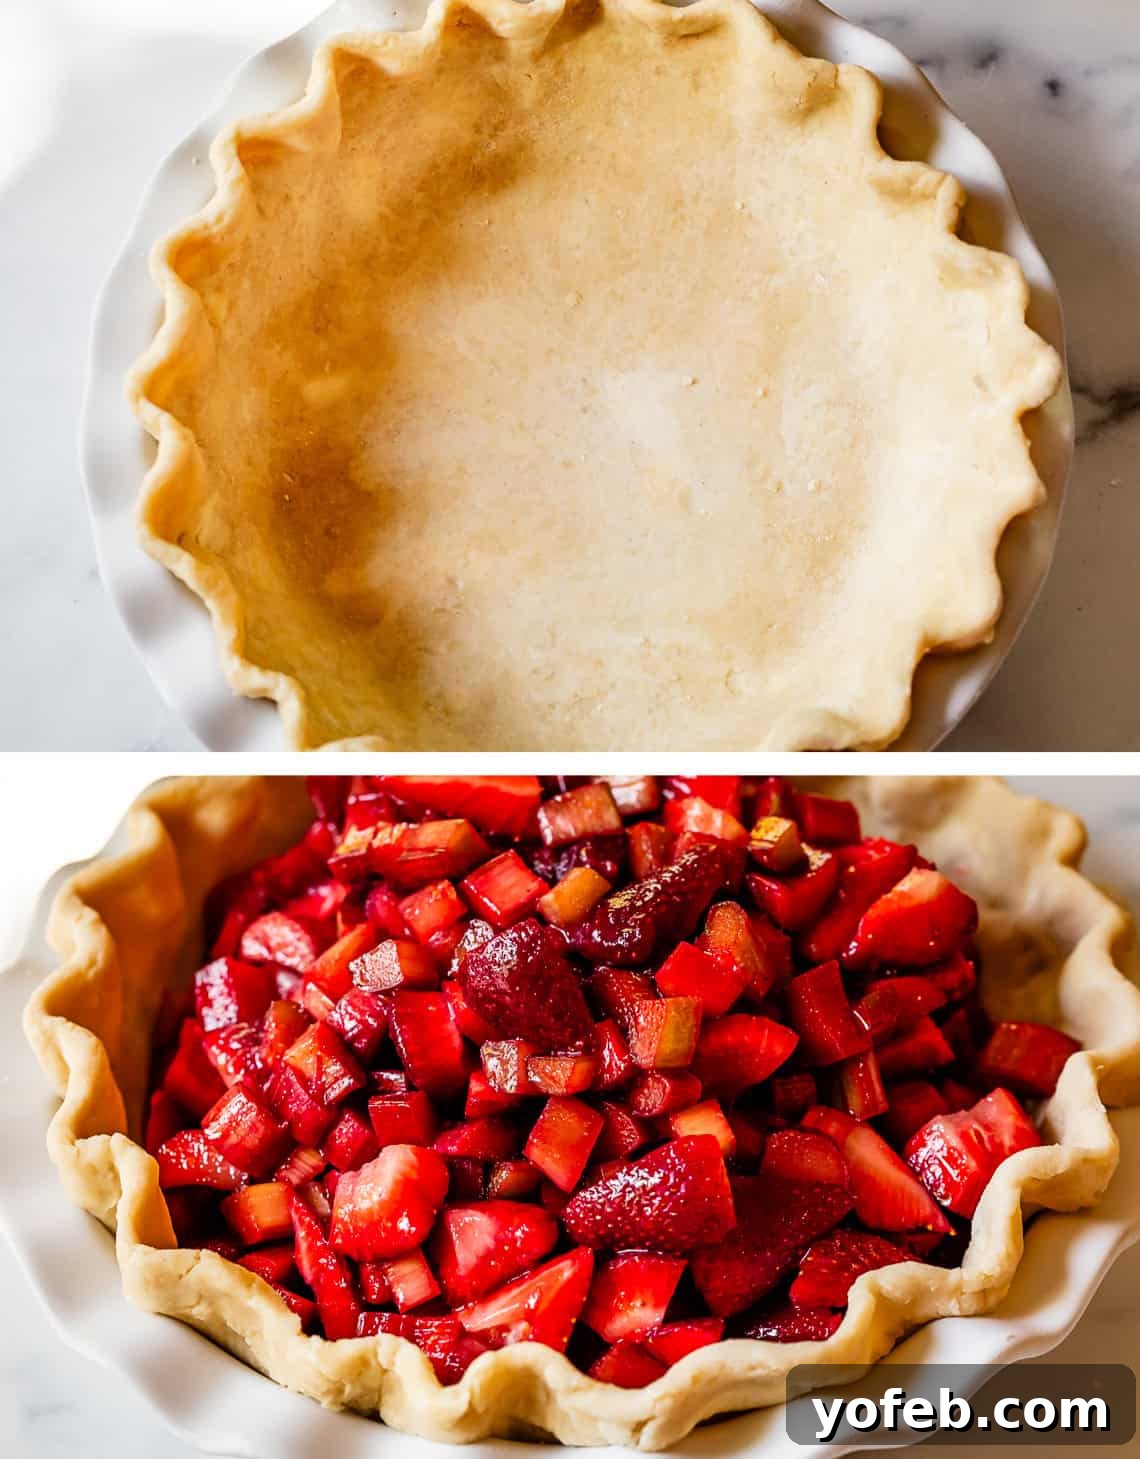
Now, let’s talk pie crust! I highly recommend making your own homemade pie crust for this recipe. It truly elevates the entire pie experience. For a wealth of tips, tricks, and detailed instructions on achieving a perfectly flaky, tender crust every time, head over to my comprehensive Homemade Pie Crust post. You might be surprised at how easy it is, especially with my recipe that incorporates an egg into the dough. The egg helps bind the dough, making it much more forgiving to roll out and significantly less prone to cracking. A homemade crust truly makes all the difference!
Classic Double Crust Strawberry Rhubarb Pie
Up until this point, the preparation steps are identical, regardless of whether you choose the double crust or the crumble topping. Now, let’s delve into the specifics for crafting a traditional double-crust pie.
Before you place the top crust, don’t forget this crucial step: dot the top of your vibrant strawberry rhubarb filling with small pieces of cold butter. This butter will melt during baking, creating pockets of rich flavor and ensuring a wonderfully tender and moist filling.
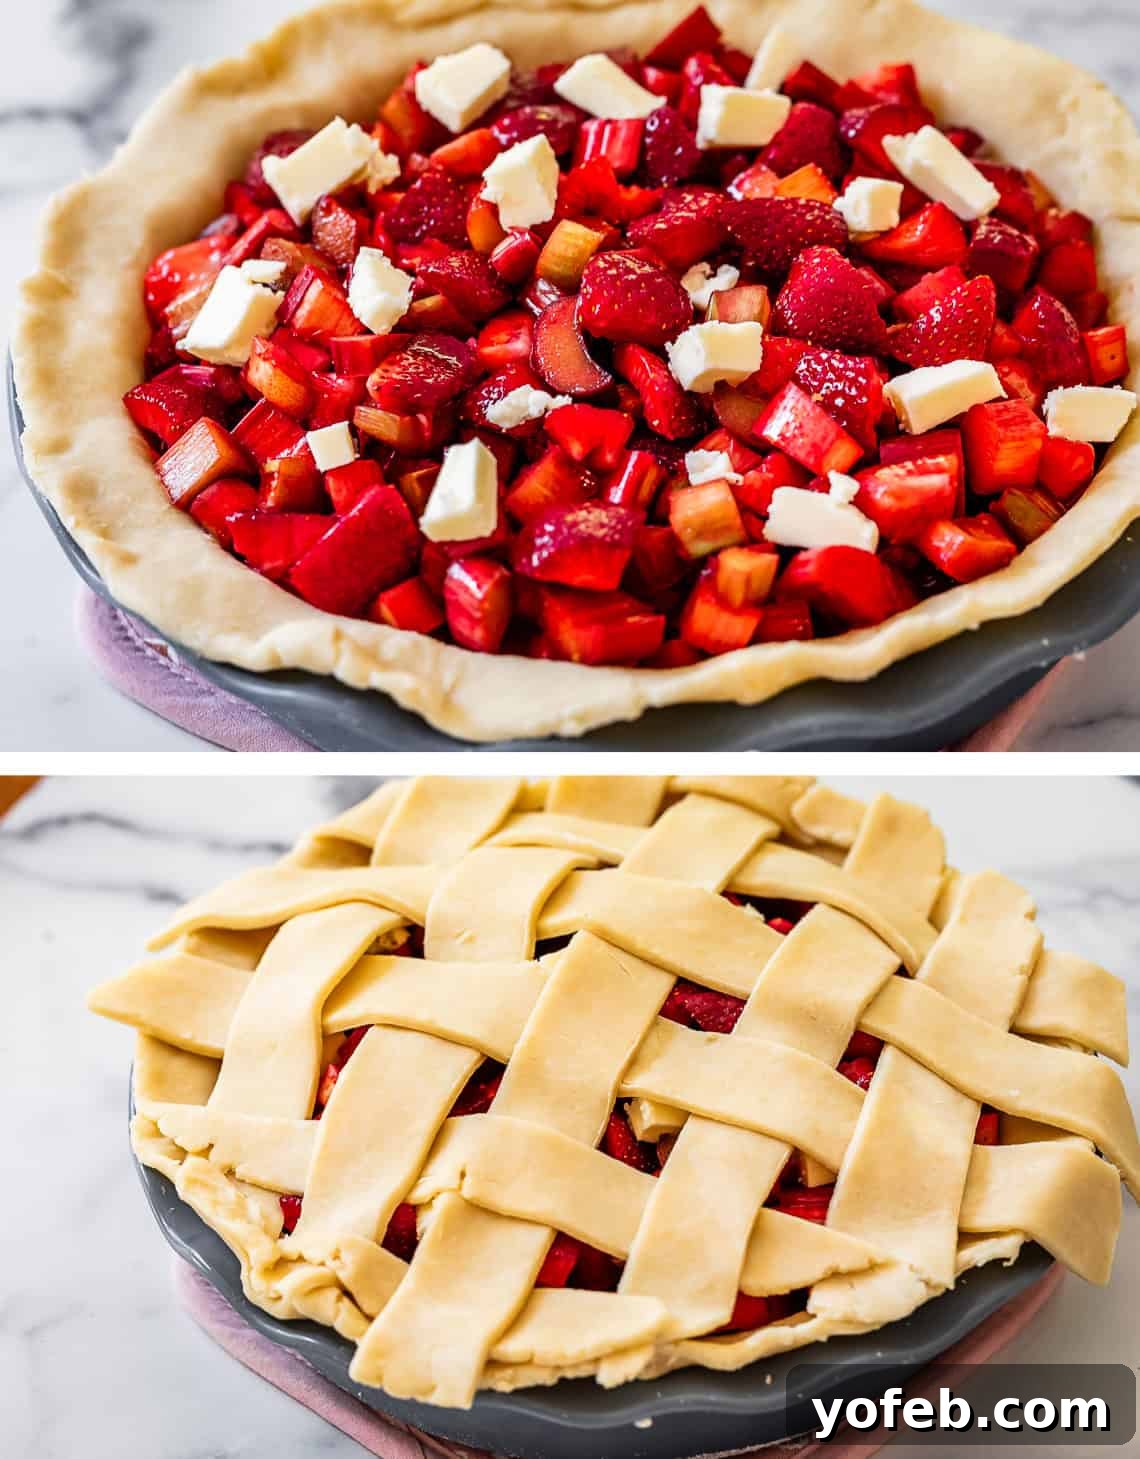
For an impressive presentation, consider making a lattice crust for the top! While it may look intricate, lattice crusts are not as challenging as they appear. You can find all the detailed instructions, step-by-step photos, and helpful tips to create a beautiful woven top on my dedicated Lattice Pie Crust post. It’s a fantastic way to elevate your pie from delicious to truly stunning!
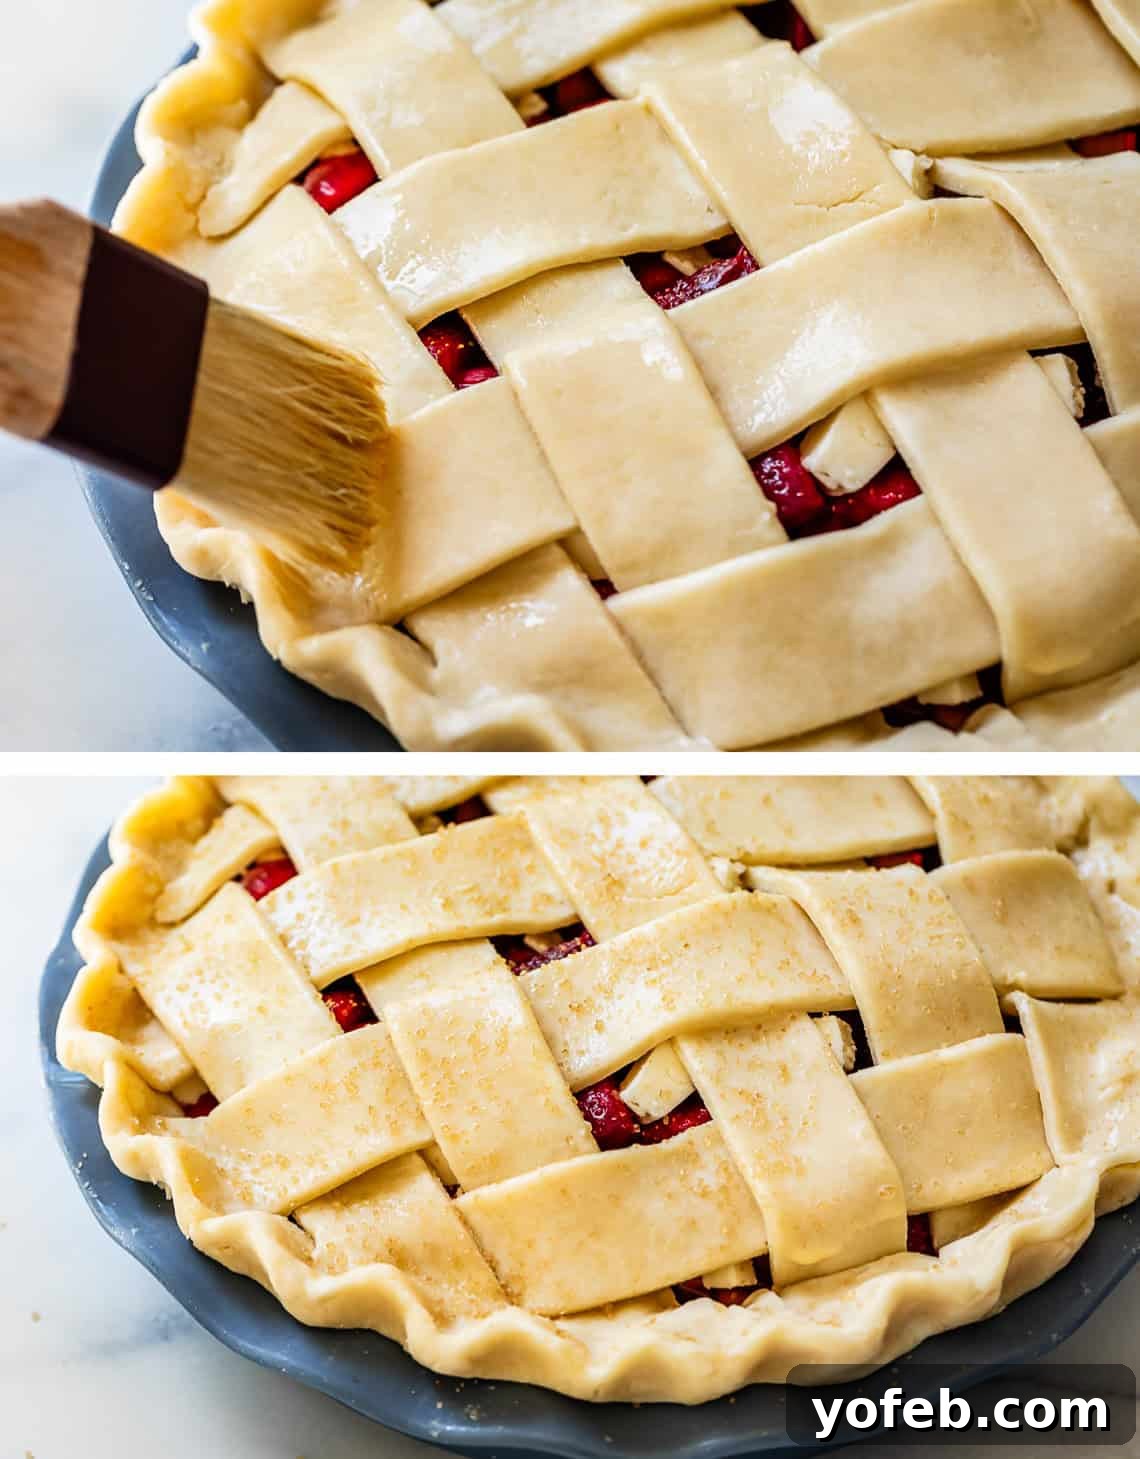
Once your top crust is in place, lightly brush the entire surface with milk. Alternatively, you can use a combination of milk and a whisked egg for an even richer color and subtle sheen. With my homemade crust recipe, I often have half an egg leftover, and I find a milk-egg mixture provides a lovely golden-brown finish without the overly glossy look of a straight egg wash. Finally, generously sprinkle the brushed crust with granulated sugar or demerara sugar for a beautiful sparkle and added crunch. Your double-crust pie is now prepped and ready for the oven, promising a truly delightful classic dessert!
Irresistible Strawberry Rhubarb Crumble Pie
If you’re opting for the streusel topping, get ready for an incredibly satisfying textural experience! Unlike a traditional apple pie crumble that often features brown sugar and cinnamon, for this strawberry rhubarb pie, I prefer to stick with granulated sugar. Brown sugar contains molasses, which can introduce deeper, darker, and sometimes spicier notes that might overshadow the bright, zesty flavors of fresh rhubarb and lemon. However, if you adore those warming spices, feel free to add 1/2 teaspoon of cinnamon and/or 1/4 teaspoon of nutmeg – it’s all about personal preference! Just know that omitting them allows the fruit’s natural vibrancy to shine.
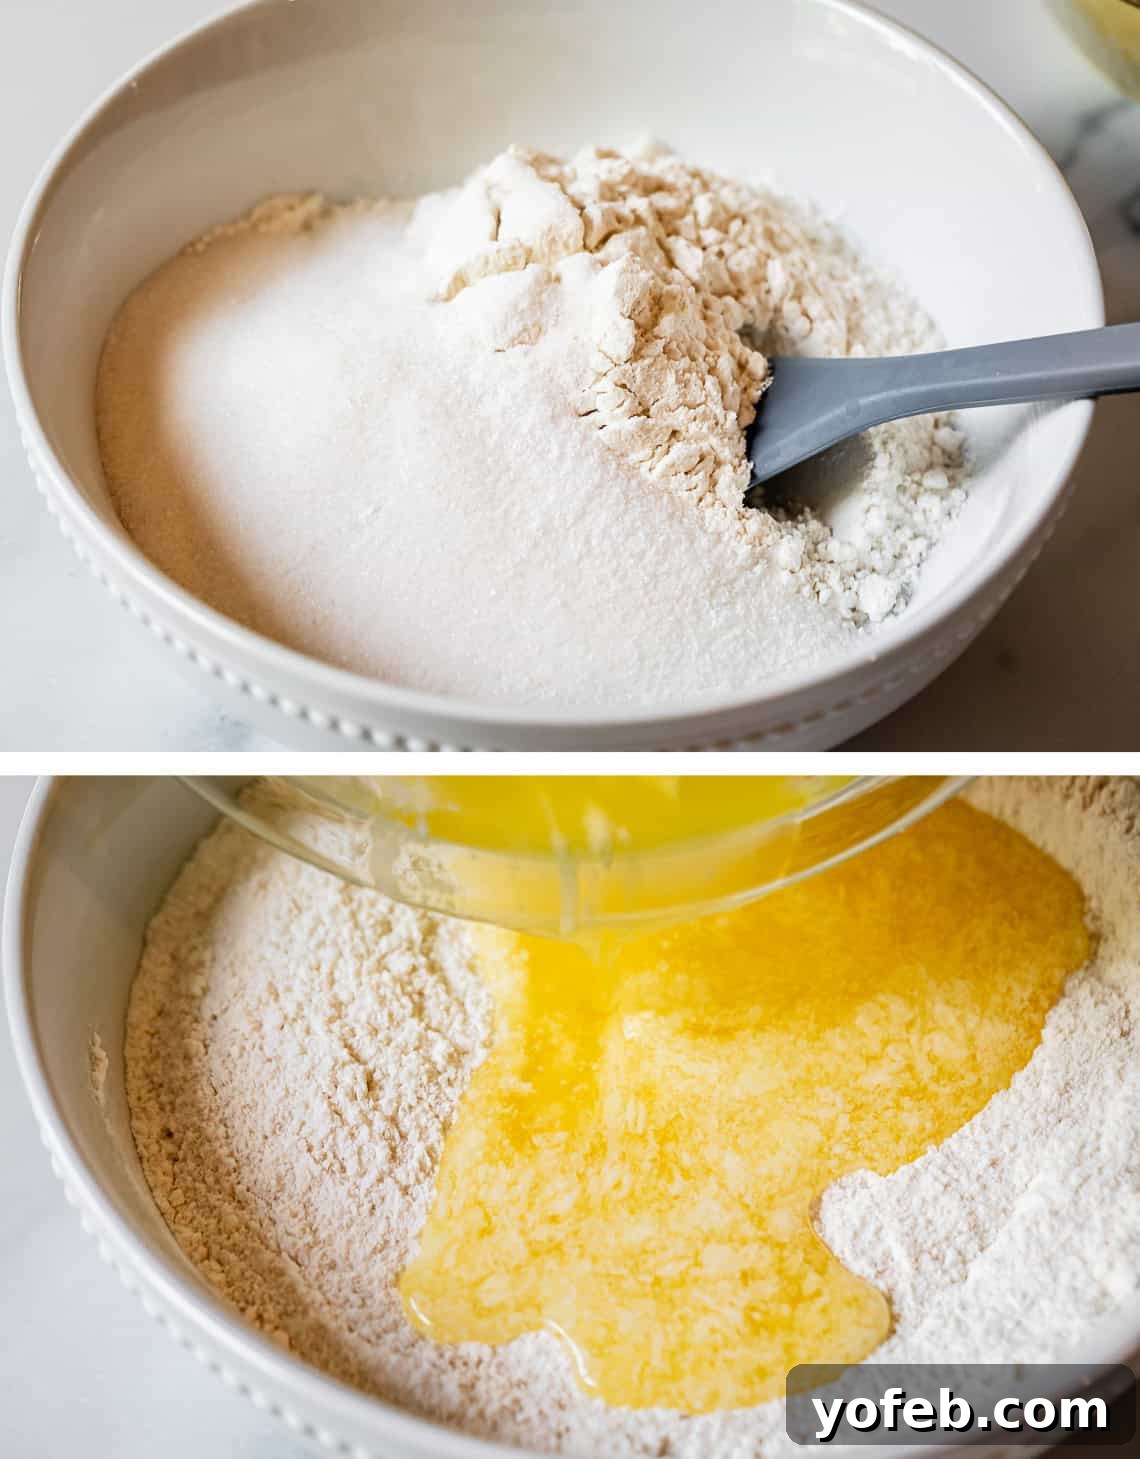
To make the perfect streusel, begin by combining your dry ingredients (flour, sugar, and salt). Then, gradually pour in some melted butter, ensuring it’s not too hot. I’ve experimented with many methods for streusel – cutting in cold butter, using softened butter – but my absolute favorite technique for achieving those wonderfully large, distinct crumbles is to use melted butter. This method, followed by a quick chill, yields the most phenomenal results!
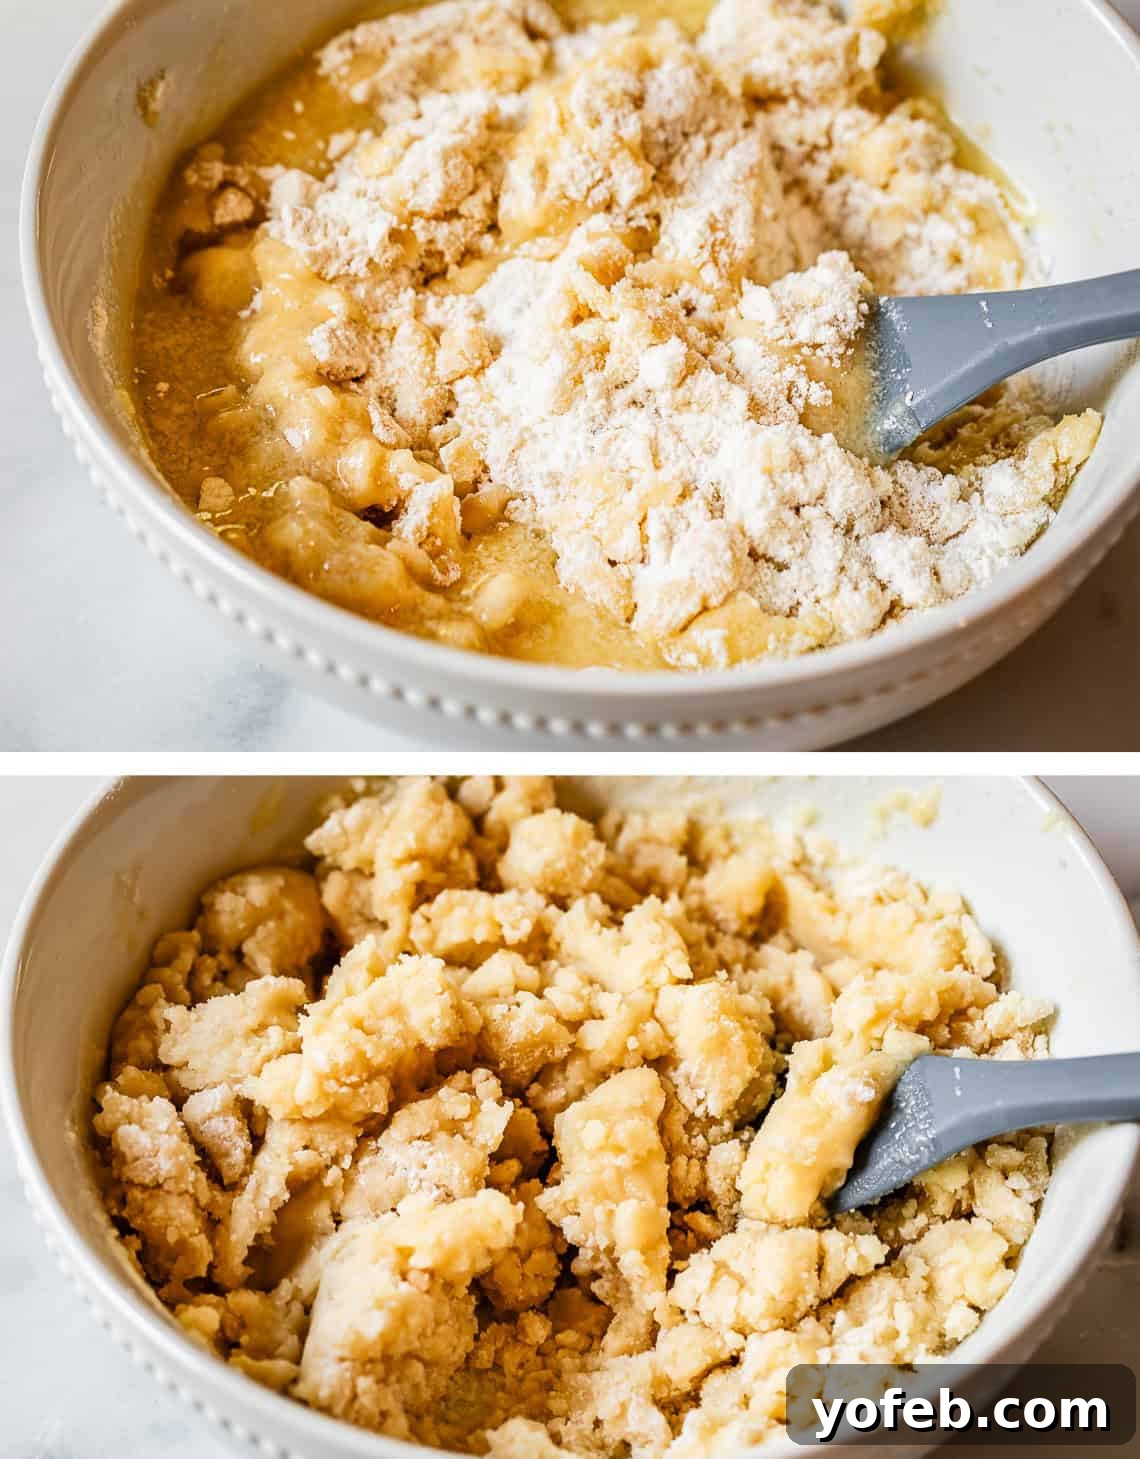
After adding the melted butter to the dry ingredients, give it a rough stir with a rubber spatula. You don’t need to overmix; some flour streaks are perfectly fine, even desirable, as they contribute to the crumble’s texture. The key here is to then chill this mixture in the fridge or freezer for about 30 minutes. This chilling step is crucial! If the crumble topping isn’t cold when it goes into the oven, the butter will simply melt too quickly, causing the topping to fuse into the pie filling rather than forming those distinct, crisp crumbles we’re aiming for. A cold crumble ensures you get the biggest, most delicious, and perfectly textured streusel!
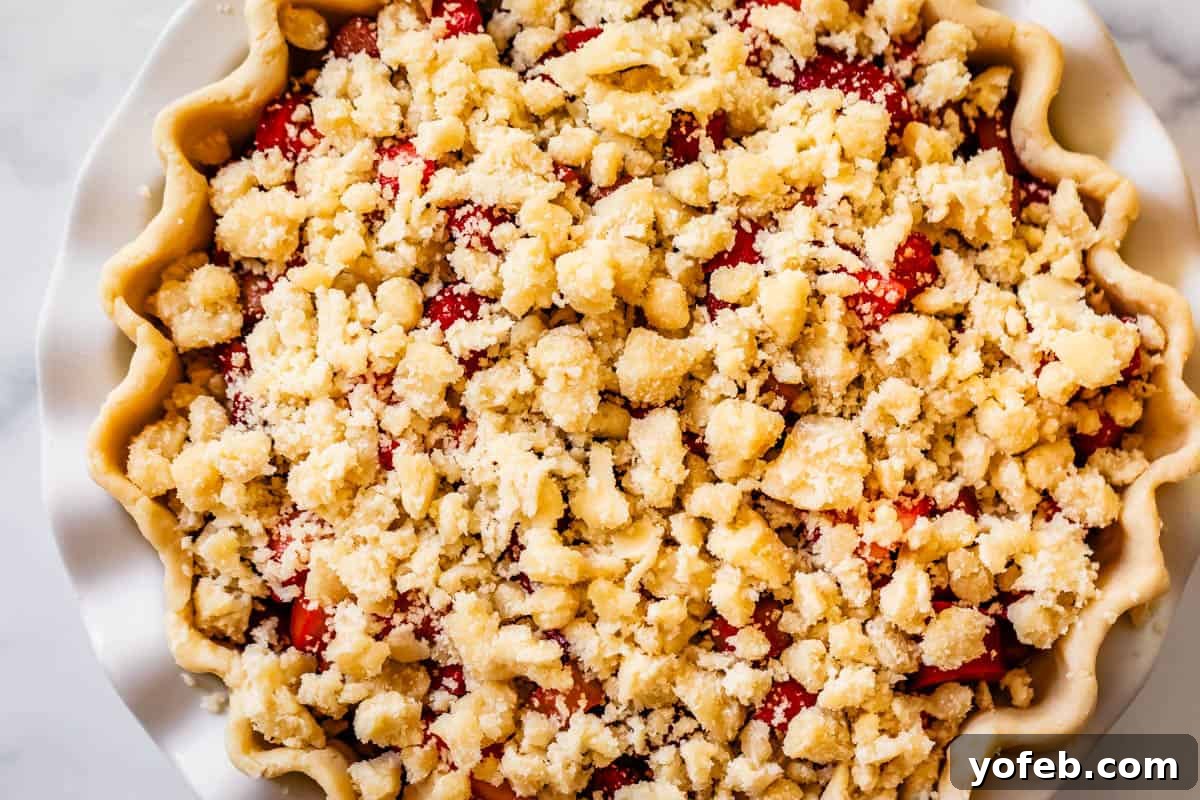
Once your pie is assembled in its crust and the crumble is thoroughly chilled, it’s time to add it to the pie. However, we’re not adding all of it at once! Sprinkle less than half of the crumble mixture over the top of the pie filling. Use your fingers to break up the crumble into various sized pieces – some fine, sandy bits, and some larger, irregular chunks, about the size of a dime or less. This layered approach ensures a wonderfully crisp and dynamic topping.
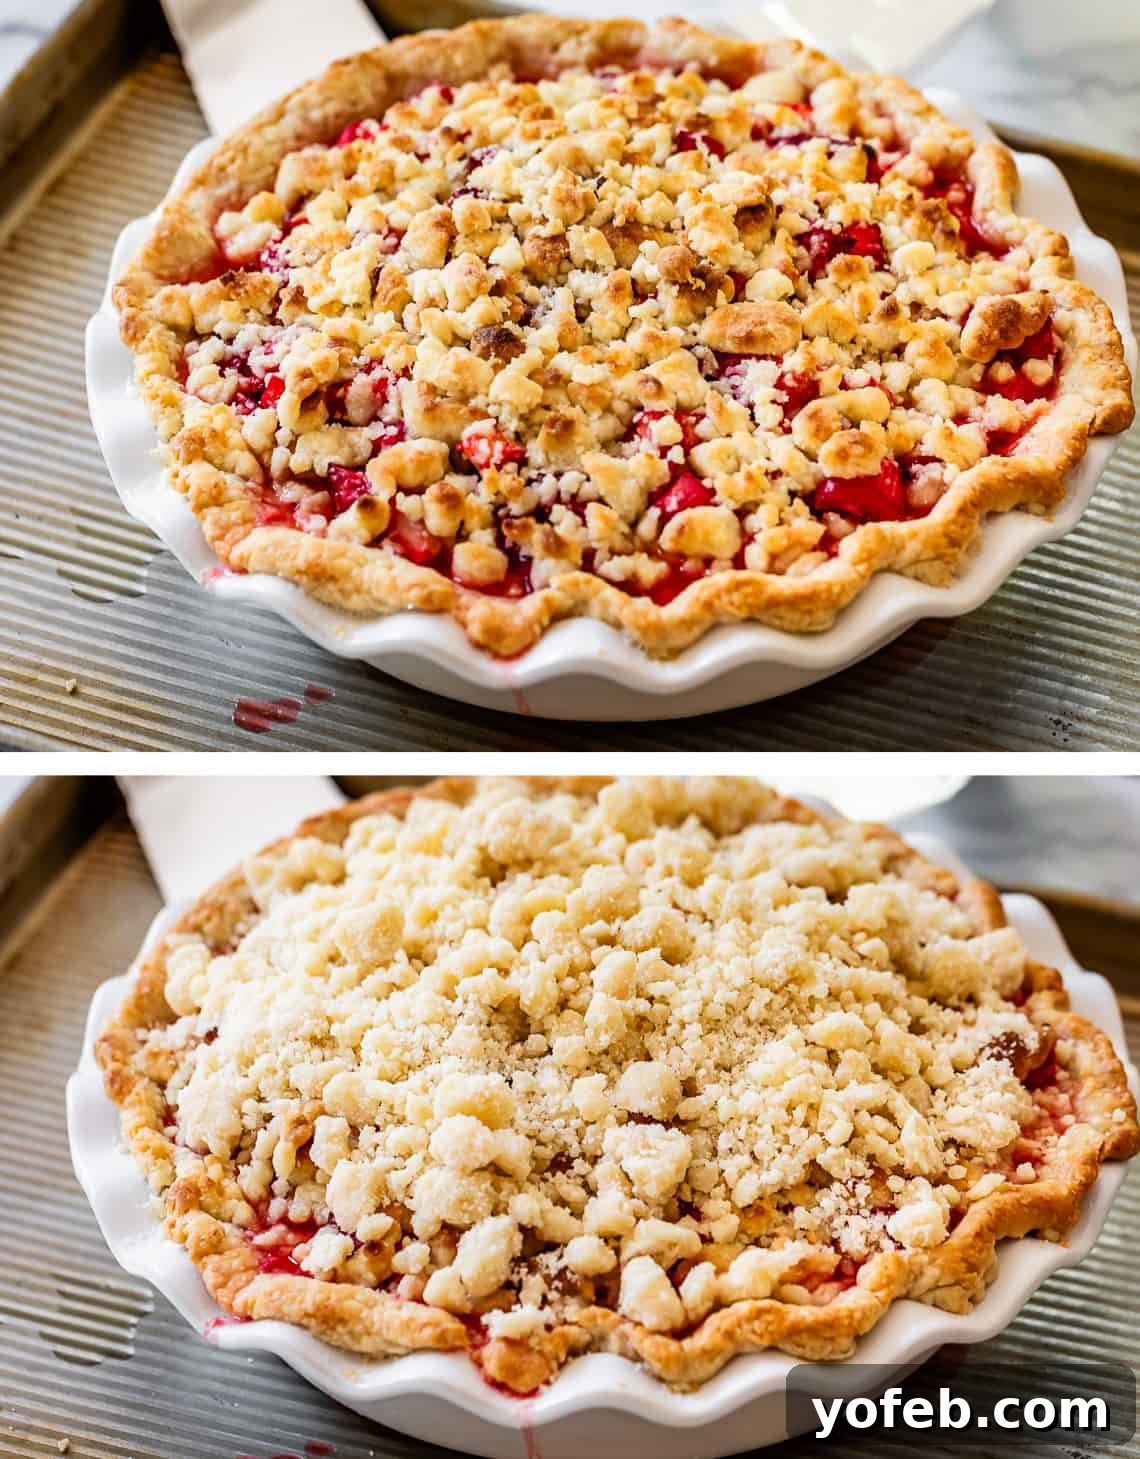
About halfway through the baking time, you’ll remove the pie from the oven and pile on the remaining crumble. Yes, all of it! This second layer of cold crumble hitting the hot pie allows it to crisp up beautifully, creating an incredibly satisfying crunchy top layer that contrasts perfectly with the tender fruit filling. Trust me, it’s absolutely worth this extra step!
Now, regardless of whether you’re making the double-crust or the crumble-top pie, there’s one essential tool you’ll need for a perfect bake: a homemade pie shield! This simple trick will revolutionize your pie baking and save your crust edges from burning.
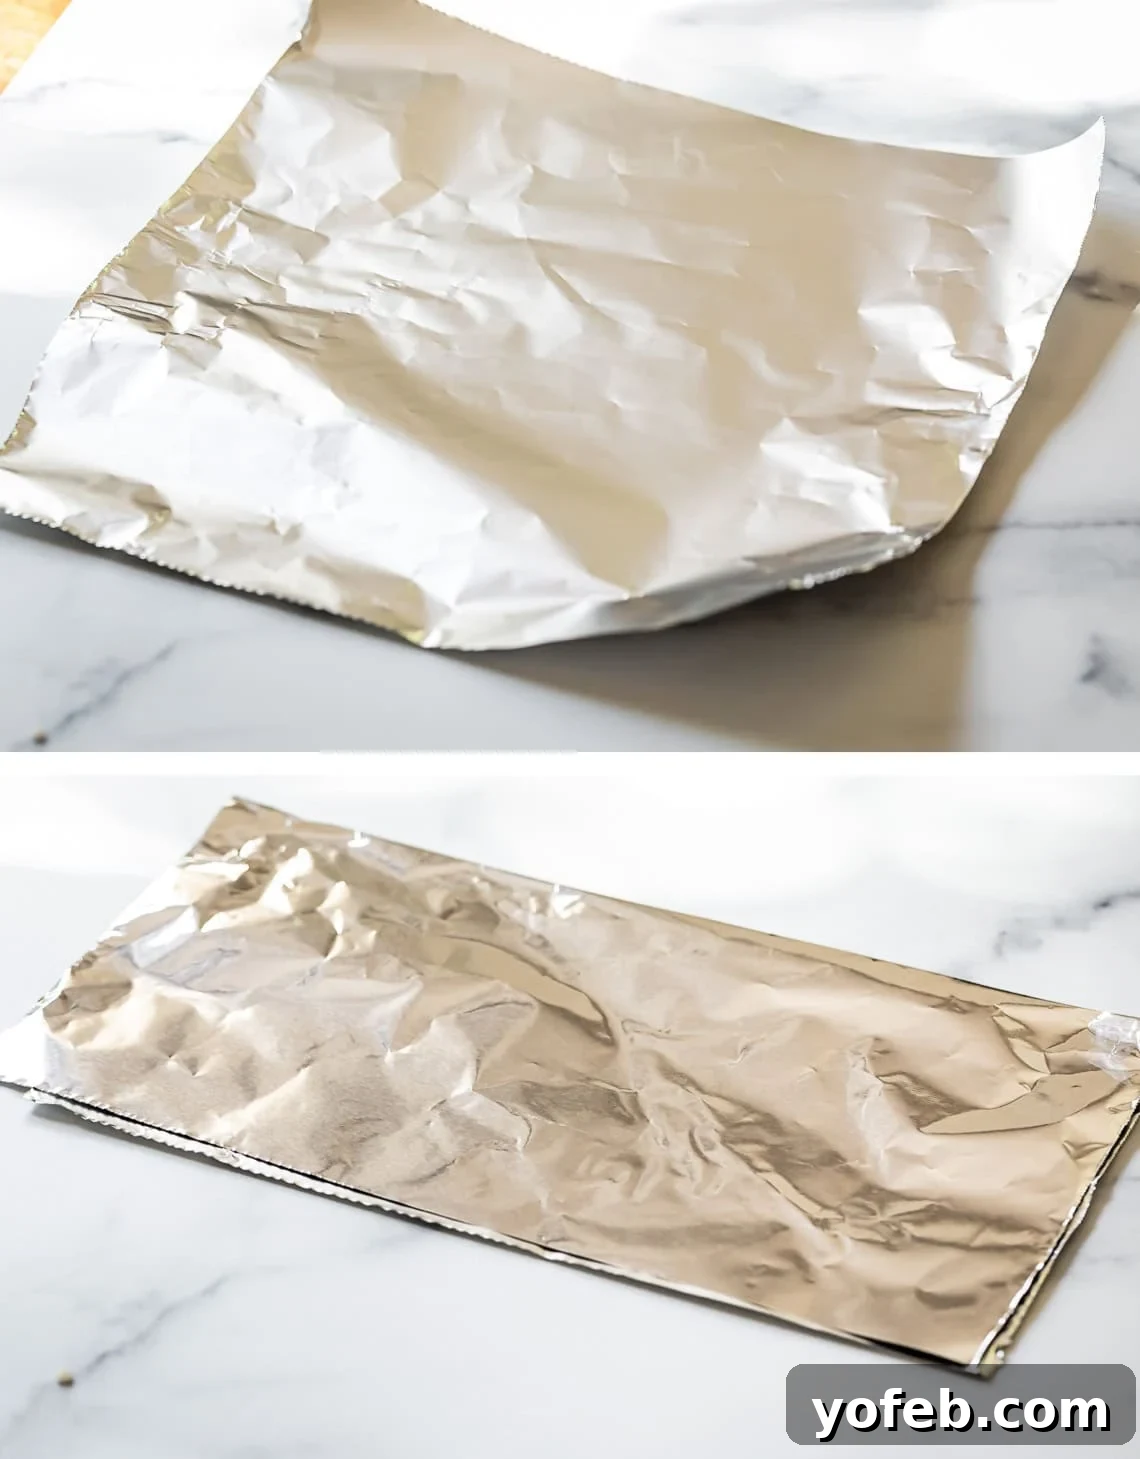
In my kitchen, no pie leaves the oven without the protection of one of these handy foil shields. Pies, especially those with juicy fruit fillings like this one, often require a full hour or more of baking. During this time, the delicate edges of the pie crust can easily become over-browned or even burnt. A simple foil shield acts as a barrier, protecting the crust edges and ensuring they remain tender, flaky, and beautifully golden, rather than brittle and dark.
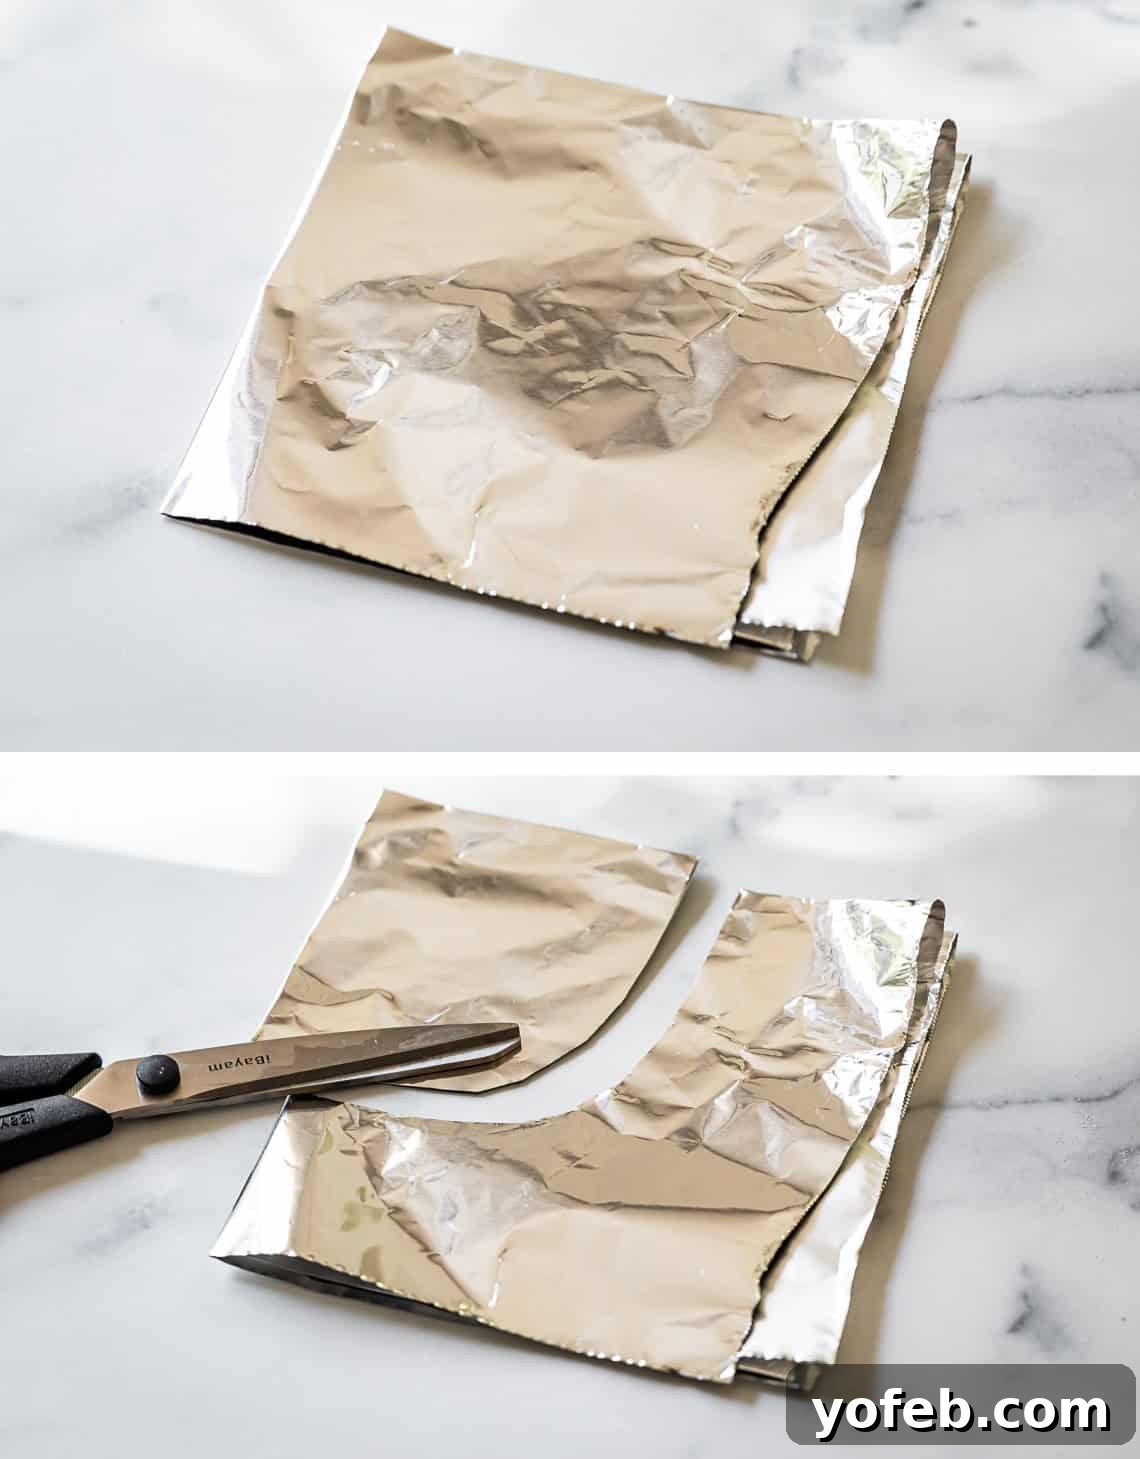
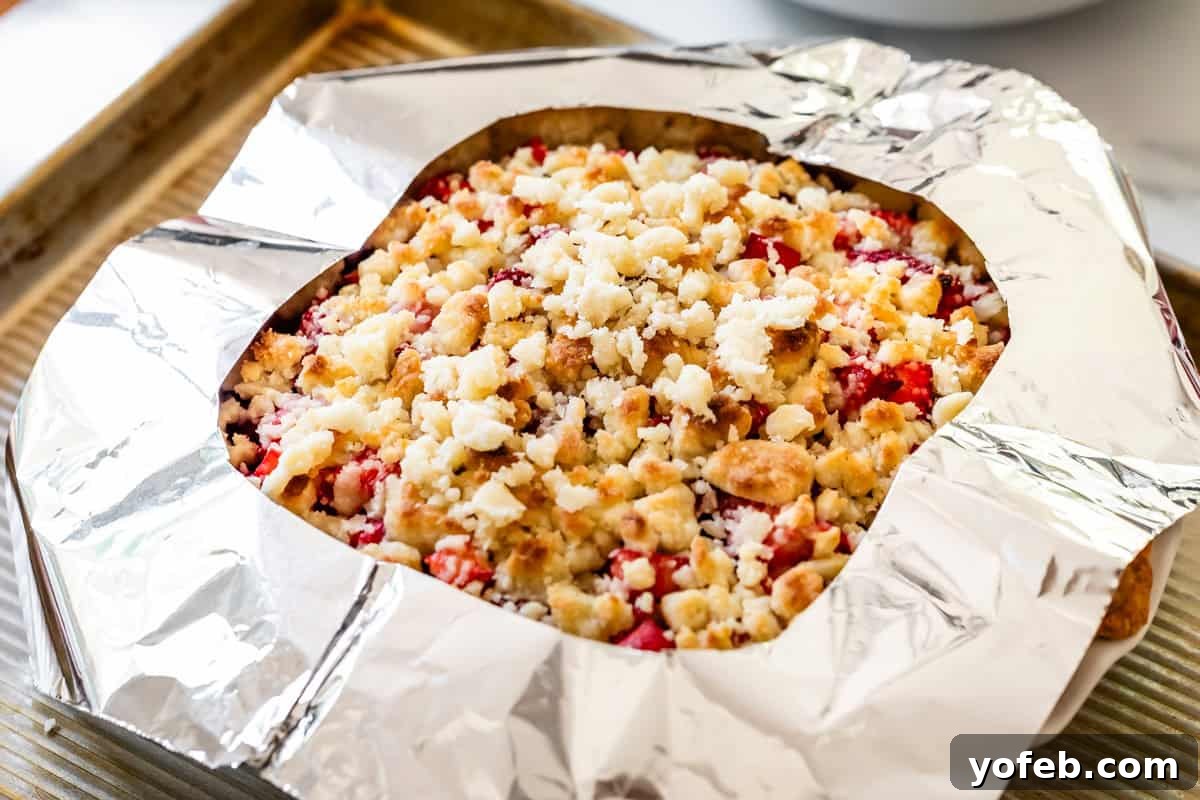
To make one, take a square of aluminum foil about the same size as your pie plate. Fold it in half, then fold it in half again to create a smaller square. Using scissors, cut out a semi-circle from the folded corner (the corner opposite the folded edges). When you unfold the foil, you’ll have a perfect ring with a circular opening in the center. This design allows the middle of your pie, where the filling is, to continue browning and cooking evenly, while the edges are safely protected. I use this method for both double-crust and crumble-top pies, ensuring perfect results every time.
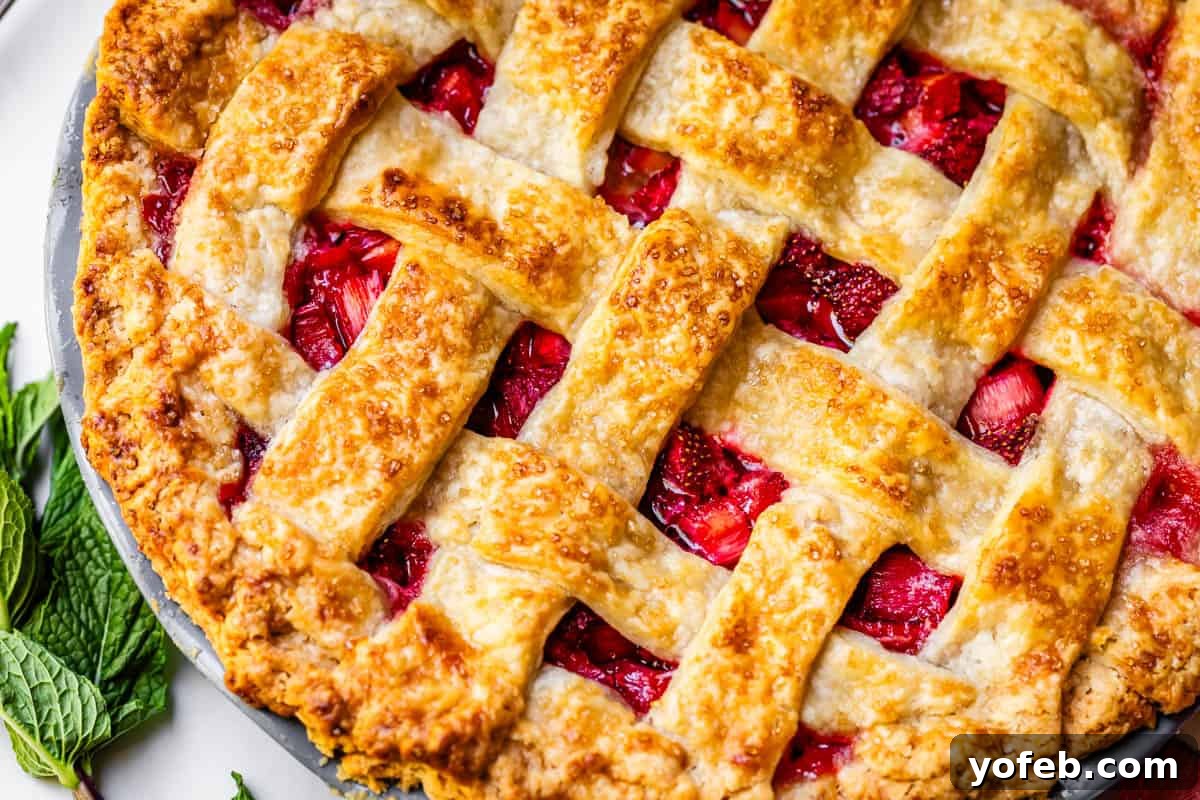
And there you have it! The secrets to baking a truly spectacular strawberry rhubarb pie. Which version will you bake first – the classic double crust or the irresistible crumble? No matter your choice, make sure to seek out some fresh rhubarb. You absolutely need this delightful dessert in your life!
Serving Suggestions for Your Strawberry Rhubarb Pie
While this delightful strawberry rhubarb pie is certainly capable of standing alone as a magnificent dessert, there are a few accompaniments that can elevate the experience to pure bliss. My top recommendation, without a doubt, is a generous scoop of creamy vanilla ice cream. The cold, smooth ice cream melting into the warm, fruity filling creates a heavenly contrast that is simply irresistible. Alternatively, a dollop of freshly whipped cream provides a lighter, equally delicious touch.
As this pie is one of my absolute favorite springtime desserts, it pairs wonderfully with a variety of fresh and flavorful meals. Here are some of my top recommendations for spring lunch and dinner recipes to enjoy before indulging in a slice of this pie:
- Caprese Salad Skewers Appetizer >> Light, fresh, and incredibly easy to assemble.
- Raspberry Avocado Salad with Poppyseed Dressing >> A refreshing side dish that complements any grilled meal.
- Easy Broccoli and Bacon Salad >> Packed with a delightful medley of flavors and textures.
- Italian Tortellini and Pepperoni Pasta Salad >> A guaranteed crowd-pleaser that’s remarkably simple to make.
- Grilled Chicken Marinade Recipe >> The easiest grilled chicken that pairs perfectly with almost anything.
- Chicken Salad with Mandarin Oranges >> This flavorful filling is begging to be spooned into croissants – trust me!
- Prosciutto-Wrapped Chicken with Asparagus >> Looks incredibly fancy but is surprisingly quick and easy to prepare.
- Honey Balsamic Pork Ribs in Crock Pot >> Fall-off-the-bone deliciousness with minimal effort.
- Best Corned Beef Recipe (Crockpot or Oven) >> You won’t believe how incredibly tender and flavorful this dish is!
- Summer Sweet Corn Salad from Budget Bytes >> A vibrant and fresh seasonal side.
- Fresh Spring Rolls from Tastes Better from Scratch >> A light and healthy option.
Storage and Shelf Life of Strawberry Rhubarb Pie
One of the beauties of fruit pies like this strawberry rhubarb delight is their flexibility when it comes to storage. Initially, after baking, your pie will be perfectly fine left on the counter at room temperature for approximately two days. For best results, loosely cover the pie plate with plastic wrap or foil. This allows any residual heat to escape while protecting the crust from becoming soggy, ensuring it retains its wonderful crispness. Slice and enjoy at your leisure!
Honestly, I can barely imagine having leftover pie for two full days – who has that much self-control?! But if you happen to possess more willpower than I do, or if you simply want to extend its freshness, you can transfer any remaining pie to an airtight container and refrigerate it. In the fridge, it should last for another day or two. Be aware that refrigerated fruit pies can sometimes become a little runnier or the crust may lose some of its crispness, so it’s always best enjoyed fresh or at room temperature within the first couple of days.
Can You Freeze Strawberry Rhubarb Pie?
Yes, you absolutely can freeze strawberry rhubarb pie, and it’s a fantastic way to prepare ahead! However, for optimal results, I highly recommend freezing it when it’s fully assembled but *unbaked*. This method ensures the freshest taste and best texture when you finally bake it.
To freeze an unbaked pie: Prepare the recipe all the way through assembling the top crust (whether lattice or whole) and fluting the edges. Then, place the entire pie plate on a baking sheet and flash freeze it in the freezer for about 30-45 minutes. This quick freeze helps to solidify the pie, preventing it from losing its shape. Once firm, carefully wrap the pie in several layers of plastic wrap, followed by a layer of heavy-duty aluminum foil. Alternatively, you can place the entire wrapped pie pan into a 2-gallon freezer bag, ensuring as much air as possible is removed before sealing. Your pie will keep beautifully in the freezer for up to 3 months.
On baking day: There’s no need to thaw the pie! Take it directly from the freezer, unwrap it, and if it’s a double-crust pie, brush the top crust with milk and sprinkle with sugar. If using glass or ceramic pie pans, it’s crucial to place the frozen pie into a *cold* oven. Introducing a cold dish to a preheated hot oven can cause thermal shock, potentially leading to cracks or breakage. Once the pie is in the cold oven, then preheat your oven to 425°F. Be prepared for the baking time to be roughly double what’s listed for a fresh pie when baking from frozen.
If you need your pie plate back for other baking projects (like during busy holiday seasons such as Thanksgiving!), you can pre-line your pie plate with parchment paper or aluminum foil (sprayed with non-stick spray) before assembling the pie. Flash freeze the assembled pie as described above, then gently lift the frozen pie out of the pan using the paper or foil. Carefully peel away the lining from the crust. At this point, you can proceed with the wrapping, freezing, and baking instructions mentioned in the previous paragraphs. While I haven’t personally tried this “pan-freezing” method yet, it’s an ingenious idea for those times when you need all your pie dishes simultaneously!
Frequently Asked Questions About Strawberry Rhubarb Pie
The combination of strawberry and rhubarb is a time-honored classic for several compelling reasons. Firstly, both fruits are seasonal harbingers of spring, often abundant at the same time. In fact, in a garden, they can even help each other thrive! This natural synchronization makes their culinary pairing intuitive. Beyond seasonality, their colors are a beautiful rosy pinkish-red, creating an aesthetically pleasing dessert. Most importantly, rhubarb is notably tart and sour, making it an ideal candidate to be balanced by the natural sweetness of other fruits like strawberries. This combination creates a perfectly harmonious flavor profile that is both vibrant and pleasantly sweet, though for those who adore rhubarb’s sharp tang (like me, I love straight-up rhubarb!), the sweetness simply enhances its best qualities.
While strawberry rhubarb pie enjoys a dedicated following across the entire country, its popularity truly flourishes in the Midwest and Great Plains regions of the United States. This geographical preference makes perfect sense when you consider rhubarb’s growth requirements: it thrives in colder climates where the ground experiences a freezing period, and its growth is inhibited by temperatures consistently above 90 degrees Fahrenheit. Therefore, it’s naturally more prevalent and celebrated as a beloved springtime dessert in northern states and colder climates where these conditions are met.
A soupy strawberry rhubarb pie is a common frustration, but it usually comes down to one of two main reasons. Most often, the filling simply hasn’t been cooked long enough for the thickening agent to fully activate. The cornstarch (or whatever thickener you’re using) needs sufficient time at a high temperature to properly bind with the fruit’s natural sugars and juices, creating that perfectly set consistency. Another possibility is that you might have forgotten to add the thickening agent altogether. Additionally, be mindful of “extra” fruit or juice; if you’ve added more fruit than the recipe calls for without adjusting the thickener, you’ll inevitably end up with a runnier pie. Always adjust the amount of cornstarch if you decide to increase the fruit in your filling to maintain the ideal texture.
Preventing a soggy crust is key to a truly fantastic pie! It’s distinct from a soupy filling; sogginess refers to the crust (top or bottom) losing its crisp, flaky texture and becoming wet or soft. Here are several strategies to avoid this common issue:
- High Initial Baking Temperature: Start baking your pie at a high temperature (like 425°F, as in this recipe). This allows the crust to set and crisp up quickly before it has a chance to absorb too much moisture from the filling.
- Thick Filling: Ensure your pie filling is adequately thick. A well-thickened filling prevents excess liquid from seeping into the bottom crust during baking and as the pie cools. This is why cornstarch is so important in fruit pies.
- Proper Cooling: Always allow your pie to cool completely on a wire rack. Cutting into a warm pie releases steam and allows the filling to run, which can make the crust soggy. Complete cooling also ensures the thickener fully sets.
- Loose Covering for Storage: When storing leftover pie, cover it loosely with plastic wrap or foil. An airtight seal can trap condensation, which will inevitably lead to a soggy crust. Allowing a little airflow helps maintain the crust’s texture.
- Pre-baking (Blind Baking) the Crust (Optional): For particularly juicy fruit fillings or if you frequently struggle with soggy bottom crusts, consider blind baking your bottom crust for 10-15 minutes before adding the filling and proceeding with the recipe. This extra step can create a barrier against moisture.
By following these tips, you’ll achieve a beautiful, flaky crust every time, perfectly complementing your delicious rhubarb filling.
More Delectable Fruit Desserts to Try
If you’ve fallen in love with this Strawberry Rhubarb Pie, you’ll surely enjoy these other fantastic fruit-based desserts. They’re perfect for any season and offer a variety of flavors and textures to explore:
- Homemade Apple Pie >> The undisputed best of the best, and my most popular recipe!
- The Easiest Mixed Berry Cobbler Recipe You’ll Ever Make >> Truly takes just about 5 minutes to throw together for a quick, comforting dessert.
- Fresh Blackberry Glacé Pie >> One of my most cherished fresh fruit pies, bursting with berry flavor.
- How to Make Strawberry Shortcake >> A classic option that beautifully showcases all those gorgeous spring strawberries.
- Homemade Peach Cobbler >> A go-to summertime dessert around here, incredibly easy and always a hit.
- Peach Apricot Slab Pie >> Perfect for feeding a crowd, featuring sweet fresh apricots and peaches.
- Chicago Style Fruit Pizza >> A fun and customizable dessert with a sugar cookie crust, cream cheese frosting, and your favorite fruits!
- Easy Homemade Cherry Pie Bars >> Totally irresistible and a convenient way to serve “pie” to a gathering.
- Homemade Blueberry Pie Recipe >> The only recipe you’ll ever need for a perfect blueberry pie.
- White Chocolate Blueberry Lasagna from OMG Chocolate Desserts >> An intriguing and decadent no-bake option.
- Plum Galette from Oh Sweet Basil >> A rustic and elegant dessert showcasing fresh plums.
Facebook | Pinterest | Instagram

Strawberry Rhubarb Pie
Print Recipe
Ingredients
- 1/2 cup grenadine syrup, optional
- 1 homemade double pie crust*
For the filling:
- 3 and 1/4 cups rhubarb, chopped (about 6 stalks, buy 1.5 pounds)
- 3 and 1/4 cups strawberries, chopped (buy 1.5 pounds)
- 1 and 1/3 cups granulated sugar
- 1/2 teaspoon lemon zest, from 1 lemon
- 2 tablespoons lemon juice
- 1/4 teaspoon kosher salt
- 1/8 teaspoon nutmeg
- 1/4 cup cornstarch
- 2 tablespoons butter, cut in pieces
Pie assembly and serving:
- 1 tablespoon milk, to brush on pie crust
- 1 and 1/2 tablespoons granulated sugar, for sprinkling on pie crust
- vanilla ice cream or whipped cream, for serving
Instructions
- Soak your rhubarb in grenadine: This step is totally optional. It helps bring out the RED color of rhubarb. Rhubarb is greenish sometimes, and can look a little funny in a pie. Soaking in grenadine not only sweetens the rhubarb slightly, but brightens the fruit to make your pie more appetizing. After all, we eat with our eyes first. You can skip it no problem!
- Chop about 4-6 stalks of rhubarb in half lengthwise, if they are thick. Then chop each split stalk into 1/4 inch pieces. You need a very sharp knife for rhubarb, and you need to cut through all the way. If you don’t, the edges of the stalk will strand off in ribbons. This is no big deal, but it is kind of annoying, and you often lose the outer edge of red color if you peel off the outside strands. So chop confidently and thoroughly.
- Measure the rhubarb to make sure you have about 3 and 1/4 cups. (Don’t just toss in all that you have.) Add to a medium bowl and pour 1/2 cup grenadine syrup over the top. Stir together well and cover. Chill in the fridge for about 60 minutes, or up to overnight.
- Make your pie crust: If you know what’s good for you, make a homemade pie crust. Seriously. No shade, Pillsbury, but you cannot compete. I’ve got lots of tips and tricks for success on my pie crust post. Make the recipe as written for a double pie crust.*
- Roll out your pie dough and place in a deep 9 inch pie dish, with the excess hanging over the edges. Chill in the fridge until your filling is ready.
- Make the filling. Preheat your oven to 425 degrees F. Drain the rhubarb in a colander. Return the drained rhubarb to the now-empty bowl (no need to wash it.) Chop 3 and 1/4 cups strawberries into bite size pieces. Add to the rhubarb.
- Add 1 and 1/3 cups granulated sugar, 1/2 teaspoon lemon zest (I love to use my microplane grater for zesting), 2 tablespoons fresh lemon juice, 1/4 teaspoon kosher or sea salt, 1/8 teaspoon nutmeg, and 1/4 cup cornstarch. Stir with a rubber spatula until well combined.
- Roll out the second pie crust quickly, to keep it cold.
- Pour the filling into the chilled bottom pie crust. Mound the filling in the center slightly. Chop 2 tablespoons butter into small pieces and scatter them over the top of the strawberry rhubarb filling.
- Top the pie with the second rolled out crust. You can even make a Lattice Pie Crust if you are feeling fancy! If you top with the whole pie crust, be sure to use a sharp knife to make a few cuts in the top of the pie, so the steam from the filling can vent.
(If you have any down time at all during the pie assembly process, the pie dough and filled pie should be chilled in the fridge or freezer, if possible. Chilled pie going into a hot oven makes for a super flaky crust!) - If you have time and space, freeze the assembled pie for 20 minutes.
- Place your gorgeous pie on a baking sheet, in case the filling overflows. Brush the top with 1 tablespoon milk. (Or you can do 1 tablespoon milk whisked together with half a beaten egg. I always have a half egg leftover from my homemade pie crust.) Milk brushed on top of the pie will make the crust brown and matte. Egg brushed on will make it brown and shiny. I like a combo 🙂
- Sprinkle the brushed pie with 1 tablespoon demerara sugar, or regular granulated sugar is great too.
- Bake at 425 degrees F, with the rack in the lower 1/3 of the oven, for 15 minutes. The crust on the edge should be turning light brown.
- Make a pie shield out of tin foil. Get a square of foil that is the same size as your pie. Fold it in half, then in half again. Cut out the center. Open it up again. You should have a square of foil with a circle cut out of the center. See photos above.
- Lower the oven temperature to 350 degrees F. Remove the pie from the oven and place the foil on the edges of the crust. Loosely crimp it around the edges. This will protect it from burning.
- Return the pie on the baking sheet to the oven. Don’t forget, the oven should be at 350 now. Bake for 30 minutes.
- Take a peek at your pie through the door. If the whole top of the pie looks golden brown, top the pie with another square of tin foil. No need to crimp or anything fancy, literally just place the foil on top of the pie.
- Bake for another 15 minutes. The pie should be in the oven a total of about an hour.
- Cool. Take the pie out of the oven and let cool completely on a wire rack. It will take at least 3-5 hours for this pie to reach room temperature. If you cut into it early, it will be a juicy mess. (Delicious, but the wrong texture.) Pie! a lesson in patience indeed.
- Serve this pie with vanilla ice cream or whipped cream, you cannot miss out on this opportunity!! Such an amazing combo.
Notes
*Pie Crust: If you are making the Crumble topping, you only need a single pie crust.
Strawberry Rhubarb Crumble Pie:
Make the pie as directed, until you have the filling poured into the pie crust. Flute the edges of your single pie crust. Skip the 2 tablespoons butter that are normally chopped and sprinkled on top of the pie. In a small bowl, whisk together the flour, sugar, and salt:
- 1 and 1/4 cups flour
- 3/4 cups + 2 tablespoons granulated sugar
- 1/4 teaspoon kosher salt
- 10 tablespoons butter (1 stick + 2 tablespoons), melted and cooled
Melt the butter in a medium bowl and let cool slightly. Add the flour to the butter mixture and use a rubber spatula to mix it together. (put your flour bowl back in the cupboard.) See photos, you don’t want to combine the flour and butter too much. Some flour streaks are ok. Put this mixture in the fridge or freezer for 20-40 minutes until it’s chilled. Keep your assembled pie in the fridge or freezer if there is wait time.
Preheat the oven to 425. When the oven is really hot and the crumble is completely chilled, add less than half of the crumble to the top of the pie. Use your fingers to break up the crumble into chunks that about about the size of a dime or less. You want some sandy bits, and some bigger chunks. Work it with your fingers. Only sprinkle on as much of the mixture as you need to barely cover the strawberry rhubarb filling. Save the remaining crumble in the fridge.
Bake the pie on a metal baking sheet (to protect from overflow) on a rack this is placed in the lower 1/3 of the oven. Bake at 425 for 15 minutes. Then lower the heat to 350.
Make a tin foil pie shield, see photos in the post.
Remove the pie from the oven and cover the edges of the crust with the tin foil shield.
Don’t forget to lower the heat to 350. Place the pie back in the oven and bake another 15 minutes.
Remove the pie from the oven one last time. Take off the pie shield and add the remaining crumble, all of it, pile it on. Replace the pie shield on the edges of the pie, making sure the crumble part is exposed.
Bake at 350 for another 20-30 minutes. (the pie should be in the oven for a total of 50-60 minutes.) Check the pie toward the end, and if the crumble topping looks very brown, get a square of tin foil and place it right on top of the other shield (no need to crimp or anything, just toss it on top.) This is to protect the top from overbrowning, but you want the rhubarb to be in the oven for at least 50-60 minutes, to make sure it gets fully cooked.