
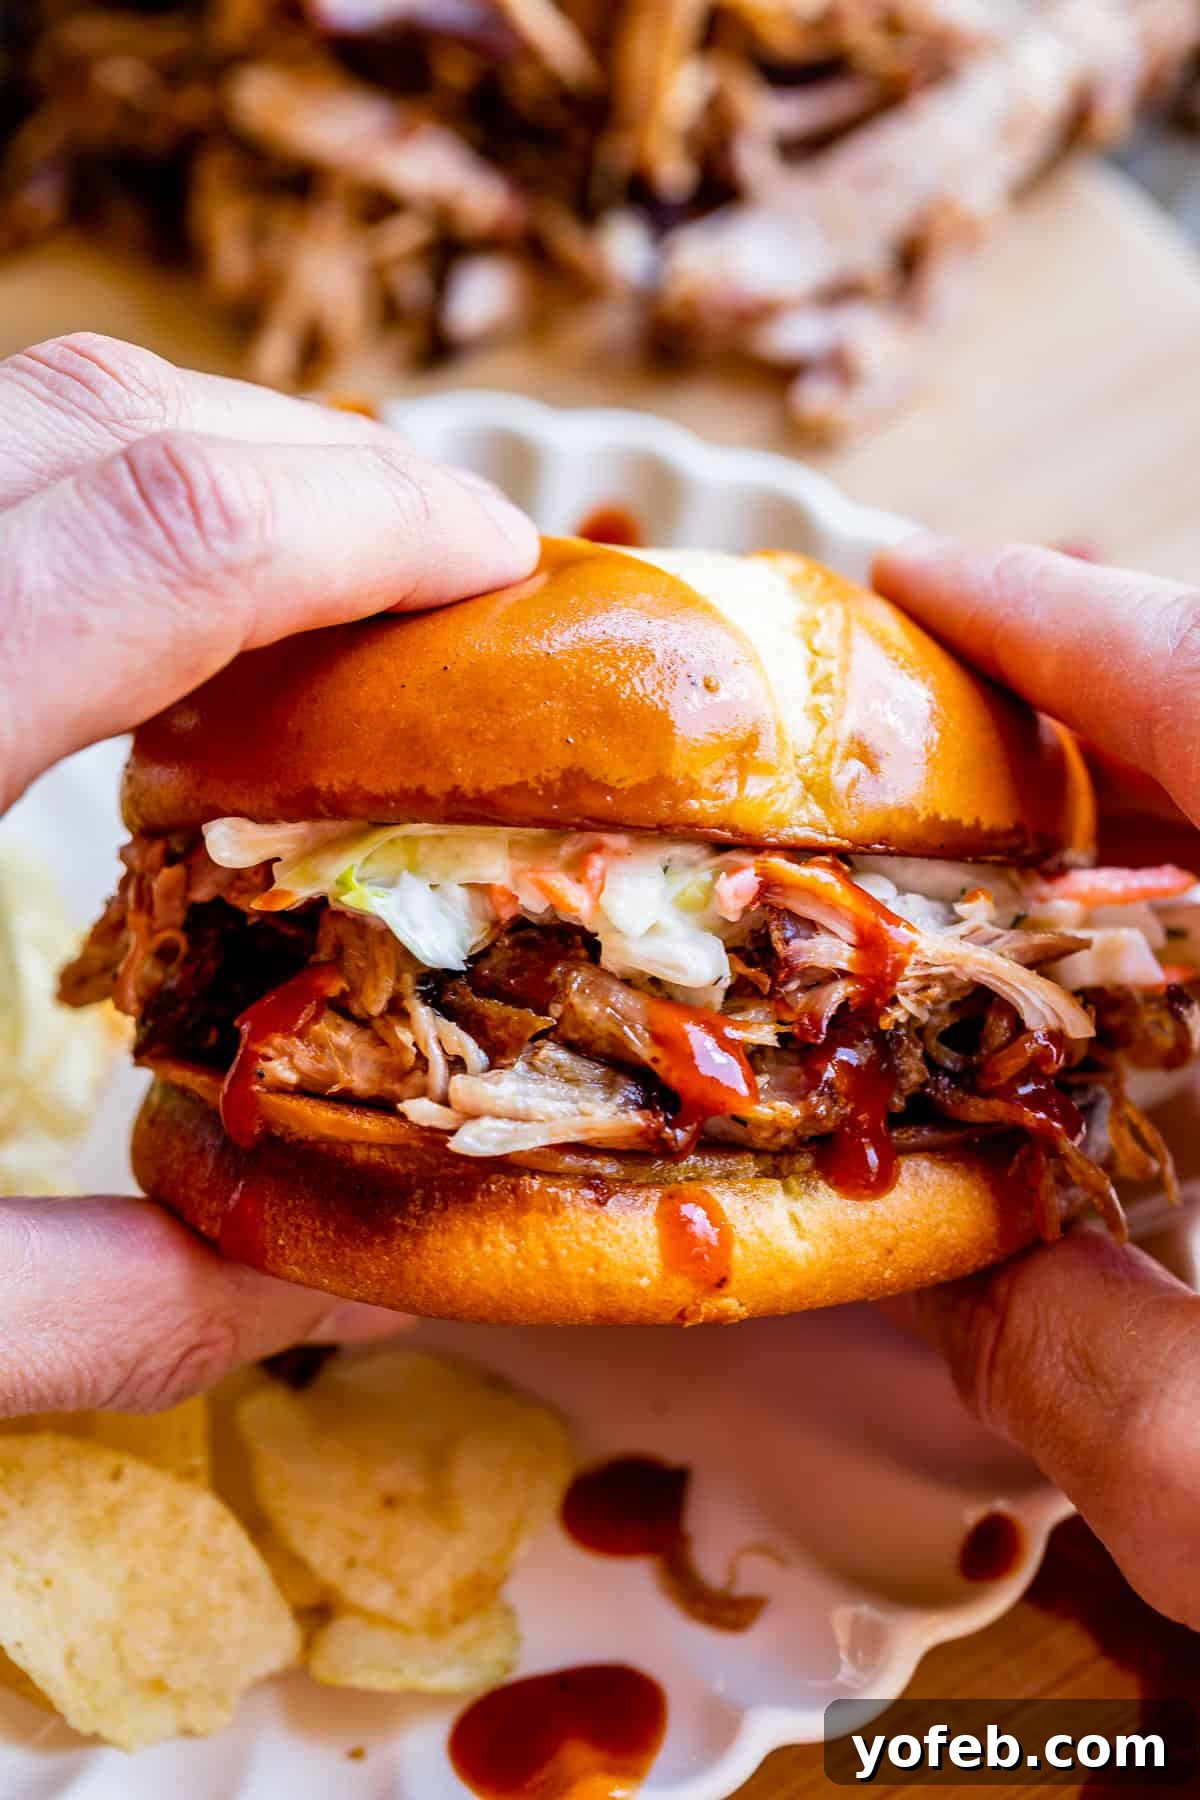
This comprehensive guide will show you how to create the most incredibly juicy and tender BBQ Smoked Pulled Pork right on your GAS grill! Achieve that authentic, deep smoky flavor you crave without the need for a dedicated smoker. This is an incredibly satisfying and surprisingly hands-off recipe that delivers legitimate barbecue results. The pork will effortlessly fall apart, boasting a rich, smoky interior and that coveted crispy, blackened “bark” that only outdoor cooking can provide. Perfect for backyard gatherings, game days, or simply feeding a crowd, this recipe is a must-try for any grilling enthusiast. For those without a grill, don’t miss my Slow Cooker and Oven Pulled Pork. And, of course, no pulled pork is complete without a fantastic BBQ Sauce! Originally published July 13, 2022.

Table of Contents
- Mastering Smoked Pulled Pork on Your Gas Grill
- Essential Ingredients for the Best Smoked Pulled Pork
- Step-by-Step: How to Make Smoked Pulled Pork
- The Importance of Dry Rub for Smoking Pulled Pork
- The Secret to Achieving Tender Pulled Pork
- Creating Authentic Smoke on a Gas Grill
- DIY Wood Chip Foil Packets for Smoking
- The Smoking Process for Pulled Pork
- Total Cooking Time for Perfect Pulled Pork
- Don’t Ruin Your Pulled Pork: Embrace the Fat
- Serving Up Your BBQ Pulled Pork
- Perfect Pairings: What to Serve with Smoked Pulled Pork
- Storing and Reheating Pulled Pork BBQ
- More Mouthwatering Summer Grill Recipes!
- Smoking Pulled Pork Recipe
As the long, lazy days of summer arrive, there’s nothing quite like the irresistible aroma of barbecue filling the air. After recently moving to a new home with a pool, I’m all about finding easy, delicious grill recipes that keep the kitchen cool and the family happy. Who wants to heat up the oven when the sun is blazing outside?

That’s where this incredible smoked pulled pork recipe comes in! For a long time, I considered myself more of a Carnitas or Cafe Rio Pork kind of girl, enjoying those rich Mexican flavors with my pork shoulder. But BBQ? As a California native, it just wasn’t my go-to. However, this recipe has completely transformed my perspective, proving that exceptional pulled pork can be achieved right in your backyard, even without a fancy smoker.
My journey to this perfect pulled pork began with deep dive into cookbook methods and grilling techniques. I was particularly inspired by Cook’s Illustrated’s innovative approach to achieving authentic smoky flavors on a gas grill. After experimenting and adding my own unique twists, I discovered a method that truly works like magic! While a dedicated smoker remains a dream for another day, I’m thrilled to share this clever hack that allows you to recreate those incredible, complex smoky flavors typically reserved for professional barbecue joints or generous neighbors with smokers!
Mastering Smoked Pulled Pork on Your Gas Grill
You don’t need a fancy, expensive smoker to achieve mouthwatering, tender smoked pulled pork. With a few simple tools and a gas grill, you can unlock a world of rich, smoky flavor and achieve that desirable fall-apart texture. This guide focuses on maximizing your gas grill’s potential to deliver a barbecue experience that rivals traditional smoking methods.
While this grill method is my absolute favorite for its flavor and the satisfying crispy “bark” it produces, I understand that sometimes convenience is key. For those moments, you can also prepare a delicious pulled pork recipe in the slow cooker or oven, offering an easier, albeit less smoky, alternative.
Essential Ingredients for the Best Smoked Pulled Pork
Crafting truly exceptional smoked pulled pork starts with a selection of quality ingredients and the right equipment. Here’s a breakdown of everything you’ll need to achieve barbecue perfection. Detailed measurements can be found in the recipe card at the bottom of this post.
For the Flavorful Pork Rub:
- Kosher Salt
- Freshly Ground Black Pepper
- Smoked Paprika
- Garlic Powder
- Onion Powder
- Chili Powder
- Cayenne Pepper (for a touch of heat)
- Ground Cumin
- Dry Mustard Powder
- Light Brown Sugar (packed)
Pork and Necessary Equipment:
- Olive Oil (for rubbing)
- Pork Butt or Pork Shoulder (bone-in recommended)
- Hickory Wood Chips (essential for smoke)
- Heavy-Duty Aluminum Foil OR a Smoker Box
- Disposable Metal Pie Pans (for water)
- Large Disposable Metal Pan (9×13 inch)
- Accurate Meat Thermometer (crucial for doneness)
- At Least Half a Tank of Propane (don’t run out!)
- Oven/Grill Thermometer (for monitoring grill temperature)
For Serving Your Delicious Pulled Pork:
- Homemade or Store-Bought Barbecue Sauce
- Soft Brioche Buns (ideal for sandwiches)
- Butter (for toasting buns)
- Creamy Coleslaw (a classic pairing)
What is the Best Meat to Use for Pulled Pork?
The foundation of truly succulent pulled pork lies in selecting the right cut of meat. For this recipe, a pork butt or pork shoulder is unequivocally the best choice. These cuts, despite their names, both originate from the pig’s shoulder region. The pork butt, also known as “Boston Butt,” sits higher on the foreleg, while the pork shoulder is located further down.
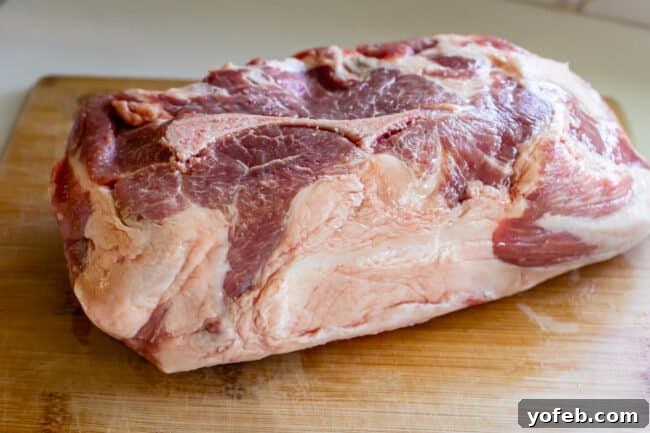
Historically, these cuts were stored in barrels called “butts,” which explains the somewhat confusing nomenclature – rest assured, it has nothing to do with a pig’s rear! Pork butt generally offers a slightly richer intramuscular fat marbling compared to a pork shoulder. However, both cuts are abundant in connective tissue and collagen. This is precisely what we want, as slow cooking allows these tough tissues to melt into tender, juicy gelatin, resulting in that irresistible fall-apart texture. Whichever cut you choose, rest assured, the results will be incredibly delicious!
For an even richer flavor and slower, more even cooking, I highly recommend opting for a bone-in pork butt or shoulder. The bone contributes to the meat’s moisture retention and infuses additional flavor from the bone marrow. However, a boneless cut will work perfectly well if that’s what’s available.
Crafting the Perfect Rub
The beauty of smoked pulled pork is that it’s quite forgiving when it comes to the spice rub. Many combinations yield fantastic results, and the magic truly lies in the inherent qualities of the meat and the meticulous cooking process. That said, I’m a firm believer in a well-balanced spice blend that enhances the pork’s natural flavors. Below is my personal favorite combination, with precise measurements provided in the recipe card:
- Kosher Salt
- Black Pepper
- Smoked Paprika
- Garlic Powder
- Onion Powder
- Chili Powder
- Cayenne Pepper
- Cumin
- Dry Mustard Powder
- Brown Sugar
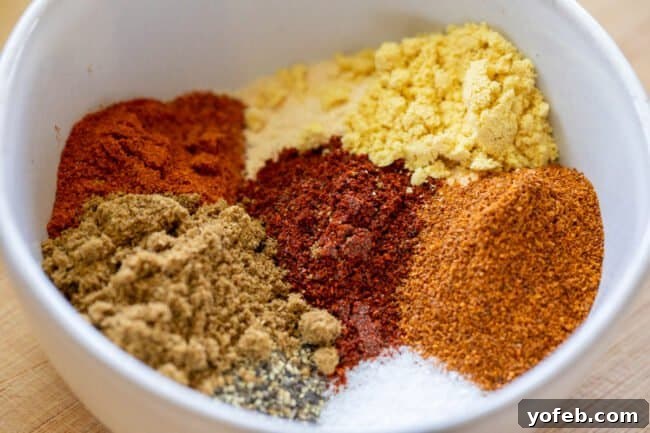
This rub creates a harmonious blend of savory, sweet, and subtly spicy notes, forming the foundational layer of flavor for your smoked pulled pork. The brown sugar not only adds sweetness but also aids in developing that beautiful, caramelized “bark” during the smoking process.
Step-by-Step: How to Make Smoked Pulled Pork
While the full, detailed recipe can be found at the very end of this post, here’s an overview of the key steps to prepare sensational smoked pulled pork on your gas grill:
- Generously coat your pork with a homemade spice rub.
- Allow the pork to marinate for a minimum of 6 hours, or ideally up to 48 hours.
- Set up your gas grill with a smoker box or cleverly crafted foil packets to generate consistent smoke.
- Cook the pork at a low, consistent temperature for an extended period, typically 4 to 7 hours.
- Once perfectly tender, shred the pork, mix with your favorite BBQ sauce, and get ready to enjoy! More intricate details follow below.
The Importance of Dry Rub for Smoking Pulled Pork
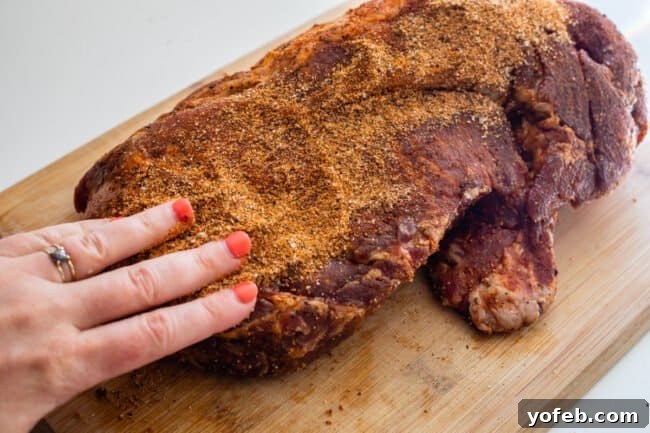
Applying a dry rub is a critical first step in building complex flavors for your smoked pulled pork. Start by patting the pork dry with paper towels on a clean work surface. Then, massage a couple of tablespoons of olive oil over the entire surface of the meat. This not only helps the spices adhere effectively but also contributes to moisture retention during the long cooking process.
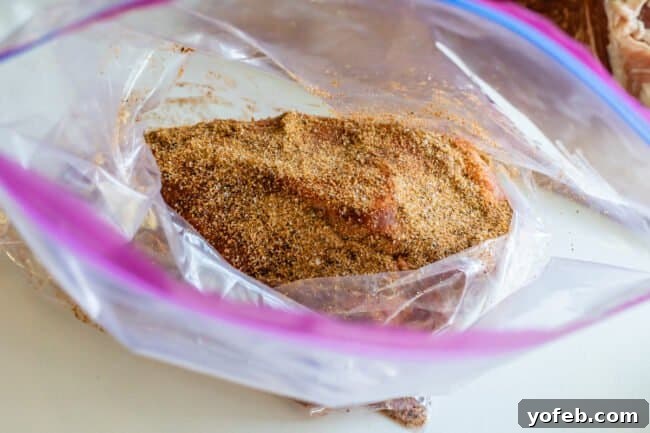
Before you begin coating the pork, remember to set aside about 3 tablespoons of the prepared spice rub in a small baggie or covered bowl. This reserved rub will be used later to enhance the “bark” – that delicious, crispy outer crust – on your finished pulled pork. With the remaining rub, generously coat every inch of the pork, ensuring it penetrates all the nooks and crannies. I find it easiest to sprinkle the spices with one “dry” hand and rub them in firmly with the other “wet” hand. Once coated, place the pork in a large freezer bag (these 2-gallon bags are perfect for larger cuts) and refrigerate for a minimum of 6 hours, or ideally up to 48 hours. The longer the marination, the deeper the flavor will permeate the meat.
The Secret to Achieving Tender Pulled Pork
The ultimate secret to incredibly juicy and tender pulled pork is a steadfast commitment to **low and slow cooking**. This isn’t a process you can rush if you desire that melt-in-your-mouth texture and rich flavor. Cooking pork too quickly prevents the essential fats and connective tissues from properly breaking down, which results in dry, tough, and stringy meat – precisely what we want to avoid.
Plan to start your cooking process early in the day. While reheating finished smoked pulled pork is simple and effective, there’s no way to significantly speed up the slow cooking time once it begins. Remember, every cut of meat is unique, and its size will naturally influence the total cooking duration. To ensure success, always start early, allowing ample time, and double-check your propane tank to ensure you have at least half a tank’s worth. Also, review your ingredient and equipment list meticulously to confirm you have everything on hand before you begin.
Creating Authentic Smoke on a Gas Grill
Achieving genuine smoky flavor on a gas grill is simpler than you might think. There are two primary, effective methods you can employ:
- Utilizing a dedicated smoker box
- Crafting your own wood chip foil packets
Regardless of the method you choose, a crucial element is your choice of wood chips. I highly recommend investing in hickory wood chips – the aroma they produce as they smolder is absolutely divine and imparts a classic BBQ flavor!
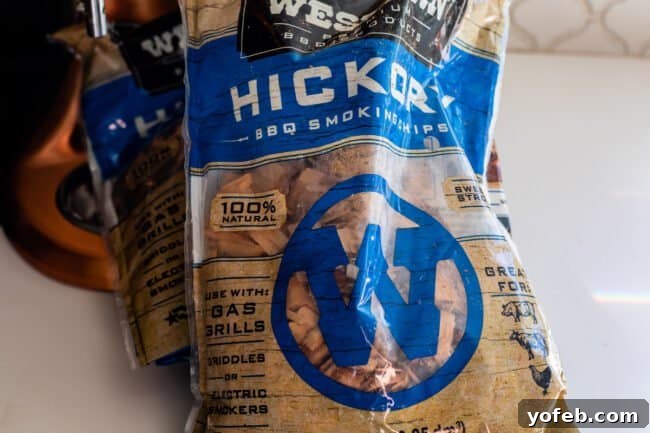
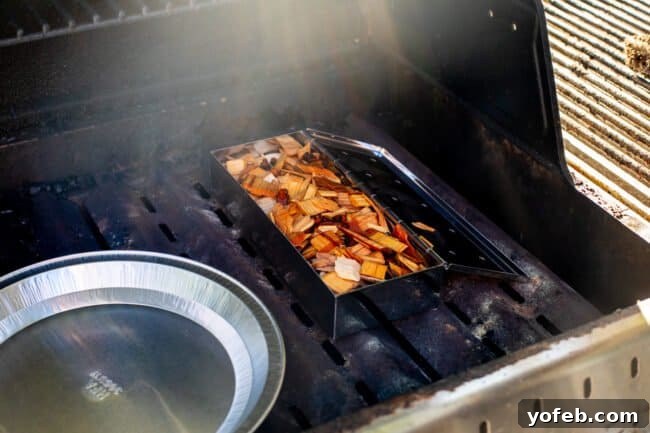
Using a Smoker Box: A smoker box is an incredibly convenient and reliable tool for gas grill smoking. These small metal boxes, typically with holes on top, are designed to hold wood chips and prevent them from igniting. Simply fill it with your chosen wood chips and place it directly on a burner under the grill grates. The smoke will steadily escape through the perforations, infusing your food with delicious flavor. This method is exceptionally easy to use and provides consistent results, making it an excellent investment for repeated use.
Wood Chip Foil Packets: If you prefer a more budget-friendly option, or don’t have a smoker box, homemade wood chip foil packets are a fantastic alternative. While they require a bit more attention, they are highly effective.
DIY Wood Chip Foil Packets for Smoking
Creating your own foil packets for smoking wood chips is straightforward. Gather a large square of heavy-duty aluminum foil. Place a generous pile of your desired wood chips in the center. Carefully fold the foil over the chips, creating a securely sealed packet. Ensure there are no punctures that could allow the chips to catch fire.
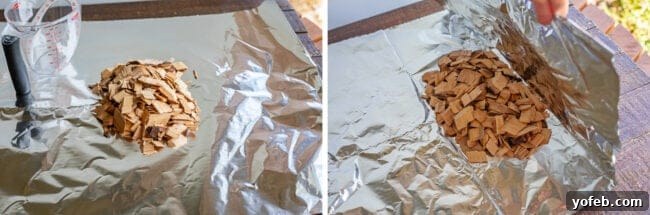
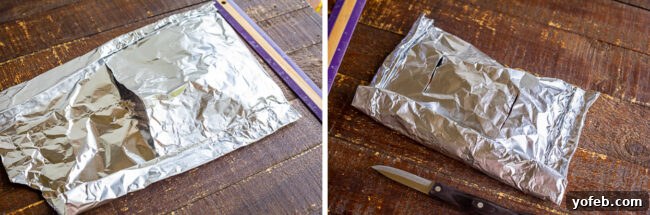
Once your packet is formed, use a knife to carefully cut two slits in the top (or poke several holes with a fork). These openings will allow the smoke to escape and circulate, flavoring your pork. Position these foil packets directly on top of your grill grates, above the active burner. The main drawback of this method is the increased risk of the foil packets catching fire if the grill gets too hot, which can impart an unpleasant, acrid taste to your pork. Therefore, close monitoring is essential. Despite this, it remains a very cost-effective and viable method for generating smoke.
The Smoking Process for Pulled Pork
Before placing your pork, prepare your grill for indirect cooking. Remove the grill grates from one side where you intend to place the pork. On the heat plates below, position two disposable metal pie pans, each filled with approximately 3 cups of water. These water pans serve a dual purpose: they catch any fat drippings from the pork, preventing unwanted flare-ups, and create a humid environment that helps keep the pork moist during its long, slow cook.
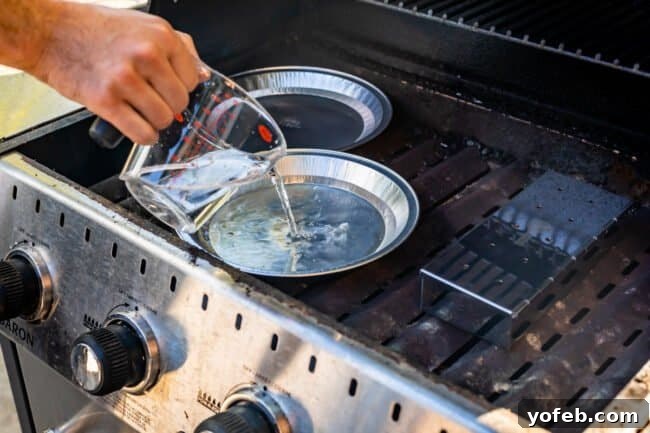
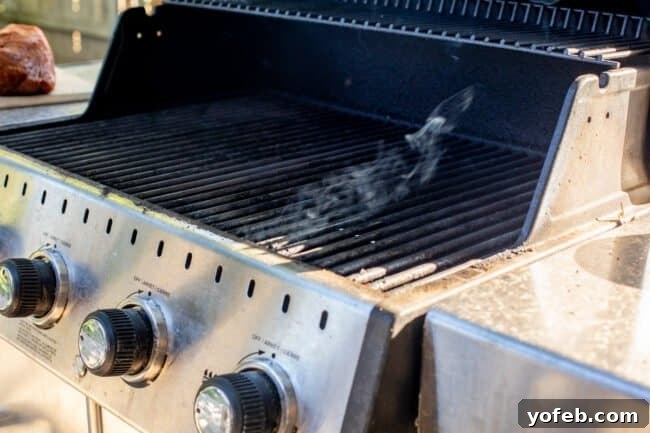
On the opposite side of the grill, where direct heat will be applied, place your wood chips. If using a smoker box, position it directly on the burners (you may need to remove the heat plates and grill grates on this side). If using foil packets, place them on top of the grill grates. Turn all burners to medium heat and close the lid, allowing the grill to preheat for about 15 minutes. You should soon observe smoke beginning to emit from your smoker box or foil packets, indicating it’s time to begin.
Time to Get Grilling
While the grill preheats, remove your marinated pork from the refrigerator and pat it thoroughly dry with paper towels. Now, take the 3 tablespoons of reserved spice rub and apply it liberally over the entire surface of the pork. This final layer of dry rub is crucial for developing that desirable, crispy “bark” on the exterior of the cooked pork.
Once the grill is hot and actively smoking, turn off the burners directly beneath the water pans where the pork will reside. Keep the other two burners, those directly below your wood chips, set to medium or medium-low heat. The goal is to achieve and maintain a consistent internal grill temperature of approximately 300 degrees Fahrenheit. Before placing the pork, ensure your grill grates are clean and then lightly oil them on the side above the water pans. A crumpled paper towel dipped in a small amount of olive oil works perfectly for this.
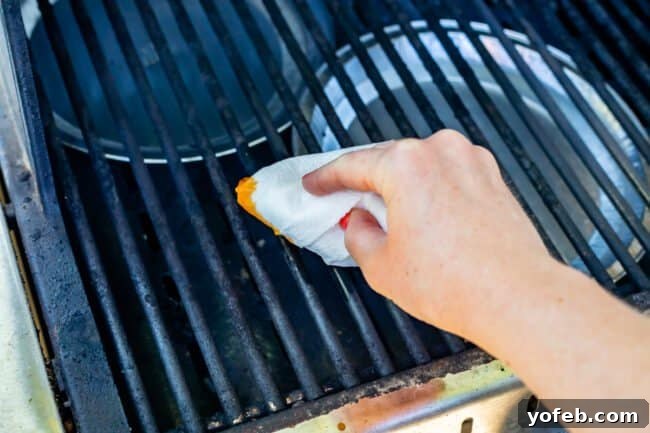
Carefully place your rubbed pork butt or shoulder directly onto the oiled grill grates, ensuring the fat cap faces upwards. Crucially, there should be no direct heat immediately beneath the pork. Close the grill lid. This stage requires your attention. Regularly monitor your grill’s temperature gauge, or use an external oven thermometer placed inside the grill, to ensure the temperature consistently remains around 300 degrees F. Adjust the active burners as needed to maintain this heat.
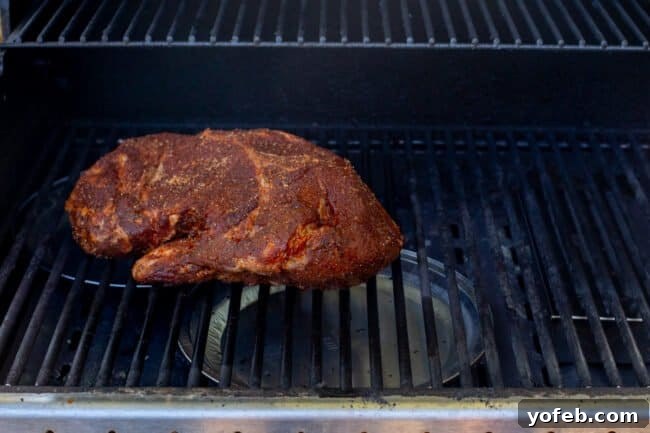
Keep a watchful eye on your smoke production. Most wood chips will actively smoke for approximately 45-60 minutes. If the smoke diminishes prematurely, you might need to briefly increase the heat on the active burner side for a minute or two until they start smoking again, then reduce the heat to maintain 300 degrees. After about an hour, the initial smoke will likely dissipate. You can either replace the wood chips in your smoker box or create new foil packets for additional smoke, or you can opt to continue cooking without more smoke. The initial phase of smoking is generally the most important, as meat absorbs water-soluble smoke compounds more effectively early in the cooking process. However, for a pronounced smokehouse flavor, feel free to replenish your wood chips as desired.
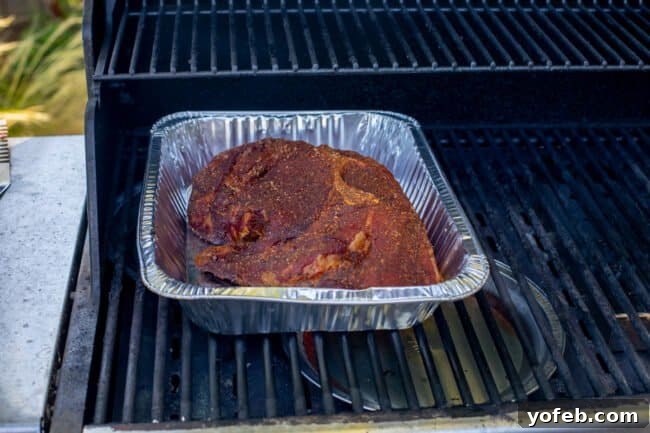
After the first 60-90 minutes of smoking, or once the initial round of smoke has subsided, carefully transfer the pork to a 9×13 inch disposable aluminum pan. While optional, this step is highly recommended as it allows you to capture all the delicious, smoky juices released from the meat during the remainder of the cooking process, preserving invaluable flavor.
Understanding “The Stall”
When slow-cooking large cuts of meat like pork butt, you’ll inevitably encounter a phenomenon known as “the stall.” This is when the internal temperature of the meat rises steadily until it reaches approximately 155-165 degrees F, and then seemingly plateaus, remaining at this temperature for several hours. This can be frustrating, especially for first-timers, but it’s a completely normal and expected part of the barbecue process.
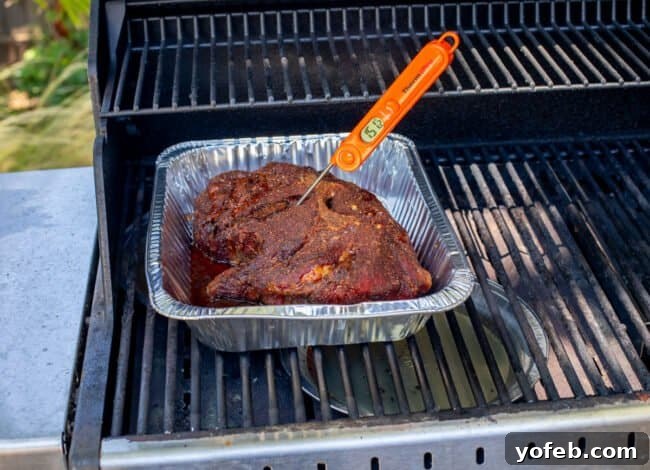
The stall occurs because of evaporative cooling. As the pork cooks, a significant amount of moisture within the meat evaporates from the surface, which actively cools the meat, much like sweat cools your skin. This cooling effect counteracts the heat being applied, causing the temperature rise to pause. Don’t panic or try to aggressively increase the grill temperature during this phase; simply maintain your consistent 300-degree F heat, and eventually, the moisture will dissipate enough for the internal temperature to start rising again. Patience is truly a virtue here!
Pull Your Pork (Shred It!)
Once your pork reaches the ideal internal temperature of 195-200 degrees F, carefully remove it from the grill. Tent the pan loosely with foil and allow the pork to rest for at least 20 minutes. This crucial resting period allows the muscle fibers to relax and the juices to redistribute evenly throughout the meat, ensuring maximum tenderness and flavor. You can leave it right in the foil pan if you used one.
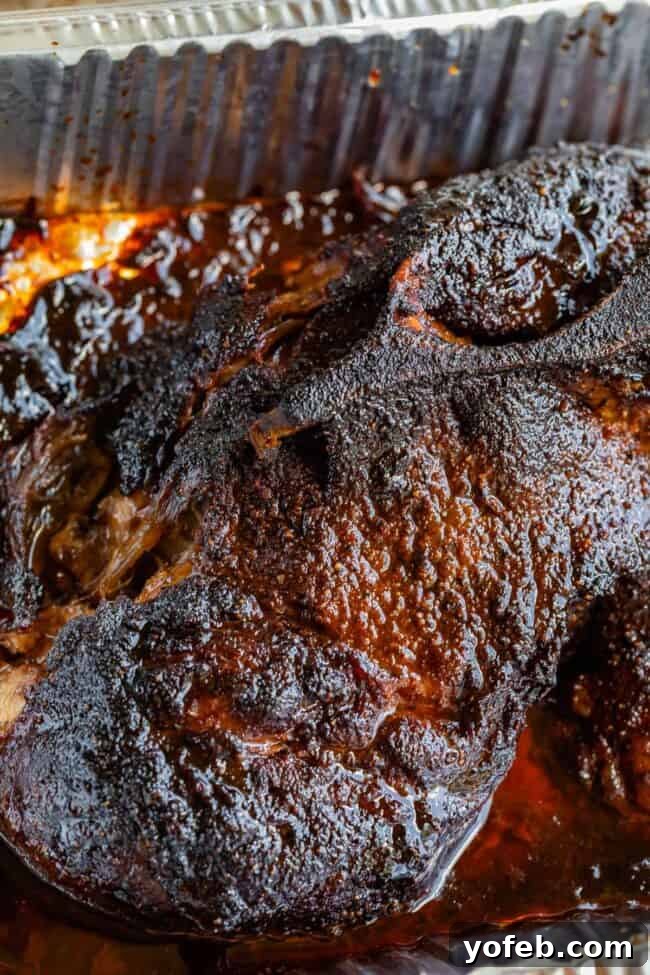
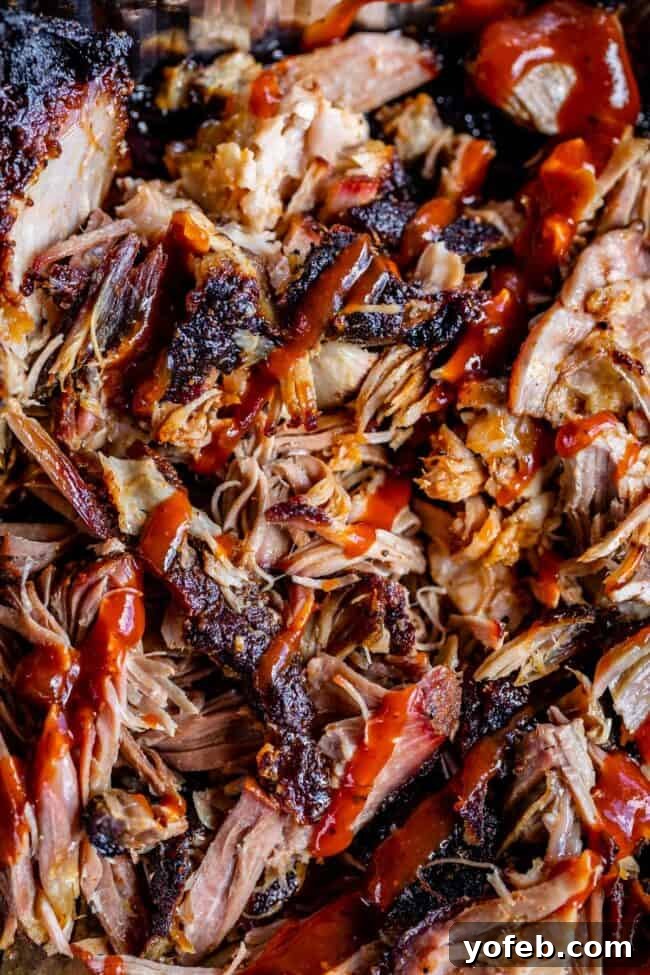
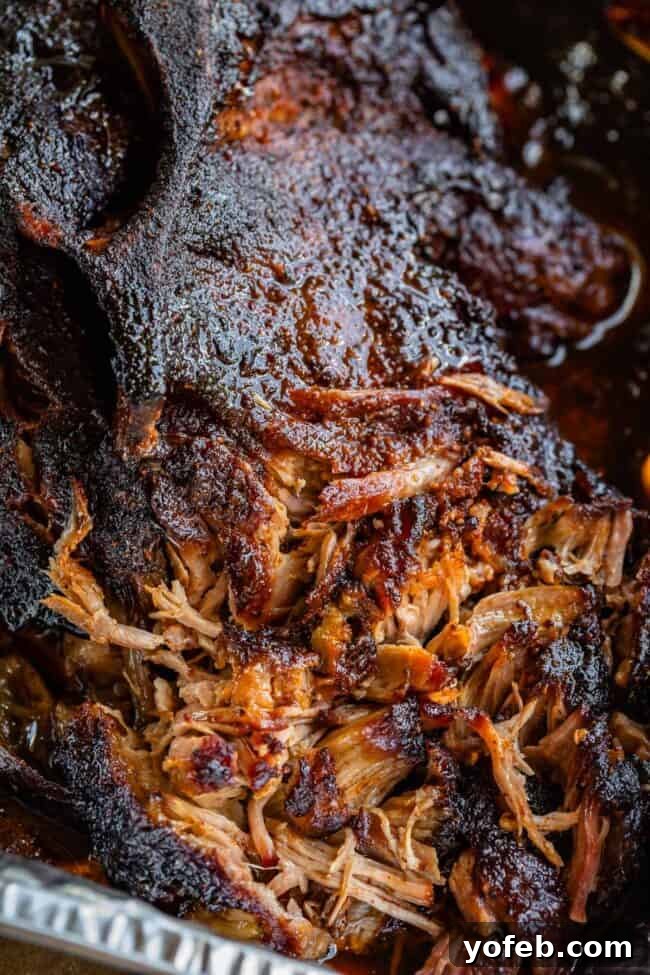
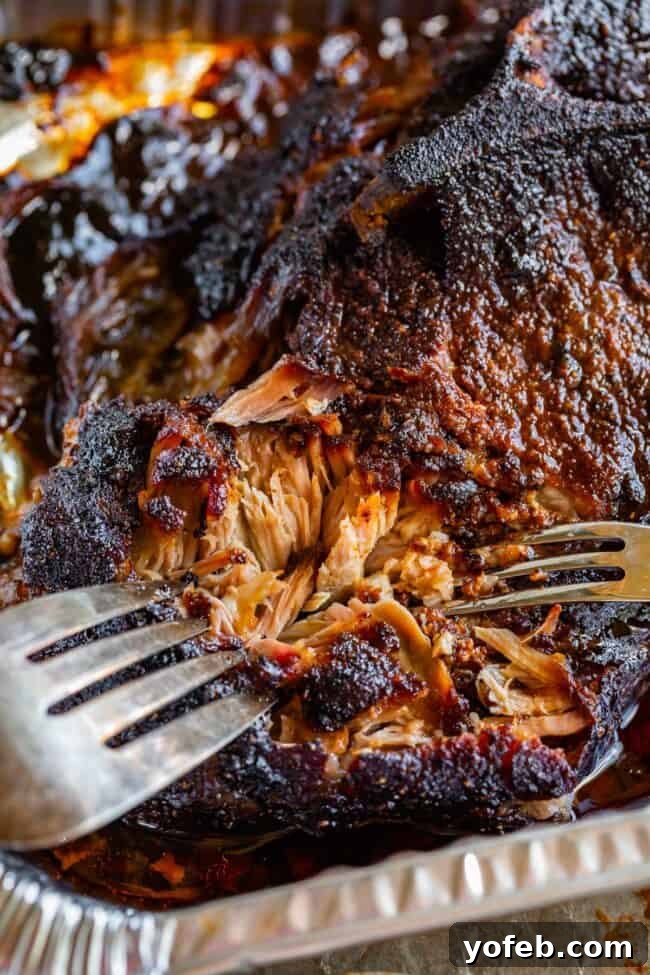
At this stage, your pork might appear significantly darkened or “burned” on the exterior. This is not a mistake; it’s the coveted, gloriously flavorful “bark.” This crispy, blackened crust is a delectable combination of your spice rub, the smoke, and the caramelized meat proteins, offering a fantastic textural contrast and depth of flavor that is truly unique to smoked barbecue. It’s a hallmark of outdoor cooking and something you simply cannot achieve indoors!
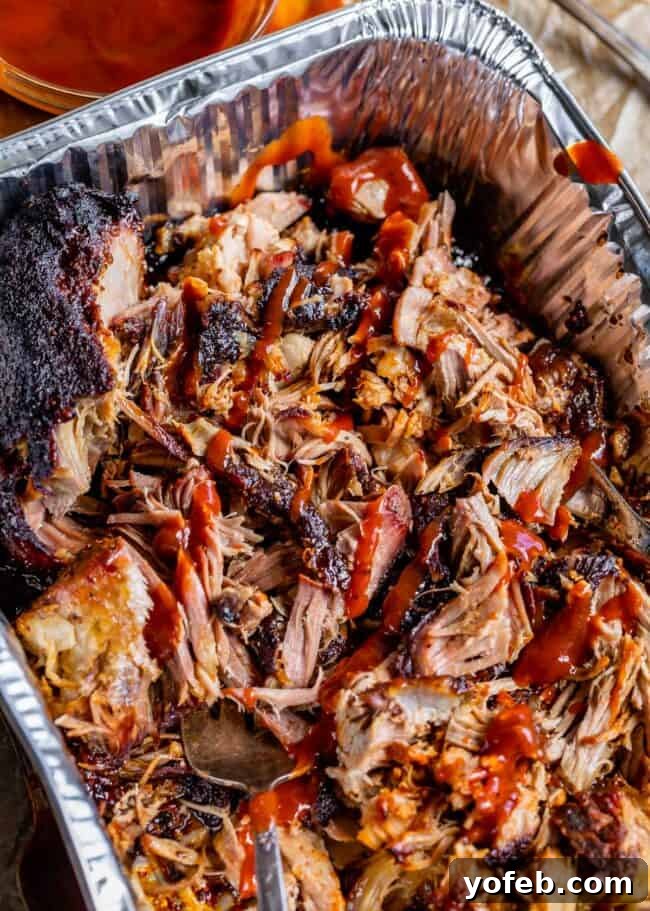
Now, it’s time to “pull” or shred your pork. If cooked properly, this will be an incredibly satisfying experience. The meat should be so tender that it practically falls apart with the slightest touch; two forks are usually all you need. If there’s a significant amount of cooking liquid in the pan, transfer the pork to a cutting board first. Pour the pan juices into a fat separator. Discard the separated fat, but save a portion of the smoky, flavorful juices. You can stir some of these back into the shredded pork for added moisture and flavor, or mix a little into your BBQ sauce later. These juices are liquid gold! Just be mindful not to add all of them back into the shredded pork, as this can soften that precious bark you worked so hard to achieve.
Total Cooking Time for Perfect Pulled Pork
In total, your pork will typically remain on the grill for approximately 5-7 hours. This duration can vary significantly based on the size and initial temperature of your pork butt or shoulder. The key is to patiently work through “the stall,” consistently maintaining your grill temperature at around 300 degrees F throughout the entire process.
What Temperature Do You Cook Pulled Pork To?
The optimal internal temperature for perfectly cooked, fall-apart tender pulled pork is between 195 and 203 degrees F. Remember that the meat’s temperature will continue to rise by about 5 degrees after it’s removed from the heat (this is called carryover cooking), so aiming to pull it off the grill at 195 degrees F is usually ideal to reach that sweet spot of around 200 degrees F. Cooking it less than 195 degrees will result in tough pork, while significantly exceeding 203 degrees can lead to dry, chalky meat.

A reliable meat thermometer is absolutely non-negotiable for this recipe. You cannot accurately rely on a clock for timing, as cooking times are highly variable. Invest in a good digital meat thermometer. Once the internal temperature approaches the 180s, start checking the pork’s temperature approximately every 30 minutes until it reaches the desired range.
Yes, unfortunately, you absolutely can overcook pulled pork! While I’ve emphasized the importance of cooking low and slow, it’s crucial to understand that there’s a delicate balance. Let’s delve into a quick science lesson:
As the pork butt cooks, it will first reach around 130 degrees F, at which point the intramuscular fat begins to render (melt), effectively basting the meat from the inside out. As the temperature climbs to approximately 160 degrees F, the tough collagen and connective tissues start to break down and transform into succulent gelatin, contributing significantly to the pork’s tender texture. While the meat is safe to eat at this stage, it will still be quite tough.
The sweet spot for truly fall-apart pulled pork is between 195-203 degrees F, where the collagen has fully rendered, and the meat fibers are perfectly tender. However, if the temperature continues to rise beyond approximately 210 degrees F, the muscle fibers themselves can start to tighten and expel too much moisture, leading to sad, chalky, and chewy pork. We want to avoid this at all costs!
This is precisely why I strongly recommend using a precise meat thermometer to hit that ideal temperature range. Digital thermometers are best for accuracy, and a fancy wireless thermometer would be a dream for monitoring without constantly opening the grill lid! (Hint, hint, Eric!)
Don’t Ruin Your Pulled Pork: Embrace the Fat!
Allow me to be very direct for a moment: DO NOT DISCARD THE FAT!
I’ve encountered other recipes that actually instruct to “remove the crusty fat cap and discard.” This baffles me. Why would anyone want to throw away the incredibly flavorful, crispity-porky, blackened “bark” that develops on the fat cap? It’s an integral part of what makes smoked pulled pork so exceptional.
Many years ago, before I understood the culinary magic of fat, I was camping and cooking bacon. My brother-in-law witnessed me peeling off the un-crisped strips of bacon fat over the trash can. He exclaimed, “What are you doing?! Do you not understand bacon?” He was right; I clearly did not. I’ve learned a lot since then.
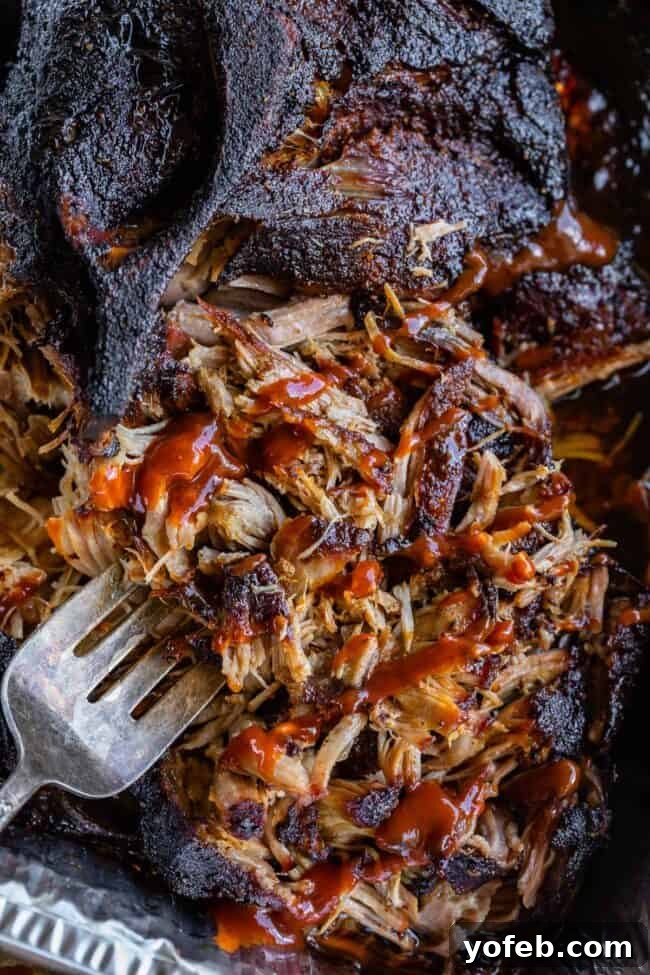
Fat equals flavor. Say it with me: Fat equals flavor! Pork is inherently delicious precisely because of its generous fat content. Think about bacon – you’re essentially enjoying cooked pork fat, and it’s universally adored. While the fat on pulled pork may not achieve the same crispy texture as bacon, it still delivers an abundance of that coveted porky flavor. Remove any gristle or truly unappetizing bits you encounter, but please, do not systematically discard every piece of fat. Shred it up and toss it right in with the pulled pork. This is what truly makes smoked pulled pork so incredibly flavorful and moist. You absolutely will not regret it!
Serving Up Your BBQ Pulled Pork
To quote the legendary Ron Swanson from Parks and Recreation, during a burger contest: “It’s a hamburger made out of meat on a bun with nothing. Add ketchup if you want, I couldn’t care less.” His point, and mine here, is that when the meat itself is perfectly prepared, additional sauces are often merely supplementary. When your pulled pork comes fresh off the grill, infused with deep smoky flavor and incredible tenderness, it hardly needs any BBQ sauce. I encourage you to try a bite as is; you might be surprised!
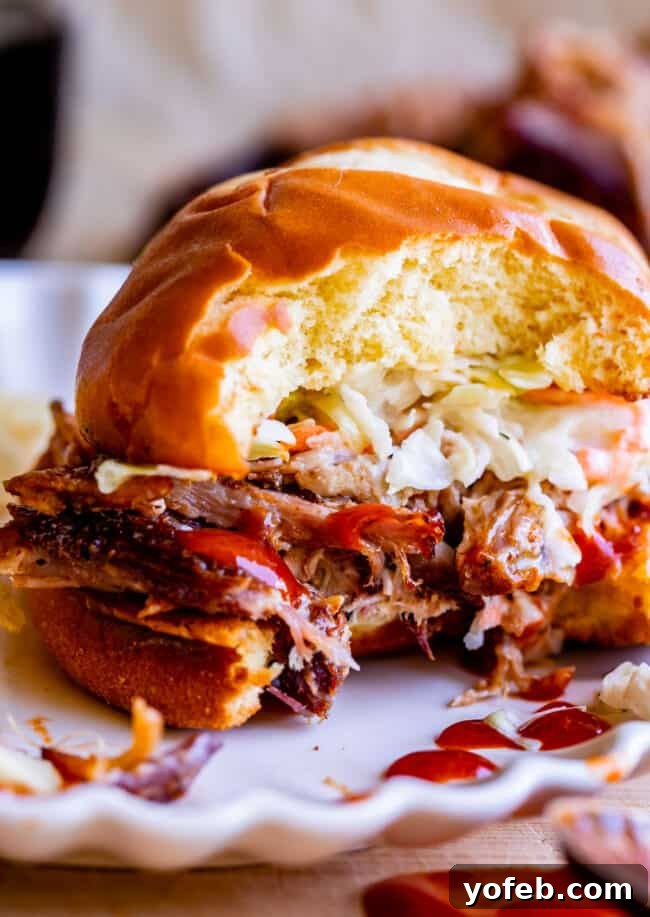
One of my favorite ways to enjoy it is simply as a pulled pork sandwich with just the meat and a generous pile of coleslaw. It’s absolutely divine. That being said, for many, sauce is still king. After shredding, you can toss your pulled pork with 1-2 cups of your favorite BBQ sauce, whether it’s homemade or store-bought. Sauce becomes particularly important for leftovers, as the meat tends to dry out slightly in the refrigerator after being pulled.
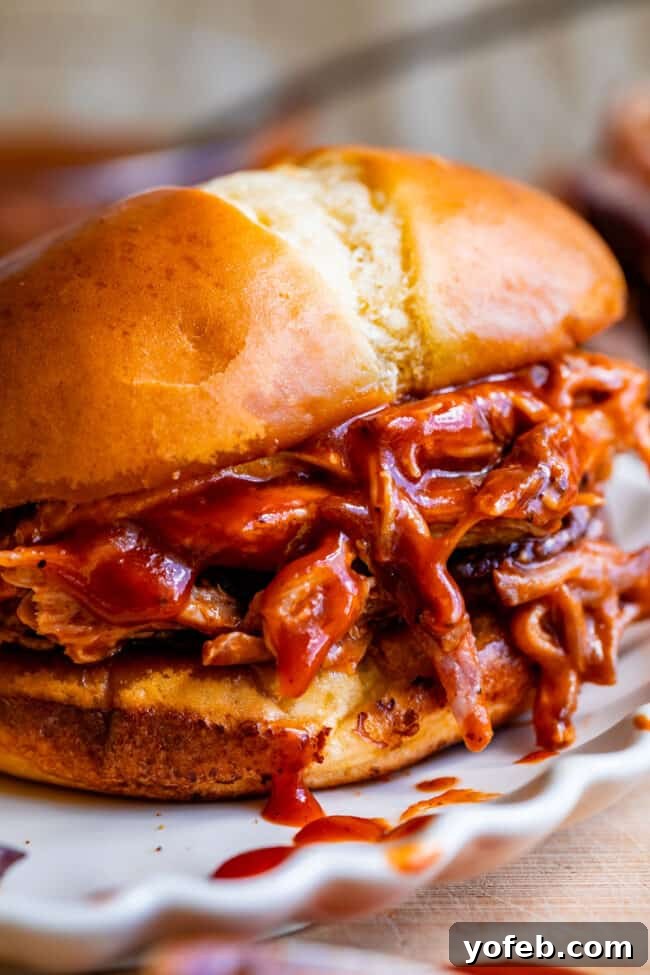
I’ve been tirelessly testing and refining my homemade BBQ sauce recipe, and I’m thrilled to announce it’s finally perfect and now live on the blog! In the meantime, if you’re opting for a store-bought option, I highly recommend Stubb’s Original. It boasts a smoky, black-pepper-forward, classic flavor profile that I worked hard to replicate in my own version. I experienced many culinary missteps that ended up down the drain during my testing, but Stubb’s is truly a legitimate and delicious alternative if you don’t have the time to whip up your own sauce.
Perfect Pairings: What to Serve with Smoked Pulled Pork
The versatility of smoked pulled pork allows for an array of fantastic side dishes. Here are some of my top recommendations, beyond the indispensable BBQ Sauce, to create a truly memorable meal:
- My Favorite Coleslaw: An absolute essential, bursting with fresh lemon and aromatic herbs.
- Easy Broccoli Bacon Salad: A timeless barbecue side dish, loaded with savory bacon goodness.
- The Only Macaroni Salad You Need: Creamy, tangy, and utterly delicious flavors you’ll adore.
- Italian Tortellini and Pepperoni Pasta Salad: A guaranteed crowd-pleaser with a zesty Italian twist.
- Bacon Baked Beans: Rich, smoky, and infused with the irresistible flavor of bacon.
- Santa Maria Pinquito Beans: These unique BBQ beans offer an incredibly smooth and distinct flavor profile.
- The Best Potato Salad Recipe: A classic comfort food, perfectly creamy with no unwanted crunch.
- Classic Deviled Eggs: A perennial favorite that always disappears quickly from any gathering.
- Literally the Best Mac & Cheese I’ve Ever Had: Mac and cheese with BBQ is a match made in culinary heaven.
- Pig Pickin Cake (Sunshine Cake): This light, refreshing tropical-flavored cake is a traditional favorite at pig roasts and perfectly complements any outdoor cookout!
- For even more inspiring ideas, explore my dedicated Labor Day/4th of July recipe section!
Storing and Reheating Pulled Pork BBQ
One of the many benefits of making a large batch of pulled pork is how easily it transforms into effortless leftover meals. To store, allow the meat to cool completely to room temperature. Then, transfer it to an airtight container and place it in the refrigerator. Properly stored, it will maintain its quality for 4-5 days.
To reheat a single serving, simply place some pork in a microwave-safe bowl, cover it, and microwave on 50% power for 1-2 minutes, or until thoroughly warmed through. For larger quantities, you can use the same microwave method for a longer duration, or gently reheat it in a covered pan on the stove over low heat with 1-2 tablespoons of water until warm. Alternatively, a slow cooker set to the “warm” setting can effectively reheat a large batch without drying it out.

Can You Freeze Pulled Pork?
Pulled pork is an excellent candidate for freezing, making it perfect for meal prep or having delicious barbecue on standby. Allow the pork to reach room temperature, then transfer it to a freezer-safe ziplock bag. Press out as much air as possible before sealing to prevent freezer burn. It will keep beautifully in the freezer for approximately 3-4 months. To reheat from frozen, simply defrost the bag on a plate in the refrigerator overnight. Once thawed, follow the reheating methods described above. You can freeze it with or without BBQ sauce mixed in, depending on your preference.
And there you have it, folks! I sincerely hope you enjoy creating and savoring this delicious smoked pulled pork on your gas grill. If a grill isn’t an option for you, remember that my Slow Cooker or Oven Pulled Pork recipe is also a fantastic and flavorful alternative. Happy cooking!
More Mouthwatering Summer Grill Recipes!
Barbecue on the grill truly embodies the spirit of summer. Don’t stop at pulled pork; expand your grilling repertoire with these other incredible recipes:
- Texas Beef Brisket In The Oven: This brisket uses a very similar low-and-slow process as our smoked pork, promising incredibly tender and smoky results that will bring tears of joy!
- Carne Asada Made with Juicy Skirt Steak + the BEST Mojo Marinade!: Tastes even better than your favorite restaurant’s version, packed with vibrant flavors.
- How to Cook Ribeye Steak (Grilled or Pan-Seared): Master the perfect ribeye, complete with fragrant garlic butter and rosemary.
- How to Cook Tri Tip Roast (Grilled or Oven-Roasted): If you’ve never experienced tri-tip, you’re missing out on a culinary delight.
- How to Cook Flank Steak (Grilled or Oven Broiled): Achieve flavorful, tender, and juicy flank steak every time.
- Nana’s Fall-Off-The-Bone Ribs and “Barb”-ecue Sauce: A cherished family favorite that starts in the oven and finishes beautifully on the grill.
- Grilled Lamb Skewers from Two Purple Figs: A delicious and elegant addition to any barbecue party.
- Easy BBQ Grilled Shrimp Skewers from Jennifer Cooks: Quick, easy, and bursting with barbecue flavor.
Facebook | Pinterest | Instagram

Smoking Pulled Pork
20 mins
6 hrs
6 hrs
12 hrs 20 mins
6
Print Recipe
This AMAZINGLY juicy and tender BBQ Smoked Pulled Pork is made on a GAS grill! Get that unique smoky flavor you love without investing in an actual smoker. It’s an easy recipe that is pretty hands-off. The flavor is legit. The meat just falls apart, and you get that crispy blackened edge that only comes from outdoor cooking!
Ingredients
For the Rub/Marinade
- 1 tablespoon kosher salt (use 2 and 1/2 teaspoons if using table salt)
- 2 teaspoons black pepper
- 1 tablespoon paprika
- 2 teaspoons garlic powder
- 2 teaspoons onion powder
- 1 teaspoon chili powder
- 1 teaspoon cayenne pepper
- 2 teaspoons cumin
- 1 teaspoon dry mustard powder
- 1/3 cup brown sugar, packed
Pork and Equipment
- 3 tablespoons olive oil, for rubbing on meat
- 5 to 7 pound pork butt or pork shoulder (leave the fat cap on)
- 4 cups hickory wood chips
- Heavy-duty tin foil OR a smoker box
- 2 disposable metal pie pans
- 6 cups water, for pie pans
- 1 (9×13 inch) disposable metal pan
- Meat thermometer (not optional!)
- At least half a tank of propane
- Oven/grill thermometer, for gauging temperature of the grill
To Serve
- Barbecue sauce, homemade or store-bought
- Brioche buns (if you’re making sandwiches)
- Butter, softened
- Coleslaw (my favorite recipe ever!)
Instructions
- Choose your pork. A pork shoulder is good, but a pork butt (sometimes called Boston Butt) is even better. Both are similar cuts from the pig’s shoulder and contain the necessary fat and connective tissues for tender, juicy pulled pork (butts typically have slightly more marbling). Opt for a bone-in butt or shoulder if available, as the bone adds flavor and helps with even cooking, though boneless works too. Select a cut that is well-marbled with visible white fat.
- Marinate with spice rub. In a small bowl, combine 1 tablespoon kosher salt, 2 teaspoons black pepper, 1 tablespoon paprika, 2 teaspoons garlic powder, 2 teaspoons onion powder, 1 teaspoon chili powder, 1 teaspoon cayenne pepper, 2 teaspoons cumin, 1 teaspoon dry mustard powder, and 1/3 cup packed brown sugar. Measure out 3 tablespoons of this spice mixture and set it aside in a small ziplock bag or covered bowl for later use.
- Use paper towels to thoroughly pat your pork dry. Massage 3 tablespoons of olive oil over the entire surface of the meat, ensuring it’s evenly distributed. Then, use your hands to firmly rub the remaining spices (all but the 3 tablespoons you set aside) into every nook, cranny, and flap of the pork. Place the rubbed pork in a large ziplock bag and seal tightly (these 2-gallon bags are ideal for large cuts).
- Marinate the pork in the refrigerator for a minimum of 6 hours, or for best results, up to 48 hours.
- Prepare for grilling. You need to set up your grill to accommodate the wood chips for smoking. You can either use a purchased smoker box or create your own using heavy-duty aluminum foil. Proceed with the instructions for your chosen method:
- Smoker box instructions: Fill your smoker box with about 4 cups of dry hickory wood chips, or as much as it can hold. Remove the grill grates from one side of your grill and place the smoker box directly on the primary burner. (You may need to remove the heat plate entirely from your grill for proper placement).
- Heavy-duty tin foil instructions: Take large sheets of heavy-duty foil and create two separate foil packets. Each packet should be filled with approximately 2 cups of dry wood chips and measure about 8×5 inches once folded. Ensure the foil is securely sealed and the chips haven’t punctured it. Cut a 2-inch slit on either side of the top of each packet to allow smoke to escape and oxygen to feed the chips. Place these foil packets on top of the grill grates over the primary burner.
- Once your smoker box or foil packets are in place, remove the grill grate on the opposite side. Fill two disposable metal pie plates with 3 cups of water each and place them either directly on the burner or on top of the heat plate. (This water helps to catch drippings, preventing flare-ups, and creates a moist environment for the pork.) Replace the grill grates on both sides of the grill. You should now have your smoker box or foil packets on one side (over direct heat), and the two pans of water on the other side, where your pork will be placed over indirect heat.
- Turn on all the burners. If using a smoker box, turn them to high heat. If using foil packets, turn them to medium heat. Close the lid and allow the grill to heat up for about 10-15 minutes. You should observe smoke beginning to emit from your wood chips. Your grill is now ready for the meat.
- Prepare the meat. Take your marinated pork out of the ziplock bag and pat it dry once more. Rub the remaining 3 tablespoons of reserved spice mixture thoroughly into the meat.
- Place the meat on the grill: Turn off the burners directly beneath the pans of water. Adjust the primary burners (where the smoke is generating) to medium or medium-low heat to achieve a consistent grill temperature of 300 degrees F. Ensure your grill grates are clean. Lightly oil the grill grates located over the water pans (a crumpled paper towel dipped in a small bowl of oil works well). Carefully place your pork on these oiled grates, with the fat cap facing up. Double-check that the two burners directly below the pork are OFF.
- Smoke the pork for about 1 hour, diligently maintaining a consistent grill temperature of approximately 300 degrees F. You will need to monitor and adjust the burners as necessary. This stage is crucial for infusing the initial smoke flavor. Use an oven thermometer placed inside your grill to accurately gauge the temperature if your grill lacks a reliable built-in thermometer. Regularly check that your wood chips are still actively smoking; if they stop, you can momentarily increase the heat on that side to reignite them, then return the heat to maintain 300 degrees F.
- Your initial batch of wood chips will likely smoke for about an hour. Once they stop producing smoke, you can remove them from the grill (allowing them to cool completely before discarding). If you desire a very intense smoky flavor, you can prepare two more foil packets (or refill your smoker box) and repeat the smoking process. (I found excellent results without repeating the smoke, as meat absorbs most smoke flavor early in cooking.) At this point, carefully transfer the pork to a disposable 9×13 inch pan. This step is to collect all the delicious, smoky juices that will render from the pork. Return the pan to the same spot on the grill, positioned over the water pans and indirect heat.
- Continue grilling for another 4 to 7 hours, constantly maintaining a grill temperature of approximately 300 degrees F (adjusting as needed!). The pork is done when its internal temperature reaches between 195 and 200 degrees F. (An internal temperature below 195 F will result in tough pork; much higher than 200 F, and your pork will begin to dry out.)
- Remove the pan from the grill and let the pork rest, tented loosely with foil, for about 20 minutes. This allows the juices to redistribute, ensuring maximum moisture and tenderness. Transfer the pork to a cutting board. Pour any accumulated pan juices into a fat separator.
- Shred the pork using two forks. It should be incredibly tender and fall apart effortlessly. Remove any gristle or tough connective tissue, but please, do not discard all the fat! Shred the flavorful fat and toss it in with the meat. Remember, fat equals flavor, and the slow-cooked fat is a key component of what makes pulled pork so amazing. Pour some of the delicious, smoky pan juices back into the shredded meat for added moisture, but not all of it. Avoid drowning your pork, as this can soften the crispy “bark” you worked hard to develop.
- Serve the pulled pork as is. I genuinely believe it needs no sauce when fresh off the grill. However, a fantastic homemade BBQ sauce is always a welcome addition. (For an extra boost of flavor, stir in some of the reserved smoky pan juices into your BBQ sauce.) Toss about 1 to 2 cups of your chosen barbecue sauce with the pulled pork and serve warm.
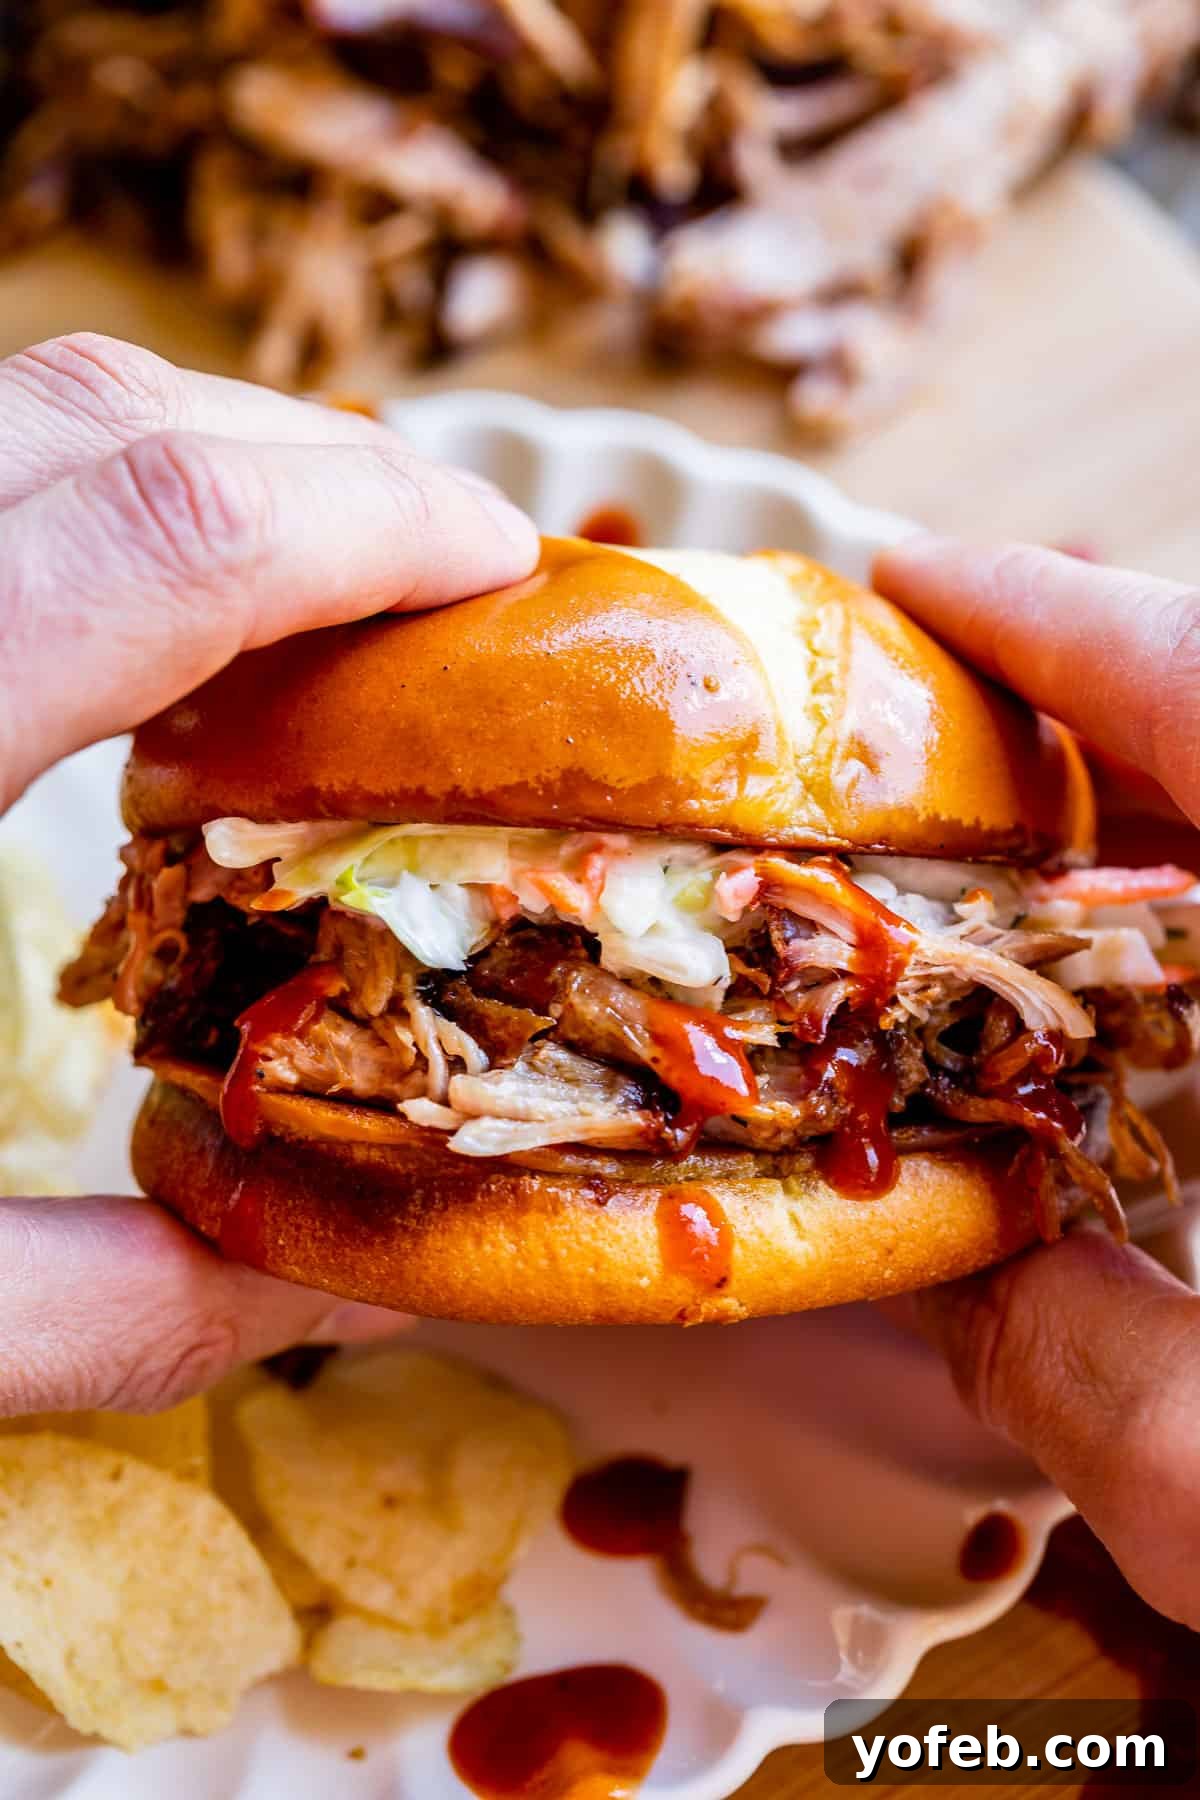
- Make a sandwich: For the ultimate pulled pork sandwich, butter both sides of a brioche bun. Heat another tablespoon of butter in a pan over medium heat on your stove. Toast the buttered buns for 2-4 minutes until they are lightly golden and warmed through.
- Pile a generous amount of shredded pork onto your toasted bun. Add BBQ sauce if desired. For a truly irresistible experience, top with an unreasonable amount of tangy lemony herb coleslaw. Finish with the top of your toasty brioche bun and devour enthusiastically! If you’re not getting deliciously messy while eating this, you’re not doing it right.
- Store leftovers in an airtight container in the refrigerator. Leftovers may dry out slightly over time, so adding BBQ sauce becomes even more important for reheating. It will keep well for 4-5 days.
- Pulled pork freezes beautifully. Seal it in a ziplock bag (you can mix in BBQ sauce beforehand or freeze it plain) with as much air removed as possible. It will remain fresh in the freezer for up to 3-4 months. To reheat, thaw the bag in the refrigerator overnight. Once thawed, follow the reheating methods described above, adjusting heating time based on the quantity.
Notes
Remember to start grilling your pork well in advance of your event! It’s much easier to reheat fully cooked pulled pork than to try and rush the cooking process if you’re running behind. Plan ahead to avoid stress!
If you don’t have a grill, try this pulled pork recipe made in the slow cooker or oven! It uses the same delicious ingredient list but offers alternative, simpler cooking methods.
Nutrition
Did you make this? I’d love to see it!
Mention @thefoodcharlatan or tag #thefoodcharlatan!