
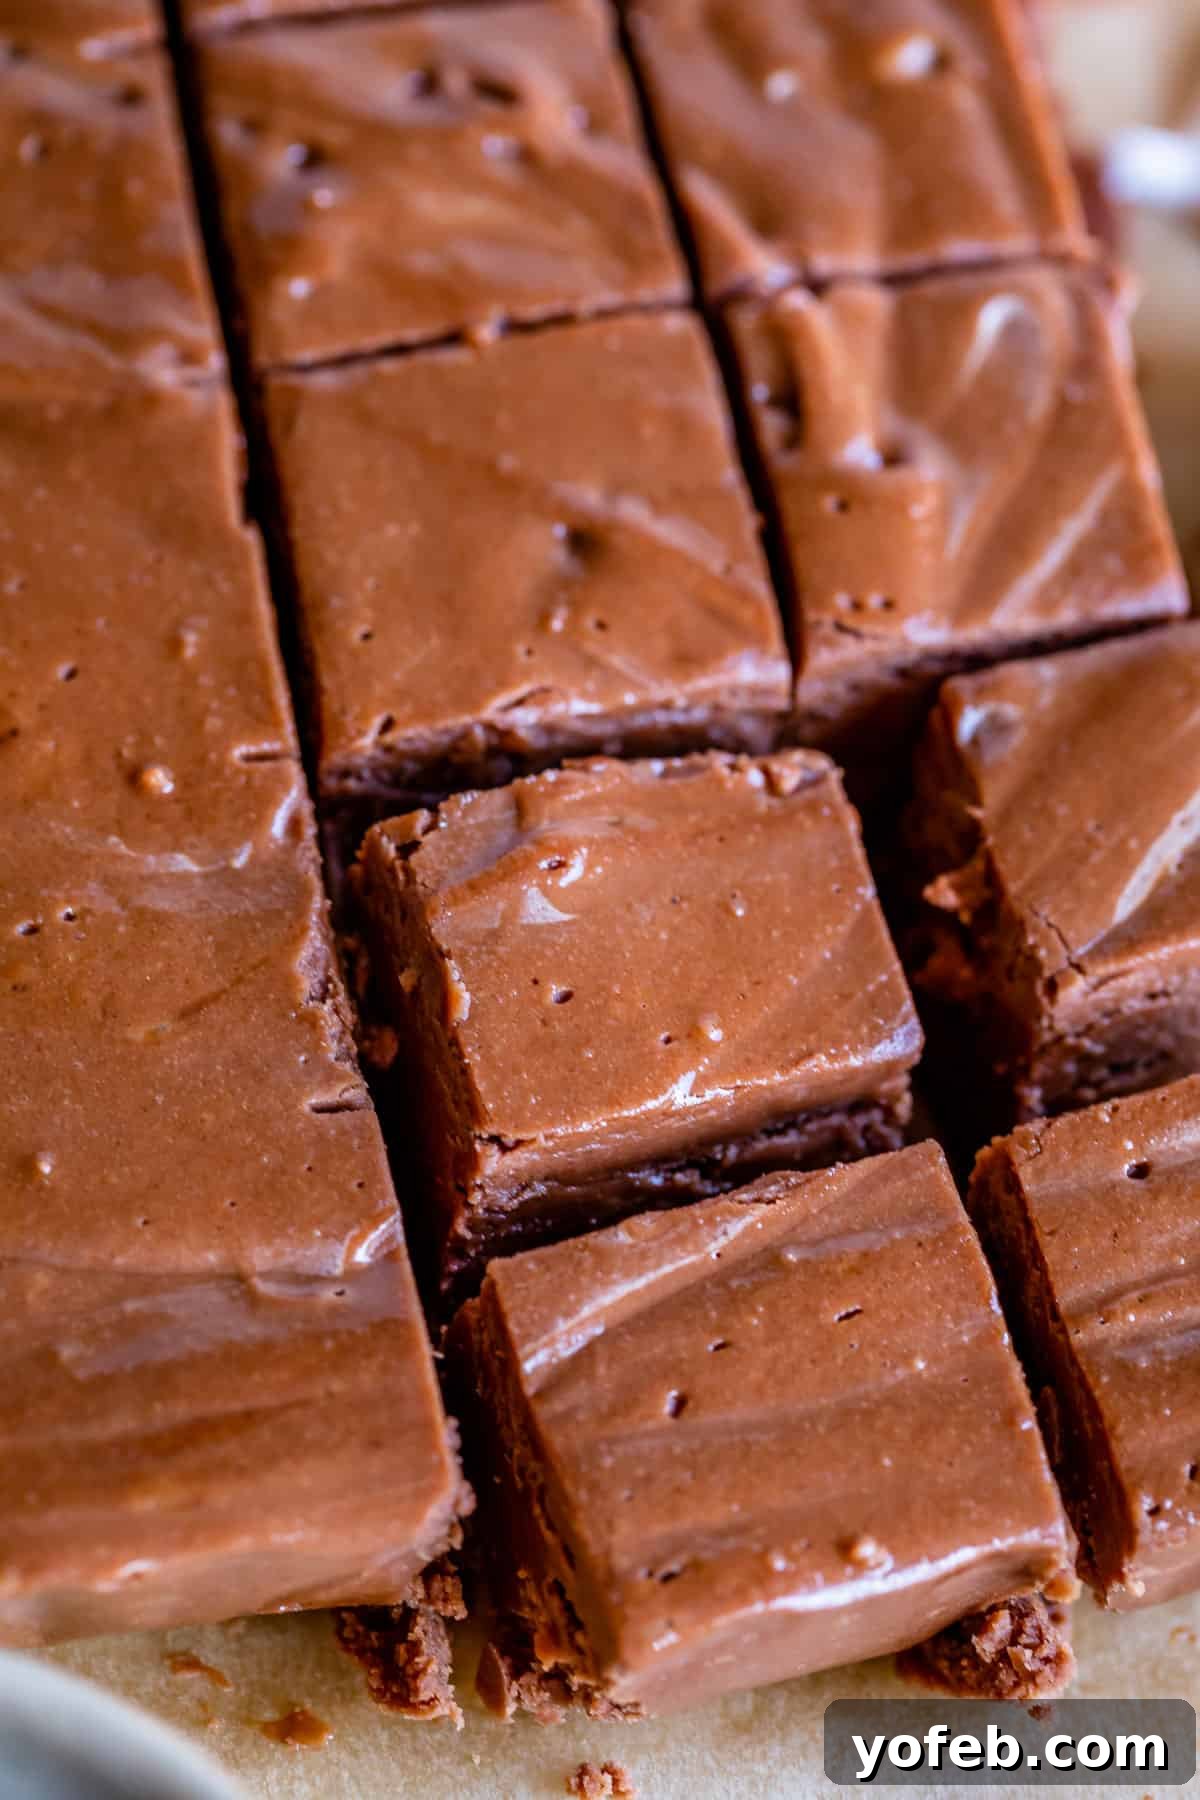
Welcome, fellow chocolate enthusiasts, to the ultimate guide for crafting the most heavenly, melt-in-your-mouth marshmallow fluff fudge! This isn’t just a recipe; it’s an invitation to a world of smooth, creamy, and undeniably decadent chocolate perfection that promises an experience so delightful, you’ll find it impossible to stop at just one piece. Prepare to master this simple fudge recipe with confidence, as I’m about to reveal every secret and precise step to ensure your success, even if you’re a complete novice in the kitchen. This beloved recipe, originally shared in December 2012, has stood the test of time, becoming a cherished classic for countless families, including my own.
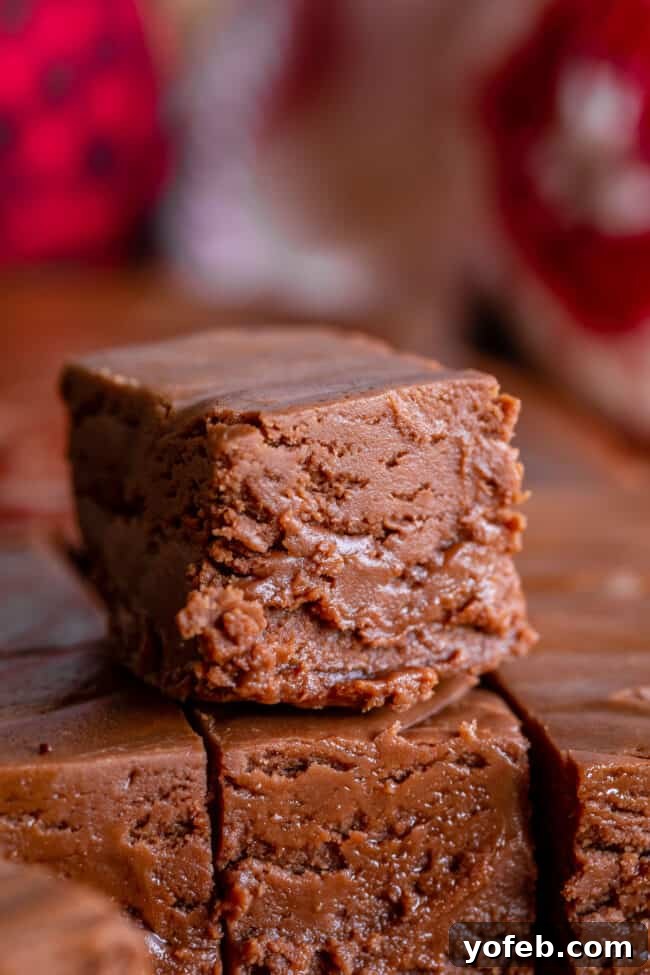
Table of Contents
- The Legendary No-Fuss Chocolate Fudge Recipe
- Essential Ingredients for Perfect Fudge
- Smart Substitutions and What to Avoid
- Top Tips for Fudge-Making Success
- Step-by-Step: How to Make the Best Fudge
- Frequently Asked Questions About Homemade Fudge
- How to Store and Preserve Your Delicious Fudge
- Indulge in the Magic of Homemade Fudge
- More Irresistible Holiday Treats to Explore
- Mom’s Marshmallow Fudge (Full Recipe Card)
- Additional Christmas Recipes You Will Adore!
The Legendary No-Fuss Chocolate Fudge Recipe
For many families, the arrival of the holiday season sparks traditions of baking specific treats. Some households swear by the aroma of fresh cinnamon rolls, while others anticipate the crunch of toffee or a medley of candies. My husband Eric’s family fills their homes with cookies. But for my family, growing up, Christmas meant one thing above all else: Mom’s incredibly simple, yet utterly divine, chocolate fudge.
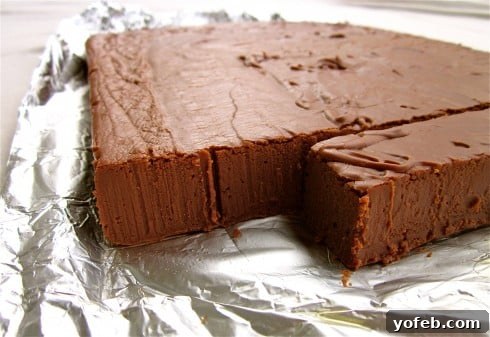
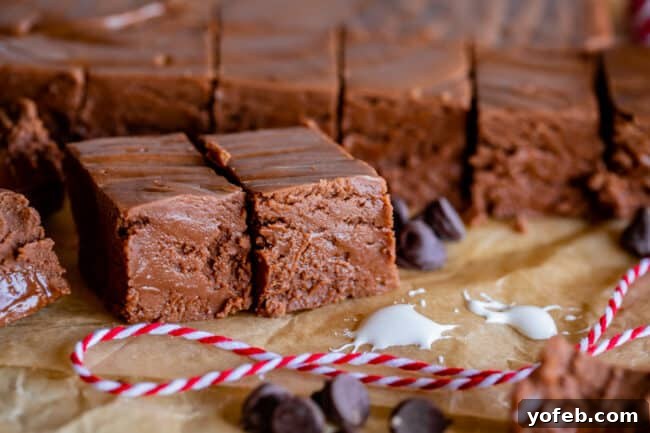
This isn’t just any fudge; it’s a direct, no-nonsense chocolate fudge. In fact, this was one of the very first recipes I ever shared on this blog back in 2012! By “no-nonsense,” I mean we skip all the embellishments – no nuts, no peanut butter swirls, no peppermint candy canes, no fancy layers. It’s simply pure, semi-sweet chocolate goodness that truly melts in your mouth. While I appreciate a creative fudge variation, there are times when nothing quite measures up to the timeless perfection of a classic. This fudge is precisely that – a pure, unadulterated chocolate experience for the purist at heart.
Every December, this fudge became a central family activity. We’d all gather around the stove, anxiously watching the stirrer (usually Mom), offering unsolicited advice and making sure no critical step was overlooked. The moment she poured the warm, glossy fudge into the pan, our non-subtle comments about leaving a bit extra for us to “clean” the pot would begin. It was a cherished ritual, a sweet prelude to the holiday feasts.
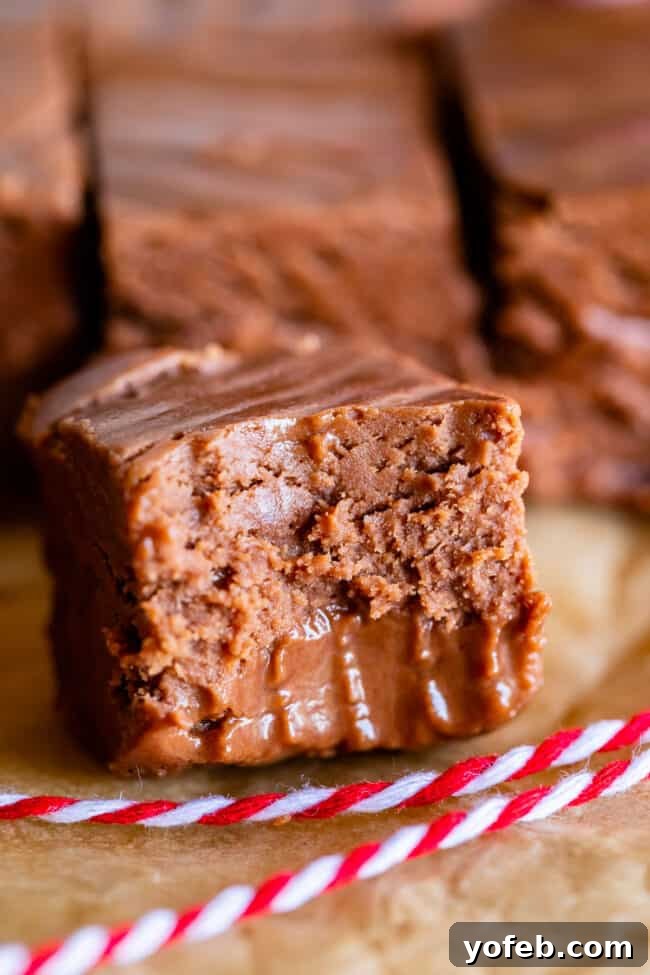
Mom, knowing our impatience, would often pour a small amount into a separate bowl, ostensibly so it would set faster for us. Of course, we never waited. Have you ever tasted warm, freshly made fudge? It’s an experience in itself! My sister, Nikki, was famously known for her ability to devour an entire batch within a 12-hour window. It was that irresistible.
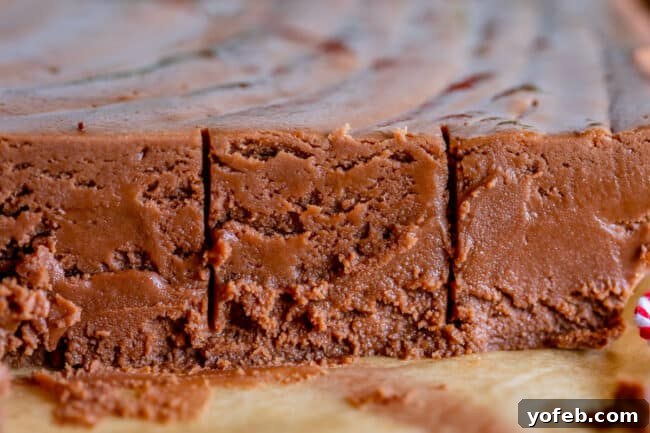
Most of the time, this delicious fudge was destined for friends and neighbors, a perfect way to spread holiday cheer. However, one year, our good intentions backfired. We left a plate of fudge on a friend’s doorstep, expecting them home within hours. They returned from vacation a week later to find an entire ant colony enjoying our Christmas gift. Nothing quite says “Merry Christmas” like an unexpected pest infestation! Lesson learned: ensure your recipients are actually home.
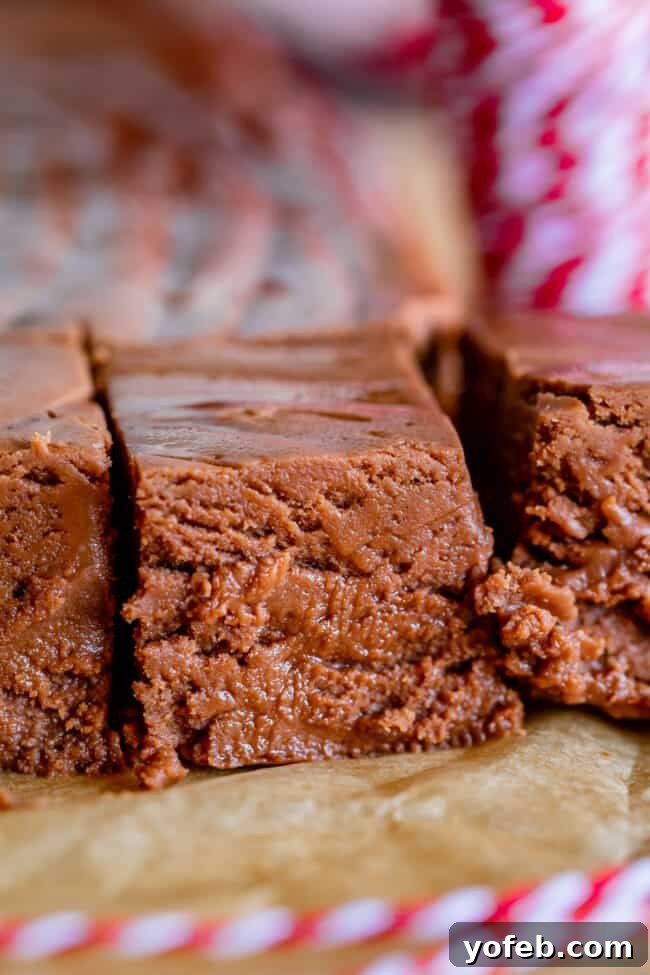
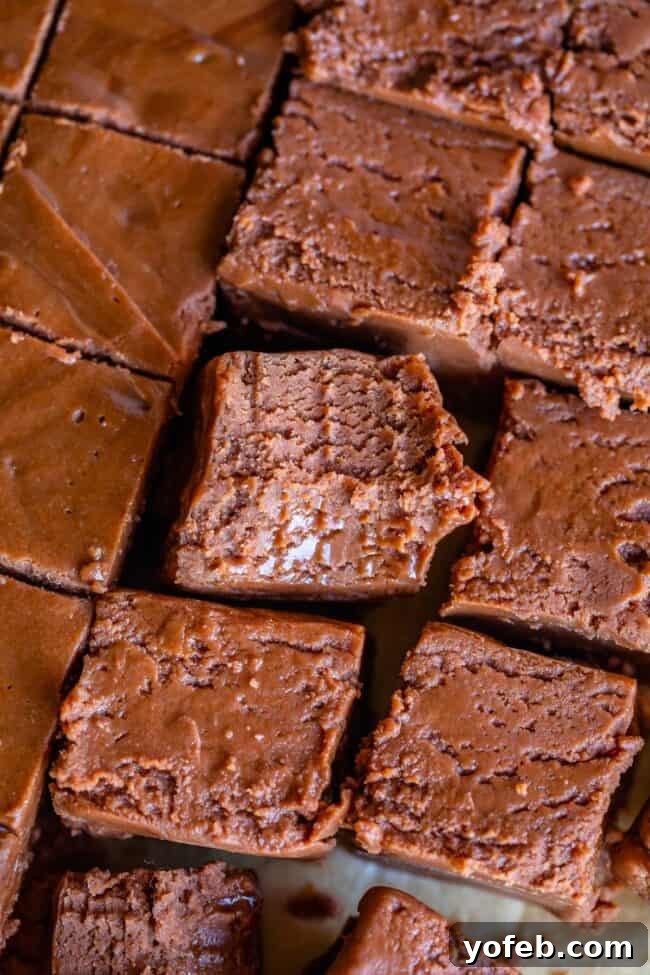
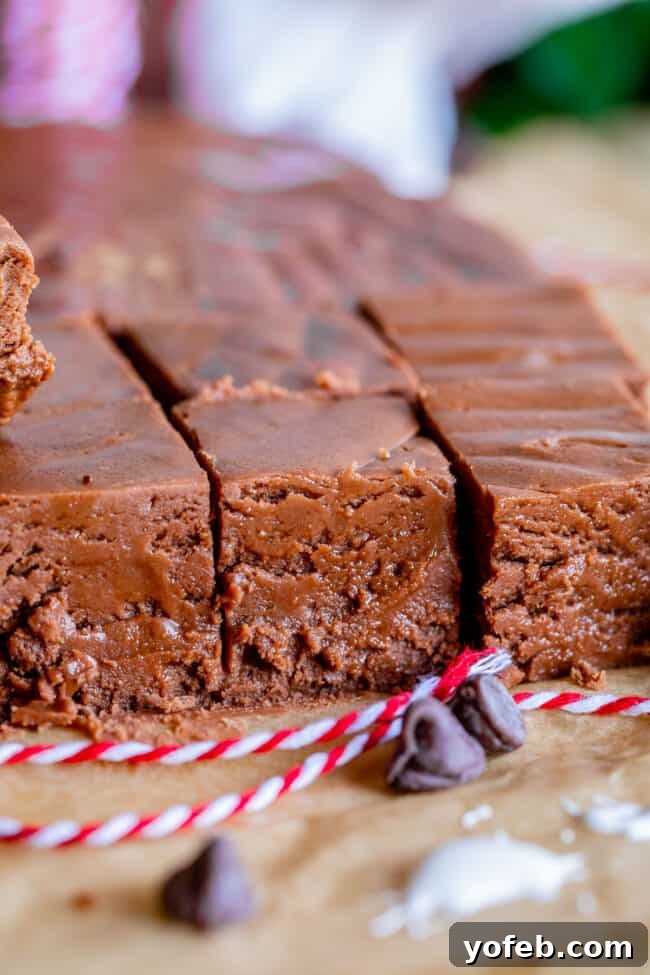
But let’s not dwell on that incident. Instead, envision dreamy, creamy, perfectly textured fudge – not too soft, not too dry, and never crunchy. Just pure, beautiful chocolate bliss. And the best part? You can make this magic happen in about 15 minutes of active cooking time. It’s almost unbelievably quick for such a decadent treat.
I am about to share a wealth of detailed instructions for this recipe. While fudge making might seem straightforward, it is still a form of candy making, and precision is key. Ignoring the small details can easily lead to a less-than-perfect result. You might think I’m overly meticulous, but I’m simply being thorough because I want you to succeed! Over the past decade, hundreds of glowing reviews have poured in for this recipe, but I’ve also seen comments from disheartened bakers who ended up with sad, dry, or crumbly fudge. My mission is to ensure that doesn’t happen to you!
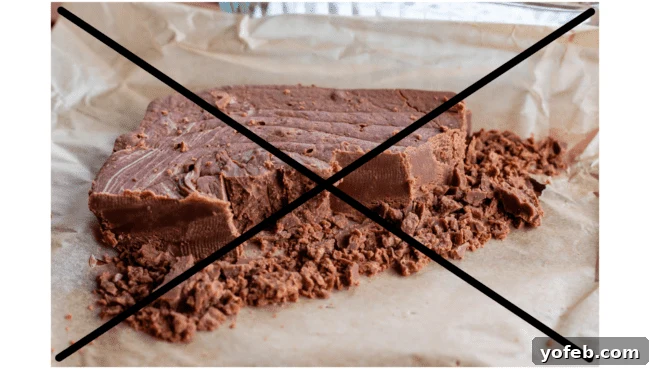
This crumbly, dry mess is the unfortunate outcome when you don’t meticulously follow your own “nit-picky” fudge instructions – perhaps because you were too busy capturing a hundred process shots for a blog post. Don’t make my mistakes! Take your time, pay attention, and your fudge will be perfect.
What is Fudge? A Sweet Symphony of Sugar and Chocolate
Fudge, in its essence, is a confectionery dream come true. It’s a soft, tender American chocolate candy that typically begins with a careful cooking of sugar, butter, and milk, culminating in the addition of chocolate and vanilla. My mom’s rendition of this classic, inspired by the timeless Kraft recipe, elevates the experience by incorporating marshmallow creme, resulting in the dreamiest, silkiest fudge you’ll ever taste. Fudge is traditionally portioned into small (or, if you’re like my family, sometimes rather large) squares, making it a beloved treat. You often find it sold by the pound in charming small towns with quaint storefronts, usually at a price that can feel quite hefty. The good news is, with just a few simple ingredients, you can easily replicate this delightful delicacy right in your own kitchen.
The Curious Origin: Why is Fudge Called Fudge?
The exact etymology of “fudge” in the context of this sweet treat remains a bit of a mystery, but popular legend offers a charming explanation. “Fudge” is also an informal term meaning to “mess up” or “botch.” The story goes that in the late 19th century, someone attempting to make caramels “fudged” the batch, accidentally creating a softer, richer, and equally delicious sweet confection instead. What started as an error evolved into a beloved candy that we now deliberately create. It’s a bit like the accidental discovery of penicillin, though perhaps with slightly less significant health benefits!
Essential Ingredients for Perfect Fudge
Alright, let’s get down to the nitty-gritty: the ingredients. First and foremost, the secret to the best fudge truly begins with **high-quality ingredients**! I cannot emphasize this enough. While many recipes casually mention this, it is an absolute game-changer for candy making. This isn’t a dish where you can cut corners on quality. If you start with inferior ingredients, your fudge might not even set correctly, or it could end up with a grainy, unappetizing texture. Below is an overview of what you’ll need; precise quantities are detailed in the recipe card at the end of this post.
- Butter: I consistently use salted butter for its nuanced flavor, but unsalted butter works perfectly fine too. Ensure it’s real butter, not margarine, for the best texture and taste.
- Granulated Sugar: Standard white granulated sugar is what we’re looking for here.
- Evaporated Milk: This is crucial. Seek out the full-fat variety, found in a can in the baking aisle. This is definitely not the place for diet versions!
- Vanilla Extract: Pure vanilla extract will impart the best flavor.
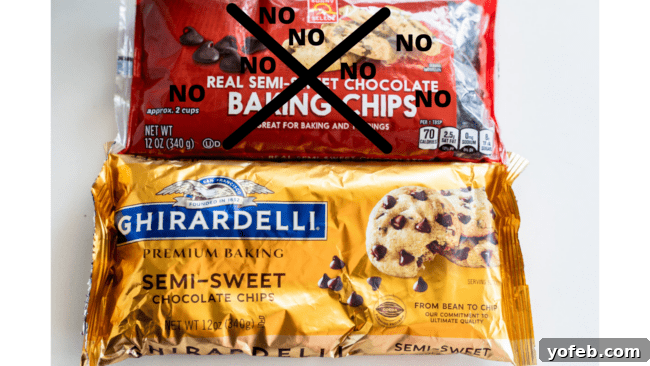
- Semi-Sweet Chocolate Chips: This is arguably the most critical ingredient. Invest in the best brand you can afford. My top recommendations are Ghirardelli or Guittard for their superior melting properties and rich flavor. Nestle can work in a pinch, but absolutely steer clear of generic or “baking chips” from brands like Walmart’s Great Value. Low-quality chocolate will not melt smoothly, leading to an inconsistent, chunky fudge.
- Marshmallow Creme (or Marshmallow Fluff): This sweet, sticky substance is key to the fudge’s dreamy, smooth texture. You’ll find it in a tub, also in the baking aisle. It’s different from regular marshmallows, and we’ll discuss why below.
Smart Substitutions and What to Avoid
Can I use sweetened condensed milk instead of evaporated milk?
A firm NO! These two ingredients are fundamentally different and are not interchangeable in any recipe, especially in candy making. Evaporated milk is unsweetened, concentrated milk, while sweetened condensed milk is very sweet and much thicker. Using condensed milk will result in a cloyingly sweet and often unset fudge. Please, for the sake of your fudge, do not swap them!
Can you use regular marshmallows instead of marshmallow fluff for this simple fudge recipe?
Ah, I see your attempt at a shortcut! While the thought of using regular marshmallows instead of marshmallow creme is tempting, I generally advise against it unless you are truly in a bind. Marshmallow creme is specifically designed for its smooth, gooey consistency, which contributes directly to the silky texture of this fudge.
Regular marshmallows, on the other hand, are typically coated in cornstarch to prevent them from sticking together in the bag. When introduced into fudge, this cornstarch can dry out the mixture, leading to a less smooth, slightly grainy, and tougher fudge texture. The older your marshmallows are, the more pronounced this drying effect will be. So, while it might work in an emergency, it won’t yield the same superior result. My strongest recommendation is to make the trip to the store and get genuine marshmallow creme if at all possible.
If you absolutely must use marshmallows, it’s best to be precise with your measurements. A 7-ounce tub of marshmallow creme is roughly equivalent to 4 cups of mini marshmallows or about 40 large marshmallows. For accuracy, it’s always best to use a kitchen scale to weigh out 7 ounces of marshmallows, rather than relying on volume measurements, as their density can vary.
Top Tips for Fudge-Making Success: Your No-Fail Cheat Sheet
Making outstanding fudge boils down to a few fundamental principles. These are the core guidelines you need to follow for a truly impressive result. We’ll delve into much more detail below, but consider these your essential, quick-reference tips:
- Mise en Place is Your Best Friend: Ensure all your ingredients are meticulously measured out and ready to go *before* you even turn on the stove. Fudge moves quickly, and you won’t have time to scramble for ingredients mid-process.
- Quality Chocolate Matters: Do not skimp on your chocolate chips. High-quality semi-sweet chocolate is critical for a smooth, lump-free, and rich-tasting fudge.
- Marshmallow Creme, Not Marshmallows: Stick to marshmallow creme for the ideal texture. Regular marshmallows, with their cornstarch coating, can lead to dry, grainy fudge.
- Invest in a Heavy-Bottom Pot: This is more important than you might think! A heavy-bottomed, 3-quart saucepan distributes heat evenly, preventing scorching and ensuring a consistent cook.
- Prepare Your Pan with Parchment Paper: Lining your pan makes for effortlessly clean slicing and easy removal of the entire fudge block.
- Guard Against Sugar Crystals: Be diligent about keeping sugar crystals from clinging to the sides of the pan or your stirring spoon. These rogue crystals are the primary culprits behind grainy fudge.
- Consistent Stirring and Temperature Control: Stir gently but constantly during the boiling phase, aiming for 5 minutes of a full rolling boil, or until a candy thermometer reads 234-236 degrees F (112-113 degrees C).
- Strategic Pouring: When transferring the fudge to the pan, pour the smooth liquid fudge from the center, and resist the urge to scrape the very edges of the pot. Those bits can be drier and compromise the final texture.
Step-by-Step: How to Make the Best Fudge (A Detailed Guide)
Making perfect fudge requires attention to detail and a methodical approach. Remember, fudge moves fast, so preparation is paramount. Let’s walk through each step to ensure your success.
Step 1: The Art of Preparation (Mise en Place)
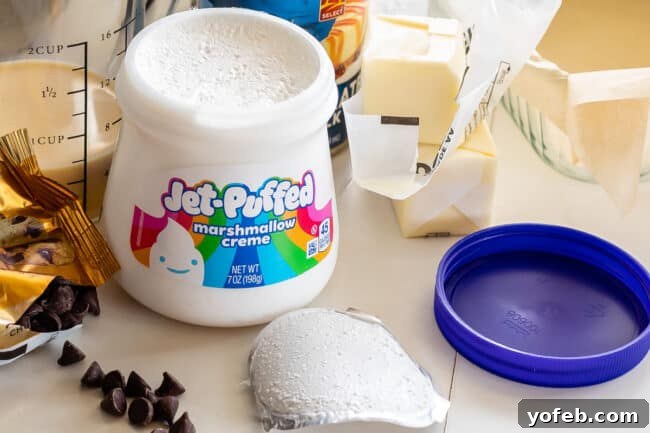
First, have EVERYTHING completely measured out and ready to go *before* you even ignite your burner. This isn’t just a suggestion; it’s a non-negotiable step for fudge-making. You might look at the initial photo and think, “That looks ready!” But it’s not quite there.
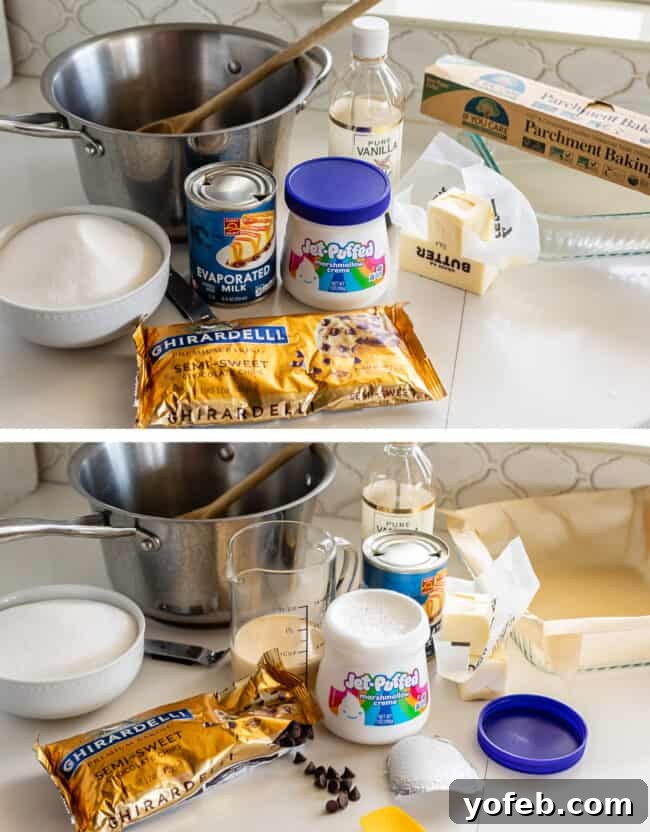
In a truly “ready” state, you’ve peeled off the foil top of your marshmallow creme container. You’ve precisely measured out the 2/3 cup of evaporated milk. Your baking pan is lined with parchment paper. You might even have your chocolate chip bag already open (okay, perhaps you can skip the artful spilling!). I know I sound insistent, but trust me, once the cooking starts, there will be no time for these preparatory tasks. Total readiness ensures a smooth process.
Step 2: Choosing Your Chocolate Wisely
Let’s talk about chocolate – specifically, what *not* to buy. Observe the red package in the image; it labels its contents as “baking chips.” Guys, please, do not use these. If you opt for low-quality chocolate, the chips often won’t melt completely, leaving you with unpleasant chocolate chunks in what should be incredibly smooth, dreamy, creamy fudge. My sister once made this mistake, and when someone inquired if it was “chocolate chip fudge,” she sheepishly said yes! Let’s aspire for better. Always use the highest quality semi-sweet chocolate chips you can find. Ghirardelli, Guittard, and Lindt are excellent brands that will guarantee a perfectly melted, smooth result.
Step 3: The Right Pot Makes All the Difference
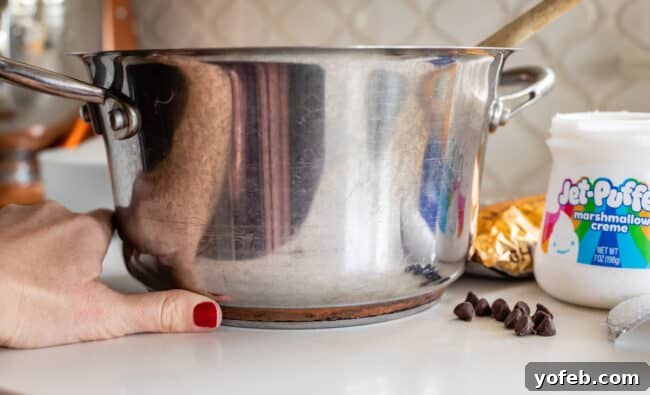
Next, let’s discuss your cookware. Yes, this truly matters! You need a heavy, 3-quart saucepan. When you pick it up, it should feel substantial – give it a little swing to test its weight! These are often referred to as “heavy-bottomed pans.” Notice how thick the bottom of the pan is compared to its sides? This design is crucial.
A thin, cheap pan will heat your fudge mixture unevenly, creating “hot spots” that can easily scald the sugar. This scorching is a direct path to dry, crumbly, and ultimately disappointing fudge. The quality of your pan can genuinely be the deciding factor between perfectly smooth fudge and a complete failure. Trust me on this essential detail!
Step 4: Marshmallow Creme and Evaporated Milk Prep
Continuing our prep: take a moment to completely remove the foil seal from your marshmallow creme jar. These seals can sometimes be stubborn, requiring both hands, which you won’t have available later. I personally prefer Kraft Jet-Puffed, primarily for its ease of opening, though generic brands also yield excellent results. Since we’ll be briefly microwaving the marshmallow creme later, ensure absolutely *all* foil bits are removed. Go ahead and place the tub in the microwave now, ready for its quick warm-up.
Next, open your can of full-fat evaporated milk and measure out precisely 2/3 cup into a liquid measuring cup. Have your vanilla extract nearby with a teaspoon ready. All these ingredients should be within arm’s reach of your stove. Once fudge making commences, you cannot step away! Prepare to enlist help or shout instructions if the doorbell rings or any other distraction arises – I’ve done my fair share of “fudge-hollerin'” to keep the process on track.
Step 5: Preparing Your Baking Pan
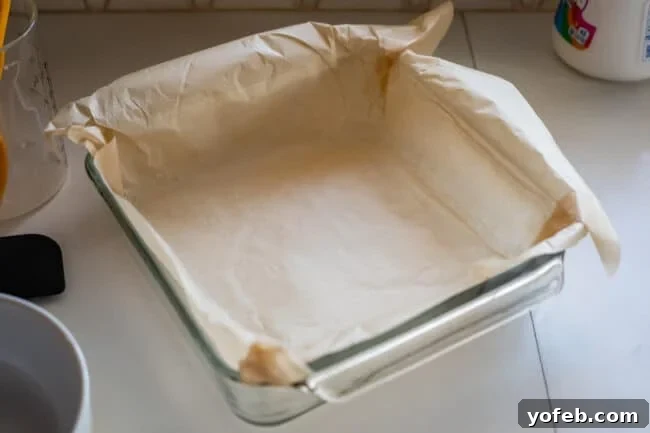
One final, crucial prep step: line your 8×8 or 9×9 inch baking pan with parchment paper before you begin cooking. Fold the corners neatly to create a snug fit. While you can pour the fudge directly into an unlined pan, using parchment makes lifting out the entire block and cutting clean slices significantly easier. If your plan is to devour the entire batch row by row, slicing off small pieces for yourself every time you pass through the kitchen (and no judgment here!), then you can certainly skip the parchment. There’s no need to spray the pan with cooking spray when using parchment.
Whew! Now that all our meticulous preparation is complete, we can finally move on to the exciting part: actually making the fudge!
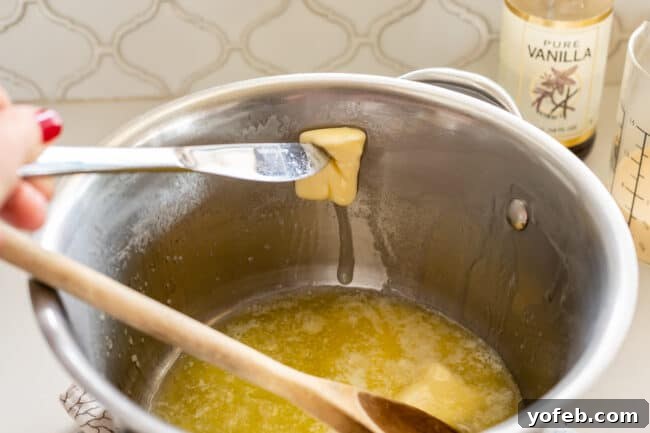
- Melt the Butter and Coat the Pot: Begin by adding the butter to your heavy-bottomed saucepan. Melt it over medium heat. As the butter melts, use a spoon or knife to meticulously coat the inside edges of the pan, all the way to the top, with the melting butter. This creates a barrier that helps prevent sugar crystals from forming on the sides of the pan, which is vital for smooth fudge.
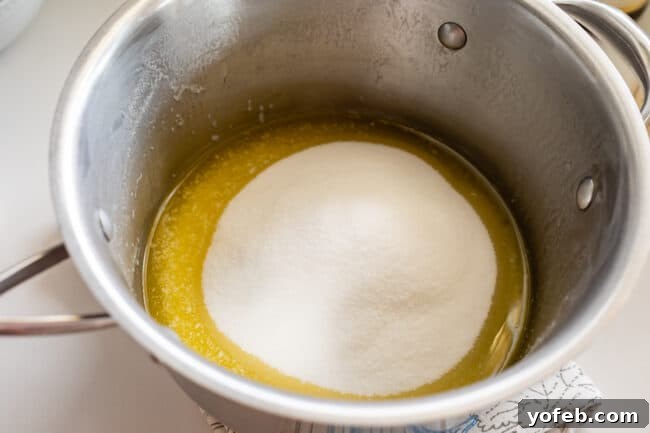
2. Add Sugar Carefully: Once the butter is mostly melted, slowly and gently pour the granulated sugar into the *center* of the pan. Exercise extreme caution to avoid getting any sugar crystals on the sides of the pan. Using a long wooden spoon, carefully draw the melted butter in from the edges towards the sugar in the center, slowly moistening all the sugar. The goal here is to dissolve the sugar evenly without creating any rogue crystals on the pan’s edges.
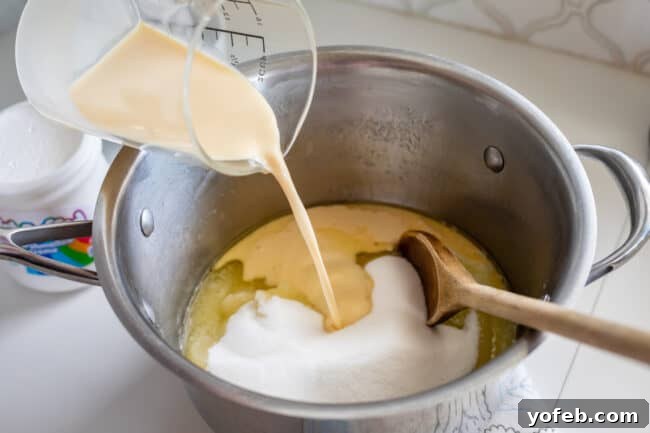
3. Incorporate Evaporated Milk: Now, add the measured evaporated milk to the mixture. Increase the heat to medium-high. Stir the mixture gently but thoroughly to ensure everything is evenly combined, but continue to avoid scraping the sides of the pan with your spoon. This prevents any undissolved sugar crystals from being incorporated later.
4. Achieve a Full Rolling Boil: Bring your butter-sugar-evaporated milk mixture to a full, vigorous rolling boil. What exactly is a “rolling boil”? It means that bubbles are actively and continuously rising from the *center* of the pan, not just simmering around the edges. You should see robust bubbling even when you briefly stir or swipe your spoon across the bottom of the pan. Stir gently and constantly during this process. Don’t stop!
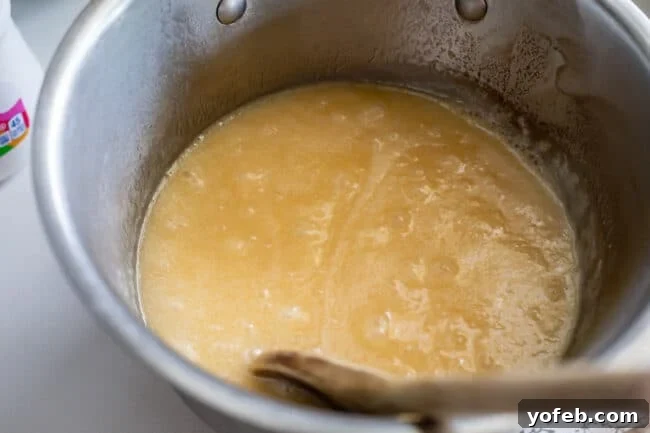
5. Boil for Precisely 5 Minutes (or to Temperature): Immediately upon reaching a full rolling boil, set a timer for precisely 5 minutes. Reduce the heat to medium to maintain the boil without scorching the mixture or risking burns. The mixture must maintain a consistent boil for the entire 5 minutes. If the boil diminishes or starts to die down, slightly increase the heat. Continue stirring gently and constantly throughout this period. Your arm might feel tired, and your hand might get warm, but this constant agitation is crucial for the correct fudge texture. Think of it as a calorie-burning bonus before you enjoy your delicious treat!
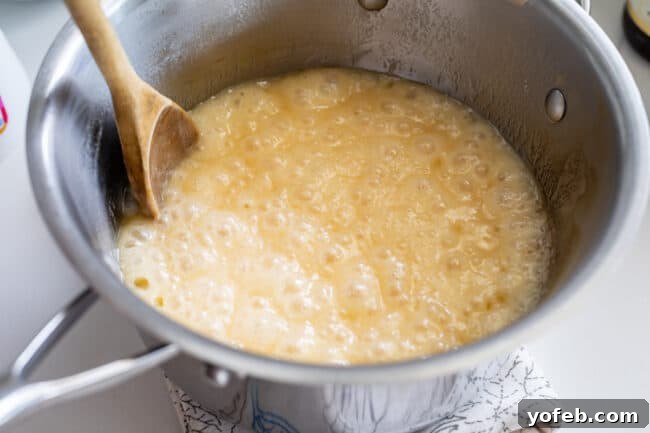
After 5 minutes, the mixture will appear lighter in color and noticeably foamier. Another reliable way to verify doneness is by using a candy thermometer. The target temperature range is 234-236ºF (112-113ºC), which is considered the “soft-ball stage.” While my mom (and often I) skip the thermometer for this forgiving recipe, it’s an excellent tool if you’re feeling nervous. Be careful not to cook it past 236ºF, as higher temperatures will result in dry, crumbly fudge. The final seconds before the timer goes off are critical – be ready, as the next steps happen very quickly!
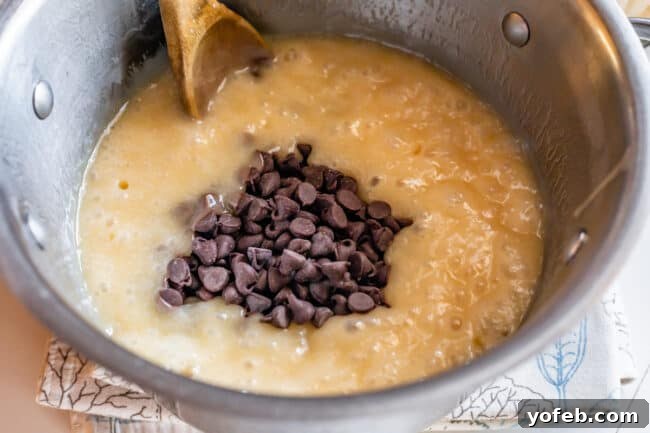
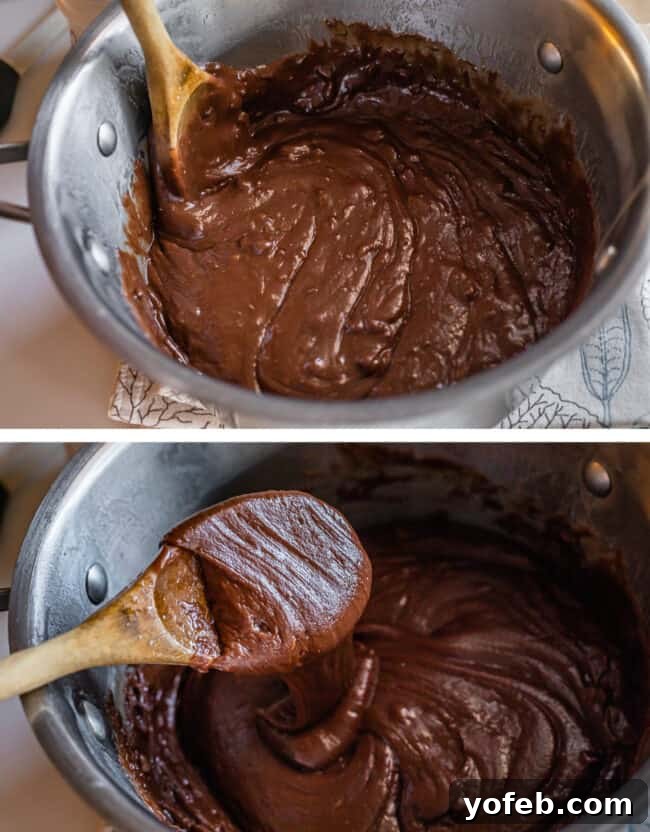
6. Add Chocolate Chips and Stir Until Smooth: The moment the timer rings, turn off the burner and immediately remove the pot from the heat. Without delay, add all the chocolate chips at once. Stir vigorously with your wooden spoon until *all* the chocolate chips are completely melted and the mixture is perfectly smooth. Any unmelted chunks at this stage will unfortunately translate into chunks in your finished fudge, so be diligent in achieving a silky consistency.
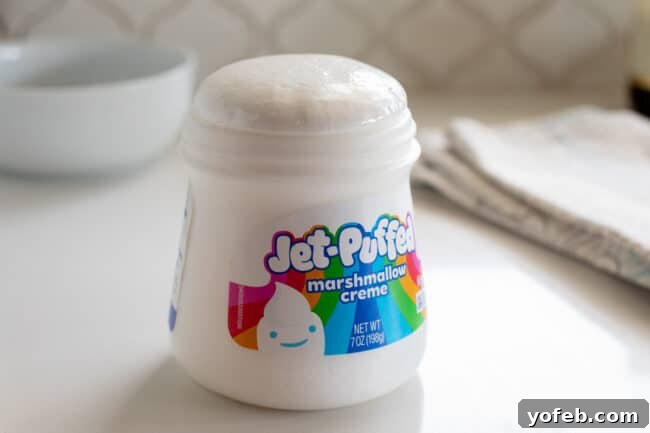
7. Prepare and Incorporate Marshmallow Creme: Now, for the marshmallow creme. Place its tub (with the foil seal completely removed!) in the microwave for about 10-15 seconds. Watch it closely; you want it to puff up slightly, just a bit over the lip of the container. This quick microwave step makes scooping the marshmallow creme out of the jar significantly easier and faster, saving you from a sticky struggle. Add all the warmed marshmallow creme to the chocolate mixture and beat with your wooden spoon until it’s mostly incorporated. Don’t worry about perfect blending just yet.
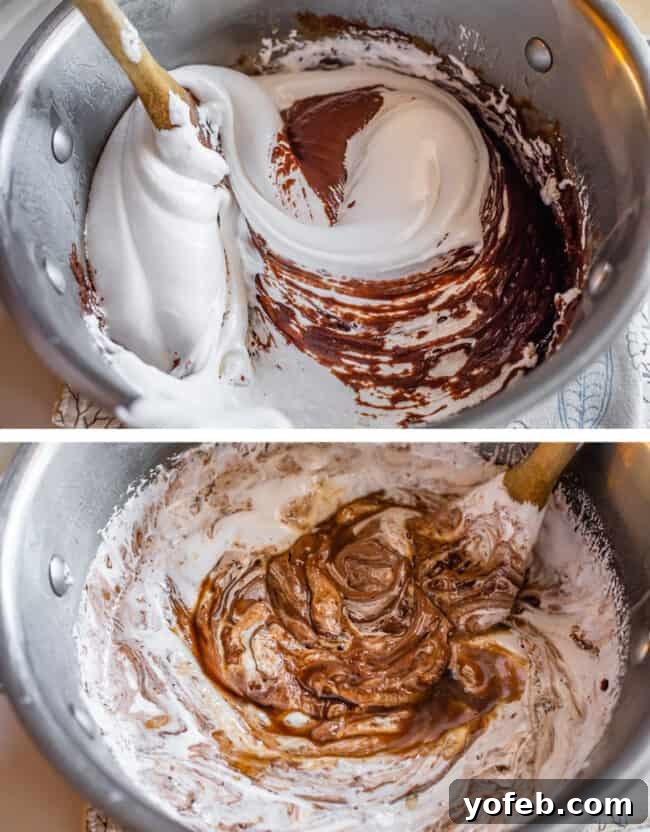
8. Add Vanilla and Final Mix: Immediately add the vanilla extract to the mixture. Continue stirring until there are no visible marshmallow streaks and the entire mixture is uniform in color and perfectly smooth. This final mixing should be quick but thorough. The fudge will begin to set as it cools, even in the pot, so work with a sense of urgency once the vanilla is added.
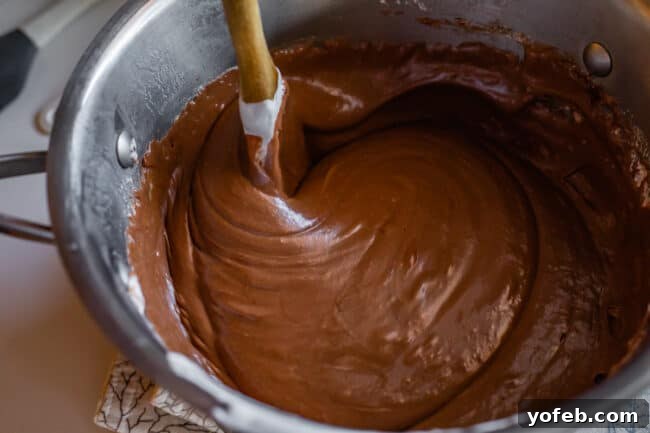
9. Pour into the Pan (The “No Scrape” Rule): As soon as the mixture is smooth and fully combined, immediately pour the fudge into your prepared, parchment-lined pan. Here’s a crucial instruction: DO NOT scrape the edges of the pot well! Only pour out the fudge that is perfectly liquid and smooth. Any fudge clinging to the very edges of the pot will likely have dried out slightly and become crumbly. Introducing these dry bits will ruin the beautiful, smooth top of your fudge. I don’t even use a spatula; I simply use the same wooden spoon to gently guide the main body of fudge into the pan.
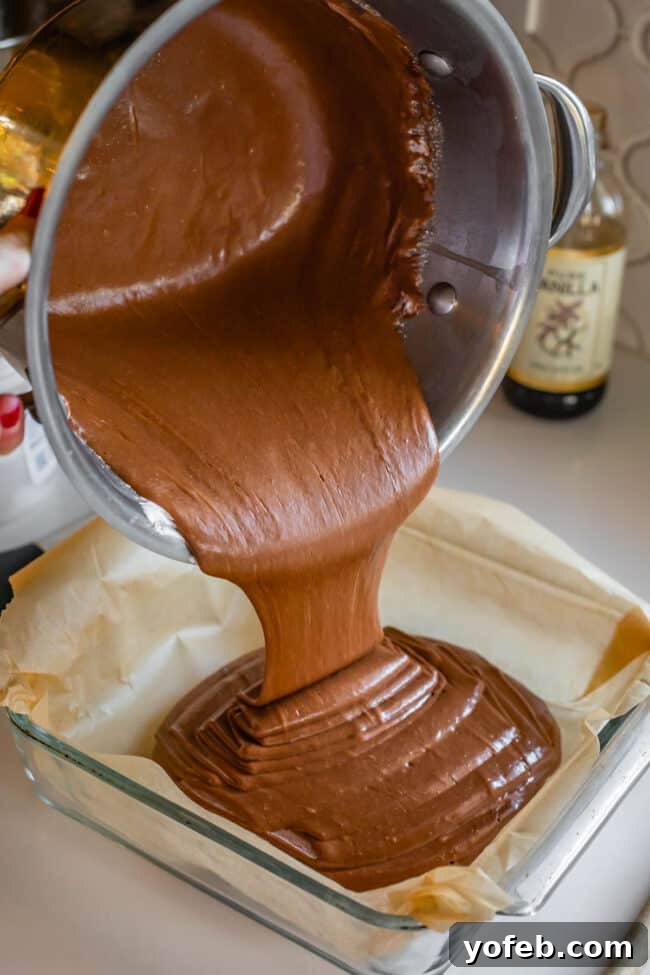
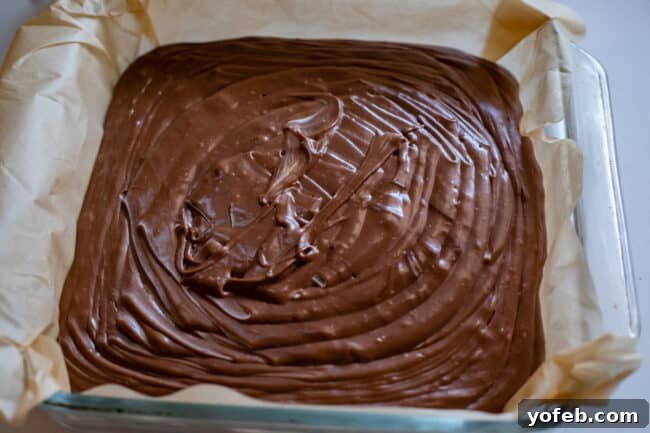
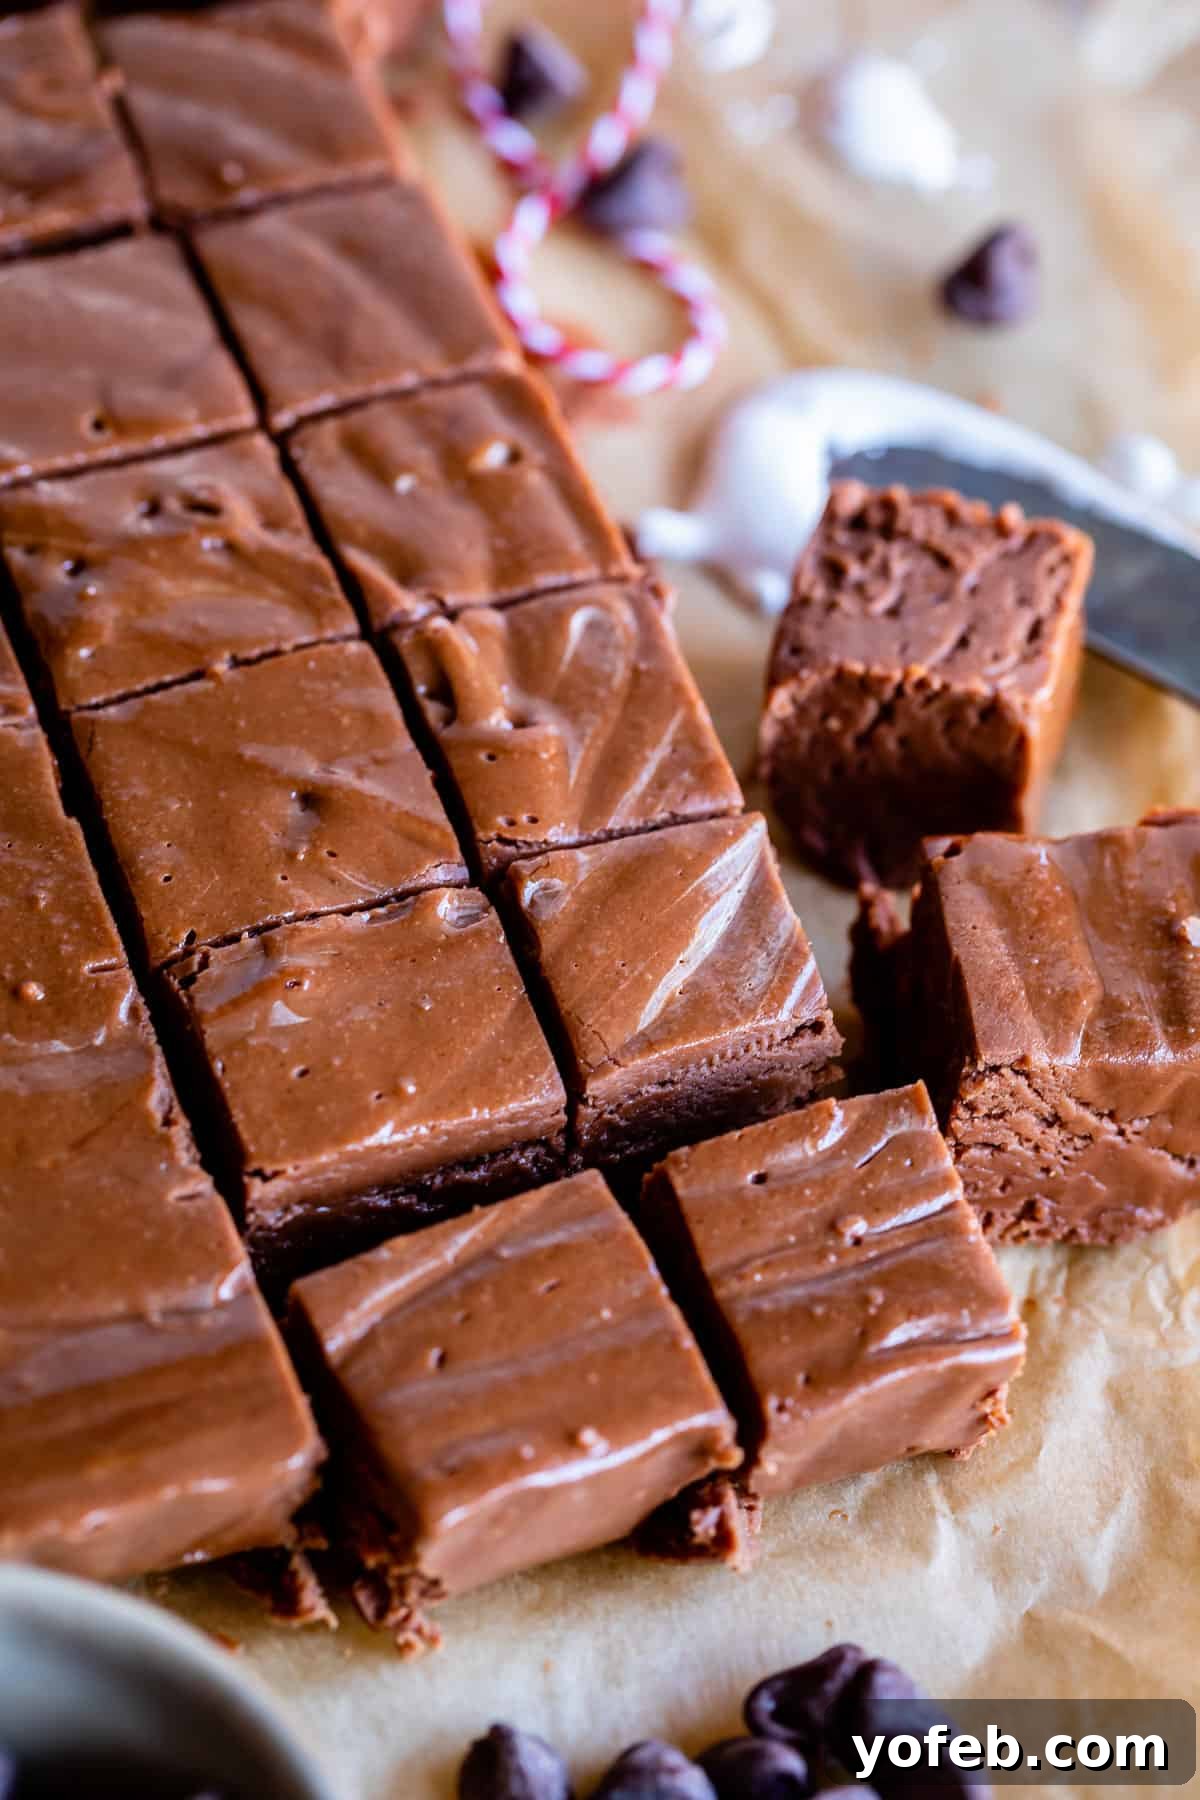
Once the smooth, liquid fudge is in the pan, gently shake the pan a few times to help the fudge settle and evenly distribute. DO NOT touch the top of the fudge or try to smooth it with a spatula. The surface should naturally form gorgeous, subtle ripples, just like this:
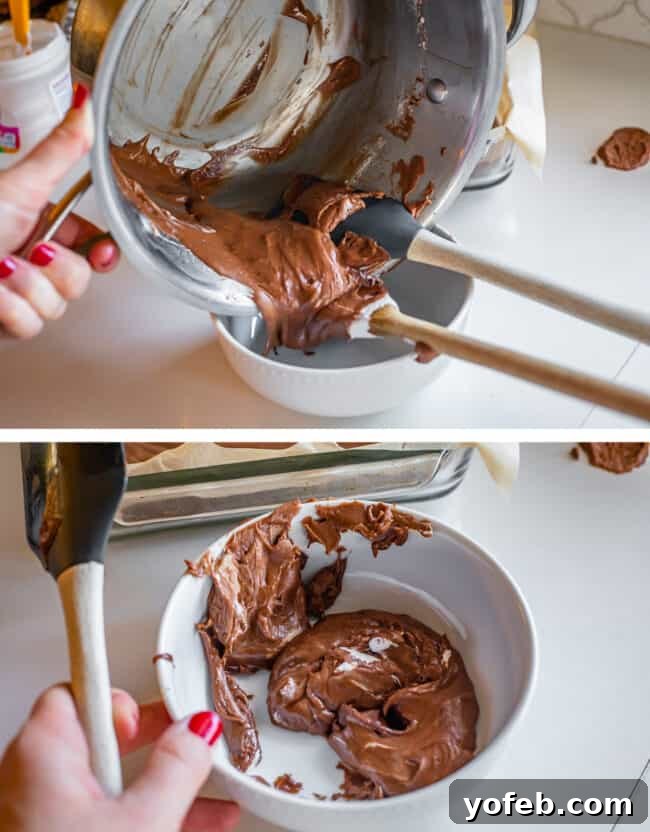
After pouring the main fudge, take a spatula and carefully scrape the remaining, slightly firmer fudge from the pot into a small, separate bowl. This bowl is your special treasure! Indulge yourself with a spoon. Everyone else has to patiently wait hours for the fudge to set, but not you. This warm, gooey reward is yours to enjoy immediately, a well-deserved treat for your hard work.
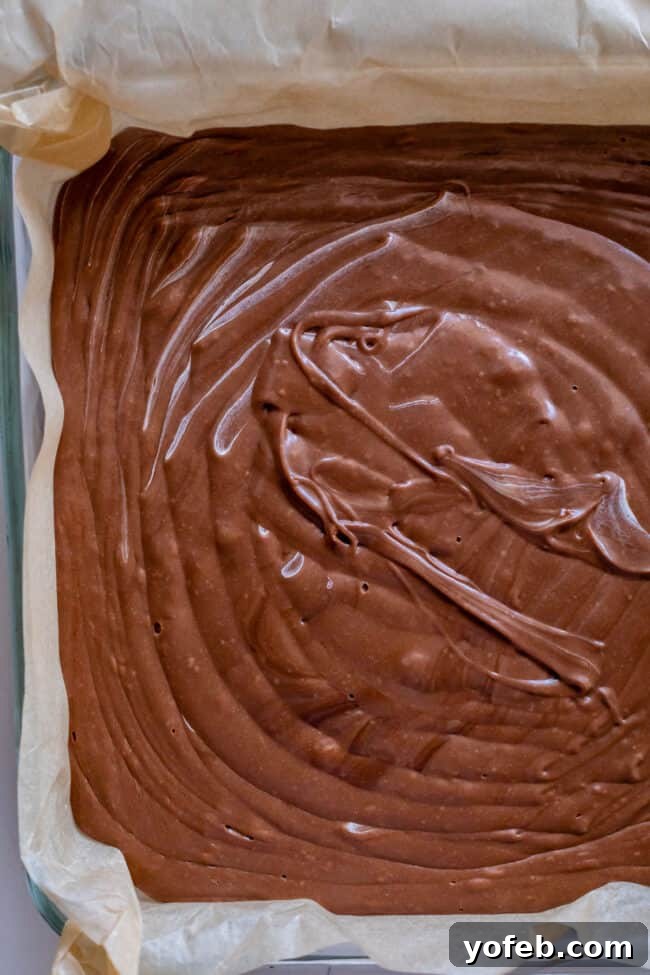
10. Cool and Set: Allow your pan of fudge to cool completely to room temperature. This setting process takes several hours. If you try to lift or slice the fudge before it has fully cooled and firmed up, it will likely crack or crumble. However, if you plan to eat it directly from the pan, you can cut into it while it’s still warm – it will simply be a soft-set consistency rather than firm.
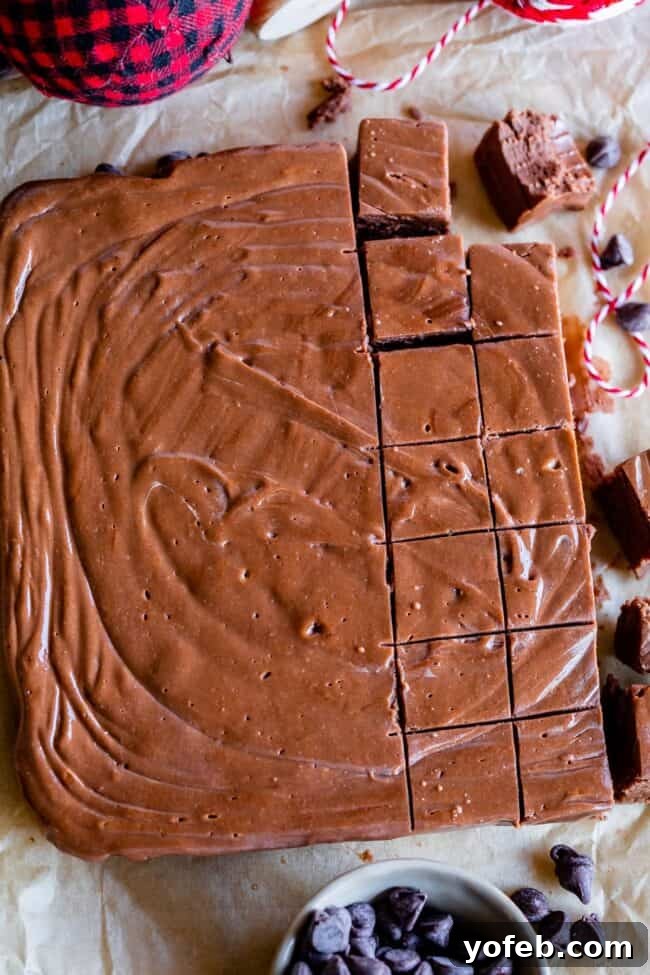
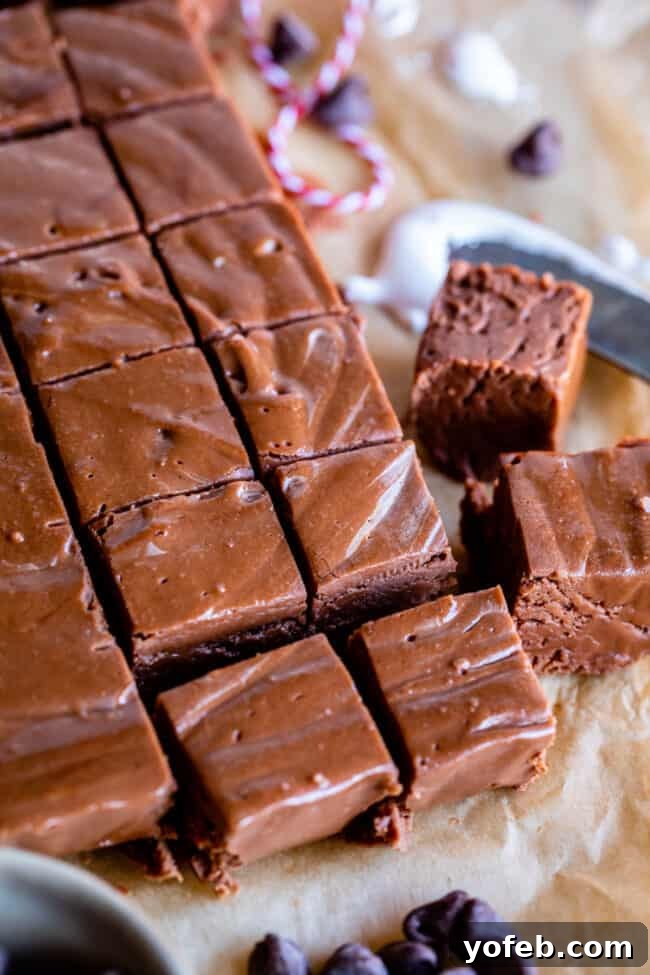
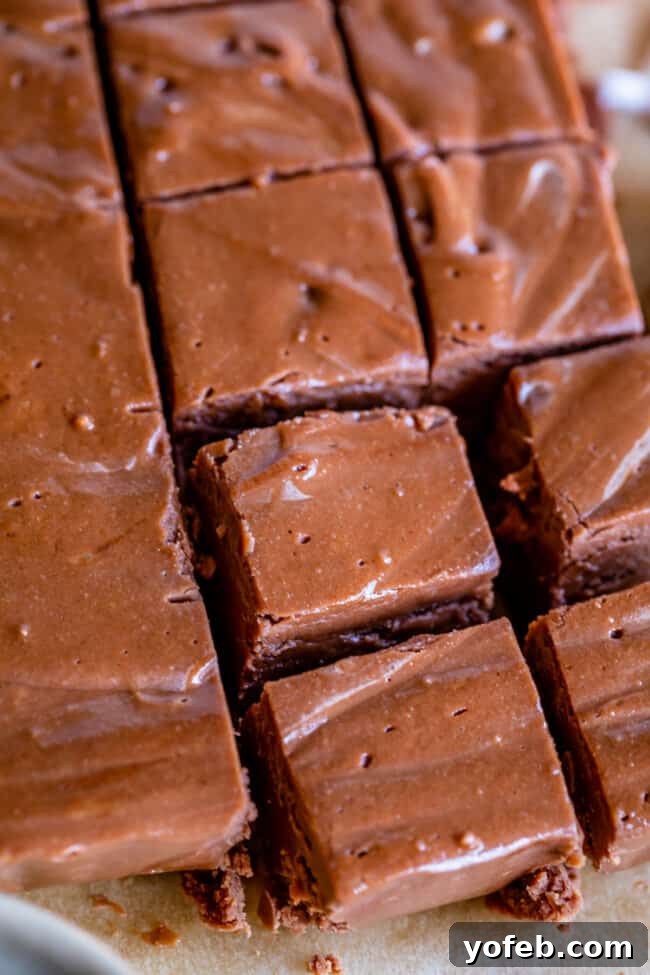
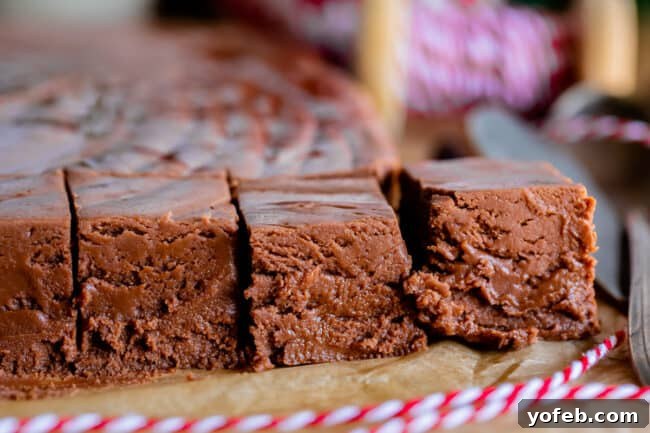
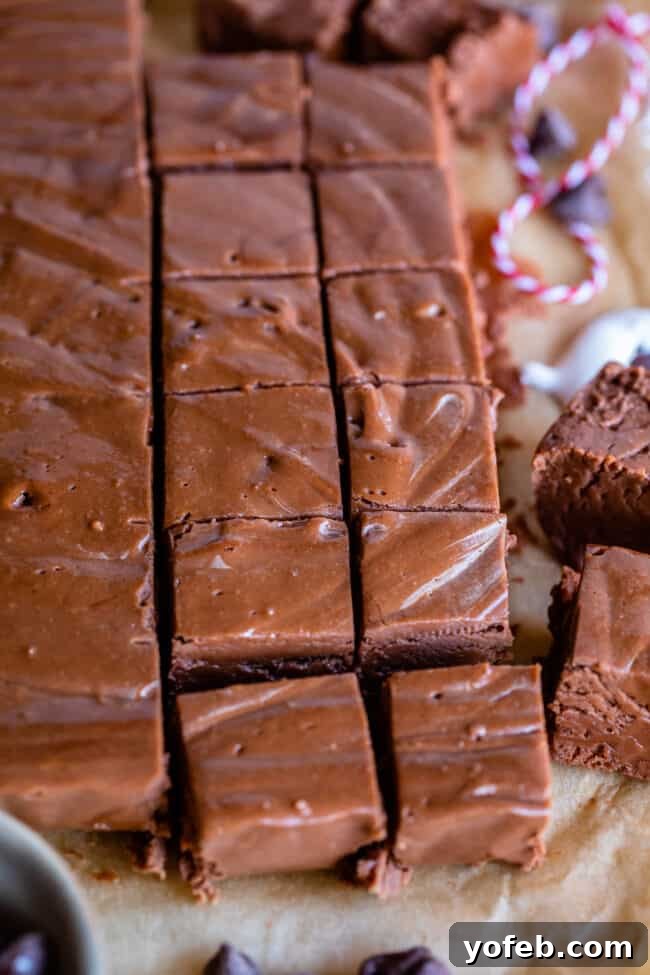
11. Slice and Serve: Once the fudge is completely cool and firm, it’s ready to be sliced and served! To get those perfect, clean squares, use the parchment paper to lift the entire fudge block out of the pan. Use a long, sharp knife, wiping it clean between each slice for crisp edges. Cut several rows in one direction, then rotate the block 90 degrees and cut more rows to create small, bite-sized pieces. Since this fudge is incredibly rich, a little goes a long way! I typically aim for 7×7 rows, yielding about 49 two-bite pieces. Store any uncut fudge on the counter, tightly covered with plastic wrap. Avoid refrigerating fudge, as it tends to dry out very quickly. For optimal freshness, only cut pieces as you need them. The longer pre-cut pieces sit out, the drier they become. If preparing for a party or holiday platter, wait until just before serving to slice the entire block.
Frequently Asked Questions About Homemade Fudge
While this recipe specifically calls for marshmallow creme, for general reference, 4 cups of mini marshmallows (or approximately 40 large marshmallows) can substitute for one 7-ounce tub of marshmallow creme. However, as previously emphasized, for the absolute best results and texture, it’s highly recommended to use marshmallow creme as specified in the recipe.
Grainy fudge is a common pitfall, and it all comes down to rogue sugar crystals. Fudge is a supersaturated solution of sugar, meaning it holds more sugar than it ideally should at room temperature. When cooked correctly, all sugar crystals dissolve. If even a few crystals remain undissolved, they act as “ladders” or nucleation points, causing other dissolved sugar molecules to recrystallize and adhere to them as the fudge cools. This process is similar to how rock candy forms crystals and results in that undesirable grainy texture.
Here’s how to meticulously avoid grainy fudge:
– Pre-Grease Your Pot: Before adding any sugar, coat the entire inside surface of your pot with melted butter. This makes it more difficult for sugar crystals to cling to the sides.
– Careful Sugar Addition: Slowly pour the sugar into the very center of the melted butter and milk mixture, ensuring *no* sugar crystals touch the sides of the pan. If any accidentally do, carefully wash them down with the liquid mixture using a wet pastry brush or the stirring spoon before the mixture begins to boil.
– Clean Your Spoon: Be vigilant about any dry sugar crystals adhering to the upper edge of your wooden spoon. If you spot any, gently rinse them off with the boiling liquid in the pan before the mixture reaches a full boil.
– Dry and Clean Pan: Pour the hot fudge mixture into a prepared pan that is impeccably dry and clean (and preferably lined with parchment paper). Any introduction of water at this critical stage can trigger recrystallization.
Fudge can indeed be sensitive, much like a beloved, occasionally temperamental holiday relative. Factors like humidity, altitude, and even barometric pressure can influence candy making. This particular recipe is quite forgiving, but it’s still fudge. For proper setting, the butter mixture needs to reach a temperature of 234-236ºF (112-113ºC) – which typically takes about 5 minutes of boiling. If your fudge fails to set, it most likely didn’t reach this critical temperature.
While I haven’t personally experienced unset fudge with this recipe, a common remedy is to return all the unset fudge to a clean saucepan with a tablespoon or two of evaporated milk. Reheat the mixture, stirring constantly, and use a candy thermometer to ensure it reaches the 234-236ºF range. Then, proceed with adding the chocolate, marshmallow creme, and vanilla as usual.
If reheating isn’t an option or doesn’t work, don’t despair and don’t throw it away! You still have delicious options:
– Fudge Sauce: If it’s quite thin, use it as an incredible fudge sauce over ice cream, or drizzle it generously over Nana’s Famous Fudge Brownies. Or, embrace its gooeyness and enjoy it straight with a spoon!
– Fudgy Truffles: If it’s thicker but still not firm, try mixing in some powdered sugar, rolling the mixture into balls, and then dipping them in melted chocolate for decadent fudgy truffles.
– Patience is Key: Sometimes, fudge just needs more time. Leave it uncovered and unrefrigerated overnight. A “gooey mess” can often harden over time, becoming more brittle than ideal, but still perfectly delicious and less messy.
– Chilling Aid: As a last resort, you can try chilling the fudge in the refrigerator to see if the cold helps it firm up. Be aware, however, that refrigeration can lead to a drier texture over time.
For fudge to achieve its ideal firm consistency, allowing for clean lifting and slicing into neat squares, it needs to cool completely to room temperature, which typically takes several hours. Rushing this process can lead to cracking or crumbling when you attempt to move or cut it. Of course, if aesthetics aren’t your primary concern, it’s perfectly safe and undeniably delicious to eat as soon as it’s cool enough not to burn your tongue – though waiting that long can be quite the challenge!
Fudge is officially classified as a type of sugar candy, also known as a confectionery. Its identity as a sugar candy stems from its creation process, which involves cooking sugar and other ingredients to the “soft-ball stage.” This places it perfectly between a very soft sugar candy, like fondant, and a much firmer, chewier one, such as caramel. However, if you choose to serve this rich, decadent treat as a dessert, I highly doubt anyone will be complaining!
Traditional, or “old-fashioned,” fudge distinguishes itself by *not* including marshmallow creme. Instead, its foundation relies solely on sugar, butter, milk, and either cocoa powder or chocolate (much like the core of this recipe). While equally delicious, achieving the perfect smooth texture and consistent set with traditional fudge can be more challenging, as it relies entirely on the precise crystallization of sugar. It’s a tribute to delicious, delicious sugar in its purest form.
How to Store and Preserve Your Delicious Fudge
Proper storage is key to maintaining the delightful texture and freshness of your homemade marshmallow fluff fudge. Follow these guidelines to keep your treat at its best:
How long does fudge last?
Technically, homemade fudge can last for 2-3 weeks when stored correctly at room temperature. However, in my house, it rarely survives that long! The temptation to grab “just a little piece” every time you pass through the kitchen is simply too strong. It’s amazing how quickly those little pieces add up to needing to make another batch!
How long does fudge last in the fridge?
This is a common mistake: fudge should absolutely *not* be stored in the refrigerator. The cold, dry air in a fridge rapidly draws out moisture, causing the fudge to become unpleasantly dry and crumbly. For optimal texture, keeping it on the counter is always the best method. If you’re looking to extend its shelf life beyond a couple of weeks, freezing is the superior option.
How long does fudge last unrefrigerated?
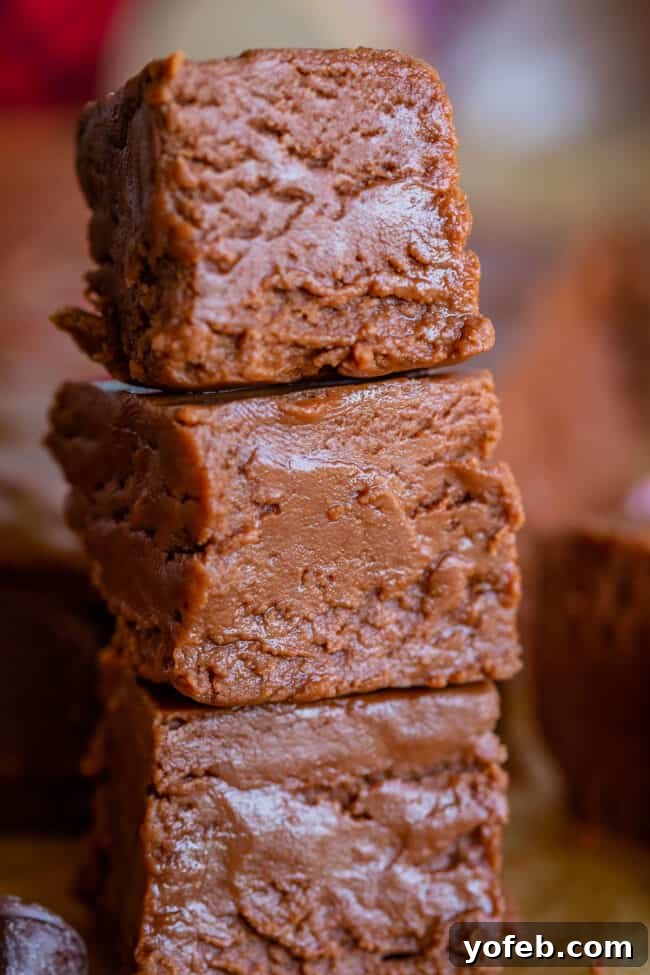
When kept on the counter and properly sealed (see below), fudge will remain fresh and delicious for 2-3 weeks. As mentioned, refrigeration is detrimental to its texture, so the counter is indeed its ideal home.
Can you freeze fudge?
Yes, absolutely! Freezing is an excellent way to prepare fudge in advance and preserve its freshness for longer periods. I do this every year during the busy Christmas season. For best results, seal the entire block of fudge (uncut, if possible) tightly in an airtight freezer-safe bag or container. When you’re ready to enjoy it, simply remove the fudge from the freezer and let it thaw completely to room temperature while still in its sealed bag. This slow thawing helps prevent condensation and maintains its smooth texture. Do not attempt to slice it until it has reached room temperature. Properly frozen, fudge can last for approximately 2 months.
Indulge in the Magic of Homemade Fudge
And there you have it, folks – your comprehensive, capstone course on crafting the perfect homemade marshmallow fluff fudge. You’ve earned your diploma in confectionery arts! A heartfelt thank you to my Mom for passing down her invaluable fudge-making wisdom. I sincerely hope this simple, no-fail fudge recipe brings as much joy and deliciousness to your family and friends as it has brought to ours over the years. May your holidays be filled with sweet treats and cherished memories. Merry Christmas to all!
More Irresistible Holiday Treats to Explore!
- Penuche Fudge Recipe << A delicious brown sugar variation of today’s classic fudge!
- Soft Homemade Caramel Candy << Discover the best, softest, and most flavorful caramel candies you’ll ever make.
- Nana’s Famous Fudge Brownies << For those who truly can’t get enough fudge!
- Caramel Nougat Pecan Rolls << This unique recipe is a personal favorite, offering a truly distinctive treat.
- Candy Cane Brownie Trifle << A huge reader favorite and a festive dessert I’ve been making for years!
- Homemade Peppermint Bark << Surprisingly easy to make and wonderfully festive.
- The Best English Toffee << A cherished family recipe from my Aunt Shirley.
- Oreo Truffles << Requires just 4 simple ingredients!
- Hot Fudge Sauce << Pour this rich sauce over absolutely everything!
- Holiday Chex Mix << A truly classic holiday snack.
- Dessert Charcuterie Board << An elegant way to present your fudge and other sweets.
- Chocolate Covered Oreo Fudge from Barefeet in the Kitchen
- Pineapple Fudge from Mom on Timeout
Facebook | Pinterest | Instagram

Mom’s Marshmallow Fudge
Ingredients
- 3/4 cup butter, this is 1 and 1/2 sticks; do not use margarine
- 2 & 1/2 cups white granulated sugar
- 2/3 cup full-fat evaporated milk, do not use sweetened condensed milk
- 12 ounce package (high quality) semi-sweet chocolate chips, 2 cups
- 7 ounce jar marshmallow cream, also called marshmallow fluff
- 1 teaspoon vanilla extract
Instructions
-
Prepare your ingredients: For fudge-making, it’s important to have everything completely measured out and ready to go before you turn your burner on. Fudge moves fast, so you need to be totally prepared!
-
Line an 8×8 or 9×9 inch square pan with parchment paper. Set aside.
-
Open your 12-ounce bag of HIGH QUALITY semi sweet chocolate chips. Remove the lid and all traces of the foil seal from the tub of marshmallow creme (we are microwaving it later).
-
Make the fudge: In a 3-quart HEAVY saucepan over medium heat, add 3/4 cup butter. (This is 1 and 1/2 sticks). Use a spoon to drag the melting butter up the sides of the pot, clear to the top, greasing the edges of the pan.
-
Once the butter is mostly melted, slowly pour 2 and 1/2 cups sugar into the center of the pan as carefully as you can, making sure to not get any sugar crystals on the side of the pan. With your wooden spoon, draw the butter in from the edges toward the center, going slowly all the way around the pan until it’s mostly moistened. Do not leave any sugar crystals on the side of the pan or on the edge of your spoon; it will make your fudge grainy. The goal is to dissolve all of the sugar.
-
Pour in 2/3 cup evaporated milk. Stir this mixture together thoroughly, making sure to douse any rogue bits of dry sugar with the liquid in the pan. All the dry sugar crystals need to be dissolved before the mixture reaches a boil.
-
Settle in for the boil: Bring the mixture to a full rolling boil over medium high heat. (Rolling boil means bubbles are coming up from the center of the pot.) Stir constantly with a long wooden spoon.
Once it starts boiling, set a timer for 5 minutes and turn the heat down to medium so that you don’t burn your fingers off. It should be boiling the full 5 minutes. Stir constantly. A candy thermometer should read about 234-236 degrees F at the end. Take it off heat early if it reaches 234-236 before 5 minutes. Overcooking at this stage makes for dry, crumbly fudge.
-
Add the chocolate chips. When the timer goes off, remove from heat and add 12 ounces chocolate chips all at once. Stir vigorously until all the chocolate chips are melted and mixture is completely smooth. (if there are lumps in this mixture, there will be lumps in your fudge. Get them all out).
-
Marshmallow creme. Heat your 7-oz tub of marshmallow creme in the microwave for about 10-15 seconds (to make it fast and easy to scoop out of the jar.)
Move quickly. Add all the marshmallow creme to the chocolate mixture and beat with a wooden spoon until nearly blended.
-
Vanilla. Add 1 teaspoon vanilla and continue stirring until there are no more marshmallow streaks and the mixture looks even and smooth. Stop stirring as soon as it’s combined.
-
Pour into final pan. Immediately pour into the prepared pan. Don’t scrape the edges of the pot too well. Only pour fudge into the pan that is completely liquid and smooth. If the fudge-bits on the edges of the pot look dried out at all, leave them behind.
Shake the prepared pan to help the fudge settle. Do not touch the top of the fudge or try to smooth it with a spatula. It should have a rippled appearance.
-
Let cool to room temperature. (Good luck with that.)
-
Slice and serve! I like to slice a square pan of fudge into 7×7 rows, making about 49 small pieces. Fudge is so rich!
-
Store on the counter covered with plastic wrap. Do not refrigerate. Unfortunately this means you will probably eat “just a sliver” of fudge every time you pass through your kitchen. Oh darn! This is one of the greatest joys of the season if you ask me!
Video
Notes
Nutrition
Additional Christmas Recipes You Will Adore!
- Healthy Oatmeal Chocolate Chip Cookies
- Perfectly Cooked Rib Eye Steak
- Easy French Toast Recipe for Brunch
- The Softest Cut-Out Sugar Cookie Recipe
- Best Buttercream Frosting for Sugar Cookies
- Classic Scone Recipe
- The Best Fudgy Brownie Recipe
- Best Homemade Cinnamon Roll Recipe
- Delicate Rhubarb Shortbread Bars
- Hearty Sausage, Potato, and Kale Soup