

Welcome to the ultimate guide for crafting the most exquisite, melt-in-your-mouth Roti, the beloved Indian flatbread! If you’ve ever dreamt of serving a curry so rich and flavorful that you need the perfect vehicle to soak up every last drop, look no further. This recipe promises unbelievably soft, buttery Roti, a culinary experience that will transform your Indian meals. Forget dry, tough flatbreads; I’m here to share all my secrets and step-by-step instructions to ensure your homemade Roti is nothing short of perfection. Get ready to impress your taste buds and everyone at your table!

Table of Contents
- The Irresistible Allure of Homemade Roti
- What is Roti? Exploring the Heart of Indian Cuisine
- Roti vs Naan: Unraveling the Differences
- Essential Roti Recipe Ingredients and Flour Selection
- How to Make Roti (Indian Bread): Step-by-Step Perfection
- Can You Make Roti Vegan?
- What Do You Serve Indian Flatbread With?
- Storing and Freezing Indian Bread for Freshness
- Roti Recipe (Buttery Indian Flatbread)
- More Bread Recipes You Are Going To Love!
- Explore More Top Recipes!
There’s a certain magic that comes with homemade food, a warmth and comfort that store-bought simply can’t replicate. Recently, I found myself reminiscing about a peculiar memory involving a forgotten Little Caesar’s gift card in my parents’ fridge. My dad, with his unique approach to memory-aids, thought placing it front and center would serve as a constant reminder for their next pizza craving. While I, personally, don’t need much prompting when it comes to free food, this quirky anecdote got me thinking about the simple, profound joy of food that truly captivates. And that’s exactly how I feel about Roti.

Unlike that easily forgotten pizza gift card, Roti is a dish I actively seek out and, even better, love to prepare myself. It’s a revelation, a soft, pliable flatbread that has truly captured my culinary heart. In many Indian restaurants in my area, Naan often takes center stage, and while I adore a good Homemade Naan, I believe the world needs to experience the subtle brilliance of Roti. It’s not about choosing favorites, but appreciating the distinct charm each bread brings to the table.
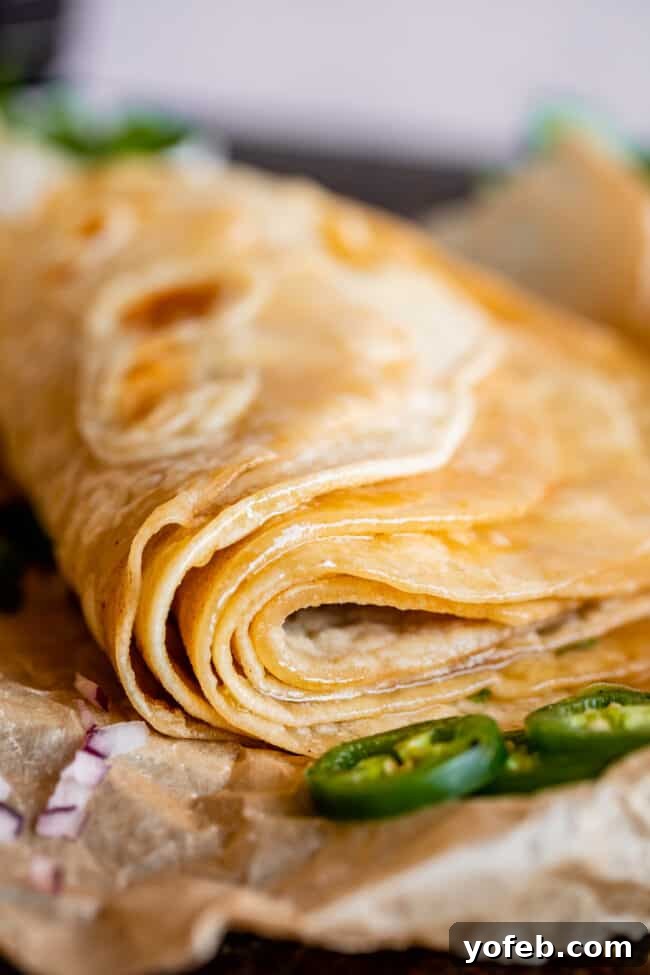
Roti might be “skinnier” than its yeasty cousin, Naan, lacking the dramatic puff, but it offers an unparalleled tenderness and pliability. It’s the kind of bread that effortlessly conforms to your culinary desires, perfect for scooping up a rich curry or serving as a simple, satisfying accompaniment. This recipe focuses on achieving that coveted soft and buttery texture, ensuring every piece of Roti you make is a delightful embrace for your favorite Indian dishes. Let’s delve into the details and unlock the secrets to perfect Roti.
The Irresistible Allure of Homemade Roti
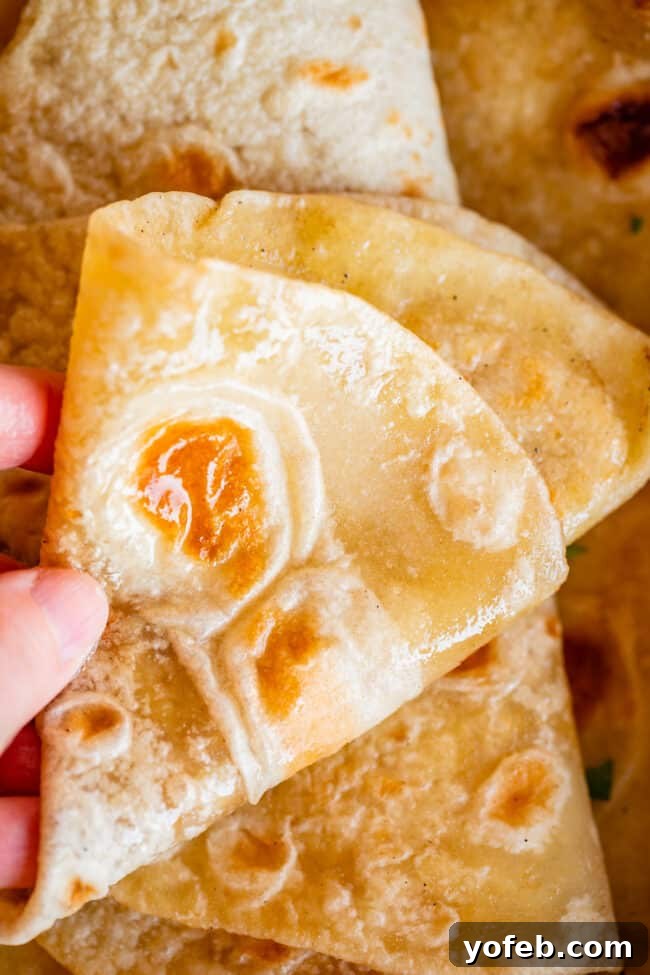
There’s an undeniable satisfaction in creating a dish from scratch, especially one as fundamental and comforting as Roti. This simple Indian flatbread, traditionally made with just a few ingredients, holds a special place in the hearts of many, and for good reason. Its versatility, humble origins, and incredible ability to enhance any meal make it a culinary cornerstone. While you might occasionally find it on restaurant menus, nothing compares to the freshness, warmth, and bespoke tenderness of homemade Roti. This recipe empowers you to bring that authentic, comforting experience directly to your kitchen. It’s more than just bread; it’s an essential tool for enjoying the vibrant flavors of Indian cuisine.

What is Roti? Exploring the Heart of Indian Cuisine
Roti is a staple unleavened flatbread, deeply ingrained in the culinary traditions of India, Pakistan, Nepal, Bangladesh, and other South Asian countries. Its name, derived from the Sanskrit word for “bread,” speaks to its fundamental role in daily meals. Unlike breads that rely on yeast or baking powder for rise, Roti is known for its flat, disc-like shape, achieving its tender texture through a careful balance of ingredients, precise kneading, and a quick cook on a hot griddle.

Traditionally, Roti is made from just two core ingredients: “atta” (a type of Indian whole wheat flour) and water. This simplicity belies its profound impact on a meal, acting as the perfect companion for a wide array of saucy Indian dishes like curries, dals, and sabzis. When expertly prepared, Roti should be soft, pliable, and slightly chewy, with a delicate flavor that complements rather than overpowers the accompanying food. Its texture is often compared to a soft Mexican tortilla, making it ideal for tearing and scooping.

It’s worth noting that Roti is often used interchangeably with “Chapati,” though some culinary distinctions exist. While Roti is the broader term for unleavened flatbreads, Chapati can sometimes refer to a specific variant that includes salt and a touch of oil or ghee in the dough, contributing to an even richer flavor and softer texture. My recipe today leans into this enhanced version, incorporating butter for that irresistible tender and buttery finish. Regardless of the subtle variations, the ultimate goal remains the same: a wonderfully soft, flavorful bread that makes every bite of curry an absolute delight.
Roti vs Naan: Unraveling the Differences
While both Roti and Naan are quintessential Indian flatbreads, often served in similar culinary contexts, they possess distinct characteristics that set them apart. Understanding these differences can deepen your appreciation for each. Naan, perhaps the more globally recognized of the two, is a leavened bread, meaning it uses yeast (and sometimes baking powder) to create its characteristic puffy, airy texture. Its dough typically incorporates dairy ingredients like yogurt, milk, or sour cream, along with eggs, which contribute to its richness and chewy softness. Naan is traditionally cooked in a tandoor (a clay oven), giving it smoky flavors and distinct blistered spots.

Roti, on the other hand, is an unleavened bread, relying purely on the development of gluten during kneading and proper cooking technique to achieve its soft, pliable nature. It contains no yeast or leavening agents, making its dough much simpler, often just flour, water, and sometimes salt and fat. Roti is traditionally cooked on a “tava” (a flat griddle), leading to its characteristic flat shape and occasional puffed center. The absence of yeast means no rising time is required beyond a short rest to relax the gluten, making Roti a quicker bread to prepare.
Both breads excel at complementing rich curries and gravies, perfect for scooping and savoring every drop. However, Roti offers a lighter, more wholesome profile, often favored for everyday meals, while Naan, with its richer ingredients and leavened texture, can feel more indulgent. Ultimately, choosing between Roti and Naan often comes down to personal preference for texture and flavor. My brother, who lived in India, enthusiastically prefers Roti for its authentic simplicity. But why choose? With this recipe, you can easily master Roti and enjoy both fantastic flatbreads!

Essential Roti Recipe Ingredients and Flour Selection
Creating truly spectacular Roti requires just a handful of simple ingredients, but the quality and type of each can significantly impact the final texture and flavor. Here’s what you’ll need and a closer look at the crucial role each plays:
- Bread Flour: This is my preferred choice for homemade Roti, and for good reason! Bread flour has a higher protein content than all-purpose flour, which is essential for developing strong gluten networks. This gluten structure is what gives Roti its characteristic chewiness and elasticity, allowing it to be rolled very thin without tearing and contributing to its soft, pliable texture. While you can substitute all-purpose flour in a pinch, your Roti might be slightly less chewy and tender.
- Salt: A fundamental flavor enhancer, salt might be omitted in some traditional Roti recipes, but I find it indispensable. It balances the flavors of the flour and butter, preventing the bread from tasting bland. I typically use kosher salt, but fine table salt works perfectly fine as well.
- Butter: Melted butter is incorporated directly into the dough and also used for pan-frying. In the dough, it adds richness and contributes to the Roti’s tenderness, creating a truly luxurious flatbread. For frying, butter not only prevents sticking but also infuses the Roti with a beautiful golden color and an irresistible buttery flavor. I use salted butter, but unsalted works too – just adjust the salt content in the dough accordingly. For a vegan option, simply use oil instead!
- Warm Water: The temperature of the water is more important than you might think. Warm water helps hydrate the flour more effectively and quickly, allowing the gluten to relax and develop without overworking. It also makes the dough much more pliable and easier to handle, contributing to that desired soft texture.
Which flour is best for Roti?
The choice of flour is perhaps the most critical decision when making Roti. Traditionally, authentic Indian Roti is made using “Atta flour,” a special type of whole wheat flour prevalent in South Asia. Atta flour is finely milled but retains a significant portion of the wheat germ and bran, giving it a unique protein structure and a distinct nutty flavor. Its high protein content makes the dough incredibly elastic and strong, ideal for rolling out paper-thin Roti that remain soft and flexible.
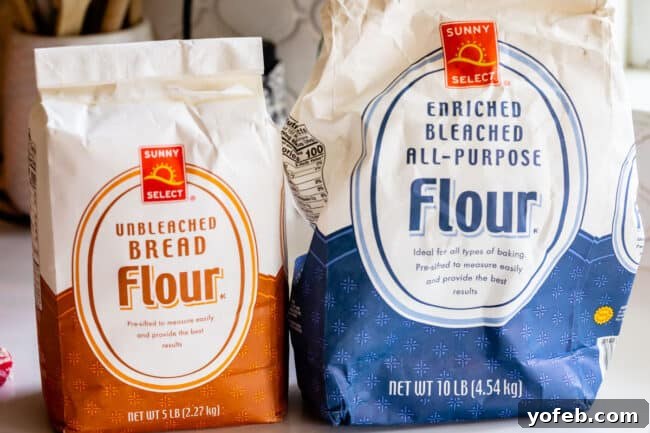
However, Atta flour can be difficult to find outside of specialized international markets. This is where bread flour becomes an excellent substitute. Bread flour, with its high protein content (typically 12-14%), closely mimics the gluten-forming capabilities of Atta flour. It allows for the necessary elasticity and strength to roll out thin Roti without excessive tearing, resulting in a wonderfully chewy and tender final product. While you might be tempted to use standard whole wheat flour, I strongly advise against it for Roti. American-style whole wheat flour is coarser and has a different protein structure than Atta, making the dough notoriously difficult to roll out thinly and often yielding tough, dense Roti rather than the desired soft texture. Stick with bread flour for the best results, or all-purpose flour if bread flour isn’t available, accepting a slightly less chewy outcome.

How to Make Roti (Indian Bread): Step-by-Step Perfection
Making homemade Roti might seem intimidating at first, but I promise, the process is incredibly straightforward and deeply rewarding. With a few key techniques and a little patience, you’ll be creating soft, pliable Indian flatbreads in no time. Follow these steps for Roti success:
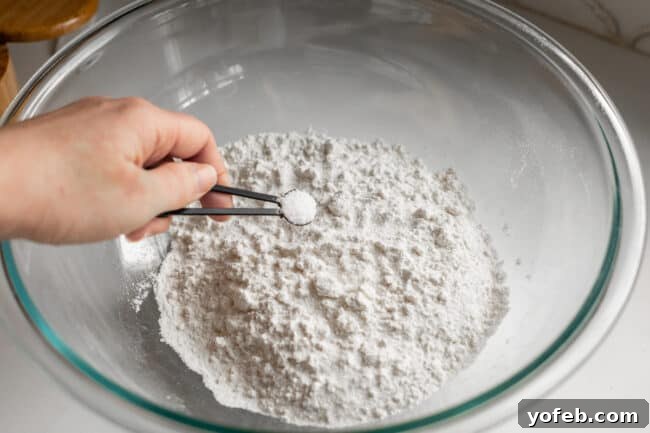
1. Prepare Your Dry Ingredients: In a large mixing bowl or the bowl of a stand mixer, combine your bread flour (or all-purpose flour) with the salt. Whisk these dry ingredients together thoroughly to ensure the salt is evenly distributed. While some traditional Roti recipes skip salt, I find it essential for a balanced flavor profile.
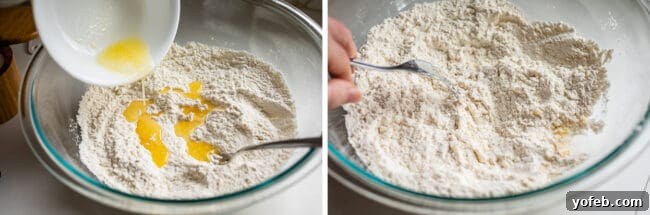
2. Incorporate the Fat: Pour in the melted butter (or oil, for a vegan version) and use a fork to cut it into the flour mixture. Continue mixing until the butter is fully incorporated and the mixture resembles coarse crumbs. This step is crucial for adding richness, flavor, and contributing to the Roti’s tender crumb.
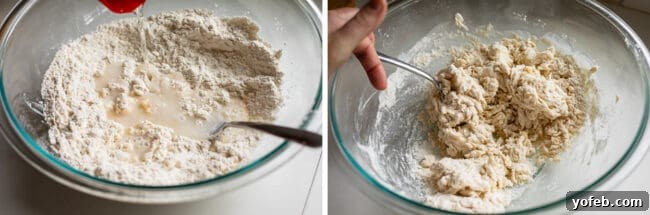
3. Form the Dough: Gradually add the warm water to the flour mixture. Continue stirring with your fork until a shaggy, cohesive dough begins to form. Once it starts to come together, you can switch to kneading by hand on a lightly floured surface or attach the dough hook to your stand mixer.
4. Knead for Elasticity: Knead the dough for approximately 8 minutes. This is a vital step where the magic of gluten development happens. As you knead, the proteins in the flour will combine to form long, elastic strands of gluten. This network gives the dough its strength, allowing it to be stretched and rolled thinly without tearing, and ultimately resulting in a soft, pliable Roti. The dough should become smooth, elastic, and less sticky as you knead.
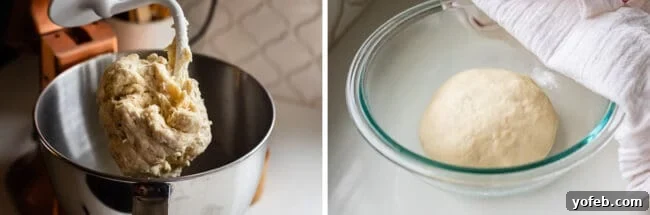
5. Rest the Dough: Shape the kneaded dough into a ball, place it back in the bowl, and cover it with a clean tea towel. Let the dough rest at room temperature for 20-45 minutes. Unlike yeast dough, this resting period is not for rising; your dough will look exactly the same size. However, this step is absolutely critical! Resting allows the gluten, which became taut during kneading, to relax. This relaxation makes the dough incredibly much easier to roll out thinly and prevents it from snapping back, ensuring a tender Roti. If you find your dough springing back too much when rolling, give it a longer rest.

6. Divide and Shape: Lightly flour your work surface. Divide the rested dough into 6 equal pieces. Take each piece and gently pinch and roll it between your fingers to form smooth, round balls. This ensures an even thickness and shape for your Roti.
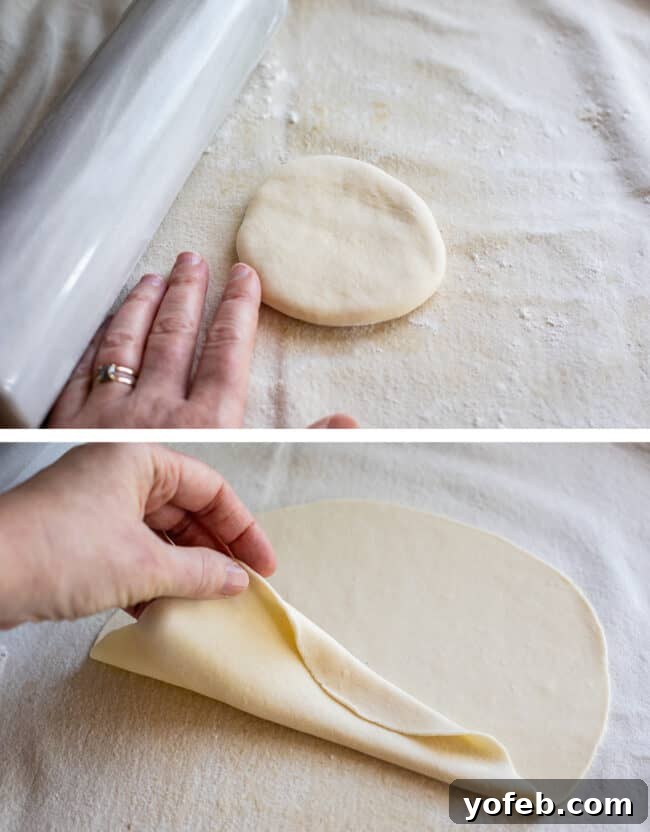
7. Roll Out the Roti: Take one dough ball and flatten it into a small disk with your fingers. Using a rolling pin, roll the dough out into a thin circle, aiming for about 8-9 inches in diameter. The key here is to roll it very thinly; this is essential for a tender Roti. Don’t worry if your circles aren’t perfectly round – embrace the rustic charm of homemade!
8. Preheat Your Skillet: Place a cast iron skillet, griddle, or any heavy-bottomed frying pan over medium to medium-high heat. Allow it to preheat for several minutes until it’s thoroughly hot. A hot pan is crucial for achieving quick cooking and proper browning without drying out the Roti.
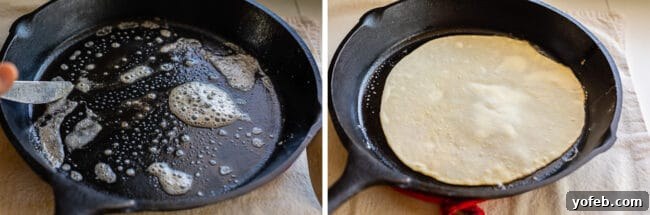
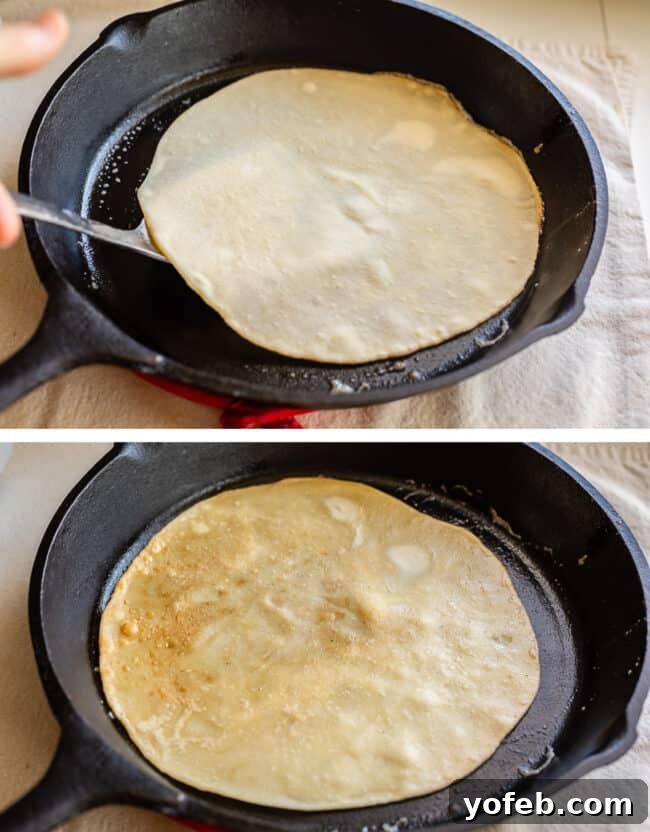
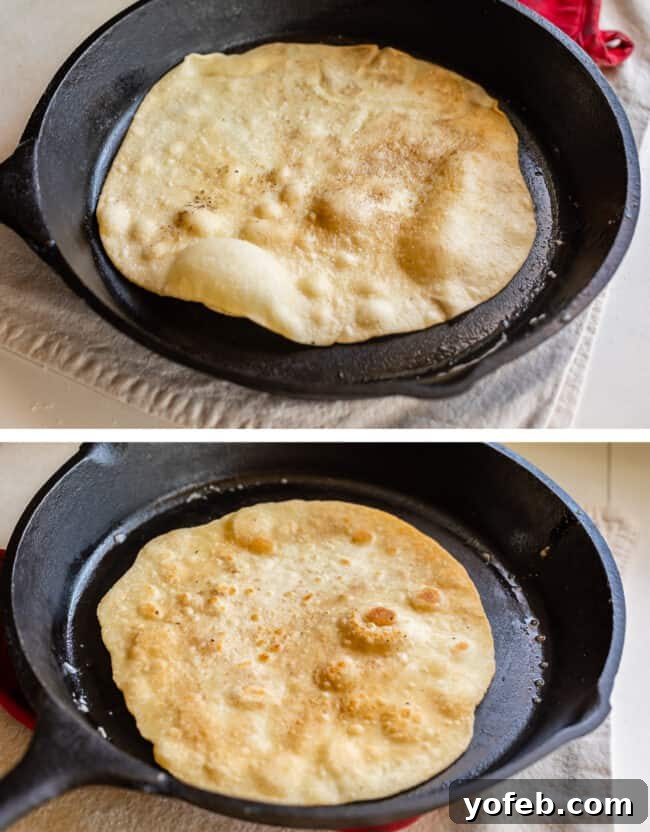
9. Cook the Roti: Add about a teaspoon of butter to the hot pan and swirl to coat the bottom. Carefully transfer one rolled-out Roti to the pan. Cook for about 6-7 seconds on the first side. This initial quick sear helps set the dough. Then, using your fingers or a spatula, quickly flip the Roti over. Add a little more butter to the pan if needed; generous butter ensures a soft Roti. Cook this second side for 30-50 seconds until bubbles start to form on the surface and light brown spots appear on the underside. Flip it back to the first side and cook for another 20-40 seconds, just until brown spots develop. Adjust heat as needed to cook quickly without burning.
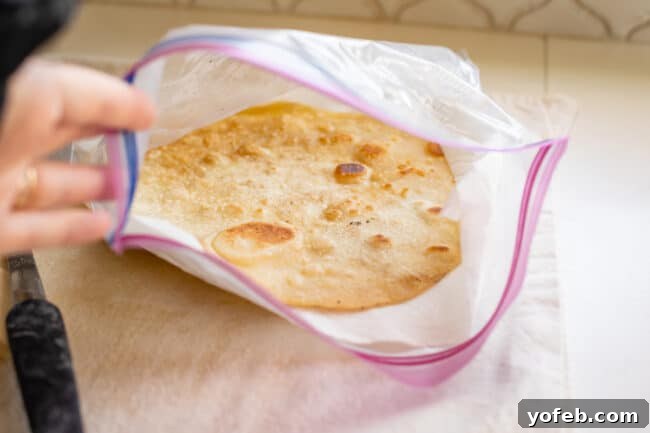
10. The Essential Steaming Step: This is arguably the most important step for achieving truly soft and pliable Roti! As each Roti comes off the hot pan, it needs to be steamed to prevent it from becoming tough and crackly as it cools. If you have a dedicated tortilla warmer, now is the time to use it. If not, a large ziplock bag lined with paper towels works wonderfully as a makeshift steamer. Place a paper towel in the bag, then add your hot Roti on top. Cover it with another paper towel and quickly seal the bag. As you cook subsequent Rotis, place them directly on top of the previous one (no need for paper towels in between). The warmth and moisture trapped in the bag will gently steam the Rotis, keeping them incredibly soft and cozy until serving.
Can You Make Roti Vegan?
Absolutely! Making this Roti recipe vegan is incredibly simple. The only non-vegan ingredient is butter, which can be easily substituted. For the butter called for in the dough (2 tablespoons), simply replace it with your preferred cooking oil. Then, for pan-frying, instead of butter, use a suitable oil. Opt for an oil with a high smoke point to prevent your Roti from burning and to avoid setting off your smoke alarm. Excellent choices include canola oil, vegetable oil, or light olive oil (ensure it’s “light” in flavor, not extra virgin, for a neutral taste and higher smoke point). This easy swap ensures your Roti remains just as delicious and tender while adhering to a vegan diet!

What Do You Serve Indian Flatbread With?
Roti truly shines as the ultimate accompaniment to a vast array of Indian dishes. Its soft, pliable nature makes it the perfect tool for scooping up every last bit of rich, flavorful sauce from your plate. Think of it as a culinary sponge, ensuring “no sauce left behind!” Whether it’s the vibrant Easy Chicken Curry, a creamy Slow Cooker Chicken Tikka Masala, or any other saucy creation, Roti elevates the dining experience. It’s designed to be torn, wrapped, and used to deliver deliciousness from your plate to your mouth. Here are some fantastic curries and dishes that pair perfectly with your homemade Roti:
- Slow Cooker Basil Chicken in Coconut Curry Sauce: A top-rated recipe that’s incredibly flavorful.
- Slow Cooker Chicken Tikka Masala: Achieve amazing roast-y chicken flavors by adding sauce at the end.
- Sheet Pan Curry Chicken and Carrots with Basmati Rice (Biryani): A convenient and delicious sheet pan dinner!
- 6 Ingredient One Pot Vegetable Curry: A quick weeknight meal made even faster with jarred sauce.
- Slow Cooker Beef Curry: A surprisingly delicious combination discovered on vacation!
- Butter Chicken from Cafe Delites: A classic, rich and creamy favorite.
- Slow Cooker Chicken Korma from Taming Twins: A mild, sweet, and fragrant curry.
Storing and Freezing Indian Bread for Freshness
Ensuring your Roti remains soft and delightful even after cooking is simple with proper storage. The steaming step immediately after frying (detailed in the “How to Make” section above) is paramount. This initial steaming process locks in moisture, keeping your Roti pliable and tender.
For any leftover Roti you plan to consume within a few days, simply keep it in the same paper towel-lined ziplock bag used for steaming. Store it at room temperature, away from direct sunlight, for 1-3 days. There’s no need to refrigerate, as the cool temperatures can actually make Roti tougher.

Does Roti freeze well?
Yes, Roti freezes exceptionally well, making it perfect for meal prepping or having a quick side ready for any curry craving! Freezing is actually a better option than refrigeration for longer storage, as it preserves the Roti’s moisture and prevents it from drying out. To freeze Roti effectively, ensure each piece is cooled completely. Then, layer the Rotis between sheets of parchment paper to prevent them from sticking together. Stack these layered Rotis and place them in an airtight freezer-safe bag or container. Store them flat in your freezer for up to 2-3 months.
When you’re ready to enjoy them, reheating is easy. You can either thaw the frozen Roti in the bag at room temperature for an hour or two, then gently warm them in the microwave for a few seconds (be careful not to overheat, as this can make them tough). Alternatively, for a freshly cooked taste and texture, you can reheat the Roti directly from frozen on a hot skillet, using the same method as when you first cooked them. A quick re-grill will bring back their softness and a delightful warmth, almost as if they were just made.

More Bread Recipes You Are Going To Love!
- Homemade Naan Bread Recipe: A similar flatbread, but with yeast for a buttery, springy texture.
- One Hour French Bread: Seriously, crusty, fresh bread in just an hour!
- Pizza Dough Recipe for Beginners: Mastering homemade pizza is a life skill.
- Garlic Knots: Drenched in butter and garlic, these are always a hit.
- Garlic and Rosemary Skillet Bread: A flavorful, easy-to-make bread with rave reviews.
- Peshwari Naan from Fatima Cooks: A sweet, coconut-filled variant of Naan.
- Kulcha Naan from Hebbars Kitchen: Another delicious Indian flatbread, perfect for dipping.
Facebook | Pinterest | Instagram

Roti Recipe (Buttery Indian Flatbread)

Equipment
-
Cast Iron Skillet Highly recommended for even heat!
-
Rolling Pin A marble rolling pin works beautifully.
Ingredients
- 2 cups bread flour , or all-purpose flour, spooned and leveled
- 1 teaspoon salt
- 2 tablespoons butter*, melted
- 2/3 cup warm water
- 1/4 cup butter, for frying, or more as necessary
Instructions
-
Make the dough. In a large bowl or stand mixer, use a fork to whisk together 2 cups bread flour and 1 teaspoon salt. (Kosher salt is preferred, but table salt works.)
-
Add 2 tablespoons melted butter* and mix it in with the fork until the flour mixture is crumbly, breaking up any large chunks.
-
Add 2/3 cup warm water. Mix with the fork until the dough pulls together. Transfer to a lightly floured surface or use the dough hook attachment on your stand mixer.
Knead until the dough is smooth and elastic, about 8 minutes. It should form into a ball quickly.
-
Rest the dough. Shape the kneaded dough into a ball. Leave it in the bowl, cover with a tea towel, and let rest for 20-45 minutes. A longer rest yields softer, more pliable roti and makes it easier to roll out. (Note: This is not a yeast recipe, so the dough will not rise.)
-
Roll out the dough. Lightly flour your work surface. Divide the dough into six equal pieces and use your fingers to shape each piece into a smooth ball.
Take one ball, pat it into a disk with your fingers, and use a rolling pin to roll it into a thin circle, approximately 8-9 inches across (refer to photos for thinness).
(Optional: If rolling all dough at once, separate each sheet with parchment paper to prevent sticking. I prefer to roll one while frying the previous.)
-
Cook the Roti. Heat a cast iron skillet or large frying pan over medium to medium-high heat for a few minutes until very hot.
Add about a teaspoon of butter to the pan and swirl to coat.
-
Transfer the thin roti dough to the hot pan. Cook for 6-7 seconds, then flip. Add more butter if necessary to keep the roti soft. Cook for 30-50 seconds until bubbles form on top and the underside has light brown spots. Adjust heat to cook quickly without burning. Flip back to the original side, adding more butter if needed, and cook for another 20-30 seconds until brown spots appear.
-
Steam the Roti. This crucial step ensures soft, pliable roti! Place a paper towel inside a large ziplock bag. Immediately transfer the hot-off-the-pan roti onto the paper towel, then cover with another paper towel (to prevent sogginess). Seal the bag.
As you fry subsequent rotis, add them directly on top of the previous one in the bag, covering the stack with the top paper towel. This traps steam, keeping them tender. Keep the bag sealed as much as possible. A tortilla warmer can also be used.
-
Serve the roti hot, alongside your favorite curry and rice.
-
Store leftover roti in the paper towel-lined ziplock bag at room temperature for 1-3 days.
-
Freezing Roti: Layer cooled rotis between sheets of parchment paper, then seal in a freezer-safe ziplock bag. Store flat in the freezer.
To reheat, thaw at room temperature in the bag, then gently microwave until warm (avoid overcooking). Alternatively, re-grill directly from frozen using the same cooking method.
Notes
Nutrition
Explore More Top Recipes!
- Easy Pot Roast Crock Pot
- How to Cook a Perfect Ribeye
- Classic French Toast Recipe
- Comforting Red Beans and Rice
- Decadent Texas Sheet Cake
- Homemade Tomato Soup
- Fluffy Scones
- Sweet and Moist Honey Cornbread
- Rich Caramel Cake with Caramel Icing
- Classic Stuffed Bell Peppers
- Hearty Zuppa Toscana
- Crispy Chicken Parmesan