
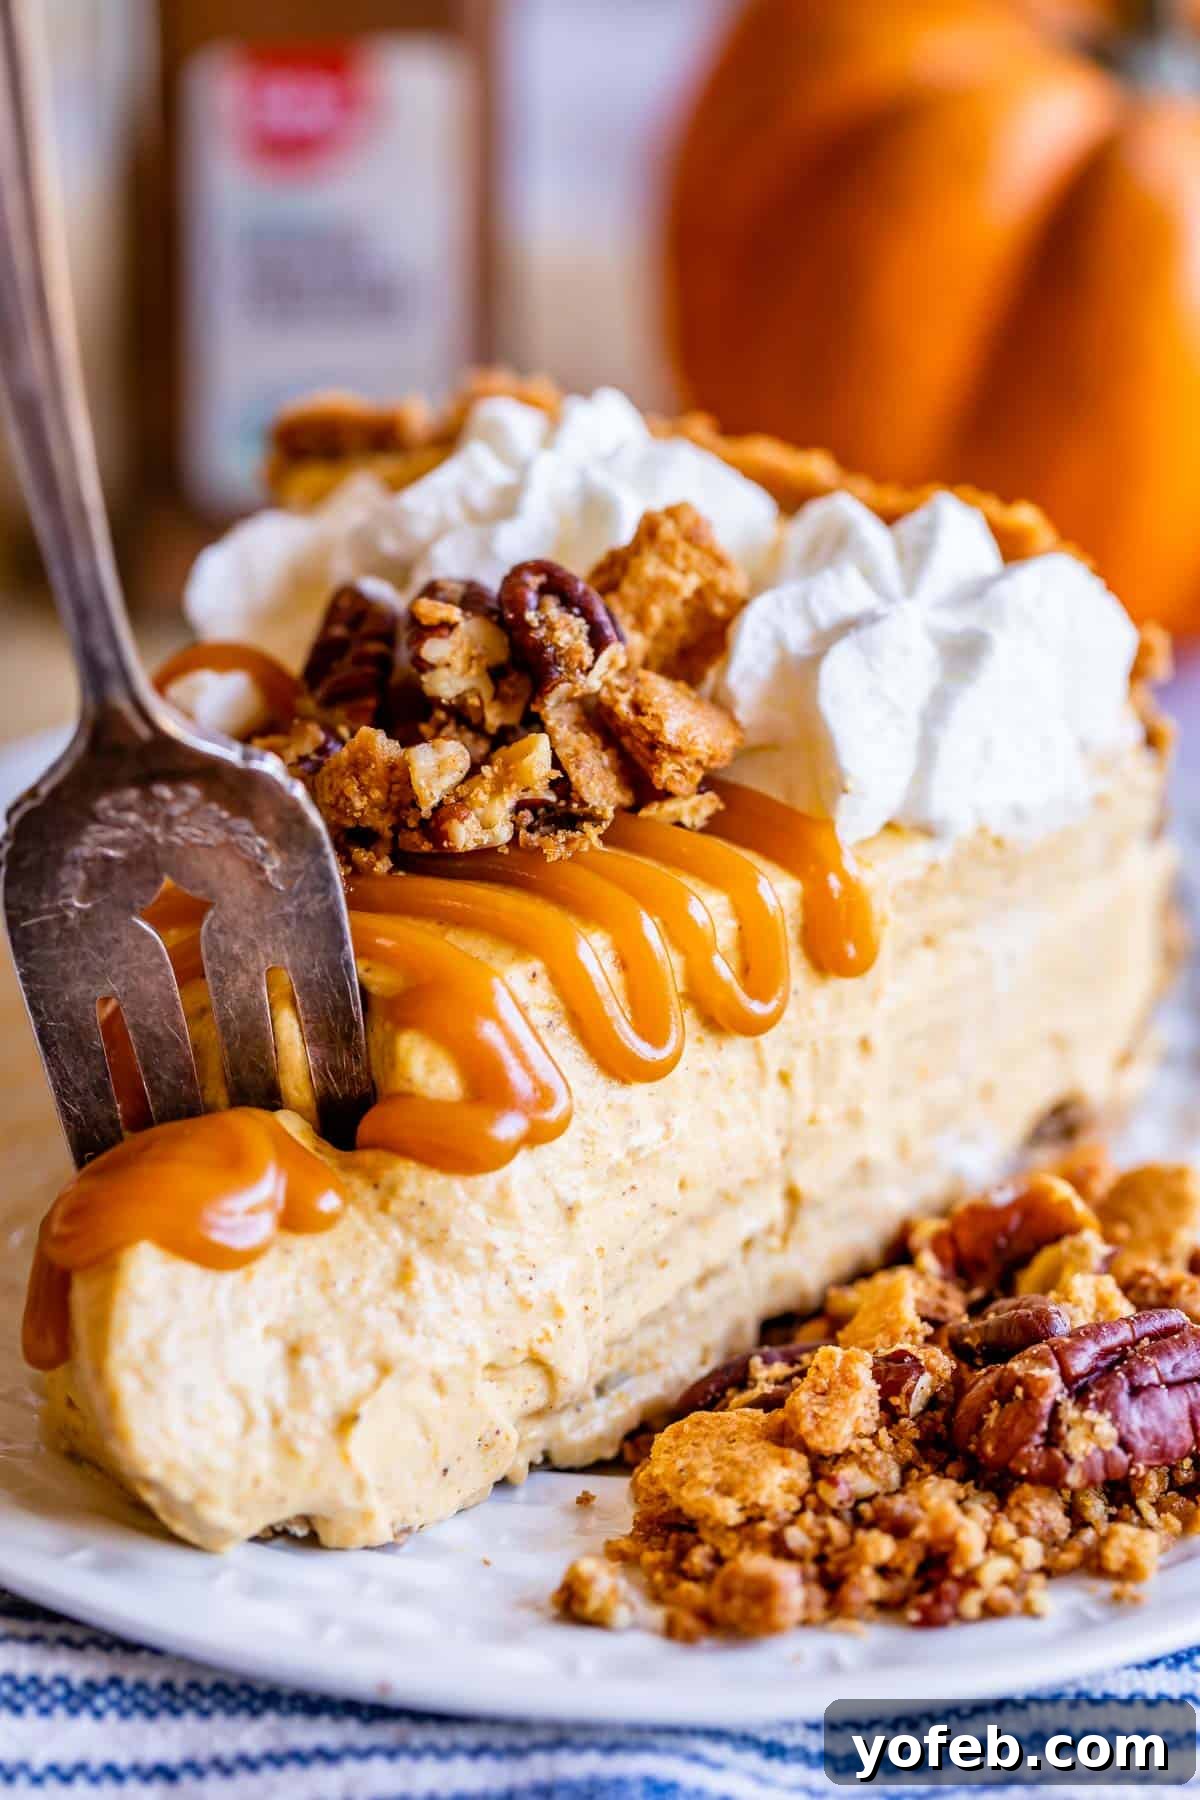
Indulge in the ultimate autumn dessert with this incredibly easy and luscious No-Bake Pumpkin Cheesecake. This recipe delivers a perfectly smooth, creamy, and intensely pumpkin-flavored experience without ever needing to turn on your oven for the filling. We understand that a truly exceptional cheesecake needs a standout crust, so we’ve taken it up a notch by adding a generous amount of crispy pecan graham crumble, not just as the base, but also as a delightful garnish sprinkled generously on top. Finish with a luxurious drizzle of warm caramel sauce, and you’ll find yourself in pure fall dessert bliss. This stress-free dessert can be prepared well in advance, making it the perfect showstopper for your Thanksgiving feast or any autumn gathering. Originally published on November 18, 2020, this beloved recipe has been refined for even greater ease and flavor.
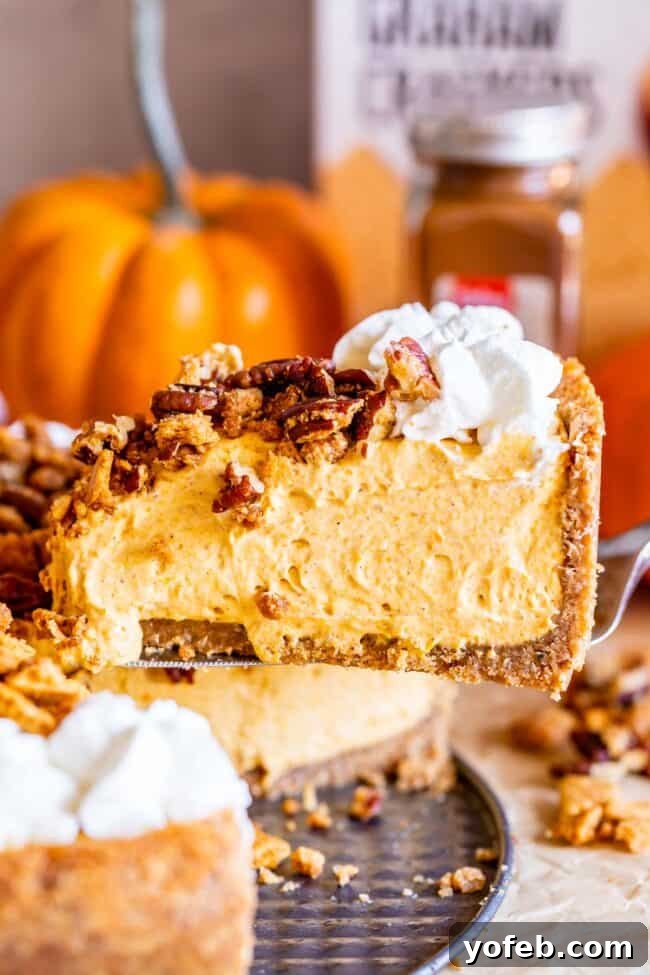
Table of Contents
- The Allure of No-Bake Pumpkin Cheesecake: A Fall Favorite
- No Bake vs. Baked Pumpkin Cheesecake: Understanding the Difference
- The Crispy Crust Debate: Elevating Your No-Bake Cheesecake
- Why This Pumpkin No-Bake Cheesecake Will Become Your Go-To
- Essential Ingredients for Your Pumpkin No-Bake Cheesecake
- Step-by-Step Guide: How to Make Pumpkin Cheesecake (No-Bake)
- The Secret Weapon: Pecan Graham Crumble Topping
- Serving and Storing Your Easy Pumpkin Cheesecake
- No-Bake Pumpkin Cheesecake Recipe FAQs
- More Irresistible No-Bake Cheesecakes to Explore
- Delightful Pumpkin Recipes for Your Thanksgiving Table
- Easy Pumpkin Cheesecake Recipe (No Bake) Recipe Card
The Allure of No-Bake Pumpkin Cheesecake: A Fall Favorite
As the leaves begin to turn and the air grows crisp, our thoughts often drift to the warm, comforting flavors of pumpkin. And what better way to celebrate the season than with a decadent pumpkin dessert? This year, let’s simplify our holiday baking with a show-stopping No-Bake Pumpkin Cheesecake. It’s a surprisingly effortless yet incredibly elegant treat that’s perfect for Thanksgiving, Halloween, or any cozy autumn evening. Forget the stress of cracks, water baths, or endless baking times – this recipe promises a smooth, creamy, and intensely flavorful cheesecake that comes together in mere minutes of active prep time.
Preparing desserts for holiday gatherings can often feel overwhelming, but this no-bake cheesecake offers a refreshing alternative. It allows you to create a stunning, flavorful dessert with minimal effort, freeing up your oven and your time for other dishes. Plus, the ability to make it ahead means one less thing to worry about on the big day. Get ready to impress your family and friends with a dessert that tastes like it took hours, but truly only requires a few simple steps and some patient chilling.
No Bake vs. Baked Pumpkin Cheesecake: Understanding the Difference
Before we dive into the delicious details, let’s address the fundamental distinction between no-bake and traditional baked cheesecakes. While both are incredibly satisfying, they offer entirely different textural experiences and preparation methods.
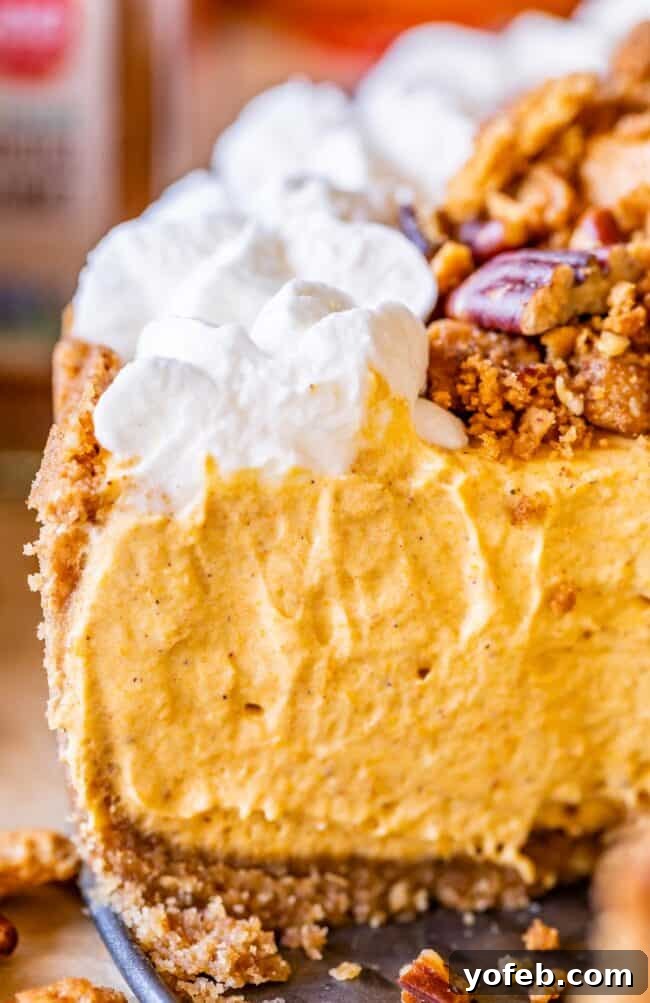
A **no-bake cheesecake**, like the one featured today, is celebrated for its light, airy, and mousse-like consistency. It’s typically made with cream cheese, whipped cream, and other flavorings, then chilled until set. The absence of eggs and baking results in a dessert that feels refreshing and less dense, making it an ideal palate cleanser after a rich holiday meal. The biggest advantage? Speed and simplicity. You can whip up the filling in about 10 minutes, making it a dream for busy schedules or when you want a gourmet dessert without the fuss.
In contrast, a **baked cheesecake** involves a specific baking technique, often with a water bath, and relies on eggs to achieve its signature dense, rich, and custard-like texture. While undeniably classic and delicious, baked cheesecakes require more precision, longer cooking times, and careful monitoring to prevent cracks or over-baking. They are a labor of love, whereas a no-bake cheesecake is a labor of delightful ease.
It’s important to understand that these are not interchangeable desserts; they are distinct culinary experiences. If you’re craving a light, creamy, and effortlessly elegant pumpkin dessert, the no-bake variety is undoubtedly the way to go. Its delicate texture and intense pumpkin flavor will captivate your taste buds without weighing you down.
The Crispy Crust Debate: Elevating Your No-Bake Cheesecake
Traditionally, a “true” no-bake cheesecake implies that absolutely no oven time is involved, not even for the crust. In such cases, the graham cracker crust is simply pressed into the pan and chilled, relying on the melted butter to help it hold its shape. This method is incredibly convenient, especially during the hot summer months when turning on the oven is the last thing you want to do.
However, I have a confession: I don’t always love a purely unbaked crust. While many adore the softer texture of a refrigerated crust, I often find it can become a bit too soft or even slightly soggy, especially when paired with a creamy filling. For me, a truly outstanding cheesecake experience requires a **crispy, sturdy crust** that offers a delightful contrast to the smooth, light filling. It’s a matter of personal preference, of course, but that satisfying crunch adds an essential textural dimension.
This is precisely why this recipe embraces the best of both worlds! We’re creating a pumpkin-infused, wonderfully creamy no-bake filling, but we’re pairing it with a non-apologetically crispy, perfectly baked graham cracker and pecan crust. The minimal oven time for the crust is a small step that yields immense flavor and textural payoff. And for those who are “no-bake purists,” don’t worry – I’ve included instructions for a no-bake crust option as well, so everyone can enjoy this autumn delight.
Why This Pumpkin No-Bake Cheesecake Will Become Your Go-To
This pumpkin no-bake cheesecake isn’t just easy; it’s genuinely exceptional. Here’s why it’s poised to become your favorite fall dessert:
- Uncompromised Pumpkin Flavor: Unlike some pumpkin desserts that are more orange in color than authentic in taste, this recipe packs a powerful, genuine pumpkin punch. We use real pumpkin puree and a carefully selected blend of warming spices to ensure every bite is bursting with true autumn flavor.
- Light & Creamy Texture: After a hearty holiday meal, a heavy dessert can be too much. This cheesecake offers a delicate, airy, and incredibly smooth texture that feels luxurious yet light, providing the perfect contrast to rich savory dishes. It melts in your mouth!
- Effortless Preparation: With minimal active cooking time (around 20 minutes!), this recipe is a lifesaver for busy hosts. The majority of the work is done by your refrigerator, allowing you to relax and enjoy the process.
- Perfect for Make-Ahead: The cheesecake needs ample chilling time to set perfectly and for the flavors to fully develop. This means you can prepare it up to two days in advance, crossing one major item off your holiday to-do list well before guests arrive. This advanced preparation capability makes it a top choice for Thanksgiving, freeing up precious oven space and reducing last-minute stress.
- Customizable Crust: Whether you prefer a truly no-bake crust or my personal favorite, a slightly baked crispy crust, this recipe offers both options.
- Impressive Presentation: With its smooth surface, optional whipped cream decoration, and a generous sprinkle of pecan graham crumble, this cheesecake looks as professional as it tastes.
Don’t just take my word for it:
Featured Comment
“…the recipe was phenomenal!! And honestly, it’s pretty quick to pull together.” – Nathan
See All Comments
Ready to create this autumnal masterpiece? Let’s gather our ingredients!
Essential Ingredients for Your Pumpkin No-Bake Cheesecake
Crafting this delightful No-Bake Pumpkin Cheesecake requires a few key ingredients, each playing a crucial role in achieving that perfect flavor and texture. Here’s a detailed shopping list to ensure you have everything on hand. For the complete list of quantities and detailed instructions, remember to jump to the recipe card below!
For the Crispy Pecan Graham Crust (or No-Bake Crust):
- **Pecans (chopped):** These add a wonderful nutty flavor and crunch to the crust. Toasting them, even for a no-bake crust, significantly enhances their aroma and taste.
- **Graham Crackers:** The classic base for any cheesecake crust. Crushed finely, they provide the perfect texture.
- **Dark Brown Sugar:** Contributes a deep, molasses-rich sweetness that complements the pumpkin and spices.
- **Butter (melted):** The binding agent for the crust, ensuring it holds its shape and crisps up beautifully if baked.
- **Salt:** A pinch of salt balances the sweetness and enhances all the flavors.
For the Creamy Pumpkin Cheesecake Filling:
- **Heavy Cream (or Whipping Cream):** Essential for whipping into stiff peaks, creating that light, airy, and mousse-like texture of the no-bake filling. Ensure it’s very cold for best results.
- **Powdered Sugar:** Used to sweeten the whipped cream and helps stabilize it.
- **Cream Cheese (full-fat, softened):** The star of any cheesecake! Full-fat cream cheese is crucial for achieving a firm, rich, and smooth filling. Make sure it’s softened to room temperature to prevent lumps.
- **Dark Brown Sugar:** Provides a warm, caramel-like sweetness that pairs perfectly with pumpkin and enhances the fall spice profile.
- **Vanilla Extract:** A touch of vanilla rounds out the flavors and adds a comforting aroma.
- **Cinnamon:** A foundational spice for pumpkin desserts, bringing warmth and classic autumnal notes.
- **Powdered Ginger:** Adds a subtle peppery warmth and depth.
- **Powdered Nutmeg:** Essential for that traditional pumpkin pie spice blend, offering a sweet and slightly pungent note.
- **Cloves:** A small amount of ground cloves contributes a strong, aromatic warmth, enhancing the overall spice complexity.
- **Cardamom:** My secret weapon! A pinch of cardamom introduces a bright, slightly citrusy, and exotic aroma that elevates the pumpkin flavor beautifully. Don’t skip it if you can help it!
- **Canned Pumpkin Puree (15 oz can, NOT pumpkin pie filling):** This is the pure essence of pumpkin. Be very careful to select plain pumpkin puree and not the pre-spiced pumpkin pie filling, which would alter the flavor profile significantly.
- **Salt:** Crucial for balancing the sweetness and intensifying the spice flavors in the filling.
For the Optional but Highly Recommended Pecan Graham Crumble Topping:
- **Graham Crackers:** More crushed graham crackers for that extra texture.
- **Butter:** Melts and coats the crumble, making it deliciously toasty.
- **Chopped Pecans:** Adds another layer of nutty crunch.
- **Dark Brown Sugar:** Sweetens the crumble and aids in caramelization during baking.
To Garnish (Optional, but Absolutely Amazing for Presentation and Flavor):
- Whipped Cream: Freshly whipped cream adds a light, creamy counterpoint.
- Caramel Sauce: A luscious drizzle of homemade or high-quality store-bought caramel sauce brings an extra layer of sweetness and sophistication.
Step-by-Step Guide: How to Make Pumpkin Cheesecake (No-Bake)
Creating this stunning dessert is surprisingly straightforward. Follow these steps for a perfect no-bake pumpkin cheesecake every time!
1. Prepare Your Crust
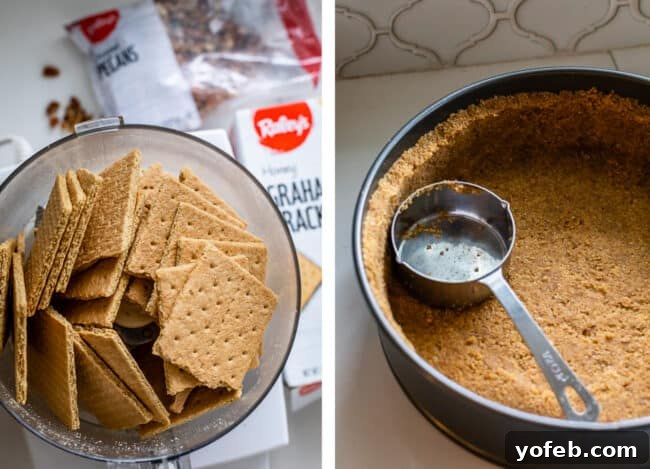
First, you’ll need to decide on your crust. Do you want a truly no-bake (chilled) crust, or do you prefer the superior crispness of a lightly baked crust? Both options use the same ingredients and amounts, but the baked version offers a much more satisfying crunch. Instructions for baking the crust are provided in the notes section of the recipe card.
To begin, finely crush 12 sheets of graham crackers (about 1.5 cups) and 1/2 cup of chopped pecans. A food processor makes quick work of this, but you can also achieve this by placing them in a Ziploc bag and crushing them with a rolling pin. If opting for a chilled crust, I highly recommend quickly toasting your pecans in a dry skillet over medium heat for 3-5 minutes until fragrant, then letting them cool. This simple step vastly improves their flavor. Combine the crushed crackers, pecans, 1/3 cup dark brown sugar, 1/4 teaspoon salt, and 1/2 cup melted butter. Mix until the mixture resembles wet sand.
Press this mixture very firmly into the bottom and at least 2 inches up the sides of a 9 or 10-inch springform pan. Use the flat bottom of a measuring cup or glass to really pack it down, especially into the corners. The firmer you press, the less likely your crust will crumble when sliced. If baking, bake at 350°F (175°C) for 10 minutes. Immediately after removing from the oven, gently press the crust back into shape with a spoon as the pecans can cause it to puff slightly. Let the crust cool completely, then chill it in the fridge or freezer for at least 20 minutes before adding the filling.
2. Prepare the Cheesecake Filling
This is where the magic happens! Start by whipping your heavy cream:
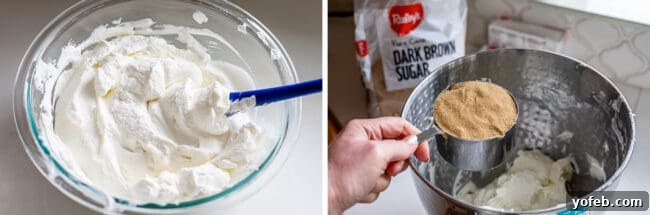
In a large bowl or stand mixer, combine 1 1/4 cups very cold heavy cream and 1/4 cup powdered sugar. Beat on high speed for about 2 minutes, until stiff peaks form. Be careful not to overbeat, or you’ll end up with butter! Once whipped, gently transfer it to another bowl and refrigerate while you prepare the rest of the filling. (You can use the same mixer bowl for the cream cheese mixture, no need to wash it.)
Next, tackle the cream cheese. The key to a silky-smooth filling is lump-free cream cheese:
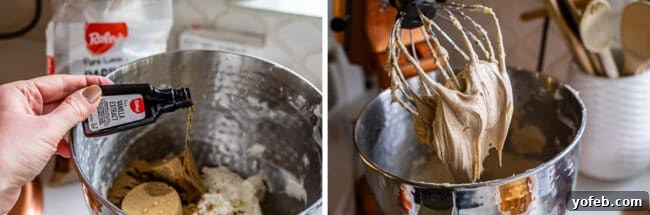
Add two (8-oz) packages of *softened* full-fat cream cheese to your mixer bowl. Beat on medium speed for about 2 minutes, scraping down the sides and bottom frequently, until it’s completely smooth with absolutely no lumps. This step is crucial for the cheesecake’s texture! Then, add 1 1/4 cups dark brown sugar, 2 teaspoons vanilla extract, 1 1/2 teaspoons cinnamon, 1 teaspoon powdered ginger, 1/2 teaspoon powdered nutmeg, 1/4 teaspoon cloves, 1/4 teaspoon cardamom, and 1/2 teaspoon salt. Beat for another minute, ensuring everything is well combined and lump-free.
Finally, incorporate the pumpkin puree. Add one (15-oz) can of pumpkin puree (remember, *not* pumpkin pie filling!) to the cream cheese mixture. Beat on low speed until just combined, scraping the sides as needed. You want a beautifully smooth, orange-hued mixture.
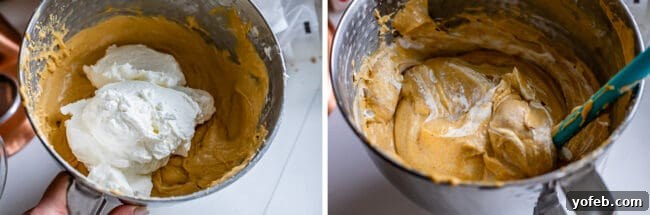
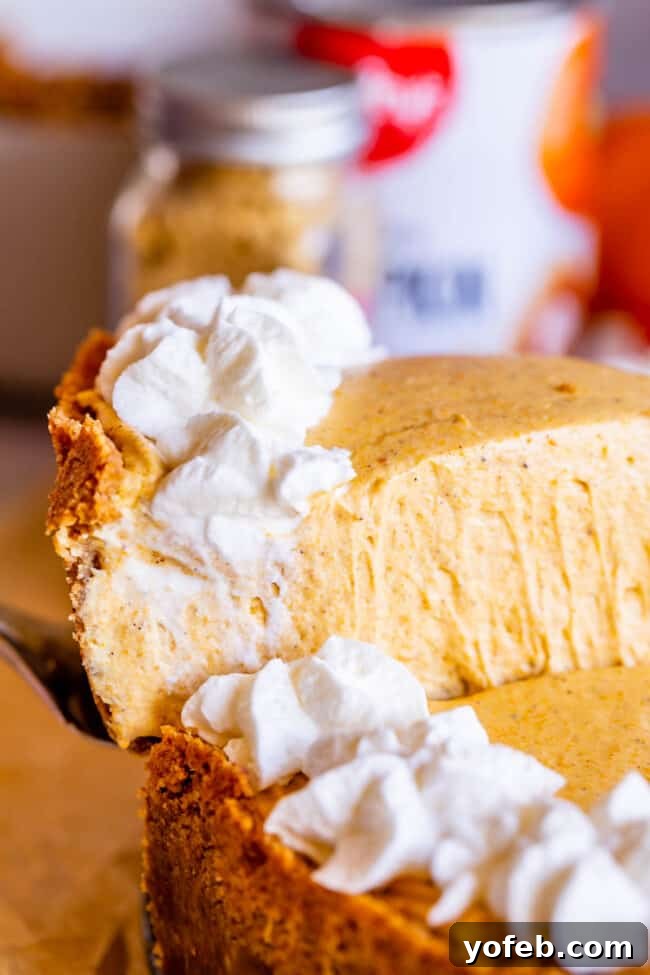
Now, it’s time to fold in the reserved whipped cream. Ditch the mixer at this stage! Using a large rubber spatula, gently fold the whipped cream into the pumpkin mixture until just combined. Overmixing will deflate the air you’ve whipped into the cream, resulting in a denser cheesecake. The goal is to keep it light and fluffy!
3. Fill the Crust and Chill
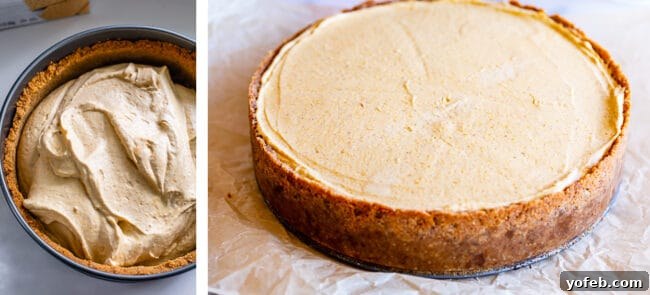
Carefully scrape the luscious cheesecake filling into your prepared crust. If you’re using a 9-inch pan, you might have a tiny bit of extra filling. Only fill it to the point where you can smooth out the top to be perfectly flat. Any excess? That’s your reward for your hard work – scoop it into a small bowl and enjoy a spoonful right then and there! Use an offset spatula or the back of a spoon to create a smooth, even surface.
Cover the springform pan tightly with plastic wrap and transfer it to the refrigerator. This is the most crucial step for setting the cheesecake and deepening its flavors. Chill for at least 3 hours, but for the absolute best results and a perfectly set, flavorful dessert, I highly recommend chilling it overnight (8-12 hours).
The Secret Weapon: Pecan Graham Crumble Topping
Since we’ve already “committed the crime” of lightly baking the crust (a delicious “crime,” I might add!), let’s go all-in on texture and add an incredible Pecan Graham Crumble topping. This garnish isn’t just for looks; it adds an irresistible crispiness and nutty sweetness that perfectly complements the creamy cheesecake.
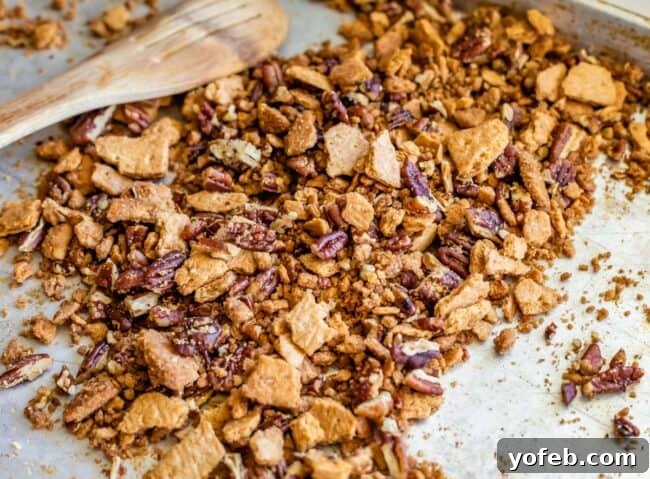
For those who love extra crust (and who doesn’t?), this crumble is a game-changer. It solves the eternal dilemma of “never enough crust” by allowing you to sprinkle additional crispy goodness directly onto each slice. Here’s how to make it:
Preheat your oven to 350°F (175°C). Take 6 full sheets of graham crackers and break them into chunks – some fine, some larger (about quarter-sized) for varying texture. In a medium bowl, melt 1/4 cup of butter. Add the crushed graham crackers, 3/4 cup chopped pecans, and 2 tablespoons dark brown sugar. Mix thoroughly until the butter evenly coats all the ingredients.
Spread this mixture onto a baking sheet in an even layer. Bake for 9-12 minutes, stirring every 3 minutes, until the crumble is lightly browned, fragrant, and perfectly crisp. Watch it closely to prevent burning. Once baked, remove it from the oven and let it cool completely. It will become even crispier as it cools. This topping is so good, you might just find yourself making extra to snack on!
Serving and Storing Your Easy Pumpkin Cheesecake
Once your no-bake pumpkin cheesecake has had ample time to chill and set, it’s time for the grand unveiling and delicious enjoyment!
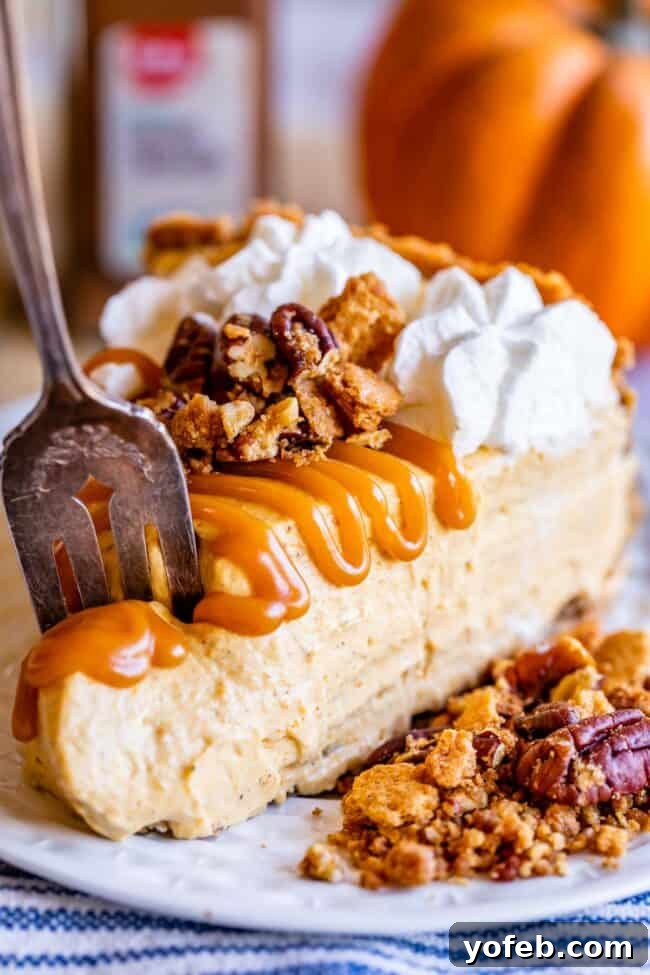
Serving Suggestions:
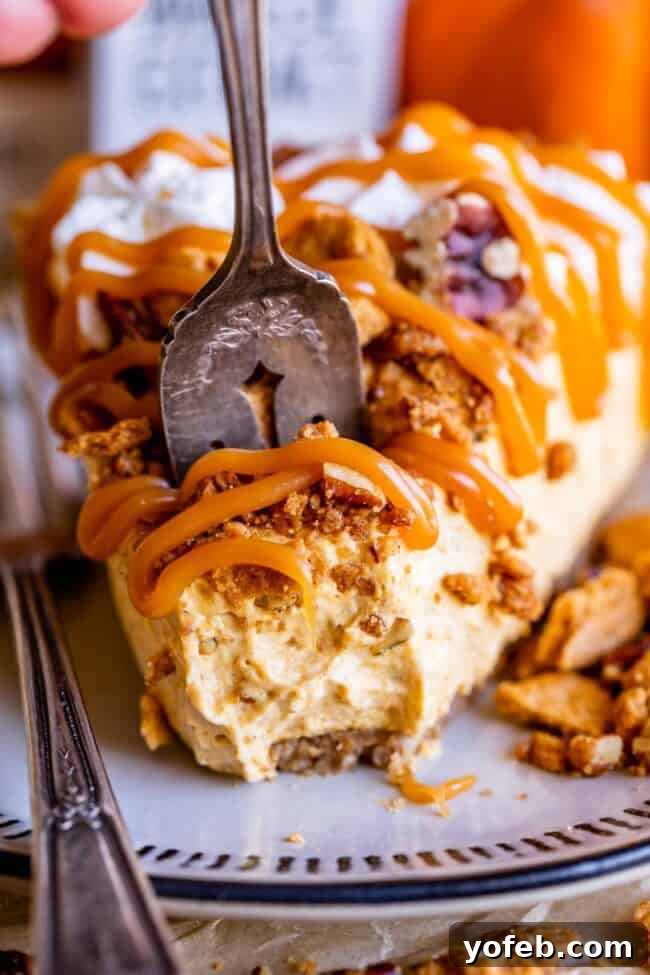
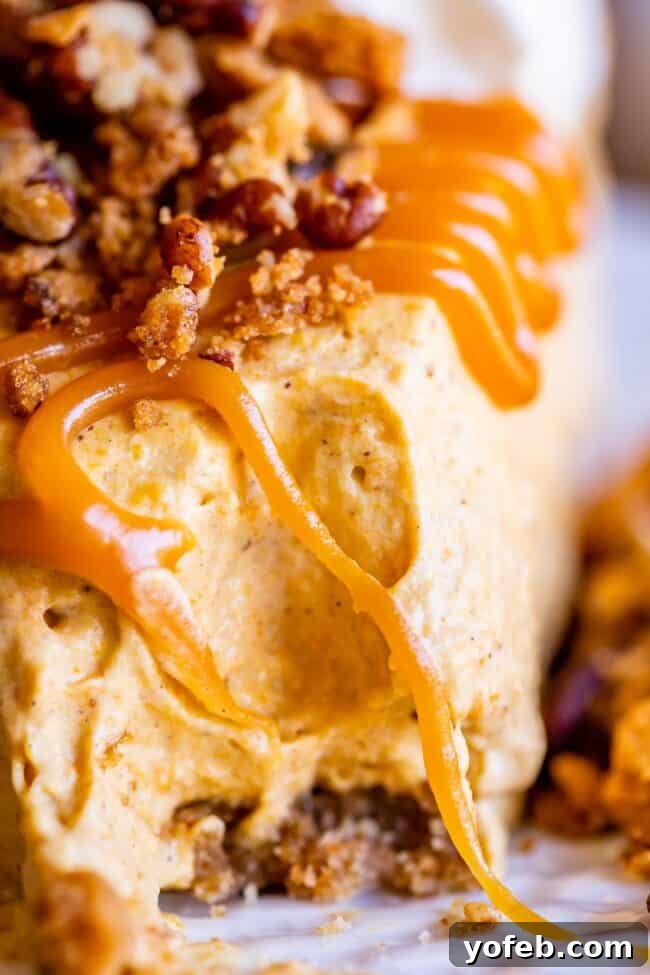
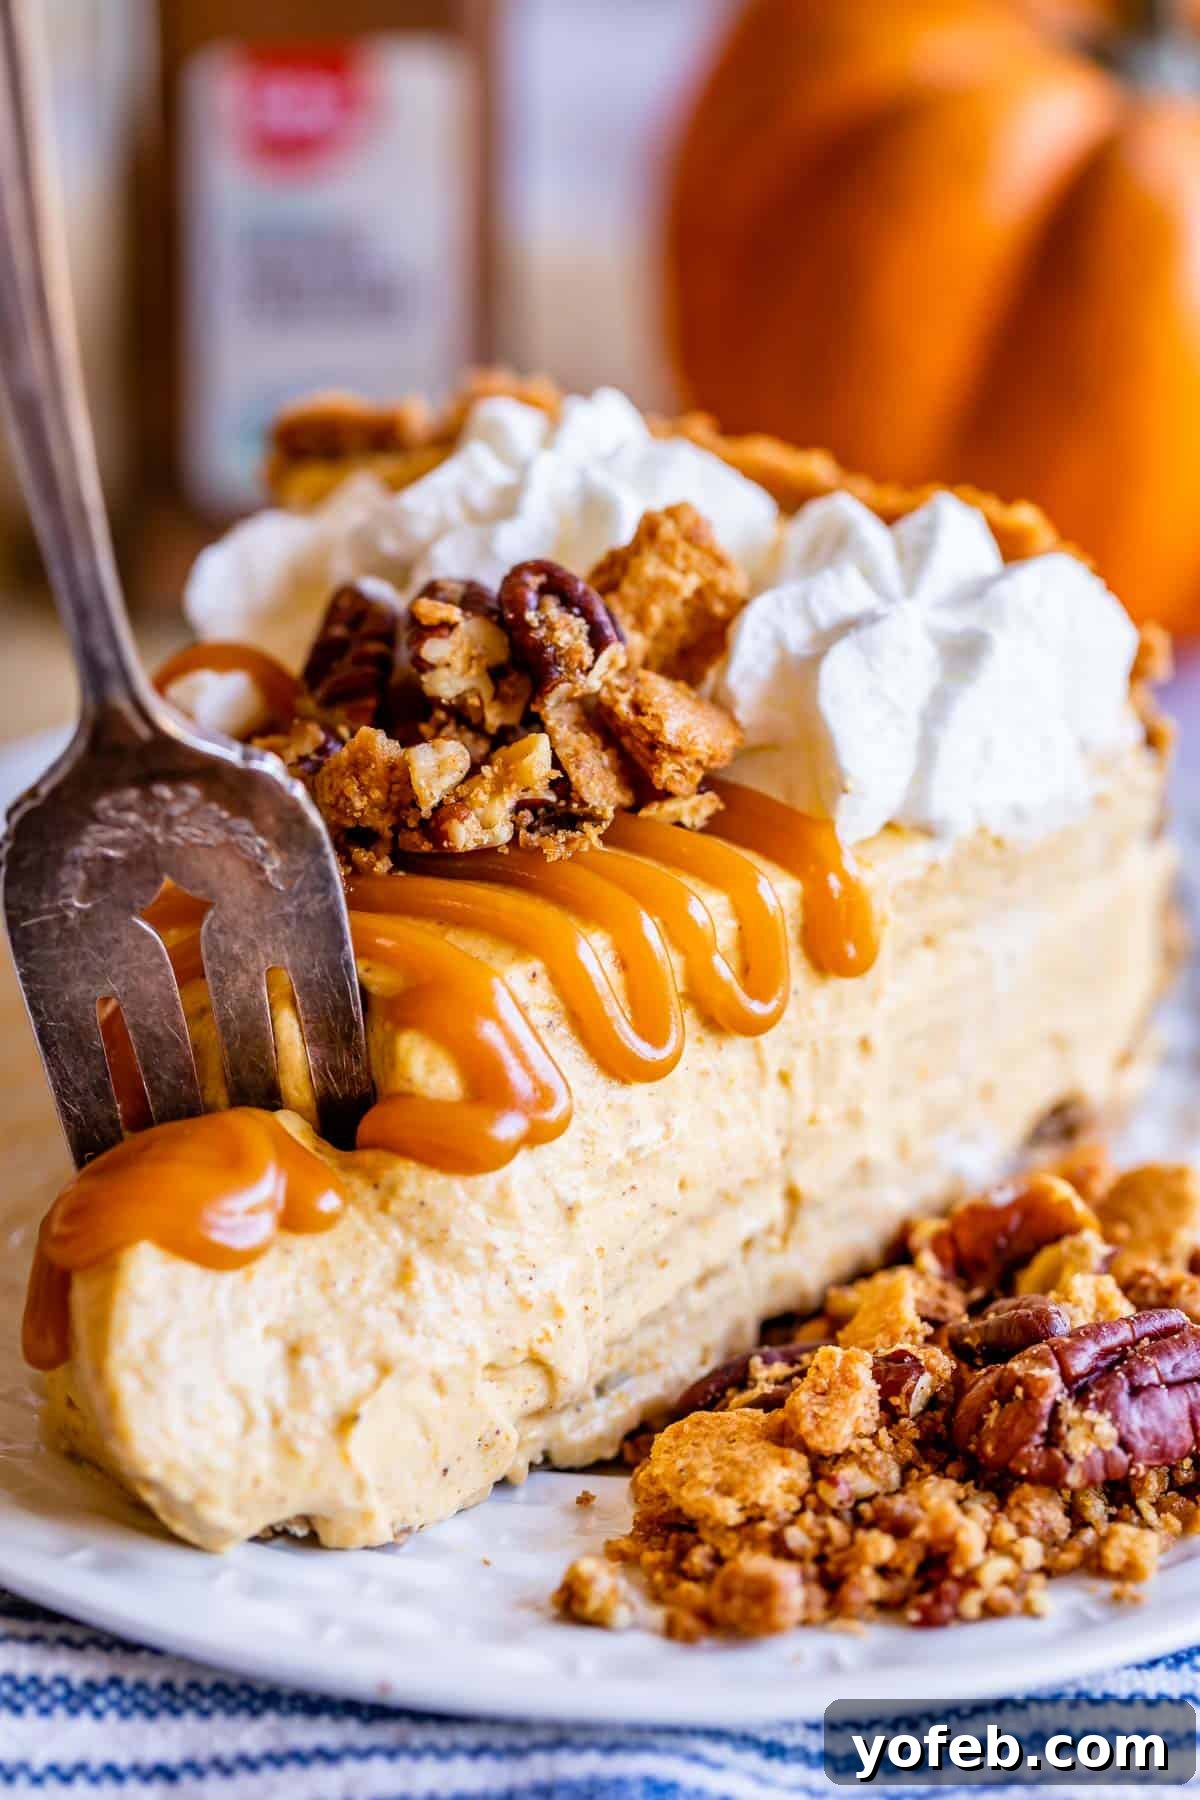
For pristine slices, run a sharp knife under hot water and wipe it clean between each cut. This creates clean, elegant portions. To make your cheesecake truly unforgettable, garnish each slice generously. Start with a dollop or swirl of fresh whipped cream. Then, sprinkle a generous amount of your homemade Pecan Graham Crumble over the whipped cream and around the plate for extra crunch and visual appeal. Finally, add a decadent drizzle of salted caramel sauce. The combination of creamy, crunchy, sweet, and salty flavors is pure autumnal perfection. Devour!
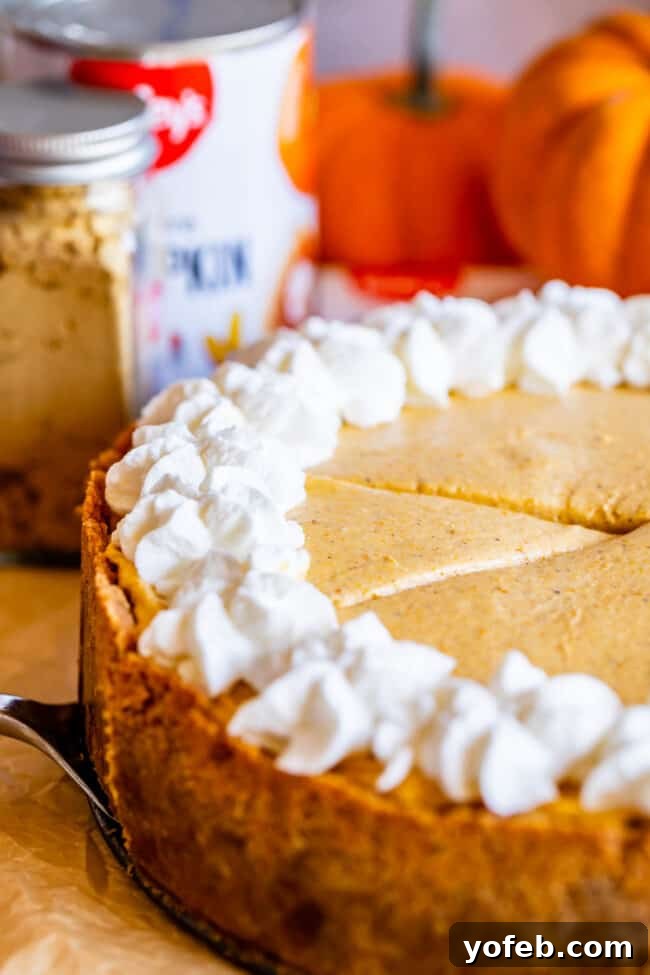
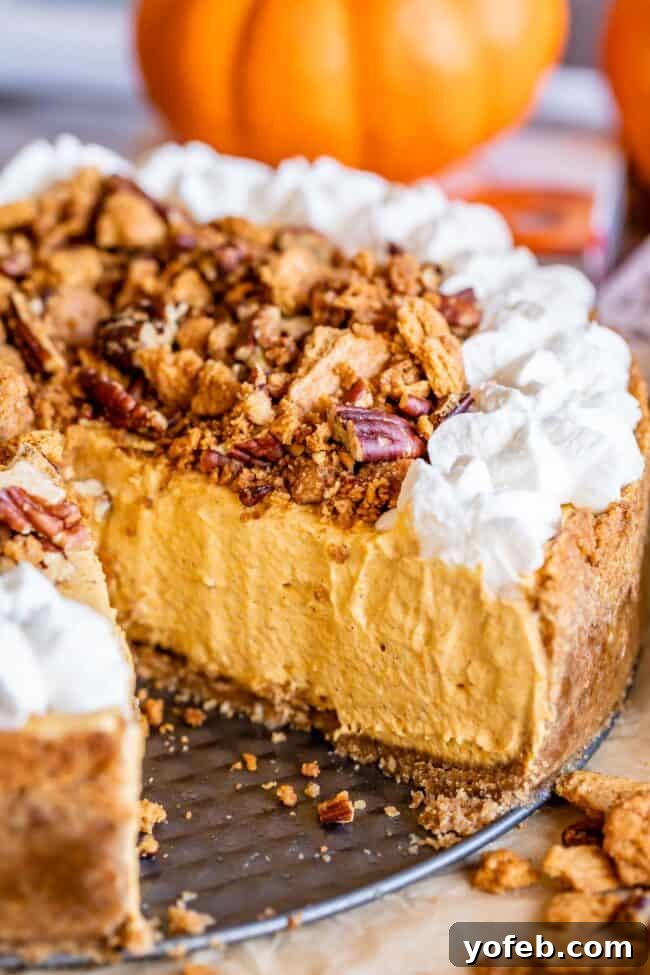
A note on garnishing the whole cheesecake: If you plan to serve the entire cheesecake at once, you can mound the Pecan Graham Crumble in the center of the cheesecake before serving. However, if you anticipate having leftovers, it’s best to garnish individual slices just before serving to keep the crumble from getting soggy. Whipped cream can be piped around the edges of the whole cake if desired, as it holds up well.
Storage Tips:
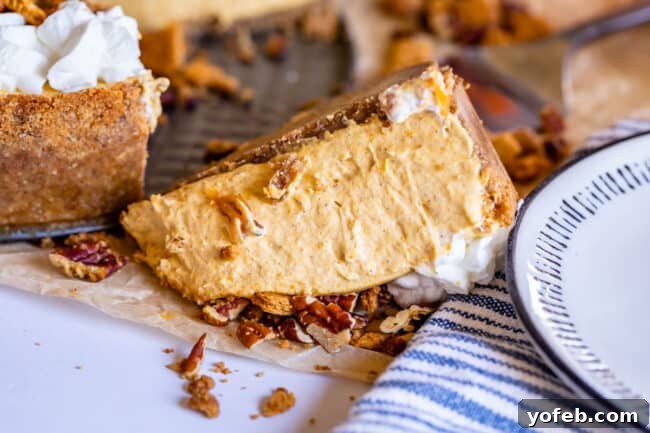
Store any leftover cheesecake slices or the entire cake in an airtight container in the refrigerator. Cheesecake is quite forgiving and will remain fresh and delicious for 3-4 days. It’s important to keep it well-covered to prevent it from absorbing odors from other foods in the fridge.
Do not freeze no-bake cheesecakes. While baked cheesecakes often freeze beautifully, no-bake versions are quite different due to their higher moisture content and delicate, aerated texture. Freezing will significantly alter the texture, making it icy, gummy, or grainy, and it will not thaw back to its original creamy consistency. For this reason, I strongly advise against freezing this recipe. Plan to enjoy it fresh within a few days!
A little kitchen humor from my own experience: The photo above is a gentle reminder that even with the best intentions, things in the kitchen can sometimes take an unexpected turn. This particular slice had a little mishap during a photo shoot. It’s truly a miracle my husband, Eric, puts up with my demanding requests for “just the right angle” during recipe photography. Sometimes, delicious things fall! But rest assured, the cheesecake itself is robust and easy to handle once set.
No-Bake Pumpkin Cheesecake Recipe FAQs
Many argue that it’s not just as good, but in some ways, even better! While it offers a different experience than its baked counterpart – a light, airy, mousse-like texture instead of a dense, rich custard – this difference is precisely what makes it so appealing. No-bake cheesecakes eliminate the common stresses of baking, such as cracks, over-baking, or under-baking. They are consistently smooth, creamy, and deliver an addictively delicious, refreshing quality that baked cheesecakes simply don’t. Expect to fall in love with its unique, dreamy texture and ease of preparation.
There are a few common reasons why a no-bake cheesecake might not set:
- Insufficient Chill Time: This is the most frequent culprit. While 3 hours is a minimum, overnight (8-12 hours) is truly ideal for the cheesecake to firm up completely and for the flavors to fully meld. Patience is key!
- Cream Cheese Temperature & Quality: Ensure your cream cheese is at room temperature before beating it to prevent lumps, but also use *full-fat* cream cheese. Low-fat or “light” cream cheese often contains more water and less fat, which can result in a runnier, less stable cheesecake. Always opt for the full-fat variety for optimal setting and richness.
- Over-mixing the Whipped Cream: If you overbeat the heavy cream, it can become grainy or even turn into butter, which won’t contribute to the light, airy texture needed for setting. Conversely, under-whipping it (not reaching stiff peaks) will mean less stability.
- Incorrect Ingredient Ratios: Double-check that you’ve measured your ingredients precisely, especially the heavy cream and cream cheese.
If your cheesecake still feels a little soft, simply give it more time in the refrigerator. It will eventually set.
If your no-bake cheesecake turns out hard or icy, it’s almost certainly because it was placed in the freezer to speed up the chilling process. While tempting when you’re eager to dig in, freezing a no-bake cheesecake is not recommended. The water content in the filling will crystallize, destroying the delicate, creamy texture. It can result in a cheesecake that is rock-hard in some spots and strangely watery or grainy in others once thawed. No-bake cheesecakes rely on extended refrigeration to set properly, not freezing. Stick to the fridge for a minimum of three hours (preferably longer), and if you absolutely can’t wait, serve it in bowls with a spoon to enjoy its creamy, slightly softer state.
Absolutely! This recipe provides a well-balanced spice profile, but you can certainly adjust it to your personal taste. If you prefer a stronger ginger kick, increase the amount slightly. If you’re not a fan of cloves or cardamom, you can omit them, though they do add wonderful depth. For an even more intense pumpkin flavor, you could try gently reducing the pumpkin puree on the stovetop for a few minutes to evaporate some of its moisture, making its flavor more concentrated (allow it to cool completely before adding to the mixture).
Yes, this recipe is easily adaptable to be gluten-free. Simply substitute traditional graham crackers with your favorite brand of gluten-free graham crackers for both the crust and the pecan graham crumble topping. All other ingredients in the filling are naturally gluten-free.
More Irresistible No-Bake Cheesecakes to Explore
If you’ve fallen in love with the ease and deliciousness of this No-Bake Pumpkin Cheesecake, you’re in for a treat! There’s a whole world of quick and easy no-bake cheesecake recipes waiting to be discovered. Here are some more favorites that I think you’ll adore:
- No Bake Dulce de Leche Cheesecake with Caramelized Peaches >> This seriously delicious combination offers a rich caramel base with sweet, tender peaches.
- No Bake Cherry Cream Cheese Pie >> An absolute classic for a reason! It’s incredibly simple to make and always a crowd-pleaser.
- Maple Cheesecake with Roasted Pears >> Don’t let the unassuming name fool you; everyone who tries this unique flavor combination is utterly blown away!
- No Bake S’mores Cheesecakes >> Capture all the fun and deliciousness of a summertime campfire s’mores without the need for a bonfire.
- No Bake Salted Caramel Cheesecake with Caramelized Bananas >> Experience a delightful blend of sweet and salty, enhanced by soft caramelized bananas and a crunchy almond crust.
- No Bake Cheesecake with Raspberry and Lavender from A Dish of Daily Life >> A sophisticated and aromatic twist on a classic.
- No Bake Strawberry Cheesecake from Grandbaby Cakes >> A vibrant, fruity, and refreshing option for any berry lover.
- No Bake Woolworth Cheesecake from Kitchen Fun With My Three Sons >> A nostalgic recipe that promises old-fashioned charm and taste.
Delightful Pumpkin Recipes for Your Thanksgiving Table
Thanksgiving is synonymous with pumpkin, and while this No-Bake Pumpkin Cheesecake is a fantastic addition, there are many other ways to incorporate this beloved fall flavor into your holiday menu. Explore these other delicious pumpkin-centric recipes perfect for your festive table:
- Pumpkin Cupcakes with Maple Pecan Frosting >> These cupcakes are incredibly moist and packed with flavor, thanks to the magic of browned butter and a sweet maple pecan frosting.
- Double Layer Pumpkin Cheesecake >> For those who adore baked cheesecakes, this classic features two rich layers of pumpkin goodness and, of course, a delightful graham crumble.
- Fudgy Pumpkin Chocolate Chip Bars >> Imagine the indulgence of brownies, but infused with all the comforting flavors of autumn – a perfect treat for pumpkin and chocolate lovers.
- Easy Pumpkin Dump Cake >> This incredibly simple dessert is a guaranteed crowd-pleaser, requiring minimal effort for maximum flavor.
- Crème Brulée Pumpkin Pie >> Elevate your traditional pumpkin pie with a crispy, caramelized sugar topping. You’ll never go back to plain pumpkin pie again!
- Pumpkin Honey Bun Cake from Bunny’s Warm Oven >> A sweet, spiced, and incredibly moist cake that combines the best of a honey bun with pumpkin.
- Glazed Pumpkin Scones from The Woks of Life >> Perfect for a festive breakfast or an afternoon tea, these scones are tender and beautifully spiced.
- Extra Fudgy Pumpkin Brownies from The Loopy Whisk >> Another delightful fusion of rich chocolate and warm pumpkin, resulting in an irresistibly fudgy brownie.
Facebook | Pinterest | Instagram

Easy Pumpkin Cheesecake Recipe (No Bake)
Ingredients
For the crust
- 1/2 cup chopped pecans
- 12 sheets graham crackers, 1 and 1/2 cups crushed
- 1/3 cup dark brown sugar
- 1/4 teaspoon salt
- 1/2 cup butter, melted (1 stick)
For the cheesecake filling
- 1 & 1/4 cups heavy cream*
- 1/4 cup powdered sugar
- 2 (8-oz) packages cream cheese, softened**
- 1 & 1/4 cups dark brown sugar
- 2 teaspoons vanilla
- 1 & 1/2 teaspoons cinnamon
- 1 teaspoon powdered ginger
- 1/2 teaspoon powdered nutmeg
- 1/4 teaspoon cloves
- 1/4 teaspoon cardamom
- 1/2 teaspoon salt
- 1 (15-oz) can pumpkin puree
For the Pecan Graham Crumble (optional)
- 6 sheets graham crackers
- 1/4 cup butter, (half stick)
- 3/4 cup chopped pecans
- 2 tablespoons dark brown sugar
To garnish
- More whipped cream, to decorate top*** (see notes)
- caramel sauce, optional
Instructions
-
Make the crust. First decide if you want a true no-bake situation (chilled crust) or a baked crust, which will be crispier, and in my opinion, tastier. See notes for how to bake the crust.
-
To chill the crust: In a small saucepan, toast 1/2 cup chopped pecans over medium heat for about 3-5 minutes, until fragrant. Be sure to stir often. Let cool. Add 1/2 cup toasted pecans and 12 sheets graham crackers to a food processor. Run the processor until they are finely crushed. (You could also seal the crackers and pecans in a ziplock and crush with a rolling pin.)
-
Transfer the mixture to a medium bowl (if not using a food processor). Add 1/3 cup brown sugar, 1/4 teaspoon salt, and 1/2 cup melted butter. Stir (or pulse in the processor) until everything is moistened and the mixture looks like wet sand.
-
Press the mixture very firmly into the bottom and at least 2 inches up the sides of a 9 or 10 inch springform pan. I like to use a measuring cup to press it into the corners. The more firmly you press your crust, the less likely it will be to crumble and fall apart on you when slicing. Put your back into it!
-
Chill the crust for at least 20 minutes in the fridge or freezer before adding the cheesecake filling.
-
Make the cheesecake filling: In a large bowl or stand mixer, add 1 and 1/4 cups heavy cream and 1/4 cup powdered sugar. Beat on high for about 2 minutes, watching it carefully to make sure you don’t churn it into butter! Whip the cream until stiff peaks form, scraping the sides as necessary.
-
Chill the whipped cream. If you are using a stand mixer, scrape the whipped cream into another bowl and store in the fridge. Use the same bowl to make the rest of the filling (no need to clean it out). (If you are using a hand mixer, just put the whipped cream in the fridge and get a new large bowl.
-
Beat the cream cheese. Add 2 packages of softened cream cheese to the bowl.** Beat on medium speed for about 2 minutes, stopping to scrape the sides and bottom. Make sure there are absolutely no lumps. Keep beating until it is smooth!
-
Add 1 and 1/4 cups dark brown sugar, 2 teaspoons vanilla, 1 and 1/2 teaspoons cinnamon, 1 teaspoon ginger, 1/2 teaspoon nutmeg, 1/4 teaspoon cloves, 1/4 teaspoon cardamom, and 1/2 teaspoon salt. Beat for another minute or so, scraping the sides and bottom and making sure there are no lumps!
-
Add the 15 ounce can of pumpkin puree. Beat on low speed until the pumpkin is incorporated, scraping the sides.
-
Fold in the whipped cream. Put away your mixer. We don’t want to deflate the whipped cream! Use a large rubber spatula to gently fold in the whipped cream that you beat earlier. Only mix until everything is combined, and then stop. You want it to stay light and fluffy!
-
Fill the crust. Use a rubber spatula to scrape the filling into the crust. If you are using a 9 inch pan, you might have a little extra filling. Only fill it to the point where it can be smoothed out flat. (This is the part where you scrape the extra filling into a bowl and eat it with a spoon right then and there. It’s your reward for getting this dessert done ahead of time. Also, you have to test it, right?) Use an offset spatula to smooth the top of the cheesecake nice and flat.
-
Cover the cheesecake tightly with plastic wrap and chill in the fridge for at least 3 hours, or up to 2 days. I like to chill at least 8-12 hours before serving. That way the cheesecake has plenty of time not only to set up, but also for the flavors to deepen.
-
Make the Pecan Graham Crumble. (If you are dedicated to a true no-bake cheesecake, you will have to skip the deliciousness that follows. Therefore, it is optional. But I feel that only a fool would make this choice. Don’t be foolish now.) Preheat the oven to 350 degrees F.
-
Add 6 full sheets graham crackers to a ziplock bag. Use a rolling pin to break up the graham crackers. See photos. I like to leave some big chunks in there, the biggest ones were about the size of a quarter.
-
In a medium bowl, melt 1/4 cup butter in the microwave. Add the crumbled graham crackers, 3/4 cup chopped pecans, and 2 tablespoons brown sugar to the bowl. Mix it all together and make sure the butter is distributed.
-
Spread the mixture out onto a baking sheet. Bake at 350 for 9-12 minutes, making sure to stick around to open the oven and stir the mixture every 3 minutes or so. When the mixture is lightly browned and fragrant, take it out and let cool completely.
-
Decorate the cheesecake with whipped cream around the edges, if desired. See notes for making your own whipped cream. I used a star tip and piping bag to decorate the edges. If you are sure that you are going to eat the entire cheesecake right away, you can choose to fill the center of the cheesecake with a mound of Pecan Graham Crumble. But keep in mind that it will get soggy in just a little while, so if you are not serving the whole cheesecake, leave it off and garnish individual slices.
-
Serve the cheesecake.Use a sharp knife to slice the cheesecake, wiping off the knife in between cuts. Garnish each slice with additional whipped cream, plenty of Pecan Graham Crumble, and a drizzle of caramel sauce for good measure. Devour!
-
Store leftovers in the fridge. Cheesecake is very forgiving; it will stay fresh for 3-4 days. Do not freeze no-bake cheesecakes. Baked cheesecakes are ideal for freezing, but no-bakes are quite different. It will change the texture significantly if you freeze it, so I don’t recommend it.
Notes
- Skip toasting the pecans. Crush 1/2 cup pecans and 12 sheets of graham cracker either in the food processor or in a ziplock with a rolling pin.
- Transfer the mixture to a medium bowl if not using a food processor. Add 1/3 cup brown sugar, 1/4 teaspoon salt, and 1/2 cup melted butter. Combine until everything is moistened and the mixture looks like wet sand.
- Press the mixture very firmly into the bottom and at least 2 inches up the sides of a 9 or 10 inch springform pan. I like to use a measuring cup to press it into the corners. The more firmly you press your crust, the less likely it will be to crumble and fall apart on you when slicing.
- Bake the crust at 350 degrees F for 10 minutes. It will puff up and lose its shape a little bit. Immediately after removing from the oven, use a spoon to gently press the crust firmly back into place.
- Let the crust cool completely before adding the filling. I like to speed this up by putting it in the fridge or freezer.
*Heavy cream is usually sold near the milk at the store. It is sometimes called whipping cream. The different names refer to different fat content levels. (Use the highest percentage fat that you can find The percentage will usually be between 30-40%; look near the nutrition facts.) Heavy cream is not coffee creamer. It is the thick, rich part of milk that rises to the top when you milk a cow. Those of you who know what cream is think it is odd that I am explaining this, but it is one of my most-asked questions when I post a recipe involving cream!
**If you didn’t have time to soften your cream cheese, you can microwave it in 30 second increments on power level 1 until it is soft. If it melts at all, you will have to throw it out, so be careful.
***Whipped Cream If you would like to make your own whipped cream for decorating the top, beat together 1/2 cup cream* and 2 tablespoons powdered sugar until peaks form. I used a star tip and a piping bag to decorate the top of the cheesecake.
How to store this no-bake pumpkin cheesecake recipe
Store leftovers in the fridge. Cheesecake is very forgiving; it will stay fresh for 3-4 days. Do not freeze no-bake cheesecakes. Baked cheesecakes are ideal for freezing, but no-bakes are quite different. It will change the texture significantly if you freeze it, so I don’t recommend it.