
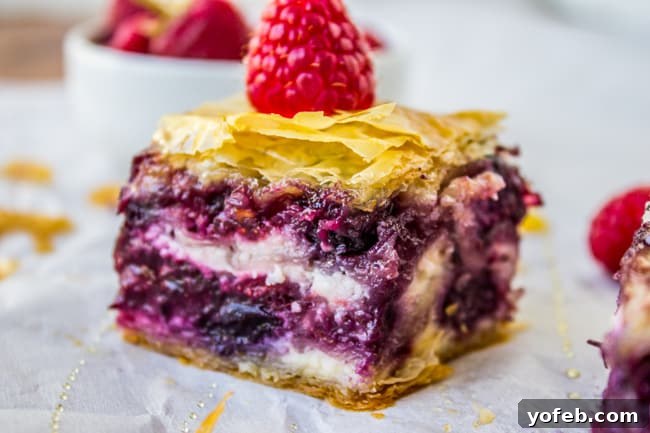
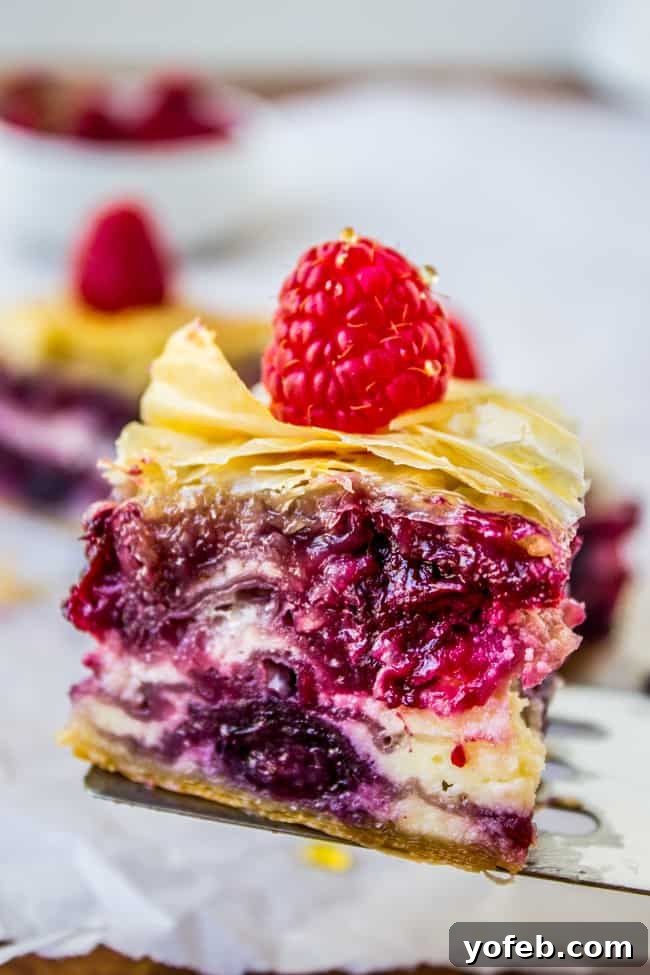
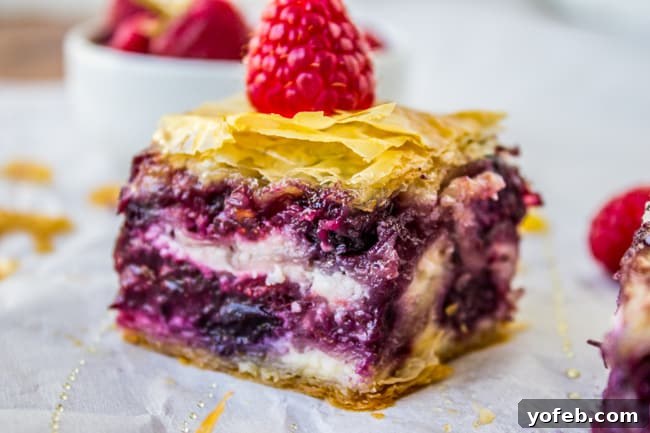
This Berry Cheesecake Baklava is a delightful modern twist on a cherished classic, offering the perfect make-ahead summer dessert that’s refreshingly light and entirely nut-free. If you or your loved ones aren’t keen on nuts, this vibrant baklava variation is crafted just for you, promising a unique culinary experience that beautifully marries creamy cheesecake with the flaky layers of traditional baklava.
Life, much like a perfectly layered baklava, is full of wonderful moments and unexpected delights. Recently, my family experienced such a joyous occasion: my sister-in-law Jessie’s wedding! It was more than just a ceremony; it was an unforgettable celebration that brought our entire family together under one roof. Unlike a previous family wedding where we were confined to different floors of a hotel, this time we shared an Airbnb house, which made all the difference. There’s something incredibly special about having a communal space – a real couch to sprawl on, a kitchen to raid for late-night snacks, and the freedom to gather in a relaxed setting once the little ones were tucked into bed. Those evenings, filled with laughter and competitive rounds of Bananagrams and Scattergories, underscored the true joy of family connection.
Weddings with young children are always an adventure, and this one was no exception. I discovered a new level of multitasking skill, expertly wrangling grumpy, overheated toddlers while navigating in dangerously high heels and a stunning bridesmaid dress that, while beautiful, restricted my arm movements significantly. My son, Truman, played his role as ringbearer with admirable dedication, eventually transforming his satin ringbearer pillow into an actual pillow for a much-needed nap amidst the festivities. Those tiny diamond rings were momentarily forgotten in the pursuit of comfort!
Every moment, every laugh, every small challenge was absolutely worth it. The highlight for me was dancing the night away with my wonderful husband, soaking in the atmosphere of pure happiness and celebrating the love that brought everyone together. These are the precious memories we make, the ones that fuel our souls and inspire us in countless ways.
My daughter, Charlotte, truly found her calling as the flower girl. I’m convinced she’s destined for a professional career in petal-scattering! I’ve never witnessed a four-year-old enjoy the spotlight quite as much as she did, carrying her golden basket and joyfully tossing giant fistfuls of flower petals in every direction. Her sheer delight was contagious, adding an extra layer of sweetness to an already perfect day.
Why Berry Cheesecake Baklava is Your New Summer Essential
Baklava. The very word conjures images of delicate, honey-drenched layers, often packed with crunchy nuts. I absolutely adore traditional baklava, and I have a fantastic recipe that I’ll gladly share sometime. But first, let me introduce you to its vibrant, summery cousin: Berry Cheesecake Baklava. While classic baklava often feels like a cozy, autumnal or festive treat, this berry-infused version is specifically designed to brighten your summer table.
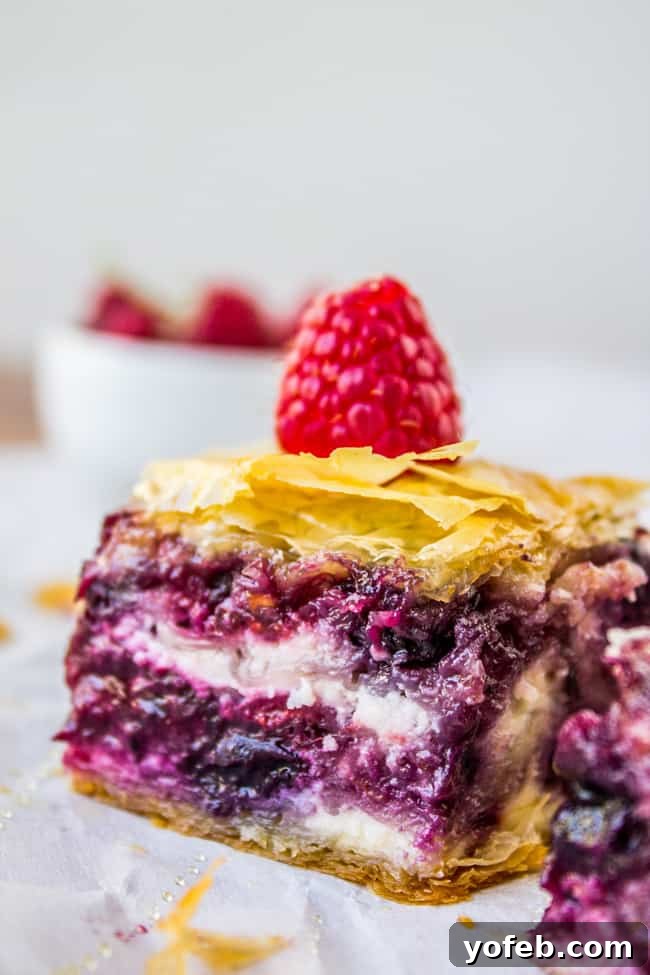
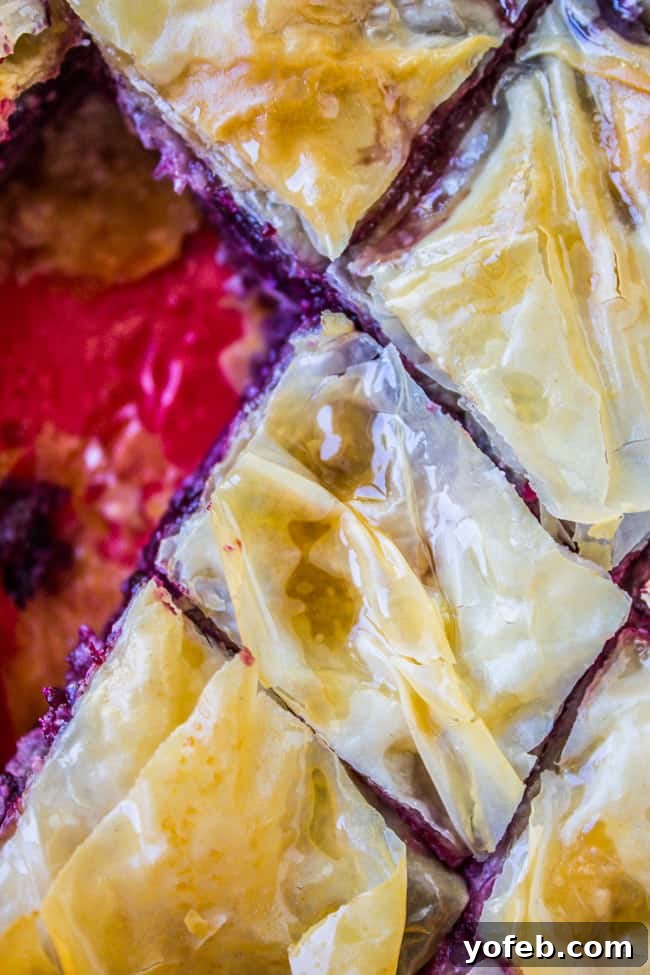
Imagine this: wafer-thin layers of phyllo dough, each delicately brushed with melted butter, cradling a luscious, creamy cheesecake mixture, and studded with a burst of sweet, tart mixed berries. Yes, I did mention butter – a lot of it! The process of layering and buttering phyllo can feel like an edible art project, transforming simple ingredients into a masterpiece. The contrast between the crisp phyllo, the rich cheesecake, and the juicy berries, all brought together by a fragrant honey-vanilla syrup, is simply divine. It’s fantastic served chilled on a hot day or at room temperature, making it incredibly versatile for any gathering. And for those who prefer to avoid nuts, this recipe offers all the textural and flavor complexity of baklava without a single nut in sight.
Ready to dive into this delectable creation? Or are you simply thirsty for more culinary inspiration?
Facebook | Pinterest | Instagram | Twitter

Berry Cheesecake Baklava: The Ultimate Nut-Free Summer Dessert
Print Recipe
Ingredients
For the Syrup: A sweet, aromatic glaze
- 1/4 cup water
- 1/4 cup sugar
- 1/2 cup honey
- 1 teaspoon vanilla extract
For the Cream Cheese Filling: The creamy core
- 8 ounces cream cheese, softened
- 1 large egg
- 1/3 cup sugar
- 1/8 teaspoon salt
To Assemble: Layers of flaky goodness
- 1 16-oz package phyllo dough, thawed
- 3/4 cup unsalted butter, 1 and 1/2 sticks, melted
- 2 cups mixed berries, fresh or frozen (unthawed)
- Fresh berries, to garnish
Instructions for Berry Cheesecake Baklava
-
Prepare the Phyllo Dough: Begin by thawing your phyllo dough according to the package directions. This is crucial for easy handling and preventing tears.
-
Craft the Honey-Vanilla Syrup: In a small saucepan, combine the water, 1/4 cup sugar, and 1/2 cup honey. Stir this mixture over high heat until the sugar fully dissolves, which typically takes only a couple of minutes. Remove the saucepan from the heat and stir in the vanilla extract. Set the syrup aside to cool completely while you prepare the other components. It’s important that the syrup is cool when drizzled over the hot baklava to ensure optimal absorption and texture.
-
Prepare the Cream Cheese Filling: In a medium bowl or the bowl of a stand mixer, beat the softened cream cheese until it is smooth and creamy. Next, add the egg, 1/3 cup sugar, and salt. Continue beating until all ingredients are thoroughly combined, making sure to scrape down the sides of the bowl as needed to ensure an even mixture. Set this delightful filling aside.
-
Melt the Butter and Prepare the Pan: In a small, microwave-safe bowl, melt the 3/4 cup of butter. Using a pastry brush, generously butter a 9×13 inch baking pan. This ensures the baklava won’t stick and contributes to its golden, crispy bottom layer.
-
Cut the Phyllo Dough: Carefully open the package of phyllo dough. Using a sharp serrated knife, cut the entire stack of phyllo dough in half across its width (not lengthwise). Immediately cover the cut phyllo sheets with a damp cloth to prevent them from drying out, which can make them brittle and difficult to work with.
-
Build the Base Layers: Lay 2 sheets of the cut phyllo dough into the prepared baking pan. Lightly brush the top sheet with melted butter. Repeat this process three more times, layering 2 sheets of phyllo and brushing with butter, until you have a total of 8 sheets forming the bottom base. This creates a sturdy, flaky foundation for your baklava.
-
Add the First Filling Layer: Evenly spread 1/4 of the prepared cream cheese mixture over the top phyllo layer. Then, sprinkle 1/2 cup of the mixed berries over the cream cheese.
-
Continue Layering Phyllo: Place 2 more sheets of phyllo dough on top of the berry and cream cheese layer, brush with butter, then add another 2 sheets and brush them with butter.
-
Repeat Filling and Phyllo Layers: Repeat steps 7 and 8 three more times, alternating between a cream cheese and berry layer and two sets of buttered phyllo sheets.
-
Finish with Top Layers: After your final cream cheese and berry layer, continue layering phyllo sheets, brushing every second one with butter, until you have at least 8-10 sheets on top. You may have a few phyllo sheets leftover, which is perfectly fine. The top layers will create that signature crispy baklava crust.
-
Summary of Layers: To clarify, you should have 4 distinct layers of cream cheese and berries, with 4 buttered phyllo sheets in between each filling layer. The very bottom layer should consist of 8 buttered phyllo sheets, and the top layer should have at least 8-10 buttered sheets. Remember to brush every 2 sheets with butter for maximum flakiness.
-
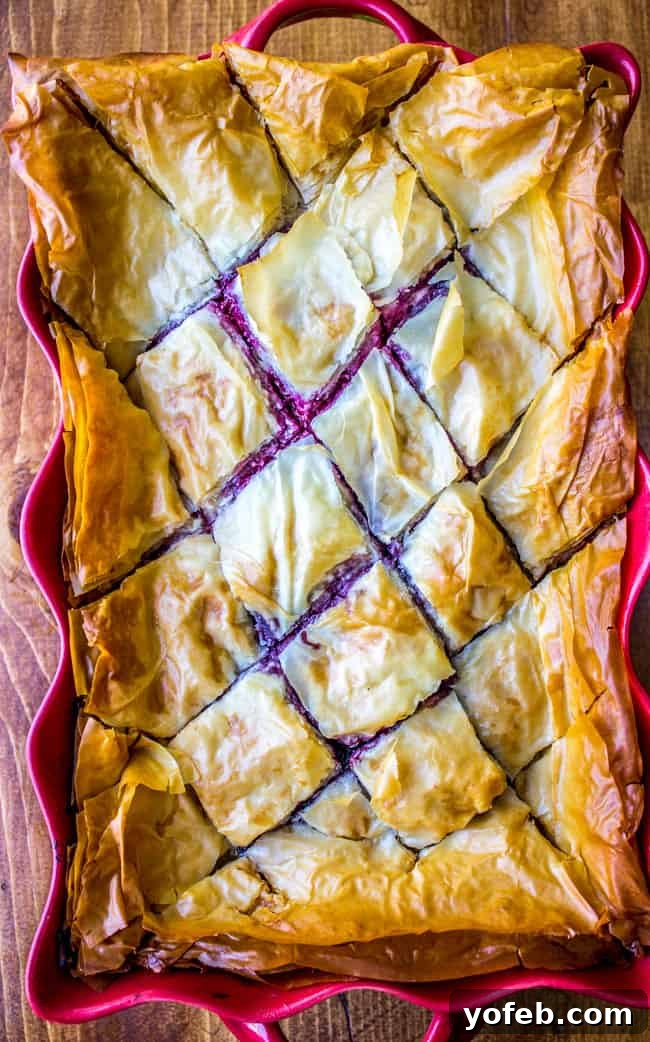
Pre-Slice the Baklava: Using a sharp serrated knife, carefully slice the unbaked baklava into your desired shapes (squares or diamonds). It’s important not to push the knife all the way to the bottom of the pan; leave at least a half-inch of the bottom layer uncut. This technique allows the syrup to penetrate the top layers without making the very bottom soggy.
-
Bake to Golden Perfection: Bake the baklava in a preheated oven at 325 degrees F (160 degrees C) for 60-65 minutes, or until the top is beautifully golden brown and crispy.
-
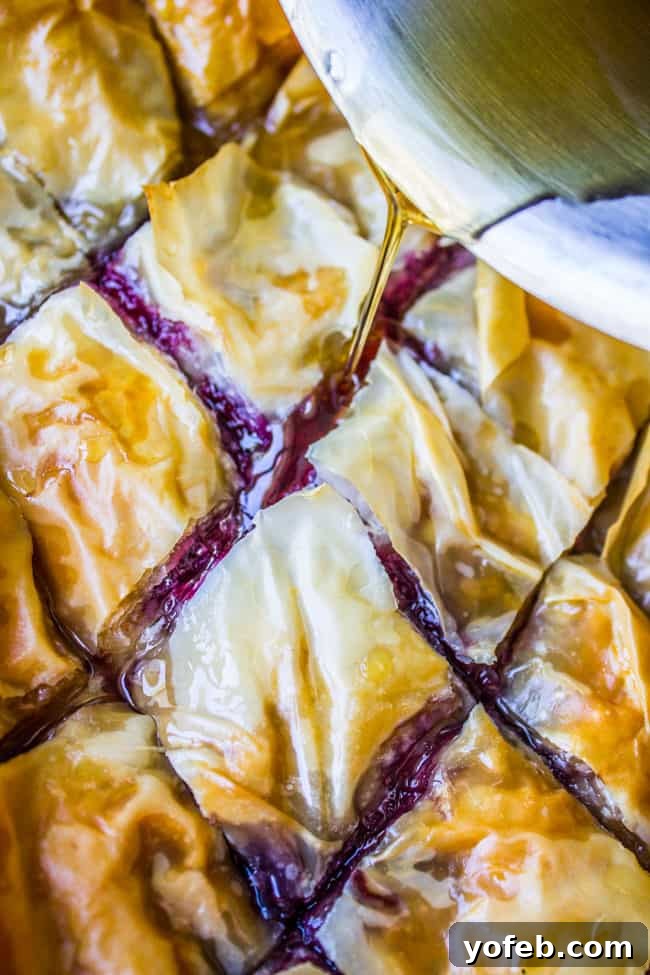
Drizzle with Cooled Syrup: Immediately after removing the baklava from the oven, liberally drizzle the cooled honey-vanilla syrup evenly over the entire hot surface, paying special attention to the edges. The sizzle you hear is a good sign! Allow the baklava to cool completely to room temperature before serving.
-
Serve and Store: Garnish with fresh berries and an extra drizzle of honey if desired. This Berry Cheesecake Baklava is delicious served at room temperature or chilled, depending on your preference. To store, keep it in the fridge, uncovered. Covering it will cause the delicate phyllo layers to become soggy.
Notes for a Perfect Berry Cheesecake Baklava
Feel free to use any combination of mixed berries that you love! My go-to mix includes blueberries, blackberries, and raspberries for a vibrant flavor and color profile. Frozen berries can be used directly from the freezer without thawing, making this dessert even more convenient.
Nutrition Information
Tips for Baklava Brilliance
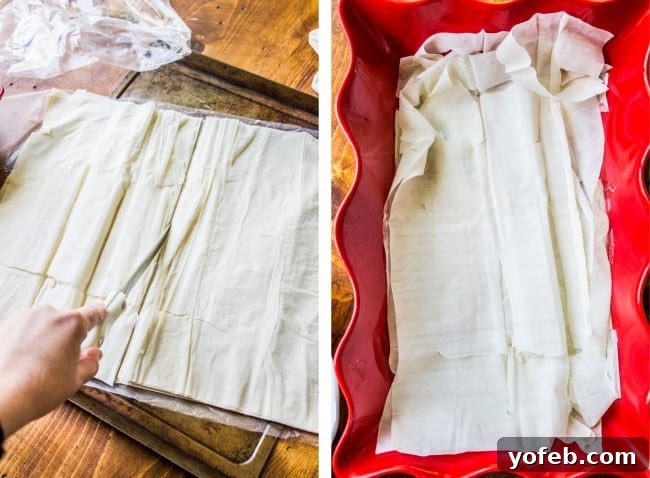
Don’t be intimidated by phyllo dough! It’s notoriously delicate, and you WILL tear a few sheets. Guess what? It absolutely doesn’t matter for the final product. The beauty of baklava is in its many layers, and small tears will disappear into the overall flaky structure. Just keep layering and buttering!
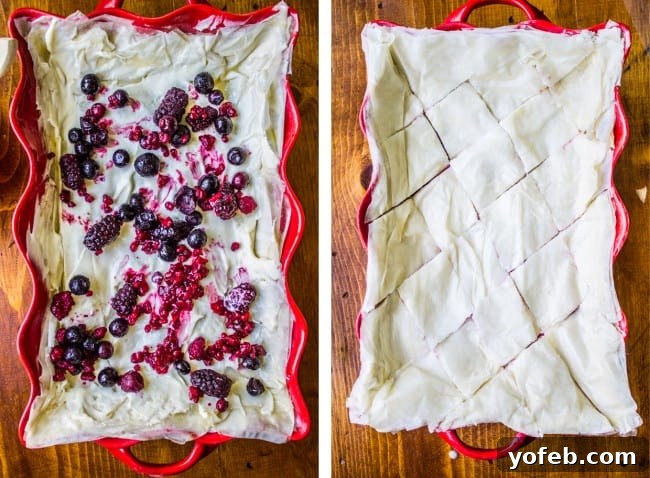
One of the most crucial steps to achieving beautiful, easy-to-serve baklava is to slice it before it goes into the oven. This pre-scoring helps create those distinct portions and allows the syrup to seep into the layers more effectively after baking. Remember to only cut partway through, keeping the very bottom layer intact to prevent the syrup from making the entire base soggy.
Craving More Summer Sweet Treats?
If you’re anything like me, the summer season calls for an abundance of fresh, fruity desserts. Here are some other delightful recipes that are perfect for warm weather gatherings:
Fresh Blackberry Glace Pie: A shimmering, berry-packed pie that’s as stunning to look at as it is delicious to eat. Its vibrant color and refreshing taste make it a guaranteed crowd-pleaser.
Blackberry Lemon Cheesecake Bars: These bars offer a fantastic combination of tart lemon and sweet blackberries, all on a creamy cheesecake base. They’re easy to make and perfect for picnics or potlucks.
Plum Tartlets with Cinnamon Rye Crust: A sophisticated yet simple dessert, these tartlets feature juicy plums baked in a unique, flavorful rye crust with a hint of cinnamon. They’re individual portions of pure joy!
Explore More Creative Baklava Variations!
If you’re inspired by the versatility of baklava, you’ll love these inventive takes from my talented friends in the food blogging world:
- Pecan Pie Baklava from Crazy for Crust: A delightful merger of two classic American desserts with a Greek twist.
- Salted Chocolate Chip Cookie Baklava from Half Baked Harvest: Indulgent layers combine the beloved cookie flavor with the flaky texture of baklava.
- Baklava Poke Cake from Life Love and Sugar: All the flavors of baklava infused into a moist and easy-to-make poke cake.
I hope you embark on this culinary adventure and give the Berry Cheesecake Baklava a try. It’s a dessert that perfectly embodies celebration, freshness, and the joy of creating something truly special. Enjoy every flaky, creamy, berry-filled bite!