
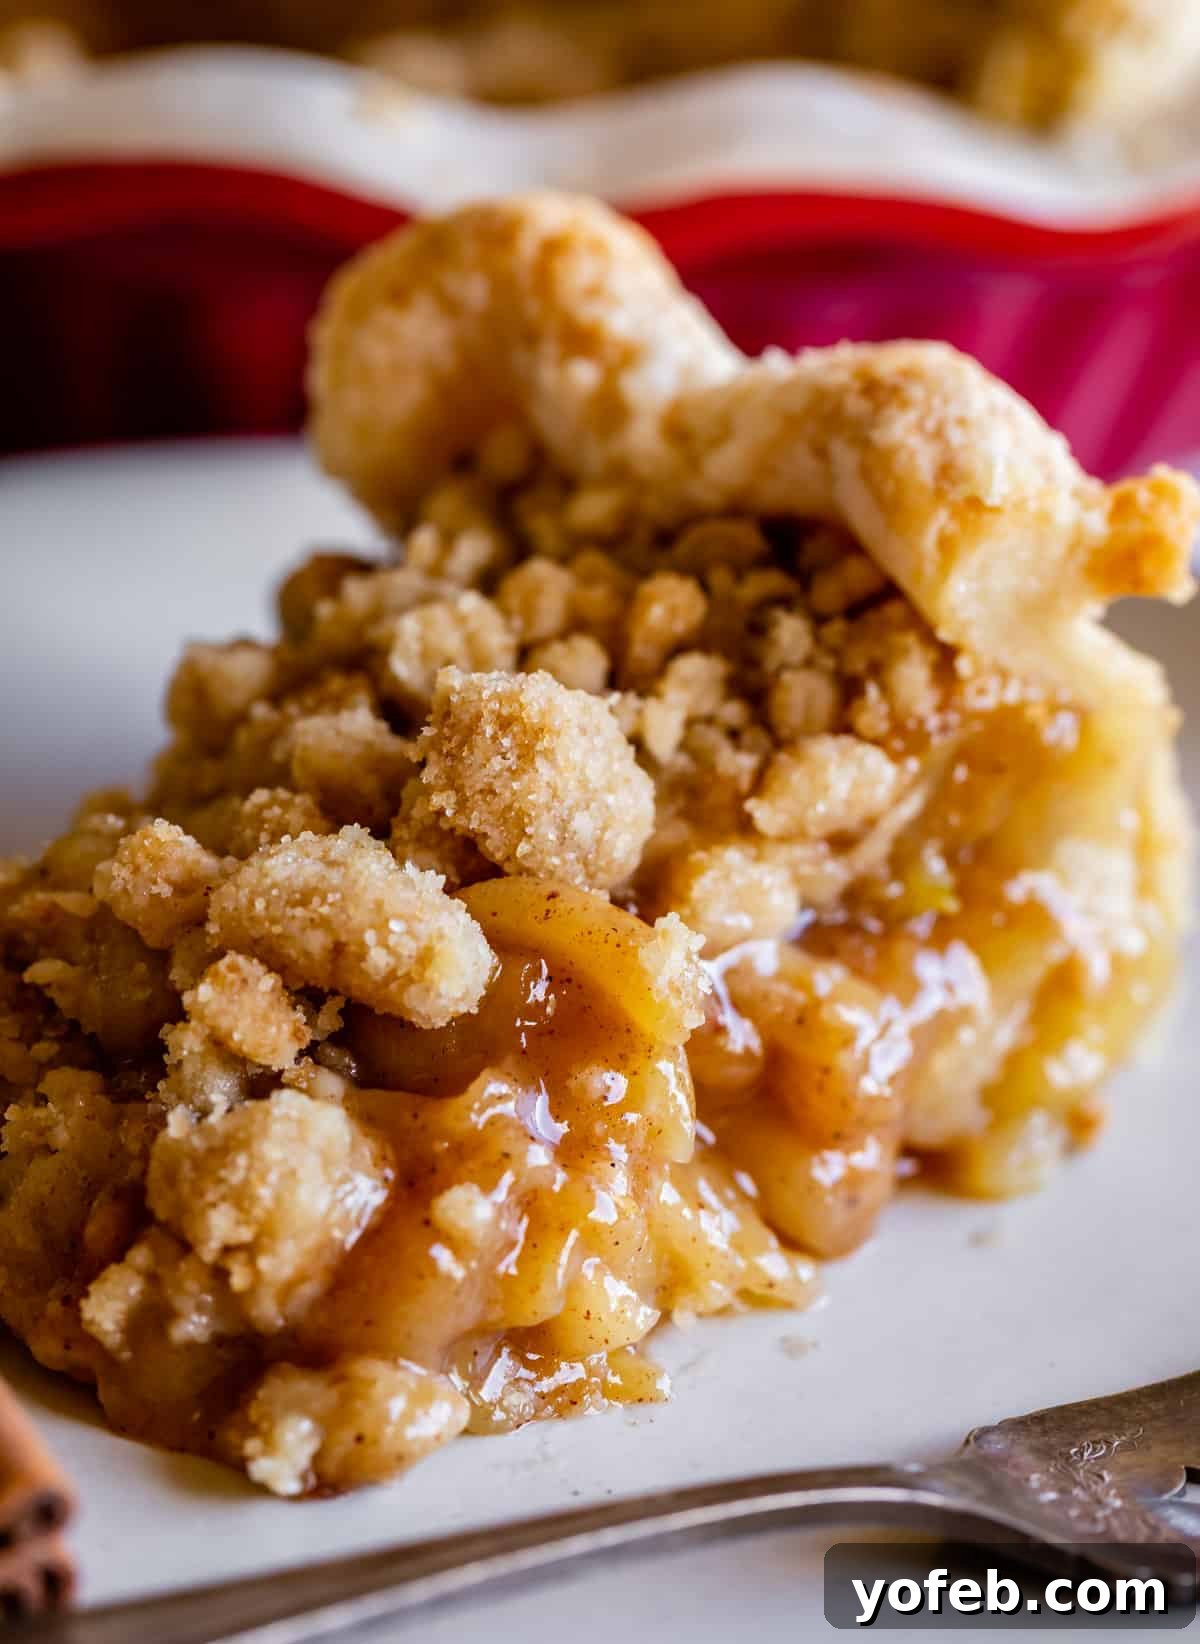
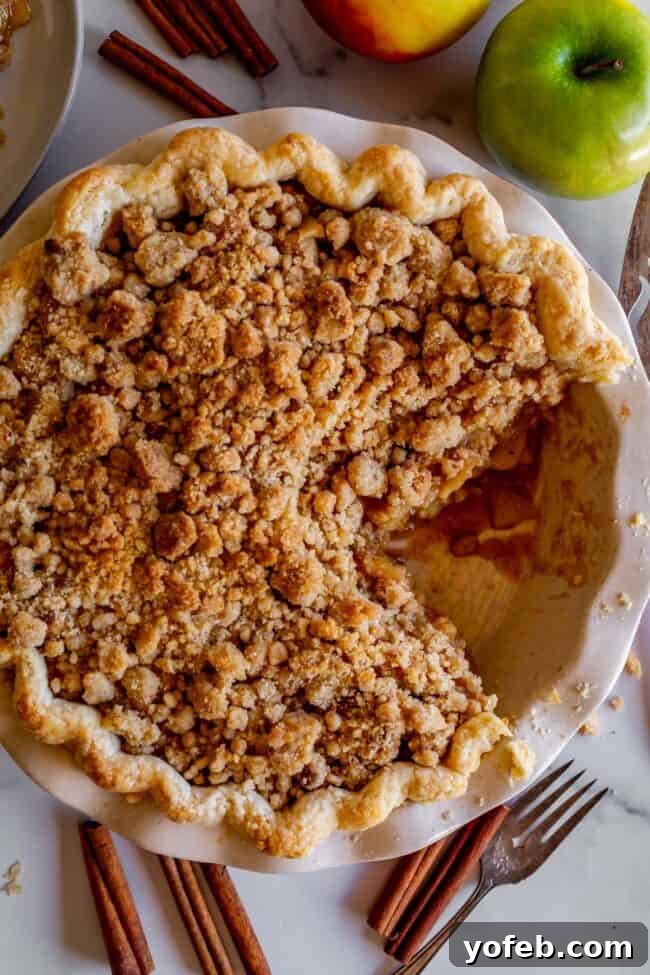
Welcome to the ultimate guide for creating the most divine Dutch Apple Pie! If you crave a dessert that perfectly balances a tender, flaky bottom crust with a rich, caramelized apple filling and an irresistibly golden-crisp streusel topping, you’ve found your new favorite recipe. This pie isn’t just a dessert; it’s an experience—a symphony of textures and flavors that will become a cherished tradition in your home. Adapted from one of my most beloved traditional apple pie recipes, this Dutch-ified version takes comfort food to a whole new level. Get ready to impress your family and friends with this masterpiece, complete with step-by-step guidance and photos to ensure your success. Originally shared on November 14, 2021, this recipe has since brought joy to countless kitchens, and it’s time for yours to be next!
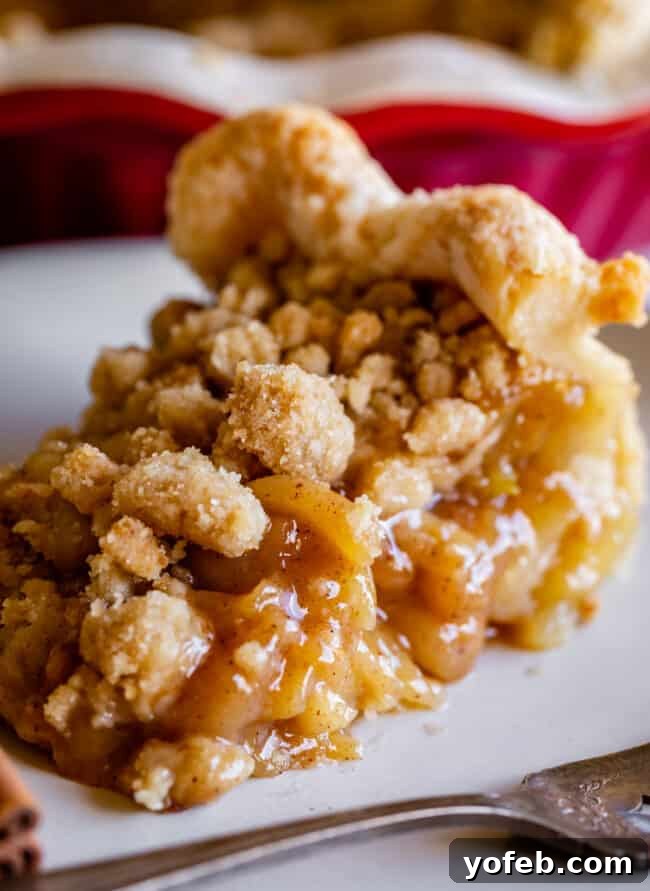
Table of Contents
- The Best Apple Crumb Pie
- What is Dutch Apple Pie?
- Apple Pie vs. Dutch Apple Pie: A Delicious Fusion
- Why You Will Adore This Dutch Apple Pie Recipe
- Essential Ingredients for Your Apple Crumble Pie
- Recommended Tools for Baking Dutch Apple Pie
- Selecting the Best Apples for a Crumb Top Pie
- How Many Apples Do You Need for This Pie?
- Cooked or Raw Apples: The Secret to a Superior Dutch Apple Pie
- Crafting the Perfect Dutch Apple Pie Filling
- Preventing a Soggy Dutch Apple Pie Crust
- How to Make the Ultimate Crumb Topping for Apple Pie
- Freezing Your Dutch Apple Pie with Crumb Topping
- Dutch Apple Crumb Pie FAQs
- More Irresistible Pie Recipes to Try
- Dutch Apple Crumble Pie Recipe
Lately, it feels like my brain is on a permanent vacation! This past week, a huge package arrived, just a day before my daughter Valentine’s fifth birthday. Grandmas had mentioned sending something, so naturally, I assumed this was it and enthusiastically began wrapping.
(My husband, Eric, tried to convince me that something so large didn’t need wrapping. “Just slap a bow on it,” he suggested. But really, what’s more thrilling for a five-year-old than tearing through an absurd amount of paper from a present almost as big as she is?)
So, the gift was wrapped, the ribbon tied. On Val’s birthday, we video-called Grandma to share in the excitement. She took one look at the wrapped present and declared, “That’s not what I sent.”
Utterly baffled, we opened the box to reveal a beautiful baby play mat. Eric and I exchanged blank stares, wondering aloud, “Who on earth would think a five-year-old would be interested in a baby toy?”
And *only then* did I recall that just days prior, *I* had purchased that very play mat for my cousin’s upcoming baby shower. I even remembered commenting to Eric, “That present for my cousin hasn’t arrived yet; I’d better check the order.”
Oh, the joys of a busy mind! I suppose I’ll be wrapping it up again, for the second time. (And no, Eric, for a baby shower, “just slapping a bow on it” won’t do either. That’s your etiquette tip for the day. Don’t worry, there won’t be a test. Mostly.)
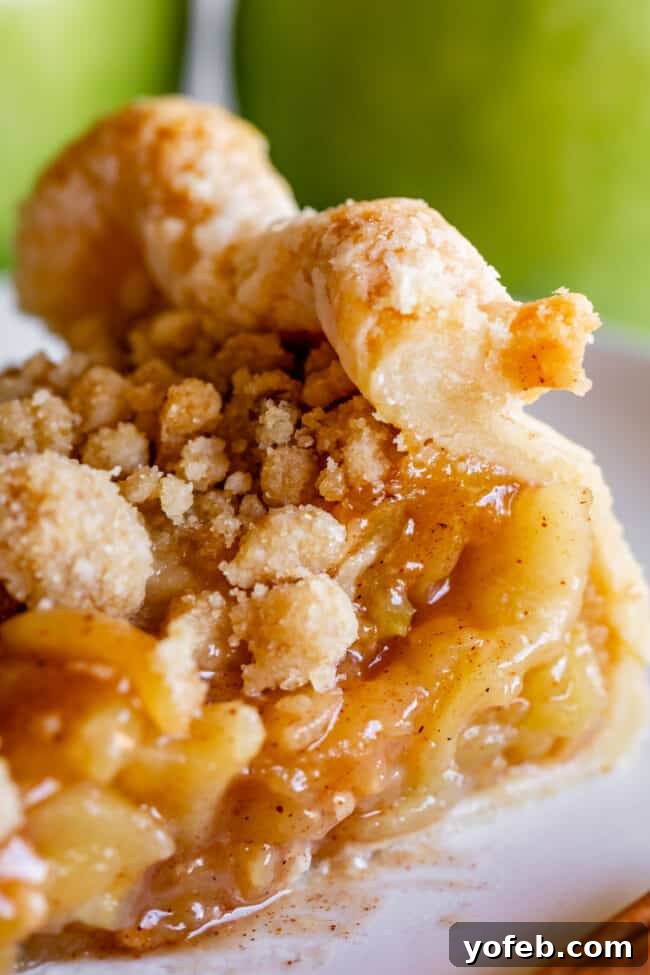
The Best Apple Crumb Pie
Friends, it’s always pie season, isn’t it? While many associate apple pie with holidays like Thanksgiving and Christmas, a good Dutch Apple Pie truly transcends specific occasions. Its comforting warmth and delightful crumb topping make it welcome any time of the year.
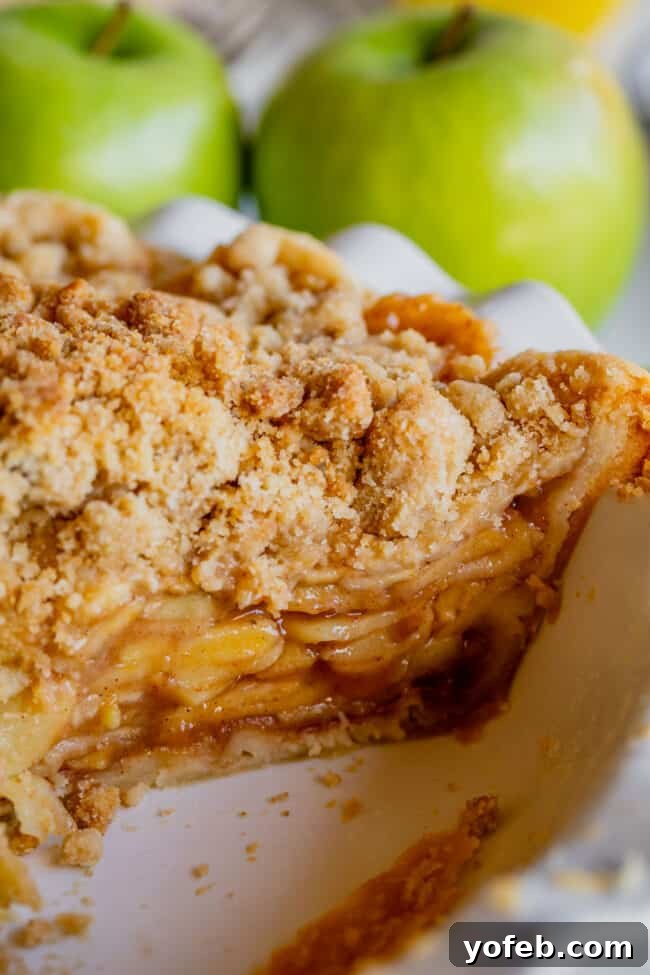
Hands up if you’ve already made my highly acclaimed Best Homemade Apple Pie? That recipe, first shared in the fall of 2020, became an overnight sensation. The response was incredible, with thousands of you discovering the joy of a truly homemade apple pie. The requests for a Dutch Apple Pie adaptation of that beloved recipe poured in, and today, that day has finally arrived!
I’m thrilled to present the best homemade apple pie, now “Dutch-ified”! But what exactly does that mean, you ask? Let’s dive into what sets this incredible dessert apart.
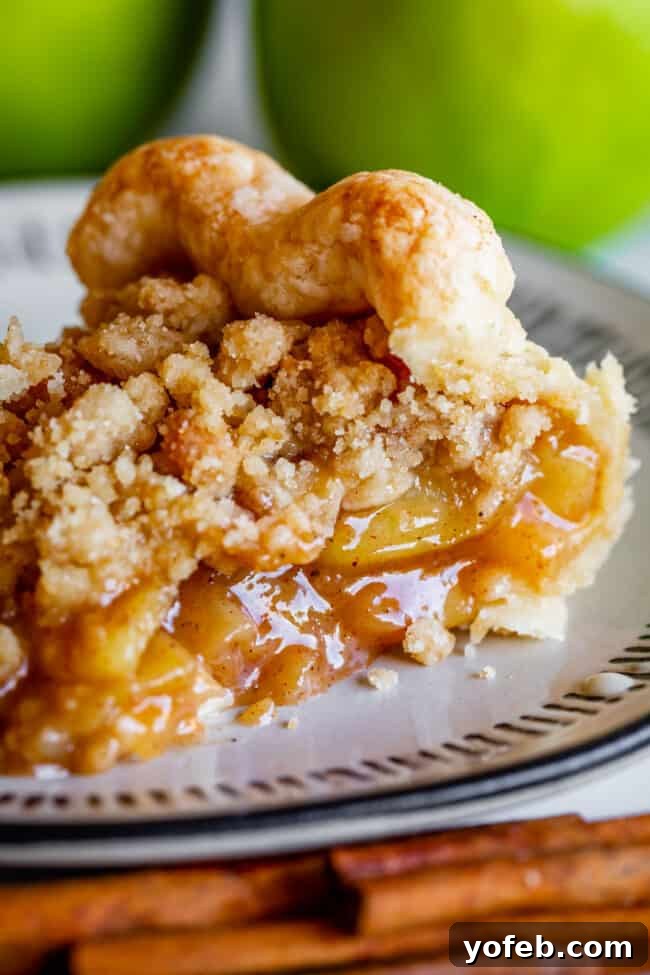
What is Dutch Apple Pie?
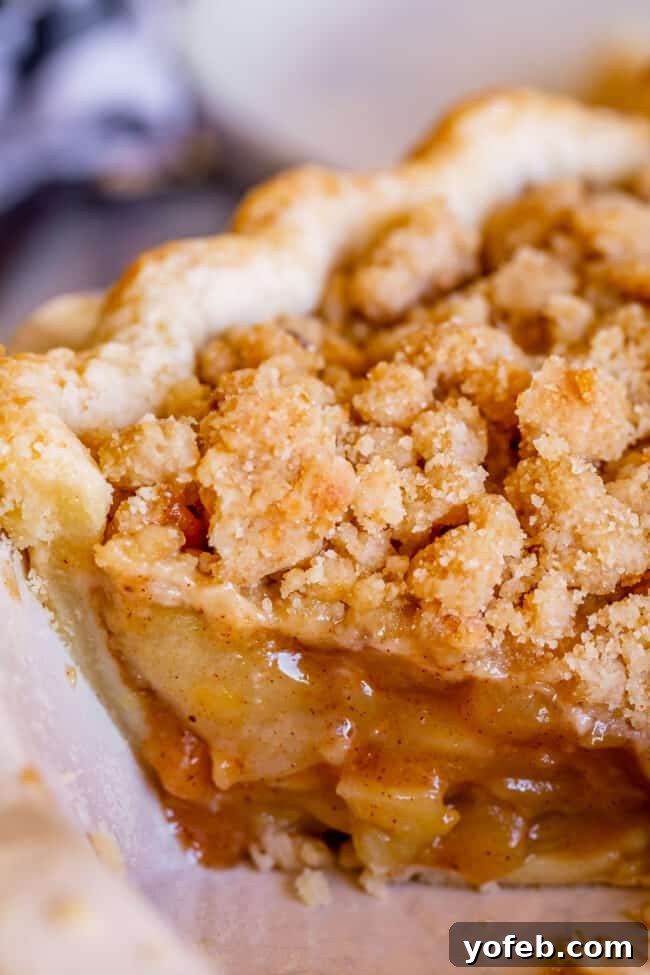
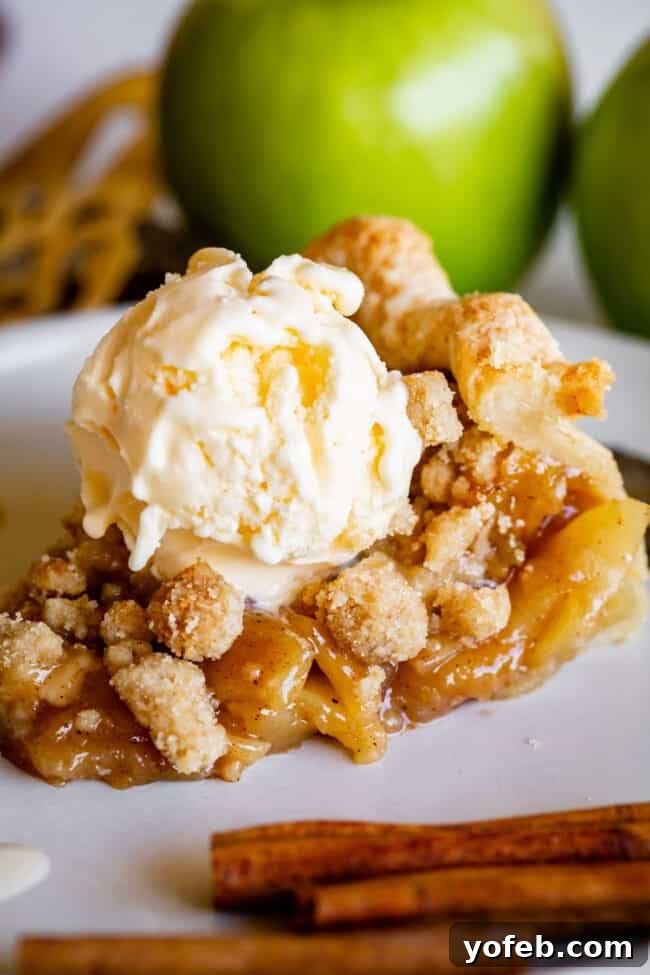
At its heart, Dutch Apple Pie is a celebration of contrasting textures and harmonious flavors. It features a perfectly flaky, buttery pie crust on the bottom, holding a luscious, tender apple filling, all crowned with the most unbelievably golden-crisp, buttery crumb streusel topping. This combination creates a dessert that’s both rustic and refined, incredibly satisfying and utterly heavenly.
Apple Pie vs. Dutch Apple Pie: A Delicious Fusion
To truly understand Dutch Apple Pie, it helps to distinguish it from its traditional counterpart. A classic American Apple Pie typically features a double crust—a top and bottom layer of pastry encasing a sweet apple filling. The top crust is often solid, latticed, or decorative, providing another layer of rich, buttery pastry.
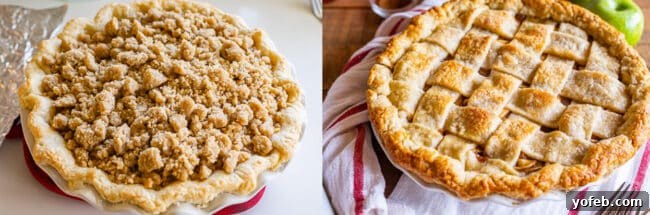
Dutch Apple Pie, on the other hand, represents a beautiful confluence of culinary traditions. It’s essentially what happens when the traditional Apple Pie (with its French-inspired pastry crust) and Apple Crisp (a German/Dutch invention known for its delightful streusel topping) come together. The result is a delicious “baby” of these two worlds: a pie with a sturdy, flaky pastry bottom and a crumbly, sweet streusel crown. Think of it as “business on the bottom, party on the top”—the best of both worlds, uniting the comforting chew of a pie crust with the satisfying crunch of a crumble. It’s an incredibly delicious and truly glorious creation.
Why You Will Adore This Dutch Apple Pie Recipe
This isn’t just another apple pie recipe; it’s *the* recipe that guarantees rave reviews. Here’s why this Dutch Apple Pie will quickly become your go-to:
- The Ultimate Pie Crust: We start with a homemade pie crust that is effortlessly flaky, exceptionally tender, and richly buttery. It provides the perfect foundation for our abundant apple filling.
- Abundant Apple Flavor: Unlike many recipes that skimp on apples, we use a generous five pounds to ensure every slice is bursting with intense, authentic apple flavor. This commitment to quantity makes all the difference!
- Perfectly Cooked Apple Filling: Say goodbye to crunchy, undercooked apples! Our apple filling is gently cooked on the stovetop to a glorious, caramel-like perfection. This crucial step not only ensures beautifully tender apples but also deepens their flavor and prevents a watery, soggy pie. (Many Dutch apple pies call for raw apples, but we’re elevating the game here!)
- Aromatic Spice Blend: Beyond the classic cinnamon and nutmeg, we introduce a hint of cardamom. This optional, yet highly recommended, addition elevates the spice profile, adding a subtle, sophisticated warmth that truly complements the apples. Trust me, you’ll love it!
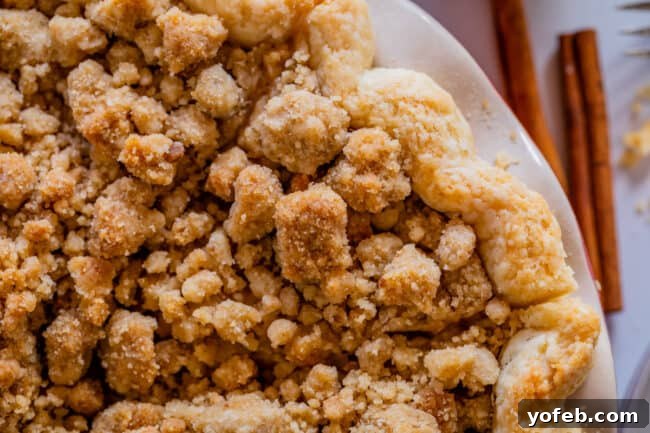
- Double the Streusel Delight: Because, let’s be honest, who doesn’t love a generous streusel topping? This recipe calls for twice the amount of crumbly goodness compared to most, ensuring a thick, golden, and incredibly satisfying top layer. I am absolutely all about the streusel!
- Surprisingly Simpler: Despite its impressive results, this Dutch Apple Pie is actually easier to make than a traditional double-crust Apple Pie. No intricate lattice work or top crust crimping needed!
Essential Ingredients for Your Apple Crumble Pie
Crafting this incredible Dutch apple pie requires a thoughtful selection of ingredients. While the exact quantities are detailed in the recipe card below, here’s a rundown of the key components you’ll need to gather:
- Homemade Single Pie Crust: The foundation of your pie. A good quality, buttery crust makes all the difference.
- Fresh Lemon Juice and Zest: Brightens the apple flavor and prevents browning.
- A Generous Amount of Apples: The star of the show! We’re talking five pounds for maximum flavor (see details below).
- Brown Sugar: Adds a deep, molasses-rich sweetness and contributes to the caramelized filling.
- Granulated Sugar: Provides classic sweetness and balances the tartness of the apples.
- All-Purpose Flour: Used in both the filling for thickening and the streusel for structure.
- Kosher Salt: A pinch enhances all the flavors, balancing sweetness and bringing out the best in the apples and spices.
- Ground Cinnamon: The quintessential apple pie spice, providing warmth and aroma.
- Ground Nutmeg: Another classic, offering a sweet and slightly pungent note.
- Ground Cardamom (Optional, but highly recommended!): This often-overlooked spice adds a floral, citrusy, and slightly spicy note that harmonizes beautifully with apples. Don’t skip it if you want to elevate your pie!
- Pure Vanilla Extract: Enhances the overall sweetness and complexity of the filling.
- Unsalted Butter: Crucial for both the rich, flaky crust and the irresistibly crumbly streusel topping.
Using quality ingredients will truly make your Dutch Apple Pie shine. Fresh apples, good butter, and a homemade crust are the pillars of this exceptional dessert.
Recommended Tools for Baking Dutch Apple Pie
Having the right kitchen tools can make the baking process much smoother and more enjoyable. These are some of my favorite essentials for making a perfect Dutch Apple Pie:
Selecting the Best Apples for a Crumb Top Pie
A truly exceptional apple pie is only as good as the apples it contains. Fortunately, today’s markets offer a fantastic array of apple varieties. To ensure your Dutch Apple Pie has the most complex and delicious flavor, keep these important tips in mind:
- Use a Generous Quantity of Apples: The key to an intensely apple-flavored pie is, unsurprisingly, using plenty of apples! Most standard apple pie recipes suggest 2-3 pounds. For this recipe, we’re calling for a robust 5 pounds of apples (which translates to about 11 to 12 large apples). This abundance ensures a substantial, fruity filling that won’t shrink excessively during baking, giving you maximum apple goodness in every bite.
- Embrace Variety for Flavor Depth: Relying on just one type of apple results in a flat, one-dimensional flavor profile. The magic happens when you combine varieties that offer different levels of tartness, sweetness, and texture. For this pie, I recommend a blend of Granny Smith (known for its bright tartness), Honeycrisp (a wonderfully balanced sweet-tart apple with a crisp texture), and Golden Delicious (on the sweeter side, which softens beautifully). This trio creates a perfectly balanced pie that hits all the right notes between sweet and tangy.
To help you choose your perfect blend, here’s a spectrum of common apple varieties, ordered from most tart to sweetest:
▪️ Granny Smith (Very tart, firm)
▪️ Braeburn (Tart-sweet, firm)
▪️ Macintosh (Sweet-tart, softer, juicy)
▪️ Honeycrisp (Sweet-tart, very crisp)
▪️ Red Delicious (Sweet, mealy, generally not recommended for baking)
▪️ Golden Delicious (Sweet, softer, holds shape)
▪️ Ambrosia (Sweet, crisp)
▪️ Gala (Mildly sweet, crisp)
▪️ Fuji (Very sweet, crisp)
Feel free to customize your apple selection based on your preference. If you lean towards a tarter pie, increase the proportion of Granny Smiths. If a sweeter profile is more to your liking, opt for more Gala or Golden Delicious apples. A word of advice: I strongly recommend avoiding Red Delicious apples for baking. Their texture tends to become mushy, and honestly, if you don’t enjoy eating them plain, why would you want them in your pie? (Are there people who still genuinely enjoy eating Red Delicious apples, even?) Stick to apples that maintain some structure and offer compelling flavor when cooked.
How Many Apples Do You Need for This Pie?
Given that apple sizes can vary dramatically, it’s always most accurate to weigh your apples rather than count them. This recipe calls for 5 pounds of apples *before* they are peeled and cored. As a general guideline, there are approximately 3 medium-sized apples in one pound. To be safe and ensure you have enough, I recommend purchasing at least 15 apples. In my experience, using large apples, I typically need about 11 to 12. If you happen to have any leftovers, consider it a delicious bonus—perfect for snacking while you prepare your magnificent pie!
Cooked or Raw Apples: The Secret to a Superior Dutch Apple Pie
This tip is genuinely a game-changer and utterly crucial for a truly remarkable Dutch apple pie: **always pre-cook your apple pie filling.** Many apple pie recipes instruct you to layer raw, sliced apples directly into the pie shell and then bake the pie for an extended period, relying on the oven to soften the apples. While this method can work, it often leads to several undesirable outcomes.
Firstly, you run a significant risk of having undercooked apples. Is there anything more disappointing than biting into a slice of apple pie only to encounter crunchy, raw-tasting apple pieces? It’s an absolute culinary tragedy! Say a firm “no” to crunchy apple pie!
Secondly, apples naturally contain a high percentage of water. If you don’t cook some of this moisture off beforehand, all that excess water will inevitably release into your pie during baking. This results in a watery filling, a thin, lackluster sauce, and ultimately, a less flavorful apple pie.
I conducted a side-by-side test to confirm this. I baked one pie with raw apples and another with a pre-cooked filling. The raw apple pie, while passable, definitely had less flavor. It was, frankly, quite bland—nothing to rave about. The filling was looser and lacked depth.
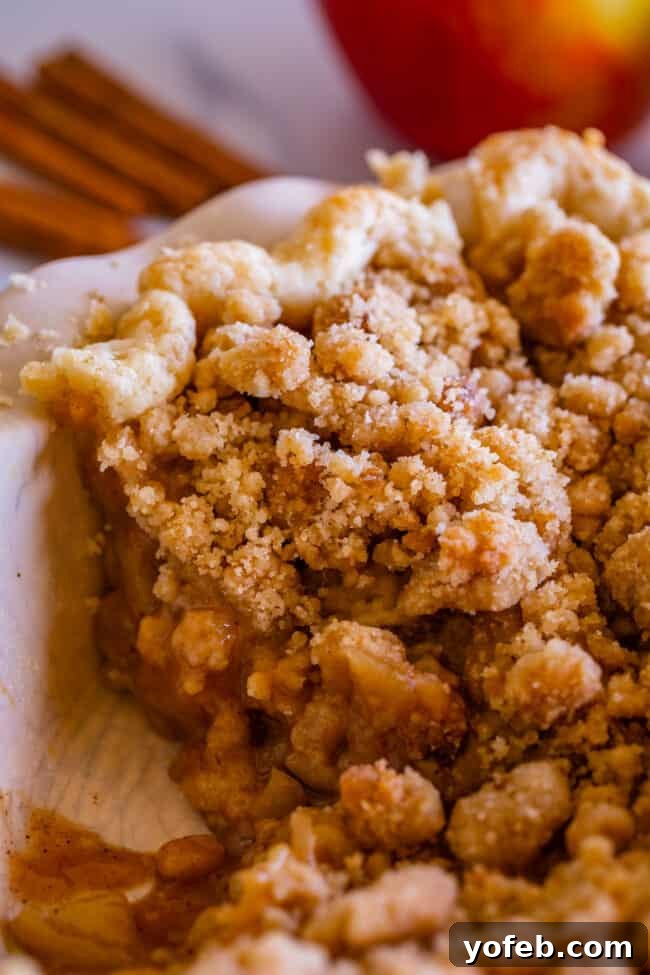
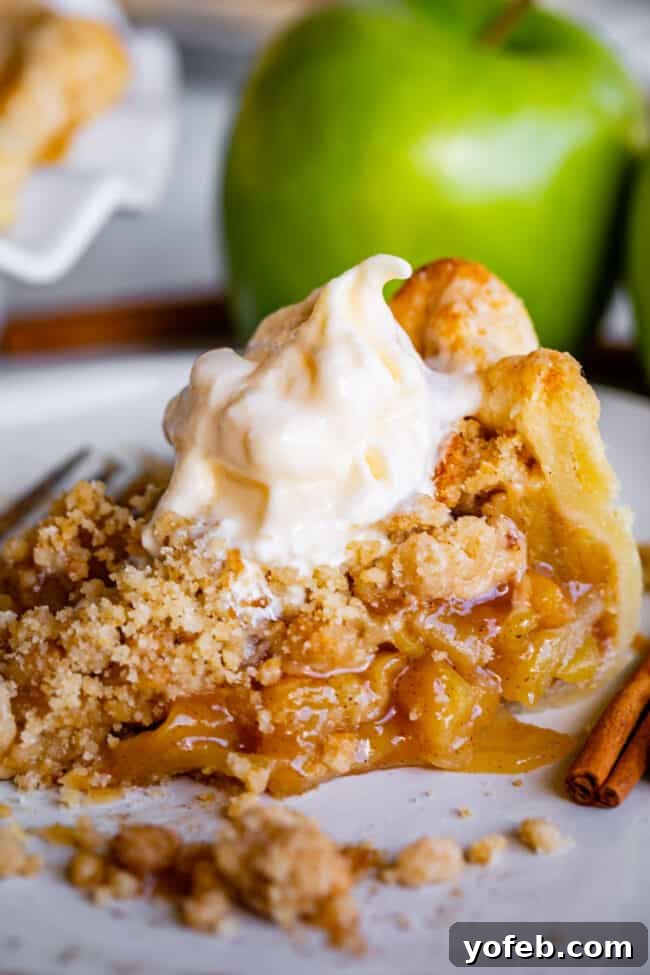
The pie with the cooked filling, however, was a revelation. It boasted a darker, richer, and significantly deeper flavor, almost caramel-like. The sauce was thicker and more luxurious, truly enveloping the apples. There was absolutely no risk of under-baking, and the overall flavor was simply incredible. This method ensures consistent tenderness and superior taste.
I understand that pre-cooking the filling adds an extra step (and yes, you’ll even need to cool it before adding it to the pie). But let’s be honest, you didn’t decide to make a homemade apple pie because you needed a quick, last-minute dessert, did you? Embrace the process! Investing an extra 20 minutes to cook the filling is a small price to pay for a vastly superior pie. You absolutely will not regret it—your taste buds (and your guests) will thank you.
Crafting the Perfect Dutch Apple Pie Filling
Let’s begin by preparing the star of our pie: the glorious apple filling. This cooked filling ensures perfect texture and unparalleled flavor.
First, gather all your beautiful apples. Remember, the quality of your apples directly impacts the quality of your pie.
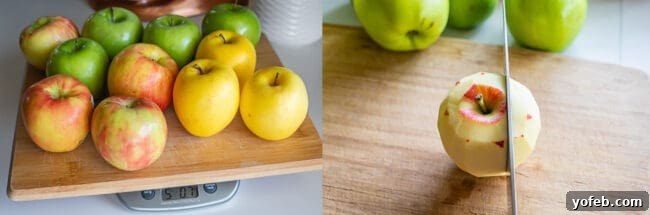
You’ll need exactly 5 pounds of apples before you begin peeling and coring them. This typically amounts to about 11-12 large apples, so choose wisely!
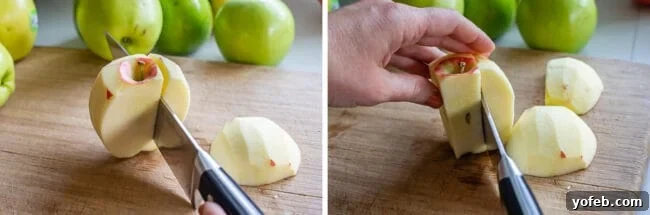
Here’s my preferred method for slicing apples. While a mandolin can offer uniform slices, always use a metal glove for safety—those blades are incredibly sharp!
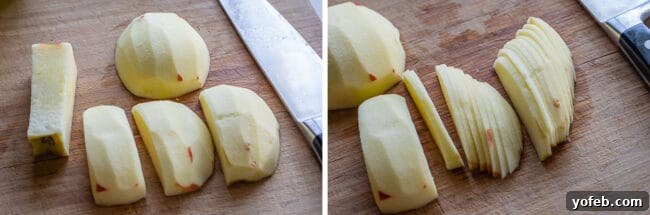
Slice around the core to create segments, then cut these segments into approximately 1/8-inch slices. You can opt for thicker slices if you prefer (though they might require a slightly longer cooking time), but I find that thin apples create a more tender, harmonious filling in the finished pie.
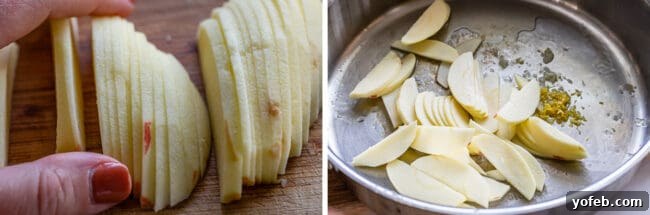
As you slice each apple, immediately toss the pieces into a 12-inch high-sided skillet (ensure the heat is off for now) along with the lemon juice and zest. Stir gently to coat the apple slices thoroughly with the lemon mixture. This step prevents oxidation and adds a subtle bright note.
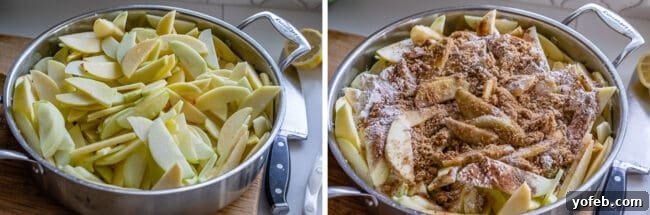
Now, it’s time to infuse flavor and begin the cooking process. Add the sugars (brown and granulated), flour, salt, and your chosen spices (cinnamon, nutmeg, and the optional but highly recommended cardamom) directly over the apples. Crucially, do not add any extra liquid—the apples themselves will release plenty of moisture as they cook.
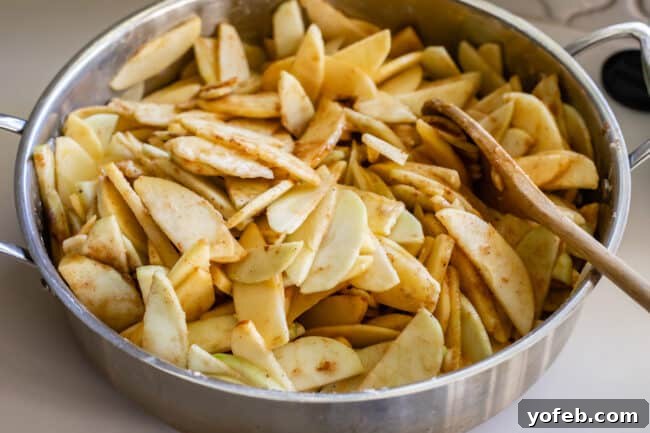
Place the skillet over medium heat. Cover the pan with a lid, but don’t wander off! You’ll need to stay close and stir the mixture gently every couple of minutes, replacing the lid each time. Covering the pan helps to trap the steam, which aids in softening the apples efficiently. Continue this process for approximately 20 minutes, during which you’ll notice the most glorious, caramel-like sauce beginning to form.
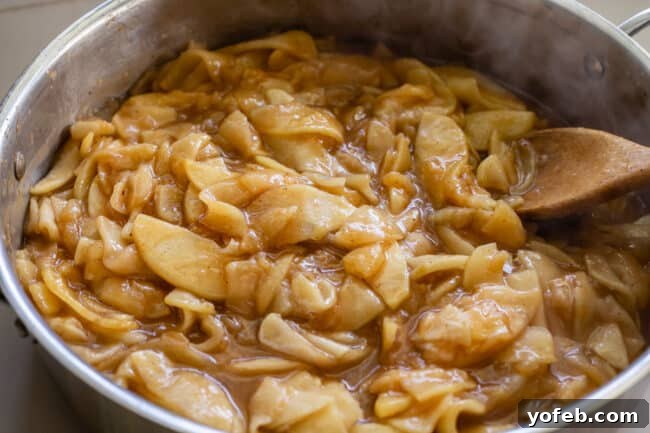
Something truly magical happens when you gently cook the apple pie filling over a sustained period like this. As explained by experts like Cooks Illustrated, the pectin within the apples undergoes a transformation, converting into a heat-stable form. This means that when your apples bake again inside the pie in the oven, they won’t turn into a mushy, unrecognizable pulp. Whatever level of “al dente” (firm yet tender) they reach by the time you finish cooking them on the stovetop is precisely how they will taste in your finished pie.
This scientific marvel allows you to fine-tune the cooking time to achieve your personal apple perfection. Cook the apples a little longer if you prefer them softer, or slightly less if you enjoy a firmer bite. You no longer have to guess or overcompensate for additional softening in the oven. It’s truly revolutionary, isn’t it? Pure science at work in your kitchen!
Preventing a Soggy Dutch Apple Pie Crust
The cardinal rule for avoiding a soggy or melting crust is to ensure all your pie components go into the oven COLD. This applies equally to all three elements: the pie crust, the apple pie filling, and the crumb topping. Temperature control is your best friend here.
If you were to add the hot, freshly cooked apple filling directly into a pie crust right now, the residual heat would instantly melt the butter in your crust, turning it into a sad, greasy heap. Your beautiful crust would become irredeemably soggy.
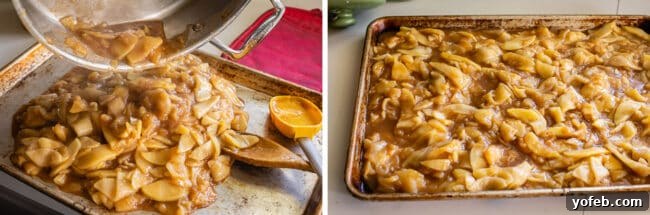
So, we’ll take that hot, caramel-y apple goodness and give it a good chill. Pour the mixture onto a half sheet pan (or any baking sheet with a lip) and spread it out evenly. I often stick mine in the freezer for about 20-30 minutes to cool rapidly. Alternatively, you can place it in the refrigerator, or simply leave it in the cooking pan to cool to room temperature over a couple of hours if you’re not in a hurry.
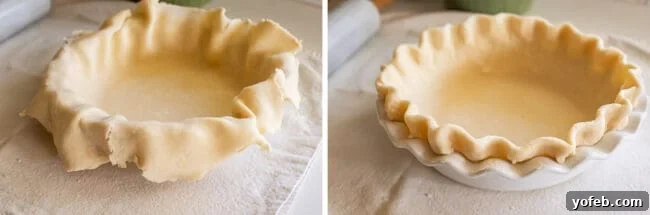
Next, let’s address the crust. I have a comprehensive guide on How to Make Flaky Pie Crust, which I highly recommend checking out for detailed tips and tricks! The most critical takeaway is to keep your pie crust extremely cold before it enters the oven. After shaping and beautifully crimping the edges, pop the pie shell into the freezer for at least half an hour. I’ve heard too many heartbreaking stories (and seen pictures!) of pie crusts literally melting down the sides because they went into the oven too warm. Don’t skip this chilling step—it’s essential for achieving that perfect, flaky texture.
Another crucial step to banish soggy bottoms is to hit your pie with high heat at the beginning of the baking process. Turn your oven to a blazing 425°F (220°C) and place a pizza stone or a heavy-duty sheet pan on the center rack. Allow it to preheat thoroughly for 20-30 minutes while your other components chill. This intensely hot surface provides direct, even heat to the bottom of your crust, ensuring it cooks quickly and sets up firm and crispy. Nobody wants a soggy bottom!
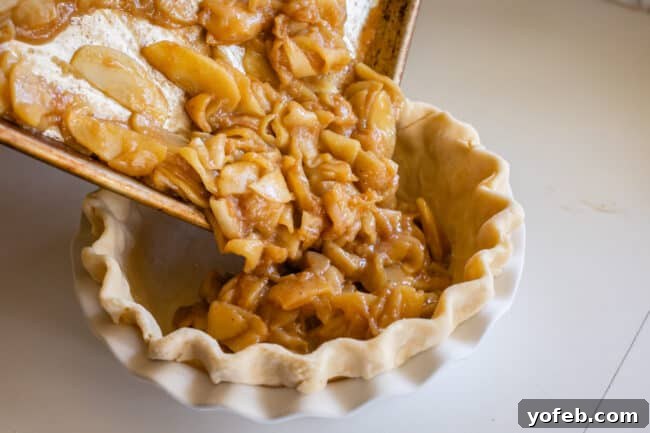
Once your apple pie filling is thoroughly chilled, pour it gently into your cold pie crust.
How to Make the Ultimate Crumb Topping for Apple Pie
Now, for the glorious streusel topping! Beyond its incredible flavor and texture, one of the best aspects of a crumb topping is how wonderfully easy it is to bring together. It adds a rustic charm and irresistible crunch that perfectly complements the soft apple filling.
What is the crumble on apple pie made of?
A classic crumb topping is typically composed of a few simple, yet essential, ingredients:
- All-Purpose Flour: Provides the structure for the crumbs.
- White and Brown Sugar: A combination offers both classic sweetness and a rich, molasses-like depth from the brown sugar, contributing to that beautiful golden color and caramelized flavor.
- Salt: A small amount is crucial to balance the sweetness and enhance all the other flavors.
- Melted Butter: The fat that binds the ingredients and creates those coveted crisp, buttery crumbs.
How do you make the crumble for an apple pie?
Start by grabbing a medium-sized bowl. Add all the dry ingredients for the crumble: the flour, both white and brown sugars, and a touch of salt. Give them a good whisk to combine them thoroughly and eliminate any lumps.
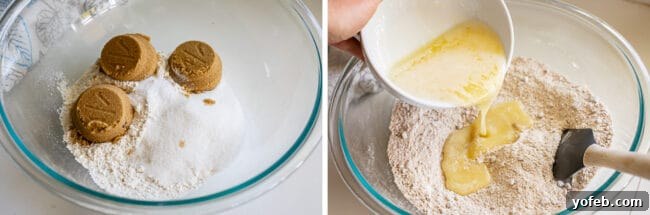
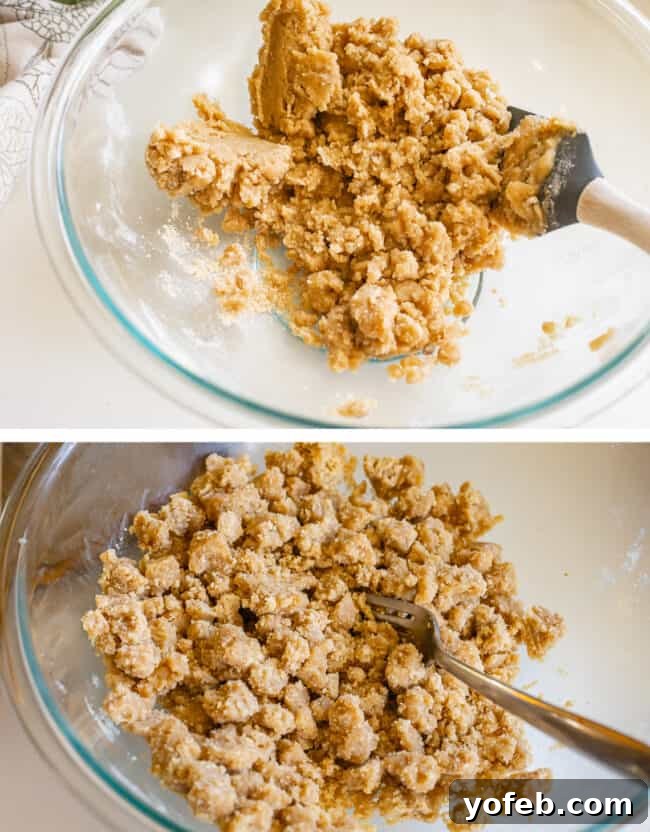
Next, melt your butter until it’s fully liquid, then drizzle it evenly over the dry ingredients in the bowl. Use a fork or a spatula to mix everything together. Be careful not to overmix; you’re aiming for a mixture that resembles wet sand with some larger clumps. It will feel almost like a soft cookie dough. Once combined, chill the mixture for a few minutes. After chilling, use a fork to break it up into those signature crumbly bits. I personally adore generous, chunky bites of crumble, but you can mix it further for a finer, sandier texture if that’s what you prefer.
Now, you have all your essential components perfectly chilled and ready for assembly! The waiting is the hardest part, but it’s crucial for the perfect pie.
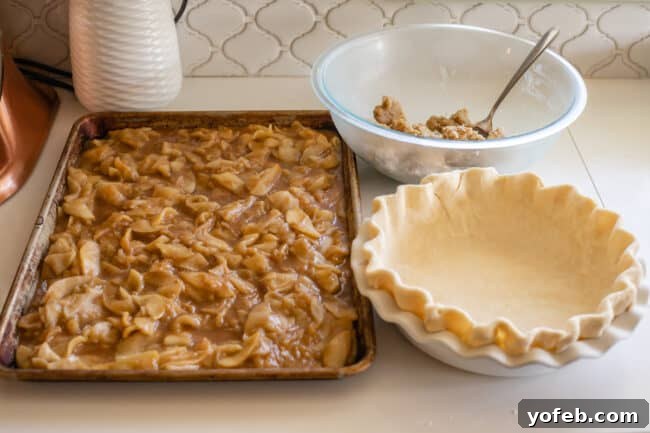
Carefully sprinkle just enough crumble over the top of your pie to fully cover the apples. Don’t use all of it yet—you’ll need about a cup or two for this initial layer. Place the remaining crumble back into the fridge to keep it chilled.
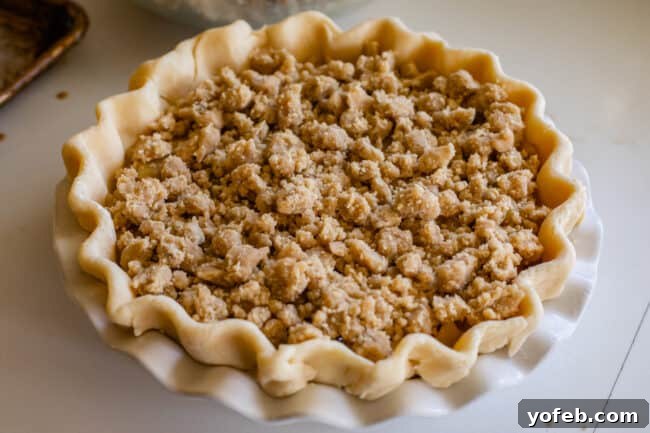
The baking process involves a clever two-stage streusel application. You’ll bake the pie halfway with the initial layer of crumble, then lower the oven temperature slightly and add the rest of the crumble. This technique, adding the streusel in layers, is key to achieving a topping that is not only wonderfully thick, as I prefer it, but also beautifully crispy and golden all the way through. It’s a small price to pay for such a ridiculous amount of streusel on your pie, and it’s absolutely worth it! (Plus, we need to remove the pie briefly to shield the crust anyway, so it’s a perfect opportunity for the second streusel application.)
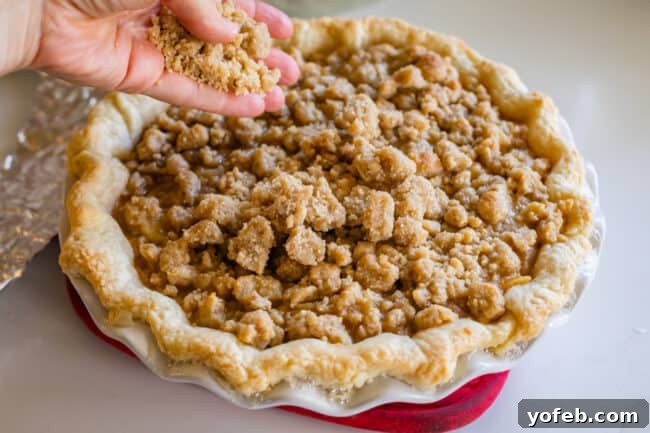
At this mid-point, you’ll also create a makeshift crust cover using some super fancy aluminum foil. Tear off a square of foil roughly the same size as your pie plate. Fold it in half, then in half again, and carefully cut out the center, creating a circle in the middle. Unfold it, and voilà! Your pie is now ready for its space mission! Just kidding. This foil shield is essential for protecting the delicate edges of your pie crust from burning while allowing the center and the streusel to brown perfectly.
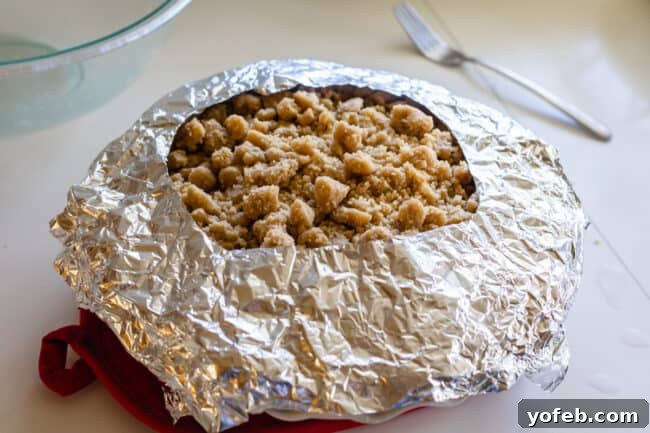
You’ll know your pie is perfectly baked and ready to emerge from the oven when the streusel topping has achieved a beautiful, light golden-brown hue across the center, and the edges of your pie crust are a rich, appealing brown.
Once baked, resist the urge to slice immediately! Allow your pie to cool completely on a wire rack for at least 4 hours. I know, this waiting period is absolutely killer, but it’s non-negotiable for the perfect pie. If you cut into it too soon, the juices will be scalding hot and far too liquid-y, resembling soup more than pie. More importantly, the warm moisture will spread to your beautiful, crispy streusel, turning it soggy and sad. The juices need time to set and thicken as they return to room temperature, achieving that ideal consistency, and your crumble needs to stay dry and crisp. Patience truly is a virtue in pie making!
This is an excellent pie for making ahead of time (more on freezing below). However, once you’ve made that first cut, it needs to be enjoyed relatively soon afterward. The moment the internal moisture touches the dry streusel, the crispness begins to fade. Therefore, it’s ideal to bake this pie the day before an event, but make sure to resist the temptation to sneak an early slice if you want the crumble to remain perfectly crumbly for serving. You must resist!
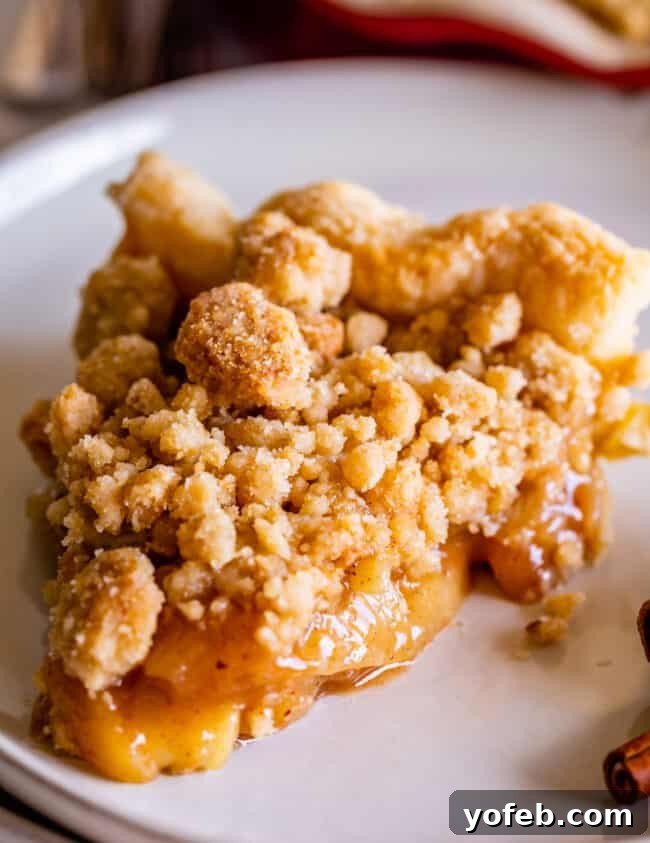
Your pie will be at its absolute best when served the day after it’s made, especially if no early cuts have been made. This makes it a perfect candidate for holiday gatherings like Thanksgiving! Store any leftovers on the counter, loosely covered with plastic wrap or foil, for up to two days. After that, transfer it to the refrigerator to maintain freshness.
Freezing Your Dutch Apple Pie with Crumb Topping
Dutch Apple Pie is an exceptionally freezer-friendly dessert, making it a fantastic option for meal prep or for easing the holiday baking rush. It freezes beautifully, saving you precious time when you need it most!
You have three convenient methods for preparing and freezing your pie in advance:
- Freeze Components Separately: Prepare your pie crust dough, apple filling, and streusel topping. Freeze each component individually in separate, airtight freezer-safe bags. When you’re ready to bake, thaw them in the refrigerator, then proceed with the assembly and baking instructions as detailed in the main recipe. This method offers maximum flexibility.
- Freeze Assembled, Unbaked Pie: Fully assemble the pie in its pie pan, including the first half of the crumb topping. Wrap the entire pie, pan and all, extremely well with two layers of plastic wrap followed by two layers of aluminum foil to prevent freezer burn. Store the second half of the crumb topping in a separate small freezer-safe bag. Freeze upright for 1 to 3 months. For baking from frozen, remove the pie from the freezer, discard the plastic wrap and foil. Preheat your oven to 425°F (220°C) with a pizza stone or baking sheet on the center rack. Place the frozen pie directly onto the hot surface. Follow the baking instructions from step 24 onwards in the main recipe, but anticipate an additional 15-20 minutes of baking time at the end. Keep a close eye on the second layer of crumb topping during the final 10 minutes, covering the entire top with foil if it begins to brown too quickly.
- Freeze Baked Pie: After baking, allow the pie to cool completely – a full 8 hours is ideal to ensure the filling has fully set. Once cooled, wrap the baked pie exceptionally well with two layers of plastic wrap and then two layers of aluminum foil to protect it from freezer burn. Store upright in the freezer for 1 to 3 months. To reheat, remove the pie from the freezer, discard the plastic wrap and foil. Preheat your oven to 350°F (175°C) with a baking sheet or pizza stone on the center rack. Place the frozen, baked pie directly onto the hot sheet/stone. Bake for approximately 30 minutes, or until it is thoroughly warmed through. Since the pie is already cooked, monitor the crust and crumb topping closely to prevent over-browning or burning. If needed, cover the entire top of the pie with a square of foil.
Dutch Apple Crumb Pie FAQs
A watery apple crumb pie is a common issue if you’ve used the traditional method of simply layering raw apples into the crust. Apples naturally release a significant amount of moisture as they cook. This recipe cleverly solves that problem by pre-cooking the apple filling on the stovetop. This crucial step allows the apples to release their excess liquid and thicken into a super caramelized, perfectly textured filling, ensuring your pie is rich and flavorful, not watery.
Your apple crumble topping should have a delightful crispness, a satisfying contrast to the tender apple filling. It won’t be as hard as a potato chip, but it definitely shouldn’t be soft or soggy. However, it’s important to note that the crumble *will* soften and lose some of its crispness once you cut into the pie, as the moisture from the warm apple filling begins to spread. For this reason, it’s best to resist cutting into the pie until you’re ready to serve, preserving that perfectly crisp streusel topping.
Several factors can contribute to a soggy crumble topping. The most common reason is cutting into the pie before it has had ample time to cool completely; the internal moisture from the hot filling will quickly absorb into the dry topping. Another factor is if the crumble topping itself wasn’t chilled before baking, causing the butter to melt too quickly and creating a less crisp texture. Ensuring your streusel is made with cold butter (or chilling it thoroughly after mixing with melted butter, as this recipe instructs) helps create those distinct, crisp crumbs. Always allow the pie to cool fully before slicing to keep your crumble topping at its best.
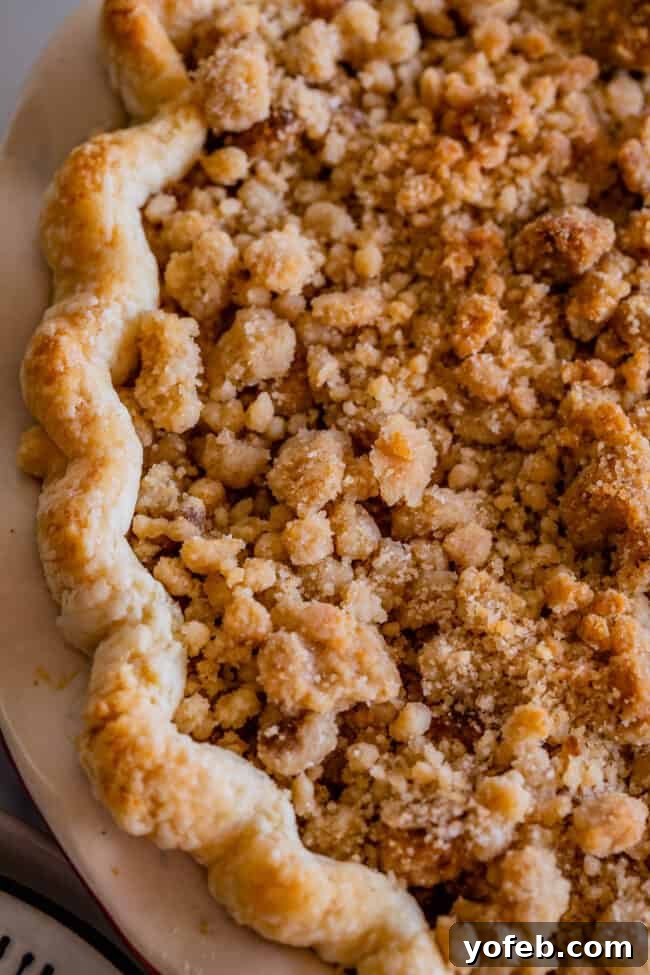
I would absolutely love to hear from you if you decide to try out this incredible Dutch Apple Pie recipe! Especially if you’ve already had the pleasure of making my original Apple Pie, I’m eager to know how you think these two beloved pies compare. It’s almost like choosing a favorite child, isn’t it? Happy pie baking, and may your kitchen be filled with the most delightful aromas!
More Irresistible Pie Recipes to Try
If you’ve fallen in love with pie, there are plenty more delicious creations to explore. Here are some other fantastic pie and dessert recipes you’re sure to enjoy:
- The Best Homemade Apple Pie << This classic is one of the top-performing recipes on The Food Charlatan!
- Apple Custard Pie with Cinnamon Streusel << Imagine today’s pie, but with an added luscious custard layer – pure indulgence!
- Pecan Pie with Butter Streusel Topping << Because streusel truly is life, even on a pecan pie.
- Crème Brulée Pumpkin Pie << Once you try this, you might never go back to regular pumpkin pie. That crackly top is unforgettable!
- French Apple Cake from Once Upon a Chef << A beautiful alternative to pie.
- Apple Pie Bars << All the deliciousness of apple pie, but in a portable bar format that you can eat with your hands. The crust is truly outstanding!
- Apple Crisp, with a Ridiculous Amount of Streusel << A must-try if you adore streusel as much as I do – seriously, it’s overloaded!
- Homemade Peach Cobbler << A versatile recipe that works wonderfully with fresh, canned, or even frozen peaches.
- Key Lime Pie from Spaceships and Laserbeams << A zesty, refreshing option for a change of pace.
- No Bake Peanut Butter Pie from Fresh April Flours << A quick and delightful treat for peanut butter lovers.

Dutch Apple Crumble Pie Recipe
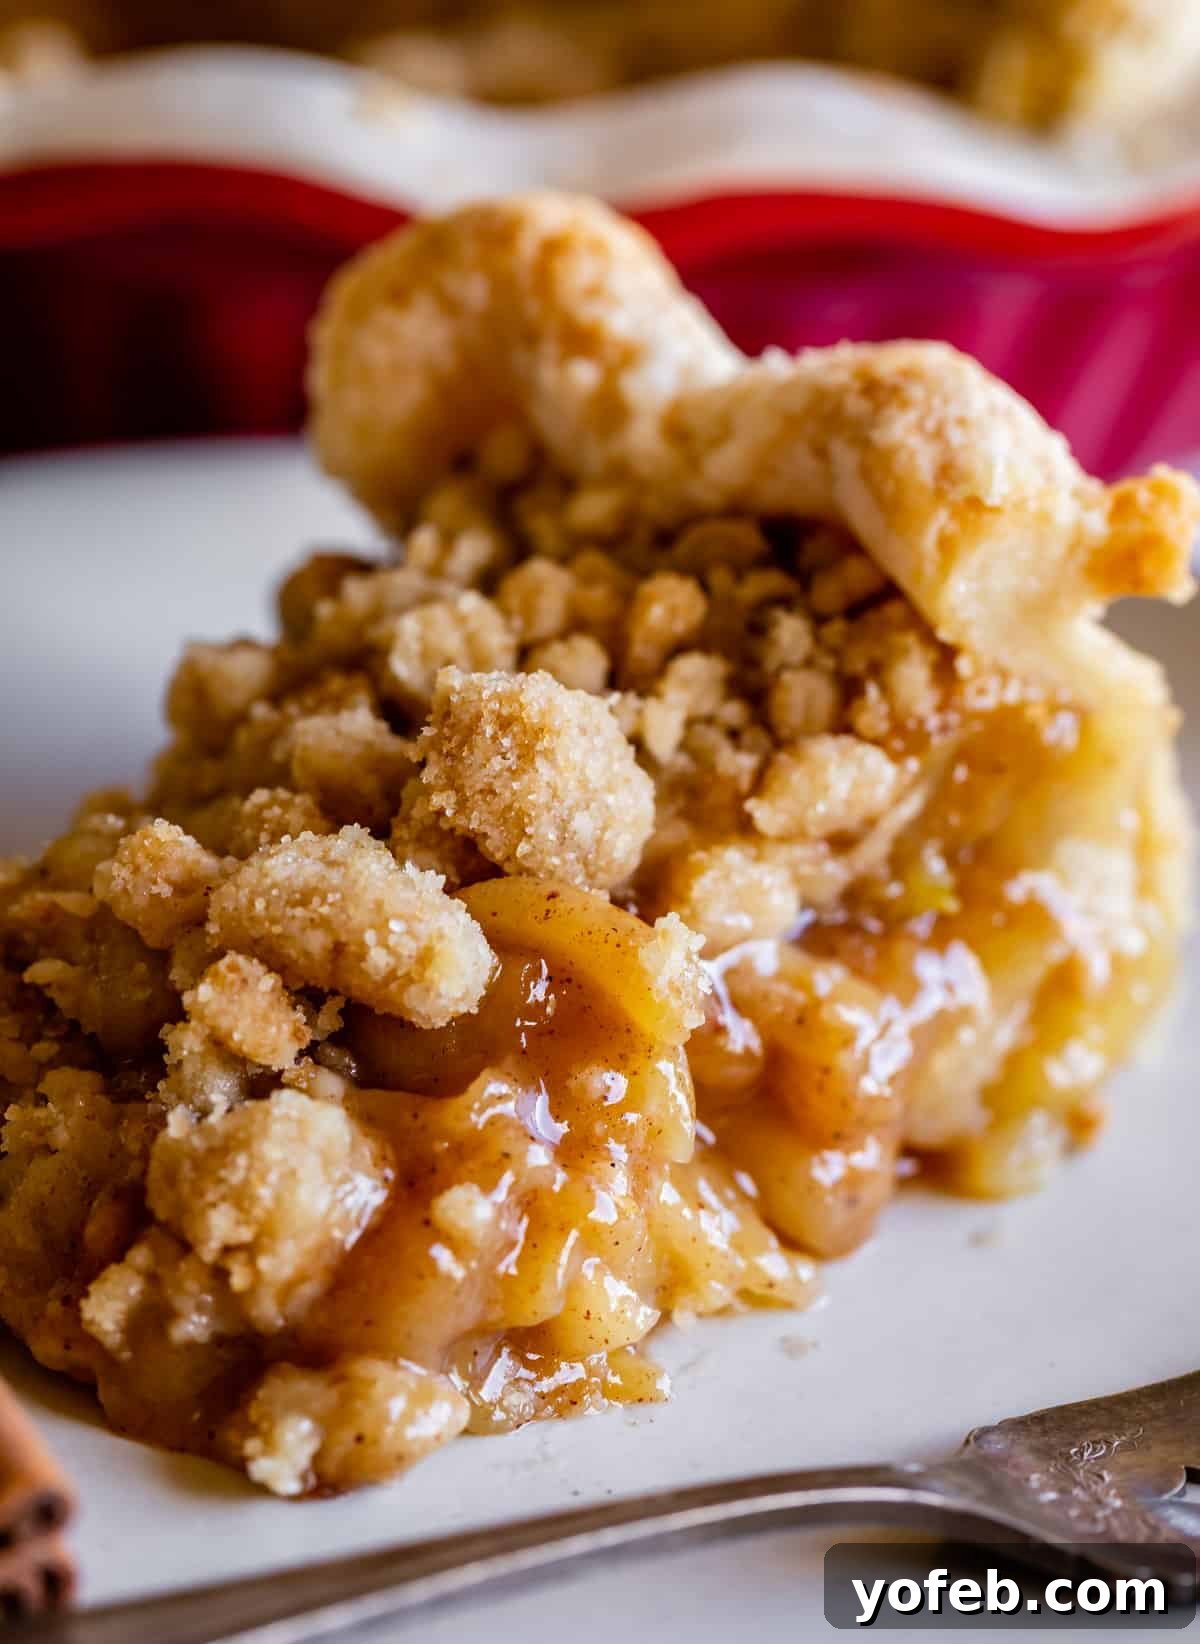
Equipment
-
12 inch high sided skillet
-
Microplane grater
-
Pie pan
Ingredients
- 1 homemade single pie crust, 1 sheet of pie dough
For the apple filling
- 1/4 teaspoon lemon zest
- juice from half a lemon, 2 tablespoons, no more
- 5 pounds apples, 5 pounds before peeling and coring
- 1/2 cup brown sugar, packed
- 1/2 cup granulated sugar
- 1/3 cup all-purpose flour
- 1/2 teaspoon kosher salt
- 1 & 1/2 teaspoons cinnamon
- 3/4 teaspoon nutmeg
- 1/2 teaspoon cardamom, optional
- 1 teaspoon vanilla
For the sugar crumble
- 1 & 1/2 cups all purpose flour
- 1/3 cup granulated sugar
- 3/4 cup brown sugar, packed
- 1/2 teaspoon kosher salt, use a little less if using table salt
- 3/4 cup butter, melted (1 and 1/2 sticks)
Instructions
-
Choose your apples.
You need 5 pounds of apples for this recipe, which is about 11 large apples. I like to use a mix of apples for the best flavor. For this pie I used Granny Smith, Honeycrisp, and Golden Delicious.
-
Make the filling:
Use a microplane grater to zest 1/4 teaspoon lemon peel into a 12-inch high sided skillet. The heat should be off.
-
Add the juice from half the lemon to the skillet, about 2 tablespoons. Don’t use much more than this, you’re not making a lemon apple pie. We just want to wake up the apples a bit and keep them from browning.
-
Use a potato peeler or this handy apple peeler to peel the apples. Slice the apples into 1/8 inch pieces. Check out the photos above to see my method for slicing apples. I like to peel and slice one apple at a time so that they don’t get brown: I peel one apple, then stop and slice it, add it to the pan with the lemon juice, and then move on to peeling the next apple. Stir the apples in the pan occasionally to coat everything with lemon juice.
-
Once you have all the apples peeled and sliced in the pan, set it over medium heat on the stove.
-
Add 1/2 cup packed brown sugar, 1/2 cup granulated sugar, 1/3 cup flour, 1/2 teaspoon kosher salt, 1 and 1/2 teaspoons cinnamon, 3/4 teaspoon nutmeg, and 1/2 teaspoon cardamom (optional). Stir it together gently so you don’t break all the apples.
-
Once the mixture is all moistened and you don’t see patches of flour or cinnamon, set a timer for 20 minutes. Cover the mixture completely with a lid, but don’t walk away. Stick around and stir the mixture every 3 minutes or so, replacing the lid each time. Cook for 20 minutes, until the apples are fork tender but still hold their shape. The apples will not soften more while baking in the oven. So have a taste and see if you want to cook a longer or shorter time. Only you can know your apple al dente perfection level.
If your apples start to stick to the pan, add 1 tablespoon water (plus more as needed); use sparingly.
-
Remove the pan from heat and stir in 1 teaspoon vanilla.*
-
Transfer the apple pie filling (including all the the brown caramel gooeyness) to a half sheet pan, or any pan with a lip. Spread the apples all the way to the edges. Cool the apple pie filling completely by placing it in the fridge or the freezer. If you put it in the freezer, it only takes 30 minutes or so. (If you have plenty of time, you can just leave the apples in the pan to cool down; it will take a couple hours.)
-
Roll out your pie dough and place in a 9-inch pie dish. Fold the edges underneath and crimp them with your fingers and thumbs. See my pie crust recipe for lots of photos and details.
-
Place the pie crust in the fridge or freezer for about 30 minutes, for a really flaky crust.
-
While the crust and filling are chilling, place a baking sheet or pizza stone in the center rack of your oven and preheat to 425 degrees F. Let it heat up for at least 20-30 minutes to make sure it’s really hot.
-
Make the sugar crumble:
In a medium bowl, add the dry ingredients for the crumble: 1 and 1/2 cups flour, 1/3 cup white sugar, 3/4 cup packed brown sugar, and 1/2 teaspoon kosher salt (use less for table salt). Whisk together.
-
In a small bowl, melt 3/4 cup butter (1 and 1/2 sticks). Pour the butter over the dry ingredients and stir together gently. You should end up with a pretty wet sandy mixture with some large clumps. See photos. Let it chill in the fridge until you are ready to assemble. Try not to eat it all.
-
When the apple pie filling in the freezer is completely cooled, and the pie shell is mostly frozen, take them out of the freezer. Use a rubber spatula to scrape all the chilled apple pie filling into the pie shell. Don’t forget to scrape in every last bit of the gooey filling.
-
Use your hands or a fork to break the crumble into smaller bite size pieces. Top the pie with about a cup or two of the sugar crumble, not all of it! You only want to add enough to cover all the apples, we are not piling it on. (That’s for later.) Place the remaining crumble back in the fridge to chill.
-
Bake the pie:
Place the chilled pie onto the baking sheet in the oven and let bake for 15 minutes at 425 F. The crust on the edge should be turning light brown.
-
Meanwhile, get a square of tin foil that is the same size as your pie. Fold it in half, then in half again. Cut out the center. Open it up again. You should have a square of foil with a circle cut out of the center (or use a pie shield). See pie crust post for more details.
-
After baking at 425 for 15 minutes, reduce the heat to 350 degrees F. Don’t take the pie out of the oven. Just change the temperature.
Bake at 350 for an additional 10 minutes.
-
At this point, remove the pie from the oven and quickly shut the oven door.
Sprinkle the remaining chilled crumble all over the top of the pie. Break up large pieces with your fingers.
Place the foil on top of the pie crust (the center of the pie should be exposed). Loosely crimp it around the crust on the edge. This will protect the edges from burning.
-
Don’t forget that your oven temperature should be at 350. Place the pie back on the hot baking sheet in the oven and bake at 350 for about 25-35 more minutes. (the pie should be in the oven for a total of about 55-65 minutes)
-
You will know the pie is done when the edges of the crust are brown and the crumble is turning a light golden brown in the center. If you want your crust and crumble to brown a little more, remove the foil shield and bake another 5-10 minutes.
-
Let the pie cool on a wire rack for about 4 hours. I know, this is killer. But if you cut into it now, the juices will be lava hot and way too liquid-y. Your crumble will get wet and soggy sad. You have to wait for it to cool to room temperature to get the right texture for the filling AND to not ruin the crumble. Pie! A lesson in patience indeed.
-
Once the pie is completely cool, slice and serve! My husband Eric considers it a crime to serve this without vanilla ice cream, and I tend to agree. Treat yoself right. Drizzle on some Salted Caramel Sauce for a really decadent treat!
-
Store the pie on the counter for up to 2 days, covered with plastic wrap or foil. After that transfer it to the fridge.
-
See notes for detailed freezing instructions!
Video
Notes
How to freeze Dutch Apple Pie:
Method 1: Make the crust, filling, and topping and freeze each separately in freezer ziplock bags. Thaw in the fridge, then follow the directions for assembly and baking.
Method 2: Completely assemble the pie in the pie pan up through adding the first half of the crumble. Wrap the whole pie, pan and all, really well in plastic wrap and then foil (I suggest two layers of each to avoid freezer burn) and the second half of the crumb topping in a small freezer ziplock bag. Store upright in the freezer for 1- 3 months. The longer it’s in the freezer, the more it’s at risk of drying out. When ready to bake, remove pie from freezer and remove foil and plastic wrap. Preheat your oven to 425 degrees with a pizza stone or cookie sheet on the center rack. Follow the baking instructions in the original recipe starting with step 24, but plan on an additional 15-20 minutes of bake time at the end. Watch the second layer of crumb topping the last 10 minutes and cover the entire top of the pie with foil if it’s getting too brown.
Method 3: To freeze after baking the pie, allow the baked pie to cool completely, like a full 8 hours. Wrap it really well in plastic wrap and then foil (I suggest two layers of each to avoid freezer burn). When ready to bake, remove pie from freezer and remove foil and plastic wrap. Preheat oven to 350 degrees with a cookie sheet or pizza stone on the center rack. Once the oven is at temperature, place the frozen pie directly onto the cookie sheet/stone. Bake for about 30 minutes or until warmed through. Because the pie is already baked, you’ll need to watch your crust and crumb topping very carefully to make sure they don’t burn. Add a square of foil over the top of the whole pie if it’s browning too much.
Nutrition
Facebook | Pinterest | Instagram