
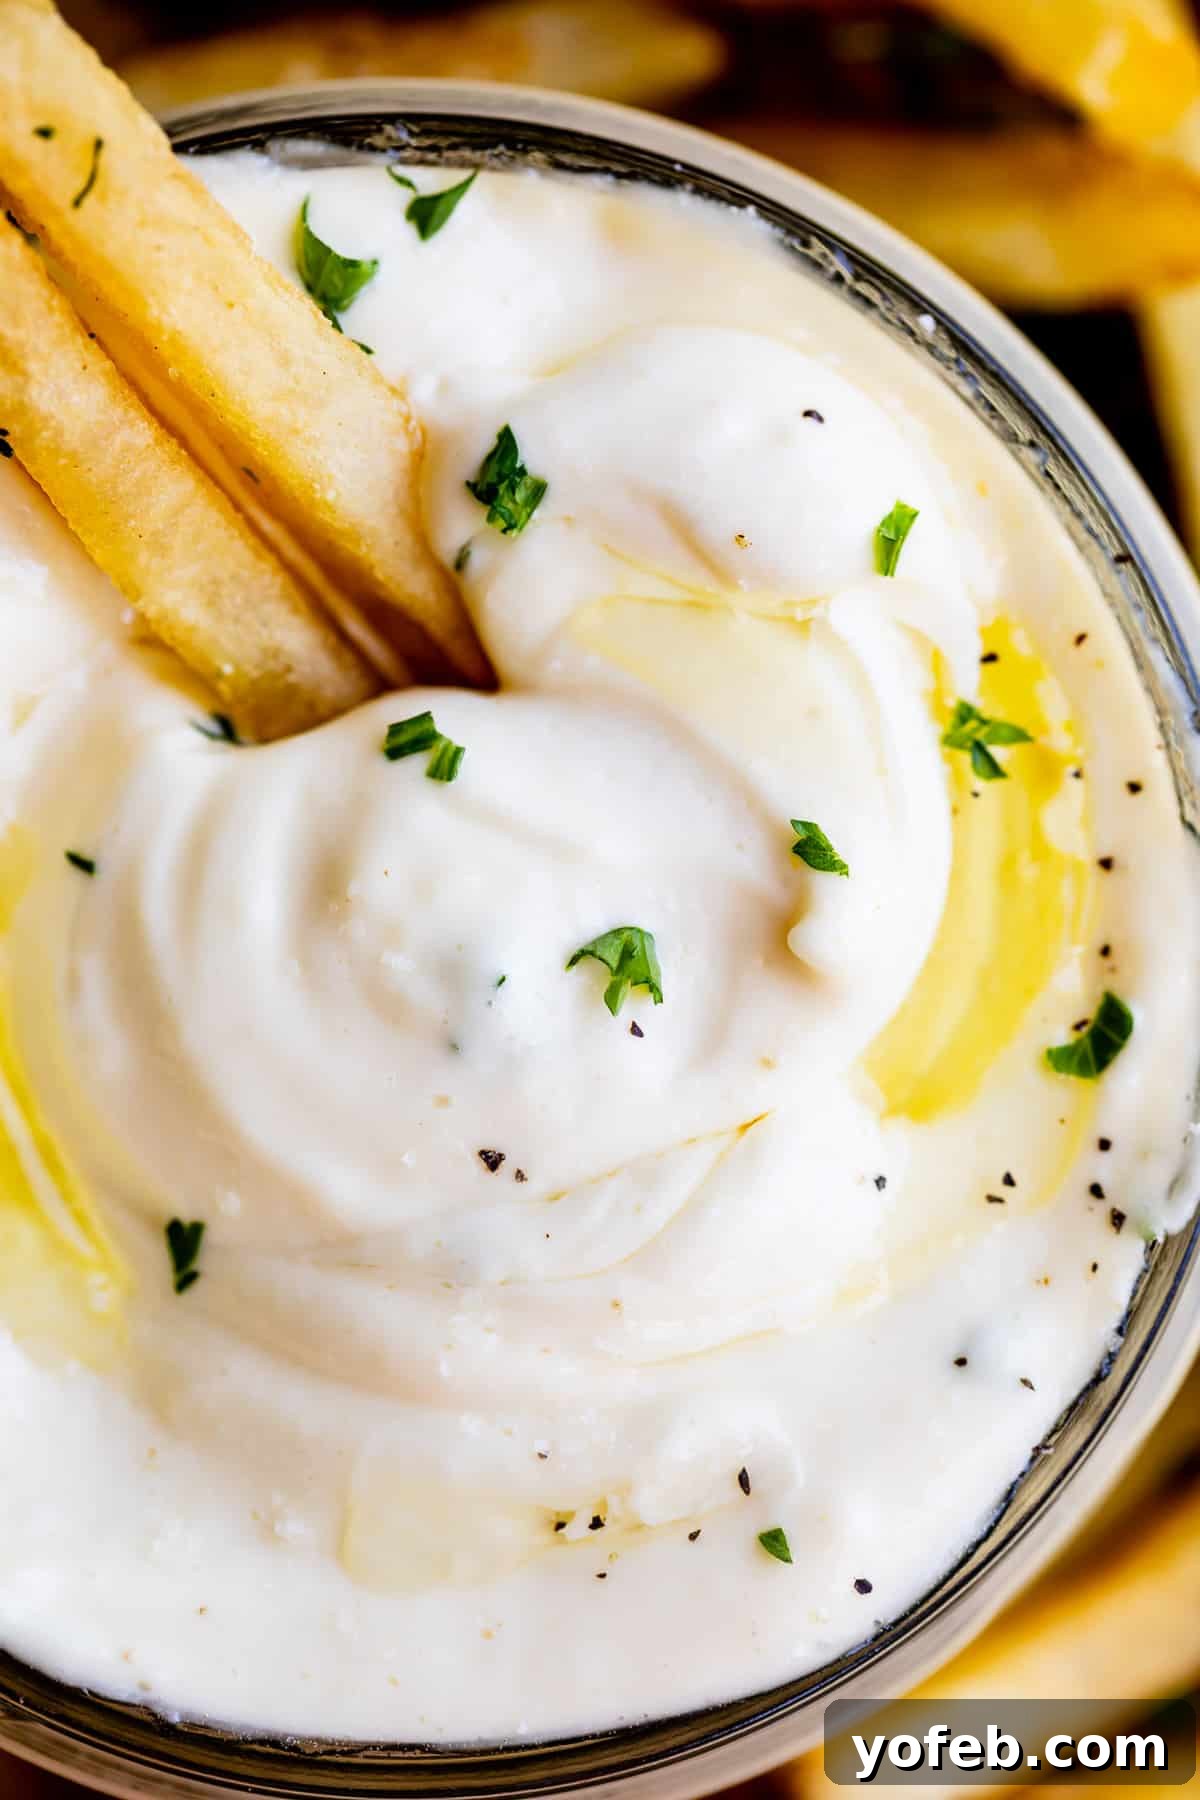
Homemade Garlic Aioli: The Ultimate Lemony, Garlicky Condiment (Classic & Easy Versions)
Welcome to the definitive guide for making luscious homemade Garlic Aioli Sauce! Whether you’re a seasoned chef or a beginner in the kitchen, you’ll be amazed at how simple it is to whip up this incredible condiment from scratch. We’ll explore two fantastic methods: the traditional, deeply satisfying classic version, and a lightning-fast “cheater” alternative that’s just as delicious. Either way, prepare to experience lemony, garlicky heaven! This versatile sauce will undoubtedly become your new favorite accompaniment for almost anything. Originally published on July 14, 2020, this timeless recipe continues to delight.
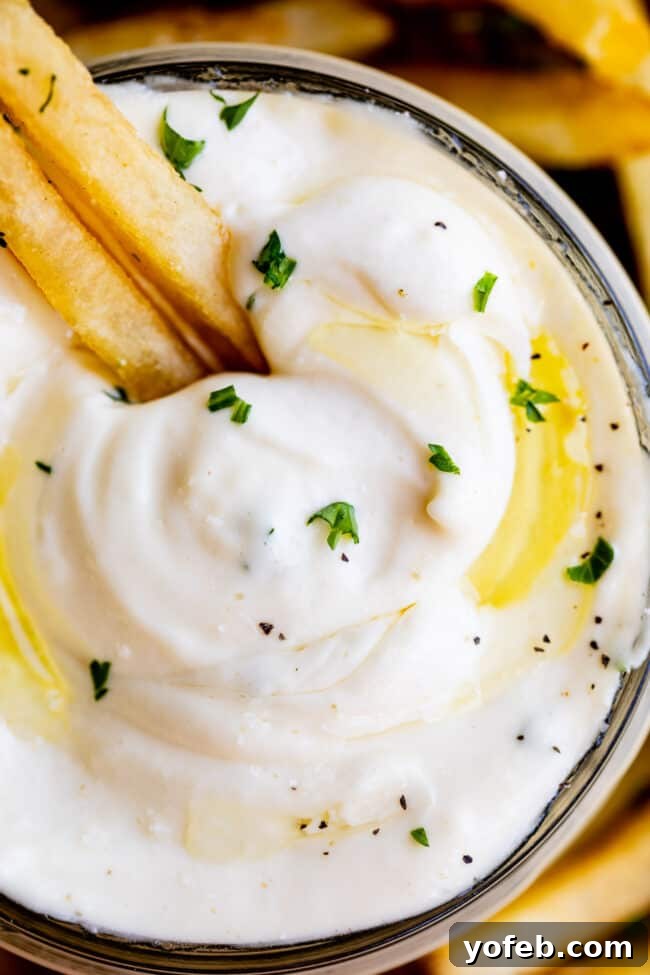
Table of Contents
- Introduction to the Wonderful World of Aioli
- What Exactly is Garlic Aioli? A Culinary Delight Explained
- Garlic Mayo vs. True Garlic Aioli: Understanding the Delicious Distinction
- Mastering Homemade Garlic Aioli: Essential Ingredients You’ll Need
- Step-by-Step Guide to Crafting Classic Garlic Aioli From Scratch
- The Quick Route: Making Cheater Garlic Aioli with Store-Bought Mayo
- Serving Your Delicious Garlic Aioli: Hot or Cold?
- Endless Pairings: How to Enjoy Your Homemade Garlic Aioli
- Creative Twists: Exciting Variations for Your Aioli Sauce
- Storing Homemade Garlic Aioli: Tips for Freshness and Longevity
- How Long Does Homemade Aioli Last in the Fridge?
- Beyond Aioli: More Irresistible Dipping Sauces and Condiment Ideas
- Garlic Lemon Aioli (Classic and Cheater Versions) Recipe Card
Introduction to the Wonderful World of Aioli
Before we dive into the recipe, let me share a quick, slightly embarrassing story about my recent quest for the perfect french fries to accompany this exquisite garlic aioli. I made a dash to Carl’s Jr. with a singular mission: acquire three large orders of their natural-cut fries for these photos. Pulling into the drive-through, I placed my rather unusual order – just fries, nothing else. I then patiently waited at the window, lost in thought, wondering why it was taking an unusually long time, perhaps attributing it to the lunch rush.
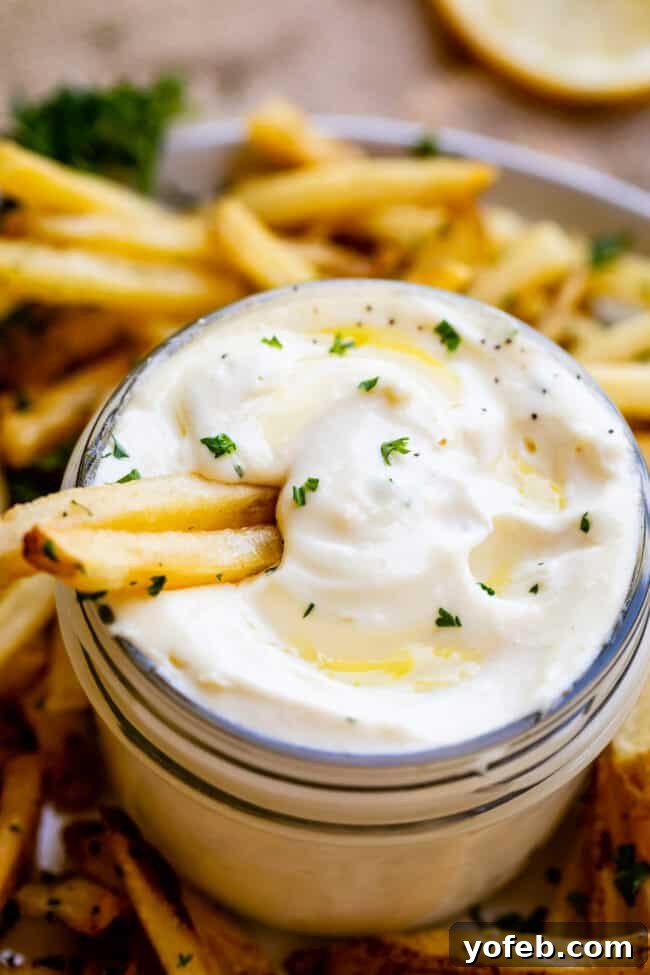
Suddenly, I noticed an employee emerging from a back door, waving me forward with a rather amused expression. It turned out I was at the wrong window – a completely shuttered one, which I only registered at that moment. They must have thought I was an absolute eccentric, ordering nothing but fries and then failing to even make it to the correct pick-up spot! What can I say? My mind was clearly on the aioli. When I sheepishly asked if I was the first to make such a blunder, they kindly admitted I wasn’t the only absent-minded customer. Small comfort, but comfort nonetheless.
Beyond drive-through adventures, July has been treating us well! We recently visited Eric’s parents in beautiful Montana, enjoying a wonderful trip. It’s a two-day drive each way, and we arrived home last night just in time to whip up scrambled eggs and smoothies for dinner – quite literally the only food we had left. Eric was on a mission to get the kids into bed as quickly as possible. He confessed, “I don’t know why, but I just need them IN BED ALREADY!” I gently suggested, “Could it perhaps be that you’ve spent two days in an enclosed space with absolutely no escape from their delightful chaos?” Probably. While our kids are generally well-behaved on car trips, we’re lucky. But let’s be honest, they’re still kids! They can’t help but be full of energy. I suppose we all eventually experience what we put our own parents through, right?
What Exactly is Garlic Aioli? A Culinary Delight Explained
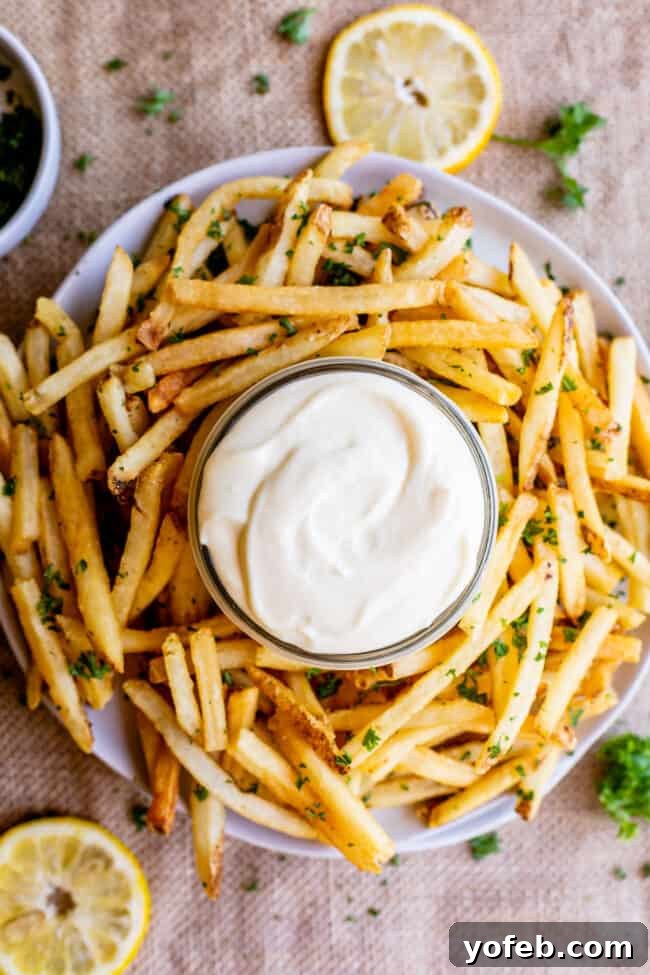
At its heart, garlic aioli is a classic Mediterranean sauce, renowned for its rich, creamy texture and pungent garlic-forward flavor, often brightened with a touch of lemon. Think of it as mayonnaise’s sophisticated cousin, elevated by fresh garlic and vibrant citrus. While it shares a similar texture to mayonnaise, aioli is typically thicker and more robust, making it perfect as a luxurious dip for vegetables or meats, or an exquisite spread for burgers and sandwiches. Honestly, if fast-food establishments offered tubs of aioli instead of ketchup packets, those long road trips with children would be far more enjoyable!
The name “aioli” originates from Provençal, a dialect of French, where “ai” means garlic and “oli” means oil. Historically, it literally translates to “garlic oil,” reflecting its most fundamental ingredients. This beloved condiment boasts numerous variations across Europe, each with its unique character. Some regional aiolis are thinner and intensely garlicky, while others are thicker and more akin to mayonnaise, often incorporating egg yolks for added richness and stability. In this recipe, we’ll explore both ends of the spectrum: the traditional method involving emulsifying eggs and oil, and a quicker, simpler version that starts with store-bought mayonnaise. Both are, without a doubt, ridiculously delicious and bound to impress.
Featured Comment
“Outstanding! I used a handheld blender and it was super easy.” – Vicki
See All Comments
Garlic Mayo vs. True Garlic Aioli: Understanding the Delicious Distinction
It’s a common question: what’s the real difference between garlic mayonnaise and garlic aioli? While often used interchangeably, there’s a subtle but important distinction. When a menu lists “garlic mayo” on a sandwich, it typically implies that standard mayonnaise has simply been enhanced with some minced garlic and perhaps a squeeze of lemon juice. And let’s be clear, this combination is undeniably tasty!
However, true aioli is a more involved culinary process. Authentic aioli traditionally requires emulsifying oil directly into garlic, creating a stable, creamy sauce from scratch. This emulsification demands either considerable manual effort with a mortar and pestle or a modern kitchen tool like a blender or immersion blender. In its purest, most ancient form, aioli is simply an emulsion of garlic and olive oil. Our recipe, while aiming for authenticity, incorporates lemon, Dijon mustard, and eggs. These additions contribute to a superior creamy texture, vibrant tanginess, and a complex tartness that makes this aioli truly irresistible and one that I absolutely adore.
Mastering Homemade Garlic Aioli: Essential Ingredients You’ll Need
You’ll be delighted to find that this incredibly simple garlic aioli sauce recipe primarily uses ingredients you likely already have on hand. Freshness is key, especially for the garlic and lemon, as they are the stars of this show. Here’s a quick overview of what you’ll need to gather to create this flavorful condiment. For the complete list of ingredients and detailed instructions, be sure to jump to the recipe card below!
- Fresh Garlic: The foundation of our aioli. Don’t skimp on quality here!
- Kosher Salt: Essential for seasoning and creating that vital garlic paste.
- Lemon Zest & Juice: Provides brightness, tang, and helps “cook” the raw garlic flavor.
- Dijon Mustard: A secret ingredient for depth of flavor and aiding emulsification.
- Egg & Egg Yolk: Crucial for the classic version’s creamy texture and binding the emulsion.
- Vegetable Oil and/or Olive Oil: The base of the emulsion. A blend offers balanced flavor.
Step-by-Step Guide to Crafting Classic Garlic Aioli From Scratch
Making classic garlic aioli is a rewarding process that results in a wonderfully rich and flavorful sauce. The key is in the technique, particularly the emulsification process. Follow these steps carefully for a perfect homemade aioli every time.
First, begin by preparing your garlic. Crush several cloves of fresh garlic along with some kosher salt using the side of a chef’s knife. The salt acts as an abrasive, helping to break down the garlic fibers and release its potent flavor, forming a smooth paste. Trust me, you want all the garlic you can get for this!
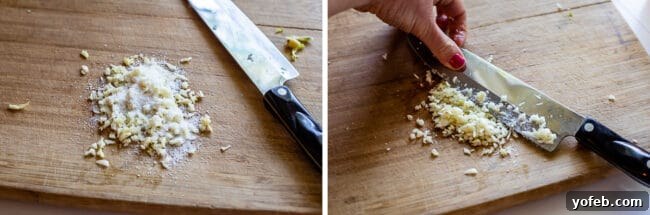
Here’s a clever little trick for removing that persistent garlic smell from your fingers: after handling the garlic, simply rub your fingers on the flat side of your chef’s knife under running water. You’ll be amazed at how effectively it neutralizes the odor. It’s a game-changer if you’ve never tried it!

Once your garlic paste is ready, let it marinate in some fresh lemon juice for approximately 15 minutes. This crucial step allows the lemon juice to absorb the garlic’s intense flavor, creating a beautifully infused base. If you’re a bit sensitive to strong garlic flavors – or perhaps have a hot date coming up – you can remove some of the minced garlic at this stage, up to half or even a bit more. The lemon juice will have already absorbed much of its magic, leaving you with a more subtle garlic note. As a self-proclaimed garlic freak, I always leave it all in!
Next, add one whole large egg and an additional egg yolk to your garlic and lemon mixture. These eggs are essential emulsifiers, binding the ingredients together to create that signature creamy texture.
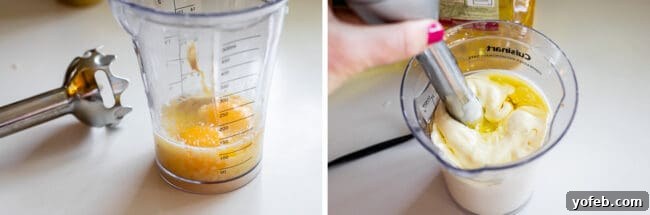
Now, this next step is critically important for success, so pay close attention! You must emulsify the oil into this lemony-garlic-egg concoction. Emulsification means that your lemon-egg mixture must be in constant, vigorous movement when the oil is introduced. If the mixture isn’t continuously agitated, the oil will not combine properly and will separate, resulting in an undesirable oily mess with no easy way to salvage it. There are three primary methods to achieve perfect emulsification:
- Traditional Blender: Turn your blender on a low setting. Slowly and gradually drizzle the oil through the small opening in the blender lid. The consistent blending action will incorporate the oil drop by drop.
- Bowl and Whisk: If you’re going old-school, you’ll need strong arm muscles! While whisking constantly and very vigorously, slowly drizzle the oil into the mixture in a thin, steady stream. This requires patience and persistence.
- Immersion Blender (my favorite!): This is arguably the easiest method. You can add all the oil at once on top of the egg mixture in a tall jar or container. Place your immersion blender firmly at the very bottom of the jar and turn it on low. SLOWLY and incrementally move the blender upwards towards the top of the jar. As you move it, you’ll see the aioli emulsifying and thickening from the bottom up. Once the aioli is fully emulsified and creamy, you can move the blender up and down more freely to ensure everything is combined.
Follow these steps, and you will be rewarded with a beautiful, thick, and creamy aioli! Deviate from them, and you might end up with a sad, separated, oily disaster.
For this recipe, we use a blend of half olive oil and half vegetable oil. Olive oil, particularly extra virgin, can have a strong, distinct flavor that might overpower the delicate balance of the aioli. By combining it with a more neutral-tasting vegetable oil (like canola, grapeseed, or light olive oil), we temper the intensity of the olive oil while still benefiting from its richness and depth.
The Quick Route: Making Cheater Garlic Aioli with Store-Bought Mayo
For those times when you need delicious garlic aioli in a flash, the “cheater” version is your best friend. This method is so straightforward, it barely needs pictures! Simply take a good quality store-bought mayonnaise as your base. Then, stir in some finely minced garlic that has been infused with lemon juice (just like in the classic method, letting the garlic sit in the lemon juice for a few minutes really helps). A dash of Dijon mustard and a pinch of salt and pepper, and voilà! You’ll have an incredibly flavorful, creamy aioli that’s almost indistinguishable from its homemade counterpart. It truly is that good.
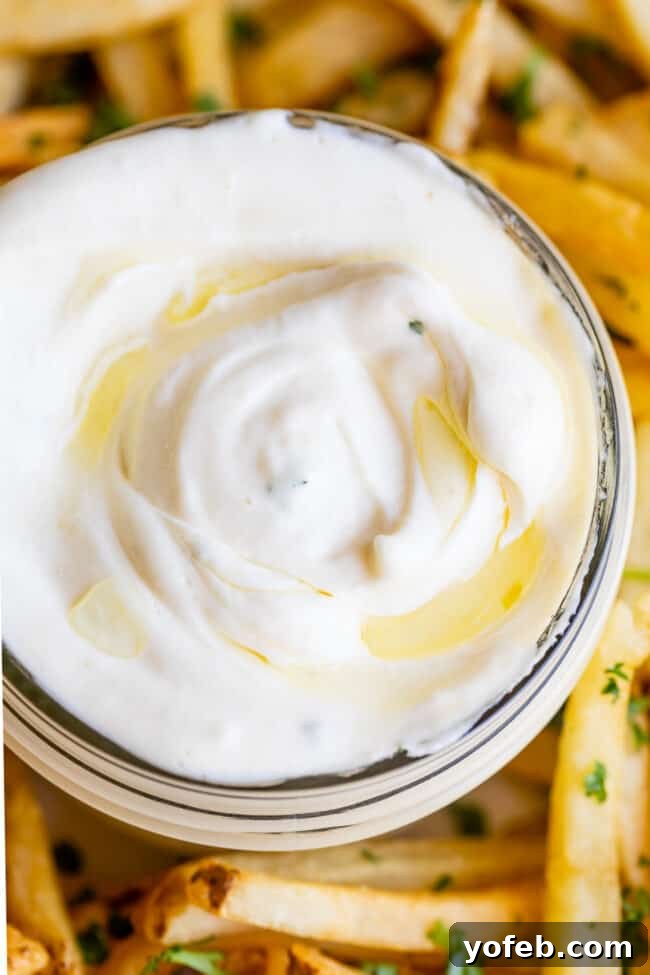
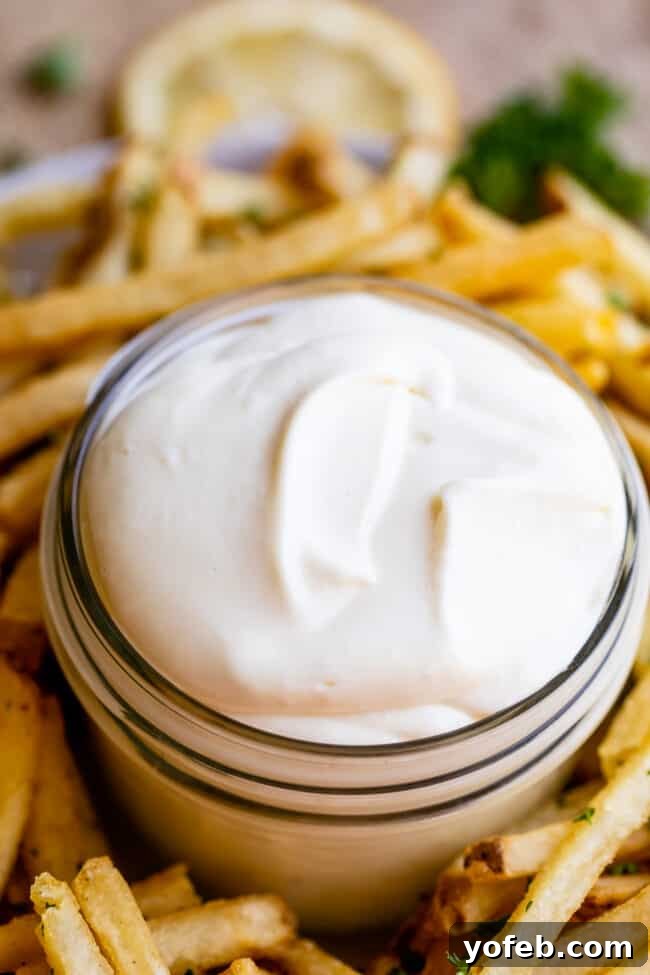
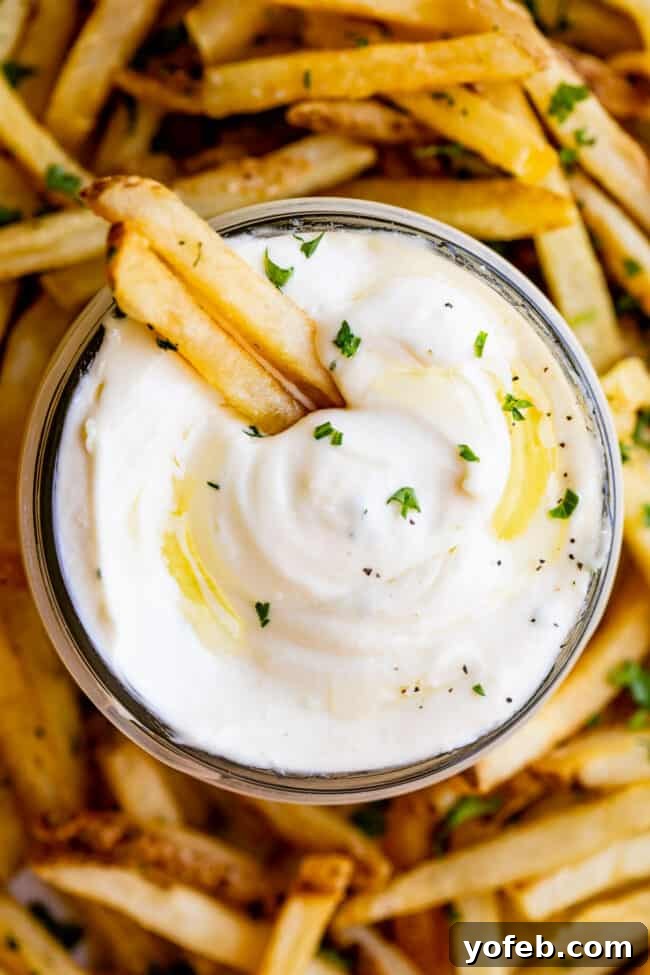
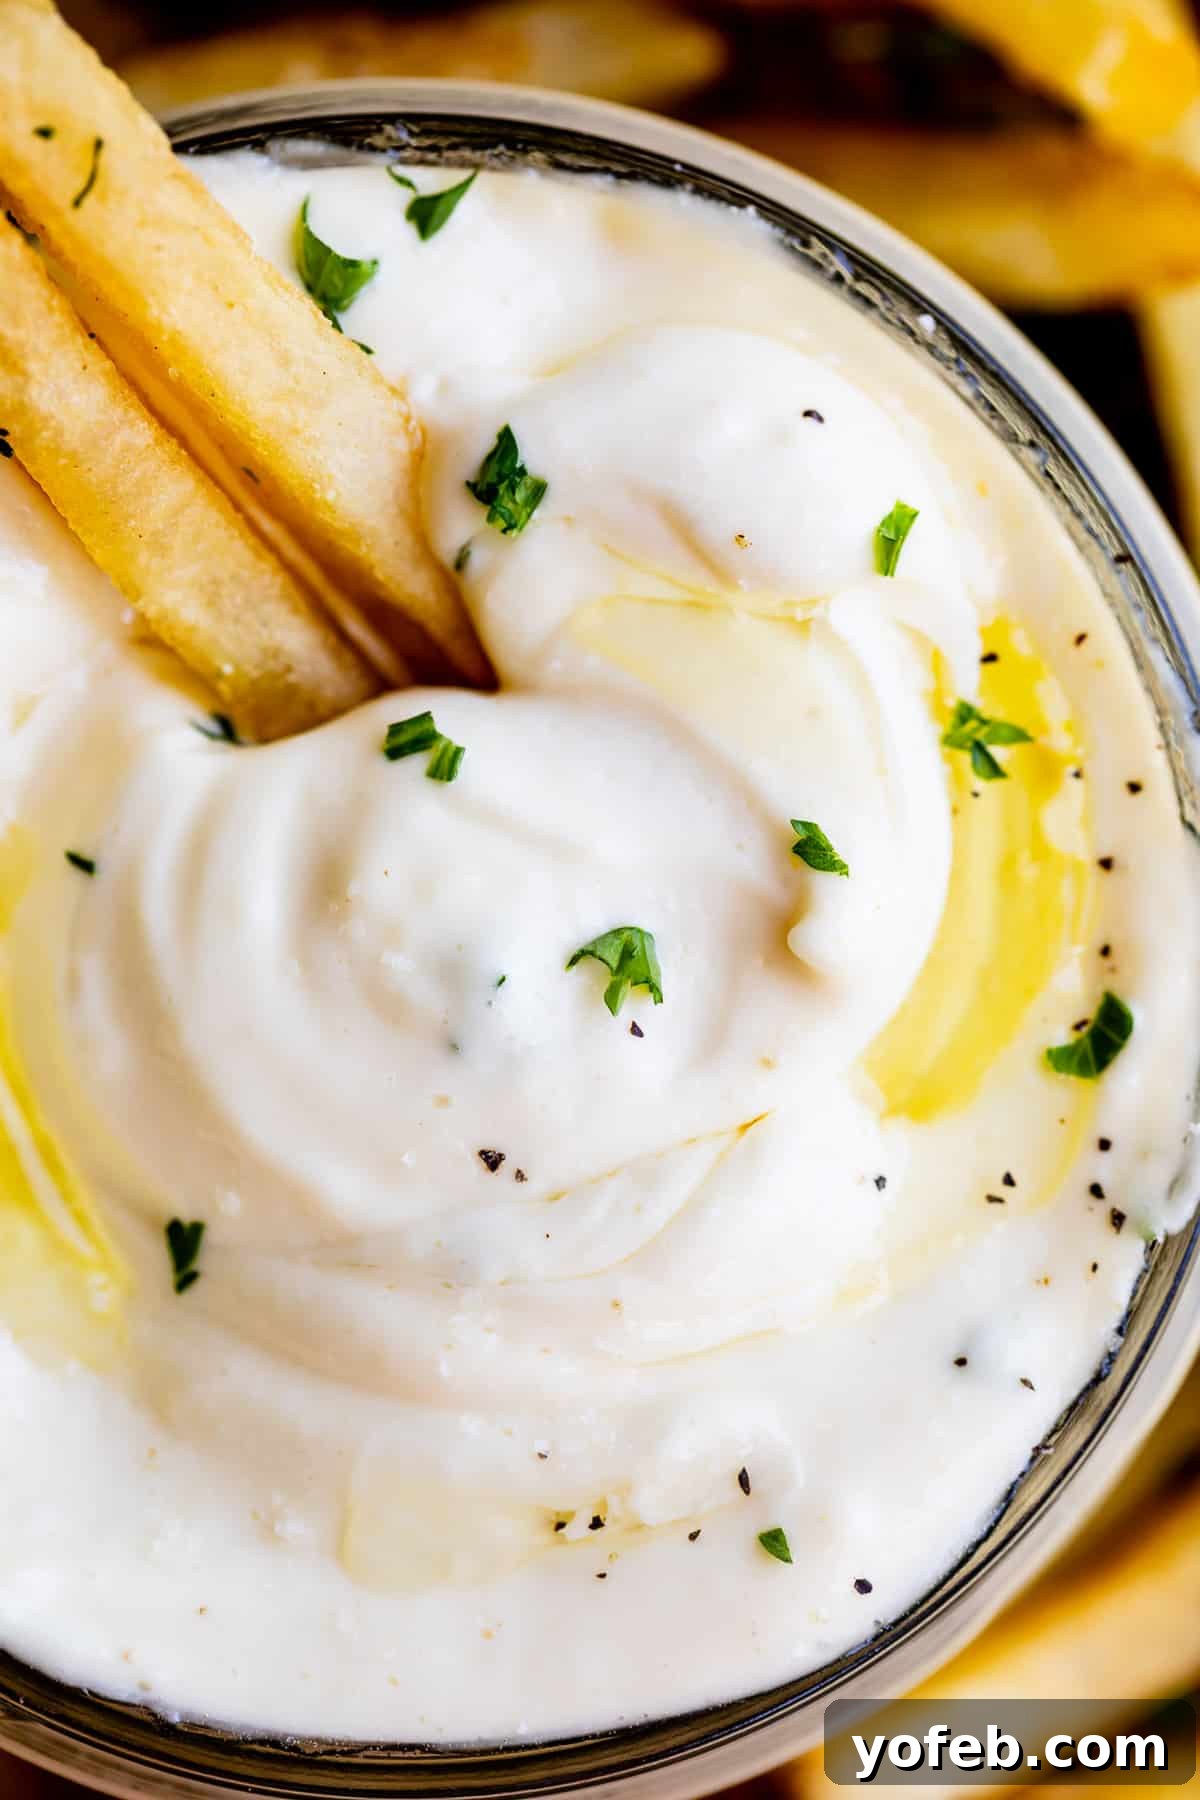
The best aspect of making aioli at home, whether you choose the classic or cheater version, is the ability to adjust it precisely to your taste. As you can see from the photos, this aioli typically achieves a thick, mayonnaise-like consistency, which I absolutely adore for its rich creaminess. If you prefer a thinner aioli, simply add a little more fresh lemon juice or even a teaspoon or two of water until it reaches your desired texture.
Serving Your Delicious Garlic Aioli: Hot or Cold?
Aioli is fundamentally a cold sauce, designed to be served chilled or at room temperature. It’s perfectly fine to leave it out for a short period, especially if you’re serving it as part of a meal or appetizer spread. However, it’s crucial not to heat aioli, as doing so will cause the delicate emulsion to break and separate, leading to an unappetizing oily mess. Always keep it cool for the best texture and flavor.
Endless Pairings: How to Enjoy Your Homemade Garlic Aioli
The real question isn’t what to eat with aioli, but rather what *not* to eat with it, because once you experience its exquisite flavor, you’ll want to dollop it on everything! This versatile condiment elevates countless dishes. Here are some of my absolute favorite ways to enjoy homemade garlic lemon aioli:
- Classic Fries: The quintessential pairing! Whether golden french fries or crispy sweet potato fries, aioli transforms them into a gourmet experience.
- Fresh Vegetable Dip: Elevate your crudités platter with aioli. It’s sensational with carrots, celery sticks, broccoli florets, cauliflower, cherry tomatoes, and crisp snap peas.
- Sandwich and Wrap Enhancer: Ditch the plain mayo! A generous smear of aioli on your favorite sandwich or wrap adds an incredible burst of flavor and creamy texture.
- Gourmet Burger Topper: If you’ve never tried aioli on a hamburger, you are truly missing out. It takes a humble burger to an entirely new level of deliciousness. For an extra special treat, try it on a Bacon and Goat Cheese Aioli Burger with Crispy Onions.
- Roasted Vegetable Companion: The rich, tangy flavor of aioli beautifully complements roasted vegetables. Dip tender roasted artichokes or fried zucchini in it. It’s also divine with Roasted Sweet Potatoes and Brussels Sprouts.
- Potato Salad Upgrade: Stir a generous spoonful into your potato salad for an instant flavor boost and extra creaminess.
- Protein Pairing: Serve it alongside Sheet Pan Sausage and Veggies or salmon cakes for an unforgettable meal.
- Pasta Perfection: For a simple yet indulgent carby treat, stir some aioli into warm pasta.
- Roasted Potatoes: Dip these amazing 3 Ingredient Roasted Potatoes or savory Bacon Wrapped Potatoes into your homemade aioli.
- Tuna Salad Twist: Give your classic tuna salad a zesty, garlicky makeover by swapping in aioli for traditional mayonnaise.
- Kebabs: These Easy Sausage and Broccoli Kebabs would be exceptionally good with a side of aioli.
I’m confident you’ll discover a hundred more creative ways to incorporate this magical sauce into your meals. Essentially, anything you would typically pair with mayonnaise can be significantly enhanced by substituting it with homemade garlic aioli. While I might have tunnel vision when it comes to aioli and fries, which go together like salt and pepper, the possibilities truly are limitless!
Creative Twists: Exciting Variations for Your Aioli Sauce
While this garlic aioli recipe is absolutely divine as is, one of its greatest strengths is its versatility. Don’t hesitate to get creative and customize the flavors to suit your palate or complement specific dishes. Here are a few inspiring ideas to get you started:
- Extra Lemony Zing: For those who adore a brighter, more acidic kick, simply thin out your aioli and amplify its lemon flavor with an extra squeeze of fresh lemon juice.
- Spice It Up: Introduce a delightful heat with a pinch of red pepper flakes or a dash of cayenne pepper. For a smoky, fiery twist, consider mixing in a drizzle of your favorite hot sauce.
- Herbaceous Additions: Infuse your aioli with aromatic freshness by stirring in finely chopped fresh herbs like chives, rosemary, dill, or even a blend of your favorites.
- Cilantro Lime Aioli: For a vibrant, Mexican-inspired twist, swap out the lemon for fresh lime juice and use fresh cilantro in place of parsley. This variation is fantastic with fish tacos or grilled chicken.
- Roasted Garlic Aioli: Elevate the garlic flavor to a whole new dimension by using roasted garlic instead of raw. Roasting mellows the garlic’s pungency and imbues it with a sweet, nutty depth. (Check the recipe notes for details on how to roast garlic!)
Storing Homemade Garlic Aioli: Tips for Freshness and Longevity
Proper storage is essential to maintain the freshness, texture, and safety of your homemade garlic aioli. Since it contains raw eggs in the classic version, and oil-based emulsions are prone to separation if not handled correctly, a few guidelines will ensure your aioli remains delicious for as long as possible.
How Long Does Homemade Aioli Last in the Fridge?
Yes, absolutely! Aioli must always be stored in the refrigerator. Not only is this crucial for food safety, as raw eggs can spoil at room temperature, but it also prevents the emulsion from breaking. If aioli gets too warm, it will separate into an unappetizing oily and watery mess. Keep it tightly covered in an airtight container in the coldest part of your fridge.
Typically, homemade aioli, especially the classic version made with raw eggs, is best enjoyed within a week. The cheater version, starting with pasteurized mayonnaise, might last a little longer, but a week is a good general guideline for optimal freshness and safety. Avoid freezing aioli at all costs, as the freezing and thawing process will invariably cause the emulsion to break, resulting in a completely unappetizing texture. It’s always best to make what you anticipate consuming within that week. But don’t worry – you’ll likely find yourself making more sooner than you think because it disappears so quickly!
Beyond Aioli: More Irresistible Dipping Sauces and Condiment Ideas
If you’ve fallen in love with the magic of homemade sauces and condiments, here are a few more fantastic recipes to explore that will elevate your culinary creations:
- Blender Hollandaise Sauce (5 Minute Recipe): A rich, buttery sauce perfect for breakfast or brunch.
- Creamy Buttermilk Ranch Dressing: Far superior to store-bought versions, and incredibly easy.
- How to Make Chimichurri Sauce: A vibrant, herbaceous sauce that you’ll quickly become obsessed with.
- How to Make a Balsamic Reduction: Sweet and tangy, this reduction enhances everything from salads to desserts.
- Banh Mi Sandwich: This Vietnamese classic is a perfect candidate for a generous dollop of aioli!
- Homemade Chipotle Sauce Recipe: A creamy, smoky, and slightly spicy condiment that adds a kick to any dish.
Facebook | Pinterest | Instagram

Garlic Lemon Aioli (Classic and Cheater Versions)
Rate this Recipe
Print Recipe
Learn how easy it is to make homemade Garlic Aioli Sauce! This guide offers both a classic, from-scratch method that’s quick and easy, and a fantastic “cheater” version that’s even faster. Either way you prepare it, this aioli delivers lemony, garlicky perfection and will quickly become your go-to condiment.
Ingredients
Classic Homemade Aioli
- 4 cloves garlic
- 1 teaspoon kosher salt
- 1 teaspoon lemon zest
- 2 tablespoons + 2 teaspoons fresh lemon juice
- 1/2 teaspoon Dijon mustard, optional
- 1 large egg
- 1 egg yolk
- 1/2 cup olive oil
- 1/2 cup vegetable oil, or light-tasting olive oil
- Parsley, to garnish, optional
- French fries (for serving, highly recommended!)
Instructions
How to make Classic Homemade Aioli:
- Use the side of a chef’s knife to smash 4 cloves of garlic. Remove the peels and mince the garlic finely.
- Top the minced garlic with 1 teaspoon kosher salt. Use the side of the chef’s knife to repeatedly smash the salt into the garlic until a smooth paste forms. (Refer to photos above for visual guidance.)
- Transfer the garlic and salt paste to a blender, or if you plan to use an immersion blender, add it to a mason jar or other suitable container.* Add about 1 teaspoon lemon zest to the garlic and salt mixture. (A microplane grater works wonderfully for zesting.)
- Pour 2 tablespoons + 2 teaspoons of lemon juice over the garlic mixture. Add about 1/2 teaspoon of Dijon mustard. Stir everything together with a spoon and allow the mixture to sit for approximately 15 minutes. This resting period helps the flavors meld beautifully.
- At this point, if you prefer a milder garlic flavor, you can use a spoon to strain out some of the minced garlic. The garlic will have already imparted much of its flavor to the lemon juice during the marinade. I prefer a robust garlic flavor, so I leave it all in! However, if you’re concerned about strong garlic breath, feel free to remove up to half or even more of the minced garlic, ensuring you strain it well to retain the lemon juice.
- Add 1 large whole egg and 1 additional egg yolk to the mixture.
- This step is crucial for successful emulsification:
- Using a Blender: With the blender running on a low setting, slowly drizzle in 1/2 cup olive oil and 1/2 cup light-tasting olive oil** (or any neutral vegetable oil) in a thin, steady stream. Continue blending until the mixture is smooth and creamy.
- Using a Whisk (in a bowl): If whisking by hand, SLOWLY drizzle the oil into the bowl in a gradual stream while whisking constantly and vigorously.
- Using an Immersion Blender: Add all the oil at once on top of the egg mixture in your container. Place the immersion blender head all the way at the bottom of the container. Turn it on low and SLOWLY and gradually move the blender upwards toward the top of the jar until the aioli is completely emulsified and thick.
Failing to add the oil slowly while continuously mixing will prevent emulsification, leaving you with a separated, oily mixture.
- Taste the aioli and adjust seasoning as needed. Add more salt, pepper, lemon juice, or Dijon mustard to achieve your perfect balance of flavor.
- Garnish with fresh chopped parsley, if desired.
- Serve and enjoy! This aioli is fantastic with french fries (highly recommended!), a fresh relish tray (carrots, celery, broccoli, cauliflower, snap peas, etc.), or roasted Brussels sprouts. It’s also an incredible spread for sandwiches and burgers, like this Bacon and Goat Cheese Aioli Burger. The possibilities are truly endless!
- Refer to the notes section below for ingredients and instructions on making the cheater aioli!
Notes
How to Make Cheater Aioli:
- 2-3 cloves garlic, smashed and minced finely
- 3/4 teaspoon kosher salt
- 1 teaspoon lemon zest
- 1-2 tablespoons lemon juice, depending on desired consistency
- 1 cup high-quality mayonnaise
- 1/2 or 1 teaspoon Dijon mustard, optional
- Pepper to taste
- Use a chef’s knife to smash 2-3 cloves of garlic. Remove the peels and mince the garlic finely.
- Top the garlic with 3/4 teaspoon kosher salt. Use the side of the chef’s knife to smash the salt into the garlic, repeatedly, to create a paste.
- Place the salted garlic in a medium bowl.
- Add 1 teaspoon lemon zest and 1 tablespoon lemon juice. Stir it together and let sit for 15 minutes.
- At this point, if you are garlic-shy, you can use a spoon to strain out some of the garlic. The garlic has already worked its magic on the lemon juice from the marinade. I leave it all in for maximum garlic flavor, but if you plan on kissing anyone soon, you might want to remove some (up to half or more) of the minced garlic, being careful to strain it well so you don’t lose any lemon juice.
- Add 1 cup mayonnaise, 1/2 or 1 teaspoon Dijon mustard, and some cracked pepper. Taste and check the consistency, adding more lemon juice as desired. Devour with french fries!
Variation: Roasted Garlic Aioli
Aioli reaches a whole different level when you roast the garlic first. To do this, spread 4-5 cloves of unpeeled garlic on some foil, drizzle with olive oil, and wrap them up. Roast at 400°F (200°C) for about 30-40 minutes, or until a fork slides in easily and the cloves are tender and caramelized. Let them cool, then peel and prepare the aioli with the roasted garlic as usual. This adds a sweet, mellow, and deeply aromatic flavor profile.
*If you do not have a blender or immersion blender, you can prepare the classic aioli entirely in a bowl. Whisk all the ingredients together up until the point of adding the eggs. Then, SLOWLY whisk in the oil in a gradual, thin stream. It is crucial to whisk constantly and vigorously while slowly adding the oil to ensure it emulsifies properly.
**The flavor of extra virgin olive oil can be quite strong and sometimes bitter, which is why we suggest toning down its flavor with a lighter-tasting, more neutral oil like vegetable oil. This creates a more balanced aioli. However, if you only have one kind of oil, or prefer the strong olive oil flavor, your aioli will still taste great!
Nutrition
Serving: 1 serving | Calories: 259 kcal | Carbohydrates: 1g | Protein: 1g | Fat: 28g | Saturated Fat: 4g | Polyunsaturated Fat: 9g | Monounsaturated Fat: 13g | Trans Fat: 1g | Cholesterol: 46mg | Potassium: 18mg | Fiber: 1g | Sugar: 1g | Vitamin A: 65IU | Vitamin C: 1mg | Calcium: 10mg | Iron: 1mg
Did you make this? I’d love to see it!
Mention @thefoodcharlatan or tag #thefoodcharlatan!